Category: Photography & Mockups|Silhouette Studio Tutorials

  • How to Create Custom Color Charts in Silhouette Studio

    Do you carry every color vinyl, paint, or paper color that your supplier offers? Most businesses don’t, so it is helpful to have a color chart to reference and also share with customers. Custom color charts are not difficult to create in Silhouette Studio. Here’s how:

    1) Open a new file in Silhouette Studio. I plan to print this color chart and place it in a binder, so I set the size to 8.5″ by 11″.

    2) Find an image that you’d like to use for your custom shape and open it. Many businesses use circles or squares, but you can use any shape you’d like. When choosing a custom shape, be sure it is large enough that a potential customer can see the color. For a simple square or circle, draw one using the tools within Silhouette Studio. For this example, I’ve chosen a bird.
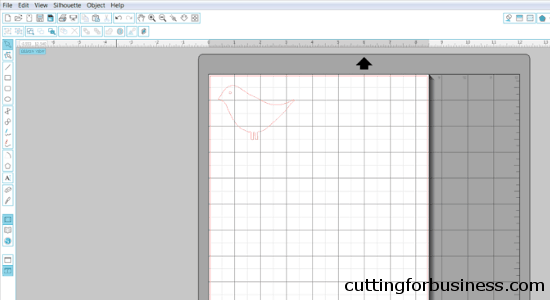
    Creating custom color charts in Silhouette Studio

    3) Next, you’ll click “Object”, “Replicate”, and “Fill Page”. (Tip: If you don’t want to fill the page, you can choose a different replicate setting – Column of Three – Column of Four – Row of Three – Row of Four.)
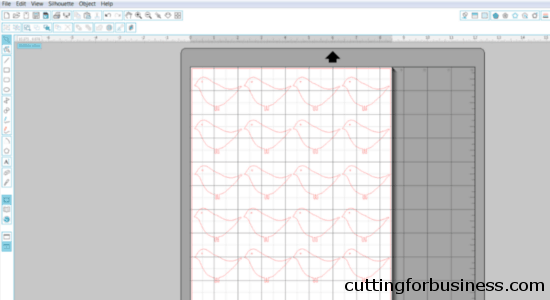
    Creating custom color charts in Silhouette Studio - by cuttingforbusiness.com

    4) Open your color chart within Silhouette Studio. If you don’t have a color chart on your computer, you can use Google or Google Images to find one.
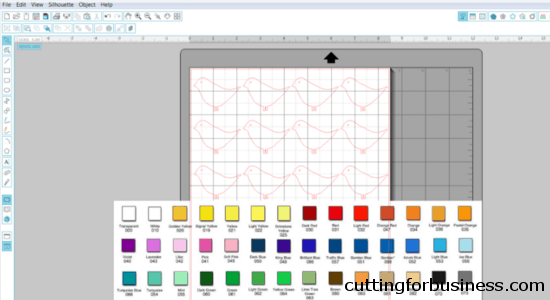
    Creating custom color charts in Silhouette Studio - by cuttingforbusiness.com

    5) Select your first shape. From the Fill Color window, use the dropper tool to choose a color in your color chart by clicking on it with the tool. I’ve highlighted the Fill Color icon and the dropper tool in red in the image below. Your first shape will fill in with your chosen color.
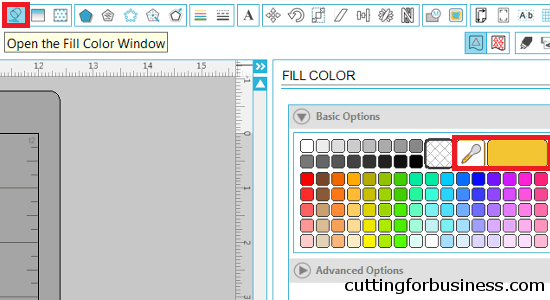
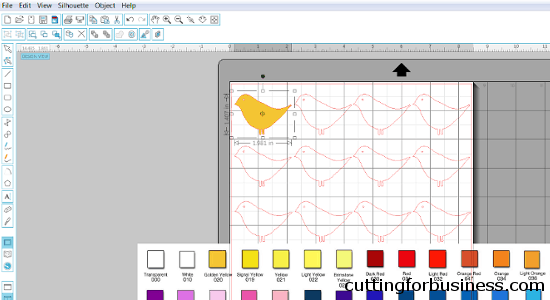
    Creating custom color charts in Silhouette Studio - by cuttingforbusiness.com

    Creating custom color charts in Silhouette Studio - by cuttingforbusiness.com

    6) Repeat step 5 to fill in the remaining shapes with colors from your color chart.
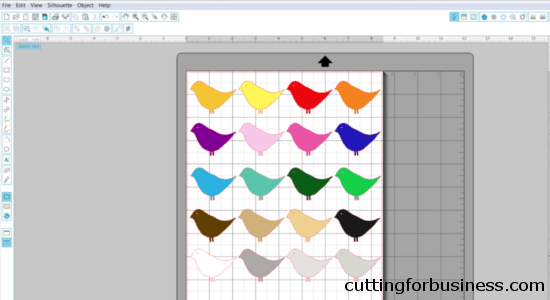
    Creating custom color charts in Silhouette Studio - by cuttingforbusiness.com

    7) Using the text tool, add the names of each color below your shapes. I recommend keeping the names the same as the supplier names, this will make it easier for you when ordering supplies. You can also add your business name, watermarks, or other details.
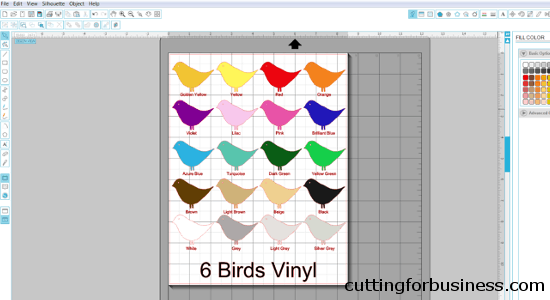
    Creating custom color charts in Silhouette Studio - by cuttingforbusiness.com

    8) Now you’ll need to get your color chart out of Silhouette Studio. To save them as a .jpg or .png file, you can use a virtual printer, like Bullzip. There are a lot tutorials online for Bullzip, but quickly: 1) Install Bullzip 2) From Silhouette Studio, click “File”, “Print”, and select “Bullzip PDF Printer”. Create a file name and select the file format and Bullzip will virtually print it to your computer. Depending on your computer, you can also take a screenshot (CNTL + ALT + PRTSCN) or use the snipping tool.

    Besides simplifying the ordering process, custom color charts can also help your business in a few more ways:

    • You can charge a special order materials charge if a customer requests something made in a color you don’t normally stock.
    • You can reduce your turnaround times by keeping all the colors on your custom color chart in stock at all times.
    • You will save time not having to constantly order more and more colors of materials.
    • When selling with a limited number of colors, you’ll be more likely to receive multiple customers requesting the same colors. This will allow you to use more of your scrap materials.

    Save this post to Pinterest:
    How to Create Custom Color Charts in Silhouette Studio - by cuttingforbusiness.com

  • How to Create Product Mockups in Silhouette Studio

    Successful online stores have a wide variety of items available for customers to purchase. Fellow crafters understand that supplies are expensive, and making a sample of each color you have available or each design can be impossible. The solution is to do a mockup, which is basically showing a customer what the completed item will look like without physically making it.

    The process of making a mockup is easy: 1) Create your product design, 2) Save it with a transparent background, and 3) Layer the design onto an image of whatever you plan to apply the final design to (t-shirt, mug, wooden board).

    Here are step-by-step instructions in Silhouette Studio:

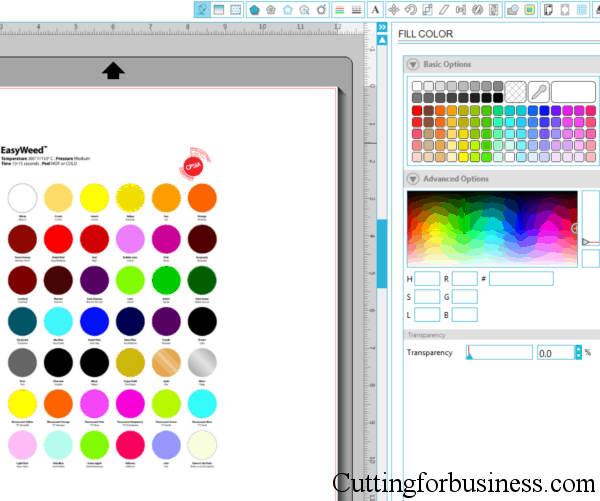
    1) Create your design in Silhouette Studio. For this example, I am using a “Love” design for a decorative throw pillow. Fill your design with the color of vinyl, paper, or paint that you will be using in your final product. I will be using red, but none of the standard reds available in the Silhouette Studio color palette are exactly the right shade. Since I will be using Siser Easyweed Heat Transfer Vinyl, I start by opening the Siser Easyweed color chart in Silhouette Studio (Click “File”, then “Open”.)

    Creating Product Mockups in Silhouette Studio - by cuttingforbusiness.com

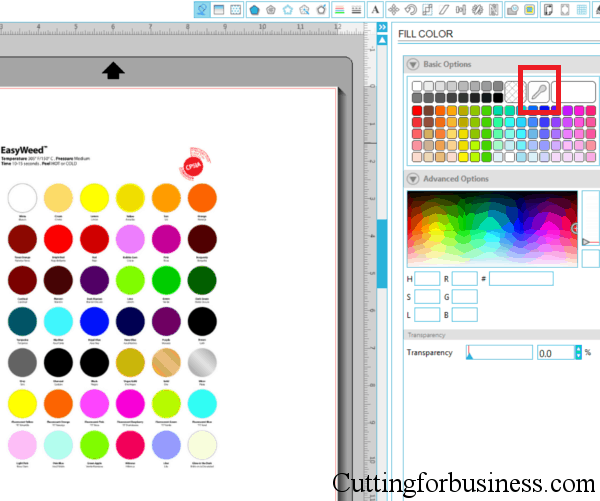
    2) Next, from the “Fill Color Window” (1st icon in the row along the top right side), you’ll want to select the dropper tool. Using the dropper tool, click the color from the color chart (or paint color chart, etc) that you will be using in your final product.

    Creating Product Mockups in Silhouette Studio - by cuttingforbusiness.com

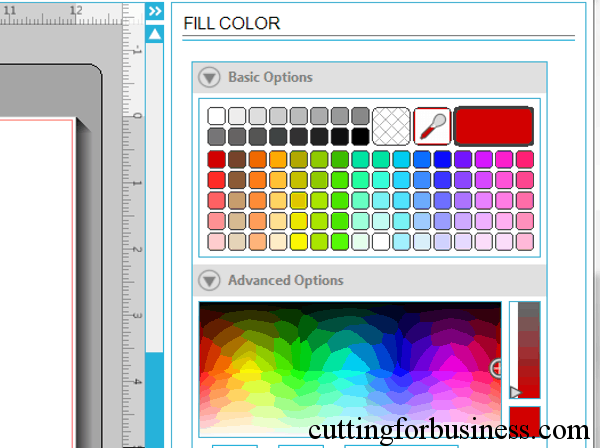
    3) The color that you selected is now active in the palette.

    Creating Product Mockups in Silhouette Studio - by cuttingforbusiness.com

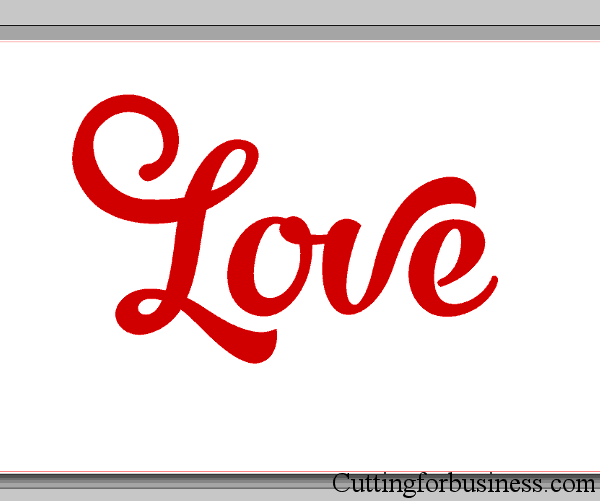
    4) Fill in your design with your selected color and save it. You’ll need it in a few minutes.

    Creating Product Mockups in Silhouette Studio - by cuttingforbusiness.com

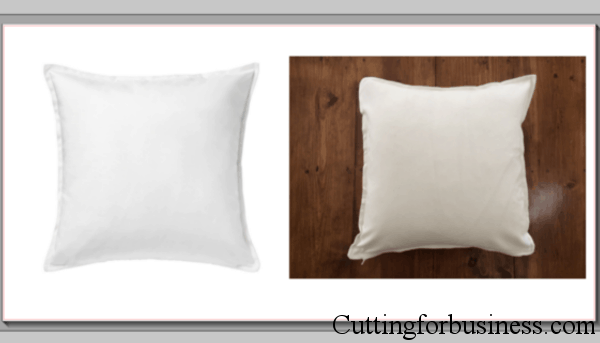
    5) Take a photo of the item you will be applying the design to, or use a photo from your supplier. Personally, I prefer to use photos that I take myself, as it creates a more realistic look for the mockup. I feel that supplier photos with white backgrounds give products a sterile look. Here are my photos. The first is a photo from the supplier of the pillowcase, while the second is a photo I took of the pillowcase.

    Creating Product Mockups in Silhouette Studio - by cuttingforbusiness.com

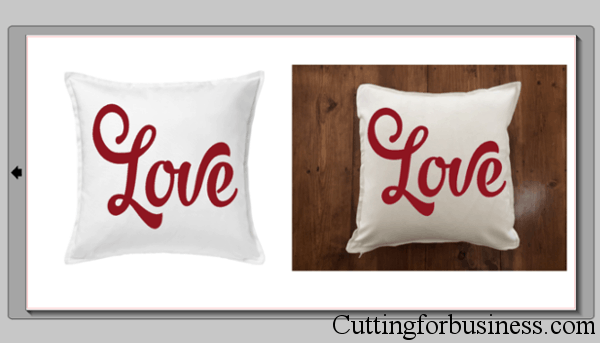
    6) Next, drag your design onto your images. (If you are using Silhouette Studio Designer Edition and need to bring your design to the top layer, right click and select “Bring to front”.)

    Creating Product Mockups in Silhouette Studio - by cuttingforbusiness.com

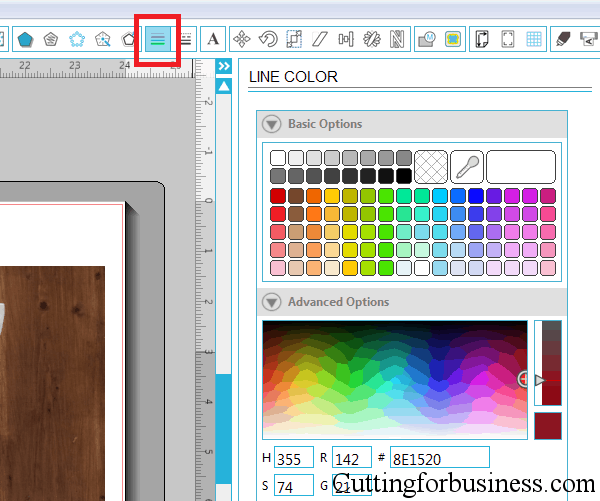
    7) If your cut lines are showing you have two options: a) From the “Line Color” menu, change the lines to transparent, or b) From the “Line Color” menu, change the lines to the same color as your design.

    Creating Product Mockups in Silhouette Studio - by cuttingforbusiness.com

    8) Now you’ll need to get your designs out of Silhouette Studio. To save them as a .jpg or .png file, you can use a virtual printer, like Bullzip. I have a full tutorial for using Bullzip located here, but quickly: 1) Install Bullzip 2) From Silhouette Studio, click “File”, “Print”, and select “Bullzip PDF Printer”. Create a file name and select the file format and Bullzip will virtually print it to your computer. Depending on your computer, you can also take a screenshot (CNTL + ALT + PRTSCN) or use the snipping tool. After getting your image out of Silhouette Studio, you can crop it in any photo editor and add your watermark.

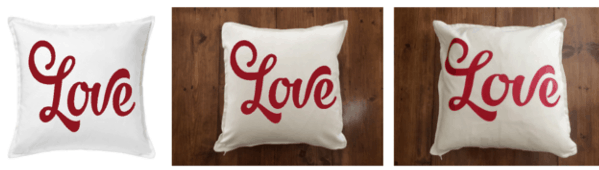
    Here’s the final result of my product mockups. The first two are the mockups I just created, and the third one is the final product.
    Creating Product Mockups in Silhouette Studio - by cuttingforbusiness.com

    In closing, product mockups are a great way to offer a large number of products without needing to create each one of them. If your not the best photographer (like me!) you can purchase blank mockups through etsy.com or creativemarket.com.

    Etsy sellers: Etsy restricts mockups from being used as the first image in your Etsy listing. If you plan to use mockups on Etsy, you need to first read their Listing Photos help page. This page outlines that mockups are allowed as the second through fifth photo only – however Etsy’s enforcement of this policy is spotty.

    Read more mockup tips on Cutting for Business, just click here.

    Save this post to Pinterest:
    How to Create Product Mockups in Silhouette Studio - by cuttingforbusiness.com