Category: Shows, Fairs, Classes, Markets, and More

  • 8 Questions to Ask a Craft Show Organizer Before You Sign Up

    With the changing of seasons from Winter to Spring, you’ll likely see more craft shows and fairs popping up. While I’ve shared a lot of information related to fairs and markets before, I realized I haven’t given you any advice on how to choose craft shows that might work best for your business.

    The best way to determine if a craft show is right for your business is to ask the organizer some questions. Below, you’ll find those questions.
    8 Questions to Ask a Craft Show Organizer Before You Sign Up - cuttingforbusiness.com

    8 Questions to Ask a Craft Show Organizer Before Signing Up

    1. How many shows have you hosted in the past? It’s no secret: First year events (and not just craft shows and fairs) rarely do off without issues. If the organizer hasn’t had experience hosting other large events in the past, you may want to skip it.
    2. How many vendor spaces are available and how many spaces remain? This is a good question to ask because you can see if the show will be full or not. If it is two weeks to the event and there are 100 out of 150 vendor spaces remaining, it might be a red flag to not attend the show.
    3. How many vendors are returning from last year? If the event was held last year, the organizer should be able to give you an estimate of how many returning vendors will be present. If very few vendors from last year are returning this year, it’s probably a sign that last year’s show didn’t perform well.
    4. Is this a juried event? A juried event means that vendors must submit samples before being accepted into the show. This helps organizers know how many of each type of vendor will be at each show. (Read more about juried craft shows.) I’ve seen shows where there have been 50 spaces and 35 of them have been jewelry. If you sell jewelry, it might not be the show for you.
    5. How many people are expected to attend? A good organizer will have an estimate of the number of people that will attend the show and should be able to give you the demographic of those being advertised to. Knowing how many potential customers (and information about them) can help you make a decision about whether or not the booth fee is worth it – and it can help you determine how much inventory to bring. (I also have information on how much inventory to bring.)
    6. Is there a fee to attend the show? Put simply, if shoppers have to pay to get through the door to shop – you will have more serious shoppers. Keep this in mind as you choose craft shows.
    7. Besides the booth fee, what other costs are there? At many shows, it is expected that all vendors donate a giveaway product for a raffle or donate loot to giveaway bags. Be sure you are clear on the expectations before you sign up for the show.
    8. The show specifics. Be sure to ask the event organizer all the logistics questions: How large is the booth space? Is it inside or outside? Is electricity available? For outside shows, what happens if it rains/snows? What time is setup? What time is tear down? Are there cancellation fees? While most show organizers will have a sheet with all of this information covered, be sure to go over the information carefully. If anything you need to know is missing, don’t be afraid to ask.

    Craft shows and fairs can be hit or miss. If you attend a show and don’t do as well as you expected – don’t put the blame entirely on yourself. A lot of the success of vendors falls onto the shoulders of the organizers.

    Read my craft show tips.
  • 4 Tips to Overcome a Disappointing Craft Show

    I’ve said it before and it bears saying again: Craft shows are always a gamble. Despite your best efforts, there’s no guarantee for any show that it will be profitable.

    Today, I’m sharing four tips to help you overcome a disappointing craft show.

    4 Tips to Overcome a Disappointing Craft Show - cuttingforbusiness.com

    4 Tips to Overcome a Disappointing Craft Show

    Don’t Leave Early

    You’ll know a few hours into the show how successful the show is. Keep at it through the entire scheduled timeframe. Even if you only stand in front of your booth and pass out business cards to shoppers – you are still getting your business name out there.

    Network with Other Vendors

    If you are at a craft show and traffic is slow for everyone, take time to walk around and introduce yourself to other vendors. One of my dearest friends and I met over 15 years ago at a failed craft show. We were both selling jewelry – along with everyone else. While I no longer sell jewelry, we still talk weekly and visit each other when we are in the same state. There’s no reason why you couldn’t find a few new friends or a potential business relationship.

    Take Notes and Photos Immediately After the Show

    Give yourself the opportunity to learn from this ‘bad’ show. How does your set up look? Why do you think things didn’t go well? Did you have enough inventory in several price points and for several demographics? Were your products not a good fit for this type of show? Was the entire show just void of buyers? Did other sellers have a bad show as well? Use your notes to improve on your next show.

    Realize that a Disappointing Craft Show May Not Be Your Fault

    Unfortunately for show organizers, unsuccessful shows often fall onto their shoulders. As a seller, you aren’t involved in the advertising, show location assignment, or selecting vendors. You cannot (and should not) blame yourself.

    No matter the reason for the poor show performance; keep your chin up and starting planning for your next show. ❤️

    And please, ask the organizer of the next craft show you attend these questions before you sign up.

  • The Ultimate Guide to Craft Shows for Sellers

    I’ve got a lot of information on Cutting for Business about preparing and attending craft shows.

    Today, I’m rounding it up into one place so it’s easier to find.

    The Ultimate Guide to Craft Shows for Sellers - cuttingforbusiness.com

    The Ultimate Guide to Craft Shows for Sellers

    [mv_create key=”36″ type=”list” title=”Craft Show Resources” thumbnail=”https://cuttingforbusiness.com/wp-content/uploads/2019/06/JuriedvsNonJuriedCraftShowsSQ.png” layout=”hero”]

  • 3 Methods to Determine How Much Inventory to Take to a Craft Show

    Craft show season will be upon us soon, and I know that many Cutting for Business readers are already signing up for shows and events. Today, let’s tackle how much inventory you should take to your next show.

    First, there are no set rules on how much inventory you should take.

    You should strive to have your craft show booth full (but not overcrowded) of inventory for customers to browse and buy. Also, you should also have enough stock on hand that you can replenish your display as customers purchase your products. Ideally, your back stock should be under the table or behind your display so that replenishment is easy.

    3 Methods to Determine How Much Inventory to Take to a Craft Show - cuttingforbusiness.com

    3 Methods to Determine How Much Inventory to Take to a Craft Show

    Based on Vendors Fees

    Some sellers set inventory goals based on the fee for being a vendor. Ideally, you should sell 8 to 10 times the show entrance fee.

    For example: If the vendor fee is $50 you should plan to sell $400 to $500 in merchandise and bring at least double the products, or $800 to $1000 in inventory. Be sure to spread your inventory across several price points.

    Unfortunately, if you are selling large and expensive products only; this formula doesn’t work well.

    Based on Sales Goals

    Other sellers set inventory goals based on their sales goals. If I attend a show and want to sell $1000 in products, I’d typically bring around 3 times my sales goal in product or $3000 worth of inventory. Again, be sure to spread this across many price points.

    Based on Attendance Numbers

    Other sellers compute their inventory based on past show numbers. At an average show you should expect that 1% to 3% of attendees will purchase something from your booth.

    First, figure out what your average product will sell for. Let’s say my average product costs $18. And, let’s say that a particular show has 2,000 attendees. If 2% of the attendees make a purchase (40), you’d multiply this by your average product price. In this case, I’d expect to sell $720 worth of product and should bring at least double the amount in product or $1440.

    Like the first two, you’d need to have products in a variety of price points.

    Remember, these are just suggestions on how to determine your ideal inventory to bring to a craft show; but there are no hard fast rules. If I’m attending several shows in one season, I might bring much more inventory to a particular show since I can always use it at a show at a later date. If I am not attending another craft show, I might bring less so that I don’t have a lot left over at the end.

    More Craft Show Tips

    Worried about having enough time to create all these products before a show? Read my strategy to quickly build up inventory.

    Or, read my favorite craft show tips.

  • How to Organize a Drive Through Decals Fundraiser

    With Back to School on the horizon, one thing is certain: Schools will be in need of fundraisers.

    If you’re close to your PTO or PTA, you could suggest a Drive Through Decals fundraiser event to raise money for your school.

    How to Organize a Drive Through Decals Fundraiser - cuttingforbusiness.com

    What is a Drive Through Decals Fundraiser?

    The premise behind a Drive Through Decals event is simple: Customers line up in their cars and make their way through an assembly line to get a decal applied to their car. The school buys the decals (from a small business owner like you!) and upcharges to make a profit.

    Organizing the Drive Through Decal Event for a School

    1. Plan to hold the event in the school parking lot. Immediately before or after school or an event is ideal.
    2. Make up flyers with the time and date of the event, location of the event, a picture of the decal to be applied, and the cost. I’d charge between $5 and $8 and accept cash only. A design with the school or sports logo is perfect!
    3. Stop 1: Customer pays for the decal. Be sure to have an extra jar for additional donations available, as well as extra decals that the customer can purchase and apply themselves.
    4. Stop 2: A spot on the back window is cleaned with a paper towel and alcohol for the decal to be applied.
    5. Stop 3: The decal is applied and the transfer tape is removed. The customer drives away.

    Decal Crafting Tips

    • Decals that are around 4 inches by 4 inches work great for Drive Through Decals Events. All cars will have the same decal applied to them during the event.
    • Consider using white for the decals. This will ensure that they can be seen even on car windows with darker tints.
    • Decals should be precut in adhesive vinyl (Oracal 651 or similar), weeded, and have transfer tape applied before the event.
    • A few helpers during the event will make it run faster and smoother. Use common sense if having children help, since cars will be moving around.

    It’s that simple to host a Drive Through Decals event and you can plan them quite quickly. As the small business owner, you can be present and run the event yourself, or simply provide the decals and let the PTO/PTA handle the actual event.

    Don’t Limit Drive Through Decal Fundraisers to Schools!

    Of course, a Drive Through Decals fundraiser isn’t limited to schools! Try it for your child’s sports team, theater group, or any other group seeking funding.

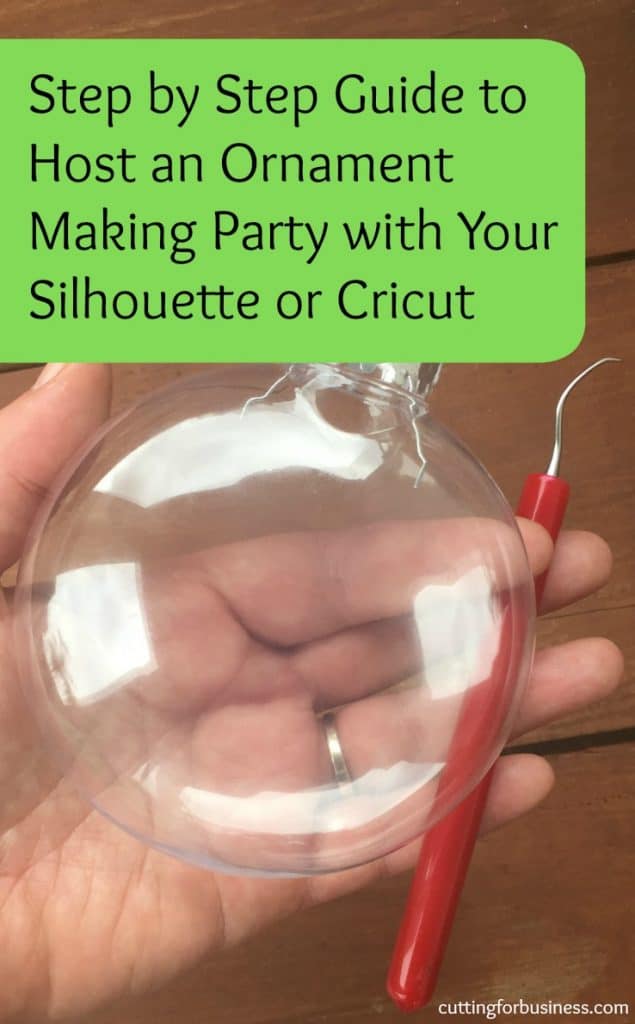
  • How to Host a Christmas Ornament Making Party

    Glittered Christmas ornaments are popular every year and are a great way to making money with your Silhouette Cameo or Cricut Explore. Some crafters love making and selling ornaments, while others prefer to teach the technique. Today, let’s look how to host your own ornament making party.

    *You should be familiar with making glittered ornaments before attempting to host a party. This tutorial deals only with the party aspect and does not offer a tutorial for the ornaments.

    Supplies Needed – General

    Supplies Needed – Per Person

    Time Needed

    A successful ornament party will probably take around 2 hours. This leaves enough time for visiting with friends, creating the ornaments, snacking, and clean up.

    Party Sign Up & Payments

    There are a few different ways to collect signups and payments for party attendees. Depending on your setup, you can use a Facebook Event from your business page and then a Paypal invoice for payment, a custom product on your website, or even a custom Etsy listing. No matter what method you choose you will want to collect the attendees’ basic information, the number of ornaments they want to make, any requests for personalized vinyl cuts, and their payment. I would charge no less than $10 per ornament. Be sure to collect all payments before the party begins.

    Party Space

    You can choose to offer the party in your house or in a hostess’s house. If you are doing the party at someone else’s home, consider letting the hostess make her ornaments for free in exchange for hosting the party.

    Before the Party Prep Work

    1. Cut all vinyl designs before the day of the party. You could cut customized designs that an attendee specifies when they sign up for the party, or you could cut generic designs and sayings.
    2. On the day of the party, set up the party space with tables and chairs, tablecloths, and/or newspaper.

    At the Party

    Here’s a sample flow of how your Christmas ornament party will run:

    1. After all attendees have arrived, start crafting!
    2. Pass out the vinyl designs and demonstrate how to weed the vinyl. Have each attendee weed their vinyl designs.
    3. Demonstrate how to apply transfer tape or paper and transfer the design onto the ornament. Have the attendees cut the transfer paper close to the design to make transfer easier, and then have attendees apply their designs to their ornaments. (If you’ve noticed, I recommend you having everyone apply the vinyl design before glittering the ornament. This is simply to combat drying time.)
    4. Show how the ornaments come apart and how to pour Polycrylic into the ornament and swirl it around. Then show attendees how to add glitter using a funnel and swirl it around to get good coverage. Distribute Polycrylic to attendees in 3 ounce paper cups and have them pour it into their ornaments and add glitter. After attendees finish glittering their ornament, have them turn it upside down in a large paper cup.
    5. Allow attendees to choose a ribbon and tie it to the top of the ornament.
    6. Before attendees leave, let them know that they should let the ornament stay upside down in the paper cup for 24 to 48 hours. Then, they can put the top and ribbon on the ornament and hang it from their Christmas tree or ornament holder.

    That’s it!

    After the Party

    Before cleaning up, be sure to take a few photos. You’ll be able to use these photos to promote future classes.

    A quick note: During the party, mention that you cut the vinyl designs using your Silhouette Cameo or Cricut Explore. Small events like these can easily get people hooked on crafting and may be able to lead you to teaching others to use their new machine.

    Have you hosted an ornament making party? If so, share your favorite tips in the comments.

    Save this post to Pinterest:

    How to Host a Christmas Glitter Ornament Making Party with Your Silhouette Cameo or Cricut Explore - by cuttingforbusiness.com.

  • 8 Tips for Customizing Products at Craft Shows

    I am seeing more and more readers report that they are signing up for craft shows. (Yay!)

    Craft shows can be great sources of income. However, the one thing about craft show customers is that many are more likely to purchase when they can leave your shop with their product.

    I thought that today would be a good time to share tips for customizing products at craft shows.

    8 Tips for Customizing Products at Craft Shows - cuttingforbusiness.com

    8 Tips for Customizing Products at Craft Shows

    Verify that You Have Electricity Available in Your Booth or Table

    You can’t personalize items if you can’t bring your Silhouette or Cricut machine with you. Similarly, make sure that you have enough space in your booth or table to be able to set up your machine and still have plenty of room to display products. It’s always a good idea to bring extension cords and a power strip.

    Collect Payment Before You Personalize

    Just like any other product you sell, payment should be collected before you start customizing a product.

    Bring a Helper

    It’s even better if you can bring a trained helper. Ideally, your helper can run your machine and apply the customization while you interact with customers and sell your products.

    Offer a Limited Number of Personalization Colors and Fonts

    It’s not practical to bring every color of vinyl or material that you own to the show. Instead, stick to the basics. (For me: this usually means black, white, and the colors of the rainbow.) Similarly, offer only a handful of fonts – preferably ones that cut well and don’t need editing before cutting.

    Cut Out as Much as Possible Ahead of Time

    Example: If I am offering a circular frame with a monogram inside to be placed onto a tumbler, I cut out the frame ahead of time and I’ll only have to add the monogram after the customer orders.

    Don’t Have Your Customer Wait for Their Items

    I work better when I’m not distracted. If you are personalizing a product, invite the customer to walk around and shop and return at a later time to pick up their product. This also gives you time to package the product before pickup.

    Have Order Forms Ready for Customized Orders that You Cannot Complete Immediately

    If you are personalizing orders at an event, you are going to get a customer or two that wants to make several changes or wants an entirely different design. Instead of using all your show time creating one product, have a form available to capture the order and arrange shipping to the customer.

    Don’t be Offended When Customers Ask What Type of Machine You Are Using

    If you are using your machine while at a show, you are going to have customers asking about the process. You certainly don’t have to share your secrets or teach them how to use it, but don’t be rude when they inquire.

    Have you ever offered personalization on demand at shows or fairs? How did it go? Share your experience in the comments. Read more about craft shows on Cutting for Business.

  • Step by Step Guide to Hosting a Sign Party

    Today, I’ve got a special guest on Cutting for Business! Welcome Sarah Strunk – a longtime blog reader and owner of Simply Sarah. She’s sharing her method of hosting sign painting parties with her Silhouette Cameo (or Cricut). After you read this post, pick up her new ebook with more information about hosting a party with your Silhouette at this link. I’ll let her take over:

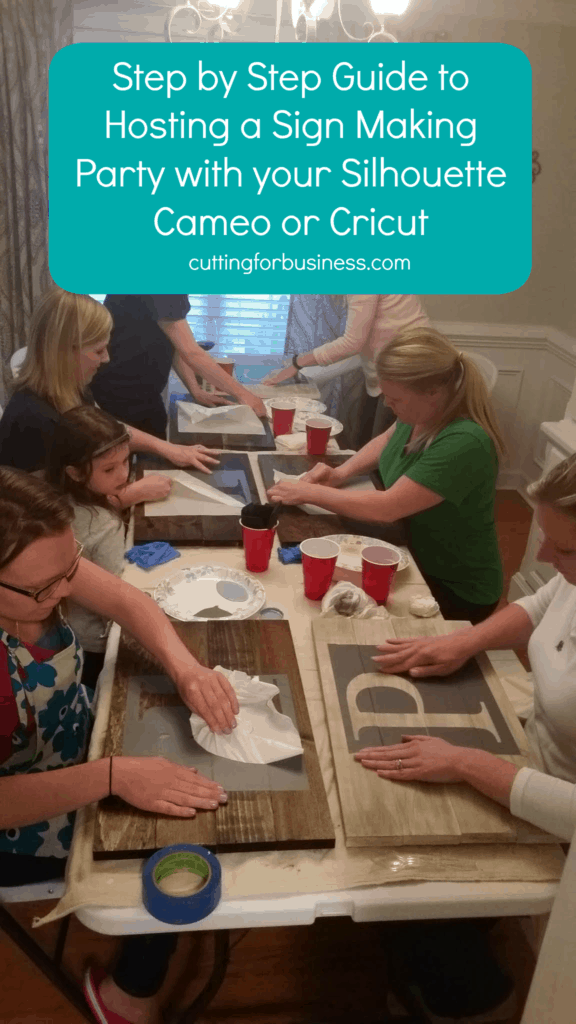
    I’ve known for a long time I wanted to do sign parties. I love those paint your own canvas nights, but lets be honest, I’m not great at freehand – that’s why I have a Silhouette! I knew parties to paint stuff I ACTUALLY wanted to hang on my walls would be a great idea. Logistically though, how was I going to pull it off? A few months ago I finally just decided to grab my closest girlfriends and give it a spin. If it was awful they wouldn’t hate me and I needed a easy group to practice on. Definitely do a few trial runs!

    Pricing

    • I charge $40 per person, but am raising the party rates to $45 per person.
    • It costs me $10 per board for each person. That figure does not include time – the prep work is fairly labor intensive, but when you love what you do it doesn’t really feel like work!

    Sign Ups­

    • I create a Facebook Event. Then, add the people who want to come and post a picture of what you’ll be making. Make a demo yourself, don’t do a mock up. You want to be able to see how long it takes you to make it and you want to have an example at the party. Get everyone signed up and collect payment UP FRONT.
    • Make payments non refundable or tell them it’s non refundable but can be applied to a future party if they need to cancel.
    • When signing up, I got everyone’s last names and established dates.

    Prep Work

    • Head to Lowe’s, Home Depot, or Menards and grab 1×4’s in pine. (Alternatively, you could use pallets but I don’t have patience for that and wanted them to take stain/paint easily.)
    • I cut the boards down into 24 inch pieces so that I could easily just cut 12×24 sheets for the stencil.
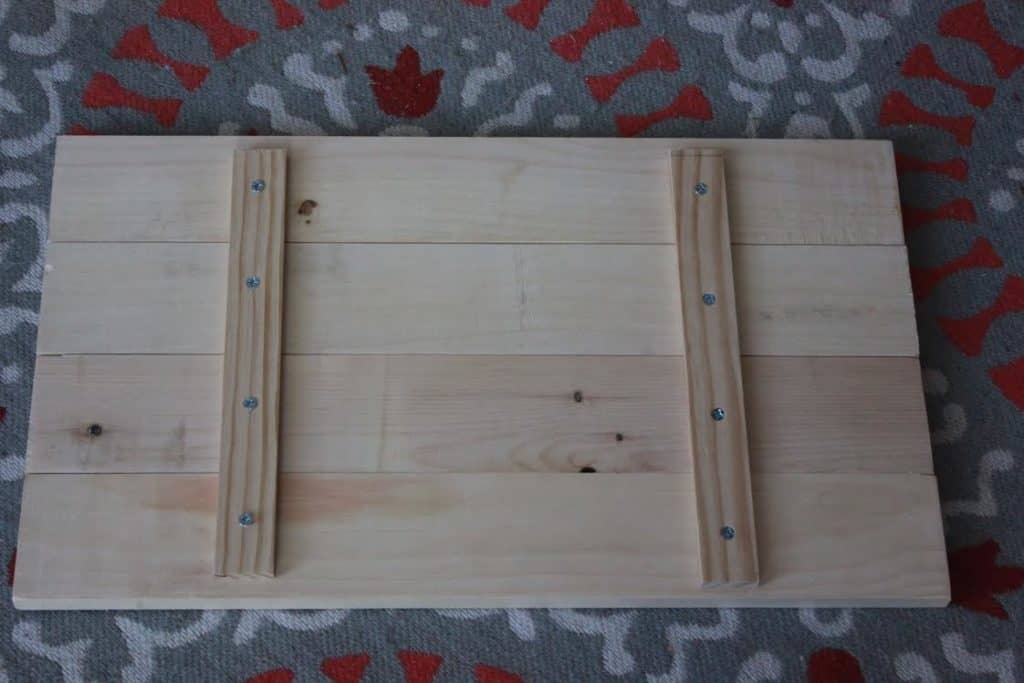
    • I then planked them together making 12×24 inch plank boards. I just used strips that I also found in the wood department at Lowes and cut those down. I used 1 1⁄2 in screws on the boards.
    • It takes me an hour or 2 to plank 10 boards. That includes cutting, sanding, and planking. TIP: Don’t offer varying sizes. The process goes quickly because you’re doing all one size.
    • Alternative: Instead of planks for your first sign, you could buy larger wood planks and cut them down. I did that for my first few parties and it was great!
      Step by Step Guide to Hosting a Paint Your Own Sign Party with your Silhouette Cameo or Cricut - by cuttingforbusiness.com

    Creating the Stencil­

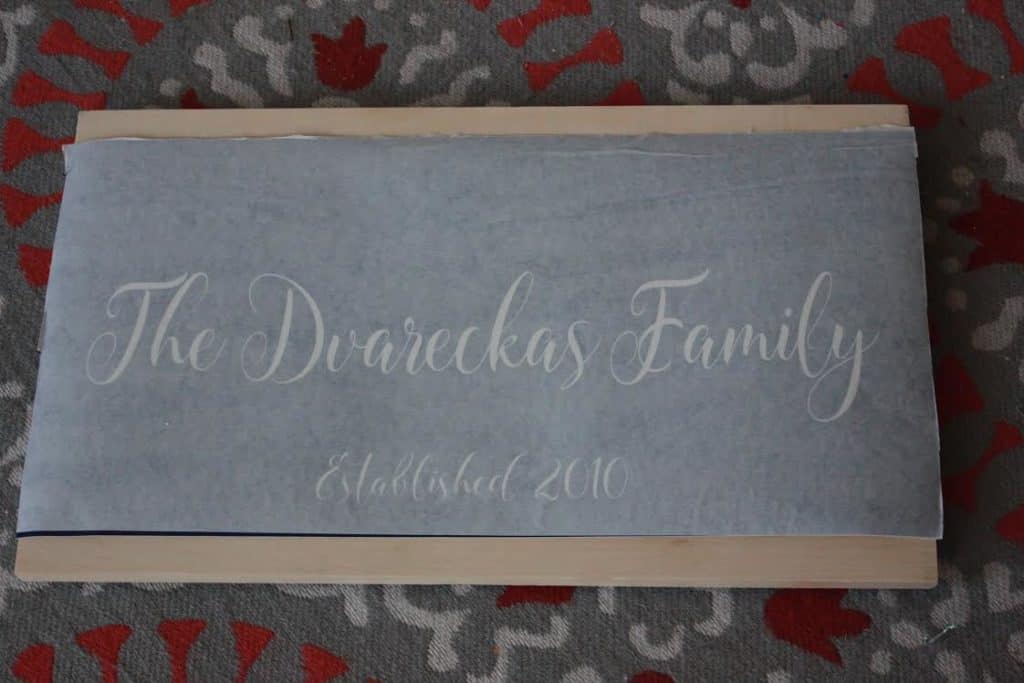
    • I created a stencil in 2 parts, using Oracal 631 vinyl. The first stencil was the big last initial. Then, I made a stencil of each person’s last names. Cut each last name on a single 12×24 sheet. This is easy for them to line up on their board and everything will be centered. Step by Step Guide to Hosting a Paint Your Own Sign Party with your Silhouette Cameo or Cricut - by cuttingforbusiness.com

    Party Day

    • Set up folding tables or your own tables and lay down drop clothes. Purchase foam brushes, burnishing squeegees, exacto knives, staining sponges, rags, and paper plates (for paint).
    • I highly recommend hosting the party at your own house, that way you have everything you need. I did a few parties at the hostesses’ home and it was chaotic and I always was forgetting something.

    At the Party

    • I had each person bring a snack and I provided wine (you can also do BYOB). You’ll need something to do while you wait for paint to dry – that’s why you need snacks and drinks!
    • After everyone visited for a bit we sat down to start the signs.
    • I offered 3 stain options: Gray, dark walnut, and a whitewash technique with antiquing glaze on top. At my last party, most picked the dark walnut with two opting for the whitewash. I poured some stain into little cups and had staining sponges I got from Lowes. Be sure to watch everyone as they put on the stain so it doesn’t go on too heavy or it won’t dry. I went by everyone after they stained and wiped off excess with a paper towel. I then helped the whitewash folks get their first coats done. I had a hair dryer on hand to help with drying times but we didn’t need it. After about 30 minutes, everyone’s boards felt dry so we moved on.
    • We then laid down the last initial, You can just show everyone how to peel their stencil from the backing paper and then lay it down on the board, have painters tape and a ruler handy as it will help attendees center theirs on their board. You then want to show everyone how to smooth out the bumps, and make sure all the edges are down really well. I double checked each person’s board to make sure the stencils had a good seal.
    • Then we took foam brushes and sponged on our paint in light coats! I use Waverly brand chalk paint (available at walmart and less than $6 a jar, it goes far, and dries fast).
    • Next, take a break to let the first coat of paint dry. Chat, snack, and drink!
    • Once they letters are dry, you’re ready to go do the final step and put the family name. You’ll give everyone their stencil and you may need to help to apply it. If you have any more than 6 people you may want to have a helper to help those get stencils down and peel off transfer tape. Then, attendees will lightly sponge on their color and then peel off the stencils right away. You don’t want any of the base color coming up, so don’t leave the stencil on more than maybe 10 to 15 minutes.
    • Help everyone with any minor touchups. When you’re doing plank boards you may get slight bleeding around the planks, but you can go by with an exacto knife and scrap it and it will lift right off without messing up the stain or paint underneath.

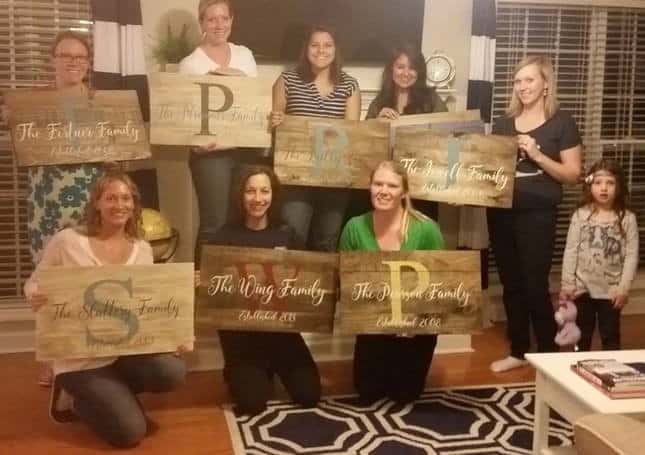
    You did it! Don’t forget to take a picture at the end. That picture is how you will get people to sign up for more parties! A note on hostesses: I find that you do not need to offer any sort of hostess reward but you can. Generally, I have no problem booking parties. In my opinion, providing hostess rewards is something that is popular with a lot of direct sale companies to help get people “in the door”.

    Step by Step Guide to Hosting a Paint Your Own Sign Party with your Silhouette Cameo or Cricut - by cuttingforbusiness.com

    A huge thank you to Sarah for stopping in to share her “secrets”! Please thank Sarah for stopping in by visiting her website Simply Sarah or picking up her new book. I’ve got a few other home party posts that you can read here. As always, if you loved this post, pin it or share it on Facebook by hovering over the image below or tapping it on mobile.

    Step by Step Guide to Hosting a Paint Your Own Sign Party with your Silhouette Cameo or Cricut - by cuttingforbusiness.com

  • How to Host a Workshop with Your Silhouette Cameo

    I’ve written a few posts about ways to make money with your Silhouette Cameo that don’t include selling products online. These ideas include selling digital designs to other crafters and working with local businesses. Another trendy way to make money with your Silhouette or Cricut is to host a workshop where you teach others how to complete a project using the Silhouette or Cricut. The idea is that they sign up for the class, show up with nothing, and leave with a completed project. You may be familiar with this style of workshop is you’ve attended a painting or pottery night out.

    What You’ll Need to Plan to Host a Workshop

    Location – You’ll need to have a place to offer the workshop. The number of people in the workshop will determine how large of a space that you’ll need.

    • Hold the workshop in your home – a great option if you know the participants.
    • Rent a space for an evening from a church, local small business, virtual office, or conference room at a local hotel.
    • Lease a space and set up a permanent workshop storefront.

    Supplies – As the host, you’ll need to provide all the supplies for each participant to complete their project. You will also need to provide a workspace for each participant. When hosting my own classes (an aside: do you know that I used to teach crafting classes at Michaels Arts and Crafts stores?), I used these tables and put two to three crafters at each table. Your supplies will vary depending on the project, but could include precut wood, basic power tools, vinyl, cardstock, measuring tapes, weeding tools, paint, paint supplies, aprons for participants, and basic art supplies like scissors, measuring tapes, and pencils.

    Project Ideas – Pinterest is a great source of project ideas! Here is my list of projects that lend themselves well to workshops:

    • Wooden home decor – You can either choose to have the wood sanded and painted, or you can invest in power tools and have the participants cut and/or sand the wood before painting it. You can then distribute precut vinyl designs to each participant and they can weed and apply it after you teach the technique. If participants are painting their own wood, you need to account for drying time and may have to do a two part workshop.
    • Floating frames – The participants choose a design before arriving and you have it precut and ready to weed. After weeding the design, participants are shown how to apply the design to their frame and they apply it.
    • Anything holiday related – Classes that are related to the closest upcoming holiday are always popular. For example, consider teaching how to make vinyled Christmas ornaments in December, a football themed project in the fall, or a gift for their sweetheart in February.
    • T-Shirts – T-shirts are quick and easy projects to demonstrate during workshops. You’ll need to be sure to have at least one heat press for participants to use.

    Class Day and Length – You’ll need to consider the length of the class when choosing projects. Most people have various commitments, so I’d suggest limiting the time to between an hour or two on a weekday evening.

    Sign Up and Payments – Generally, when you advertise the class, you’ll advertise for a specific project and you’ll offer between 2 and 4 different design options. The participant signing up for the class will choose their design when they pay for the class. If you have more than 4 people attending the workshop, I would precut the designs using your die cutter before they arrive (or invest in several die cutting machines.) Otherwise, waiting for the machine to cut each design becomes quite time consuming. All participants should prepay for the workshop before attending. A reasonable workshop price is between $30 and $60. To determine your price you’ll need to take into account the cost of the space, all project materials, wear and tear on your machines, and the cost of your time – including set up and clean up.

    Finally, at the end of the workshop, be sure to give participants information on the next workshop. Then, take photos of the participants with their projects. You can use these for future advertising and social media! If you aren’t ready to find a space to hold workshops with your Silhouette or Cricut, have you considered hosting in-home parties? We will look at that tomorrow on Cutting for Business.

    How to Host a Workshop with Your Silhouette Cameo - by cuttingforbusiness.com

  • How to Host an At-Home Party with Your Silhouette or Cricut

    Yesterday I talked about hosting workshops using your Silhouette Cameo or Cricut. Today, we are going to explore a similar idea: having in-home parties with your Silhouette or Cricut die cutting machine. If you’ve ever attended a Tupperware, Pampered Chef, Scentsy, Origami Owl, or any other at home party you will probably be familiar with the idea.

    Steps to host an in-home party with your die cutting machine:

    Before the Party

    1. Find a friend who is interested in having the party in their home.
    2. With your friend, you both decide what project will be created and choose a date for the party. Like I mentioned in yesterday’s post, one to two hour long parties on weekday evening usually work well for many people. If you are in need of projects ideas – head to Pinterest!
    3. You create some basic flyers (its a good idea to offer both email format and hard printed copies) of the project of the night for your friend to distribute, which also details the cost for each participant.
    4. Your friend then invites her friends to the party to create the project. It generally works best if your friend collects the payments from each participant before the night of the party and gets them to you beforehand. Cash or checks work well in this case. If you’d prefer to accept credit cards, after an attendee RSVP’s to your friend – you can contact them directly to collect payment via credit card. In my opinion, collecting payments at the party is not a good idea because you will have to pay all the supplies out of pocket. Additionally, you may have people who don’t show up because they haven’t paid anything – leaving you with wasted supplies. Lastly, it is time consuming to collect payments the evening of the party.

    At the Party

    1. Your friend prepares some refreshments for the party.
    2. You arrive before the party to setup and you bring all the supplies for each participant to complete the project of the night. In addition to your machine(s) and project supplies, you may also need to bring tables, chairs, newspaper (to cover tables), and aprons for all participants.
    3. You demonstrate each step of the project and attendees create the project alongside you.
    4. Attendees are able to leave that evening with a completed project.
    5. Be sure to have information available and be ready to book additional in-home parties.
    6. Always remember to take photos of everyone with their completed project. They are great for future advertising, and social media.

    How do you make money holding in-home parties?

    For those familiar with home based party companies, you may know that consultants or representatives make a commission based on the amount of products they sell. With Silhouette or Cricut based in-home parties, you will not be selling anything. Instead, you’ll make money based on the amount that each participant pays to attend the party. Let’s look at an example:

    I offer an in-home party and the chosen project is a 12″ by 12″ painted wooden sign. My cost per project is $2.50 for wood, $1.00 for paint, $1.50 for transfer paper, and $0.70 for vinyl. We will add $1 for machine wear and tear, and another $1 for gas mileage. My total cost per project is $7.70. If I charged $25 per attendee, and eight people attended the party, I’d make $200 in attendee fees. If I subtract $77.00 (total cost of supplies for eight projects, plus one demonstration product, plus no charge for the hostess of the party to create an item) that leaves me with $123.00 left as profit – not a bad payrate for a few hours of time.

    One last concern is compensation to the hostess who opened her home and invited her friends to the party, as well as served refreshments. I’d suggest two things: 1) Give the hostess the demonstration product you made during the party. 2) Bring samples to the party of other projects that attendees can book for a party in their home. You can then leave these samples with the hostess as a thank you gift.

    If home parties are your thing, consider assembling a small team beneath you and could design all the projects and your team could go out and offer the classes. This would allow you to make commissions from your ideas that would be charged to your team members. With a little creativity, you could turn this into a much larger venture than just a few home parties. Tomorrow, we will wrap up our discussion on at-home parties with How to Host a Holiday Market in Your Home.

    How to Host an At-Home Party with Your Silhouette or Cricut by cuttingforbusiness.com