Blog

  • Should You Cross Promote Other Businesses in Your Craft Business Customers?

    A Cutting for Business reader emailed me asking my opinions on cross promoting her items when she sells her handmade products on Etsy. Specifically, she is an independent distributor of body wraps and wanted to include a small sample of the wrap material, a pamphlet, and a business card when someone buys her paper party banners and favors.

    I found the timing of this reader’s question ironic because I had just received something the day before from a seller cross promoting what I (assume) was the seller’s other business. I had ordered a handmade greeting card and when I opened the package, a business card for false eyelashes was presented on top of the handmade card I ordered. I found it slightly tacky and actually thought I was mailed the wrong package until I opened it and found my card.

    I think cross promotion is a great tool for small businesses, when it is done correctly. Unfortunately, when cross promotion isn’t done correctly buyers may be confused or offended and advertising materials are wasted.

    6 Things to Consider With Cross Promotions

    1. Whether the businesses are both yours, or yours and someone elses, make sure they work together. In the example above, I purchased a gender neutral, handmade greeting card and was sent marketing materials on eyelashes/mascara. I don’t see any connection between the two.
    2. Tell the customer why they are receiving the marketing material. This is as simple as a note or printed postcard that thanks them for their purchase or one that explains the connection between the two businesses.
    3. Don’t let the secondary business overshadow the primary business – which is the one that the customer ordered the product from. I may not have been confused by the marketing material that was enclosed with my greeting card if it was placed under my greeting card and not front and center on top of it.
    4. Make sure the secondary product is not offensive. If your secondary business only appeals to a small audience and some people would find it offensive, it is best to skip cross promoting.
    5. Be sure that the other business is not in direct competition to yours.
    6. Lastly, and maybe most importantly, people are bombarded by MLM (multi level marketing) programs all day long – and many people grow tired and distrustful of them. Don’t let a MLM overshadow your handmade products. Anyone can do MLM, not everyone can create gorgeous, one-of-a-kind handmade products.

    P.S. The Cutting for Business reader who emailed this question ultimately decided that marketing her weight loss wraps to customers that buy her paper goods was not good for either of her businesses. What do you think of cross promoting businesses?

    Save this post to Pinterest:
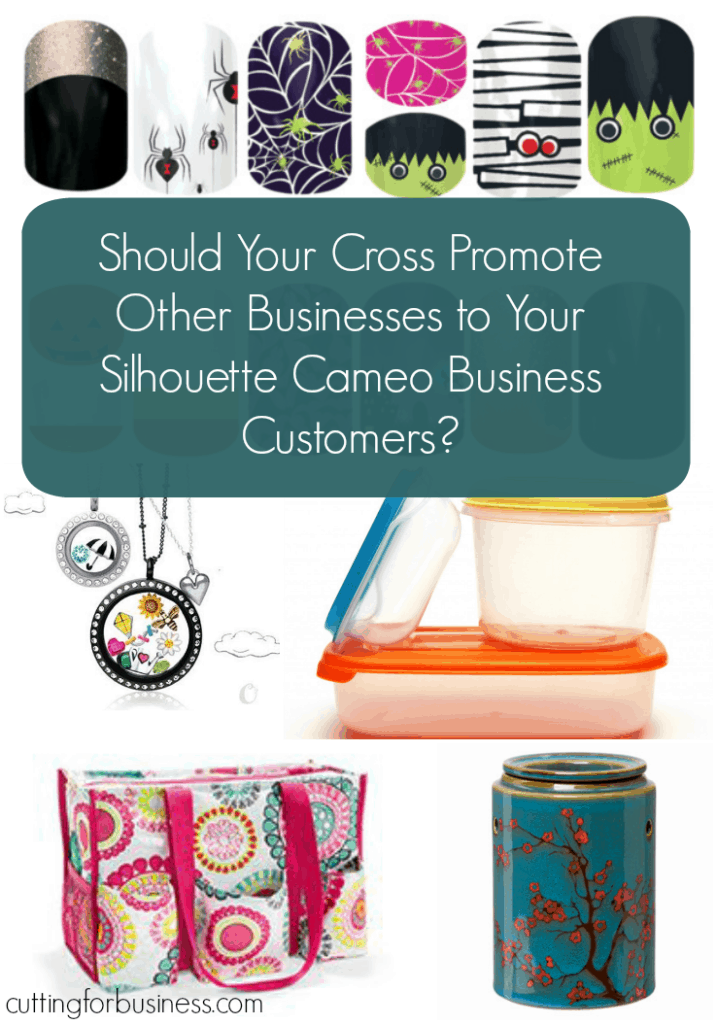
    Should you cross promote other businesses to your Silhouette Cameo small business customers? by cuttingforbusiness.com

  • Tutorial: How to Use the Logo It to Line Up Heat Transfer Vinyl Chest Designs

    Today on Cutting for Business, we are going to wrap up the tutorials related to lining up heat transfer vinyl (HTV). If you remember a few weeks ago, I introduced readers to the Tee Square It which will help you line up your HTV designs perfectly and quickly. (You can find those tutorials here and here.) To conclude this series, I will show you how to use the Logo It to line up chest or pocket designs. My Logo It was provided at no cost from Heat Press Essentials.

    How to Use the Logo It (Method 1)

    1. Pre-press your shirt.
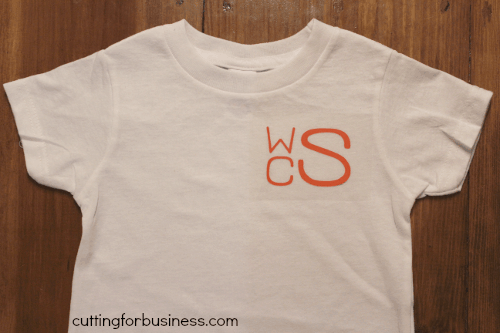
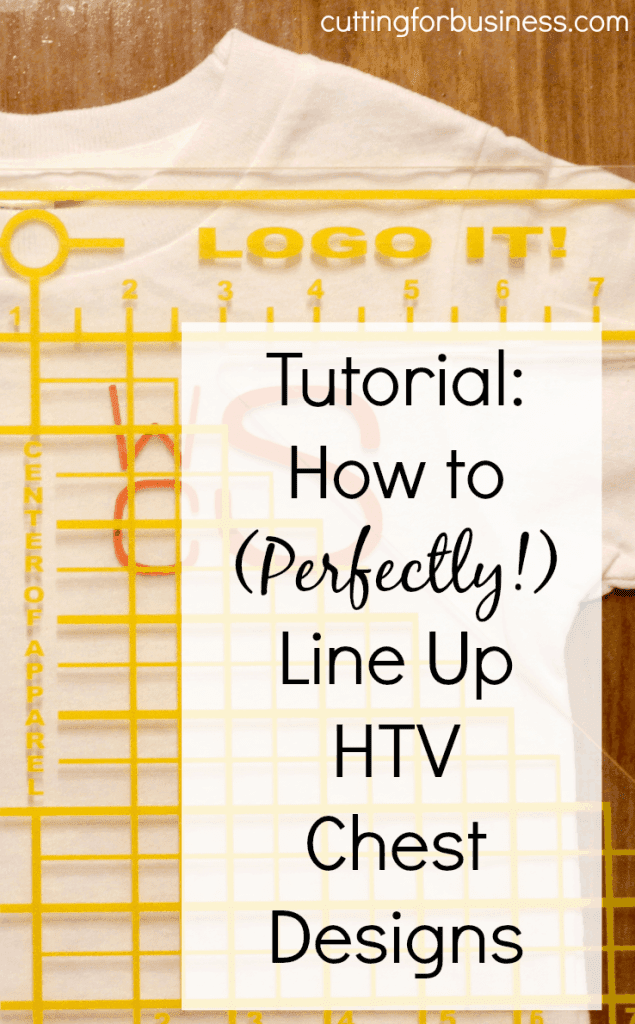
    2. Place your design onto the shirt in the position you will press it. The actual placement of your chest design will vary depending on the size of the shirt. Tutorial: How to Use the Logo It to Line Up Heat Transfer Vinyl Chest Designs by cuttingforbusiness.com
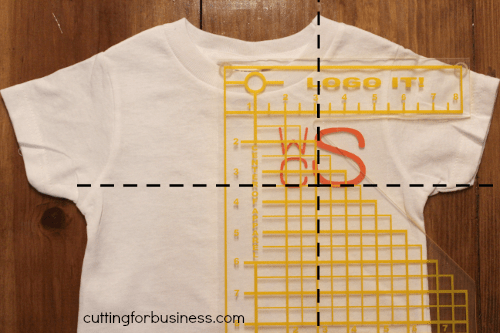
    3. Place the Logo It over your design by lining up the center mark with the center line of your shirt. To find the center line of your shirt, use the built in ruler at the top of the Logo It tool.
    4. Take note of the placement of your design. In the example below, the large S in my design lines at the 3″ mark vertically and the 3.5″ mark horizontally. When I do the next shirt, I will be able to replicate the exact placement in only seconds. If you are doing a large order, I suggest you record the measurements somewhere that you can find several months later. This can help you if the company calls for 10 more shirts 3 months later, you’ll be able to replicate them quickly and exactly!Tutorial: How to Use the Logo It to Line Up Heat Transfer Vinyl Chest Designs by cuttingforbusiness.com
    5. Remove the Logo It and press your design.

    How to Use the Logo It with the Tee Square It (Method 2)

    This method is the same as above, but you use your Tee Square it to find the exact center line of your shirt quickly.

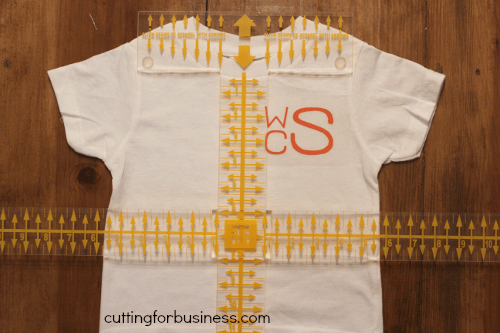
    1. Use the Tee Square It to find the center line of your shirt. Remember, a step-by-step tutorial can be found at this linkTutorial: How to Use the Logo It to Line Up Heat Transfer Vinyl Chest Designs by cuttingforbusiness.com
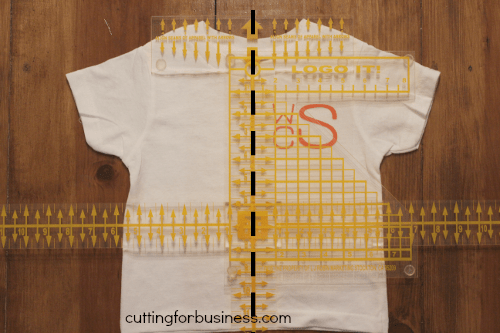
    2. Line up the center line of the Logo It on top of the center line of the Tee Square It. Then, record your measurements for your design. When placing duplicate designs on other shirts, you will be able to line it up in seconds! Tutorial: How to Use the Logo It to Line Up Heat Transfer Vinyl Chest Designs by cuttingforbusiness.com

    If you do a lot of company or team logo shirts, faux pocket designs with heat transfer vinyl, or monogram pocket shirts, I think the Logo It is a good investment and costs around $20. Before you go, I have great news for you! 1) If you are attending the All Things Silhouette Conference in November: I will have Tee Square Its, Logo Its, and heat pressing pillows at my booth for you to try out and buy. This is a great way to save on shipping costs! 2) In the coming weeks, I will have all three tools available online for you to purchase. I will make announcements via social media when they are available. Logo Its, Tee Square Its, and heat press pillows are available in my Etsy shop.

    If this tutorial was helpful, don’t forget to pin it by hovering over the image below.

    Tutorial: How to Use the Logo It to Line Up Heat Transfer Vinyl Chest Designs in your Silhouette or Cricut business by cuttingforbusiness.com

  • Tutorial: How to Use Pressing Pillows in Your Heat Press

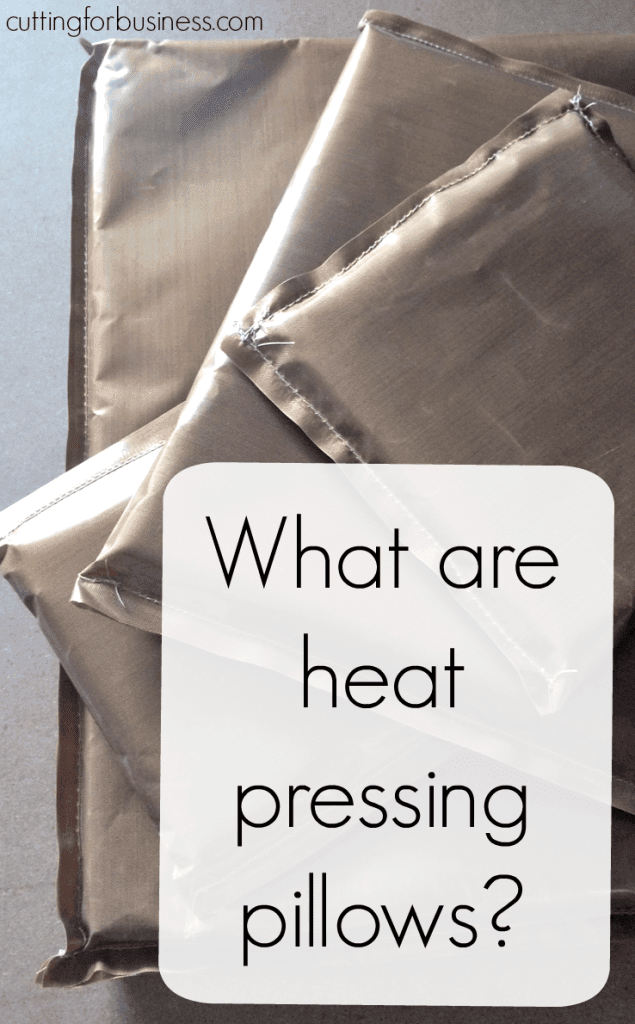
    Heat press users will know that some items are more difficult to press such as infant bodysuits, shirts with pockets, or items with zippers or thick seams. In the past, I’ve folded a hand towel and placed it inside the garment that I am pressing a design onto. This method works okay, but I’ve had some lifting on a few of my designs because the pressure was not even. I recently found out that there is a better method – using heat pressing pillows. Lou, the inventor of the Tee Square It (which I reviewed here and here), also manufactures sof-fusion heat press pillows. His company, Heat Press Essentials, graciously provided a set of pillows to me to review in this post.

    How to Use the Sof-Fusion Heat Press Pillows

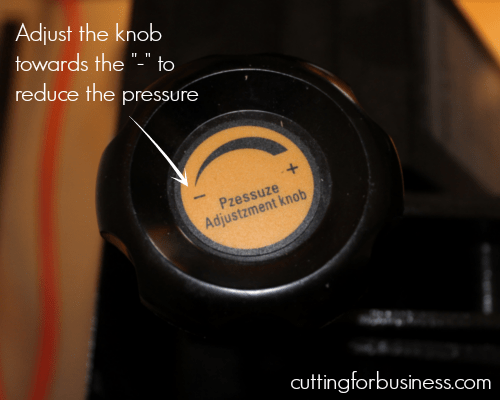
    1. Adjust the pressure by turning the pressure adjustment knob on your heat press towards the minus sign (or similar, depending on your model). My heat press model is a PowerPress which I picked up on Amazon here. It works great, I’ve never had a problem – besides some typos, LOL! Tutorial: How to Use Pressing Pillows in Your Heat Press - Great for Silhouette or Cricut crafters - by cuttingforbusiness.com
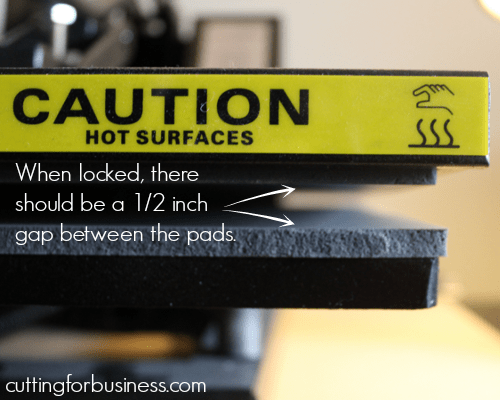
    2. There should be about a half inch gap between your heat press pads when the heat press is locked down. Tutorial: How to Use Pressing Pillows in Your Heat Press - Great for Silhouette or Cricut crafters - by cuttingforbusiness.com
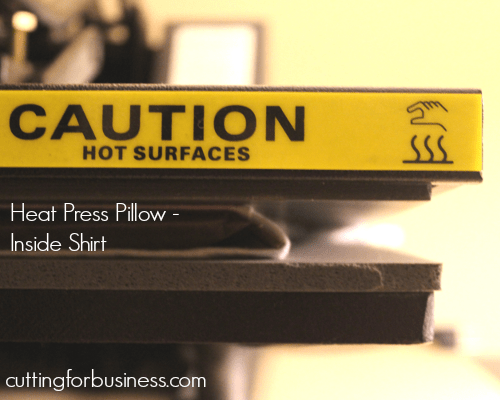
    3. Insert the heat press pillow inside the garment to be pressed and pre-press the garment for a few seconds. Tutorial: How to Use Pressing Pillows in Your Heat Press - Great for Silhouette or Cricut crafters - by cuttingforbusiness.com
    4. Add your design and press at the necessary time and temperature with a teflon sheet.

    The pressing pillow set I received from Lou has 4 different pillow sizes: 6 x 6 (infant, toddler, and bags), 5 x 16 (sleeves and pant legs), 10 x 10 (kids and smaller adult garments), and 15 x 15 (large adult garments). The pillows are reusable, made with a foam core, and covered with teflon material. They can be purchased at this link on Amazon. If you press a lot of items in your Silhouette or Cricut business, I think the cost is reasonable because it makes difficult jobs easier.

    If you don’t have a heat press yet, or if you are wondering if you need one – hurry over to this post.

    Tutorial: How to Use Pressing Pillows in Your Heat Press - Great for Silhouette or Cricut crafters - by cuttingforbusiness.com

  • Can You Layer Glitter HTV on Glitter HTV?

    There’s always an ongoing debate about whether Silhouette or Cricut vinyl crafters can layer glitter heat transfer vinyl on top of glitter heat transfer vinyl. So, what’s the answer?

    Can You Layer Glitter HTV on Glitter HTV? - cuttingforbusiness.com

    Can You Layer Glitter HTV on Glitter HTV?

    If you try to layer glitter HTV on glitter HTV, you will find out that it works. But, it won’t last. Most manufacturer application instructions state that you should not layer glitter HTV on glitter HTV.

    I like Siser brand heat transfer materials, so I headed to their website to look at their glitter heat transfer vinyl specifications. On this page, they specifically note:

    “Can be used as a top layer on other materials  •  Not recommended to be layered on top of itself”

    So, Siser recommends you not layer glitter HTV on top of glitter HTV. They also recommend that you not put any other heat transfer material on top of glitter – it should be the top most layer.

    What are Knockout Designs?

    If you are making designs where you need to layer glitter HTV on top of glitter HTV, you need to learn how to design knockout designs.

    Knockout designs are designs that have several layers. Rather than layer the materials on top of each other, you subtract the layers from each other in your software. This allows you to save materials and have a better made product because each material layer adheres directly to the blank product.

    Siser’s Application Instructions Cheat Sheet

    Siser has shared a cheat sheet on their website that I have printed, laminated, and hanging in my DreamBox.

  • 9 Best Places to Buy Patterned Vinyl

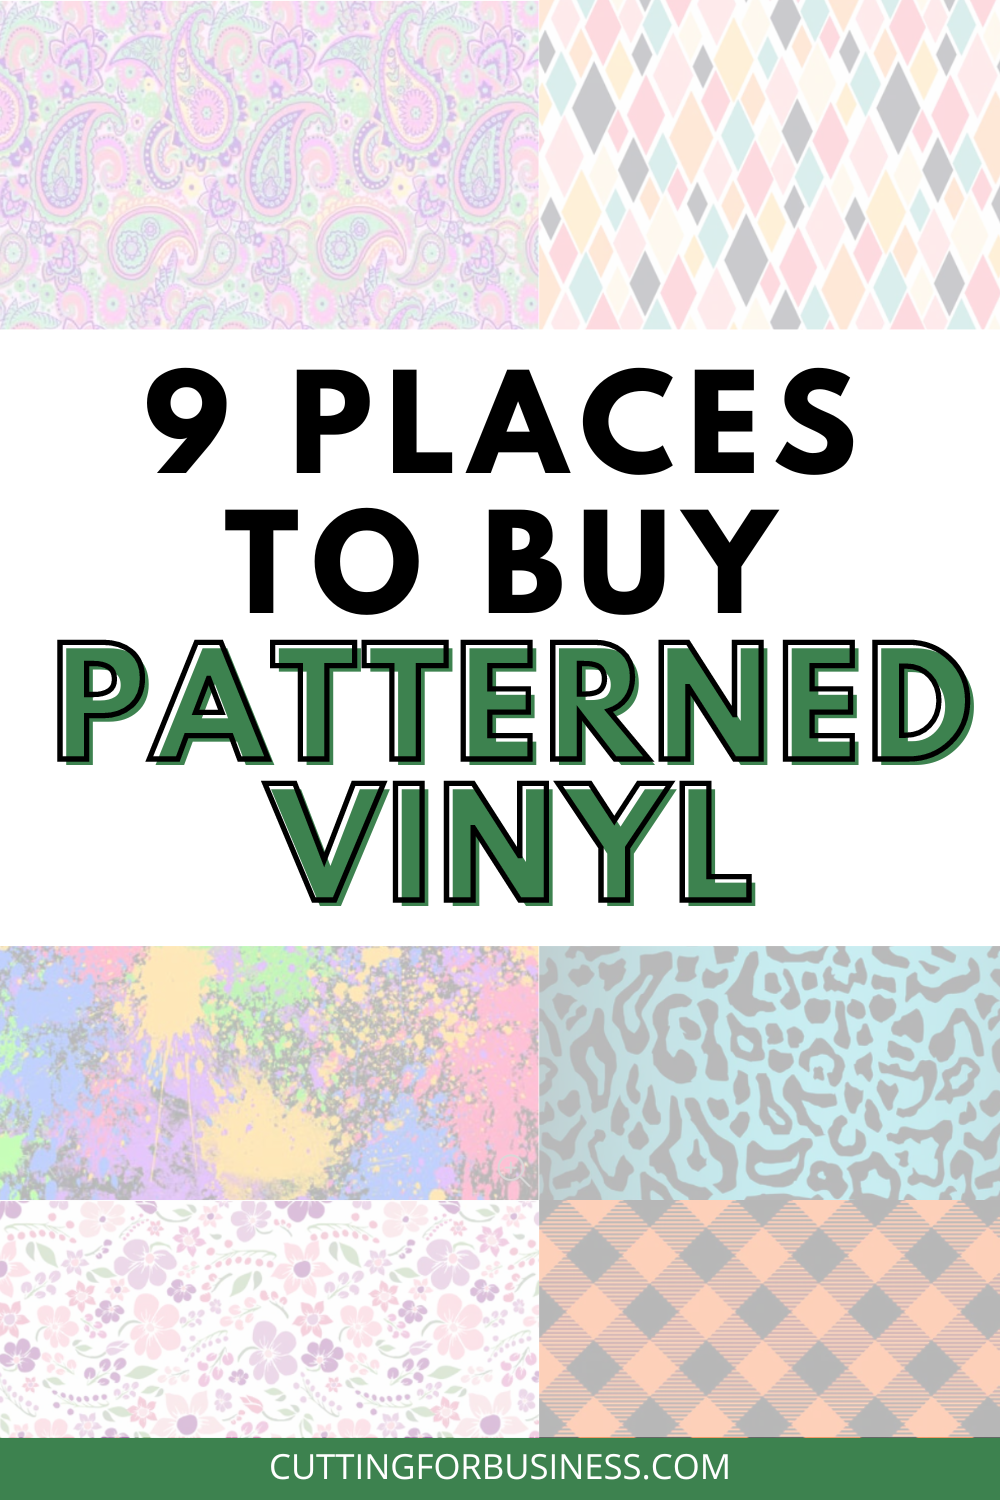
    Looking to spice up your vinyl projects with patterned vinyl? Today, I’m sharing where to buy patterned vinyl.

    9 Places to Buy Patterned Vinyl - cuttingforbusiness.com.

    9 Best Places to Buy Patterned Vinyl

    Happy Crafters

    • What They Sell: Happy Crafters carries patterned heat transfer and adhesive vinyl.
    • Company Location: West Virginia
    • Tips: Happy Crafters offers free shipping on orders over $50.
    • Shop: Happy Crafters

    Sparkleberry Ink

    • What They Sell: Sparkleberry Ink carries thousands of one-of-a-kind patterned heat transfer vinyls and patterned adhesive vinyls.
    • Company Location: Georgia
    • Tips: Join the rewards program to earn rewards for referring friends to Sparkleberry Ink.
    • Shop: Sparkleberry Ink

    Expressions Vinyl

    • What They Sell: Expressions Vinyl sells both patterned heat transfer vinyl and patterned adhesive vinyl.
    • Company Location: Idaho
    • Tips: Expressions Vinyl has some great tutorials on their website. Check them out while you are shopping.
    • Shop: Expressions Vinyl

    The Glitter Guy

    • What They Sell: The Glitter Guy sells adhesive vinyl in several patterns. Their translucent vinyl prints are unique.
    • Company Location: New Jersey
    • Tips: Don’t forget to check out the glitter selection while you are shopping!
    • Shop: The Glitter Guy

    Brilliant Vinyl

    • What They Sell: Brilliant Vinyl carries both patterned adhesive vinyl and patterned heat transfer vinyl.
    • Company Location: Georgia
    • Tips: Their patterned adhesive vinyl is printed with a latex printer and doesn’t require a laminate layer on top.
    • Shop: Brilliant Vinyl

    143 Vinyl

    • What They Sell: 143 Vinyl sells both patterned adhesive and patterned heat transfer vinyl.
    • Company Location: Kentucky
    • Tips: 143Vinyl offers free shipping on orders over $50.
    • Shop: 143 Vinyl

    Zindee

    • What They Sell: Zindee has a huge selection of patterned adhesive vinyl and patterned heat transfer vinyl.
    • Company Location: Mississippi
    • Tips: Check out their acrylics while you are shopping for patterned vinyl – they have a lot to choose from!
    • Shop: Zindee

    Amazon

    • What They Sell: You can find individual sheets of patterned adhesive vinyl and patterned heat transfer vinyl as well as bundles.
    • Company Location: Worldwide
    • Tips: Always price check before you purchase at Amazon.
    • Shop: Amazon

    Cricut

    • What They Sell: Cricut carries both patterned adhesive vinyl and patterned heat transfer vinyl.
    • Company Location: Utah, may be carried in local craft store
    • Tips: Cricut has a licensing deal with Disney and carries some Disney patterned adhesive and patterned heat transfer vinyl with Disney characters.
    • Shop: Cricut
  • 4 Step Checklist When Posting About Customers on Social Media

    Cutting for Business readers: I try to keep this blog full of helpful tips for Silhouette and Cricut small business owners, and I attempt to do so in a light, fun manner. But, there is something serious I have been seeing online lately that I need to address here: Venting or trashing your customers on social media.

    Unfortunately, I see this all the time on Facebook crafting groups, on Instagram, and most recently when I was browsing my personal Twitter account. At no time is it okay to vent about your customers, complain about them, or otherwise berate them online. Small business owners must realize that without paying customers, there is no business!

    The Golden Rule of Social Media: Always assume that anything you post online (either on your personal accounts or business accounts) will be shared somewhere and could potentially be seen by anyone in the world – including by your customer.

    4 Questions to Ask Yourself Before Posting on Social Media

    1. Would my customer give me permission to post this information?
    2. Would my customer push the “like” button on my post?
    3. If your this post goes viral – will I be proud as the business owner?
    4. How does this post make my business look?

    Together, let’s let other small business owners know that it is not okay to speak poorly of customers online. If you see it online, I urge you to simply comment “This post is not professional and will not help your business grow.” If you belong to moderated online groups, reach out to the administrators of the group and ask if they will ban venting or trashing customers in their group.

    Need help dealing with difficult customers? See this post.

    4 Step Checklist When Posting About Customers on Social Media - A must read for Silhouette and Cricut Etsy Shop Owners - by cuttingforbusiness.com.
  • Tutorial: How to Use a Tee Square It With Adhesive Vinyl

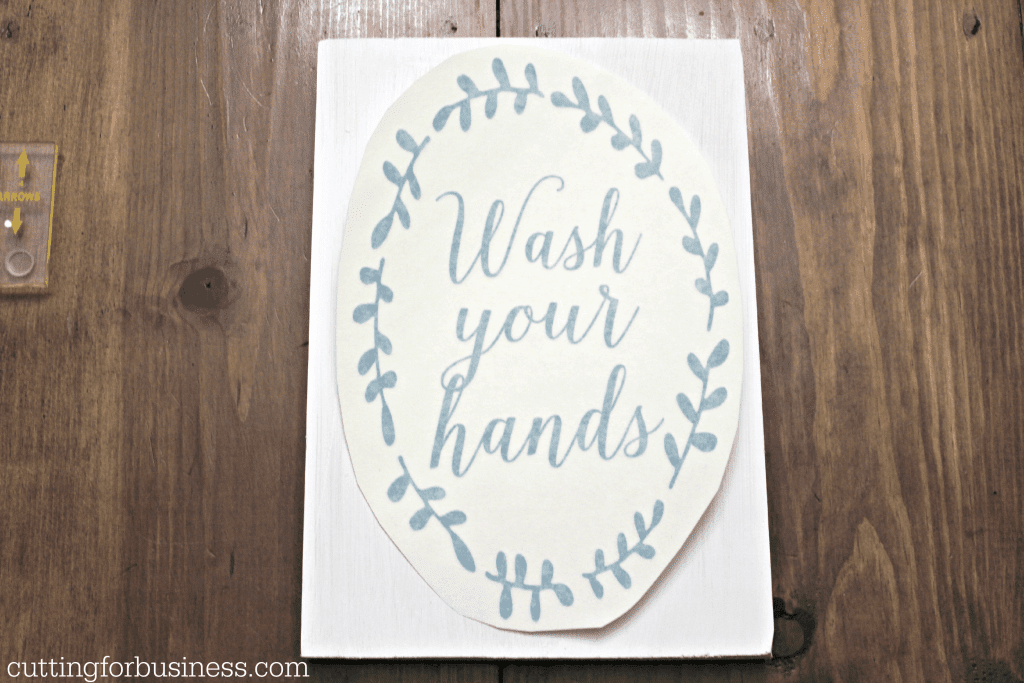
    My post a few days ago on the Tee Square It 3 has brought lots of questions. Some Cutting for Business readers were concerned about the $45 price tag, while others wanted to know if it could be used for projects other than HTV. I’ve noted a few times that I feel like it pays for itself in a few uses when you see how much time you will save and the accuracy of placing your designs. I’ve also been using my Tee Square It 3 to line up adhesive vinyl projects. Since I mostly create wooden signs, that’s what I will demonstrate today.

    (If you have not already, please see this post for a more detailed tutorial on how to use this neat gadget.)

    How to Use the Tee Square It 3 with Adhesive Vinyl Projects

    1. Design and cut your adhesive vinyl design, weed it, and apply transfer paper or tape to it.
    2. Place your design on top of your wood (or other project). Tutorial: How to Use a Tee Square It With Adhesive Vinyl by cuttingforbusiness.com
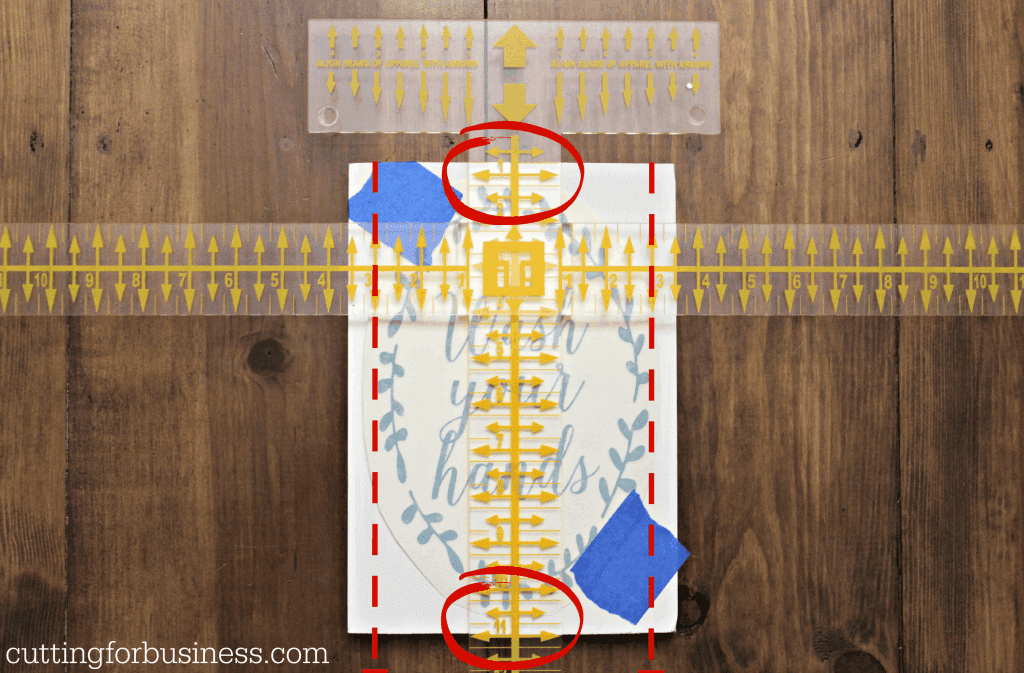
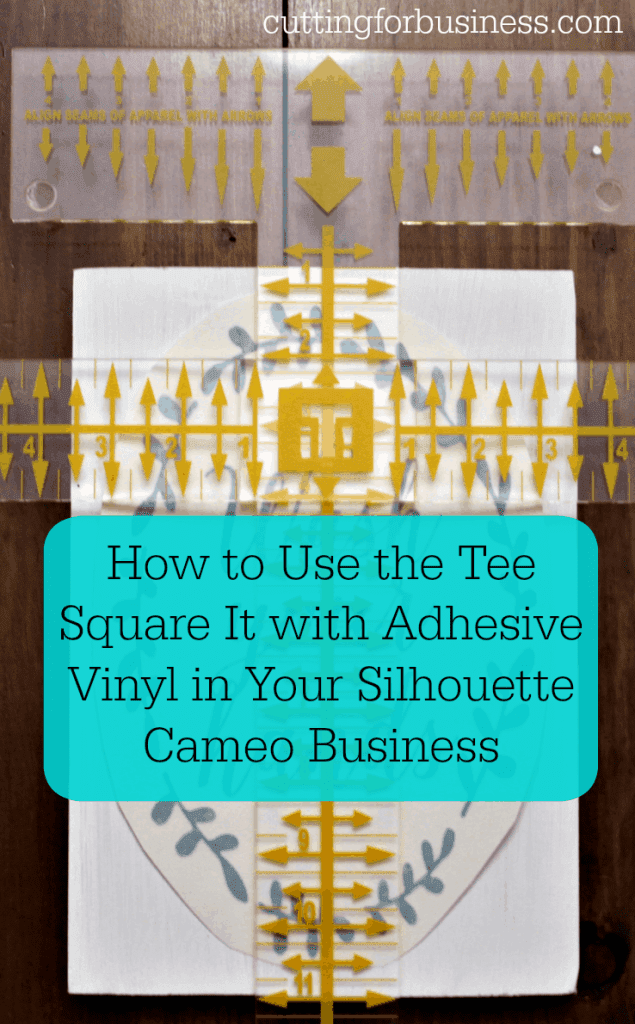
    3. Lay the Tee Square It 3 on top of your wood. Line up your adhesive vinyl both vertically and horizontally using the Tee Square It 3. You’ll see that I marked where I lined up my adhesive vinyl in red. After lining the vinyl up, tape it in place with blue painter’s tape.Tutorial: How to Use a Tee Square It With Adhesive Vinyl by cuttingforbusiness.com
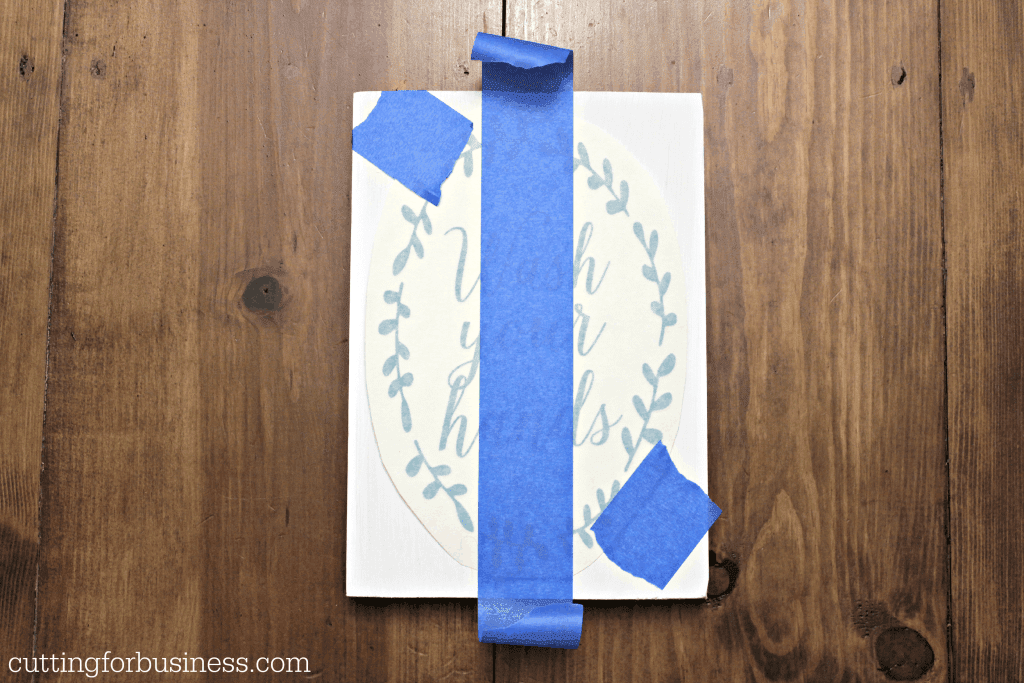
    4. Remove the Tee Square It 3 and place a piece of tape down the center of your design. Tutorial: How to Use a Tee Square It With Adhesive Vinyl by cuttingforbusiness.com
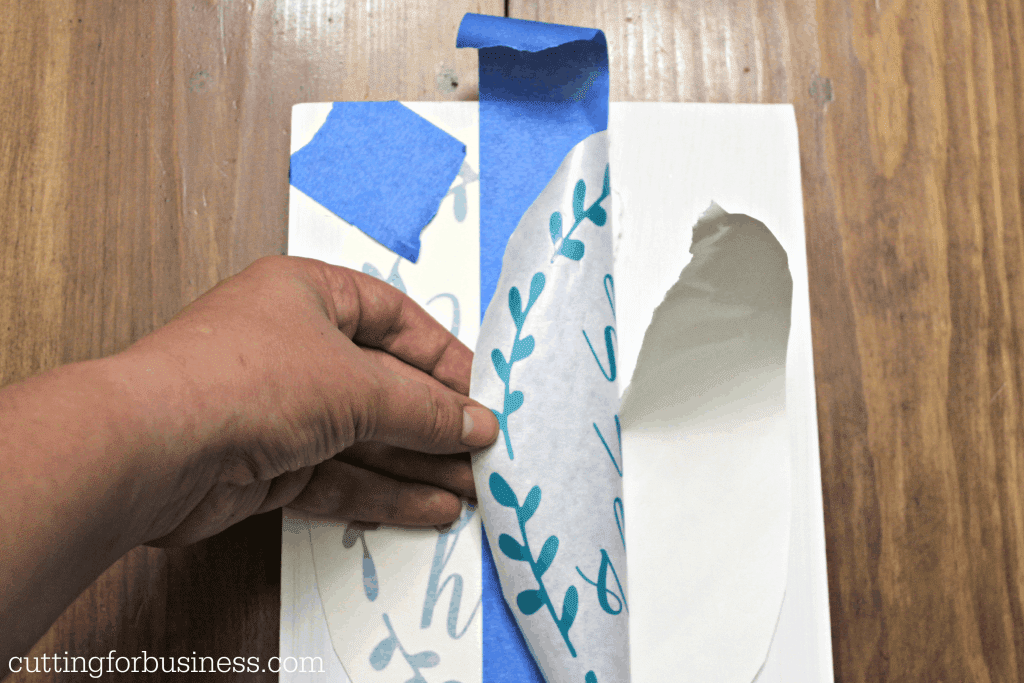
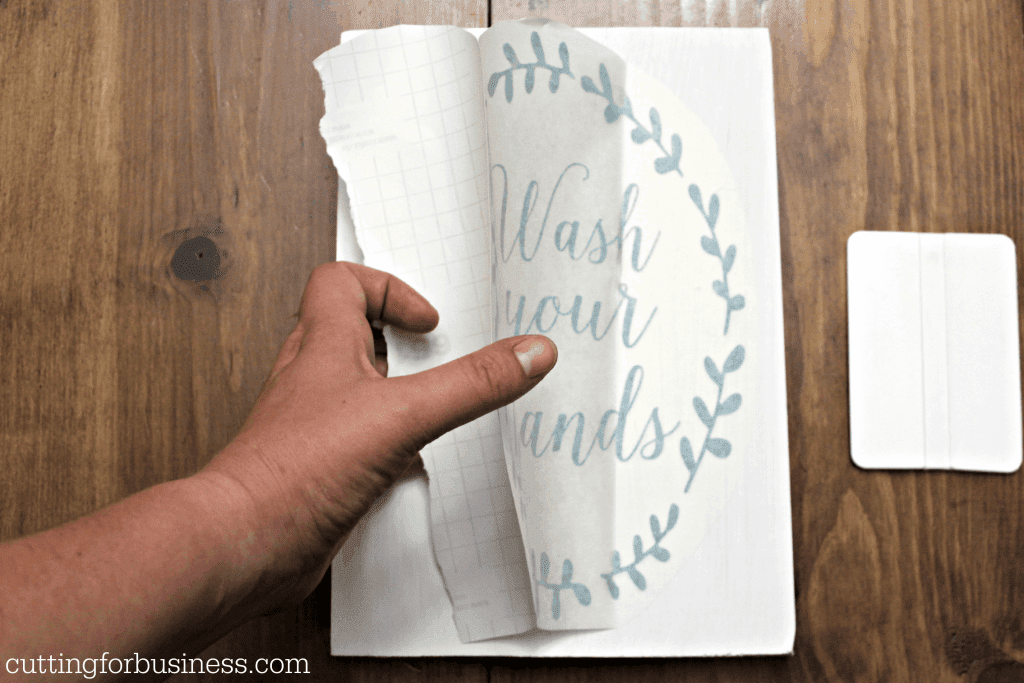
    5. Remove the tape from the right side of the adhesive vinyl. Peel back the transfer tape backing to the center and tear it off. Apply the right side of the design to your project. Tutorial: How to Use a Tee Square It With Adhesive Vinyl by cuttingforbusiness.com
    6. Remove the remaining painter’s tape and peel back the remaining transfer backing, then apply the left side of the design. Tutorial: How to Use a Tee Square It With Adhesive Vinyl by cuttingforbusiness.com
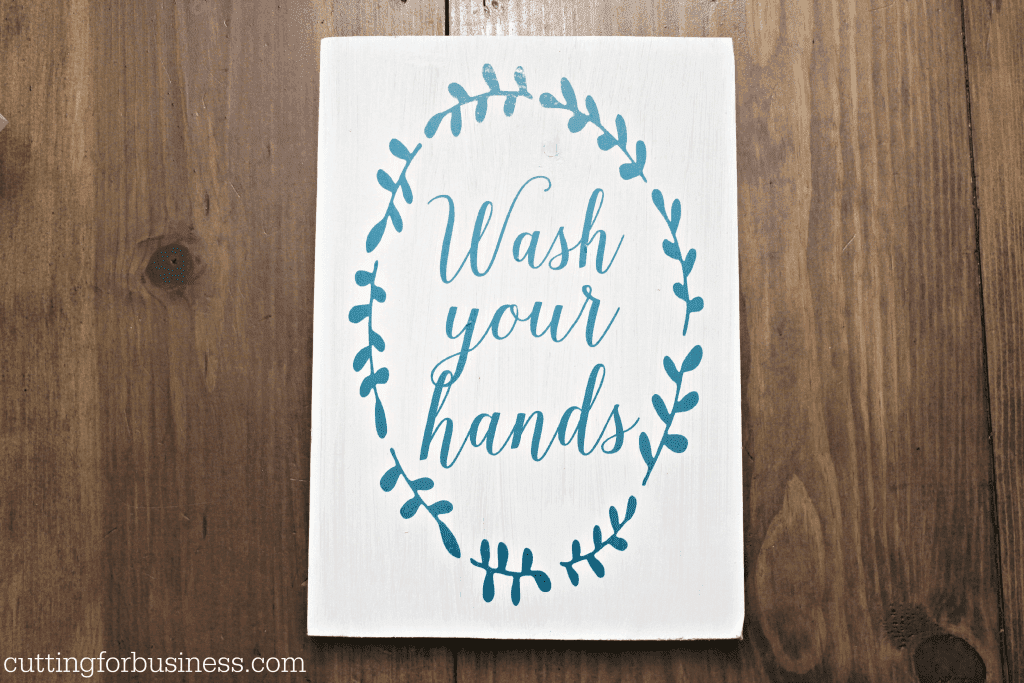
    7. Remove your transfer tape or paper and you are set to go – your design should be centered! Tutorial: How to Use a Tee Square It With Adhesive Vinyl by cuttingforbusiness.com

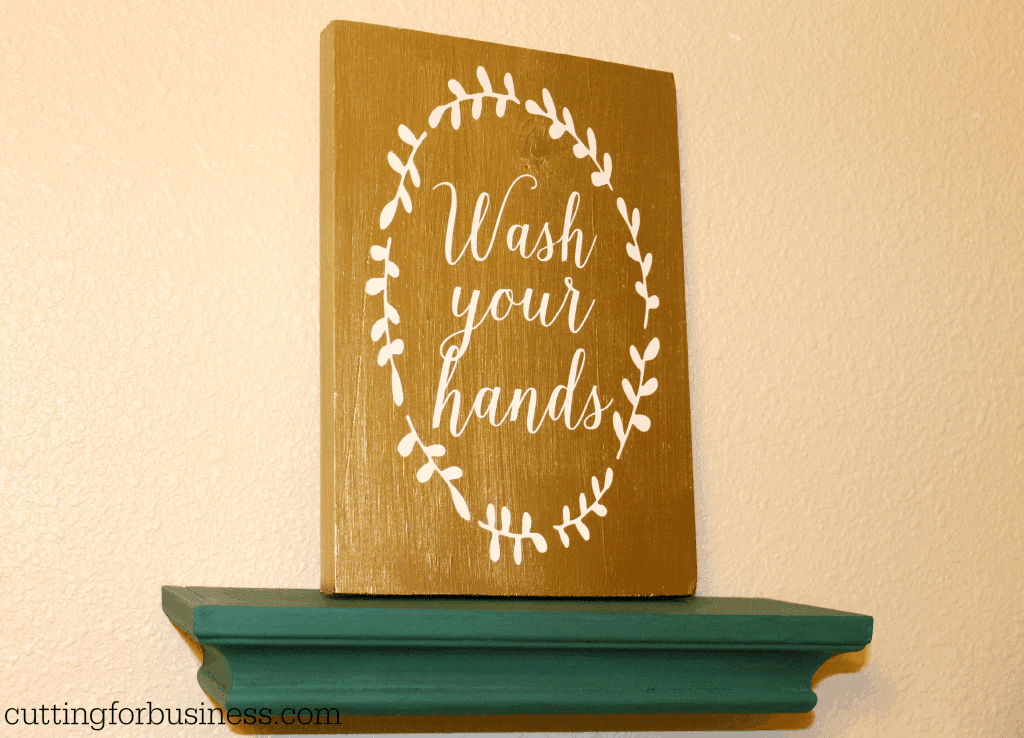
    After a quick coat of metallic gold spray paint, this piece of scrap wood that I picked up for free from my local Home Depot (see this post to find out how to get free wood) is now a piece of bathroom decor! The font used in this tutorial is called Isabella Script and you can find it at Creative Market.

    Tutorial: How to Use a Tee Square It With Adhesive Vinyl by cuttingforbusiness.com

    Don’t forget to pin it:

    Tutorial: How to Use a Tee Square It With Adhesive Vinyl by cuttingforbusiness.com

  • Tutorial: How to Use a Tee Square It

    Ever heard of a Tee Square It? Today, I’m teaching you how to use a Tee Square It.

    When you use your Silhouette or Cricut to create shirts for sale, your number one concern should be the quality of your product. When working with shirts, one of the biggest quality issues is lining up the design correctly.

    Can you imagine going through a rack of shirts at your favorite store and each of the same shirt design is lined up different – or maybe even crooked? You probably wouldn’t buy the shirt, and your customers won’t want to either. To help you line up designs, I am introducing you to one of my favorite gadgets – the Tee Square It.

    Note: The Tee Square It 3 has been updated and replaced with the Tee Square It I. It functions the same with minor improvements.

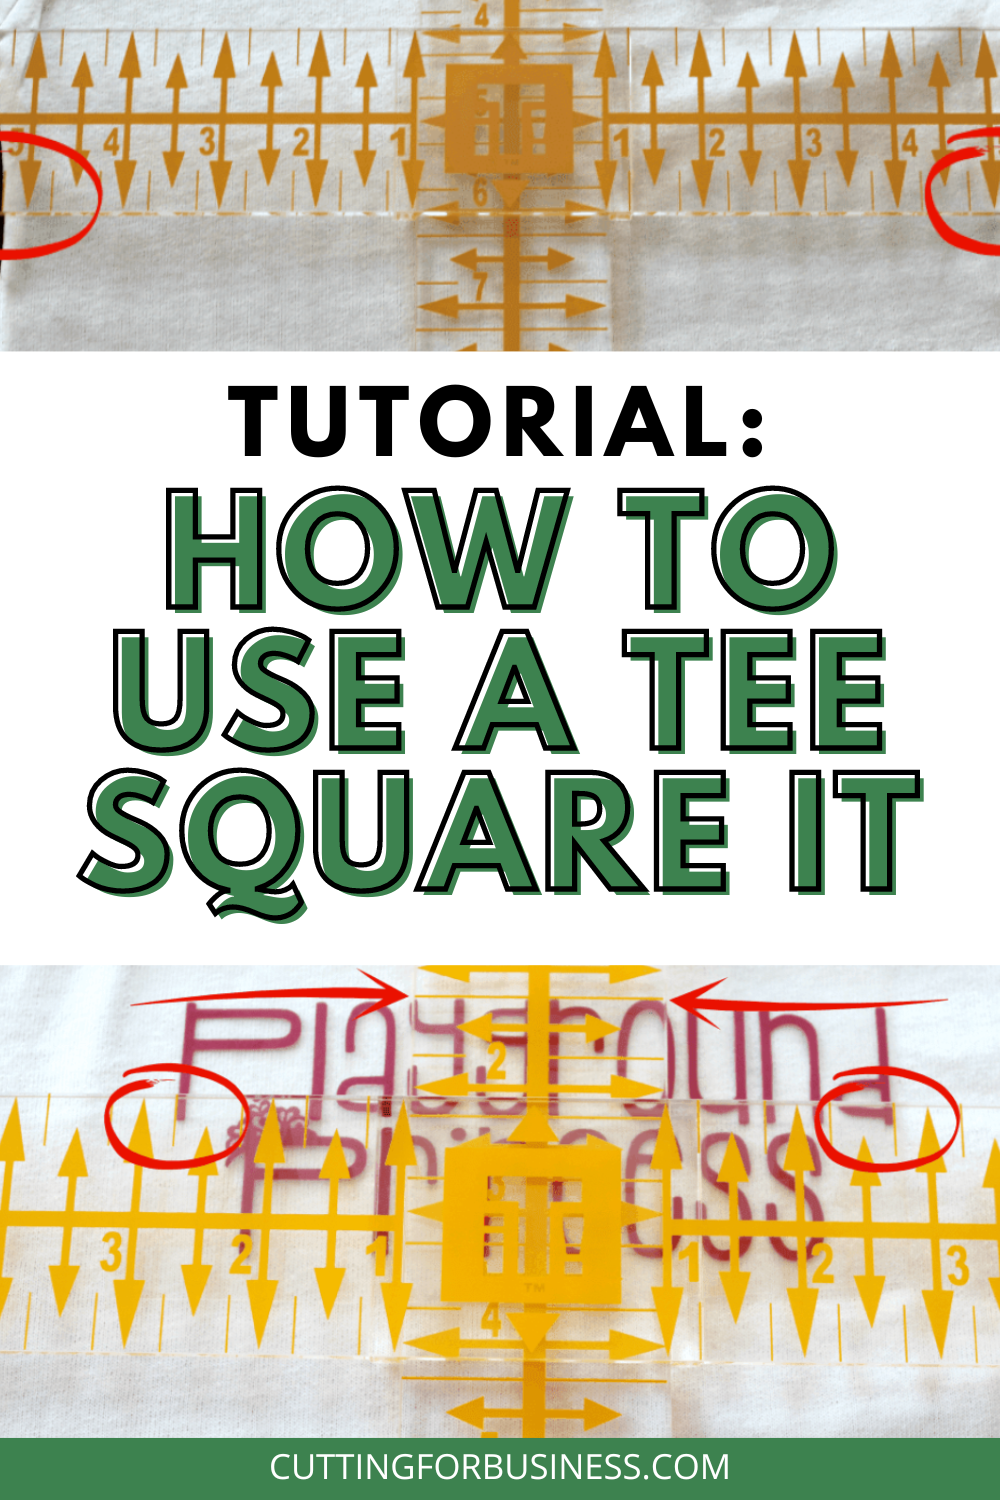
    Tutorial: How to Use a Tee Square It - cuttingforbusiness.com.

    What is a Tee Square It?

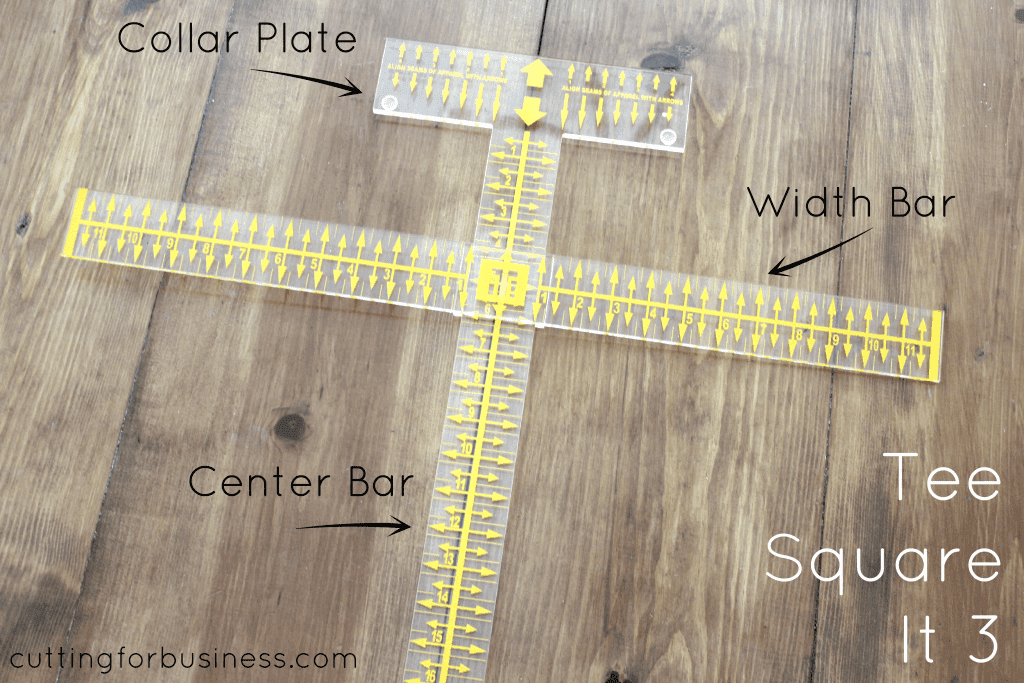
    The Tee Square It is a two piece gadget that helps you line up heat transfer vinyl, iron ons, plastisol, rhinestone, stencil, or any other transfer onto your garment. It will save you time and energy in your Silhouette or Cricut based craft business. It will also help improve your product quality, because designs will be properly lined up.

    Tutorial: How to Use a Tee Square It to Line Up Your HTV (Heat Transfer Vinyl) Designs Perfectly (and quickly & easily!) in your Silhouette Cameo or Cricut Business - by cuttingforbusiness.com

    How to Use a Tee Square It

    1. Cut and weed your design, then pre-press your shirt.
    2. Lay your shirt flat. You can do this on your heat press or on a nearby flat surface.
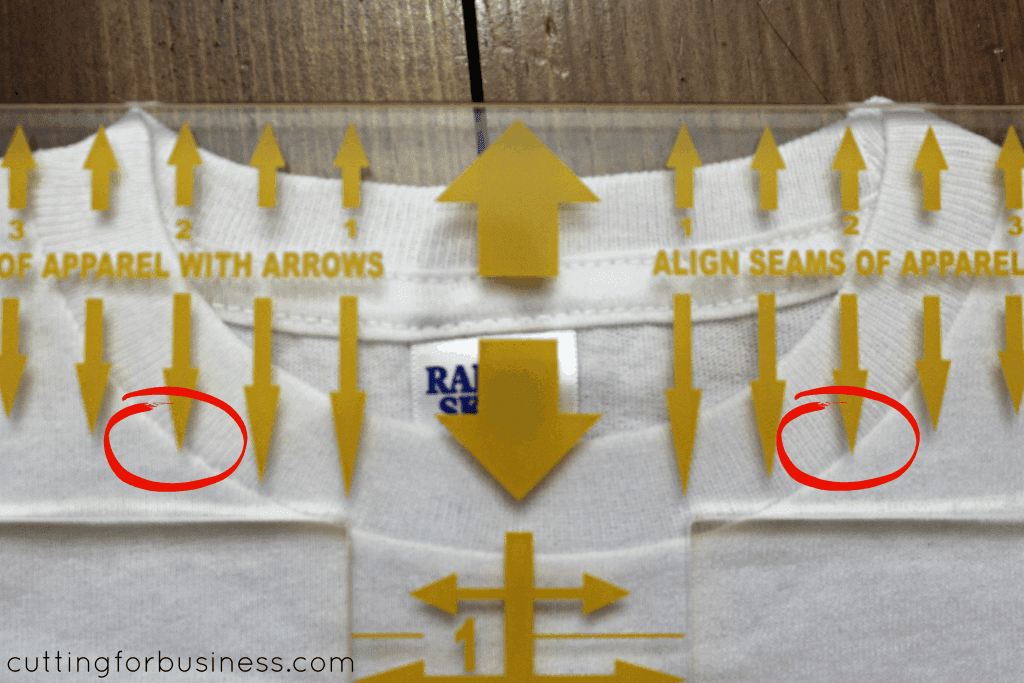
    3. Place the Tee Square It on top of your shirt with the collar plate over the collar. You will line up one set of the arrows on the Tee Square It 3 with the seam of your collar. You can see in the photo below I’ve circled the arrows that I’ve used to line up the seam.
      How to Use a Tee Square It to Line Up Your HTV (Heat Transfer Vinyl) Designs Perfectly (and quickly & easily!) - by cuttingforbusiness.com
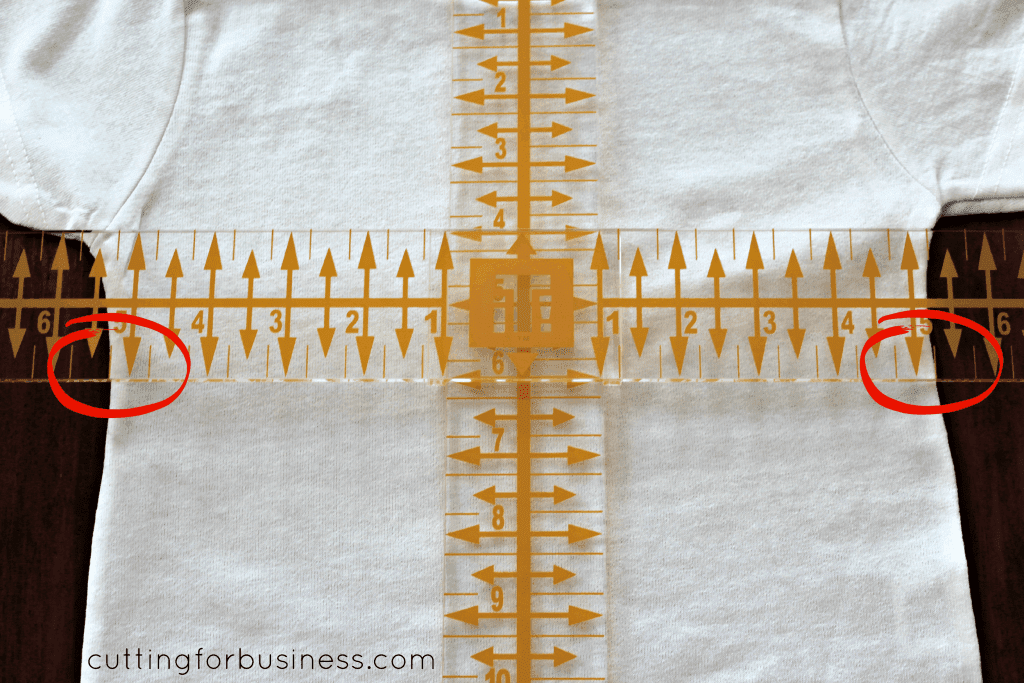
    4. Next, you’ll line up the side seams of the shirt on the width bar. In the photo below, I circled the measurements on the side seam to show you how it should line up. In this example, the side seams line up at 5.25 inches.
      How to Use a Tee Square It to Line Up Your HTV (Heat Transfer Vinyl) Designs Perfectly (and quickly & easily!) - by cuttingforbusiness.com
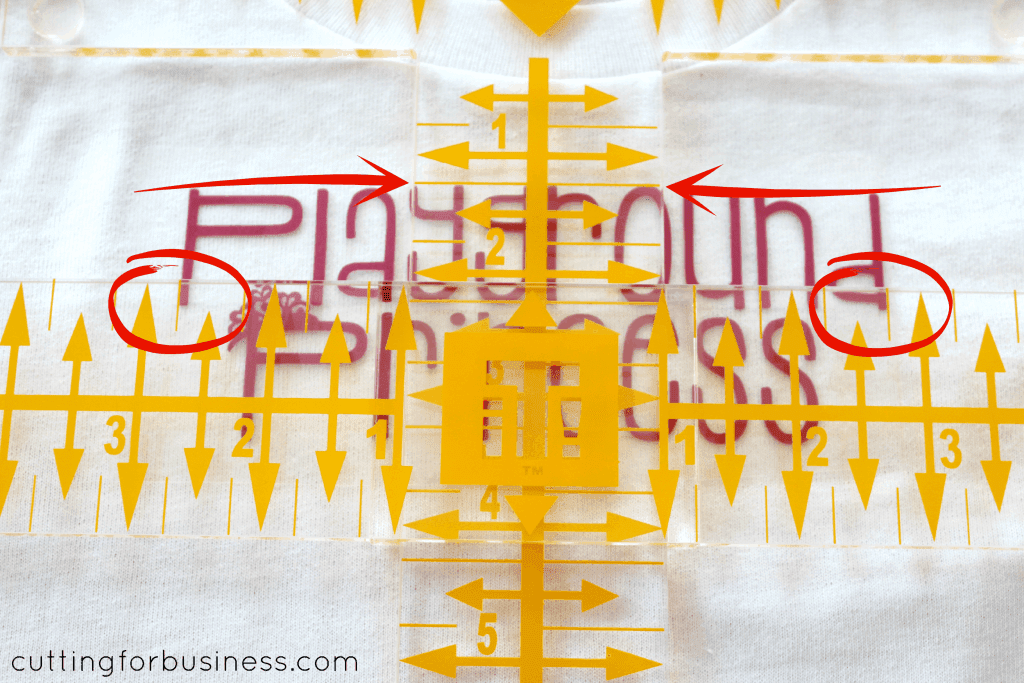
    5. After lining up your shirt, slide your transfer design under the Tee Square It. You will be able to use the width bar to line up your design. The photo below shows my design lined up using the width bar horizontally (marked with circles) and the center bar vertically (marked with arrows).How to Use a Tee Square It to Line Up Your HTV (Heat Transfer Vinyl) Designs Perfectly (and quickly & easily!) - by cuttingforbusiness.com
    6. Remove the Tee Square It, and your shirt is ready to press. (Tip: If you won’t be pressing it right away, you can secure your design with blue painters tape. It can safely be pressed – I do it all the time.)
      How to Use a Tee Square It to Line Up Your HTV (Heat Transfer Vinyl) Designs Perfectly (and quickly & easily!) - by cuttingforbusiness.com
    7. Press your design using your heat press. Need help choosing the perfect heat press? Read my heat press guide.
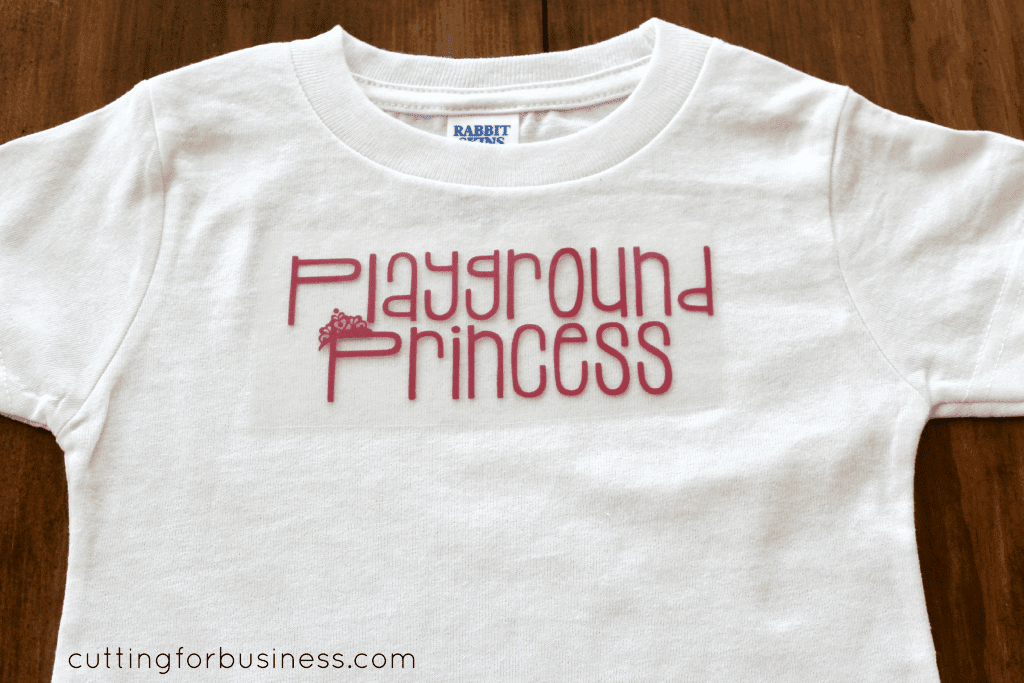
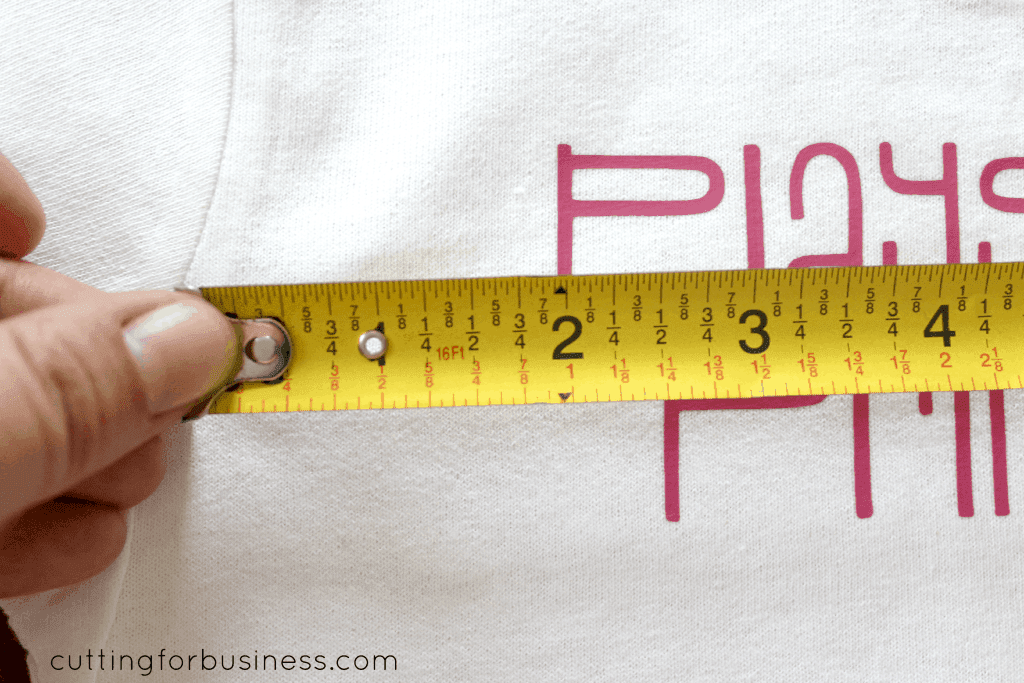
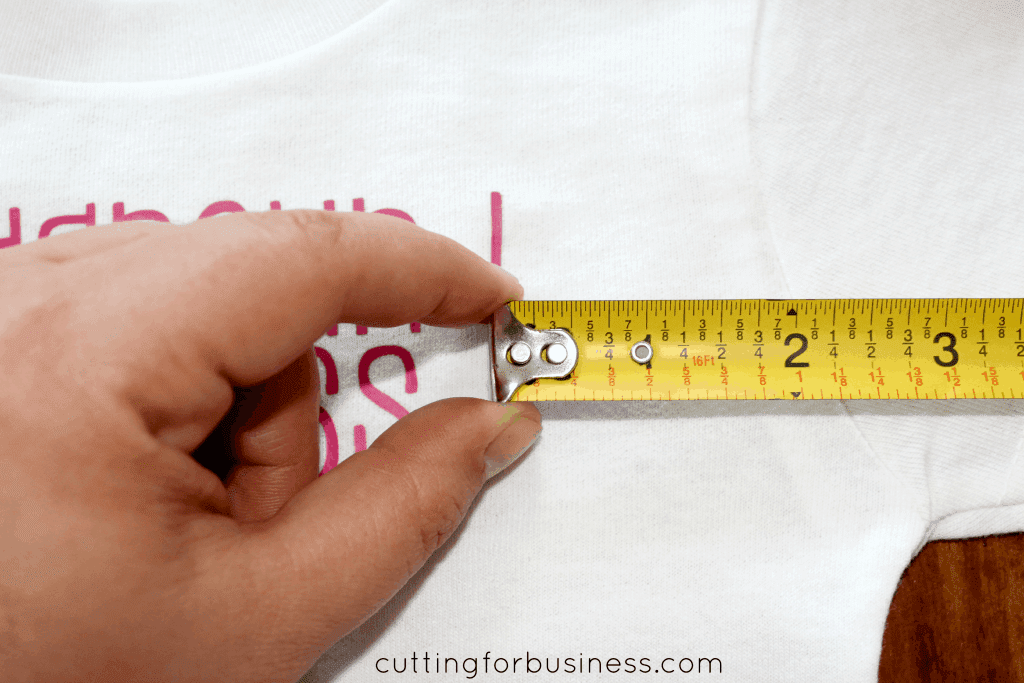
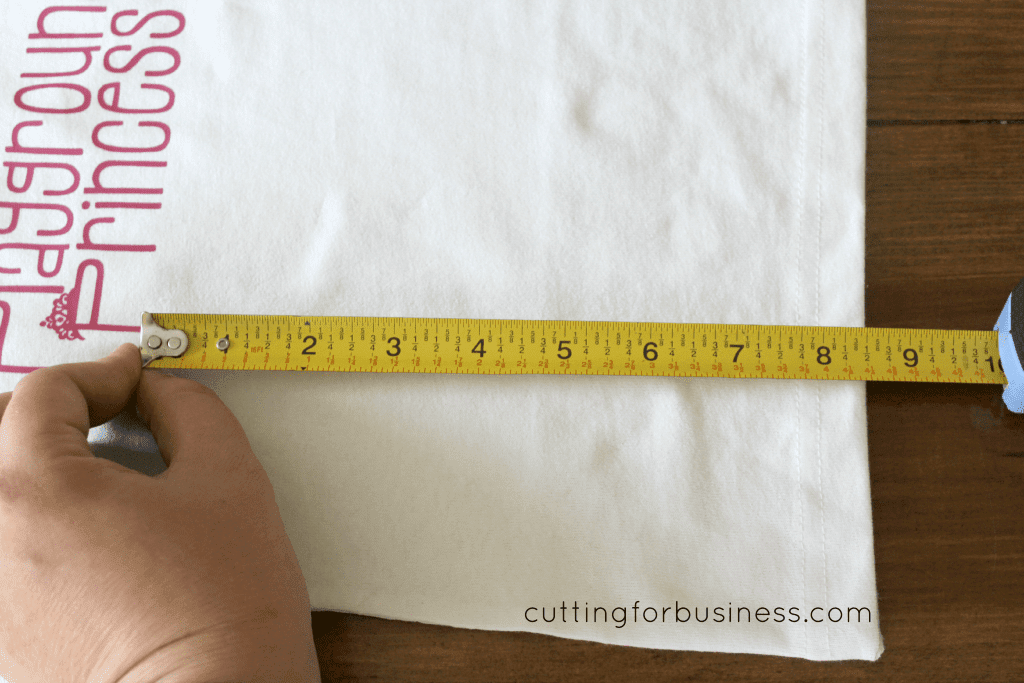
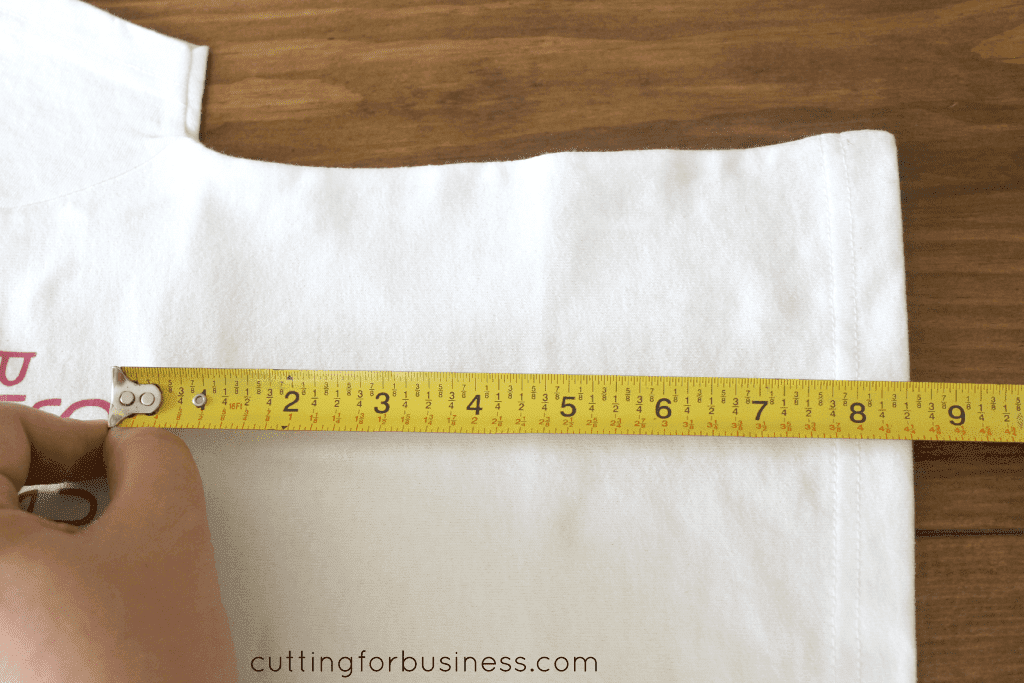
    8. That’s it! This whole process takes about 1-2 minutes. I showed every step of the way, so it looks time consuming, but it is not. But, don’t go yet! I want you to see that this tool actually works. Below are various measurements to show you that my heat transfer vinyl design is actually lined up.How to Use a Tee Square It to Line Up Your HTV (Heat Transfer Vinyl) Designs Perfectly (and quickly & easily!) - by cuttingforbusiness.com
      How to Use a Tee Square It to Line Up Your HTV (Heat Transfer Vinyl) Designs Perfectly (and quickly & easily!) - by cuttingforbusiness.com
      How to Use a Tee Square It to Line Up Your HTV (Heat Transfer Vinyl) Designs Perfectly (and quickly & easily!) - by cuttingforbusiness.com
      How to Use a Tee Square It to Line Up Your HTV (Heat Transfer Vinyl) Designs Perfectly (and quickly & easily!) - by cuttingforbusiness.com

    Heads up: This is not a sponsored post. I received no compensation to write this post, nor was I asked to write this post. I’ve had a Tee Square It from before Cutting for Business was online – and it is one of the most useful gadgets I own.

    Where to Buy a Tee Square It

    Buy a Tee Square It.

    Love the font I used in the tutorial? Download it: Stacked font.

  • FAQ: Buying Wood for Craft Projects

    Recently, I’ve had a few requests emailed to me about where to buy wood for Silhouette or Cricut craft projects.

    While I consider Mr. Cutting for Business and I amateur wood workers, we have successfully built our 10 seat dining room table, a faux fireplace mantle, an oversized outdoor corner bench, and countless painted wall signs. 

    Here are answers to frequently asked questions about buying wood for craft projects.

    FAQ: Buying Wood for Craft Projects - cuttingforbusiness.com

    FAQ: Buying Wood for Craft Projects

    Q: Where should I buy wood for craft projects?

    A: I buy wood at my local home improvement center, like Lowe’s or Home Depot. Occasionally, I’ll head over to Lumber 84.

    Q: What kind of wood should I buy for my craft project?

    A: I buy pine because it is most affordable. Within the selection of pine, I buy the “select” boards which are slightly more expensive, but the wood is higher quality.

    Q: How is wood measured and priced?

    A: Wood is sold per foot in stores and labeled in feet and inches. For example, a 1 x 4 x 8 board is 1 inch thick, 4 inches wide, and 8 feet long; while a 2 x 6 x 10 is 2 inches thick, 6 inches wide, and 10 feet long.

    Q: What are nominal measurements?

    An important note: In the wood buying world there is something referred to as “actual vs. nominal” measurements. Even though I just told you that a 1 x 4 x 8 board is 1 inch thick, 4 inches wide, and 8 feet long, and that’s what you’ll see it labeled as at the store – it really isn’t.

    The nominal measurements are slightly less than the advertised sizes. A 1 x 4 x 8 board actually measures 3/4 x 3-1/2 x 8ish. So, if you need specific sized wood for a project be sure to measure what you are buying. I never head out to buy wood without a tape measure in my pocket.

    Q: What should I look for when buying wood?

    A: You should inspect each piece of wood for knots (some knots are not a problem and add character, while very dark knots are likely to fall out of the wood), cupping or crowning (this means that the wood is bowed one way or the other rather than flat), or large shakes (these are cracks within the wood).

    To check for cupping or crowning, stand at one end of the board at look down the length of it. In most cases, you’ll see if it isn’t straight. You should try to buy wood that is as straight as possible.

    Q: I don’t have power tools at home, will the store cut it for me?

    A: Yes, home improvement centers will cut wood to size for you. Most stores will make 2-3 cuts for free, then charge between $.25 and $.50 per additional cut. Store policies vary greatly on wood cutting rules. For example, our Lowe’s will not make cuts smaller than 12 inches.

    Q: Is the wood ready to use when I get home?

    A: No, all wood should be sanded before painting or adding vinyl. Sandpaper comes in different grits. The larger the number, the finer the grit on the sandpaper. I don’t waste time sanding anything by hand.

    An electric palm sander cuts out a huge amount of work and can be picked up in store for around $30. I prefer DeWalt tools and own this model, which includes a nice carrying case.

    Q: How can I get free wood?

    A: If you are at your local home improvement center and can make use of smaller cuts of wood, ask if they have any scraps. Many stores will give you their scraps for no charge.

    If you’ve been pinning things on Pinterest to make with wood, I urge you to take the plunge.

    Stenciled or painted signs with help from your Silhouette or Cricut are great sellers.

    [mv_create key=”25″ type=”list” title=”Wood Craft Project Resources” thumbnail=”” layout=”hero”]
  • How to Offer Subscription Products in Your Silhouette or Cricut Business

    Cutting for Business readers: What do Dollar Shave Club, Beer of the Month Club, Nature Box, and Smart Art Box have in common? They are all successful businesses that operate on a subscription based model. In this model of business a customer signs up to receive a different product each month for a defined length of time. Over the last few years, subscription service based companies have been popping up everywhere and they are currently one of the hottest trends in retail. Why am I telling you this? I feel that offering a subscription based service is a great way to produce extra income in your Silhouette or Cricut business. Depending on how you set up the billing in your subscription based business, this model can also guarantee you a set amount of money each month in your business.

    Monthly Subscription Ideas for Your Silhouette or Cricut Business

    Card/Stationary of the Month Club – Customers receive a different handmade card, or stationary pack each month.

    Monogram of the Month Club – Customers receive a different product each month with their monogram on it. This could be a tumbler one month, a shirt one month, an umbrella one month, and so on.

    Front Door Decor of the Month Club – Customers receive a different front door decoration each month. Plan to make a variety of products that are themed to the season or upcoming holiday.

    Wooden Sign of the Month Club – Customers receive a different wooden sign each month. Consider having customers sign up for a certain sign size, and offer several options, for the duration of their subscription plan. This is another idea that lends itself well to the seasons or holidays.

    Tumbler/Wine Glass/Drinkware of the Month Club – Customers receive a different tumbler/wine glass/or drinkware item each month. Again, theming the items to the current season or holiday would be easy in this case.

    I could literally go on and on with this list because there are so many products that could work with a subscription based business. Now, how do you implement a subscription based service in your Silhouette or Cricut based business?

    How to Sell Handmade Products by Subscription

    • If you sell in a marketplace (like Etsy.com) create several listings with membership durations in your shop. Customers prepay for a certain amount of months in your club. You send them their first product immediately and have a set mailing date for the remaining months (example: the 1st or the 15th). Specifically, you could offer a 3 month, 6 month, 9 month, or 12 month membership for your club.
    • If you sell your products through your website or anywhere else and accept Paypal, you could create listings like I described above, or you can have Paypal automatically bill your customer each month. Many customers actually prefer this, because they don’t have to pay a large amount upfront. Paypal has information online on how to set this up so I won’t go over the specifics, but you can visit this link for more information.

    Alright readers, tell me which product that you make with your Silhouette or Cricut that you plan to offer in a subscription based business. I can’t wait to hear!

    How to Offer Subscription Products in Your Silhouette or Cricut Business by cuttingforbusiness.com