Blog

  • 22 Craft Show Tips and Tricks

    To wrap up our talk on craft shows, I’m sharing my favorite craft show tips.
    22 Craft Show Tips and Tricks - cuttingforbusiness.com

    22 Craft Show Tips and Tricks

    Before the Show

    • Have a wide variety of price points throughout your products. For example, have some items under $10, some in the $10 to $50 range, and some in the $50 plus range. This will help you appeal to the budgets of many buyers.
    • Practice your set up several times before going to the show. If you’ve just bought a brand new tent for your outdoor show, be sure you can set it up and take it down before you go to the show. (I have this tent from Amazon, it’s middle of the road quality and does the job.)
    • Tweak your product displays at home. There are lots of craft show setup ideas around the internet, so browse to find something that works for your products. My best advice on your product arrangement is to use varying levels on your table. If products aren’t visible, customers can’t buy them.
    • Invest in (or create!) a banner or sign with your business name on it. Think of your booth as your storefront – and storefronts need signs.
    • Advertise the event on your social media. You could even offer a coupon code to your social media followers for use during the show. For example, “(Business Name) will be at the (Event Name) on (Event Date). Be sure to stop by and use coupon code “Facebook” to receive a 10% discount.”

    At the Show

    • Do not be late! Be ready to go at the specified time with everything set up.
    • Bring a snack, but don’t eat in your booth. Craft shows can be long affairs, and you’ll need to eat, but don’t eat while tending to customers.
    • Bring change. Many people will pay in cash, and you’ll need to be able to provide change.
    • Bring quick and easy packaging to wow your customers after they purchase. Get packaging ideas.
    • Accept credit cards. There are several credit card processing programs to choose from.
    • Provide receipts and care instructions to customers, preferably with your business name on them. If you need them, you can download my care cards.
    • Bring business cards, post cards, or rack cards to pass out to customers who may want to purchase from you online at a later time. If you can, include a small sample (a sticker, a small vinyl decal, or a keychain) with your promotional material.
    • Invite customers to join your mailing list by collecting their name and email address. This can easily be done on a clipboard or by writing their information on a card and dropping it into a jar. If you don’t have a mailing list – read why you need a mailing list.
    • Put prices on your items. I firmly believe that I’ve done better at shows when I’ve attached easy to see price tags to my products. While others may debate this, it can be awkward for customers to ask prices on each product.
    • Bring an assistant! Bringing someone to help you not only allows for you to take a break, but an assistant can help package items, keep things neat and tidy, and collect money from customers.
    • Be friendly and greet everyone that walks into your booth at the show. While this seems obvious, I’ve attended several shows where the sellers aren’t so friendly. People buy from people they like – be likeable!
    • Handle sales as quickly as possible. Being friendly with customers is a must, but after the sale is made – keep the chit chat to a minimum. You will want to turn your attention to the next potential customer.
    • I might not be popular with this suggestion, but if you are personalizing items on the spot – have your assistant do it. As the designer and creator of the items, your time is better spent meeting and greeting customers. For example, if you are creating personalized shirts on the spot, have several designs cut and weeded so you’ll just have to add the name. Quickly put the name into Silhouette Studio and set it to cut. Have your assistant remove it from the machine, weed it, and press it – while you are tending to other potential customers. (See how I use a binder to store pre-cut and pre-weeded designs.)
    • Stay off your phone or tablet – no phone calls/texting/social media. If you are sitting around bored, potential customers may get the impression that you aren’t really interested in being there.
    • Do not pack up early. Plan to serve customers until the show ends, and then begin tear down.

    After the Show

    • Take several pictures of your booth setup. Future shows may ask for photos of your setup.
    • Make sure your space is neat and tidy before going home. No organizer wants to have to clean up after you. Always leave your space cleaner than you found it.
    • Write down notes when you get some. What went well? What didn’t work well? What did you see at other booths that might help you for next time? Save your notes for your next show, and as I’ve mentioned before, always keep evolving!
  • Juried vs Non-Juried Craft Shows – What is the Difference?

    I’ve talked a lot about craft shows lately on Cutting for Business.

    Today, I’m discussing the differences between the two main types of craft shows: Juried vs Non-juried craft shows.

    In general, juried craft shows require potential sellers to submit an application and product samples; while non-juried craft shows accept sellers on a first come, first serve basis.

    Juried vs Non-Juried Craft Shows - What is the Difference? - cuttingforbusiness.com

    Juried vs. Non-Juried Craft Shows

    Juried

    • Usually large shows.
    • Sellers/Exhibitors must submit an application and product samples to the show/show committee their work. Based on the applications, the show chooses which sellers to accept.
    • Shows will usually have a large range of product types.
    • Products that have not been “juried in” may not be sold at the show. In fact, sellers with non-approved products for sale may be shut down.
    • Juried shows are more expensive than non-juried shows. Fees can range up to 1000’s of dollars per event.
    • Usually extremely well organized, as the show organizers have put on multiple shows before.

    Non-Juried

    • Usually smaller shows. May be held at a church, school, or community center. May be a part of a larger festival or event.
    • Sellers/Exhibitors are accepted on a first come, first serve basis.
    • May be many, many sellers with similar items.
    • Seller fees usually range from free to under $100. Alternatively, you may be asked to pay a small entry fee and donate a portion of your sales to a cause.
    • May or may not be well organized, well promoted, or well attended.

    Which Type of Show Should You Choose?

    Generally, newer sellers will want to get several non-juried shows under their belt before moving onto a large scale show.

    At smaller shows, you’ll be able to practice setting up, providing great customer service, and learning how craft shows work. When looking for non-juried craft shows, be sure to ask about the organizer’s experience, the expected attendance at the show, and methods of advertising used. Remember, no craft show is going to be a guaranteed hit. At some craft shows, you may take a loss; while at others you will sell out.

  • 5 Ways to Find Local Craft Shows and Fairs

    Having a hard time finding craft shows – or finding out about them too late? Today, let’s take a look at ways to find local craft shows and fairs.

    5 Ways to Find Local Craft Shows and Fairs - cuttingforbusiness.com

    5 Ways to Find Craft Shows in Your Area

    Use a Craft Show Directory Online

    Some good places to start include: Festival Net, CraftMaster News (by subscription only), and my favorite CraftLister. (They also list non-craft events, and I have discovered lots of neat places to go with my kids!)

    Don’t forget, you can also search Google for “craft shows (your state)”.

    Look in Your Local Newspaper or Arts and Crafts Magazines

    Often times, craft show organizers put up classified ads in local newspapers to help find vendors in the months before their show. They advertise once again for shoppers when the show or fair is closer.

    Also, look in the back of arts and crafts magazines for upcoming shows or fairs. If you don’t want to purchase a copy of major crafting publications, feel free to visit your local book store or library.

    Reach Out to Local Churches, Schools, Service Organizations, Women’s Groups, and Athletic Leagues

    Groups and organizations often have craft shows as fundraisers. Reach out to them to see if they have any upcoming shows or fairs planned.

    Talk to Other Crafters

    Visit your local craft store and ask around. Having worked at Michaels Arts and Crafts as an instructor, I can tell you that most of the people that work in craft stores also craft. Many have their own crafting businesses on the side, and may also attend shows or fairs.

    Additionally, our local Michaels, Joanns, and Hobby Lobby are have bulletin boards in the front of their stores with upcoming craft show information.

    Follow Organizations on Social Media

    Take some time and start looking through social media. There are bound to be crafters and organizers talking about upcoming shows.

  • 15 Do’s and Don’ts for Selling SVG Cut Files for Silhouette or Cricut

    If you are not interested in making and selling physical products with your Silhouette or Cricut, you could sell digital cut files.

    If you are creative enough to make high quality designs for others, there’s always a need for original cut files. And, selling SVG cut files is a great way to set up passive income (this is income that you make when you aren’t actively online, like while you are sleeping!).

    Today, let’s look at some of the things you should know before you set out to sell cut files.

    Do's and Don'ts for Selling SVG Cut Files for Silhouette or Cricut - by cuttingforbusiness.com.

    Do’s and Don’ts for Selling SVG Cut Files

    DO’s for Selling SVG Cut Files

    • Create your cut files from scratch. This ensures that your design is unique from all others – and eliminates potential trademark and copyright infringements.
    • If you are using phrases, be sure to check the US Trademark Database to be sure the phrase isn’t trademarked. However, in some cases, you can sell trademarked phrases in your cut files. For example, if you look up a trademark registration and it states that the trademark is only protected for use on tee shirts, you can make and sell a cut file to be used on other goods.
    • Price your cut file accurately. Remember that you will only create the design once and (hopefully) sell it multiple times. The going rate for SVG cut files is between $1 and $5.
    • Include a license with your file. Make sure you let other crafters know if it is okay for personal, commercial, or limited commercial use. If you need help deciding, read this post about licenses.
    • Remind buyers that their license does not allow them to sell/trade/gift the file.
    • Test your file by cutting it on your Silhouette or Cricut machine before you sell it.
    • Watermark your images. You do not want non-buyers to simply trace your design and use it without paying for it.
    • Offer your cut files for instant download. When customers don’t have to wait, they are more likely to purchase.
    • Offer your designs in several formats. It is standard to include a .png, an .svg, and a .dxf file at minimum. While I have this listed as a DO, you may notice that here on Cutting for Business, I only offer SVG files. I’d guess that over the years, for every 1000 downloads someone asks me if I can send them in another format. I usually suggest they use a converter and convert the file themselves. Not offering all formats cuts down on my design time. However, I may be missing out on shoppers looking for formats I do not offer. I’ll leave this decision to you – but know that your competition offers files in various formats.

    DON’Ts for Selling SVG Cut Files

    • Trace images/clipart from the internet and sell it.
    • Don’t make changes to a file you have purchased and sell it as your own.
    • Don’t use portions of images/cliparts in your cut file without checking the file license.
    • Don’t use fonts in your design that you don’t have a commercial license for.
    • Don’t use trademarked or copyrighted material in your cut file – this includes popular cartoon characters, company logos, and other copyrighted/trademarked materials.
    • Don’t sell .studio or .studio3 files. These are proprietary file formats exclusive to Silhouette and cannot be sold.

    How Do You Sell in the Cricut Design Store?

    If you’d like to sell your designs through the Cricut Design Store, you’ll want to become a contributing artist. When filling out the application, you’ll need to submit three original designs.

    How Do You Sell in the Silhouette Design Store?

    If you would like to sell your designs through the Silhouette Design Store, you can view information about becoming a contributing artist. Similar to the Cricut contributing artist application, you’ll need to submit five original designs on the application.

    Additional Marketplaces to Sell SVG Designs

    There are several other marketplaces outside of the Cricut and Silhouette Design stores that you may want to join. Here are the links you’ll want to visit:

    While it is free to open a store or shop on most of the above sites, many of them keep a percentage of your sales.

    Looking for other ways to make money in the craft world without making and selling products? I’ve got an article with eight more ideas to make money without selling handmade products.

  • The SBA and Your Craft Business

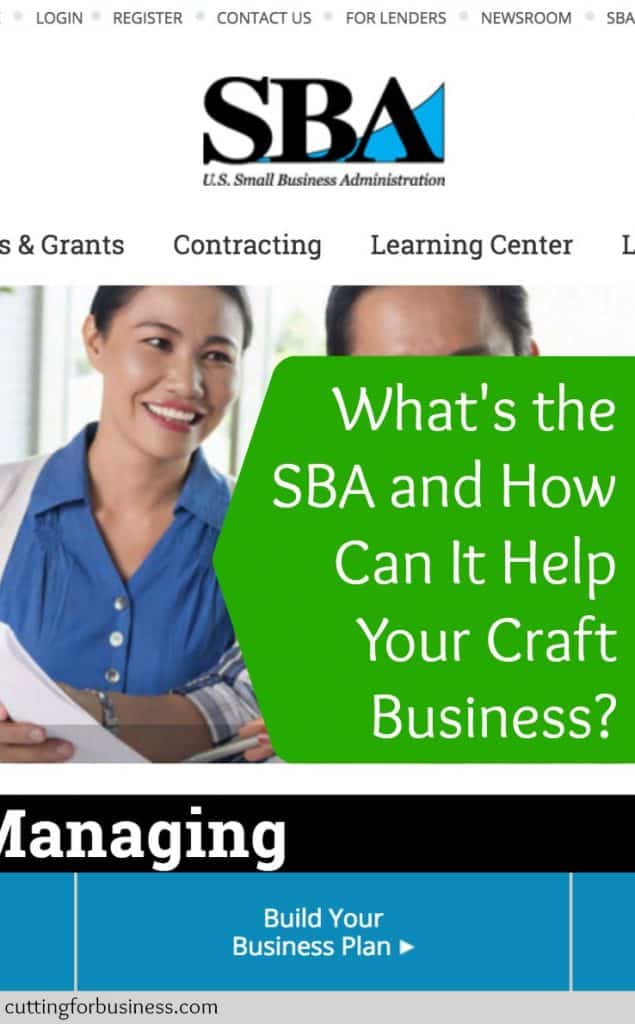
    Since Cutting for Business began earlier in the year, I’ve had many readers email or message me asking if I could point them to specific procedures for registering their business or incorporating a business in their state or county. Unfortunately, state and county procedures and laws vary greatly, as do the procedures for small businesses. One of my favorite resources is the SBA or U.S. Small Business Administration. Founded in the 1950’s, the purpose of the SBA is to offer loans, counseling sessions, and other assistance to small business owners. The SBA website is packed full of helpful information for starting a business – including free video courses – and the SBA has Small Business Development Centers, Veteran’s Business Outreach Centers, and Women’s Business Centers through the US and US territories. The staff at the SBA Centers provide free and confidential business planning, startup assistance, and financial grant information. I urge you to get in contact with your local SBA for state or region specific information.

    Links to help you find your local SBA Center/Resources:

    Have you visited your local SBA Center?

    Save this post to Pinterest:

    The SBA and Your Silhouette Cameo or Cricut Small Business - by cuttingforbusiness.com

  • Free: 35 page guide to starting a website for your Silhouette or Cricut based business

    I am finally wrapping up my posts on starting a website for your Silhouette or Cricut based business. If you missed any of last week’s posts, they were:

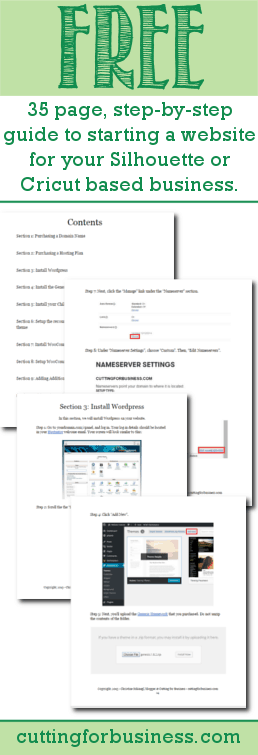
    Like I mentioned on Friday, I’m giving readers a 35 page, step-by-step guide to starting a website using WordPress, my preferred method. And, it’s free!

    Go to the guide

    If you can create gorgeous products with your Silhouette or Cricut machine, I promise that you can start a website following the guide.

    I have also added a link to the guide from Resource Depot.

    Free: 35 Page Guide to starting a website for your #Silhouette or #Cricut based business by cuttingforbusiness.com

  • How to Build Your Craft Business Website through WordPress

    Today we are winding down our discussion of starting your own website for your Silhouette Cameo business. We previously talked about basic web lingo, WYSIWYG builders, and hosted ecommerce platforms. The last solution to starting your own Silhouette Cameo business website is using a self hosted platform. This means that you create a website, install a store/shopping cart, and pay a monthly hosting plan. The solution costs more money upfront, and is more time intensive, but in the long run, it gives you the most flexibility and the cheapest price. Mainly, it eliminates paying transaction fees to a third party provider.

    There are several self hosted ecommerce platforms including Agora Cart, Magento, OpenCart, OS Commerce, X Cart, and ZenCart. Some of these solutions will require advanced programming experience – while others are easier to work in. The pricing on these solutions also vary greatly. In some cases, the ecommerce platform is free, while others make you pay for advanced features. I don’t feel that many of these are beginner friendly, so we are going to end the discussion on the above solutions here. I mentioned them in case you come across them online while doing some research.

    My preferred method of building a self hosted website and online store is through WordPress. WordPress is considered a CMS – or content management system – where you build a website using various themes, plugins, and widgets. Within WordPress, there are several plugins that allow you to add a store. My favorite is WooCommerce, because it is easiest for a beginner to navigate, is well documented, and it’s free! I know that this is a lot of information, so, where do you start?

    Steps to start a WordPress self hosted website and store:

    • Get a domain name. I’ve covered this in a previous post. I recommend (at the very least) that all small businesses at least register their domain name and get an email set up that is not gmail.com, yahoo.com, or anything similar.
    • Get a hosting plan. I use and recommend Hostgator.com. The Hatchling Plan at Hostgator is sufficient for most businesses and is as low as $3.96 per month.
    • Install WordPress. Most hosting companies provide step-by-step tutorials on how to install WordPress. If you choose to use Hostgator.com, you can find the tutorial here.
    • (Optional, but highly recommended.) Install the Genesis Framework for WordPress. This framework makes your WordPress site easier to customize, more tightly secured, simple to update, and search engine friendly.
    • Purchase a theme for WordPress and install it. If you’ve installed the Genesis Framework, you’ll be able to choose a theme here. Your theme should include instructions on how to install it, and here is a link to a beginner’s guide to the Genesis Framework.
    • Customize your new website with the pages you want your customers to see. Be sure to include information about you and your company, your refund policy, a privacy policy, and payment methods.
    • Install the WooCommerce plugin to set up your ecommerce platform on your website.
    • Enter your products, payment settings, and shipping information within WooCommerce.

    That’s it! This list is great, but a full tutorial of how to get your website started – including lots of photos would be even better, right?! Click this link to view it.

    Share this post to Pinterest before you start creating your own website:

    How to Build Your Craft Business Website through WordPress (Great for Silhouette Cameo or Cricut Crafters!) - by cuttingforbusiness.com

  • Choosing an Ecommerce Platform for Your Craft Business

    Let’s recap what we’ve covered about starting a website for your Silhouette Cameo business. First, we went over basic web lingo, then I cautioned you about using a WYSIWYG website builder to start your website. Today, let’s talk about ecommerce platforms.

    I think using an ecommerce platform is a good option for starting a website for your Silhouette Cameo business. There are several ecommerce platforms available including 3D Cart, Big Commerce, Big Cartel, Indie Made, Made Freshly, Shopify, Squarespace, Store Envy, Ultra Cart, Volusion, plus a few more. All of these sites are considered hosted solutions. This means that your website hosting is included – and you’ll only need to pay your monthly fee to the ecommerce platform. The monthly fees vary greatly from free to a portion of your sales to a few hundred dollars per month, plus payment processing fees. Like the fees, the features will also vary greatly from one platform to another. So what should you look for in an ecommerce platform?

    Things to look for in an ecommerce platform for your Silhouette Cameo business website:

    • Cost per month of the platform, be sure to ask about any additional fees.
    • The features that they offer; compared to what you want your website to do.
    • What forms of payments you can accept. Are you limited to only Paypal or Stripe?
    • The support available if you have a problem – do they offer phone support, live chat, or email only support?
    • The number of products you can have. Some ecommerce platforms limit the number of items you can sell, while others have unlimited products.
    • The templates they offer. While some ecommerce platforms have a lot of templates you can use with your store, others have a limited amount. If you don’t want to use a template they provide, how much will it cost you to hire a designer?
    • Reviews from current customers.

    I’ve mentioned Shopify before on Cutting for Business, mainly because it is one of the leading ecommerce platforms, with the most amount of features, for a reasonable price per month. I have worked inside Shopify before and the design of the store admin area is user friendly – and there is plenty of help available if you get stuck along the way. I am confident in recommending Shopify as a way for a beginner to start a webstore for their Silhouette Cameo business if they are looking to get it set up quickly. Plus, Shopify has some awesome features like the ability to build a store that displays on your Facebook page (read the post here or see my demo store here) and the ability to offer Buyable Pins on Pinterest (see information on that here).

    The last solution to starting your own website is called a self-hosted solution. This requires setting up a website and installing a store. While a little more time intensive at the beginning, I ultimately think it is the best way to go – and the most cost effective because you eliminate the monthly ecommerce platform fees. To not overload everyone with too much information today, I’ll be covering a popular and beginner-friendly solution tomorrow on the blog.

    Save this post to Pinterest so you can find it when you need it:

    Choosing an Ecommerce Platform for Your Silhouette Cameo or Cricut Small Business - by cuttingforbusiness.com

  • The Down Low on WYSIWYG Website Builders

    Continuing on from yesterday’s post, WYSIWYG – which stands for “What You See Is What You Get” or Drag and Drop – Builders are those created which allow the average, non-technical person to create a website. Companies featuring these types of websites include Wix.com, Weebly.com, Webs.com, Yola.com, Moonfruit.com, and more.

    First, some pros about these services:

    • Some offer free websites, but they often make their money by ads on your site. Some sites offer upgraded plans to remove the branding.
    • Some include domains in their package pricing.
    • Anyone can create them.
    • Many offer free templates.
    • Low learning curve compared to other solutions.
    • Support is available.

    Now, the cons:

    • Usually, the more features you need, the more you pay. Ultimately, this high price can be much more than other solutions.
    • Your website is likely to look similar to others built with the same builder or template.
    • Websites built with WYSIWYG builders generally cannot be moved to other providers as your needs grow or change.
    • You are generally limited to the features offered and cannot extend the functionality of your website.
    • If you set up your domain through the WYSIWYG provider, they may own your domain.
    • Your DIY website may turn out looking very DIY.

    My thoughts: WYSIWYG builders have come a long way since they started. If you are interested in building your own site quickly, they are one option. If you want more creative freedom and the ability to work with a web designer, a WYSIWYG editor may not be the best option.

    Stay with me for the rest of the week as we continue the discussion of starting a website for your Silhouette Cameo business. If you aren’t quite sure about anything in this post, be sure to read yesterday’s post on Beginner’s Web Lingo and see the schedule for the rest of the week. Continue on to read about ecommerce platforms.

    Don’t forget to pin the image below – because pinning it Pinterest is caring!

    The Low Down on WYSIWYG Website Builders for Your Silhouette Cameo or Cricut Small Business - by cuttingforbusiness.com

  • How to Start a Website for Your Silhouette or Cricut Business

    Once you’ve started selling products and getting yourself established as a business, it’s a good time to start a website of your own. On Cutting for Business this week and some of next, we are going to take baby steps through starting your own website. To start, we need to know some basic web terminology – in easy to understand language – and a little bit about each term.

    Beginner’s Web Lingo

    Domain: This is the address of your website. It tells users where on the internet your website is located. For example, my domain name is cuttingforbusiness.com. Domain names are unique and registered for a period of time measured in years. You must keep up with your domain name registration, or it will expire and your website will be removed. You should expect to pay between $10 – $12 on average per year for your domain name. New website owners can usually register a domain for only a few dollars if they look for a coupon code online. Currently, .com websites are the most popular, but there have been a lot of new TLD’s (which stands for Top Level Domain, and is the ending to your domain name) offered lately. I recommend everyone gets a domain, and I’ve written about domains in depth in this post.

    Registrar: This is where you register your domain name. Popular registrars include GoDaddy.com, Register.com, Namecheap.com, 1&1.com, and Name.com. Personally, I have used GoDaddy without issues for over a decade.

    Hosting: Hosting is the monthly fee you pay for the space your website takes up on the internet. Hosting plans include disk space (the amount of space you are alotted), and bandwidth (the amount of traffic your website can handle each month). The more disk space and bandwidth your website needs, the higher the cost you will pay per month. Some registrars offer website hosting; while others do not. You can expect to pay around $12 to $15 per month for your hosting of a small ecommerce website. Personally, I like Hostgator.com for hosting, and have used them for many, many years.

    Why? You may wonder why I choose to host my domains with GoDaddy and purchase my monthly hosting through Hostgator. Simple answer: It is cheaper for my needs. Be sure to price out your needs before you commit to something.

    WYSIWYG: This awkward acronym stands for “What You See Is What You Get” editor, also referred to as a “drag and drop” editor. Providers of WYSIWYG website building services allow you to build a website yourself, with no technical knowledge, and hosting is usually included in your monthly fee. Popular WYSIWYG services include Wix.com or Weebly.com. Plans range from free to $30+ dollars per month.

    Ecommerce Platform: These services allow you to build an online store that is managed through a dashboard. Your store operates on software the provider has built, and are generally fairly easy to navigate. Sites like Shopify.com and Storeenvy.com provide ecommerce platforms.

    CMS – Content Management Systems: This is exactly what it sounds like. These are systems that help you manage the content of your website. The most widely known (and my favorite!) is WordPress.com.

    HTML/XML/CSS/Javascript/PHP: These are various website programming languages that you may come across when starting your first website. The good thing is, you can run a website without knowing much about these languages. For now, just know that they exist.

    Alright, everyone still here? We got a great start today on basic web lingo. You can refer back to this page throughout the week if you forget.

    Here’s what to expect the rest of the week:

    I’ll let you know my thoughts on WYSIWYG editors – and why I don’t want you to use one.

    We will look at the pros and cons of ecommerce platforms.

    We will explore WordPress.com as a way to build your first website.

    Lastly, you can read my free 35 page guide on starting a website. Don’t worry, it’s beginner friendly and easy to follow.

    Save this post to Pinterest so you can reference it later:

    How to Start a Website for Your Silhouette Cameo or Cricut Business - by cuttingforbusiness.com