Category: Photography & Mockups

  • 4 Places to Buy Blank Mockup Images

    Any experienced small business crafter knows that mockups – or computer made photos of your products – can save a lot of time and supplies. By creating mockups, you can show a customer what their custom order will look like, give customers color and design options to choose from, and even create professional looking product photos for your shop without ever taking a picture.

    On the Cutting for Business blog, I’ve written about mockups several times. However, one thing I’ve never shared is where to buy blank photos to use to make mockups. Today, I’m sharing that list.

    4 Places to Buy Blank Mockup Images

    1. Any stock photo site. Adobe Stock is my personal favorite, but I have a list of stock photo sites at this link.
    2. Creative Market. This often overlooked site for fonts and digital goods has 100,000K plus listings for mockups. A quick caution: Be sure to read what type of program you need to have to use the mockups. Some will require Adobe Photoshop or Illustrator.
    3. Placeit.net. I love Placeit and use it often for the free cut files on Cutting for Business. I think it’s perfect for anyone that doesn’t have technical photo editing skills – and no interest in learning them. Head to this blog post if you want to learn more. Click here if you want to save 15% off (exclusive to Cutting for Business!).
    4. Etsy. I have purchased from and particularly like these sellers:

    Hoop Mama mockups

    MidniteMot: Apparel related

    MidniteMot: Frame related

    MockupCentral

    SUBLIMEStyledStock

    Pixomize

    TheUrbanDesignCo

    InspireMockupsPhoto

    StyledProductMockups

    I’ve told you where to buy blank mockup photos to use in your crafting business, but what if you need help creating the mockups? No problem! Head to this link on the blog.

    Was this post helpful? Save the image below to Pinterest.
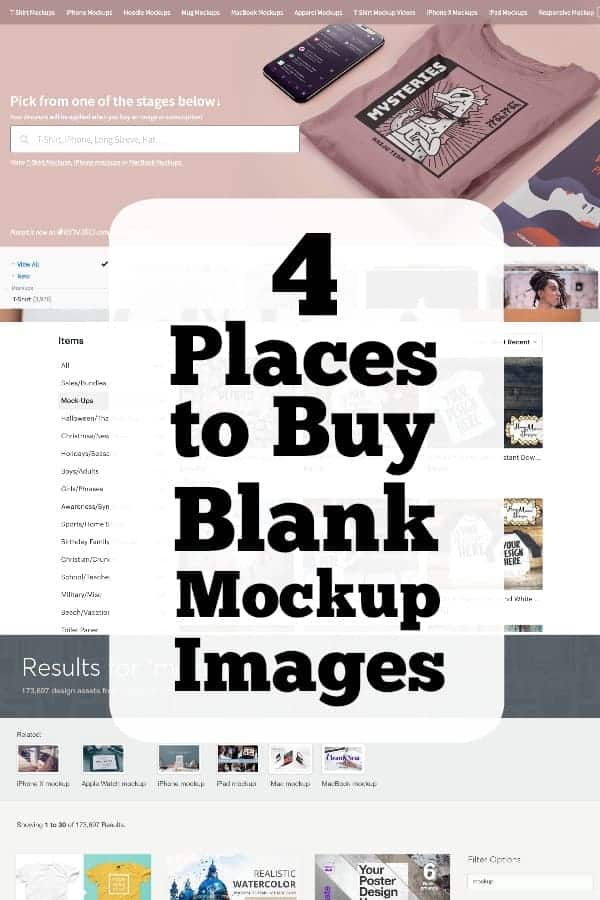
    4 Places to Buy Blank Mockup Images - A good read for Silhouette Portrait or Cameo and Cricut Explore or Maker craft business owners - by cuttingforbusiness.com

  • 15 Free Stock Photo Sites

    Alright, we celebrated my birthday yesterday, but it is time to get back to work! Today, I’ve invited Sarah Guilliot over from SarahDesign.com to share some resources with you. Sarah specializes in drop dead gorgeous mockups of tumblers, coffee mugs, wine glasses, beer mugs, mason jars, and more. In addition to selling ready to use mockups, she offers a class to teach you how to make your own mockups. I’m turning it over to her:

    Hi again Cutting for Business readers! I’m so excited to be here to share with you today. Like Christine mentioned, I’m Sarah Guilliot, from SarahDesign.com where I specialize in mockups for drinkware makers. And one of my essential tools for making quick drinkware mockups or even social media posts and blog posts, is stock photography.

    And even better than that… free stock photography. I bet you enjoy a nice free resource, too, so I put together this short list to help you next time you need a stock photo. I’ve also included some paid sites at the end of the list because there are times when it’s worth it to shell out a few bucks to find just the image you need for a quick and easy mockup!

    Most of these are free for commercial use with no attribution required, but do check the fine print to make sure you are covered.

    Free Stock Photos with Drinkware Options

    • Unsplash – This is my #1 favorite because the quality will blow you away. Stock photo aggregators like Pexels and Pixabay pull in these images quite a bit, so I like to skip the middleman and go straight to Unsplash instead. There are a ton of great shots of drinkware in here. Just search for “wine” and you’ll see. Gorgeous.
    • Pexels – This is my #2 favorite out of the whole list. It aggregates from tons of other sites but really does a good job of only displaying the higher quality options. There are lots of fantastic shots of wine glasses, mugs, and other drinkware in here so it’s a great choice for drinkware mockup resources.
    • Pixabay – This is a decent option for nice drinkware-mockup-ready images but also can be a little hit and miss on quality. There are some surprising choices…sometimes a good surprise, and sometimes not! LOL But it’s worth checking out if you want some different options. There are plenty of lifestyle and people shots to choose from.
    • StockSnap – This one is quite similar to Pexels. There are plenty of drinkware options plus lots of other choices and pretty high-quality. They add hundreds of new images each week.
    • Burst – This site is very polished and nice. I’ve definitely found glassware images here (high-quality ones!) that I haven’t seen other places. It’s worth a look!
    • FreePhotos – There are some lovely choices here with wine, beer, and even milk pouring into a glass. Plus plenty of other lifestyle and real life shots that you can use in your small business.
    • Goodstockphotos – This one doesn’t have a whole lot of drinkware choices, but does have some and I think the name is pretty accurate. These are “good” stock photos, but not the highest quality I’ve seen. I’d check Good Stock Photos out if I felt like I had used up all the great options on my more preferred sites.
    • Stockvault – Drinkware is available on Stockvault, but I’d say the majority of what they have to offer is really neat and colorful travel and lifestyle images. This is a fun but limited choice option.
    • Picjumbo – If you search for “glass” there are few nice options but not a whole lot of choices overall. Great for social media photos, however.
    • Free Stock Photos – I’m not gonna lie, this site looks a little janky, LOL! But, there are some fun and interesting things to choose from in terms of clip art, and a few drinkware choices. This is one of those sites that is just fun to search through for treasure, like when you go to a thrift shop.
    • Rgbstock – This site is good for a last resort for drinkware image searches. The quality is not great, they look like a lot of very amateur photos. However, if you are looking for a particular item, like an unusual mug, for example, this could be the site where you find it. Then, use your photo editing skills to make the image look top notch for your mockup needs.
    • Negative Space – This site has some drinkware, but not much. However, I’m including it because the quality of the images is very high and it was some unusual and quirky shots. I think you could create a really interesting Instagram feed with the images from this site, plus have some mockup options.

    Free Lifestyle Stock Photo Websites

    • New Old Stock – This one is really unique because it has vintage photos from public archives. It’s great for creating an overall “old timey” feel on social media or on your website.
    • Magdeleine – A great site for elegant imagery and tons of beautiful outdoorsy shots. There aren’t a lot of drinkware choices here, but if you need images to set the mood or beautify your Instagram, it’s a great choice.
    • Gratisography – I threw this in for fun because it has some really crazy, quirky, and funky options that could spice up your social media. I wouldn’t turn to this site for mockup materials, but for a fun post, it’s great!

    Honorable Mentions:
    Paid Stock Photo Websites with Drinkware Options

    • SarahDesign (Etsy) – I’d be remiss if I didn’t mention myself as a resource. In my shops on Etsy, Creative Market, and SoFontsy, you can find readymade Photoshop Mockup files for drinkware sellers. These usually include png and jpg styled stock photo versions as well so you can mock them up in the graphics program of your choice. I hope you’ll check it out!
    • Twenty20 – What I love about Twenty20 is how real the images are. It’s full of photos of real people doing real things. And there are a bunch of great drinkware choices in beautiful settings.
    • Adobe Stock – There are a ton of drinkware options here – even ones where a single photo has up to 10 glasses in it. You just need to dig into the licensing to figure out which one you need in order to use these as a mockup for your shop. You can sign up for 10 free images so that’s nice too.
    • Shutterstock – These aren’t free, but you can sign up to their email list for some free images. Even though it’s a paid account, I think it’s totally worth it when you are looking for just the right glassware image and can’t find it anywhere else. You can almost certainly find it on Shutterstock.

    I hope you enjoyed the list. Don’t forget to bookmark this post so you can refer back to it later. And, if you are a drinkware seller with an Etsy shop or who is wanting to start an Etsy shop, I’d love to invite you to check out my free e-course: 5 Days to Better Etsy Images. Back to Christine:

    Thanks Sarah! If you recognize Sarah’s name, it’s because she’s written for Cutting for Business before. Get her tips on designing with fonts in this post and tips for creating a logo in this post.

    This post has a ton of valuable information in it, save the image below to Pinterest.
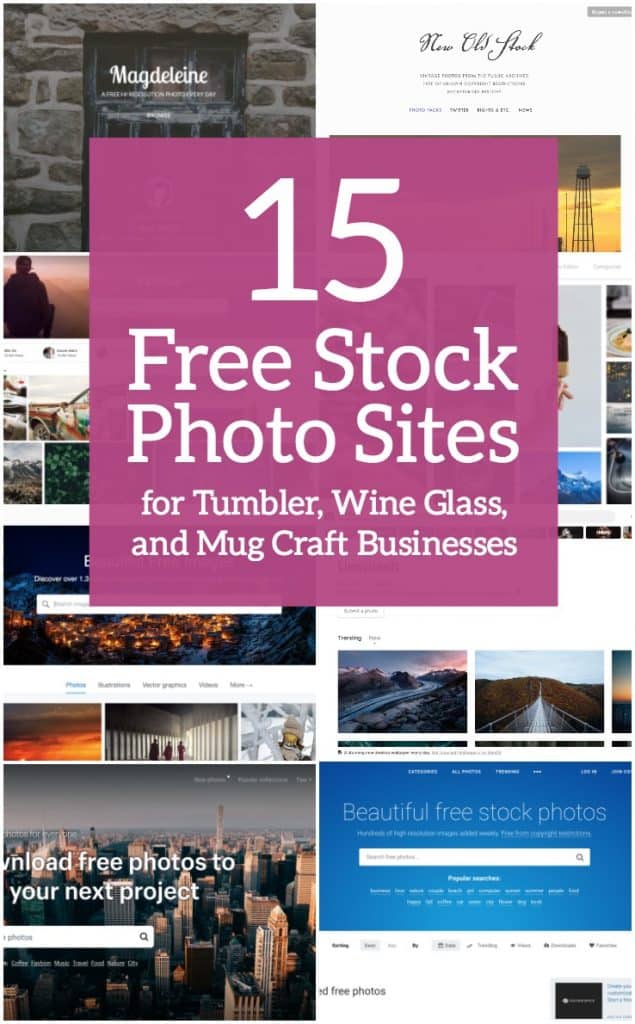
    15 Free Stock Photo Sites for Silhouette Portrait or Cameo and Cricut Explore or Maker crafters who sell tumblers, mugs, wine glasses, beer steins, and more. By sarahdesign.com and cuttingforbusiness.com.

  • Secret Trick: How to Take Better Pictures of Glass Etchings

    I get reader emails and comments all the time asking for tips about how to take better pictures of etchings on glass in products you’ve made with your Silhouette or Cricut.

    How to Take Better Pictures of Glass Etchings

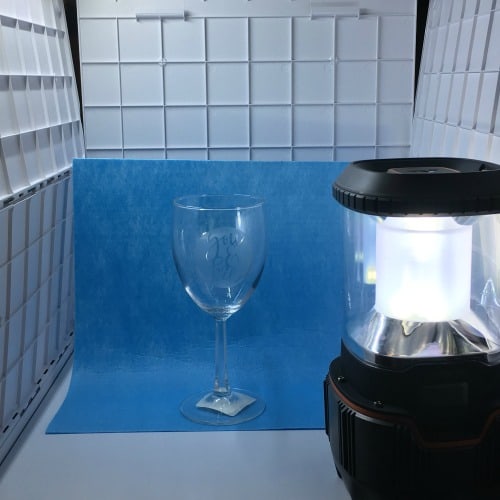
    My super secret trick is to add more lighting to your setup. You can use either a flashlight or a small lamp. For the sample below, I used a battery lantern from our hurricane supply container, because I didn’t have enough hands to hold the camera and a flashlight at the same time.

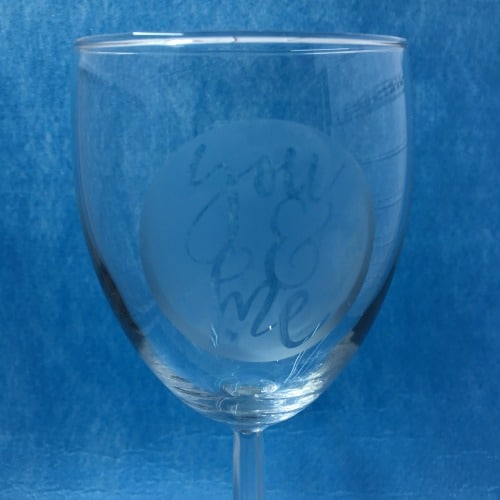
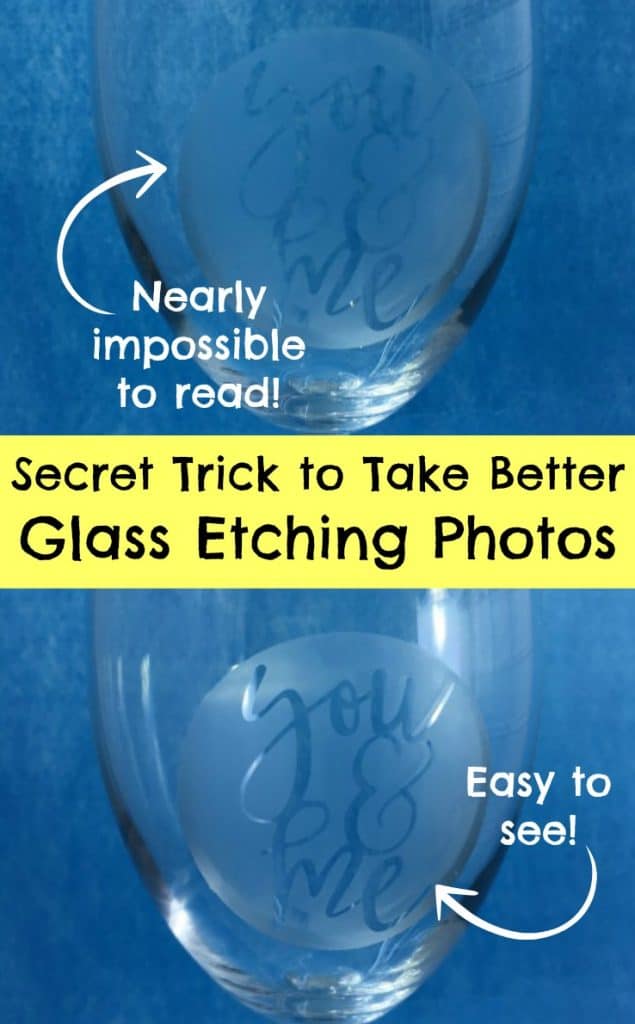
    First picture. No additional lighting. Unfortunately, you have to look really hard to see the text in the etching: Secret Trick: How to Take Better Pictures of Glass Etchings in Your Silhouette Cameo or Cricut Explore or Maker Small Business - by cuttingforbusiness.com

    Second picture. Added more lighting with a lantern. You can light it from above or the side – you’ll just want to experiment with your particular setup. You’ll see that you can now read the etching clearly:

    Secret Trick: How to Take Better Pictures of Glass Etchings in Your Silhouette Cameo or Cricut Explore or Maker Small Business - by cuttingforbusiness.com

    (In case you are wondering, my camera settings were identical in both pictures and were taken with my iPhone 6. The photos were taken 11 seconds apart.)

    Here’s my setup in my Shotbox:

    Secret Trick: How to Take Better Pictures of Glass Etchings in Your Silhouette Cameo or Cricut Explore or Maker Small Business - by cuttingforbusiness.com

    In addition to adding more light, I have better luck taking glass etchings photos on a solid background. In the sample above, no fancy background – just a piece of craft felt.

    This same trick works for holographic and specialty materials, too. Read more about this here.

    The ‘You & Me’ design is perfect for weddings, anniversaries, and more. Download it free in this post on the blog.

    Save this post to Pinterest:

    Secret Trick: How to Take Better Pictures of Glass Etchings in Your Silhouette Cameo or Cricut Explore or Maker Small Business - by cuttingforbusiness.com

  • What is a Photography Light Box (and Shotbox Review)

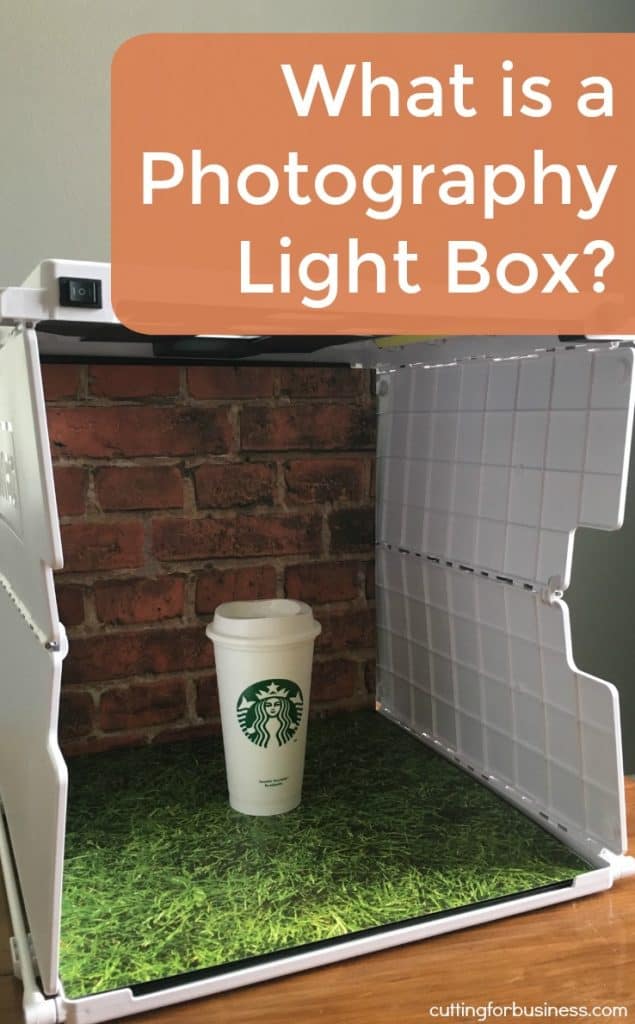
    As Photography Week continues here on the blog, today we are going to talk about light boxes and tents. So, what exactly is a light box or light tent? They are basically boxes with translucent sides that diffuse light onto your product without producing shadows. To use a light box, you place your product inside and point lights through each side and the top to illuminate your product. Light boxes are available in all sizes and shapes. Here’s a few from Amazon:


    DIY Light Boxes

    It’s not hard to craft your own DIY light box with a cardboard box, some tissue paper, and some desk lamps or photography lights. I dug up a few tutorials around the internet for you: click here, or here, or even here.

    Storage Concerns with Light Boxes

    Most commercial use light boxes collapse flat – and are easy to store. What’s not easy to store are the lighting components because they are bulky and fragile. Similarly, if you have crafted your own light box from a cardboard box and tissue paper or fabric – it’s even harder to store! Fortunately, the team at Shotbox has solved this problem.

    Tell Me About the Shotbox

    So glad you asked! The Shotbox is a collapsible light box with lighting inside it! Here’s a few pictures of the features and how it works.

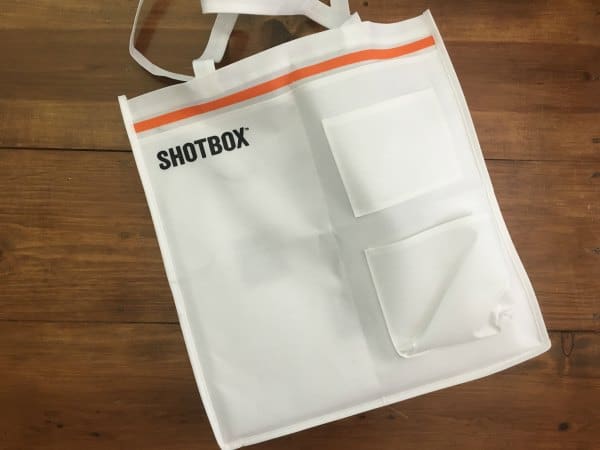
    First, the Shotbox includes a tote to carry it and all its accessories fit nicely inside – this fixes the storage issue completely!What is a Photography Light Box (and Shotbox Review) - Great for Silhouette Cameo and Cricut Explore Small Business Owners who take Product Photos - by cuttingforbusiness.com

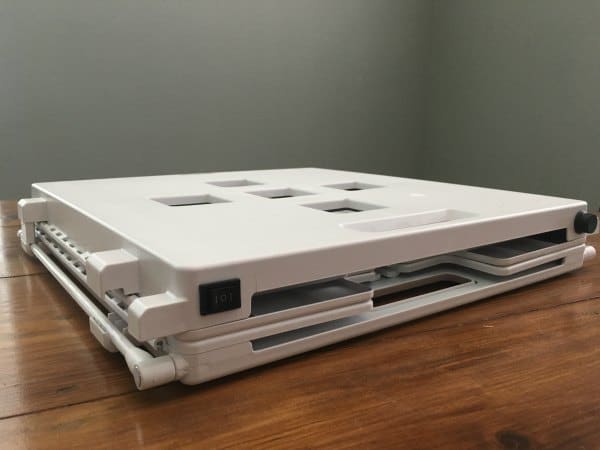
    When you pull it out, it’s about 4 inches thick in the collapsed state:

    What is a Photography Light Box (and Shotbox Review) - Great for Silhouette Cameo and Cricut Explore Small Business Owners who take Product Photos - by cuttingforbusiness.com

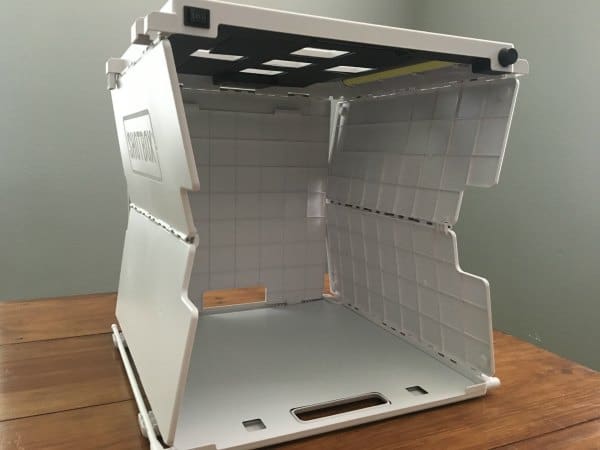
    To set it up, just pull on the top and it pops together – measuring about 15 inches tall:
    What is a Photography Light Box (and Shotbox Review) - Great for Silhouette Cameo and Cricut Explore Small Business Owners who take Product Photos - by cuttingforbusiness.com

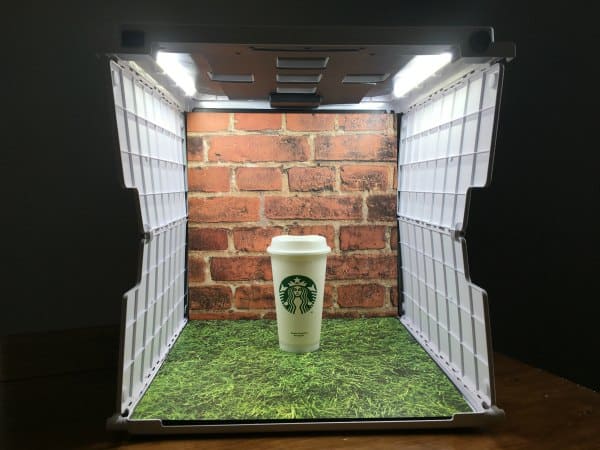
    Then, plug it in, insert backgrounds, put your product inside – and shoot away! What is a Photography Light Box (and Shotbox Review) - Great for Silhouette Cameo and Cricut Explore Small Business Owners who take Product Photos - by cuttingforbusiness.com

    One awesome thing about the Shotbox is that you can shoot overhead photos as well as straight on due to open spaces on the top of the box. The Shotbox has additional accessories like a cell phone holder (the Sideshot) that connects to the top and additional background packages.

    Where Can I Buy the Shotbox?

    You can pick up your own at this link. The link provided includes 4 infinity backgrounds, the Sideshot holder accessory, and a similar carrying case. A pack of 48 additional backgrounds (including the ones seen in this post) can be found here.

    Sample Photos from the Shotbox

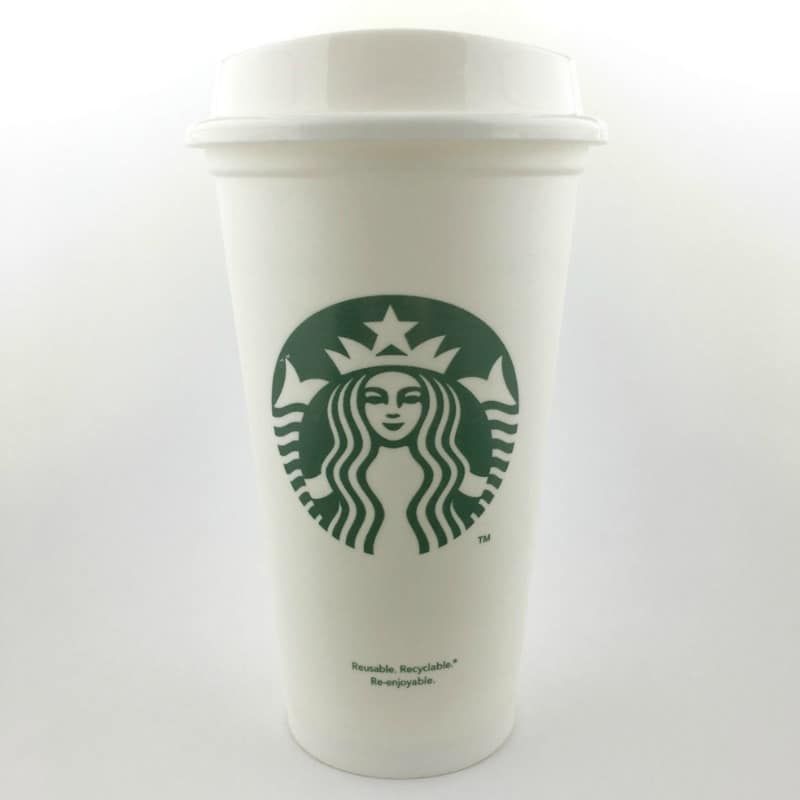
    (All photos were taken with my iPhone 6.)

    What is a Photography Light Box (and Shotbox Review) - Great for Silhouette Cameo and Cricut Explore Small Business Owners who take Product Photos - by cuttingforbusiness.com

    What is a Photography Light Box (and Shotbox Review) - Great for Silhouette Cameo and Cricut Explore Small Business Owners who take Product Photos - by cuttingforbusiness.com

    What is a Photography Light Box (and Shotbox Review) - Great for Silhouette Cameo and Cricut Explore Small Business Owners who take Product Photos - by cuttingforbusiness.com

    Before you go – I know you are going to ask: Would I recommend it? I absolutely would recommend the Shotbox if product photography isn’t your thing or if you are just beginning. If you’ve already invested in other lighting and backgrounds and have a good understanding of product photography – skip it. So far, I’ve been impressed with the photos I have taken using it. Do take note that if your products are large, this is not a good solution for you.

    I wanted to let you know that I wasn’t paid by Shotbox for this review and I didn’t receive the product from Shotbox. Instead, it was gifted to me by a friend who wasn’t using it.

    Tell me in the comments: Do you use a light box for your product photos? Which one?

    Share this post with a friend on Pinterest:

    What is a Photography Light Box (and Shotbox Review) - Great for Silhouette Cameo and Cricut Explore Small Business Owners who take Product Photos - by cuttingforbusiness.com

  • 6 Background Ideas for Product Photos

    Photography week continues! While I’ve mentioned photography backdrops a few times in the week already, let’s look at some specific products and places that make great product photo backgrounds.

    6 Background Ideas for Product Photos

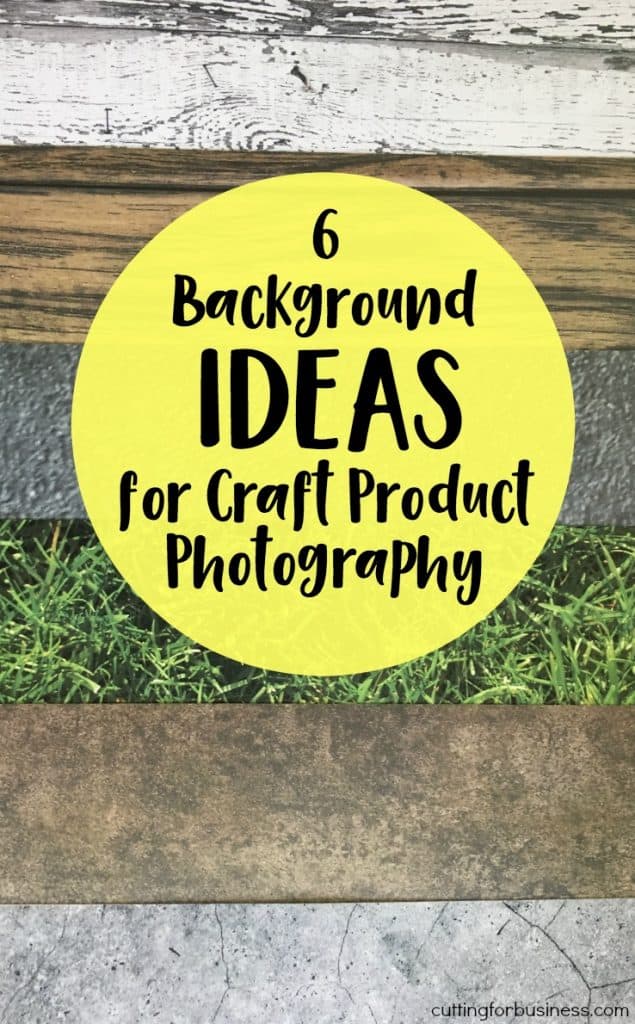
    1. The great outdoors. The light is bright and perfect for taking product photos, so find a natural setting and shoot away. Country settings are great for rustic and farmhouse products, but the concrete of an urban area works well for products with modern or funky themes.
    2. Photography backdrops. Just like the ones they use in photo studios, you can purchase photo backdrops. I have several and there are pros and cons. Pros: Easy to use, inexpensive, available in several colors and styles. Cons: If you want a large number of backgrounds – you have to buy several, the large size can make them difficult to store, they wrinkle easily and need ironed before each use. Where to buy: Amazon – click here to see options.
    3. Scrapbook paper. It’s no secret that many Silhouette Cameo and Cricut Explore small business owners use scrapbook paper as photo backgrounds. It’s cheap, readily available, and easy to store. Unfortunately, for larger products – it doesn’t work well. Where to buy: Your local craft store.
    4. Fabric. If you can’t use scrapbook paper, consider fabric. It’s available in thousands of colors, just don’t forget to iron it before you use it. Where to buy: Fabric.com.
    5. Poster board. Solid colored poster board is great for taking product photos. Tip: If you want to make your product look like it is floating, simply curve the board and set the product on top. (This style of background is referred to as an infinity background. Your local big box store.
    6. Shelves, fireplaces, and tables around your house. If your products fit the decor of your home well, stage the product somewhere within your home. Best of all: it’s free!

    Ewwww, Skip These

    Whatever you decide to do for backgrounds in your product photos steer clear of carpets and beds. No one wants to think that their gorgeous handmade product is on dirty carpet where people walk or in someone’s bed!

    Keep it Uniform

    Once you decide on a background that works well for your product photos, keep it similar throughout your product line or shop. This not only helps with your brand recognition, but it makes your shop present better.

    Tell me in the comments – what do you use for backgrounds in your Silhouette Cameo or Cricut Explore small business?

    6 Background Ideas for Product Photos in your Silhouette Cameo or Cricut Explore small business - by cuttingforbusiness.com

  • 10 Product Photography Tips for Silhouette & Cricut Businesses

    Good product photos sell your products. Everyone knows that, but getting those great shots can be tough. Here are some of my favorite tips.

    10 Product Photography Tips for Silhouette & Cricut Business Owners

    1. Know your camera. I can’t stress enough, to take better pictures – you have to know how your camera works. Whether you are shooting with your cell phone, a DSLR, or a mirrorless camera; you have to know how it works. Some of my favorite resources are: Apple’s iPhone photography websiteCreativeLive’s photography classes, and your camera’s instruction manual.
    2. Don’t shoot down on your product. If you product is sitting on a table, squat down to the same level as your product to take the picture. If your product is on the floor, lay on your belly to take the photo. Basically, get down to the same level as the product to photograph it.
    3. Take photos from several angles. This is especially important if you are selling online. Since buyers cannot touch and feel the product, it is your job as the seller to show all aspects of the product for sale.
    4. Use good lighting. Usually, natural light is best to shoot your product photos. In fact, I usually head out mid day to my driveway to shoot product photos. (After you do this a few times – the neighbors will stop staring – I promise!) If you can’t make it outside – invest in studio lighting like these inexpensive lights with umbrellas.
    5. Invest in appropriate backgrounds. While we will tackle inexpensive backgrounds later in the week, it bears saying that you should not take photos with overly busy or reflective backgrounds, wrinkled comforters or blankets, or carpet. This list might sound basic and like common sense, but a quick search of Etsy will provide lots of examples of poor photography. Better options are scrapbook papers for small items or printed photography backgrounds.
    6. Show your product in use. If possible, show your product being used. If you are selling a tee shirt – photograph it being worn. If you are selling a cup – show someone holding it. If you can’t get people to model your goods, consider using Placeit for mockups.
    7. Think about scale. Some products can look much larger or smaller than they are in photographs. One culprit is wooden signs. When photographing them, place something in the photo that buyers are likely to know the size of. For example, if you are selling an 8 inch by 8 inch wood sign, hold it in your hands to show it’s small size. In contrast, a 40 inch by 40 inch wood sign is quite large. Set it in front of a person to show how large it is.
    8. Use props minimally in your product photos. A few well placed props can add interest to your product photo, but too many become a distraction. For example, a coffee mug could be filled with coffee with a spoon next to it. Or, a Christmas ornament could be photographed hanging on a tree.
    9. Crop out the excess. Your product photo should star your product. Crop out excessive space around your photo to make the eyes of the buyer go straight to your product.
    10. Back up your photos. Personally, I prefer to backup my photos to a cloud of some kind (examples include Dropbox, iCloud, and so on). I do not like using external backups because they can fail, get lost, or damaged. For example, if I back up all my product photos to an external drive and store it in my laptop bag and my house burns down – I’ve lost my laptop with the originals and my external drive with my backups. Since I use a cloud, this cannot happen.

    Love this article? Save it to Pinterest:

    10 Product Photography Tips for Silhouette Cameo & Cricut Explore Businesses - by cuttingforbusiness.com

  • A Mockup Management System for Silhouette or Cricut Businesses

    Design Drop is no longer available and I have not found a replacement.

    —————————————————————————————————

    Today’s post comes straight from my inbox – and it is related to the best way to deal with customers and online mockups. Here’s the email:

    “Hi Christine! As my customs business is growing, I’m having a hard time keeping mockups and the changes that need to be made straight. I’m currently doing them by email, but I’ve had a few customers approve designs that had errors in them and it’s time consuming for me to go back through emails. Any suggestions for better workflow?”

    Yes! There are several online mockup management tools that work great for keeping track of changes for mockups and keeping a record from both parties. The one that I have used most recently is called Design Drop. I’m going to show you how it works from both sides (the designer and the customer).

    What You Do at Design Drop as the Designer

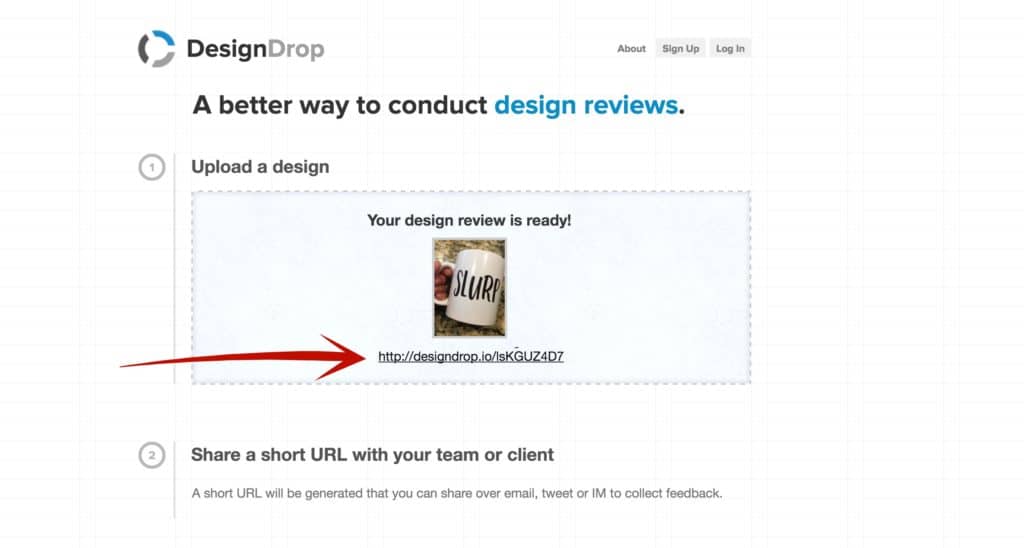
    1. Visit designdrop.com and upload a mockup to show your customer.
    2. After you upload your mockup, you’ll be given a shareable link as shown in the image below. Click it. How to Easily Get Your Design Mockup to Your Customer - Great for Silhouette Cameo and Cricut Small Business Owners - cuttingforbusiness.com
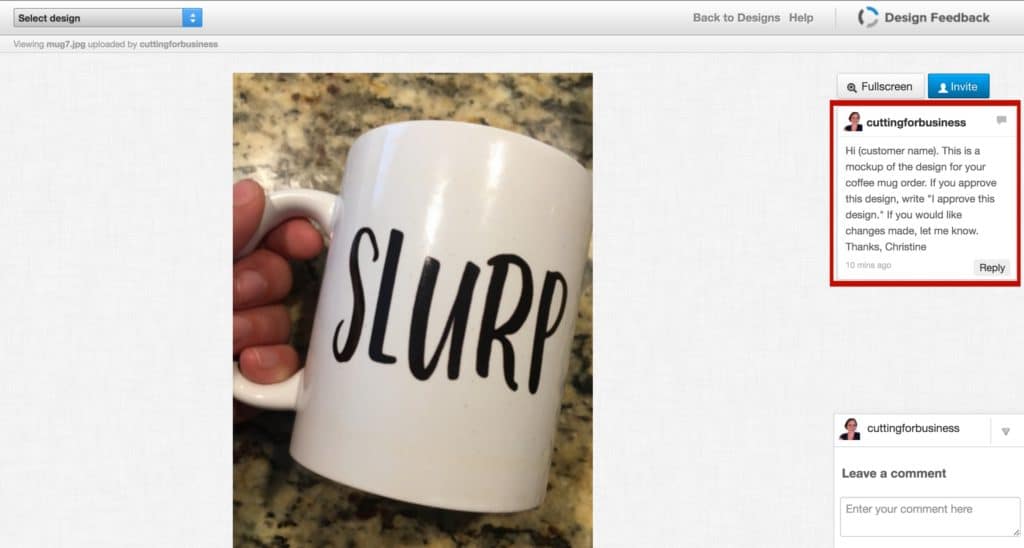
    3. On the right hand side, add a comment telling the customer that this is the design that will be placed on their custom made order. Instruct them to write “I approve the design” if everything looks good. If they need changes made, they simply need to leave a comment. The image below shows what my comment looks like: How to Easily Get Your Design Mockup to Your Customer - Great for Silhouette Cameo and Cricut Small Business Owners - cuttingforbusiness.com
    4. Send the link to your customer once you are ready to show them the mockup.

    How a Customer Sees Design Drop

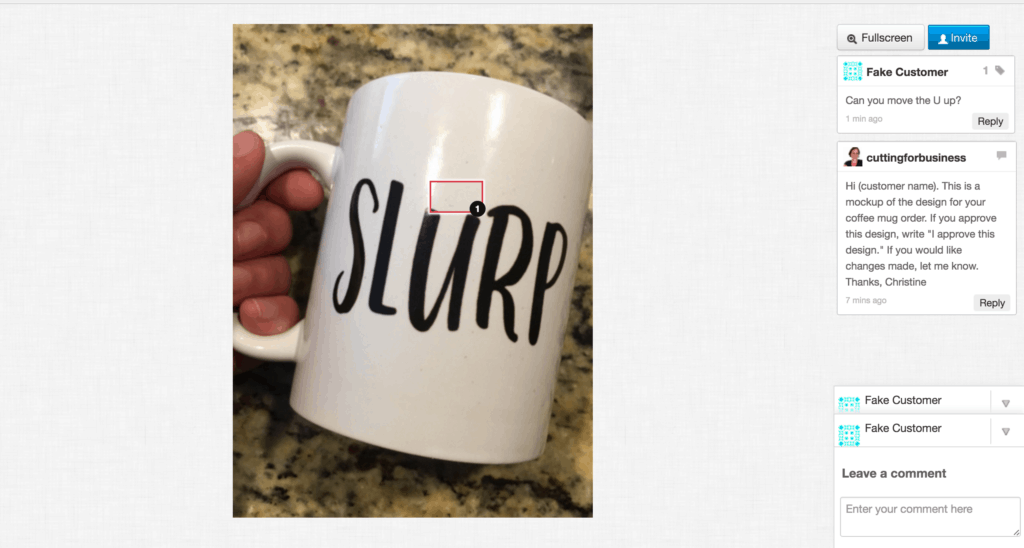
    1. Customer receives the link you send and clicks on it. The page they see is similar and shown below. They do not have to sign up or log in to leave a comment. They are able to annotate directly on the image and leave comments. If everything checks out fine – you start the order, if not – you make the changes.How to Easily Get Your Design Mockup to Your Customer - Great for Silhouette Cameo and Cricut Small Business Owners - cuttingforbusiness.com

    If you’d like to see the client end of the mockup above, click here. Feel free to annotate or leave a comment to test it out.

    I’ve used Design Drop in the past and love it for a few reasons: 1) It’s free. 2) If the customer has an error on the custom made design, I can log into Design Drop and reference their approval. This allows me to charge them for a replacement item since the error was on their part. 3) It keeps all my mockups in one place, no digging through my email box.

    Need help creating mockups? See this post, this post, or this post.

    Do you use a mockup management system? Let me know about it in the comments.

    How to Easily Get Your Design Mockup to Your Customer - Great for Silhouette Cameo and Cricut Small Business Owners - cuttingforbusiness.com

  • The Secret to Photographing Glitter and Holographic Material

    I’ve been there so many times: I’ve made the absolute most beautiful, wonderful, gorgeous creation known to anyone in this world using glitter or holographic materials and when I take a photo of it – it doesn’t sparkle! Instead, it looks flat, and usually pretty dark compared to the rest of the photo. Have you experienced this, too? If so, read on for my trick.

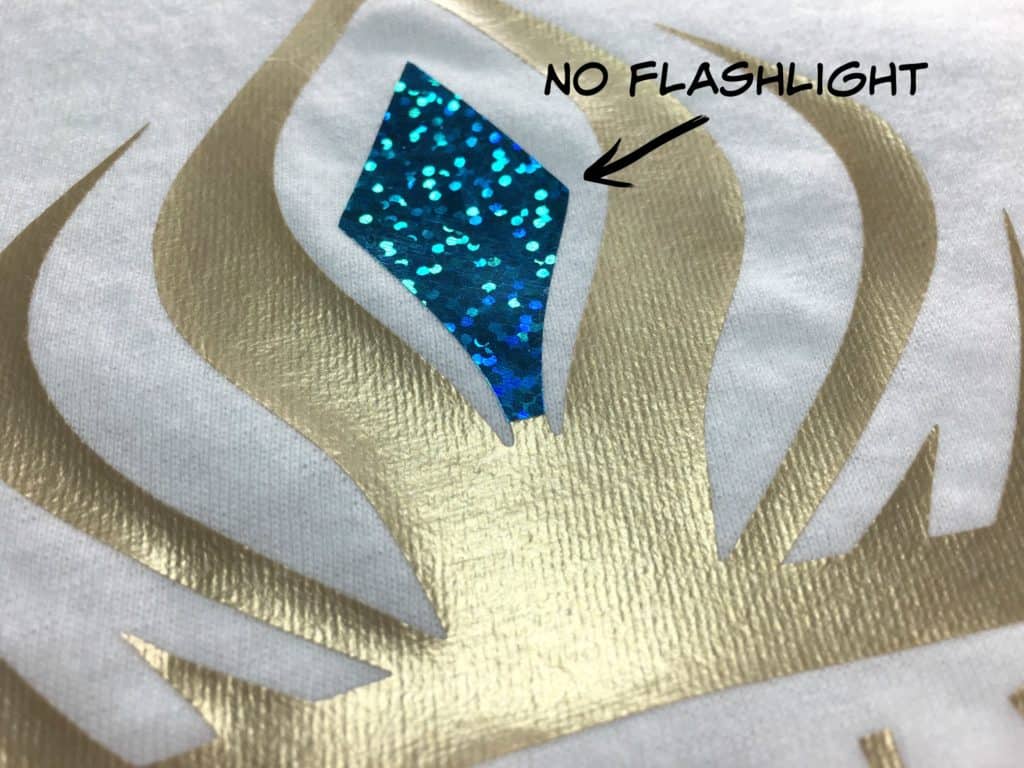
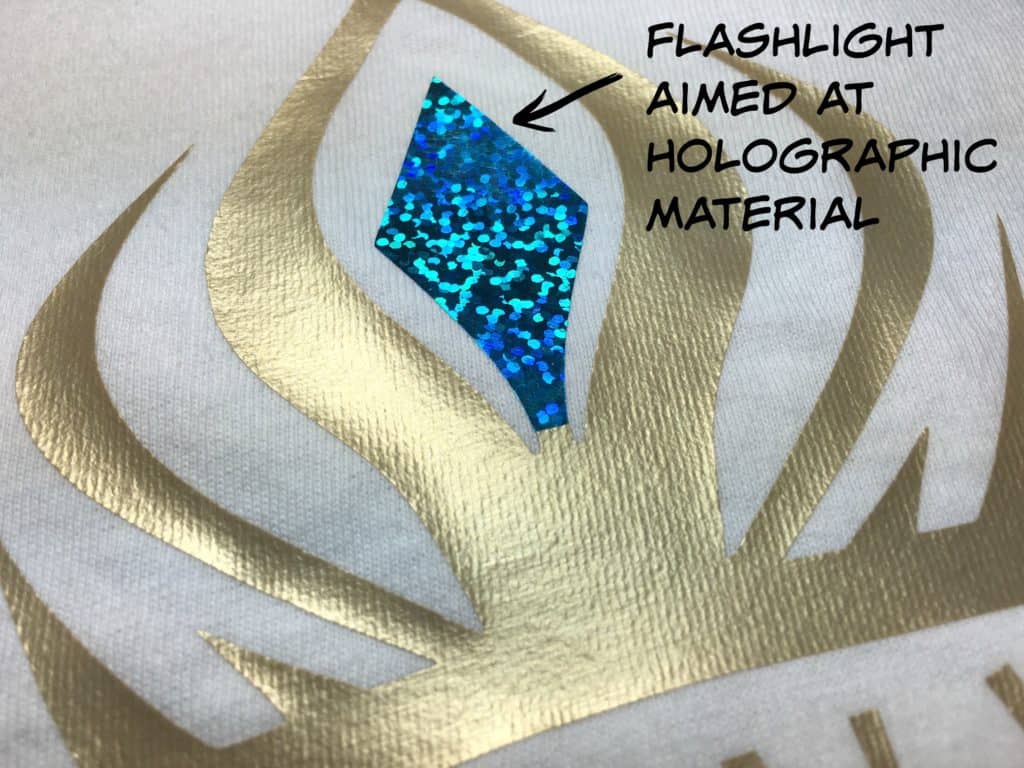
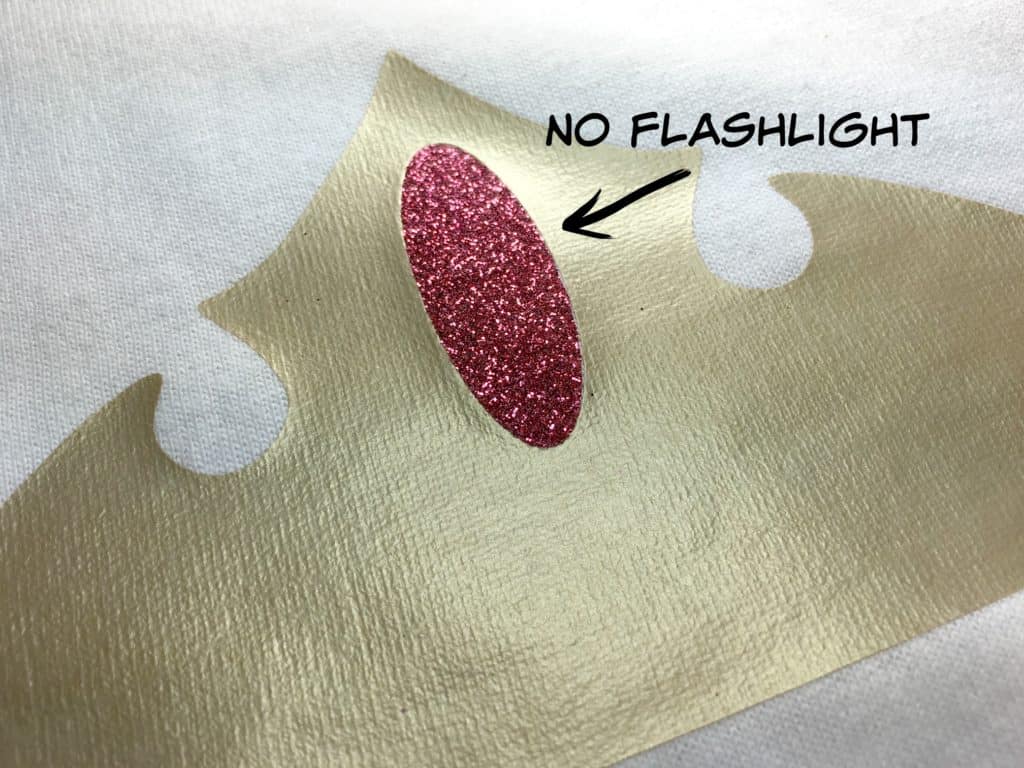
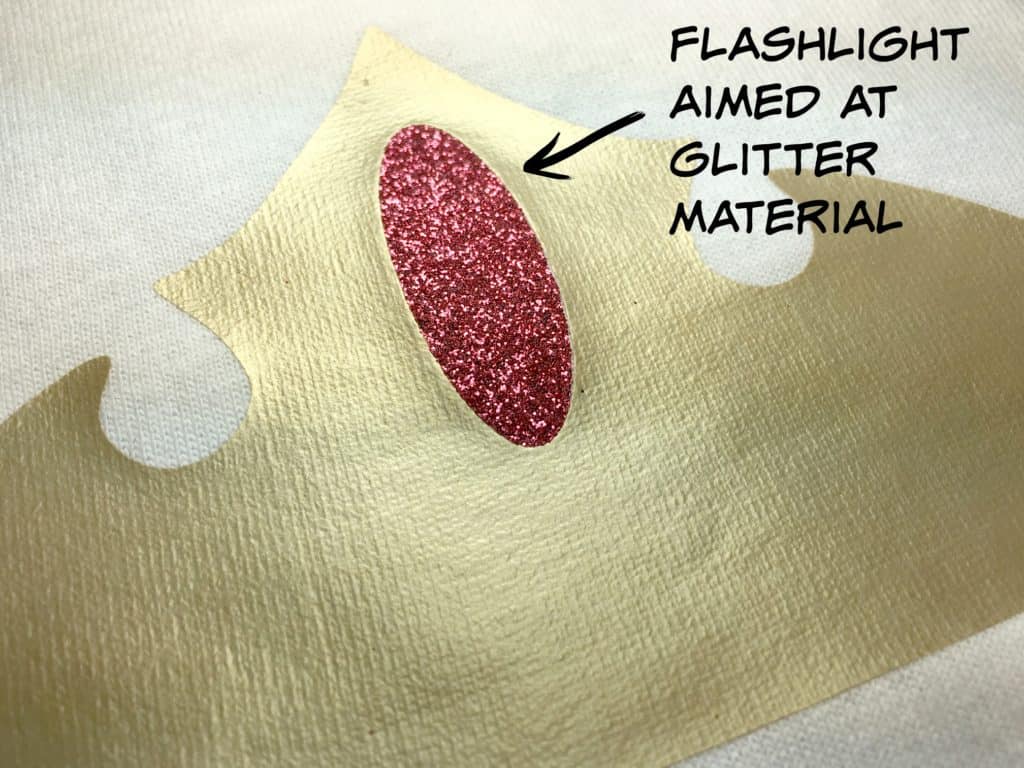
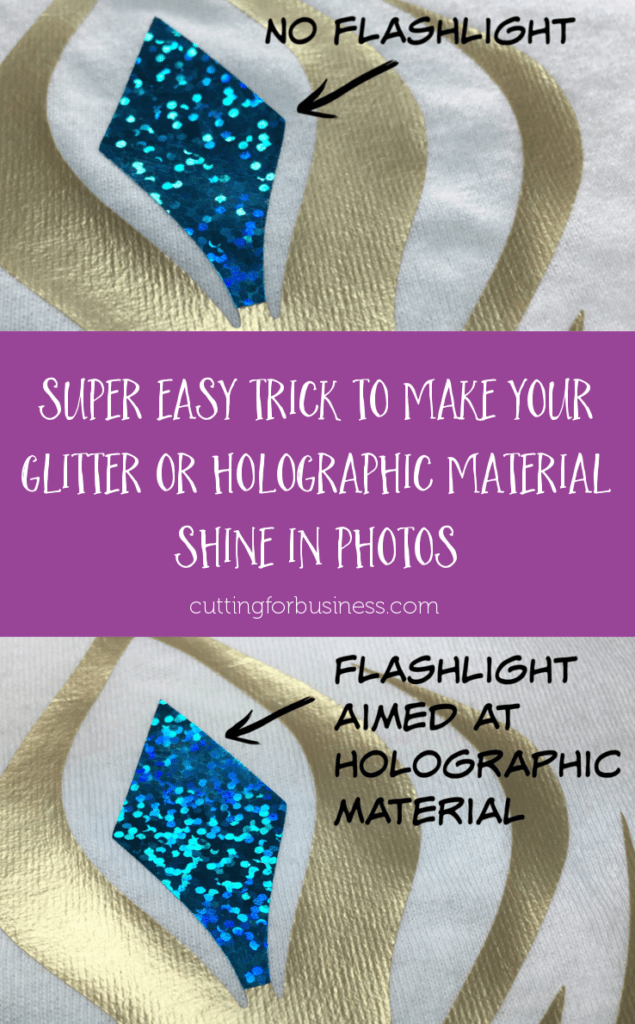
    Super, secret trick: Add more light! What I usually do is hold a flashlight off camera (an non-LED flashlight works best) pointed directly at the specialty material while taking the photograph.

    Examples

    In this first picture, you can clearly see the holographic material (it’s Siser’s holographic aqua heat transfer material), but it’s got several sections that are dark and dull.

    The Secret to Photographing Glitter and Holographic Material for Silhouette Cameo and Cricut crafters - by cuttingforbusiness.com

    When I shine a flashlight onto the material, it brightens and the dark, dull sections shine! Pretty neat, huh?

    The Secret to Photographing Glitter and Holographic Material for Silhouette Cameo and Cricut crafters - by cuttingforbusiness.com

    You can see the same thing happen below in this photo of glitter heat transfer vinyl (it’s Siser’s blush glitter heat transfer material). The glitter appearance is overall dull and dark in sections.

    The Secret to Photographing Glitter and Holographic Material for Silhouette Cameo and Cricut crafters - by cuttingforbusiness.com

    When I shine a flashlight onto the glitter, it brightens up the glitter and you can see each of the glitter specks!

    The Secret to Photographing Glitter and Holographic Material for Silhouette Cameo and Cricut crafters - by cuttingforbusiness.com

    Photographing a larger product? Grab a garage worklight, a photography spotlight, or a larger lamp to shine on the specialty material. Just an easy way to brighten up your up photos with holographic or glitter designs!

    Save this post to Pinterest and then try it out:

    The Secret to Photographing Glitter and Holographic Material for Silhouette Cameo and Cricut crafters - by cuttingforbusiness.com

  • How to Create Professional Quality Photo Mockups (No Photoshop Needed!)

    Before we get back to business on the blog; myself, Will, and the kids wanted to extend an extra thank you for all the prayers, well wishes, and donations our family has received for our dog Ollie. If you missed the news, our rescue dog, Ollie, was hit by a car at the start of our kid’s birthday celebration on Saturday. To read the whole story, or make a donation click here. Now, onto business as usual.

    I’ve shared how to do mockups on the blog using your own photos, and I’ve covered how to use stock photos in your small business. Today, I’m sharing an awesome website that I recently stumbled upon to create professional quality mockups – without Photoshop or fancy software.

    Here’s an example I made:

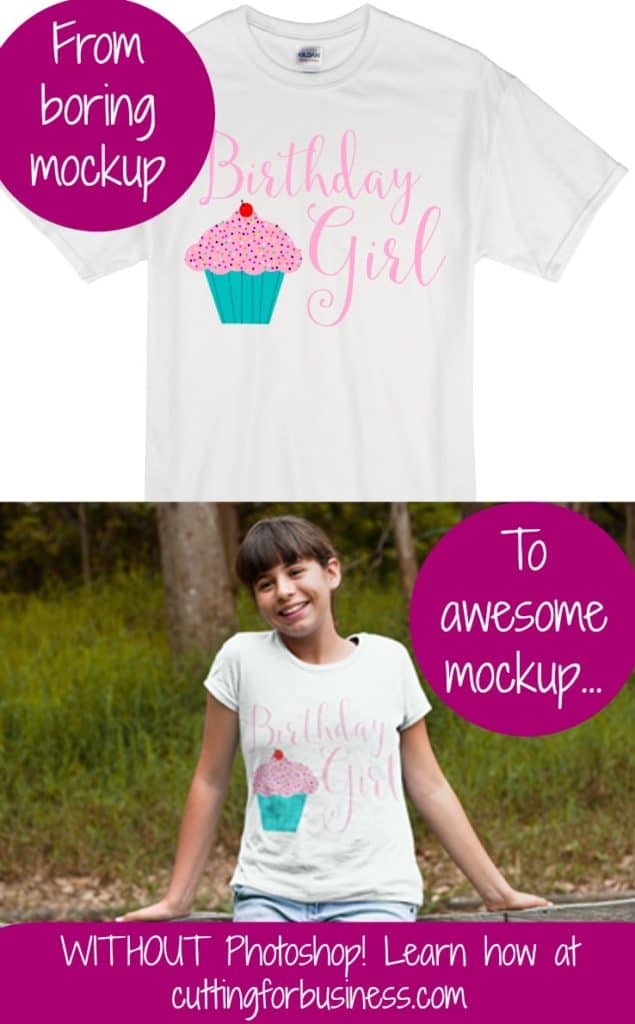
    This is a Silhouette Studio mockup. Mockups like these are used all over Etsy. This mockup is good, but it is stale and the design is clearly laid onto the shirt in a photo program.

    How to Create Professional Quality Photo Mockups (No Photoshop Needed!) - Great for Silhouette Cameo or Cricut small business owners - by cuttingforbusiness.com

    Here’s a mockup I made using Place It. The design looks like it was naturally placed and there’s nothing better to sell your product than a live person wearing it.

    How to Create Professional Quality Photo Mockups (No Photoshop Needed!) - Great for Silhouette Cameo or Cricut small business owners - by cuttingforbusiness.com

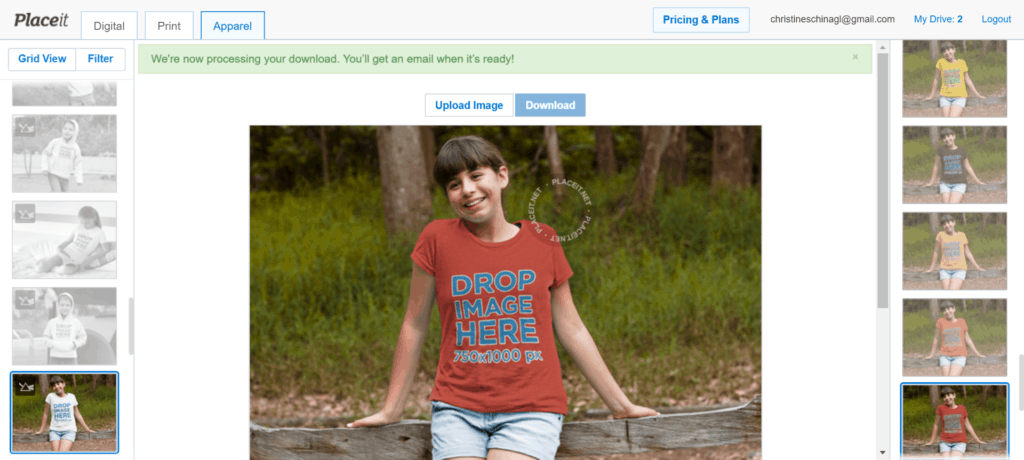
    Don’t want a plain white shirt and need more color options? You got it – this photo is offered in 36 different colors!

    Here’s one of them:

    How to Create Professional Quality Photo Mockups (No Photoshop Needed!) - Great for Silhouette Cameo or Cricut small business owners - by cuttingforbusiness.com

    And a screenshot of more color options (right hand side):

    How to Create Professional Quality Photo Mockups (No Photoshop Needed!) - Great for Silhouette Cameo or Cricut small business owners - by cuttingforbusiness.com

    Pretty awesome, huh? I don’t know about you, but I am pretty sure that the photo realistic mockup will look better in an Etsy listing photo! Place It offers mockups for a wide variety of products including: tee shirts, sweatshirts, aprons, hats, leggings, phones, computers, banners, beer bottles, coffee mugs, posters, wine bottles, and much more.

    What’s the Cost of Place It?

    Cost varies for different sized photos and inexpensive plans are available ranging from $12 and up.

    Wait, one more thing you need to know!

    Now, you are going to need a hack if you design in Silhouette Studio. Ideally, you will want a photo with a transparent background in .png format. Unfortunately, Silhouette Studio will not allow you to save as .png. I’m not one to pull out expensive software, so here is what I’ve been doing:

    1. Design and save as a .studio3 file in Silhouette Studio.
    2. Visit this link and convert your .studio3 file to .svg, then download it. (I’ve done a previous post on this converter that you can read here.)
    3. Visit this link and convert your .svg file to .png, then download it. You are ready to head to Place It and create your mockup!

    If you use another method to convert to .png, feel free to use it.

    I can’t wait to see your professional quality mockups!

    Save this post to Pinterest so you can try it out:

    How to Create Professional Quality Photo Mockups (No Photoshop Needed!) - Great for Silhouette Cameo or Cricut small business owners - by cuttingforbusiness.com

  • 3 Ways to Protect Your Product Photos without a Watermark

    I’ll be honest and blunt: Crafters and companies that steal other crafter’s photos suck. And unfortunately, this runs rampant in the craft business world.

    We, as sellers, need to try to protect our product photos. One way to protect photos is using a watermark. However, not everyone likes to use watermarks.

    3 Ways to Protect Your Product Photos without a Watermark - cuttingforbusiness.com

    3 Reasons to Not Watermark Your Product Photos

    1. Easy to Remove. In our technology driven world, there are Facebook Groups devoted to removing watermarks, apps to remove watermarks, and tutorials all over the internet on how to remove watermarks.
    2. Limits Visibility. If you use a watermark on photos while selling on certain marketplaces it can affect your ability to advertise, as well as the visibility in the search results.
    3. Requires Photo Editing. Adding a watermark to product photos takes additional time and photo editing skills.

    3 Alternatives to Watermarking Product Photos

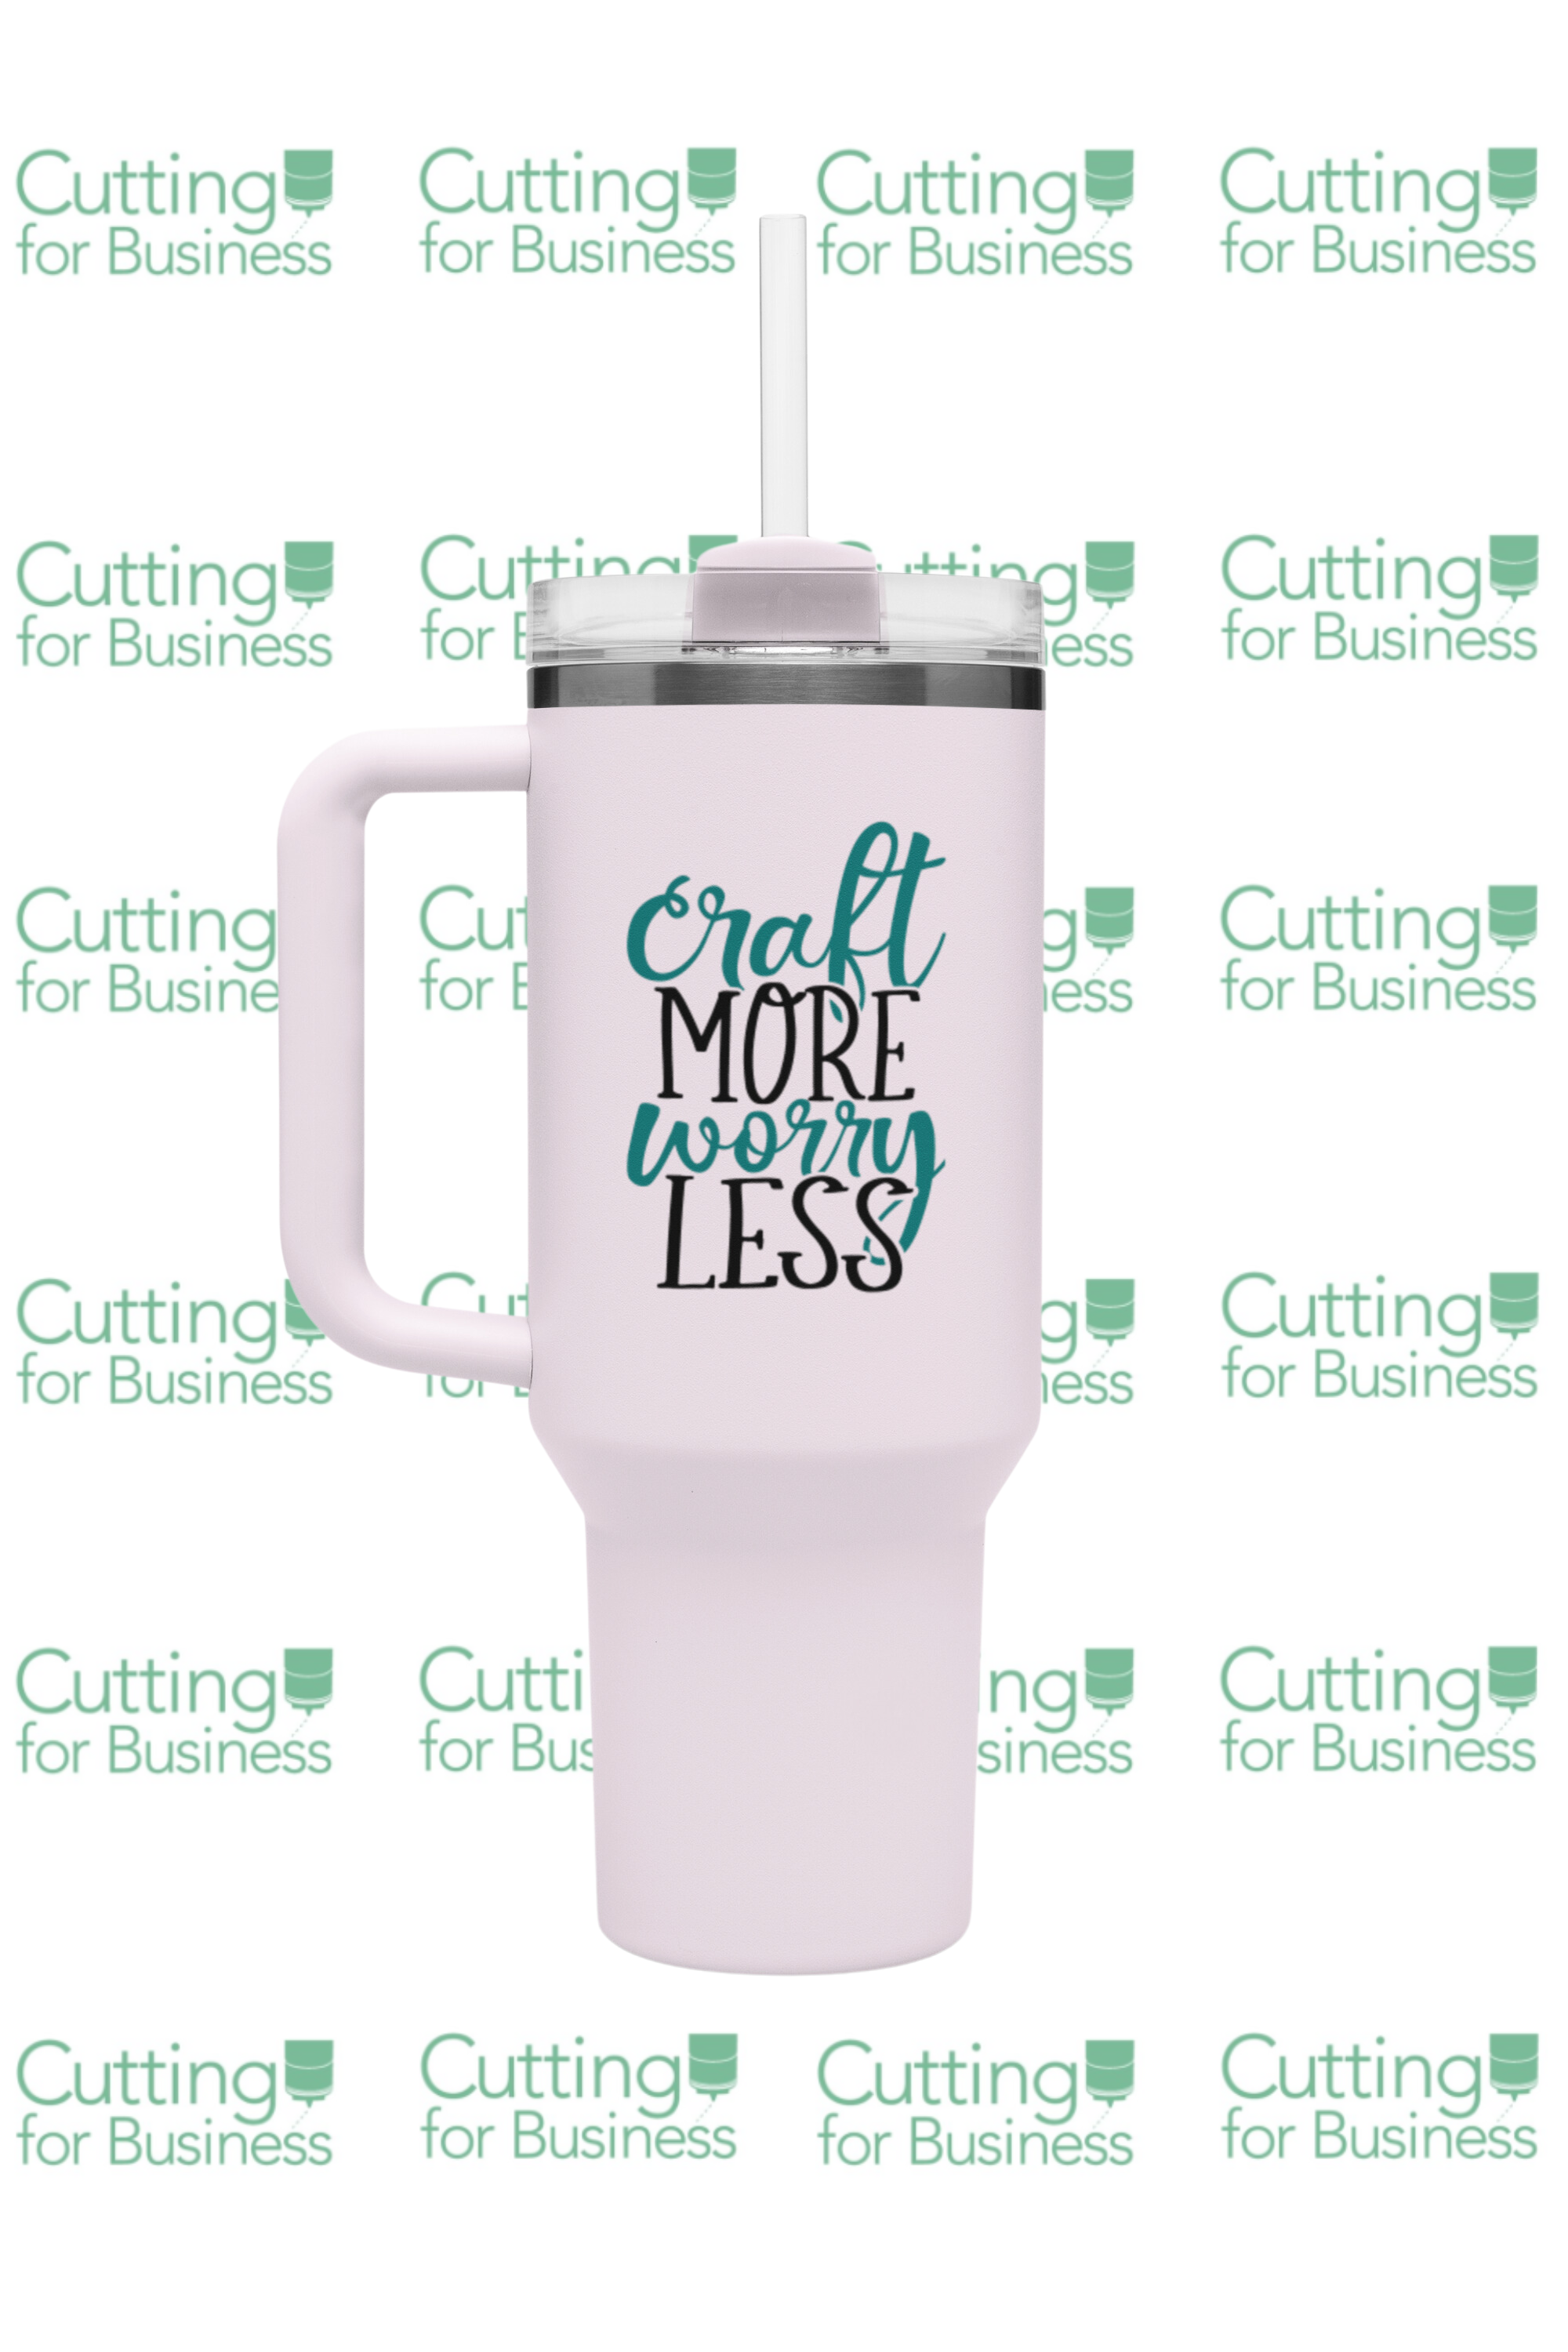
    Rather than use a watermark on your product photo, consider including a branded product in your product photo. This could be as simple as putting your business card near the shirt you are photographing or creating a customized background with your business name and logo to take product pictures in front of. Let’s look at a few examples.

    Example 1 – Use a Branded Background

    Instead of a watermark, invest in a branded background. There are a few ways to accomplish this.

    Use a Digital Background

    For this, you would take your product photo, remove the background (or use a green screen), and use a photo editing program to digitally add your branded background.

    How to Protect Your Product Photos without a Watermark - Example 1 - cuttingforbusiness.com.

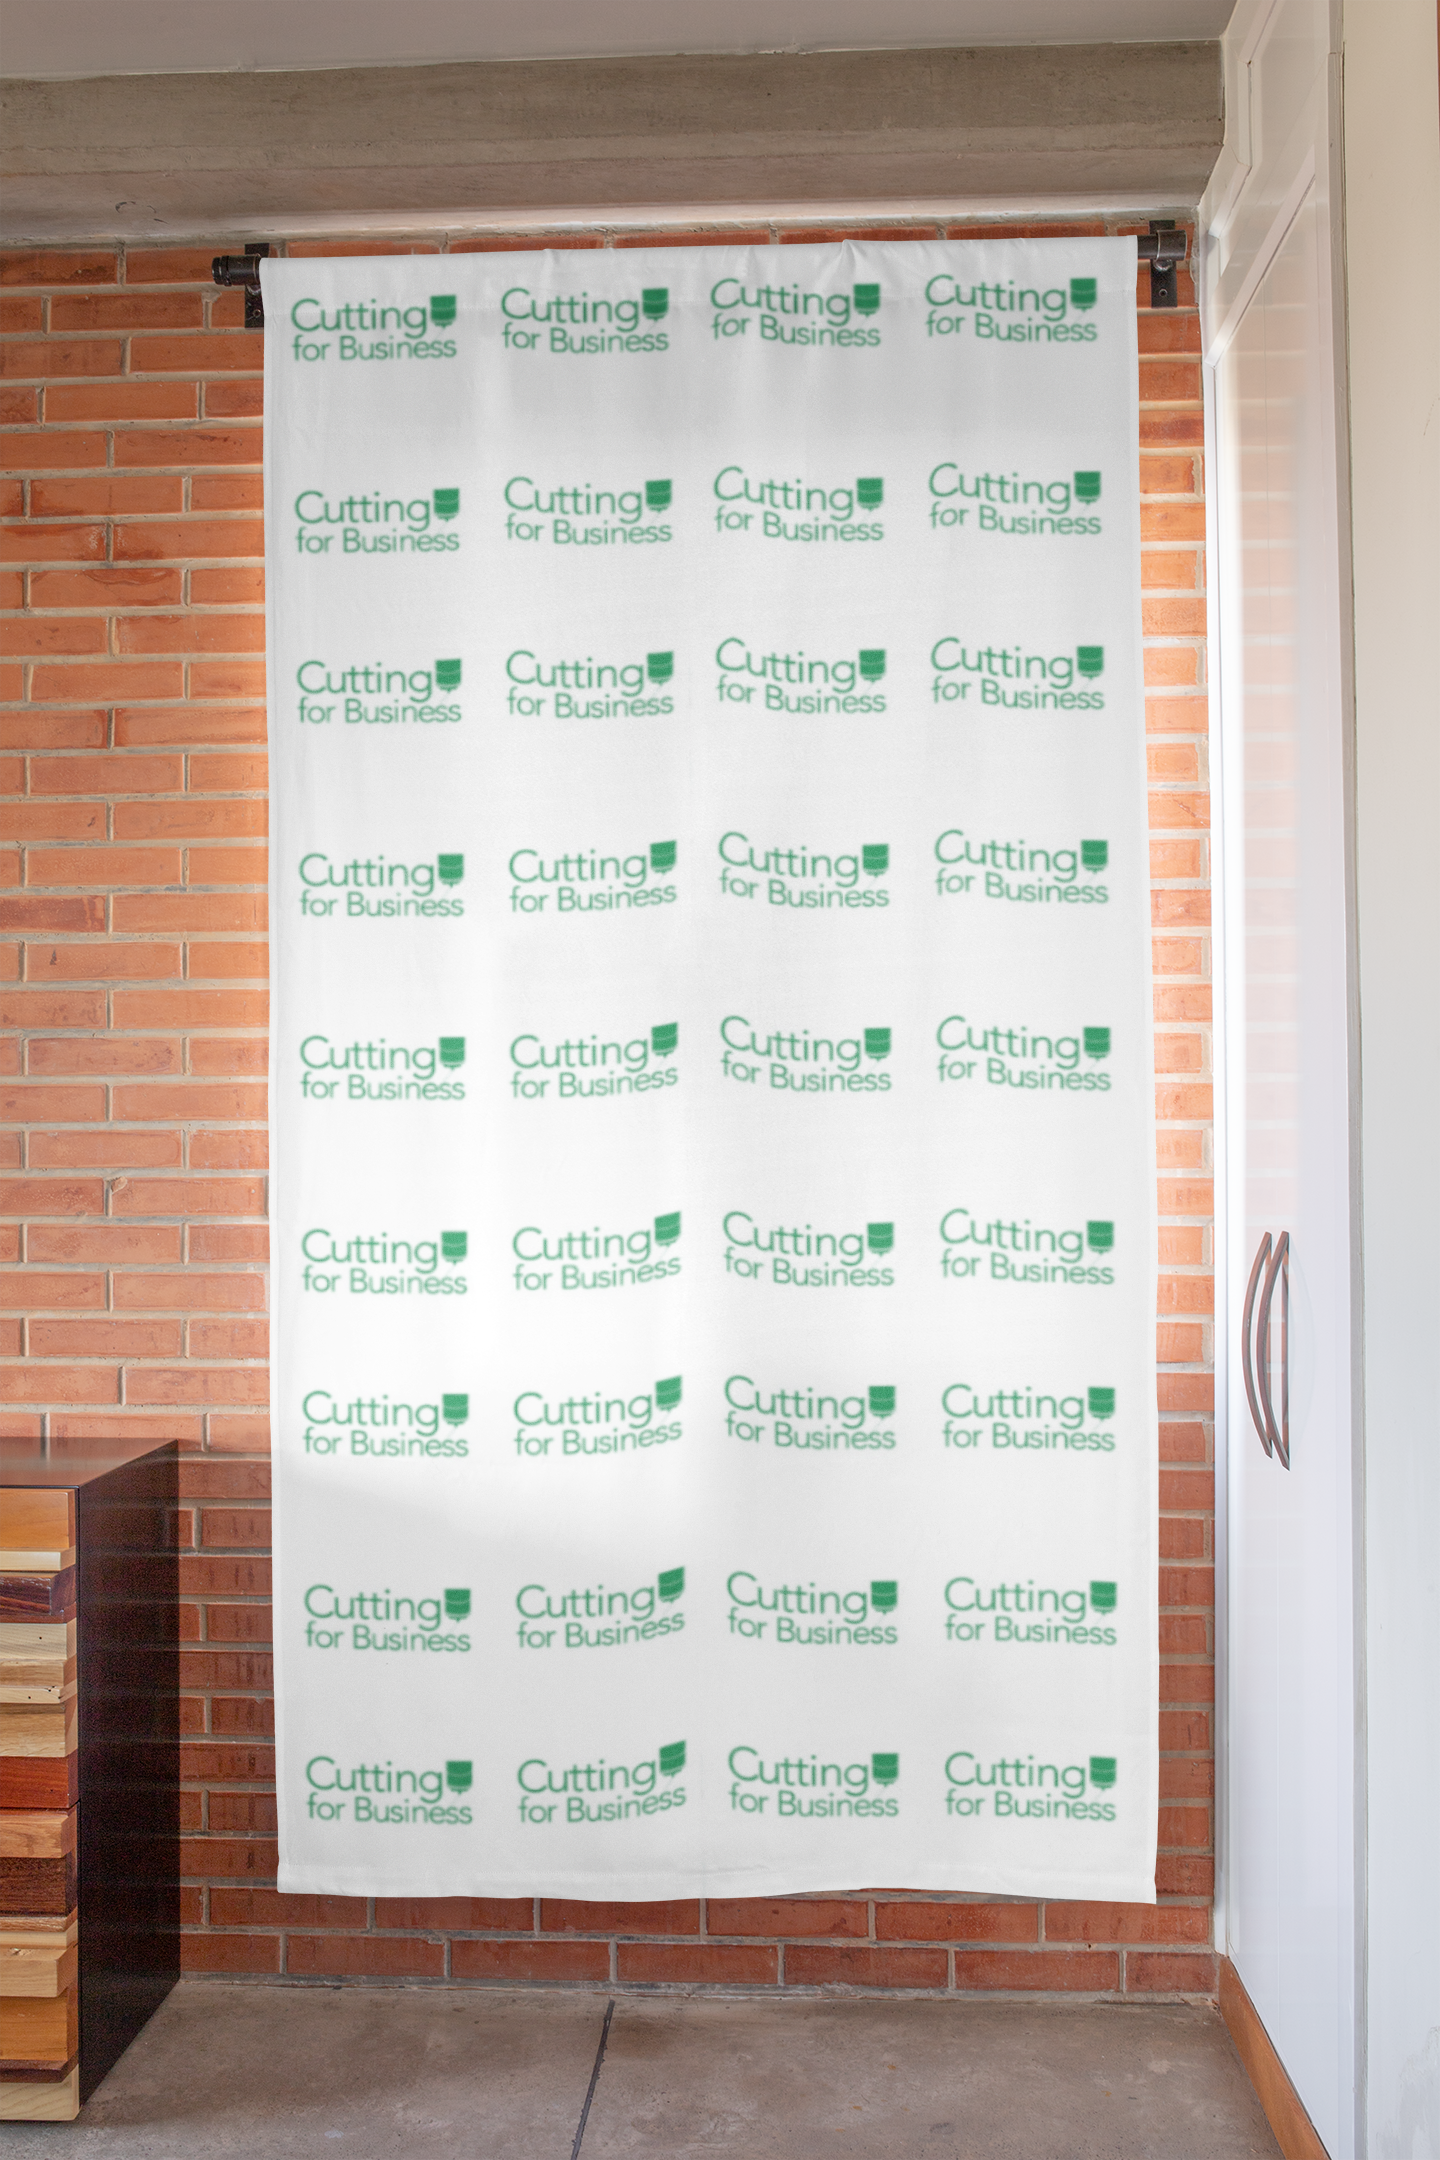
    Use a Custom Printed Background

    You can create your own branded background by ordering custom fabric with your logo on it. I’ve previously used Spoonflower, but you can order custom fabric online from several vendors.

    Then, photograph your products in front of the background.

    How to Protect Your Product Photos without a Watermark - Example 2 - cuttingforbusiness.com.

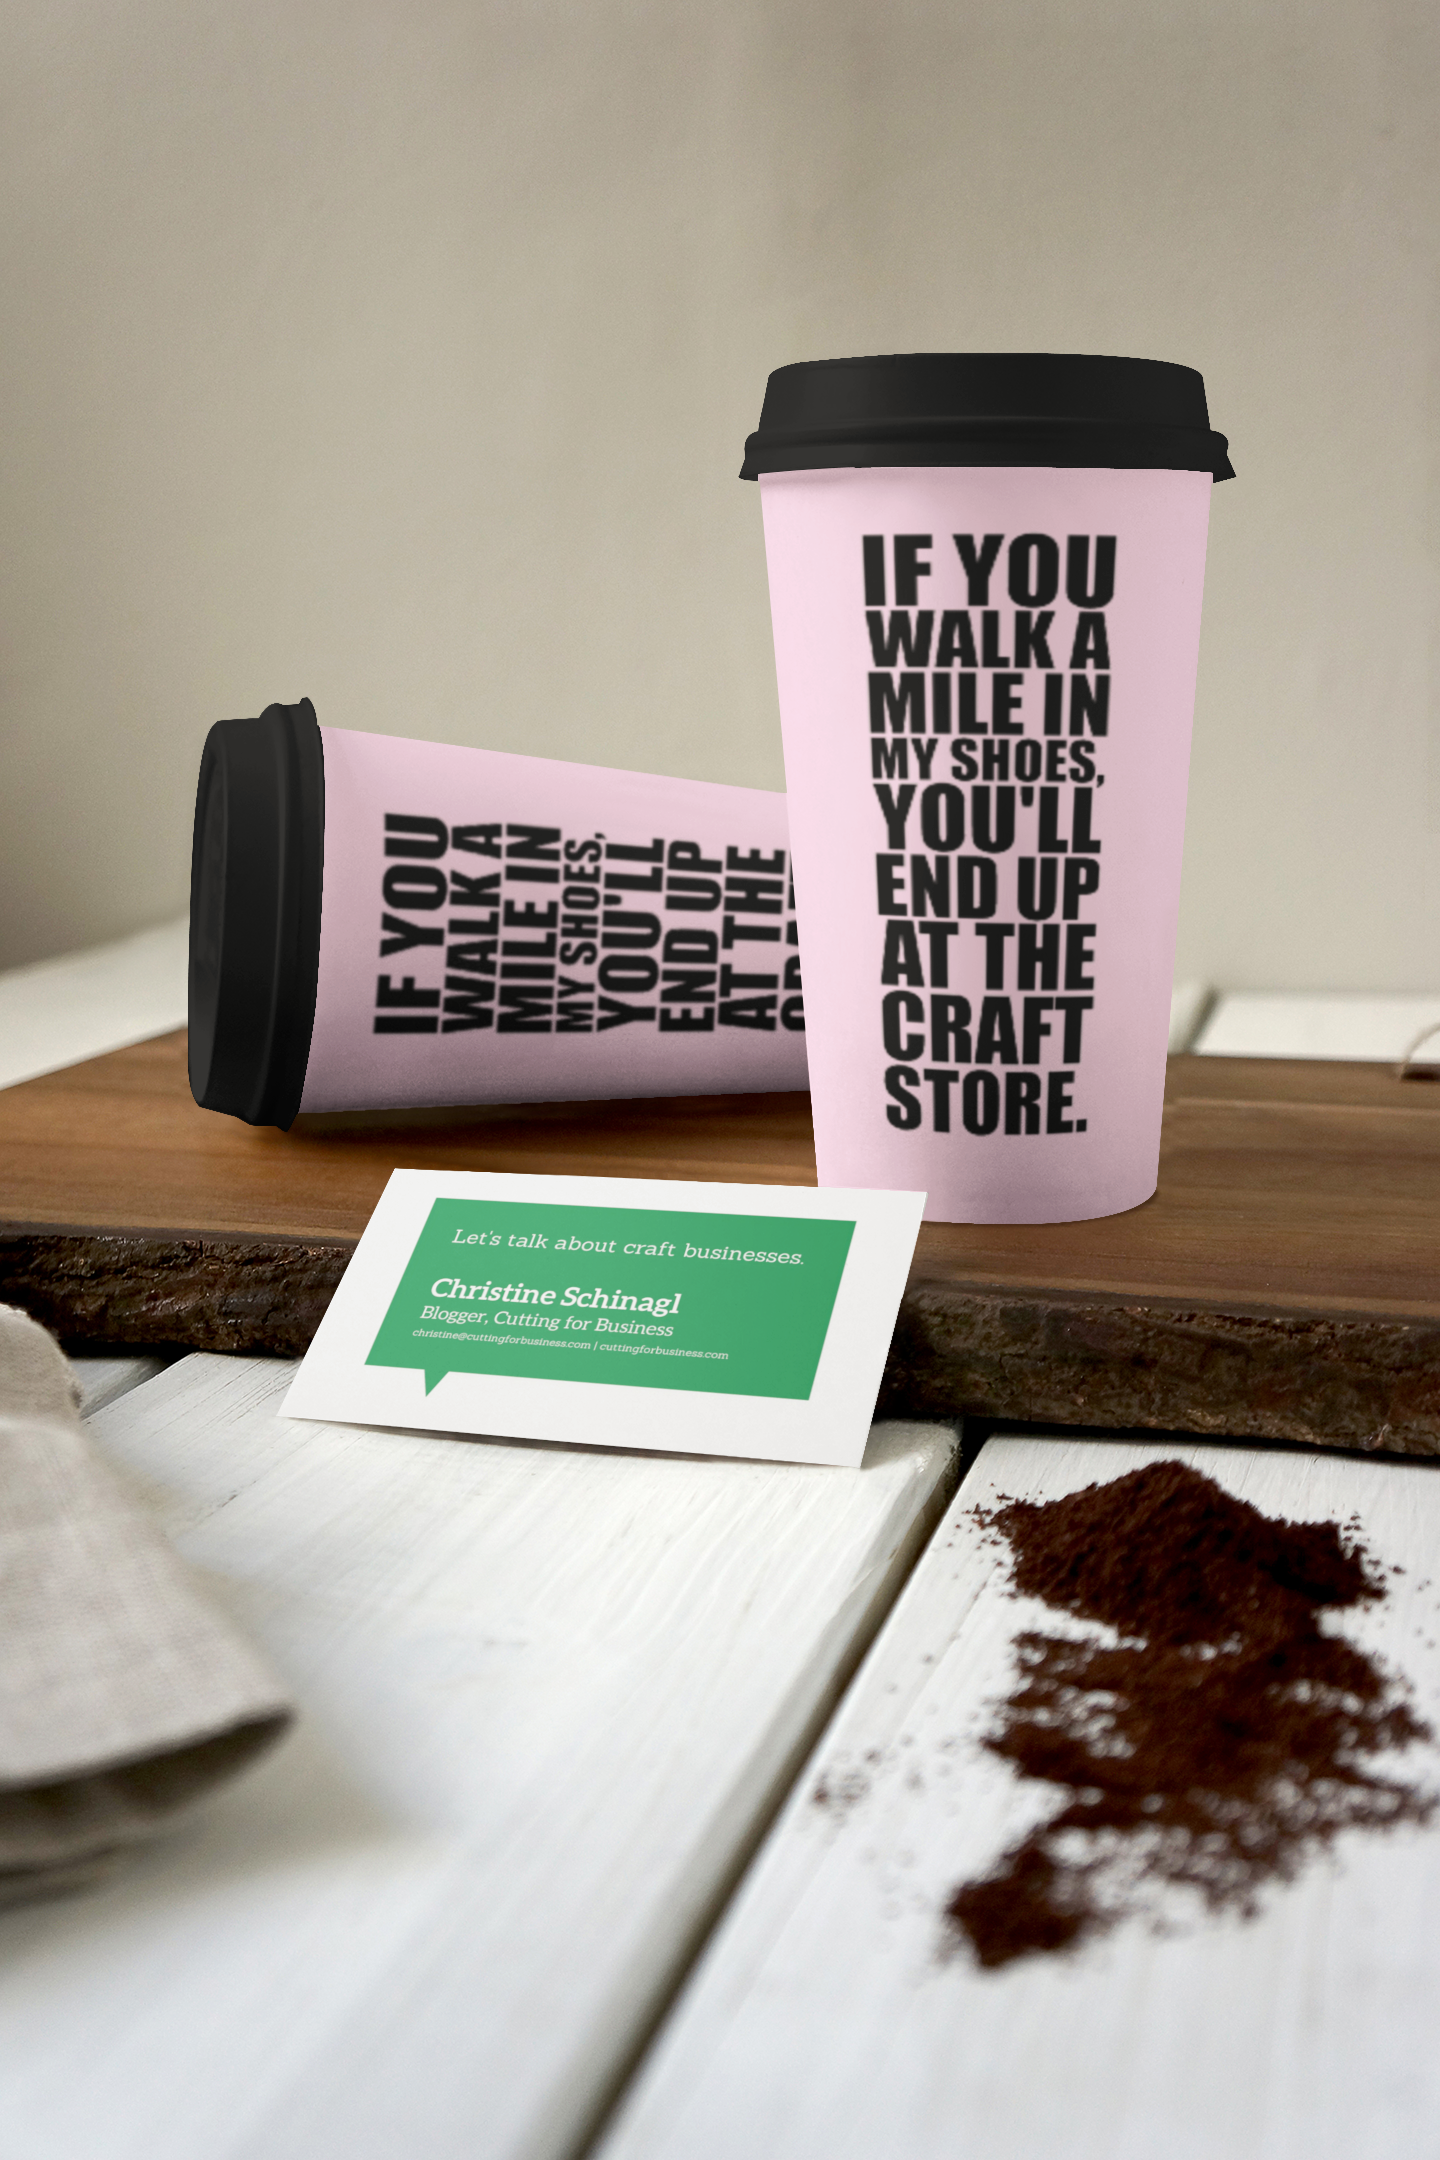
    Example 2 – Use a Business Card or Branded Bag

    Another way to protect your product photos without a watermark is to put a business card or branded bag into your product photo.

    How to Protect Your Product Photos without a Watermark - Example 3 - cuttingforbusiness.com.

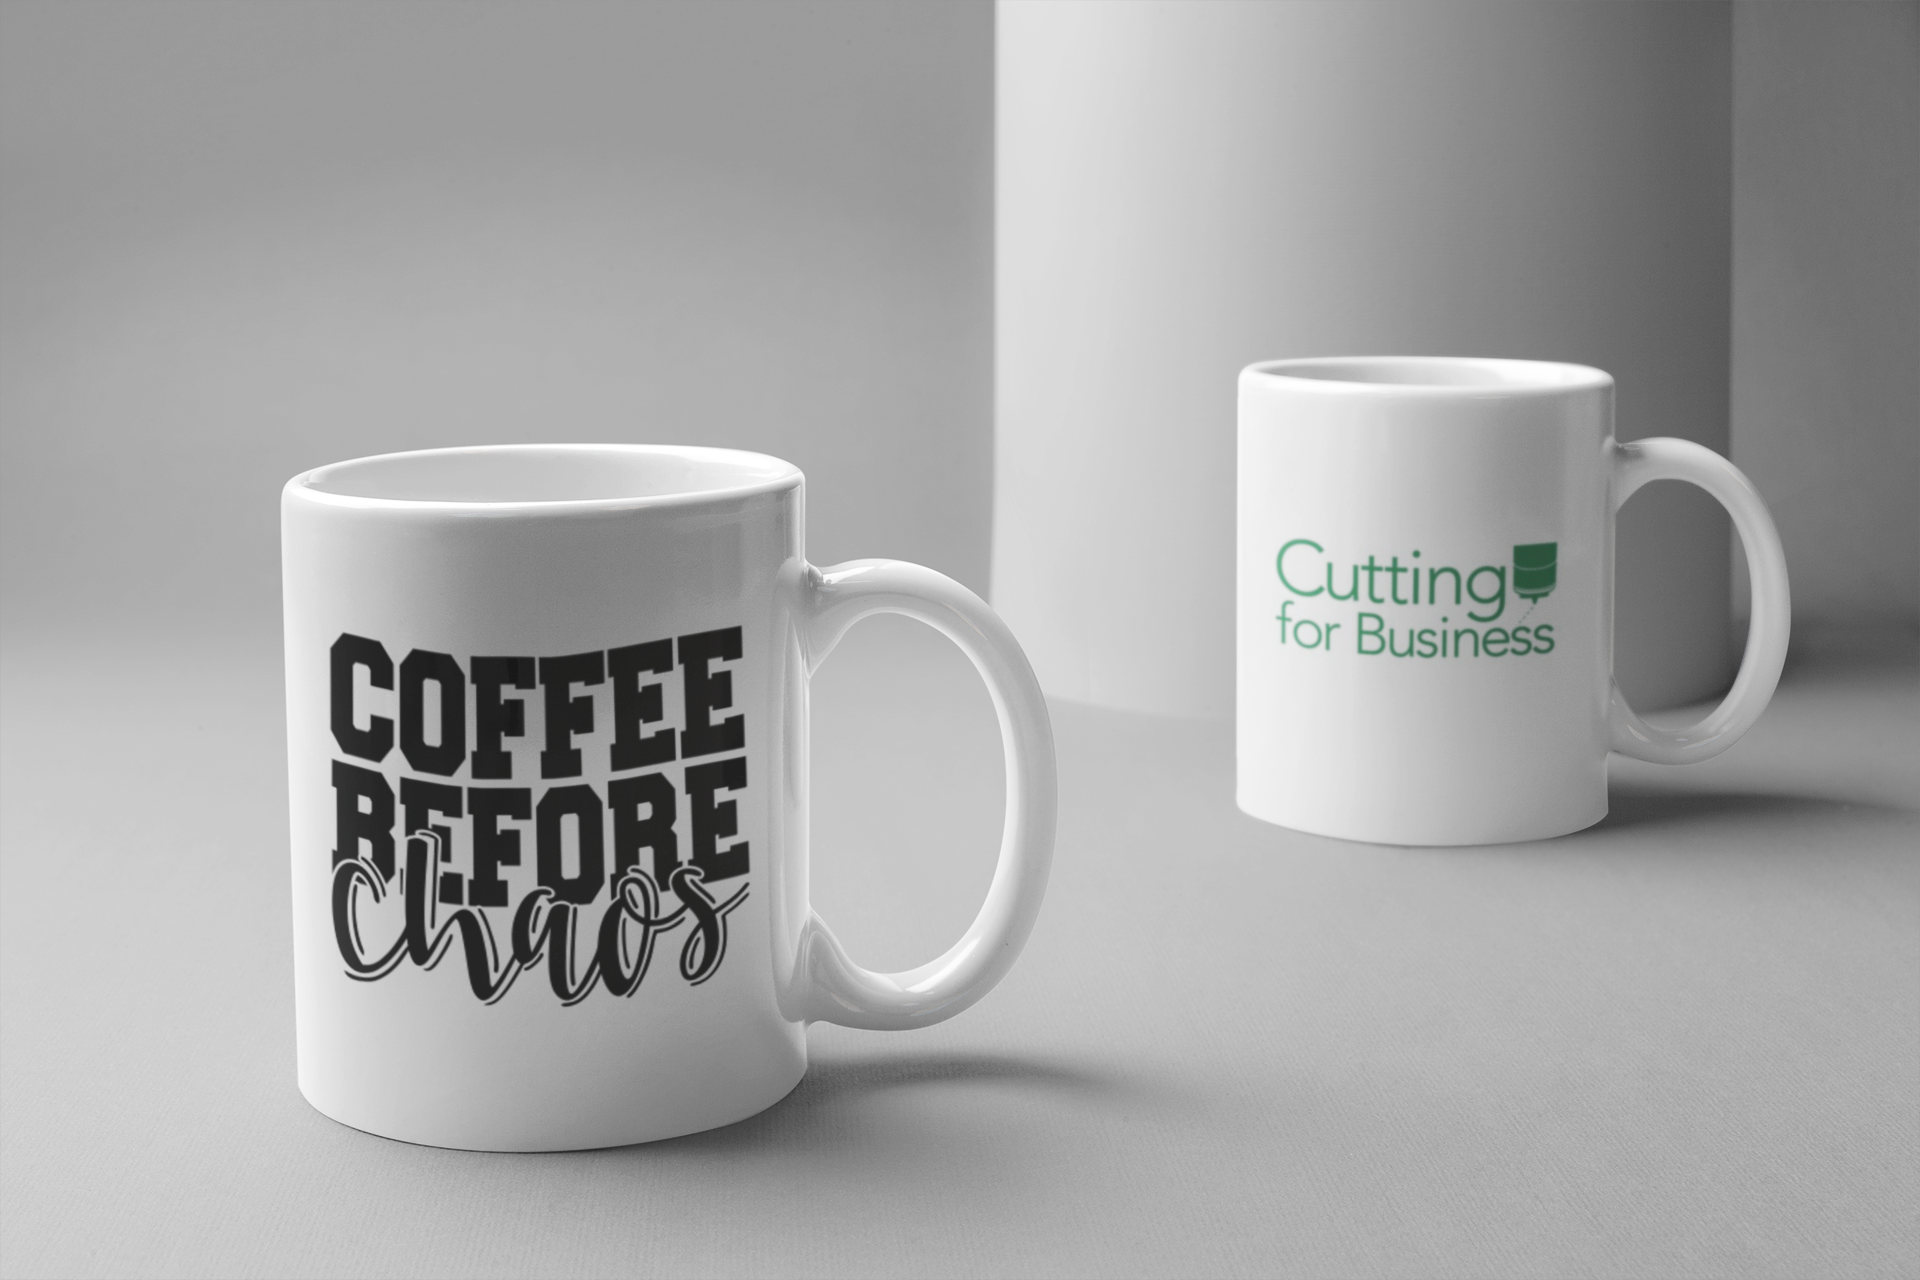
    Example 3 – Using a Branded Product

    If you make and sell similar products often, make a product with your logo on it and put it behind your product for sale. For example, in the photo below, I’m selling the coffee mug in front but have my logo on the coffee mug in the back.

    How to Protect Your Product Photos without a Watermark - Example 4 - cuttingforbusiness.com.

    Do’s and Don’ts of Watermarking Product Photos

    If you’d prefer to watermark your products, read this article: Do’s and Don’ts of Watermarking.

    In case you are wondering, many of the mockup examples shown above were made with a generator called Placeit.