Category: Reviews

  • Tutorial: How to Use Pressing Pillows in Your Heat Press

    Heat press users will know that some items are more difficult to press such as infant bodysuits, shirts with pockets, or items with zippers or thick seams. In the past, I’ve folded a hand towel and placed it inside the garment that I am pressing a design onto. This method works okay, but I’ve had some lifting on a few of my designs because the pressure was not even. I recently found out that there is a better method – using heat pressing pillows. Lou, the inventor of the Tee Square It (which I reviewed here and here), also manufactures sof-fusion heat press pillows. His company, Heat Press Essentials, graciously provided a set of pillows to me to review in this post.

    How to Use the Sof-Fusion Heat Press Pillows

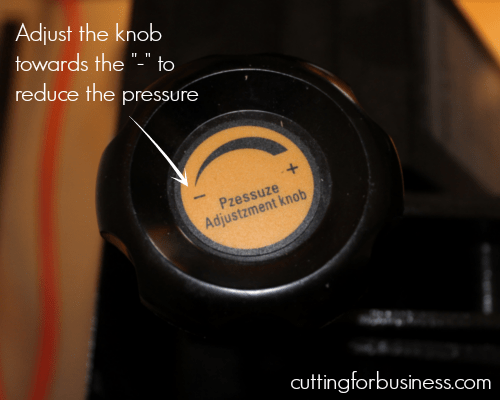
    1. Adjust the pressure by turning the pressure adjustment knob on your heat press towards the minus sign (or similar, depending on your model). My heat press model is a PowerPress which I picked up on Amazon here. It works great, I’ve never had a problem – besides some typos, LOL! Tutorial: How to Use Pressing Pillows in Your Heat Press - Great for Silhouette or Cricut crafters - by cuttingforbusiness.com
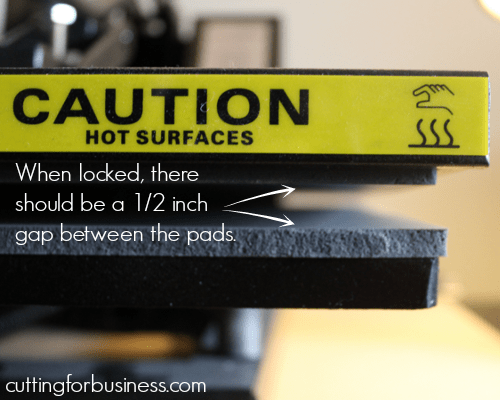
    2. There should be about a half inch gap between your heat press pads when the heat press is locked down. Tutorial: How to Use Pressing Pillows in Your Heat Press - Great for Silhouette or Cricut crafters - by cuttingforbusiness.com
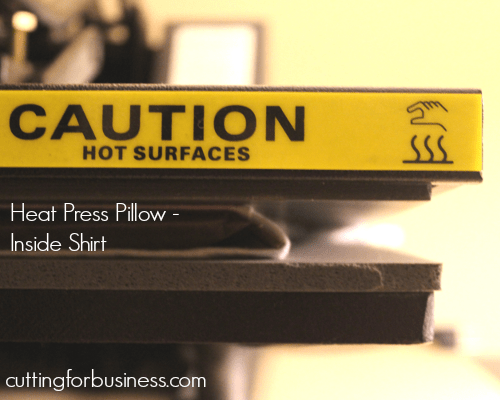
    3. Insert the heat press pillow inside the garment to be pressed and pre-press the garment for a few seconds. Tutorial: How to Use Pressing Pillows in Your Heat Press - Great for Silhouette or Cricut crafters - by cuttingforbusiness.com
    4. Add your design and press at the necessary time and temperature with a teflon sheet.

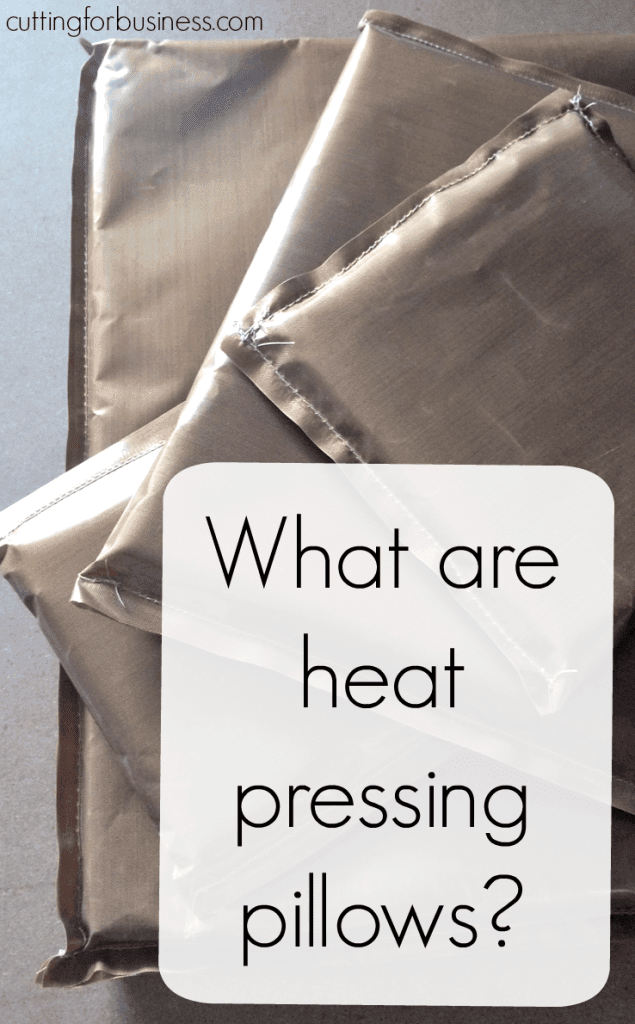
    The pressing pillow set I received from Lou has 4 different pillow sizes: 6 x 6 (infant, toddler, and bags), 5 x 16 (sleeves and pant legs), 10 x 10 (kids and smaller adult garments), and 15 x 15 (large adult garments). The pillows are reusable, made with a foam core, and covered with teflon material. They can be purchased at this link on Amazon. If you press a lot of items in your Silhouette or Cricut business, I think the cost is reasonable because it makes difficult jobs easier.

    If you don’t have a heat press yet, or if you are wondering if you need one – hurry over to this post.
    Tutorial: How to Use Pressing Pillows in Your Heat Press - Great for Silhouette or Cricut crafters - by cuttingforbusiness.com

  • Tutorial: How to Use the Logo It to Line Up Heat Transfer Vinyl Chest Designs

    Today on Cutting for Business, we are going to wrap up the tutorials related to lining up heat transfer vinyl (HTV). If you remember a few weeks ago, I introduced readers to the Tee Square It which will help you line up your HTV designs perfectly and quickly. (You can find those tutorials here and here.) To conclude this series, I will show you how to use the Logo It to line up chest or pocket designs. My Logo It was provided at no cost from Heat Press Essentials.

    How to Use the Logo It (Method 1)

    1. Pre-press your shirt.
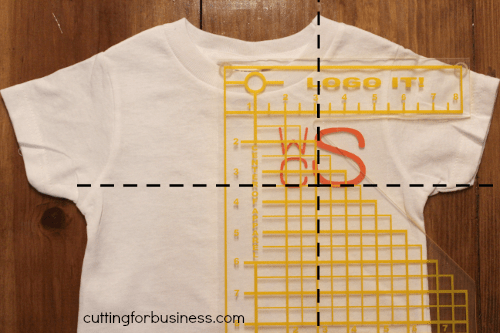
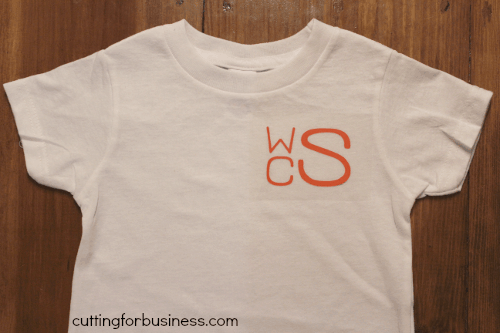
    2. Place your design onto the shirt in the position you will press it. The actual placement of your chest design will vary depending on the size of the shirt. Tutorial: How to Use the Logo It to Line Up Heat Transfer Vinyl Chest Designs by cuttingforbusiness.com
    3. Place the Logo It over your design by lining up the center mark with the center line of your shirt. To find the center line of your shirt, use the built in ruler at the top of the Logo It tool.
    4. Take note of the placement of your design. In the example below, the large S in my design lines at the 3″ mark vertically and the 3.5″ mark horizontally. When I do the next shirt, I will be able to replicate the exact placement in only seconds. If you are doing a large order, I suggest you record the measurements somewhere that you can find several months later. This can help you if the company calls for 10 more shirts 3 months later, you’ll be able to replicate them quickly and exactly!Tutorial: How to Use the Logo It to Line Up Heat Transfer Vinyl Chest Designs by cuttingforbusiness.com
    5. Remove the Logo It and press your design.

    How to Use the Logo It with the Tee Square It (Method 2)

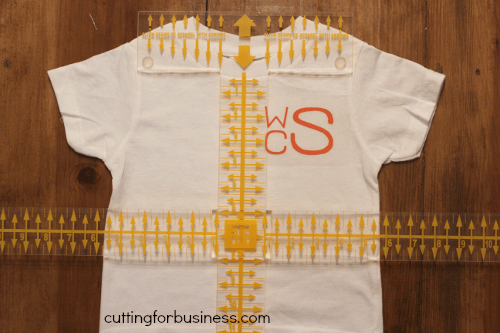
    This method is the same as above, but you use your Tee Square it to find the exact center line of your shirt quickly.

    1. Use the Tee Square It to find the center line of your shirt. Remember, a step-by-step tutorial can be found at this linkTutorial: How to Use the Logo It to Line Up Heat Transfer Vinyl Chest Designs by cuttingforbusiness.com
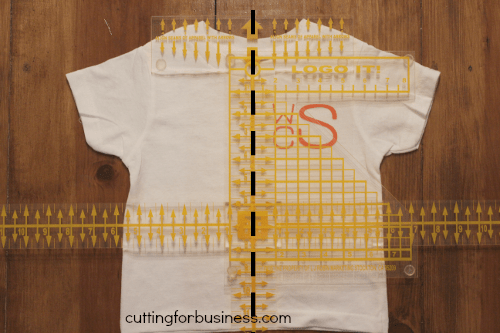
    2. Line up the center line of the Logo It on top of the center line of the Tee Square It. Then, record your measurements for your design. When placing duplicate designs on other shirts, you will be able to line it up in seconds! Tutorial: How to Use the Logo It to Line Up Heat Transfer Vinyl Chest Designs by cuttingforbusiness.com

    If you do a lot of company or team logo shirts, faux pocket designs with heat transfer vinyl, or monogram pocket shirts, I think the Logo It is a good investment and costs around $20. Before you go, I have great news for you! 1) If you are attending the All Things Silhouette Conference in November: I will have Tee Square Its, Logo Its, and heat pressing pillows at my booth for you to try out and buy. This is a great way to save on shipping costs! 2) In the coming weeks, I will have all three tools available online for you to purchase. I will make announcements via social media when they are available. Logo Its, Tee Square Its, and heat press pillows are available in my Etsy shop.

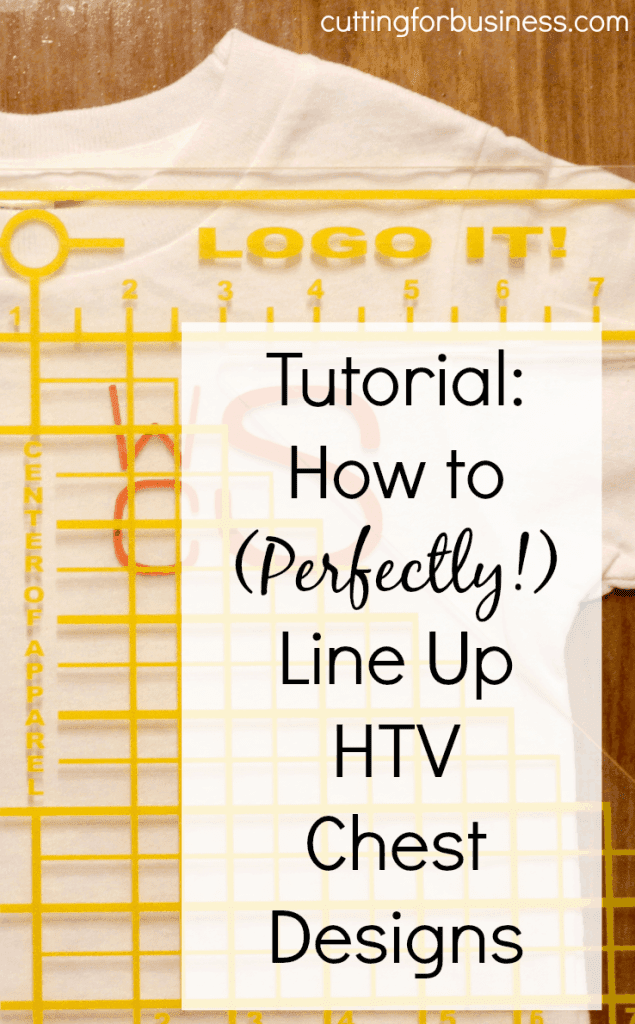
    If this tutorial was helpful, don’t forget to pin it by hovering over the image below.

    Tutorial: How to Use the Logo It to Line Up Heat Transfer Vinyl Chest Designs in your Silhouette or Cricut business by cuttingforbusiness.com

  • CB09 Blade Holder and Blades in Your Silhouette Cameo

    Several readers have written to me asking if I knew how to save money on supplies they use daily – like their Silhouette Cameo blades which wear out fast. Here are two ways to save money on your blades.

    CB09 Blades

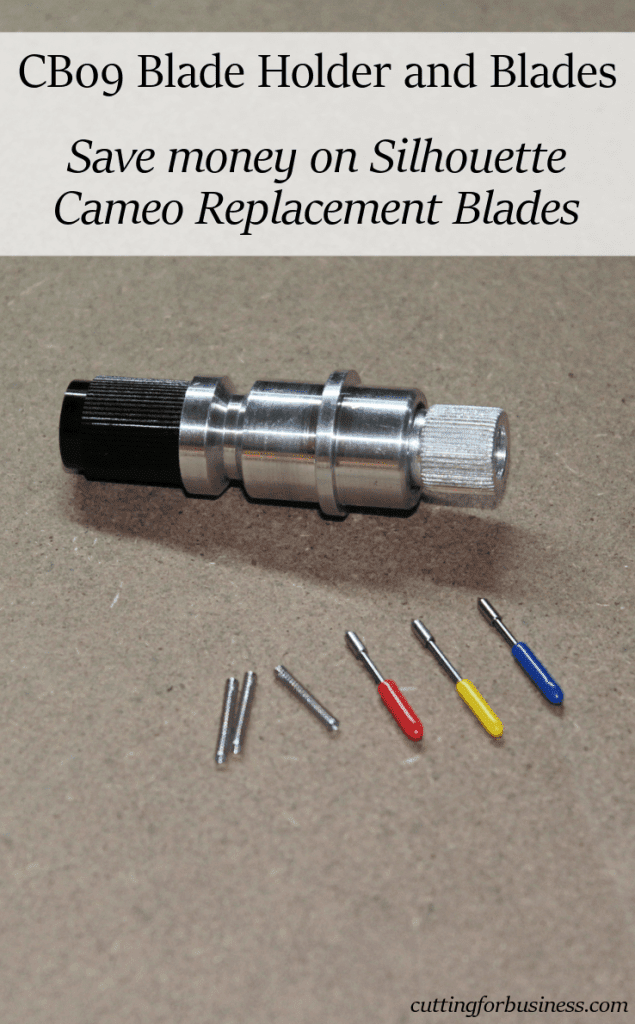
    Use a third party blade and blade holder like the CB09 blades by Graphtec. I personally use CB09 blades in my Silhouette Cameo because they are cheaper and last longer. I pay about $2 per blade for replacement blades. You’ll also need to buy the blade holder once, it should be between $15 and $18 via Amazon or Ebay. CB09 blades come in three different angles: 30, 45, and 60 degrees. The idea is that you should choose a different angle blade depending on the material you are cutting. These are the general guidelines that I follow: 30 degree blade: Good for fabric and heavy duty materials like thin cardboard and leather. More of the blade is in contact with the material than the other blade angles. 45 degree blade: Good everyday blade. This is what I use for most of my cuts including paper and vinyl. 60 degree blade: Cuts the most intricate designs and delicate cuts. I use the 60 degree blade for vellum and freezer paper. The smallest portion of the blade is in contact with the material being cut compared to the other blade angles.

    You can find the CB09 blade holder and blades on Amazon, but they are usually cheaper on Ebay. (See this link for current listings.) Most sellers are located overseas, so plan about 2-3 weeks to receive your purchase.

    CB09 Blade Assembly

    The CB09 blades need to be put inside the blade holder before you use them. Here are instructions on how to do so:

    1. Take your CB09 blade and place it inside the spring.
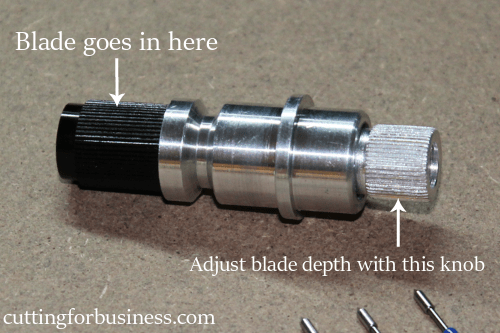
    2. Unscrew the black tip and place the blade with the spring inside the black portion. Screw the black portion back onto the blade holder.
    3. Adjust the blade depth by turning the silver knob at the top of the blade holder.
    4. Place the blade in your Silhouette Cameo and you are ready to go.

    CB09 Blade Holder and Blades in Your Silhouette Cameo by cuttingforbusiness.com

    Quick Tip: To figure out the blade depth when you are first starting with the CB09 blades, you can look up the recommended setting in Silhouette Studio for the material you are cutting. Then, adjust the Cameo blade to that blade depth by setting the blade to the corresponding number. Lastly, holding your CB09 blade holder next to your Cameo blade, set the blade to the same height as the Cameo blade. Use the Silhouette Studio test cut feature to make sure that your CB09 blade cuts well before using it on your project.

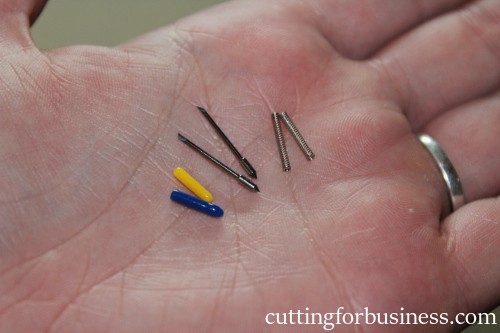
    WARNING: There are a few types of CB09 blades on the market. You’ll want to purchase the blades with colorful caps and springs with them, not the larger ones. As an aside, the caps are not color coded to the blades angle. I’ve ordered from a few different vendors and they do not seem to be standardized (Example: From one seller, the 30 degree blade may have a yellow cap, while another seller may ship the 30 degree blade with the red cap). The blades that you want to order are tiny. Here they are in the palm of my hand to show you a size reference. (I don’t have giant man hands – just average female hands!)

    CB09 Blade Holder and Blades in Your Silhouette Cameo by cuttingforbusiness.com

    Using a Price Watch App on Amazon

    If you are not willing to void your Silhouette Cameo warranty, I totally understand. You should try to stock up on Silhouette Cameo blades when they are on sale at Amazon.com which is often. My favorite way to watch sales on Amazon is to use a price tracking app such as CamelCamelCamel. Basically, you find the product you are interested in buying on Amazon, then you copy the product URL to CamelCamelCamel. You tell CamelCamelCamel what price you want to pay, and they notify you when the product drops to or below that price. The website also offers historical pricing for the product which will help you decide what price to set your alert at. (If you are interested, the highest price on the Silhouette replacement blade on Amazon has been $12.99 and the lowest has been $6.49.) Pricing is currently $7.45, so head to Amazon now if you want to pick up a few extra blades. If you subscribe on Amazon for blades to automatically be sent to you, they are currently priced at $7.08.

    CB09 Blade Holder and Blades in Your Silhouette Cameo by cuttingforbusiness.com

  • Tutorial: How to Use a Tee Square It

    Ever heard of a Tee Square It? Today, I’m teaching you how to use a Tee Square It.

    When you use your Silhouette or Cricut to create shirts for sale, your number one concern should be the quality of your product. When working with shirts, one of the biggest quality issues is lining up the design correctly.

    Can you imagine going through a rack of shirts at your favorite store and each of the same shirt design is lined up different – or maybe even crooked? You probably wouldn’t buy the shirt, and your customers won’t want to either. To help you line up designs, I am introducing you to one of my favorite gadgets – the Tee Square It.

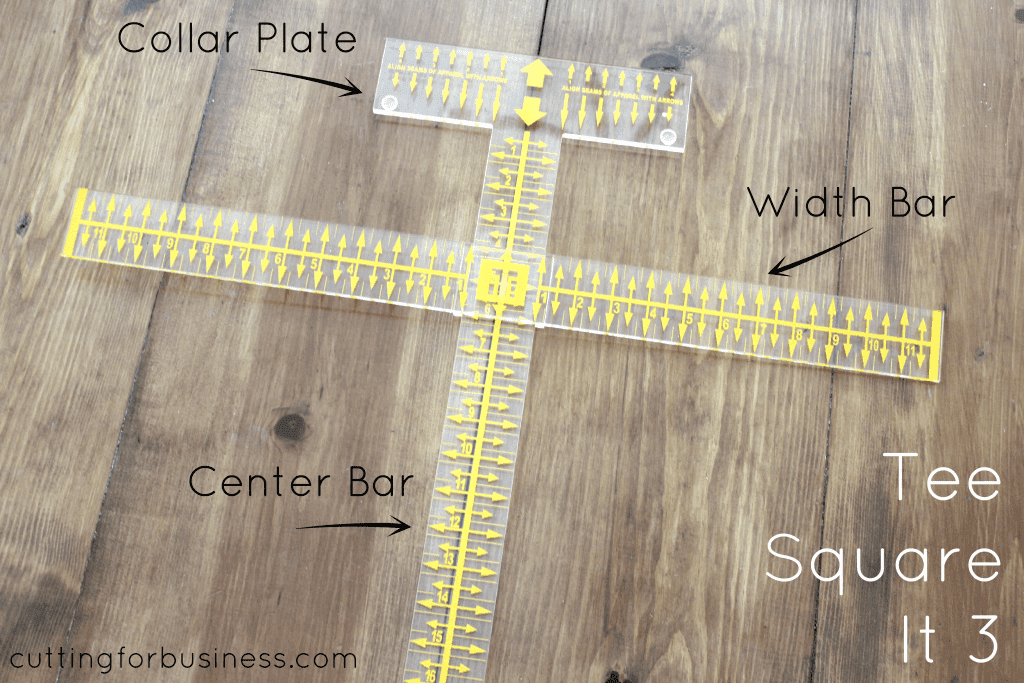
    Note: The Tee Square It 3 has been updated and replaced with the Tee Square It I. It functions the same with minor improvements.

    Tutorial: How to Use a Tee Square It - cuttingforbusiness.com.

    What is a Tee Square It?

    The Tee Square It is a two piece gadget that helps you line up heat transfer vinyl, iron ons, plastisol, rhinestone, stencil, or any other transfer onto your garment. It will save you time and energy in your Silhouette or Cricut based craft business. It will also help improve your product quality, because designs will be properly lined up.

    Tutorial: How to Use a Tee Square It to Line Up Your HTV (Heat Transfer Vinyl) Designs Perfectly (and quickly & easily!) in your Silhouette Cameo or Cricut Business - by cuttingforbusiness.com

    How to Use a Tee Square It

    1. Cut and weed your design, then pre-press your shirt.
    2. Lay your shirt flat. You can do this on your heat press or on a nearby flat surface.
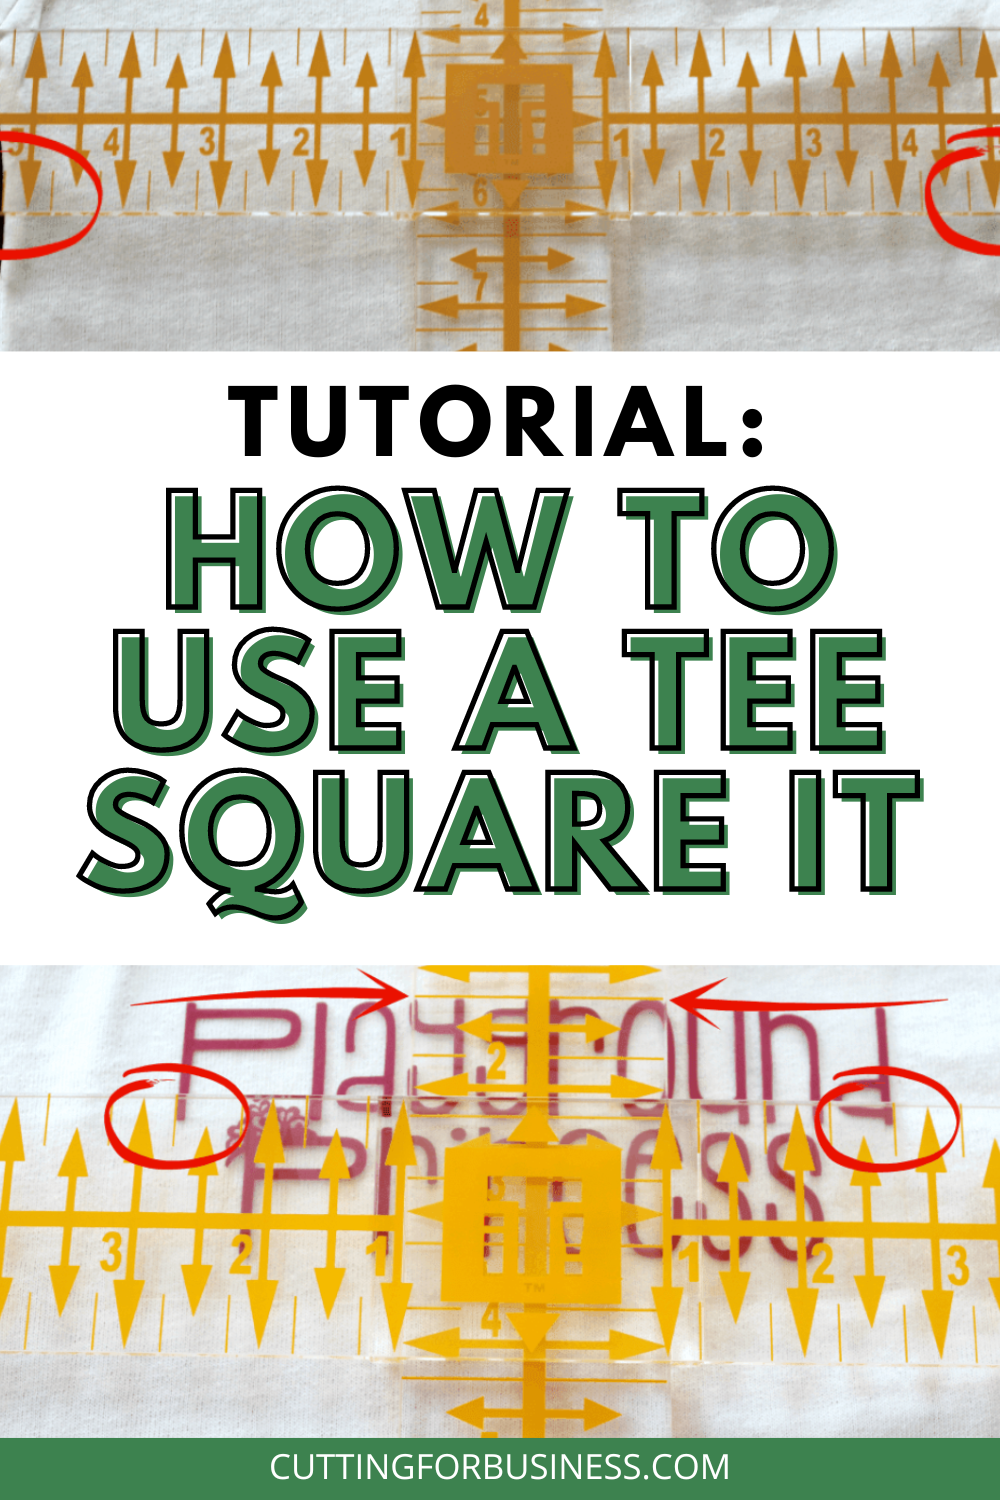
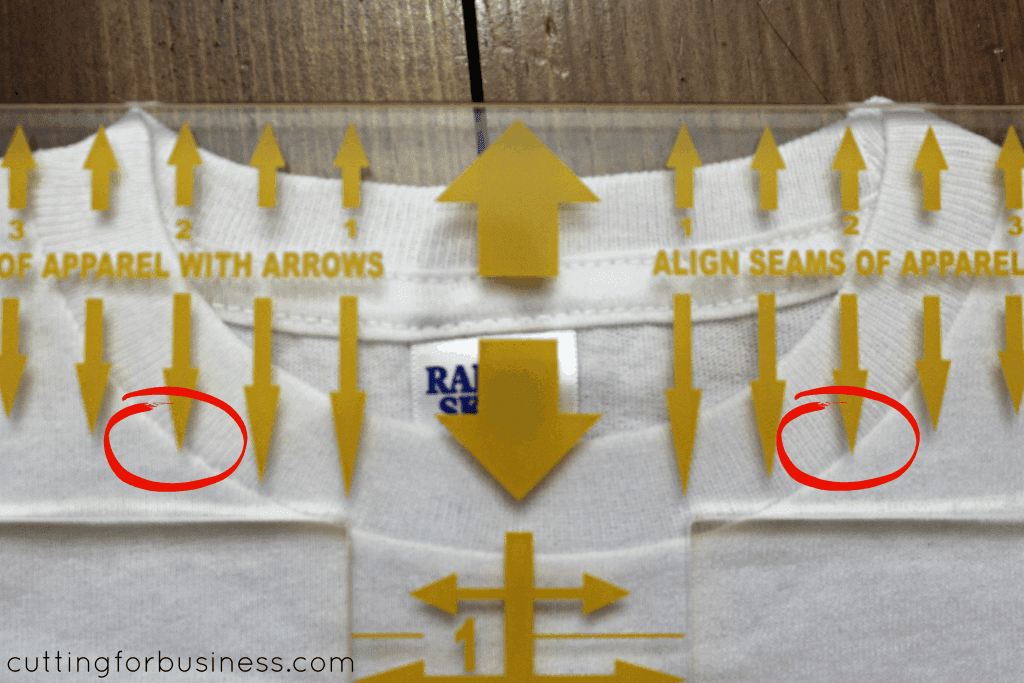
    3. Place the Tee Square It on top of your shirt with the collar plate over the collar. You will line up one set of the arrows on the Tee Square It 3 with the seam of your collar. You can see in the photo below I’ve circled the arrows that I’ve used to line up the seam.
      How to Use a Tee Square It to Line Up Your HTV (Heat Transfer Vinyl) Designs Perfectly (and quickly & easily!) - by cuttingforbusiness.com
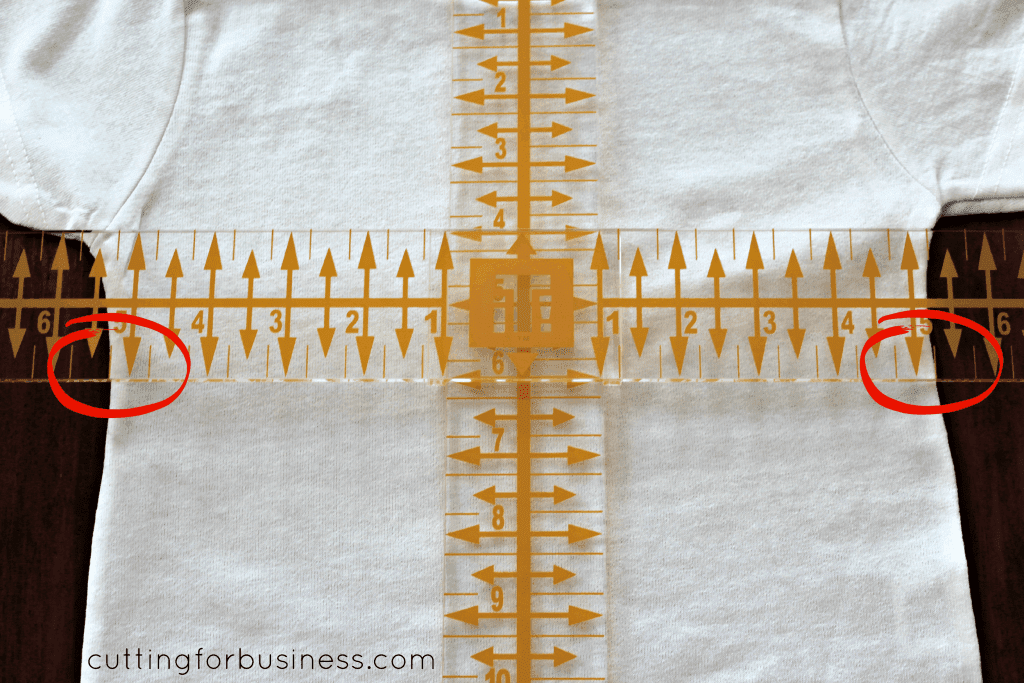
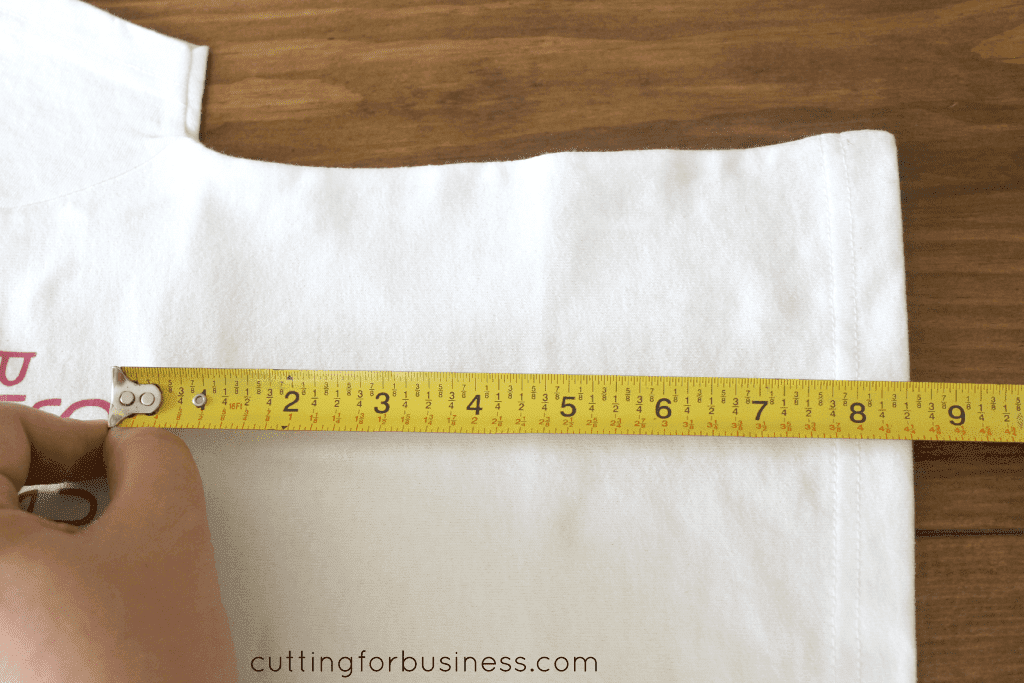
    4. Next, you’ll line up the side seams of the shirt on the width bar. In the photo below, I circled the measurements on the side seam to show you how it should line up. In this example, the side seams line up at 5.25 inches.
      How to Use a Tee Square It to Line Up Your HTV (Heat Transfer Vinyl) Designs Perfectly (and quickly & easily!) - by cuttingforbusiness.com
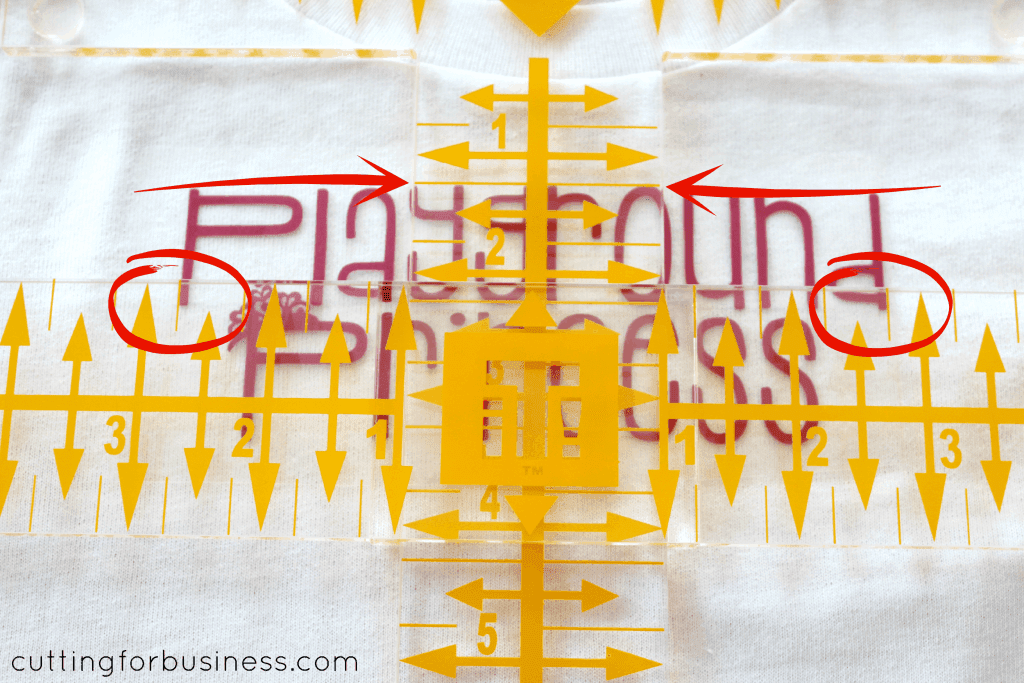
    5. After lining up your shirt, slide your transfer design under the Tee Square It. You will be able to use the width bar to line up your design. The photo below shows my design lined up using the width bar horizontally (marked with circles) and the center bar vertically (marked with arrows).How to Use a Tee Square It to Line Up Your HTV (Heat Transfer Vinyl) Designs Perfectly (and quickly & easily!) - by cuttingforbusiness.com
    6. Remove the Tee Square It, and your shirt is ready to press. (Tip: If you won’t be pressing it right away, you can secure your design with blue painters tape. It can safely be pressed – I do it all the time.)
      How to Use a Tee Square It to Line Up Your HTV (Heat Transfer Vinyl) Designs Perfectly (and quickly & easily!) - by cuttingforbusiness.com
    7. Press your design using your heat press. Need help choosing the perfect heat press? Read my heat press guide.
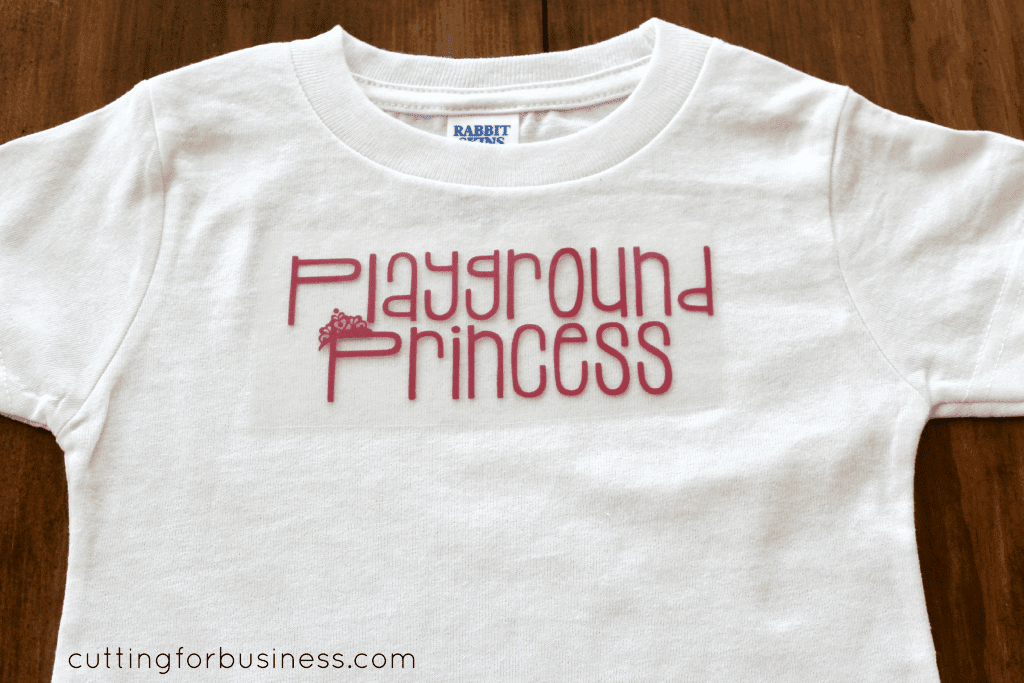
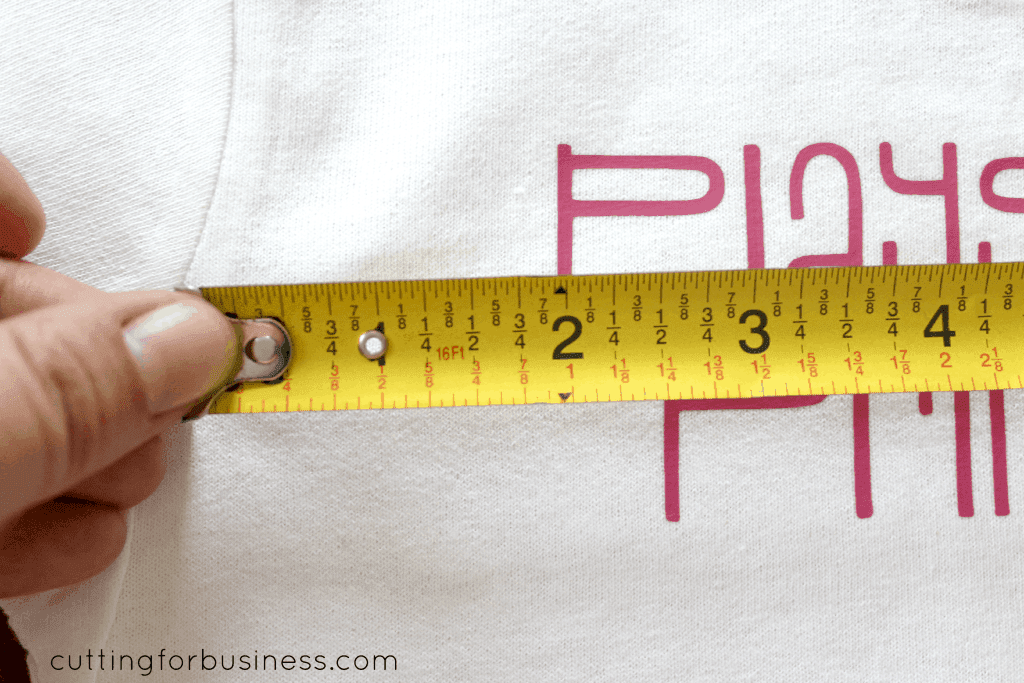
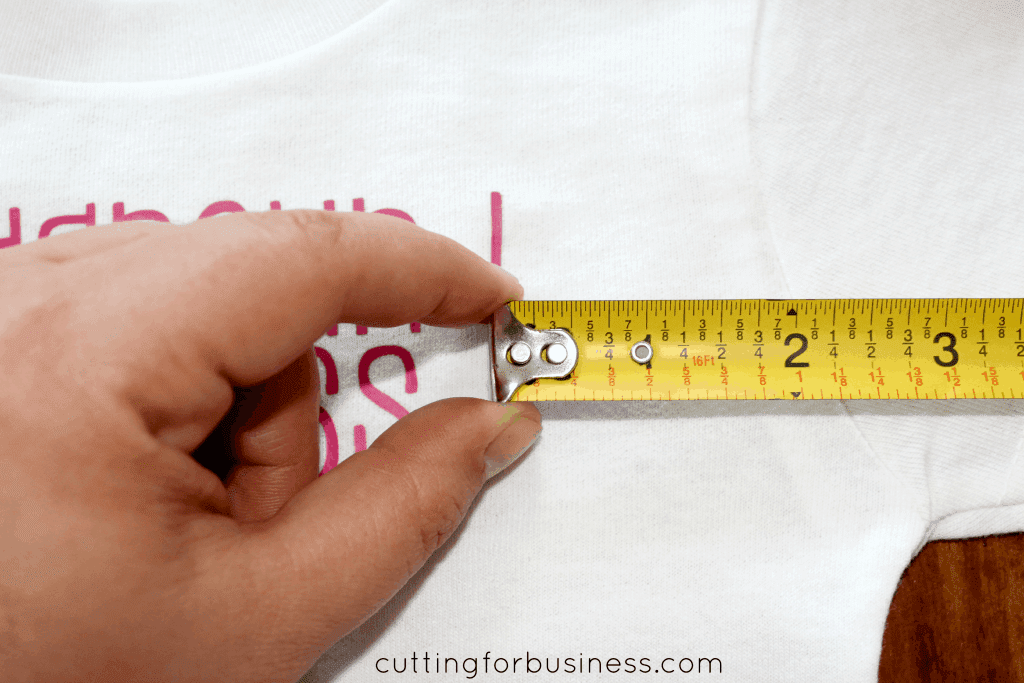
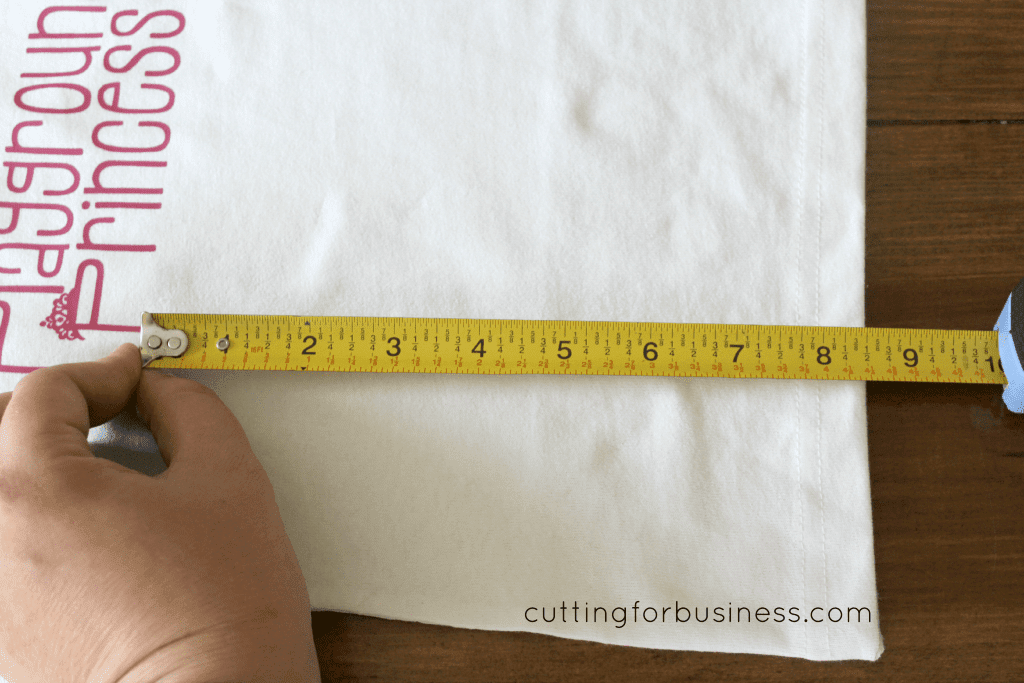
    8. That’s it! This whole process takes about 1-2 minutes. I showed every step of the way, so it looks time consuming, but it is not. But, don’t go yet! I want you to see that this tool actually works. Below are various measurements to show you that my heat transfer vinyl design is actually lined up.How to Use a Tee Square It to Line Up Your HTV (Heat Transfer Vinyl) Designs Perfectly (and quickly & easily!) - by cuttingforbusiness.com
      How to Use a Tee Square It to Line Up Your HTV (Heat Transfer Vinyl) Designs Perfectly (and quickly & easily!) - by cuttingforbusiness.com
      How to Use a Tee Square It to Line Up Your HTV (Heat Transfer Vinyl) Designs Perfectly (and quickly & easily!) - by cuttingforbusiness.com
      How to Use a Tee Square It to Line Up Your HTV (Heat Transfer Vinyl) Designs Perfectly (and quickly & easily!) - by cuttingforbusiness.com

    Heads up: This is not a sponsored post. I received no compensation to write this post, nor was I asked to write this post. I’ve had a Tee Square It from before Cutting for Business was online – and it is one of the most useful gadgets I own.
    Where to Buy a Tee Square It

    Buy a Tee Square It.

    Love the font I used in the tutorial? Download it: Stacked font.

  • Tutorial: How to Use a Tee Square It With Adhesive Vinyl

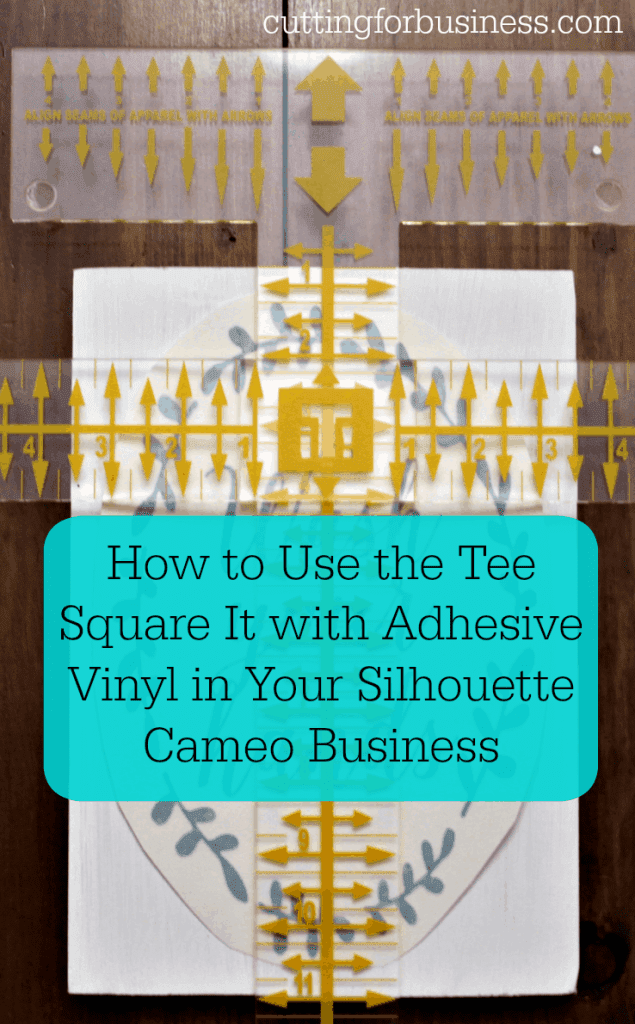
    My post a few days ago on the Tee Square It 3 has brought lots of questions. Some Cutting for Business readers were concerned about the $45 price tag, while others wanted to know if it could be used for projects other than HTV. I’ve noted a few times that I feel like it pays for itself in a few uses when you see how much time you will save and the accuracy of placing your designs. I’ve also been using my Tee Square It 3 to line up adhesive vinyl projects. Since I mostly create wooden signs, that’s what I will demonstrate today.

    (If you have not already, please see this post for a more detailed tutorial on how to use this neat gadget.)

    How to Use the Tee Square It 3 with Adhesive Vinyl Projects

    1. Design and cut your adhesive vinyl design, weed it, and apply transfer paper or tape to it.
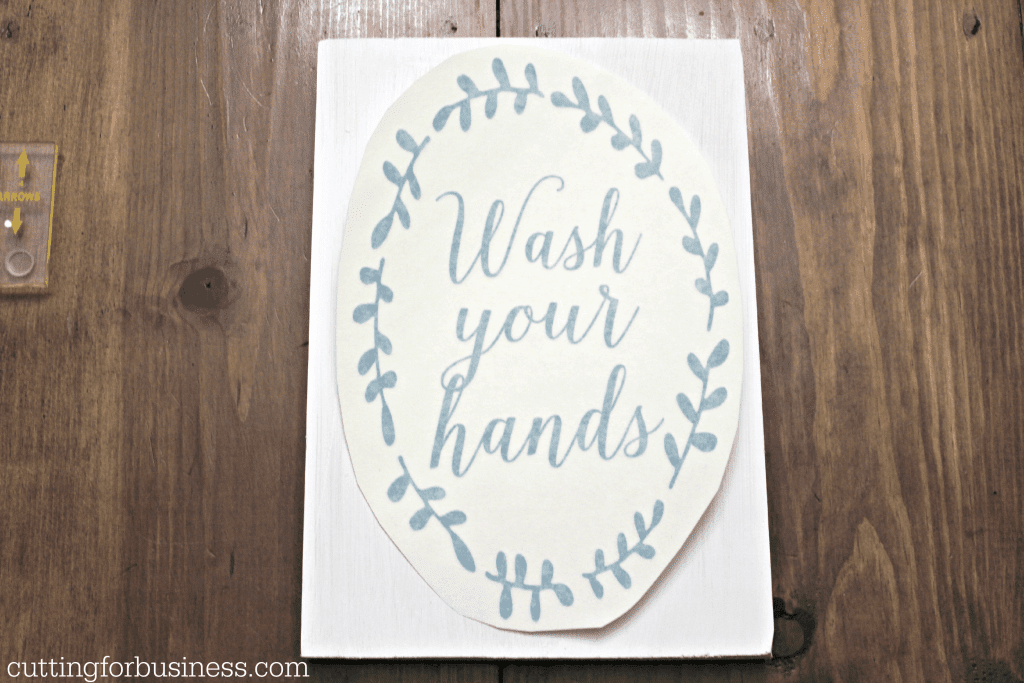
    2. Place your design on top of your wood (or other project). Tutorial: How to Use a Tee Square It With Adhesive Vinyl by cuttingforbusiness.com
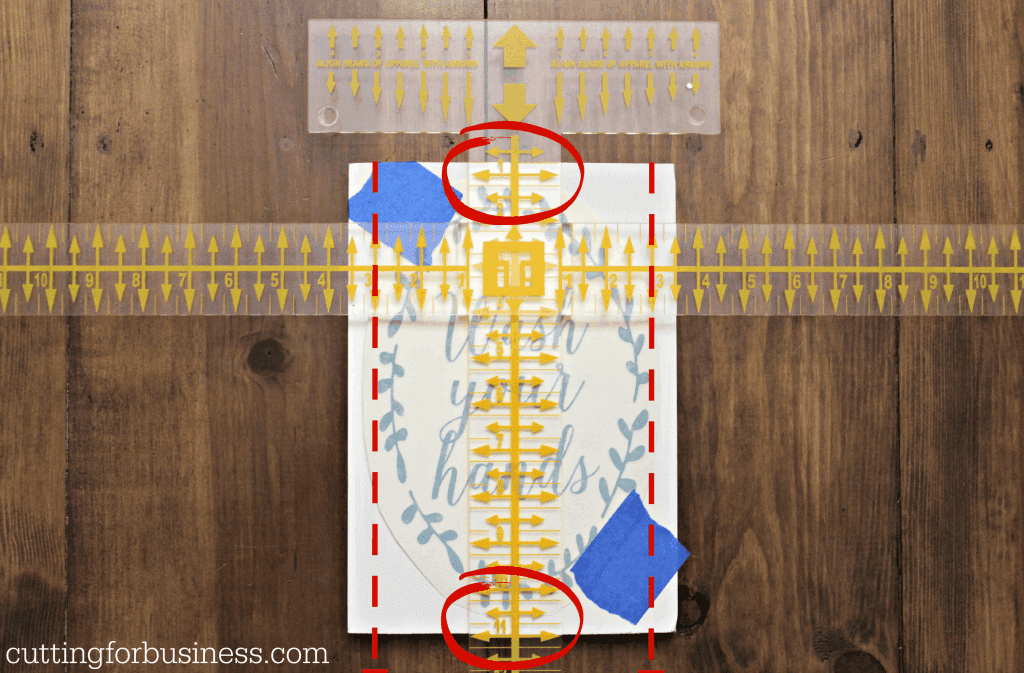
    3. Lay the Tee Square It 3 on top of your wood. Line up your adhesive vinyl both vertically and horizontally using the Tee Square It 3. You’ll see that I marked where I lined up my adhesive vinyl in red. After lining the vinyl up, tape it in place with blue painter’s tape.Tutorial: How to Use a Tee Square It With Adhesive Vinyl by cuttingforbusiness.com
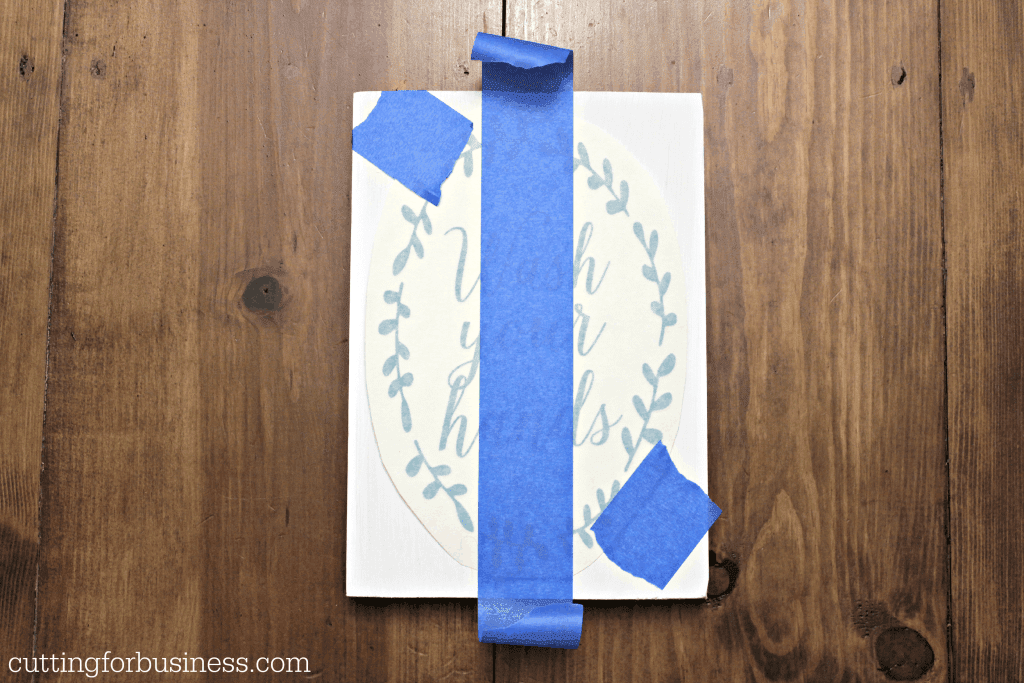
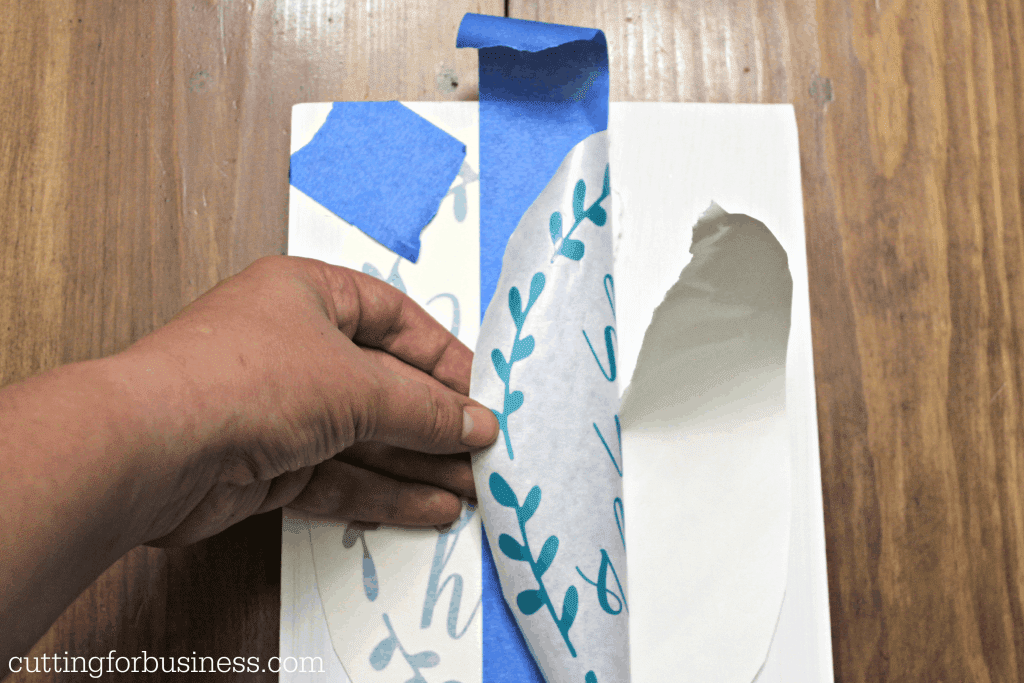
    4. Remove the Tee Square It 3 and place a piece of tape down the center of your design. Tutorial: How to Use a Tee Square It With Adhesive Vinyl by cuttingforbusiness.com
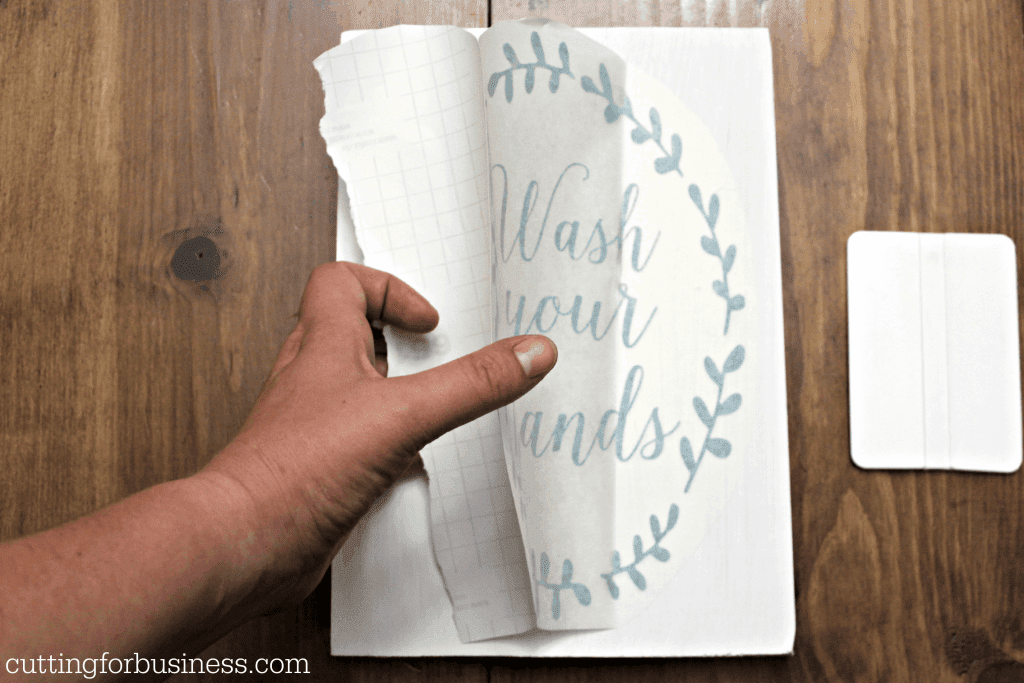
    5. Remove the tape from the right side of the adhesive vinyl. Peel back the transfer tape backing to the center and tear it off. Apply the right side of the design to your project. Tutorial: How to Use a Tee Square It With Adhesive Vinyl by cuttingforbusiness.com
    6. Remove the remaining painter’s tape and peel back the remaining transfer backing, then apply the left side of the design. Tutorial: How to Use a Tee Square It With Adhesive Vinyl by cuttingforbusiness.com
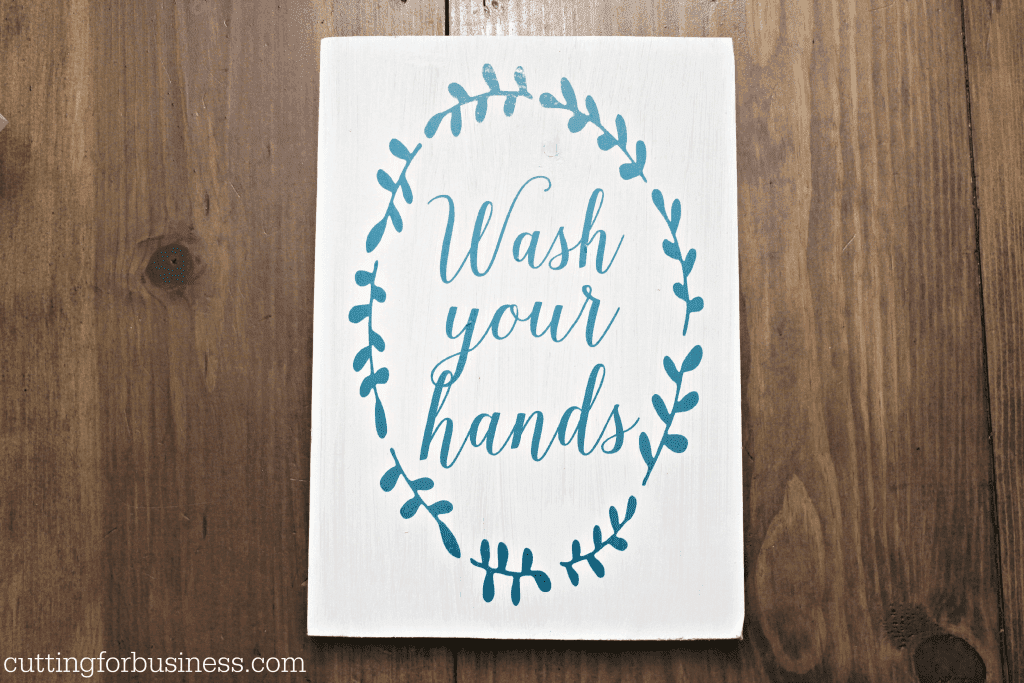
    7. Remove your transfer tape or paper and you are set to go – your design should be centered! Tutorial: How to Use a Tee Square It With Adhesive Vinyl by cuttingforbusiness.com

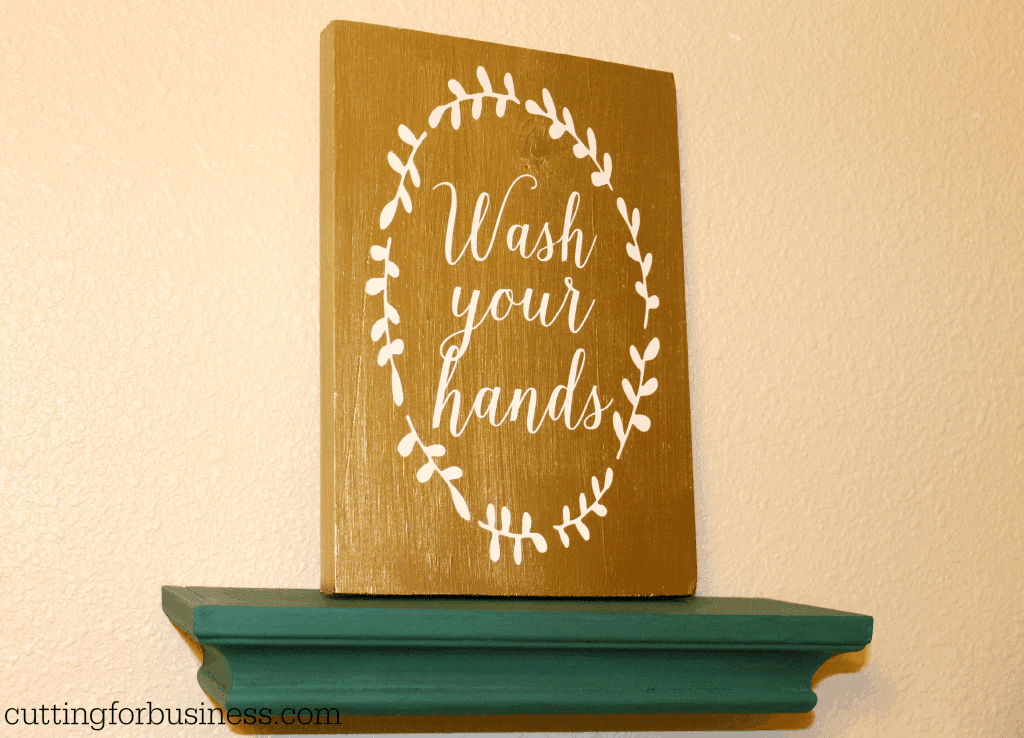
    After a quick coat of metallic gold spray paint, this piece of scrap wood that I picked up for free from my local Home Depot (see this post to find out how to get free wood) is now a piece of bathroom decor! The font used in this tutorial is called Isabella Script and you can find it at Creative Market.

    Tutorial: How to Use a Tee Square It With Adhesive Vinyl by cuttingforbusiness.com

    Don’t forget to pin it:

    Tutorial: How to Use a Tee Square It With Adhesive Vinyl by cuttingforbusiness.com

  • Review: Siser App for Heat Transfer Vinyl Crafters

    Did you hear? Siser North America just launched a new app! You can pick it up in the Apple Store or Google Play.

    Wait, if you aren’t familiar with Siser North America, they are a leading manufacturer of heat transfer materials, known to most crafters as HTV.

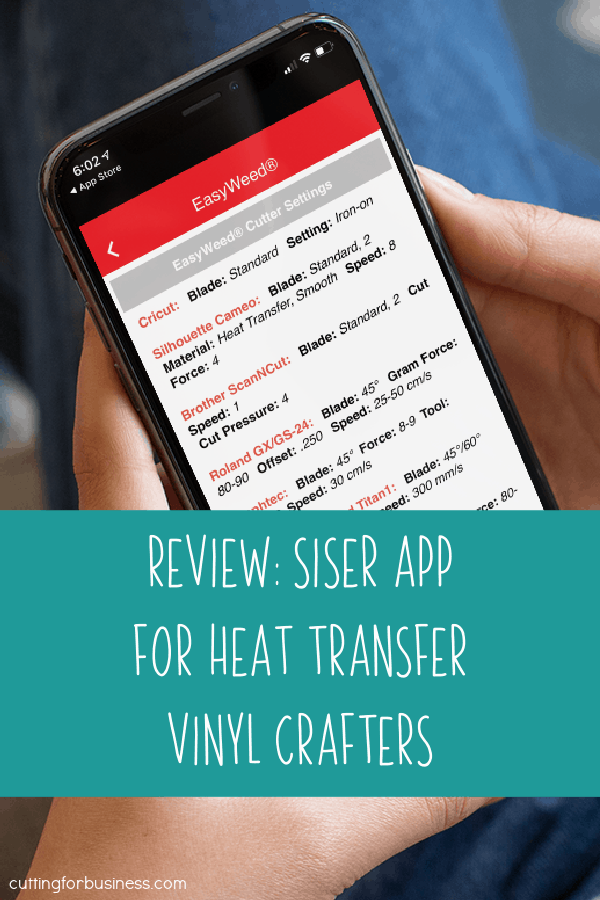
    After downloading the app, I don’t know how I lived without it before! It is incredibly handy to have Siser color charts, application instructions, and more always within reach. It’s Siser North America’s goal to educate crafters on their products through the app, as Siser products can only be purchased through a Siser Distributor.

    App Overview

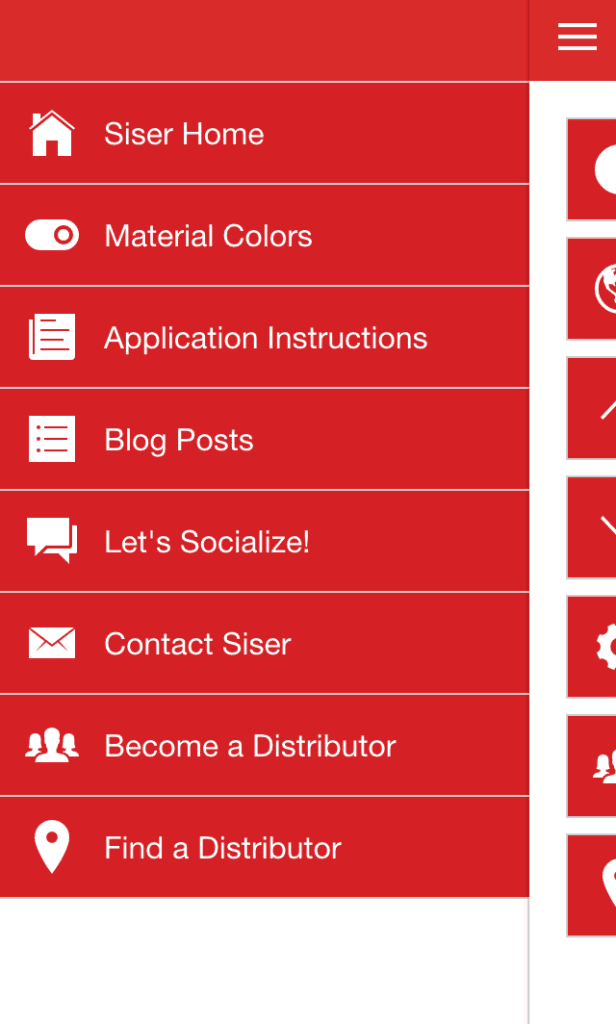
    The app is well organized and offers Silhouette Cameo crafters easy to access information:

    Do you have the new Siser Heat Transfer Material App? An overview by cuttingforbusiness.com

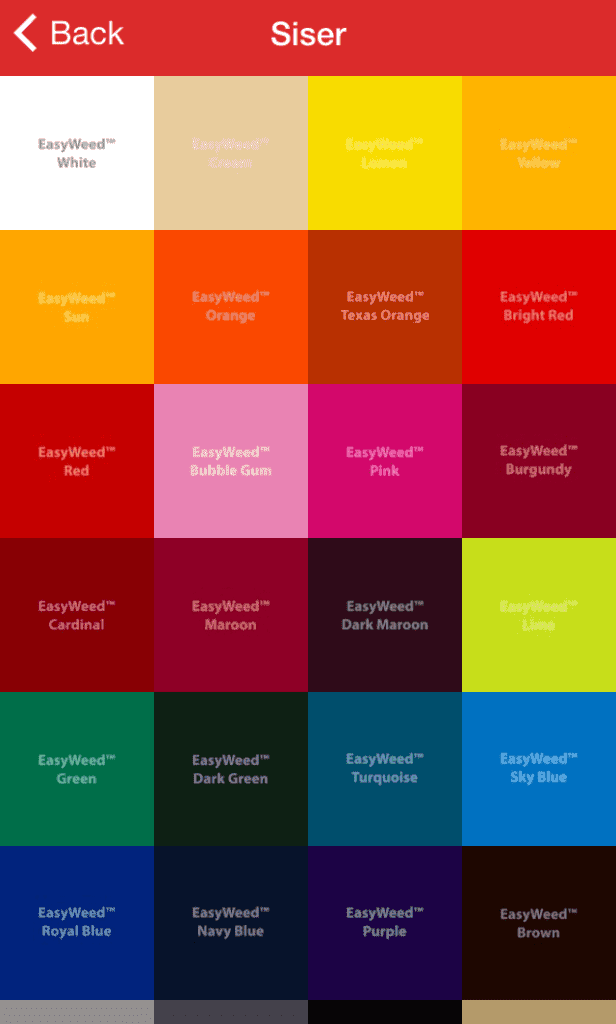
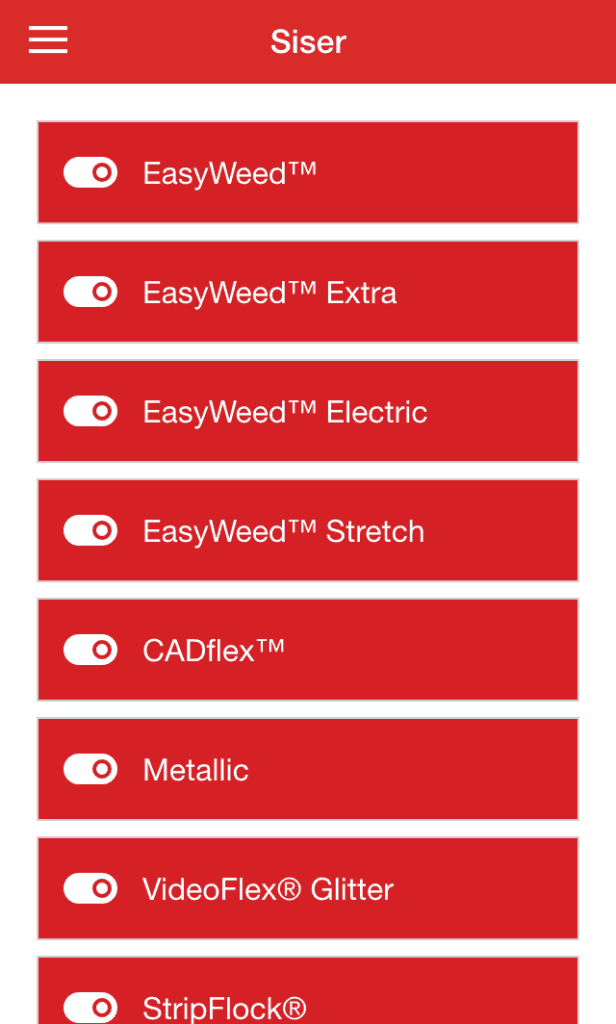
    Full color charts for Siser product lines including: EasyWeed, EasyWeed Extra, Easyweed Electric, EasyWeed Stretch, CADflex, Metallic, VideoFlex Glitter, StripFlock, ReflectAll, Glitter, Holographic, and 3D Techno.

    Do you have the new Siser Heat Transfer Material App? An overview by cuttingforbusiness.com
    Do you have the new Siser Heat Transfer Material App? An overview by cuttingforbusiness.com

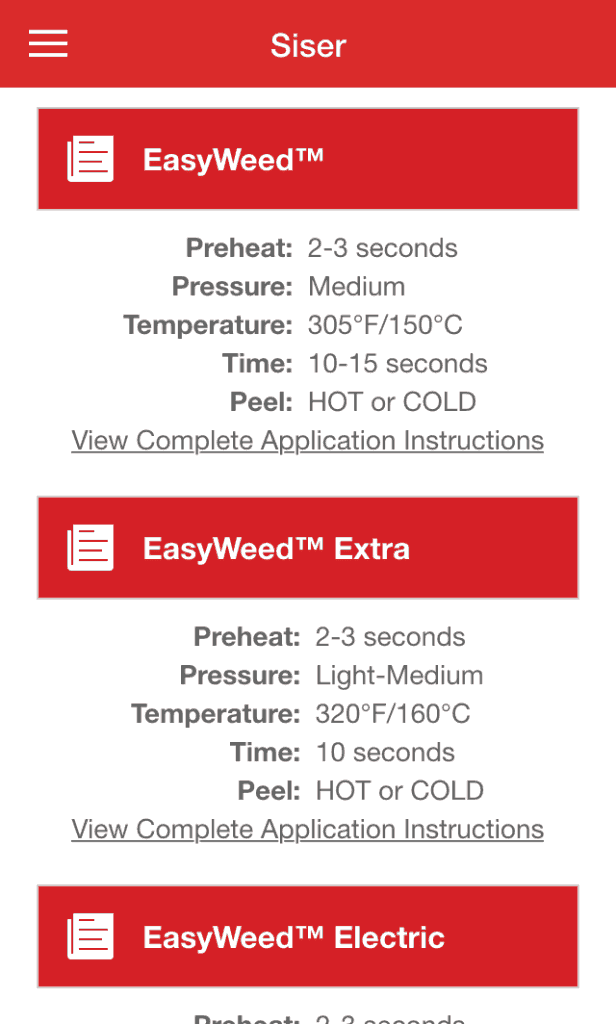
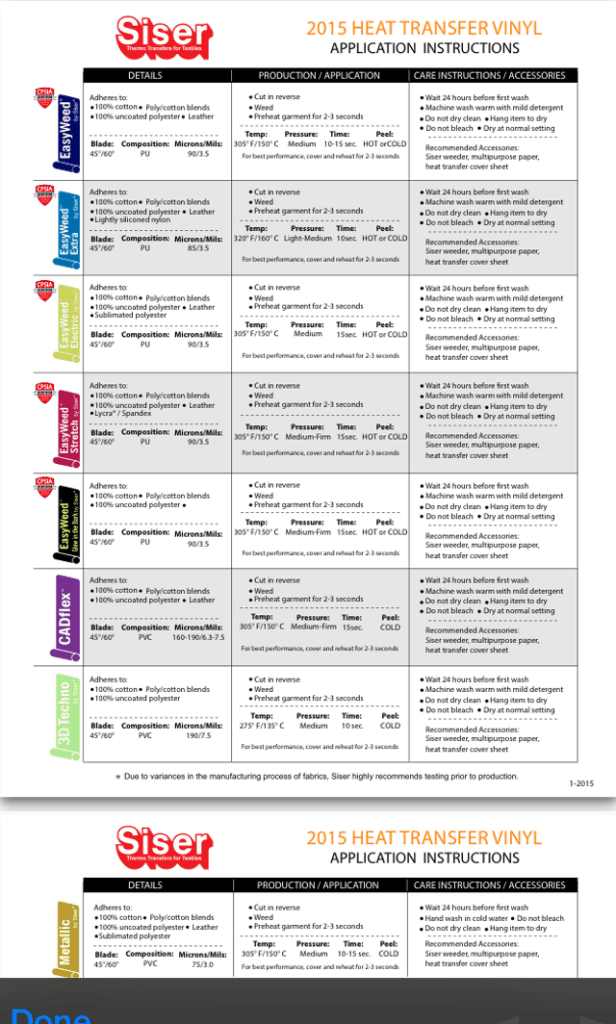
    Siser offers material application instructions for each product line, which tells crafters important pressure, temperature, and time settings for their heat presses. The “View Complete Application Instructions” link provides a PDF with more detailed information for each product line – including what materials the heat transfer material will adhere to, and care instructions:

    Do you have the new Siser Heat Transfer Material App? An overview by cuttingforbusiness.com
    Do you have the new Siser Heat Transfer Material App? An overview by cuttingforbusiness.com

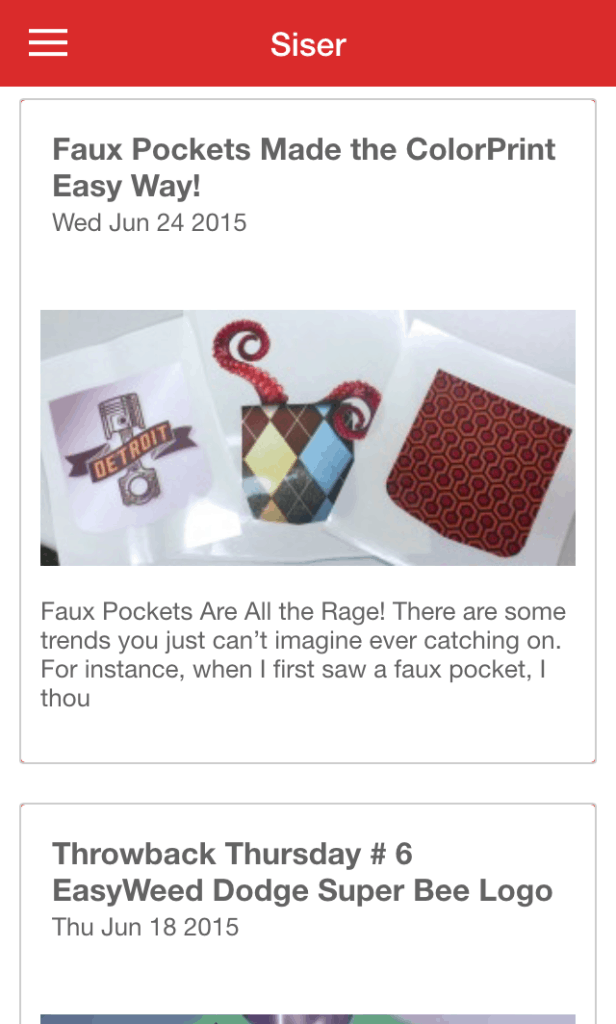
    Within the app, crafters can access the Siser North America blog with posts related to Siser products, including helpful video tutorials.

    Do you have the new Siser Heat Transfer Material App? An overview by cuttingforbusiness.com

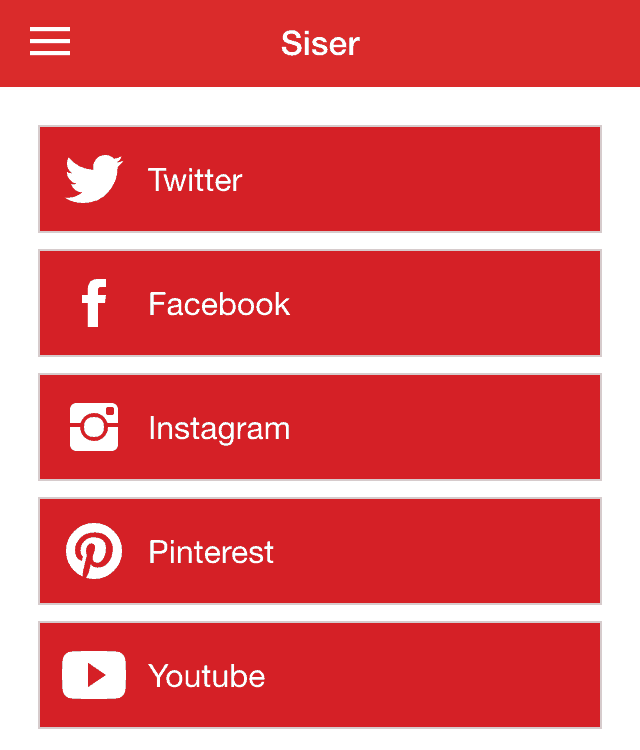
    Lastly, the Siser App includes a contact form to reach the company, information on locating a distributor, and a directory for their social media accounts:

    Do you have the new Siser Heat Transfer Material App? An overview by cuttingforbusiness.com

    Now, enter to win a Siser Heat Transfer Material Gift Pack provided by Siser North America. Each gift pack includes 10 sheets of Siser heat transfer material including Metallic, StripFlock, EasyWeed, Glow-in-the-Dark, 3D Techno, Glitter, and Holographic material! Four lucky Cutting for Business readers will win! This giveaway has ended.

    Save this post to Pinterest:

    Review: Siser App for Heat Transfer Vinyl Crafters - HTV - Silhouette Portrait, Cameo, Curio, Cricut Explore, Maker, Joy - by cuttingforbusiness.com.