Blog

  • Why I Left the Corporate World for a Silhouette Cameo Based Business

    I truly believe that sharing a successful Silhouette Cameo or Cricut based business is a great way to motivate new, struggling, or hopeful small business owners. Today, I’m sharing Courtney’s story – in her words – of why she left a corporate job to pursue a small business with her Silhouette Cameo. I’m turning it over to Courtney:

    Do you know that feeling of a singular dread?  That gut-wrenching knot in the pit of your stomach that prompts you to keep your eyes closed when your alarm is blaring or leave the engine turning so that you can enjoy the final moments of solitude before you face the day?  I quickly realized that this feeling was in direct relation to my office job.  It became so overwhelming that on a limb I decided to quit, take on some part time work at a stationery store, and start my own business.  That was three months ago.  Today I am hustling to put the pieces together, but I have long since abandoned that dread.

    For as long as I can remember I wanted to go to college.  Each morning from kindergarten onward I strove for academic excellence so that my future options would in no way be diminished.  The Honor Roll in elementary school turned into middle school panic attacks about getting grades that would allow me to secure a coveted parking space as a lowly freshman, (true story), which turned into college-level high school classes.  The fruit of my labor materialized as an acceptance letter to my top choice university: UC San Diego.  The eighteen year quest had been achieved.  However much like lonely crusader I felt a strange confusion once I reached my promised land – I had spent so long looking to get to college that once I was there I literally had no idea what I was doing.

    I spent my Freshman year of college playing hopscotch with majors.  I jumped from fine arts to literature before finally settling on a BFA in dance.  While dance has been a constant in my life and something that I am passionate about, I ultimately decided that I did not want to pursue it professionally.  Finding myself again floating between confusion and panic I grasped onto the next natural wrung in the ladder and decided to have a career because careers: it’s what you do after college. Having a goal restored order to my life and I worked on graduating early to incur as little debt as possible. 

    Sometime during my Sophomore Year I had taken an interest in Hospitality and Event Planning.  With that notion in mind I took an entry level job at a hotel during a summer in San Diego and continued with a Front Desk Agent position in Malibu once I graduated.  My trajectory escalated quickly and with luck I was hired as an Event Manager at a restaurant for a year before taking my last post as an Event Manager at a world-renowned hotel in Beverly Hills.  Typically people work as interns and assistants before reaching a management position but while no one was looking I bypassed those steps, plopped down, and pretended I had a decade’s worth of experience.  In a moment of true incredulity, I realized that the ploy paid off.  My sales and customer relations, (key components of my job), were stellar.  I actually admitted to myself that I was good at my job.  It wasn’t all luck that had placed me in an esteemed position at a young age.

    But as I have learned is quite typical in my personality, I soon realized that I was indeed NOT a career person.  Surprise!  Even once I came to terms with the fact that I was working as a method of survival and vanity instead of fulfillment, I reached down deeper and acknowledged that not only was I not looking to grow in a career but that I didn’t want to do what I was doing every day for the rest of my life.  Sure, I was making a good living, my resume was golden, I had benefits and health insurance, but I was committing 10+ hours each day to an office with no windows, incessant, bone-chilling air conditioning, and was not doing work that was really fulfilling. I was not inspired or challenged creatively, but I was secure. On top of the contentment, I relished having a position with definition.  When people inevitably asked what I did I felt proud in revealing my title, as if my job was a testimony to my years spent in “achievement.”  My response, though, in no way invoked who I actually perceive myself to be: a creative spirit, a political activist, a thinker, an entrepreneur, a dancer.

    And that’s why I left my corporate position for the uncertain and never promising world of arts and crafts.

    With a heavy glass of wine and support from my family and friends, I bulked up my savings account, quit my job, and created Cecile’s Paper Co., a custom greeting card and invitation company.  As a hobby I have always made handmade cards to give to friends and family.  When people suggested that I try selling my creations I always met their comments with reasons why my product would not be successful in the market.  Instead, I have started shifting my focus on how I can make my cards a source of profit so that I could do something I love while supporting myself.

    Even just three months in it has been worth it for me to abandon my vanity and enjoy this time to live not with the goal of achieving a title, but instead with the intention of being creative and paving my own path.  Should my business not succeed I will be satisfied knowing that I gave it a chance instead of spending my days dreaming about what life could have been like beyond my work calendar.  I would be lying if I didn’t admit that there have been numerous times where my mouse has flitted over the “apply” button on a LinkedIn account.  The sudden lack of pay is unnerving and at times derailing.  Yet my thoughts always return to that office and it refocuses my vision on the future.  This future is one I intend to create, one filled with art, and one where I am in control of the thermostat.  

    In making this decision I am also aware of the social and economic factors that enabled me to take such a large risk.  While I had set myself up financially to be able to take time away from a steady paycheck I realize that this is not a possibility for everyone at every stage in life.  However if you ever find yourself in a position where the only thing tethering you to your corporate title are societal expectations and norms, I recommend firsthand pursuing your passion.  For me, the start has been terrifying, but there is a lightness in my soul that keeps me afloat and encourages me forward.

    I hope you find encouragement in Courtney’s post for whatever is going on in your small business right now. Do you have a great story based around your Silhouette Cameo or Cricut based business? Share it with me at christine@cuttingforbusiness.com and you might see your story featured here. You can find Courtney’s website online here.

    Share Courtney’s story on Pinterest:
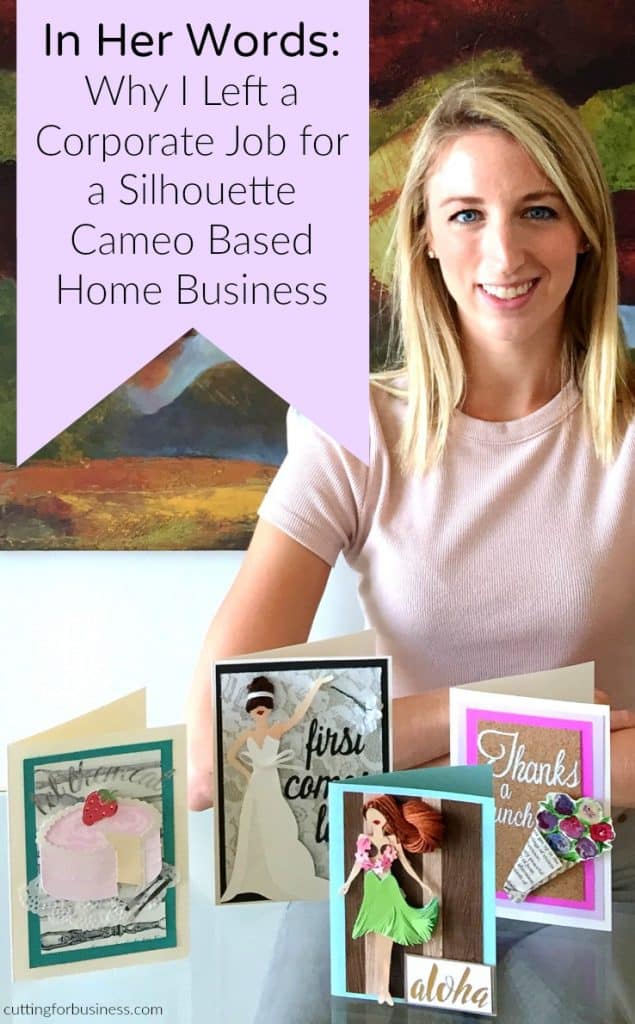
    Why I Left the Corporate World for a Silhouette Cameo Based Business - Featured on cuttingforbusiness.com

  • Paypal Working Capital – What it is and How it Works

    I’ve had a few readers asking me if I knew of any resources for micro or small businesses to get a business loan from. Unfortunately, banks generally won’t lend to tiny businesses. Don’t feel alone though, the majority of small business loan applications get denied. While I’m a huge fan of growing your business without debt (read more about that in this post), Paypal Working Capital might be a good fit for your Silhouette or Cricut small business.

    What is Paypal Working Capital?

    Paypal Working Capital is a division of Paypal that lends money to small businesses. If you have a Paypal account in good standing, it’s likely that you’ll get approved for a loan because Paypal bases their decision solely off of your relationship with them. Additionally, Paypal does not inquiry your credit to make a decision.

    What are the requirements to get a loan from Paypal Working Capital?

    You can borrow up to 15% of your total Paypal sales from the previous 12 months – capped at $97,000. You must have a Paypal Business Account, be a Paypal member for at least 3 months, and have a minimum of between $15,000 and $20,000 (varies per account) in sales on Paypal within the last 12 months. (This number may seem huge, but if your business has been on Paypal for 12 months – it’s an average of only $288 per week.)

    How do you pay back the Paypal Working Capital loan?

    This is my favorite part of the Working Capital program. Paypal deducts a portion of your daily sales to help pay back your loan over time. It’s okay to have a day without sales, you won’t fall behind on paying your loan. Furthermore, you’ll be able to determine the daily percentage of sales that Paypal takes when accepting your loan.

    How do you apply for Paypal Working Capital and what should you expect?

    You can apply to Paypal Working Capital at this link. You’ll complete a quick application (takes about 5 minutes), then Paypal will provide an instant decision about your loan. If you are approved for a loan, you choose some basic loan settings and review the loan cost. Rather than a percentage of the loan being charged for interest, you choose a flat rate. If you accept the loan, you will receive funds within minutes that you will be able to spend for your business needs.

    Note: I took out a loan for the purpose of this post and paid it back about a week later. I was not contracted to write this post.

    Save this post to Pinterest:

    Paypal Working Capital - What it is and How it Works for Your Silhouette Cameo or Cricut Explore Business - by cuttingforbusiness.com

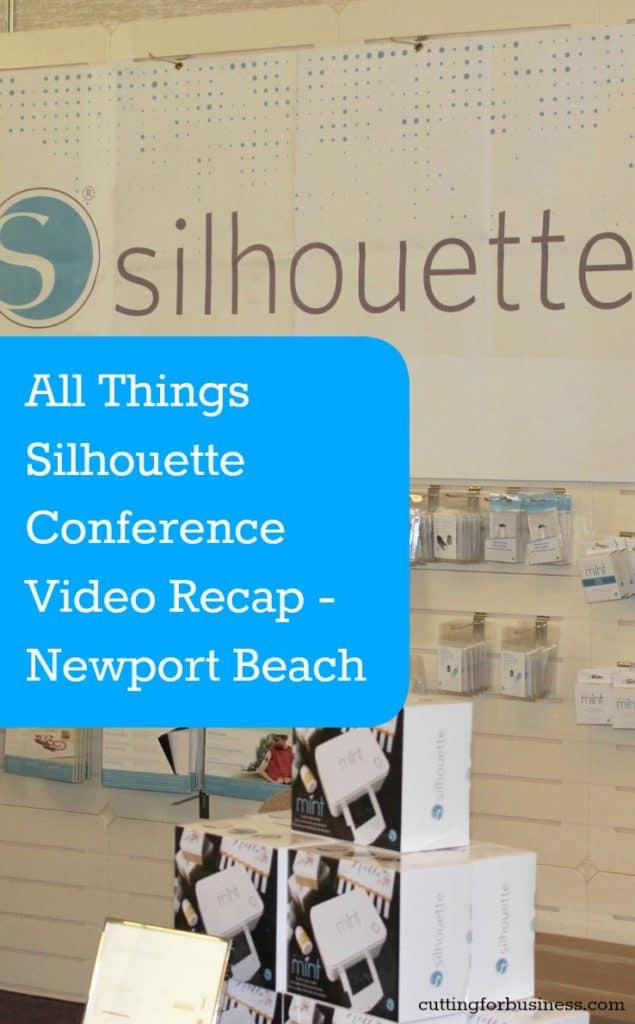
  • All Things Silhouette Conference Newport Beach Recap

    Good morning! I made it back from the All Things Silhouette Conference in Newport Beach! Like other All Things Silhouette Conferences, I enjoyed a weekend of speaking about crafting and business. I joined with these presenters:

    • Lori Whitlock – Designer at Lori Whitlock
    • Melissa Viscount – Silhouette School
    • Terri Johnson – Terri Johnson Creates
    • Lisa Potts – The Rhinestone World
    • Mags Bonham – Polymer Clay Jewelry Artist
    • Cindy Eckhoff – Formerly with Silhouette America
    • Becky Dykes – My Paper Craze
    • …and more!

    Here’s the slideshow I made to show you more of the conference:

    Ready to attend the next conference November 4 to 5th, 2016? Register here.

    No time to register now? Save this to Pinterest:

    All Things Silhouette Conference Newport Beach Recap by cuttingforbusiness.com

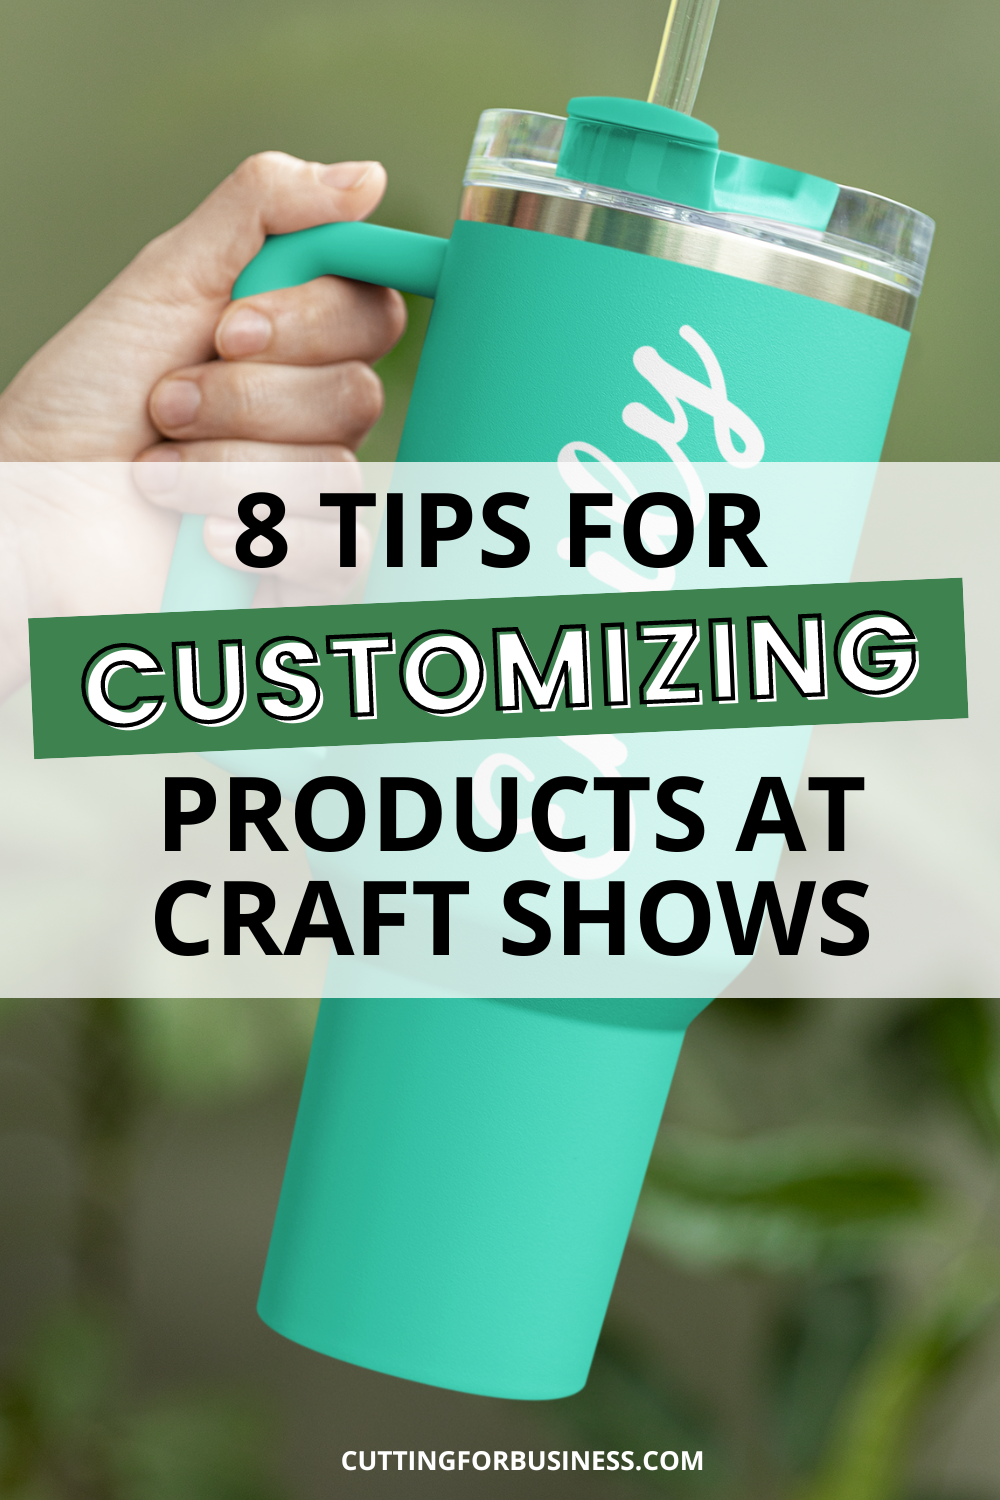
  • 8 Tips for Customizing Products at Craft Shows

    I am seeing more and more readers report that they are signing up for craft shows. (Yay!)

    Craft shows can be great sources of income. However, the one thing about craft show customers is that many are more likely to purchase when they can leave your shop with their product.

    I thought that today would be a good time to share tips for customizing products at craft shows.

    8 Tips for Customizing Products at Craft Shows - cuttingforbusiness.com

    8 Tips for Customizing Products at Craft Shows

    Verify that You Have Electricity Available in Your Booth or Table

    You can’t personalize items if you can’t bring your Silhouette or Cricut machine with you. Similarly, make sure that you have enough space in your booth or table to be able to set up your machine and still have plenty of room to display products. It’s always a good idea to bring extension cords and a power strip.

    Collect Payment Before You Personalize

    Just like any other product you sell, payment should be collected before you start customizing a product.

    Bring a Helper

    It’s even better if you can bring a trained helper. Ideally, your helper can run your machine and apply the customization while you interact with customers and sell your products.

    Offer a Limited Number of Personalization Colors and Fonts

    It’s not practical to bring every color of vinyl or material that you own to the show. Instead, stick to the basics. (For me: this usually means black, white, and the colors of the rainbow.) Similarly, offer only a handful of fonts – preferably ones that cut well and don’t need editing before cutting.

    Cut Out as Much as Possible Ahead of Time

    Example: If I am offering a circular frame with a monogram inside to be placed onto a tumbler, I cut out the frame ahead of time and I’ll only have to add the monogram after the customer orders.

    Don’t Have Your Customer Wait for Their Items

    I work better when I’m not distracted. If you are personalizing a product, invite the customer to walk around and shop and return at a later time to pick up their product. This also gives you time to package the product before pickup.

    Have Order Forms Ready for Customized Orders that You Cannot Complete Immediately

    If you are personalizing orders at an event, you are going to get a customer or two that wants to make several changes or wants an entirely different design. Instead of using all your show time creating one product, have a form available to capture the order and arrange shipping to the customer.

    Don’t be Offended When Customers Ask What Type of Machine You Are Using

    If you are using your machine while at a show, you are going to have customers asking about the process. You certainly don’t have to share your secrets or teach them how to use it, but don’t be rude when they inquire.

    Have you ever offered personalization on demand at shows or fairs? How did it go? Share your experience in the comments. Read more about craft shows on Cutting for Business.

  • 10 Ways to Use Vinyl Scraps for Big Profits

    Cutting for Business readers are in for a treat today, because Jamie stopped in from Craft Chameleon (formerly Punch Place Plus). I’m turning it over to Jamie:

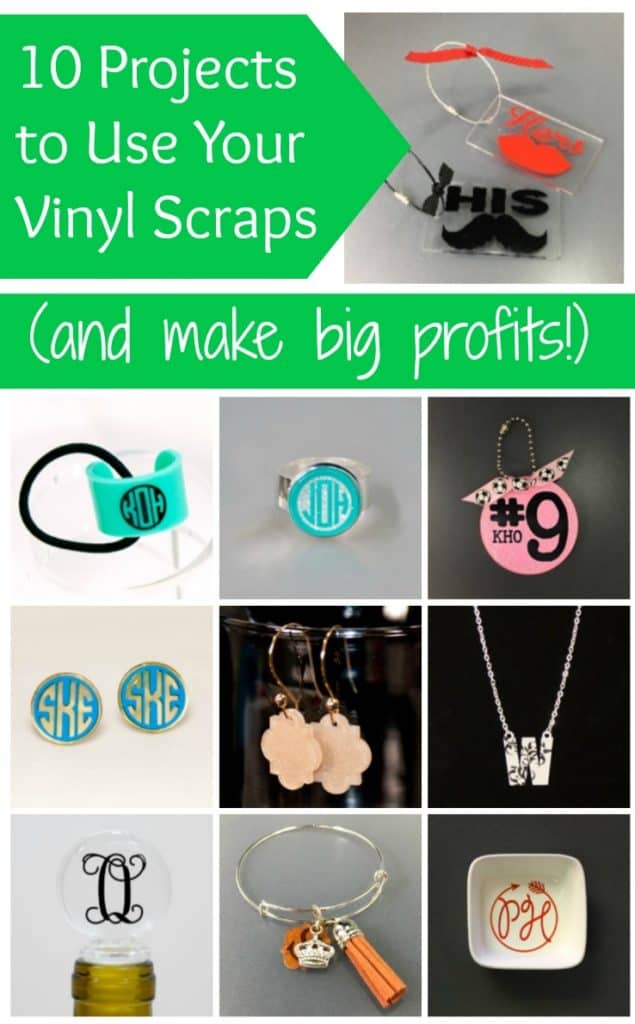
    Hi everyone, Jamie here. Let’s talk vinyl scraps today! I don’t know if it was my grandmothers’ influence, living through The Great Depression, or what but it’s tremendously hard for me to throw away small pieces of unused vinyl. Whether Granny or genetics was the cause, the effect is this list of 10 low cost items from Craft Chameleon to use with those vinyl scraps. Read on to see how you can turn your small scraps into big profits!

    Please note the figures below show only ‘Gross Profits’. This means it does not take into account the following items: wear and tear on equipment, labor, shipping, selling expenses, rent, inventory expenses, interest charges, and other expenses your business might incur.

    Now let’s make Granny proud and use up our scraps!

    1) Post Earrings

    10 Ways to Use Vinyl Scraps for Big Profits by cuttingforbusiness.com


    Scrap size needed:  1” x 2”

    Cost of Earrings $.60/pair to $.89/pair (without shipping)
    Selling Price: $5 to $12 per pair
    Gross Profit: $4.40 to $11.11

    2) Dangle Earrings

    10 Ways to Use Vinyl Scraps for Big Profits by cuttingforbusiness.com


    Scrap size needed: 1.5” x 2.5”

    Cost of Earrings: Blanks $.67/pair & Wires $.24/pair (without shipping)
    Selling Price: $5 to $15 per pair
    Gross Profit:  $4.09 to $14.09

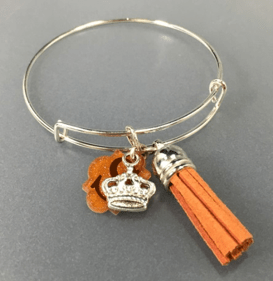
    3) Charm Bracelet

    10 Ways to Use Vinyl Scraps for Big Profits by cuttingforbusiness.com


    Scrap size needed: 1.75” x 1.75”

    Cost of bracelet and components: Bangle $.55, acrylic charm $.34, 3 Side Cut Oval Jump Rings $.12, 1.5” Tassel $.23, crown charm $.43 (without shipping)
    Selling Price: $6.00 to $12 per bracelet
    Gross Profit*:  $4.33 to $10.33

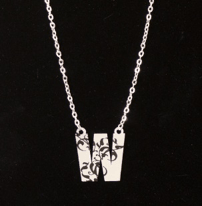
    4) Necklace

    10 Ways to Use Vinyl Scraps for Big Profits by cuttingforbusiness.com


    Scrap size needed: 2” x 2.5”

    Cost of Components:  Letter Pendant $.69, Necklace with jump rings $.54 (without shipping)
    Selling Price: $5.00 to $10.00
    Gross Profit:  $3.77 to $8.77

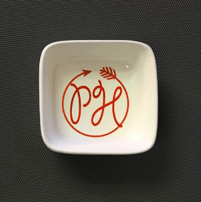
    5) Ring Dish

    10 Ways to Use Vinyl Scraps for Big Profits by cuttingforbusiness.com


    Scrap size needed: 2.5” x 2.5”

    Cost of Square Ring Dish: $2.12 each with shipping ($1.06 without shipping but these are heavy so doubling the cost)
    Sales Price: $7.50 to $12.00
    Gross Profit:  $5.38 to $9.88

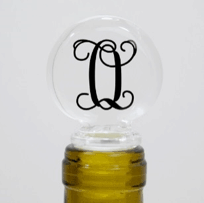
    6) Glass Bottle Stopper

    10 Ways to Use Vinyl Scraps for Big Profits by cuttingforbusiness.com


    Scrap size needed: 2” x 2.5”

    Cost of Stopper:  $2.15 (without shipping)
    Sales Price: $7 to $15
    Gross Profit: $4.85 to $12.85

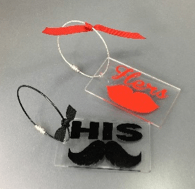
    7) Bag Tags

    10 Ways to Use Vinyl Scraps for Big Profits by cuttingforbusiness.com


    Scrap size needed: 2.5 x 3.5”

    Cost of components:  1 Tag $.75, 1 Luggage Strap $.35 (without shipping) Ribbon Scrap Optional $0
    Selling Price: $4.00 to $10
    Gross Profit: $2.90 to $8.90

    8) Keyrings

    10 Ways to Use Vinyl Scraps for Big Profits by cuttingforbusiness.com


    Scrap size needed: 3” x  3”

    Cost of Components:  2” Glitter (1 side) Circle $.65, Ball chain included (without shipping) Ribbon Scrap Optional $0
    Selling Price: $3.50 to $8.50
    Gross Profit: $2.85 to $7.85

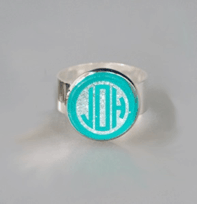
    9) Rings

    10 Ways to Use Vinyl Scraps for Big Profits by cuttingforbusiness.com


    Scrap size needed: 1“ x 1”

    Cost of Ring:  $.94 Adjustable Wideband Ring (without shipping)
    Sales Price: $5.00 to $10.00
    Gross Profit:  $4.06 to $9.06

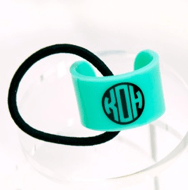
    10) Pony Tail Cuffs

    10 Ways to Use Vinyl Scraps for Big Profits by cuttingforbusiness.com


    Scrap size needed: 1.5” x 2”

    Cost of Cuff: $.95 (without shipping)
    Selling Price:  $5.00 – $6.00
    Gross Profit: $4.05 to $5.05

    Now I have some questions for you: Have you seen anything that you could cut from your small scraps? What would the price point be in your area? What would your gross profit be? Better yet what would your Net Profit be? Did this set your creativity in motion and give you ideas for other scrap busting projects?

    Have an answer to any or all of these questions? If so, Craft Chameleon would love to hear you – leave a comment or visit us at Craft Chameleon.

    Wow, a huge thanks to Jamie for stopping in and sharing so many ideas with Cutting for Business readers today. I guess I need to go pull out my scrap box and get to work.

    Don’t forget to save this to Pinterest so that you’ll have all of Jamie’s links when you get ready to start creating:

    10 Ways to Use Vinyl Scraps for Big Profits by cuttingforbusiness.com

  • A Mockup Management System for Silhouette or Cricut Businesses

    Design Drop is no longer available and I have not found a replacement.

    —————————————————————————————————

    Today’s post comes straight from my inbox – and it is related to the best way to deal with customers and online mockups. Here’s the email:

    “Hi Christine! As my customs business is growing, I’m having a hard time keeping mockups and the changes that need to be made straight. I’m currently doing them by email, but I’ve had a few customers approve designs that had errors in them and it’s time consuming for me to go back through emails. Any suggestions for better workflow?”

    Yes! There are several online mockup management tools that work great for keeping track of changes for mockups and keeping a record from both parties. The one that I have used most recently is called Design Drop. I’m going to show you how it works from both sides (the designer and the customer).

    What You Do at Design Drop as the Designer

    1. Visit designdrop.com and upload a mockup to show your customer.
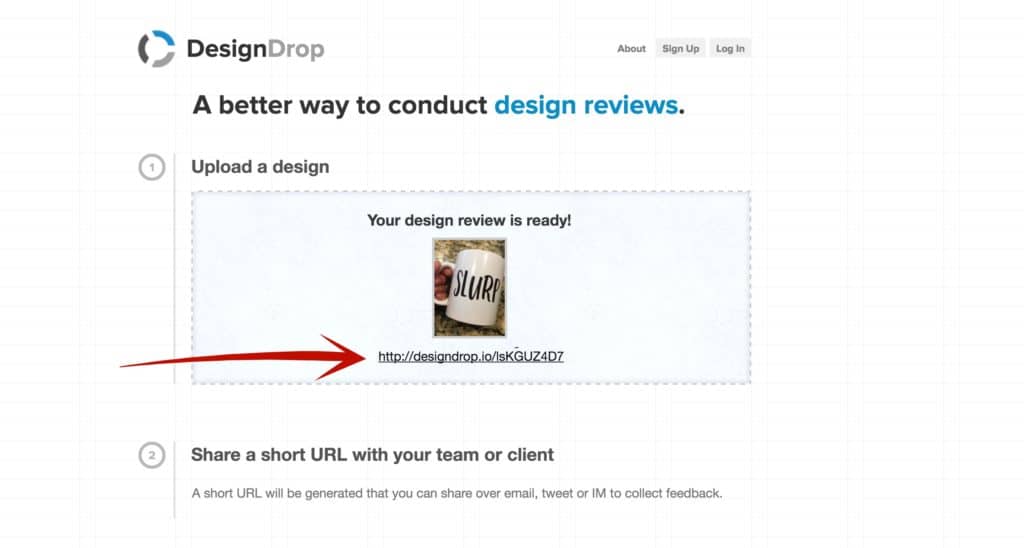
    2. After you upload your mockup, you’ll be given a shareable link as shown in the image below. Click it. How to Easily Get Your Design Mockup to Your Customer - Great for Silhouette Cameo and Cricut Small Business Owners - cuttingforbusiness.com
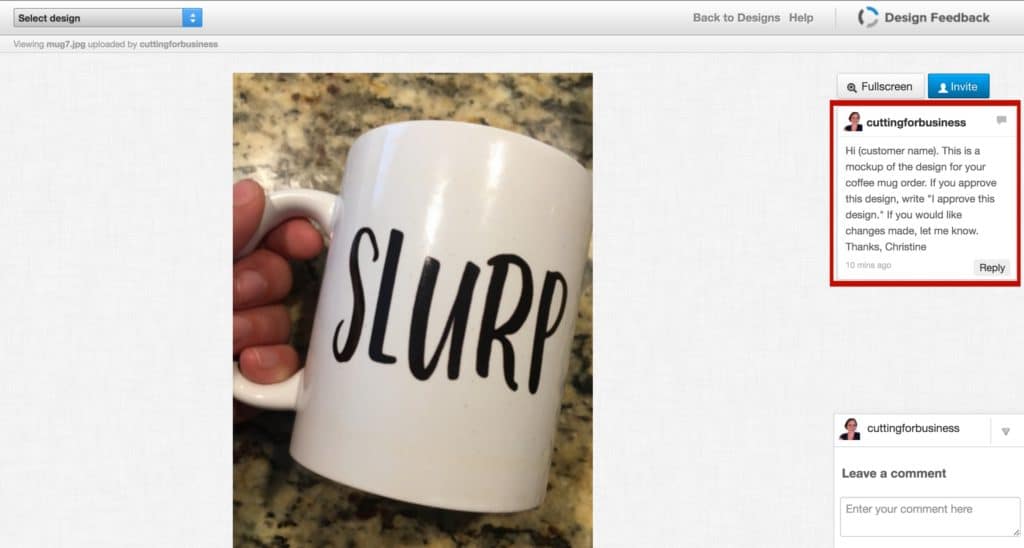
    3. On the right hand side, add a comment telling the customer that this is the design that will be placed on their custom made order. Instruct them to write “I approve the design” if everything looks good. If they need changes made, they simply need to leave a comment. The image below shows what my comment looks like: How to Easily Get Your Design Mockup to Your Customer - Great for Silhouette Cameo and Cricut Small Business Owners - cuttingforbusiness.com
    4. Send the link to your customer once you are ready to show them the mockup.

    How a Customer Sees Design Drop

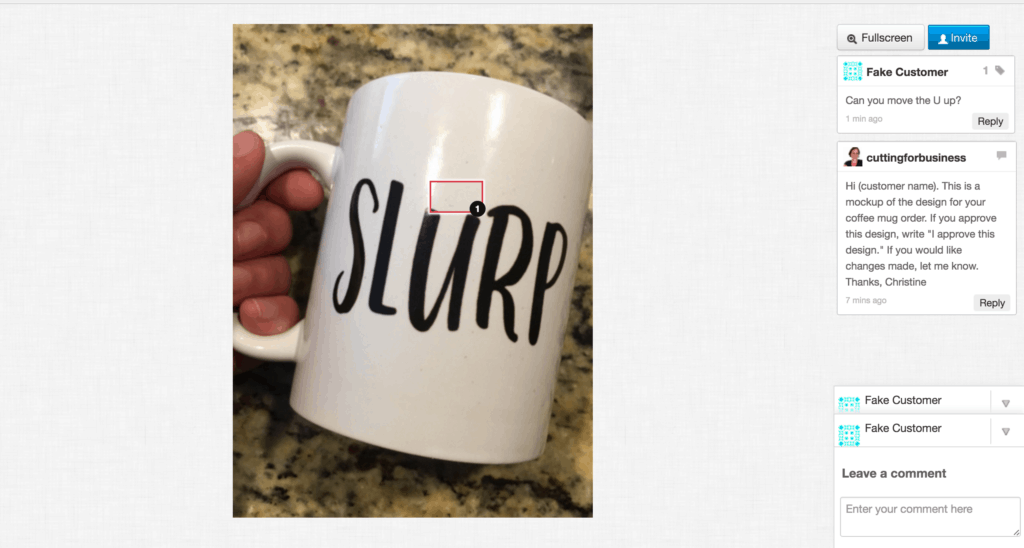
    1. Customer receives the link you send and clicks on it. The page they see is similar and shown below. They do not have to sign up or log in to leave a comment. They are able to annotate directly on the image and leave comments. If everything checks out fine – you start the order, if not – you make the changes.How to Easily Get Your Design Mockup to Your Customer - Great for Silhouette Cameo and Cricut Small Business Owners - cuttingforbusiness.com

    If you’d like to see the client end of the mockup above, click here. Feel free to annotate or leave a comment to test it out.

    I’ve used Design Drop in the past and love it for a few reasons: 1) It’s free. 2) If the customer has an error on the custom made design, I can log into Design Drop and reference their approval. This allows me to charge them for a replacement item since the error was on their part. 3) It keeps all my mockups in one place, no digging through my email box.

    Need help creating mockups? See this post, this post, or this post.

    Do you use a mockup management system? Let me know about it in the comments.

    How to Easily Get Your Design Mockup to Your Customer - Great for Silhouette Cameo and Cricut Small Business Owners - cuttingforbusiness.com

  • An Easy to Implement Hashtag Strategy for Instagram

    I know that Instagram remains a bit of a mystery for some Silhouette and Cricut small business owners. So, I’m sharing an easy to implement hashtag strategy with you today.

    Before I tell you the strategy, let’s make sure that you understand what hashtags are. Hashtags are keywords that help people find your post. Instagram users can search hashtags. All hashtags should have the “#” sign before them. Currently, you can add up to 30 hashtags on your post.

    How to Make the Most of Instagram Hashtags

    Step 1) Grab a piece of paper and write down as many hashtags as you can that are related to your business or the products you sell. If I sold tumblers, my list might start like this: #tumbler #tumblers #cup #handmade #custom and so on.

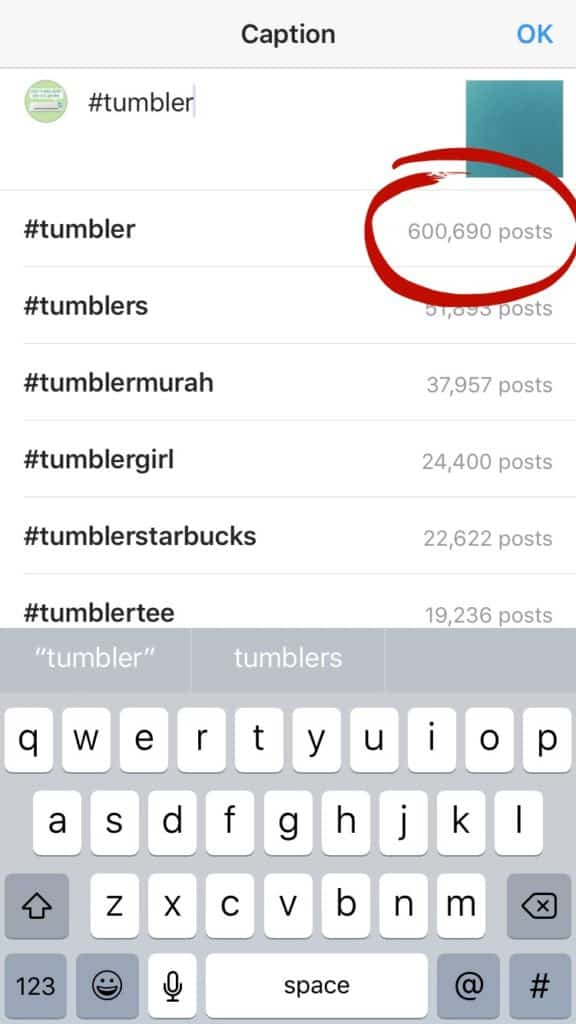
    Step 2) Pull out the Instagram app and start a new post. You aren’t actually going to publish the post, so it doesn’t matter what picture you use. When you to get to the caption, start typing in each hashtag on your list and write down the number of occurrences of that hashtag. Repeat this process for all the hashtags on your list. The image below shows which number you should write down.

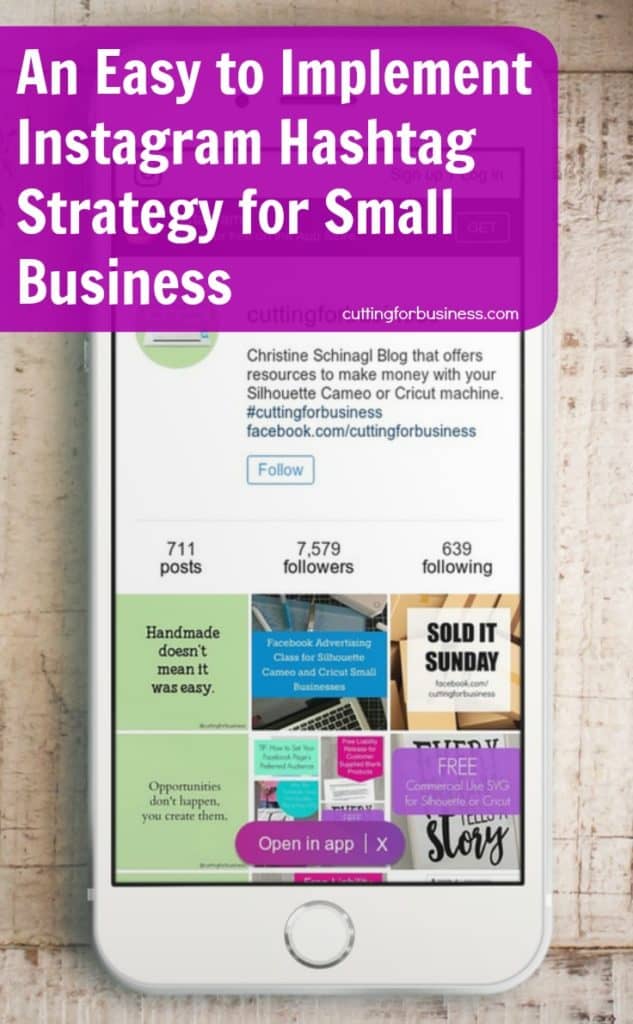
    An Easy to Implement Hashtag Strategy for Instagram - Great for Silhouette Cameo and Cricut Small Business Owners - by cuttingforbusiness.com

    Step 3) Pull out another piece of paper and divide it into three columns: High, Medium, and Low. Now, sort your hashtag list into the three columns. In the first column, put the hashtags that have a lot of occurrences on Instagram. Next, put the ones that have a medium amount of occurrences. Last, in the low column, put the hashtags that have low occurrences in that column.

    Depending on the hashtags you choose, you will have different definitions of High, Medium, and Low. Here is what mine looks like: High (500,000+), Medium (50,000 to 499,999), and Low (Under 49,999). However, yours could also look like this: High (10,000+), Medium (1,000 to 9,999), and Low (Under 999).

    Step 4) After you’ve got all the hashtags sorted, keep your list handy when scheduling your Instagram posts or when posting on Instagram. Try to post an assortment of hashtags from each category. Why?

    • When you post hashtags from your High column, these posts will likely be seen by lots of people quickly. Since this hashtag moves fast, after a short time (maybe a few hours) your post will be buried.
    • When you post hashtags from your Medium column, these posts will be seen by less people but will stick around longer near the top of the hashtag search list. This could keep your post seen for a few days.
    • When you post hashtags from your low column, these posts will be seen by less people but will stick around longer than the medium column hashtags. This could keep your post seen for weeks or months when the hashtag is searched.

    Be sure to keep your hashtag lists current by updating them regularly.

    Oh, before you leave – keep the hashtags on Instagram. Hashtags don’t do well on Facebook and you’ll even get punished in the search results for using them on Pinterest!

    Save this post to Pinterest so you can find it when you get ready to implement it:

    An Easy to Implement Hashtag Strategy for Instagram - Great for Silhouette Cameo and Cricut Small Business Owners - by cuttingforbusiness.com

  • Free Download: Editable Liability Release for Customer Provided Blanks

    Let’s talk about customers bringing you their own blank products to embellish with your Silhouette or Cricut.

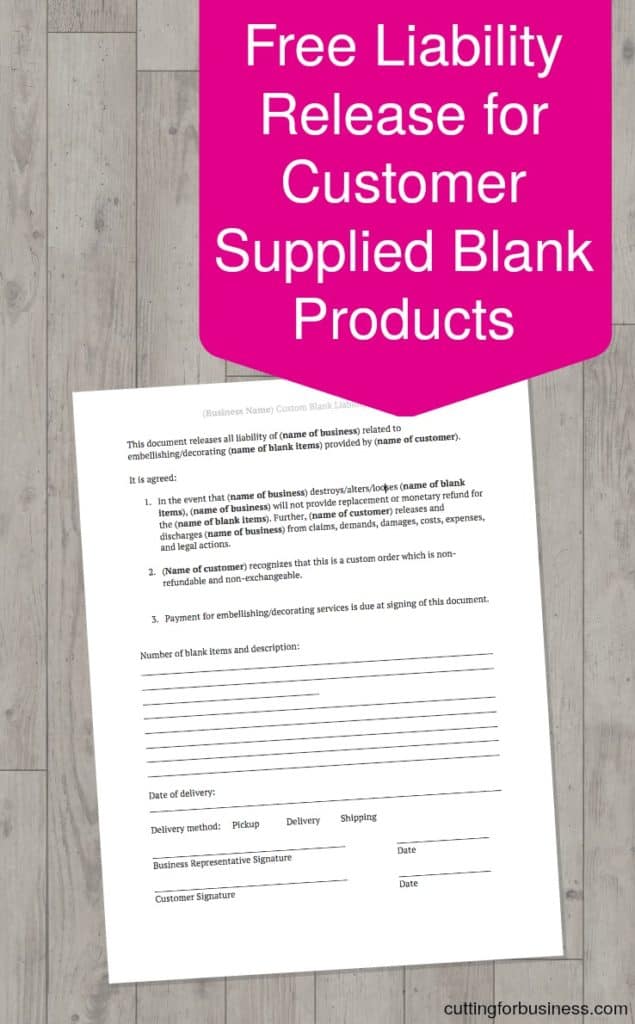
    A few examples: Your customer purchases and gives you 10 blank water bottles to add vinyl to for their children’s sports team, a customer provides a shirt for you to add a heat transfer vinyl design to, or a customer provides barnwood from their own collection to you to build a wooden sign from. Some small business owners are okay doing this, while others don’t do it. In either case, you could potentially destroy, break, or lose their products that the customer has provided to you. That’s why it is a good idea for you to have your customer sign a liability release. This document relieves you and your business from having to replace the items if your customer doesn’t like them, or if you lose or damage the blanks.

    Today, I’m sharing an editable version of a simple liability release. Need this downloadable form? First, save this post to Pinterest. Then, download the form below.

    Free Download: Editable Liability Release for Customer Provided Blanks in Your Silhouette Cameo, Curio, Mint, Cricut Explore Business - cuttingforbusiness.com
  • How to Set a Preferred Page Audience for Your Facebook Page

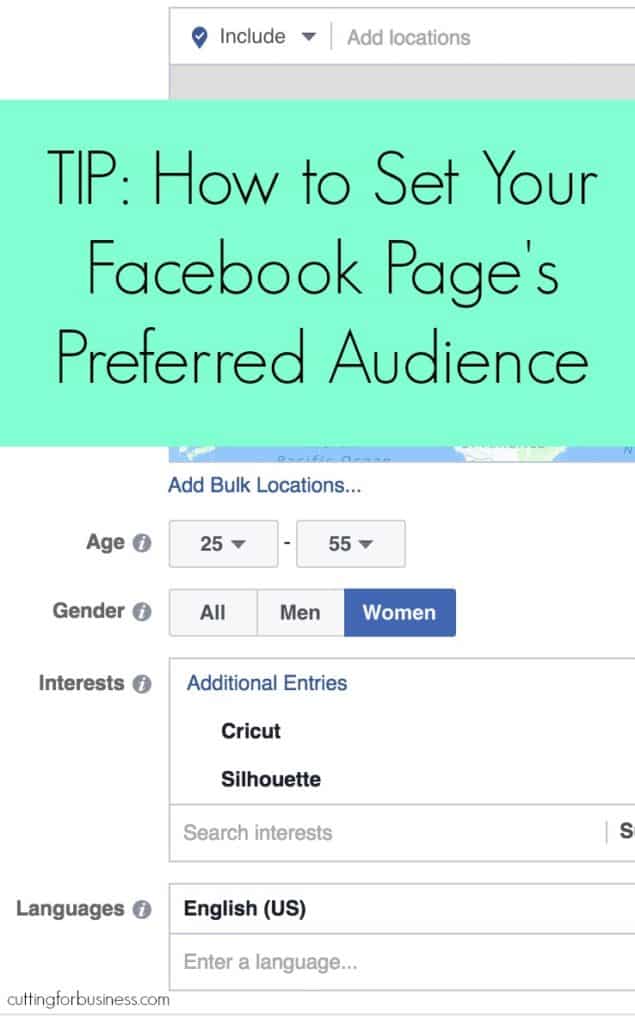
    Today, I’m showing you a little known feature in Facebook to try on your Silhouette Cameo or Cricut small business page. The feature is called a Preferred Page Audience. It allows you to tell Facebook what kind of audience is best for your page. When Facebook knows what kind of audience they should show your page to, they will suggest it to people that fit your demographic.

    Tutorial to Choose a Preferred Page Audience on Facebook

    1. Log into your Facebook business page. Click “Settings”.
    2. Click “Preferred Page Audience” from the left hand side.
    3. Click “Set Preferred Page Audience”.
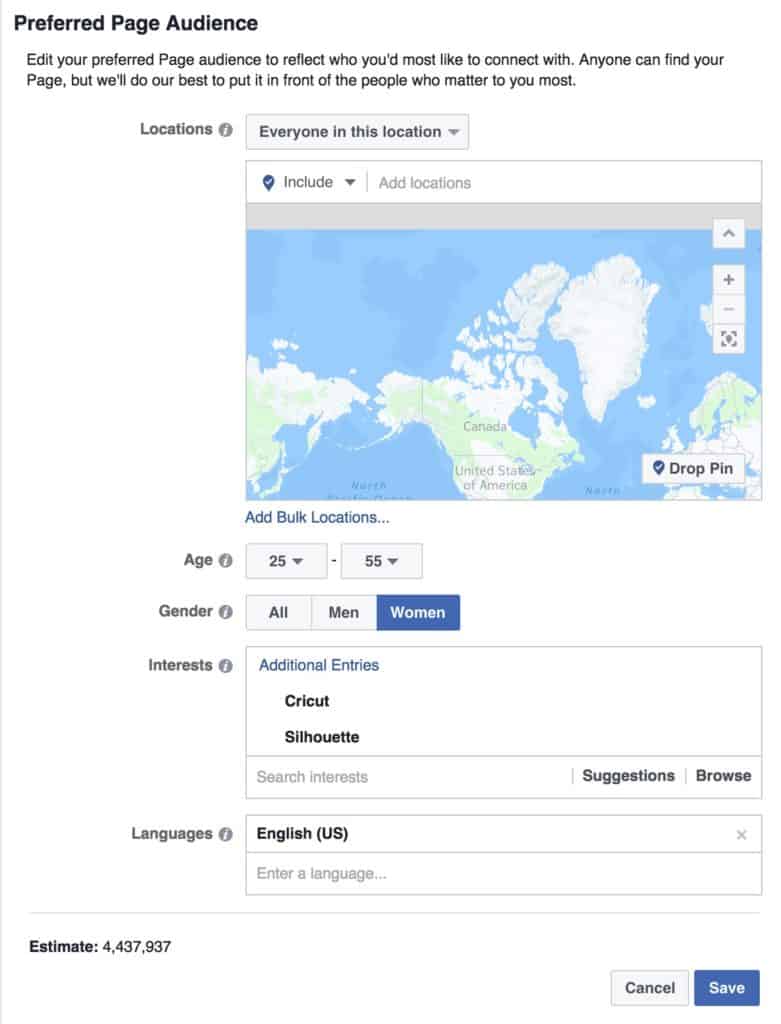
    4. Now, you’ll fill in the details of your ideal page audience. If you don’t know what to put, think of the ideal buyer of the products you sell. As an example, here is what the Cutting for Business Preferred Page Audience looks like:

    How to Set a Preferred Page Audience for Your Facebook Page - Great for Silhouette Cameo or Cricut Small Business Owners - by cuttingforbusiness.com

    That’s it! Remember to tweak your preferred page audience on Facebook as your products change. Need more help with marketing your business on Facebook? My Facebook class advertising course officially launches on Monday, but the Cutting for Business Insider’s Club members get access today. Click here to join the group!

    Save this post to Pinterest:

    How to Set a Preferred Page Audience for Your Facebook Page - Great for Silhouette Cameo or Cricut Small Business Owners - by cuttingforbusiness.com

  • How to Prepare Your Craft Business in Case of Accident or Death

    Someday, each one of us will pass away. While I hope it is many, many years down the road – people pass away unexpectedly every day. Similarly, you could get into an accident or fall ill without warning and be unable to maintain your business. As a small business owner, you have a responsibility to your customers to leave someone in charge of your business in unforeseen circumstances.

    No one likes thinking about or planning for these things, so I’m making it easy for you! I’m giving you a printable outline to download and fill out. Once you have filled it out, put it in an envelope, and place it with your important paperwork. Tell your significant other, a close friend, or family member about the envelope and your plans. Remember to keep the printable up to date.

    Download the printable here in pdf or here in .docx.

    It’s always wise to double check your business plans with an estate lawyer or your small business legal team if you have one. Additionally, be sure that your business and bank accounts have beneficiaries listed.

    Before you go, the Silhouette crafting world lost a crafter this week in an ATV accident in Florida. Feel free to read more here.

    This post is important – save it to Pinterest:

    How to Prepare Your Silhouette Cameo, Curio, Mint, or Cricut Craft Business in Case of Accident or Death - cuttingforbusiness.com