Blog

  • How to Save as .png, .jpg, or .pdf from Silhouette Studio

    This article has been recently updated to account for changes after the release of Silhouette Studio Version 4.

    Silhouette America recently rolled out an update to Silhouette Studio that allows users to save in more formats.

    Save as .JPEG and .PDF from Business Edition

    To Save as .JPEG or .PDF in Silhouette Studio, go to ‘File’, ‘Save As’, ‘Save to Hard Drive’, then select either .JPEG or .PDF under ‘Format’ as shown below. You’ll need Silhouette Studio Business Edition – buy it here.
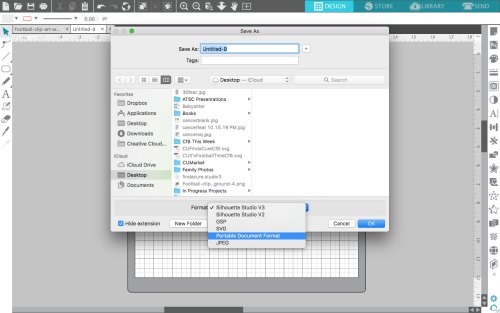
    How to save as .png, .jpg, or .pdf in Silhouette Studio (Mac Version) - by cuttingforbusiness.com

    Save as .PNG

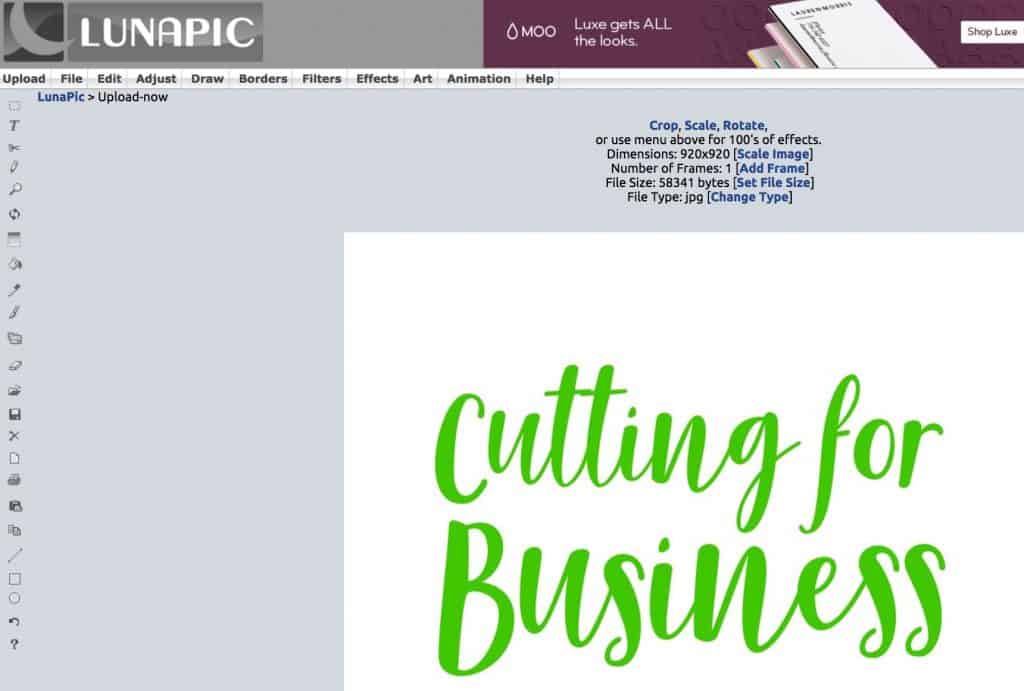
    Do you need to save as a .PNG with a transparent background? The easiest way to do this is to first save as a .JPEG, then remove the white background using Lunapic.com. Here’s how:

    1. Visit Lunapic.com and upload your .JPEG image using the ‘Browse’ button.How to save as .png, .jpg, or .pdf in Silhouette Studio (Mac Version) - by cuttingforbusiness.com
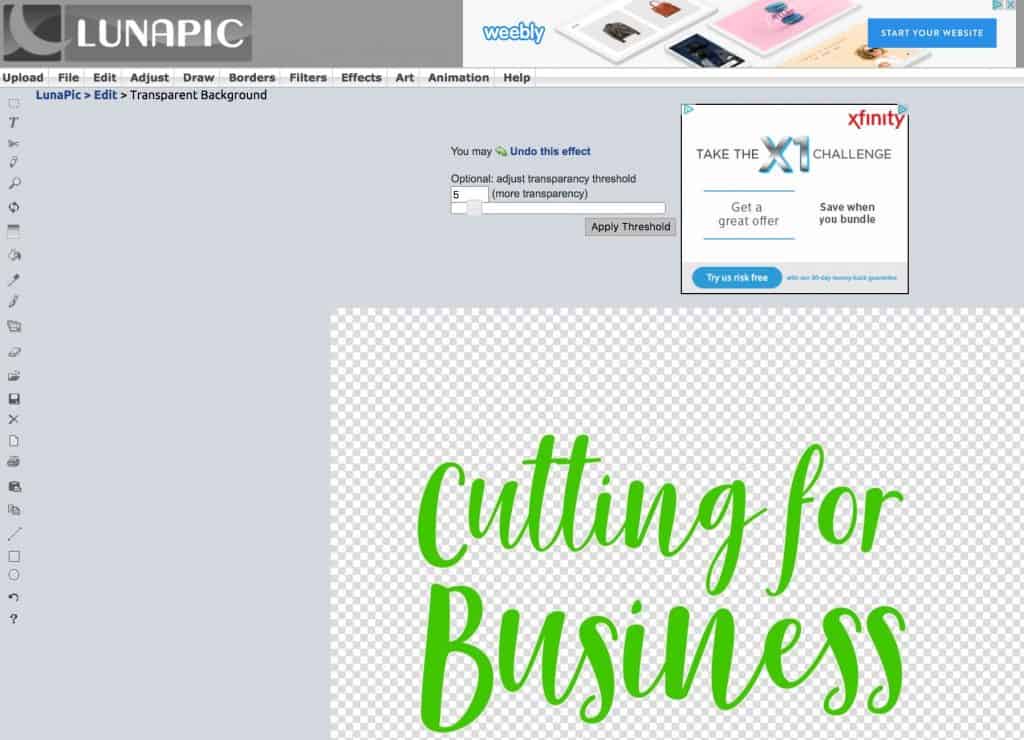
    2. Navigate to ‘Edit’, ‘Transparent Background’. Simply click on the white background and let Lunapic magically remove it for you! When the background is checkered instead of white, save it using the button near the bottom.How to save as .png, .jpg, or .pdf in Silhouette Studio (Mac Version) - by cuttingforbusiness.com

    That’s it! It’s just that fast and easy!

    Don’t have Business Edition?

    If you don’t have Silhouette Studio Business Edition, you can take a screenshot of your design. On a MAC computer, hold down ‘Command’ + ‘Shift’ + ‘4’. If you need a transparent background, you can do so using the above instructions for lunapic.com. On Windows 10, use the snipping tool. Hold down ‘ALT’ + ‘M’ to launch it. Again, if you need, you can use lunapic.com to create a PNG with a transparent background.

    Share this image on your favorite social media network by hovering over it with your mouse or tapping it on your device:
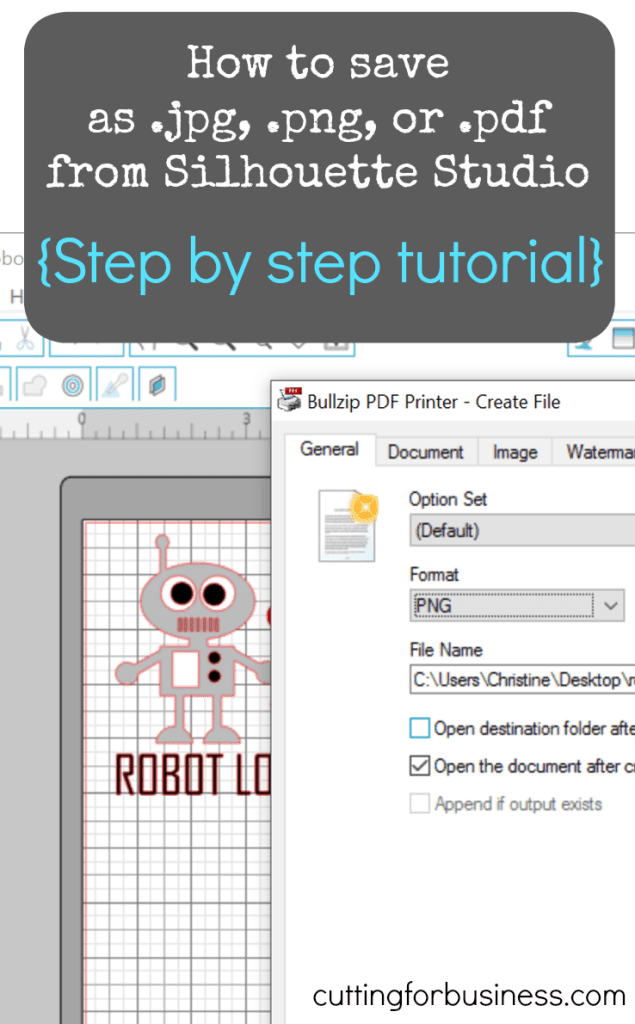
    How to Save as .png, .jpg, or .pdf from Silhouette Studio for your Silhouette Cameo - by cuttingforbusiness.com

  • How to Create Your Own Designs in Silhouette Studio

    Yesterday we talked about designing with fonts. Today, we are going to talk about creating your own designs in Silhouette Studio.

    Why create your own designs?

    Shops are likely to sell more when their products are unique and different from other shops. This is shown clearly by looking at big box retailers. You usually don’t see retailers selling inhouse brands that are the same as other retailers. Unfortunately, when you buy designs online you usually aren’t buying an exclusive design and your competition could be selling the same exact design!

    How can you create your own designs?

    First, stop tracing stuff! If you didn’t create the file you are tracing – you cannot use it in your business without a license or permission. There a number of ways you can create your own designs, including: drawing on a piece of paper and scanning it into your computer, drawing with a Wacom tablet and pen or Livescribe pen (or any other similar device), or using the drawing tools available in Silhouette Studio. But what if you can’t draw? First, don’t feel bad and know that you aren’t alone – I don’t draw well, either.

    My favorite secret to creating in Silhouette Studio:

    Think of whatever you want to draw and break it into basic shapes. For a non-art inclined crafter, this can be difficult – if not impossible for me to think of any object in basic shapes. What’s a crafter to do? Use Google! I usually search for whatever I want to design and the words “how to draw _______ step by step”. For example, if I want to design a robot shirt I would search “how to draw a robot step by step”. Several tutorials pop up and I can choose my favorite one. This is important: the actual tutorial you choose is not too important – it’s the step breakdown that you need.

    Since we are already talking robots, grab your computer and let’s draw a robot together.

    How Create a Robot in Silhouette Studio Step by Step

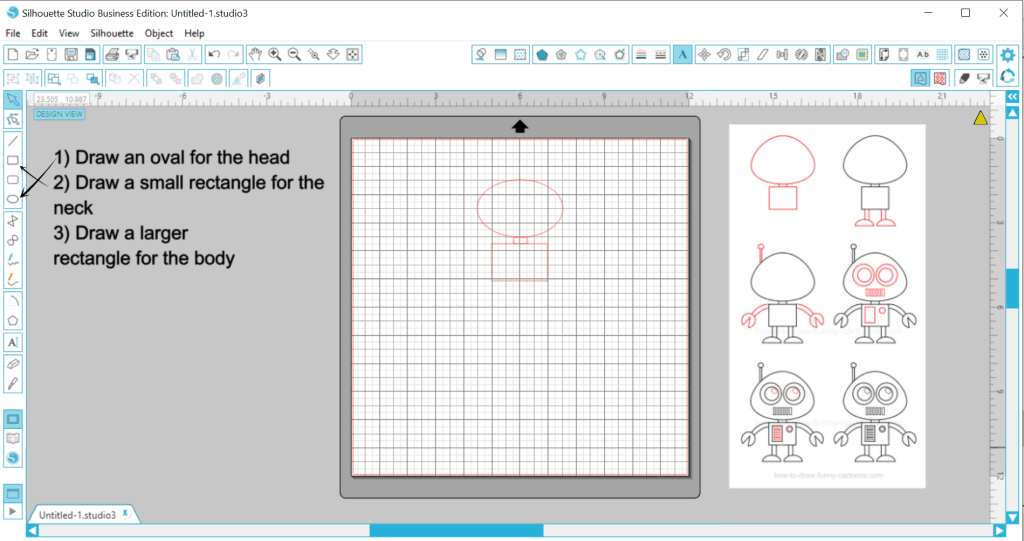
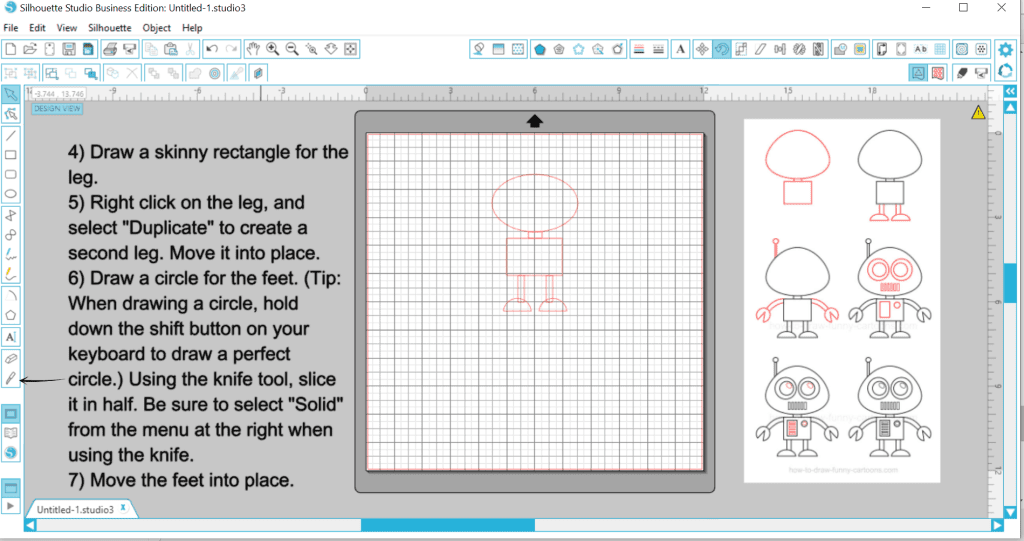
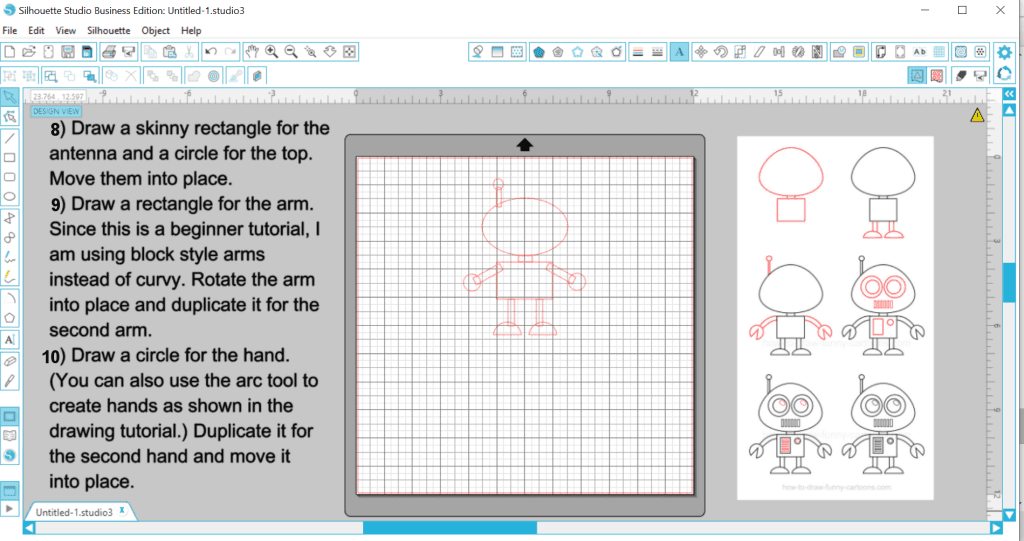
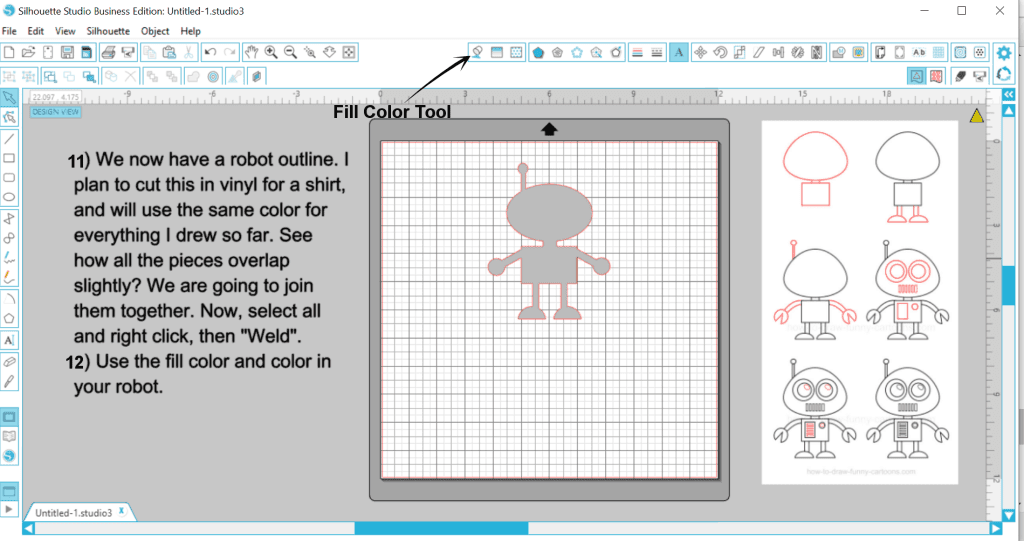
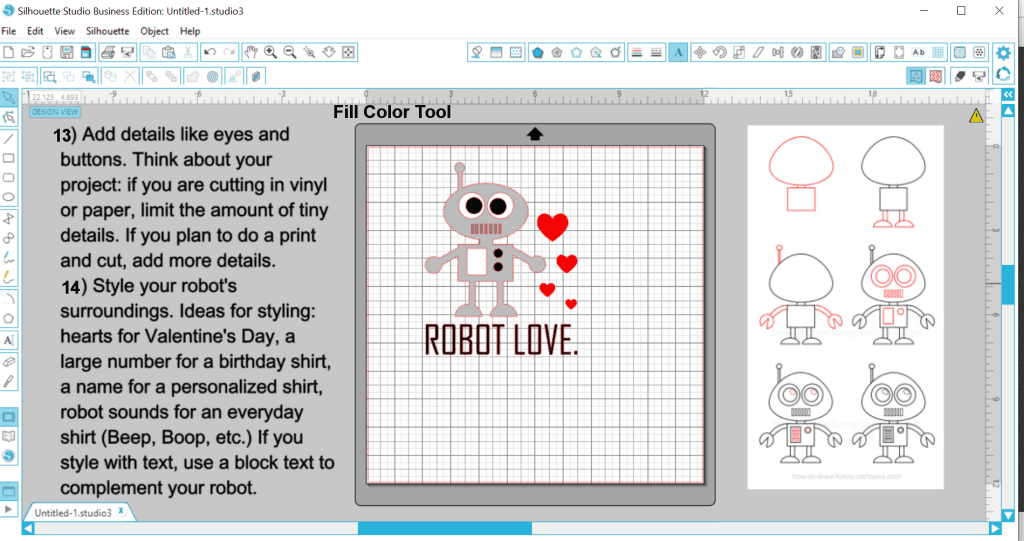
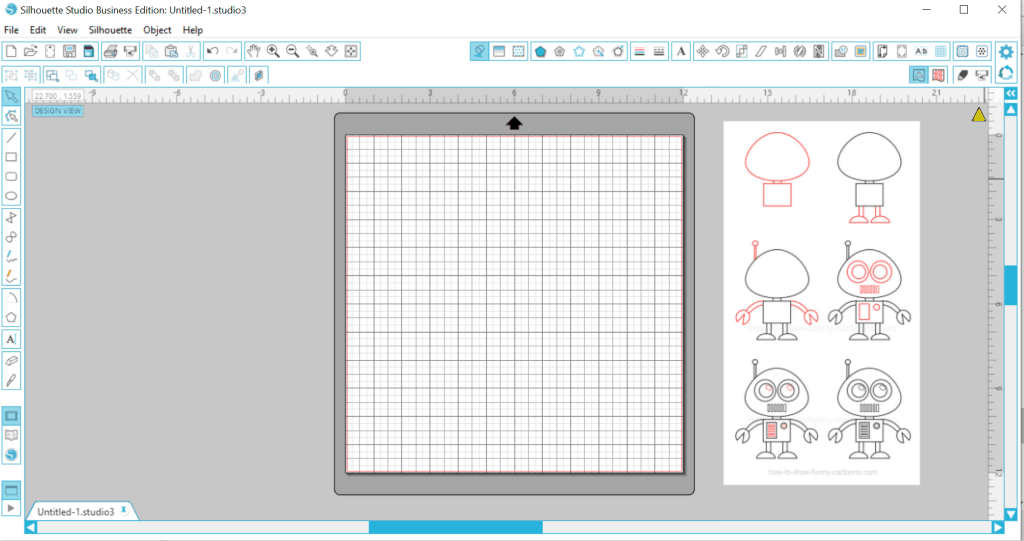
    To start, open your step by step tutorial you found online in Silhouette Studio. I used a tutorial found here.

    How to Create Your Own Designs in Silhouette Studio - Silhouette Cameo Curio - by cuttingforbusiness.com

    How to Create Your Own Designs in Silhouette Studio - Silhouette Cameo Curio - by cuttingforbusiness.com

    How to Create Your Own Designs in Silhouette Studio - Silhouette Cameo Curio - by cuttingforbusiness.com

    How to Create Your Own Designs in Silhouette Studio - Silhouette Cameo Curio - by cuttingforbusiness.com

    How to Create Your Own Designs in Silhouette Studio - Silhouette Cameo Curio - by cuttingforbusiness.com

    How to Create Your Own Designs in Silhouette Studio - Silhouette Cameo Curio - by cuttingforbusiness.com

    That’s it! Remember, you are now able to draw just about anything. Search “how to draw _______ step by step” for a step breakdown. As you draw your design, change and modify the design to fit your needs and style.

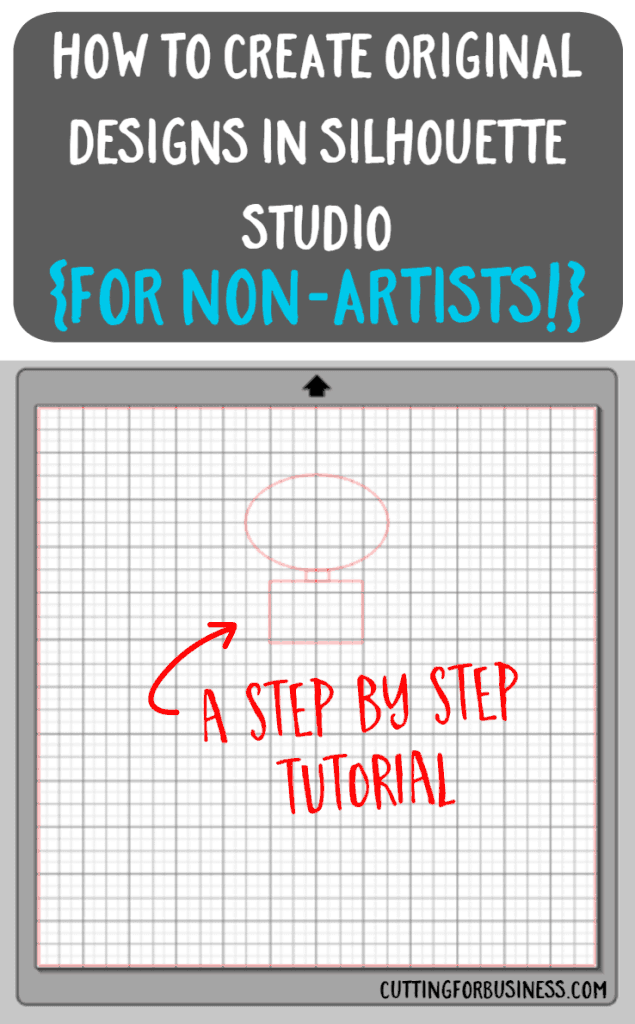
    I hope that next time someone asks you where you got your design you can proudly say, “I drew it!” If you thought it was helpful, please share this post on social media by hovering over the image below.

    How to Create Your Own Designs in Silhouette Studio - a tutorial by cuttingforbusiness.com

  • FAQ: Lost Packages in Your Craft Business

    Lost packages are something that no seller wants to deal with, but a lost package is likely to happen to your business at some point. Let’s talk about them today.

    Liability of Lost Packages

    Did you know? On most marketplaces, the seller is responsible for the package until it reaches the buyer. This means that as a seller, even though the package is out of your hands – you are responsible for it until the tracking states “Delivered” or “Notice Left”. While you may have written policies that differ from this for your own business, in the eyes of the most marketplaces the standard is as mentioned above.

    What Should You Do if a Package is Lost?

    A lost package is one that does not show as delivered by the carrier.

    1. Wait. Wait it out a few days beyond the day of expected delivery. Packages can get delayed a day or so, or incorrectly scanned or sorted. It is not uncommon for a package to show up after the expected delivery date.
    2. Stay in touch. Keep in contact with the buyer. Put yourself in the position of the buyer – they bought something that they didn’t receive. The buyer will either want a refund or a replacement product.
    3. Reach out to the carrier. Either the buyer or the seller can reach out to the USPS (or other carrier). The package carrier is able to open a claim to try to locate your package, or an insurance claim to cover the insured value of your package. To provide great customer service, I recommend that you as the seller reaches out to the carrier. You will need the tracking number, proof of the value of the item, and proof of insurance (if purchased).
    4. File a claim. To file a claim with the USPS, you can visit your local branch, call them, or use this link to file online.

    Tip: The purpose of insurance on packages is to protect the seller from being out money if the carrier loses or damages a package. Consider purchasing insurance on expensive or fragile products.

    What if the buyer claims that the package was not delivered and the tracking says delivered? I have good news for you sellers: If the tracking says that the package was delivered and the buyer states that it was not received, you are no longer liable. You should inform the buyer to reach out to the carrier for assistance. Additionally, if the buyer leaves negative feedback because of non-delivery, most marketplaces will remove the feedback.

    FAQ: Lost Packages in Your Craft Business - by cuttingforbusiness.com.
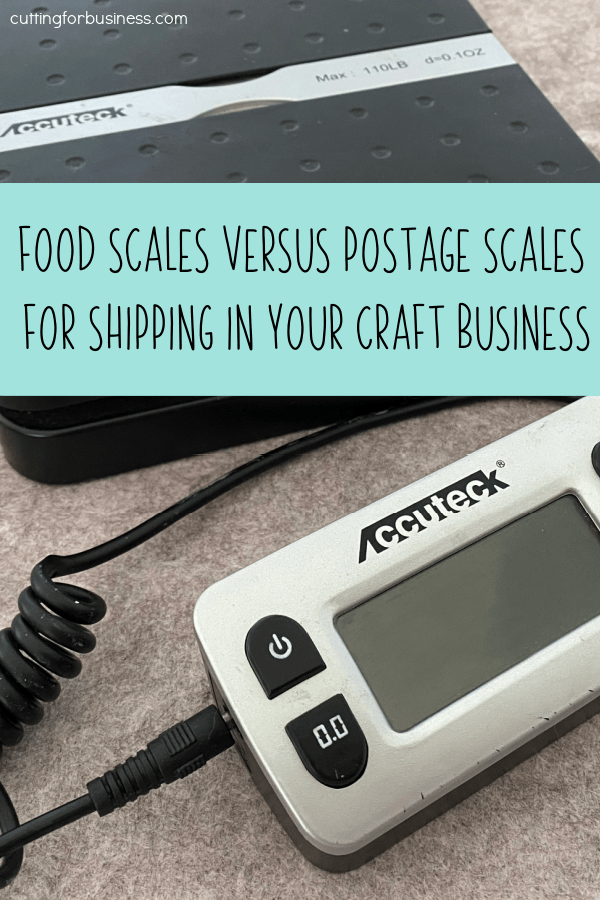
  • Food Scale versus Postage Scale for Shipping in Your Craft Business

    Today, I’m tackling another reader question: I already own a food scale, do I need to buy a postage scale to use in my craft business?

    Do You Need a Postage Scale?

    Answer: In general, either will work for shipping products made with your Silhouette or Cricut. However, there are a few things to watch out for:

    1. Weight capacity. Look at the weight capacity of the scale. Food scales in general have lower weight capacities compared to postage scales. If you only ship small items this isn’t a big deal, if you ship larger items you’ll likely need a postage scale.
    2. Automatic importing. If you want to connect your scale to your computer and automatically import the weights from the scale, you will need a postage scale.
    3. Label printer. If you want to use a label printer with your scale, you should buy a postage scale.
    4. External display. If you regularly ship large or bulky items, purchase a postage scale with an external display (this style of display is connected on a wire to the machine).

    Recommendations for Postage Scales

    You can pick up inexpensive scales on Amazon – usually for much cheaper than office stores – many are under $30. I personally own this scale and it has worked perfectly for years.

    Food Scale versus Postage Scale for Shipping in Your Craft Business - by cuttingforbusiness.com.

    Have a question you need answered? Feel free to reach out to me on social media, email, or leaving a blog comment. I personally respond to each and every message received.

  • How to Package Fragile Handmade Products for Shipping

    Today’s blog posts answers a Cutting for Business reader’s question: How do you ship fragile handmade products? My best advice for shipping fragile items is to double box them and use bubble wrap.

    Step-by-Step Guide to Package Fragile Products

    1. Wrap your handmade product in bubble wrap or packing paper.
    2. Put your handmade product in a box and tape it closed.
    3. Wrap the sealed box in bubble wrap and place it in a larger box.
    4. Seal the box and attach your shipping label.

    The Shake Test

    Before you send your package out, shake it – hard! If you hear your product rattling around inside, it isn’t packaged well enough to withstand shipping. However, if it’s nice and quiet – you are good to go!

    That’s it to packaging your fragile handmade products. Yes, you might spend a few extra cents in packaging materials but your fragile goods should arrive unharmed. If you are in need of shipping materials, my favorite place is uline.com. How do you package your fragile handmade products? Let me know in the comments.

    How to Package Fragile Handmade Products for Shipping in Your Silhouette or Cricut Business - Portrait, Cameo, Curio, Mint, Explore, Maker, Joy - by cuttingforbusiness.com.
  • Tutorial: Valentine’s Day Flask with Free SVG Cut File

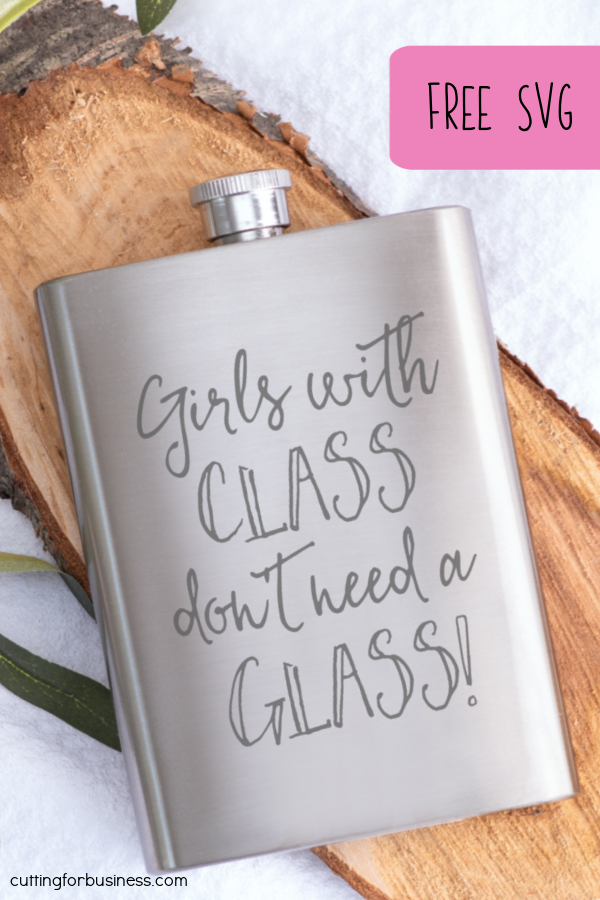
    Valentine’s Day is one of my favorite holidays of the year, so I’m excited to share this Silhouette Cameo project today. I took an inexpensive stainless steel flask and added fun text it to, “Girls with class don’t need a glass!”.

    I used silver etched vinyl from Expressions Vinyl (if you aren’t familiar with it, etched vinyl is sheer and has a slight sheen to it, making it look etched). Alternatively, if you have a sandblaster you could use it.

    In case you are wondering, the fonts used in this design were Stalemates and Gingerbuck, both available in this bundle.

    Save the image below to Pinterest, then download the SVG below.

    Free SVG - Valentine's Day - Flask - Girls with class don't need a glass - Silhouette or Cricut - Cameo, Curio, Mint, Portrait, Joy, Maker, Explore - by cuttingforbusiness.com.
  • Are Custom Products Worth It in Your Craft Business?

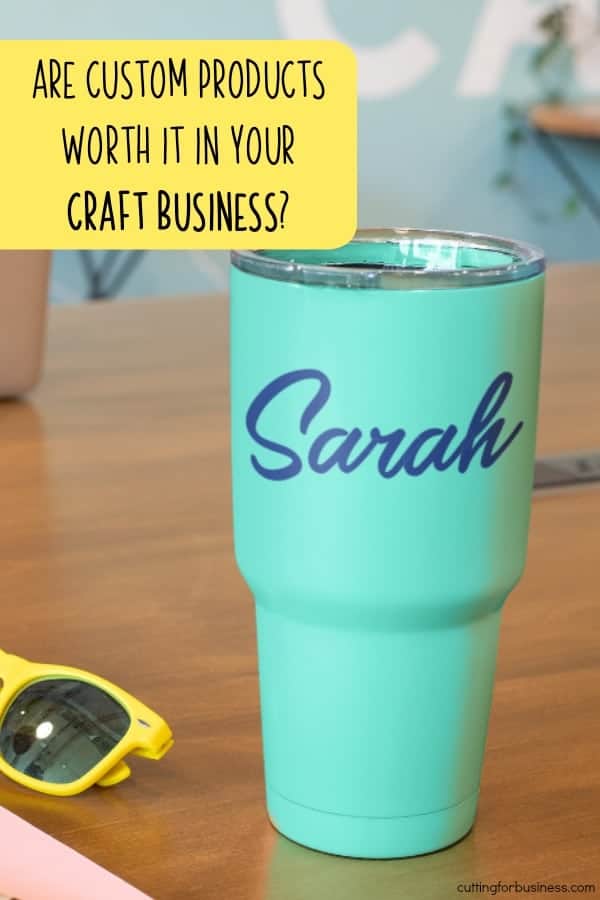
    Today’s post is to get you thinking about the products you offer in your Silhouette or Cricut small business – and the time it takes you to process each order. I’m asking you to think about whether or not custom made or personalized products are worth your time in your business. For the purpose of this post, custom products are defined as orders where the customer chooses what goes on the product and you create one, unique product. (Example: 1 personalized tumbler cup or 1 personalized tee shirt.)

    To start, let’s take a look at the process of creating a custom or personalized product.

    Process for Custom Products

    1. Make a sample of the product (which you may or may not be able to sell) or create a mockup of the product.
    2. List the product online.
    3. Get an order from a customer.
    4. Make a mockup of the product.
    5. Wait for customer approval.
    6. Get customer approval or make changes as desired by the customer, possibly wait for customer approval again.
    7. Create the product and mail it to the customer.

    And don’t forget about the customers that don’t specify their customization and you have to chase them down to get their order; or even the customer who incorrectly enters their desired customization and blames you for the error. In the event that the customer returns the item, it is unlikely that you’ll be able to resell it to another customer.

    Now, let’s take a look at the process for selling a ready to ship product.

    Process for Selling a Ready to Ship Product

    1. Create the product.
    2. Photograph and list the product for sale.
    3. Get an order from a customer.
    4. Package and ship the order.

    Are Custom or Personalized Orders Worth It?

    I can’t argue that the customization and personalization niche is huge (think large brands like Things Remembered or Personalization Mall). However, for one woman (or one man!) operations, this niche may not be as profitable unless you can sell at a high price point and large profit margin or you can sell hundreds of products. If you are a one person business, it can be more profitable to work assembly line style and create many ready made products at a time. If you browse Etsy, you may notice that many of the largest online shops do not only sell custom made or personalized products.

    Unfortunately, I can’t decide if custom orders are right for your business – but I hope I got you thinking. Does your business sell only custom orders, only ready made products, or a mix of both? Let me know in the comments, and read on for an alternative approach to selling on Etsy.


    Was this information helpful? Save the image below to Pinterest.

    Are Personalized or Custom Products Worth It in Your Silhouette Portrait or Cameo and Cricut Explore or Maker Craft Business? By cuttingforbusiness.com.

  • 6 Mistakes New Silhouette & Cricut Business Owners Make

    There seems to be a lot of new Silhouette and Cricut owners lately, and many of them are interested in using their machine to make money. If you are one of them (congratulations!), but I urge you to learn from the mistakes of the small business owners that came before you. Today, I’m sharing the most common mistakes I see from new small business owners.

    6 Mistakes New Silhouette & Cricut Business Owners Make

    1. Jumping into a new business before you know how to use your machine. Please, figure out the in’s and out’s of using your machine and troubleshooting before you start selling. I mean, you wouldn’t want someone to operate on you because they bought a set of surgical tools, so don’t sell products before you know how to use the machine.
    2. Starting a Silhouette or Cricut business just to make money. Many people want to make more money; but if you don’t love what you do you are likely to burn out quickly, be miserable all the time, or both.
    3. Not researching copyrights and trademarks before you start selling products.  Nothing is going to hurt your business more than getting sued over making something that you don’t own the rights to. I have lots of information about trademarks and copyrights – you just have to read it.
    4. Copying another designer’s design or products. It’s frowned upon in the crafting world to blatantly copy another crafter’s design. Your business is likely to do better if you can come up with your own ideas anyway! See this post for more information; or head to this post if you’ve been copied.
    5. Putting your products online and expecting them to sell themselves. In recent years, handmade marketplaces have become more popular and competition has become greater. If you want your products to sell well, you have to have a certain amount of hustle in you. You have to be able to put yourself out there and promote your products. If you can’t, this business might not be for you.
    6. Not registering with your city, county, or state and making your small business an official business. In many cases, the process isn’t difficult and the pros outweigh the cons! Read about the benefits in this post.

    If you are doing some of these things right now, don’t panic – just work to correct them and set your business up for success!

    6 Mistakes New Silhouette Portrait or Cameo & Cricut Explore or Maker Business Owners Make - by cuttingforbusiness.com

  • Recap: Free Commercial Use Silhouette Cut, Sketch, and Stamp Files

    This post has been moved. See 100+ commercial cut files on Cutting for Business at this link.


  • Silhouette Mint Teacher Gift Facebook Parody Stamp

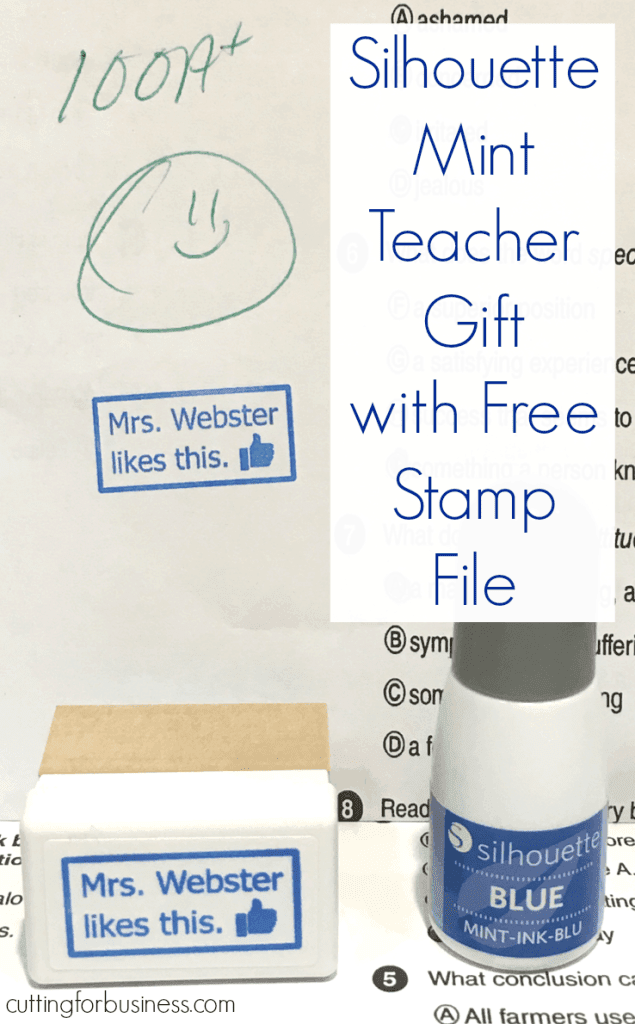
    Do you need a fast and inexpensive teacher gift? I’m sharing a Silhouette Mint Facebook parody stamp today. Don’t forget to give a your favorite teacher a bottle of ink and directions to re-ink their stamp, too.

    This file is okay for personal use products without credit back. Hope you “like” it, too!

    Silhouette Mint users can download the file in .mint format here. Since you’ll need to add a custom name, the stamp file only includes the outline and the thumbs up. I used Tacoma font, but feel free to use any font you want. My stamp is 15mm by 30mm, and I used blue ink.

    Silhouette Mint Teacher Gift Facebook Parody Stamp by cuttingforbusiness.com