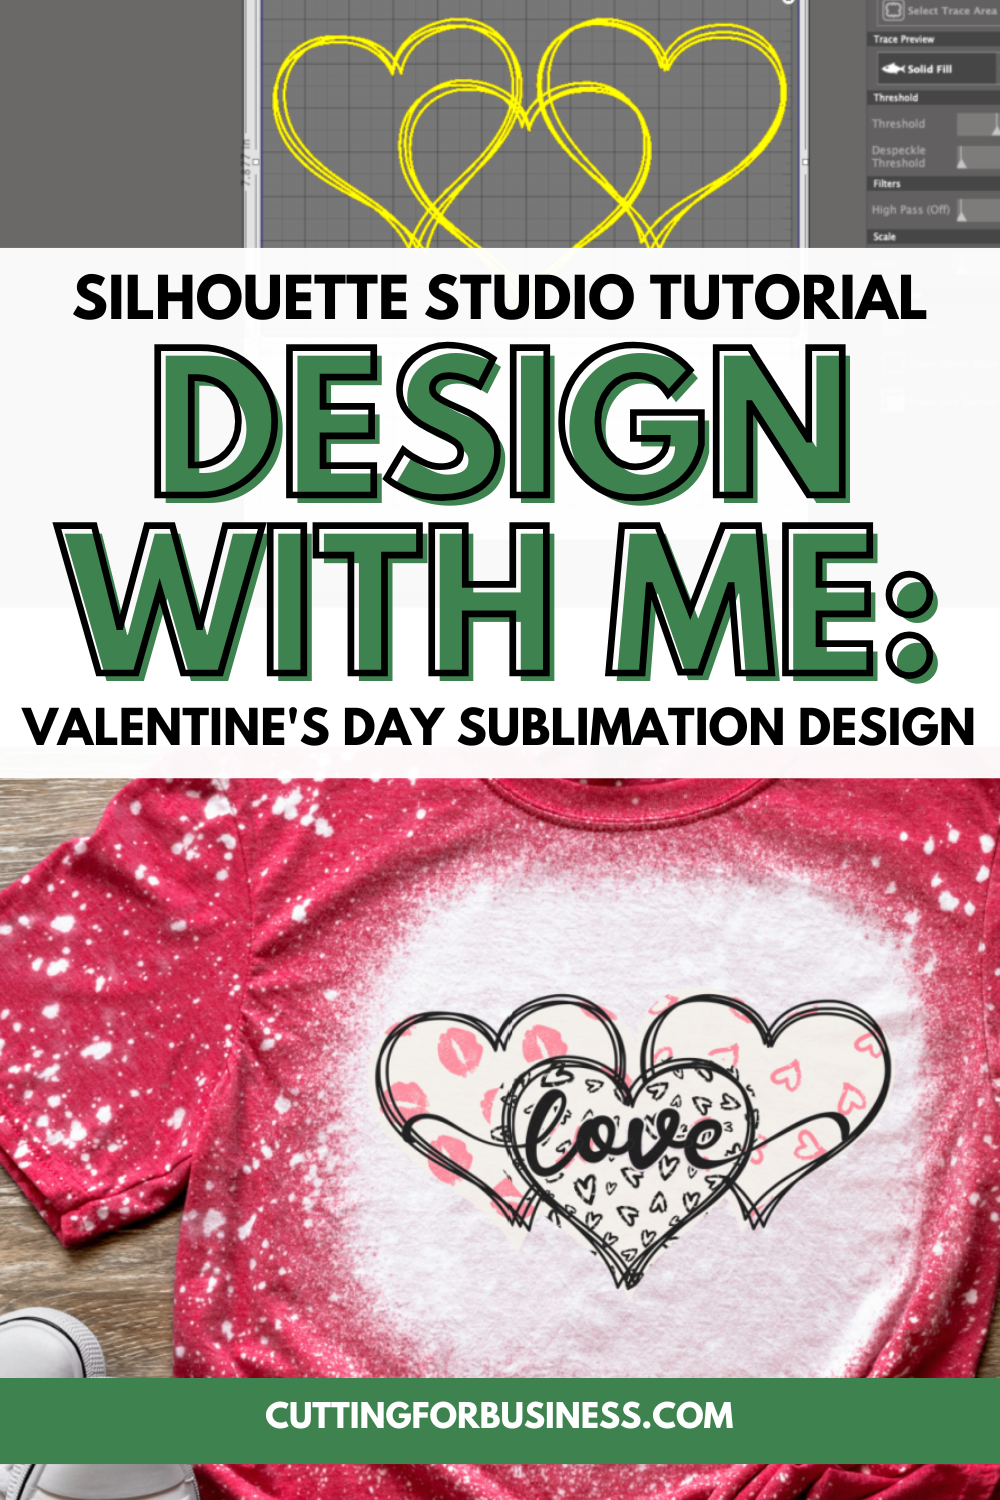
Valentine’s Day is soon and I love red, pink, hearts, and… sublimation! Let’s look at a tutorial today.
Tutorial: Valentine’s Day Sublimation Hearts
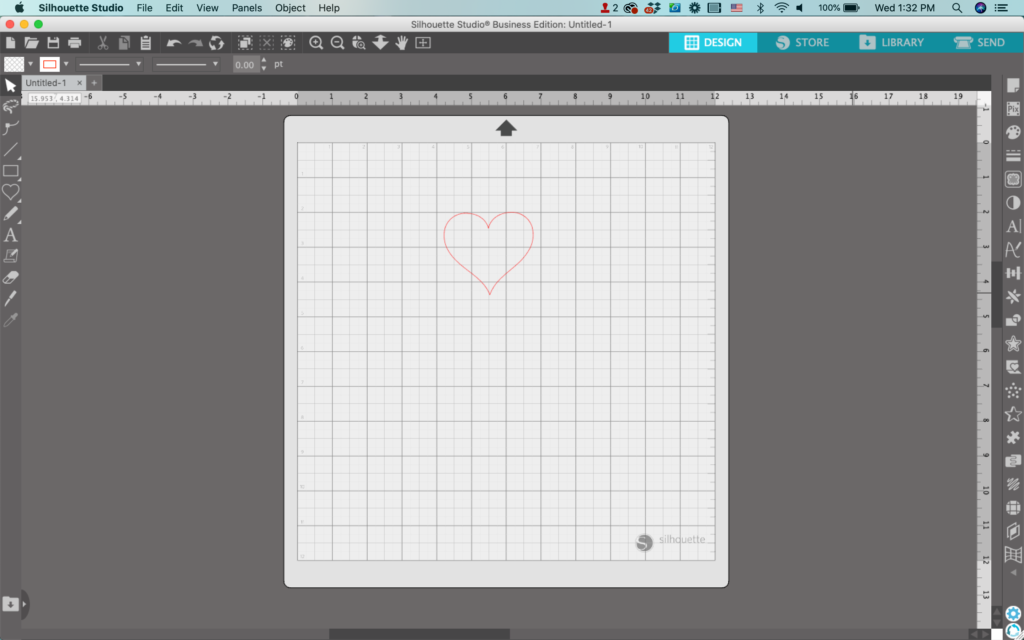
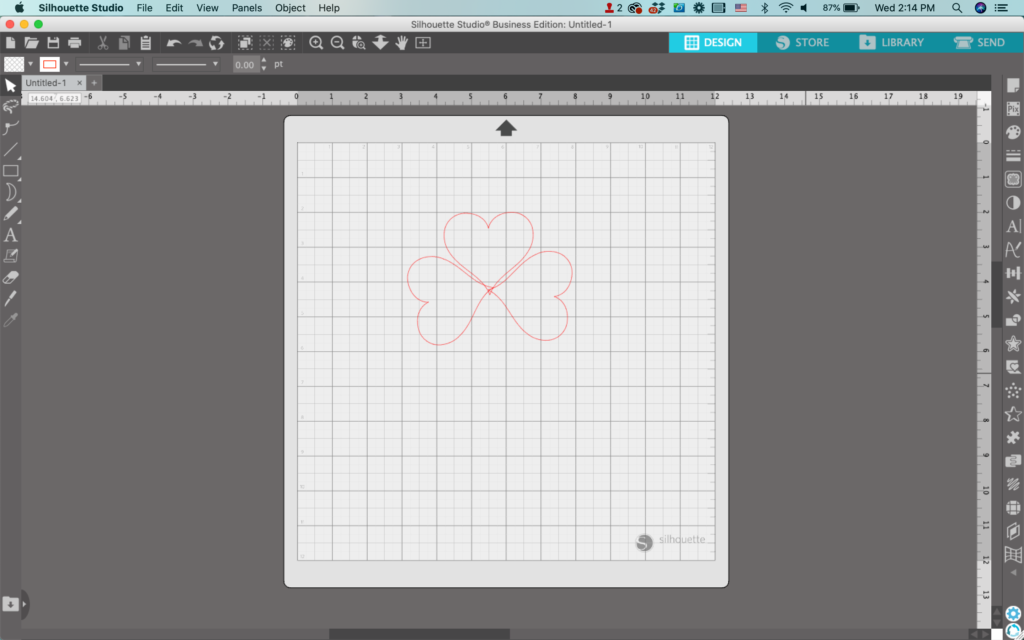
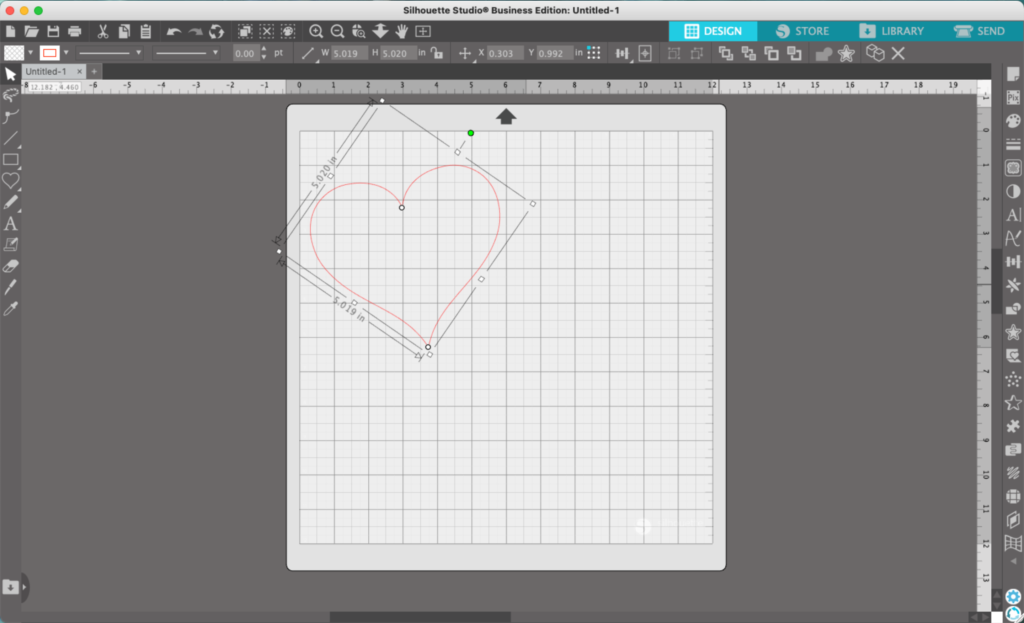
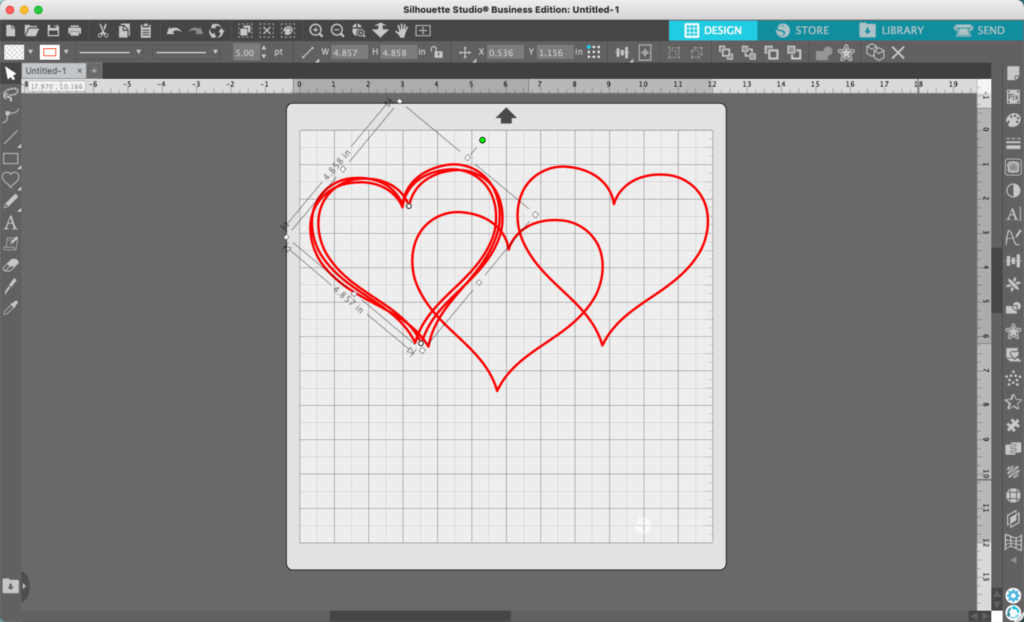
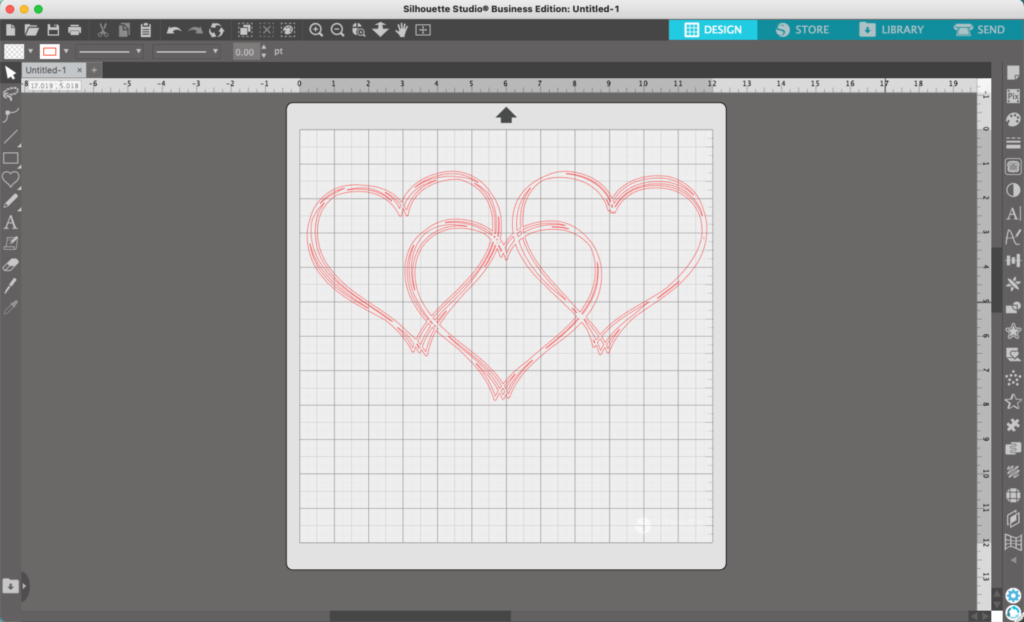
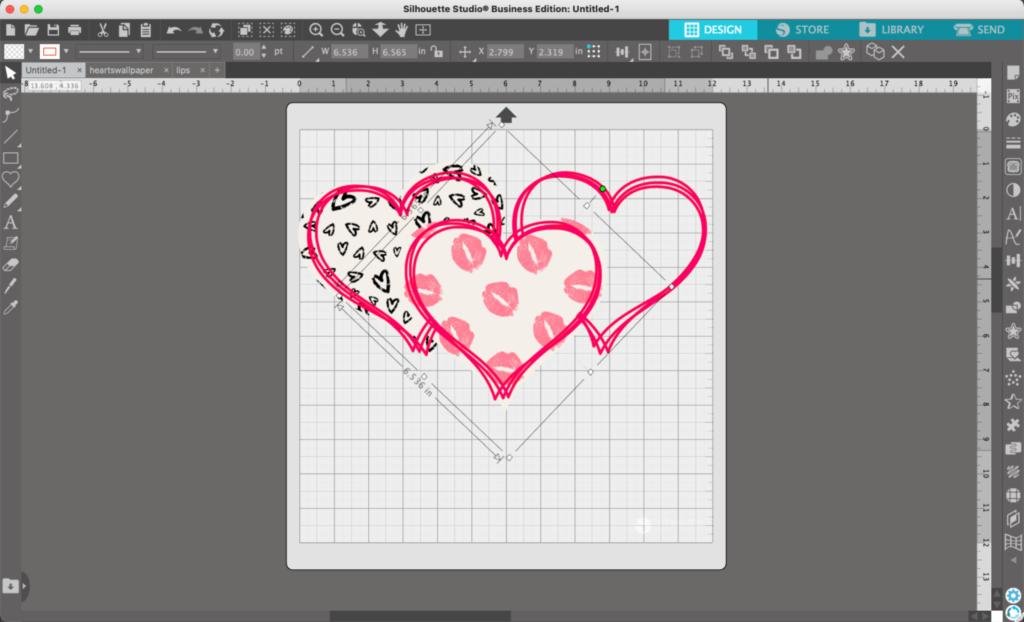
In Silhouette Studio, use Flexishapes to draw a heart.
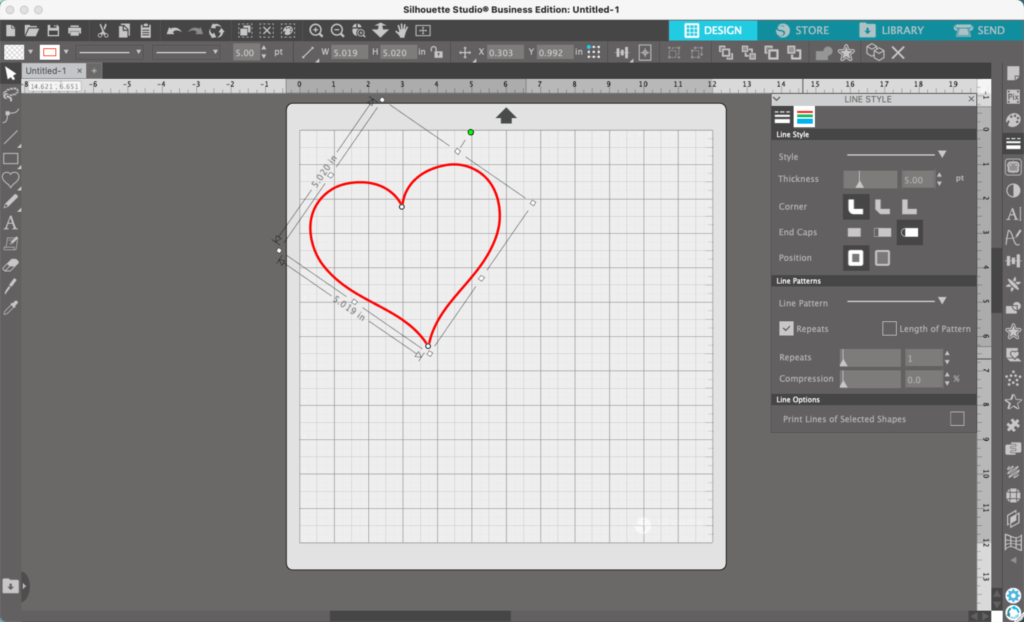
2. Navigate to ‘Panels’, ‘Line Style’, and thicken the line on your heart.
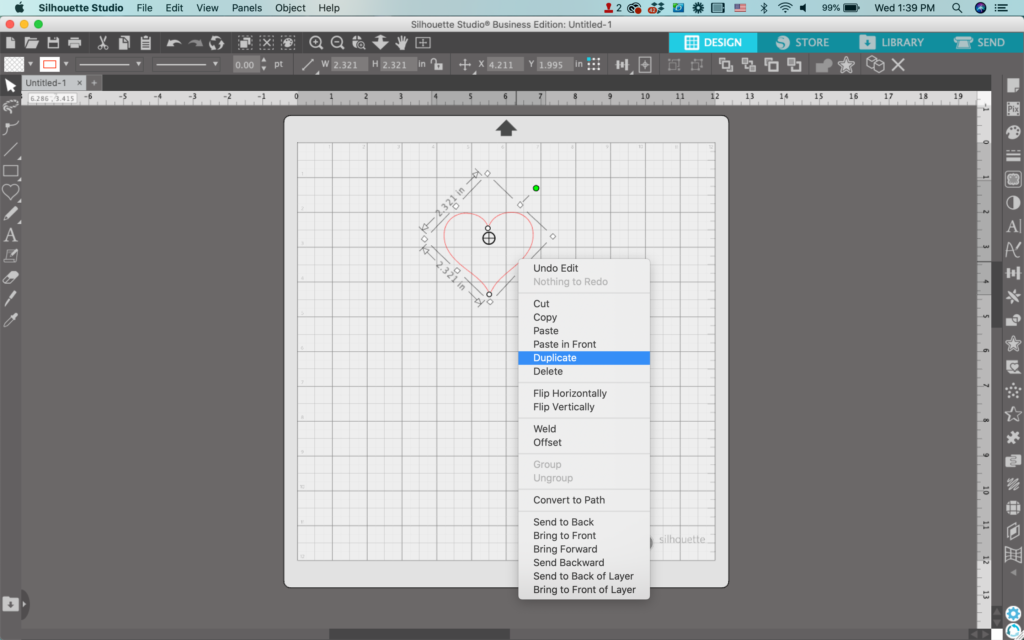
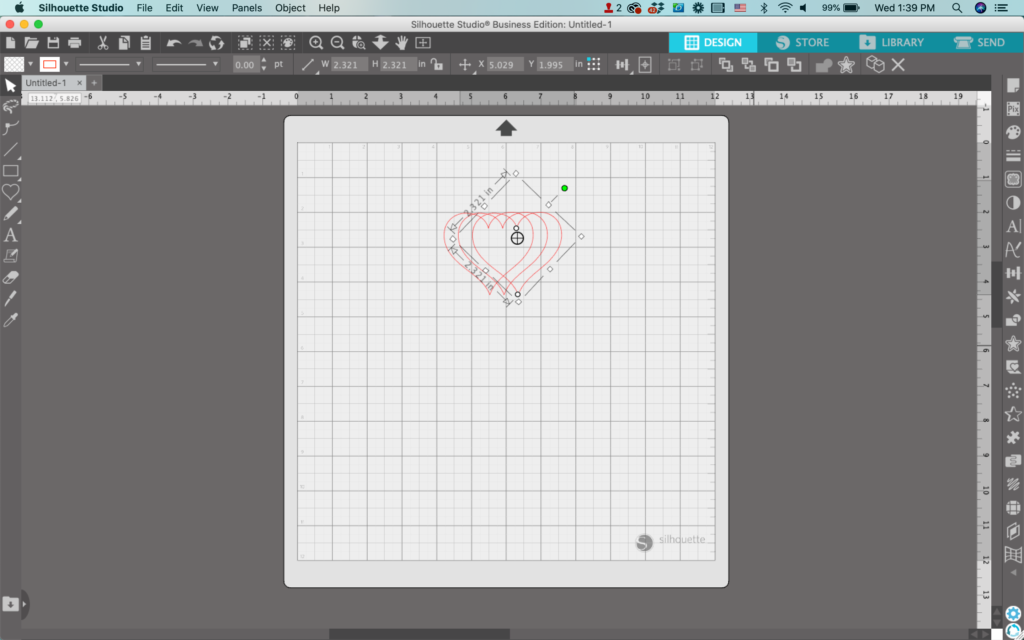
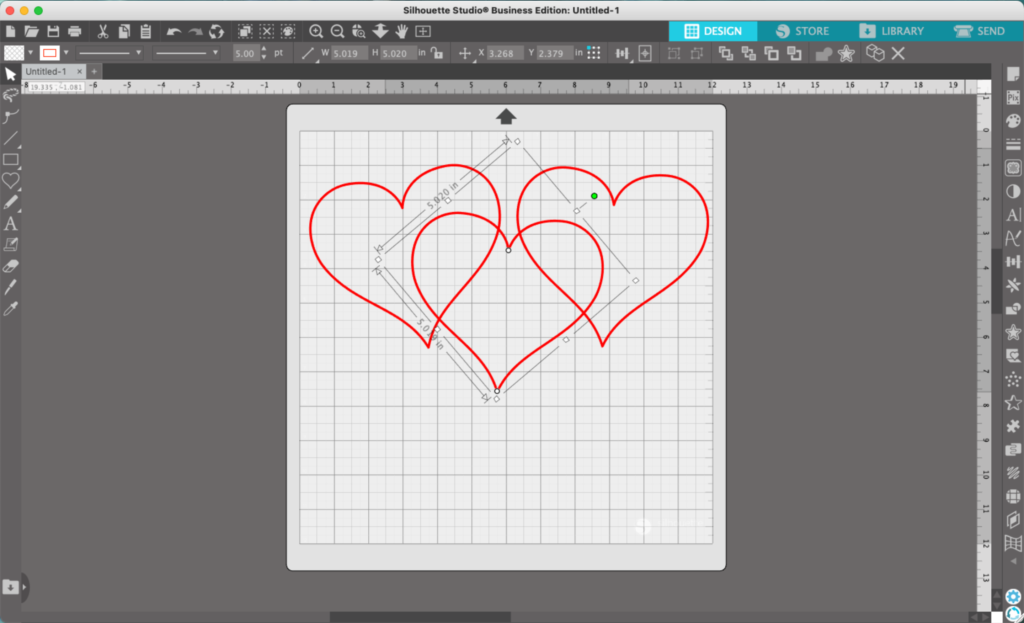
3. Duplicate the heart two times and arrange them as desired.
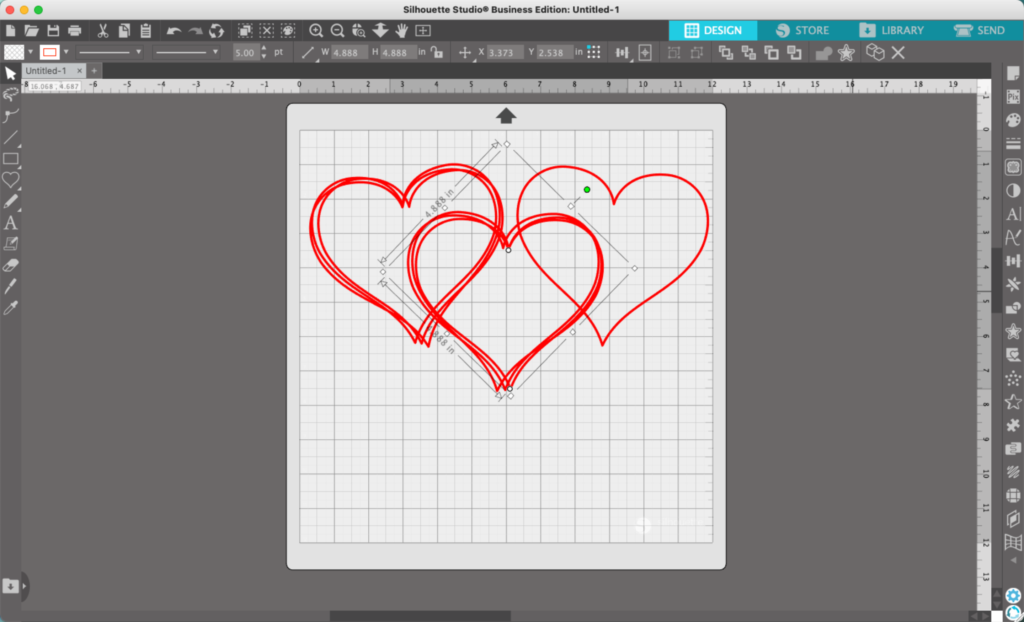
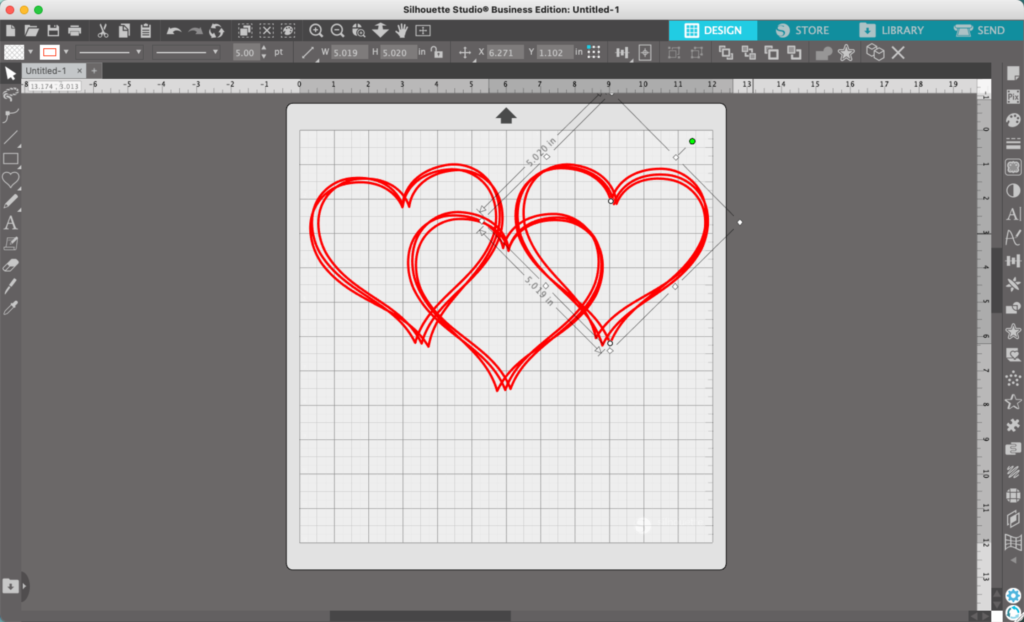
4. Now, duplicate your first heart and place the duplicates on top of the first heart.
5. Repeat step 4 for hearts 2 and 3.
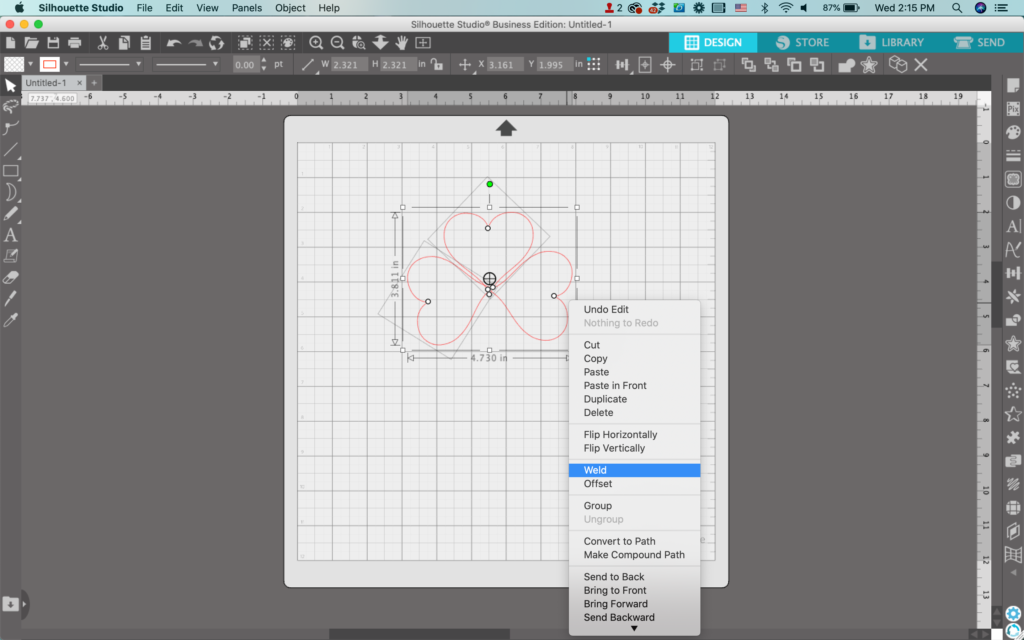
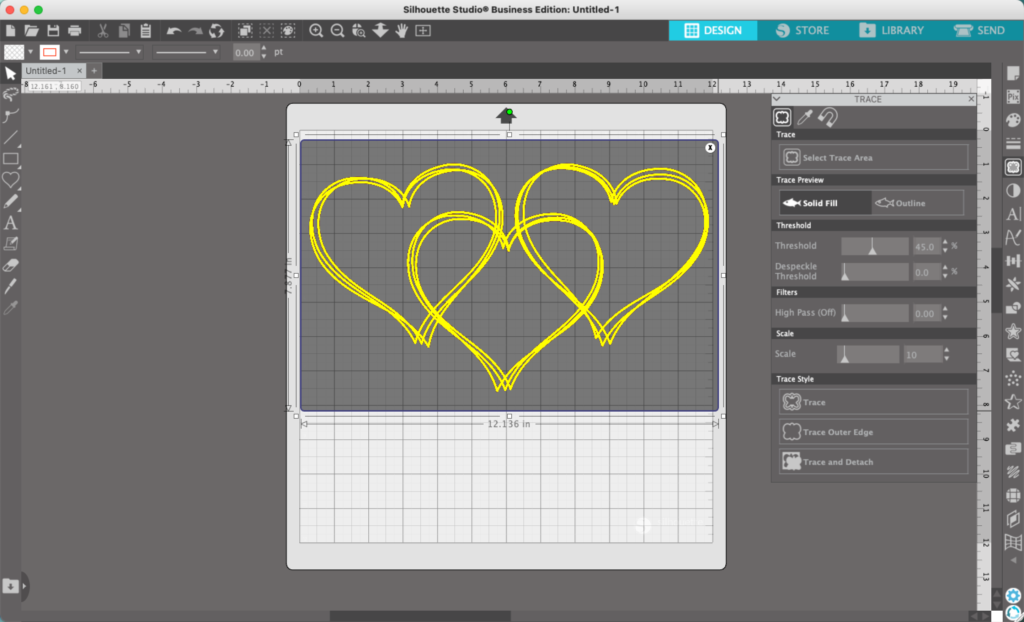
6. Navigate to ‘Panels’, ‘Trace’. Trace all the heart outlines you made.
7. Delete the original hearts.
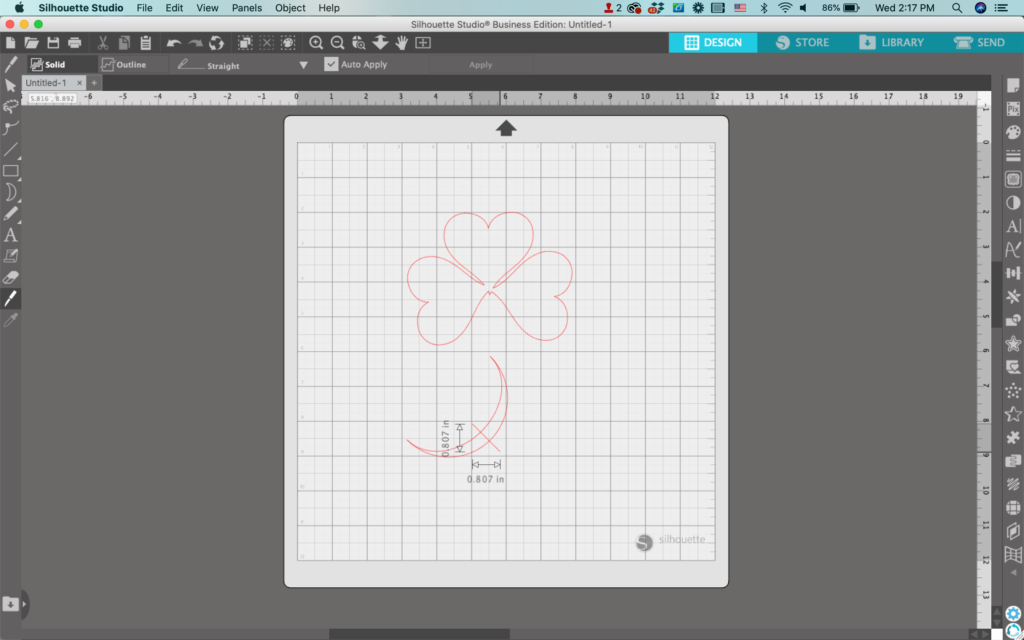
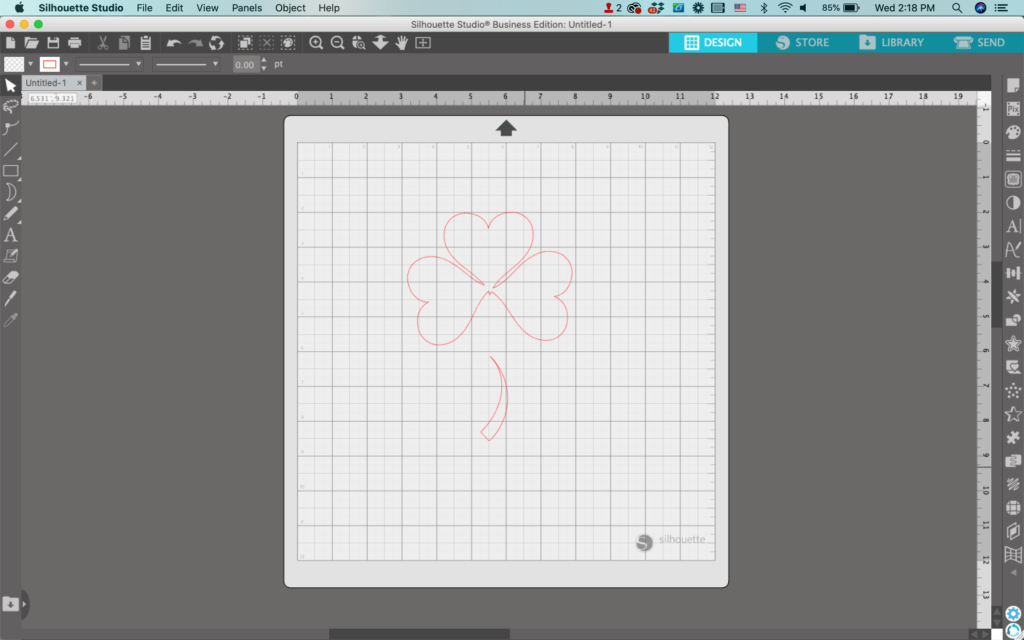
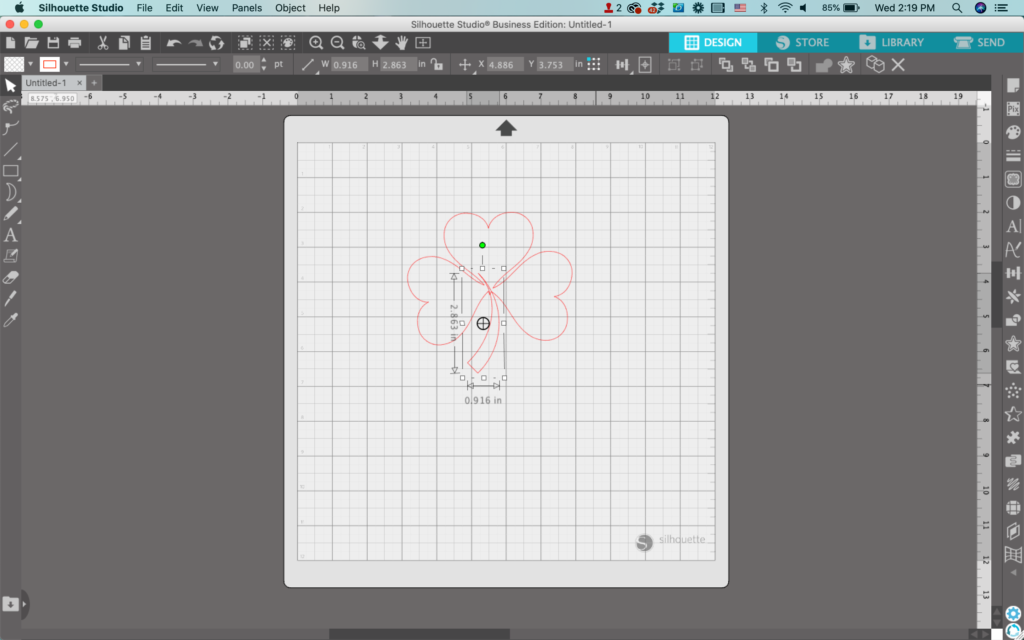
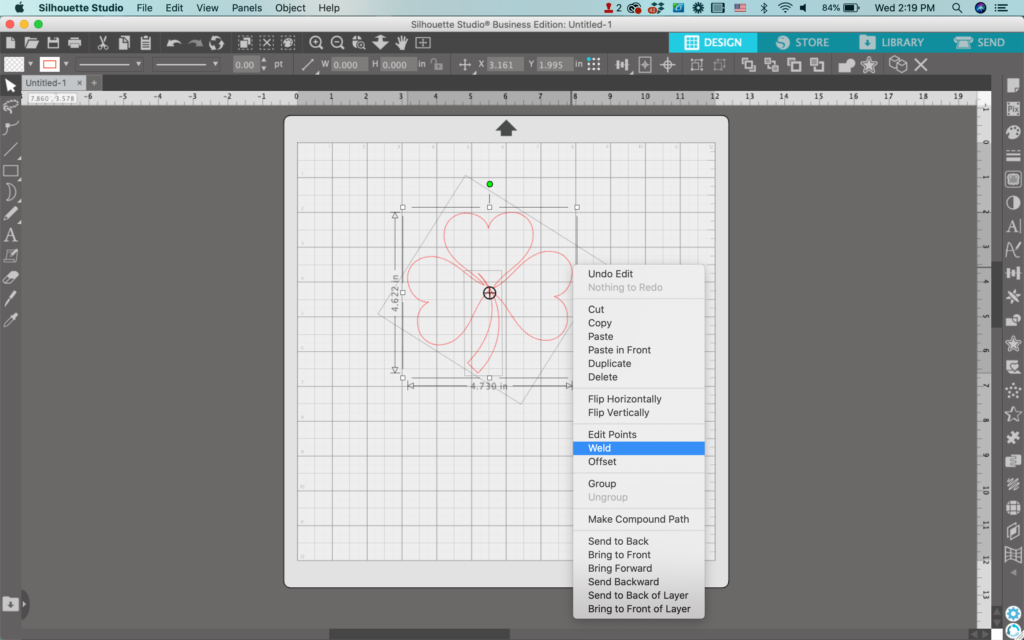
Now, there are several things you can do from here. The design can be cut now. It would look similar to this if cut from vinyl or paper:
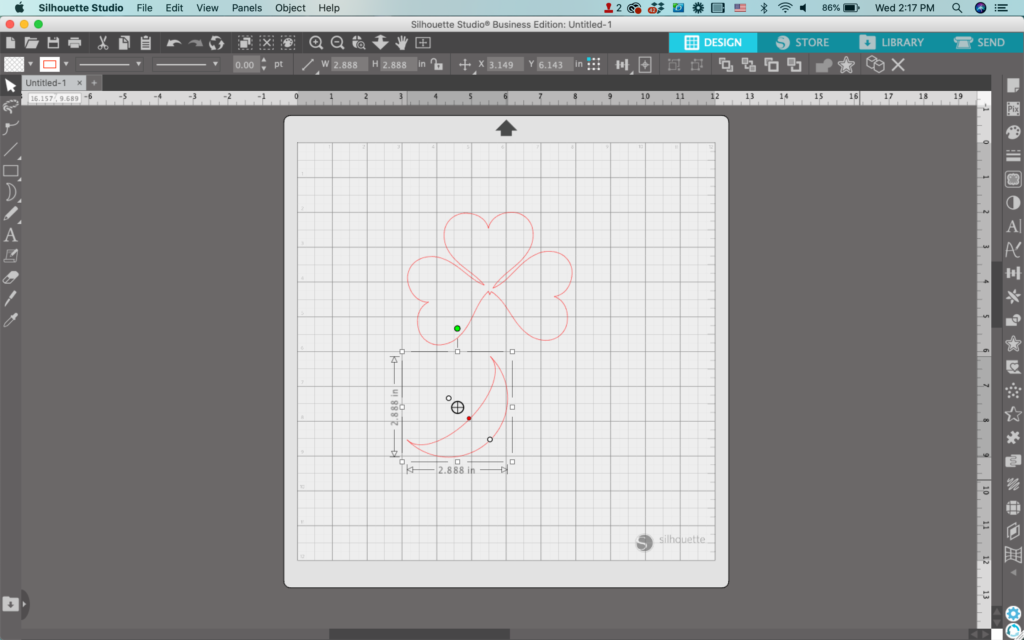
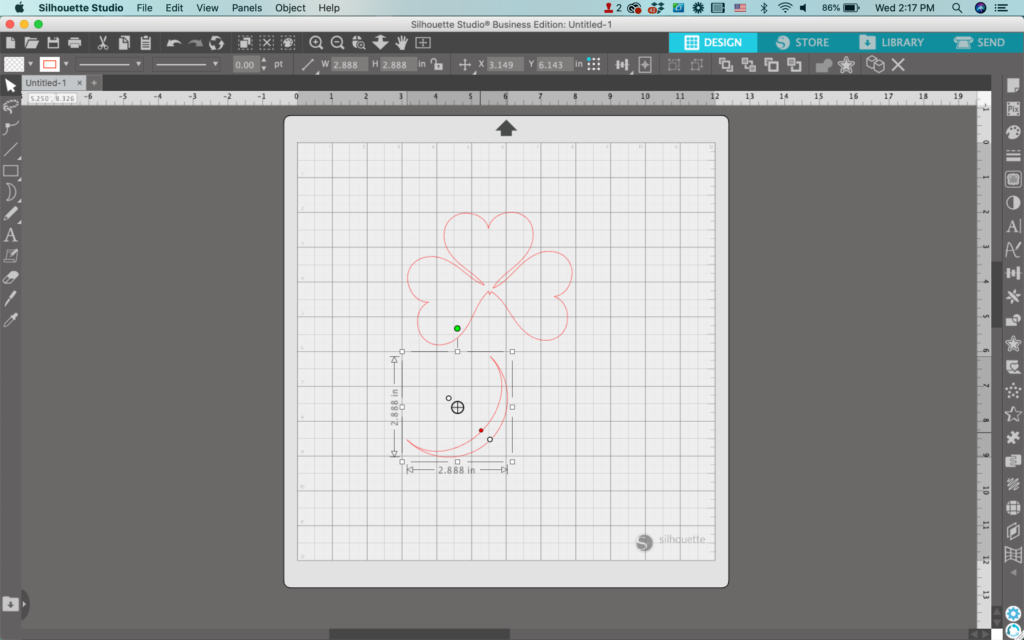
But, you could use the knife tool and cut away the overlaps – then delete them.
And then, you could turn it into a sublimation design. Here’s how:
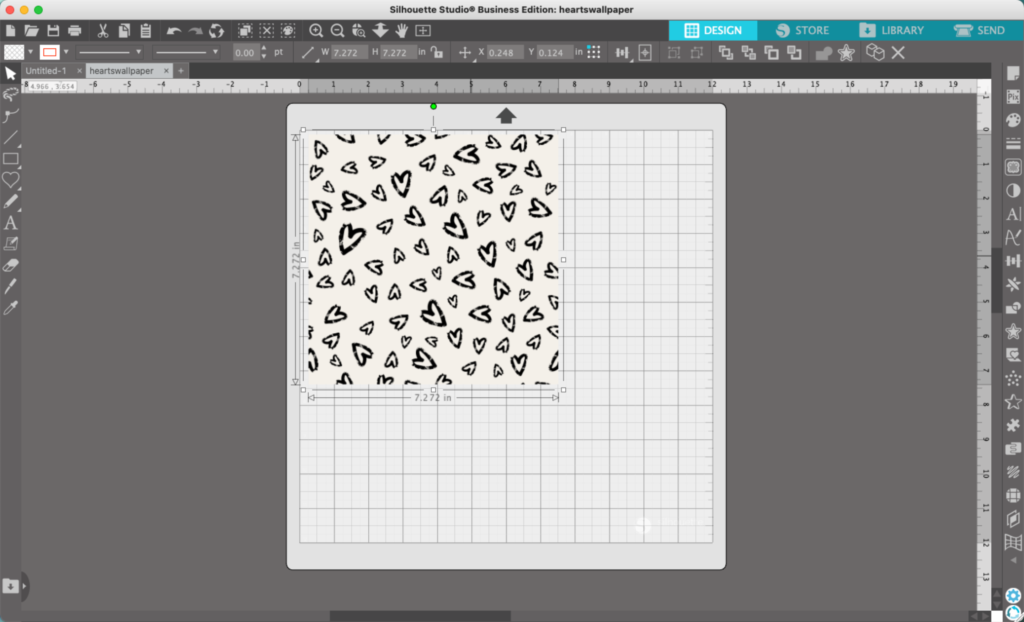
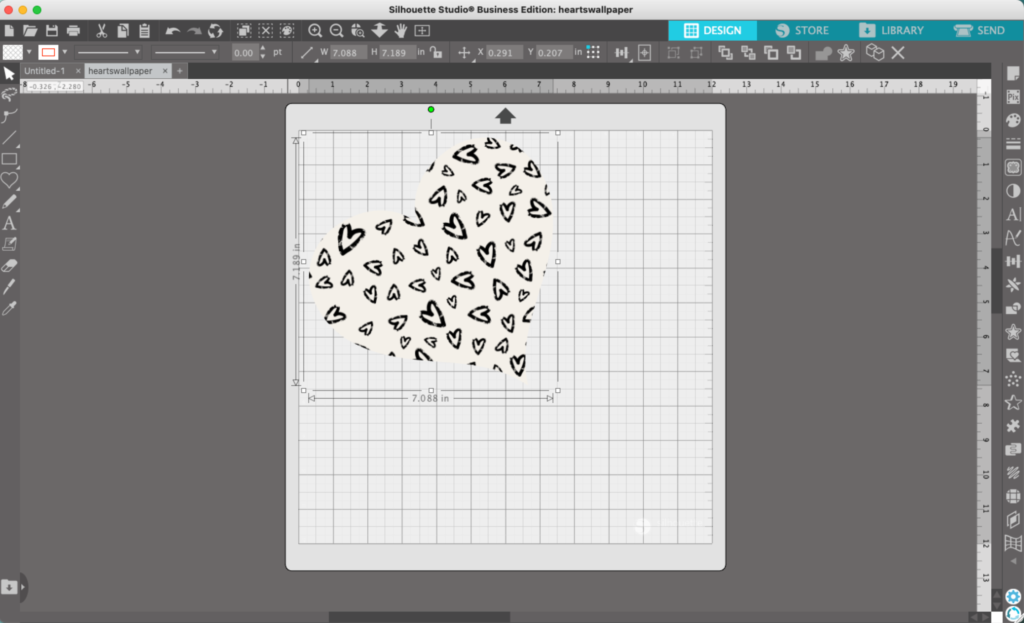
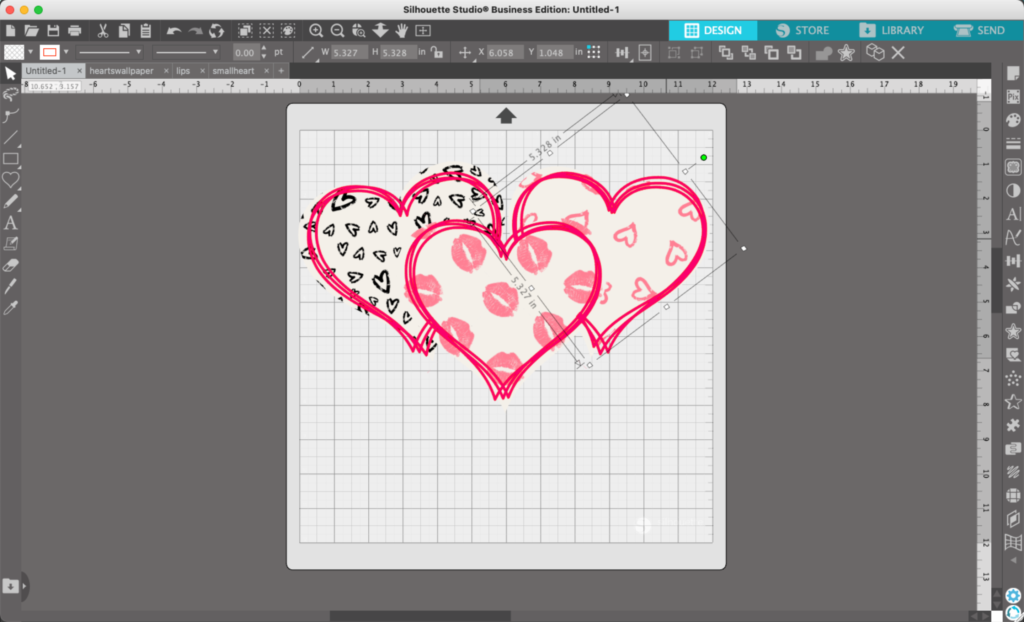
Open a wallpaper in Silhouette Studio. I downloaded one from Adobe Stock.
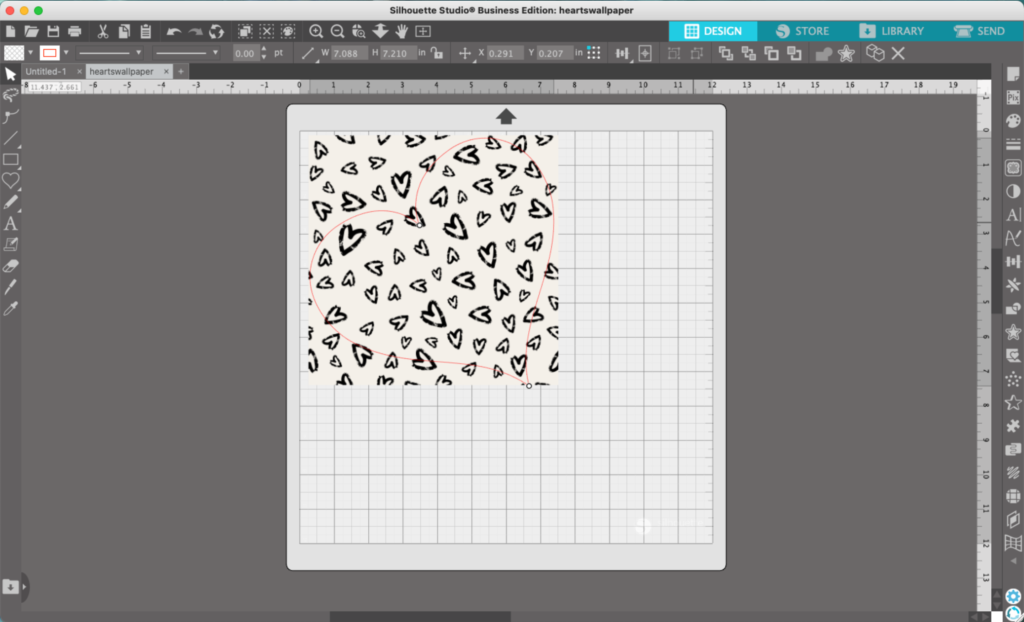
2. Use Flexishapes to draw a heart, roughly the same size of the other hearts.
3. Select the heart and the wallpaper. Then, navigate to ‘Object’, ‘Modify’, and ‘Crop’.
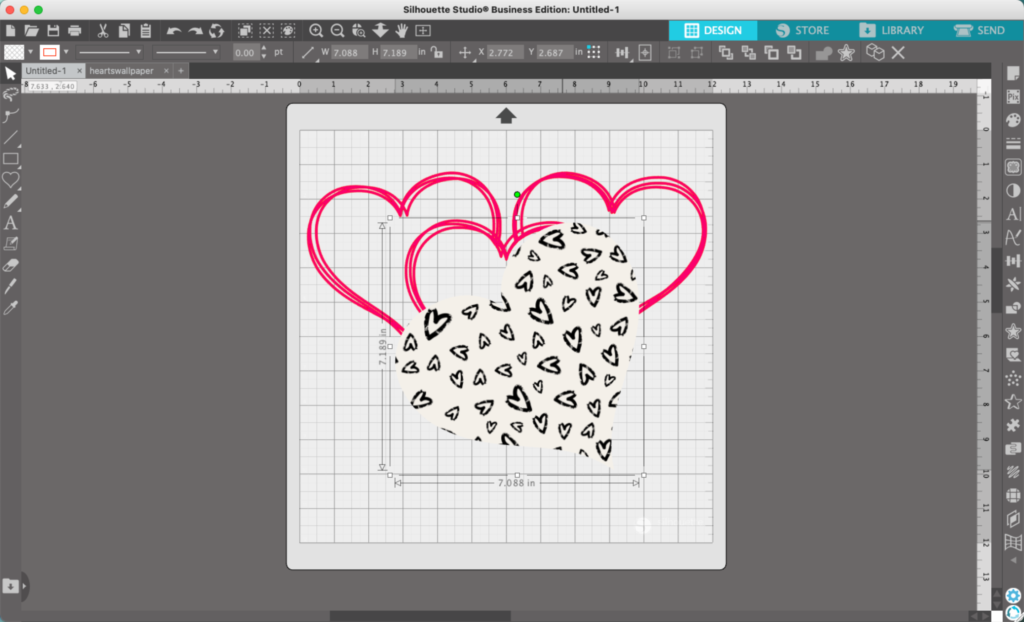
4. Copy and paste the heart onto your design.
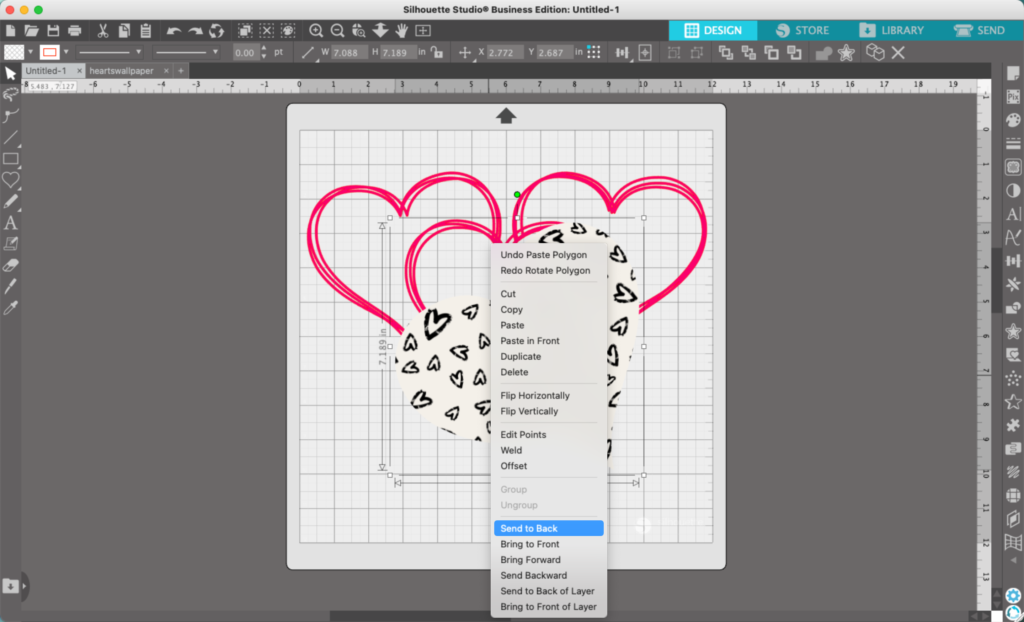
5. Right click the wallpaper heart, and select ‘Send to Back’.
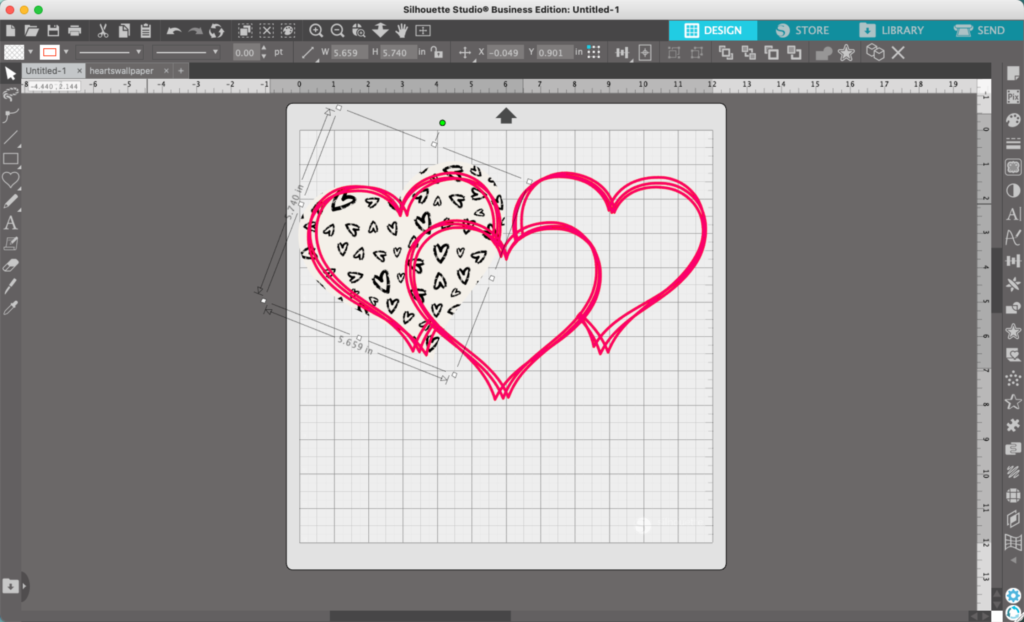
6. Resize and move the wallpaper heart behind one of the hearts.
7. Repeat steps 1 to 6 for the remaining hearts.
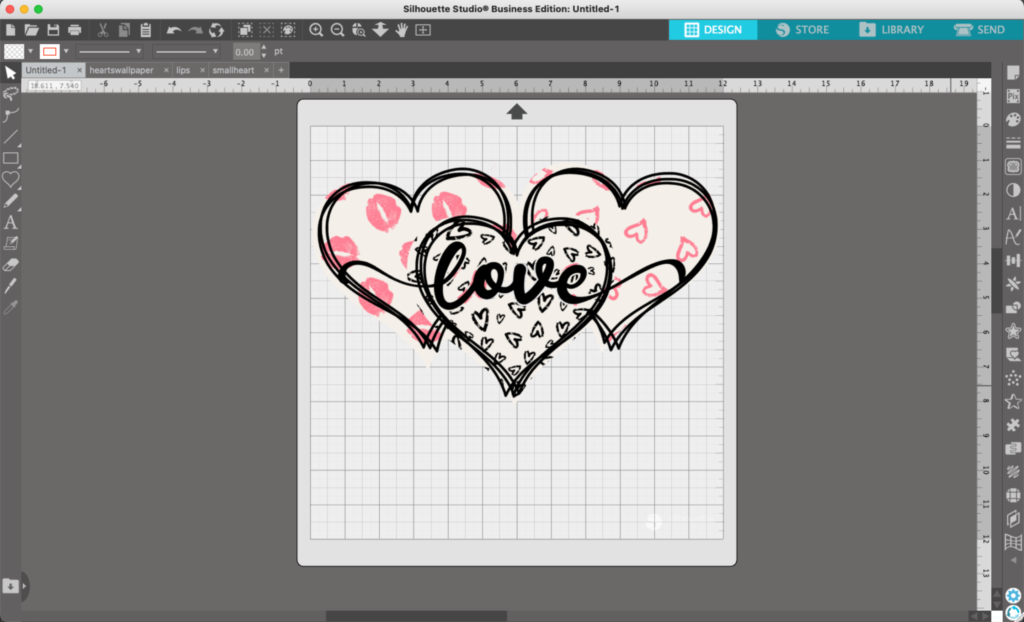
8. Change the colors or add text to finish the design. (You’ll also note that I moved the wallpaper hearts around.) If the font looks familiar, it is Watershed.
That’s it! Your design is ready to go!
Don’t Forget to Save!
To save your new SVG creation, head to ‘File’, ‘Save As’, ‘Save to Hard Drive’, name the file, then select ‘SVG’ from the dropdown menu.
When I receive products to review, I like to take my time with them. I use them more than once or twice before I post anything about them here on Cutting for Business or on social media. Why? Because most products are great the first time you use them. I find that you only notice the faults after using them over and over again.
Over the summer, I received the xTool Heat Press system for no charge in exchange for sharing my thoughts with blog readers. As always, my thoughts are my own and are not influenced by xTool.
Today, I’m going to introduce you to this new heat press system.
What is the xTool Heat Press System?
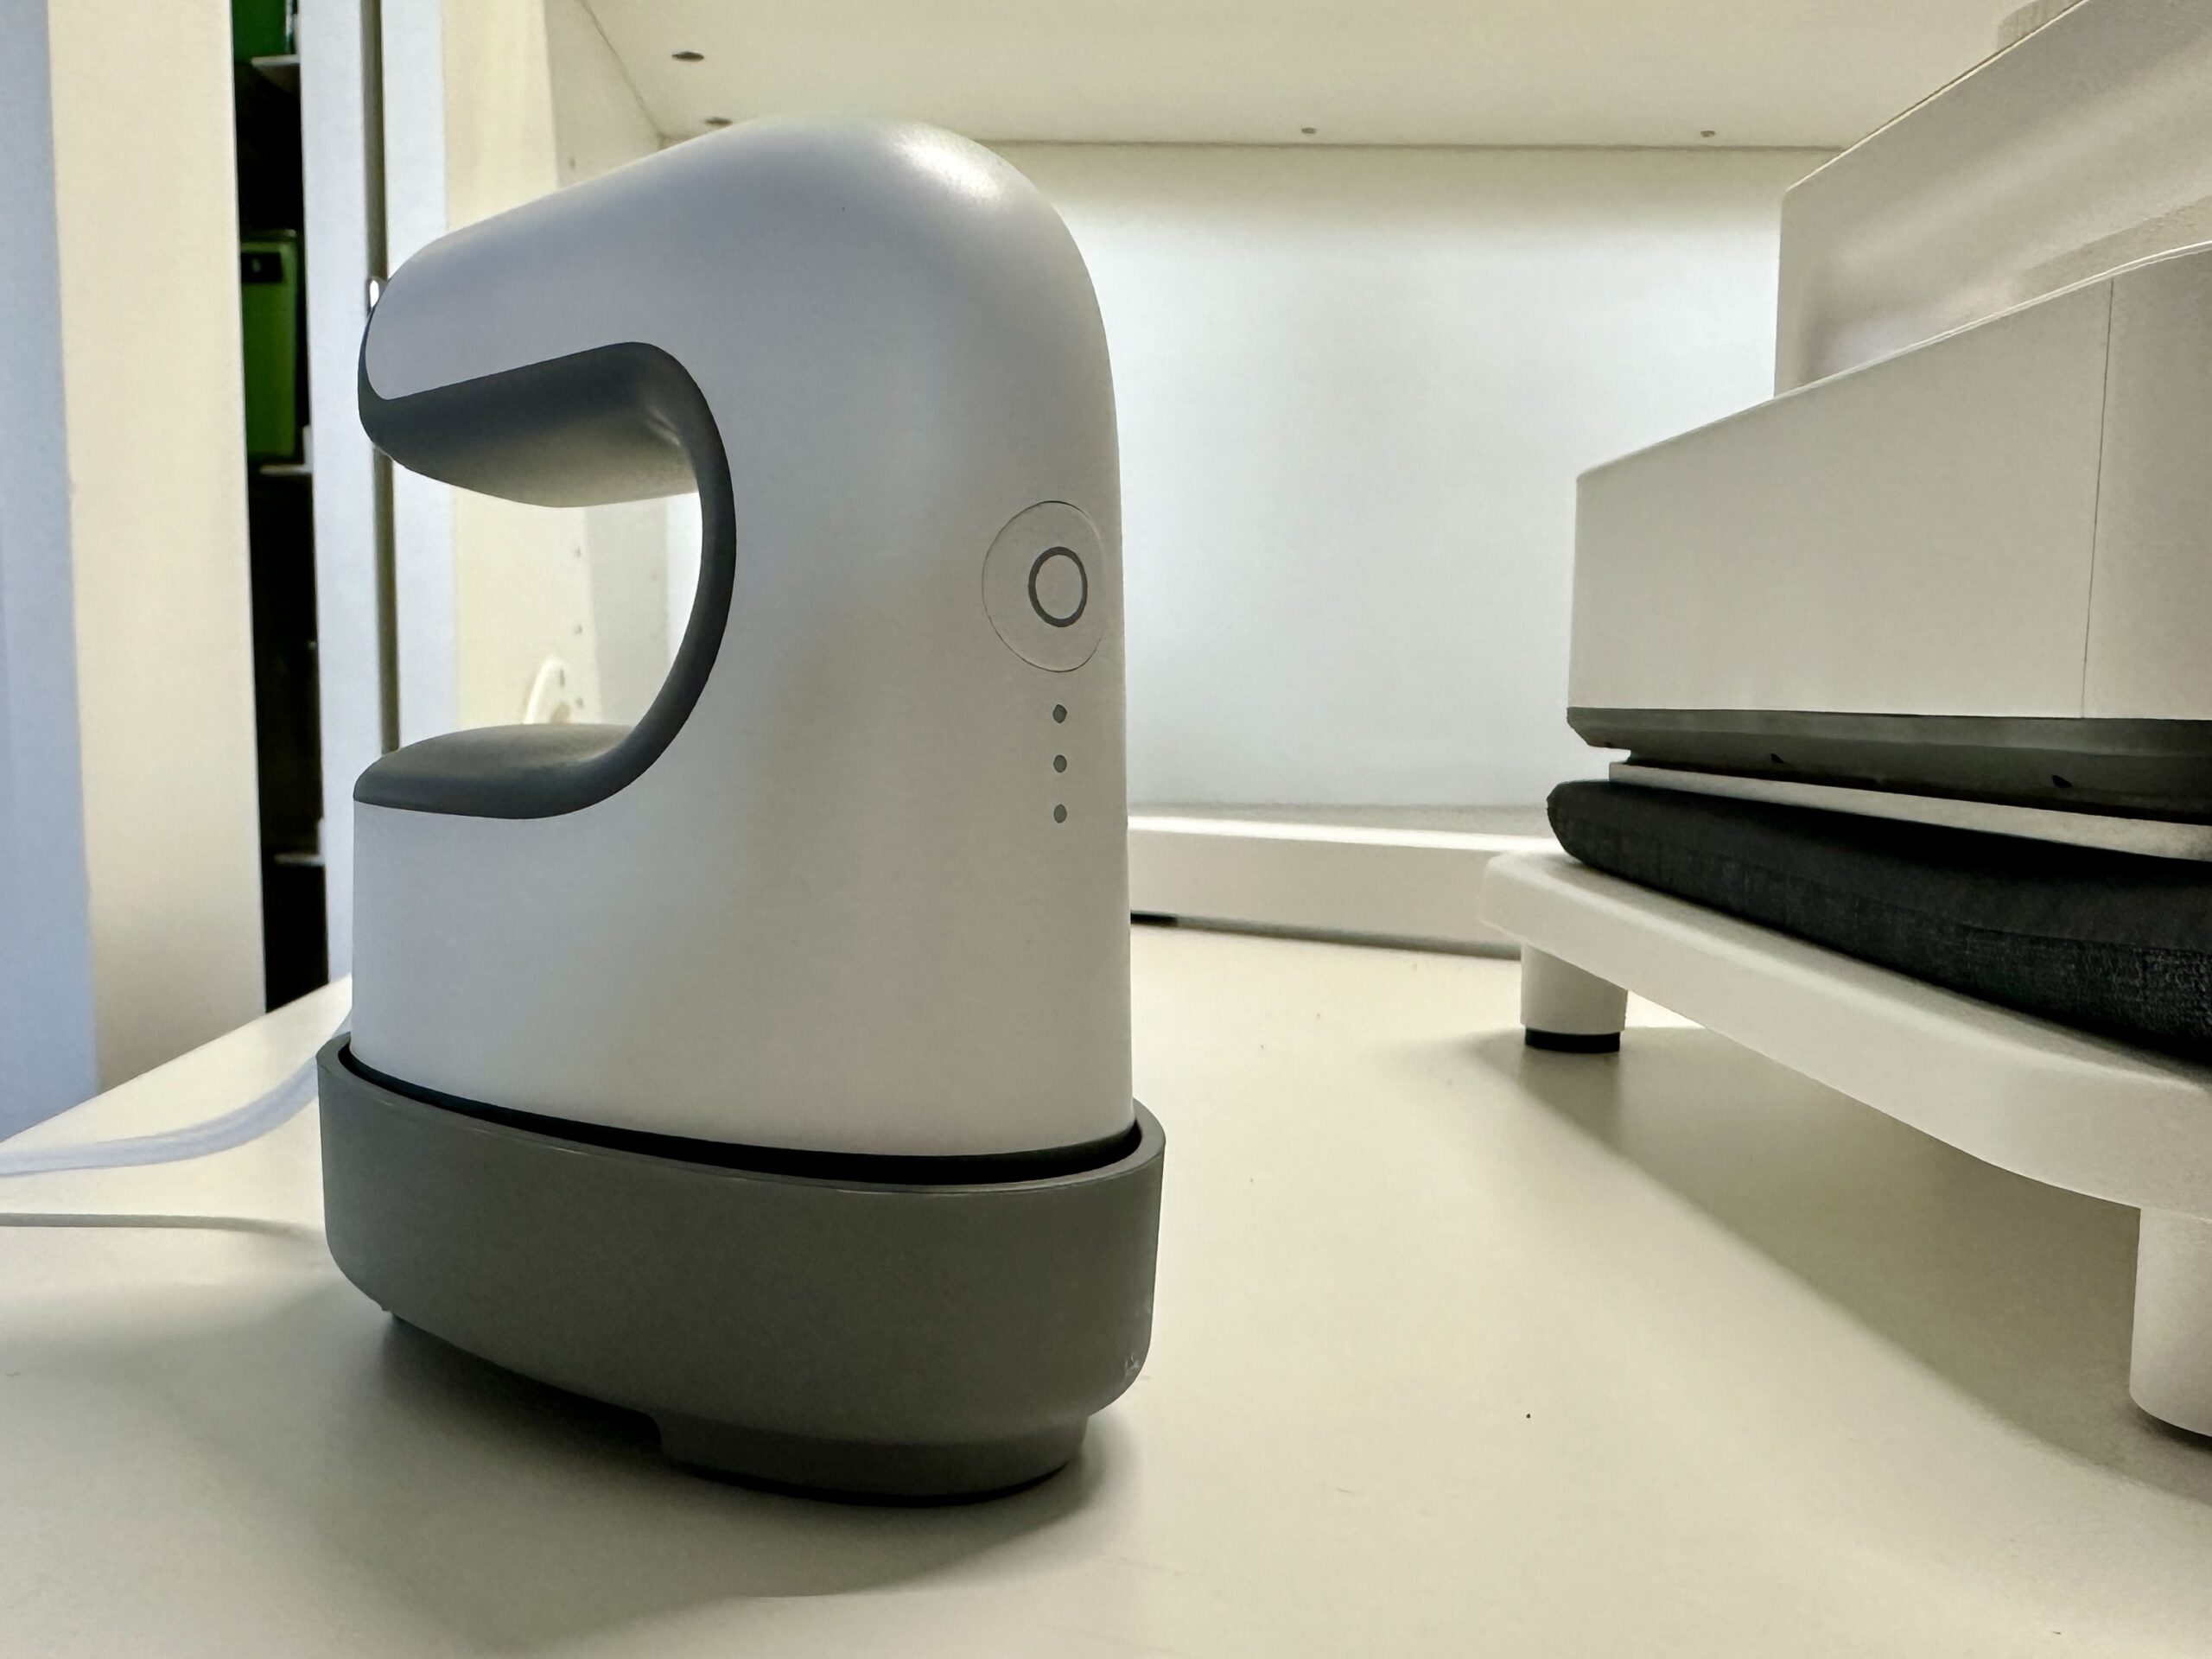
The xTool Heat Press System is a heat press device that allows users to use it as a portable press (similar to Cricut’s EasyPress), as a swing away heat press, and also includes a mini press.
What Does the xTool Heat Press Look Like?
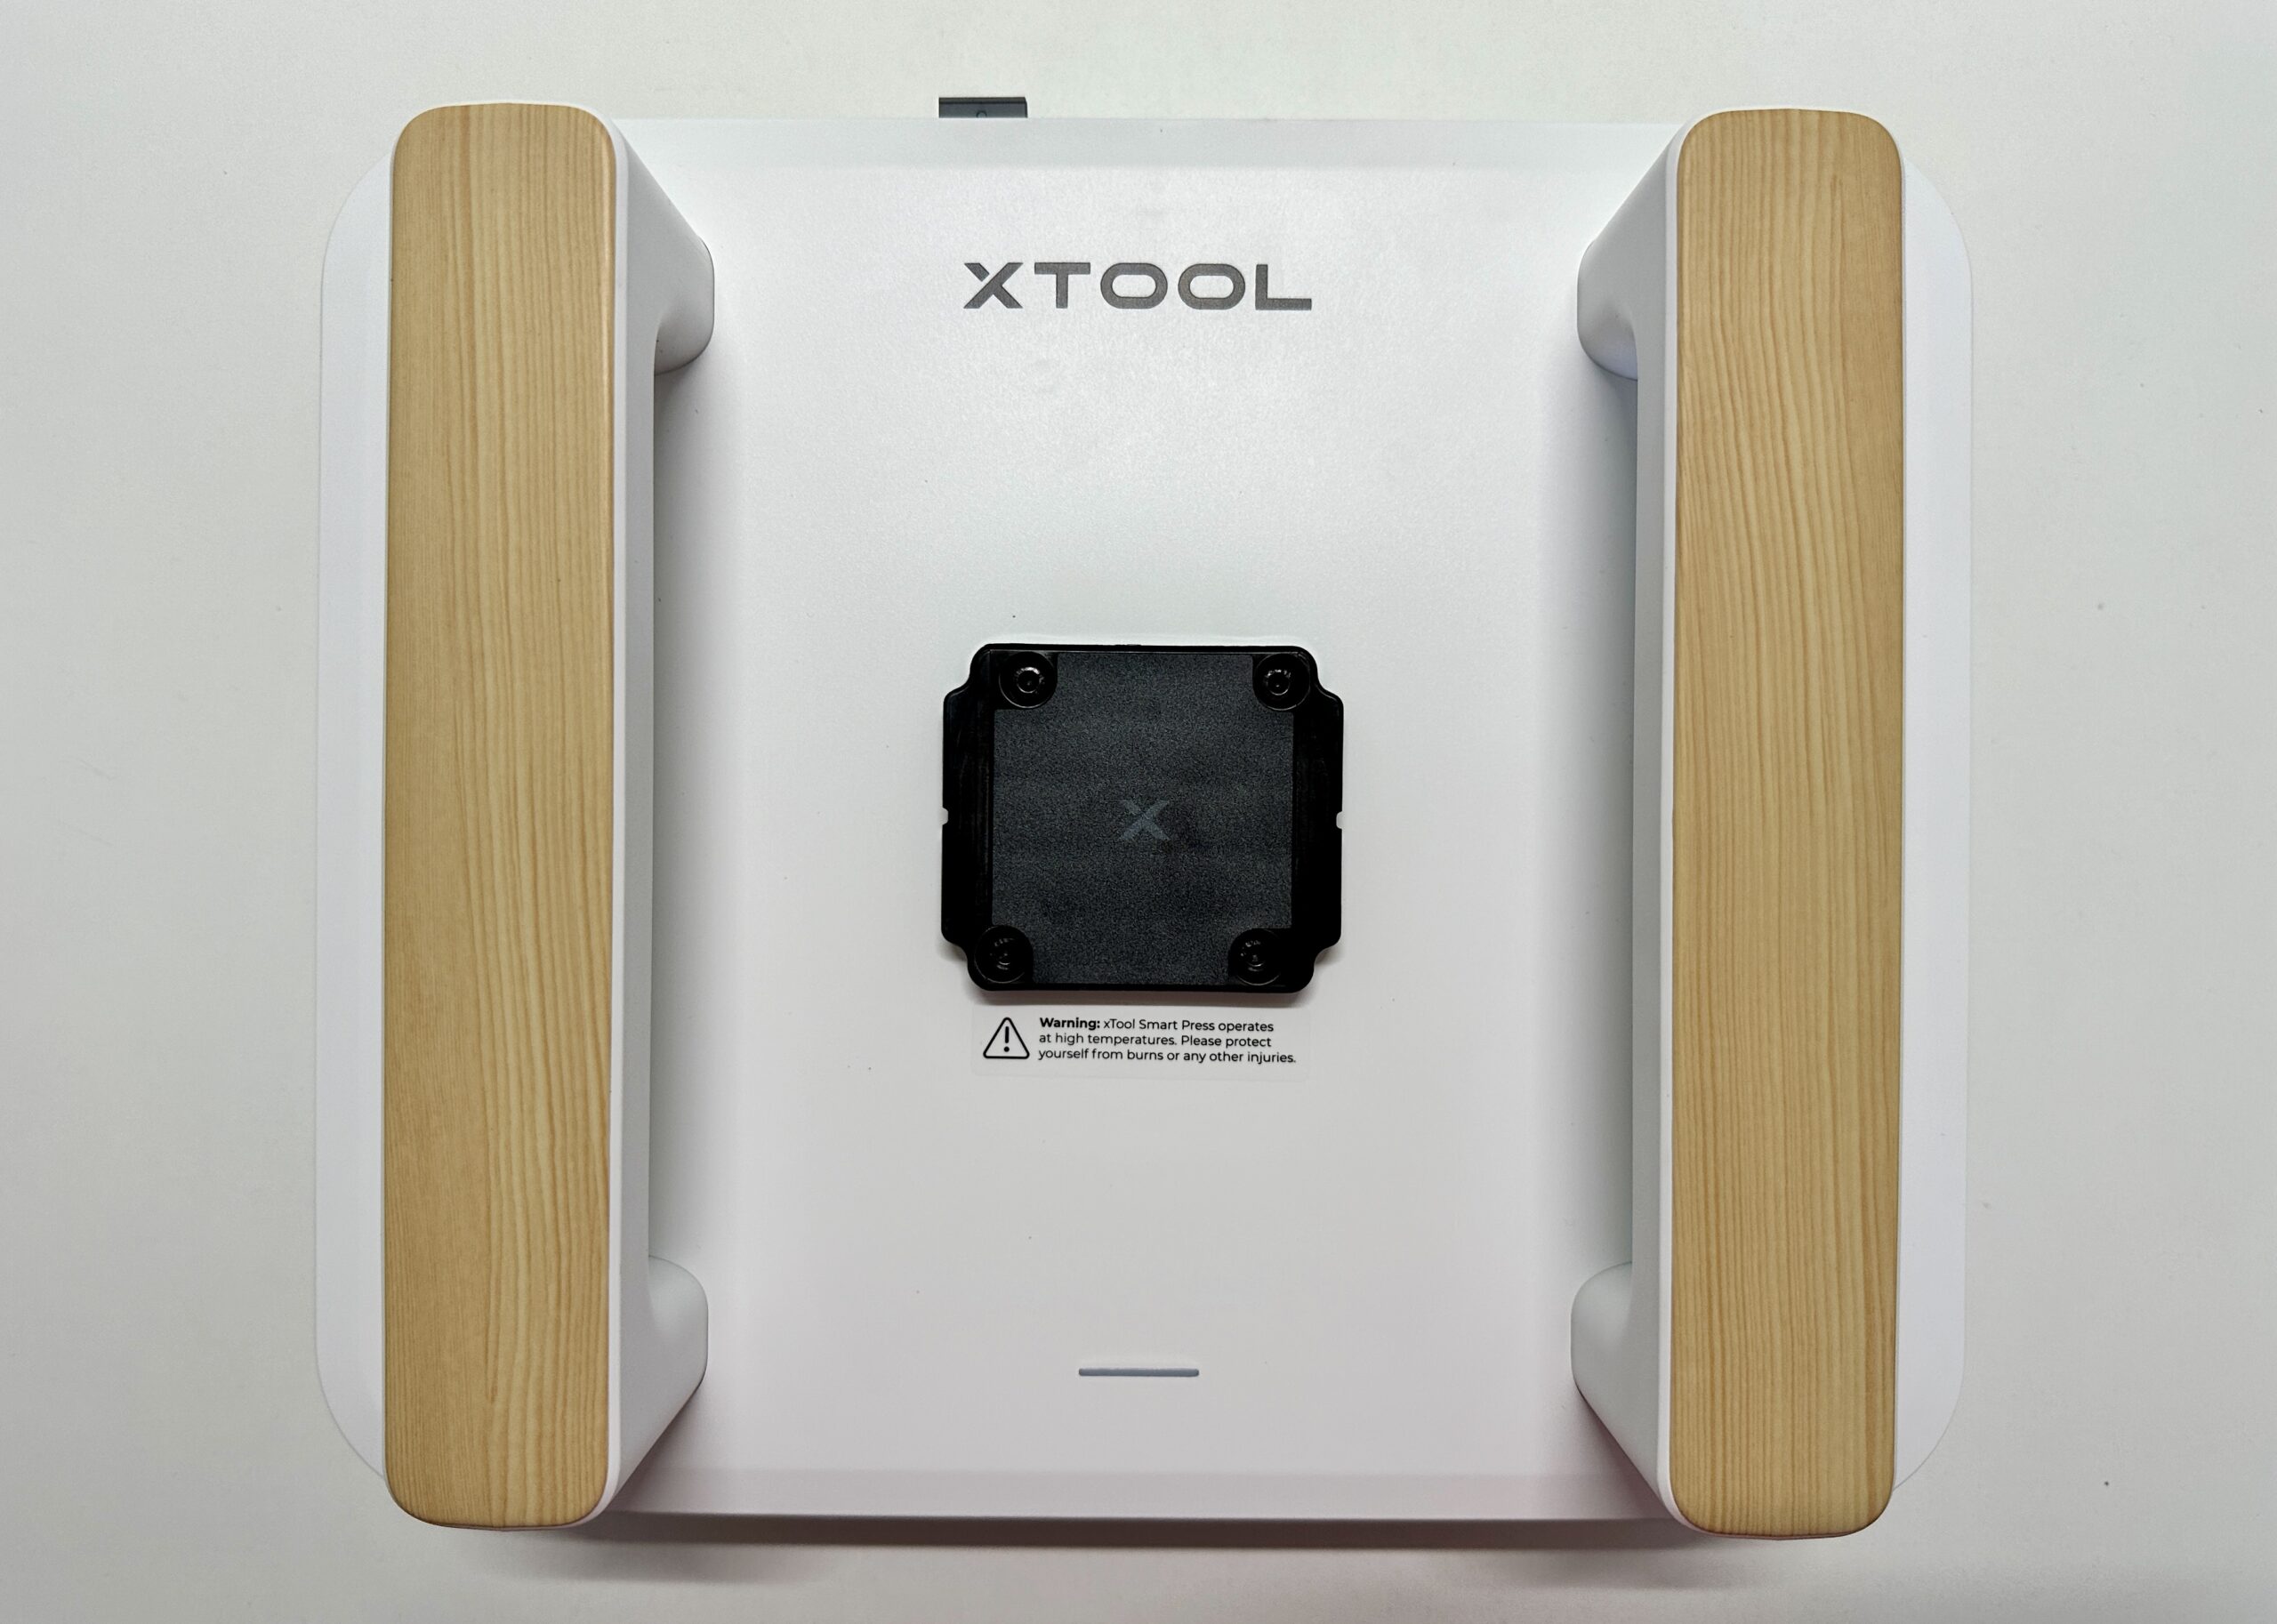
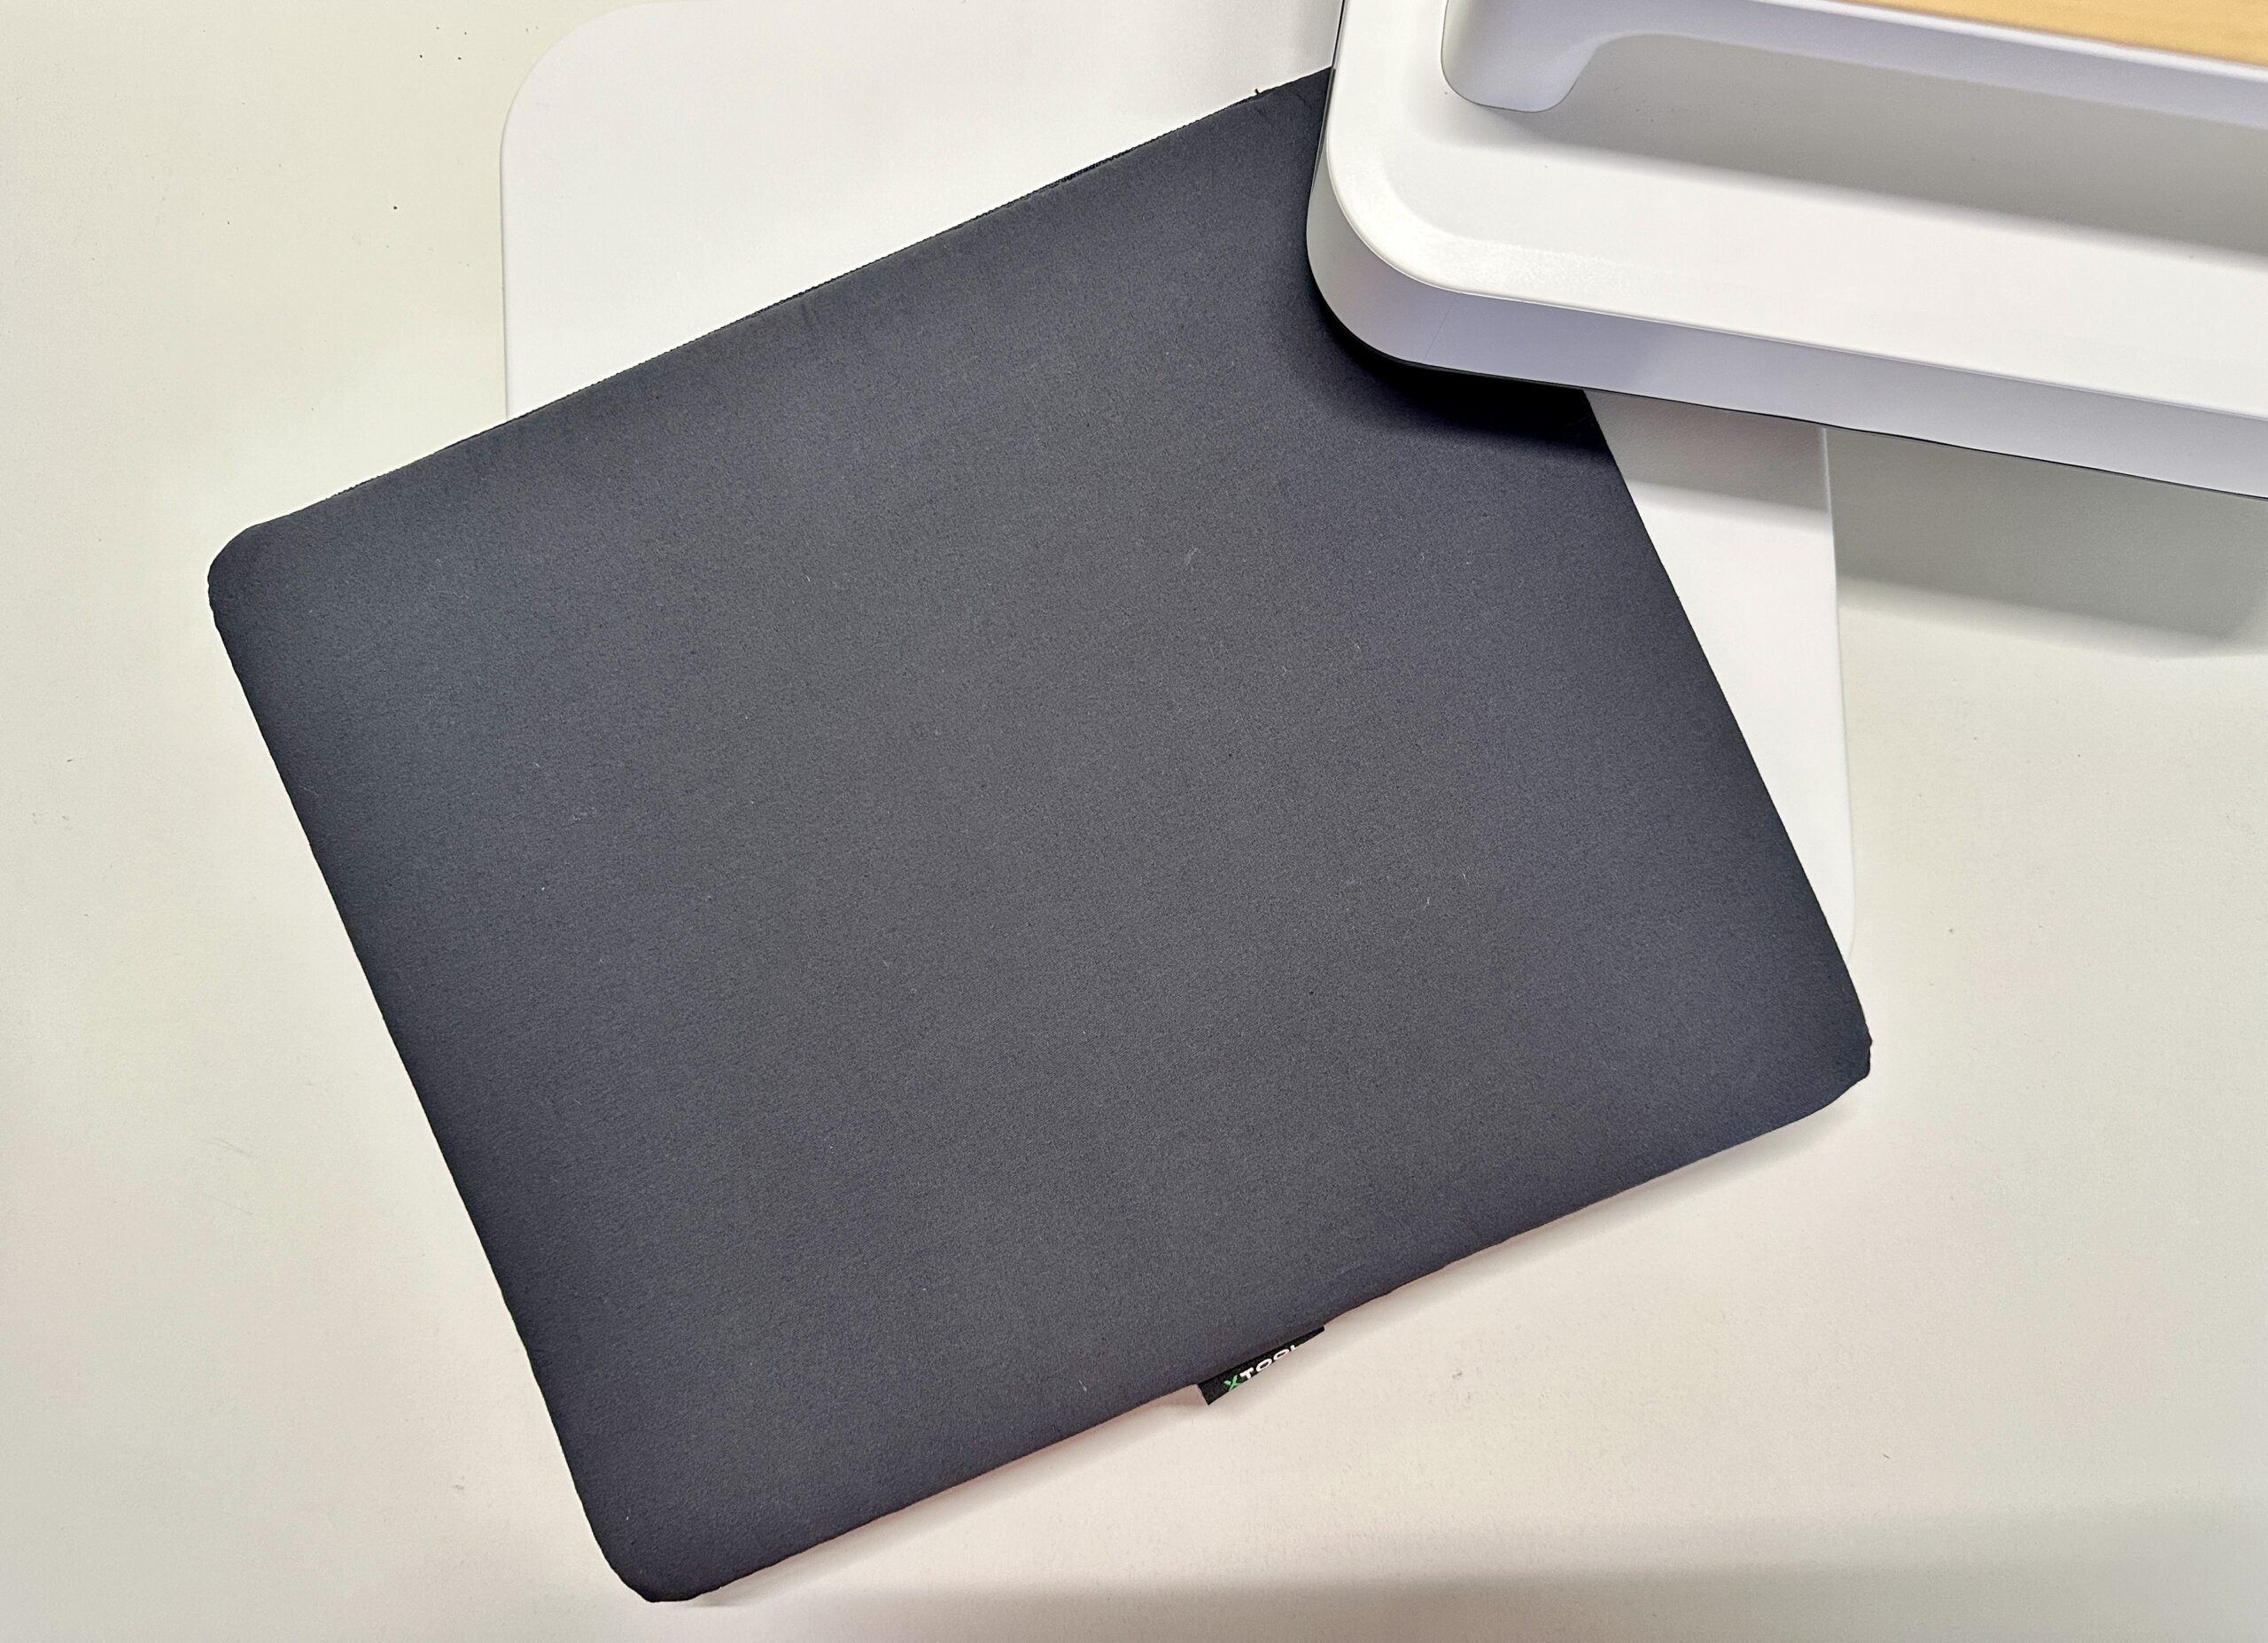
The xTool heat press is a portable press with two handles on top. To use it, you manually apply the necessary pressure based on how hard you push down on it. The xTool’s heat press platen measures 12″ by 10″. Included with the heat press is a wireless Smart Controller and a heat proof holder. A pressing mat is available – but not included in all packages.
What is the xTool Heat Press Smart Press Platform?
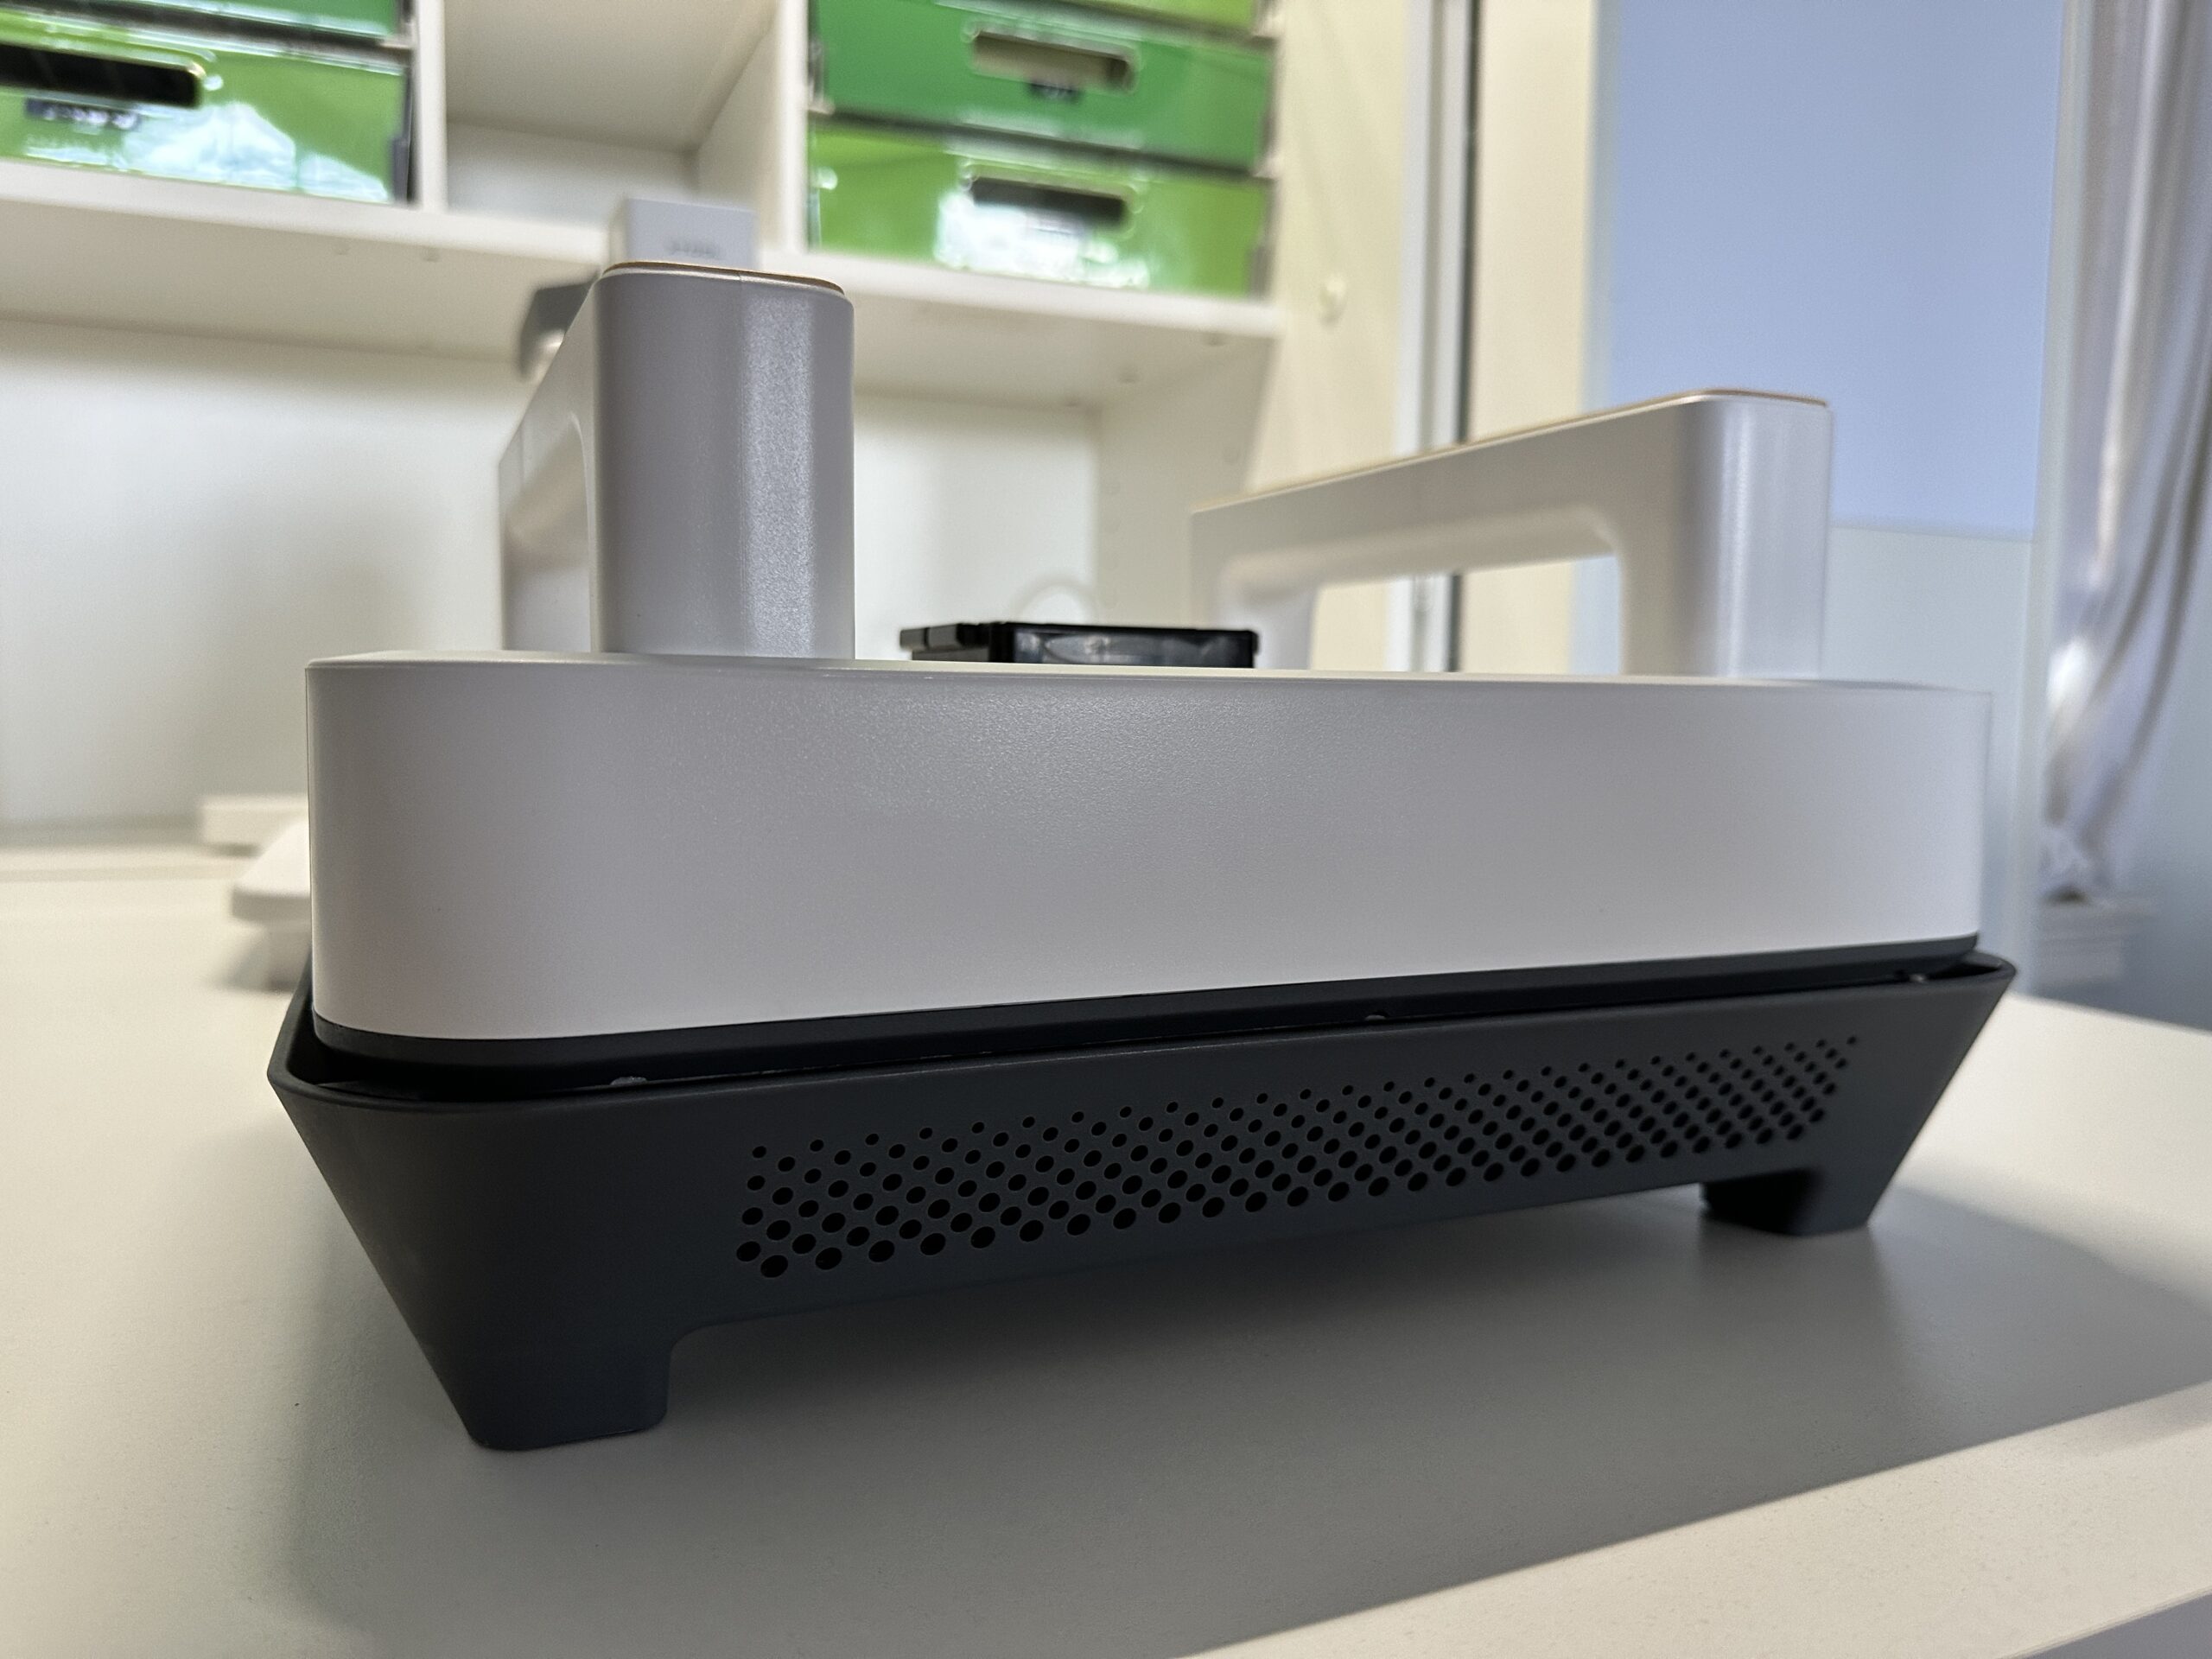
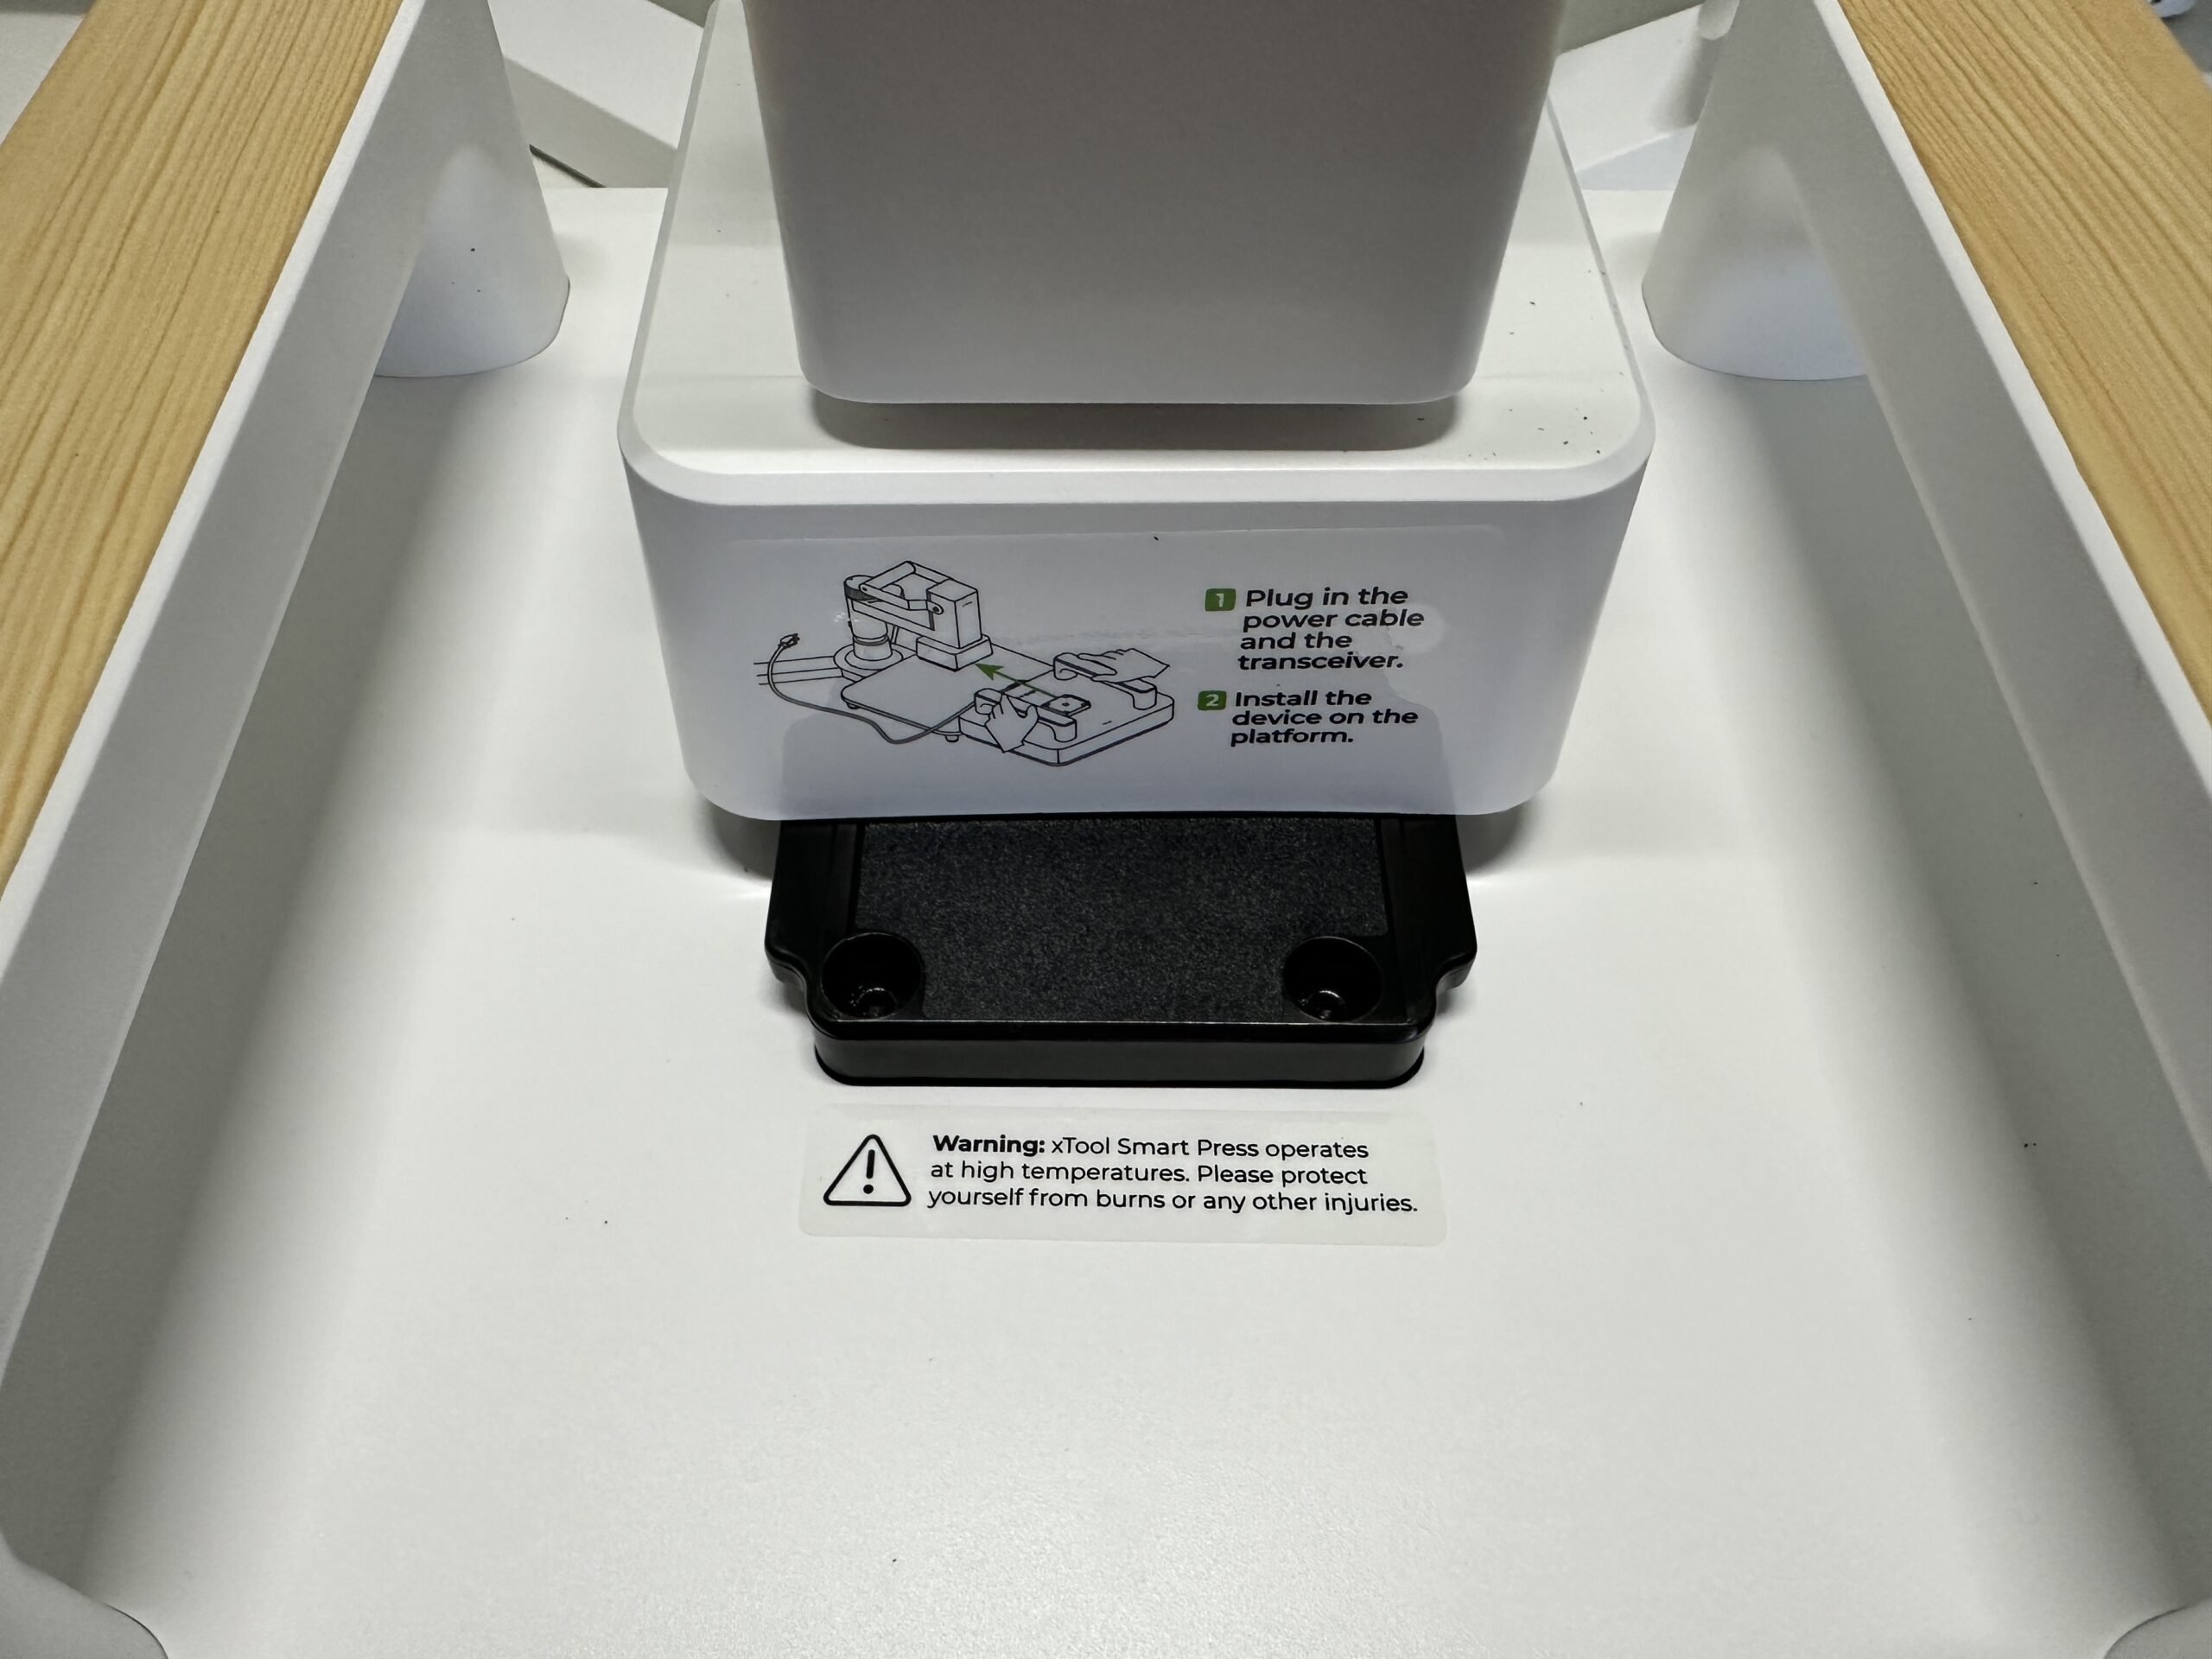
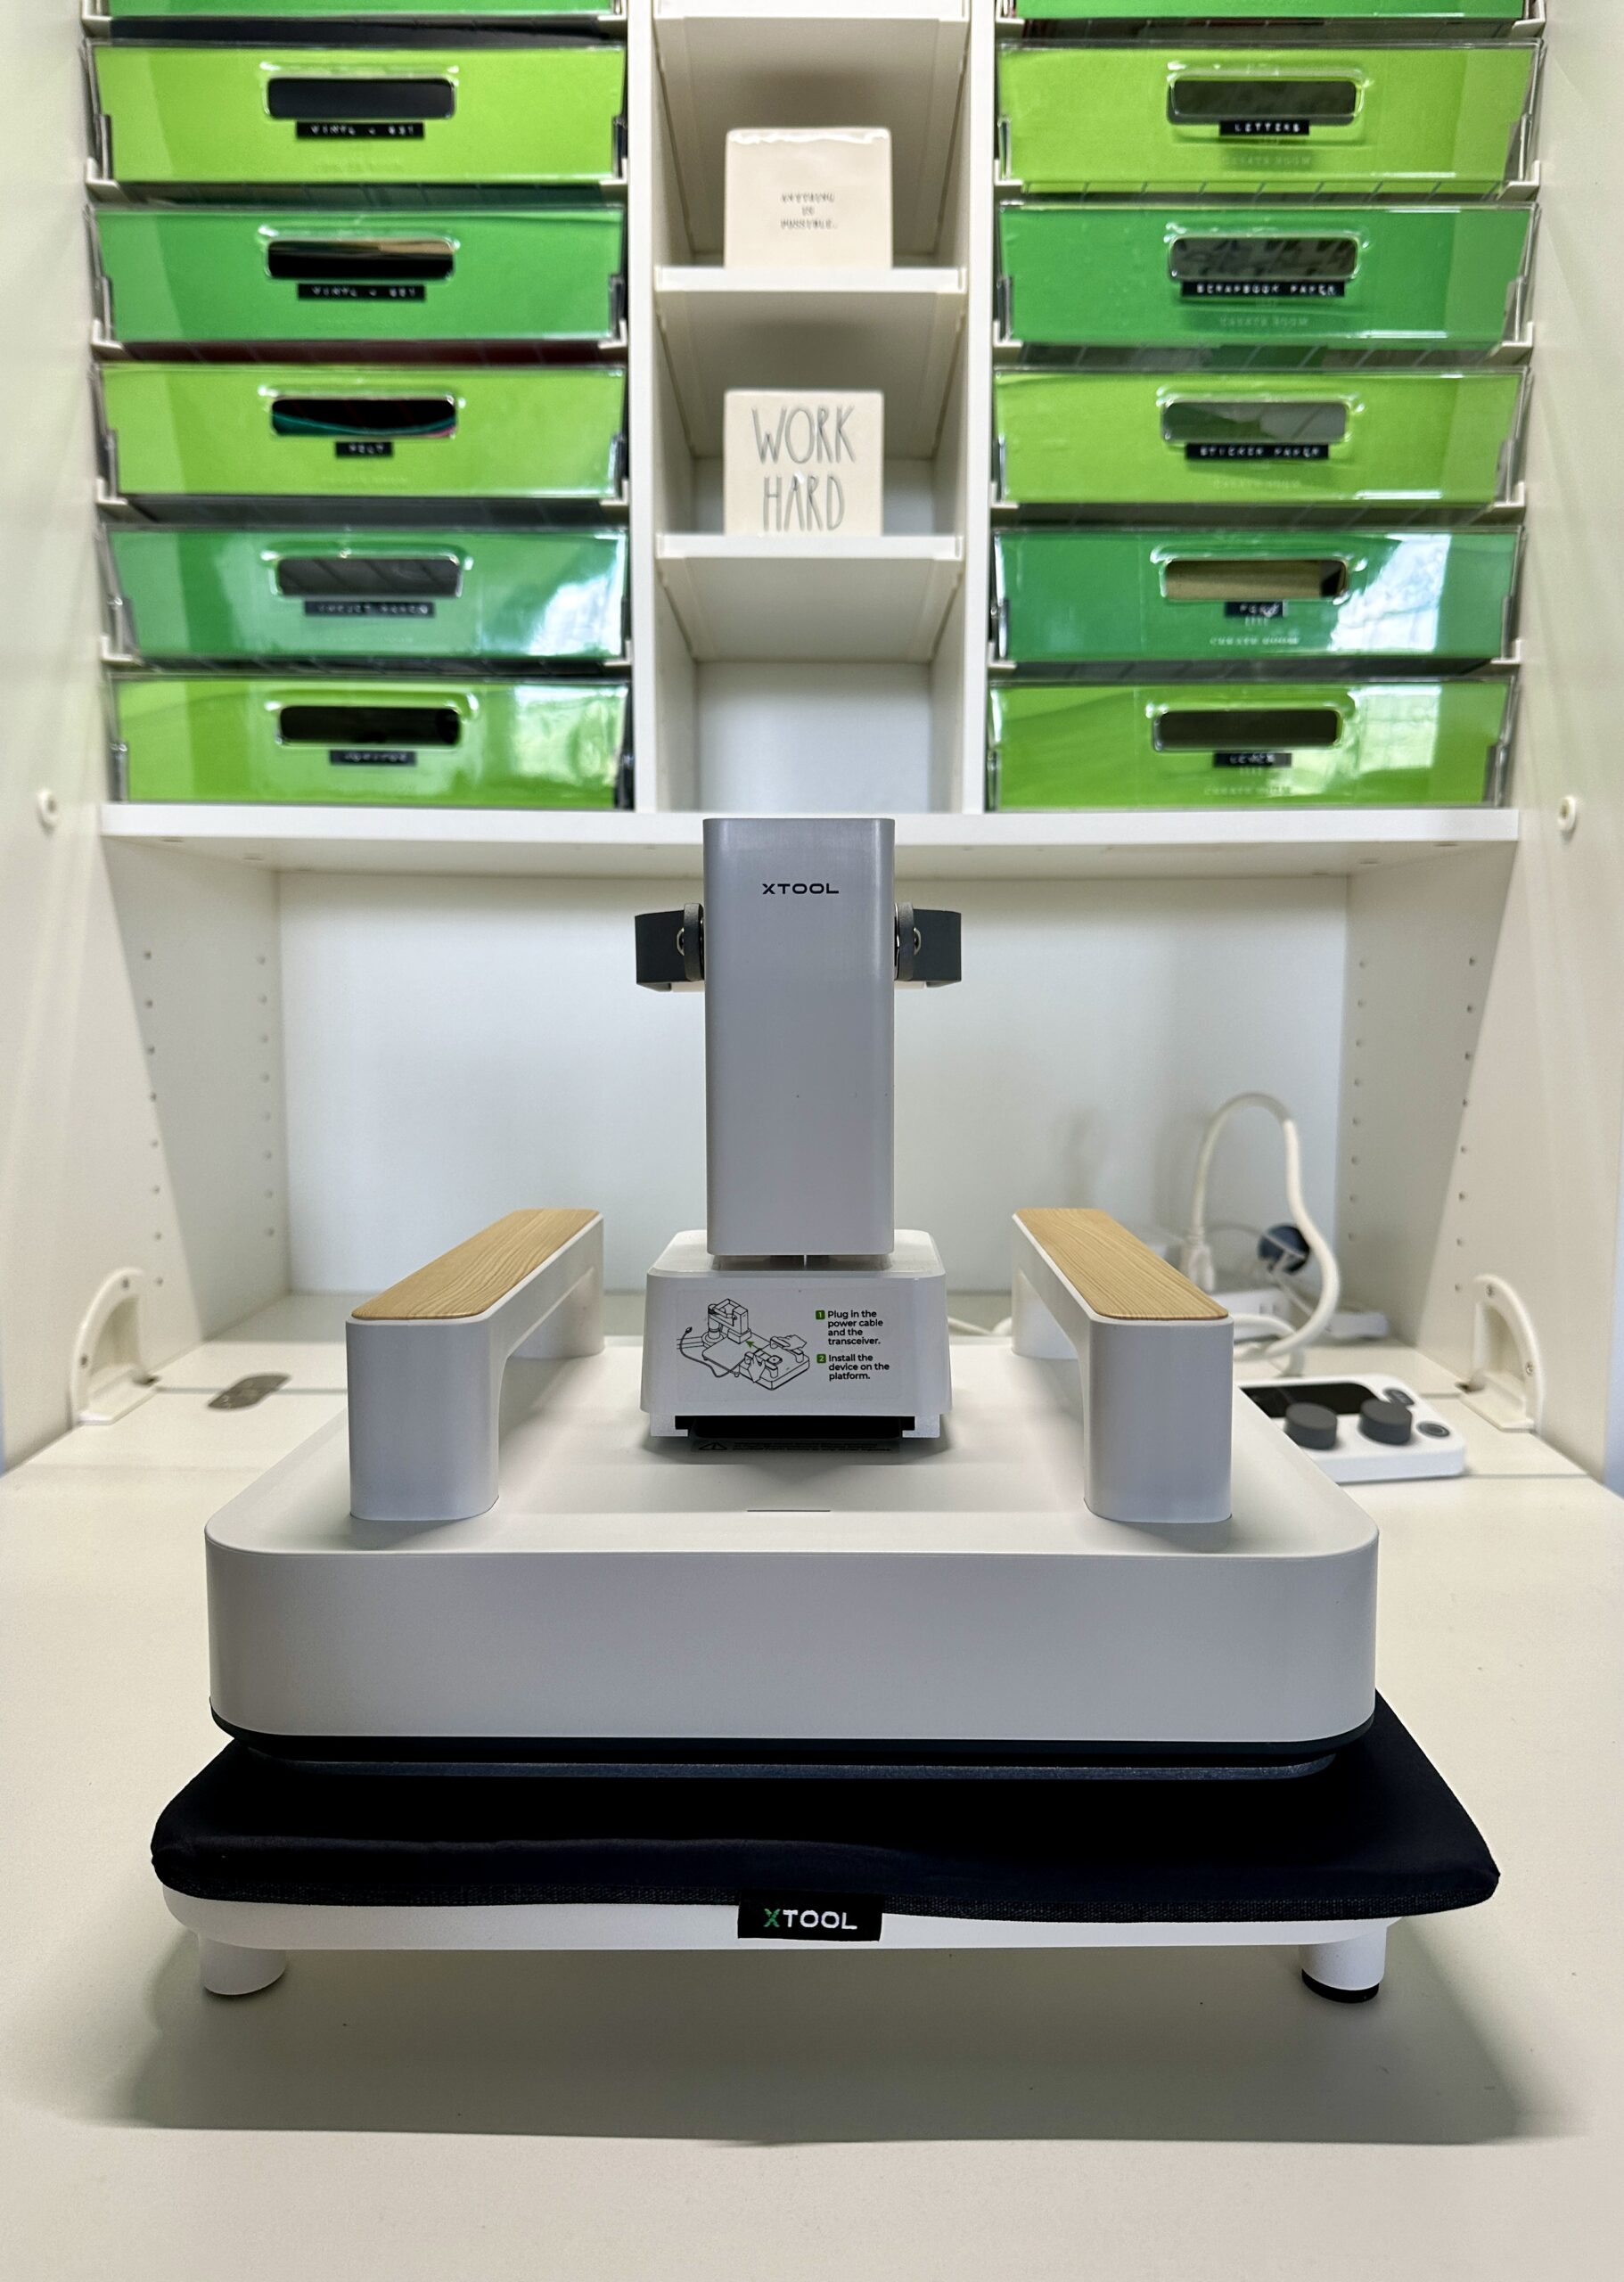
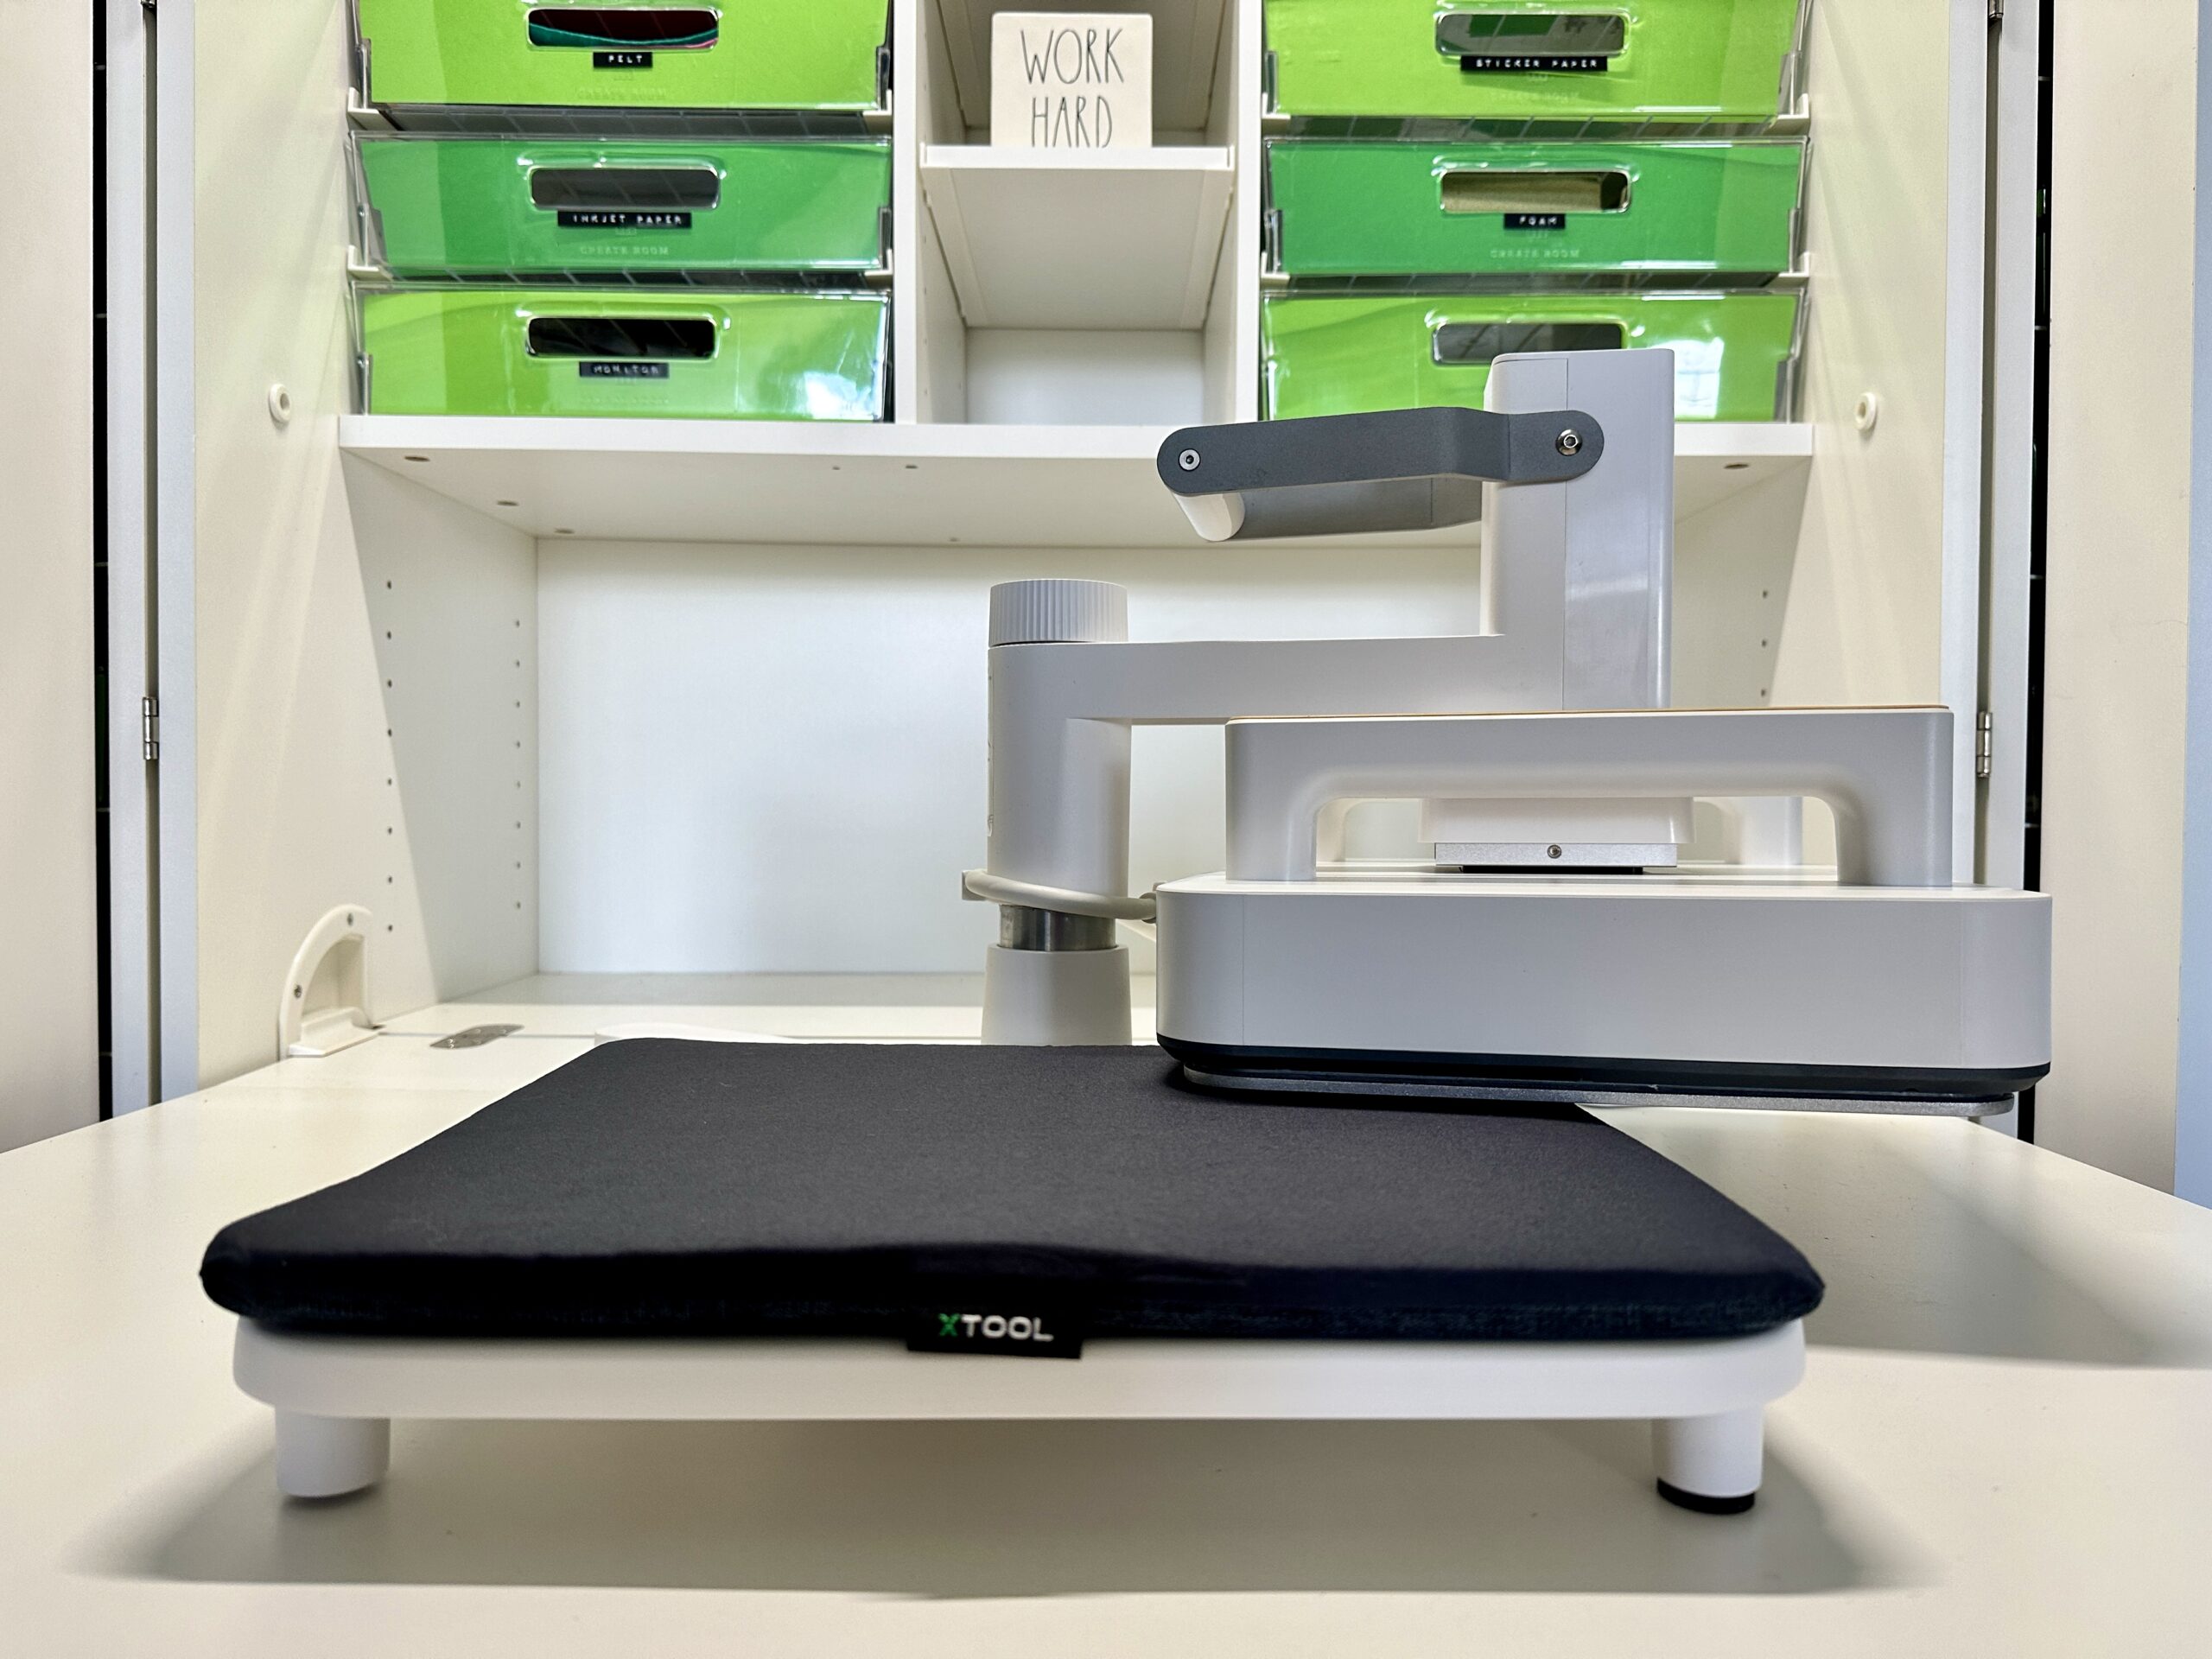
The xTool Heat Press Smart Press Platform allows you to mount the xTool Heat Press to make it into a traditional swing away heat press. When mounted, this allows you to easily adjust the pressure. I’ve found that it doesn’t take much effort to push down on the press and use it.
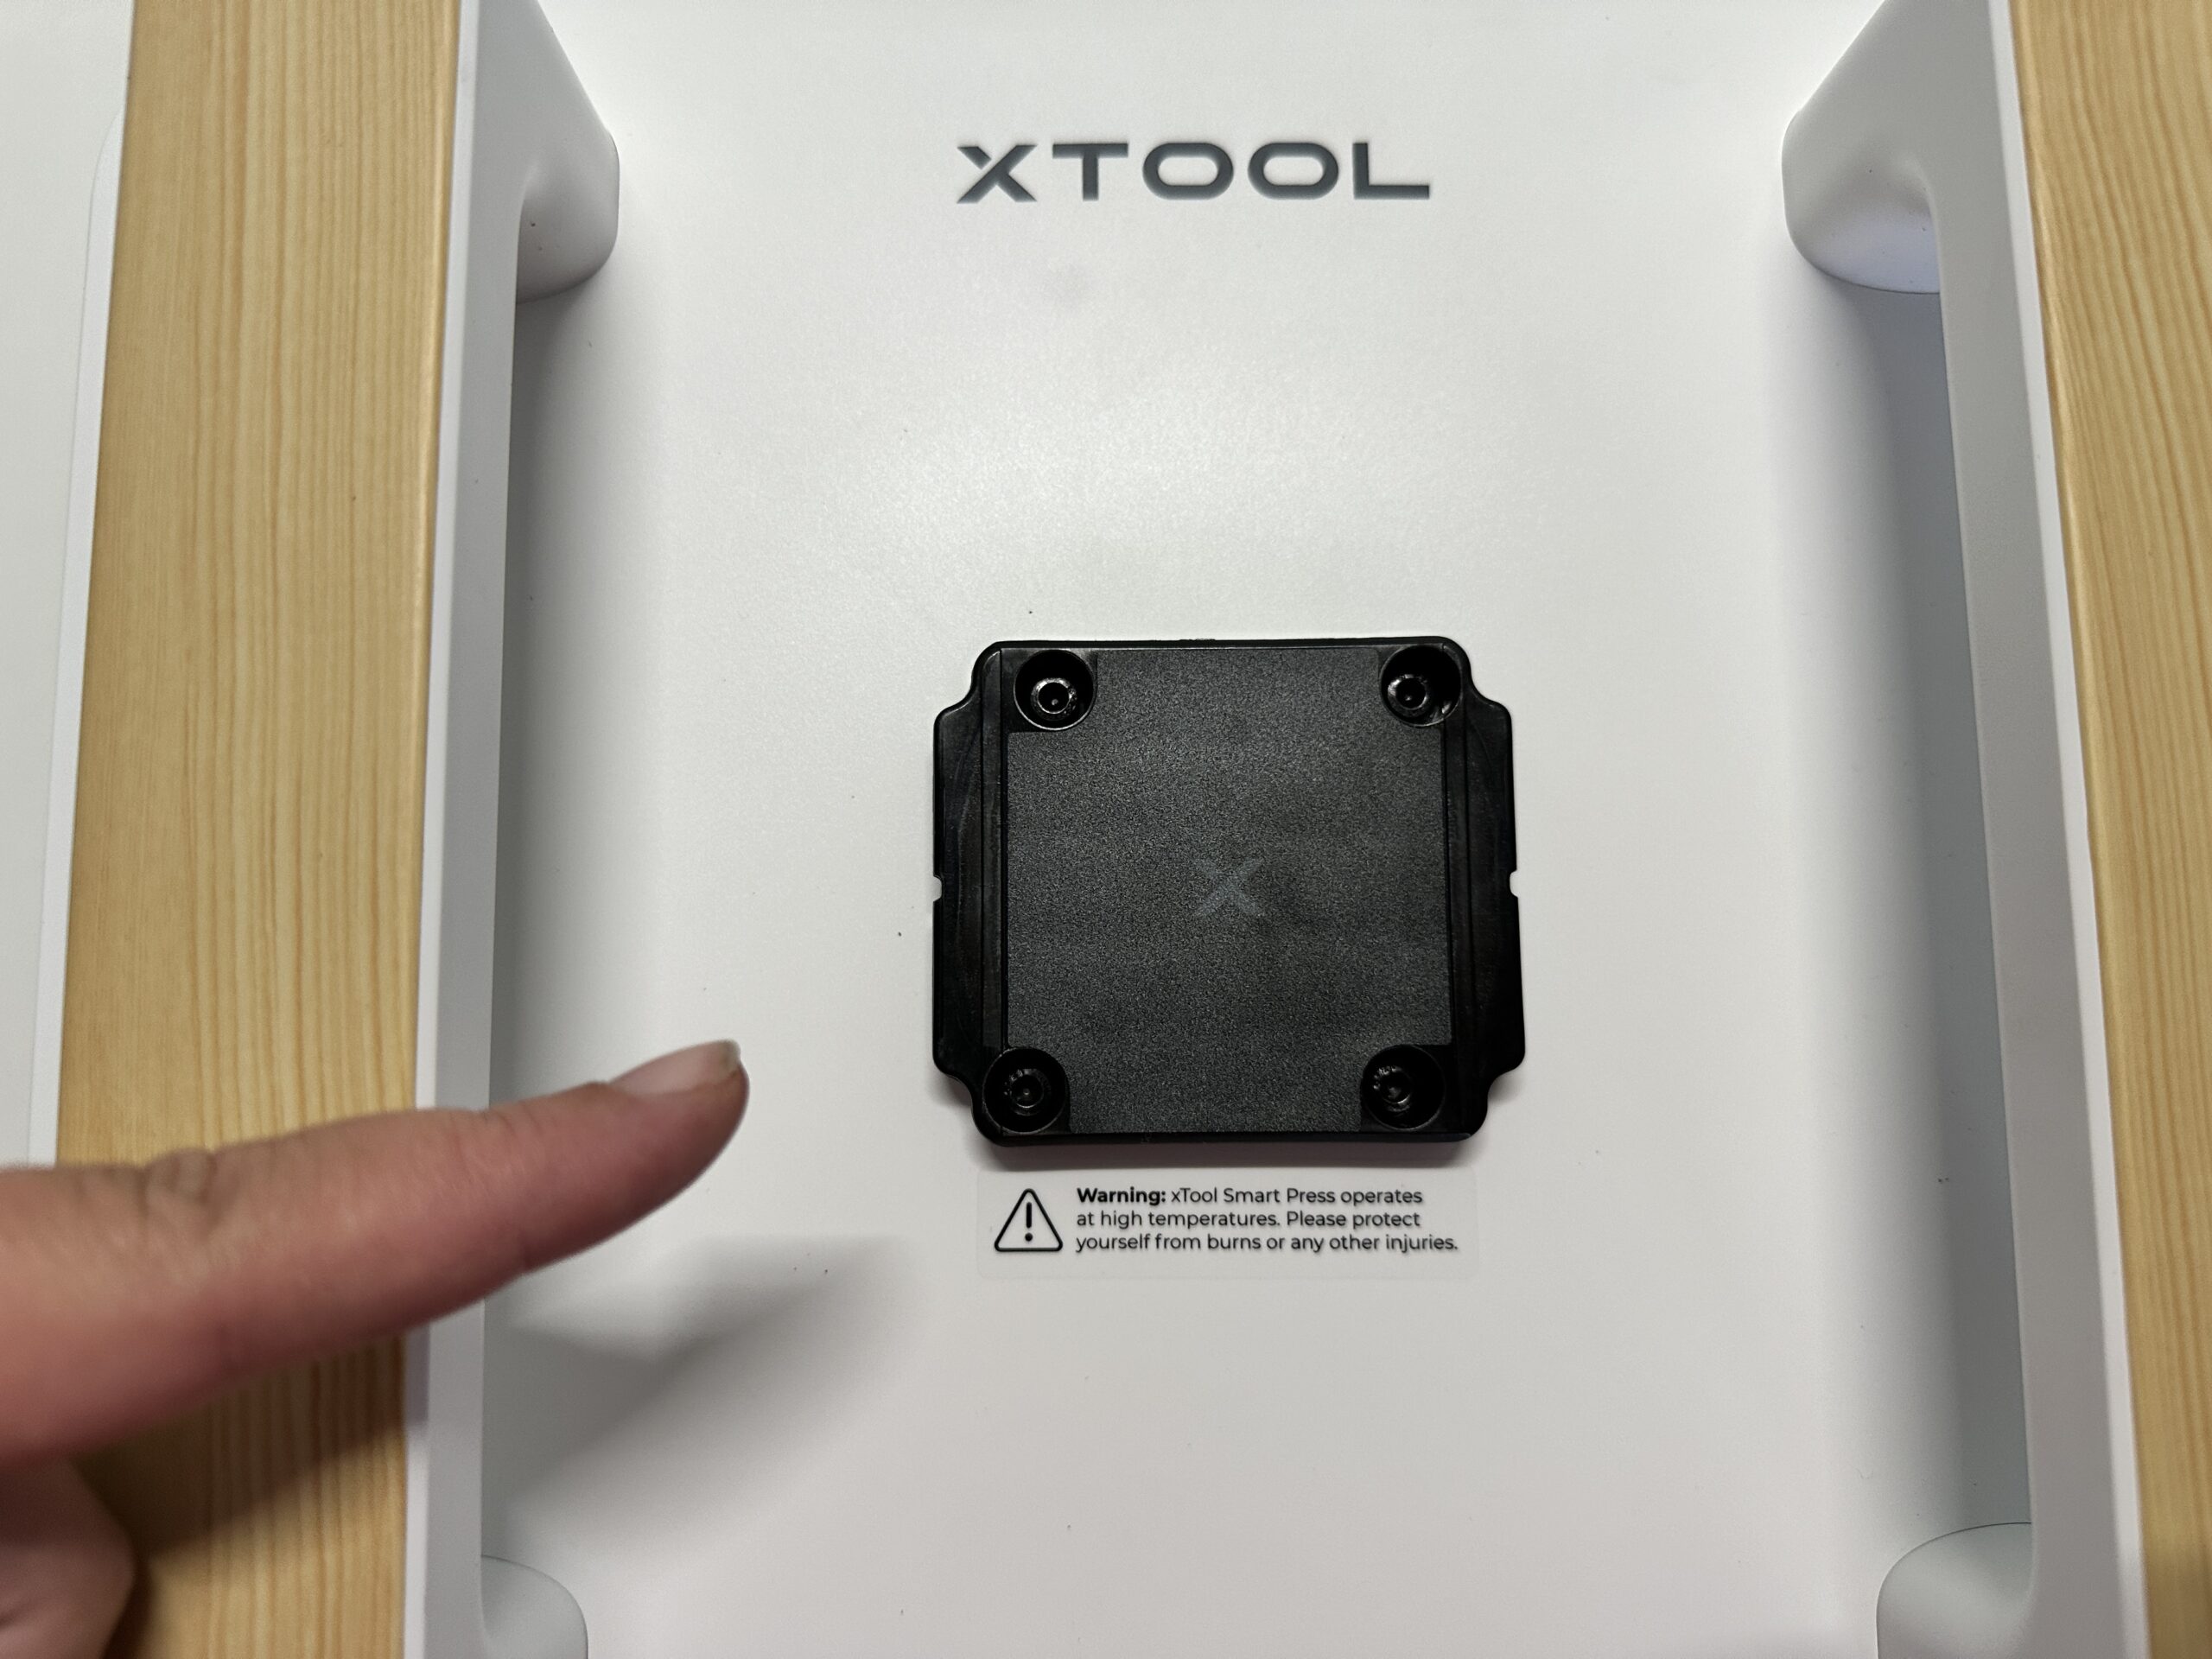
Mounting the xTool Heat Press is easy, there is a bracket you attach to the top of the heat press and it slides and clicks into the Smart Press Platform. It takes about 3 seconds to mount and unmount the press on the Smart Press Platform.
Once mounted, the xTool Heat Press functions as any other swing away heat press. It swings both left and right without much effort.
The xTool Heat Press adjusts from 212° Fahrenheit to 400° Fahrenheit. This allows crafters to use most heat transfer vinyl products, as well as also do sublimation and DTF transfers. The xTool Heat Press heats up to 400 degrees in about 5 minutes.
How Does the xTool Heat Press Smart Controller Work?
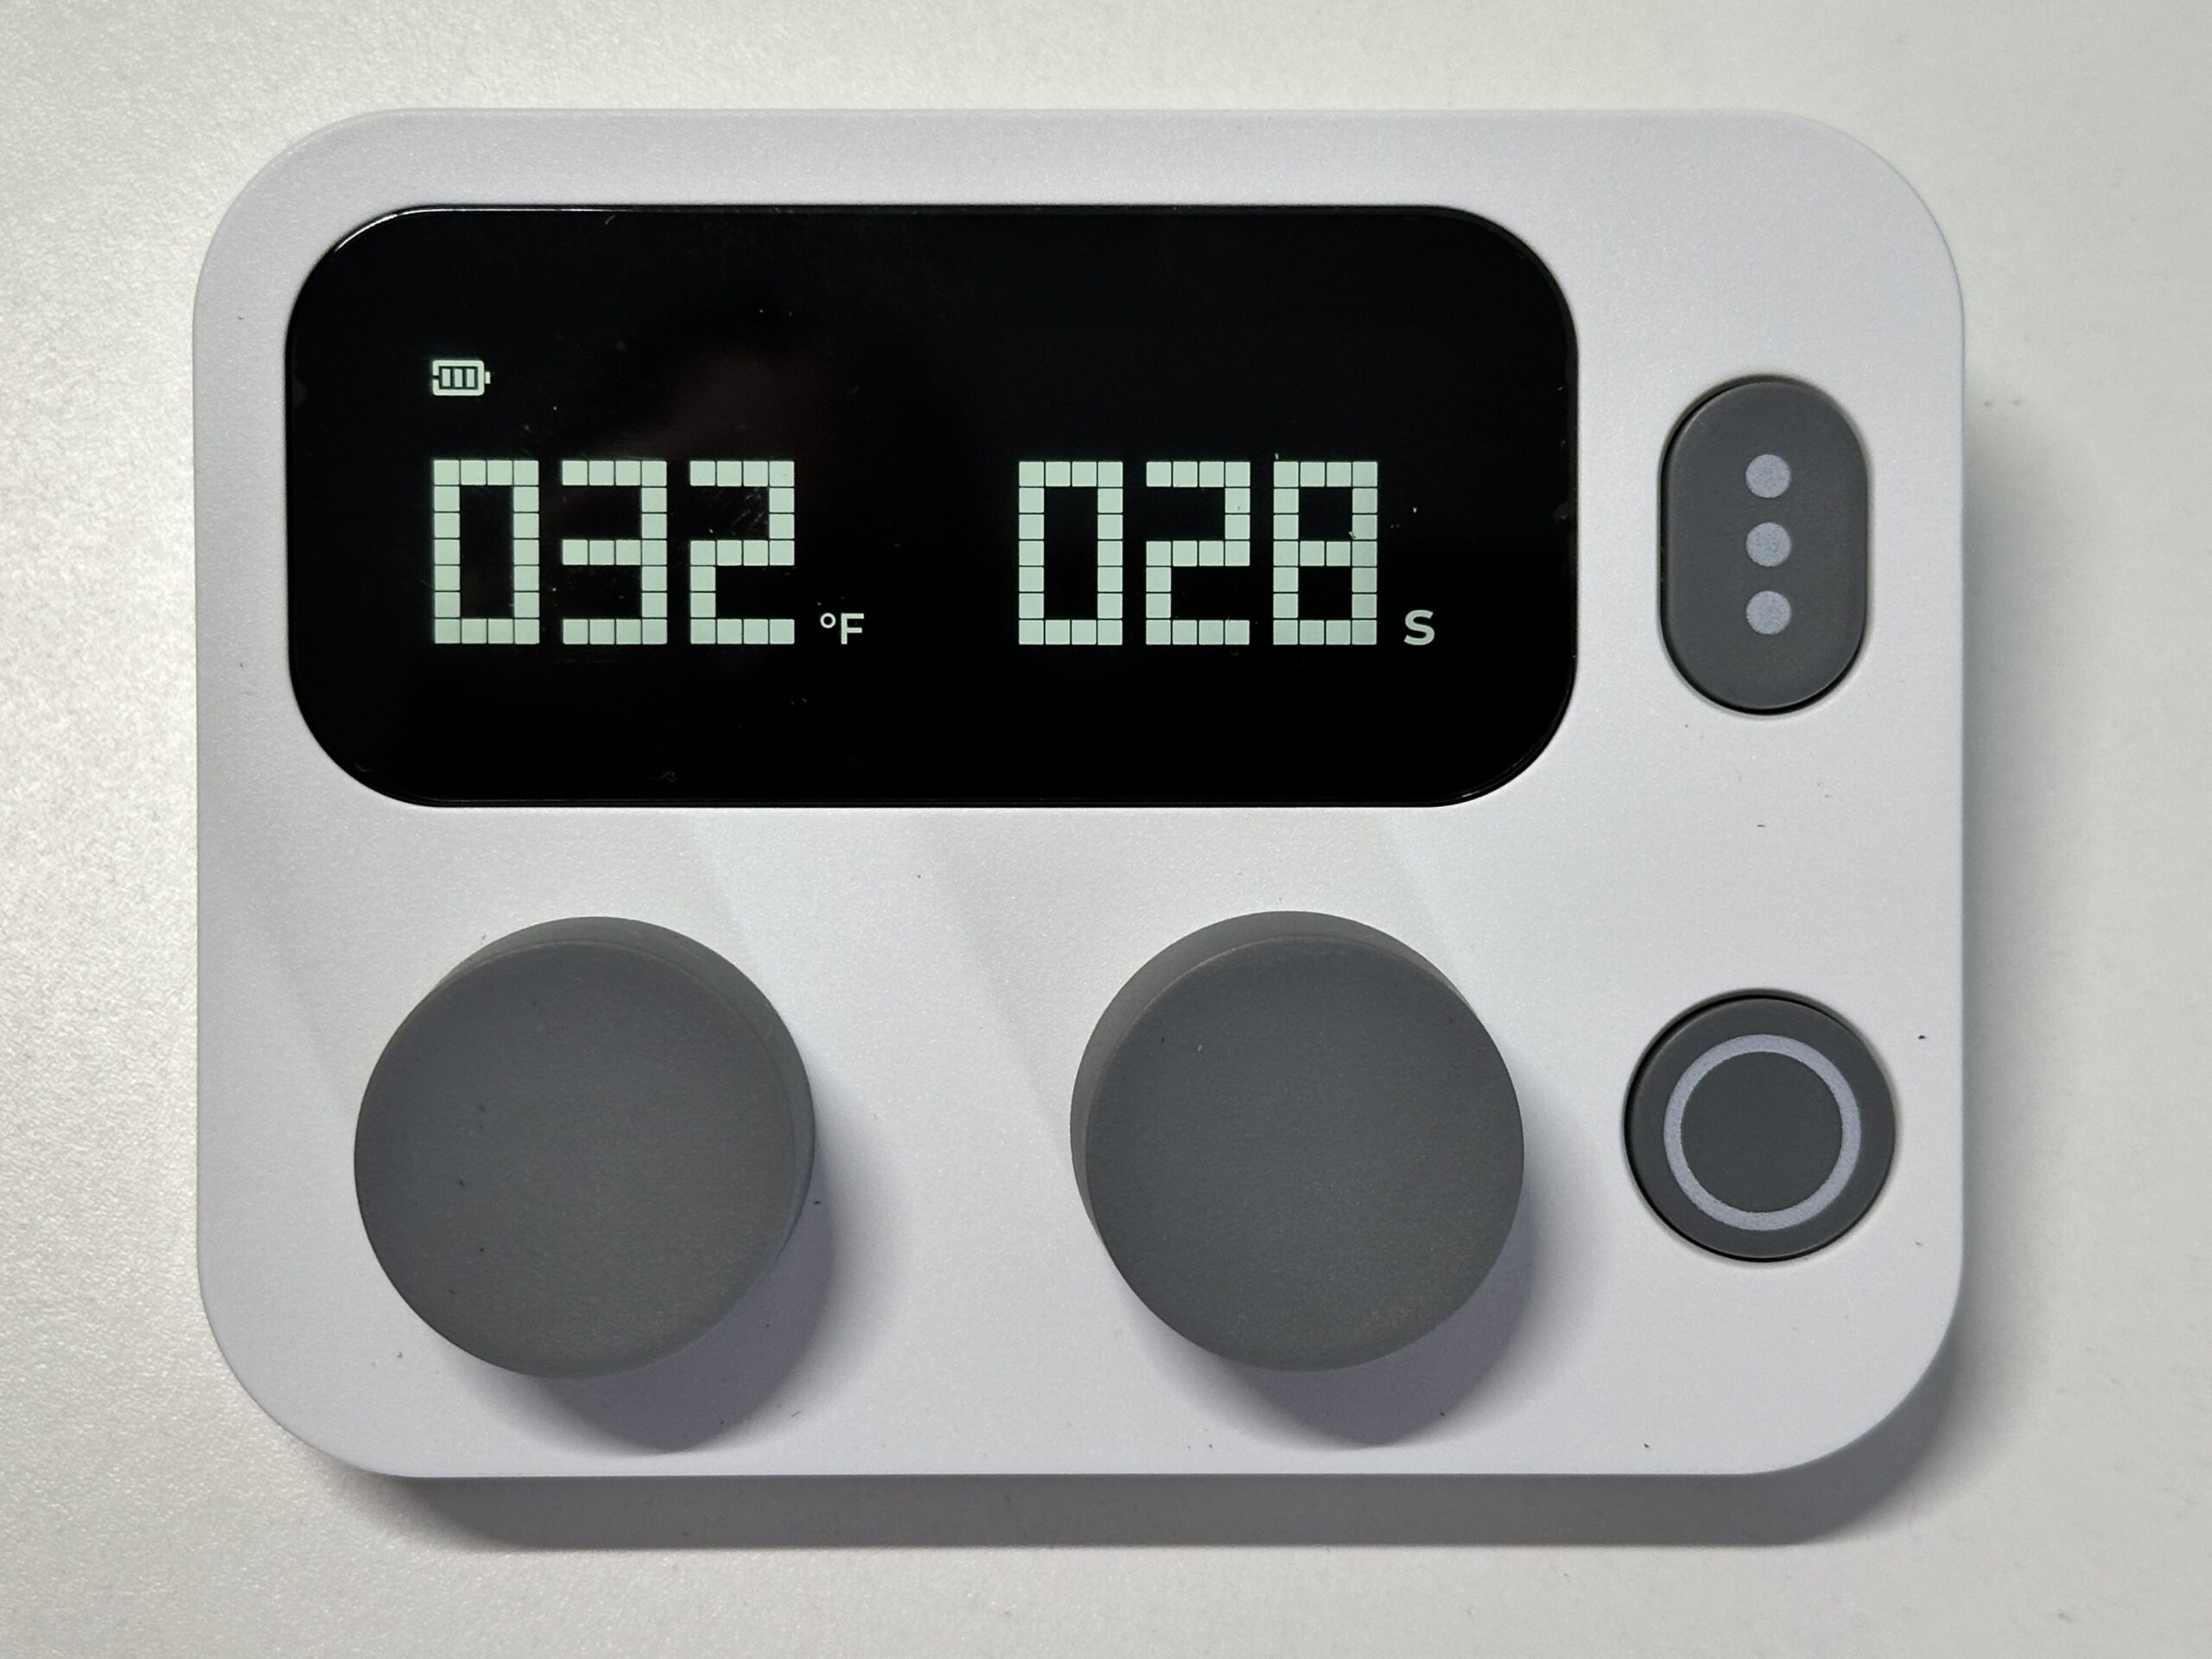
The xTool Heat Press Smart Controller connects wirelessly to the heat press. It features controls in both Fahrenheit and Celsius. Additionally, it is convenient that you can create three presets. The presets are nice, because if I routinely press the same brand HTV and use the same settings, I can store them in the controller.
What is the xTool Mini Press?
Included in the xTool All-in-One bundle is the xTool Mini Press. It weighs less than a pound and it perfect for awkward or small projects – like shoes, keychains, earrings, and more. One thing that I like about the xTool Mini Press over the Cricut EasyPress Mini is that the handle is open. It feels like I have more room for my (big!) hand.
The only thing I don’t love about the xTool Mini Press is that it has an auto shut off after 11 minutes. If I’m using it for a quick project, no worries – but it kinda drives me batty when it turns off. Luckily for me, it heats back up within just a few minutes.
Would I Recommend the xTool Heat Press System?
Yes! I would wholeheartedly recommend the xTool Heat Press System. I actually sold my Cricut EasyPress, my EasyPress Mini, and my standalone heat press. Now, I have more room for… more craft supplies!
I’d recommend the xTool All-in-One bundle, which includes: The xTool 12” x 10” Portable Smart Press, xTool Mini Press, Smart Press Platform, xTool Smart Control, and the xTool Smart Press Mat. You can purchase it directly from xTool or from Amazon. At the time of writing this review, the All-in-One Bundle is $299 through either link.
My kids went back to school last week, what about yours? Are you sad summer is over or are you ready to get your kids back in school?
Today, let’s create the *cutest* back to school lined paper SVG design – perfect for a t-shirt, bulletin board, or wood sign.
Tutorial: Back to School Lined Paper Design
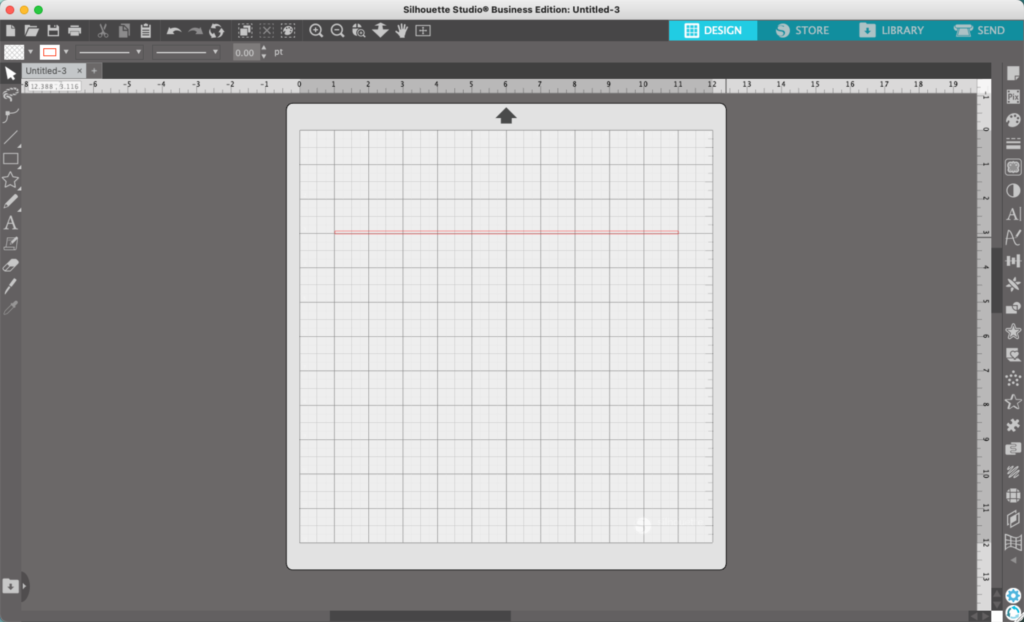
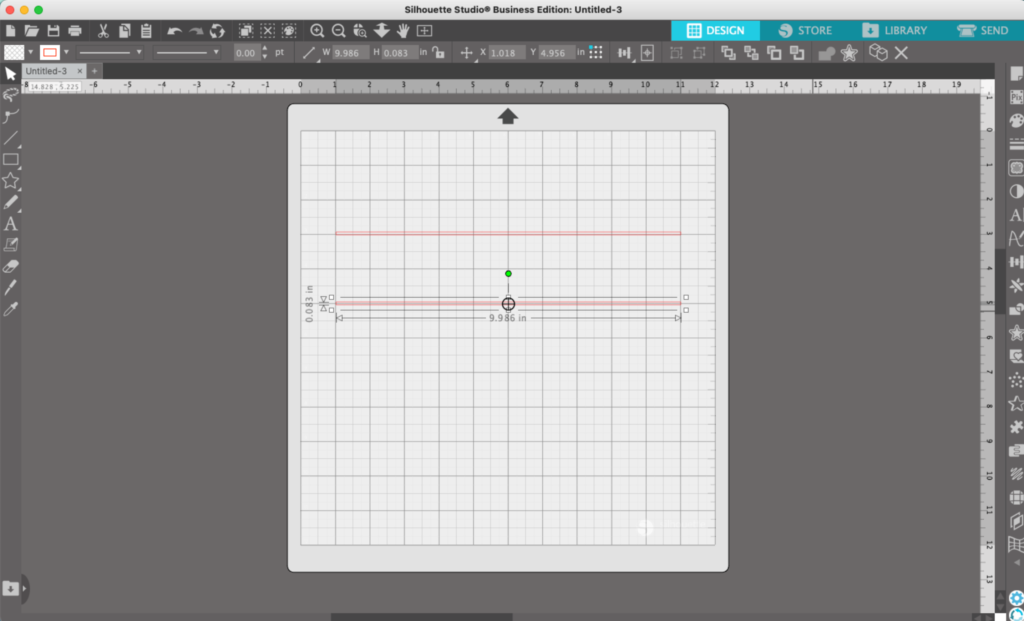
Use the ‘Draw a Rectangle’ tool to draw a long skinny horizontal box.
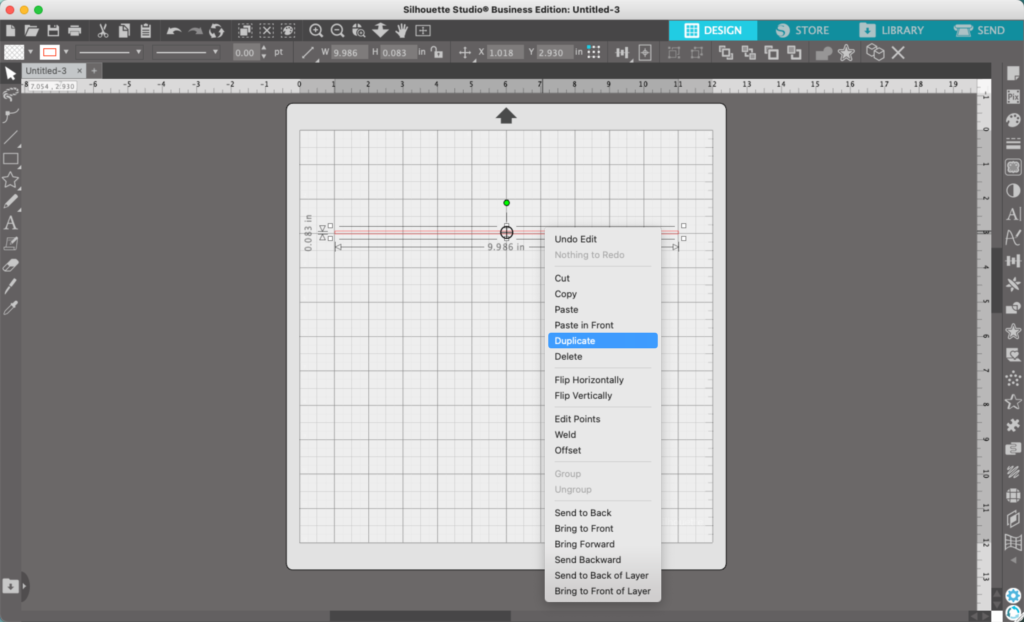
2. Right click to duplicate the skinny rectangle. Then, align it lower than the first rectangle.
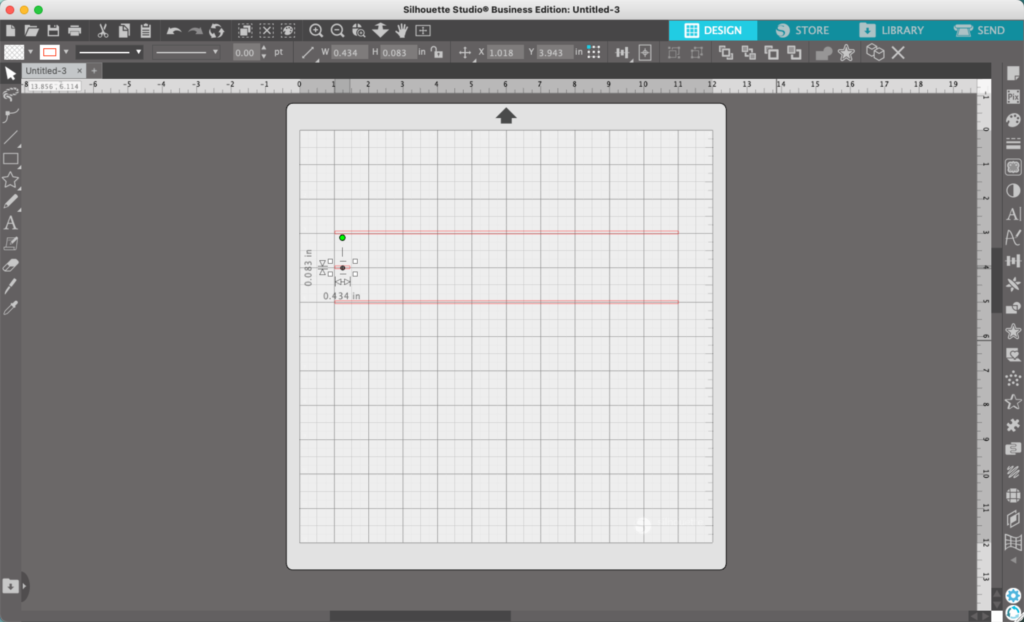
3. Use the ‘Draw a Rectangle’ tool again to draw a small rectangle between the two long rectangles.
4. Right click the small rectangle and duplicate it several times.
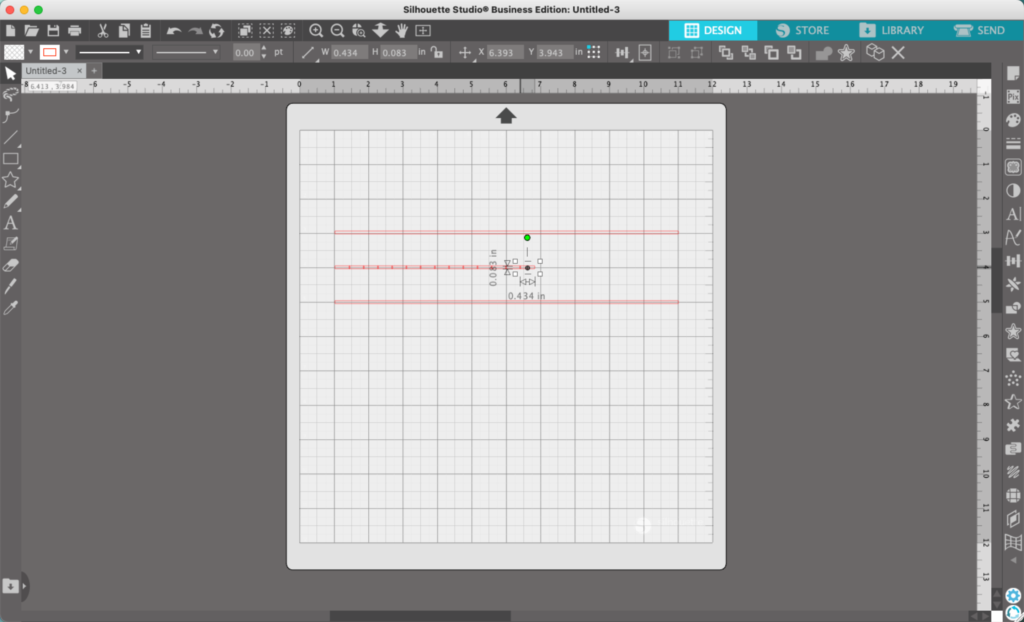
5. Drag the short rectangles apart. It doesn’t matter if they are spaced evenly or aligned perfectly – we will fix that in a minute.
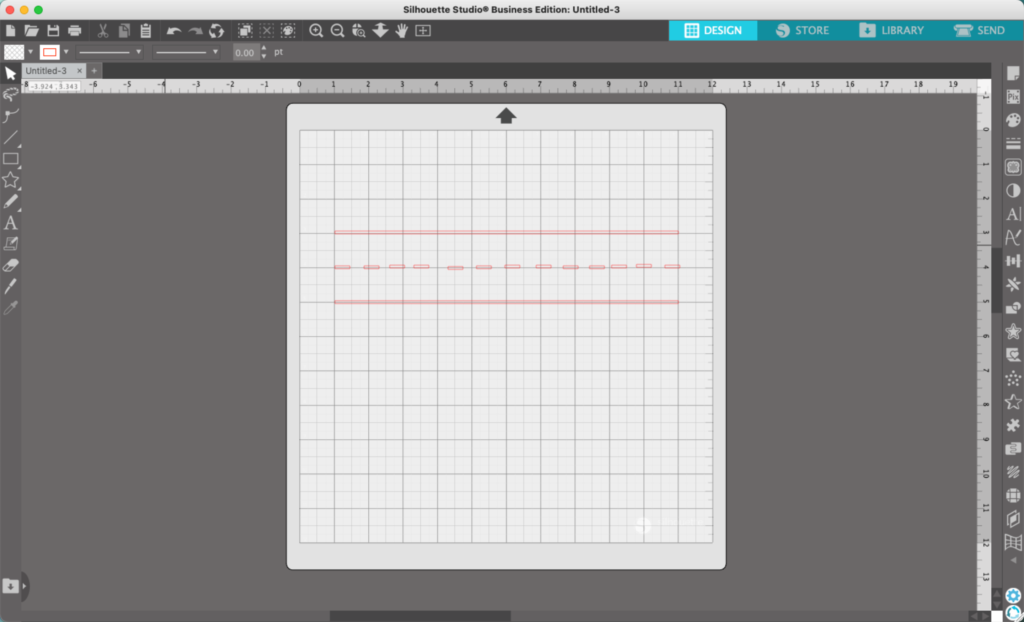
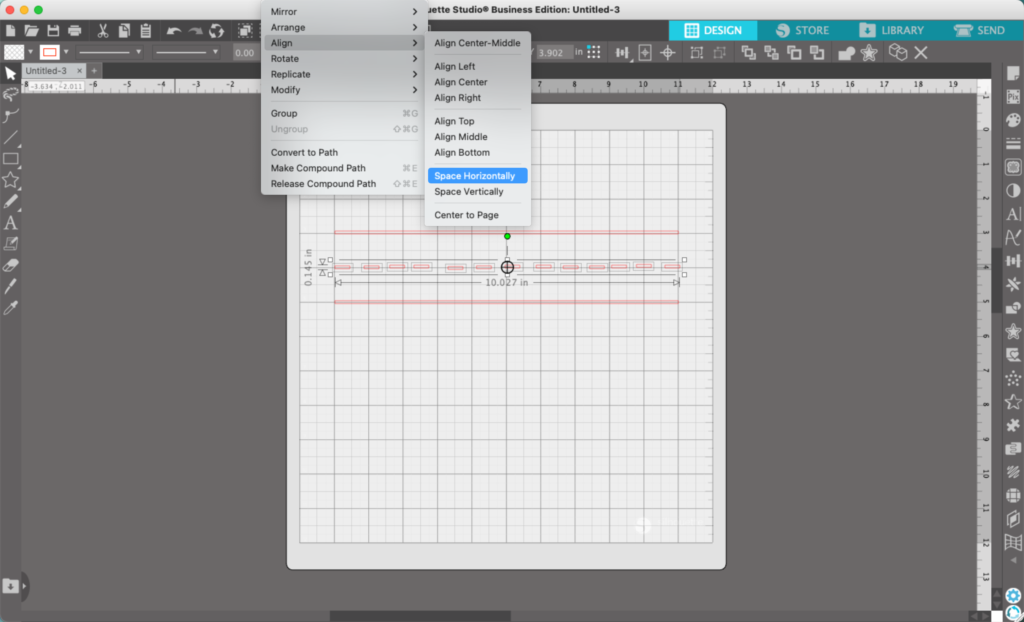
6. Select all the rectangles (my favorite way to select multiple elements is to draw a box around all the pieces). Then, navigate to ‘Object’, ‘Align’, ‘Space Horizontally’.
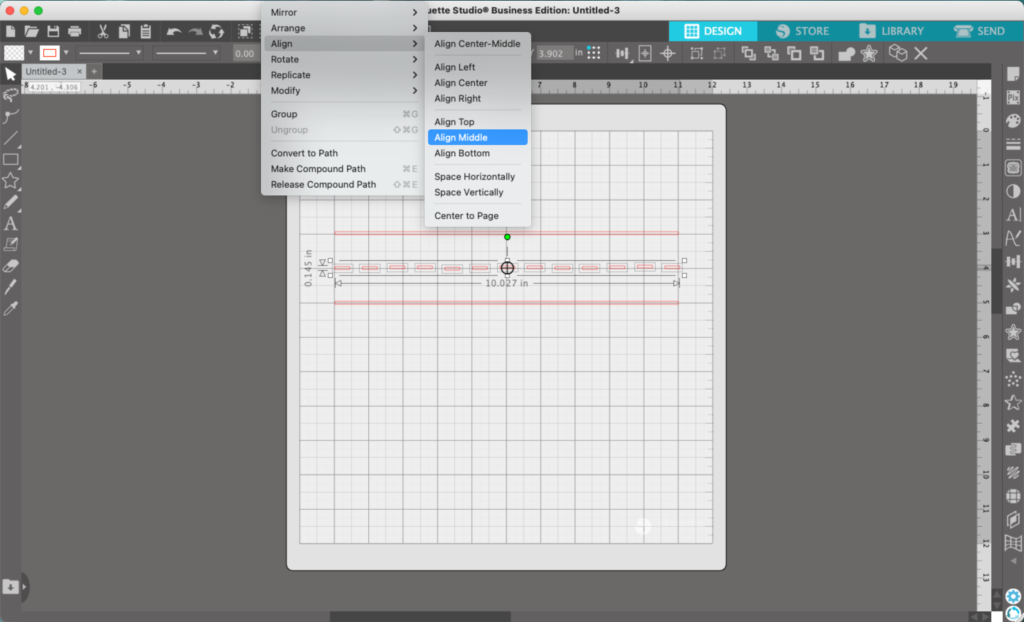
7. Return to ‘Object’, and ‘Align’, but this time choose ‘Align Middle’. The dashed lines will be lined up perfectly now. Right click and select ‘Group’ to lock together the dashes.
8. Add text of your choice. You could add a grade, teacher’s name, school name, and more. I used the Sleepy Sloth font.
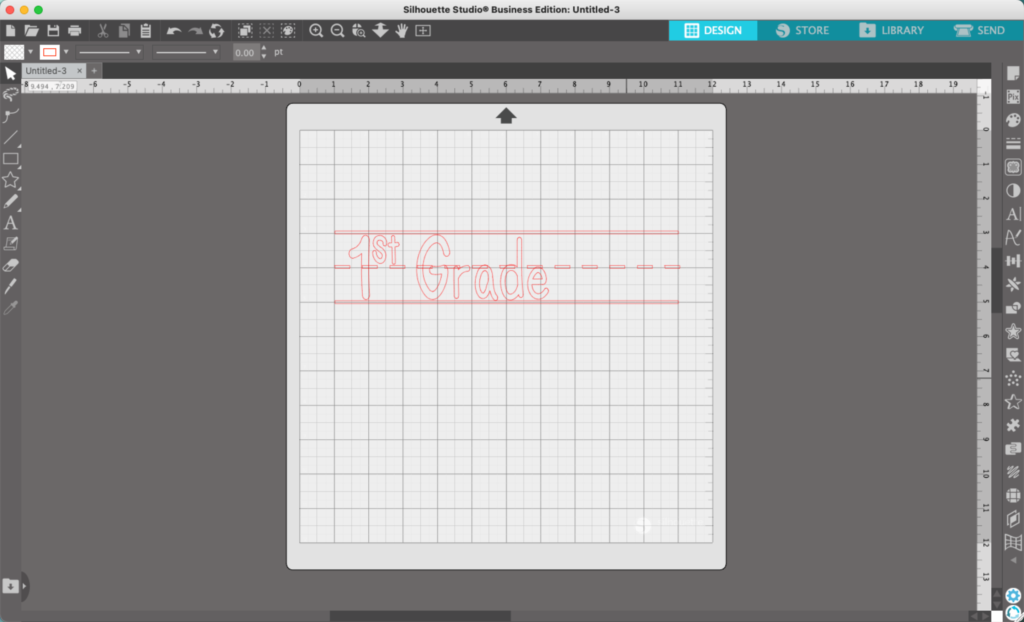
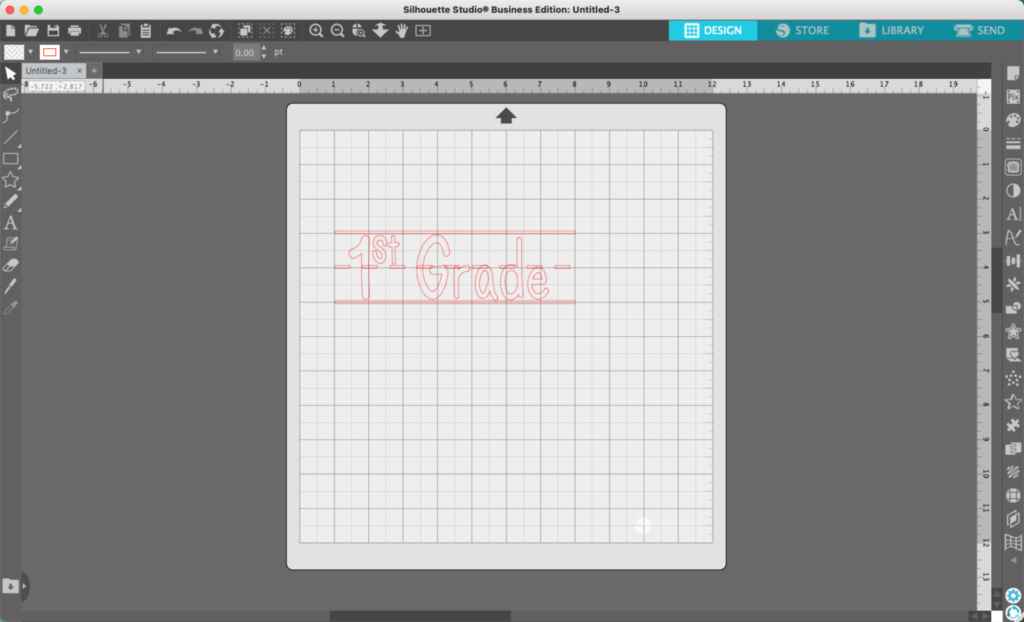
9. Use the knife tool to trim the line down to size.
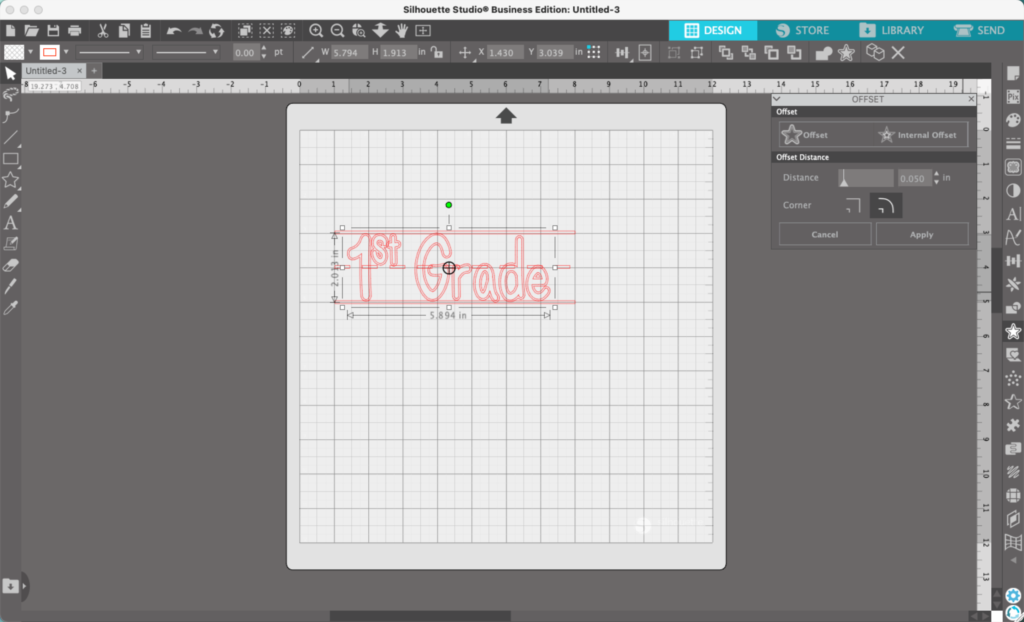
10. (Optional) Depending what you use the final design for, you may want to subtract the text from the dashed lines.
If so: Select your text, then navigate to ‘Panels’, then ‘Offset’. Perform a small offset of the text.
Then, select the dashed lines, then your offset, and go to ‘Object’, ‘Modify’, ‘Subtract’. Group everything back together as desired.
11. (Optional) Add color to the design and any additional details.
My final design looks like this:
Don’t Forget to Save!
To save your new SVG creation, head to ‘File’, ‘Save As’, ‘Save to Hard Drive’, name the file, then select ‘SVG’ from the dropdown menu.
We are just weeks away from Back to School time! So, let’s take a look at how to draw school supplies right in Silhouette Studio. I think you’ll be surprised at how quickly and easily they come together.
How to Draw 6 School Supplies
Mini Tutorial 1: How to Draw a Pencil
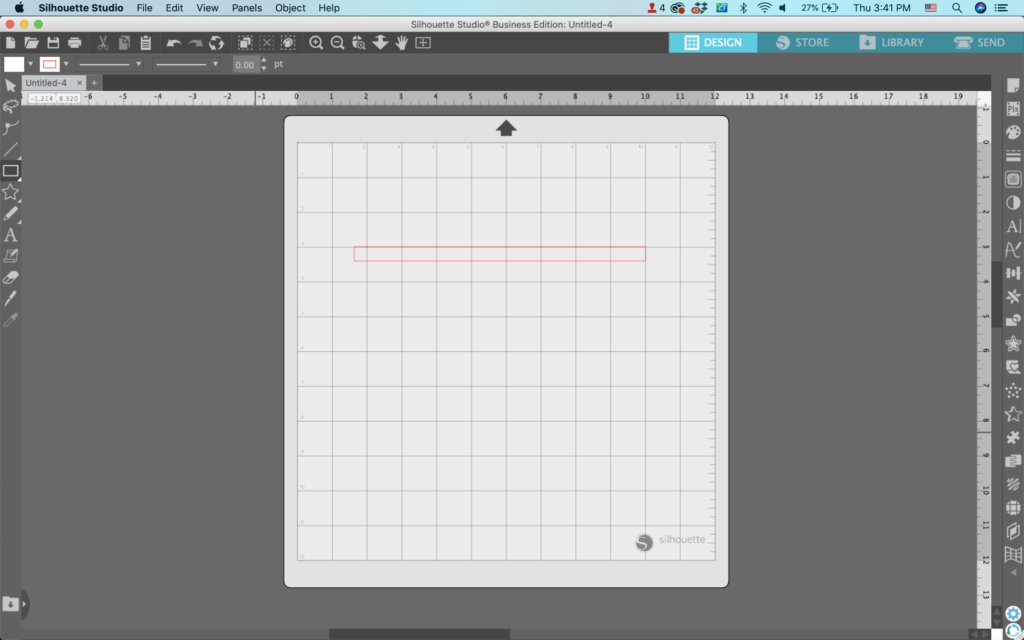
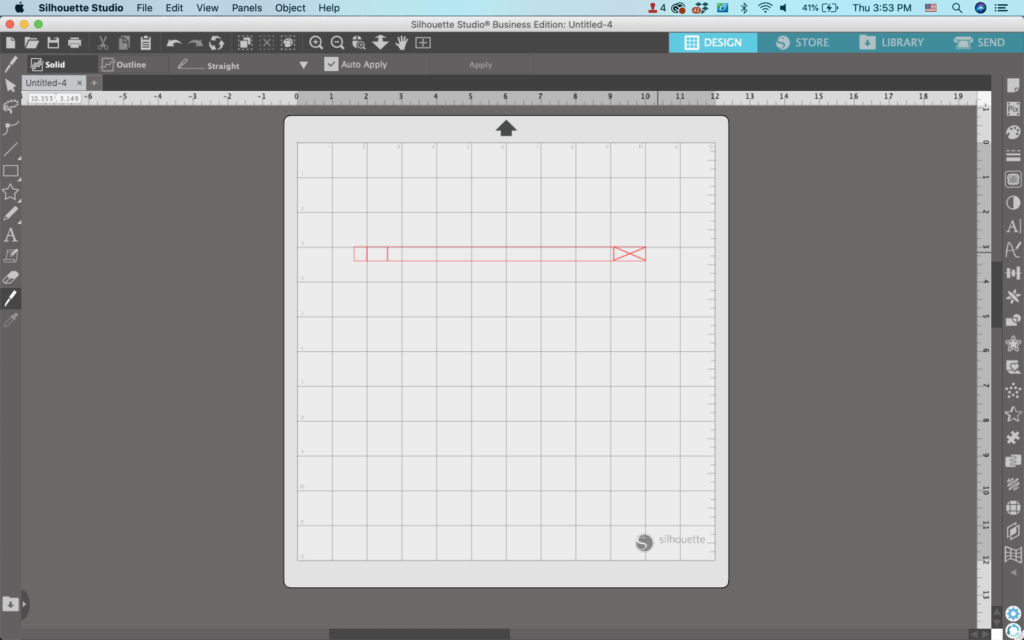
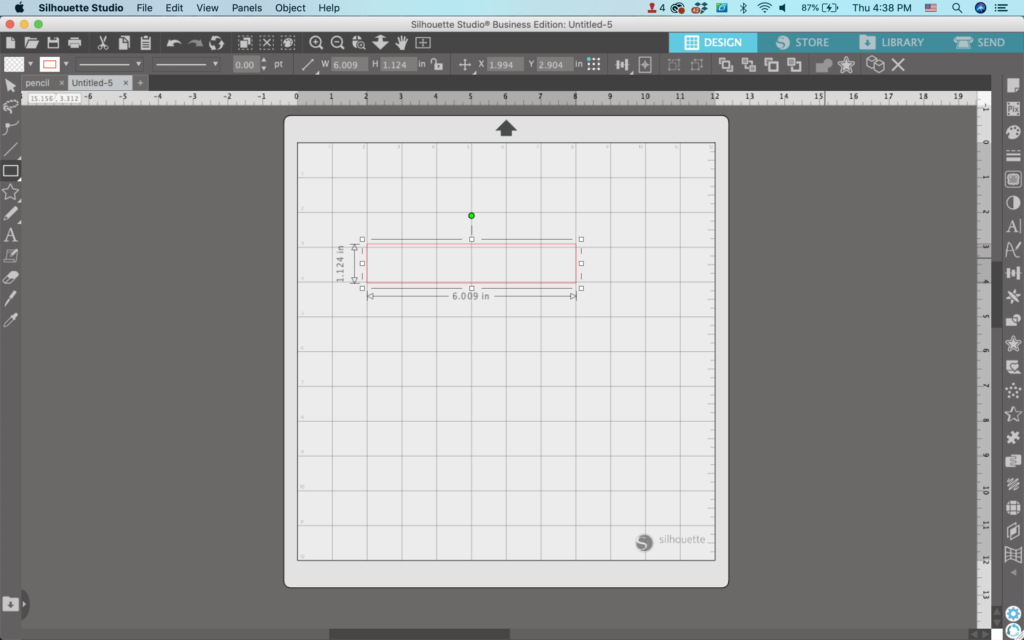
Draw a long, skinny rectangle.
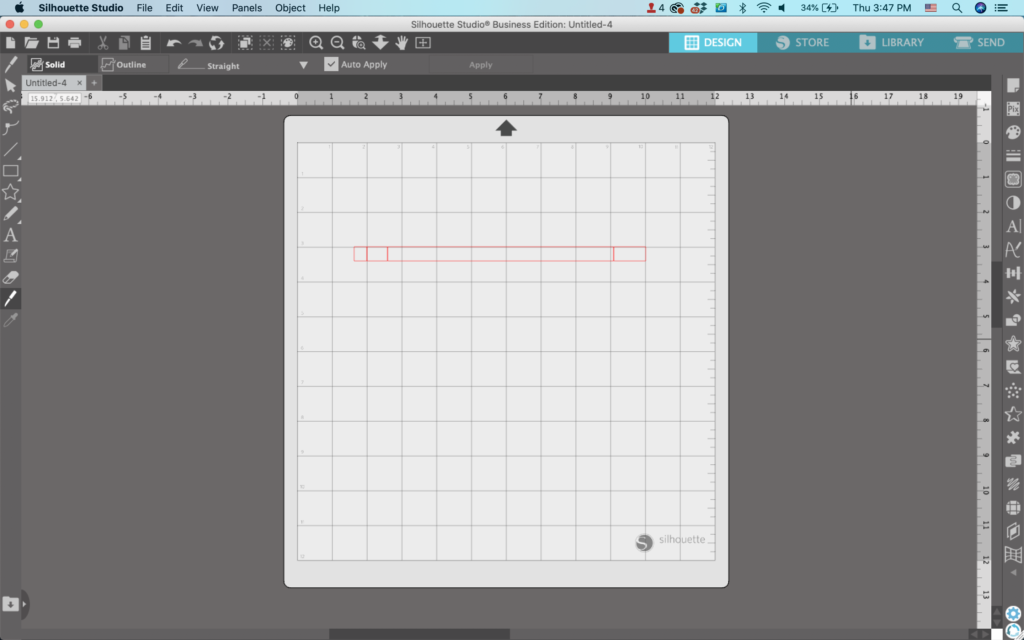
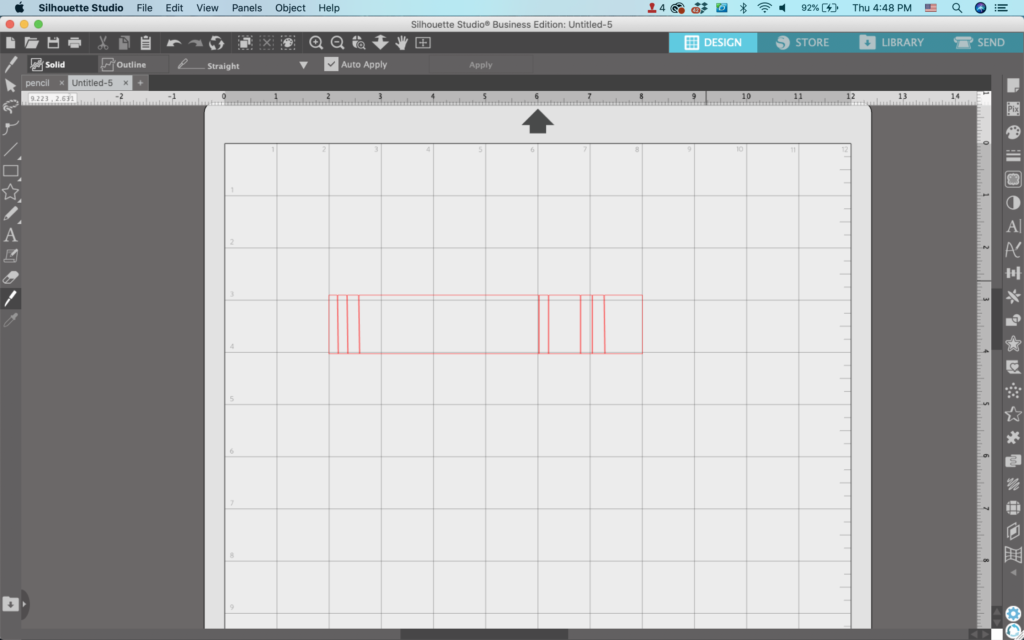
2. Use the knife tool and make three cuts. These will become the eraser, the metal band at the top, and the sharpened end.
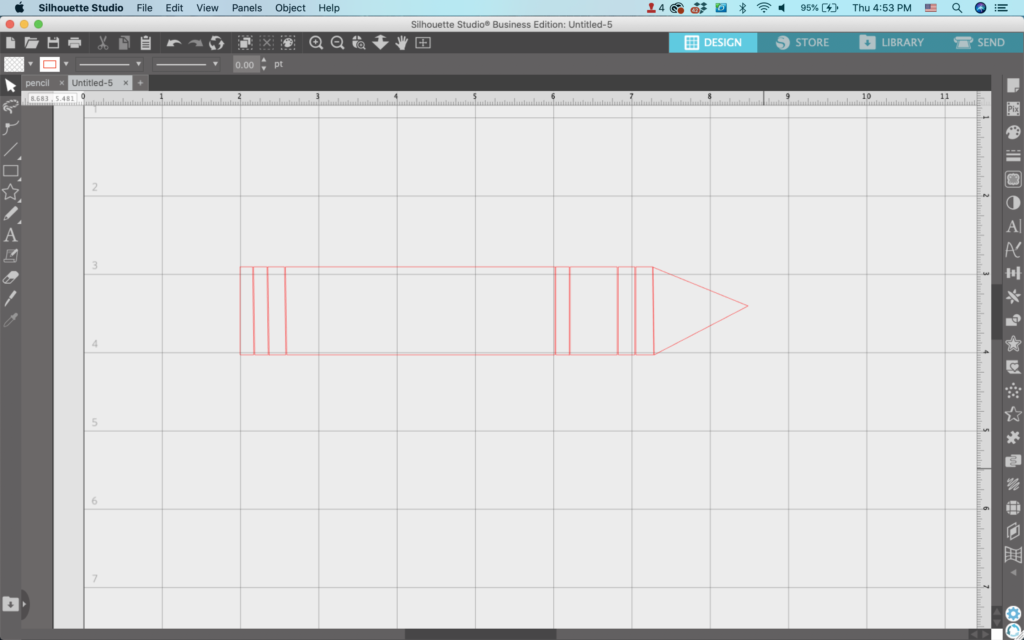
3. Use the knife tool again to make an X in the far right rectangle.
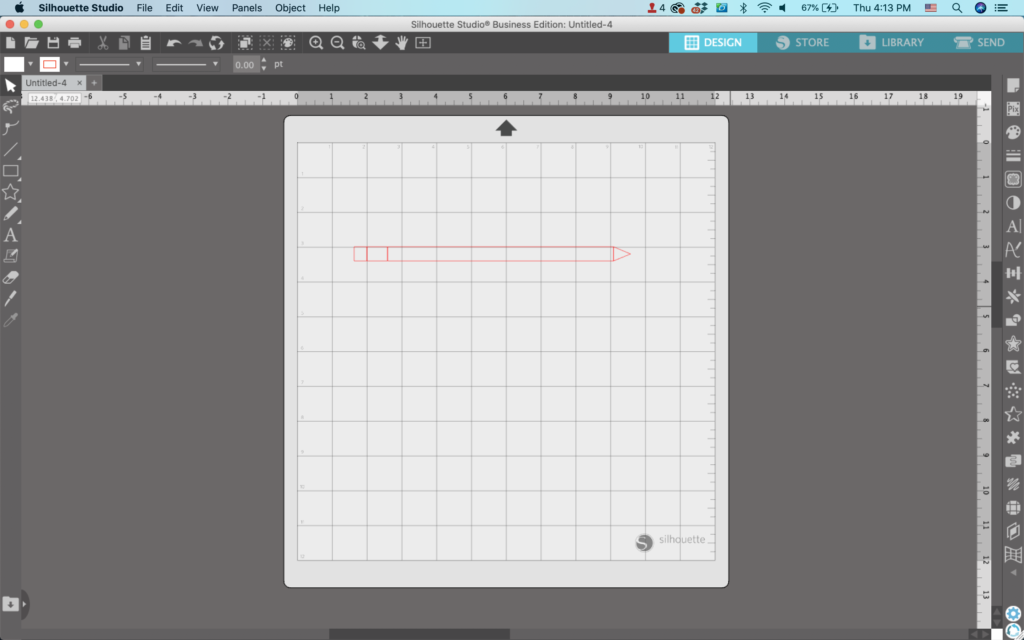
4. Delete three of the four triangles to make a point.
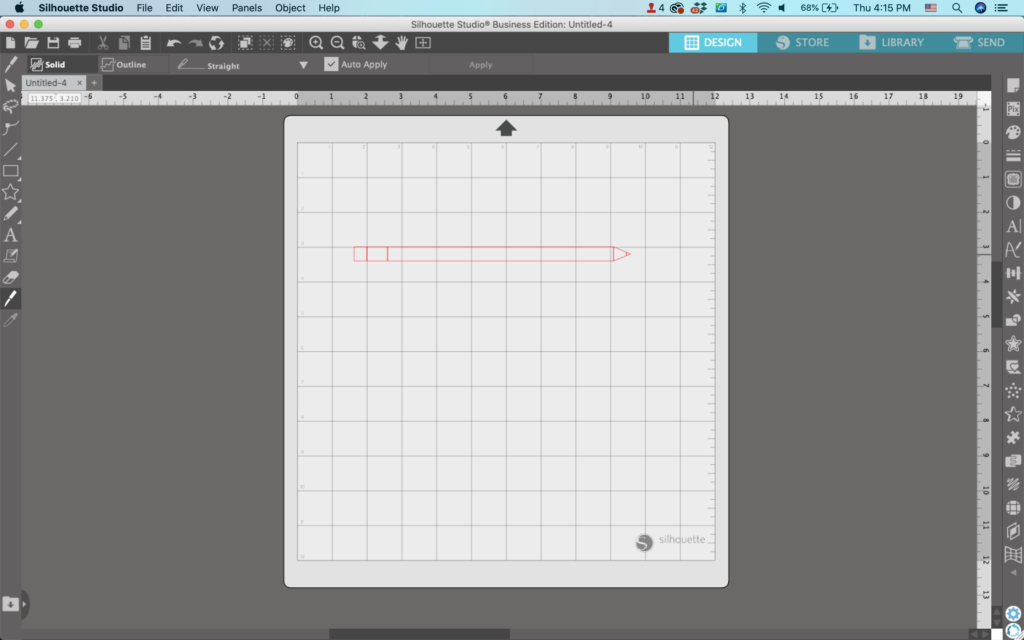
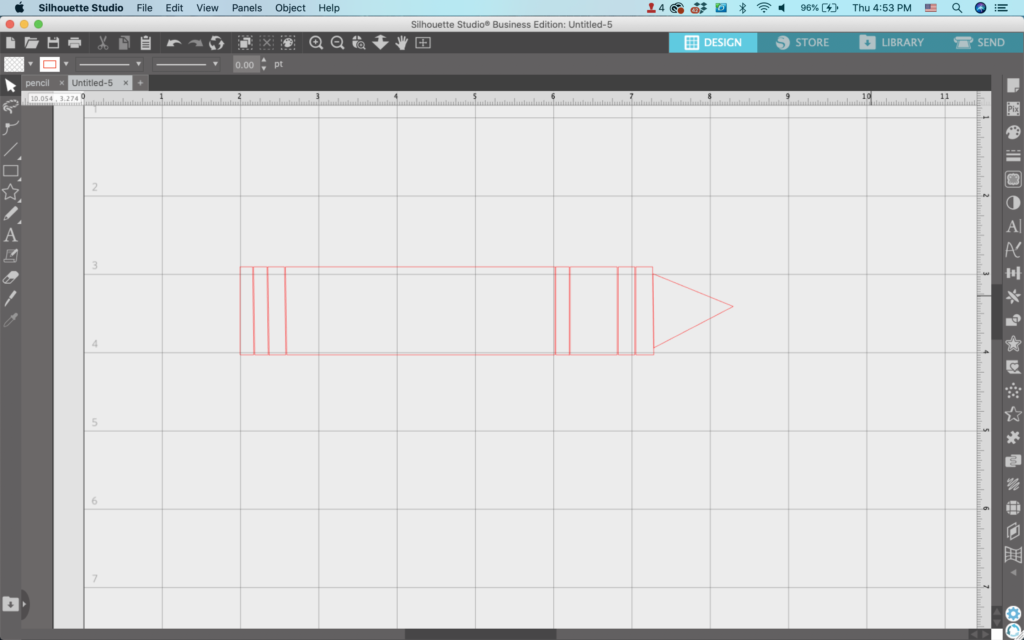
5. Use the knife tool one more time to create a lead point on the pencil.
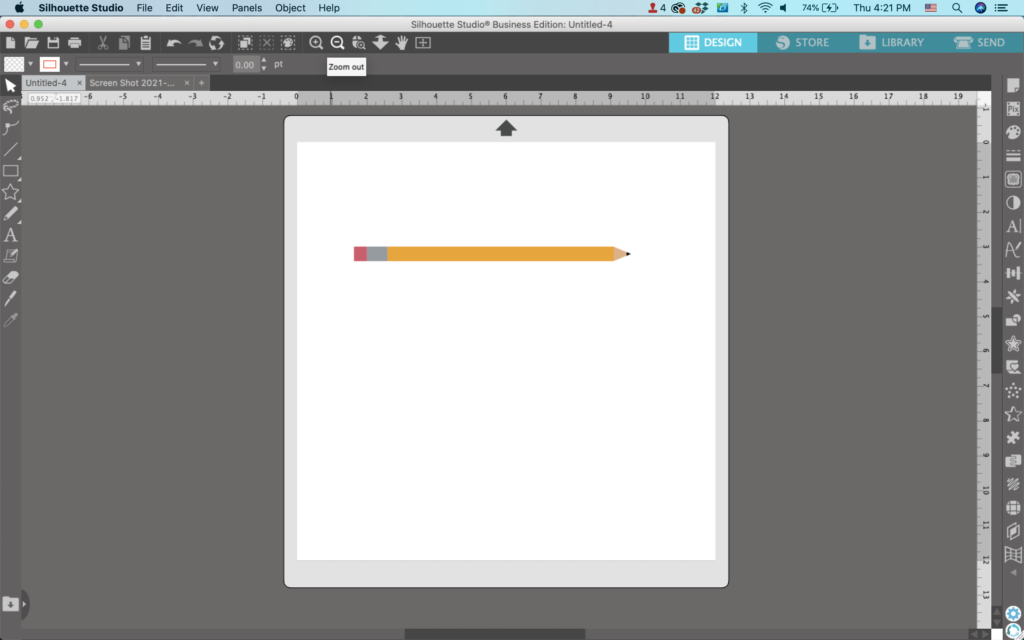
6. Make any final adjustments, group elements as needed, and fill the pencil with color.
Mini Tutorial 2: How to Draw a Crayon
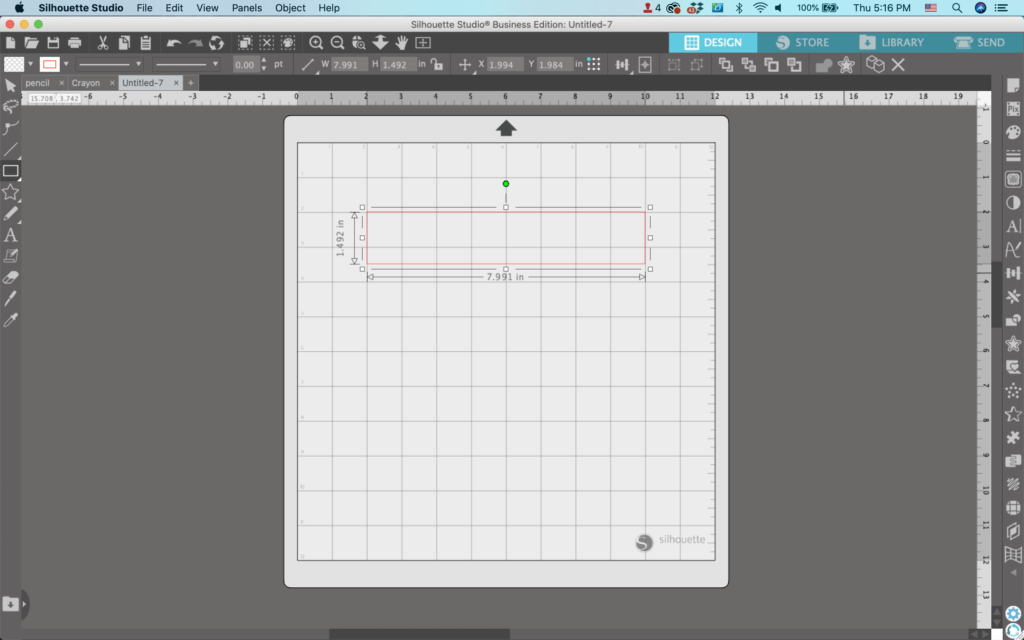
The crayon will come together a lot like the pencil we did above. First, draw a rectangle. Make it slightly thicker and chunkier than the pencil.
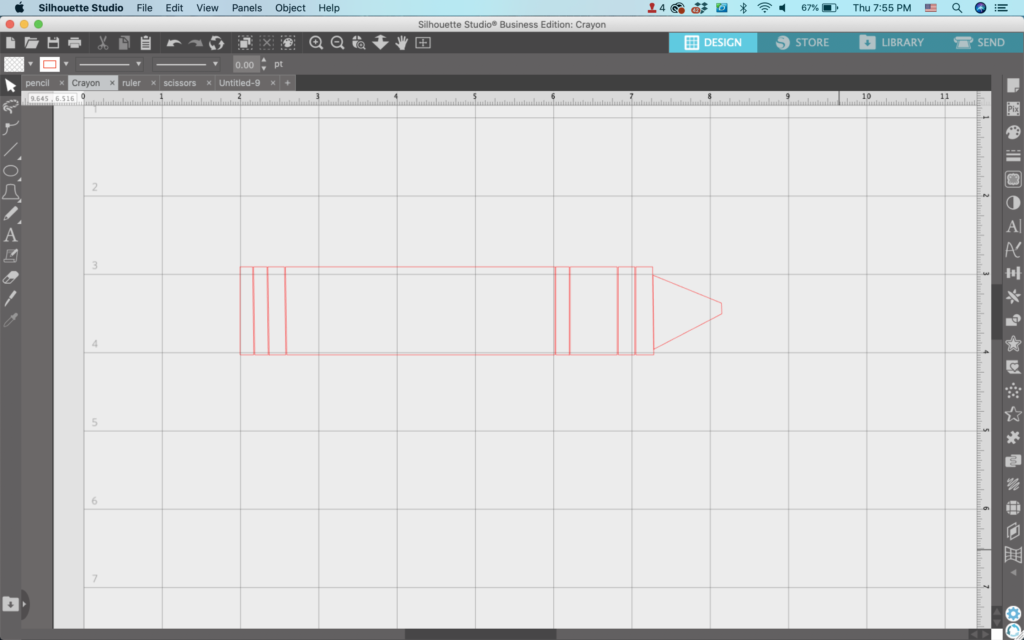
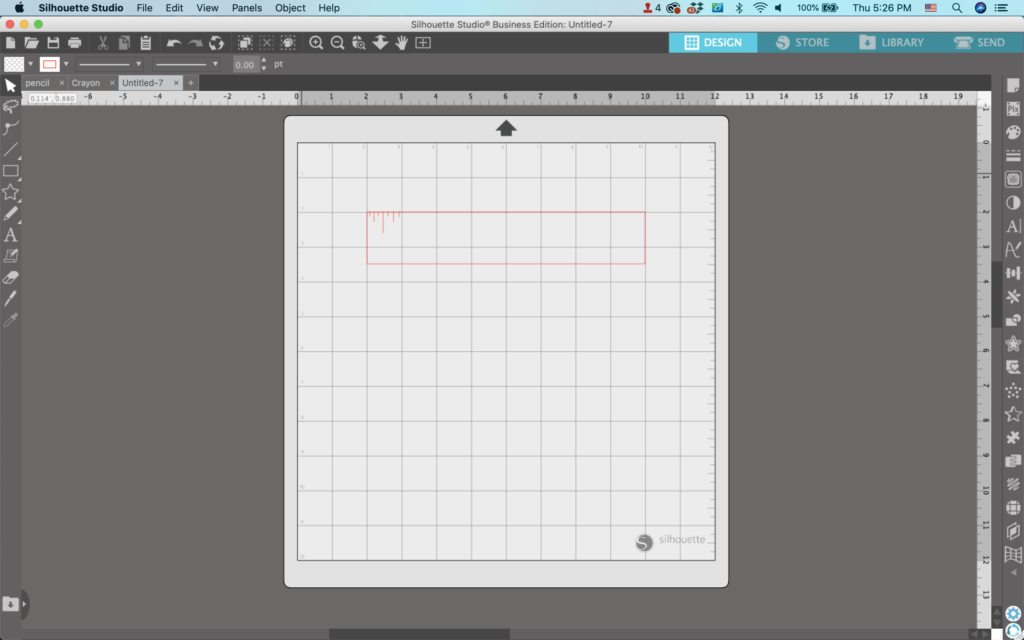
2. Using the knife tool, slice into the rectangle eight times. When you are finished, it’ll look similar to this:
3. Use the knife tool to make the right most rectangle a triangle.
4. Make the triangle slightly smaller than the current size and use the knife to flatten the tip.
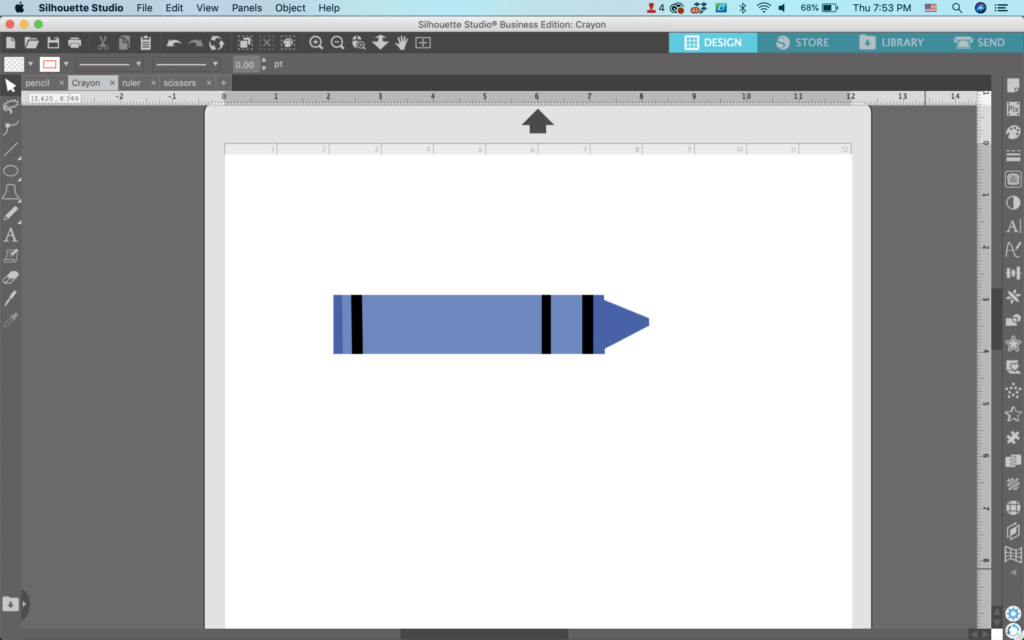
5. Make any final adjustments, group elements as needed, and fill the crayon with color.
Remember, you don’t want to make your crayon label look like well known name brands – or you will have a trademark issue on your hands.
Mini Tutorial 3: How to Draw a Ruler
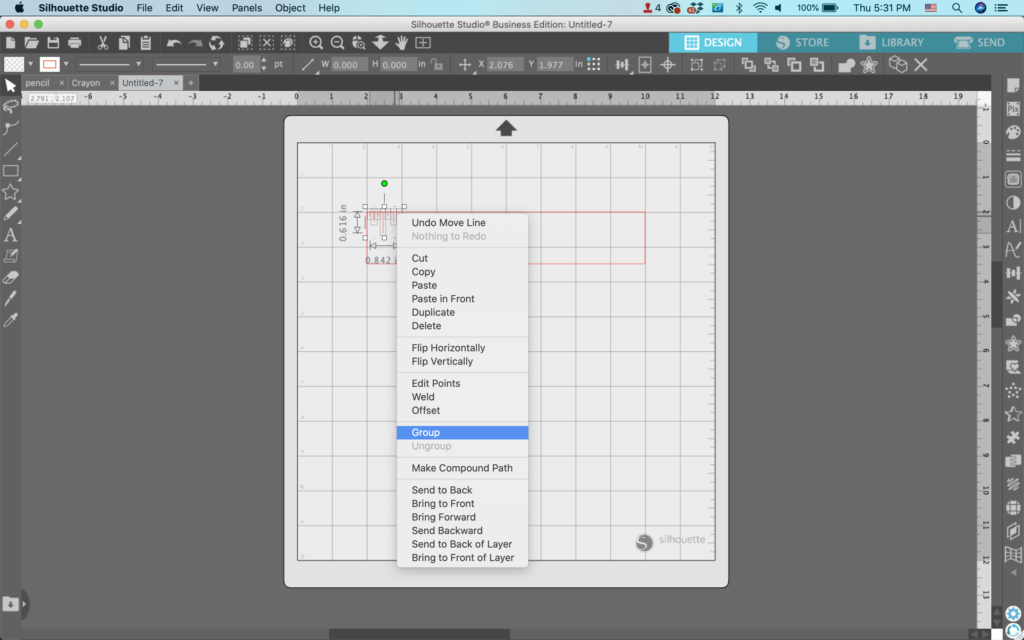
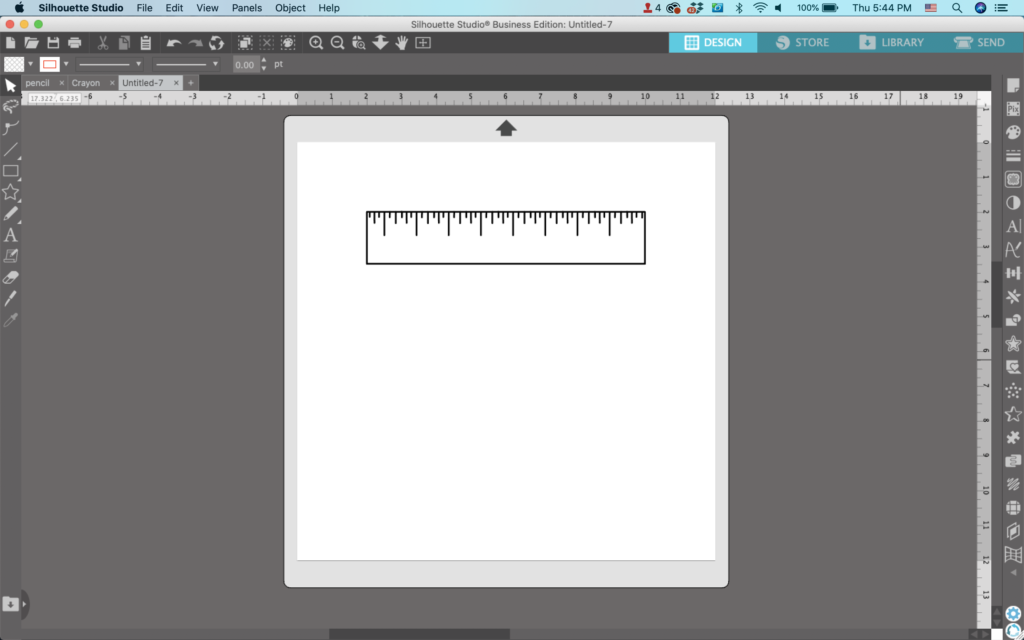
Draw a rectangle. I made sure to use the grid when drawing the rectangle. I started at the edge of a grid square and ended at the edge of a grid square.
2. Using the line tool, make lines in one square. These will represent the measurements on the ruler.
3. Select all the lines, then group them together.
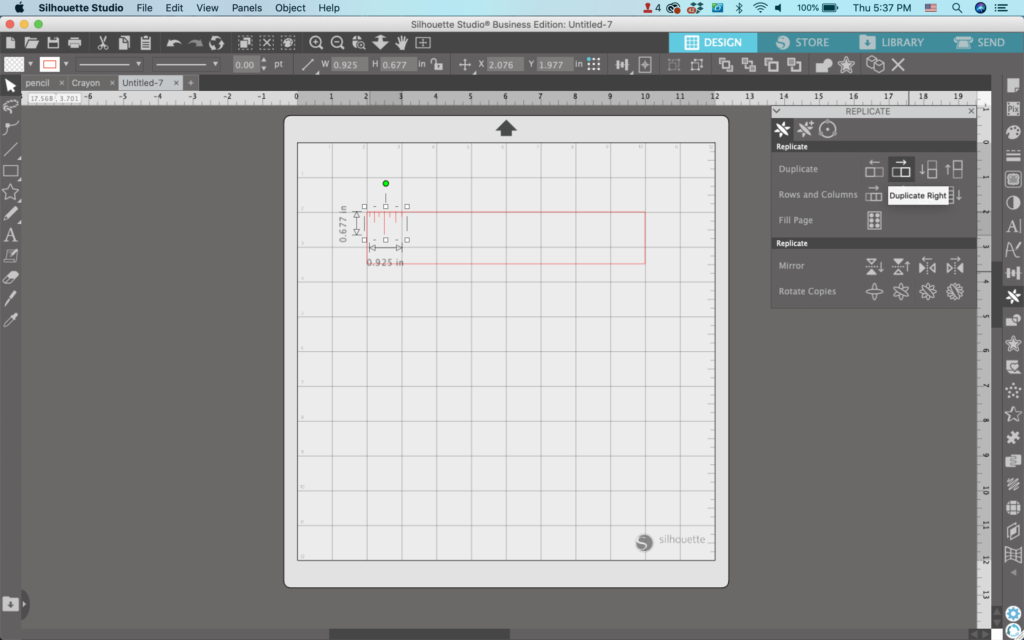
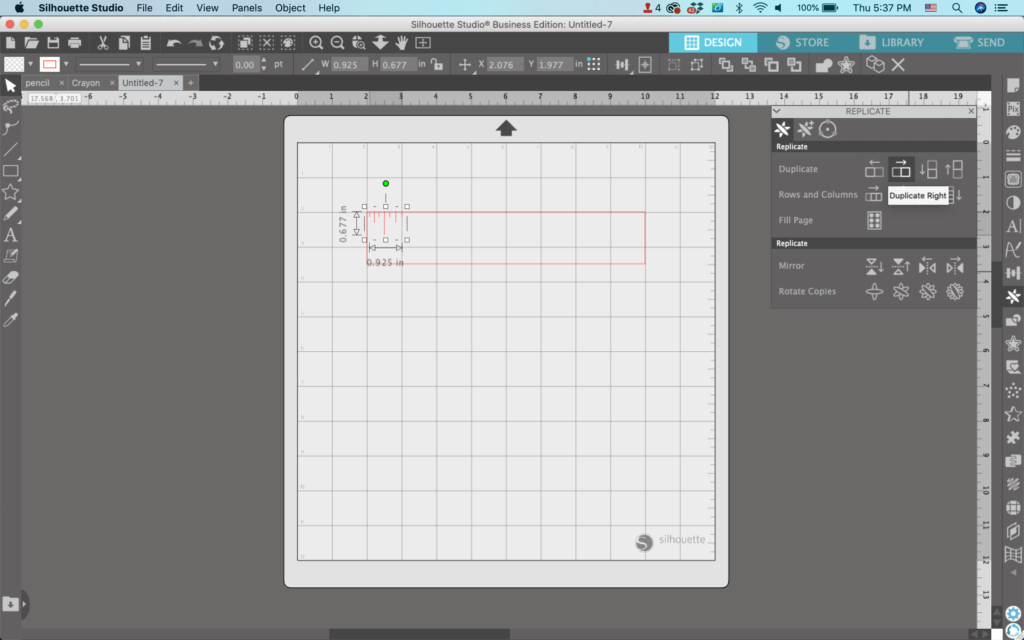
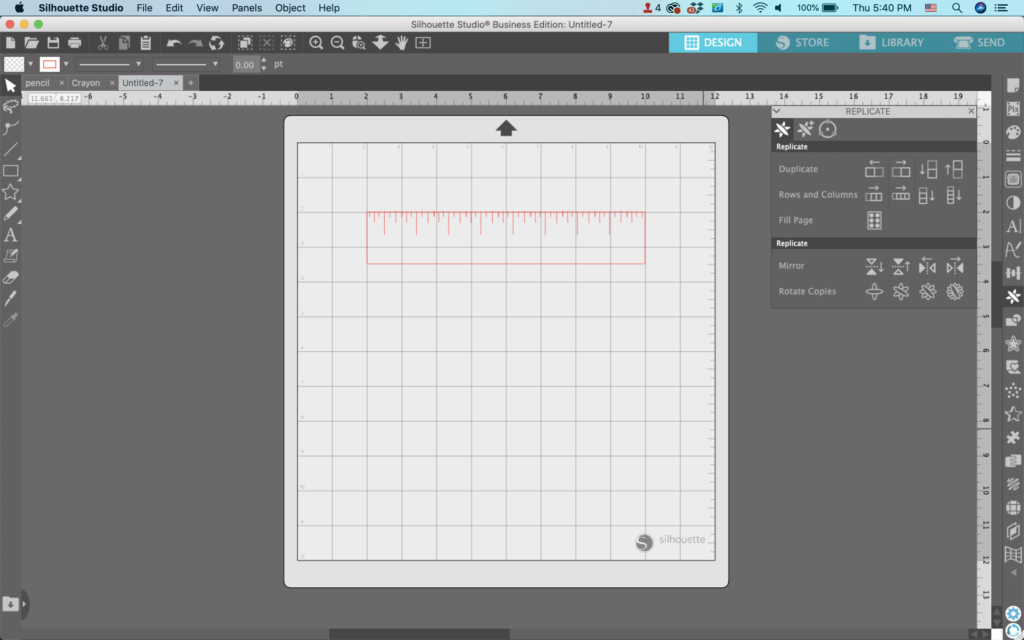
4. Navigate to ‘Panels’, ‘Replicate’, and ‘Duplicate Right’. This will fill in the marks on the rest of the ruler.
5. Make any final adjustments, group elements as needed, and fill the ruler with color or thicken the lines – your choice!
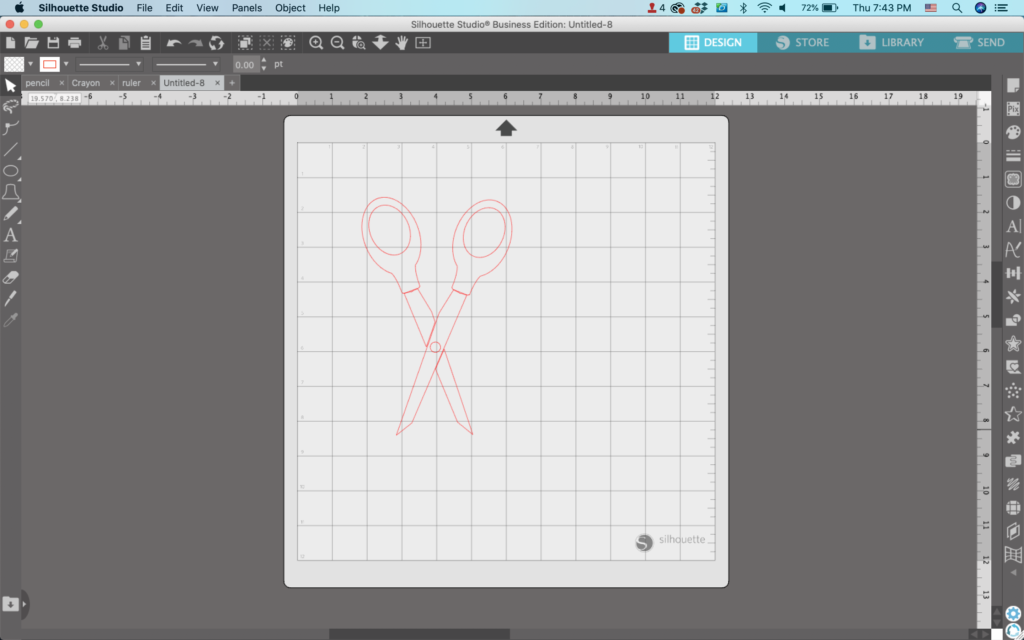
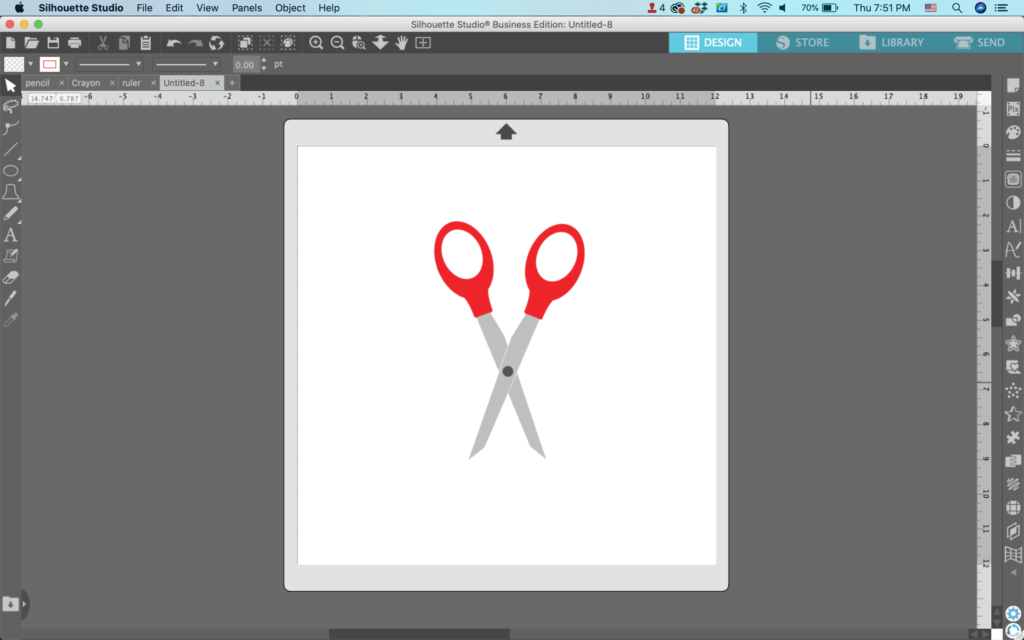
Mini Tutorial 4: How to Draw Scissors
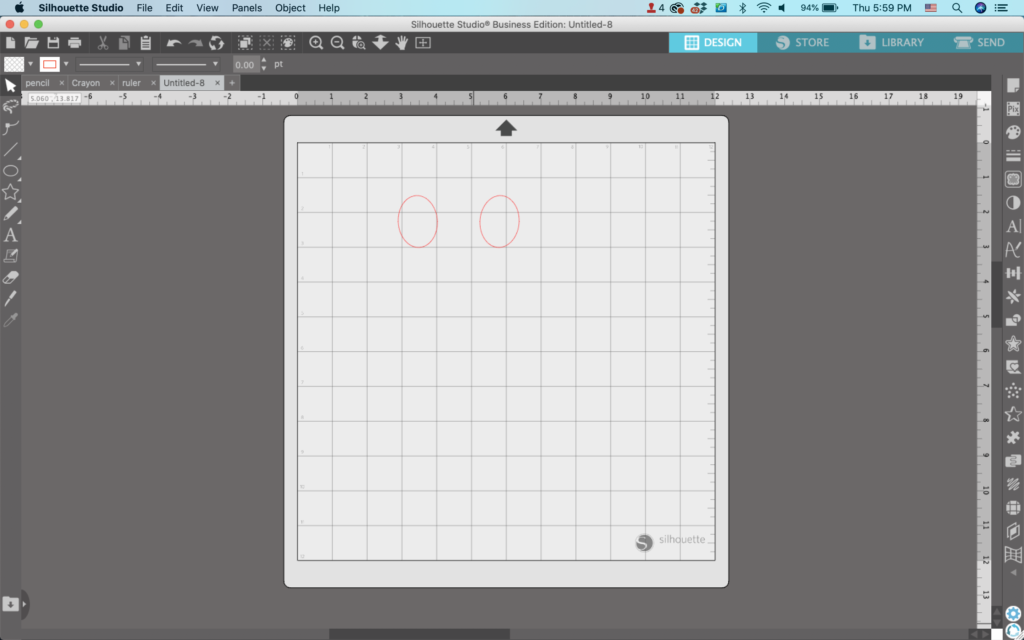
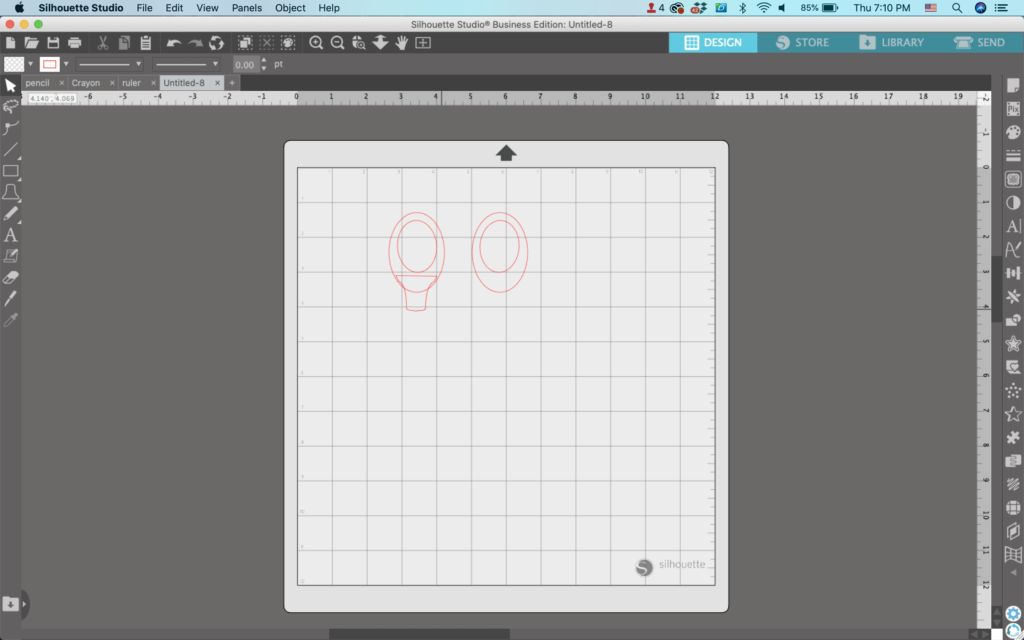
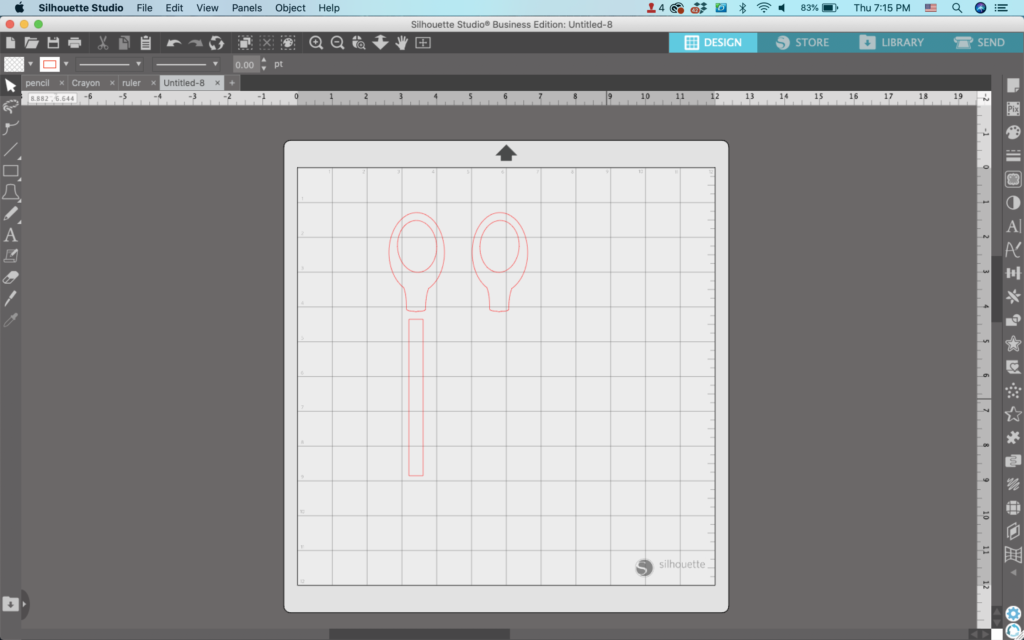
Draw two ovals.
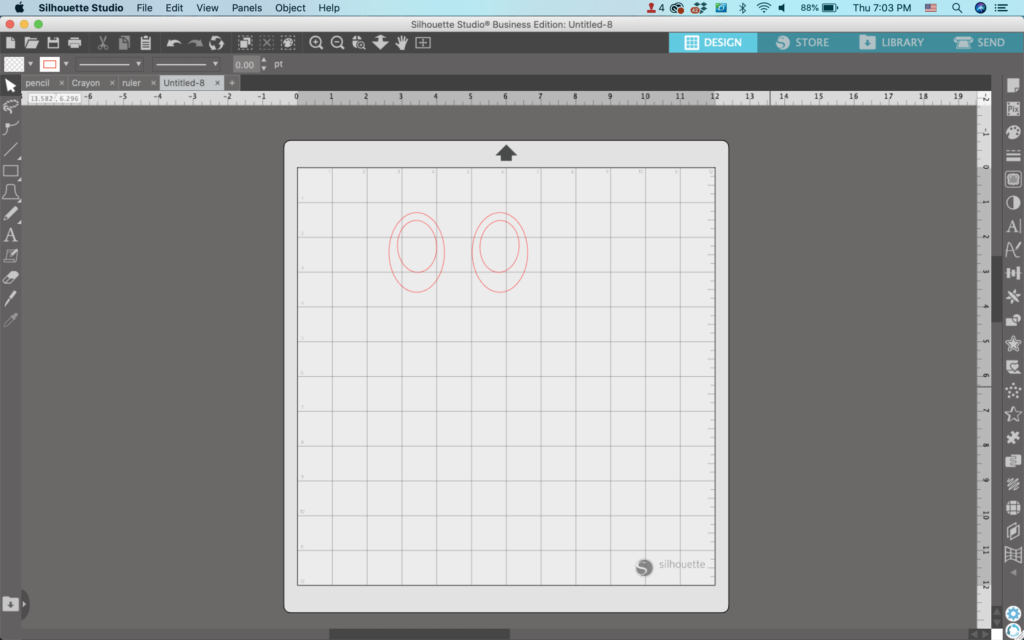
2. Draw two more ovals/egg shapes and put them over the first two.
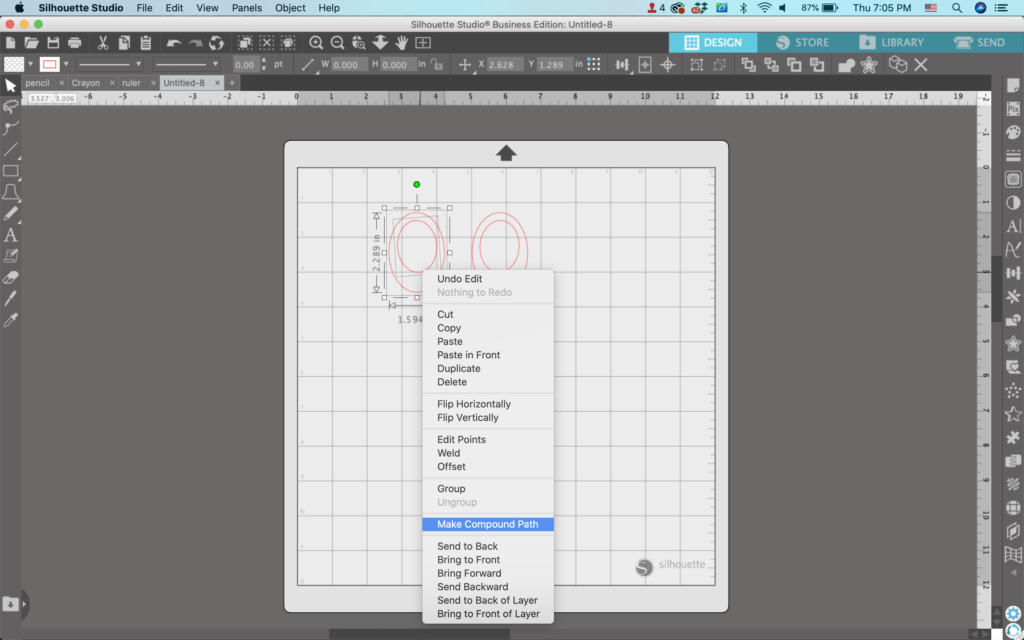
3. Select two oval elements, right click, then choose ‘Make Compound Path’. Repeat with the other set.
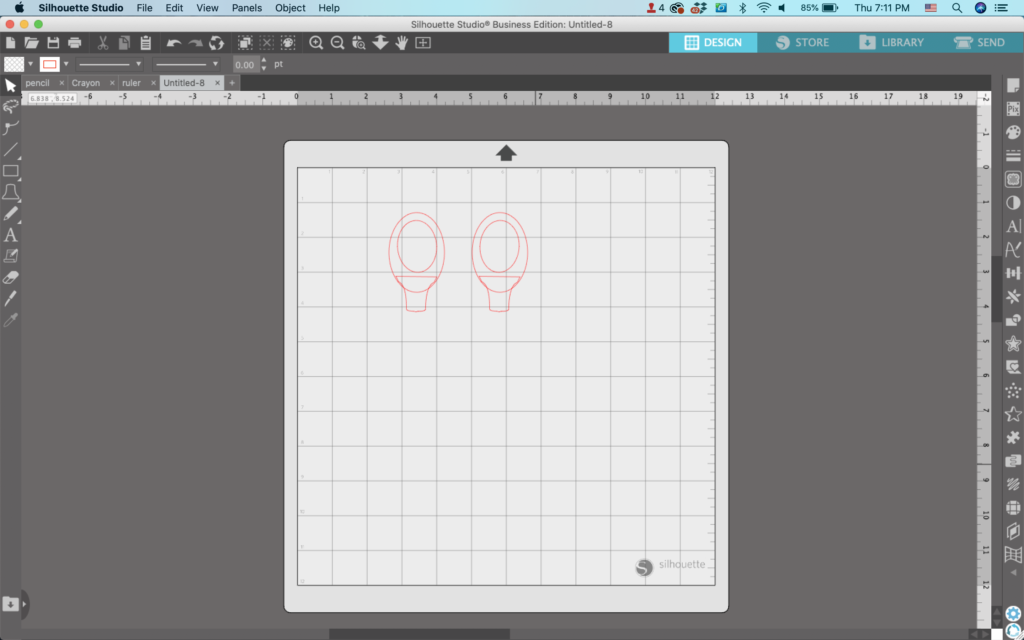
4. From the Flexishape menu, select the bell (last one, 5th row). Then, rotate it around as I did in the following image:
5. Repeat for the other oval set.
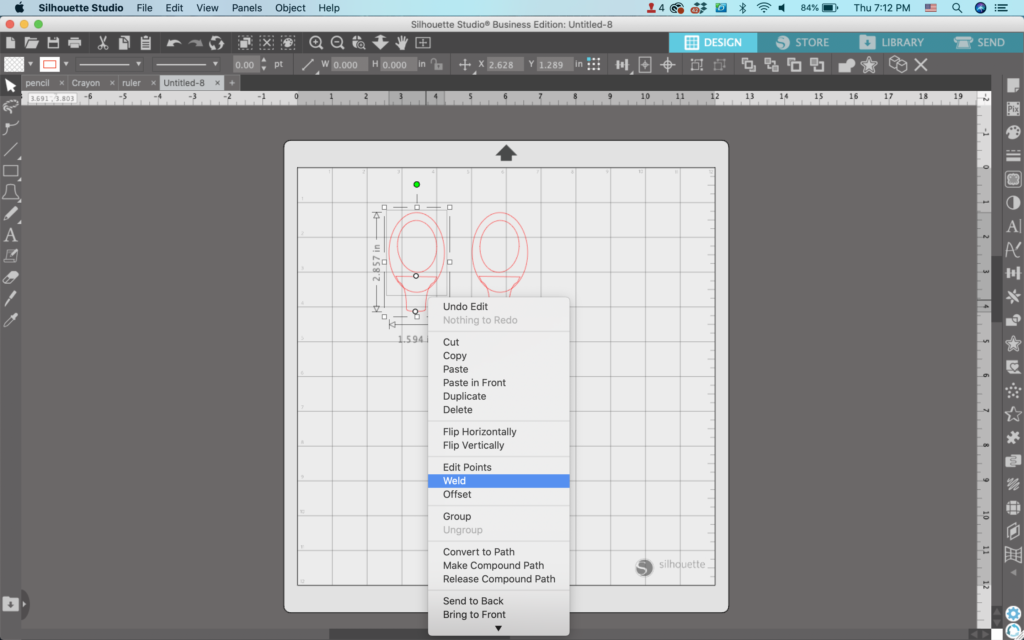
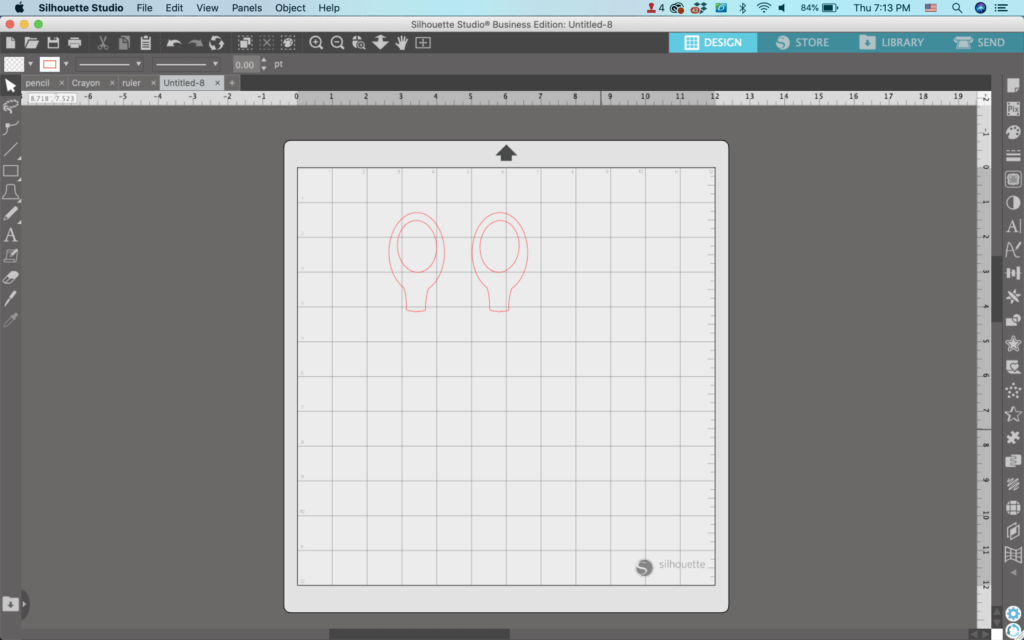
6. Select the oval and the bell and weld (Right click, ‘Weld’) them together. Repeat on the other side.
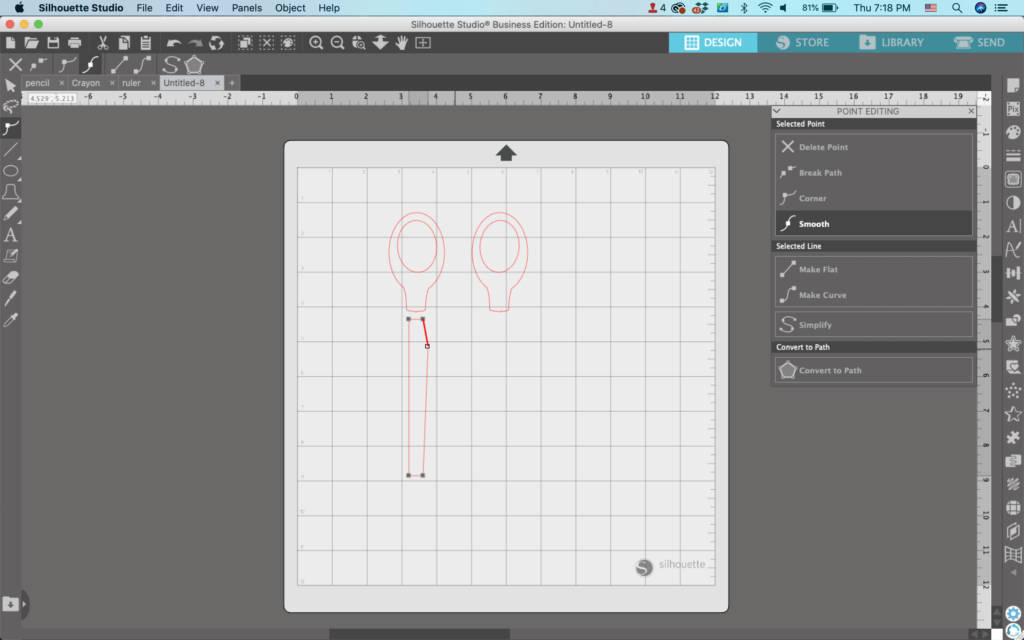
7. Draw a long, skinny rectangle.
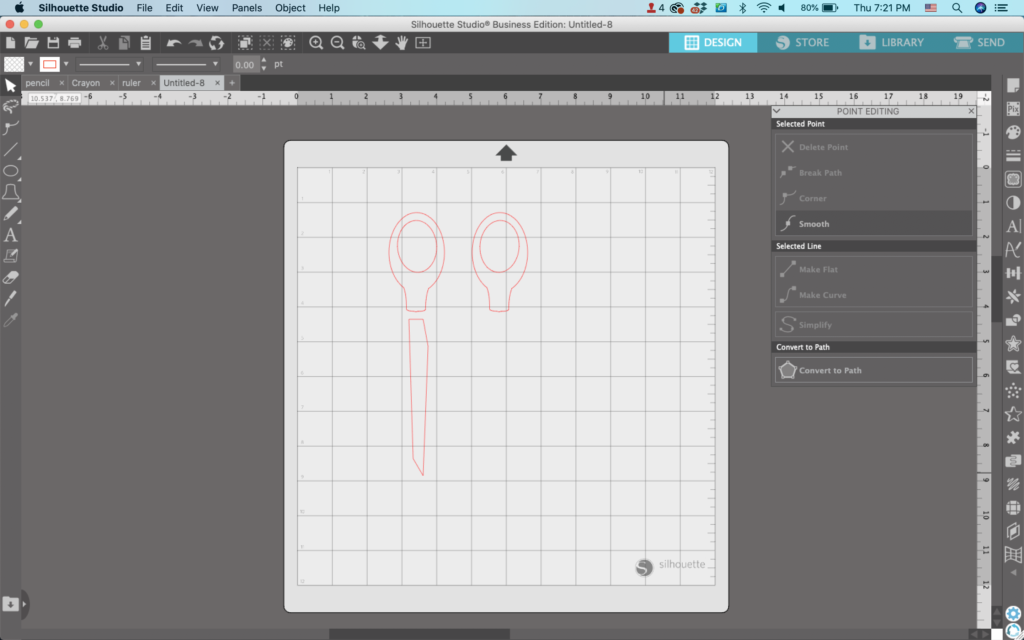
8. Double click on the rectangle to open the ‘Point Editing’ Panel. Drag one side of the rectangle slightly to make a shape similar to mine:
9. Move the bottom corner to create a point at the end of the scissors.
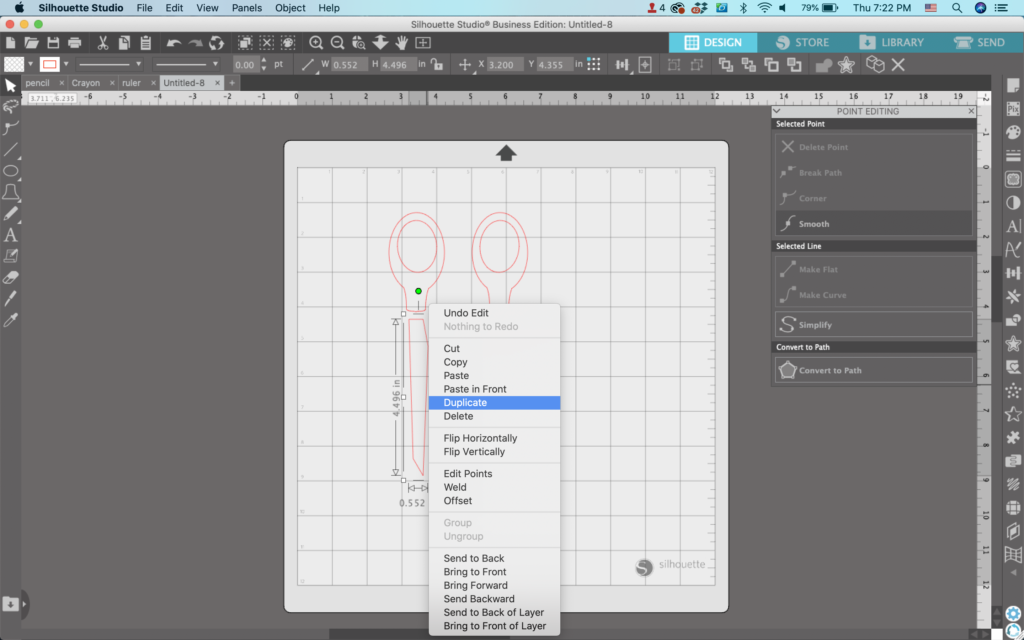
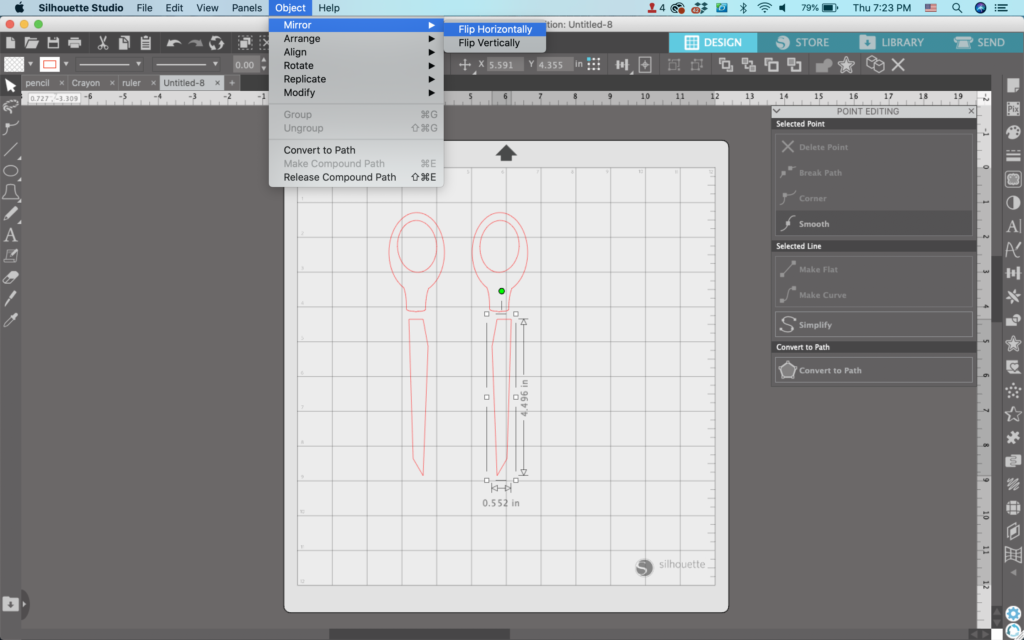
10. Duplicate the blade (Right click, then ‘Duplicate’) and navigate to ‘Object’, ‘Mirror’, ‘Flip Horizontally’.
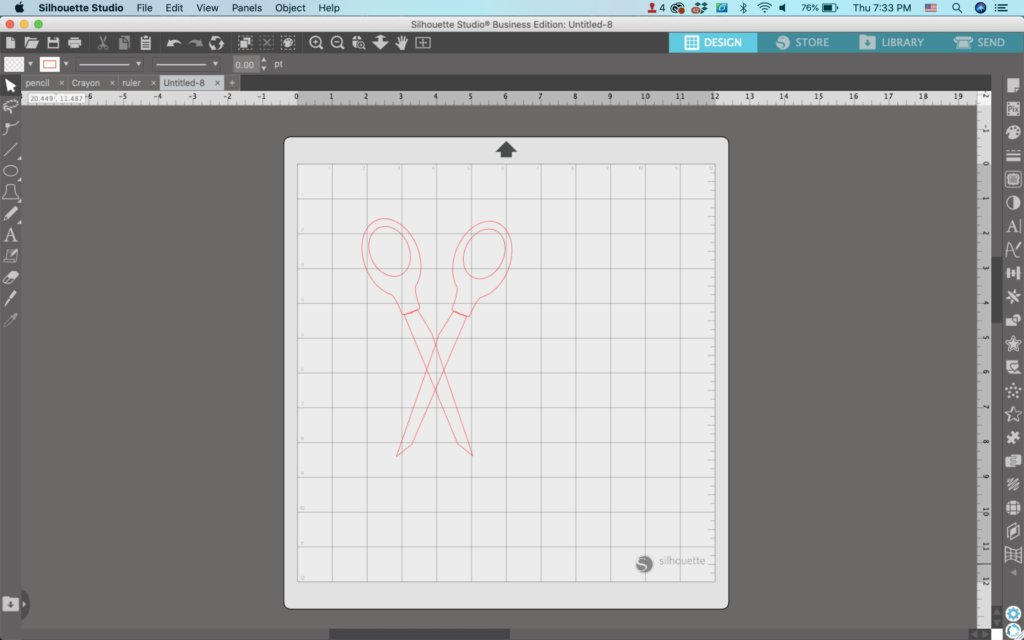
11. Move everything into place to create scissors.
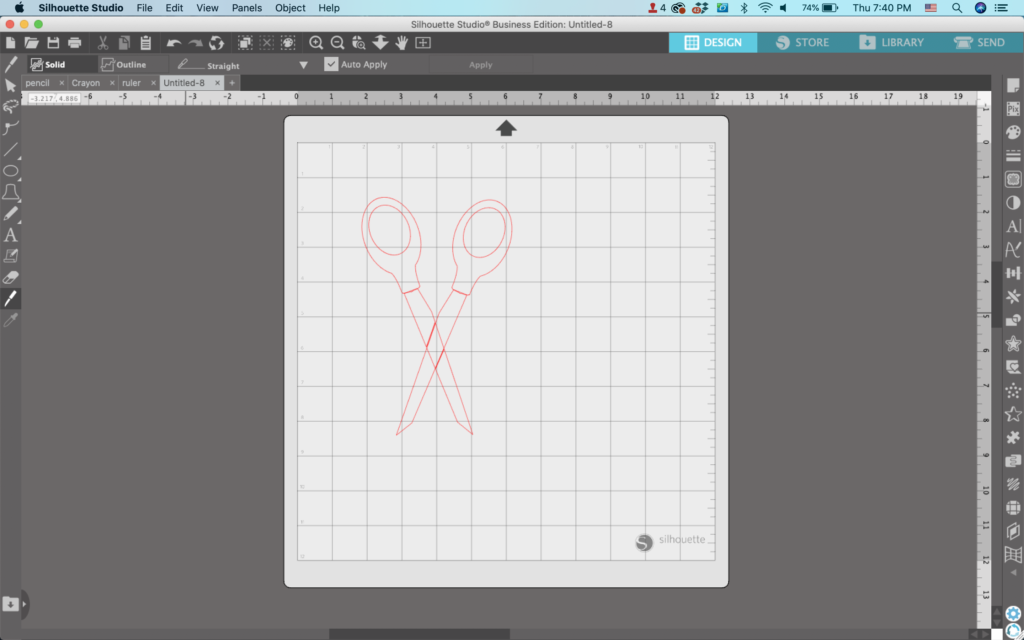
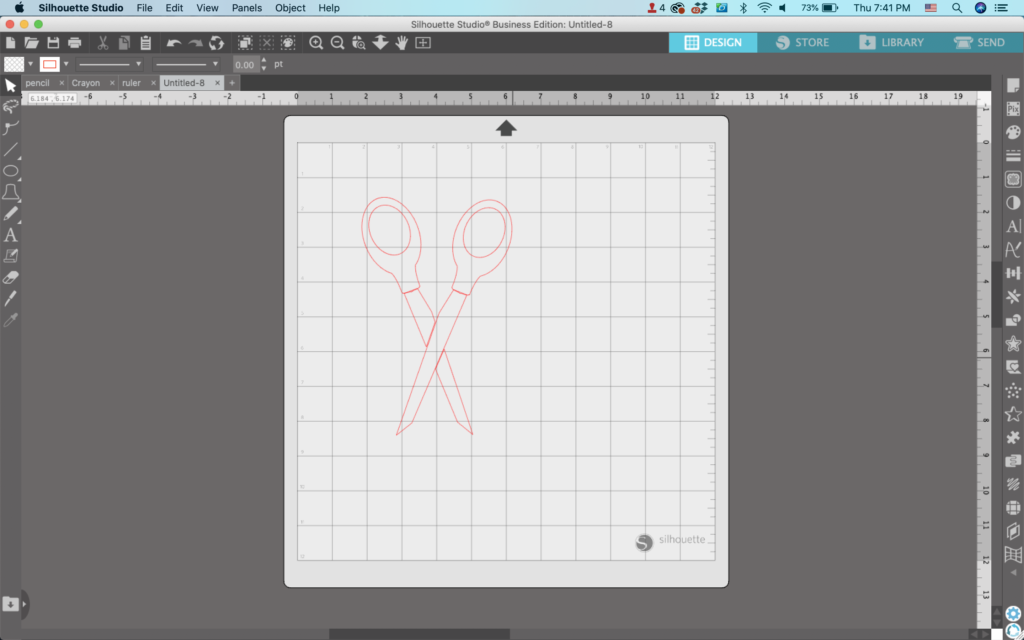
12. Use the knife tool to slice one of the blades to make it look like they overlap. Then, delete the remaining piece.
13. Add a circle for the hinge of the scissors.
14. Make any final adjustments, group elements as needed, and fill the scissors with color.
Mini Tutorial 5: How to Draw Notebook Paper
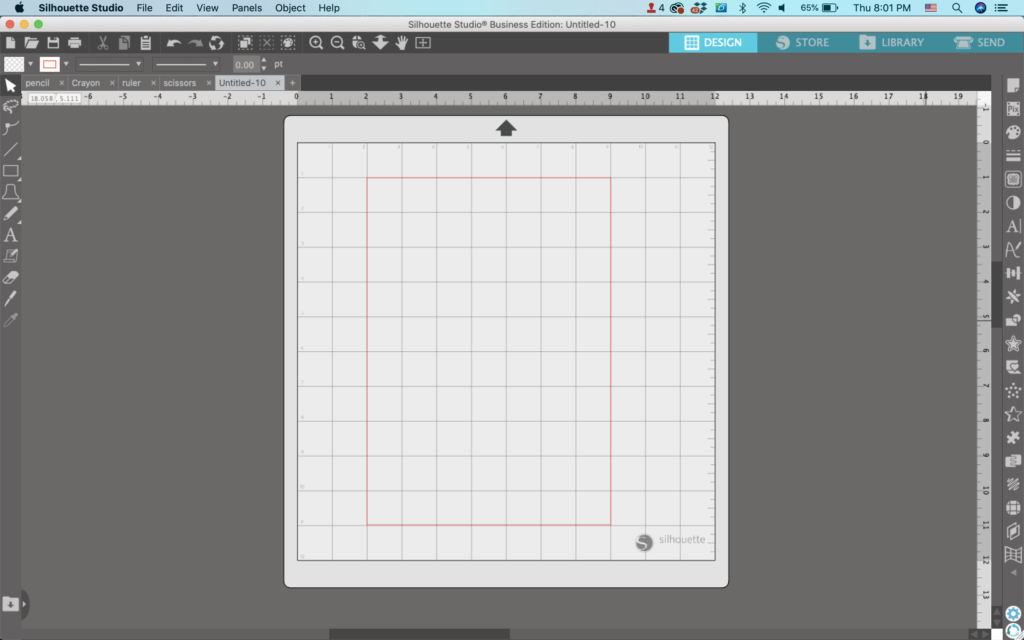
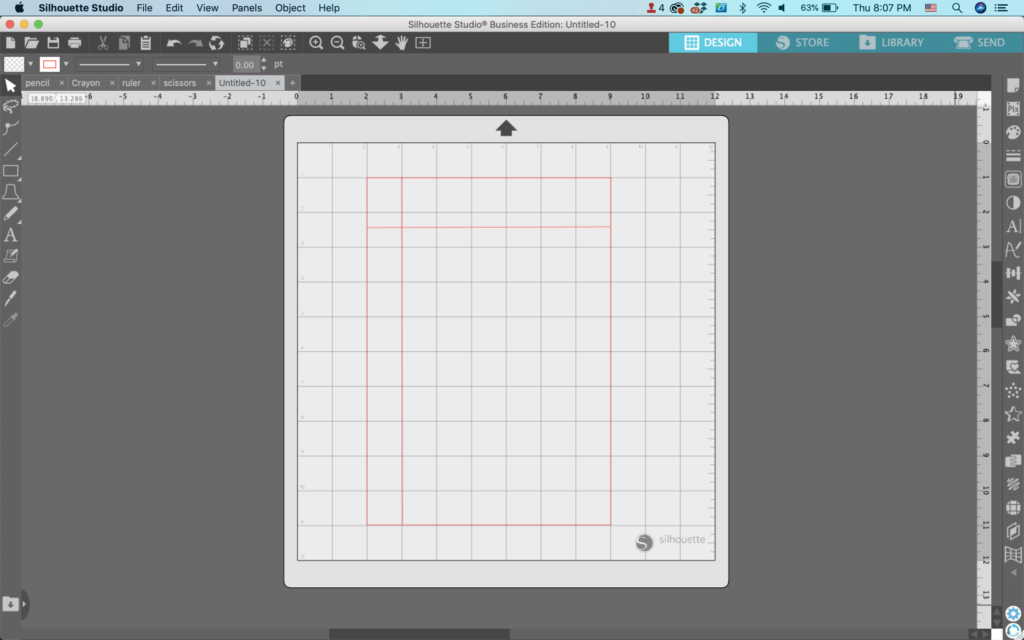
Draw a rectangle in Silhouette Studio. You’ll notice I lined up the rectangle on the grid lines.
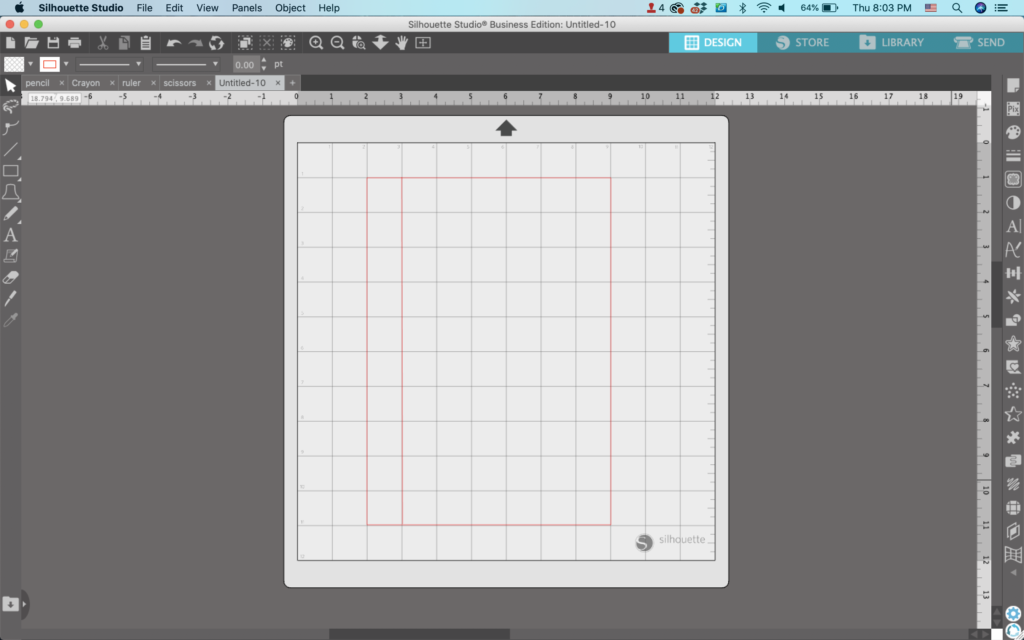
2. Draw a vertical line near the left side.
3. Draw a line across the top, leaving some space for a header.
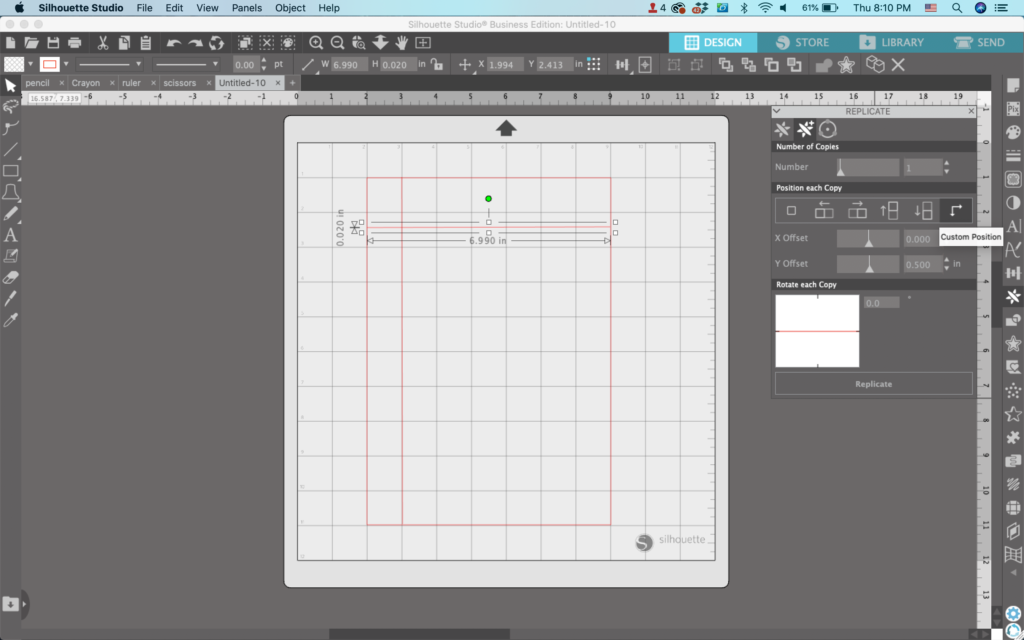
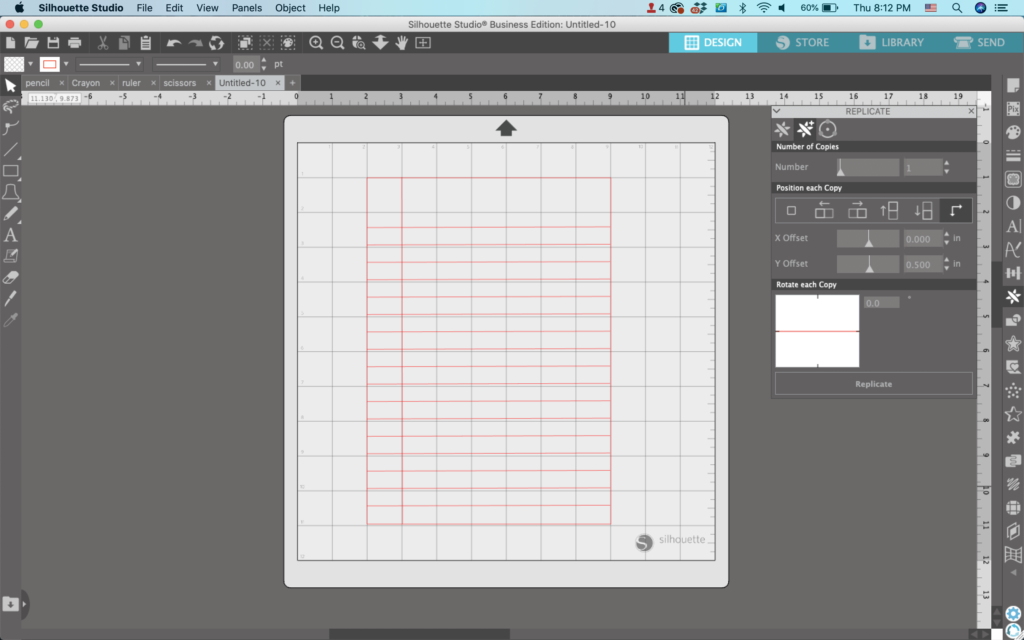
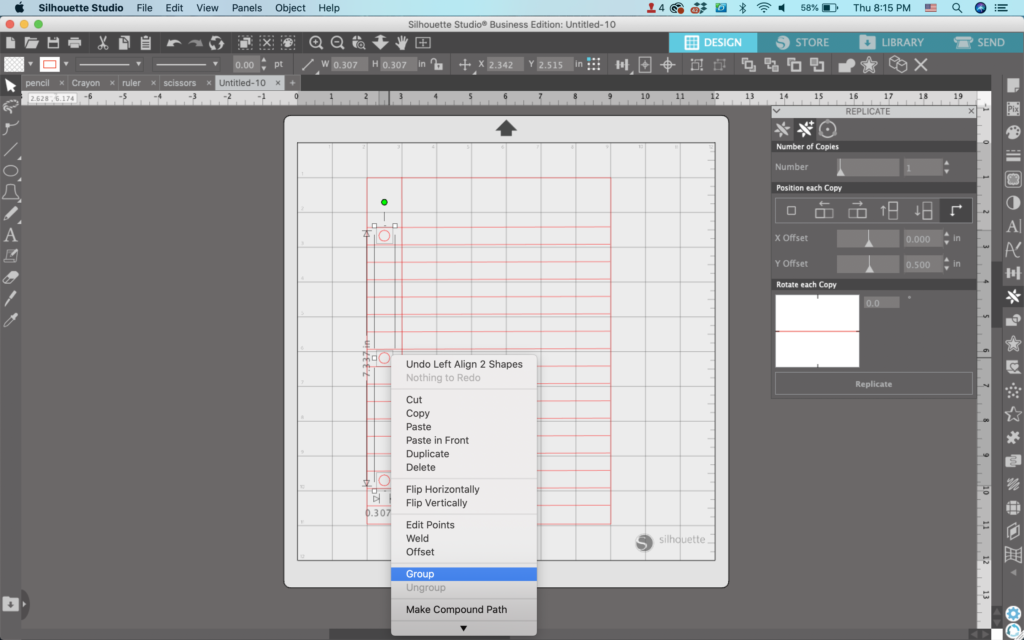
4. Navigate to ‘Panels’, then ‘Replicate’. From the ‘Advanced Replicate’ tab (it’s the second one), choose ‘Custom Position’. Set the ‘Y Offset to 0.500. Then, replicate the horizontal line you made until you reach the bottom of your notebook paper.
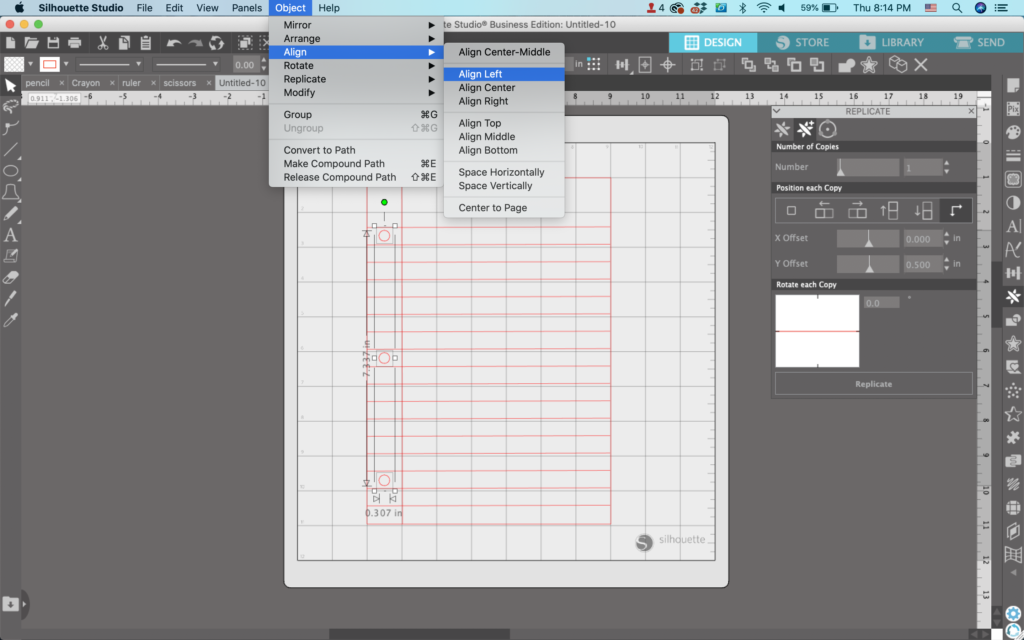
5. Make three circles on the left hand side and subtract them from the notebook paper. I aligned mine using ‘Object’, ‘Align’, ‘Align Left’. Group the circles together.
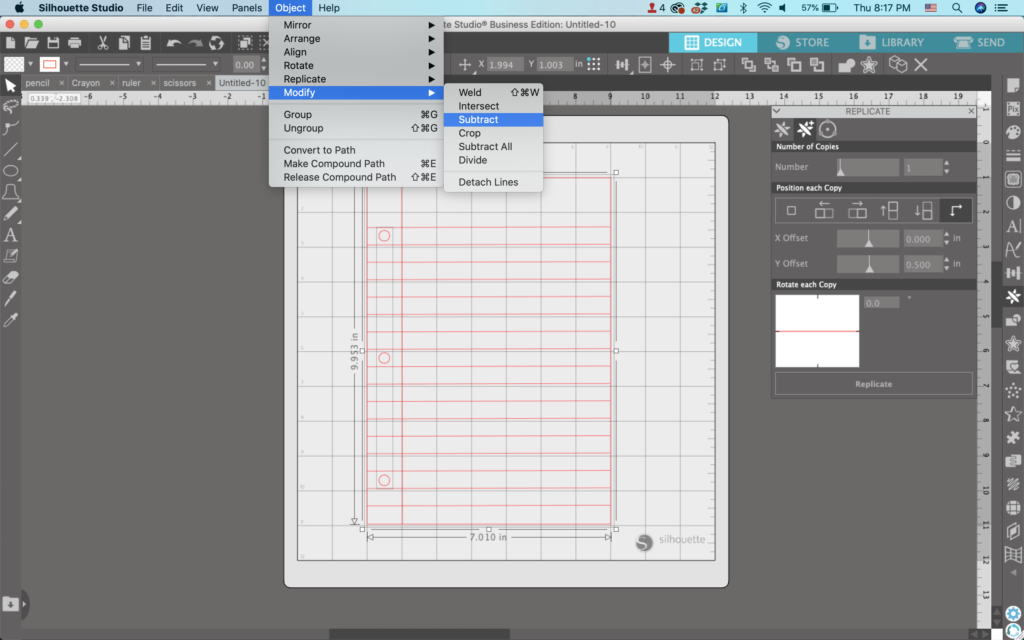
6. Subtract the circles from the rectangle. (Select both elements, then navigate to ‘Object’, ‘Modify’, ‘Subtract’.)
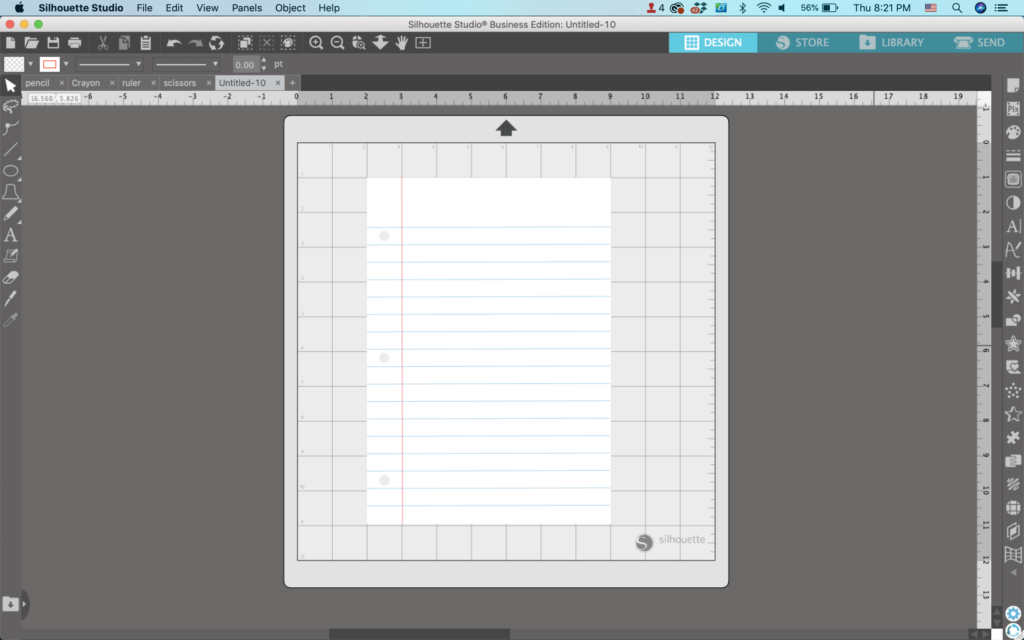
7. Make any final adjustments, group elements as needed, and fill the paper with color.
Mini Tutorial 6: How to Draw an Apple
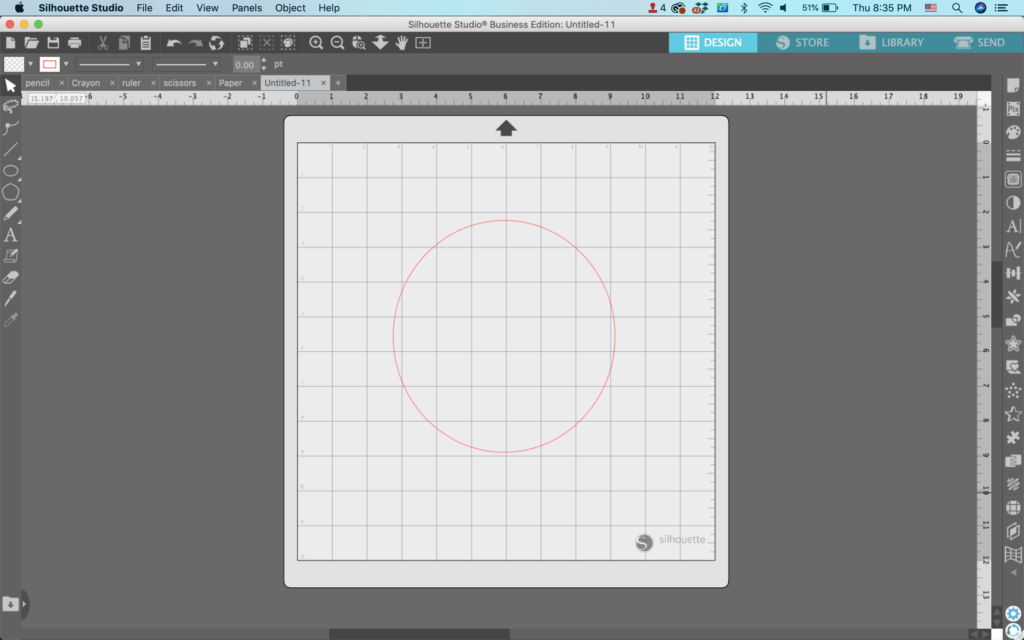
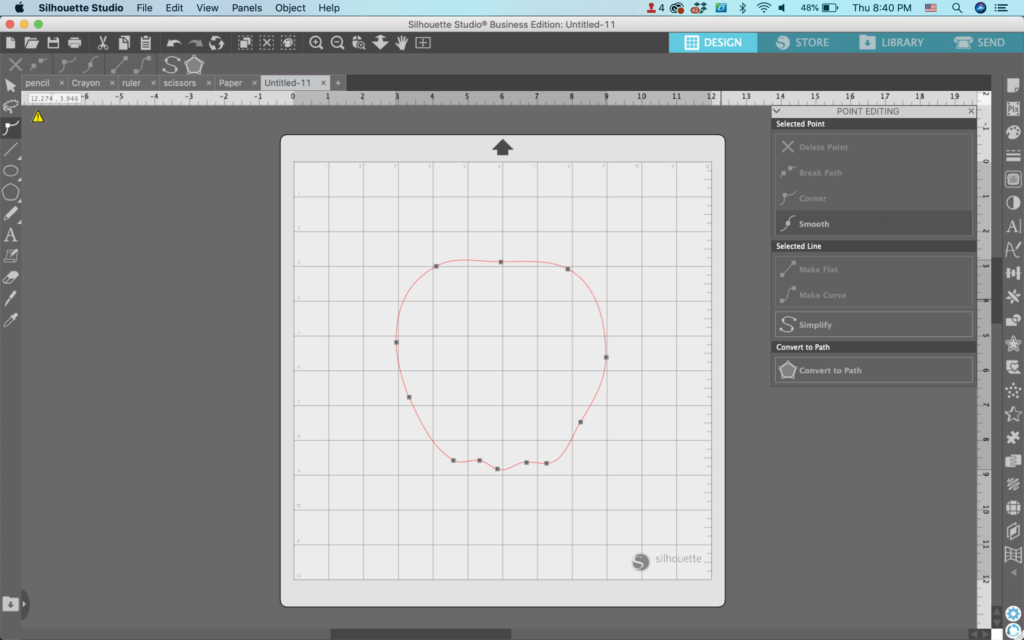
Draw a circle.
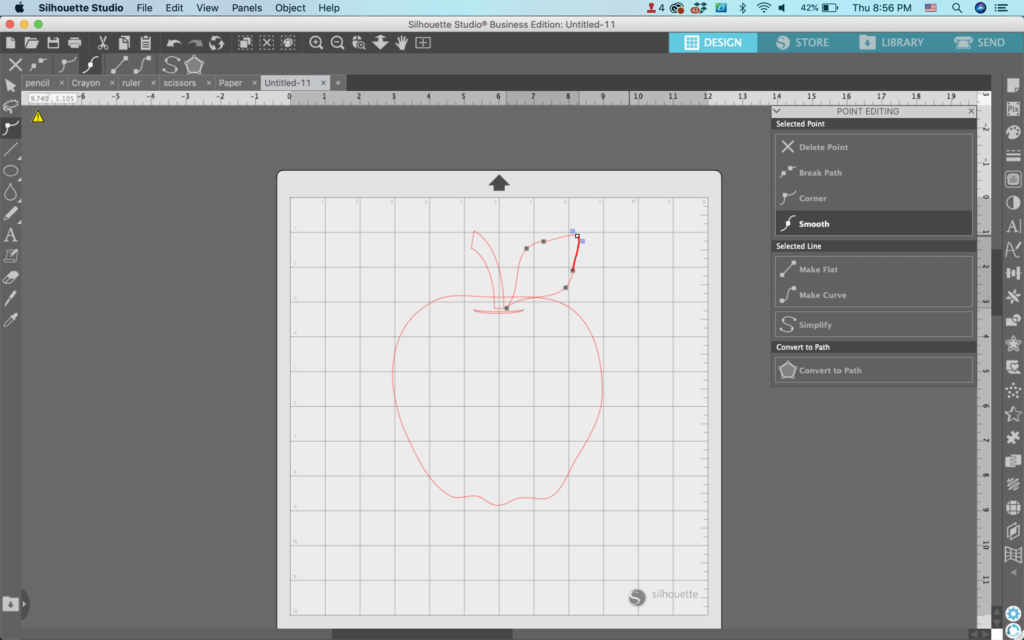
2. Double click the circle to open the Point Editing Panel. Add points and reshape the circle shape into something that looks like an apple.
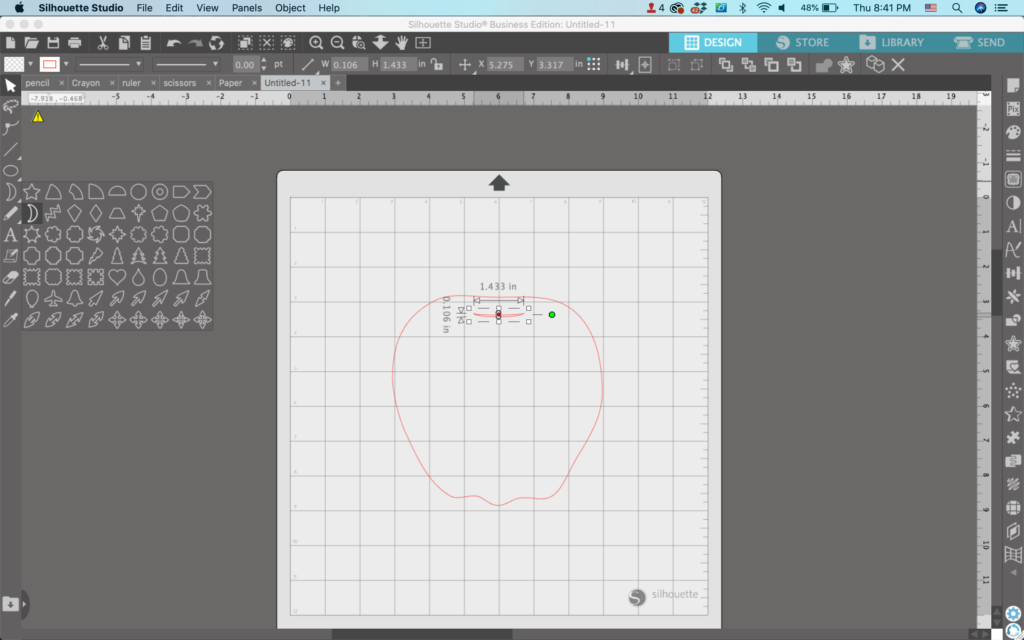
3. Use Flexishapes to draw a moon shape (1st one, 2nd row). Make it skinny and move it near the top of the apple.
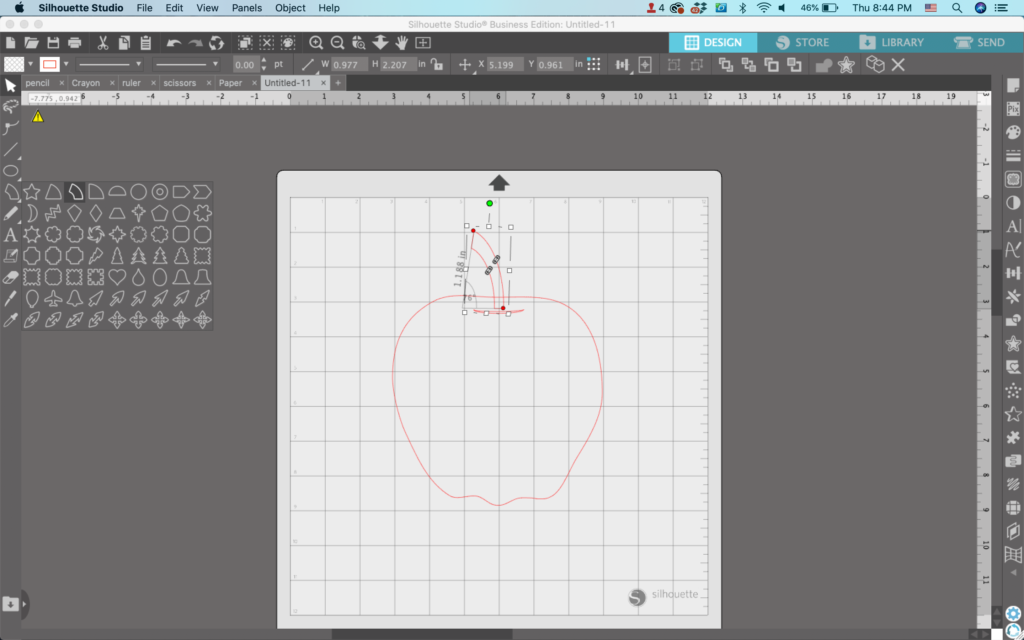
4. Use Flexishapes to draw a macaroni shape (3rd one, 1st row). Move it to the top of the apple.
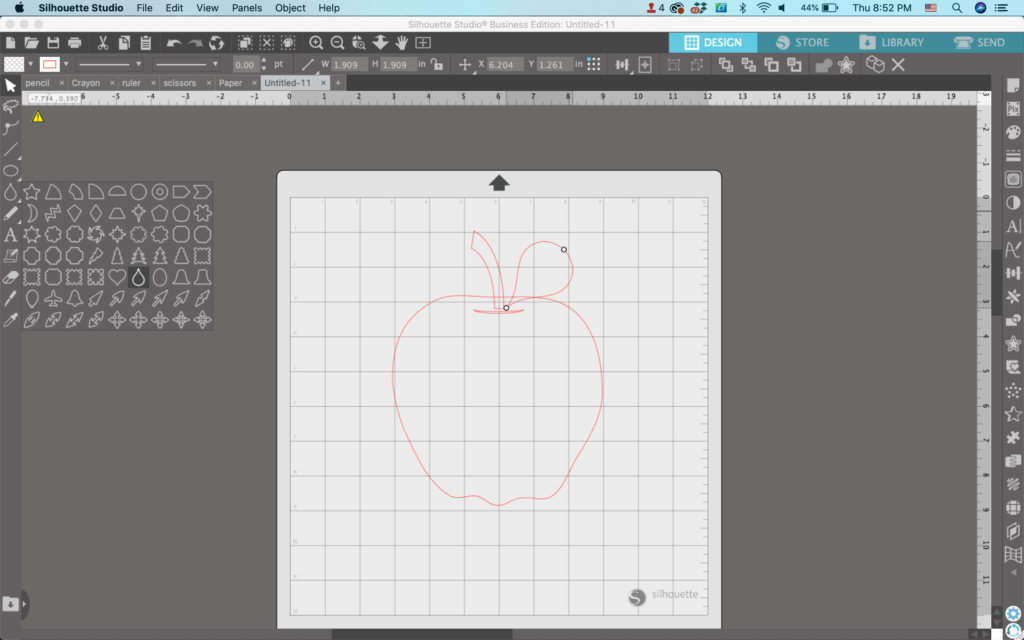
5. Use Flexishapes to draw a teardrop shape (6th one, 5th row). Move it to the top of the apple to be the leaf.
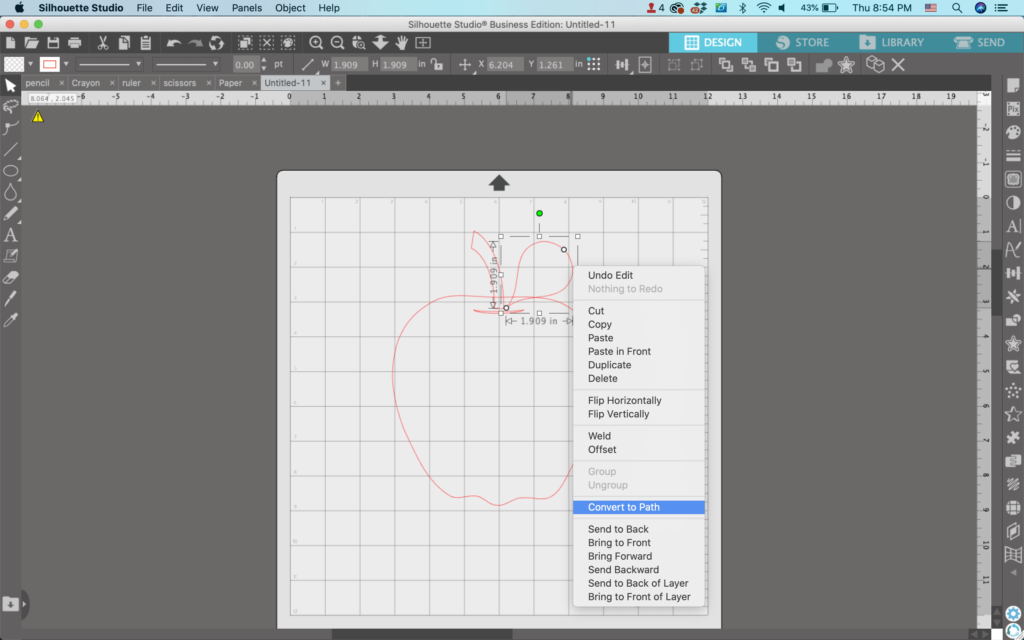
6. Select the teardrop leaf, right click and select ‘Convert to Path’.
7. Double click the teardrop leaf to open the Point Editing Panel. Drag the round side to change the teardrop shape into a leaf.
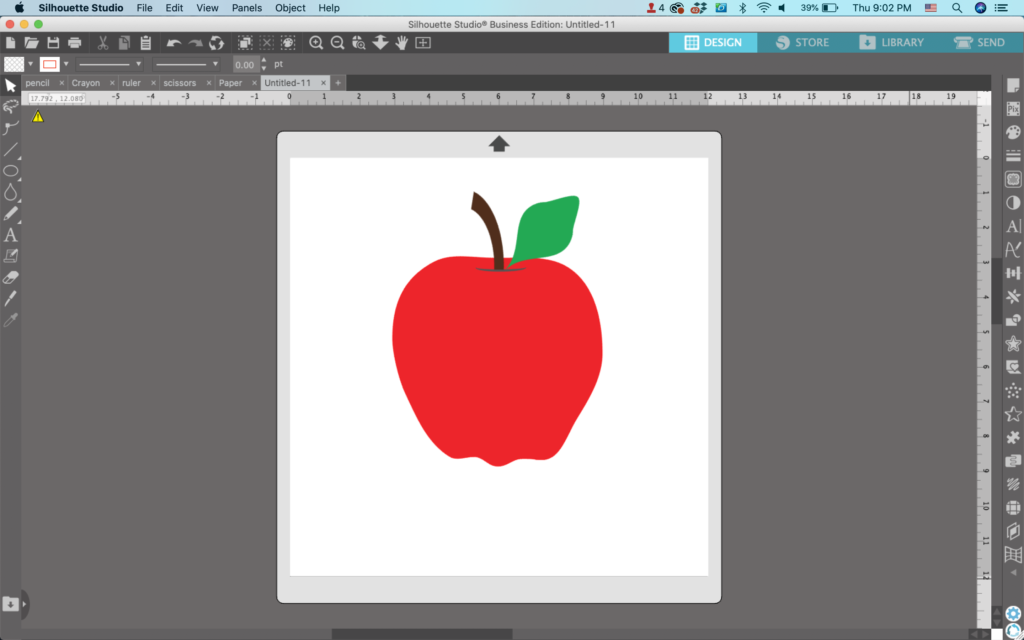
8. Make any final adjustments, group elements as needed, then fill the apple with color.
That’s it! Your designs are ready to go!
Don’t Forget to Save!
To save your new SVG creation, head to ‘File’, ‘Save As’, ‘Save to Hard Drive’, name the file, then select ‘SVG’ from the dropdown menu.
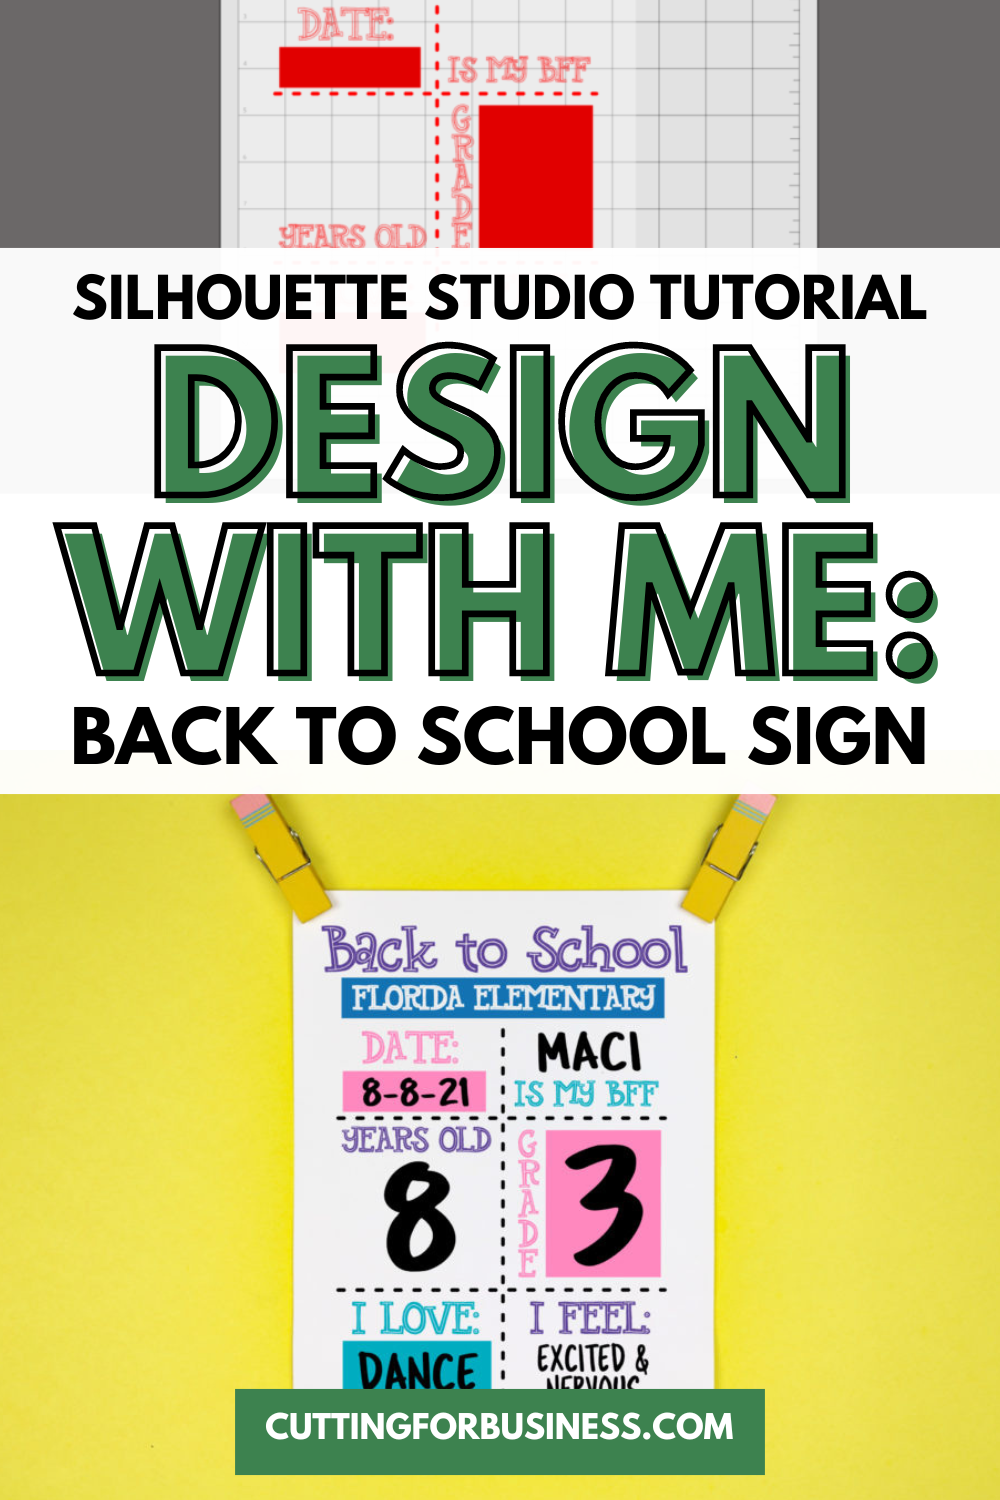
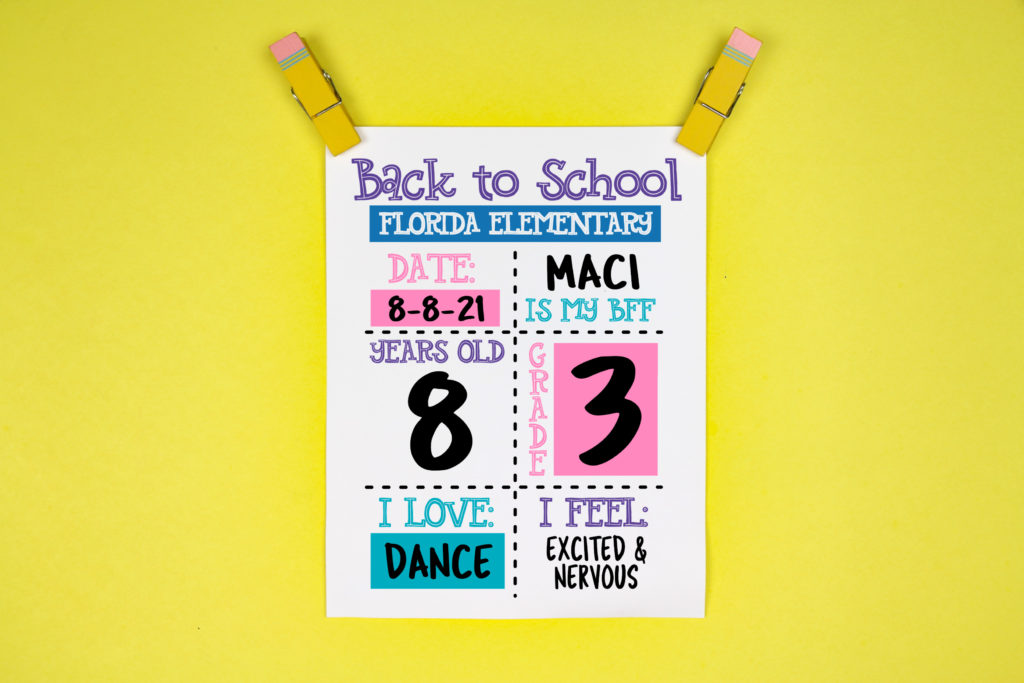
With Back to School just around the corner, I wanted to take a few minutes to show you how to design a Back to School Sign.
Before you start designing, you need to decide how many sections you’ll need on your sign. I’ve seen signs that list the age, weight, height, favorite color, favorite song, new skill, favorite hobby, Teacher’s name, school name, favorite subject or sport, future profession, and so on. You’ll need one section for each question.
Tutorial: Design a Back to School Sign
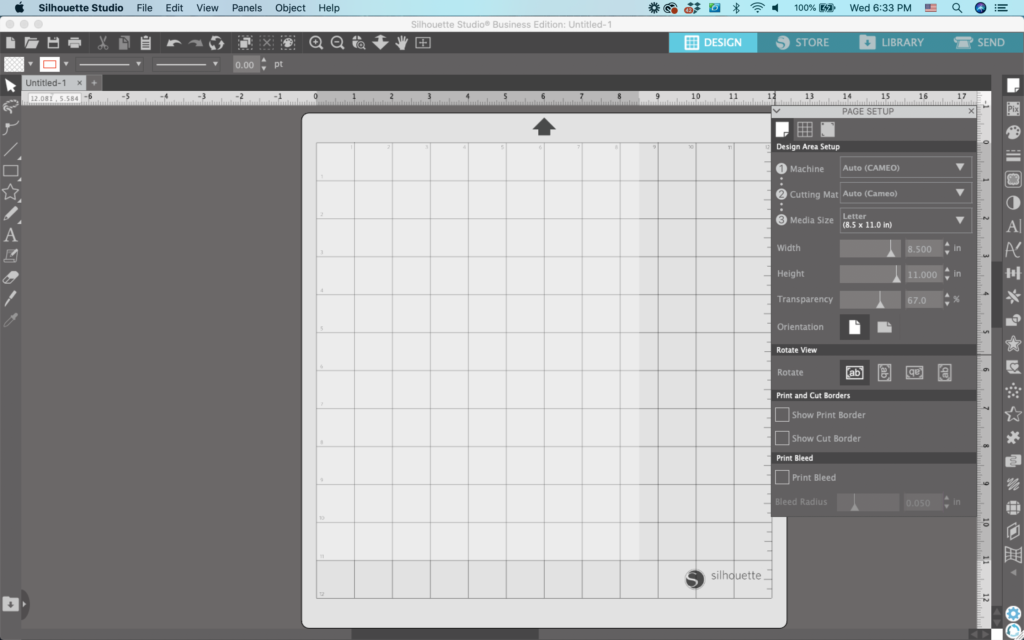
Open Silhouette Studio and navigate to ‘Panels’, then ‘Page Setup’. Set your page to the same size as your Back to School Sign will be. In this example, I plan to print out the sign on paper, so I set the media size to 8.5″ x 11″.
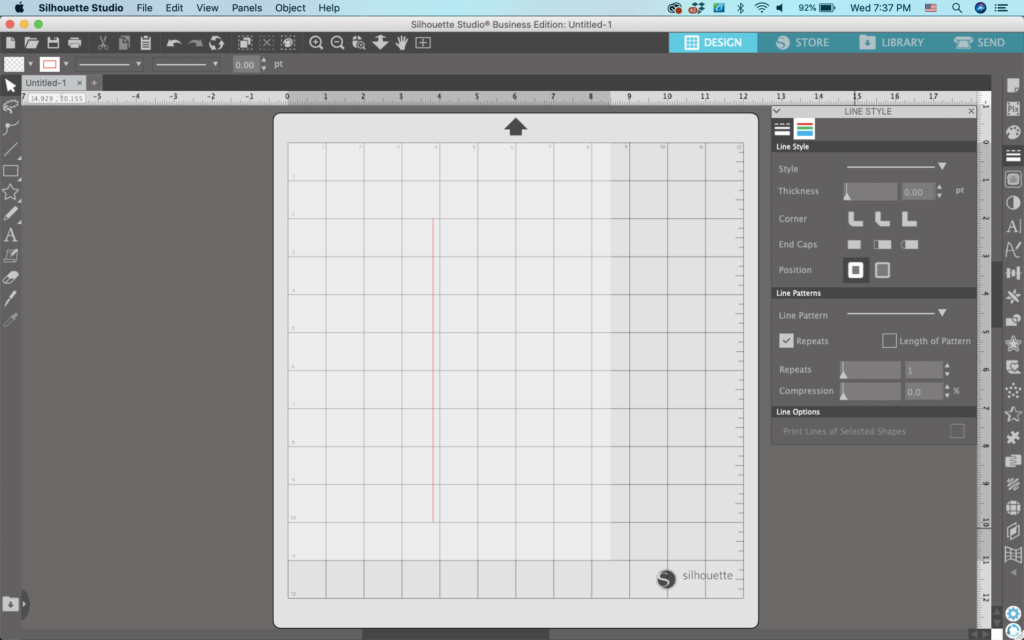
2. Using the ‘Line Tools’, draw a line down the center of the page. You’ll notice I left a space at the top to put text.
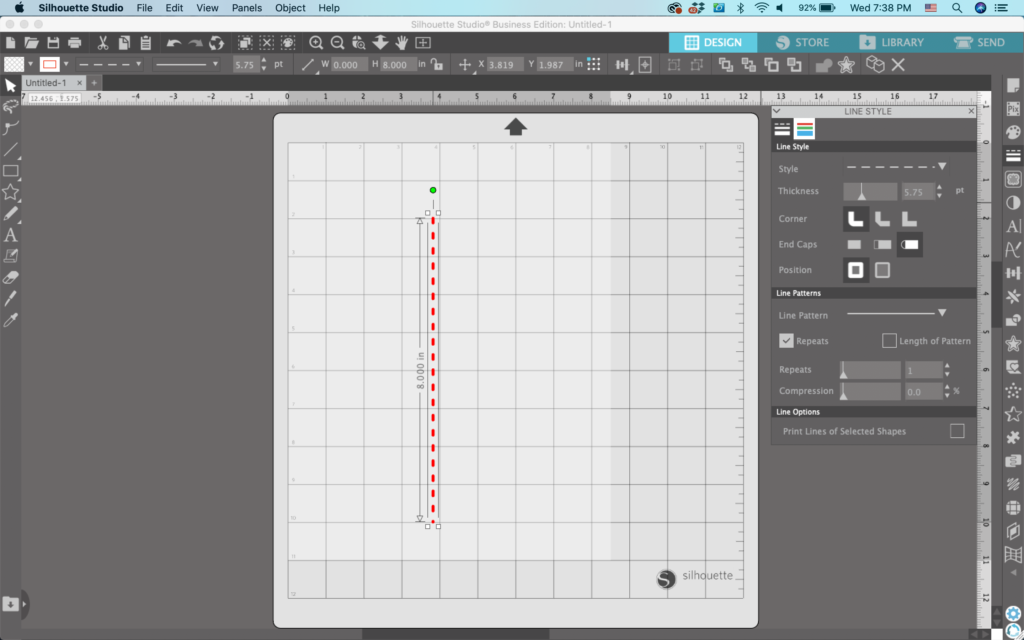
3. Navigate to ‘Panels’, ‘Line Style’. From this panel, you can change the line style to something fancy like dots or dashes. You can also thicken the line or make it into a pattern.
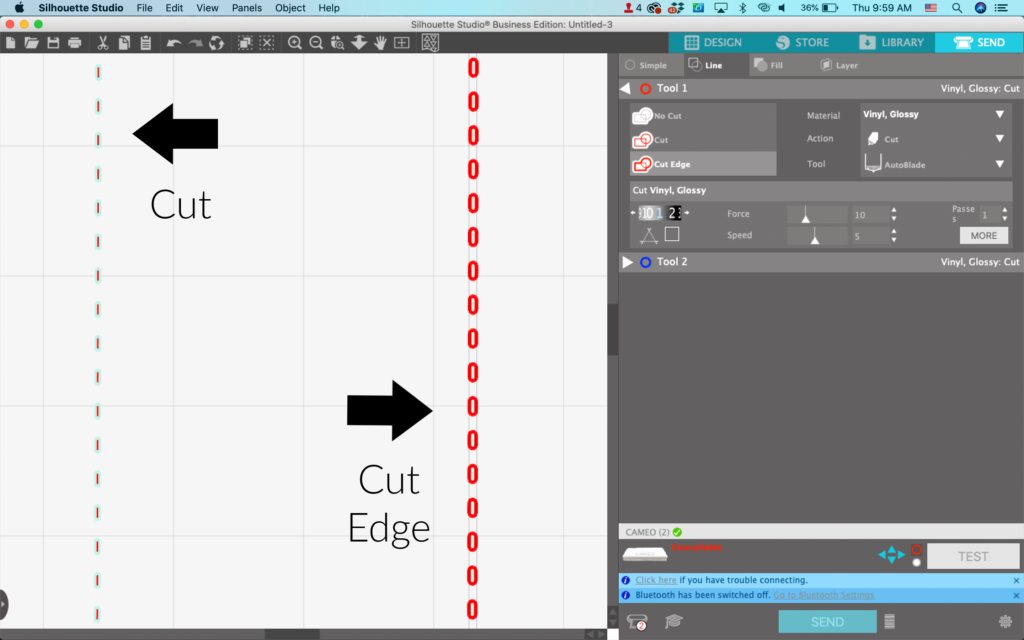
(Note: It’s important to note that if you plan to cut in vinyl, you’ll need to use the Cut Edge command when working with lines. If you don’t you’ll get a single line cut down the middle.) Take a look at Cut versus Cut Edge below on a line of dashes:
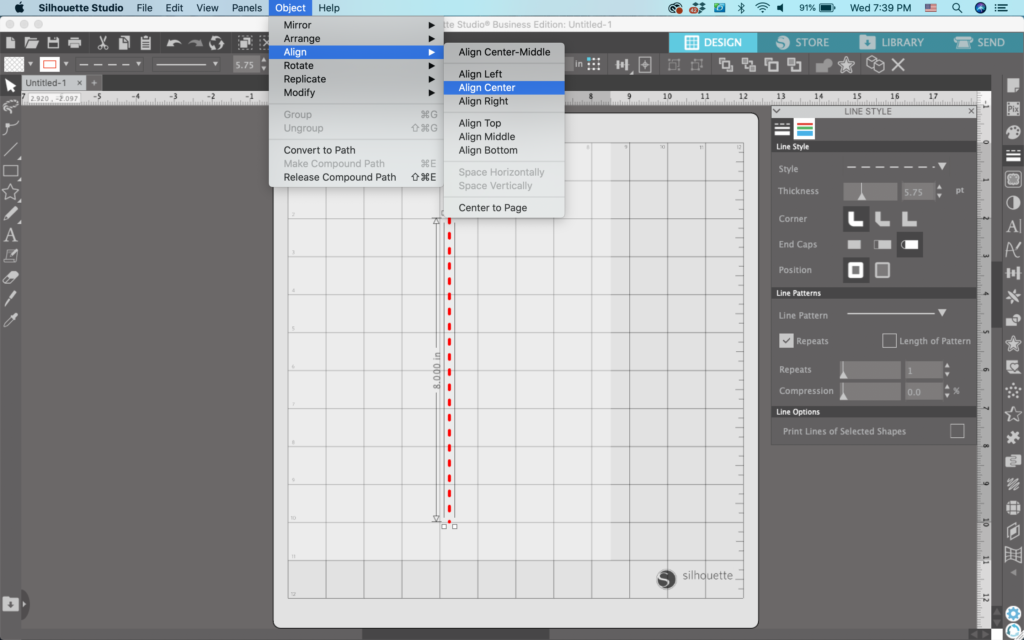
4. Select your line and navigate to ‘Object’, ‘Align’, ‘Center’ to make sure your line is centered.
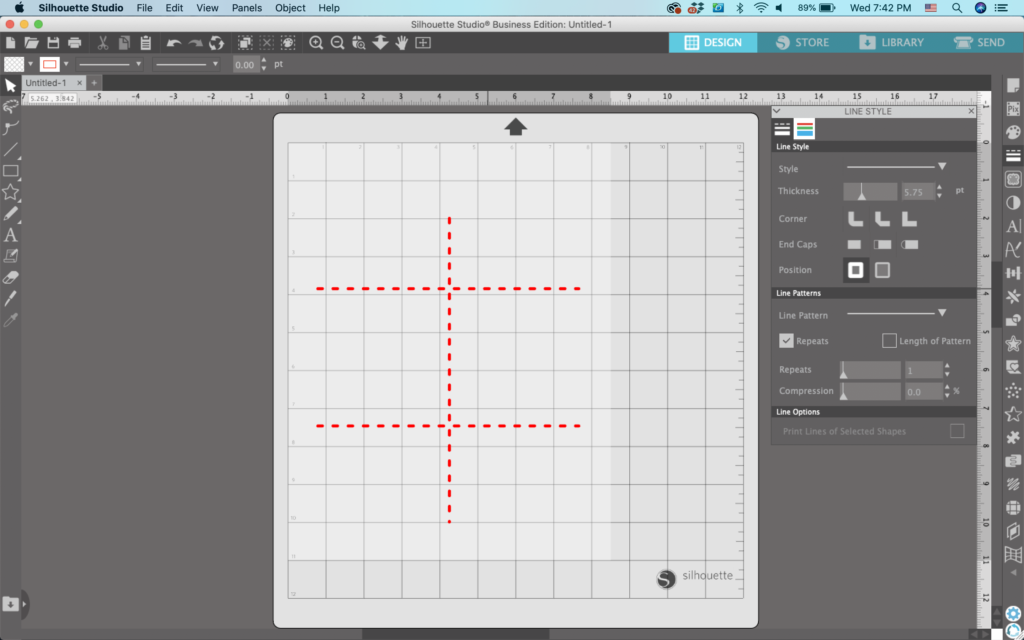
5. Add horizontal lines and style them.
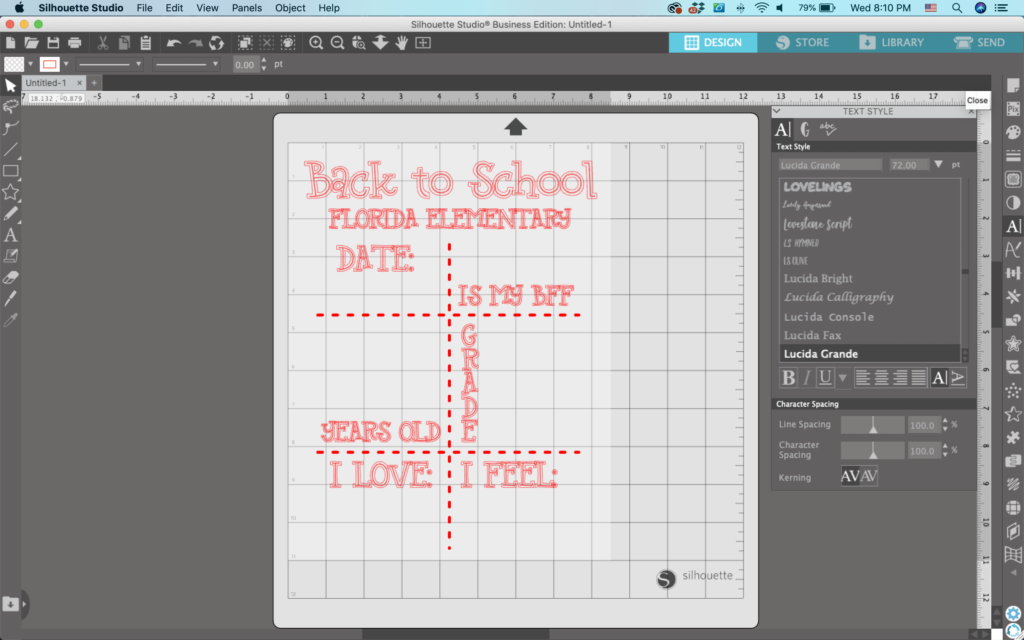
6. Add your text. You could put the name of the child at the top, first day of ___ grade, last day of ___ grade, and so on. Use the ‘Text Styles’ Panel to choose fonts, change character spacing, or line spacing. Don’t forget to use an age appropriate font.
7. Add some ‘flair’. Kids designs should fun and light hearted. Sprinkle in some glyphs or add some shapes. I used the Gab font. I’ve got a list of other kid’s fonts at this link.
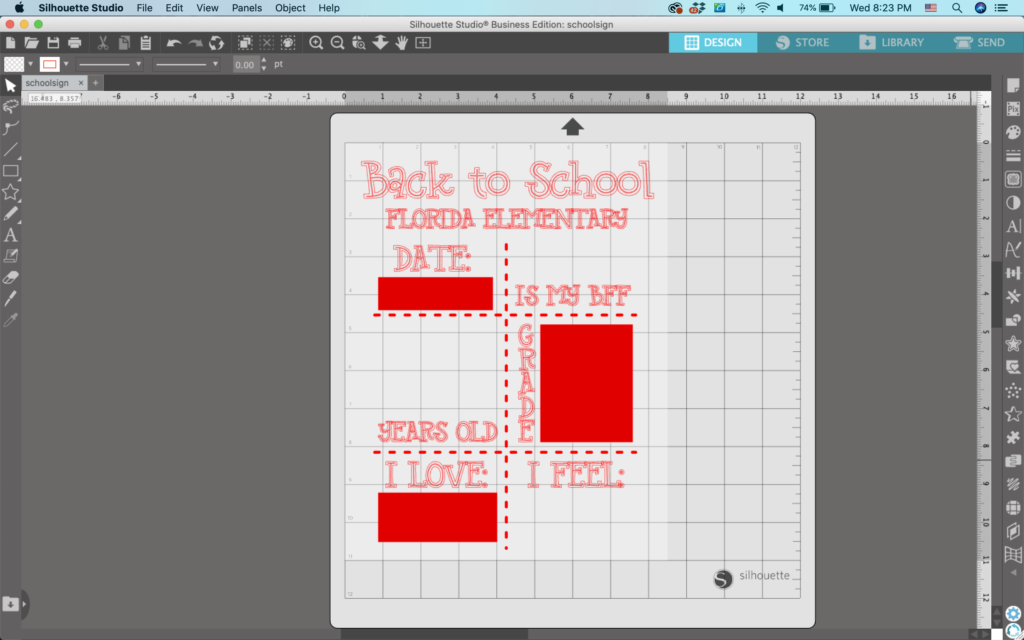
8. Add color to your design. My final design looks like this:
That’s it! Your design is ready to go!
Don’t Forget to Save!
To save your new SVG creation, head to ‘File’, ‘Save As’, ‘Save to Hard Drive’, name the file, then select ‘SVG’ from the dropdown menu.
If you’ve been around Cutting for Business for a while, you know that I love all things easy and efficient. I was surprised at how easy and efficient the xTool F1 Ultra makes replicating products.
There are two ways of (easily!) replicating products with the xTool F1 Ultra.
Batch Processing with the xTool F1 Ultra L-shaped Positioning Piece
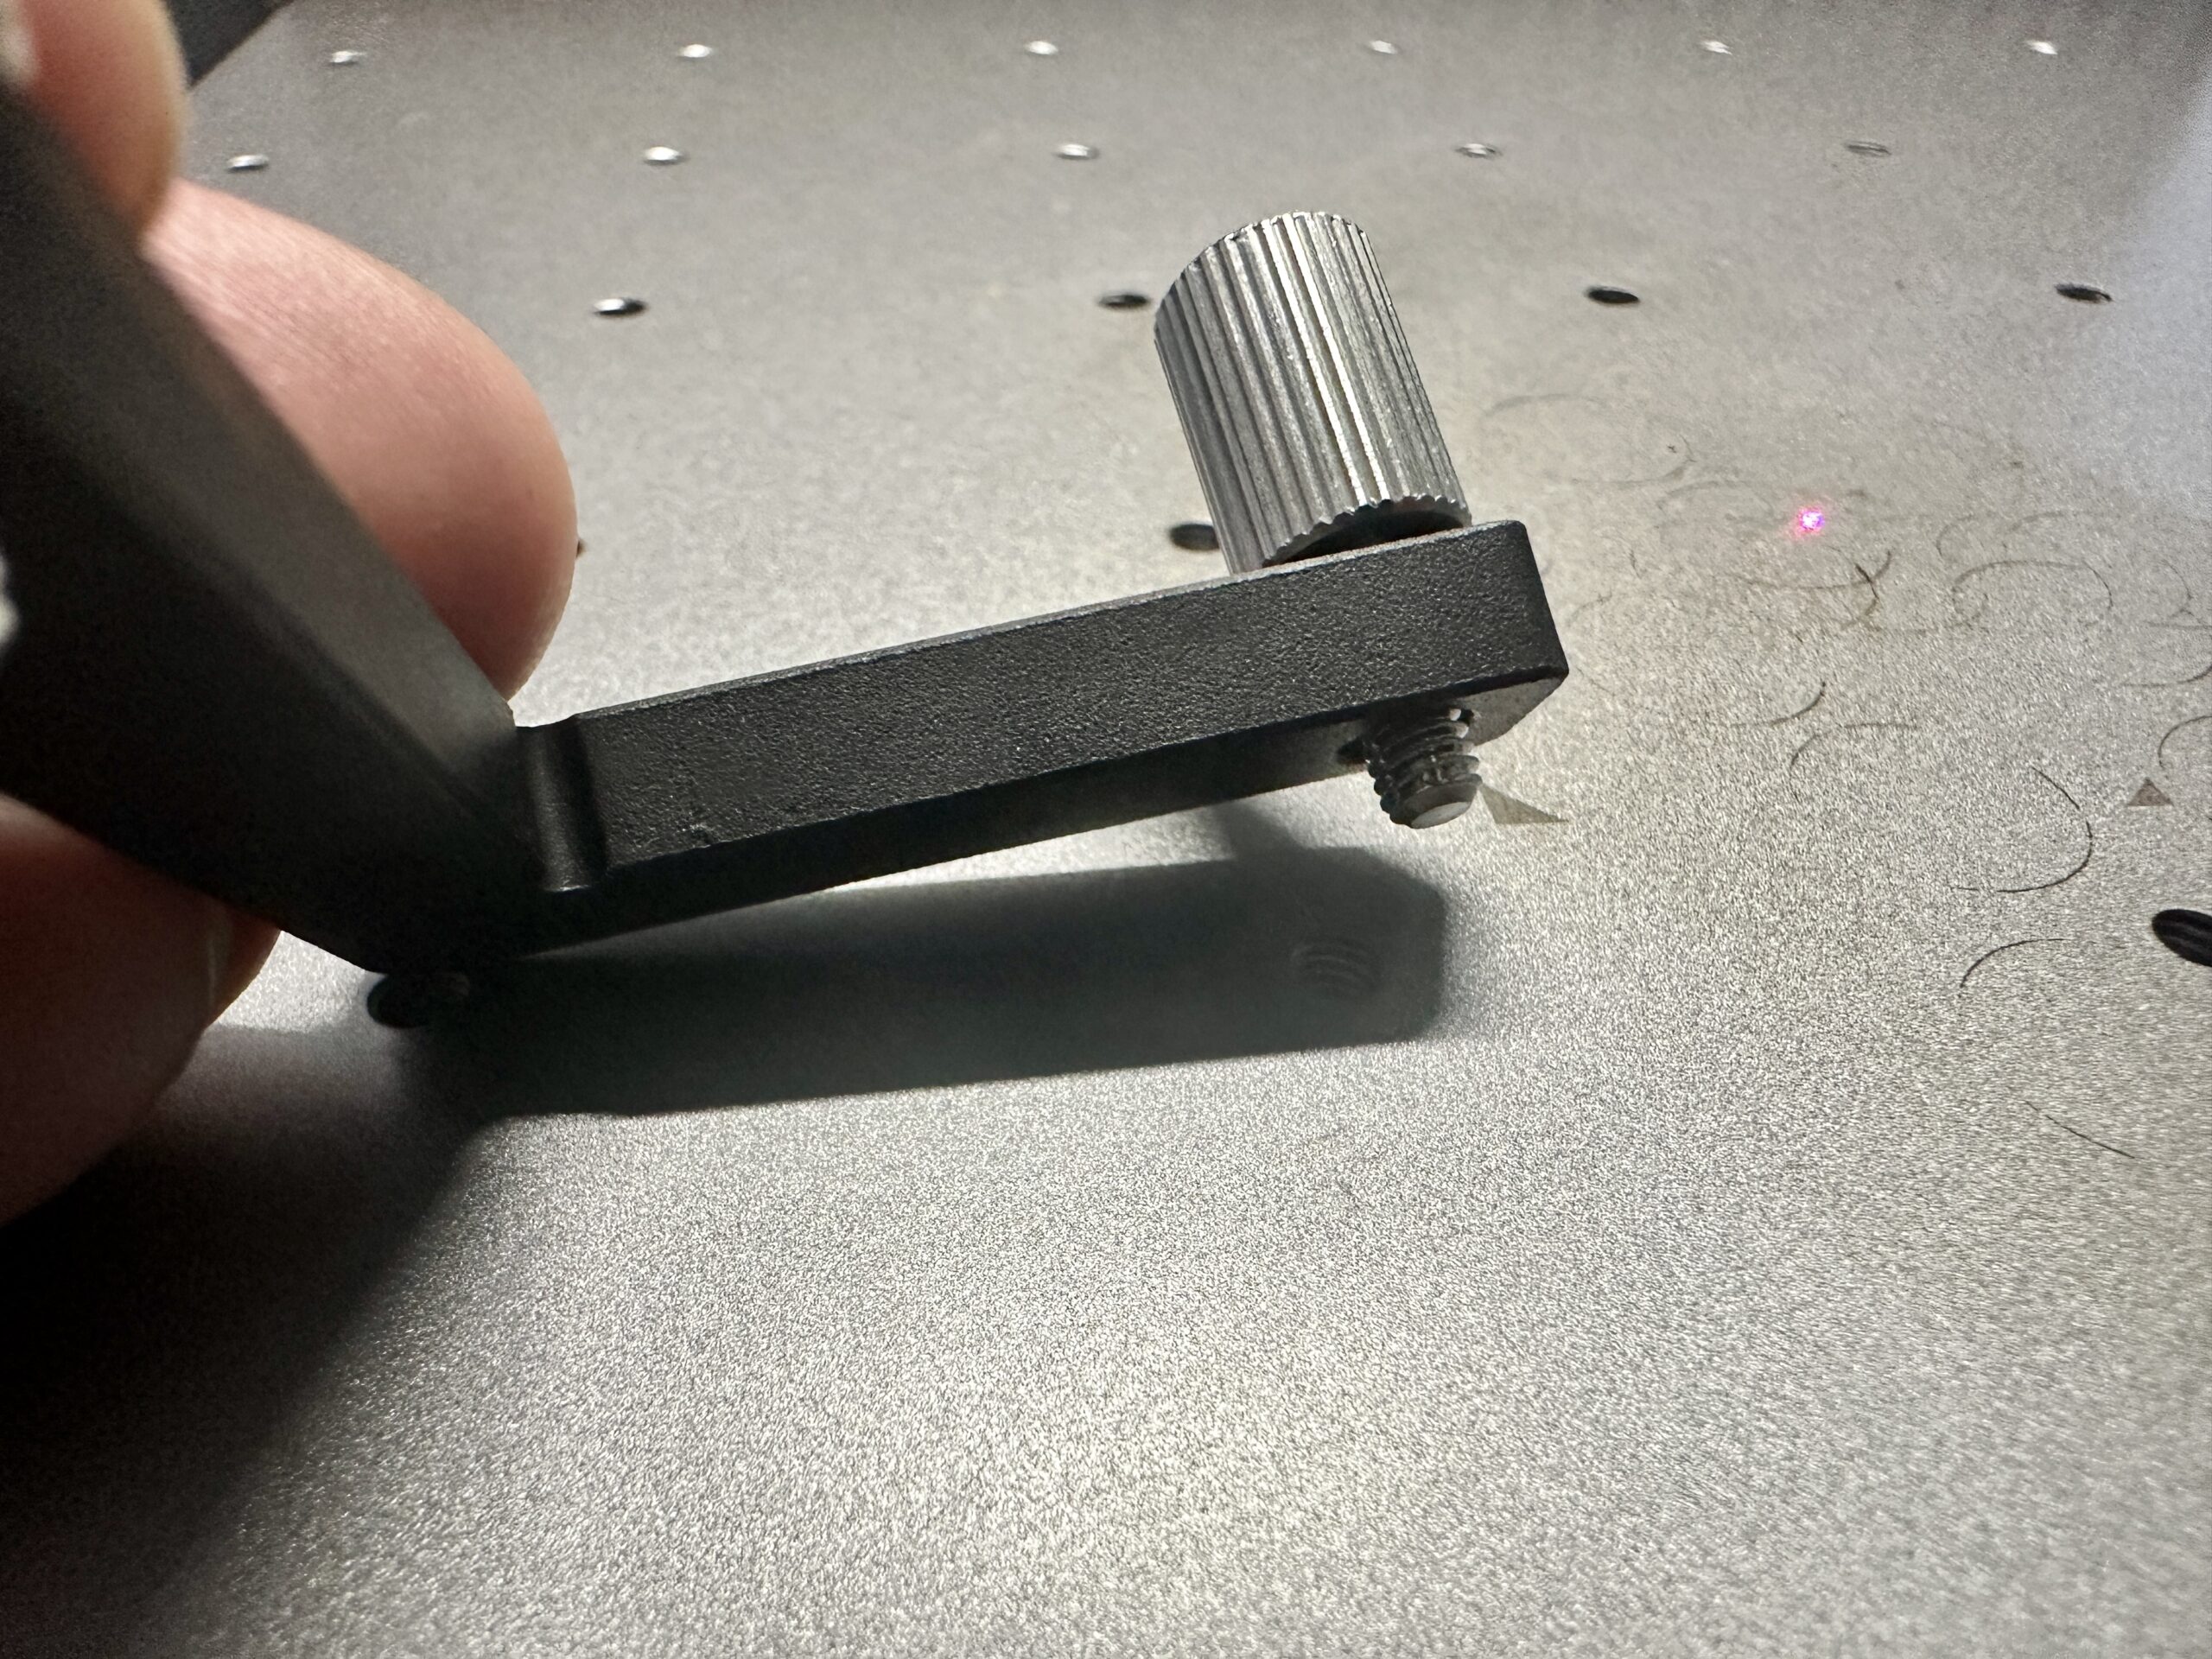
Included with the xTool F1 Ultra is an L-shaped positioning piece. Here’s how it works and why I love it:
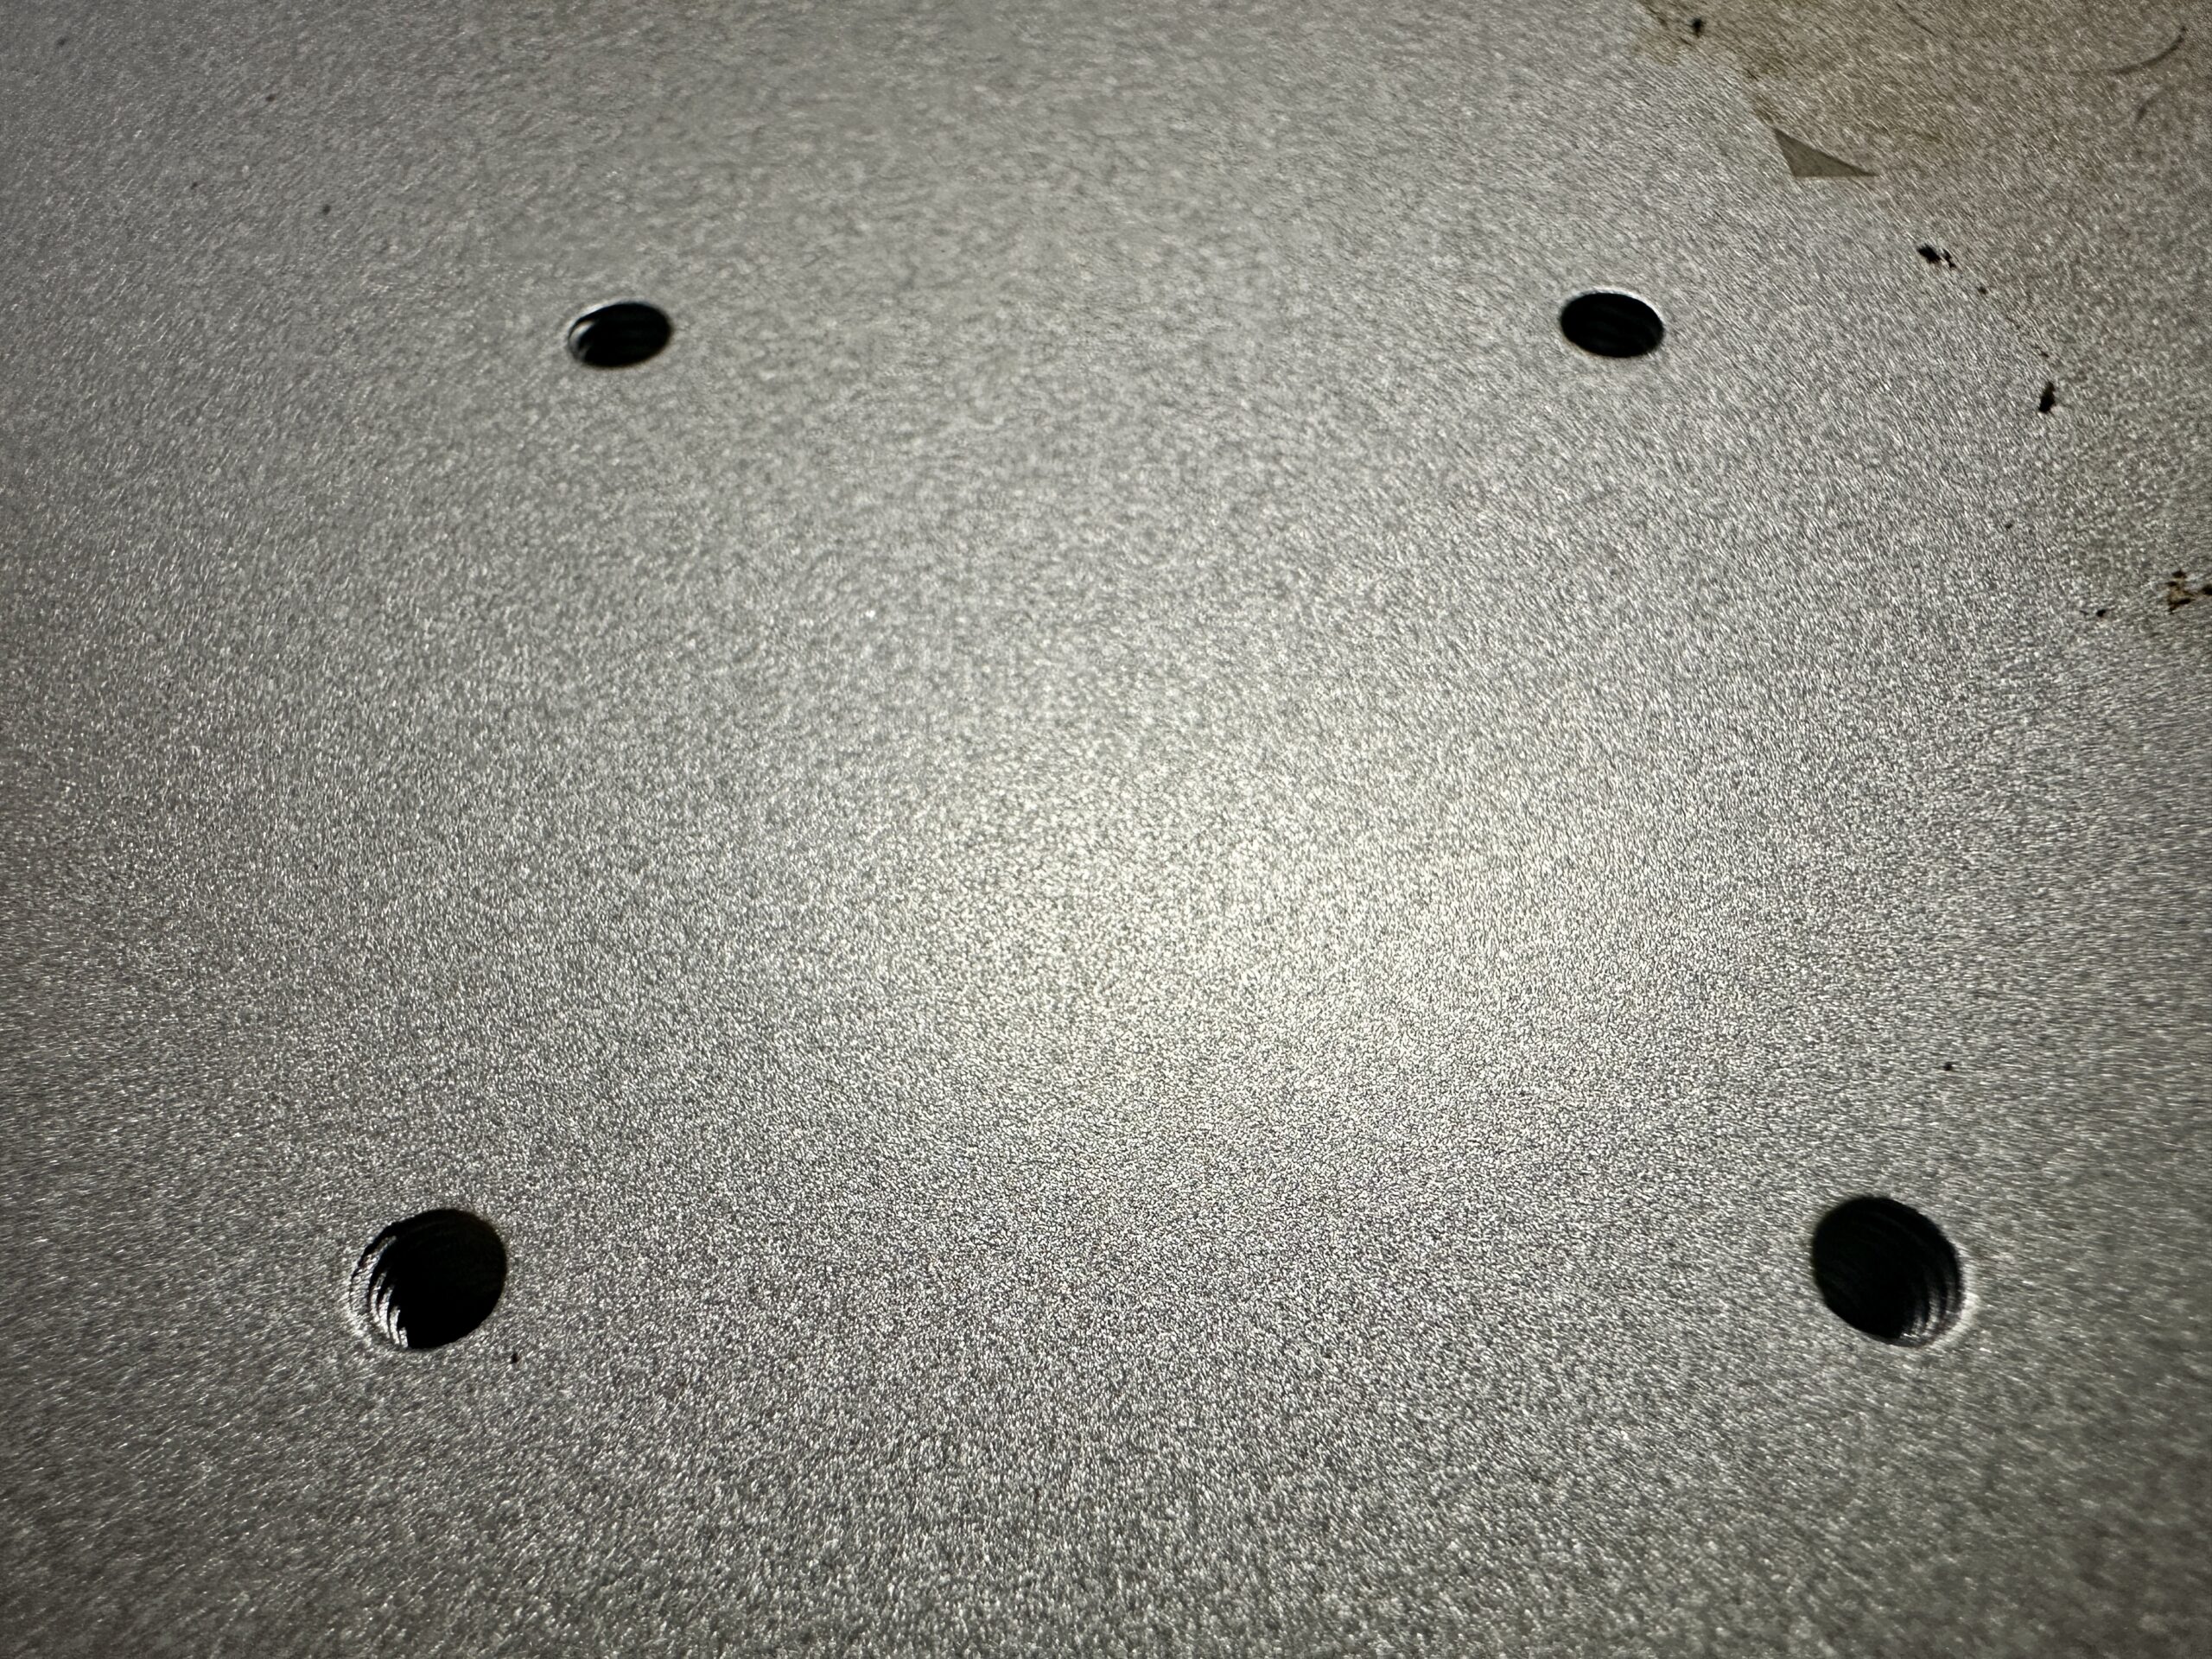
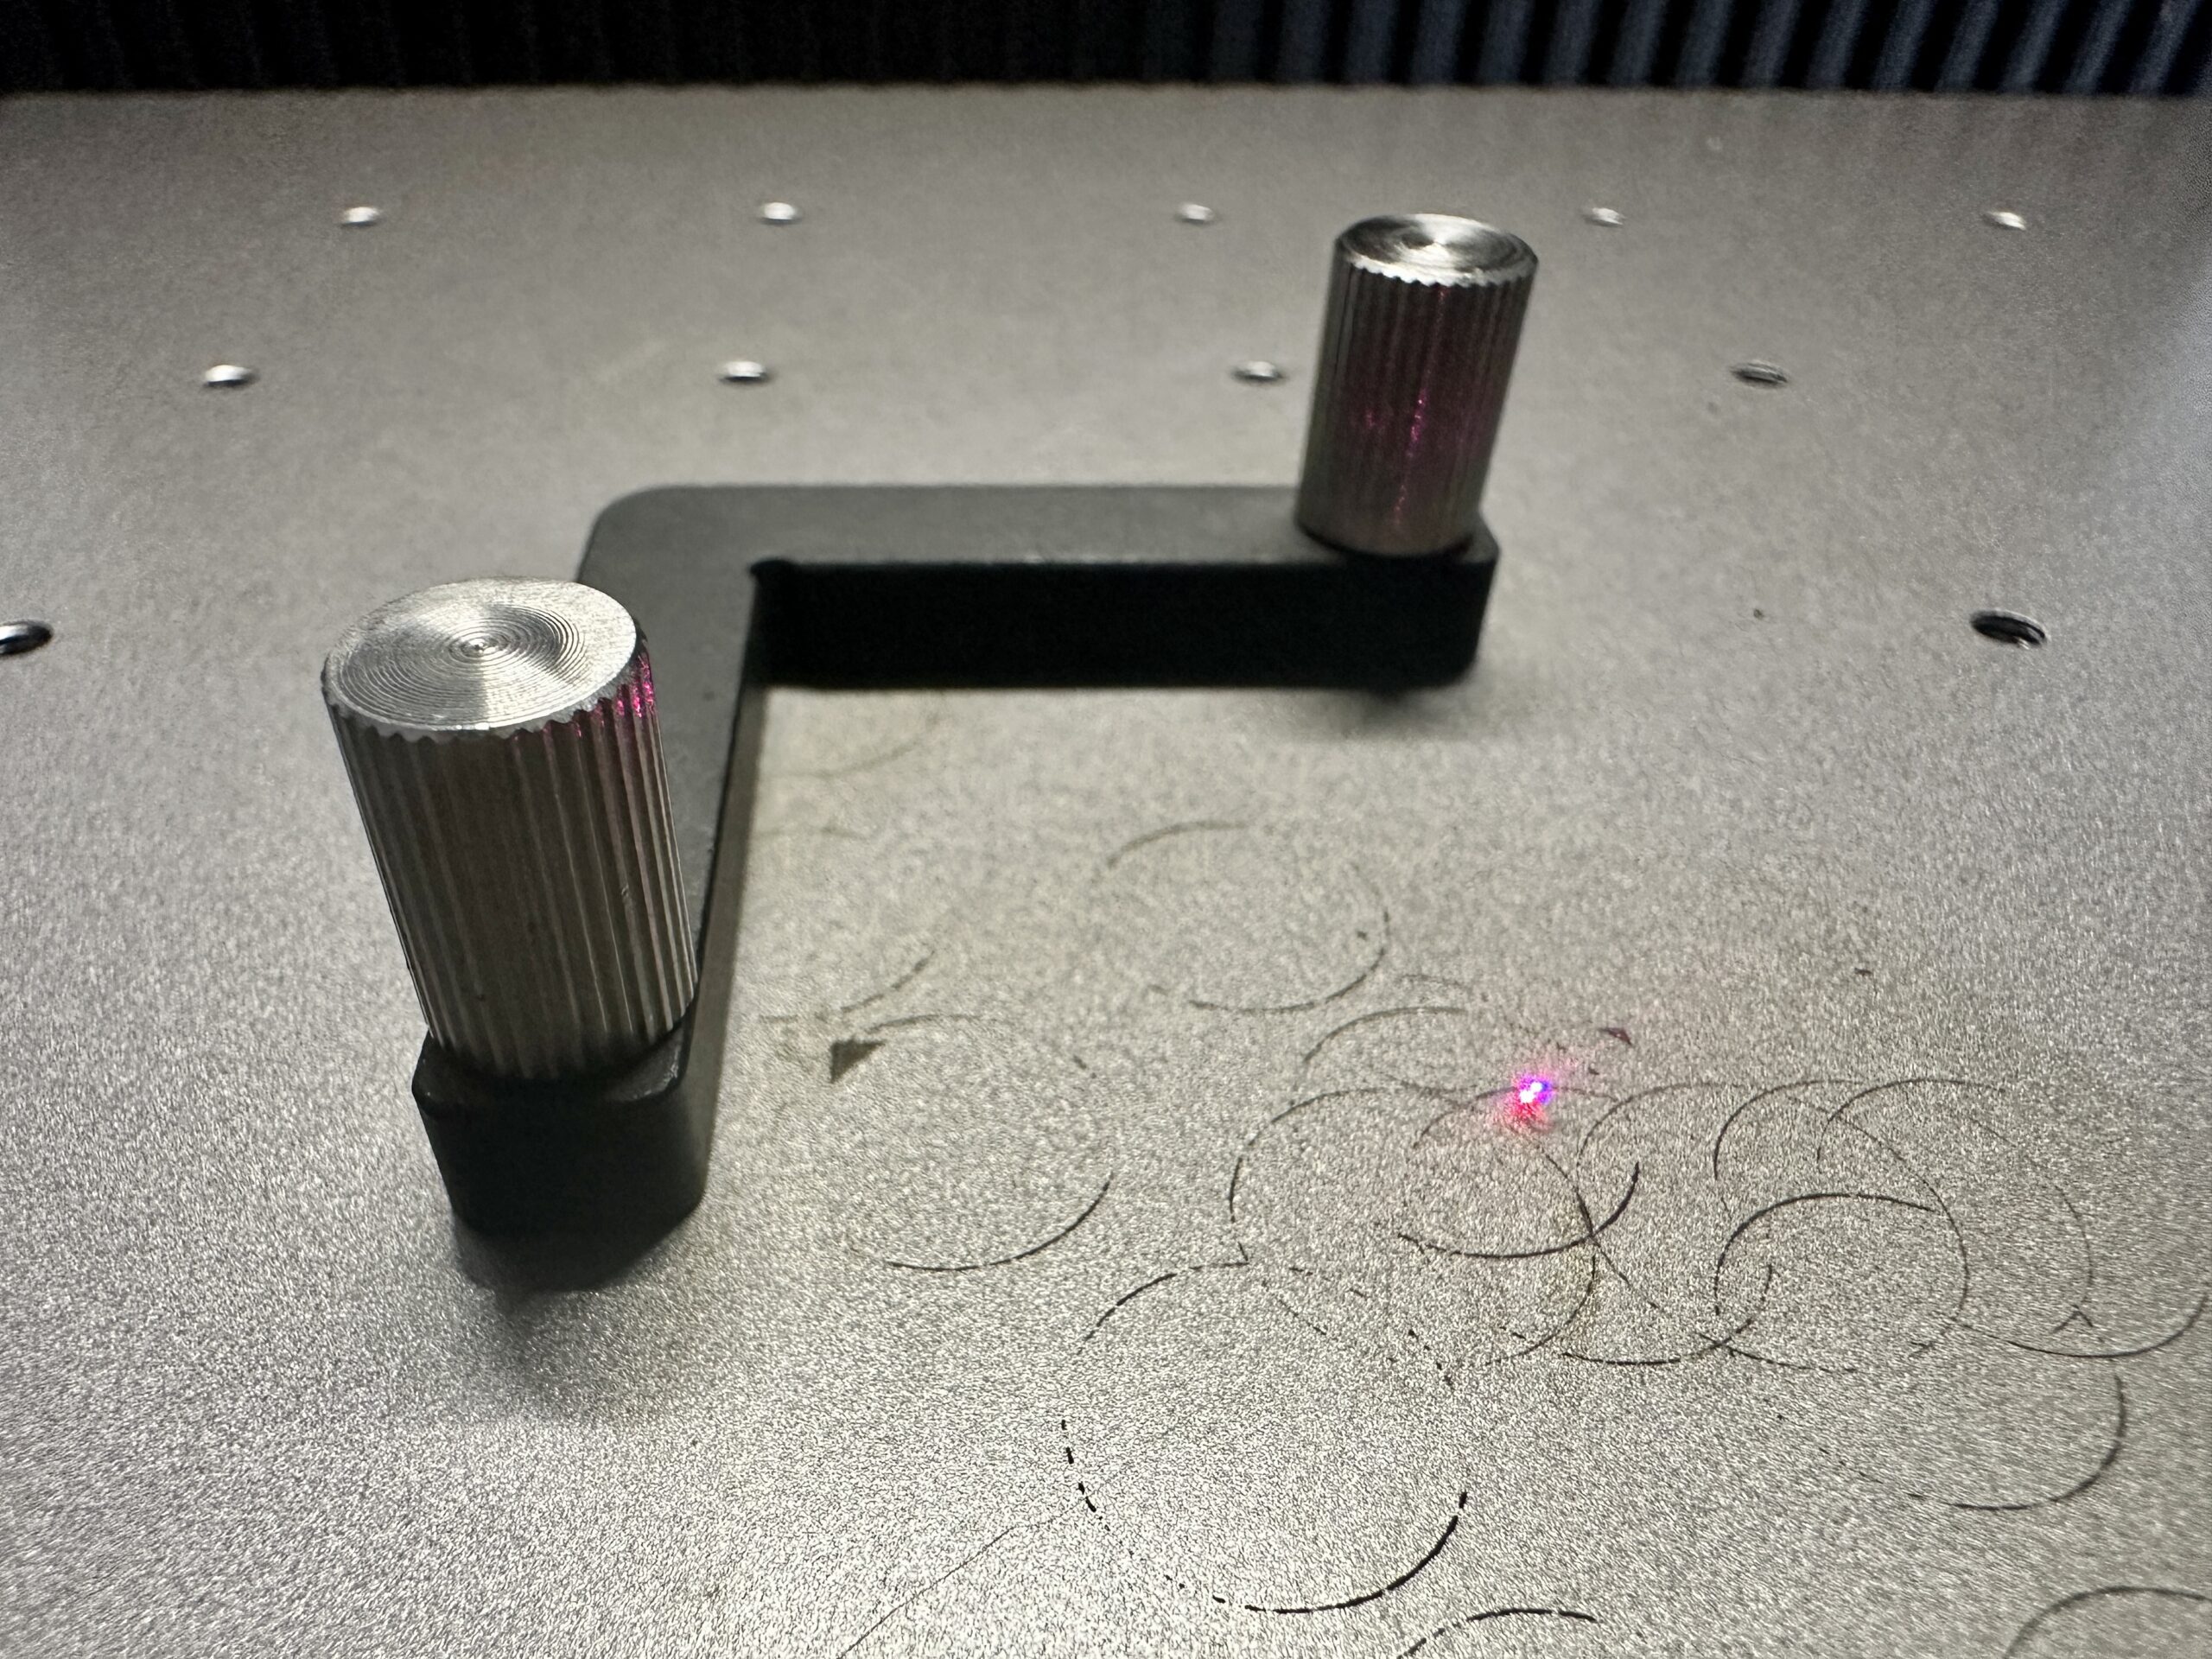
The base of the xTool F1 Ultra has screw holes that the L-shaped positioning piece screws into. You line up your design one time using the positioning piece and process it, then you switch out the blank and rerun the job. It’s that easy.
A close up look at the base of the xTool F1 Ultra with screw holes:
Screws on the L-shaped positioning piece:
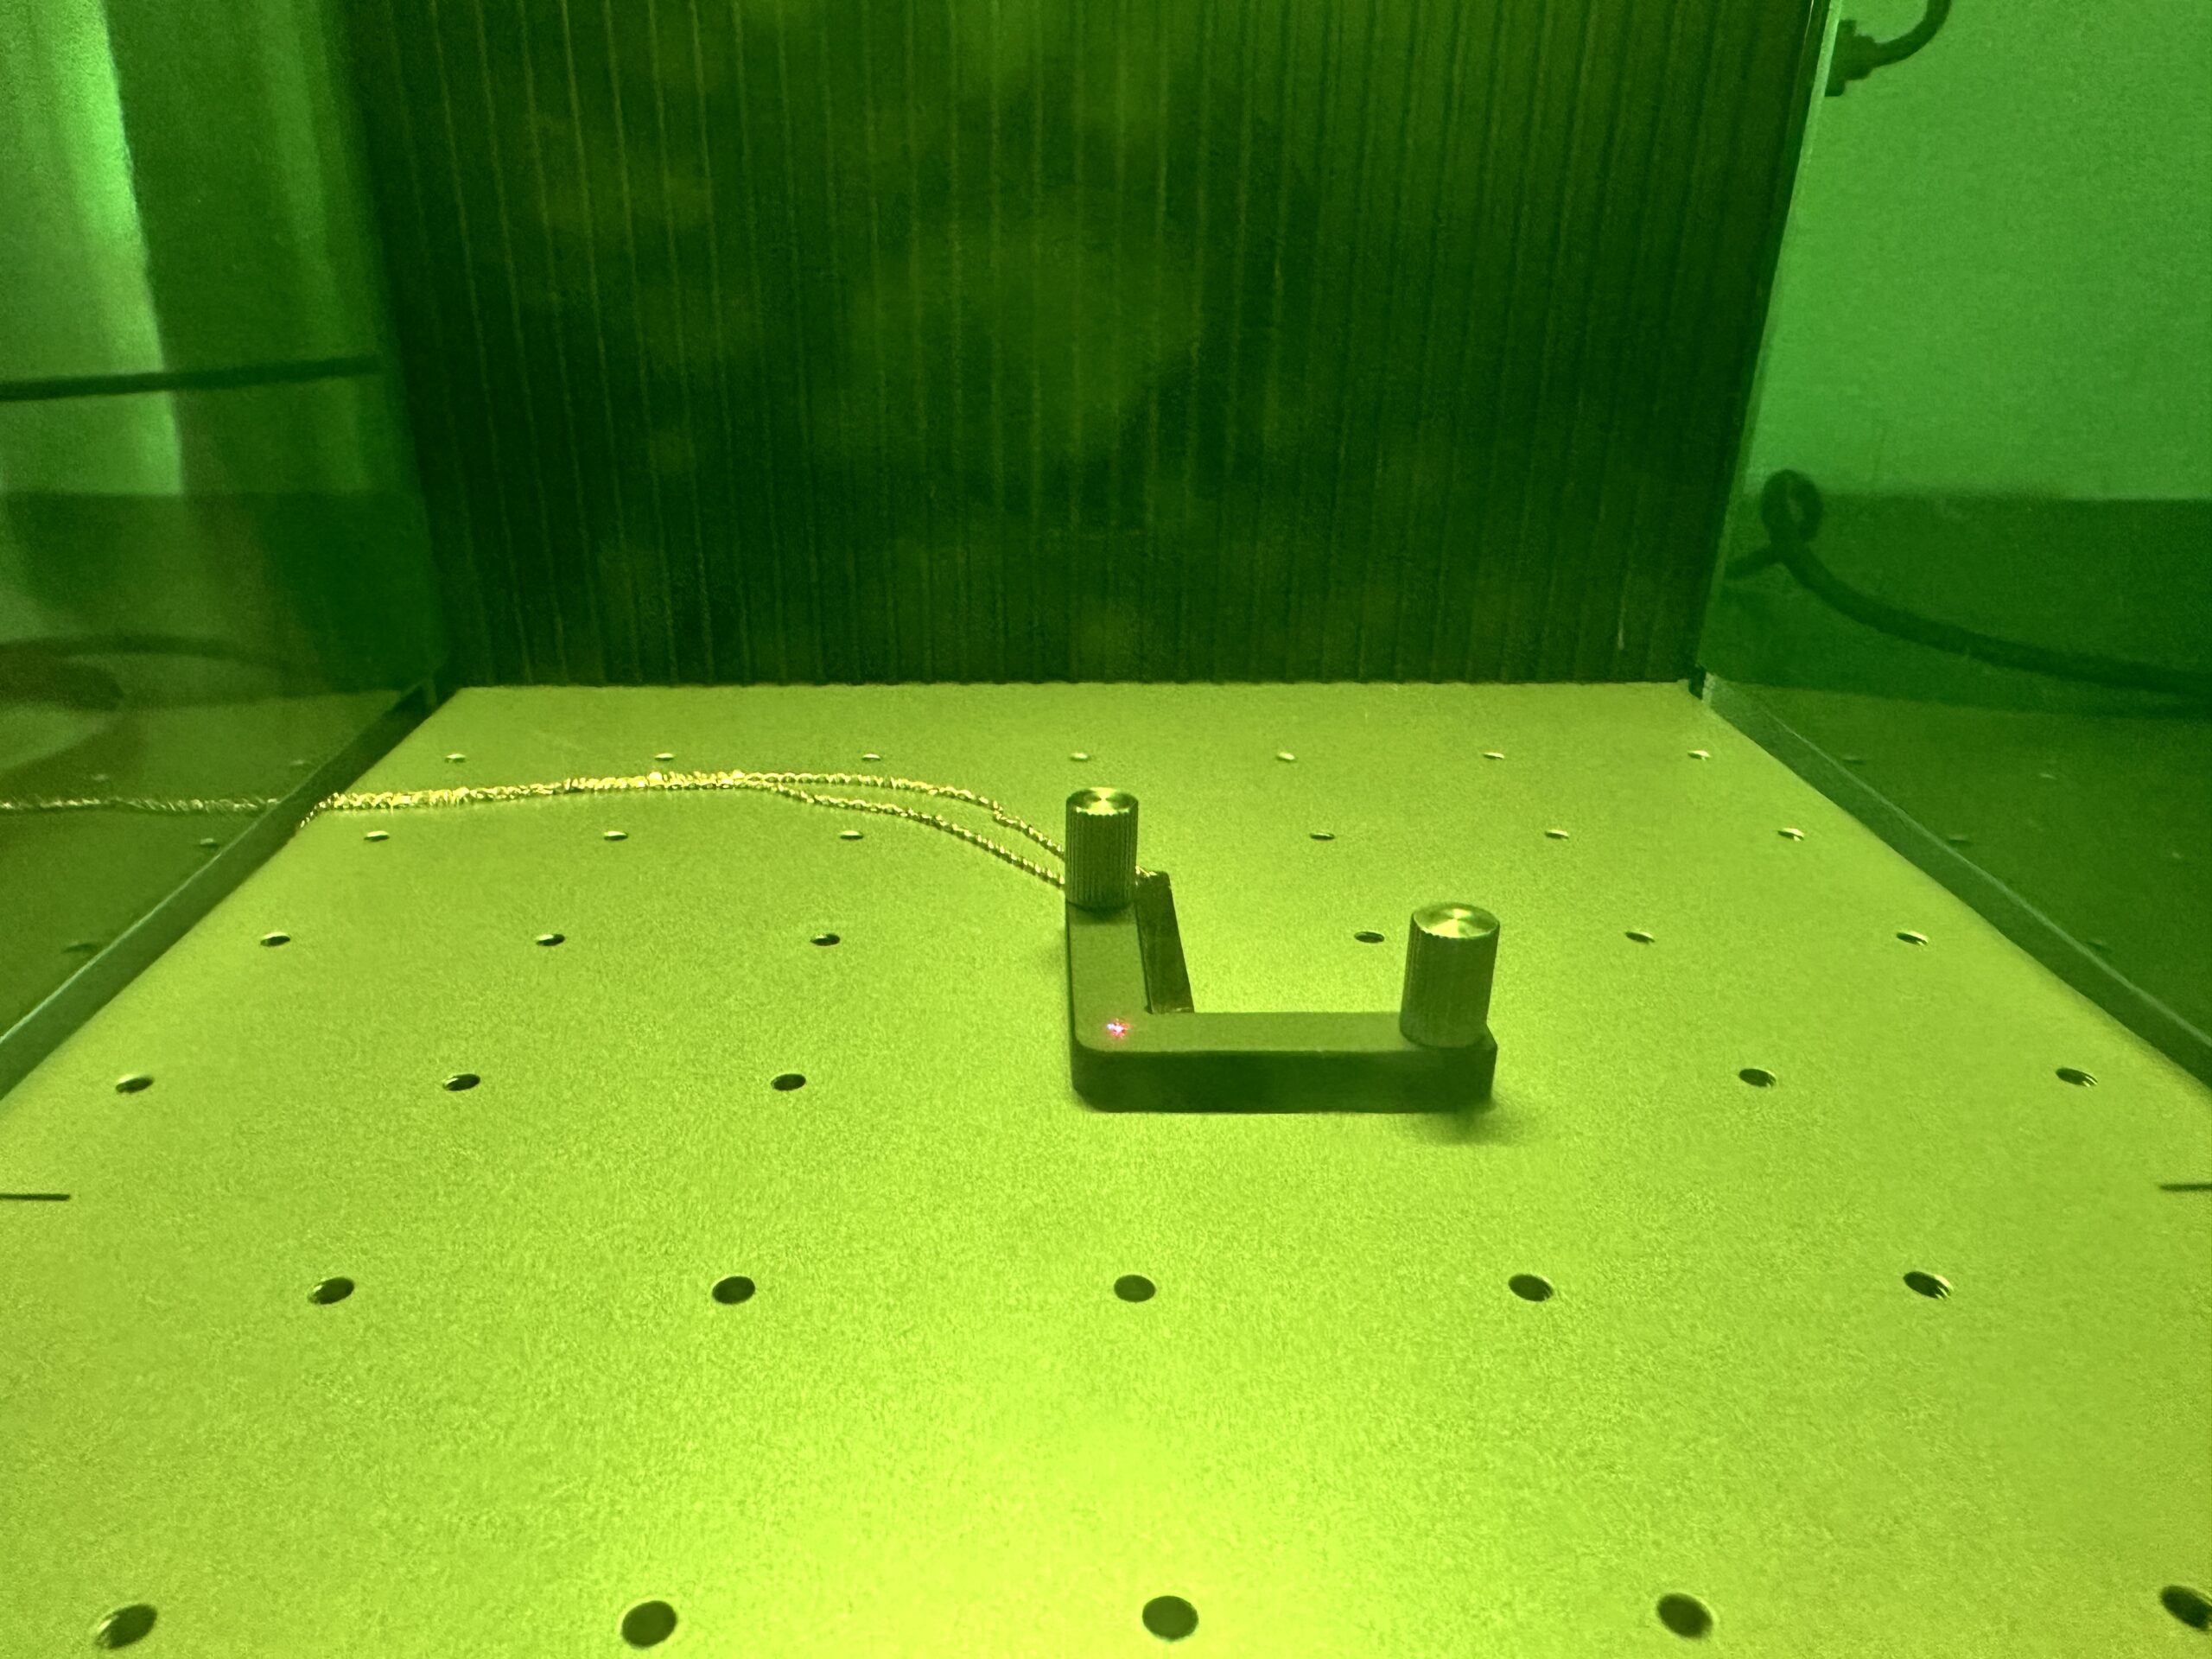
The L-shaped positioning piece screwed into the xTool F1 Ultra base:
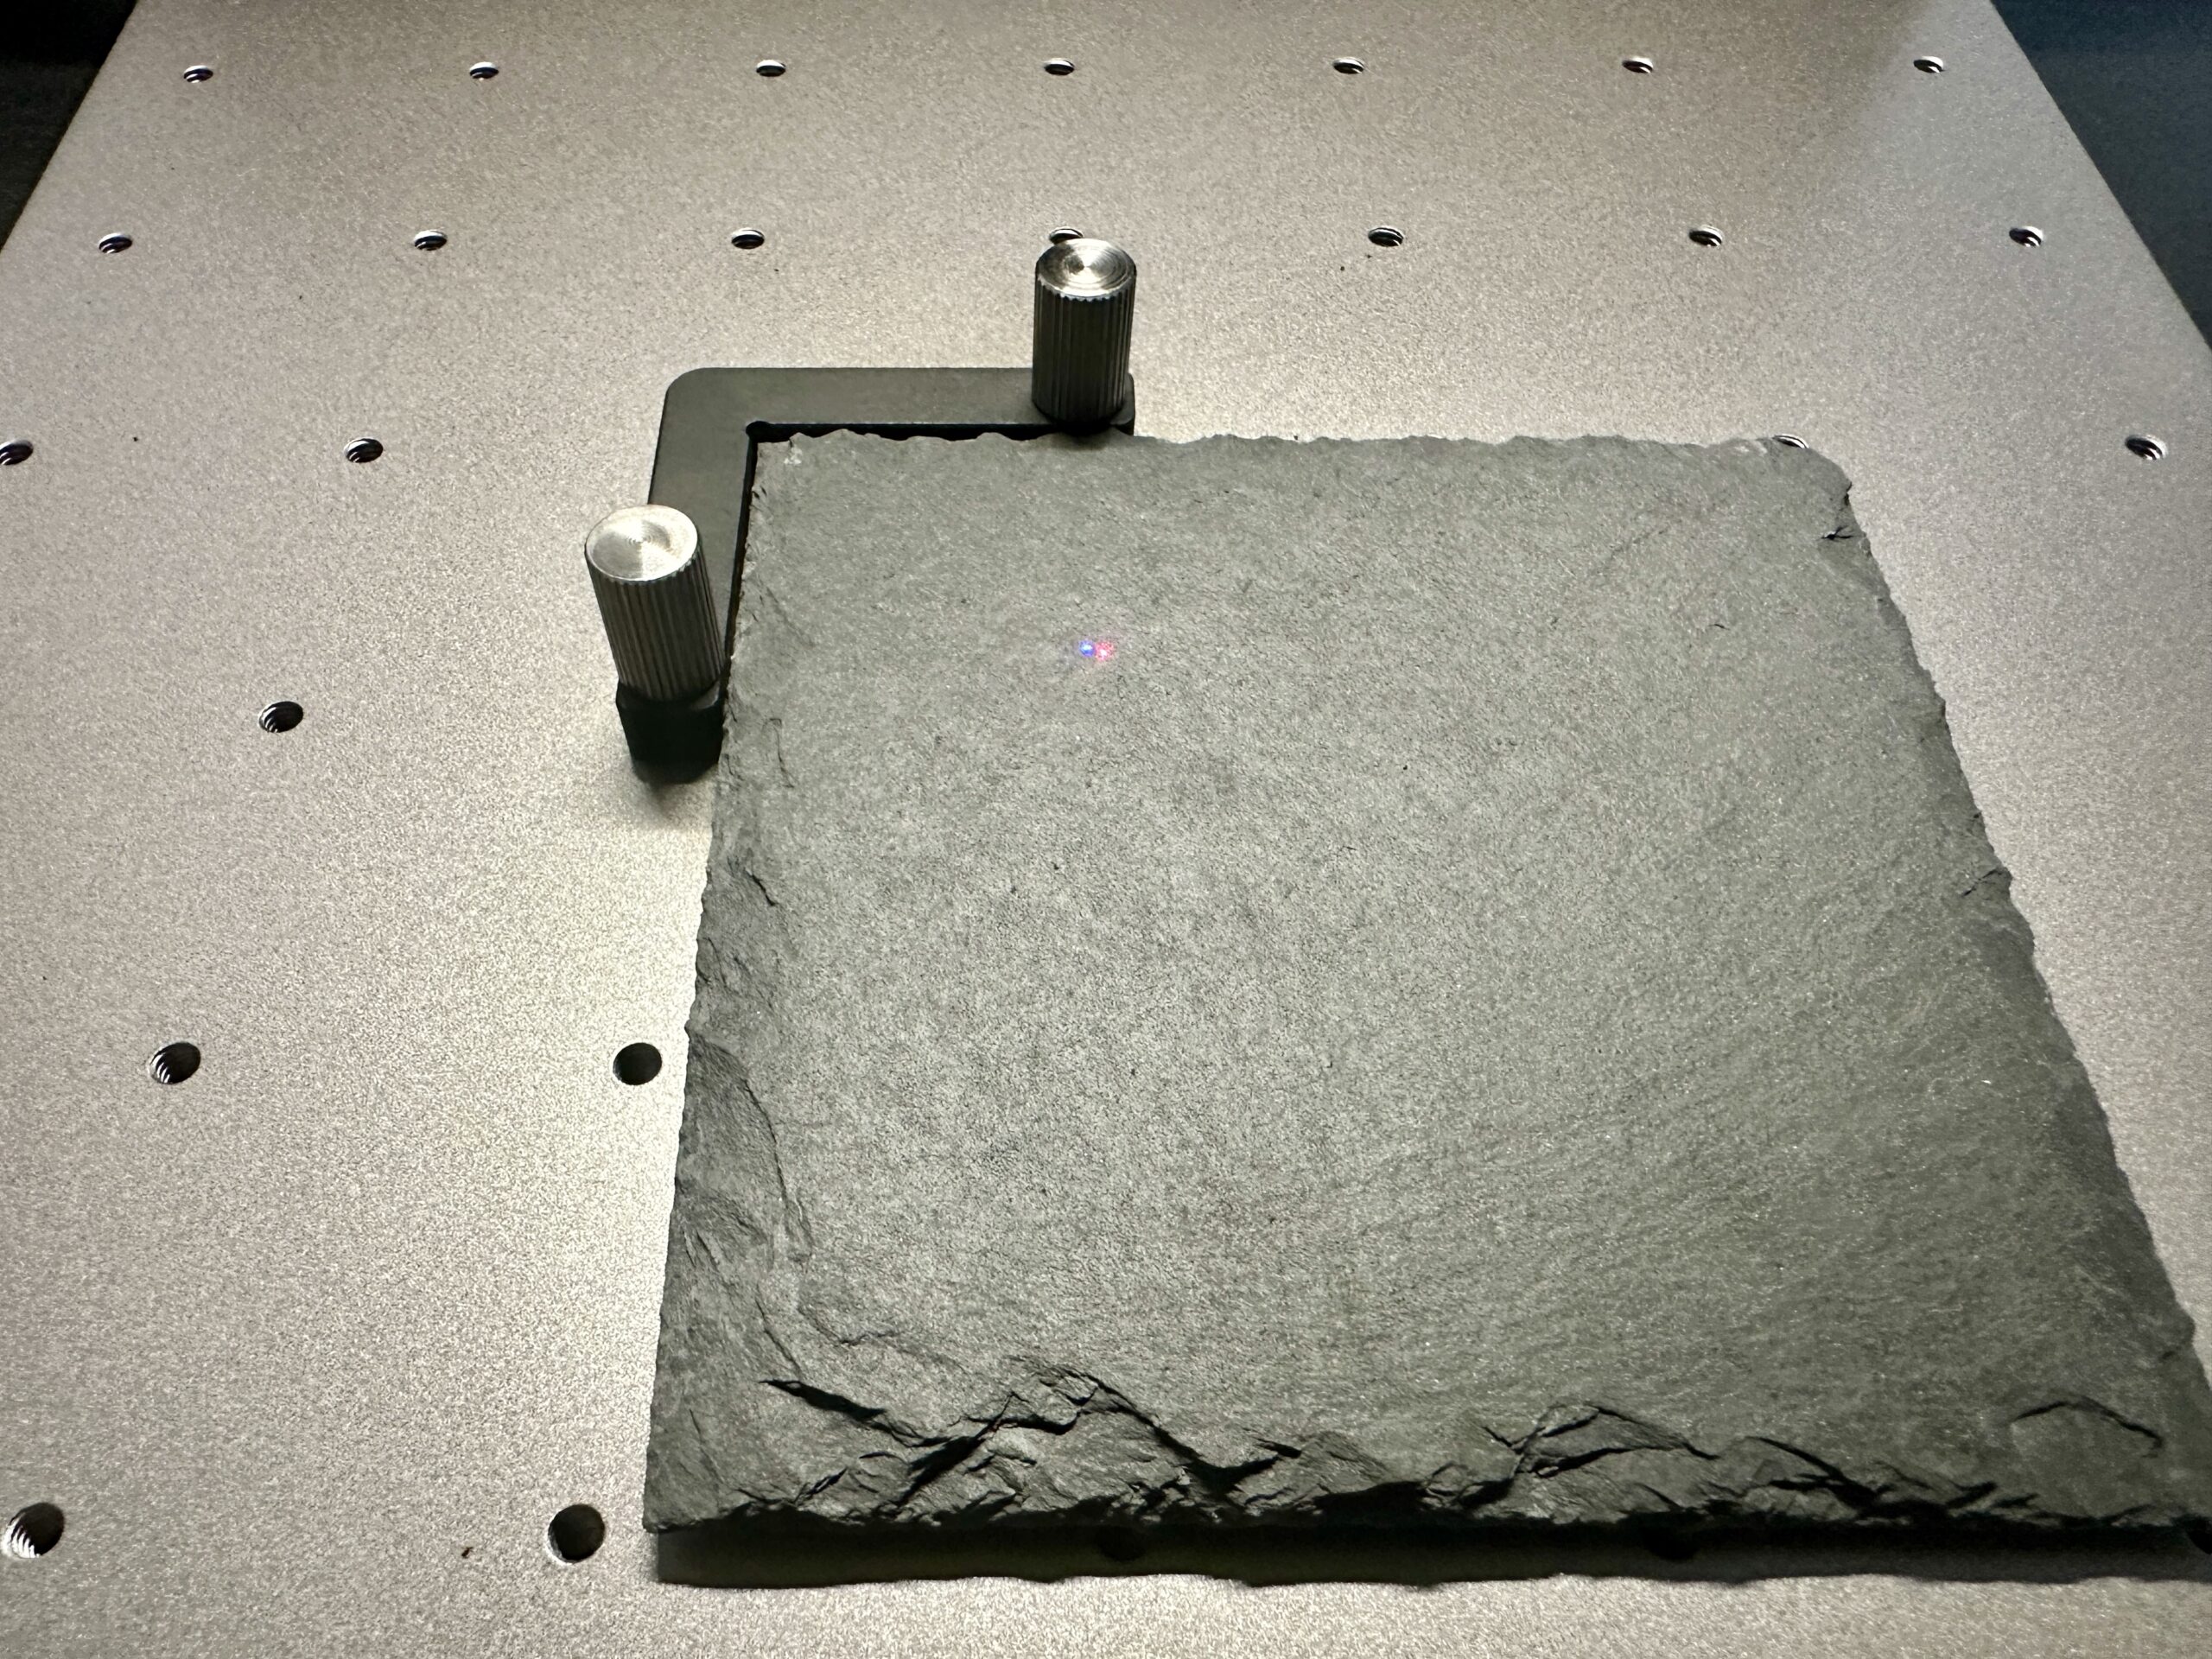
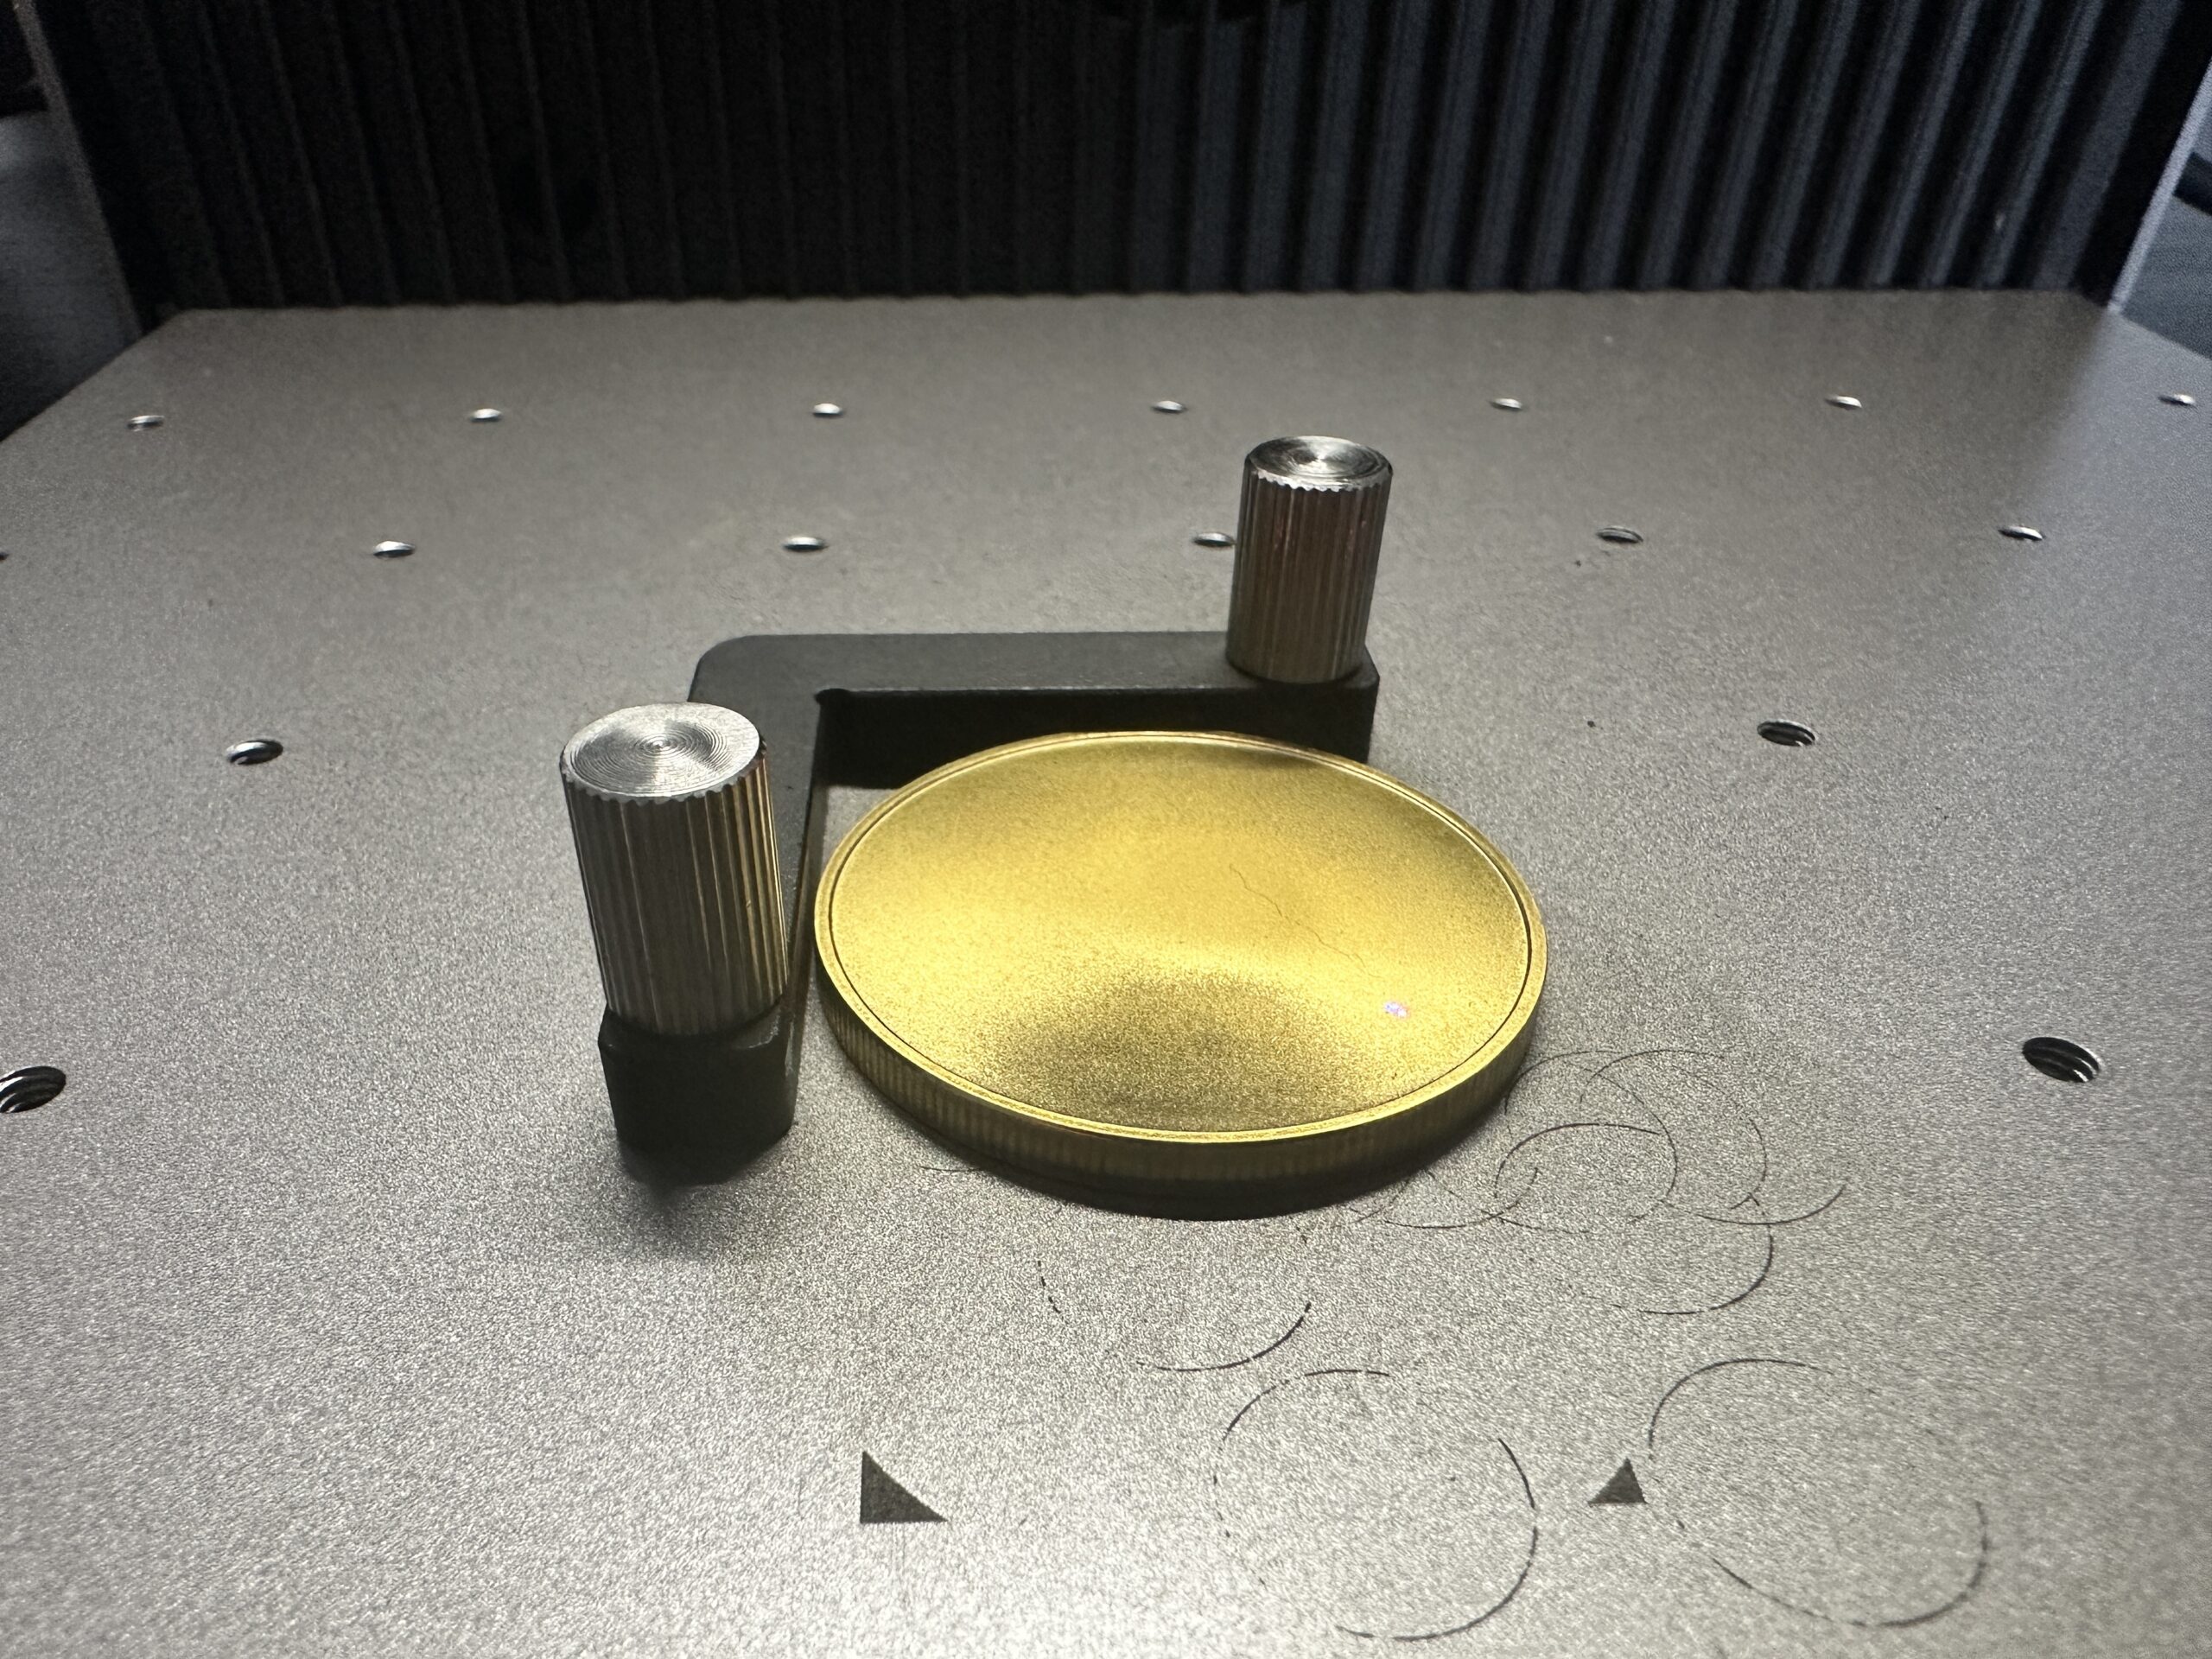
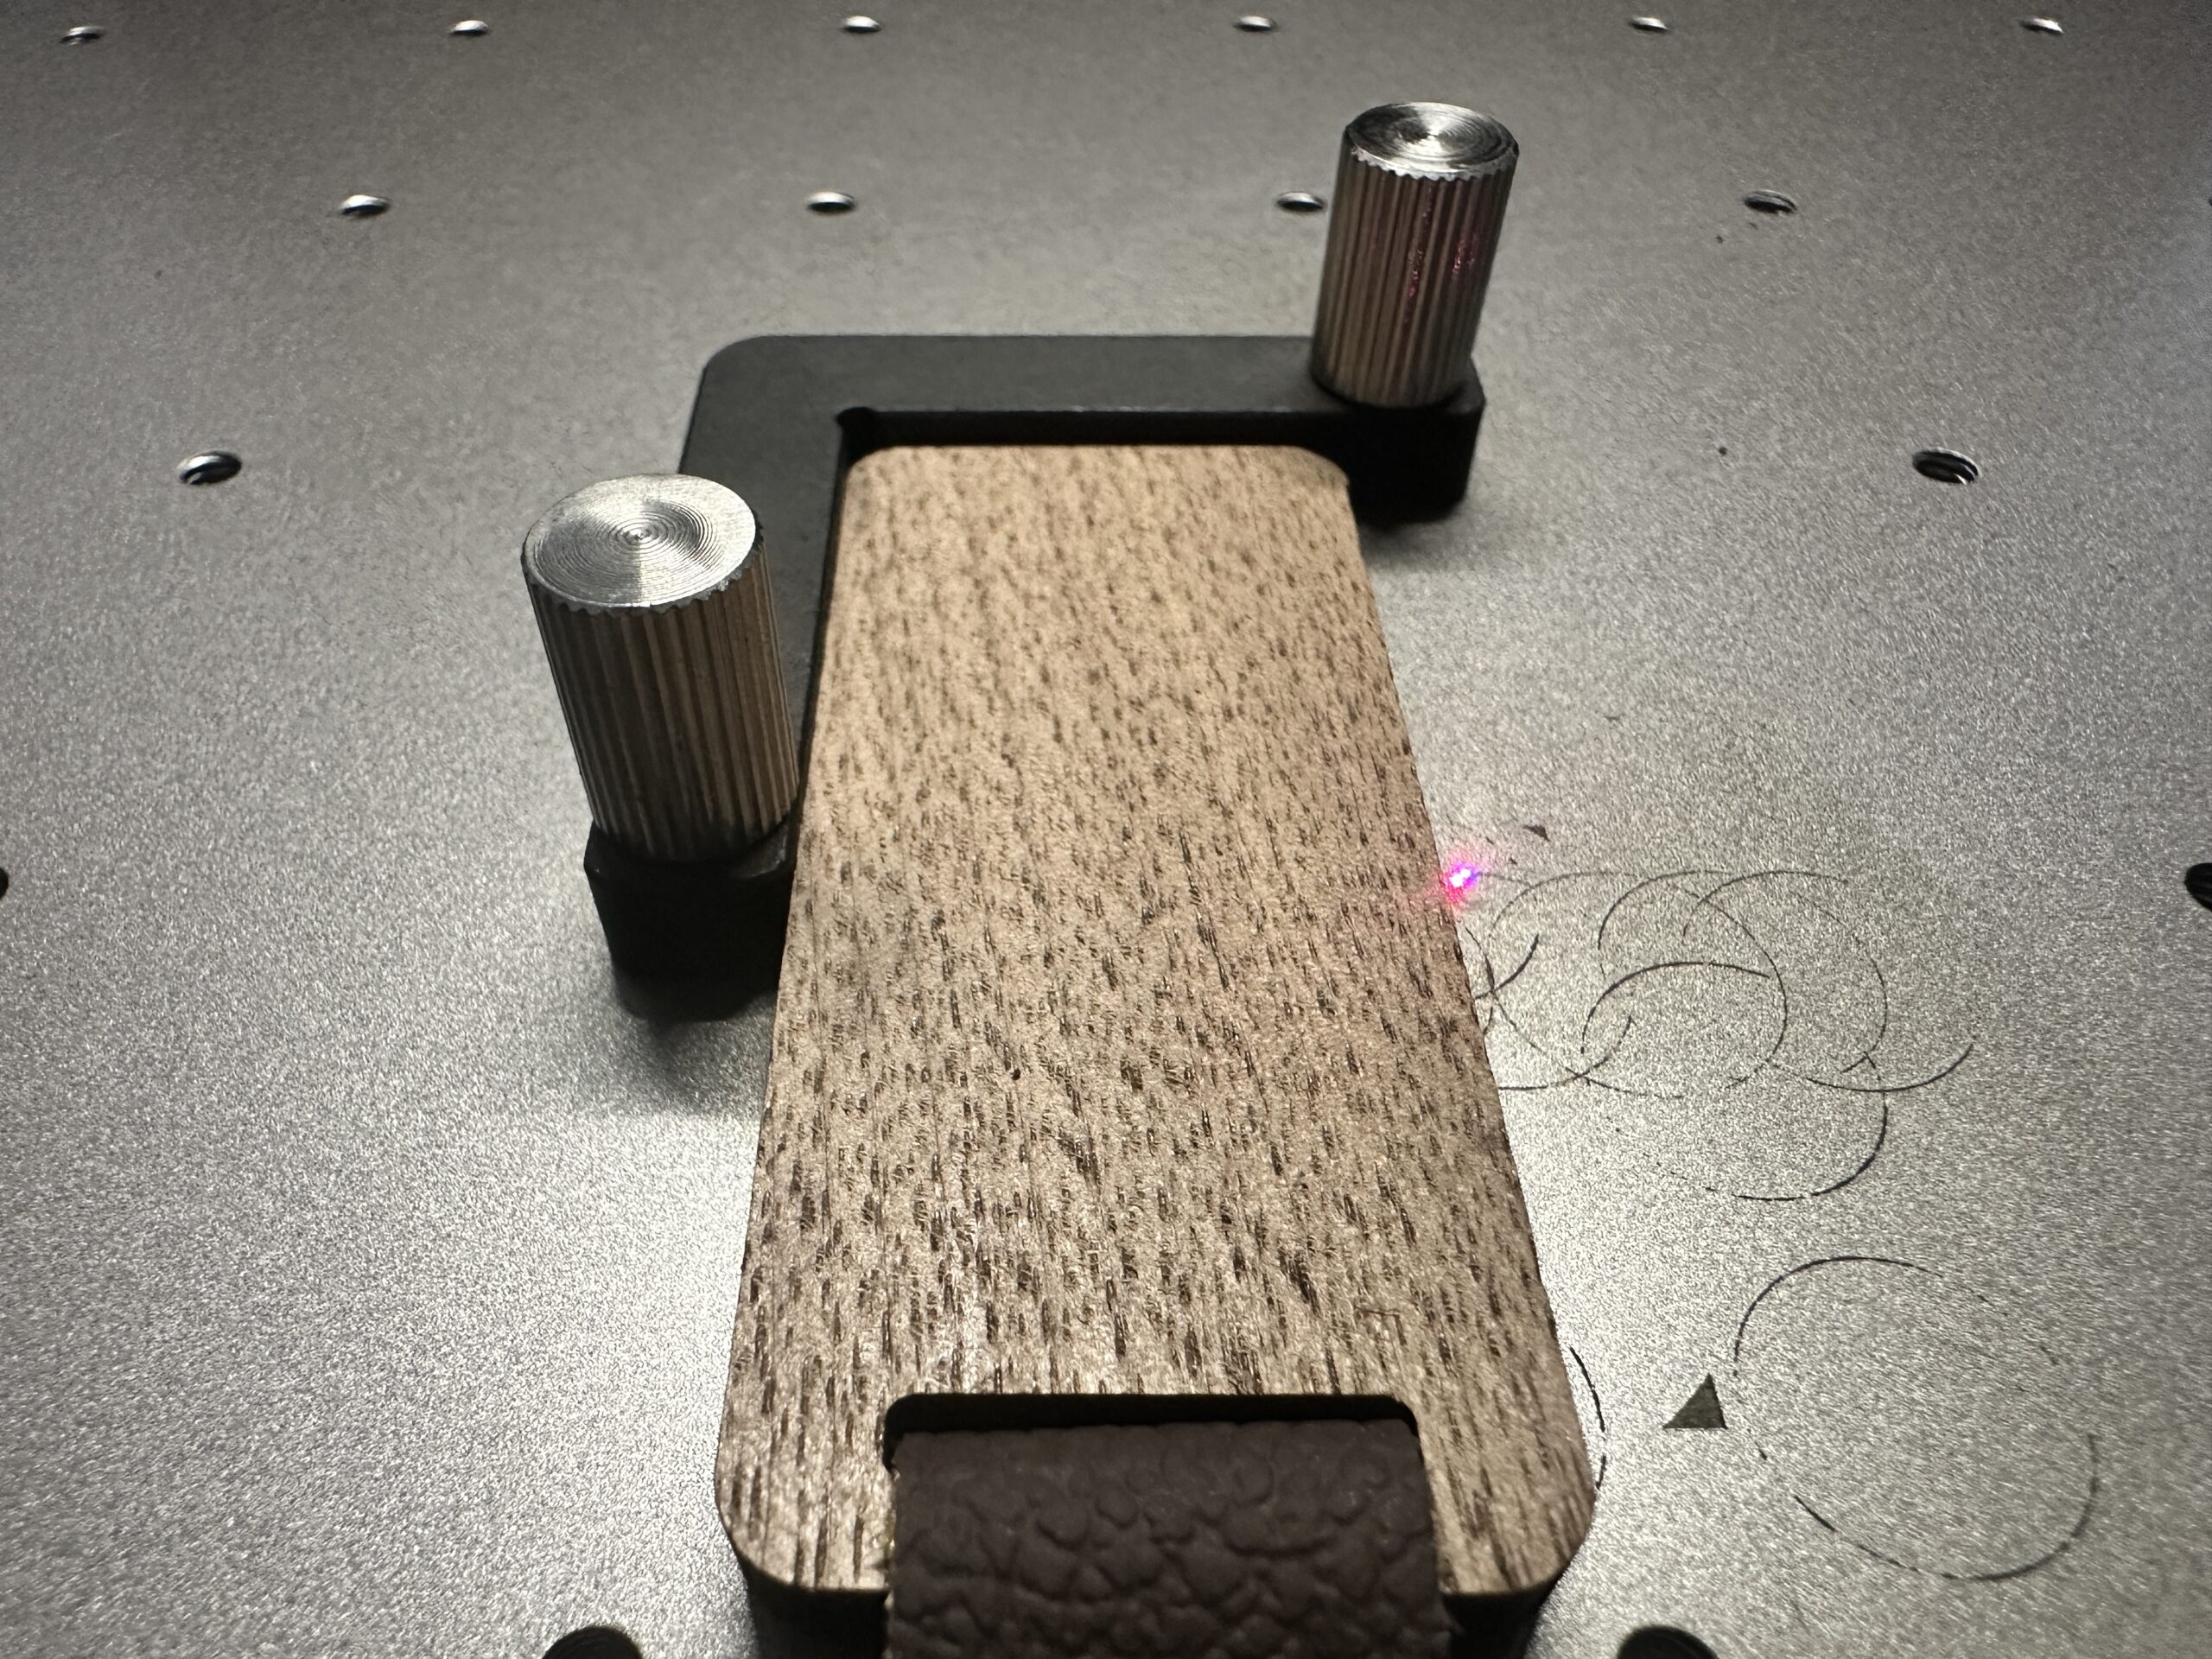
The L-shaped positioning piece works with a variety of blanks and can be moved around on the xTool F1 Ultra base.
A slate coaster positioned using the xTool F1 Ultra positioning piece.
A coin blank positioned in the xTool F1 Ultra using the L-shaped positioning piece.
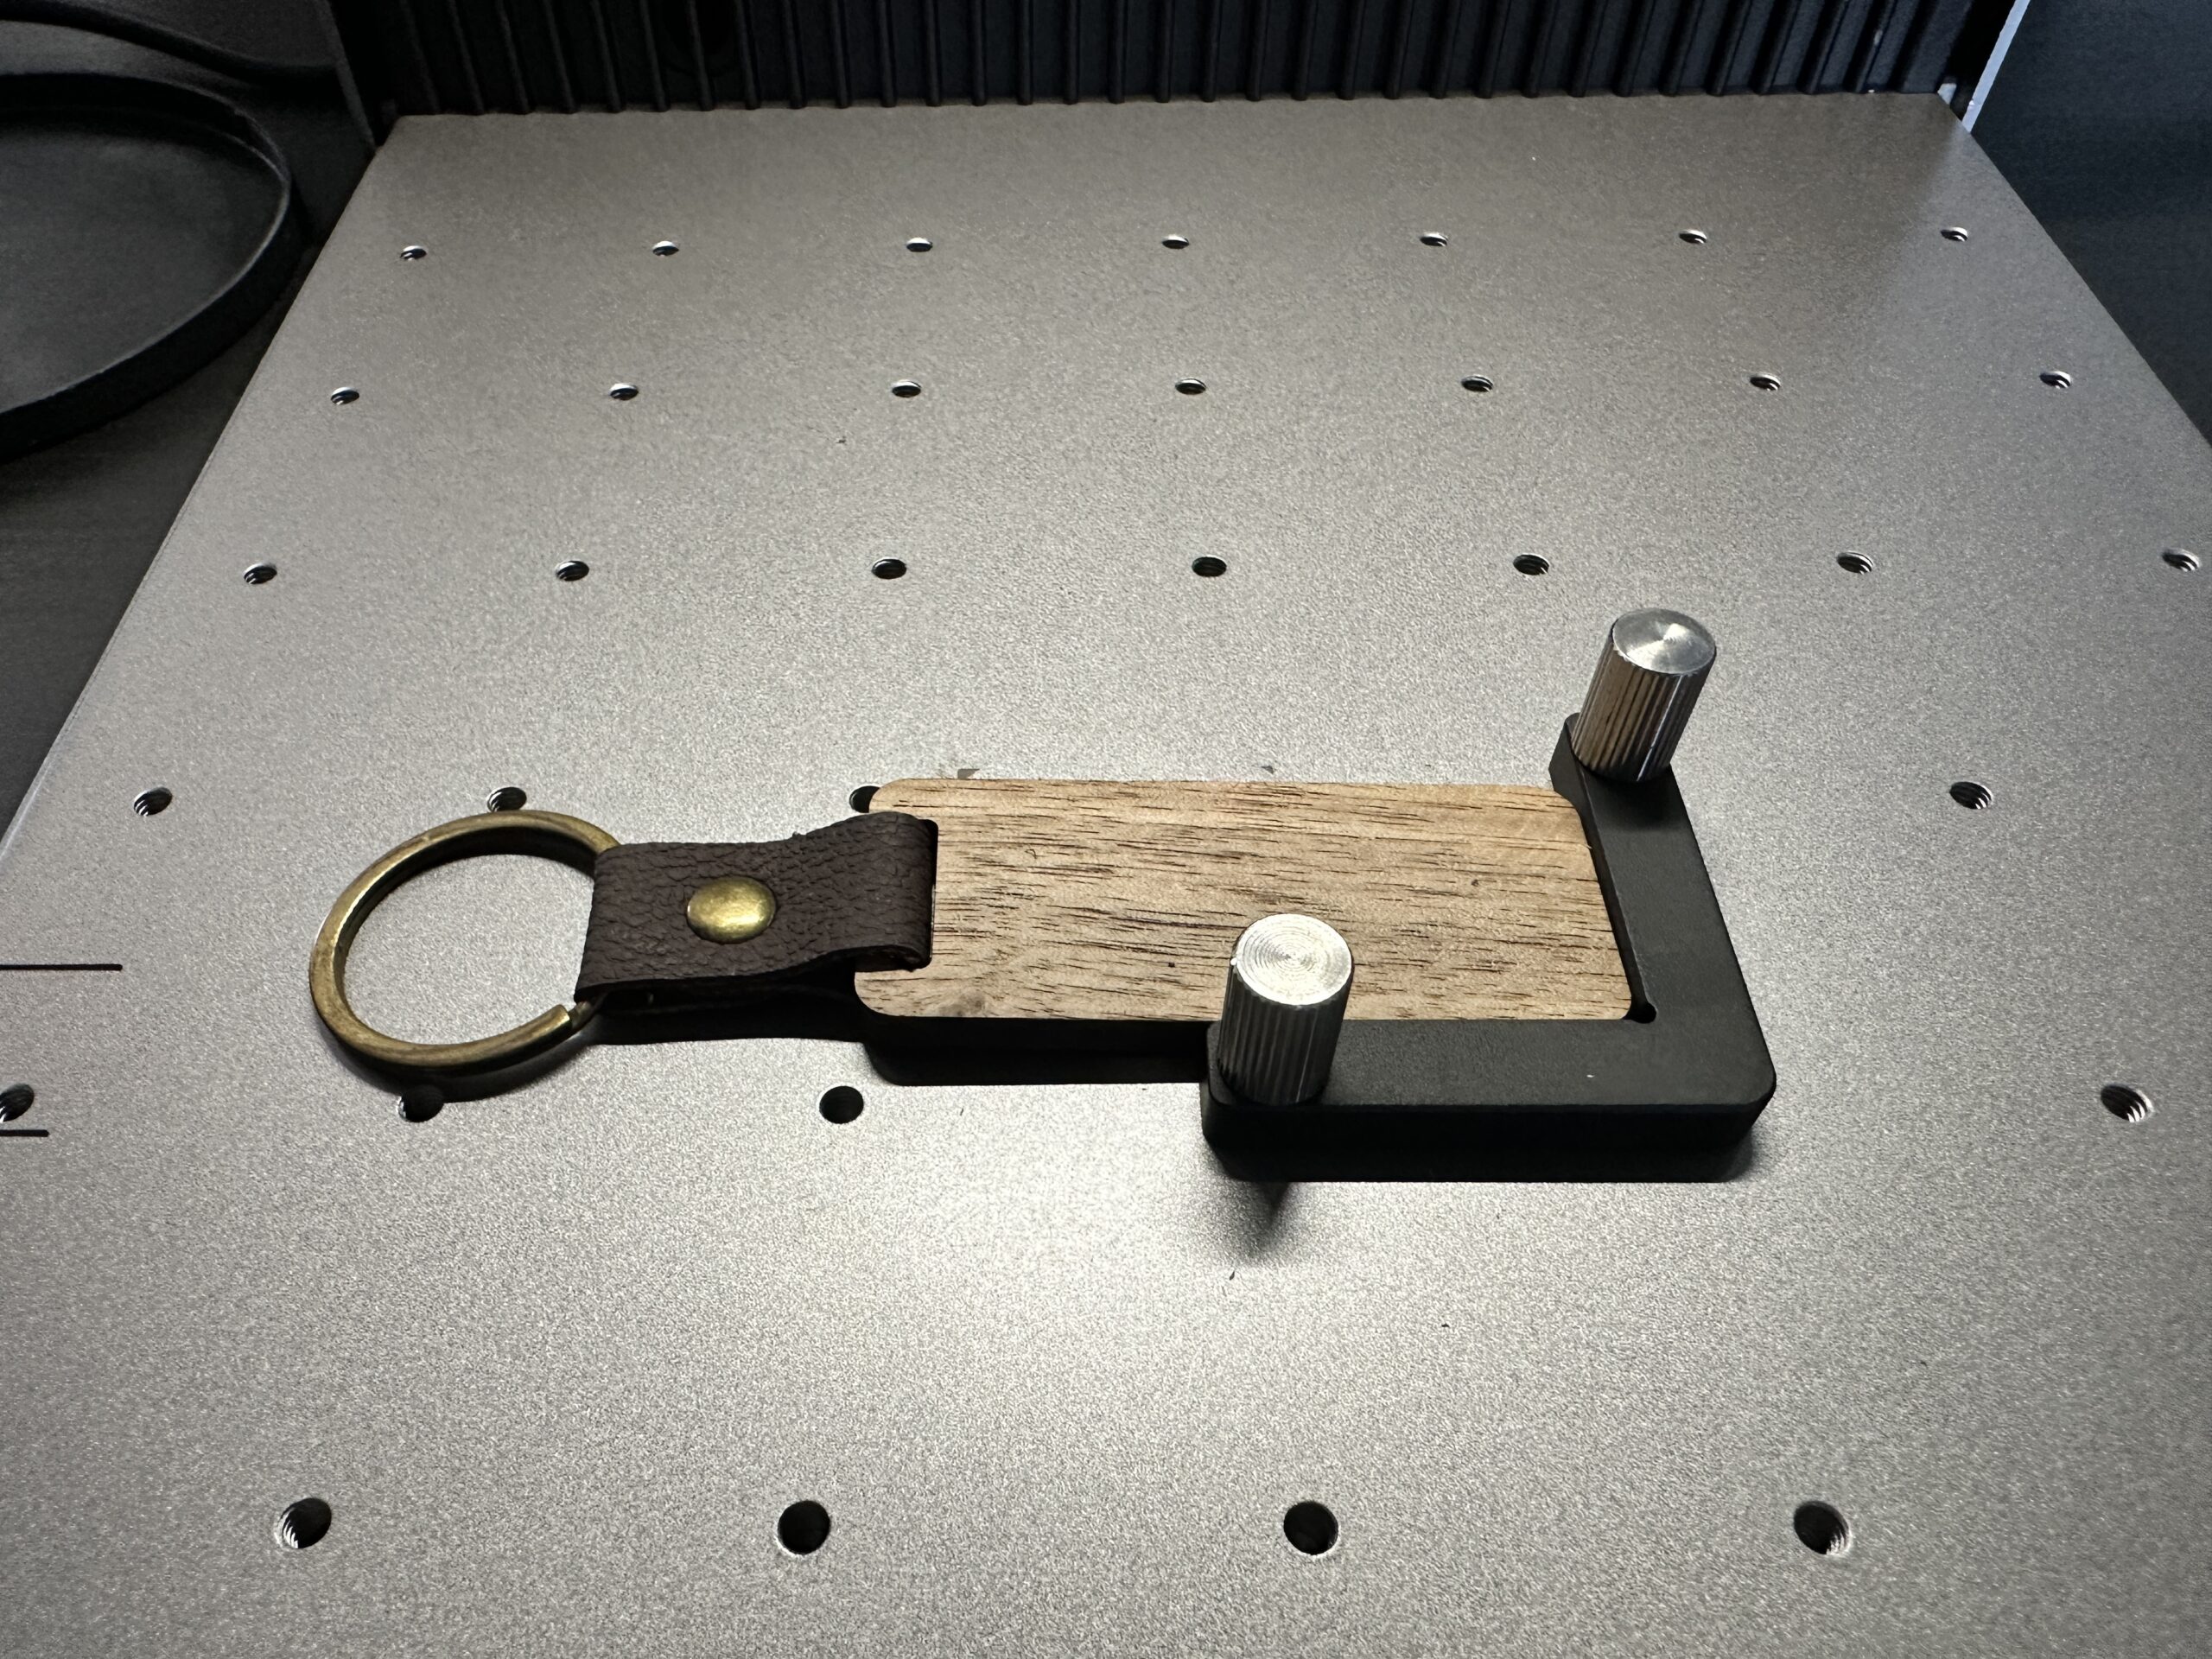
A keychain positioned in the xTool F1 Ultra using the L-shaped positioning piece.
Using the L-shaped positioning piece is great if you are doing a small batch of orders.
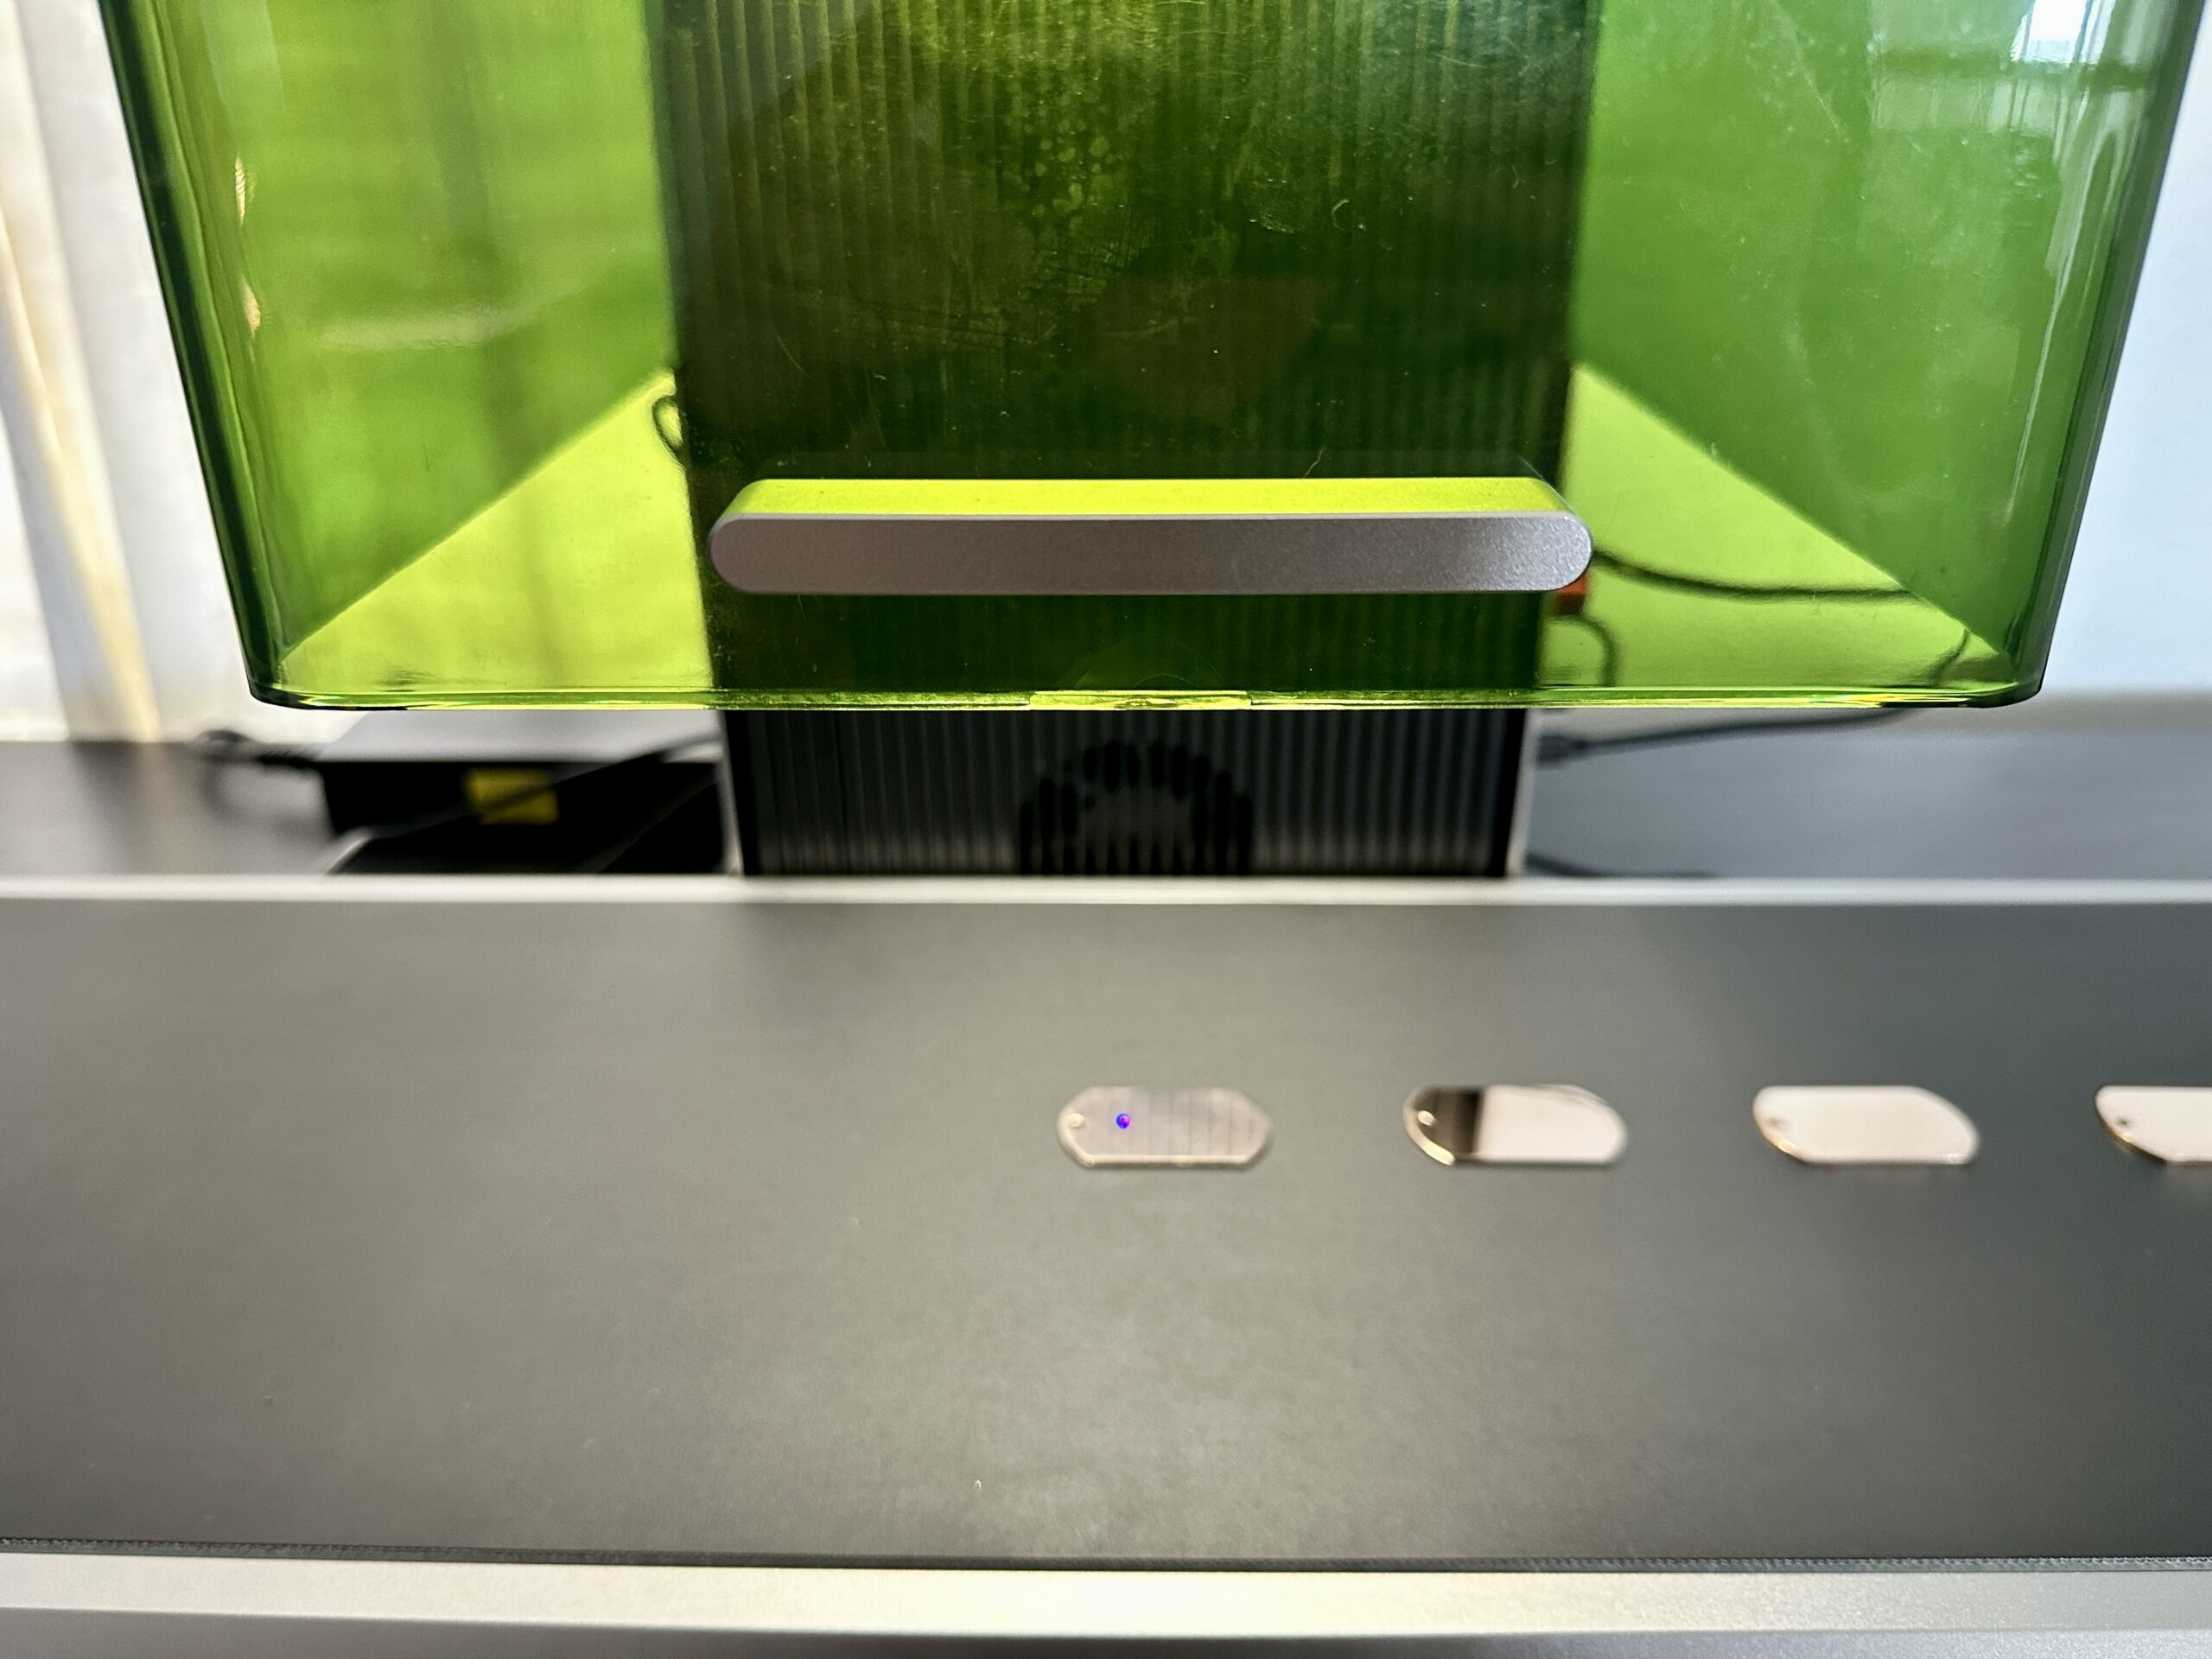
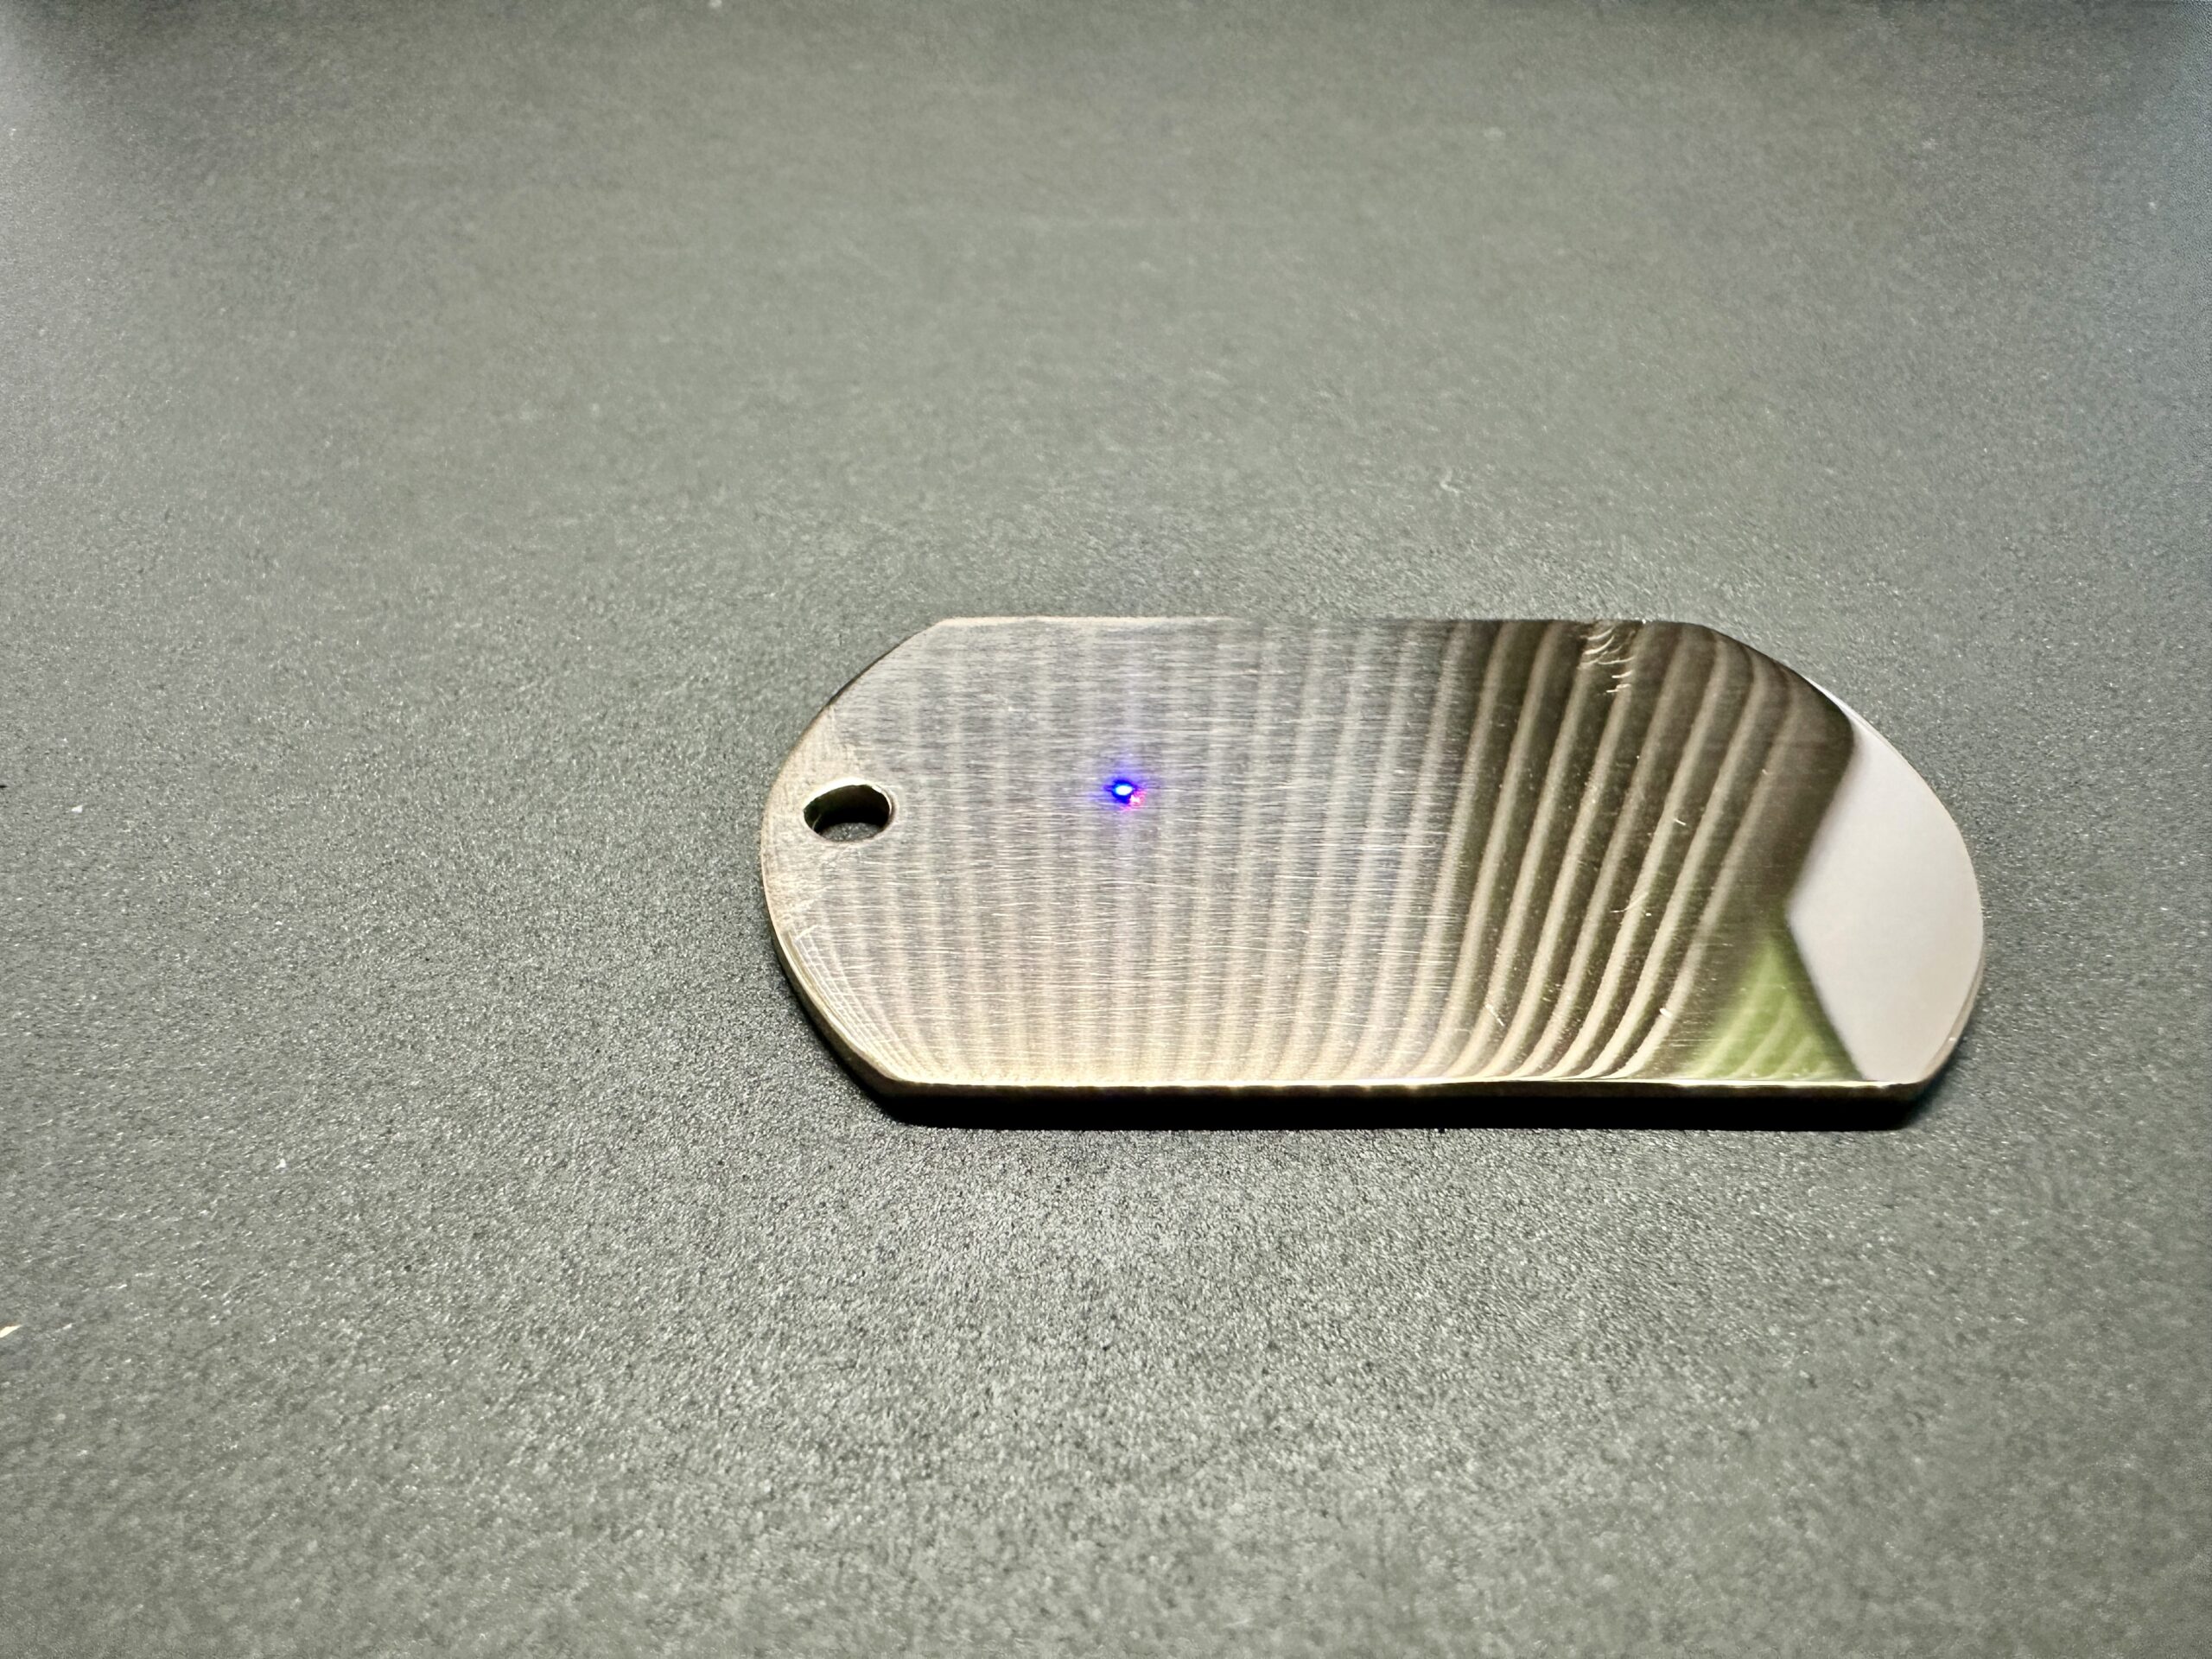
Set the laser focus on the first blank material. There are two lasers (one red and one blue), when the laser dots overlap each other – the focus is set.
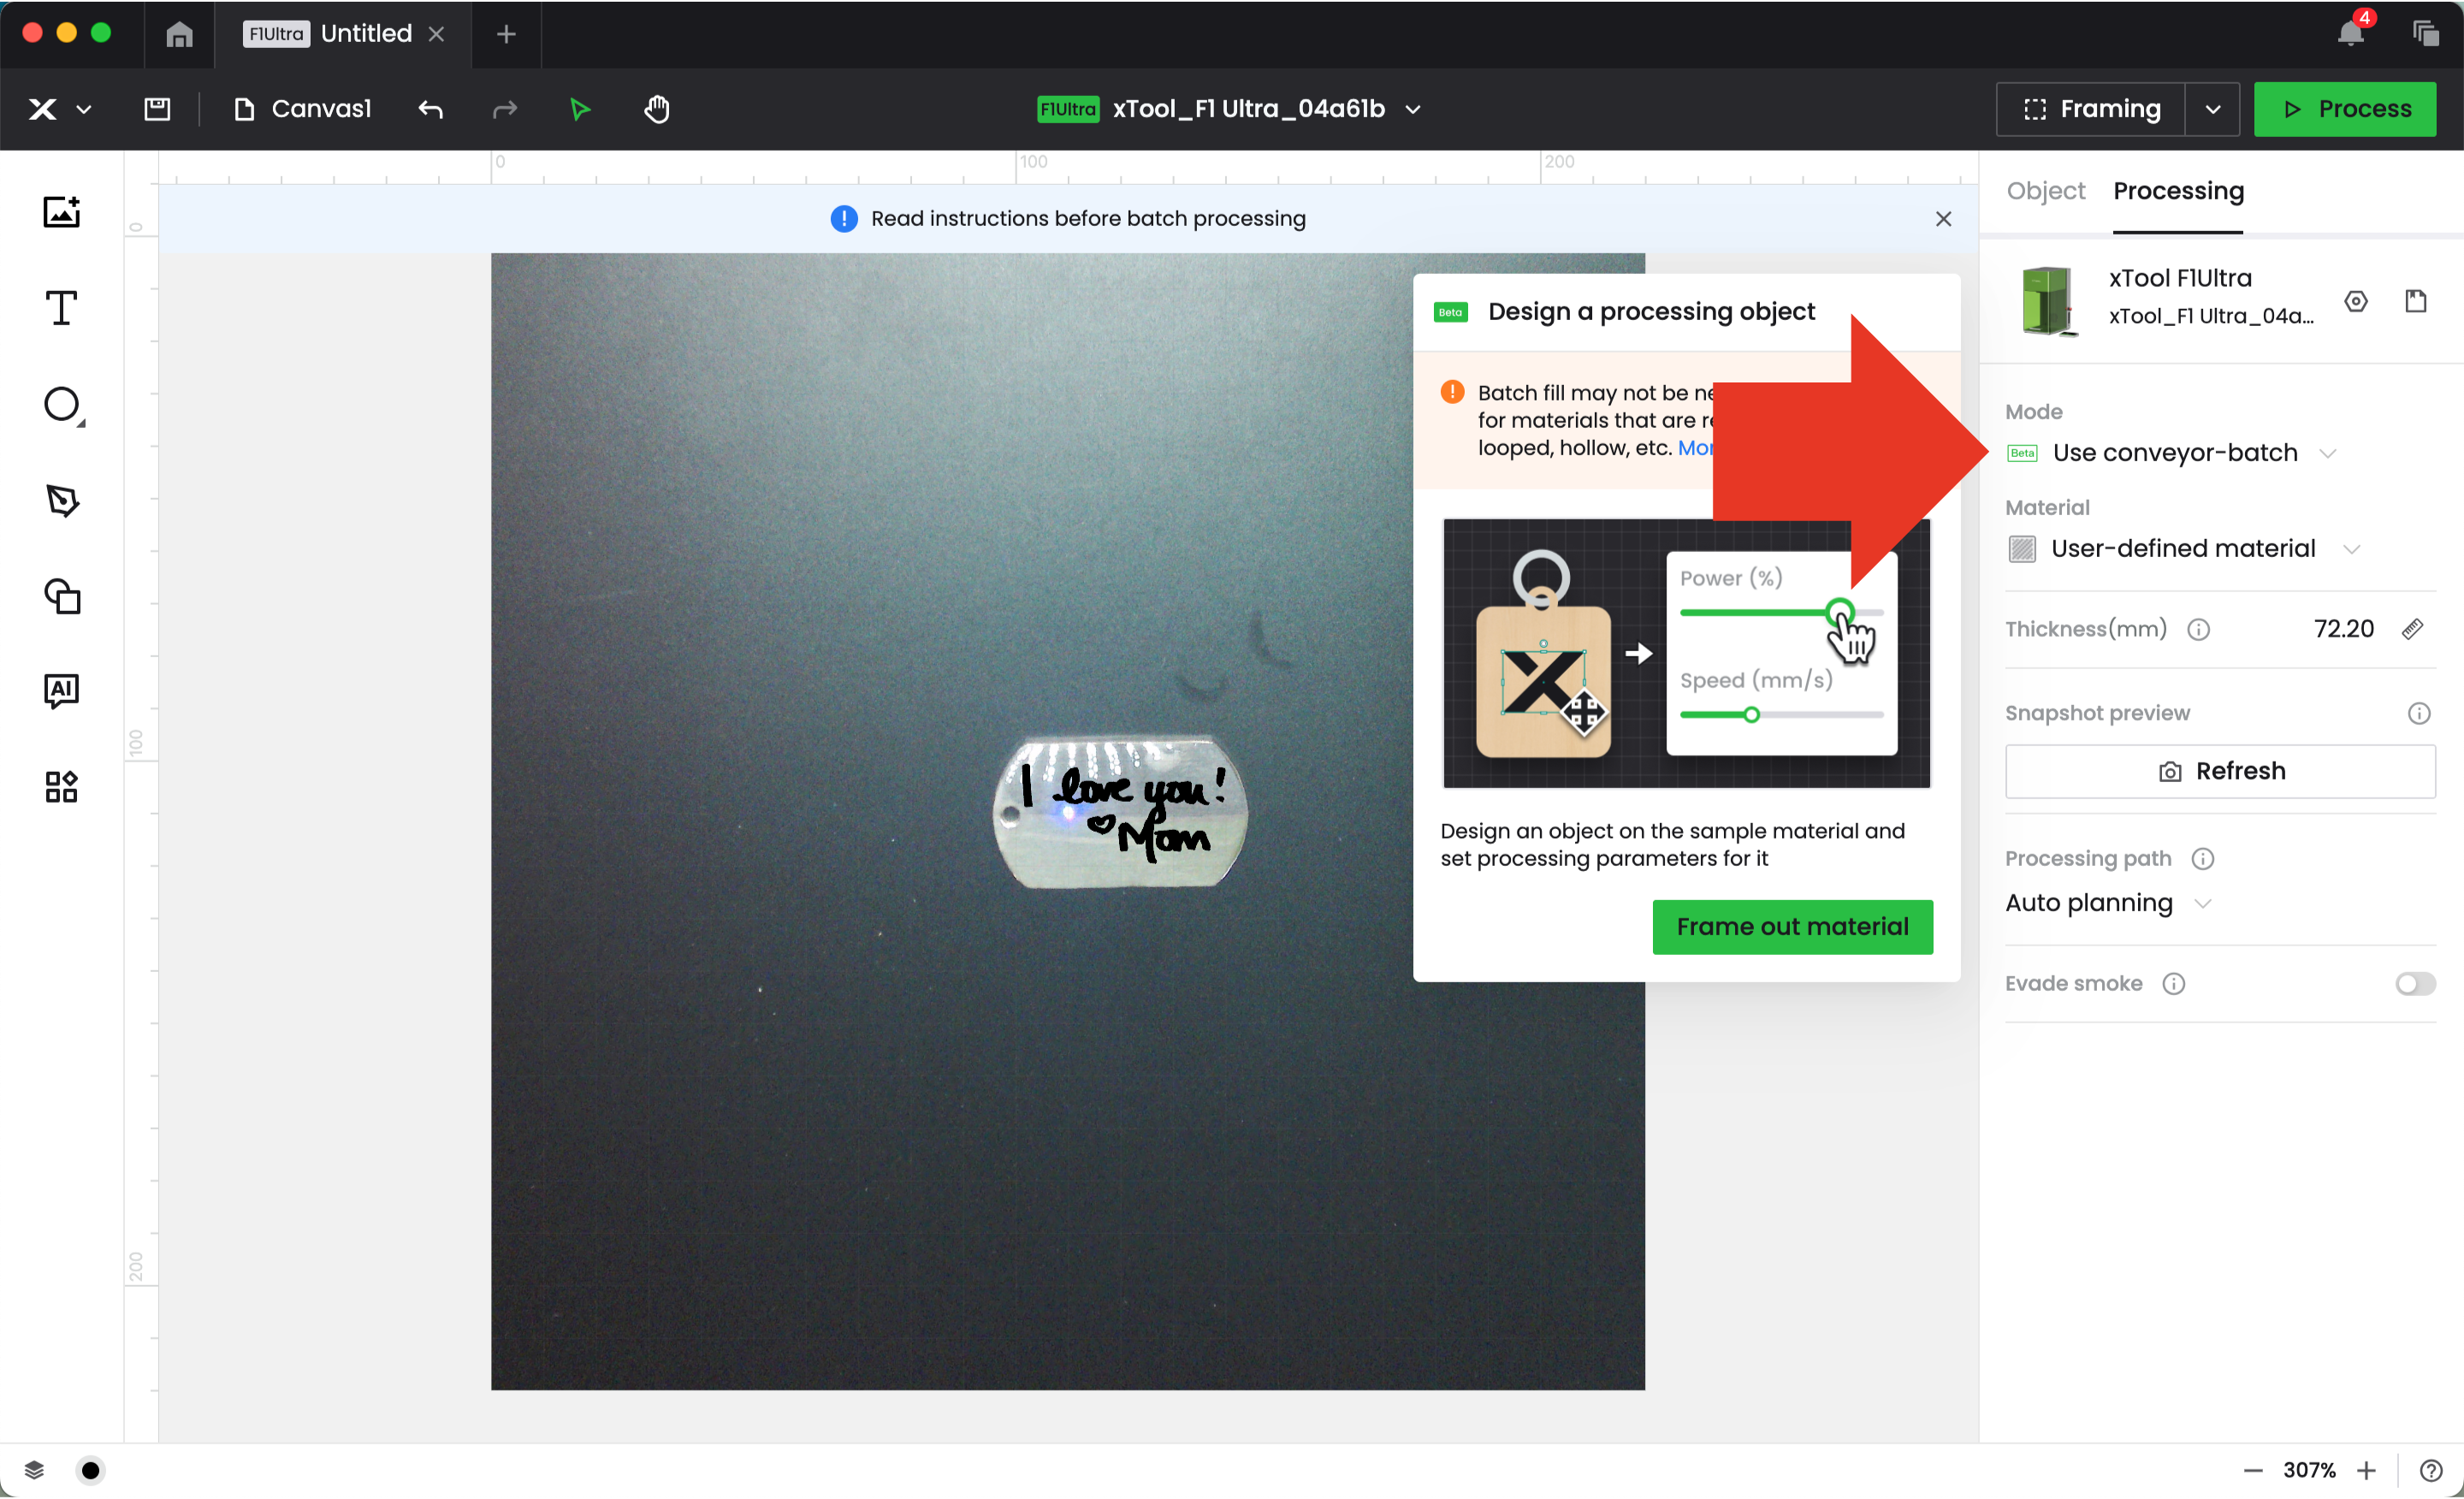
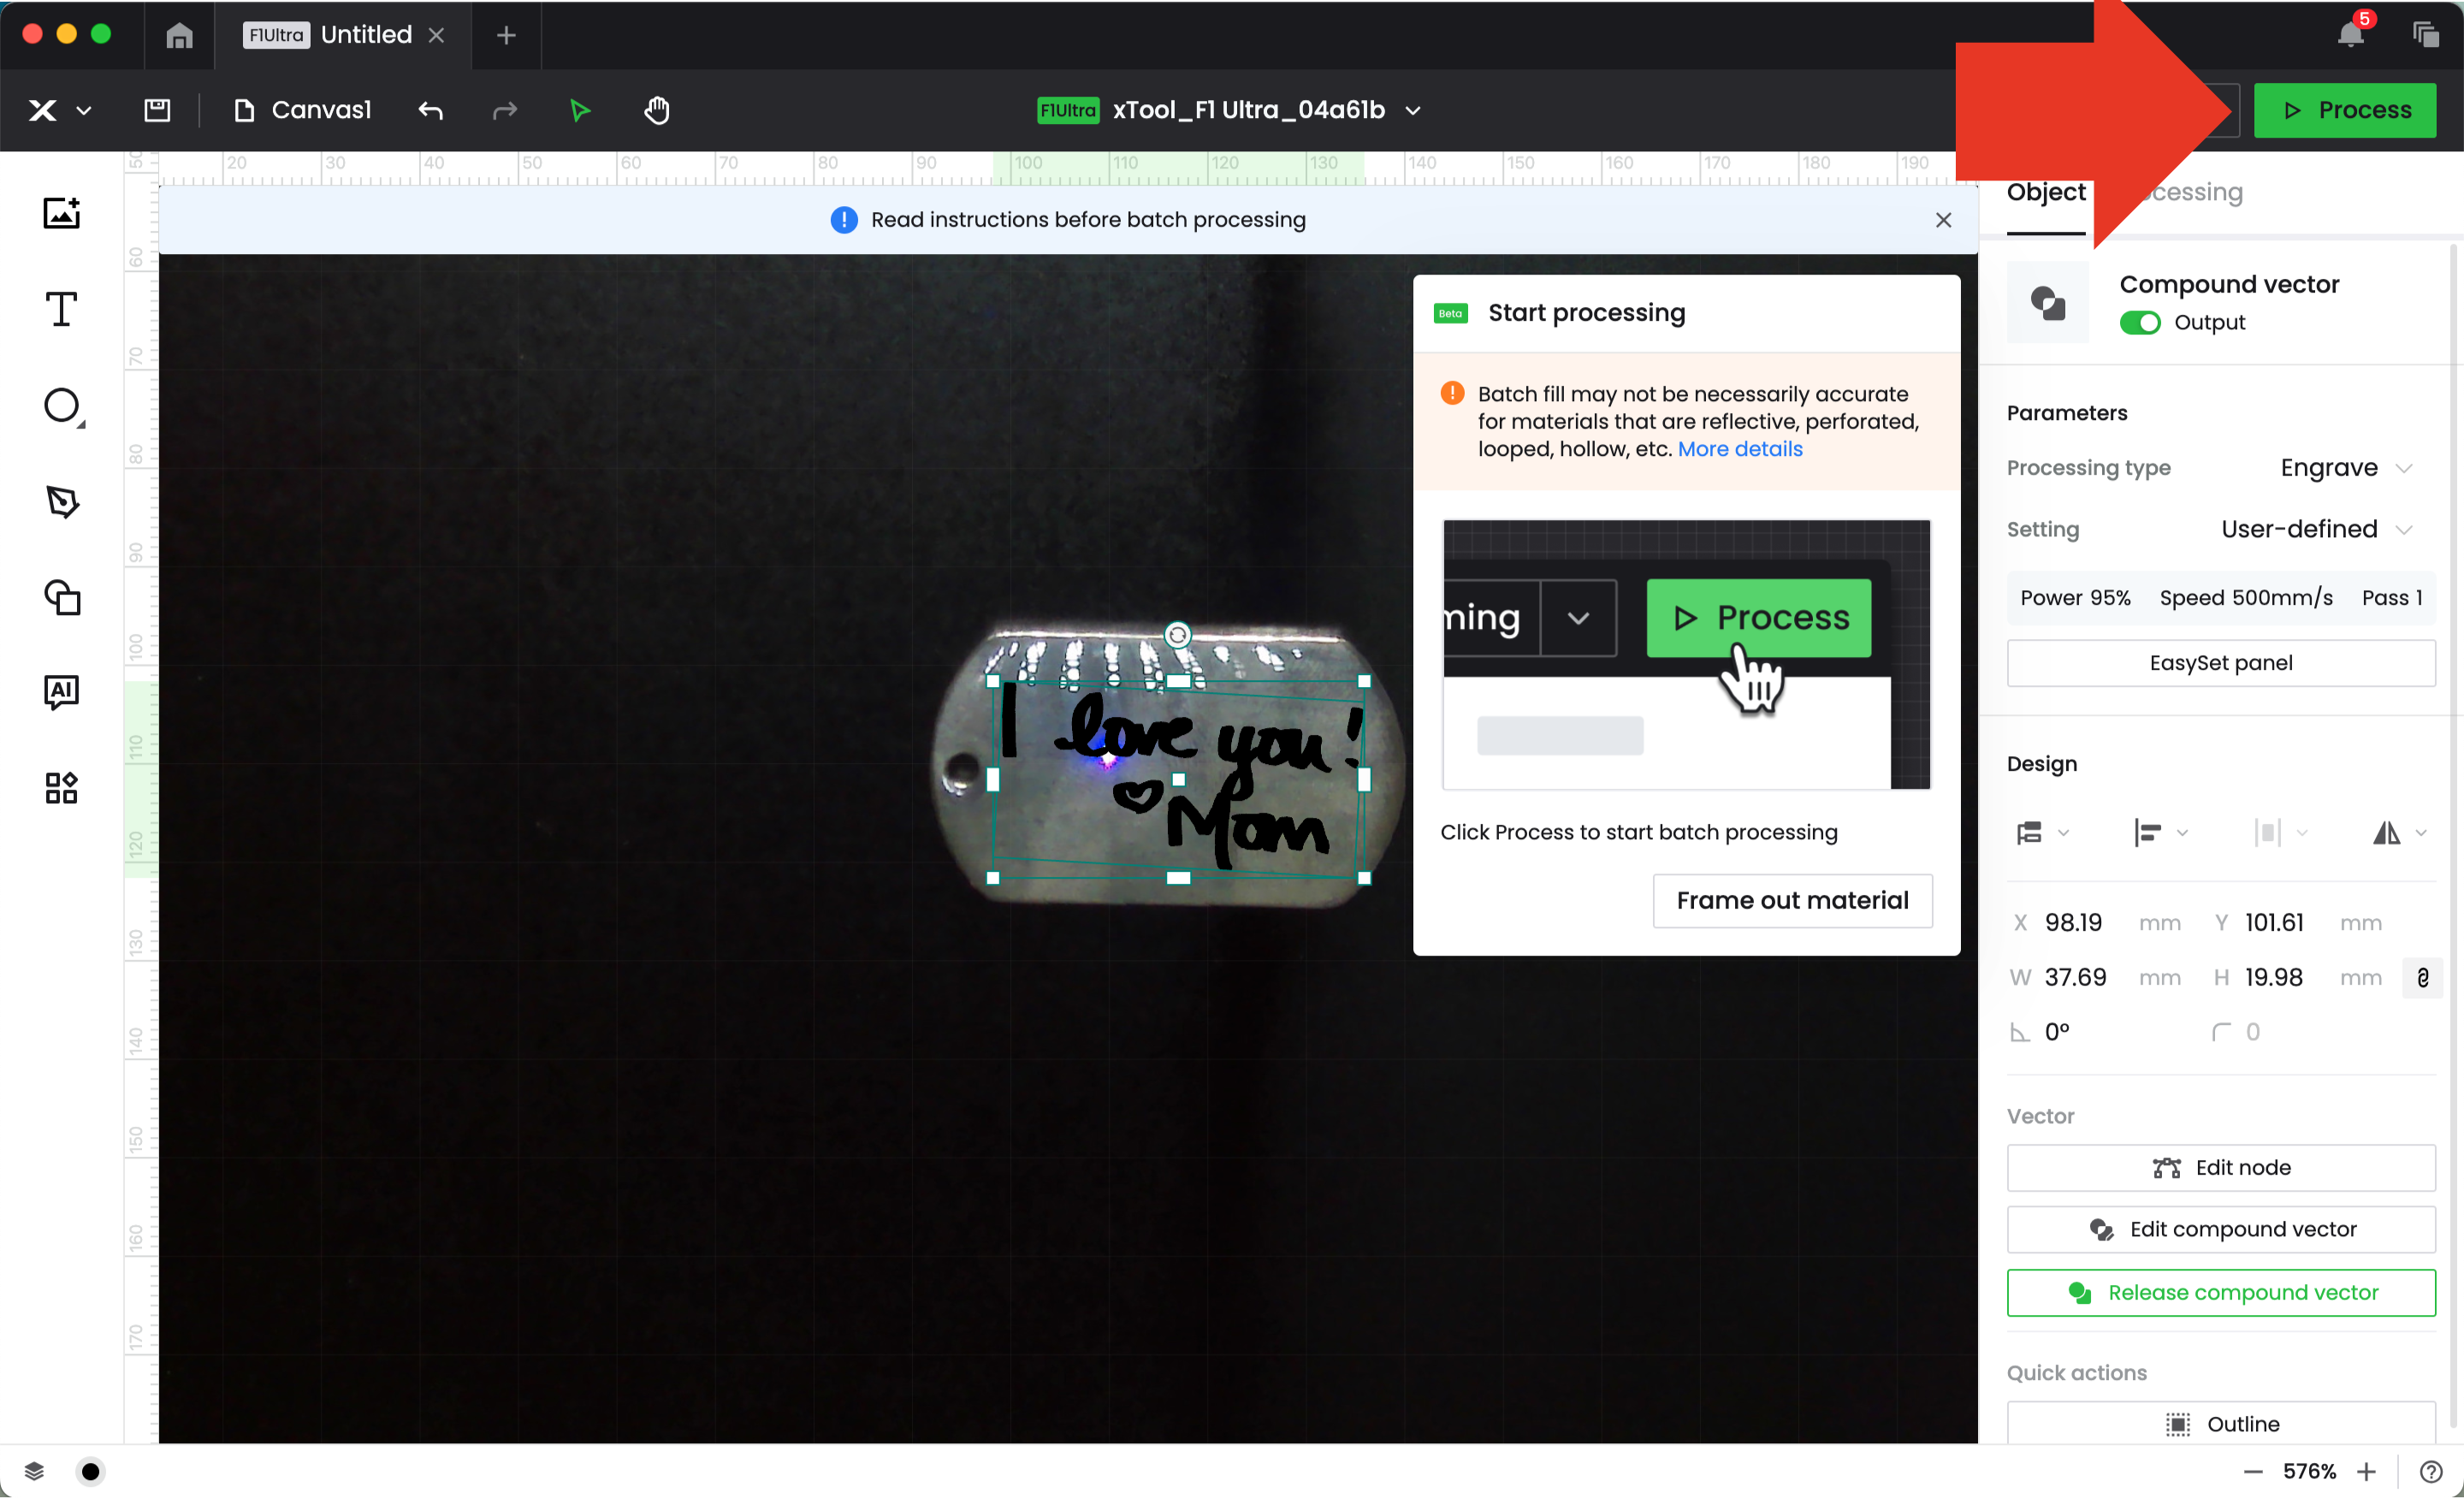
Head to the XCS software, and open your design, and choose your engrave settings. Select ‘Use conveyor – batch’ from the processing panel.
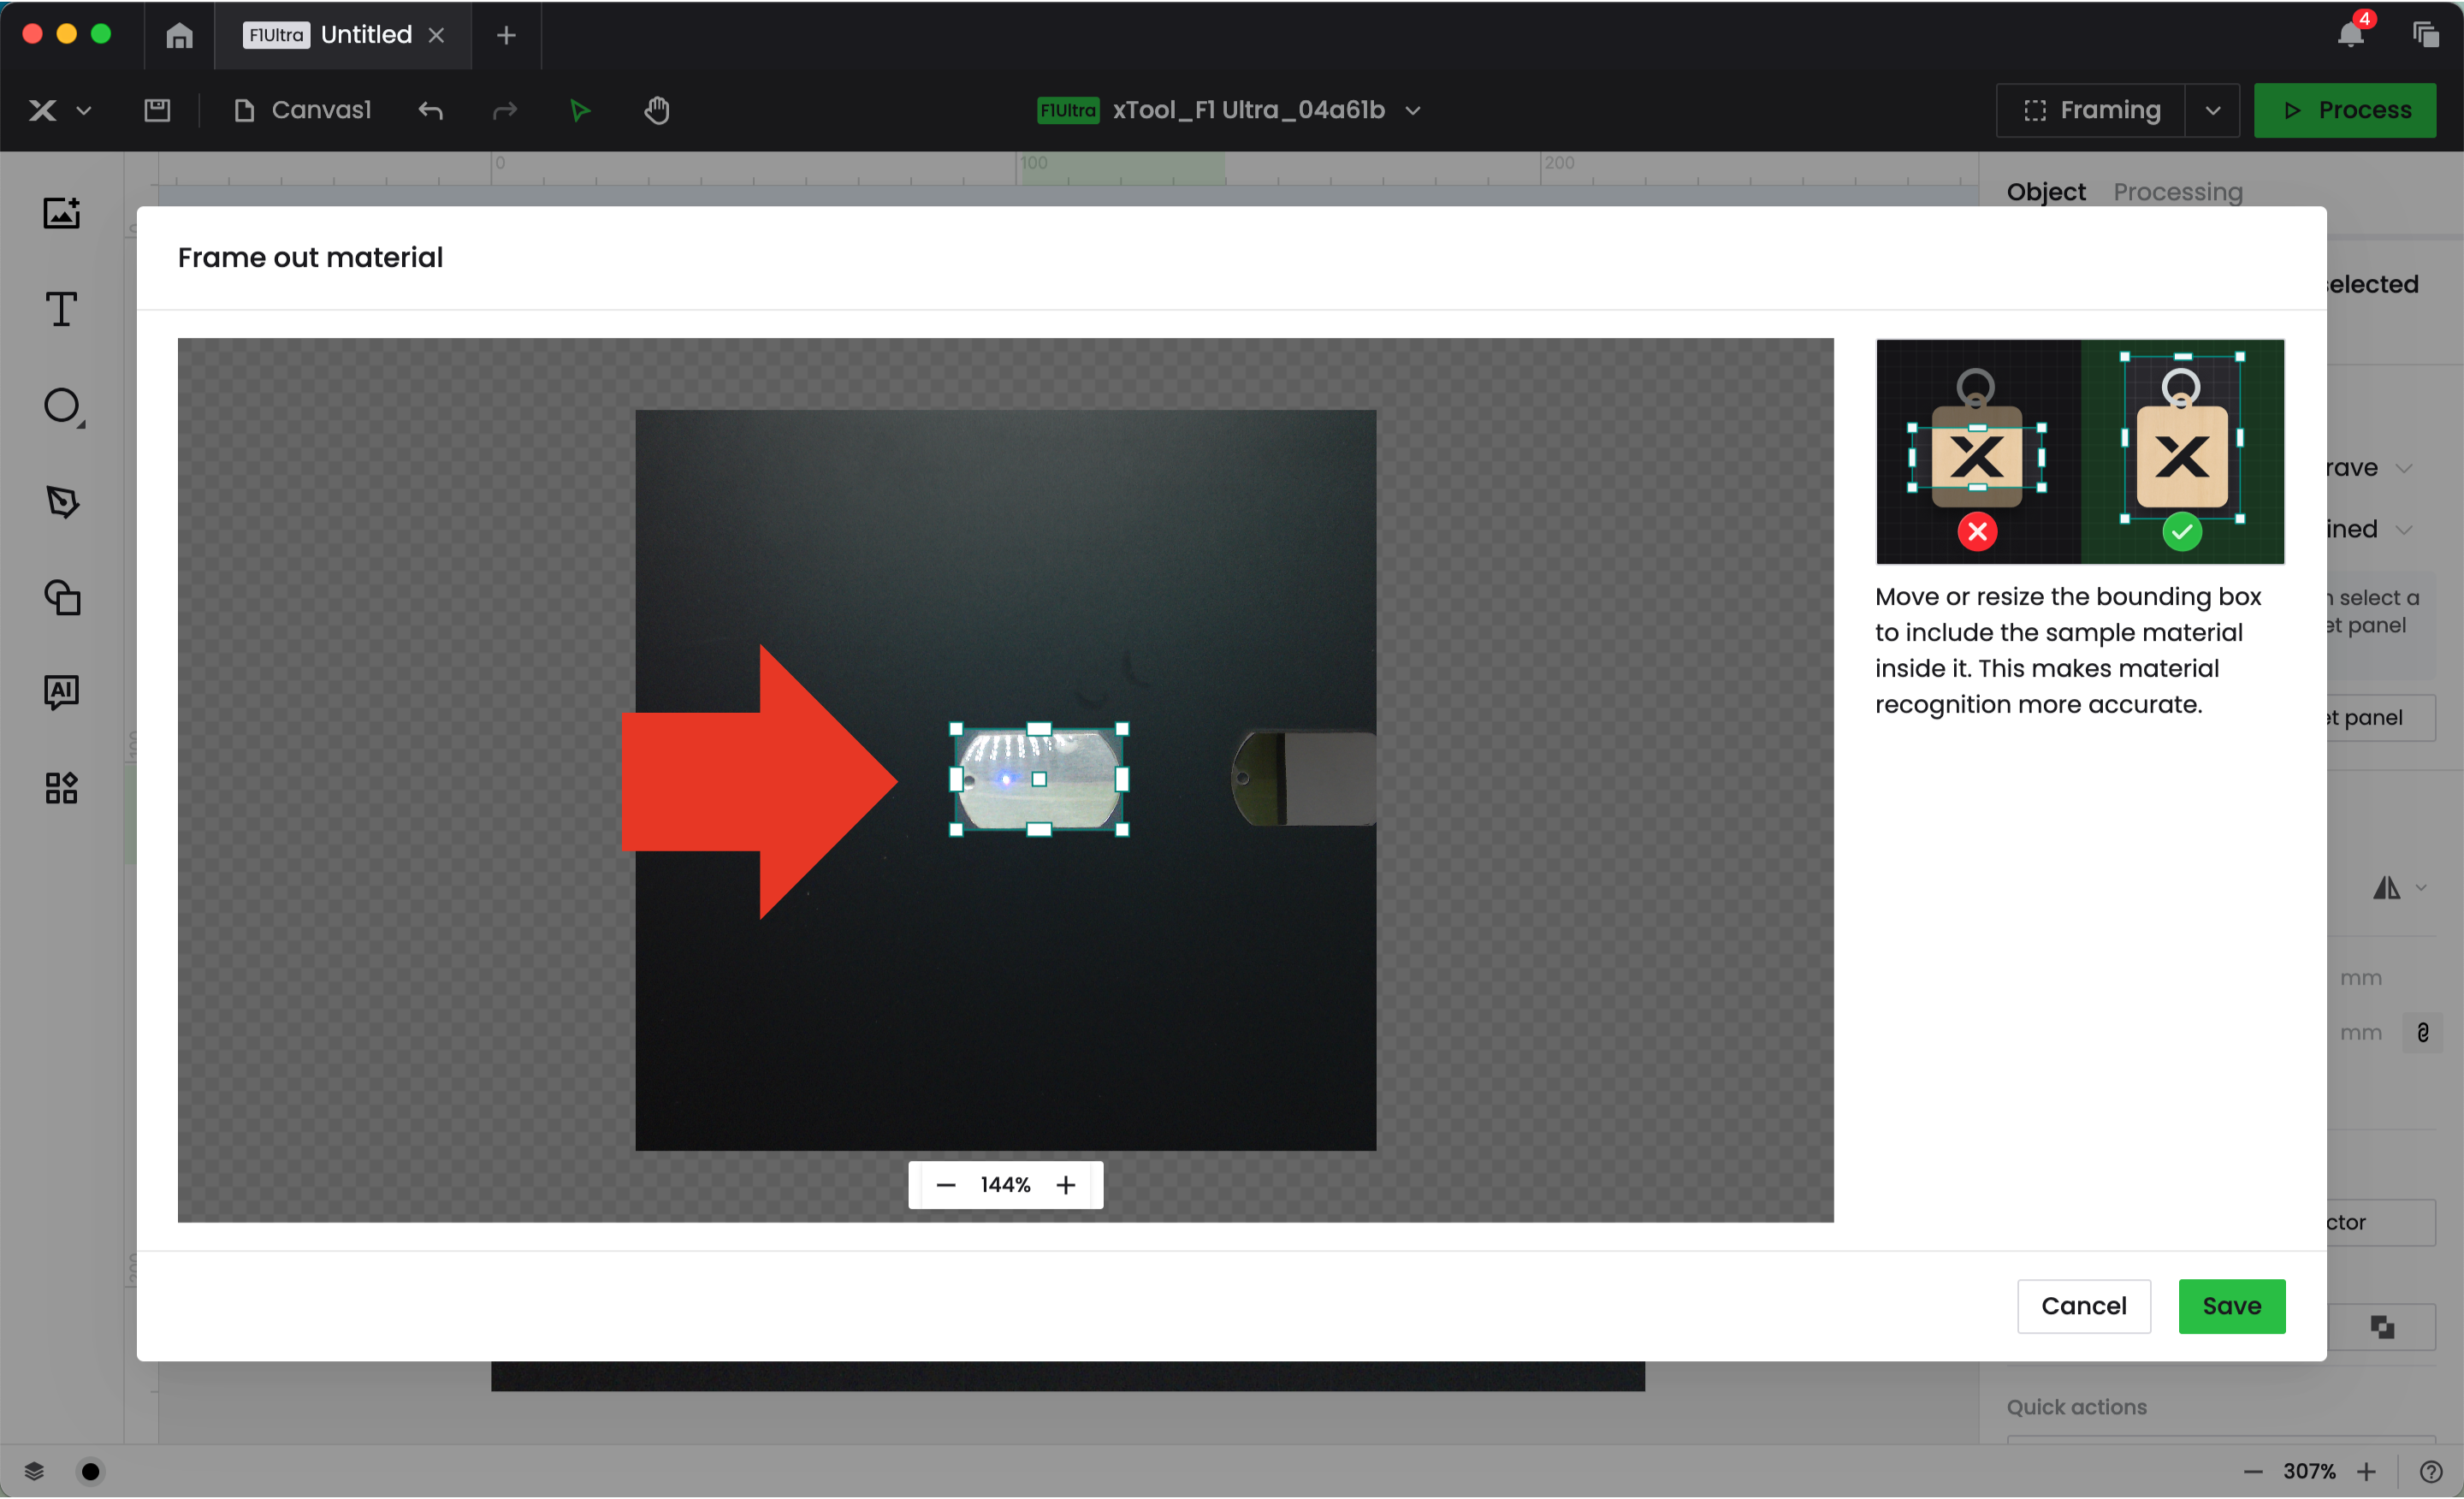
On the pop up window that appears, click the ‘Frame out material’ button. This step allows the machine to recognize your blank as it moves across the conveyor belt.
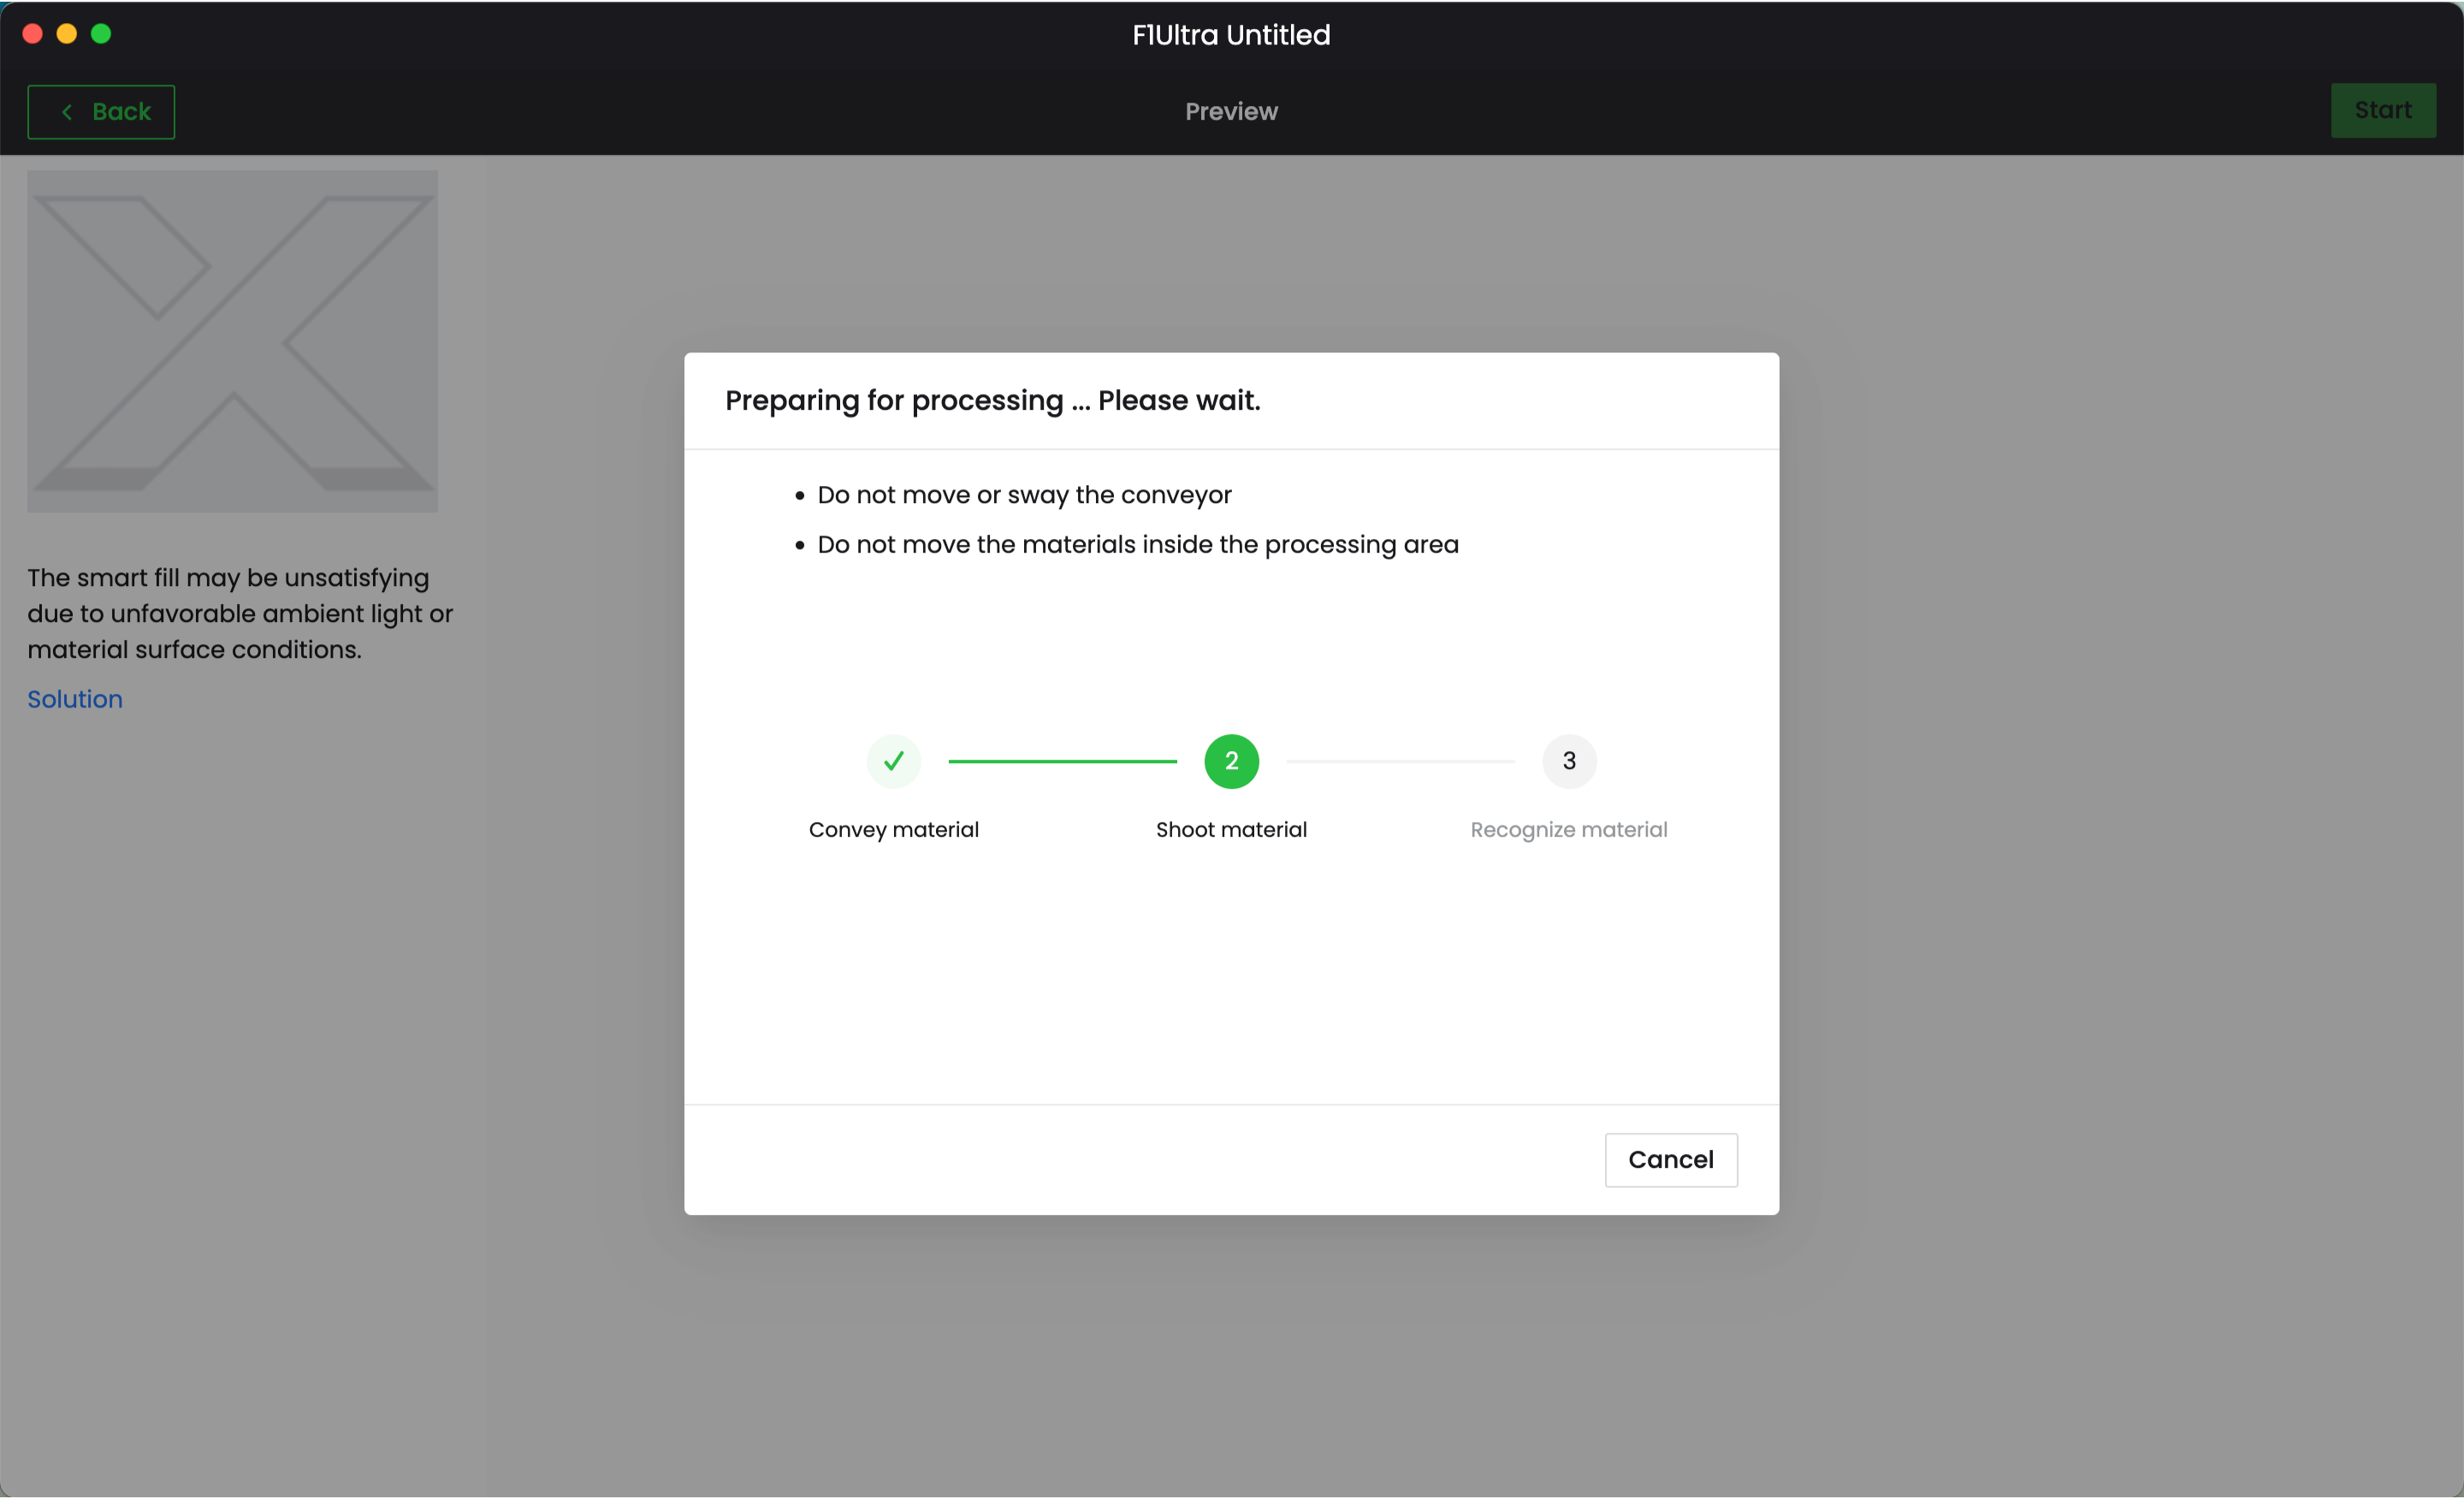
Click process in the XCS software to process the job, then click the xTool button on the touchscreen controller.
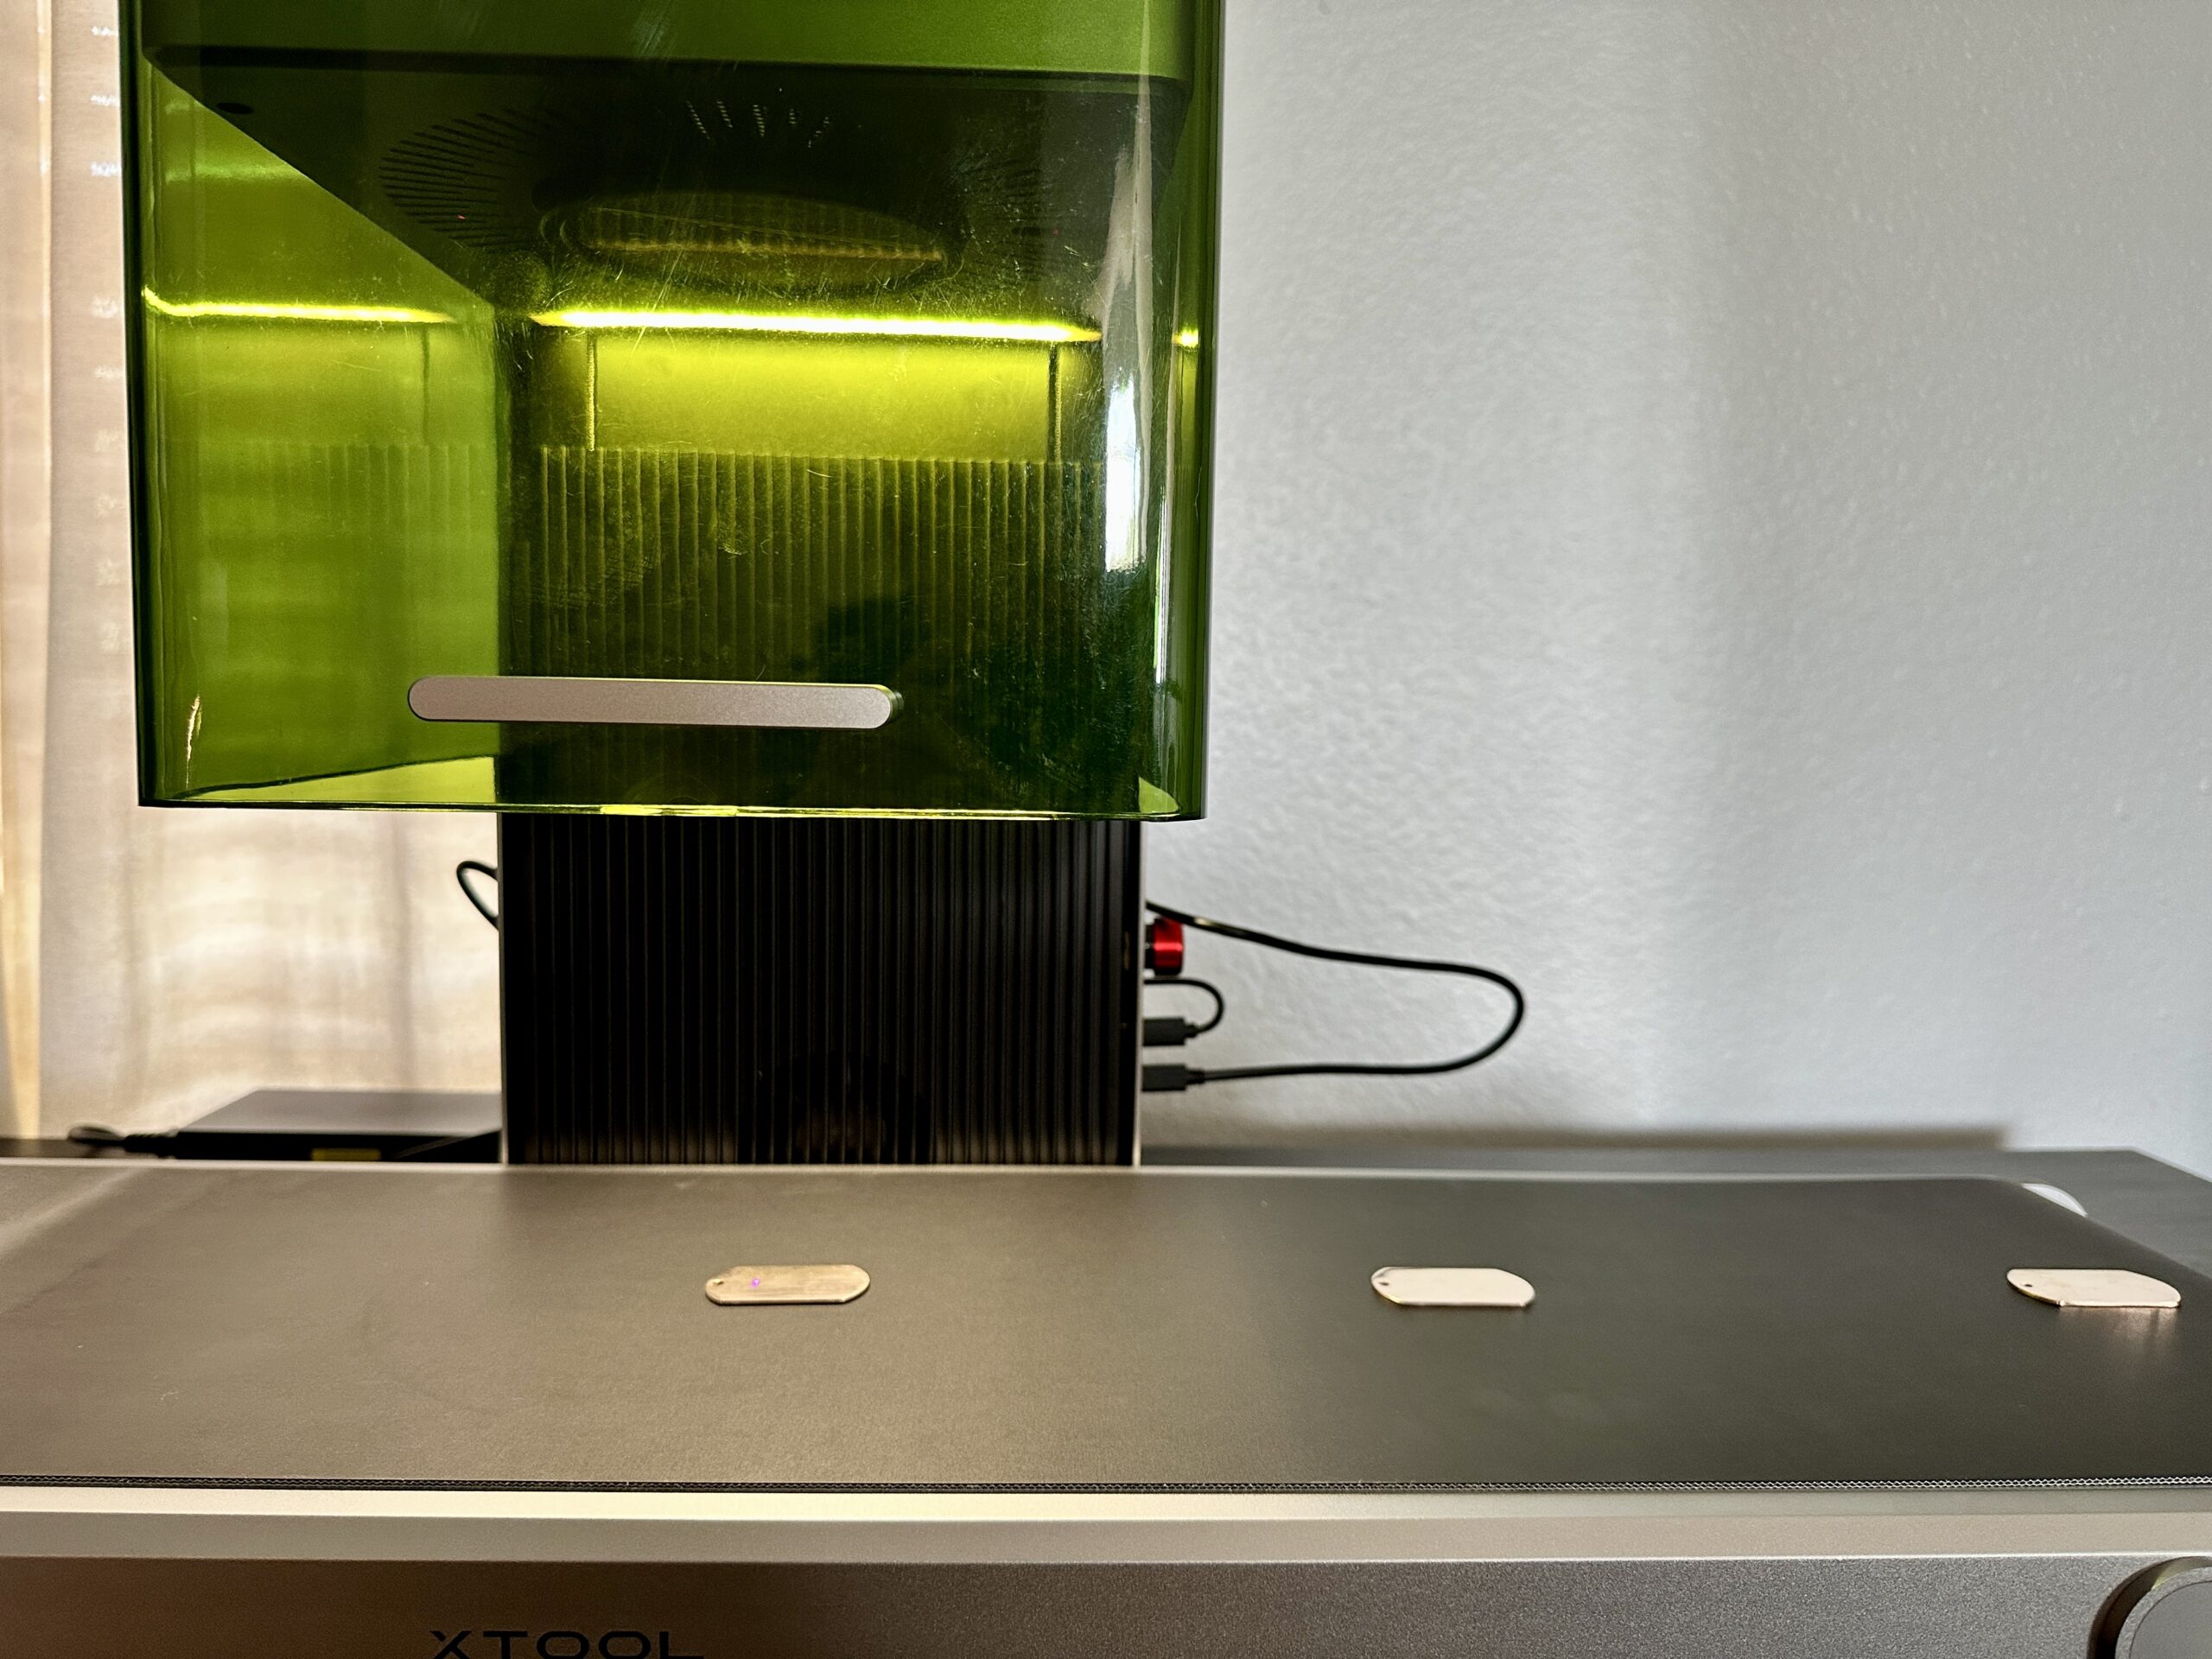
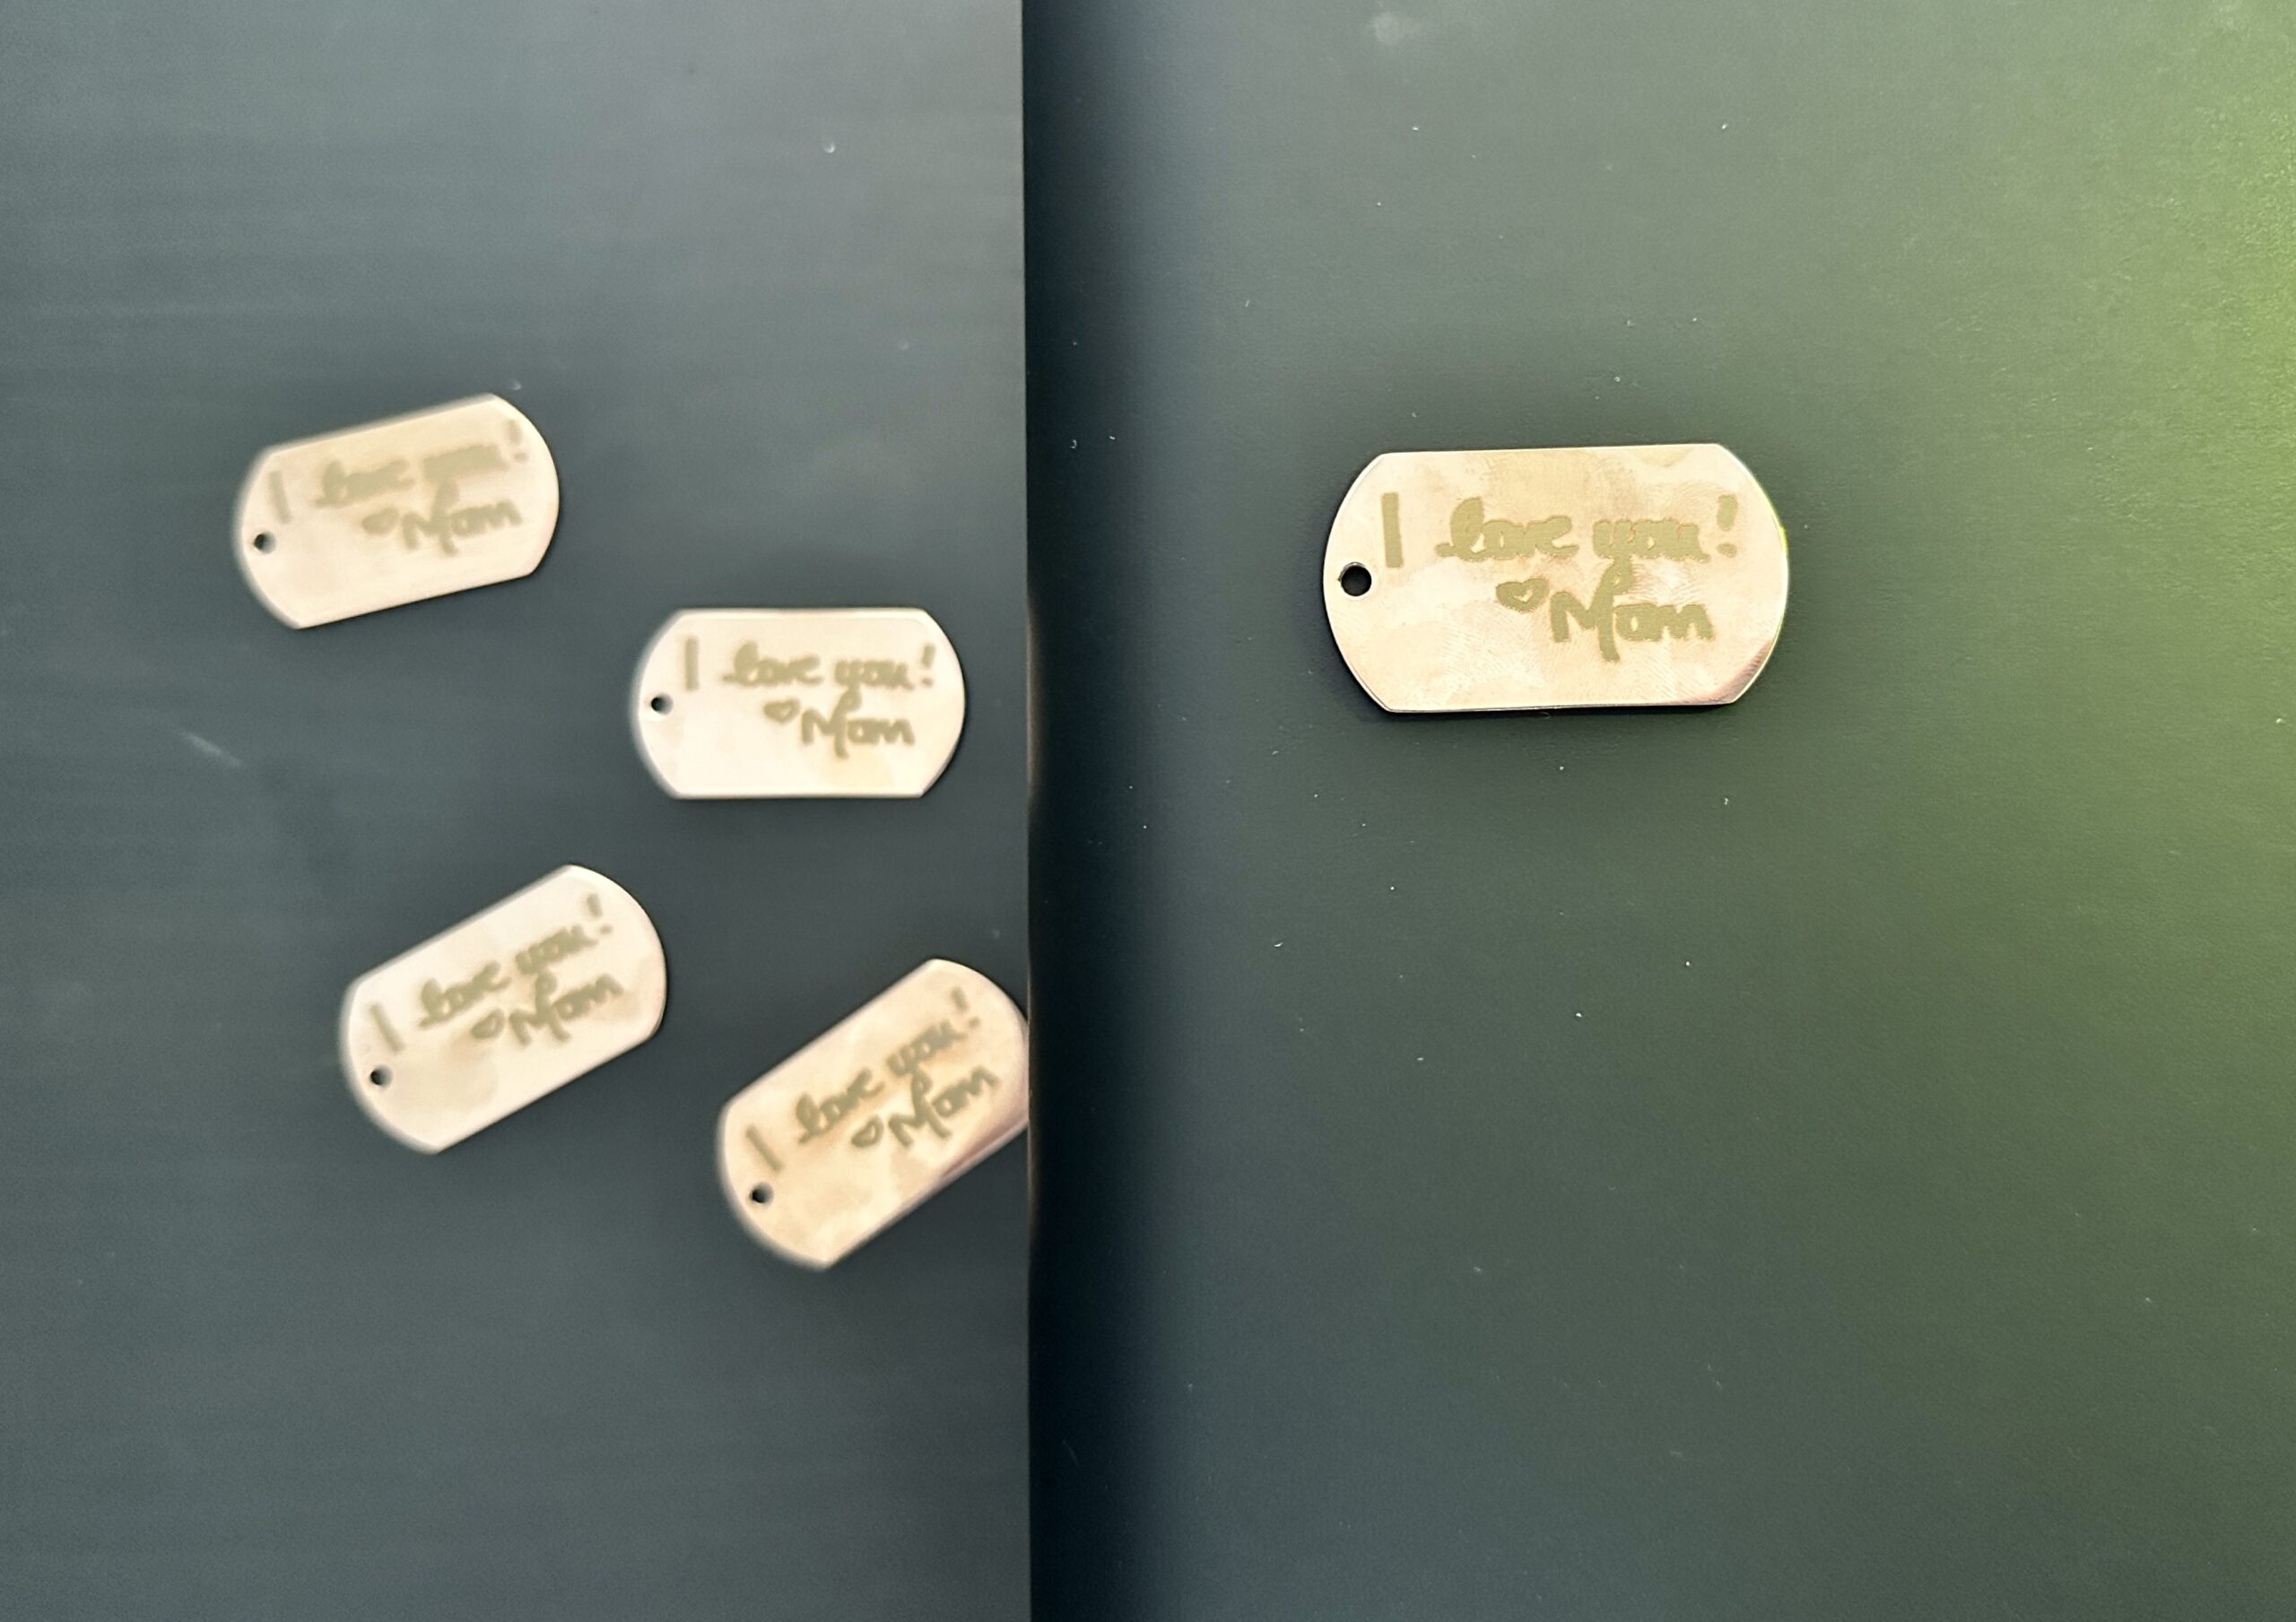
The machine will process the the batch. As the conveyor moves from right to left, you can continue adding blank materials. When the conveyor moves 5 times and cannot detect a blank, the machine will stop.
The conveyor belt in action:
As the materials are processed across the conveyor belt, they fall off on the left side. I let them fall onto my table, but you could place a container at the end for them to fall into.
Want to see the conveyor belt in action? Take a peek at my Instagram Reel.
Using the xTool F1 Ultra Conveyor Belt: Tips & Things to Know
When framing, I had better luck with getting the machine to recognize the material on the conveyor belt when I expanded the bounding box. The software wraps the blank tightly, but expanding it slightly made sure the machine recognized it.
The conveyor belt only works with engraving at this time.
Since you are engraving with the green shield open when using the conveyor belt, you’ll want to pick up a pair of goggles that can shield laser beams of 455 nm and 1064 nm wavelengths. (I wish these were included, but I picked up this pair on Amazon.)
When using the conveyor, the machine can only process one design element at a time.
Do not stack or overlap your materials on the conveyor belt.
Do not use paper, cloth, or other thin materials on the conveyor. You might laser through the materials and damage the conveyor.
You can also use the conveyor to process larger materials, but I haven’t experimented with this yet.
Engraving with the xTool F1 Ultra is an easy process. But, be sure that you’ve read my last article on the xTool F1 Ultra before you start this tutorial.
What Materials Can the xTool F1 Ultra Engrave?
With two different types of lasers in the xTool F1 Ultra, you’ll be able to engrave many different products:
Wood
Paper
Leather
Gold
Brass
Silver
Glass
Rock
Tile
Stainless steel
Acrylic
Ceramic
Platinum
Titanium
Rubber
Food
… and more!
Tutorial: Engraving with the xTool F1 Ultra
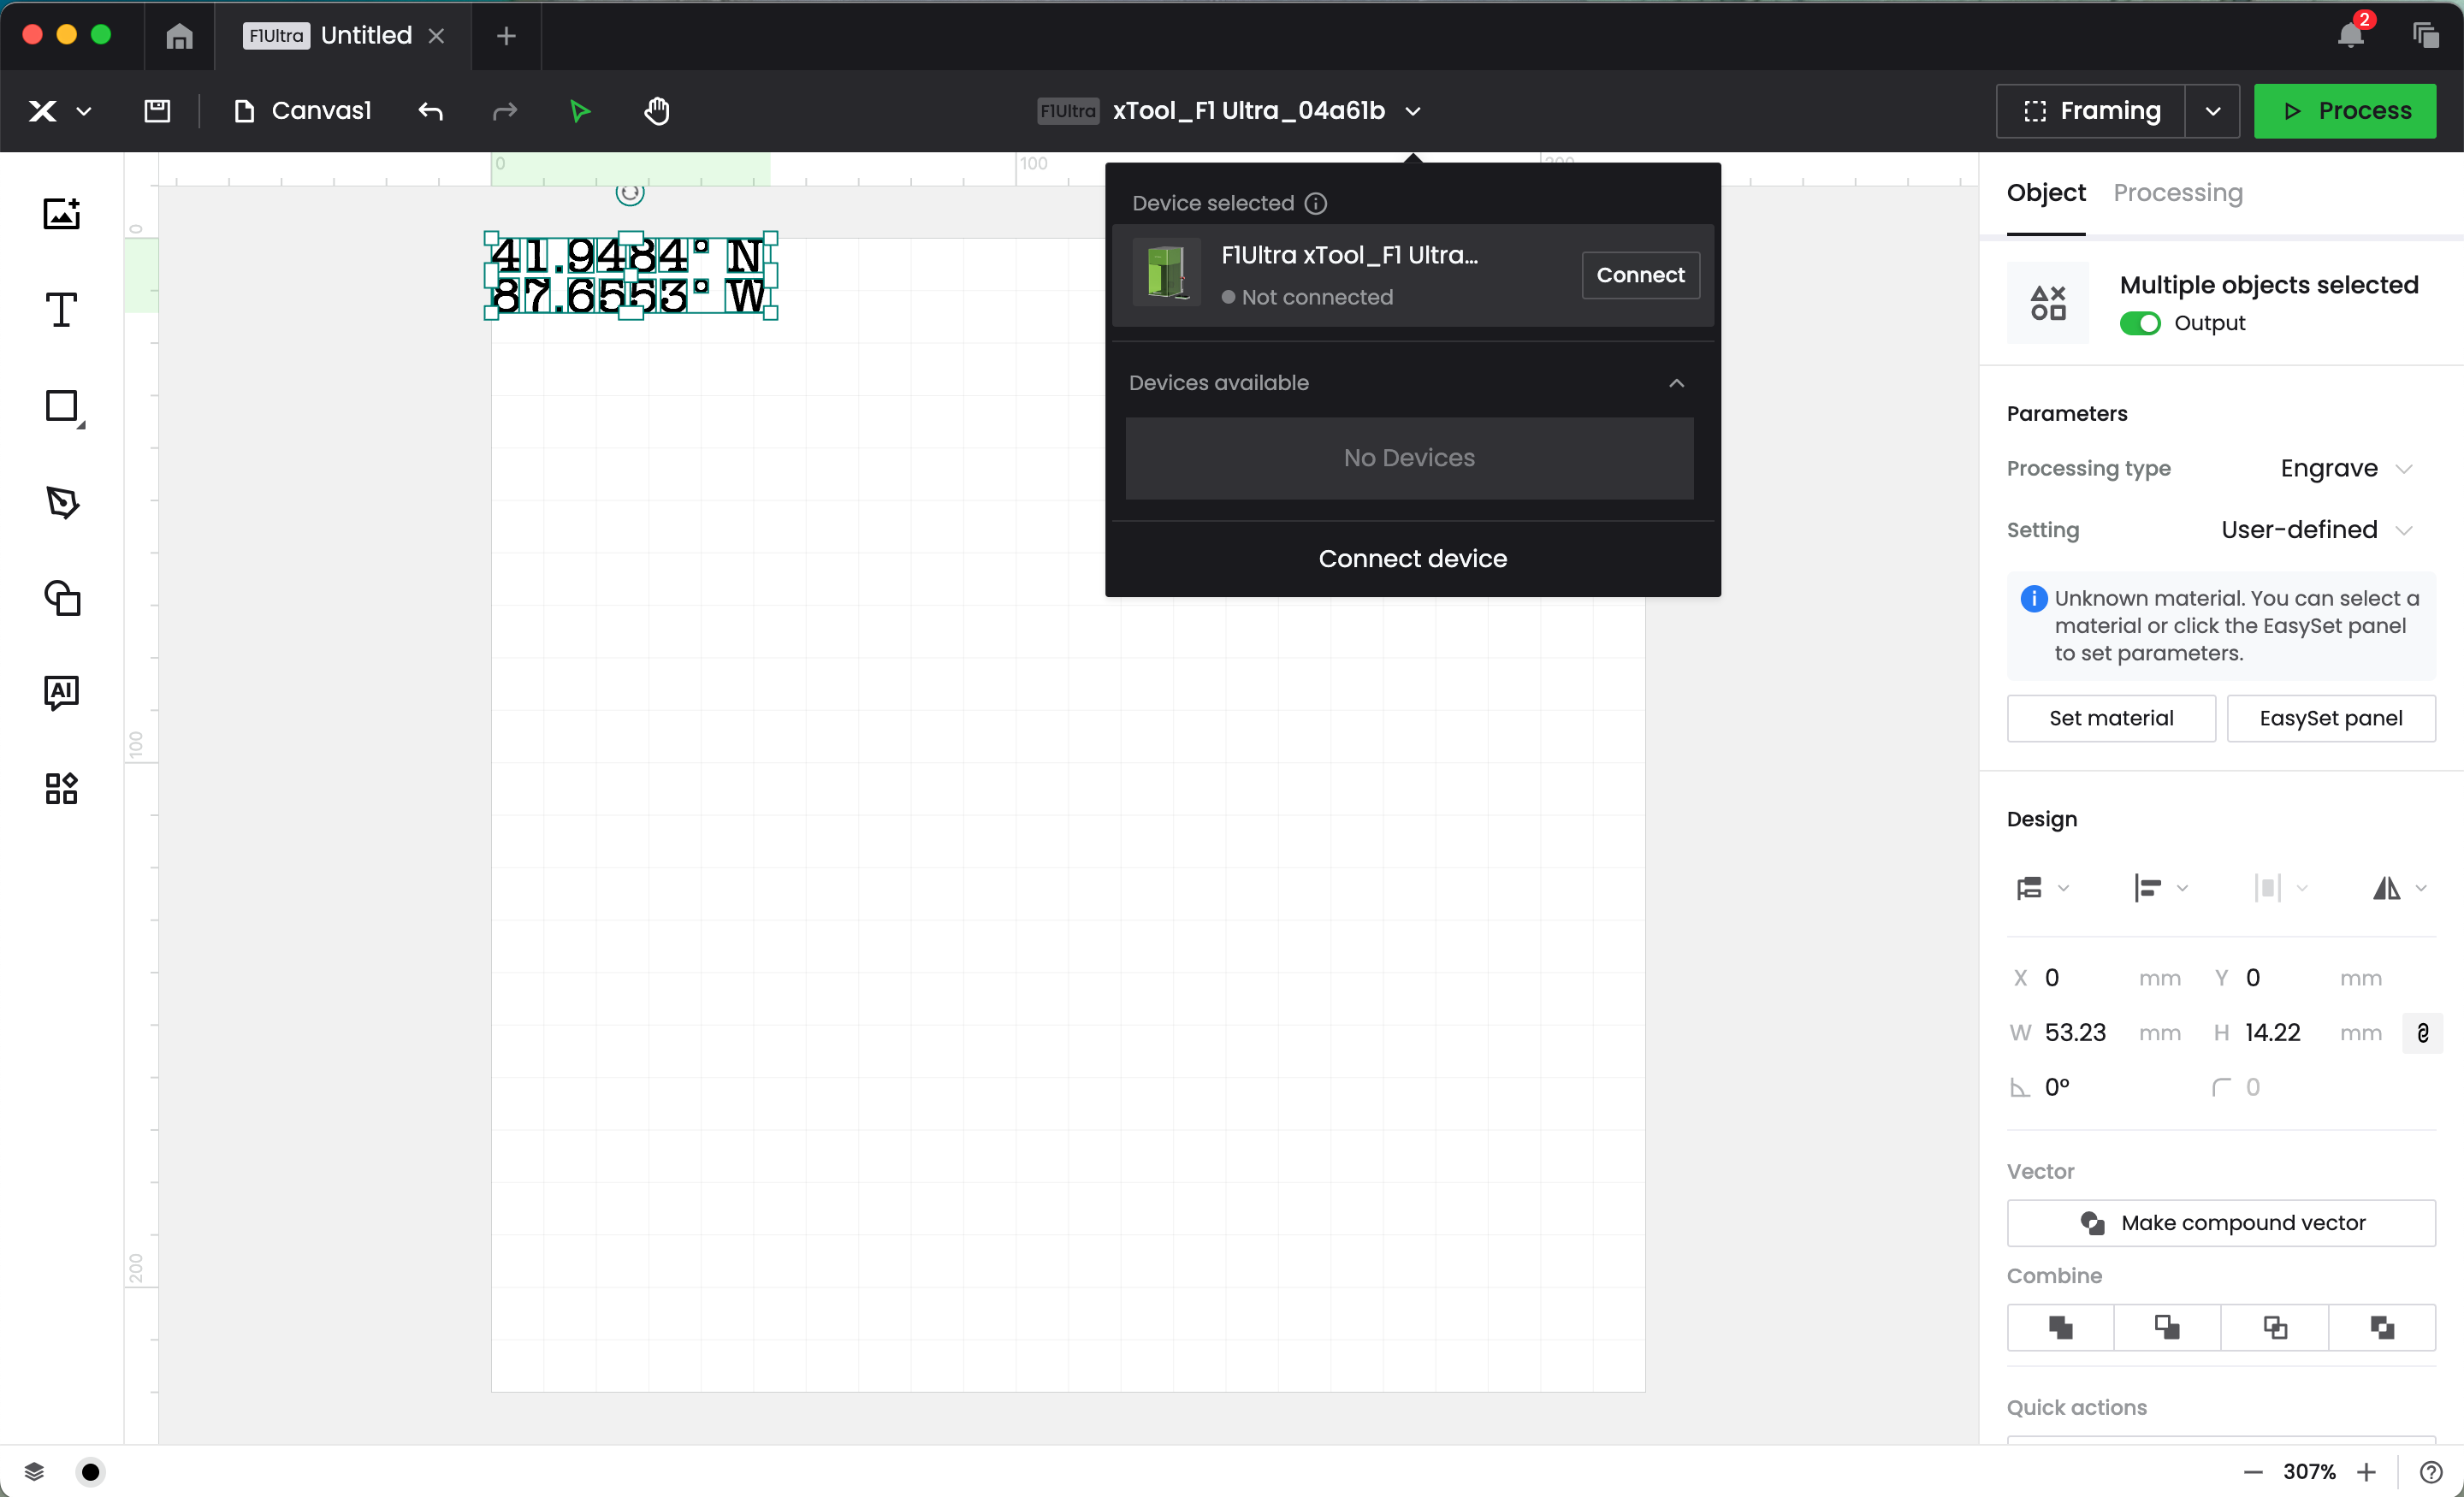
Create your design. You can create a design in xTool’s XCS (xTool Creative Studio), or your favorite design program and import it. Then, open it in XCS.
Turn on the xTool F1 Ultra and connect your machine to your computer.
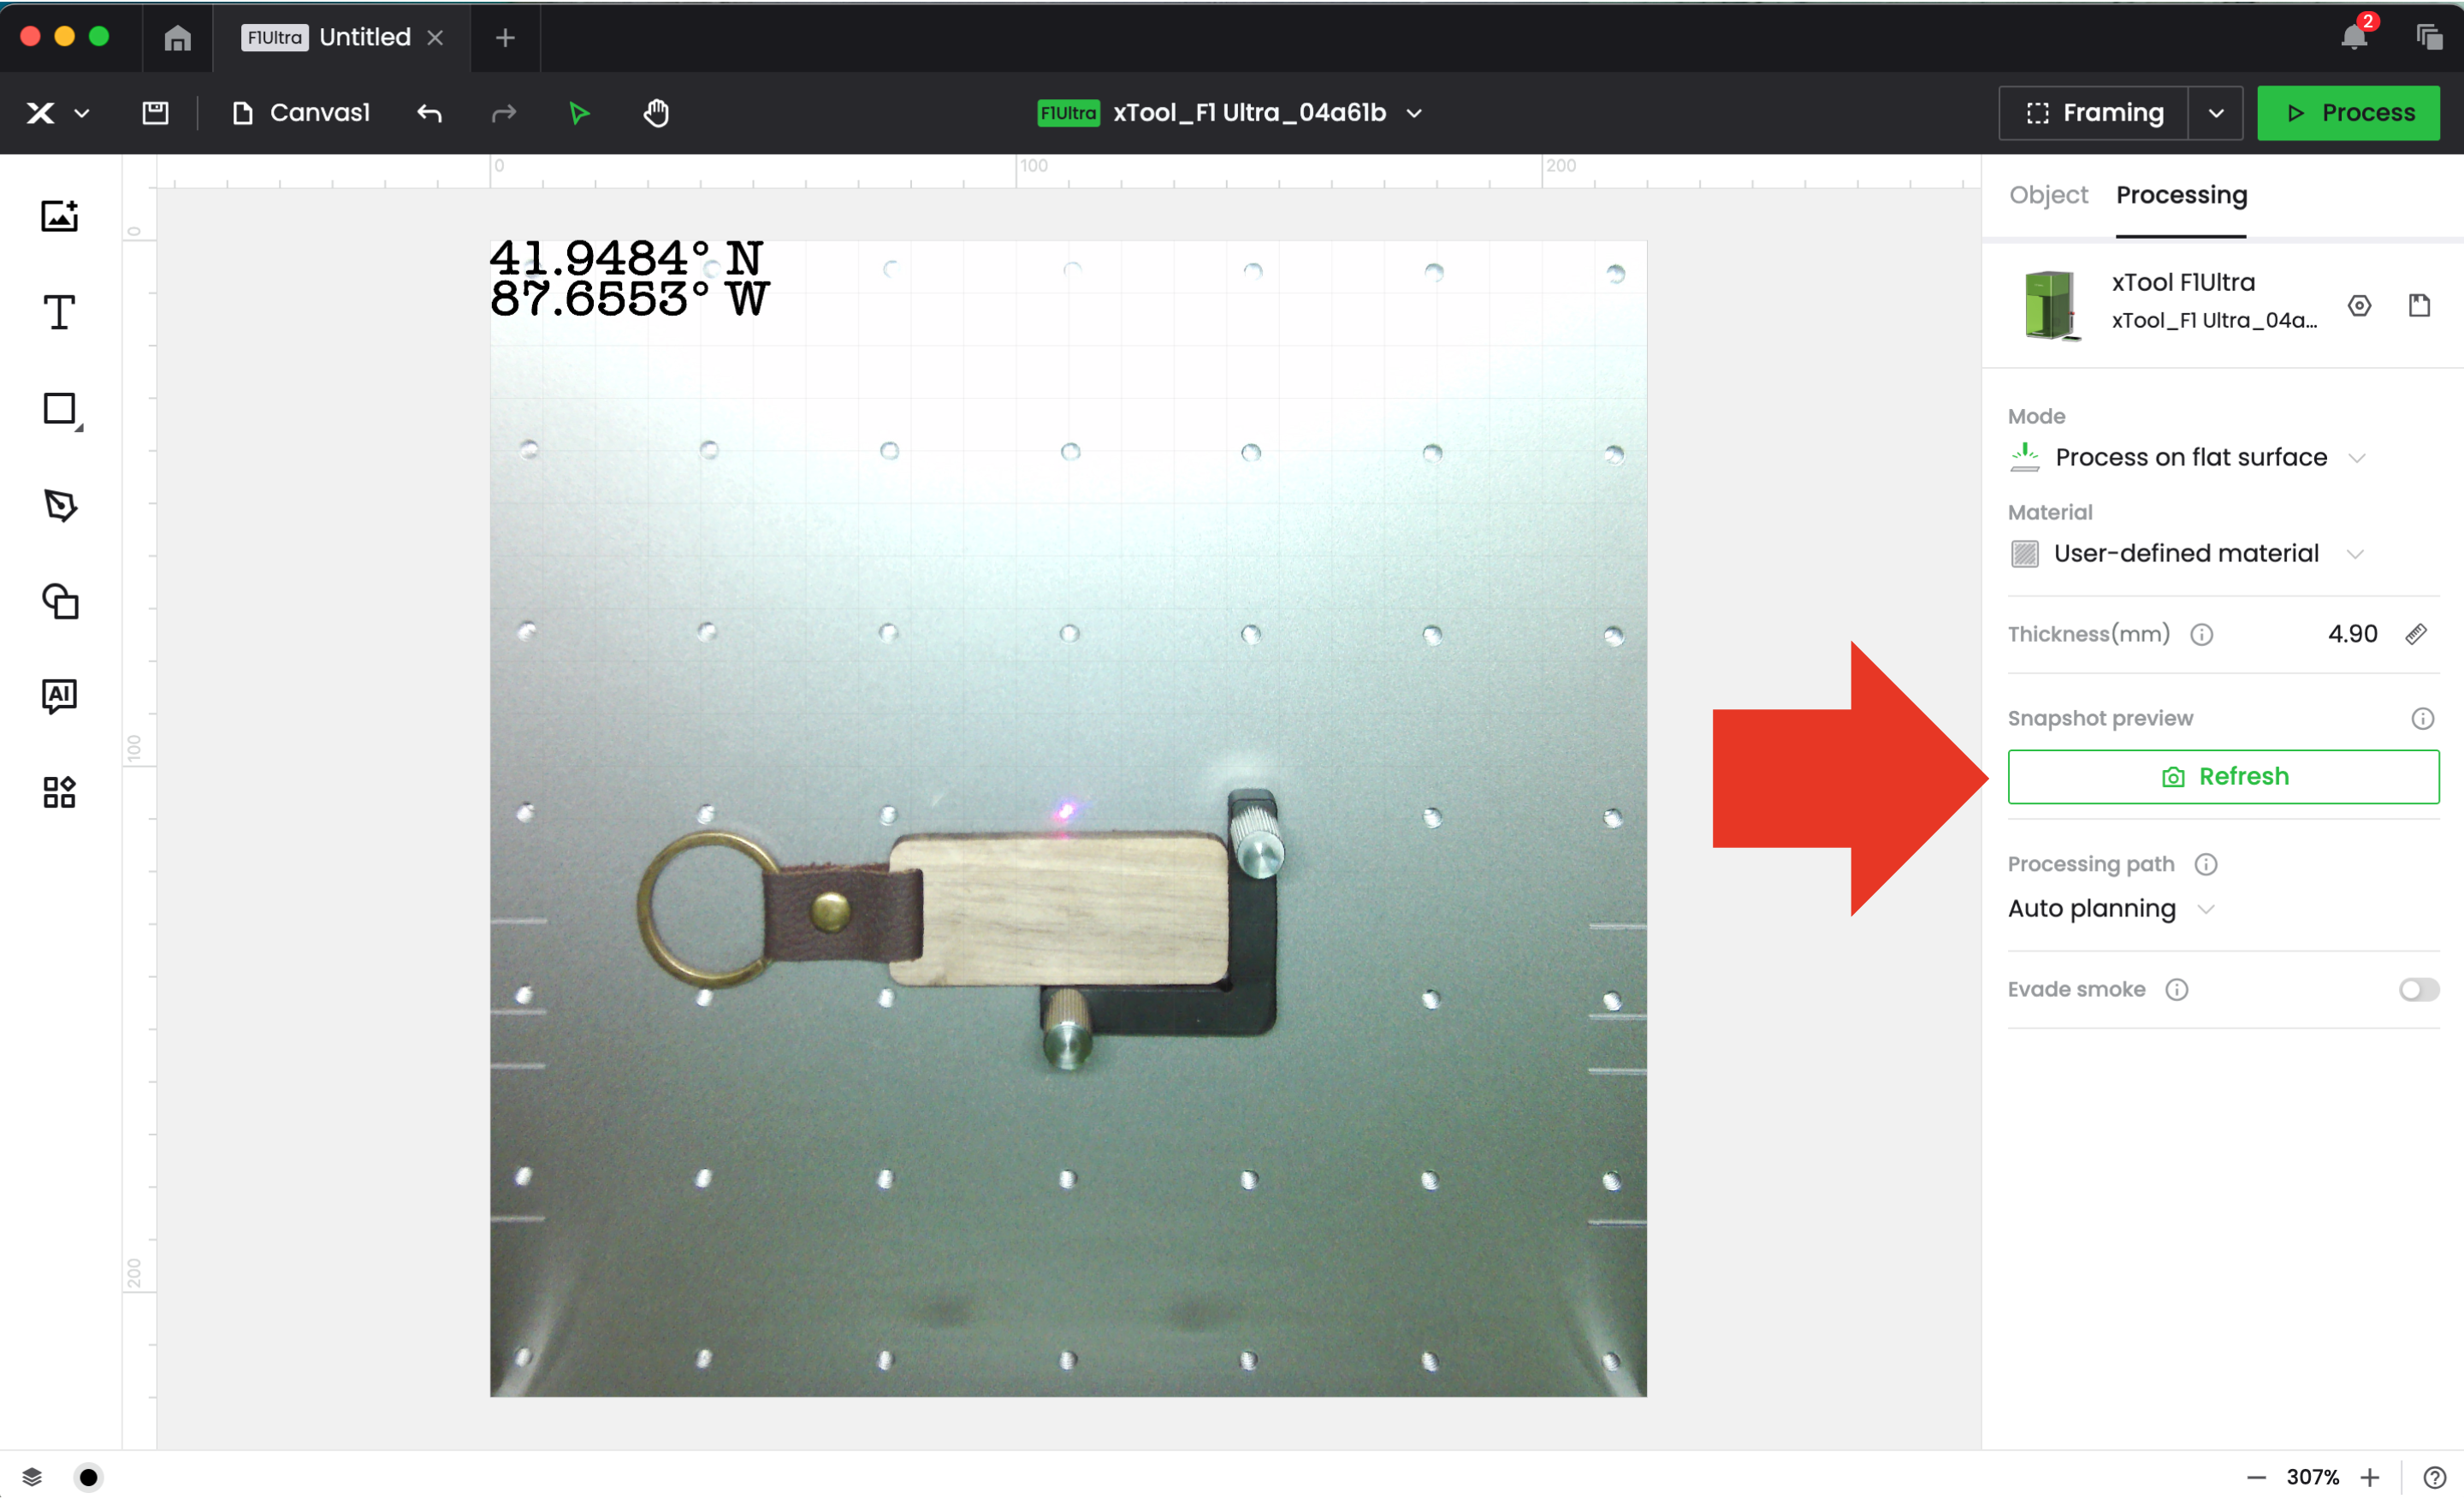
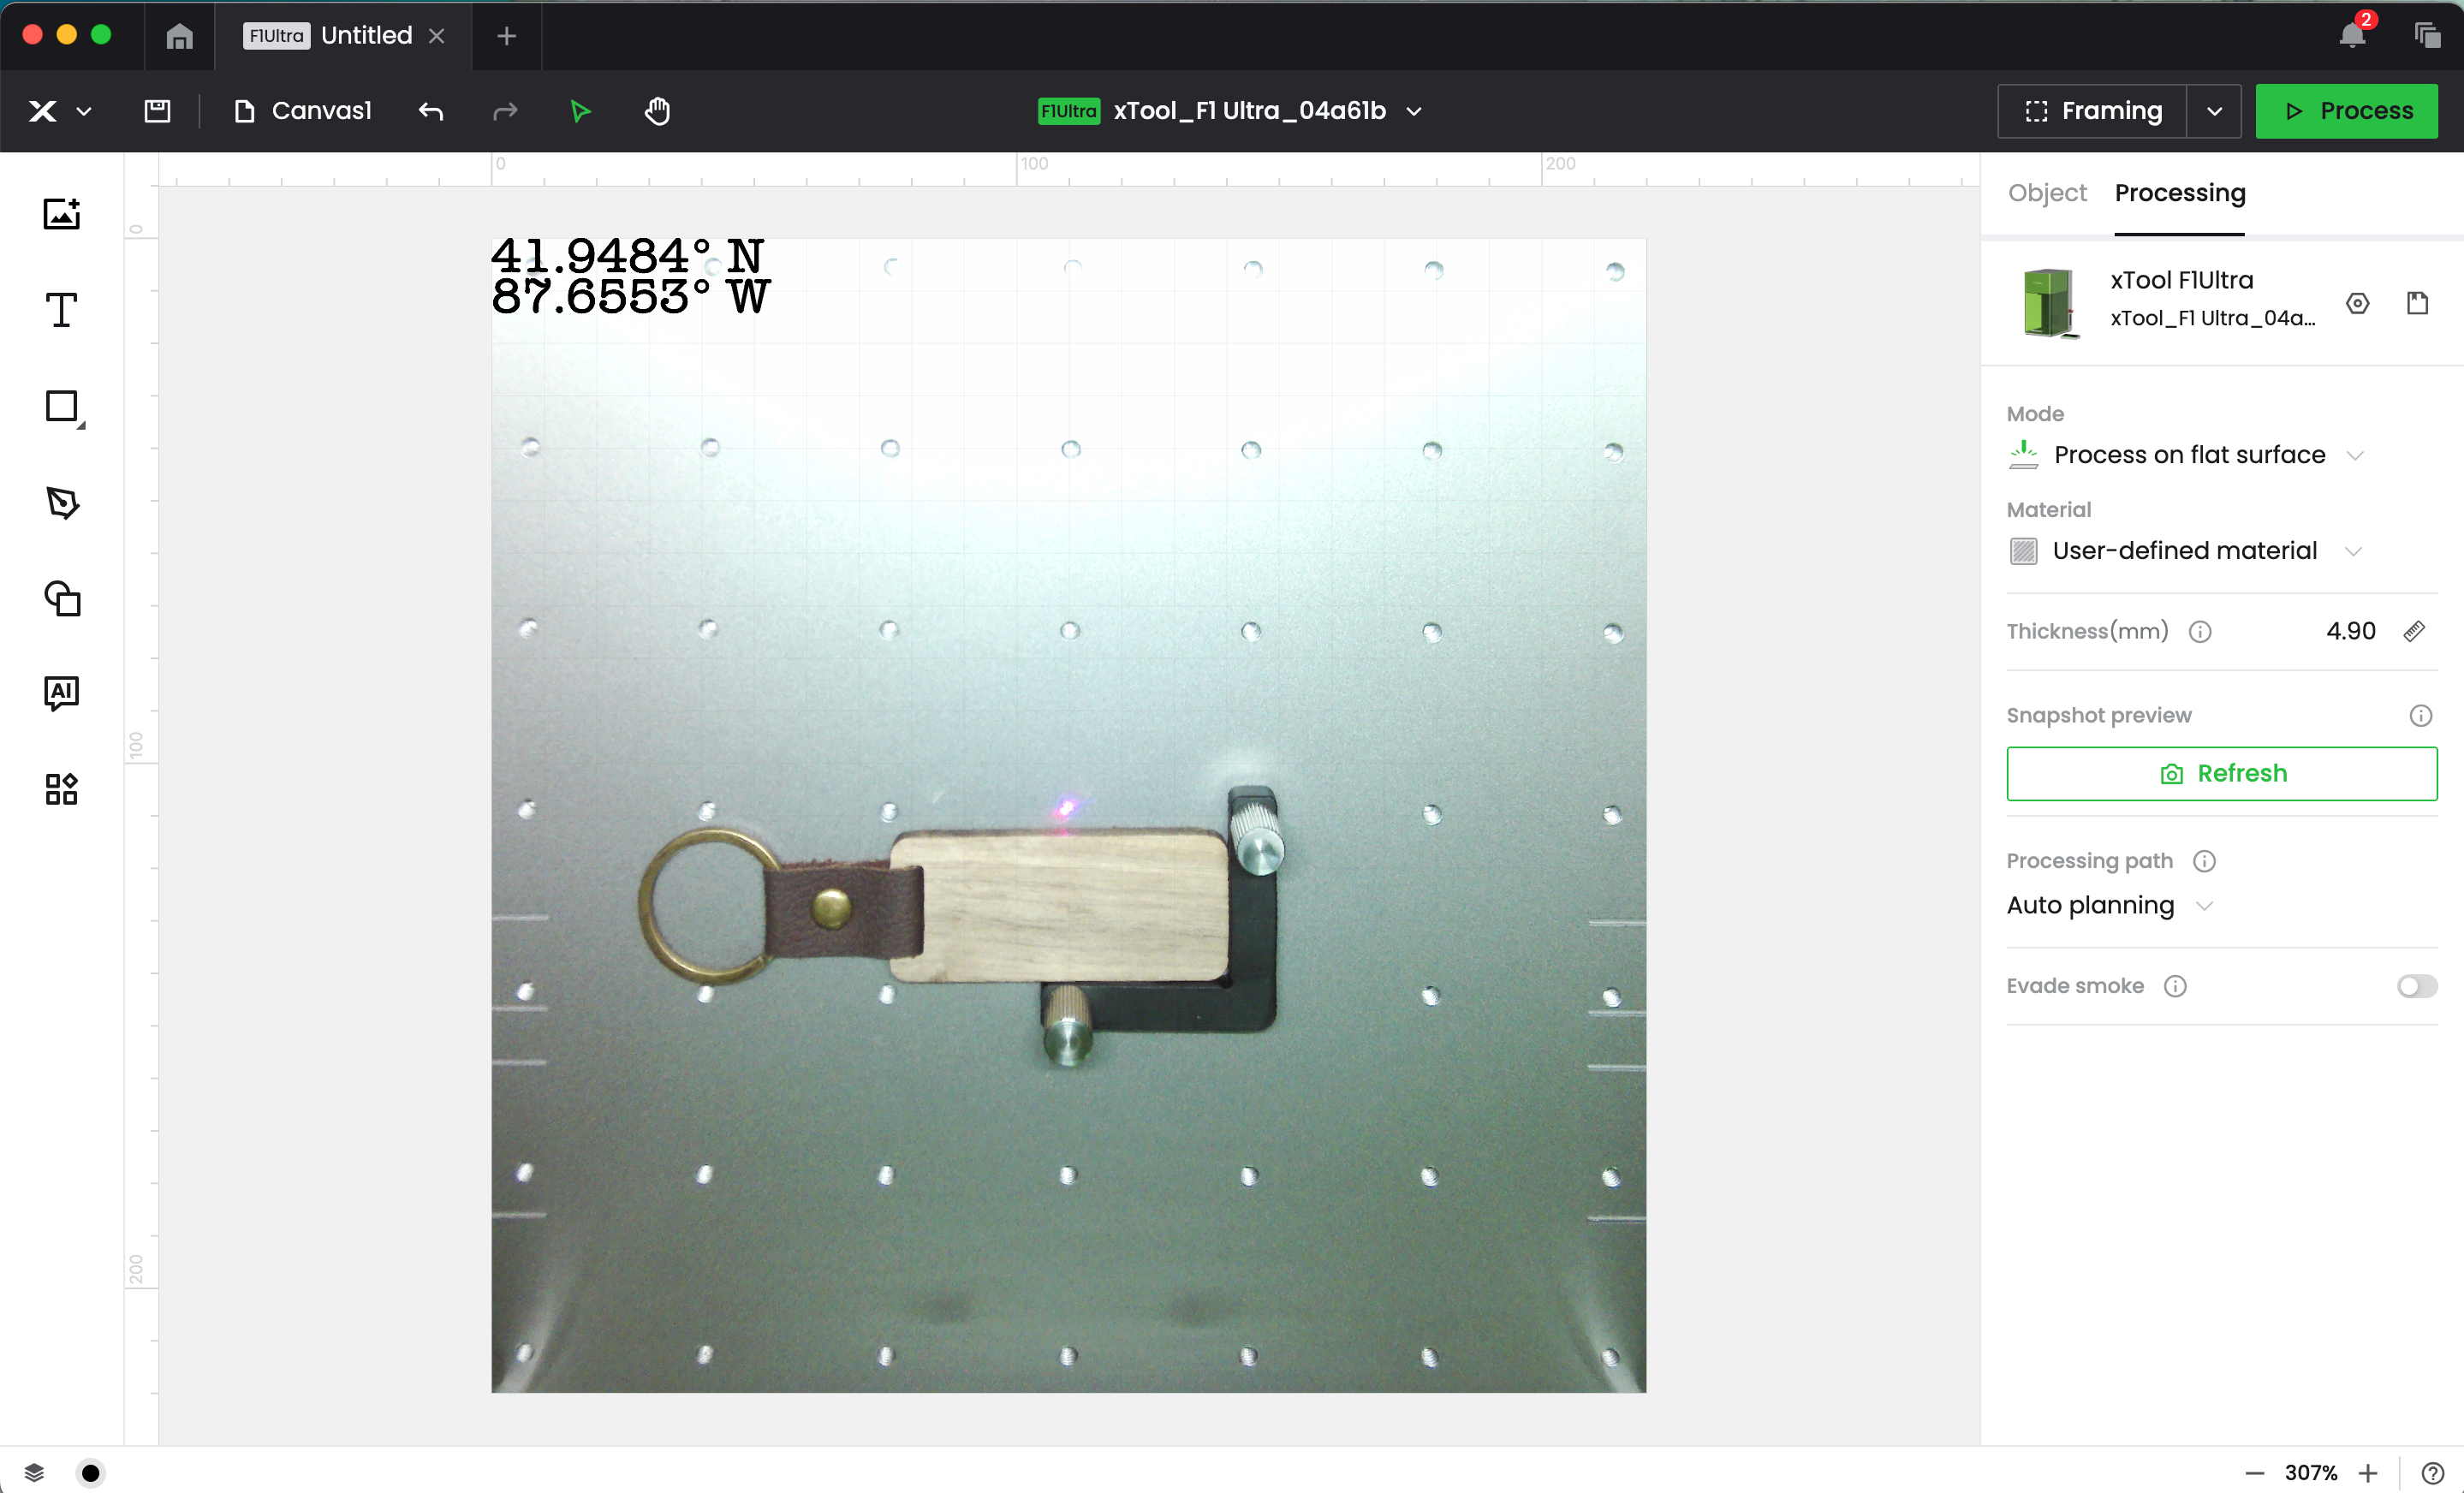
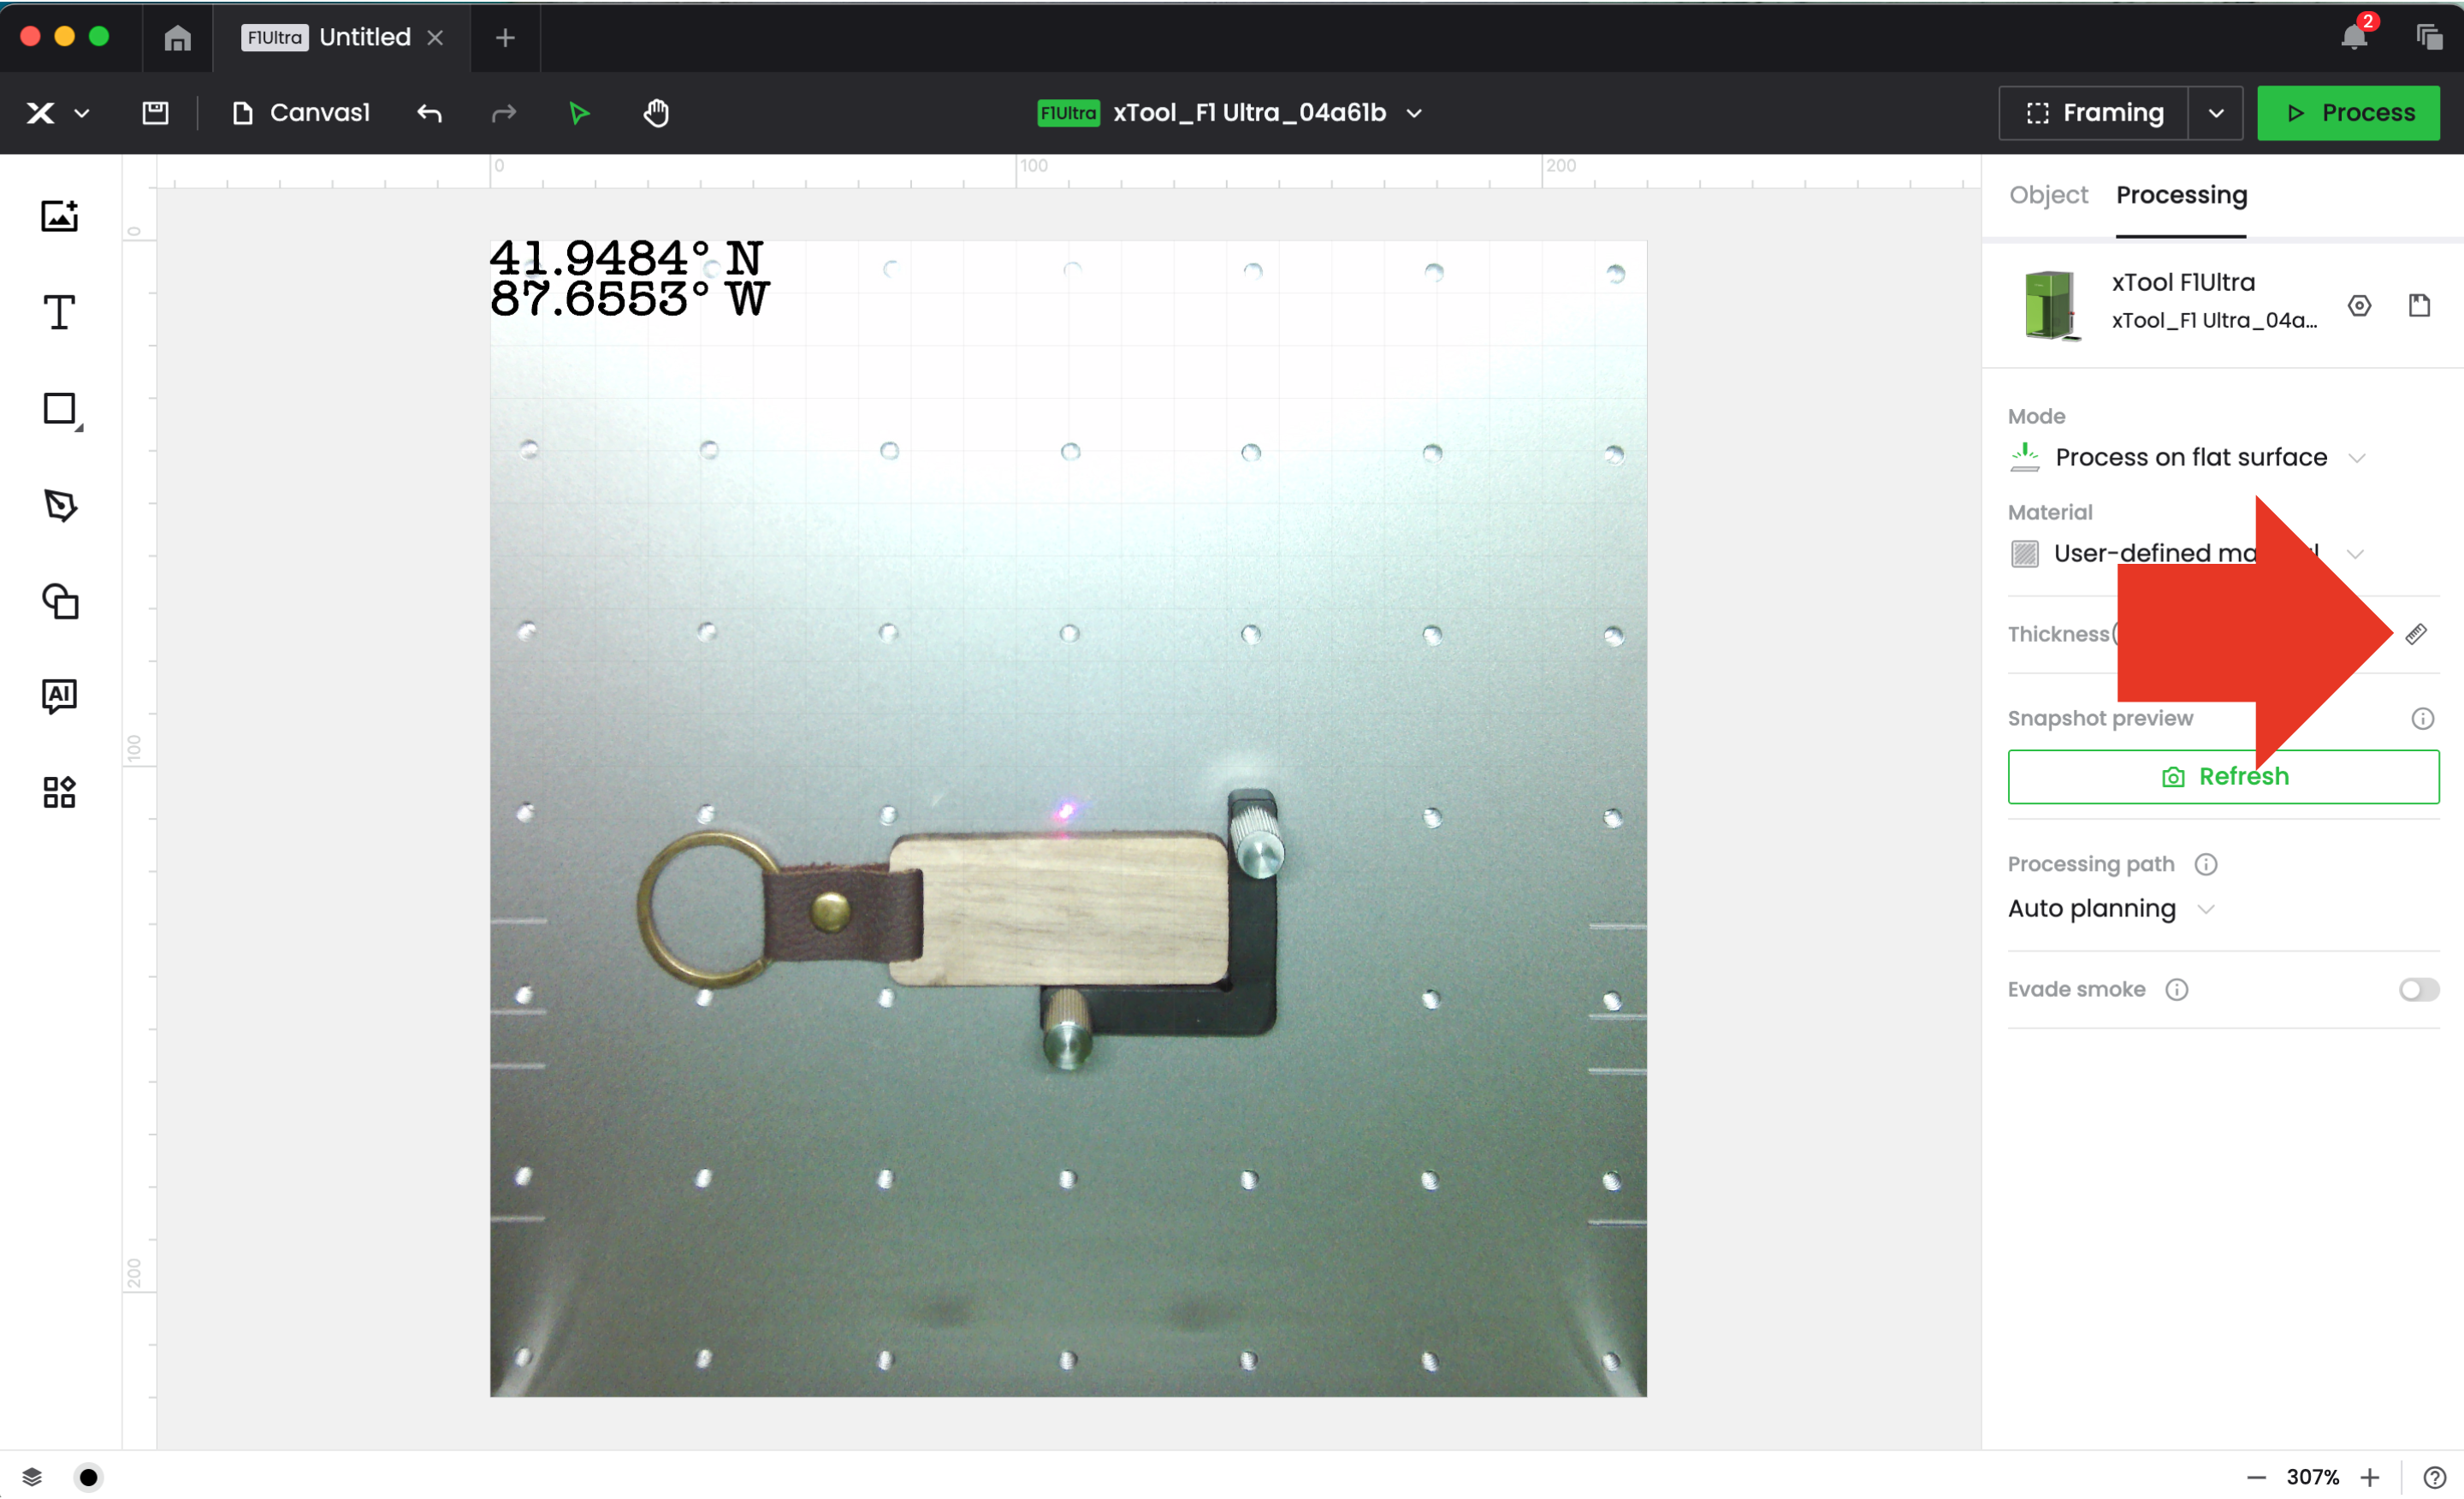
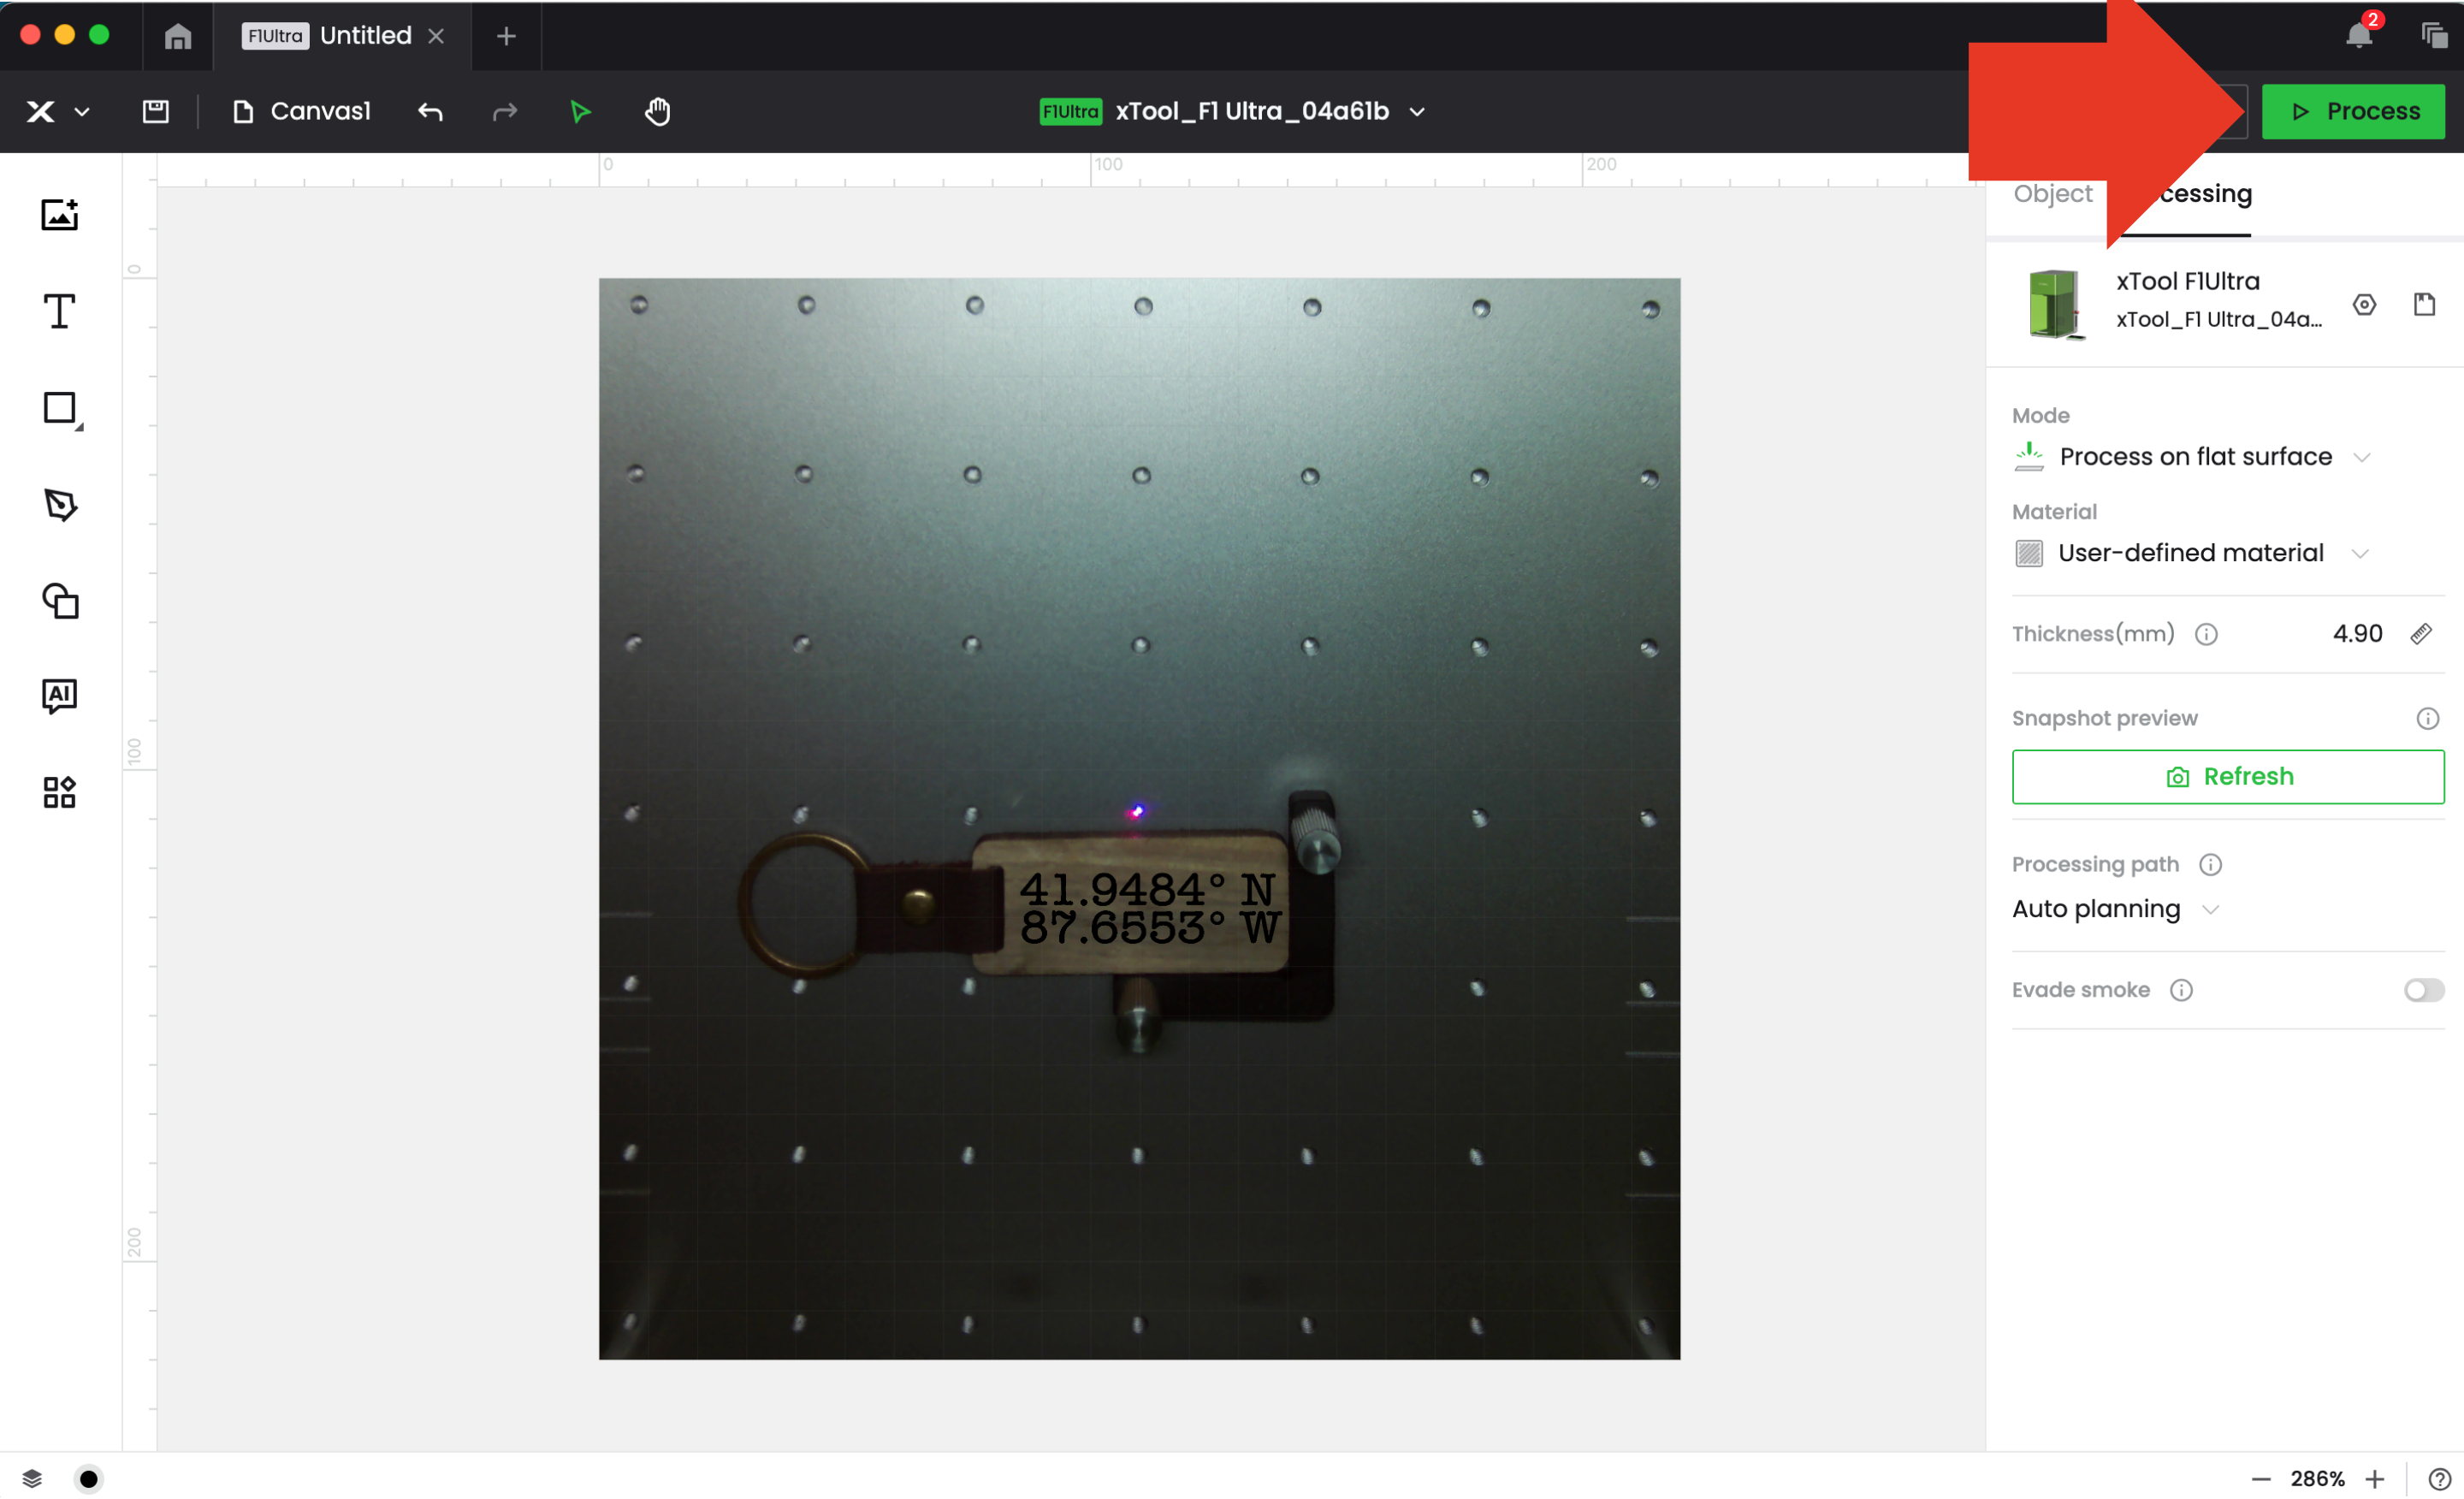
Enter the thickness of the material. You can either manually add the measurement, or use the auto measure function by clicking the ruler icon.
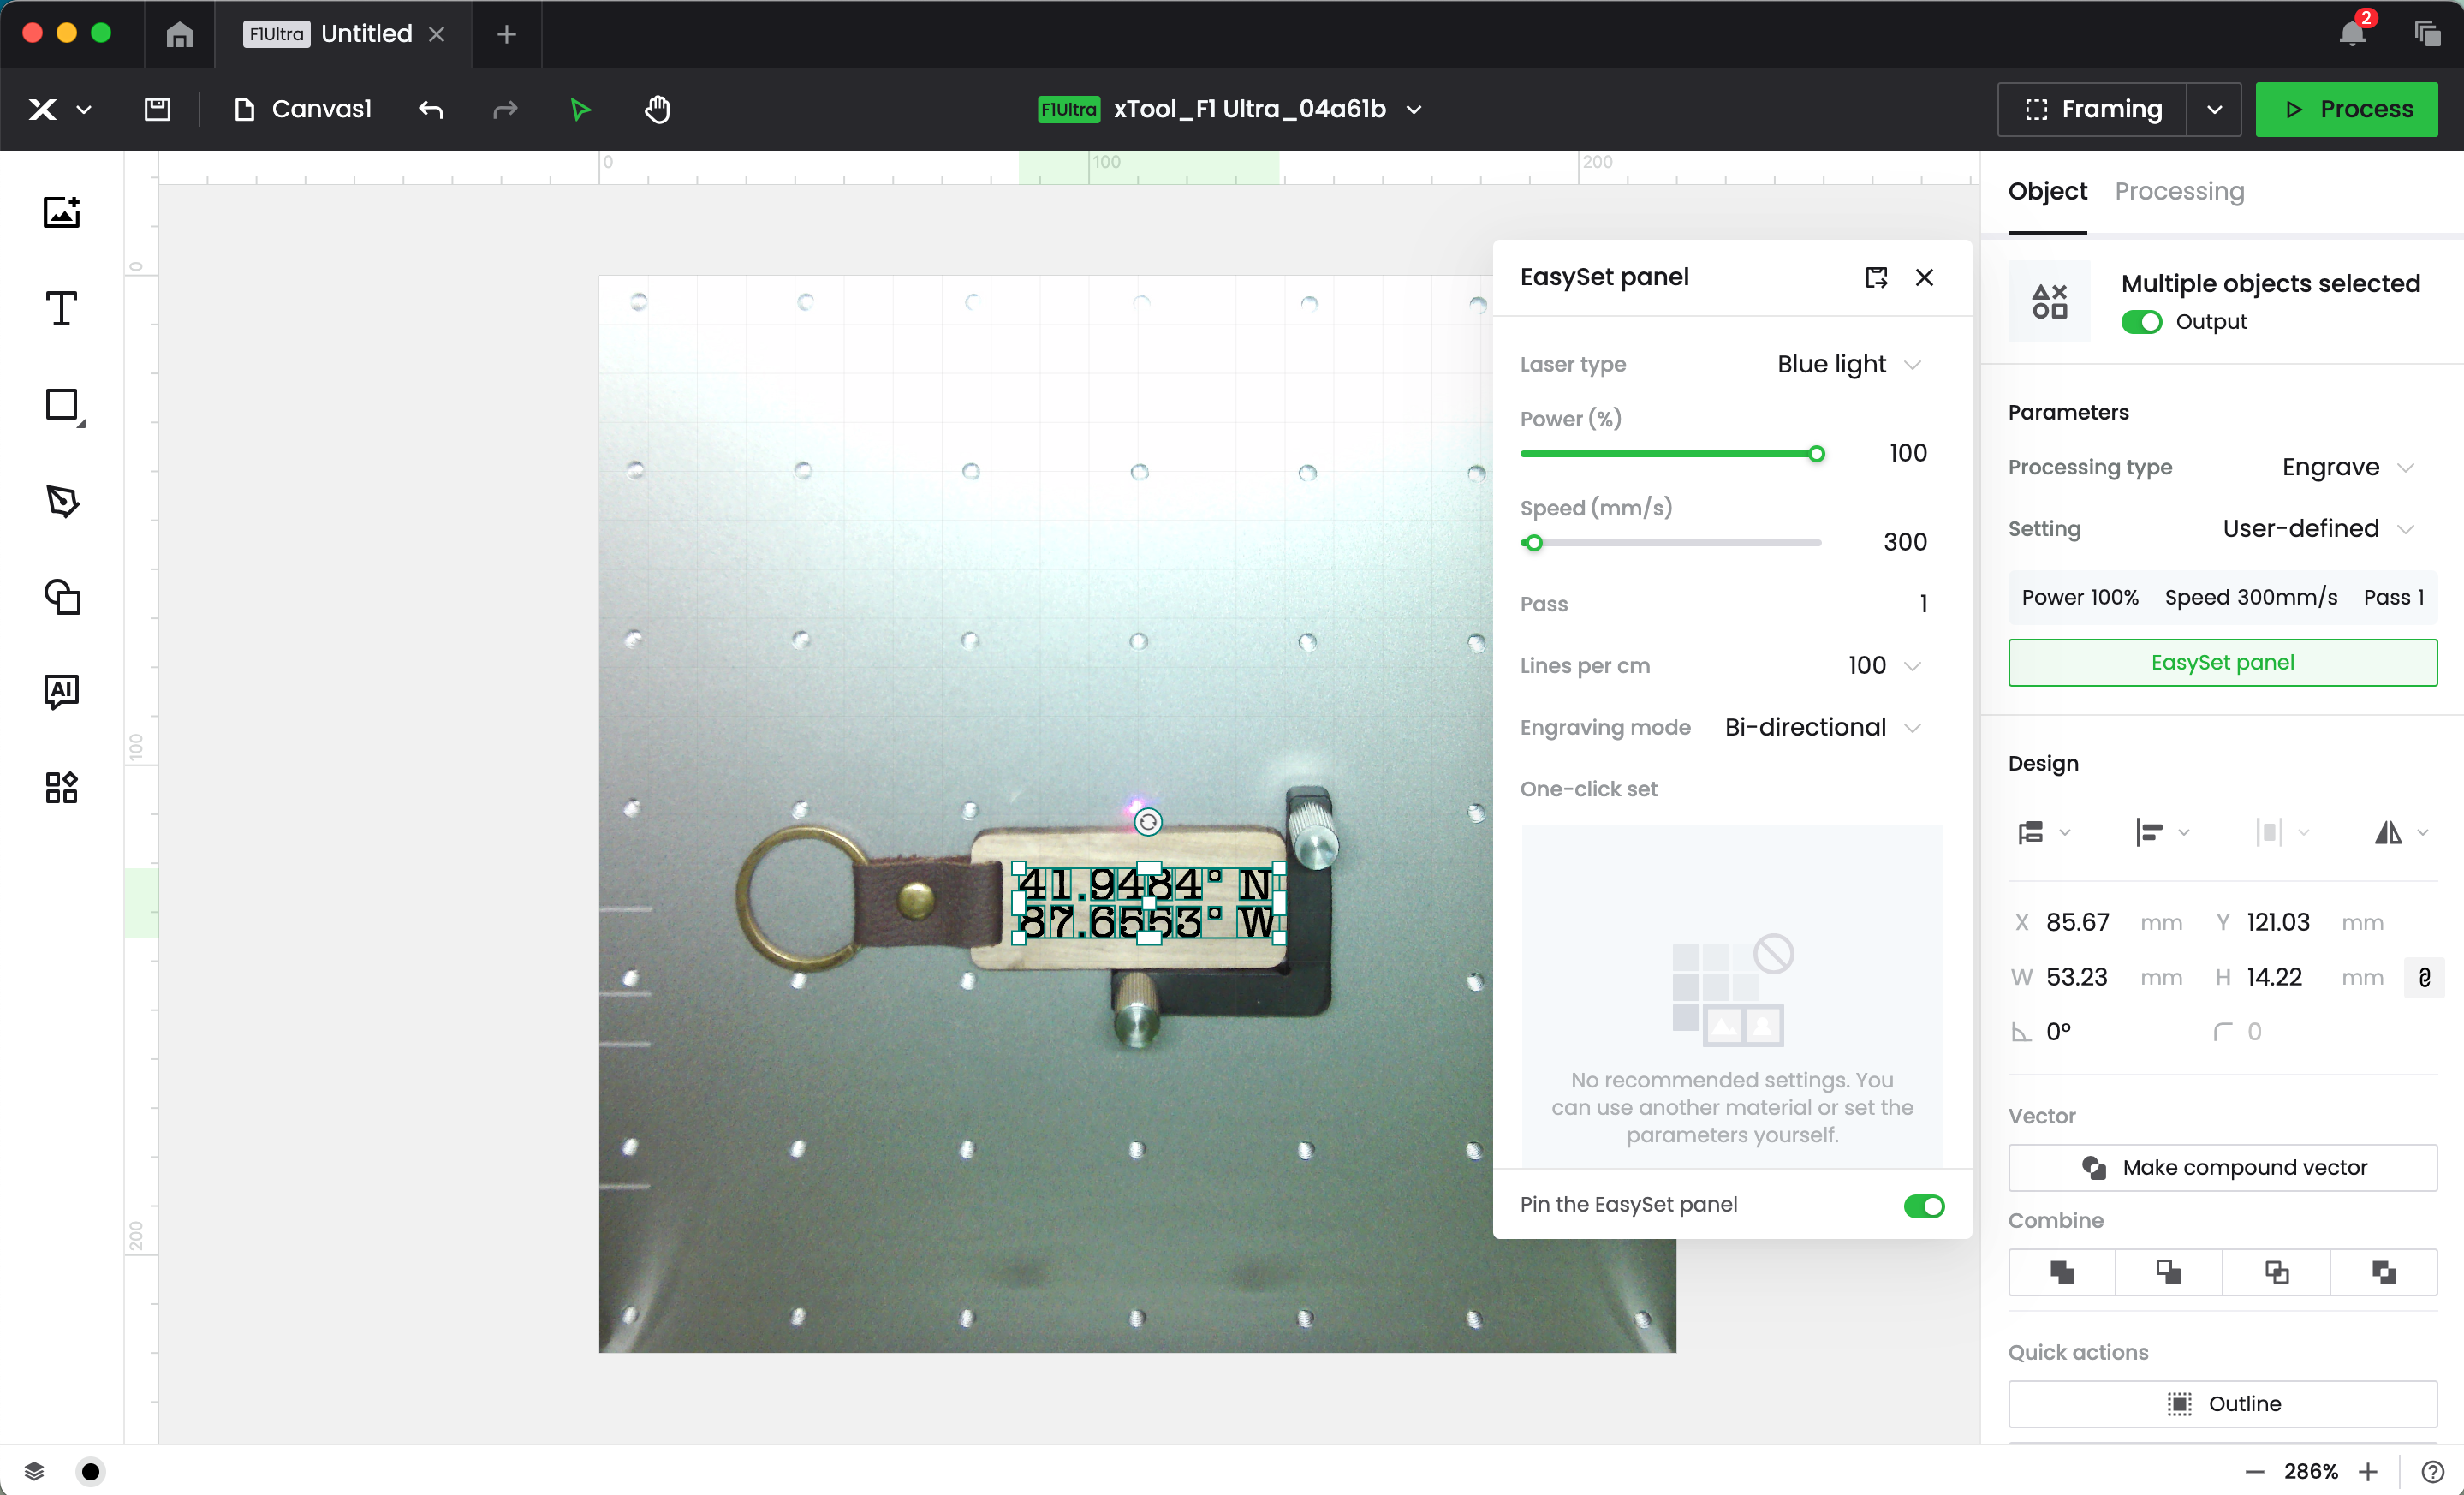
Click on your design to bring up the processing panel, then click the ‘EasySet Panel’. From here, you can choose a built in setting, or add your own.
These are the settings I used:
Turn on your smoke purifier, and click the ‘Process’ button.
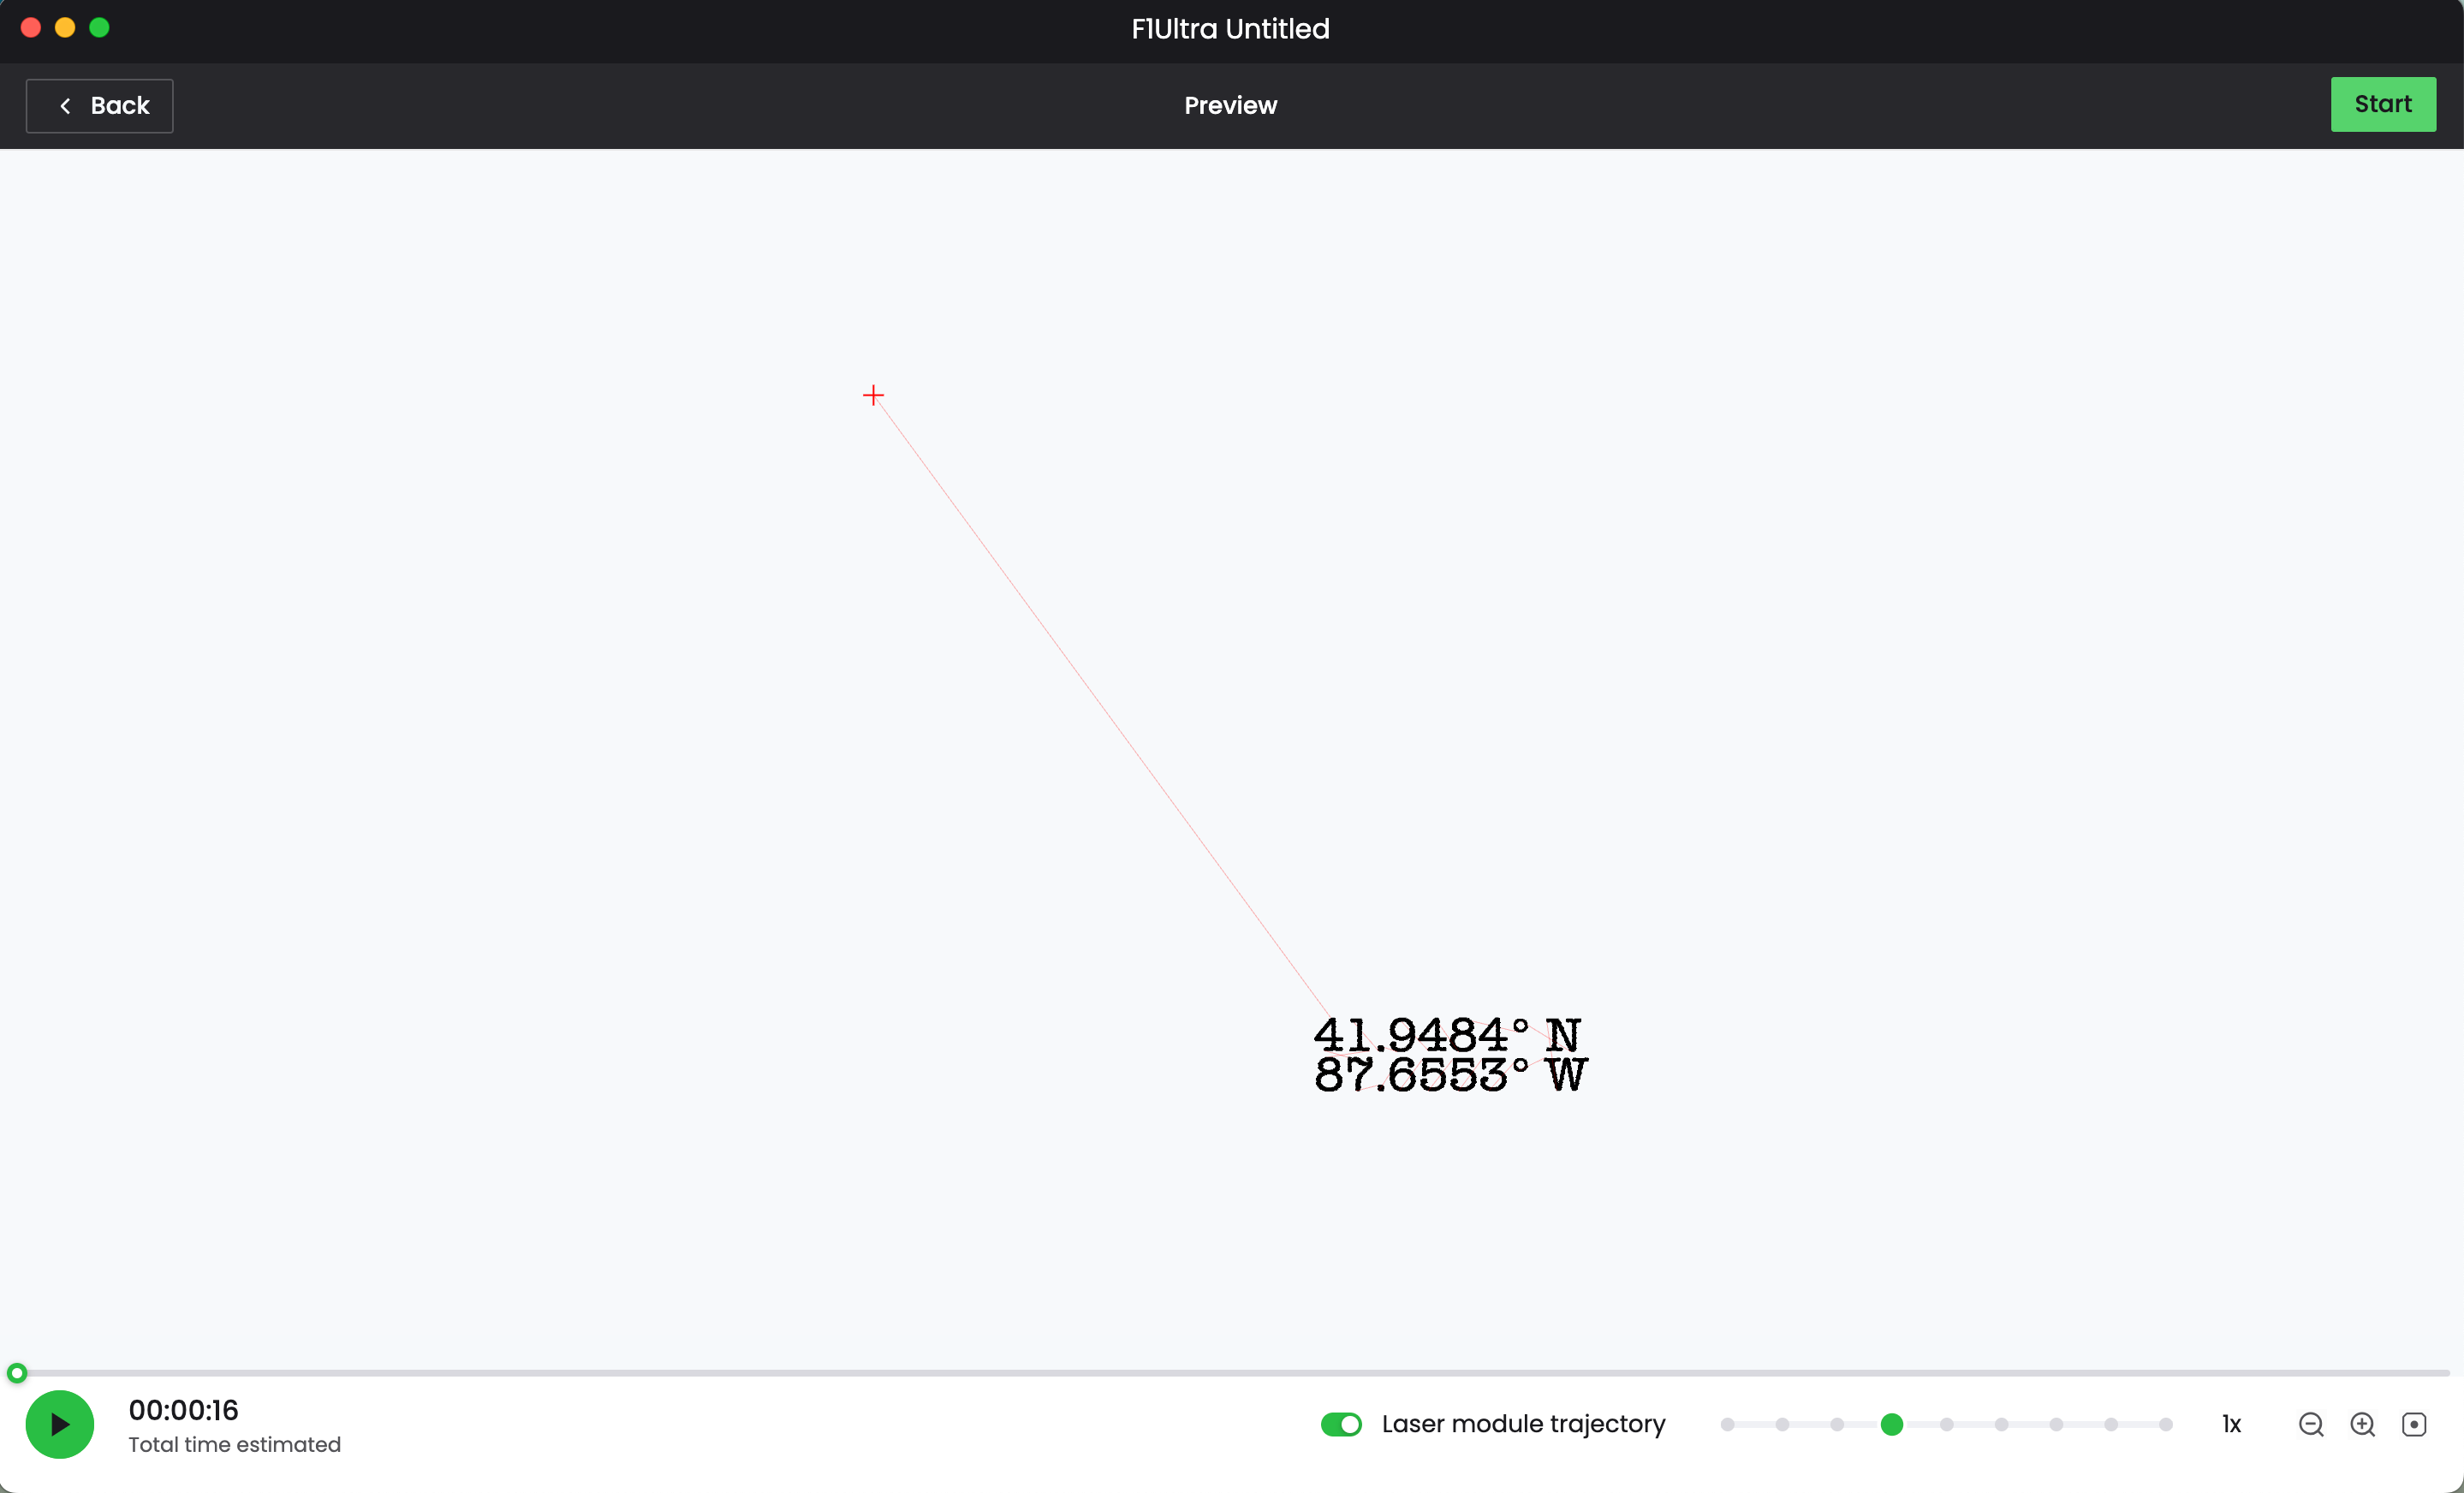
The next screen shows you how the laser will move around. I haven’t found a reason to change it – yet. Now, click the ‘Start’ button.
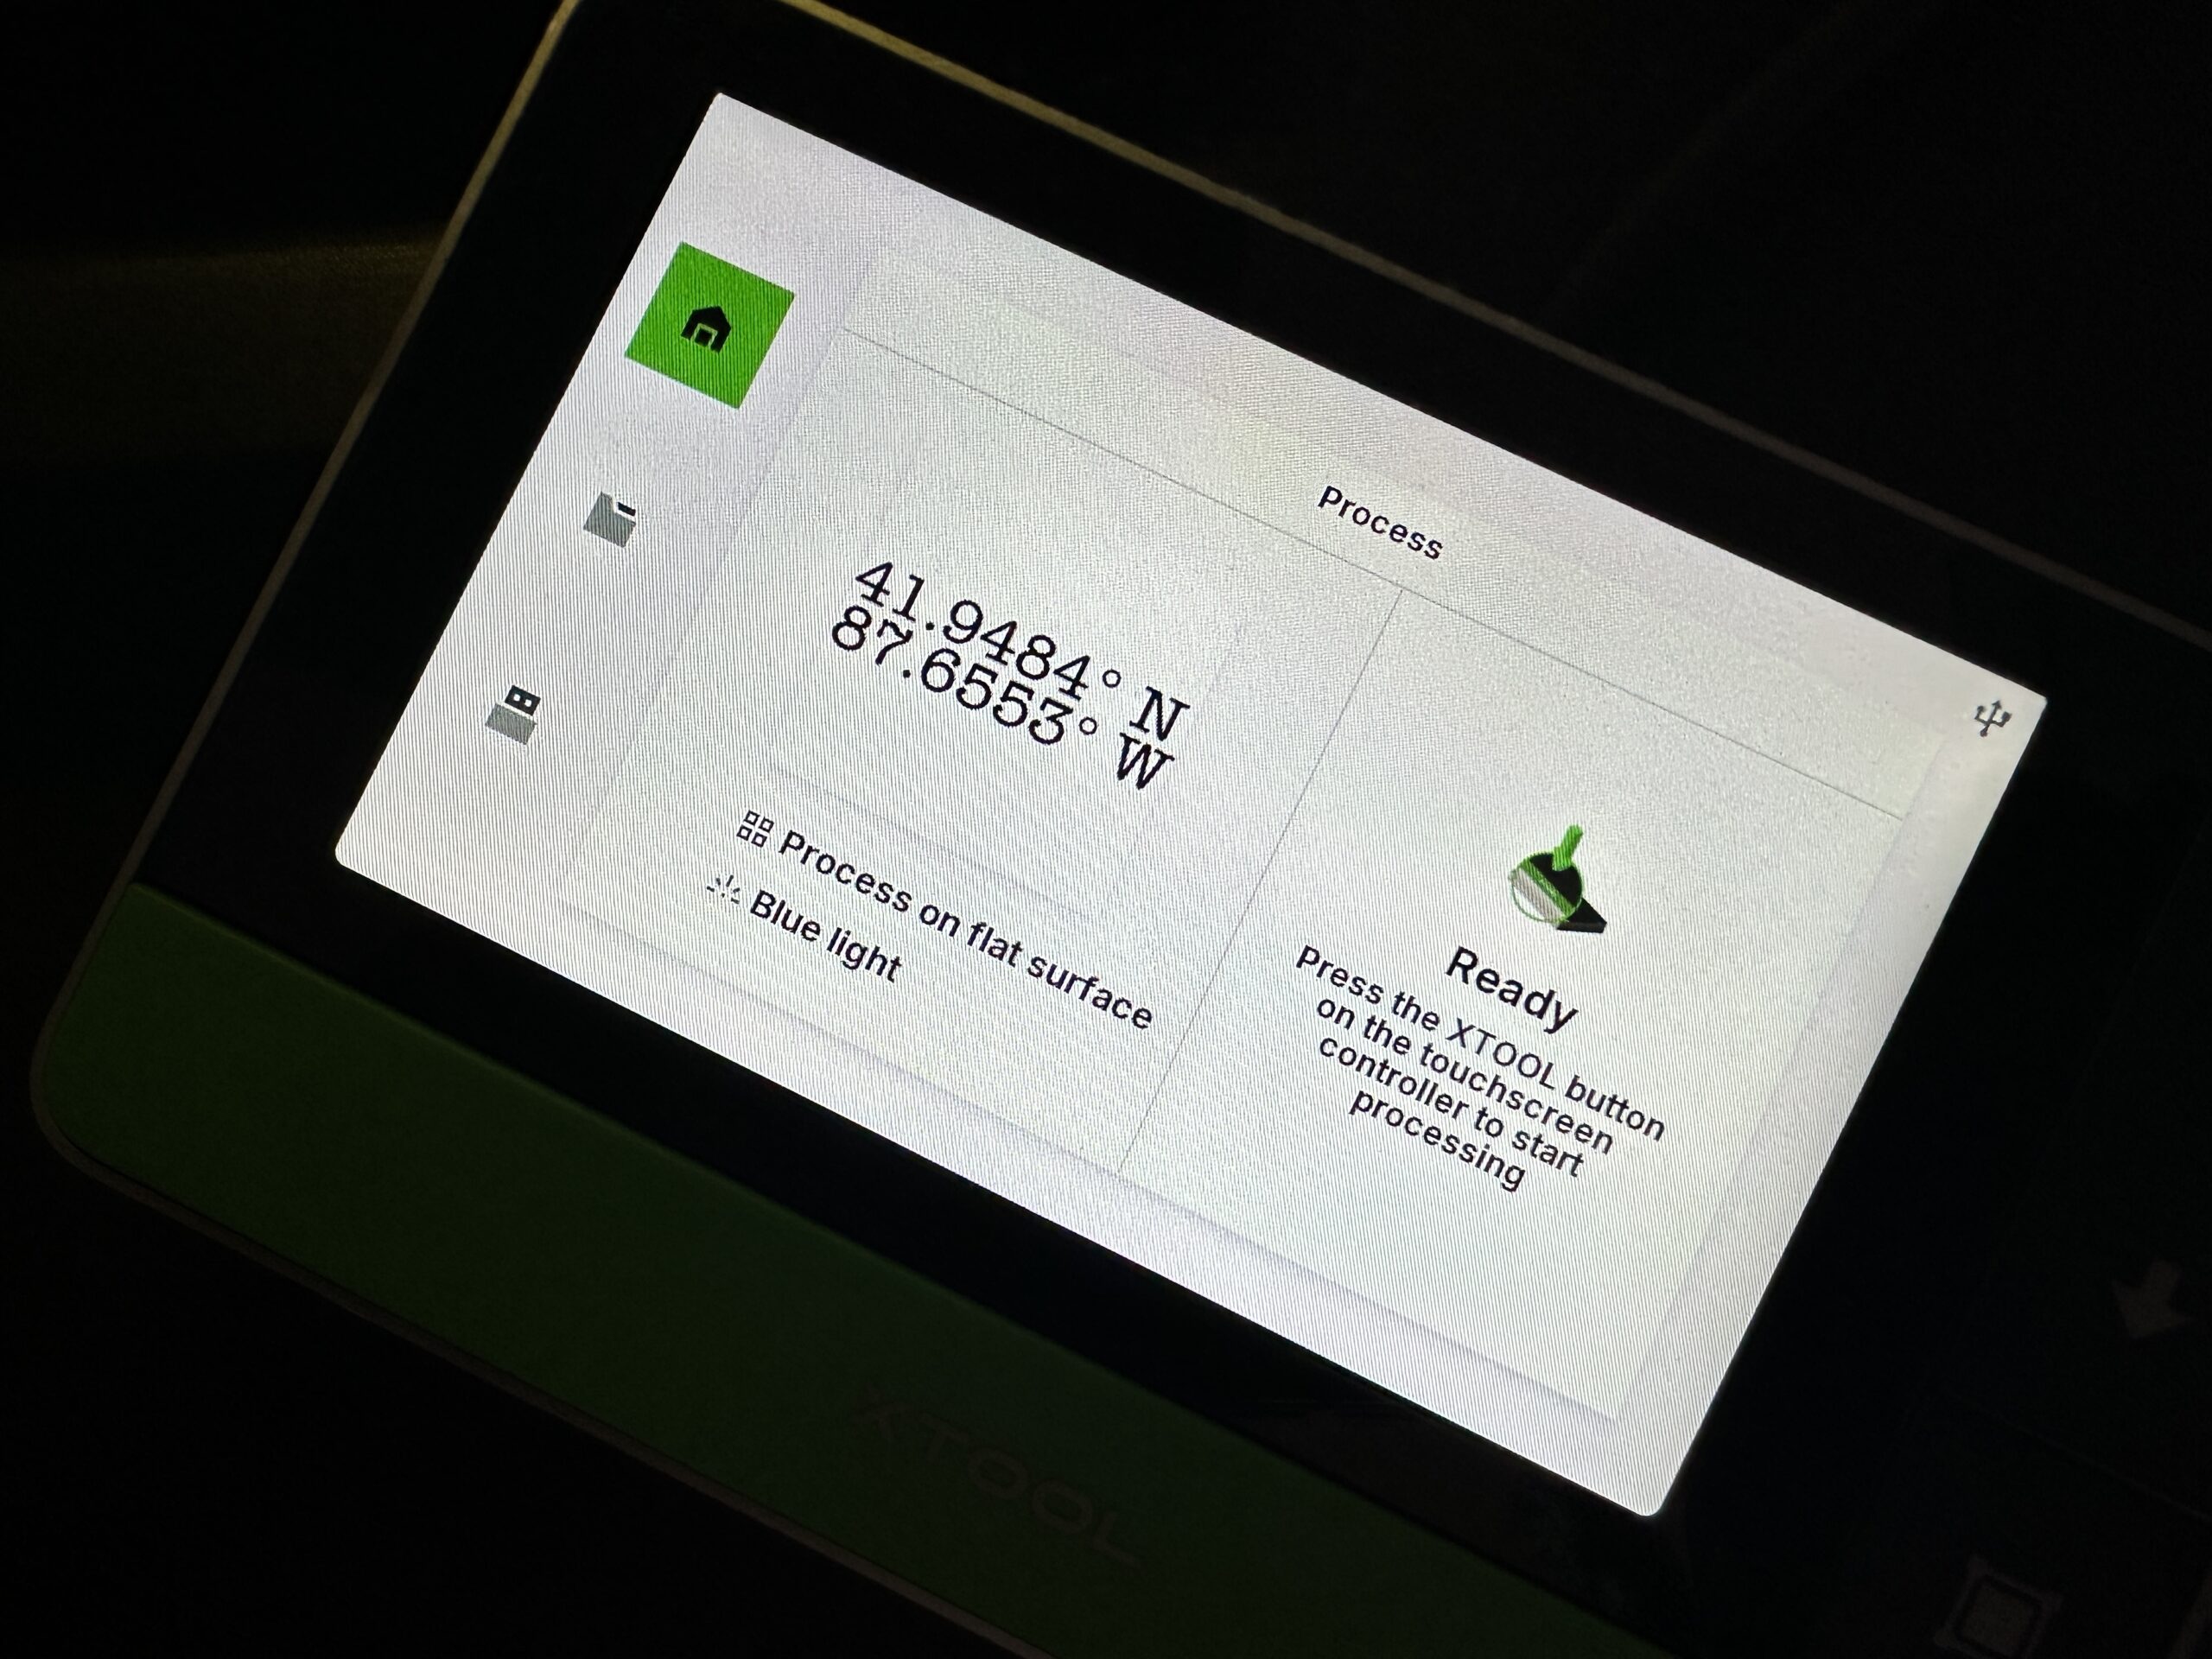
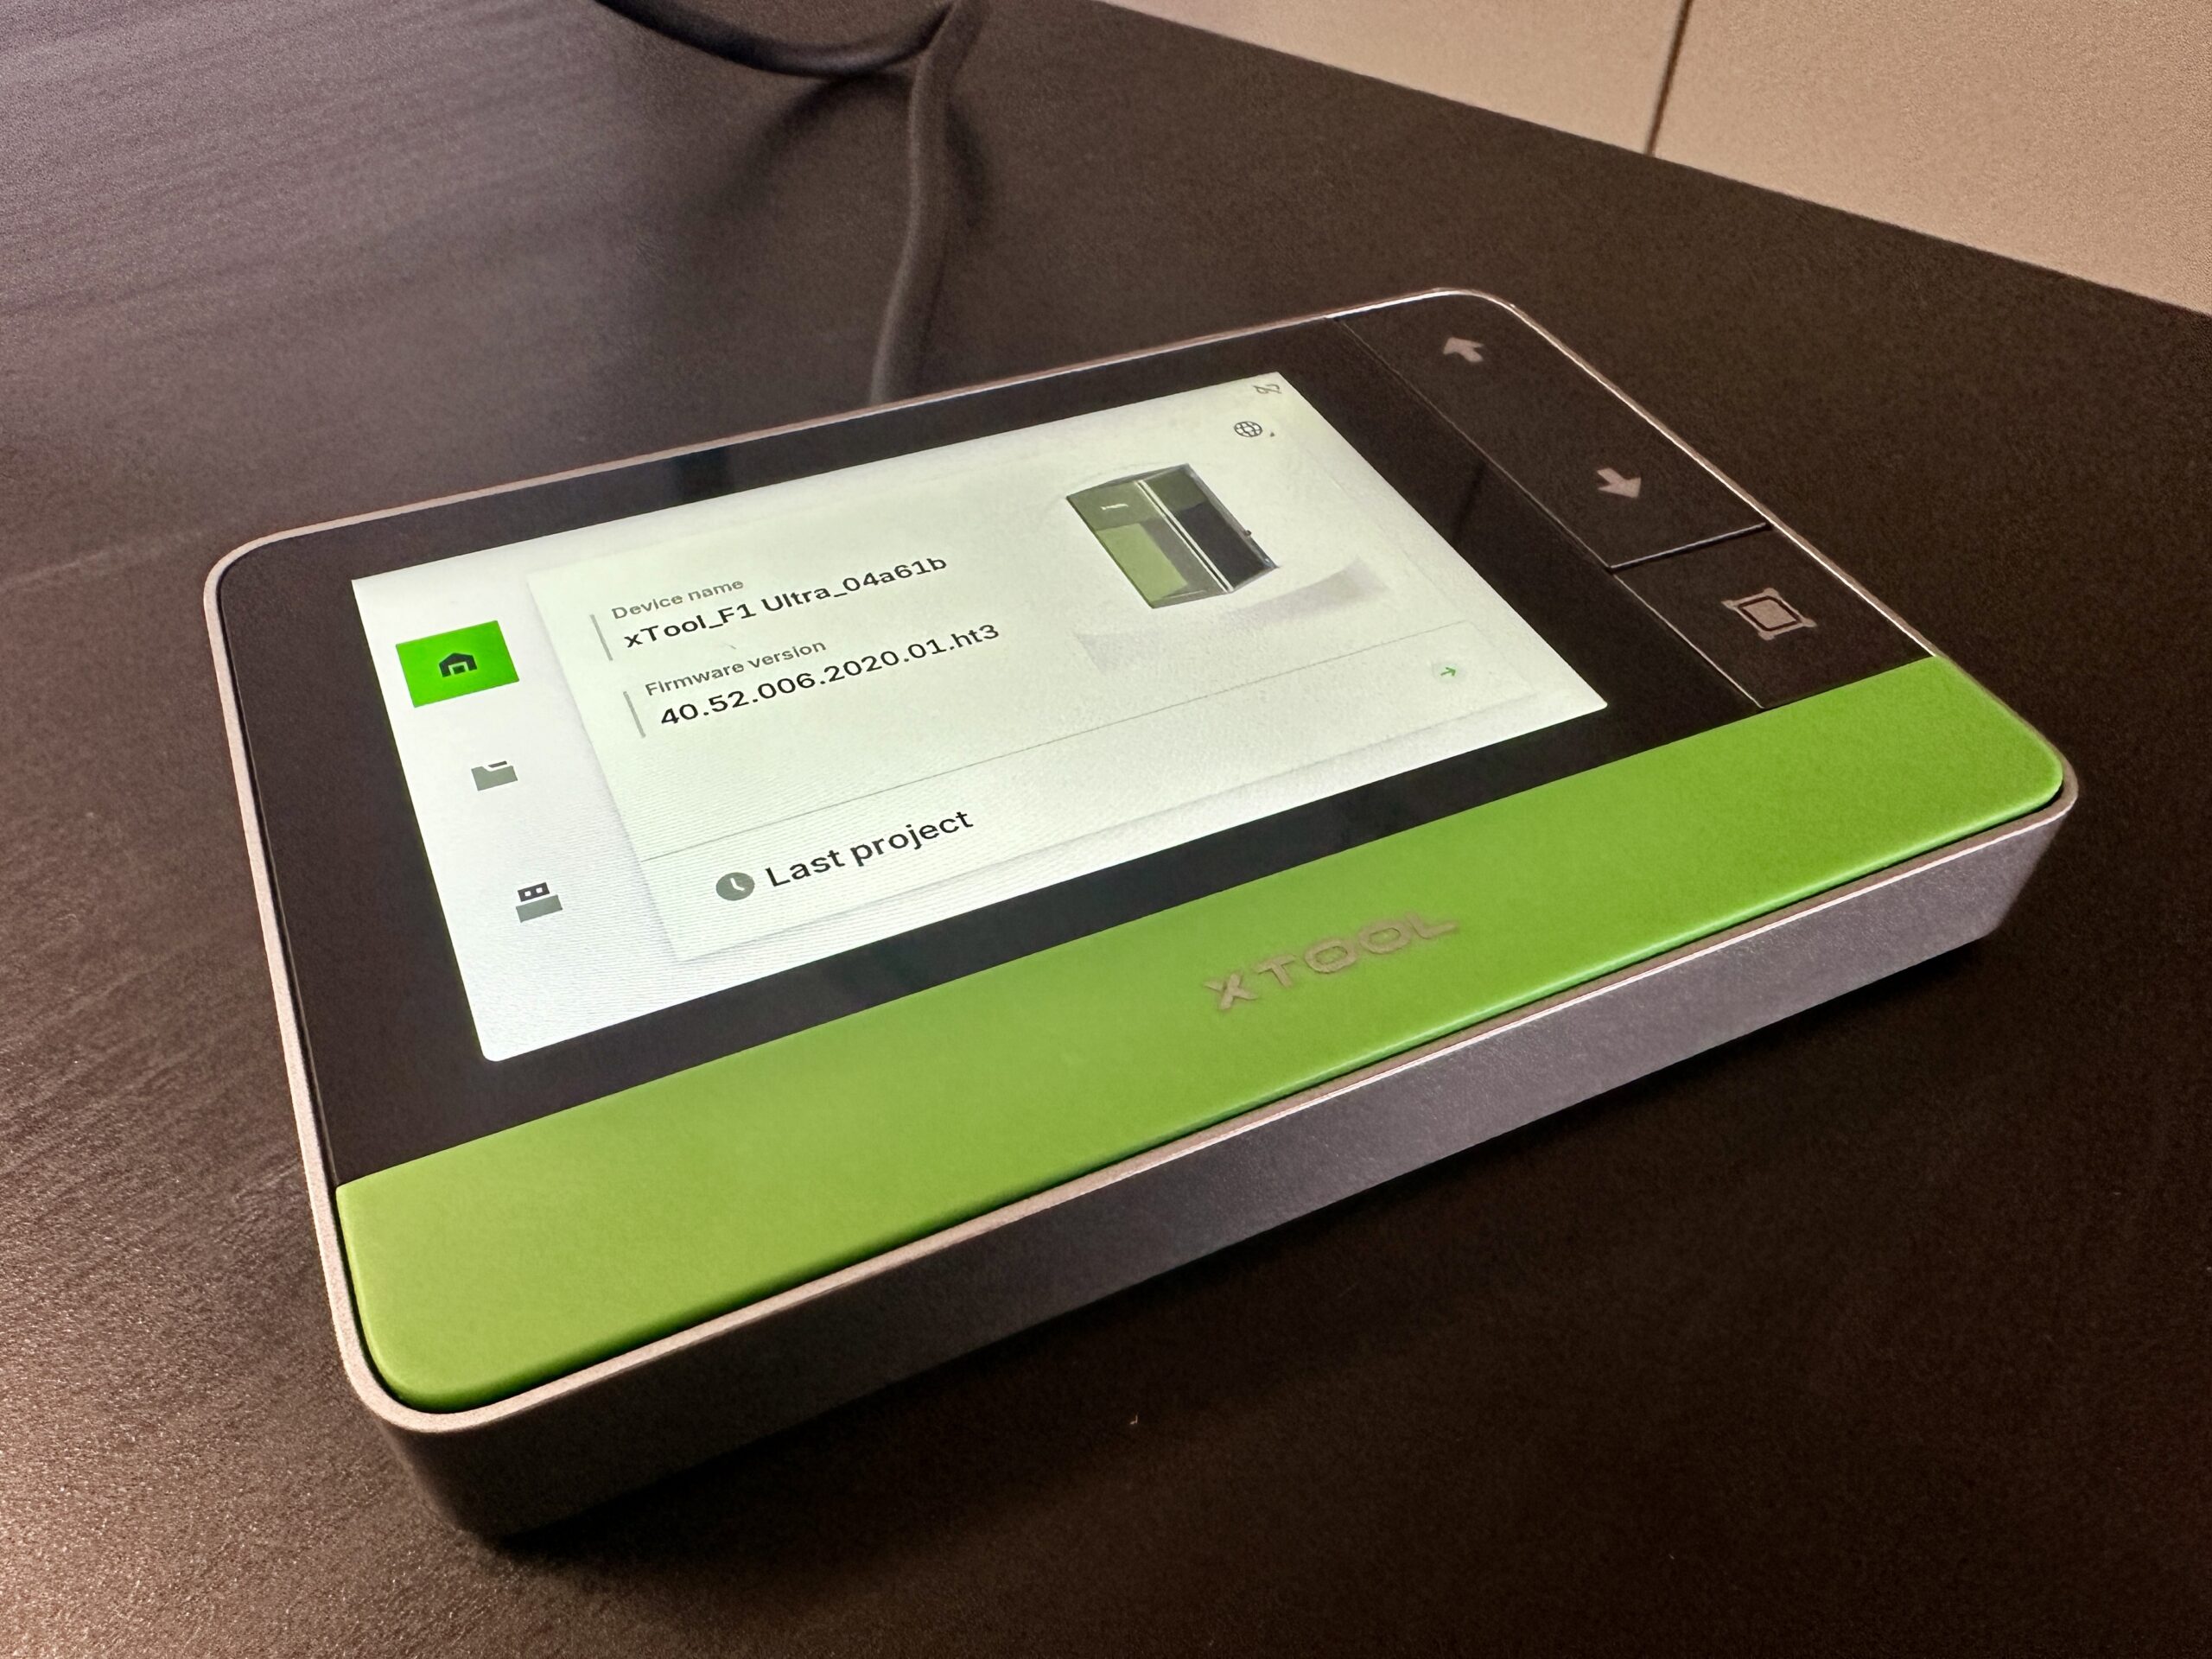
Finally, click the green xTool button on the touchscreen controller.
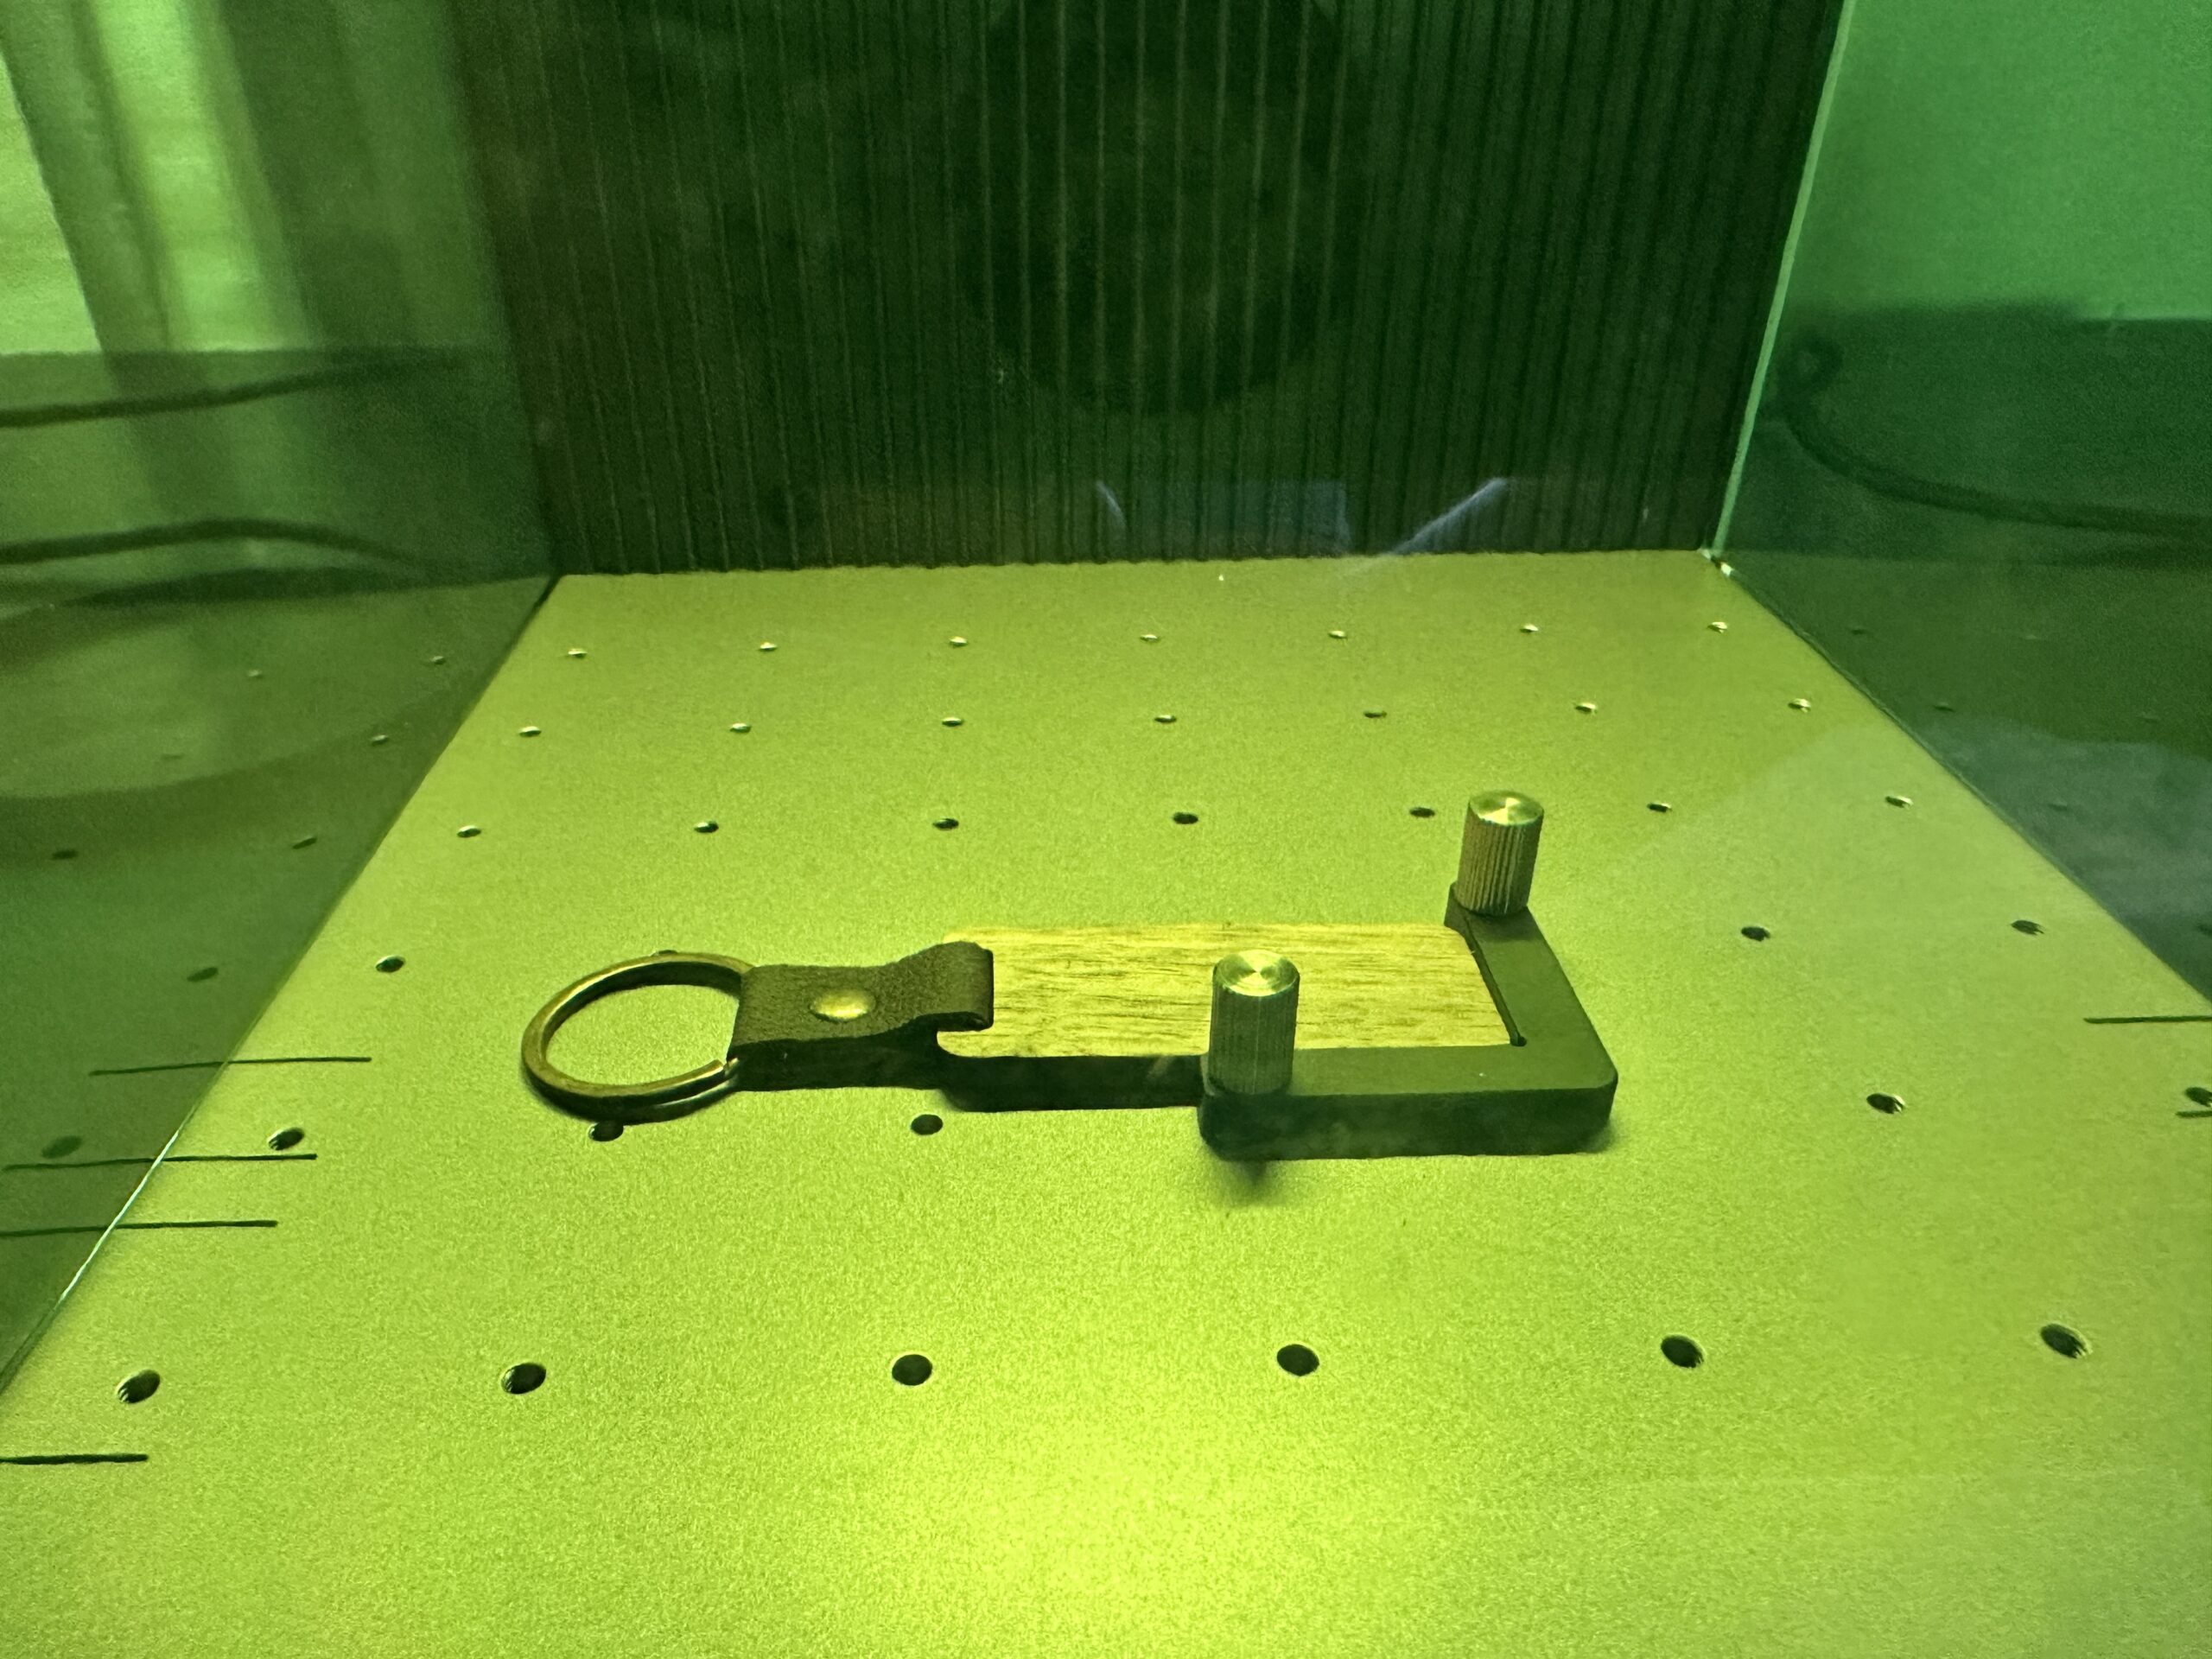
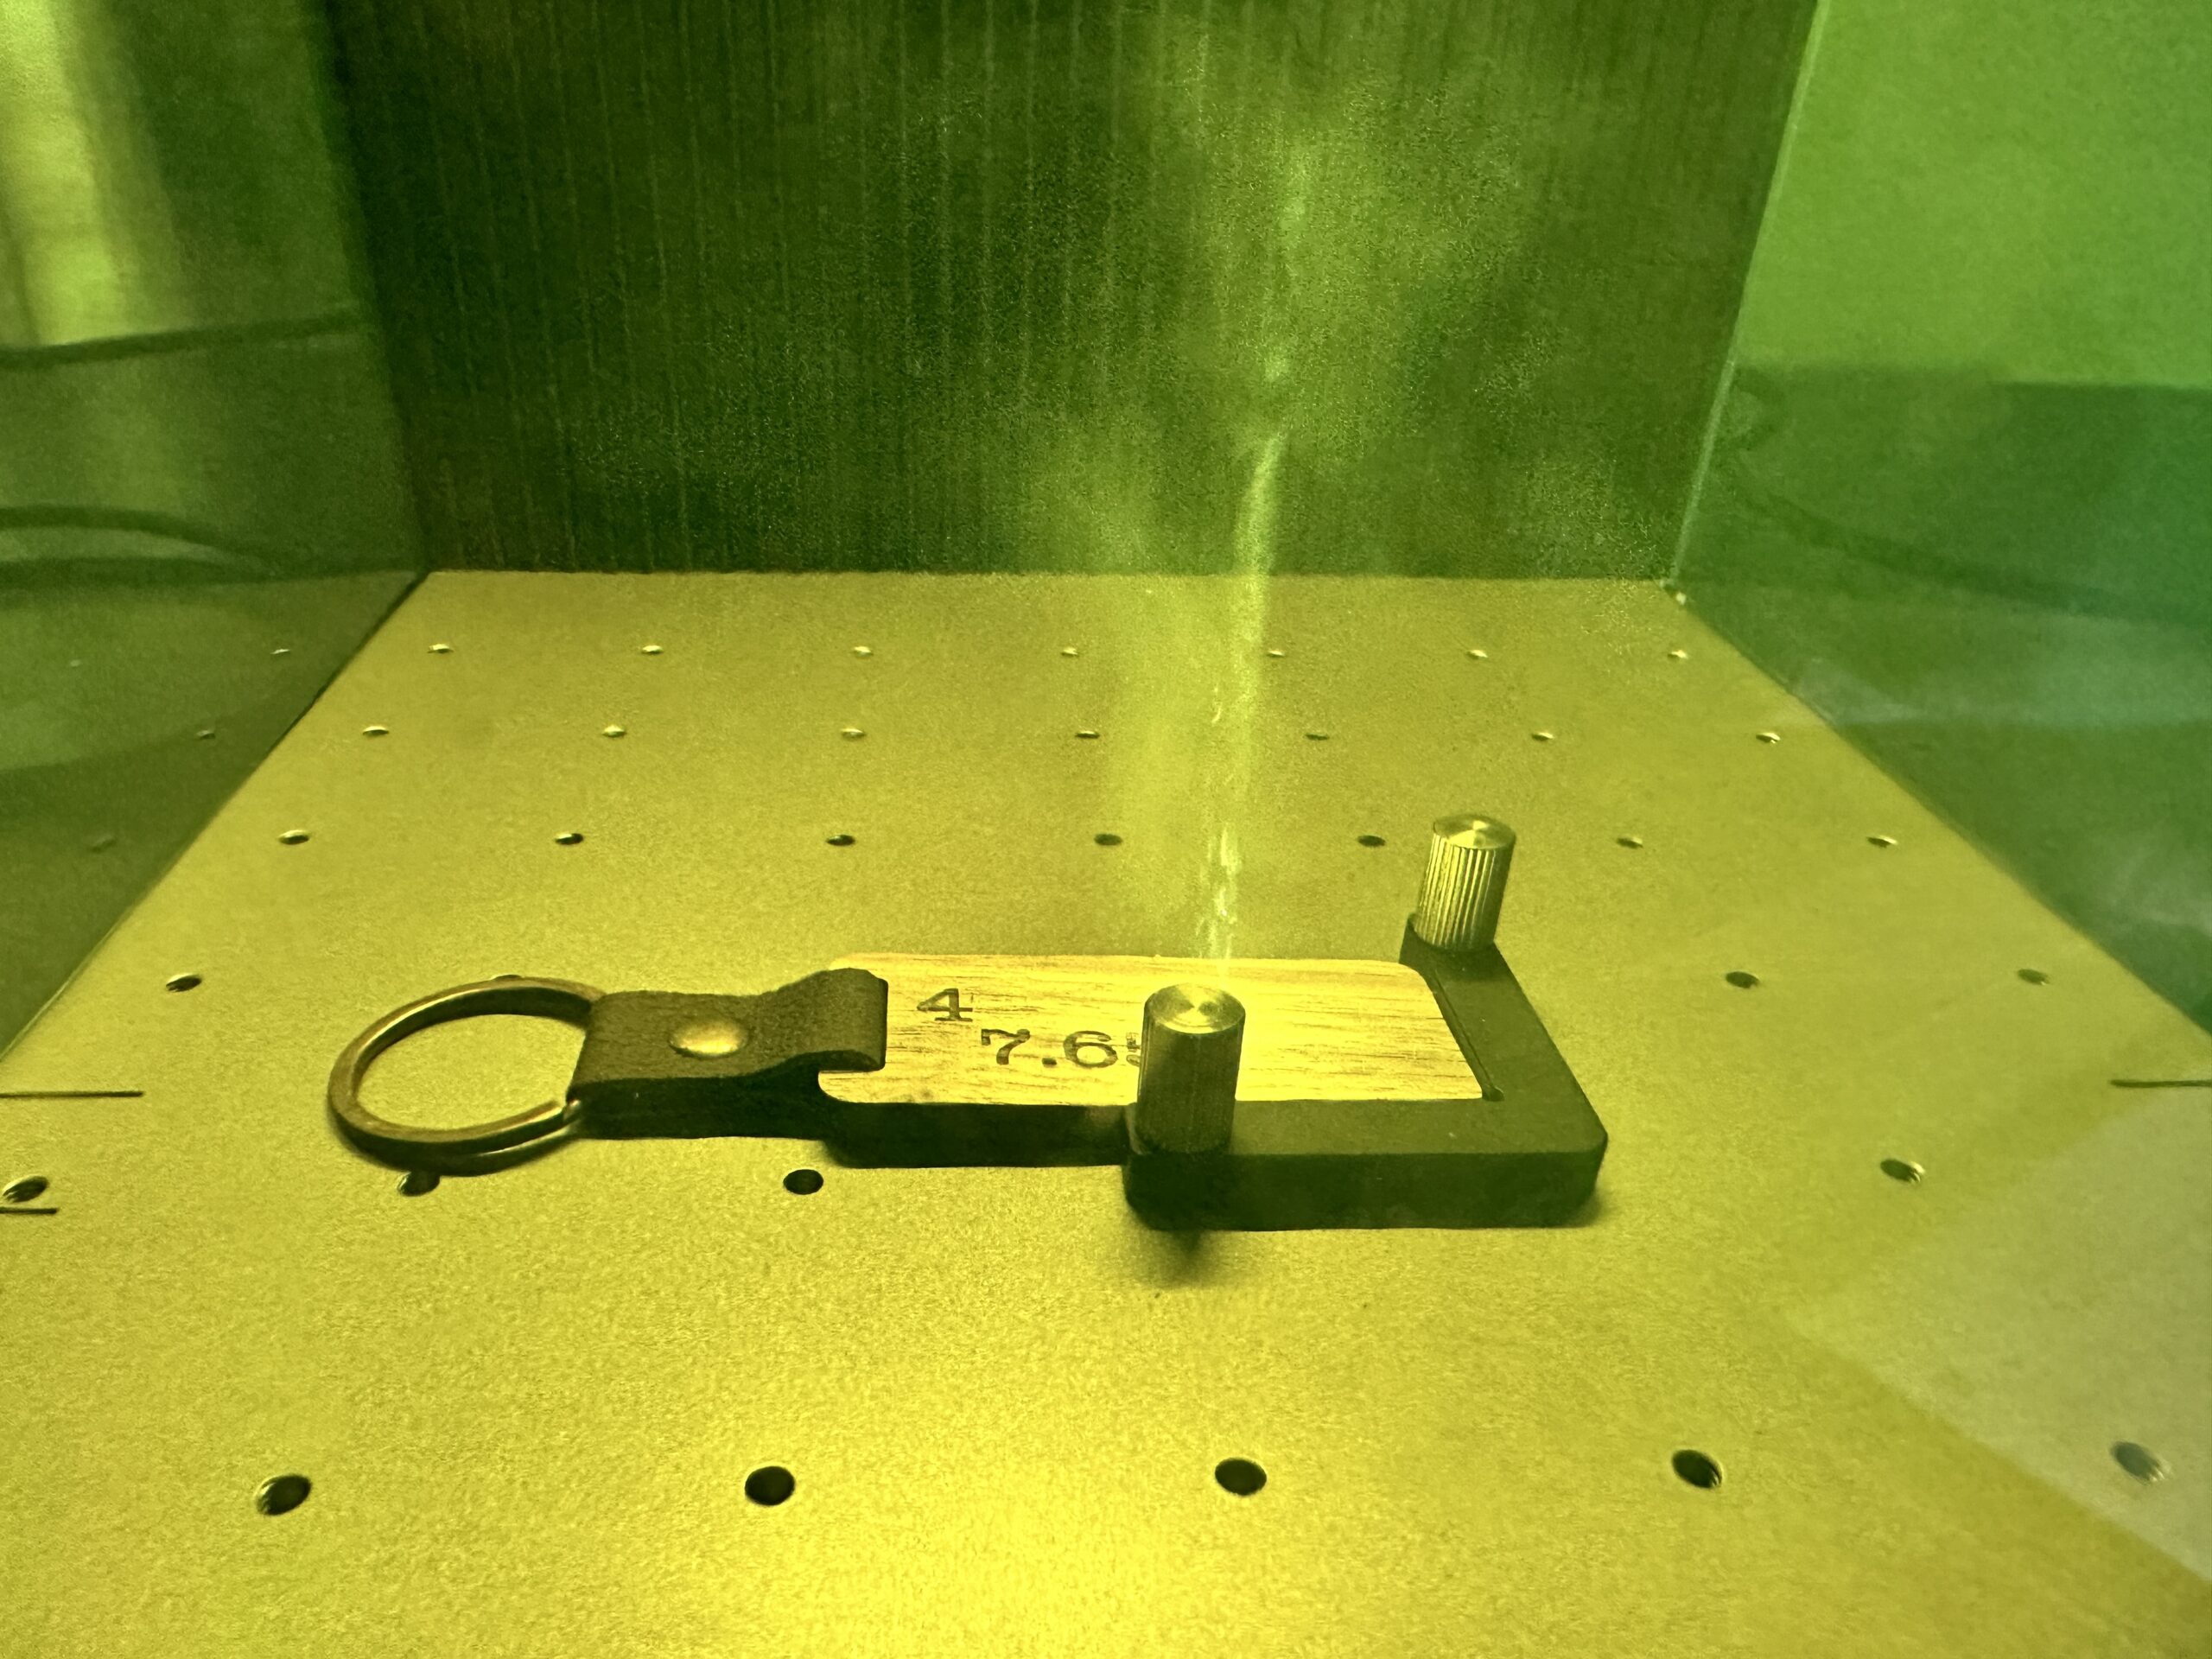
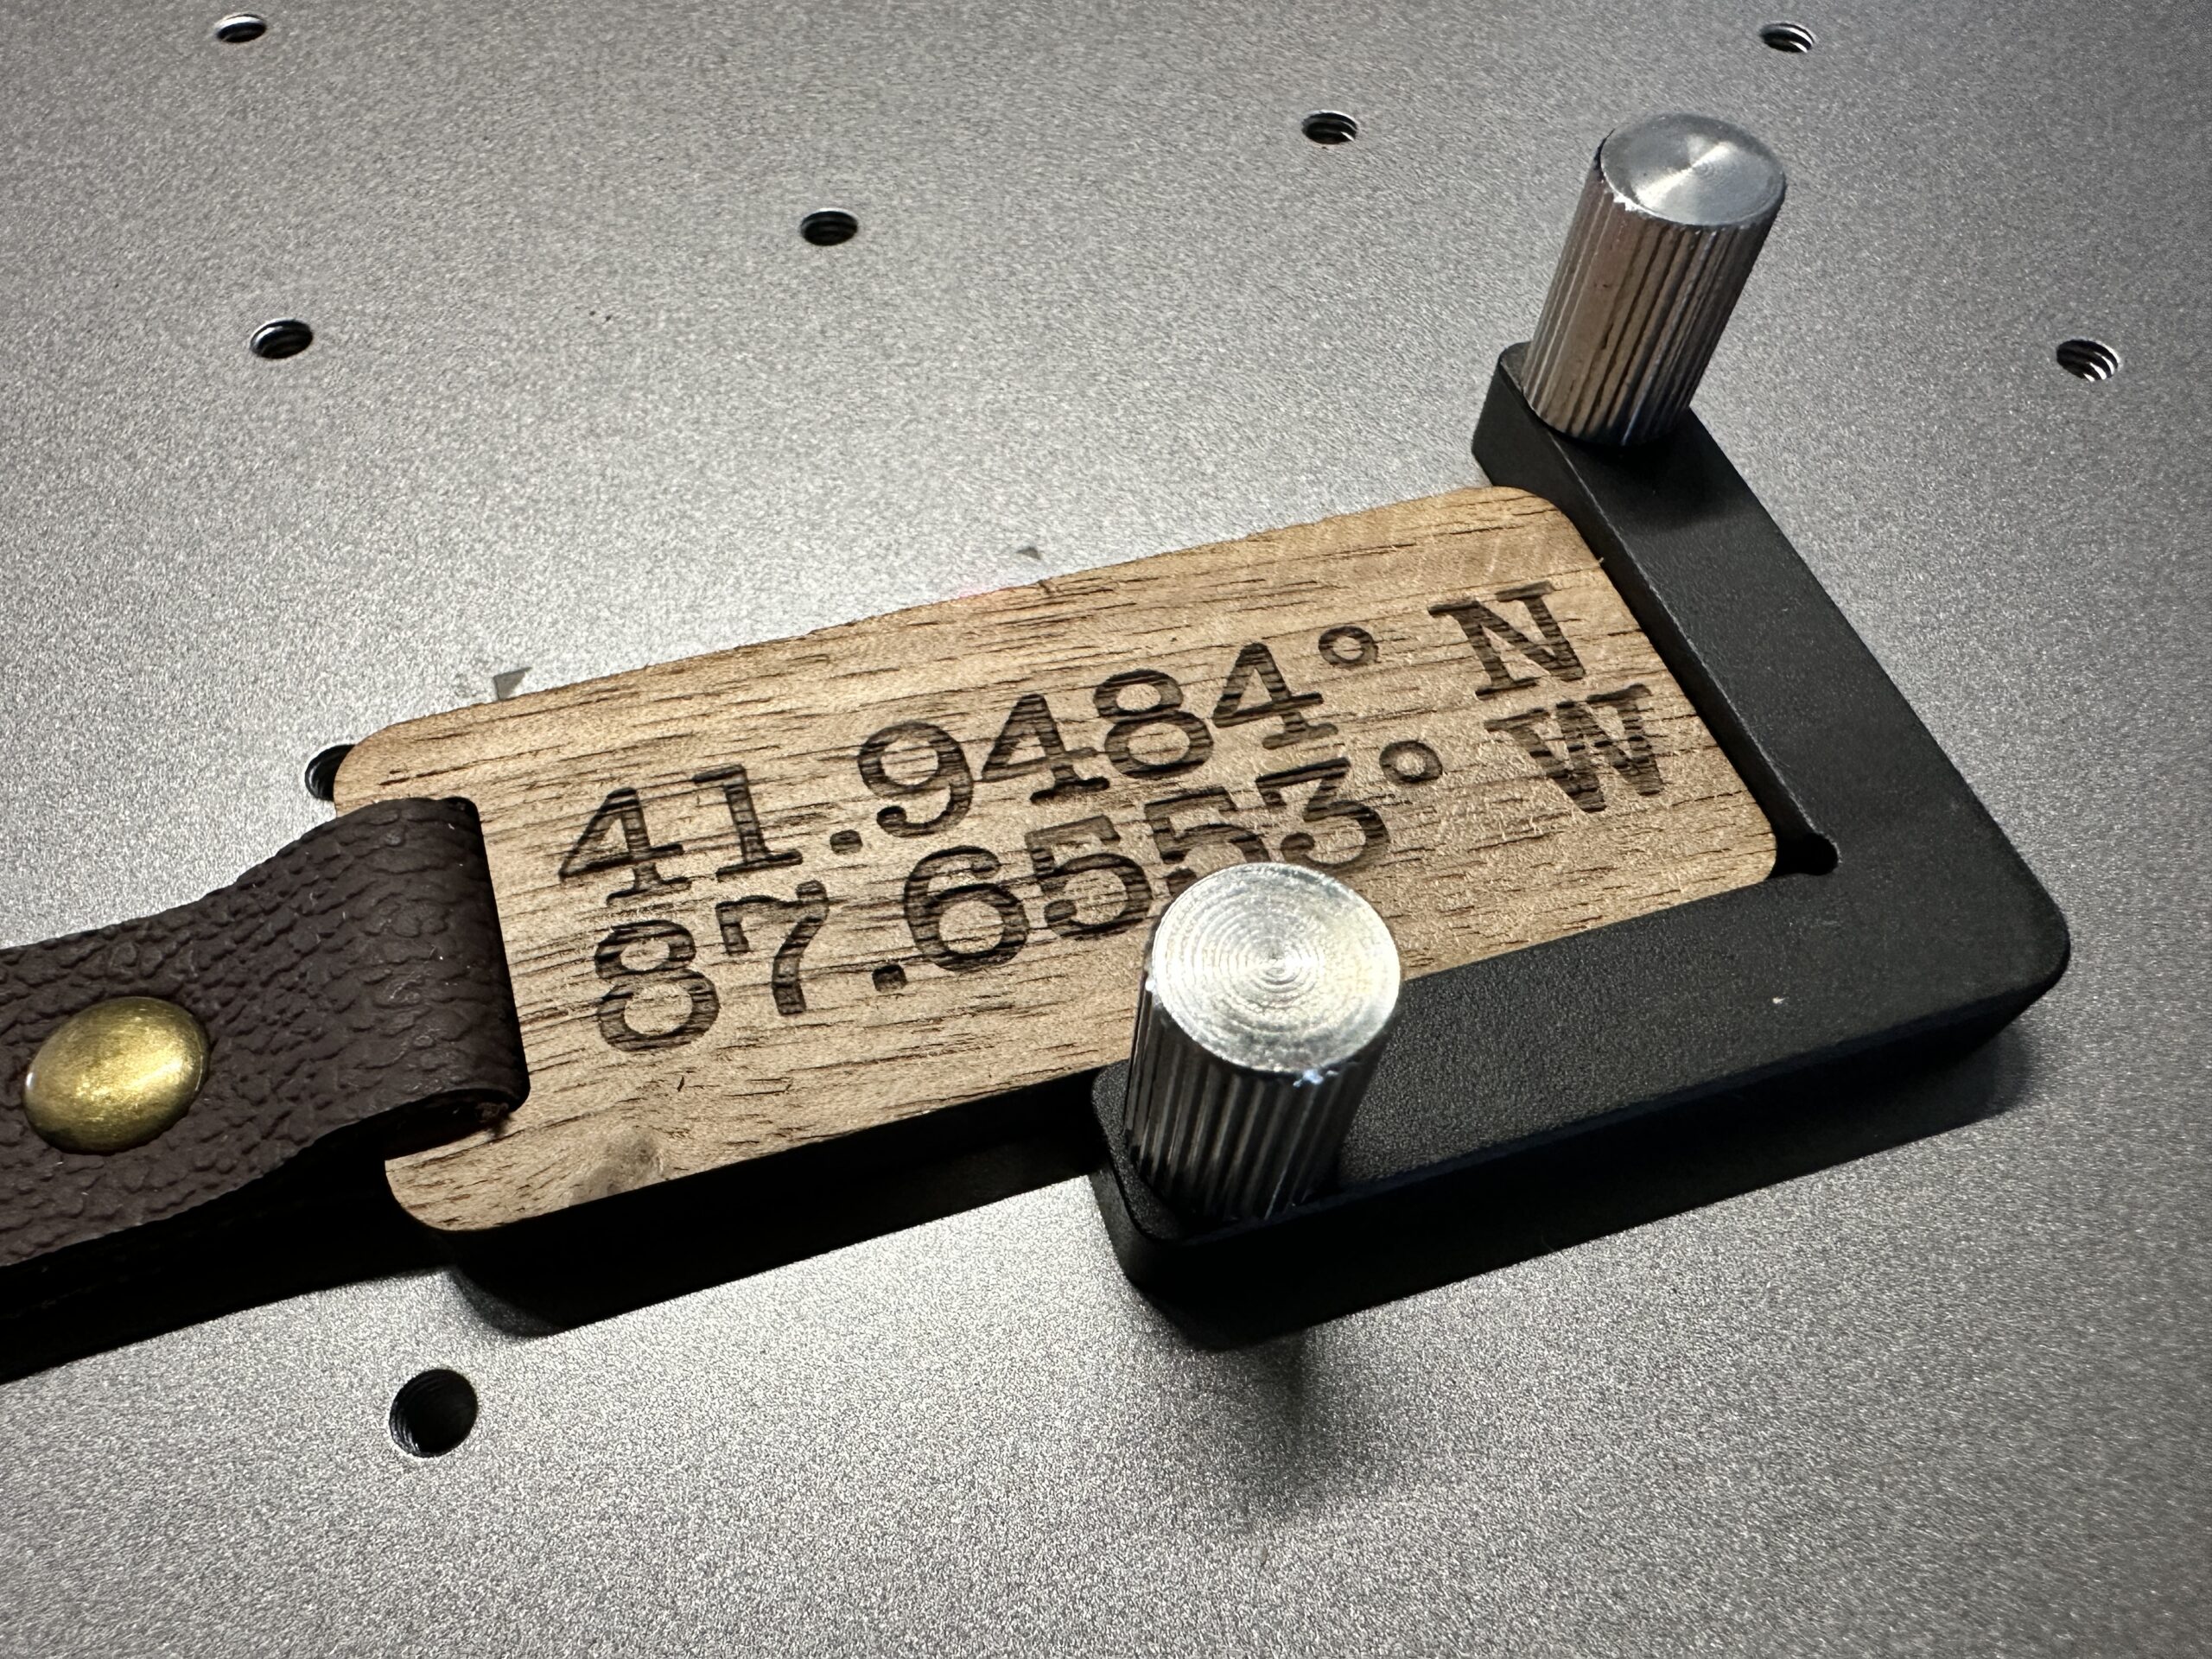
It took 16 seconds to engrave these coordinates on my wood keychain. I’ve had a handful of lasers in my crafting career, but WOW(!) this is fast – and portable!
One aspect of the xTool F1 Ultra is the machine’s ability to engrave embossed designs. Let’s take a look at how to set it up in xTool’s XCS (xTool Creative Studio) software and how it works with the xTool F1 Ultra laser.
Tutorial: Engraved Coin with xTool F1 Ultra
Setting Up the Engrave in the XCS Software
To create an embossed engrave design, you’ll need a depth map. This special graphic breaks an image down into many layers for the machine to engrave – giving it depth.
You’ve got three options:
Use the built in AI (Artimind) in XCS to create a depth map.
Use a third party site to create your own depth map and import it.
Choose an image from the XCS library.
Let’s use the built in AI with my own image in XCS to create a depth map.
First, open the XCS software, and click the AI icon on the left hand side toolbar.
Next, choose ‘Embossment’.
Upload your design, click the ‘Generate’ button and let the software transform your image.
Hover over the newly created depth map, and select the 3rd icon (Import to Canvas).
Setting Up the Engrave in the Machine
Perfect! Now that the image is loaded into the software as a depth map, put your material to be engraved onto the machine.
(add photo of material in the machine)
Choose your settings. For this tutorial, I’m using the built in settings for ‘Commemmorative Coin’.
If you’ve been wanting a portable, tabletop laser (perfect for taking to craft fairs and shows) – xTool just released the F1 Ultra Laser. And, it could be the answer to your crafty dreams.
What Type of Laser is the F1 Ultra?
The xTool F1 Ultra contains two different lasers: a 20 watt fiber laser and a 20 watt diode laser. The fiber laser handles metal engraving, while the diode laser handles everything else – including rock, acrylic, leather, and more.
Is it Really Portable? How Big is the xTool F1 Ultra?
Yes, the xTool F1 Ultra really is portable. It measures 10 inches x 14 inches x 19 inches. The xTool F1 Ultra weighs just over 32 pounds.
What Materials Will the xTool F1 Ultra Engrave or Cut?
The xTool F1 Ultra can engrave stainless steel, aluminum, brass, silver, plastic, titanium, gold, wood, acrylic, leather, glass, rock, paper, rubber, food, and more.
Additionally, the xTool F1 Ultra can cut up to .4mm brass, .3mm stainless steel, .2mm aluminum, 12mm acrylic, and 15mm wood.
How Large is the Engraving/Cutting Area on the xTool F1 Ultra?
The engraving/cutting area on the xTool F1 Ultra is 8.66″ by 8.66″. Compared to competitors, this is up to 115% larger.
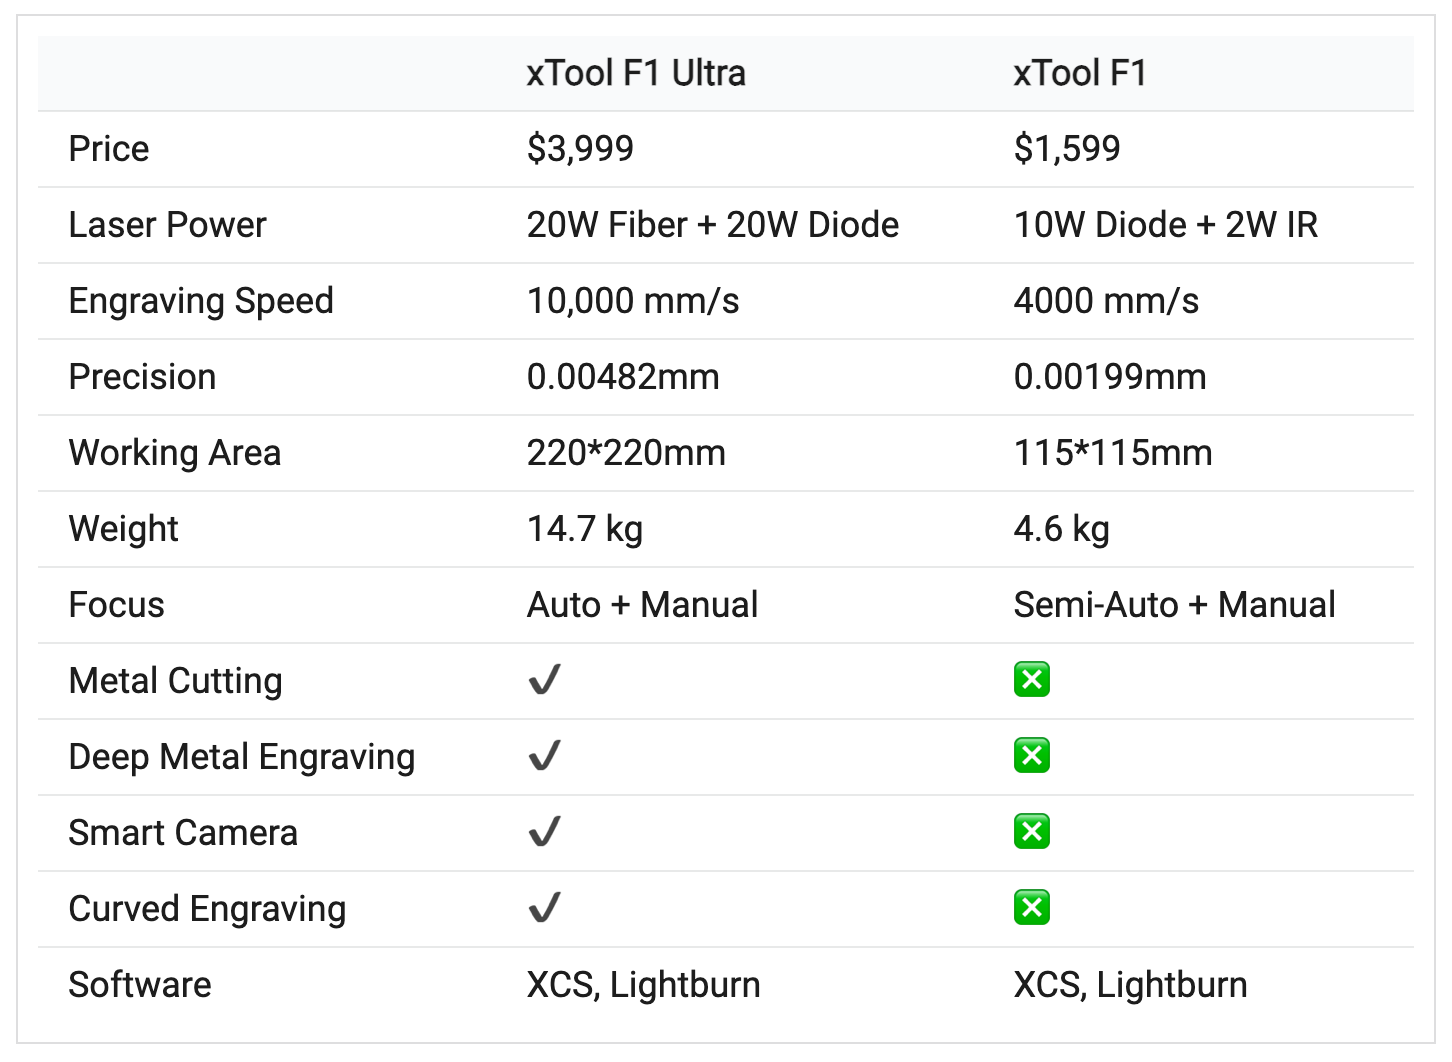
What is the Difference Between the xTool F1 and the F1 Ultra?
The xTool F1 Ultra is a much anticipated upgrade over the xTool F1 machine. xTool provides this handy chart of differences:
What Accessories Does the xTool F1 Ultra Have?
The xTool F1 Ultra works with several accessories, including:
Does the xTool F1 Ultra Require Internet or a Computer?
If you are wondering about the logistics of taking the xTool F1 Ultra to your next craft show, you do not have to have internet or a computer to run it. Instead, you can store up to 7GB of project files on the touchscreen control panel. This control panel then allows you to control the xTool F1 Ultra without a computer or internet.
How Much Does the xTool F1 Ultra Cost?
Ready to order your own xTool F1 Ultra? The xTool F1 Ultra retails for $4799, but is currently available for $3,999 as a special prelaunch deal – limited to the first 1000 orders. Also, xTool offers several financing options.
Project Sneak Peek
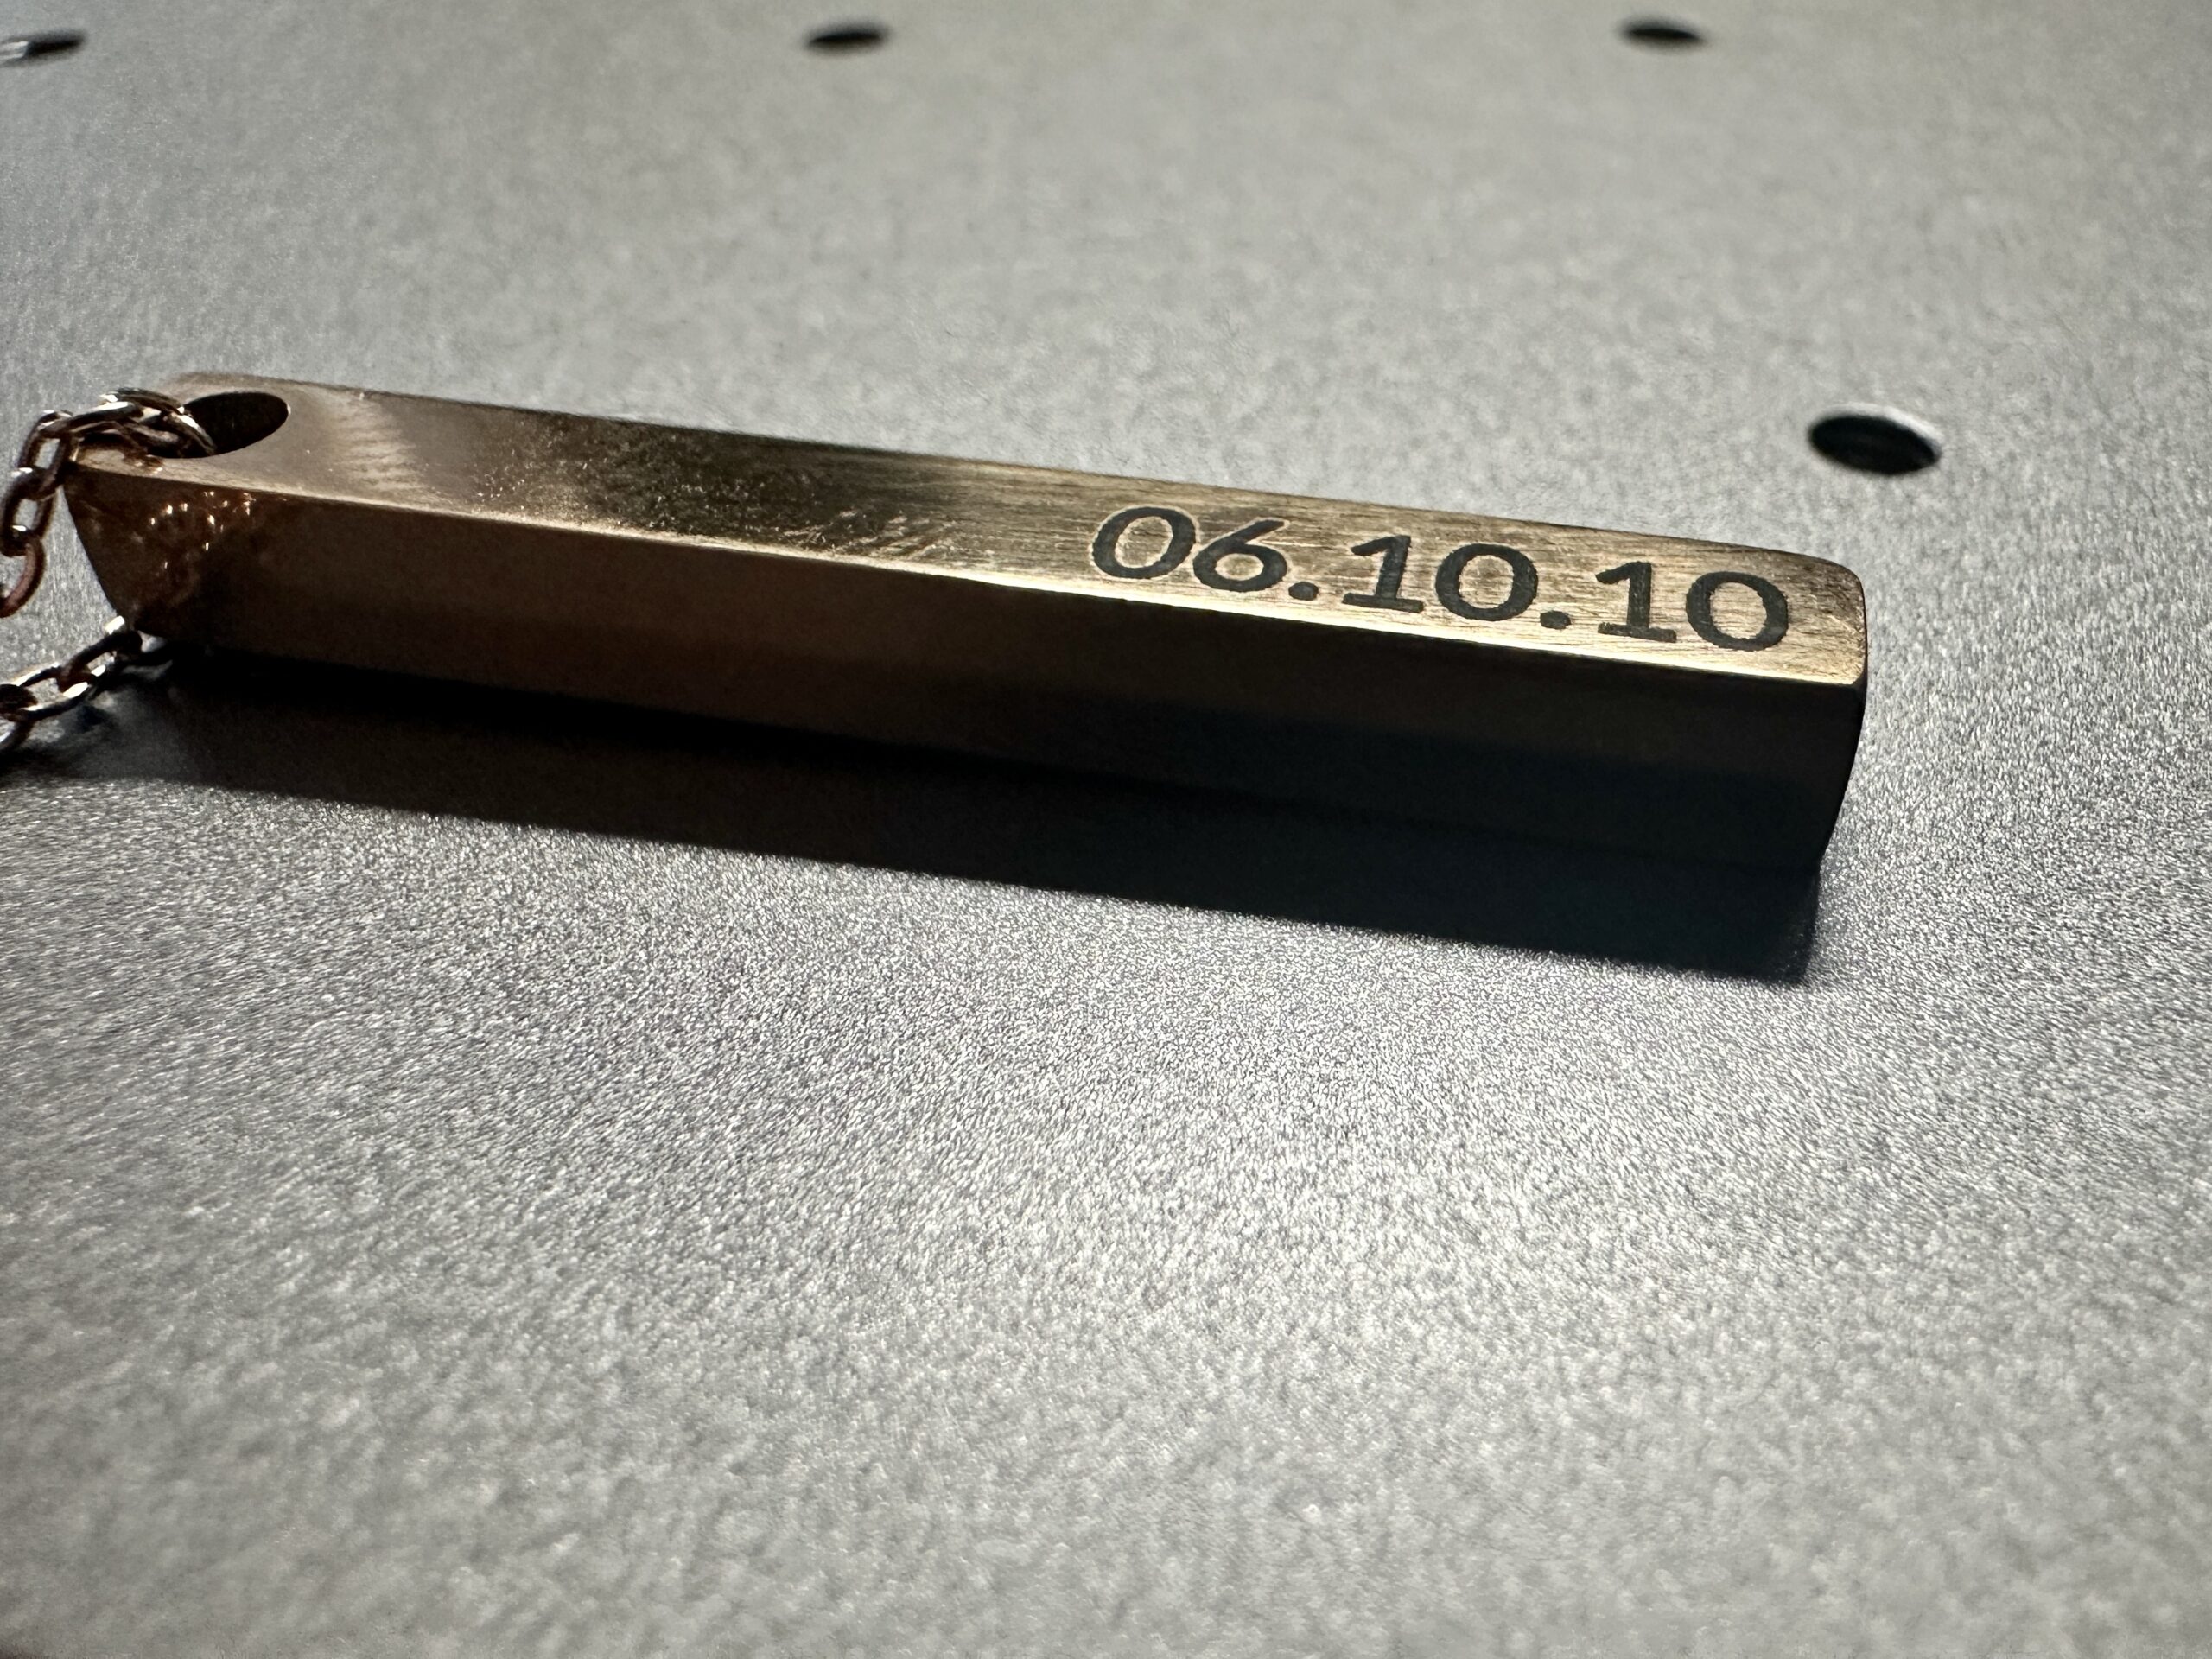
Next week, I’ll have plenty of xTool F1 Ultra projects to share with you. But, here’s a sneak peek of my first project. And, it took 5 seconds to engrave. Yes…. 5 seconds!