Author: christine

  • New on Instagram: How to Follow Hashtags

    Love using Instagram in your Silhouette or Cricut business? Me, too! There’s a new feature that I am excited to share with you today: Following hashtags! If you are like me, in addition to following other Instagramers, you love to browse relevant hashtags related to crafting, your business, and Silhouette or Cricut. (If you don’t, get to it – it’s how I find new Instagramers to follow!) Let’s take a look at how this hashtag following works.

    How to Follow Hashtags on Instagram

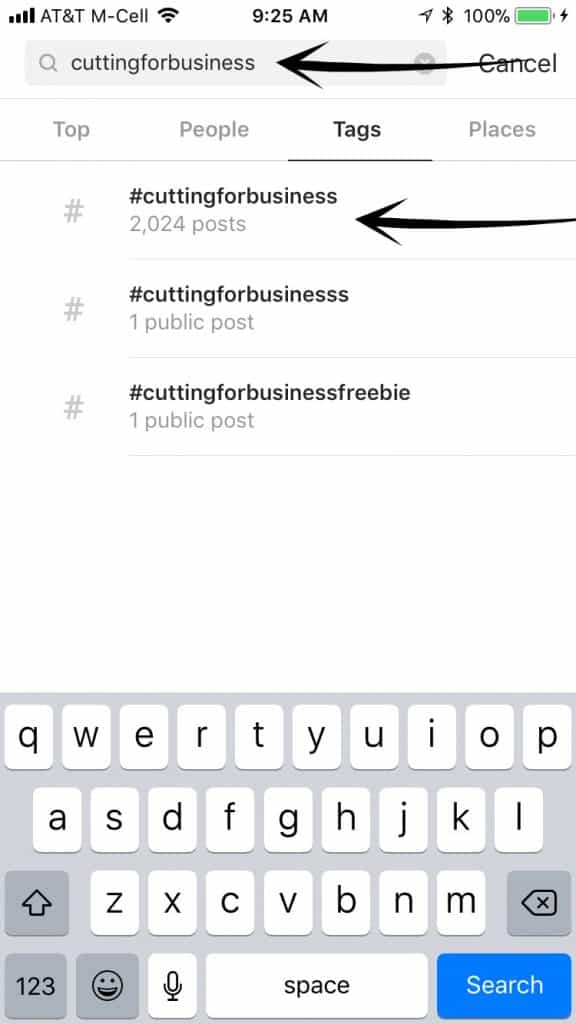
    1. Once logged into your account, click the ‘Search’ function at the bottom of the screen (it’s the magnifying glass). New on Instagram: How to Follow Hashtags - A great tool for Silhouette Cameo or Cricut Explore or Maker Small Business Owners - by cuttingforbusiness.com
    2. Type the hashtag you’d like to follow into the search box. In this case, I’m following my own hashtag, #cuttingforbusiness, which is a mix of my content and content from Cutting for Business followers. Click on the desired hashtag in the search results.New on Instagram: How to Follow Hashtags - A great tool for Silhouette Cameo or Cricut Explore or Maker Small Business Owners - by cuttingforbusiness.com
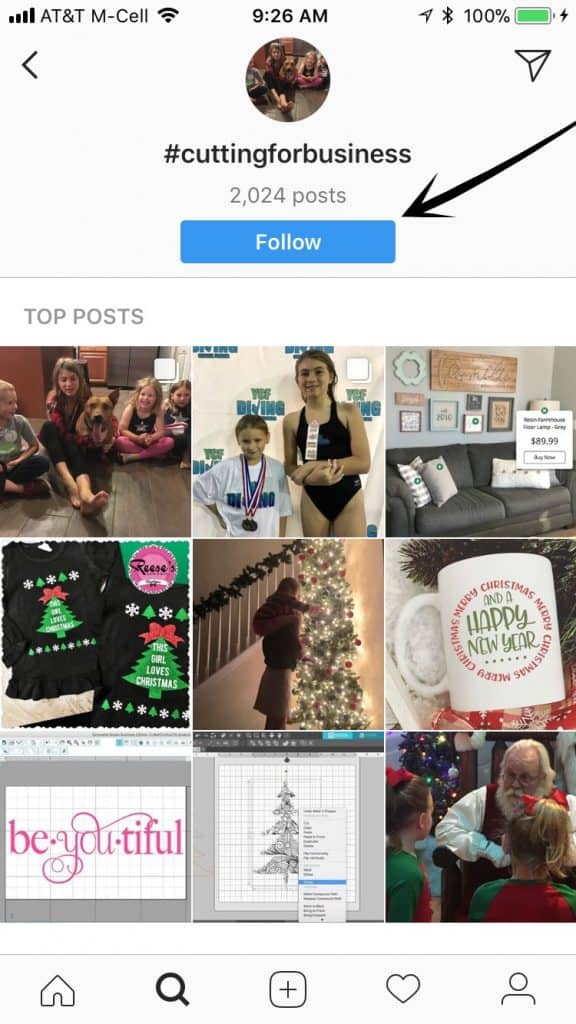
    3. Click the “Follow” button. New on Instagram: How to Follow Hashtags - A great tool for Silhouette Cameo or Cricut Explore or Maker Small Business Owners - by cuttingforbusiness.com
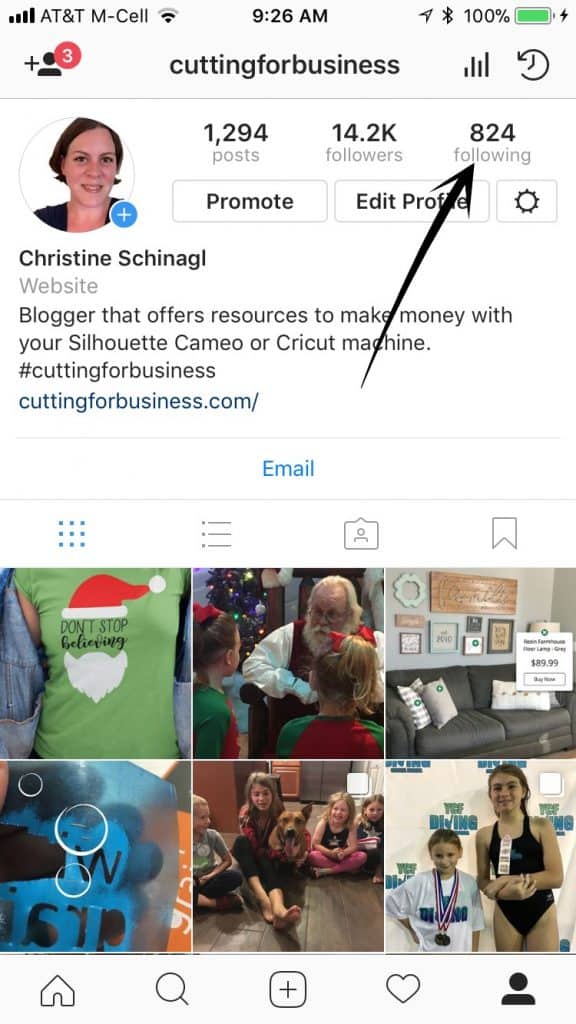
    4. Now, you (and other Instagramers) can see what hashtags you follow by first going to your profile, then clicking the “Following” tag. New on Instagram: How to Follow Hashtags - A great tool for Silhouette Cameo or Cricut Explore or Maker Small Business Owners - by cuttingforbusiness.com
      New on Instagram: How to Follow Hashtags - A great tool for Silhouette Cameo or Cricut Explore or Maker Small Business Owners - by cuttingforbusiness.com

    That’s it – it’s just that simple! It’s no secret that Instagram has undergone quite a transformation in the last few years. Of the changes made, this one is one of my favorites. It makes it so much easier (and time saving!) to discover new accounts.

    If you found this tutorial easy to follow, save it to Pinterest:

    New on Instagram: How to Follow Hashtags - A great tool for Silhouette Cameo or Cricut Explore or Maker Small Business Owners - by cuttingforbusiness.com

  • What to Do With Leftover Christmas Inventory

    Just like the big box retailers, you have to decide what to do with any leftover Christmas products or supplies in your Silhouette or Cricut small business. Let’s take a look at the three options today, along with the pros and cons.

    What to Do With Leftover Christmas Inventory - cuttingforbusiness.com

    What to Do With Leftover Christmas Inventory

    1. Pack it all up and save it for next year.
      • Pros: If you have the extra space, it isn’t difficult to pack up your products and sell them next year. You don’t even have to wait until the next holiday season, because Christmas in July is a thing!
      • Cons: If you’ve got a lot of money invested in the products, you won’t get your money back immediately.
    2. Clearance it out. Offer your remaining Christmas inventory at a discounted price.
      • Pros: You’ll get rid of everything and customers love sales!
      • Cons: Holding a sale can be tedious. Also, you may not make as much money as you had planned by putting Christmas products on sale.
    3. Do nothing. There are many craft businesses who leave Christmas products listed in their shop year round. (I mean, think of the brick and mortar Christmas stores who stay open all year long!)
      • Pros: You’ll get a little extra rest in if you don’t do anything with your remaining Christmas inventory.
      • Cons: Unsold Christmas inventory may sell slowly and take up virtual space in your shop.

    Tell me in the comments, what will you do with your unsold Christmas inventory? And, don’t forget to download this printable guide that tells you when to list what holiday craft products for sale.

  • Supplier Spotlight: Where to Buy Blank Umbrellas for Crafting

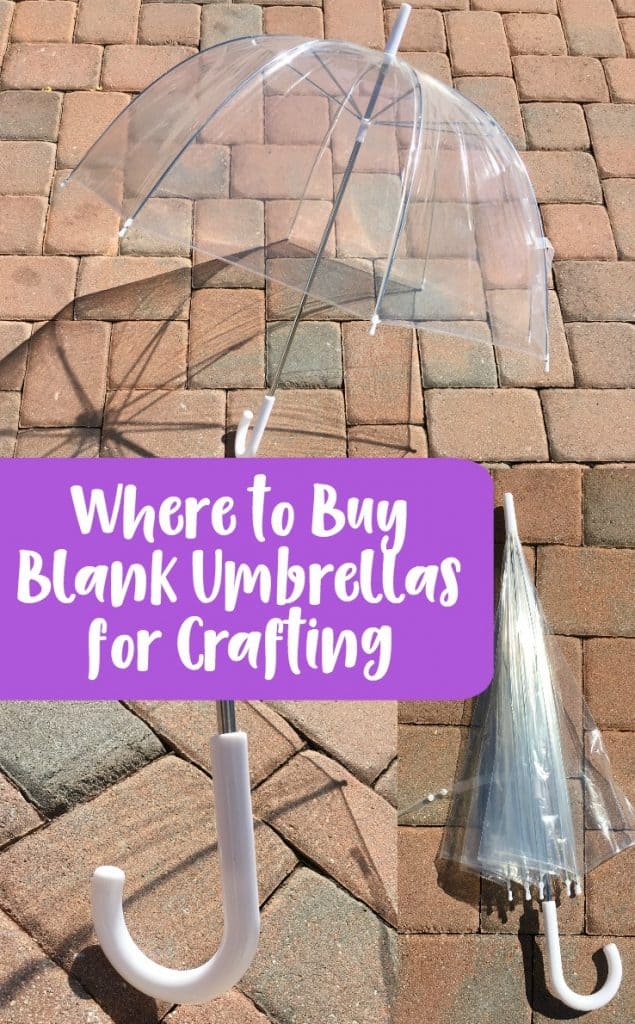
    I recently had to order a few clear, blank umbrellas to personalize for a friend. I scoured the internet high and low looking for the best price on the umbrellas. I’m happy to report that I had a wonderful experience with Sara Glove.

    I ordered the 46″ manual open clear umbrella from Sara Glove. I paid $34.95 for a case of 6 umbrellas, or $5.83 each plus shipping. When I ordered, there was a free shipping promotion going on that orders of $150 ship for free. Unfortunately, I did not meet the minimum. My ordered shipped 24 hours later.

    Links and Pricing on Umbrellas from Sara Glove

    • 46″ Manual open clear umbrella (adult size). $34.95 for a case of 6, $5.83 each. Click here to view.
    • 46″ Auto open clear umbrella (adult size). $48.95 for a case of 6, $8.16 each. Click here to view.
    • 34″ Manual open clear umbrella (kid size). $15.95 for a case of 3, $5.32 each. Click here to view.

    Try Before You Buy a Case

    It’s expensive to order a single umbrella from Sara Glove, however, they also sell on Amazon with Prime shipping. Click here to view on Amazon.

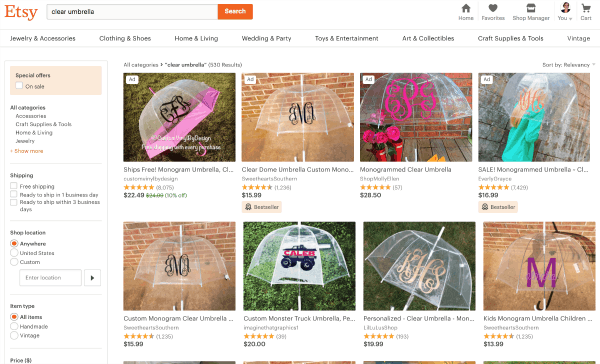
    Wondering what other crafters are doing with clear umbrellas? You can add monograms or designs to the umbrellas using adhesive vinyl. Click the photo below to see examples on Etsy: Supplier Spotlight: Where to Buy Blank Umbrellas for Silhouette Portrait and Cameo or Cricut Explore and Maker Crafting - by cuttingforbusiness.com

    Share this post with another crafter on Pinterest:

    Supplier Spotlight: Where to Buy Blank Umbrellas for Silhouette Portrait and Cameo or Cricut Explore and Maker Crafting - by cuttingforbusiness.com

  • Credit Card Processing: Should I Charge Fees to Customers Who Pay by Credit Card?

    To accept credit cards from customers in your Silhouette or Cricut business, you have to use a payment processor. Of course, your business is charged a fee for using the service. This means that you have two options regarding the fees: You can absorb the cost of payment processing, or you can pass the fee on to your customers in the form of a surcharge. A surcharge simply means to charge your customer a payment processing fee on top of the product cost and taxes.

    What You Need to Know About Surcharges

    There’s a whole lot you need to know before charging your customers surcharges:

    1. Surcharges are illegal in several states. These states are: Colorado, Connecticut, Kansas, Maine, Massachusetts, New York, Oklahoma, and Texas. (And Puerto Rico, too.)
    2. Not allowed on Paypal. If you are using Paypal to accept credit cards, it is against their terms of service to charge a surcharge. You can charge a handling charge, but you must charge it to everyone (not only those paying with a credit card). Read the full agreement at this linkPayment Processing: Should I Charge Fees to Customers Who Pay by Credit Card? A must read for Silhouette Cameo or Cricut Explore small business owners - by cuttingforbusiness.com
    3. Square allows surcharges. Of course, you’ll have to follow their rules. Read more at this link.
    4. Must notify all the major credit card companies. All of the major credit card companies require that you notify them of your intent to charge a surcharge. Each network has a specific set of rules which often include signage, recording the surcharge as a separate line item on the customer’s receipt, surcharge caps, and reporting of the surcharges among other requirements.
      • Visa
      • Mastercard
      • Discover
        • The required surcharge form is available at this link.
        • Read more about requirements at this link. (Scroll to section 7.)
      • American Express
        • Refer to the merchant card acceptance terms at this link. (Surcharge information is located on page 3.)

    My Opinions on Surcharges in Your Silhouette or Cricut Business

    This is strictly my opinion, so take it as that: Due to all the surcharge rules and requirements, I’d say that adding a surcharge to customers paying by credit card is not worth it. Also, when many merchants do not charge a surcharge, it’s one less reason for people to shop with you. Instead, build the price of credit card processing into your product price. Need help pricing your products? Head to this post.

    Want to get $1000 in free credit card processing through Square? Click here. If you’d like to learn more about Paypal card readers instead, head to this post.

    This post is important; share it on Pinterest:

    Credit Card Processing: Should I Charge Fees to Customers Who Pay by Credit Card? A must read for Silhouette Cameo or Cricut Explore small business owners - by cuttingforbusiness.com

  • Design Tutorial: Carved Initials Tree Trunk in Silhouette Studio

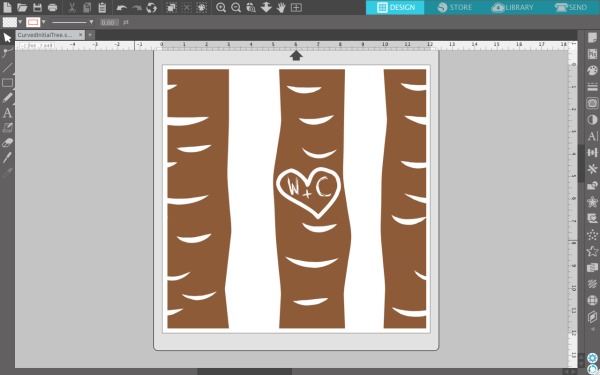
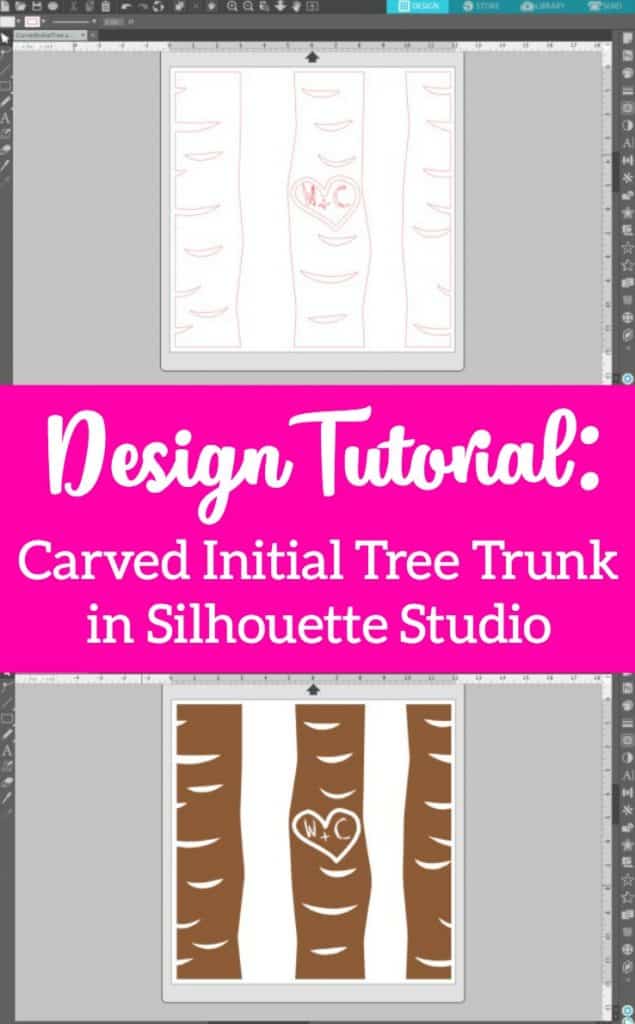
    Ahhh, goodbye Christmas and New Year! Silhouette and Cricut small business owners, it’s time to start thinking to Valentine’s Day. Today, I’m showing you how to create a carved initial tree trunk design with personalized initials. I think the design style is perfect for a ceramic tile, wood sign, or a card.

    Design Tutorial: Tree Trunk with Personalized Initials in Silhouette Studio

    You’ll need these three fonts (or similar ones) to complete this tutorial:

    • Peoni Patterns – 100% free for personal and commercial use at this link.
    • Brankovic – 100% free for personal and commercial use at this link.
    • MTF Heart Doodle – Free for personal use, $5 donation for commercial use at this link.
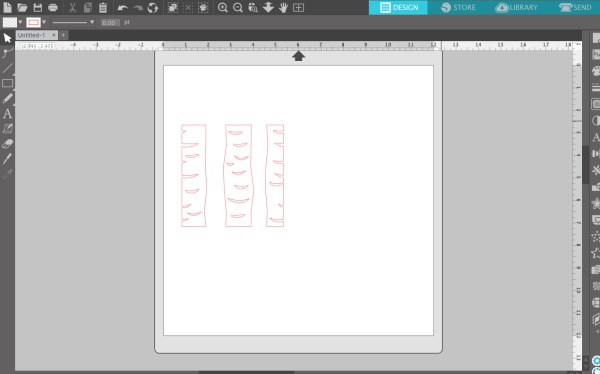
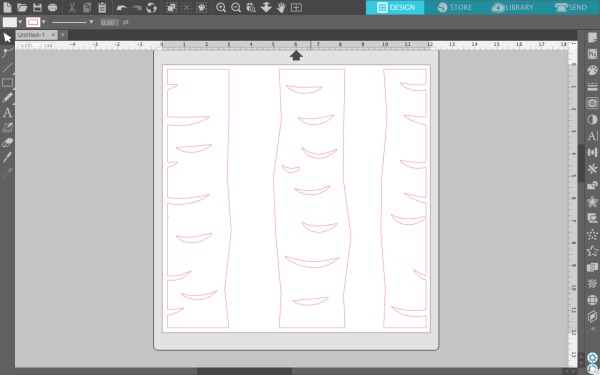
    1. In Silhouette Studio, type the letter ‘e’ using the Peoni Patterns font. (Note: You can also use the ‘d’. It’s a slightly different tree pattern.) Design Tutorial: Carved Initials Tree Trunk in Silhouette Studio - Portrait, Cameo, Curio, Mint - by cuttingforbusiness.com
    2. Resize your trees as needed. Design Tutorial: Carved Initials Tree Trunk in Silhouette Studio - Portrait, Cameo, Curio, Mint - by cuttingforbusiness.com
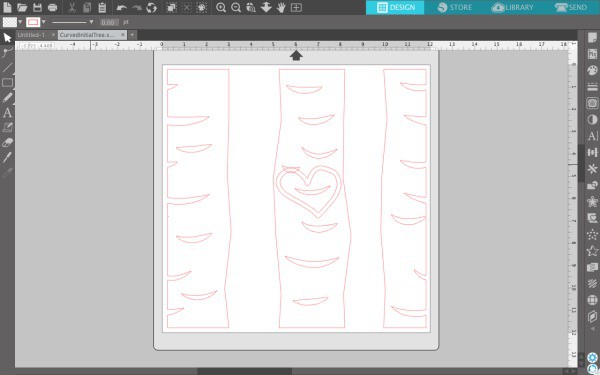
    3. Type a ‘c’ in the MTF Heart Doodle font and size it to fit the middle tree. Rotate it as desired. Design Tutorial: Carved Initials Tree Trunk in Silhouette Studio - Portrait, Cameo, Curio, Mint - by cuttingforbusiness.com
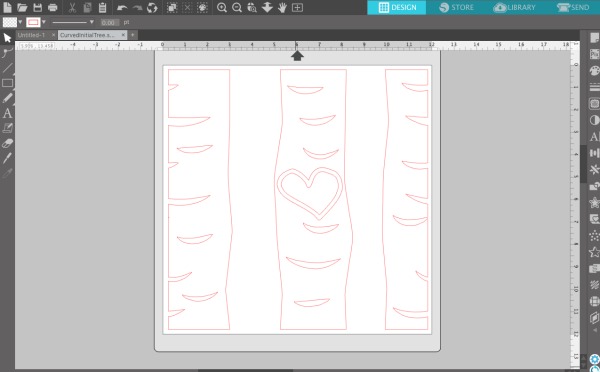
    4. Use the eraser tool to erase any tree detail from underneath your heart. (Be sure that the eraser is set to ‘Outline’ and not ‘Solid’.)Design Tutorial: Carved Initials Tree Trunk in Silhouette Studio - Portrait, Cameo, Curio, Mint - by cuttingforbusiness.com
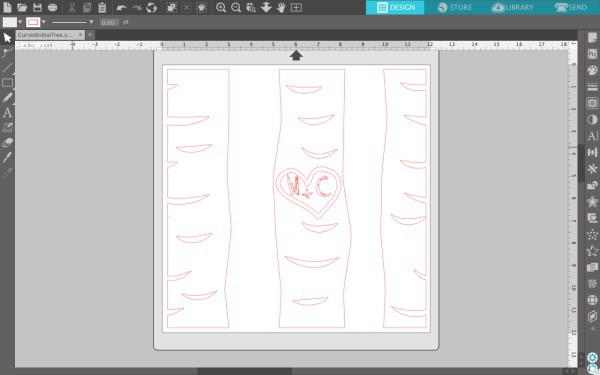
    5. Add the initials and a + sign inside the heart using the Brankovic font. Design Tutorial: Carved Initials Tree Trunk in Silhouette Studio - Portrait, Cameo, Curio, Mint - by cuttingforbusiness.com
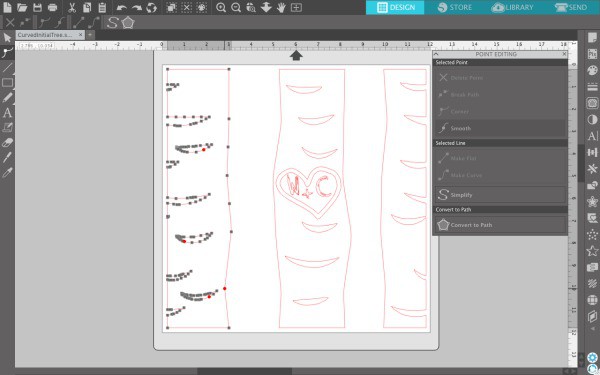
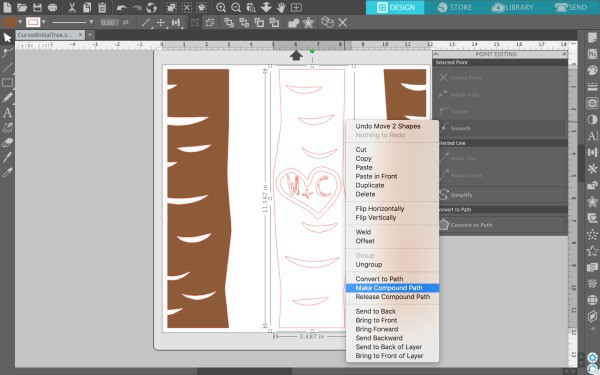
    6. Fill the design with any color and change the line color to the same color as the fill. (Tip: If your design won’t fill with color, double click the line of the design and single click on any red circles to close the path. For the middle tree, I had to first right click on it and ‘Make Compound Path’, then single click the red circles to close the path.) Design Tutorial: Carved Initials Tree Trunk in Silhouette Studio - Portrait, Cameo, Curio, Mint - by cuttingforbusiness.com
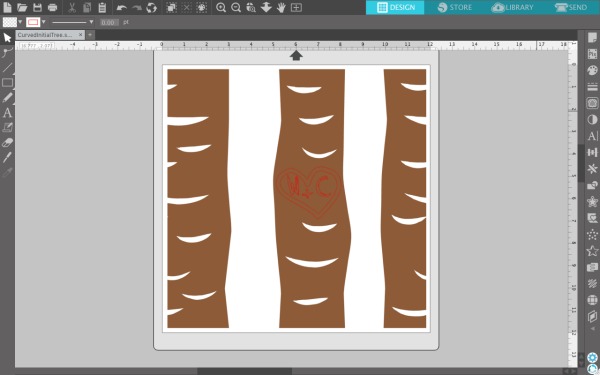
      Design Tutorial: Carved Initials Tree Trunk in Silhouette Studio - Portrait, Cameo, Curio, Mint - by cuttingforbusiness.comWhen you are finished with this step, your design should look like this: Design Tutorial: Carved Initials Tree Trunk in Silhouette Studio - Portrait, Cameo, Curio, Mint - by cuttingforbusiness.com
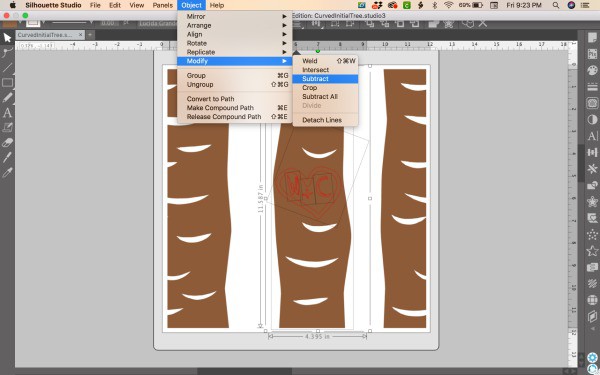
    7. Select the middle tree, then the heart, then the initials. (Tip: Hold down the ‘Shift’ key to select multiple objects at once.) Navigate to ‘Object’, ‘Modify’, ‘Subtract’. Design Tutorial: Carved Initials Tree Trunk in Silhouette Studio - Portrait, Cameo, Curio, Mint - by cuttingforbusiness.com

    That’s it! Your design should now be ready to cut. Design Tutorial: Carved Initials Tree Trunk in Silhouette Studio - Portrait, Cameo, Curio, Mint - by cuttingforbusiness.com

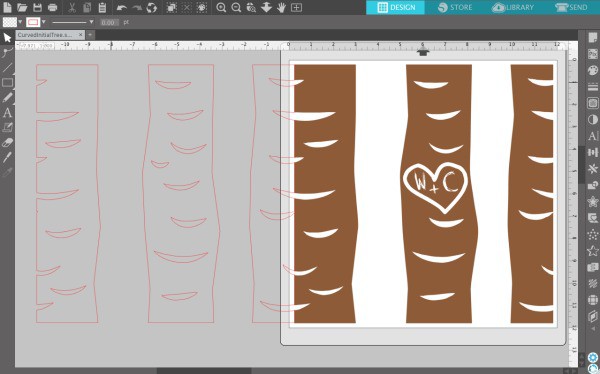
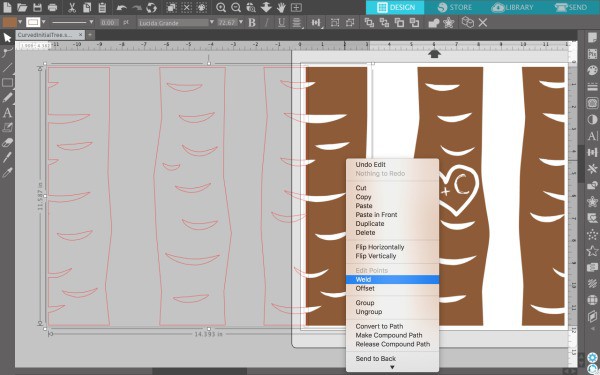
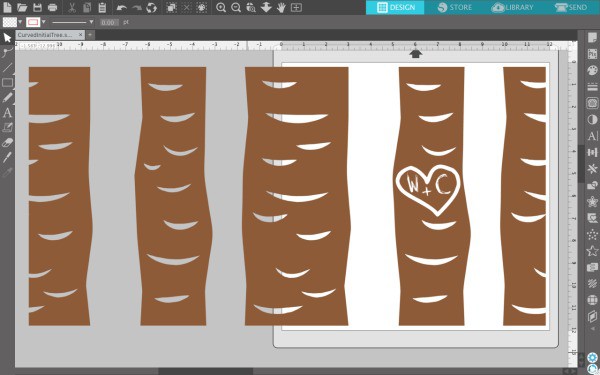
    But what if you want more trees? If you want to make the design a rectangle instead of square, type an ‘e’ in the Peoni Patterns font and resize it to the same size as the first trees. Then, overlap the edges of the trees very slightly. Design Tutorial: Carved Initials Tree Trunk in Silhouette Studio - Portrait, Cameo, Curio, Mint - by cuttingforbusiness.comSelect both objects by holding down the shift button. Then, right click and select ‘Weld’. Design Tutorial: Carved Initials Tree Trunk in Silhouette Studio - Portrait, Cameo, Curio, Mint - by cuttingforbusiness.com Your trees should have filled in with color. Design Tutorial: Carved Initials Tree Trunk in Silhouette Studio - Portrait, Cameo, Curio, Mint - by cuttingforbusiness.comYou can also do this during step 1 if you’d like to have a rectangle design with the carved initial on the biggest tree. If you are cutting a rectangle set of trees, be sure to resize your mat to fit the design.

    I think this design will be great for personalized Valentine’s Day products.

    Do you love this tutorial as much as I do? Save it to Pinterest:

    Design Tutorial: Carved Initials Tree Trunk in Silhouette Studio - Portrait, Cameo, Curio, Mint - by cuttingforbusiness.com

  • Wood Signs: How to Prevent Your Vinyl Stencil from Peeling Your Paint Up

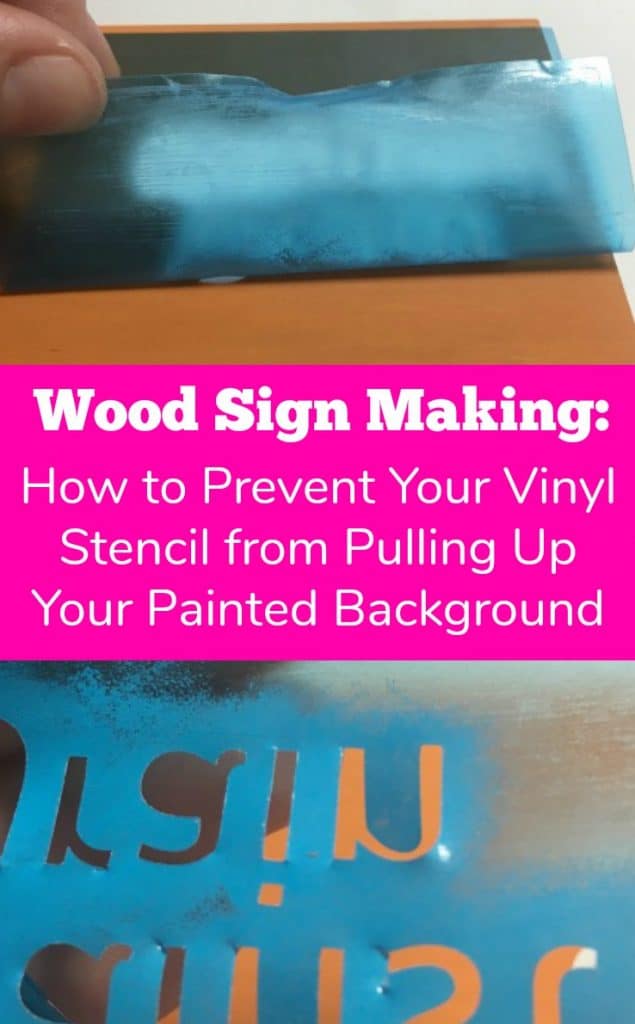
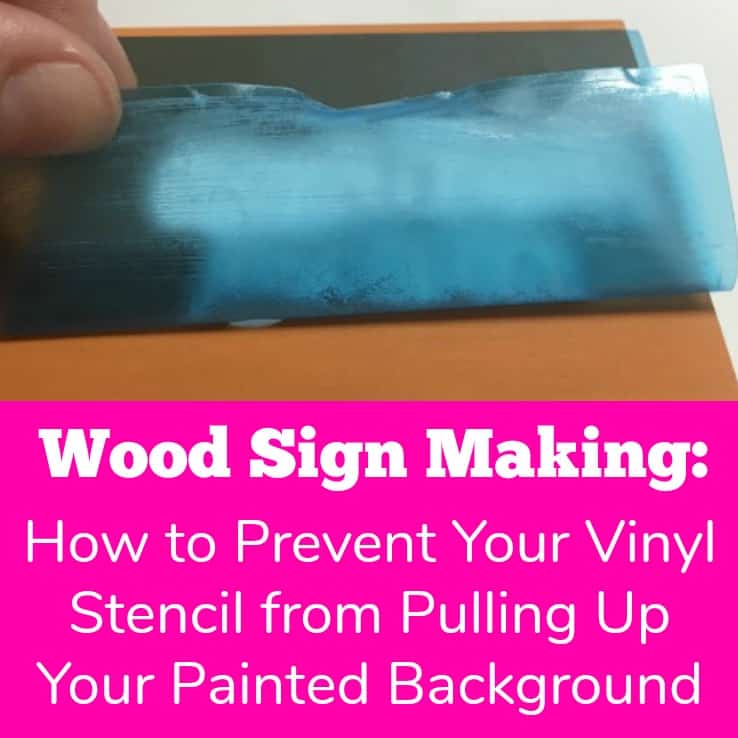
    Hey Silhouette and Cricut wood sign makers, are you having problems with your vinyl stencil peeling up the paint on your wooden sign? You know the struggle: you’ve cut your wood, sanded your wood, painted the background, applied your vinyl stencil, stenciled the sign, and you when you pull off the stencil little bits of the painted background come up, too! Today, I’m sharing a tip to help you prevent this.

    How to Prevent Your Vinyl Stencil from Peeling Your Paint Up

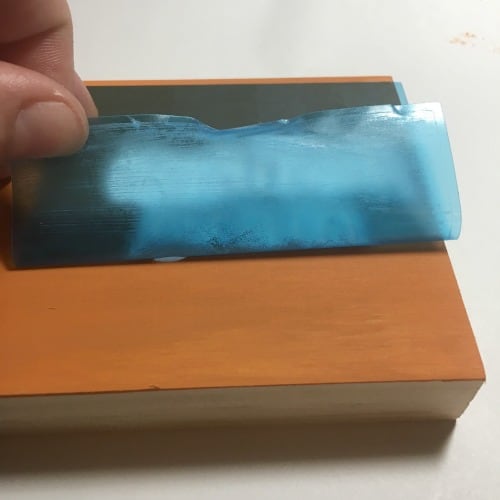
    When you pull up your vinyl stencil, pull it up against the grain of the wood. That’s it, it’s just that simple!

    Let’s look at some pictures to demonstrate.

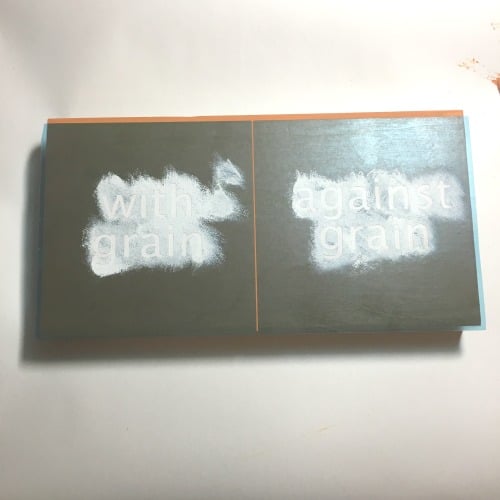
    I’ve got my sign stenciled and I am ready to remove the vinyl stencil. (By the way, I prefer to use Oramask 813 stencil film.)

    Handmade Wood Signs: How to Prevent Your Vinyl Stencil from Peeling Your Paint Up - Silhouette Portrait or Cameo and Cricut Explore or Maker - by cuttingforbusiness.com

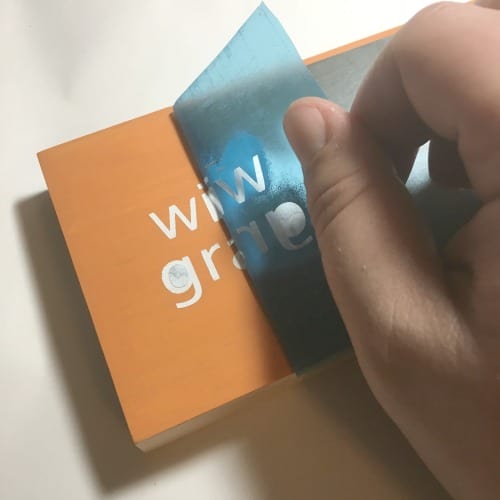
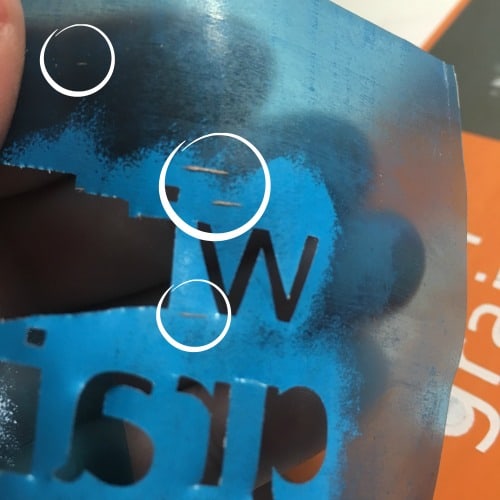
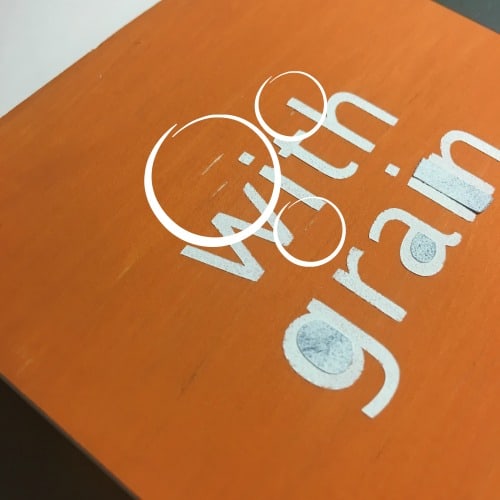
    On the left side, I have pulled off the Oramask 813 stencil in the direction of the wood grain. Handmade Wood Signs: How to Prevent Your Vinyl Stencil from Peeling Your Paint Up - Silhouette Portrait or Cameo and Cricut Explore or Maker - by cuttingforbusiness.comYou’ll see that several slivers of wood have pulled off onto with the stencil. I’ve circled them in the photo below.Handmade Wood Signs: How to Prevent Your Vinyl Stencil from Peeling Your Paint Up - Silhouette Portrait or Cameo and Cricut Explore or Maker - by cuttingforbusiness.com
    Handmade Wood Signs: How to Prevent Your Vinyl Stencil from Peeling Your Paint Up - Silhouette Portrait or Cameo and Cricut Explore or Maker - by cuttingforbusiness.com

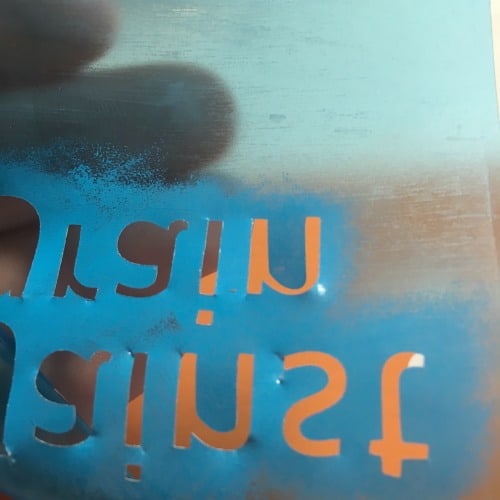
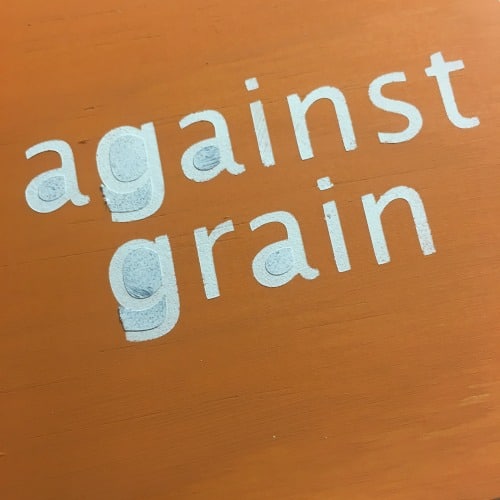
    On the other side of the sign, I’ve pulled off the Oramask 813 against the wood grain. Handmade Wood Signs: How to Prevent Your Vinyl Stencil from Peeling Your Paint Up - Silhouette Portrait or Cameo and Cricut Explore or Maker - by cuttingforbusiness.com

    From the photos, you can see that the stencil didn’t pull up the wood slivers. Handmade Wood Signs: How to Prevent Your Vinyl Stencil from Peeling Your Paint Up - Silhouette Portrait or Cameo and Cricut Explore or Maker - by cuttingforbusiness.com
    Handmade Wood Signs: How to Prevent Your Vinyl Stencil from Peeling Your Paint Up - Silhouette Portrait or Cameo and Cricut Explore or Maker - by cuttingforbusiness.com

    That’s it! One simple tip to prevent your vinyl stencil from pulling up the painted background when you remove it.

    Love this tip? Save it to Pinterest:

    Handmade Wood Signs: How to Prevent Your Vinyl Stencil from Peeling Your Paint Up - Silhouette Portrait or Cameo and Cricut Explore or Maker - by cuttingforbusiness.com

  • How to Sell on Facebook Marketplace as Your Business

    Great news for small businesses: Facebook has recently added the ability to sell in the marketplace as your Facebook page! This is great for small businesses, because it helps legitimize…. Here’s how:

    How to Sell on Facebook Marketplace as Your Business

    1. Log into the Facebook App.
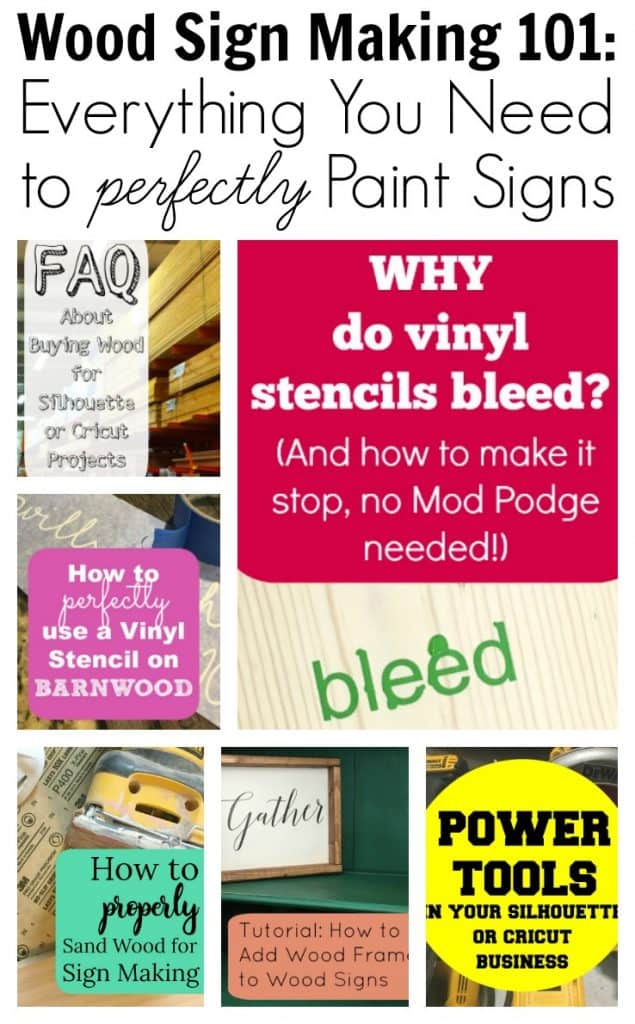
  • Wood Sign Making 101 – Everything You Need to Perfectly Paint Signs

    I get emails all the time with questions from Cutting for Business readers about making wood signs using their Silhouette Cameo or Cricut Explore or Maker. Let’s take a step-by-step walk through making a sign with your Silhouette or Cricut.

    How to Perfectly Paint Signs with Your Silhouette Cameo or Cricut Explore or Maker

    1. Buy wood. Learn the ins and outs of buying wood for sign making in this post: FAQ About Buying Wood for Silhouette Cameo Projects by cuttingforbusiness.com
    2. Cut the wood. Find out what power tools you’ll need: FAQ: Power Tools in Your Silhouette or Cricut Business - by cuttingforbusiness.com
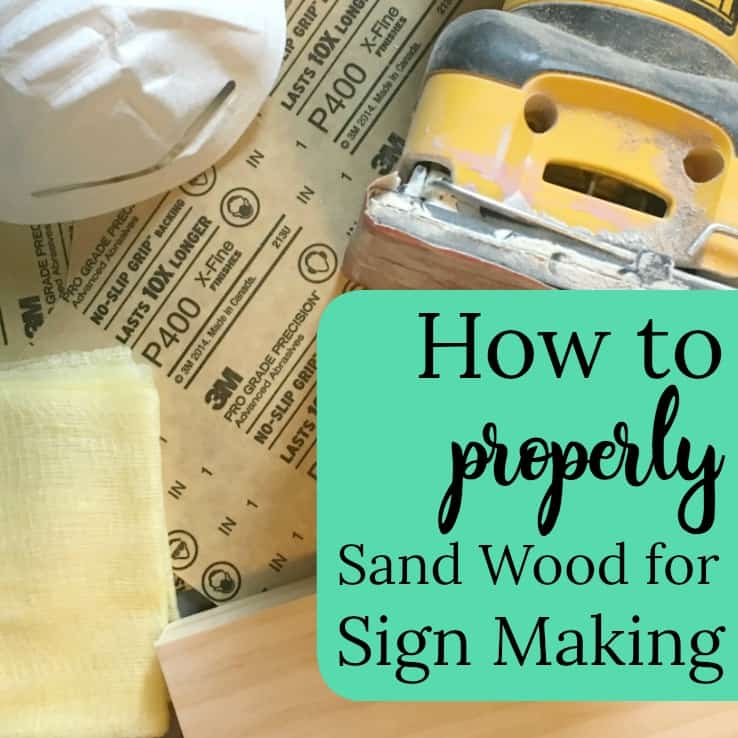
    3. Sand your wood. Don’t just sand it, sand it wellHow to Properly Sand Wood for Painted Wooden Signs - A must read for Silhouette Cameo or Cricut Explore or Maker Crafters - by cuttingforbusiness.com
    4. Cut your stencil and paint your wood. I prefer to use Oramask 813 stencil film and GreenStar transfer tape. If you are having problems, troubleshoot in these posts.Handmade Wood Signs: How to Prevent Your Vinyl Stencil from Peeling Your Paint Up - Silhouette Portrait or Cameo and Cricut Explore or Maker - by cuttingforbusiness.com
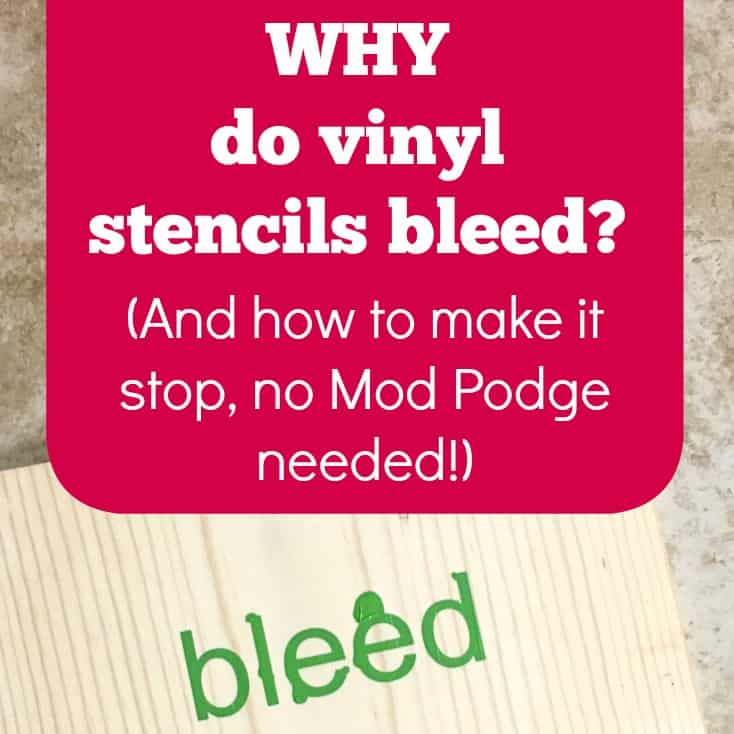
      Why do vinyl stencils bleed - and how to fix it - no Mod Podge needed! A great article for Silhouette Cameo and Cricut crafters who make wooden signs. By cuttingforbusiness.com
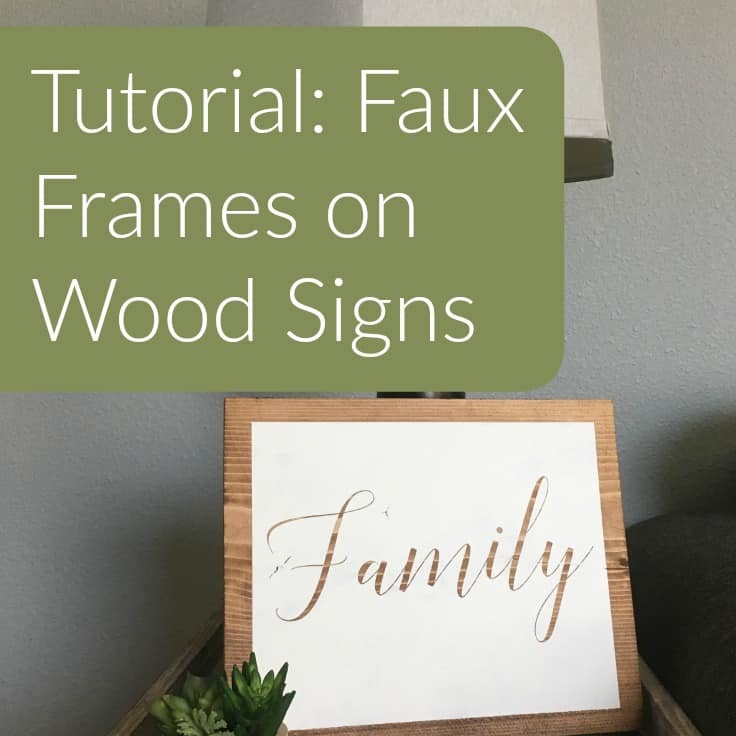
    5. Consider adding a frame: Tutorial: How to Add Frames to Wood Signs - Great for Silhouette Cameo or Cricut Explore Crafters - by cuttingforbusiness.com
      Tutorial: Faux Wood Frames on Wooden Signs with Your Silhouette Cameo or Cricut Explore - by cuttingforbusiness.com
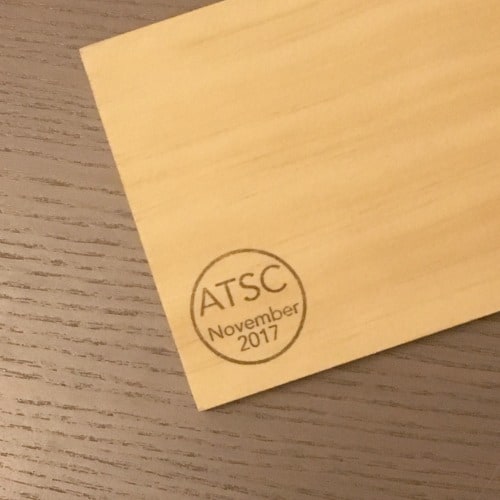
    6. Selling your sign? Brand your sign with a stamp on the back with your Silhouette Mint. See the photo below for an example and read more about buying a Silhouette Mint hereWood Sign Making 101 - Everything You Need to Perfectly Paint Signs with Your Silhouette Portrait or Cameo and Cricut Explore or Maker - by cuttingforbusiness.com
    7. Finally, package your sign to mail: How to Ship Extra Large Signs made with your Silhouette Cameo or Cricut Explore - by cuttingforbusiness.com

    Once you get the hang of making wood signs, here’s some advanced tutorials:

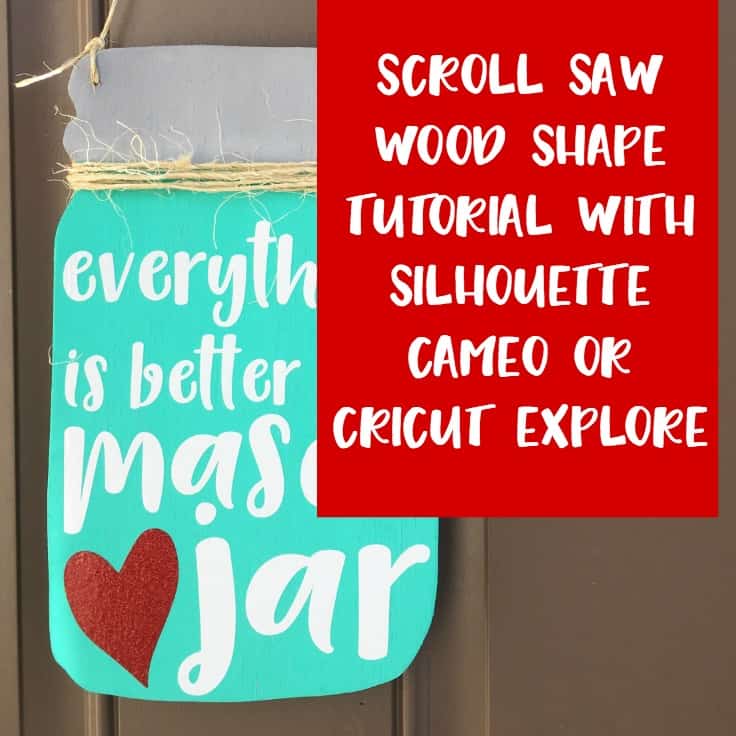
    1. Get fancy with shaped wood blanks: Scroll Saw + Silhouette Cameo or Cricut Explore Wood Shape Tutorial - Mason jar project - by cuttingforbusiness.com
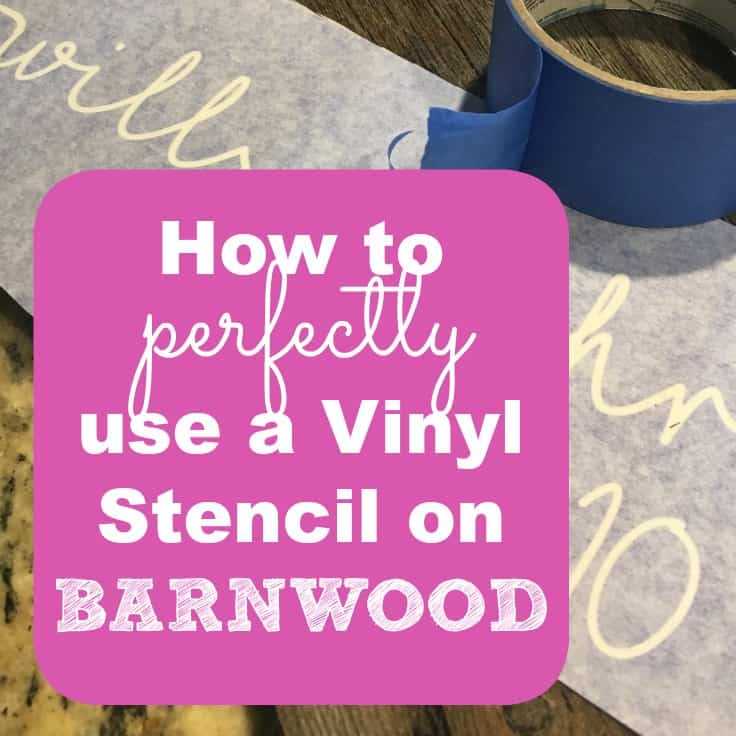
    2. Get in touch with your rustic side with barnwood: How to Use a Vinyl Stencil on Barnwood or Reclaimed Wood with your Silhouette Cameo or Cricut - by cuttingforbusiness.com
    3. Or host a party with friends: Step by Step Guide to Hosting a Paint Your Own Sign Party with your Silhouette Cameo or Cricut - by cuttingforbusiness.com

    I promise, if you sand your wood well, use only a tiny amount of paint on your signs, and dab your brush up and down – you will be successful making signs with your Silhouette or Cricut.

    Why not save this post on Pinterest so you can find it when you need it?

    Wood Sign Making 101 - Everything You Need to Perfectly Paint Signs with Your Silhouette Portrait or Cameo and Cricut Explore or Maker - by cuttingforbusiness.com

  • Product Idea: Glass Etched Men’s Monogram Valet or Jewelry Box

    While everyone is thinking Christmas, I’m starting to think ahead to Valentine’s Day. Why? First, it’s not too early to start planning. Second, after Christmas, it’s the next big money making holiday for Silhouette and Cricut small business owners. If you’re like me, gift giving to men can be difficult. Coincidentally, I was browsing online the other day and stumbled across some blank men’s jewelry cases. Of course, they’d look better with a men’s monogram on top. So, that’s exactly what I did. Here’s how:

    Supplies Needed

    You’ll also need a Silhouette or Cricut, safety equipment like googles and gloves for using etching creme, and something to apply the etching creme.

    How to Etch a Men’s Jewelry Case

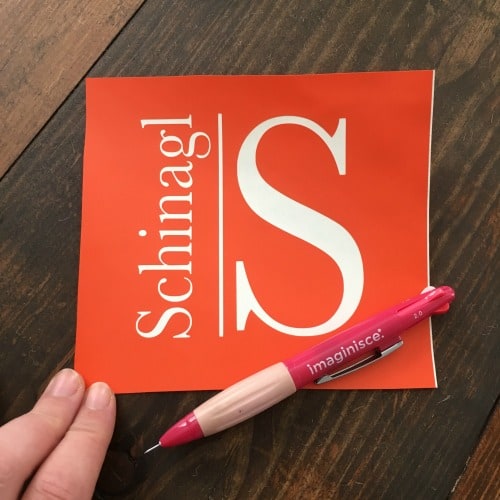
    1. Create and cut a design from scrap adhesive vinyl. The brand doesn’t matter much, I used a scrap of Oracal 631. Then, weed it with your favorite weeding toolProduct Idea: Glass Etched Men’s Valet or Jewelry Boxes with Silhouette Cameo or Cricut Explore or Maker - Includes step by step tutorial - by cuttingforbusiness.com
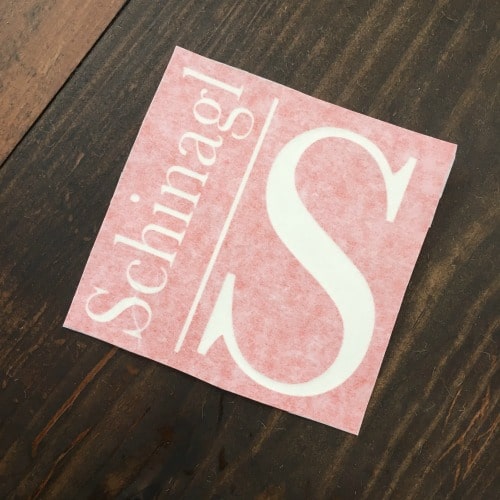
    2. Apply your transfer tape. Like always, I used GreenStarProduct Idea: Glass Etched Men’s Valet or Jewelry Boxes with Silhouette Cameo or Cricut Explore or Maker - Includes step by step tutorial - by cuttingforbusiness.com
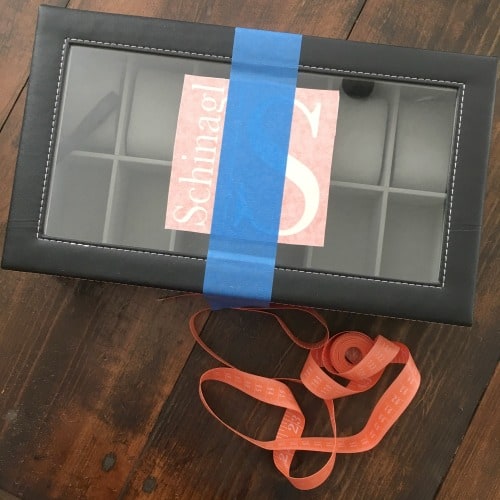
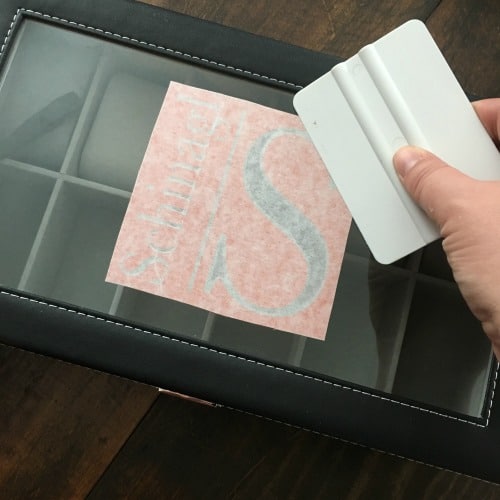
    3. Apply your vinyl to the top of the box. I used the hinge method that you can read about in this instruction setProduct Idea: Glass Etched Men’s Valet or Jewelry Boxes with Silhouette Cameo or Cricut Explore or Maker - Includes step by step tutorial - by cuttingforbusiness.com
      Product Idea: Glass Etched Men’s Valet or Jewelry Boxes with Silhouette Cameo or Cricut Explore or Maker - Includes step by step tutorial - by cuttingforbusiness.com
      Product Idea: Glass Etched Men’s Valet or Jewelry Boxes with Silhouette Cameo or Cricut Explore or Maker - Includes step by step tutorial - by cuttingforbusiness.com
      Product Idea: Glass Etched Men’s Valet or Jewelry Boxes with Silhouette Cameo or Cricut Explore or Maker - Includes step by step tutorial - by cuttingforbusiness.com
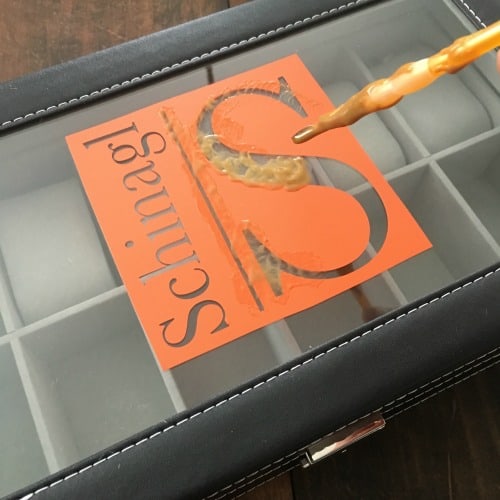
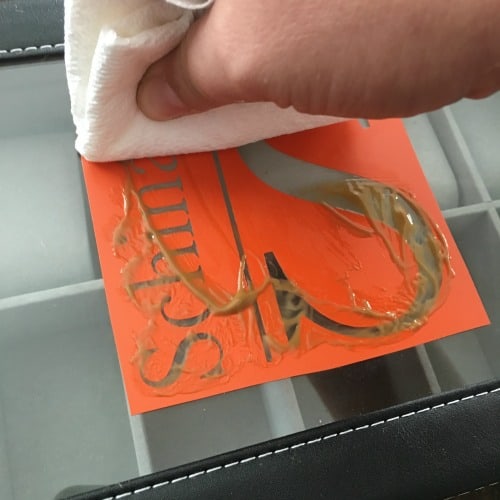
    4. Now, you’ll use a wooden stick, squeegee, or brush to apply the etching creme. I prefer the Etchall or Armour Etch brands over others I have used. Product Idea: Glass Etched Men’s Valet or Jewelry Boxes with Silhouette Cameo or Cricut Explore or Maker - Includes step by step tutorial - by cuttingforbusiness.com
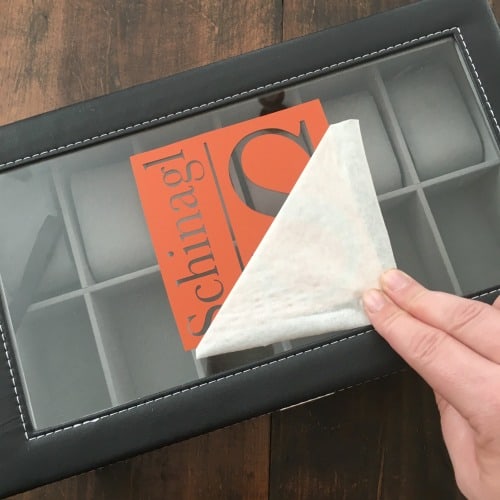
    5.  After 15 minutes, I carefully used a dry paper towel to remove the etching creme. You’ll need to be sure to not push any creme over the edge of the stencil. (Remember, the creme will etch any glass it touches.) Then, I wiped several times with a damp paper towel. Normally, I’d rinse it under water but I didn’t want to get the leather wet.Product Idea: Glass Etched Men’s Valet or Jewelry Boxes with Silhouette Cameo or Cricut Explore or Maker - Includes step by step tutorial - by cuttingforbusiness.com
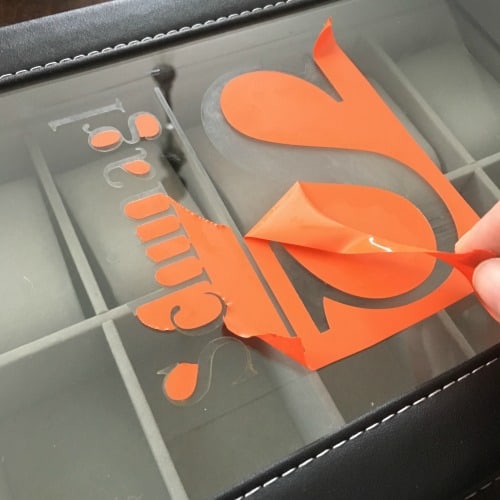
    6. Peel off your vinyl stencil and discard.Product Idea: Glass Etched Men’s Valet or Jewelry Boxes with Silhouette Cameo or Cricut Explore or Maker - Includes step by step tutorial - by cuttingforbusiness.com

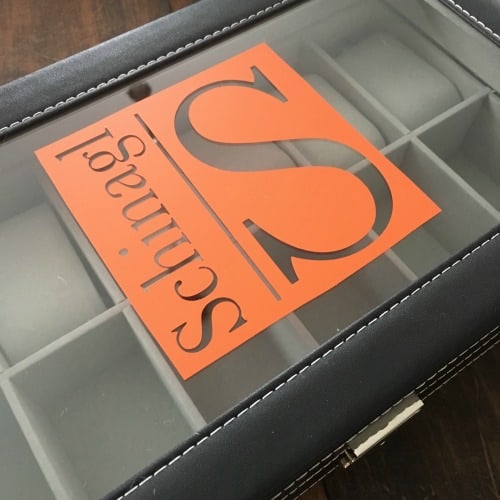
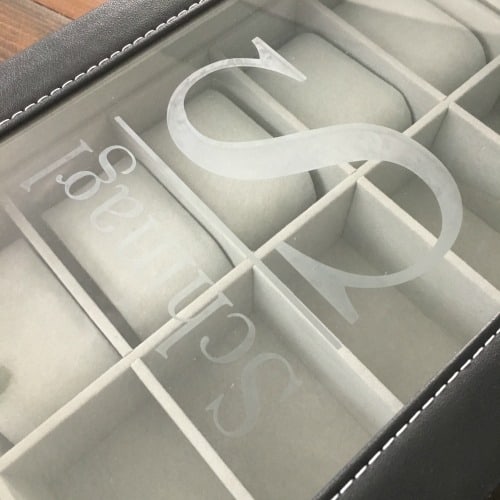
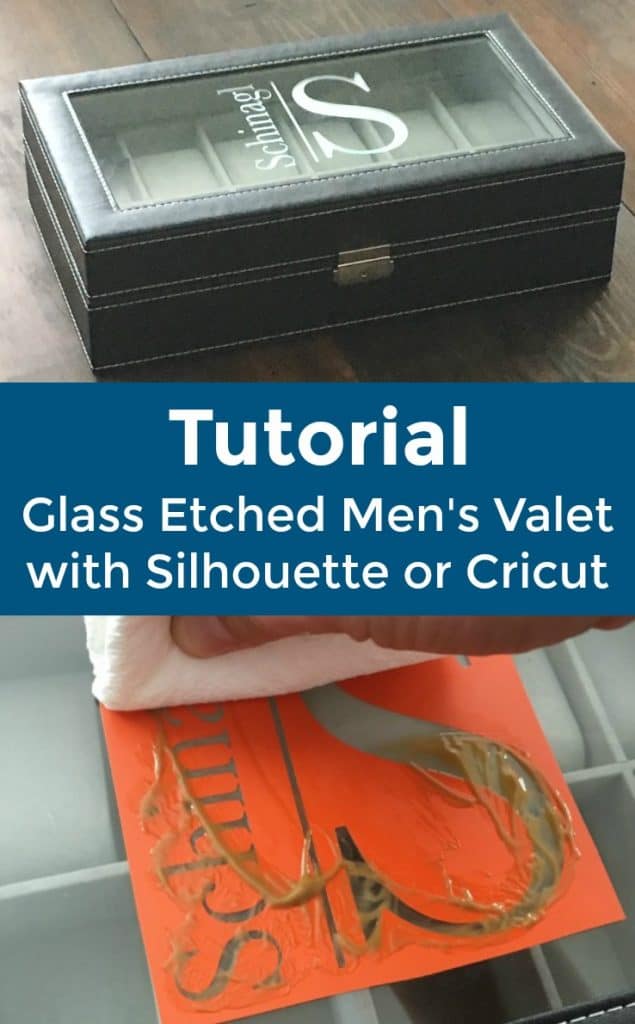
    Here’s a look at the final product: Product Idea: Glass Etched Men’s Valet or Jewelry Boxes with Silhouette Cameo or Cricut Explore or Maker - Includes step by step tutorial - by cuttingforbusiness.com

    How Much To Charge

    I paid $18 for the jewelry case. I spent less than $1 in supplies and 20 minutes of time. I’d sell for around $30 to $35. There were also several smaller cases on Amazon, like this one, if you’d like to go for a lower price point.

    Who would have known: I gifted the valet to Mr. Cutting for Business shortly after I wrote this post. I asked him how much he thought I paid on Amazon. He said $35 to $40. We are both impressed with the feel and quality of the $17 valet box!

    Like the font? I used the Baskerville font because it has a stately feel to it.

    Love this product idea? Save it to Pinterest:

    Product Idea: Glass Etched Men’s Valet or Jewelry Boxes with Silhouette Cameo or Cricut Explore or Maker - Includes step by step tutorial - by cuttingforbusiness.com

  • Review: Chemica Hotmark Revolution Vinyl

    I’m running out of vinyl and I need to restock. Previously, I’ve stocked mostly Siser Easyweed. It’s a great heat transfer material and it is available in so many places and colors.

    When I first started out using heat transfer products, I was mainly doing cotton tee shirts. After I mastered shirts, I’ve moved onto nylon backpacks and spandex based swimsuits. But, Siser Easyweed can’t be applied to nylon or spandex. So, I bought something else and I wasn’t super happy with it.

    Now, I’m looking to restock my stash with a material that is more versatile. I think I’ve found it in a new product called HotMark Revolution.

    What Is HotMark Revolution?

    HotMark Revolution is a new heat transfer material offered by Chemica. It’s been named 2017 Product of the Year in the Heat Transfer Vinyl/PU/Specialty category. So, I decided to check it out. Amy from Chemica sent me a sample pack to test out for this review and a huge sample pack to giveaway. Of course, my opinions are my own.

    Cutting & Weeding HotMark Revolution

    I put the HotMark Revolution to the test and cut the Zentangle inspired tree I shared a tutorial on earlier in the week. On my Silhouette Cameo 3 I used the ‘Heat transfer smooth’ default setting with the autoblade and it cut beautifully!
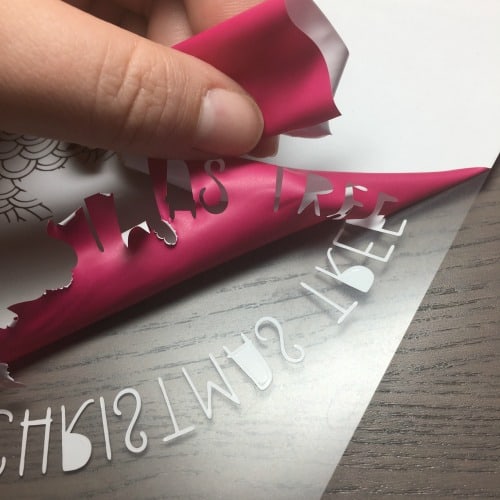
    Review: Chemica Hotmark Revolution Vinyl for Silhouette Cameo or Portrait and Cricut Explore or Maker - by cuttingforbusiness.com

    Pressing HotMark Revolution

    Now, don’t let this scare you, but you can apply HotMark Revolution at several different temperatures:

    • 230 degrees Fahrenheit for 25 seconds (good for cotton and polyester).
    • 245 degrees Fahrenheit for 20 seconds (good for cotton and polyester).
    • 285 degrees Fahrenheit for 5 seconds (good for cotton and polyester).
    • 285 degrees Fahrenheit for 20 seconds (good for nylon).

    What’s the deal with all the times and temperatures? Being able to press at a lower temperature for a longer time helps prevent ‘boxes’ on your apparel from the heat press! Similarly, if you are doing a large batch of products, you can use the higher heat setting for less time to make the process go faster.

    I used my Cricut EasyPress (read more here) to press the HotMark Revolution. Review: Chemica Hotmark Revolution Vinyl for Silhouette Cameo or Portrait and Cricut Explore or Maker - by cuttingforbusiness.com
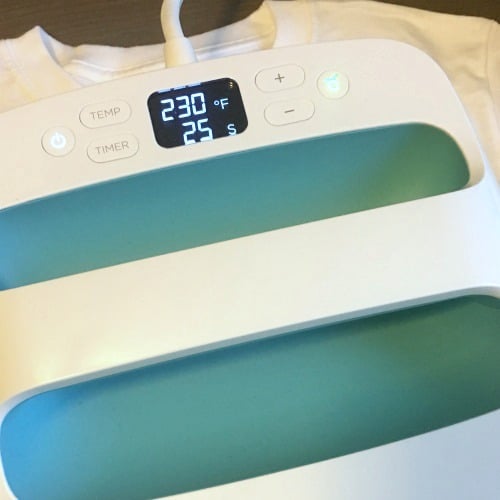
    Review: Chemica Hotmark Revolution Vinyl for Silhouette Cameo or Portrait and Cricut Explore or Maker - by cuttingforbusiness.com

    What Can You Apply HotMark Revolution To?

    HotMark Revolution can be applied to cotton, polyester, nylon, and acrylic fabrics. You can also layer the material on top of itself.

    What Colors Are Available in HotMark Revolution?

    HotMark Revolution currently comes in 35 colors, but the full line will eventually offer 56 colors. View the available colors at this link.

    Where to Buy HotMark Revolution Heat Transfer Material

    Not ready to buy but want to try it? Enter to win:

    a Rafflecopter giveaway

    Save this post to Pinterest:
    Review: Chemica Hotmark Revolution Vinyl for Silhouette Cameo or Portrait and Cricut Explore or Maker - by cuttingforbusiness.com