Author: christine

  • Easy (and Cheap!) Packaging Ideas for Your Silhouette or Cricut Products

    My five year wedding anniversary was last month and I ordered a gift from an Etsy seller for my husband. The transaction was picture perfect: I asked a question about the item and I received a response very quickly. I asked to customize the product and I was told no problem. My item was shipped two days before the expected shipping date. Then, the gift arrived – a gorgeous, handmade item – perfect in every way and just what I had imagined – wrapped in a Walmart bag. I was so disappointed in the presentation, because it is not expensive, difficult, or time consuming to package your products nicely.

    I always order packaging materials through ULINE.com. They offer good prices, excellent customer service, and very quick shipping.

    Easy (and Cheap!) Packaging Ideas for Silhouette or Cricut Products

    Organza bags: These sheer bags are perfect for anything from shirts to infant bodysuits, to tumblers and cups, and more. Organza bags come in a wide variety of colors and sizes. It’s easy to punch a hole in a business card or tag you’ve made, thread the ribbon tie top through it, and tie the bag shut. (Click here to see organza bags on ULINE.)

    Brown lunch sack style bags: These bags are also perfect for smaller items. Again, to make the packaging a little fancier, attach a pretty ribbon and your business card or even a custom made sticker – you decide! (Click here to see brown bags on ULINE and pick up sticker paper on Amazon.) If a standard sized lunch bag will work for you, feel free to pick them up from a local store, too.

    Colored gift bags: These are slightly more expensive than brown bags, but are available in a variety of colors and even prints. It’s easy to attach a ribbon and business card – (If you are seeing a theme here, you are right – your packaging should always have your business name on it or have a business card attached!) Feel free to jazz it up even more with some tissue paper. (Click here to see paper gift bags on ULINE – or plastic gift bags on ULINE.) Gift bags are available in stores, but are much cheaper online.

    Ziploc style bag with a topper: Plastic bags of all sizes come in handy for everything from t-shirts to decals to keychains. Take a piece of cardstock with your business name on it, fold it over and staple it to the top of the bag to create a bag topper.

    Twine or string: For larger or bulky items like picture frames, wooden signs, and pillows, punch a hole in a business card and wrap a few pieces of string or twine around the item and add your business card or custom tag.

    Cut shaped cards on your Silhouette Cameo: Items like earrings, headbands, and other accessories can easily be mounted on cardstock that has your business name on it.

    Make a t-shirt, pillow, or blanket wrap: Cut a piece of cardstock or thick paper with your business name on it, long enough to go around your item. Wrap it around your item and secure it with tape.

    Freezer Paper or Craft Paper: In a jam for a way to package an order? Wrap it in white freezer paper or brown craft paper, and add a business card or custom made hang tag.

    I urge you to pick a packaging style that works well for your products and stick with it. Try to make the packaging across your brand consistent, meaning that you use the same color or style of packaging for all your items. This helps customers begin to recognize your brand and repeat customers will know what to expect the next time they order. Please, just please, don’t shove your products in a Walmart bag. If you are shipping your items, you can find a few tips in this post.

    Examples including a bag topper, a handled gift bag, and a simple lunch bag.
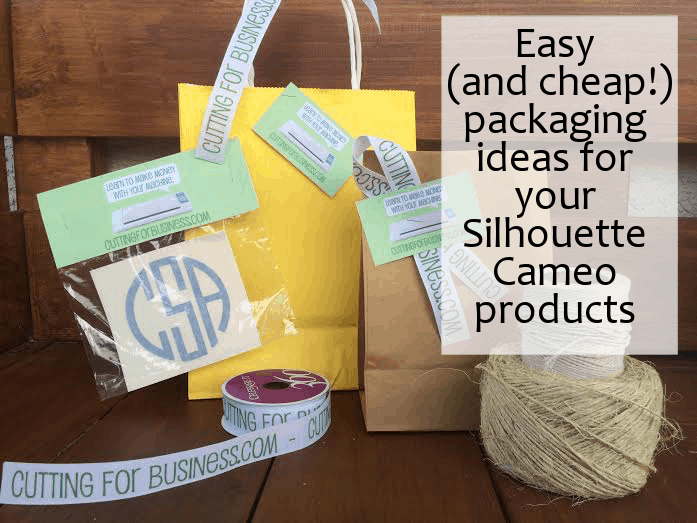
    Easy (and cheap!) packaging ideas for your Silhouette Cameo Products by cuttingforbusiness.com

    Wondering how I did the ribbon for the image above? It’s so easy. I used printable, iron-on transfer paper and my heat press. I pressed each section for 30 seconds at 350 degrees, let it cool for a few minutes and peeled the transfer cold. I kept repeating the process until I was through the entire 7/8 inch white grosgrain spool – which took about 10 minutes. I love that it gives a “high end” touch for little time and money.
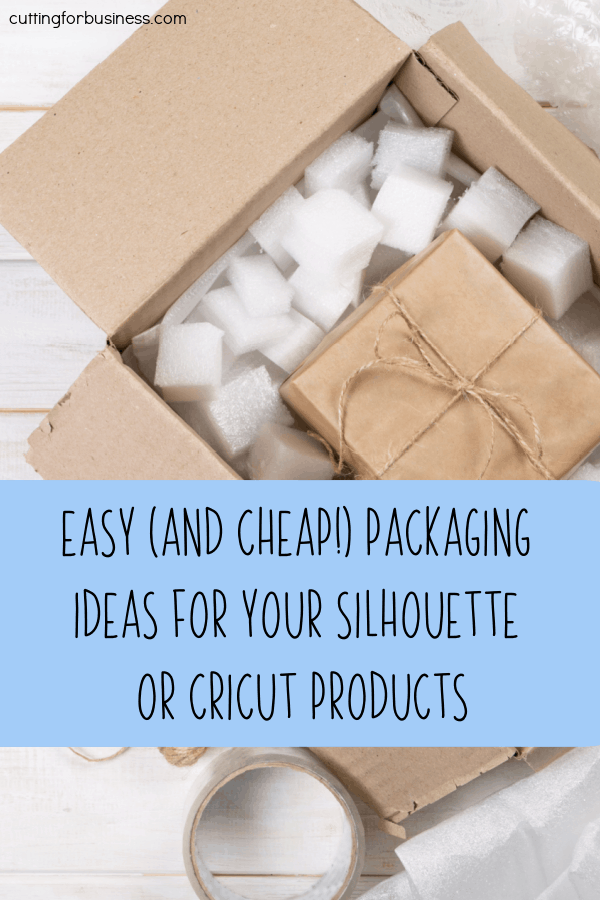
    Easy (and Cheap!) Packaging Ideas for Your Silhouette or Cricut Products - by cuttingforbusiness.com
  • Reader Question: Do I Have to Have a Craft Room to Run a Craft Business?

    Reader question: “Hi Christine, It seems like every crafter online has a gorgeous craft room straight out of a magazine. I don’t have the extra space for a craft room, is it still possible for me to have a profitable business?”

    My answer: Absolutely! As long as you have a place to store your craft supplies and a space to work, you don’t have to have a craft room to sell items made with your Silhouette or Cricut.

    My Former Work Space

    • Kitchen cabinets: While I now have a full fledged craft room (get a tour here), I haven’t always had that luxury. I used to keep all my supplies in a few extra cabinets in my kitchen. I used to keep everything in this space except for my heat press, Silhouette and Cricut, and wood and power tools – which stayed in the garage. My work space then became the countertop above the cabinets.

    Storage & Organization Ideas

    • Hanging shoe racks: The small cubbies of over the door shoe racks are perfect for holding rolled vinyl and other crafting goods.

    • An armoire or a dresser: Scour Craigslist or local garage sales and find an inexpensive armoire or dresser that matches your decor. Store your craft supplies inside. The best part is once the armoire or dresser is closed, no one will know what’s inside! I also found several armoires on Amazon.com for under $200, I linked a few below:


    • Under the bed/under the couch storage: This space is wasted in a lot of homes, so pick up some flat plastic containers, fill them with craft supplies, and slide them under the bed or couch.

    • Extra closet: If you have an extra closet, add a few shelves and some plastic drawers and store your supplies inside. (We have a coat closet and live in Florida – this space could easily be converted to craft storage!)
    • Laundry room: If you have a spacious laundry room, how about a laundry room/craft room combo?
    • Garage: If you have a climate controlled garage, or live in a moderate climate – head out to the garage. Be cautious of the garage being too hot or too cold. Certain craft supplies (anything with adhesives) shouldn’t be stored in extreme temperatures).

    I have two Pinterest boards that may interest you if you are looking to organize your craft supplies. The first is full of craft rooms and creative storage solutions, while the second can help you tame your vinyl supply, which can be difficult to store:

    Follow Cutting for Business’s board Craft Rooms and Supply Organization on Pinterest.

    Follow Cutting for Business’s board Vinyl Storage Ideas on Pinterest.

    Looking for more organization tips? Get them from the pros in this post.

    Save the image below to Pinterest to inspire another crafter.

    Reader Question: Do I Have to Have a Craft Room to Run a Silhouette Portrait or Cameo or Cricut Explore or Maker Craft Business? - by cuttingforbusiness.com

  • 10 Things to Consider Before Selling Crafts Wholesale

    I recently highlighted the differences between wholesale and consignment arrangements in craft businesses.

    Crafters are in a unique situation when offering wholesale pricing, as most of us work alone and do not have machinery that speeds up our process.

    Today, I am sharing a list of things to consider before selling crafts wholesale.

    10 Things to Consider Before Selling Crafts Wholesale - cuttingforbusiness.com.

    10 Things to Consider Before Selling Crafts Wholesale

    Not All Products are Good for Wholesale

    For example, you wouldn’t offer one-of-a-kind or custom products at wholesale pricing.

    Time Intensive Products are Not Good For Wholesale

    Whether it takes a long time to dry, a long time to weed, or a lot of design time – products that take a long time are not good for wholesale.

    Be Selective with Your Wholesale Products

    If you decide to dive into the wholesale market, you do not have to offer every product you make at a wholesale price.

    Set Minimum Order Amounts

    Consider a condition for wholesale orders that they must order a minimum number of the same exact item – including size, color, and design.

    Price Accurately

    Your products must be priced accurately to ensure that you still make a reasonable profit. If you accidentally price an item too low in a retail setting, you can adjust the pricing after selling one or two items. Unfortunately, you may take a much higher loss if you place your wholesale prices too low.

    You Must Buy Wholesale to Sell Wholesale

    You must get your blanks at wholesale prices to be able to offer wholesale pricing. Put another way: You can’t buy a shirt at retail price, embellish it, then sell it for a wholesale price.

    Know Your Machine Limitations

    The Silhouette and the Cricut both have limitations – know them. You may need to upgrade to a Silhouette Cameo Pro, or an even larger machine.

    Similarly, extra large orders of some products are better done using alternative methods. For example, an extra large t-shirt order may not be as profitable as ordering transfers then applying them due to the labor involved. I went in depth about extra large orders earlier on the blog.

    Work Assembly Line Style

    When creating wholesale orders, consider working “assembly line style”. This means that you would cut all the designs first, then weed all the designs, next you would apply all the designs, and lastly you would package all the designs.

    Use Time Saving Software Features

    The Silhouette Studio Business Edition has some time saving features that may help you when creating multiples of the same item. You can read lots more about it in a previous series of posts.

    Incorporate Your Business

    Businesses are more likely to buy from someone who has registered their business or has incorporated. If you haven’t made your business official yet, read about some of the benefits.

    Wholesale vs Consignment

    If you decide wholesaling doesn’t work for your business, have you thought about consignment? Read more on the differences between wholesale and consignment.

    Unique Wholesale Arrangements

    Wholesaling products doesn’t always have to mean selling to a store that resells your item. Continue on and read a list of unique wholesale arrangements that you can likely find in your own town.

  • Wholesale vs Consignment in Your Craft Business

    If you are ready to expand your Silhouette or Cricut craft business, one potential step is to get your products into existing stores.

    There are generally two methods for doing this: wholesale or consignment. Let’s talk about wholesale vs consignment in your craft business.

    Wholesale vs Consignment in Your Craft Business - cuttingforbusiness.com

    Wholesale vs Consignment in Your Craft Business

    What is Wholesale?

    • You sell your craft products to another person or store in a large quantity at a discount. They resell the items for a profit.
    • The person or company buying the products pays for the items up front. They own the products and it is their responsibility to sell the items.
    • You will generally have a minimum order amount or quantity. The amounts will vary greatly from business to business.
    • You’ll have a set return policy for the person or store purchasing the products. Will you refund damaged or defective items?
    • You will have a set policy for lead time. How long will it take you to make the products from the time that the person or shop orders them?
    • You will also need to have shipping policies. Generally, the shipping costs of the products will be paid for by the person or store buying the item.
    • Wholesale pricing is generally determined using the same formula I mentioned in another post on pricing your items: Cost of Supplies + Labor + 10-15% Overhead = Total Costs, then Total Costs x 2 = Wholesale Price, and Wholesale Price x 2 = Retail Price.

    What is Consignment?

    • You make an agreement with another person or store to sell your items for you. The other person or store does not own your items.
    • You get paid after the product is sold. The person or store that sold the item takes a percentage of the sale price as a commission. Typically, consignment is based on a 60/40 split. This means that you get 60% of the selling price and the other person or store keeps 40%. I’ve seen splits vary to 70/30, 80/20, and 50/50. Personally, I would not make a consignment agreement with a split of less than 60/40. Instead, I would offer wholesale pricing which is usually a 50% discount.
    • Both you, as the designer, and the store benefit from consignment agreements, as the store can add new products without spending money and you can get your products to a new market.
    • You’ll need to have a payment contract. How often will you get paid? How will you get paid?
    • You will also want to have an agreement that states how long the products will be for sale before they are returned to you.
    • You’ll also want to have an agreement on who will pay for items that get broken or stolen. If an item is faulty and becomes broken, you would generally pay to replace the item. In contrast, if your item is stolen from a store, the store owner would have to pay you for the sale.
    • You will need to set out shipping arrangements if the store is not local. Often, it is the designer that pays for shipping to the store. If the item is not sold, the store pays for the shipping back to the designer.
    • Consignment agreements are usually easier to land if you are a new small business. Successful consignment arrangements can also be a stepping stone to receiving a wholesale account with a store.

    Which is Better: Wholesale, Consignment, or Neither?

    Honestly, this is one question that I can not answer for you. It will depend on your individual business. In some cases, wholesale is a better choice – but in other cases, consignment is a better choice.

    And, remember, wholesale and consignment arrangements are not for everyone. If you choose to only sell directly to your customers, you can still have a profitable business.

    Things to Consider Before Selling Crafts Wholesale

    If you are ready to start selling your crafts wholesale, read my list of 10 things to consider before selling crafts wholesale.

  • How Can a Blogger Help Your Craft Business?

    Bloggers can be a powerful way to promote the products you make with your Silhouette Cameo or Cricut. You may have a favorite blogger, and you trust their advice for product recommendations. If you do, you are not alone. Social4retail notes that 61% of US consumers have made a purchase based on a blog post, and more than 77% of internet users read blogs.

    Great! I’ve given a few statistics, and you are interested in working with a blogger to promote the products you make with your Silhouette Cameo. Now what? You’ll first need to decide what product you’d like to offer to a blogger to review. Usually, you’ll send the blogger the product that they will get to keep in exchange for reviewing it or they will pass it on to their readers through a giveaway. In some cases, the blogger may also expect you to provide a a discount code for their readers that gives them a discount in your store, or other payment for providing the review. Next, you’ll need to do your homework and find a suitable blogger. I really recommend that you don’t skimp on this step. To maximize the effectiveness of your product review, you need to find a blogger who writes about content that matches your product. A few quick examples: if you sell trendy infant bodysuits, try looking for a fashion blogger. Or, if you sell personalized cutting boards, connect with a blogger who features gifts or recipes. You’ll also want to verify things like the amount of traffic they receive, the interaction they have with their readers, and the social media sites they use.

    Here’s my top two methods to connect with bloggers:

    1) Reach out to bloggers directly. This is my favorite method, and I feel that it is most effective. Many blogs have links for brands to reach them directly on their blog, and popular review sites have premade forms that you can fill out for more information – so look for one on your favorite blog. You can also reach out to them through social media, but I urge you to tiptoe around this carefully. You do not want to simply spam them with your product review request. (Trust me, bloggers get a lot spam!) The best approach is to follow their blog, like their content and share it on social media, and form a genuine relationship with the blogger before approaching them for a product review.

    2) Use a service to find bloggers. There are many services that will connect you, the brand, with bloggers looking to do product reviews. In my non-crafting business life, I have used Sverve with great results – although it has substantially increased in price since I used it a few years back. Other popular services include Blog Meets Brand, She Is Media, and Moms Affiliate.

    Once you have a product review done by a blogger, be sure to promote the review on your own social media. My last words of advice: Before you start connecting with bloggers, be sure you have ample inventory (or supplies) to fulfill a potential large amount of orders. Additionally, make sure you have time to create the items, answer questions, and handle additional social media demands.

    Warning! There’s a lot of scams going around (especially on Etsy), where a “blogger” will ask you for free products. In general, reputable bloggers won’t connect with you in this way. There’s also bloggers whose “blogs” exist mainly to do product reviews for the purpose of receiving free stuff. Best to skip both of these.

    Share this post on Pinterest:

    Silhouette Cameo and Cricut Small Business Owners: How Can a Blogger Help Your Craft Business? - by cuttingforbusiness.com

  • Review: Siser App for Heat Transfer Vinyl Crafters

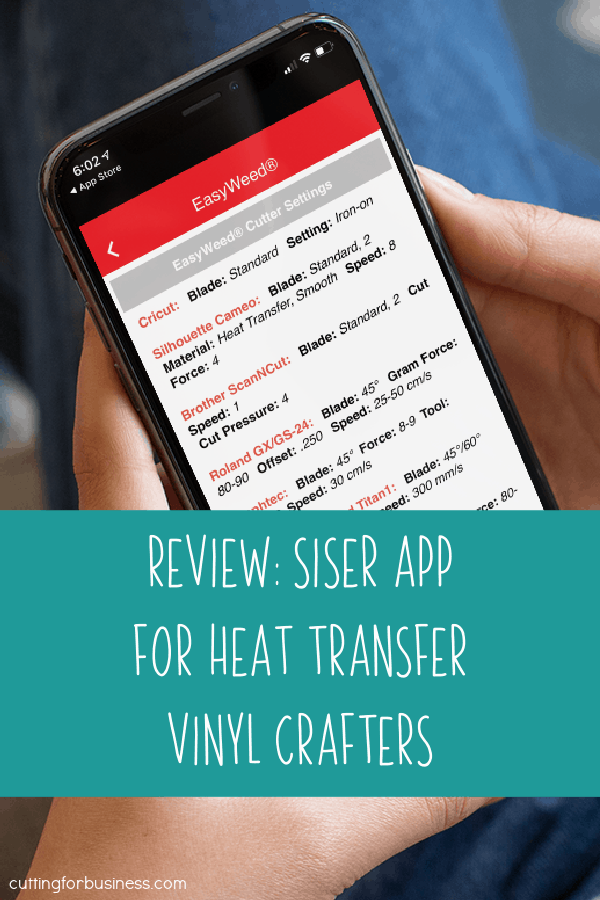
    Did you hear? Siser North America just launched a new app! You can pick it up in the Apple Store or Google Play.

    Wait, if you aren’t familiar with Siser North America, they are a leading manufacturer of heat transfer materials, known to most crafters as HTV.

    After downloading the app, I don’t know how I lived without it before! It is incredibly handy to have Siser color charts, application instructions, and more always within reach. It’s Siser North America’s goal to educate crafters on their products through the app, as Siser products can only be purchased through a Siser Distributor.

    App Overview

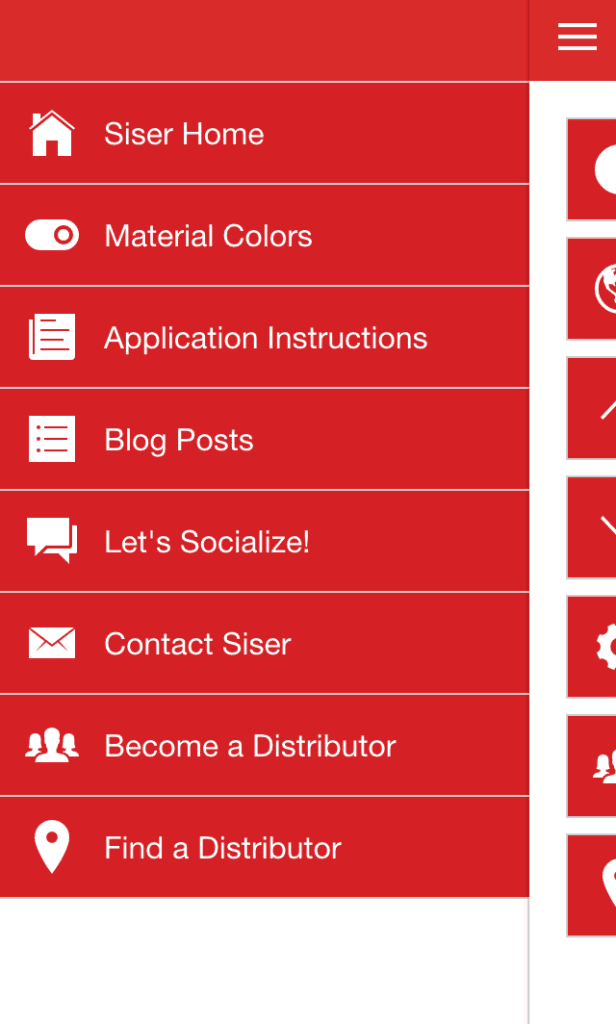
    The app is well organized and offers Silhouette Cameo crafters easy to access information:

    Do you have the new Siser Heat Transfer Material App? An overview by cuttingforbusiness.com

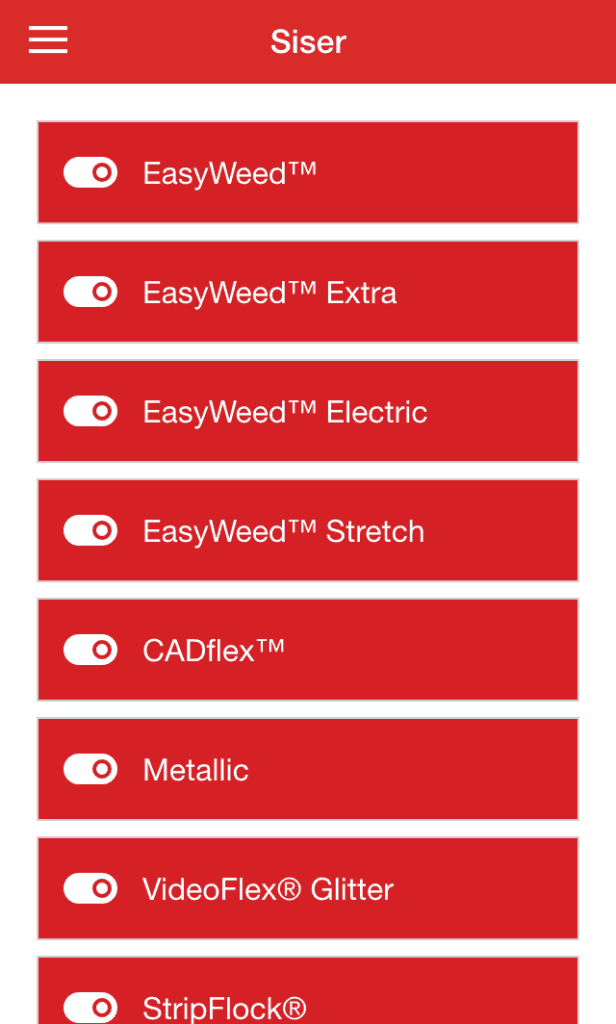
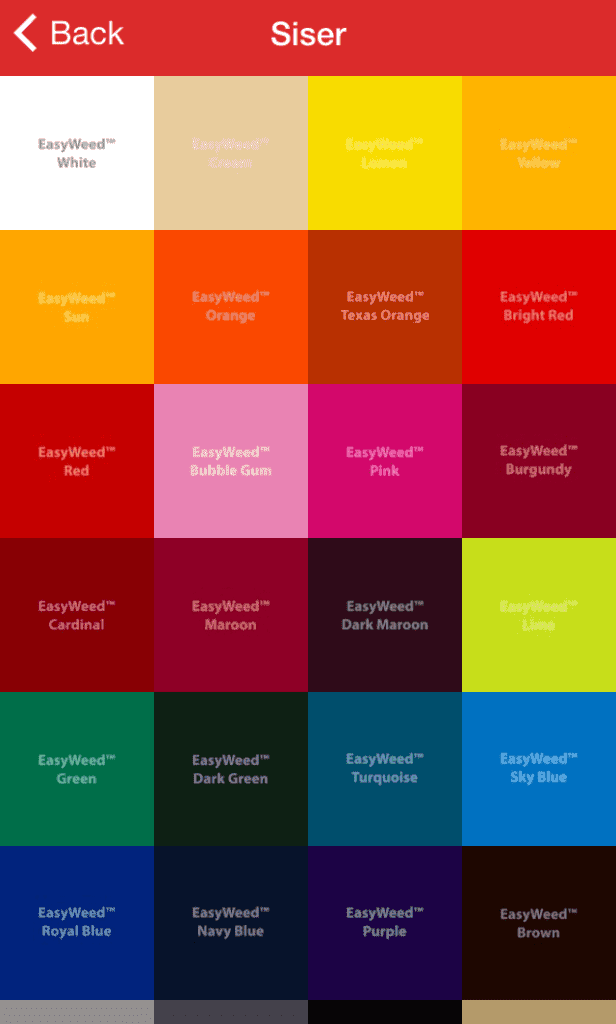
    Full color charts for Siser product lines including: EasyWeed, EasyWeed Extra, Easyweed Electric, EasyWeed Stretch, CADflex, Metallic, VideoFlex Glitter, StripFlock, ReflectAll, Glitter, Holographic, and 3D Techno.

    Do you have the new Siser Heat Transfer Material App? An overview by cuttingforbusiness.com
    Do you have the new Siser Heat Transfer Material App? An overview by cuttingforbusiness.com

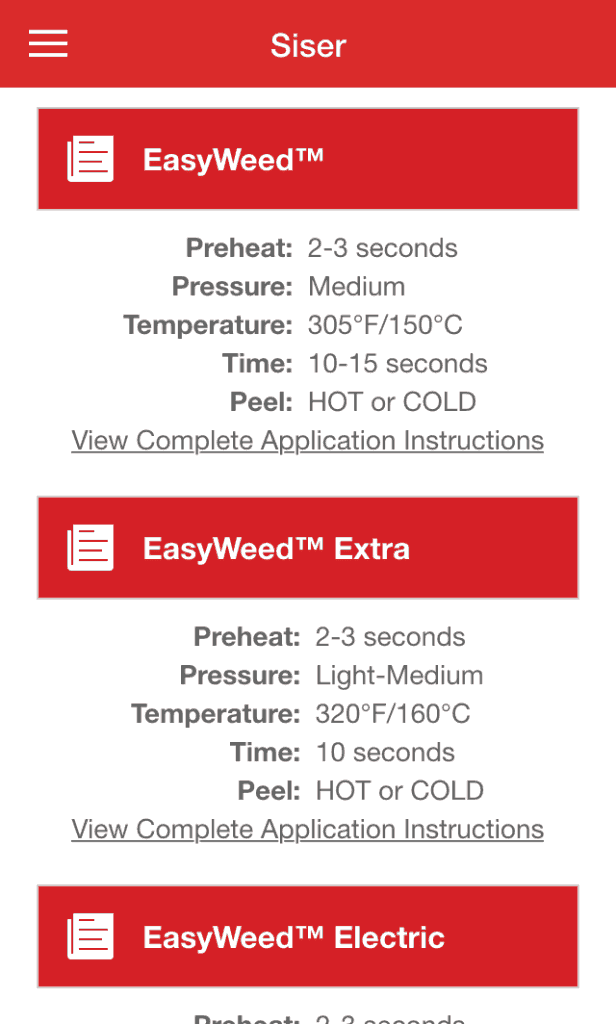
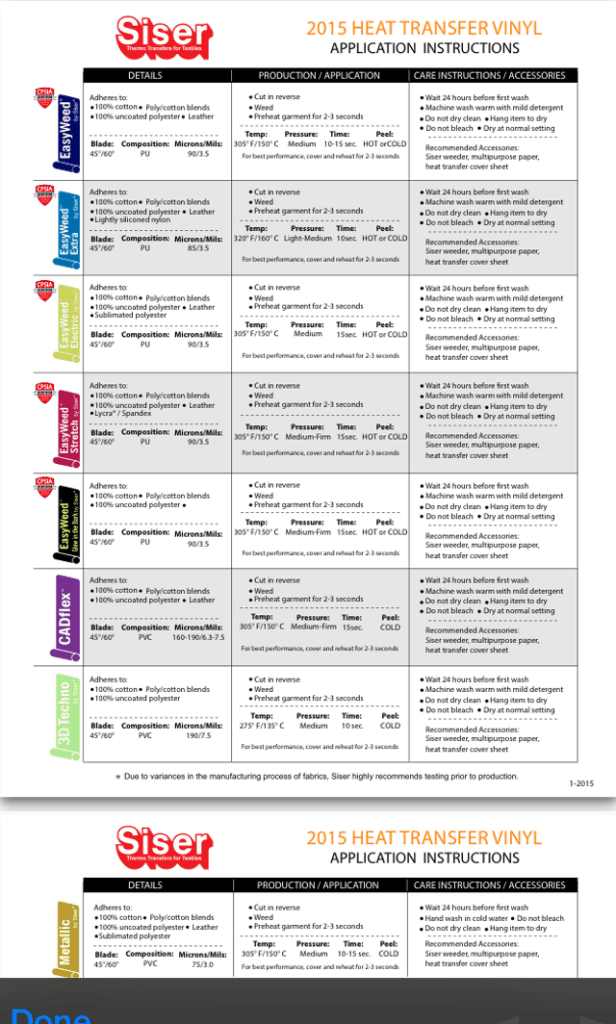
    Siser offers material application instructions for each product line, which tells crafters important pressure, temperature, and time settings for their heat presses. The “View Complete Application Instructions” link provides a PDF with more detailed information for each product line – including what materials the heat transfer material will adhere to, and care instructions:

    Do you have the new Siser Heat Transfer Material App? An overview by cuttingforbusiness.com
    Do you have the new Siser Heat Transfer Material App? An overview by cuttingforbusiness.com

    Within the app, crafters can access the Siser North America blog with posts related to Siser products, including helpful video tutorials.

    Do you have the new Siser Heat Transfer Material App? An overview by cuttingforbusiness.com

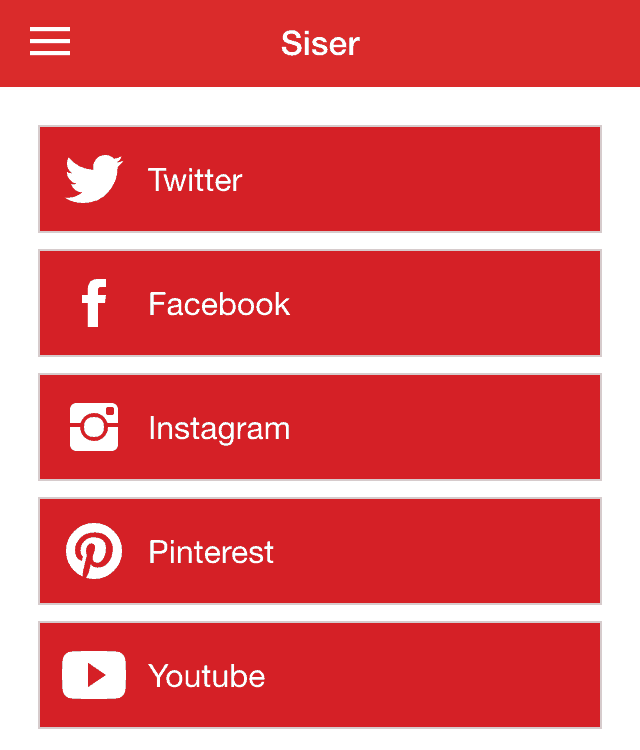
    Lastly, the Siser App includes a contact form to reach the company, information on locating a distributor, and a directory for their social media accounts:

    Do you have the new Siser Heat Transfer Material App? An overview by cuttingforbusiness.com

    Now, enter to win a Siser Heat Transfer Material Gift Pack provided by Siser North America. Each gift pack includes 10 sheets of Siser heat transfer material including Metallic, StripFlock, EasyWeed, Glow-in-the-Dark, 3D Techno, Glitter, and Holographic material! Four lucky Cutting for Business readers will win! This giveaway has ended.

    Save this post to Pinterest:

    Review: Siser App for Heat Transfer Vinyl Crafters - HTV - Silhouette Portrait, Cameo, Curio, Cricut Explore, Maker, Joy - by cuttingforbusiness.com.
  • Store Your Pre Cut Heat Transfer Vinyl (HTV) Designs in a Binder

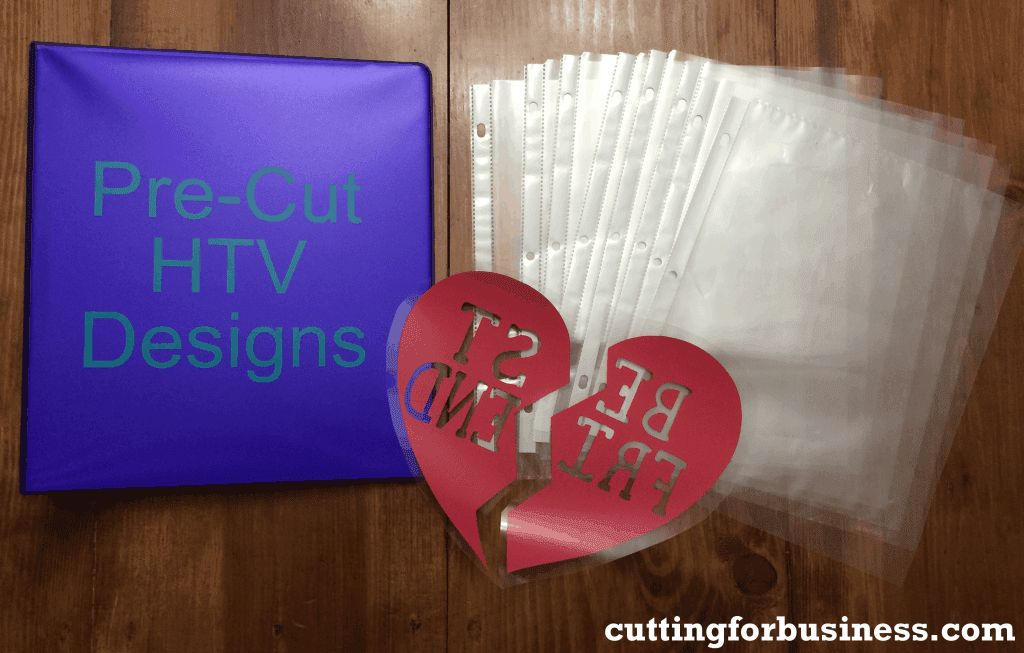
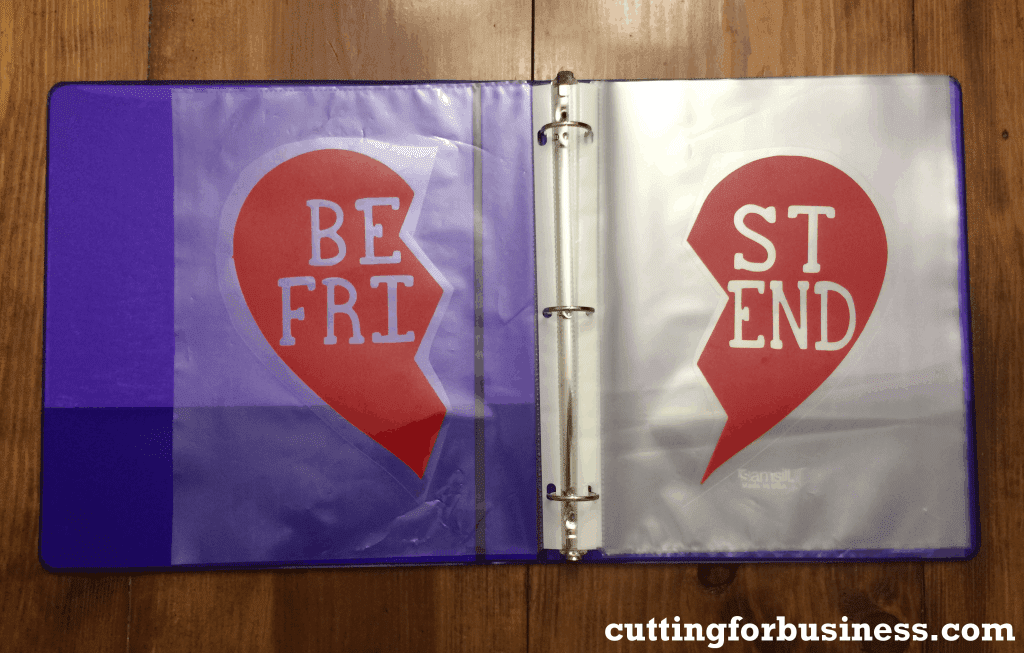
    Do you like to cut and weed several designs at once? If you do, you’ll know that the heat transfer vinyl (HTV) carrier sheet picks up hair, lint, and dust if you leave it exposed. I used to put a piece of wax paper or freezer paper over the design to keep it clean before pressing. The problem with this method is that I still had to find a place to put the design so that it wouldn’t get crinkled or damaged. Then, I picked up this tip on the internet ages ago: Use a binder and page protectors to temporarily store your designs that are waiting to be pressed! You just weed your design and stick it the the outside of the page protector! Genius, right? I’ve found it timesaving when creating items, especially if I am working on cutting layers for a project that I may not finish on the same day.

    Supplies:
    A binder – any old binder will do. If your designs are larger than a standard 3 ring binder, consider picking up a legal sized binder (8.5″ by 14″ or even 11″ by 17″) on Amazon.com.
    Page protectors or tabbed dividers. Again, if you are using a legal sized binder, you can order legal sized page protectors on Amazon.com.

    Here’s a quick peek at my binder:

    Store your pre-cut heat transfer vinyl (HTV) designs in a binder by cuttingforbusiness.com

    Store your pre-cut heat transfer vinyl (HTV) designs in a binder by cuttingforbusiness.com

    How do you store your HTV designs while you are waiting to press them? Let me know in the comments, then share this post to Pinterest:

    Silhouette Cameo or Cricut Crafters: Store your pre-cut heat transfer vinyl (HTV) designs in a binder - by cuttingforbusiness.com

  • Advertising Your Craft Business on Your Car – What You Need to Know

    Adding a decal to your car or truck is a great way to advertise your Silhouette or Cricut based business. In fact, it is easy to cut the vinyl yourself and have a custom decal for your car in only a few minutes!

    But, did you know that adding your business details to your vehicle may mean that you have to upgrade your car insurance to a commercial policy – even if you are not doing any business related activities in the vehicle? Today’s public service announcement: Before you place your business details on your vehicle, call your insurance company, your insurance agent, or consult your policy paperwork to make sure that it is allowed. In the event that you need to file a claim with your insurance company, they may decline it if you have business advertising on your vehicle and only hold a personal insurance policy.

    If you find out that it is okay to add your business details to your vehicle, you can cut your own from vinyl using your machine, you can order car magnets or bumper stickers from Vistaprint.com, or consider full window decals from Signazon.com (I’ve used them twice to add rear window decals to the back of my vans – the decals are easy to apply, you’ll just need a buddy).

    Spread the word and save the image below to Pinterest.

    Advertising Your Craft Business on Your Car - What You Need to Know for Etsy Shop Owners - by cuttingforbusiness.com

  • The Beginner’s Guide to Heat Presses

    Hey crafter! Doing some research on heat presses? Let’s talk today about everything you need to know to get started with a heat press in your Silhouette, Cricut, or sublimation small business.

    Before we get started, this article isn’t a list of the best heat press machines and me telling you to go buy them all. Instead, it’s helpful information about all the different types of heat presses available – and my recommend supplier.

    Beginner's Guide to Heat Presses - cuttingforbusiness.com.

    What is a Heat Press?

    A heat press is a tool used in crafting to apply heat transfer materials to blank products like shirts, bags, and hats.

    What are Heat Transfer Materials?

    Heat transfer materials are those that are applied to blanks using a heat press. They can be: heat transfer vinyl (HTV), printed designs on heat transfer paper, printed sublimation transfers, screenprint transfers, embroidered patches, rhinestones, infusible inks, and more.

    How Does a Heat Press Work?

    A heat press uses heat and pressure to either adhere materials to your blank product (heat transfer vinyl or transfers) or transfers specialty ink to your blank product (sublimation).

    Do You Really Need a Heat Press?

    If you are planning on selling products using heat transfer materials, you’ll need a heat press.

    Different heat press materials are designed to be applied at an exact temperature and pressure. Unfortunately, when you use an iron (even top of the line irons), you can’t guarantee the temperature you are using, and you cannot replicate the even pressure that a heat press provides.

    Customers expect merchandise to last and designs to not fall off after a few uses. It is always better to offer a quality product that follows manufacturer’s application guidelines rather than open your business to poor reviews, unhappy customers, or customers needing items remade or refunded.

    What Types of Heat Presses Are Available?

    Flat Heat Press

    These are the most common heat presses. They feature a large, flat space to place your blank product. After placing your material on top of your blank product, you close the heat press and the material or ink adheres to your blank product.

    Flat heat presses come in a few different styles:

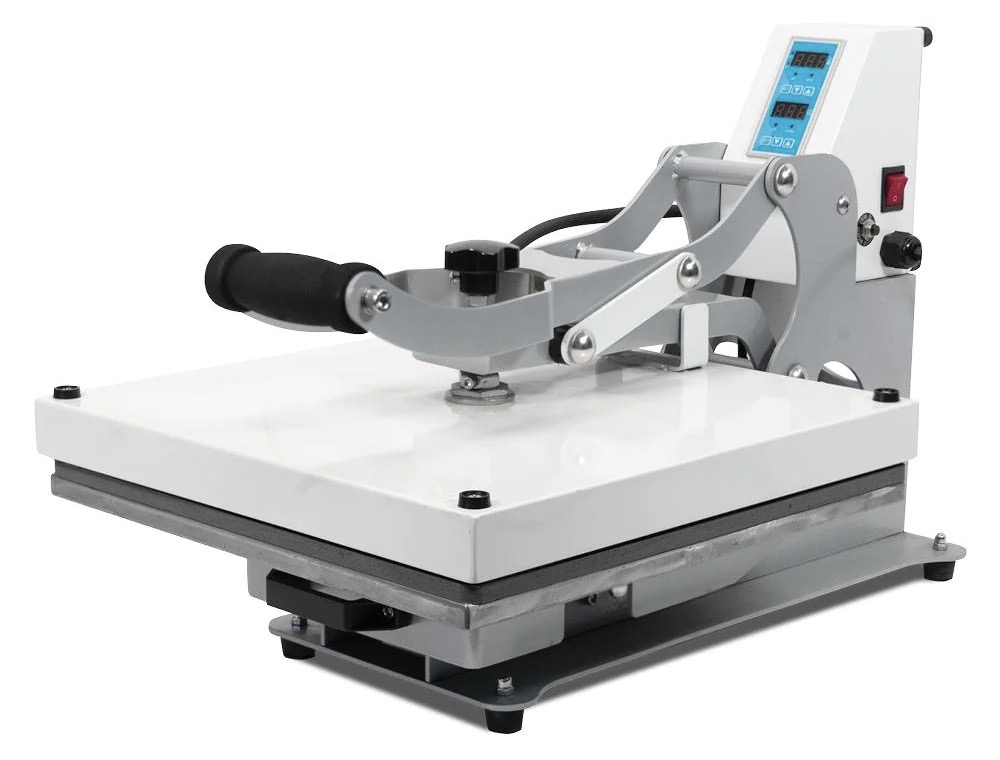
    Clam Shell

    These heat presses have a hot top platen that you pull straight down to press your items. Clam shell presses are often cheapest to buy and are readily available.

    Clamshell heat press on white background.
    This is an example of a clamshell heat press.

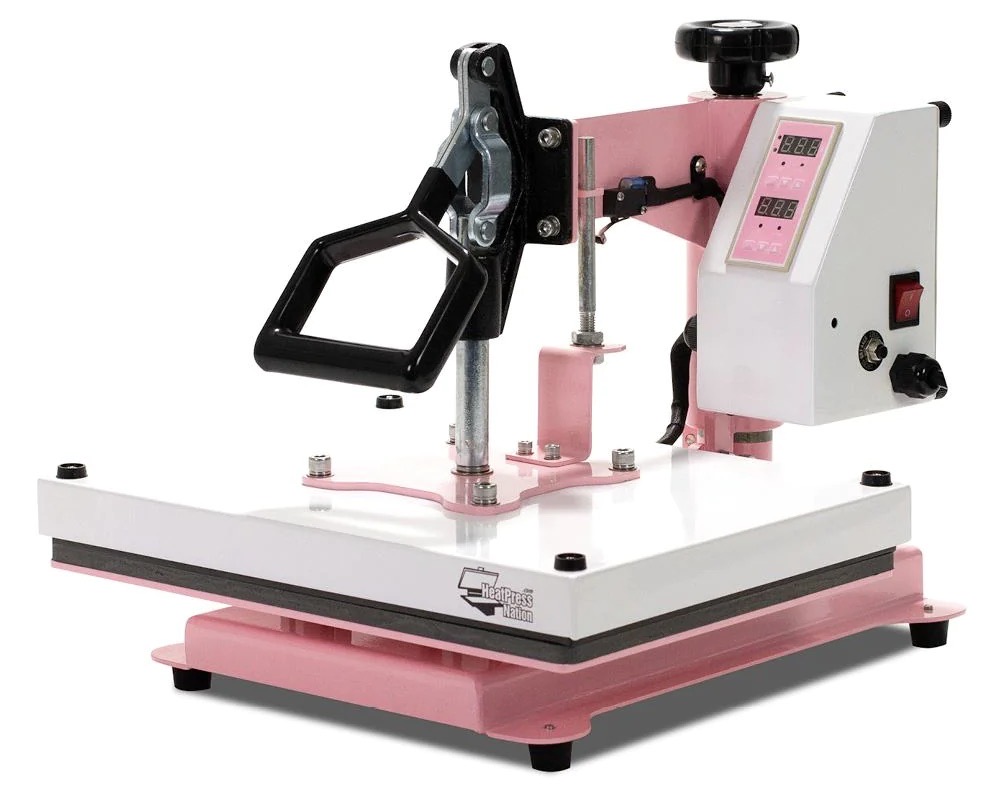
    Swing Away

    The top platen on a swing away press lifts up and swings to one side. Swing away presses give you more space to work (and you are less likely to bump your arms on the hot platen), but take up a larger footprint in your workspace. Also, they are perfect for pressing thicker materials – like wood frames.

    Swing away heat press on white background.
    This is an example of a swing away heat press.

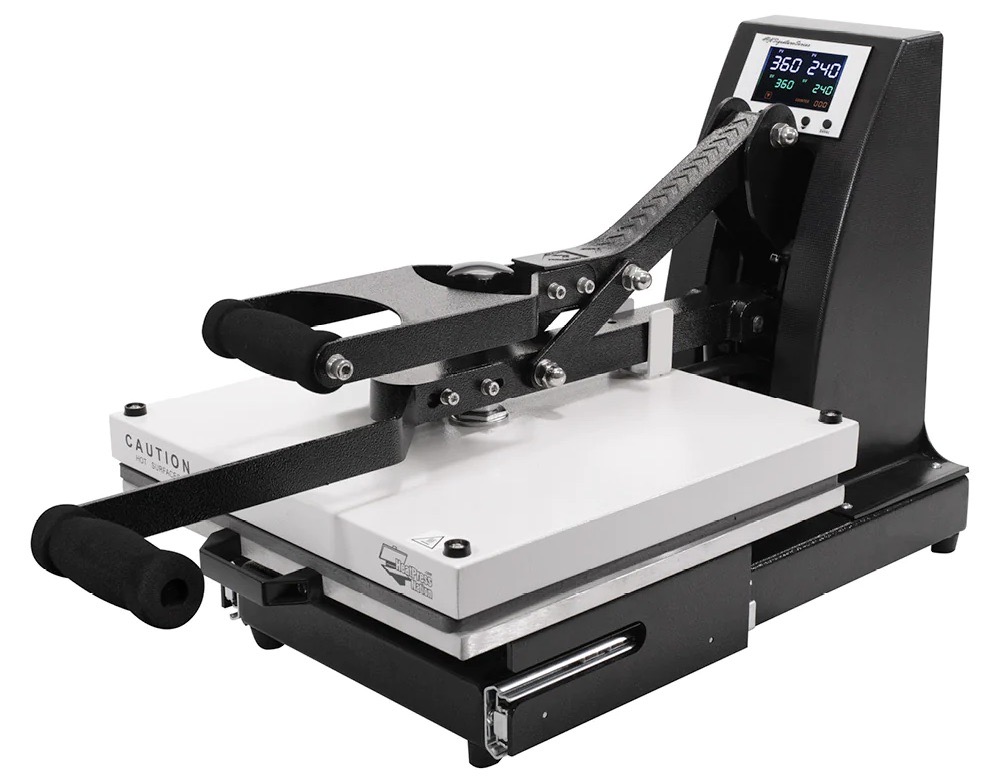
    Slide Out Drawer

    The bottom platen of this heat press pulls out like a drawer giving you more workspace. I have an ultra clumsy friend who swears by her slide out drawer heat press so she doesn’t accidentally bump the heating element.

    Slide out drawer heat press on white background.
    This is an example of a slide out drawer heat press.

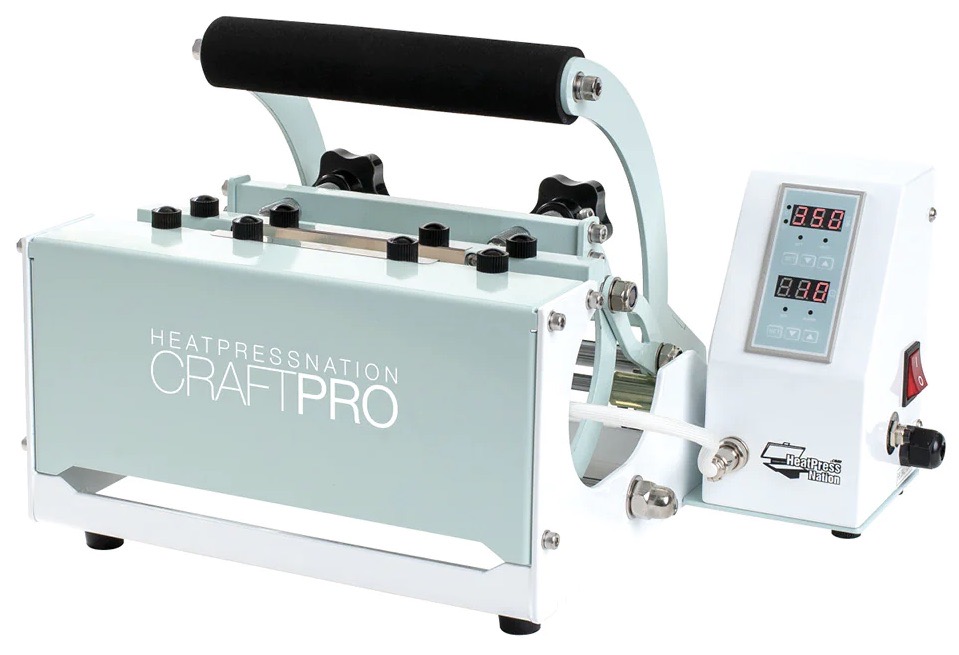
    Mug Press

    Mug Presses are heat presses used to transfer designs to cups, mugs, and tumblers.

    Mug press on white background.
    This is an example of a Mug Press.

    Cap Press

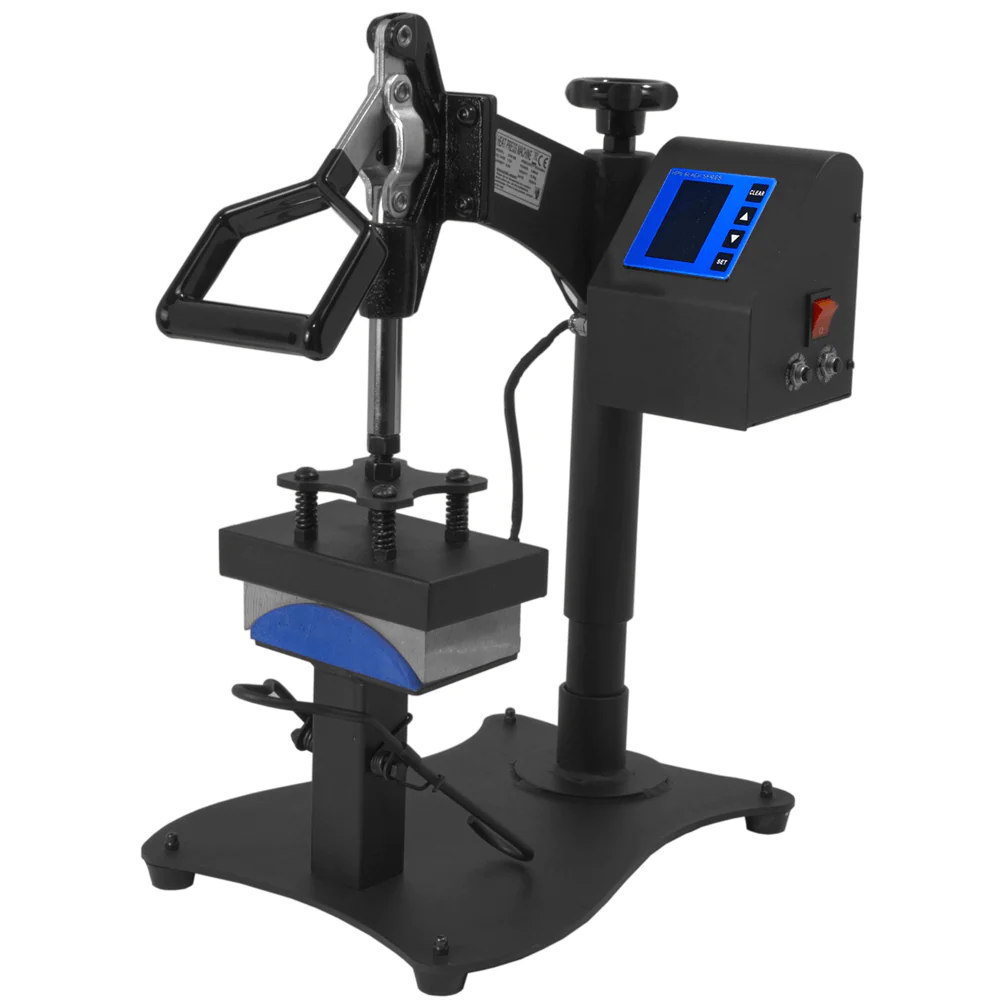
    Cap presses are heat presses that are used to apply heat transfer materials to baseball caps.

    Cap press on white background.
    This is an example of a cap press.

    Multi Function Presses

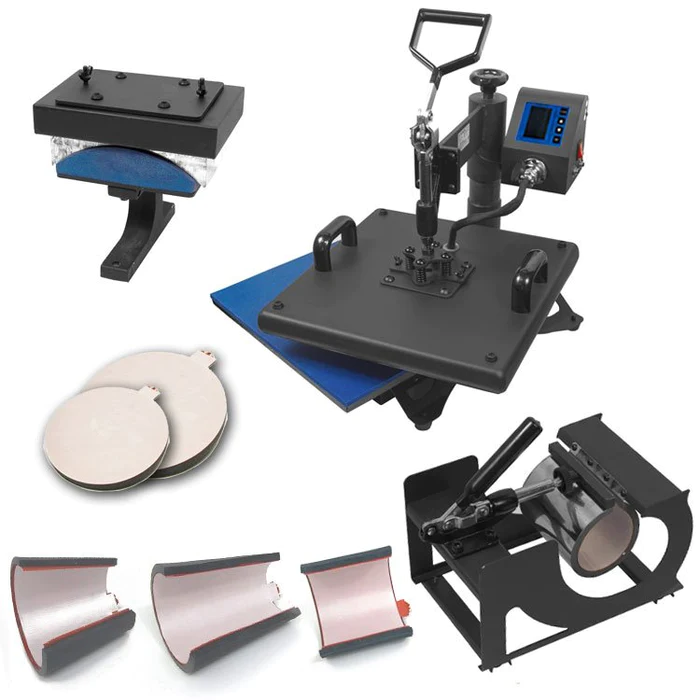
    Multi function or all-in-one heat presses have various plate attachments to make the machine more versatile.

    Multi function press on white background.
    This is an example of a multi function or all-in-one heat press.

    Heat Press Accessories

    In addition to a heat press, you’ll need some accessories:

    • Teflon Sheets: These nonstick sheets help protect your design from getting stuck to the platen.
    • Pressing Pillows: These help level an area you are pressing, especially when pressing along collars, seams, buttons, or zippers.

    Where Should You Buy a Heat Press?

    I’ve worked with a few different heat press companies since 2015 when I started this blog, Cutting for Business. Hands down, I recommend Heat Press Nation. (And no, I’m not being paid to say that.)

    Why Do I Recommend Heat Press Nation?

    • They know their stuff. Heat presses is what they do! The whole business of Heat Press Nation is… well, heat presses! They know how they work, they know what doesn’t work, and they know the different features of each model.
    • I’ve met many of them in person. They aren’t just an internet company I’ve found and partnered with. I’ve worked events side by side with the team. And, when I can, I just watch how they interact with customers.
    • I trust them. There are some companies out there who will upsell you on something you don’t need. I am confident in sending Cutting for Business readers over to Heat Press Nation, because I know they will take the time needed to match you with the right heat press for your price point.
    • They know better than I do. Heat Press Nation will be able to keep you up to date with the latest news, best presses for home crafters, and the best options for professional use.

    Which Heat Press to Buy?

    Before I send you over to Heat Press Nation to start shopping, I want to leave you with my opinion on heat presses.

    I recommend getting the largest heat press that you can afford. This will ensure that you don’t outgrow it shortly after getting it.

    I started with a 9″ by 12″ heat press. Then I extended the shirt sizes I was offering into 3X, 4X, and 5X. Well, bigger shirts need larger designs. While I could use a 15″ by 15″ press, a 16″ by 20″ heat press made larger projects easier.

    Tell me in the comments, what heat press do you have?

  • How to Stay Safe While Running a Craft Business from Home

    I’ve mentioned the need for small business crafters to stay safe on this blog before when I wrote about handling local pickups. Similarly, keeping your personal information (and your customer’s personal information) private while owning a small business is equally important. Here are a few of my tips for keeping your personal information, well, personal!

    1) Use a post office box (PO Box) for your business needs. Once you register or incorporate your business, some of your information becomes public records. This includes the address you use for your business. To keep your privacy, you can use a PO Box in most states as your official address. PO Boxes are inexpensive, mine runs about $30 per year. Additionally, use your PO Box for your domain registration, return address on packages, and mailing address for customer returns or customer payments by paper check. If you don’t want to invest in a post office box, consider a virtual mailbox.

    2) When creating sample items for sale with identifying information, such as a street address, last name, or other identifying details, make up an address. Or, when sharing completed items online, always remember to blur or cover personal identifying details. You can easily edit photos with your favorite photo editor or download free apps for your smartphone. (My personal favorites are Pic Monkey – free online, Gimp – an open source photo editor, and Blur It Free – from the Apple App Store.)

    3) When sharing customer submitted photos, especially those of children, if the person in the photograph can easily be recognized you’ll need to get a photo release form signed. Free photo release forms can be obtained from the American Society of Media Photographers.

    Remember, it’s always better to err on the side of caution when putting someone else’s personal information or photos online.

    Keep another crafter safe by sharing this on Pinterest:

    How to Stay Safe While Running a Silhouette Cameo or Cricut Craft Business from Home - by cuttingforbusiness.com