Category: Project Tutorials

  • Tutorial: Wedding Gift Wine Bottles

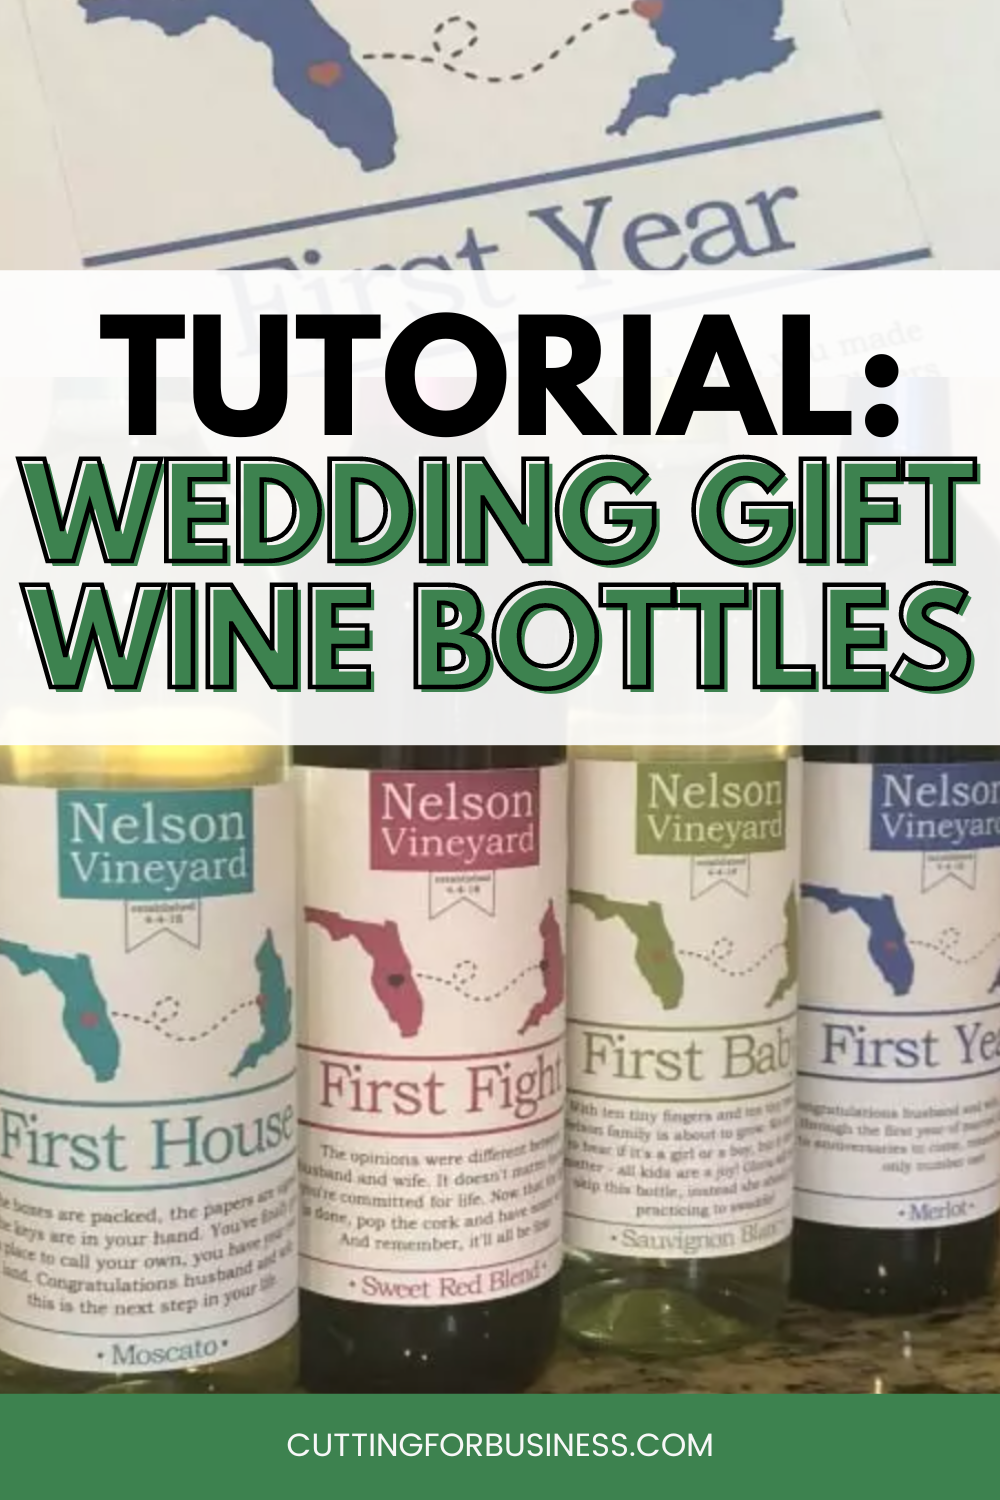
    Yesterday, we talked wedding sayings. Today, I’m sharing a simple Print and Cut Silhouette project I made for a wedding I’m attending tonight: Wedding Gift Wine Bottles.

    We are gifting the happy couple four different milestone bottles of wine: One for their first house purchase, one for their first baby, one for their first fight, and one for their first anniversary.
    Tutorial: Wedding Gift Wine Bottles - cuttingforbusiness.com

    Supplies Needed

    Tutorial: Print and Cut Wedding Wine Bottle Labels

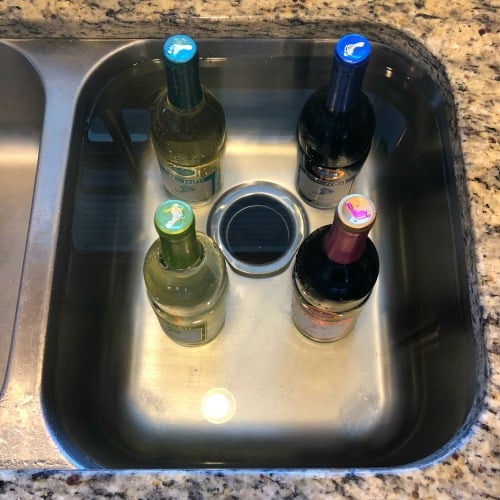
    1. While you are designing your labels, soak your wine bottles in water to remove the existing labels. If any residue is left behind, carefully use a razor blade or scraper to remove it. 
      Tutorial: Print and Cut Wedding Wine Bottle Labels with Silhouette Cameo - Great gift or product idea for Etsy shop owners - by cuttingforbusiness.com
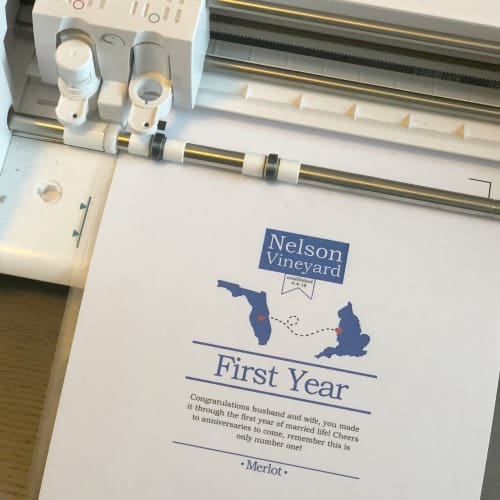
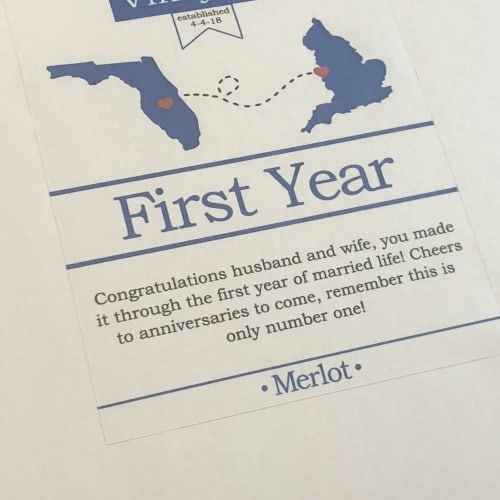
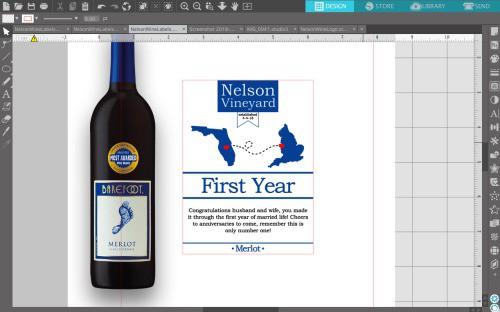
    2. Create a design in Silhouette Studio for your label. My labels measure 3.75″ by 5″. You can put whatever you want on them. I created a design that features Florida (where the groom lives) and England (where the bride is from), and their wedding date. I also wrote a text blurb for each occasion. Here’s the occasions and text that I used:
      • First House: The boxes are packed, the papers are signed, the keys are in your hand. You’ve finally got a place to call your own, you’ve got your own land. Congratulations husband and wife, this is the next step in life.
      • First Fight: The opinions were different between husband and wife. It doesn’t matter because you’re committed for life. Now that the fight is done, pop the cork and have some wine. And remember, it’ll all be fine.
      • First Baby: With ten tiny fingers and ten tiny toes, the Nelson family is about to grow. We can’t wait to hear if it’s a girl or a boy, but it does not matter – all kids are a joy! Gloria will have to skip this bottle, instead she should start practicing to swaddle.
      • First Year: Congratulations husband and wife, you made it through the first year of married life! Cheers to anniversaries to come, remember this is only number one!
    3. I matched the colors in the labels to their existing foil seals. I did this by simply taking a screenshot of each bottle from the Barefoot Wine website, and using the eyedropper tool to get the matching color. 
      Tutorial: Print and Cut Wedding Wine Bottle Labels with Silhouette Cameo - Great gift or product idea for Etsy shop owners - by cuttingforbusiness.com
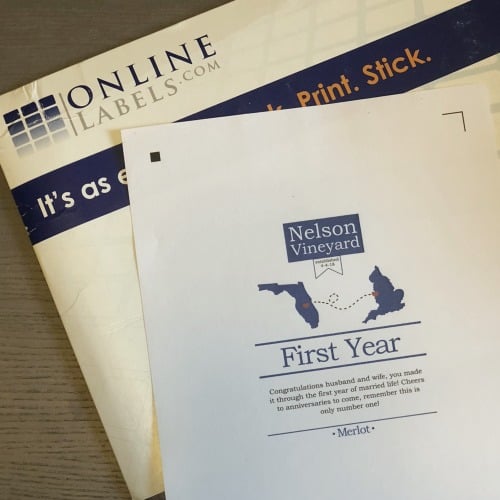
    4. After designing, it’s a simple Print and Cut/Print then Cut. In Silhouette, be sure to turn on your registration marks. I used the standard cut settings for ‘Sticker Paper’ and it cut perfectly. 
      Tutorial: Print and Cut Wedding Wine Bottle Labels with Silhouette Cameo - Great gift or product idea for Etsy shop owners - by cuttingforbusiness.com
      Tutorial: Print and Cut Wedding Wine Bottle Labels with Silhouette Cameo - Great gift or product idea for Etsy shop owners - by cuttingforbusiness.com
      Tutorial: Print and Cut Wedding Wine Bottle Labels with Silhouette Cameo - Great gift or product idea for Etsy shop owners - by cuttingforbusiness.com
    5. To apply your labels, make sure your bottles are dry and stick them on. I laid the wine bottle on a towel on my kitchen counter so that it wouldn’t slide around as I applied each label. 
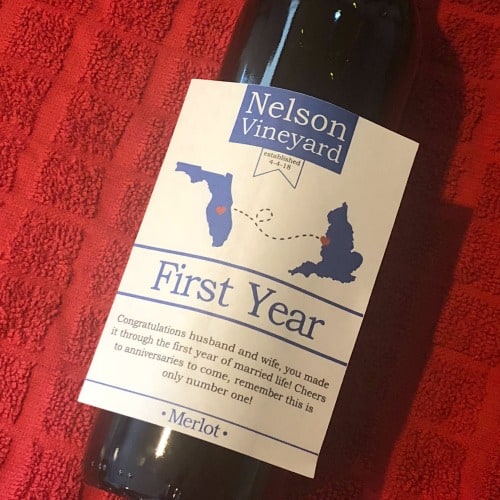
      Tutorial: Print and Cut Wedding Wine Bottle Labels with Silhouette Cameo - Great gift or product idea for Etsy shop owners - by cuttingforbusiness.com

    Finished Wedding Gift Wine Bottles

    Here’s a picture of the whole set together: 
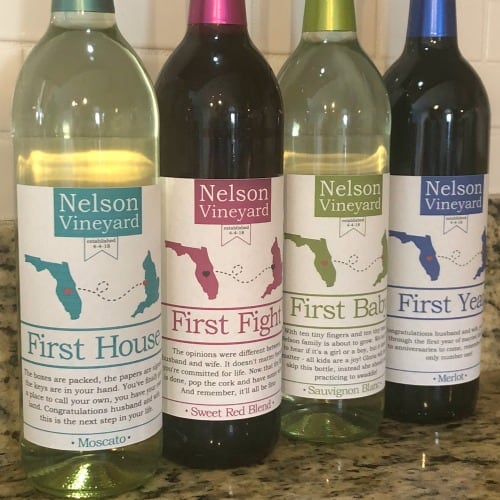
    Tutorial: Print and Cut Wedding Wine Bottle Labels with Silhouette Cameo - Great gift or product idea for Etsy shop owners - by cuttingforbusiness.com

    Reminder: You Can’t Sell Wine

    Remember, if you plan to sell printable wine bottle labels, sell only the label and include application instructions for your customer. Why? Because you can’t sell wine without the proper license. Another option would be to sell generic labels directly to a winery or wine retailer and they could sell them to their customers.
  • Tutorial: How to Cut Out Wood Words & Shapes Using a Scroll Saw

    Last year, I shared a tutorial on using your Silhouette or Cricut and a scroll saw to cut out shaped blanks that you could paint or stain. (Missed it? Read it here.) I’ve been meaning to add another, and today I finally got around to it!

    In the first tutorial, I kept the scroll saw cuts super simple. This time, this tutorial features more difficult cuts – like cutting out the centers of text. You’ll also notice that I used a thicker wood – 1/2 inch select pine.

    How to Cut Out Wood Words & Shapes Using a Scroll Saw

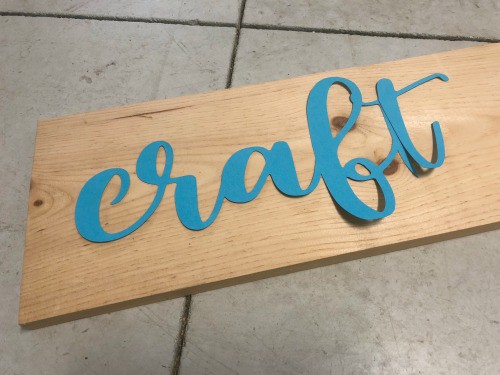
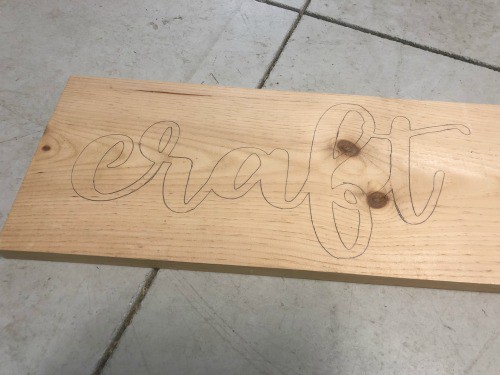
    1. Use your Silhouette or Cricut to cut a template from cardstock. I used the Hello Wedding font and the word Craft. After cutting your cardstock template, trace around it on your wood using a pencil. Tutorial: How to Cut Out Wood Words & Shapes Using a Scroll Saw and Your Silhouette Portrait or Cameo and Cricut Explore or Maker - by cuttingforbusiness.com
      Tutorial: How to Cut Out Wood Words & Shapes Using a Scroll Saw and Your Silhouette Portrait or Cameo and Cricut Explore or Maker - by cuttingforbusiness.com
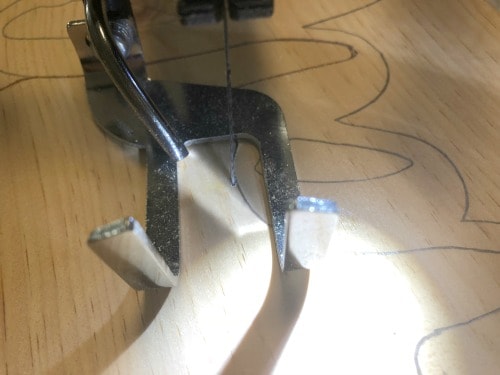
    2. Begin your scroll saw cuts and cut around the entire outside of your word or shape. Cutting with a scroll saw is much like using a sewing machine. As you complete more projects, you’ll get better at doing smooth rounded edges and corners. The one thing that helps me is to constantly keep my wood moving. (If you are curious, I don’t have a fancy scroll saw. Read more about it here.)Tutorial: How to Cut Out Wood Words & Shapes Using a Scroll Saw and Your Silhouette Portrait or Cameo and Cricut Explore or Maker - by cuttingforbusiness.com
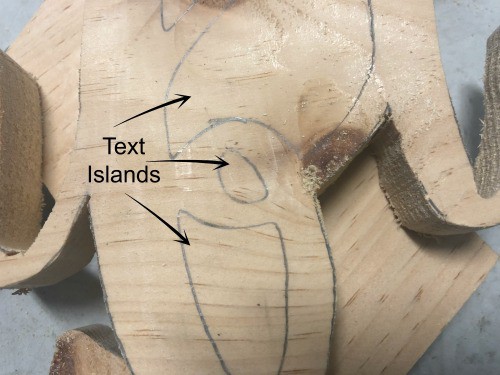
    3. After you’ve cut around the outside of the design, drill holes into the insides of the text (these are called islands). Now, consult your scroll saw manual to find out how to remove the blade. On my scroll saw, I turn a knob which releases the tension in the blade and allows me to remove and rethread the blade through my drilled hole. Then, you’ll cut out all of the islands. Tutorial: How to Cut Out Wood Words & Shapes Using a Scroll Saw and Your Silhouette Portrait or Cameo and Cricut Explore or Maker - by cuttingforbusiness.com
      Tutorial: How to Cut Out Wood Words & Shapes Using a Scroll Saw and Your Silhouette Portrait or Cameo and Cricut Explore or Maker - by cuttingforbusiness.com
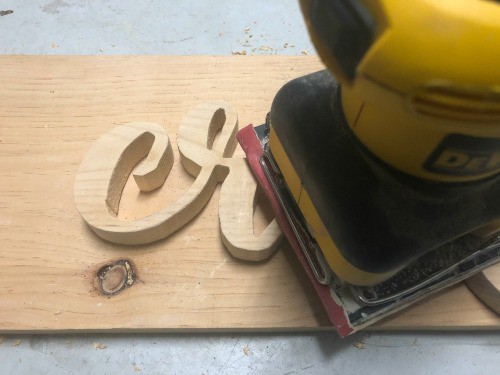
    4. After you’ve cut your shape, sand down any rough edges. (Need tips for sanding? Head to this post.) I used my palm sander for the front, back, and edges and sandpaper for the islands and other nooks and crannies. Tutorial: How to Cut Out Wood Words & Shapes Using a Scroll Saw and Your Silhouette Portrait or Cameo and Cricut Explore or Maker - by cuttingforbusiness.com
    5. Stain or paint your wood word or shape. I used spray on stain (wood stain that comes in a spray paint can). This is the first project that I’ve used it and was happy with the results. Here’s the exact one I used. After staining and painting, your wood word is ready to add a hanger to the back and hang on the wall. I usually use screw in sawtooth hangers.
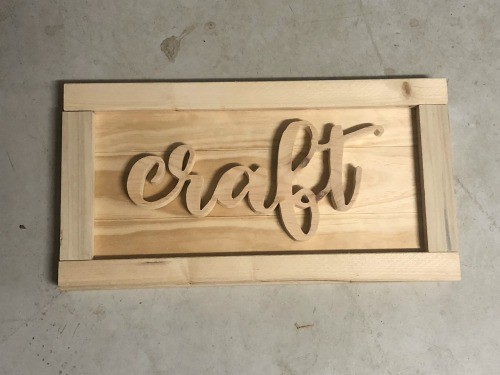
    6. I decided to mount my word onto a frame on made with some wood scraps laying around my garage. I used basic wood nails to nail everything together. Here’s a link to a tutorial on the blog if you’d like to make a frame, too. Oh! I painted the background white using this.
      Tutorial: How to Cut Out Wood Words & Shapes Using a Scroll Saw and Your Silhouette Portrait or Cameo and Cricut Explore or Maker - by cuttingforbusiness.com

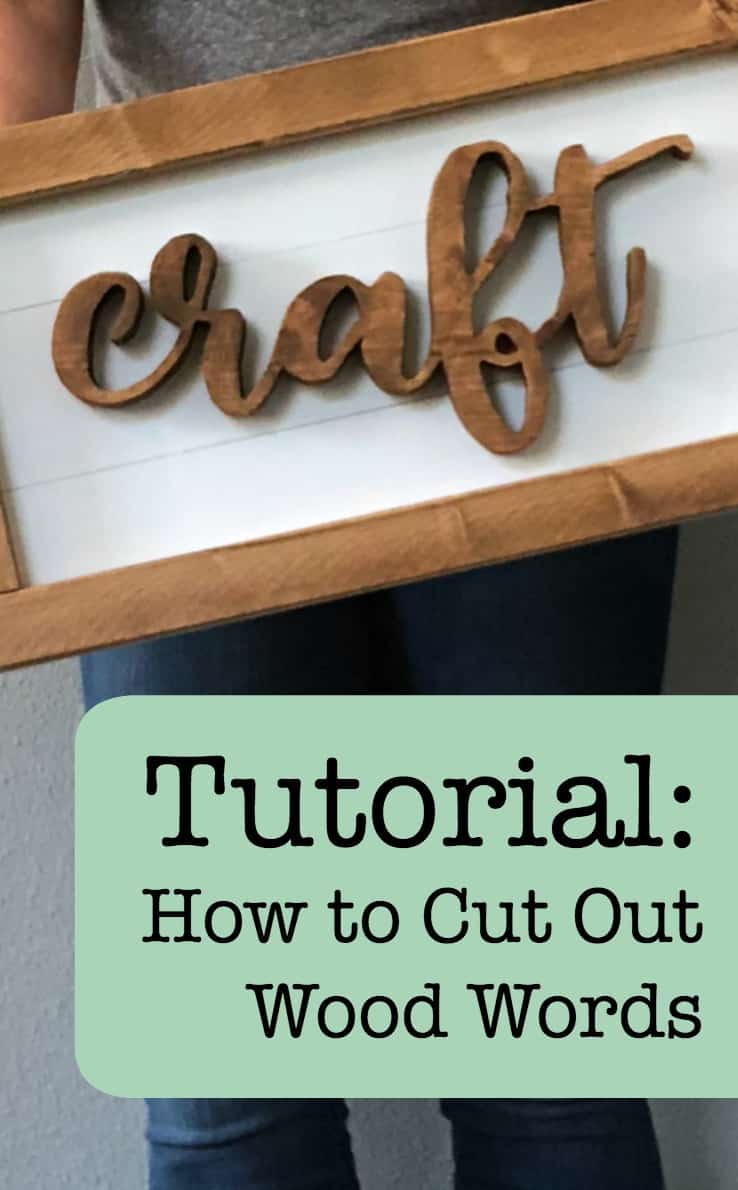
    Love this tutorial? Save the image below to Pinterest!

    Tutorial: How to Cut Out Wood Words & Shapes Using a Scroll Saw and Your Silhouette Portrait or Cameo and Cricut Explore or Maker - by cuttingforbusiness.com

  • Product Idea: Glass Etched Men’s Monogram Valet or Jewelry Box

    While everyone is thinking Christmas, I’m starting to think ahead to Valentine’s Day. Why? First, it’s not too early to start planning. Second, after Christmas, it’s the next big money making holiday for Silhouette and Cricut small business owners. If you’re like me, gift giving to men can be difficult. Coincidentally, I was browsing online the other day and stumbled across some blank men’s jewelry cases. Of course, they’d look better with a men’s monogram on top. So, that’s exactly what I did. Here’s how:

    Supplies Needed

    You’ll also need a Silhouette or Cricut, safety equipment like googles and gloves for using etching creme, and something to apply the etching creme.

    How to Etch a Men’s Jewelry Case

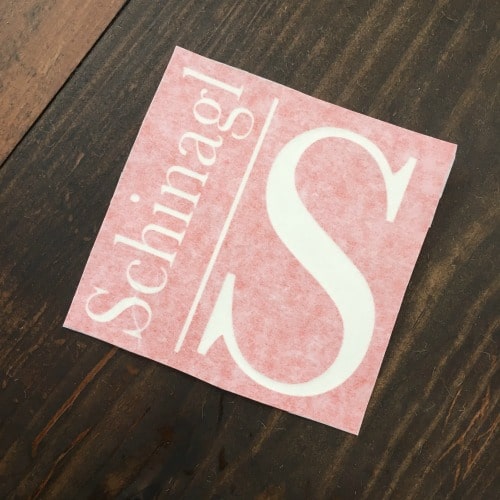
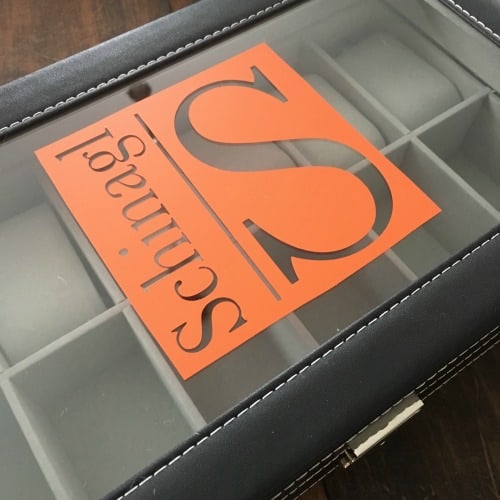
    1. Create and cut a design from scrap adhesive vinyl. The brand doesn’t matter much, I used a scrap of Oracal 631. Then, weed it with your favorite weeding toolProduct Idea: Glass Etched Men’s Valet or Jewelry Boxes with Silhouette Cameo or Cricut Explore or Maker - Includes step by step tutorial - by cuttingforbusiness.com
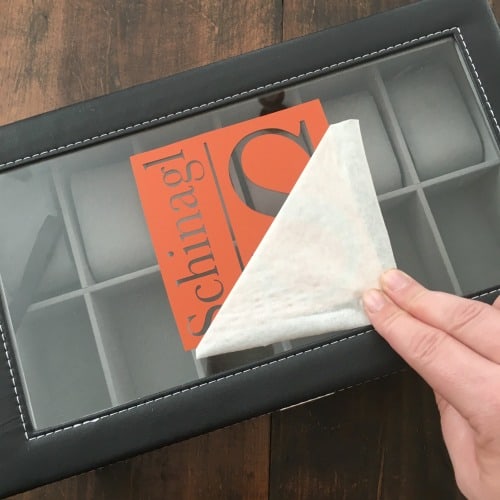
    2. Apply your transfer tape. Like always, I used GreenStarProduct Idea: Glass Etched Men’s Valet or Jewelry Boxes with Silhouette Cameo or Cricut Explore or Maker - Includes step by step tutorial - by cuttingforbusiness.com
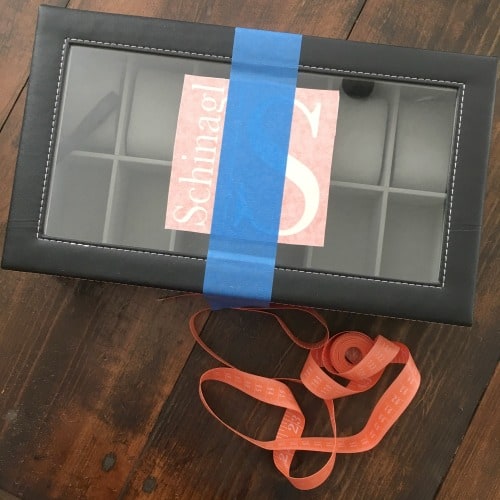
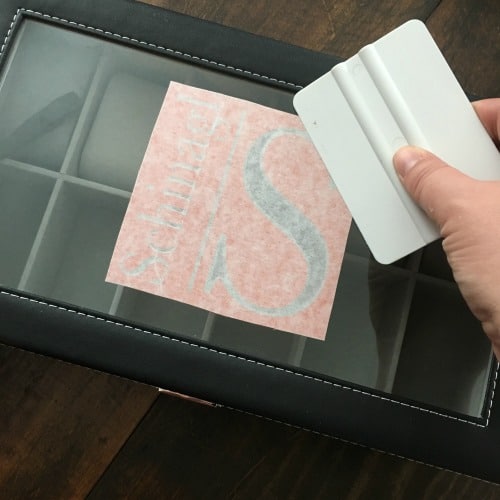
    3. Apply your vinyl to the top of the box. I used the hinge method that you can read about in this instruction setProduct Idea: Glass Etched Men’s Valet or Jewelry Boxes with Silhouette Cameo or Cricut Explore or Maker - Includes step by step tutorial - by cuttingforbusiness.com
      Product Idea: Glass Etched Men’s Valet or Jewelry Boxes with Silhouette Cameo or Cricut Explore or Maker - Includes step by step tutorial - by cuttingforbusiness.com
      Product Idea: Glass Etched Men’s Valet or Jewelry Boxes with Silhouette Cameo or Cricut Explore or Maker - Includes step by step tutorial - by cuttingforbusiness.com
      Product Idea: Glass Etched Men’s Valet or Jewelry Boxes with Silhouette Cameo or Cricut Explore or Maker - Includes step by step tutorial - by cuttingforbusiness.com
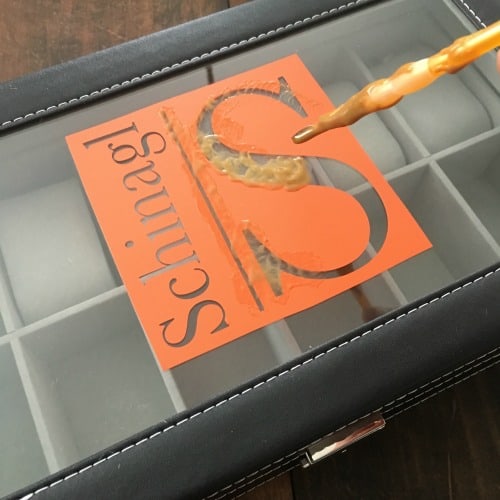
    4. Now, you’ll use a wooden stick, squeegee, or brush to apply the etching creme. I prefer the Etchall or Armour Etch brands over others I have used. Product Idea: Glass Etched Men’s Valet or Jewelry Boxes with Silhouette Cameo or Cricut Explore or Maker - Includes step by step tutorial - by cuttingforbusiness.com
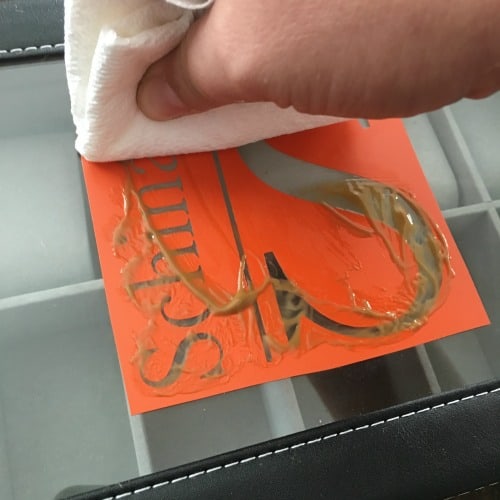
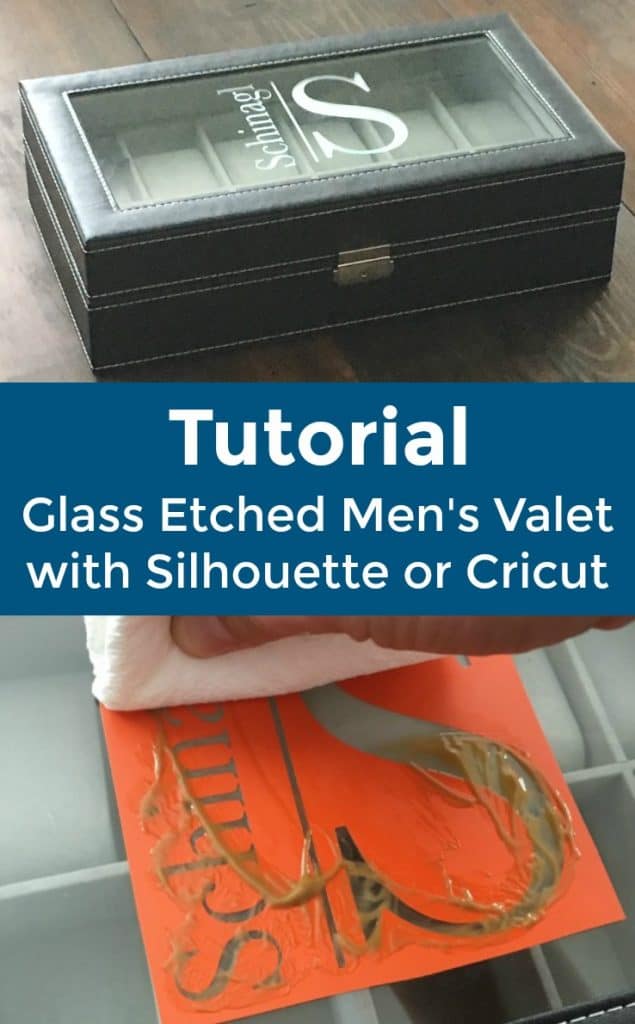
    5.  After 15 minutes, I carefully used a dry paper towel to remove the etching creme. You’ll need to be sure to not push any creme over the edge of the stencil. (Remember, the creme will etch any glass it touches.) Then, I wiped several times with a damp paper towel. Normally, I’d rinse it under water but I didn’t want to get the leather wet.Product Idea: Glass Etched Men’s Valet or Jewelry Boxes with Silhouette Cameo or Cricut Explore or Maker - Includes step by step tutorial - by cuttingforbusiness.com
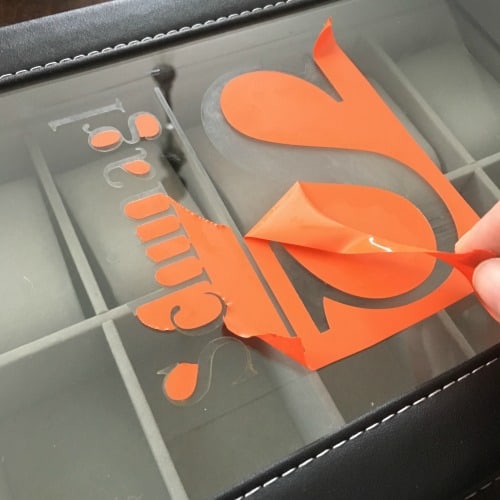
    6. Peel off your vinyl stencil and discard.Product Idea: Glass Etched Men’s Valet or Jewelry Boxes with Silhouette Cameo or Cricut Explore or Maker - Includes step by step tutorial - by cuttingforbusiness.com

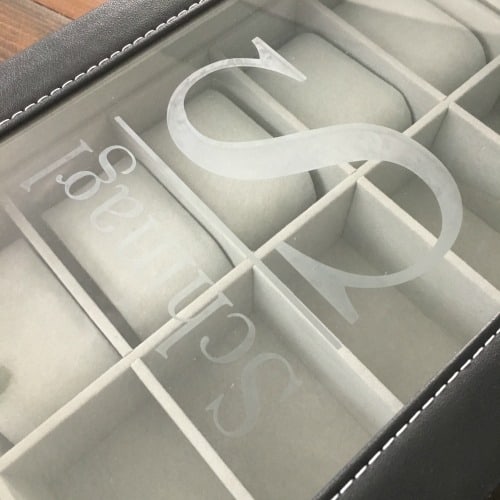
    Here’s a look at the final product: Product Idea: Glass Etched Men’s Valet or Jewelry Boxes with Silhouette Cameo or Cricut Explore or Maker - Includes step by step tutorial - by cuttingforbusiness.com

    How Much To Charge

    I paid $18 for the jewelry case. I spent less than $1 in supplies and 20 minutes of time. I’d sell for around $30 to $35. There were also several smaller cases on Amazon, like this one, if you’d like to go for a lower price point.

    Who would have known: I gifted the valet to Mr. Cutting for Business shortly after I wrote this post. I asked him how much he thought I paid on Amazon. He said $35 to $40. We are both impressed with the feel and quality of the $17 valet box!

    Like the font? I used the Baskerville font because it has a stately feel to it.

    Love this product idea? Save it to Pinterest:

    Product Idea: Glass Etched Men’s Valet or Jewelry Boxes with Silhouette Cameo or Cricut Explore or Maker - Includes step by step tutorial - by cuttingforbusiness.com

  • Wood Sign Making 101 – Everything You Need to Perfectly Paint Signs

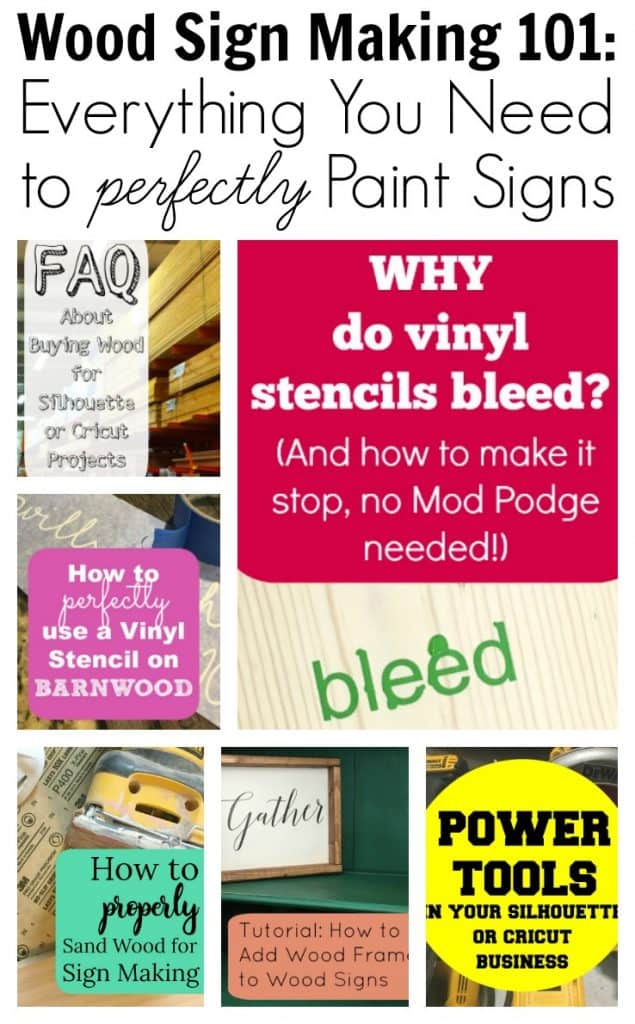
    I get emails all the time with questions from Cutting for Business readers about making wood signs using their Silhouette Cameo or Cricut Explore or Maker. Let’s take a step-by-step walk through making a sign with your Silhouette or Cricut.

    How to Perfectly Paint Signs with Your Silhouette Cameo or Cricut Explore or Maker

    1. Buy wood. Learn the ins and outs of buying wood for sign making in this post: FAQ About Buying Wood for Silhouette Cameo Projects by cuttingforbusiness.com
    2. Cut the wood. Find out what power tools you’ll need: FAQ: Power Tools in Your Silhouette or Cricut Business - by cuttingforbusiness.com
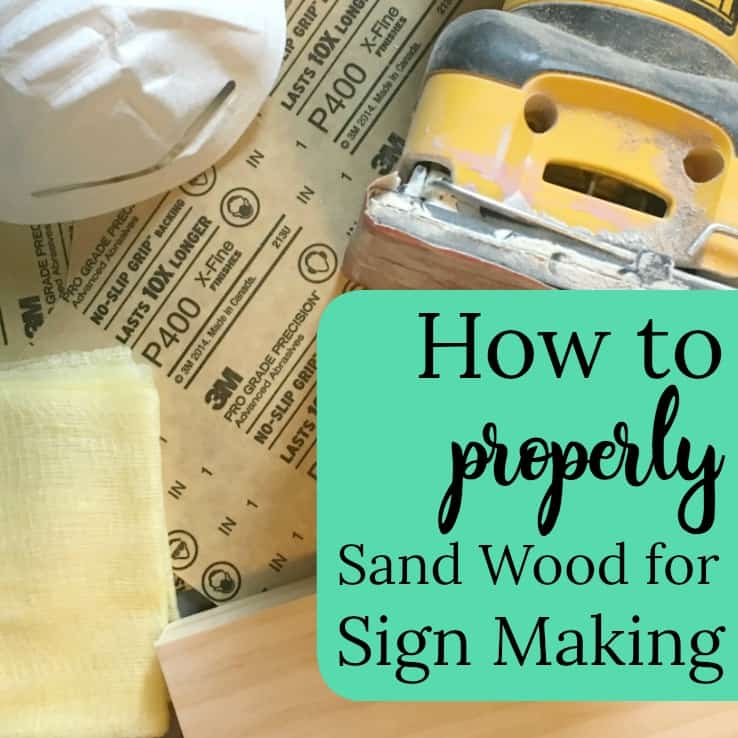
    3. Sand your wood. Don’t just sand it, sand it wellHow to Properly Sand Wood for Painted Wooden Signs - A must read for Silhouette Cameo or Cricut Explore or Maker Crafters - by cuttingforbusiness.com
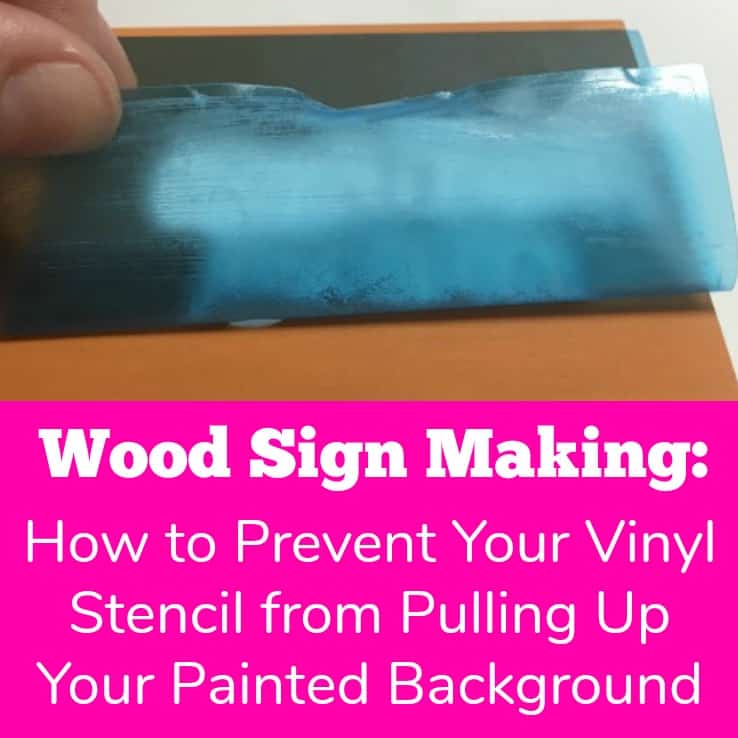
    4. Cut your stencil and paint your wood. I prefer to use Oramask 813 stencil film and GreenStar transfer tape. If you are having problems, troubleshoot in these posts.Handmade Wood Signs: How to Prevent Your Vinyl Stencil from Peeling Your Paint Up - Silhouette Portrait or Cameo and Cricut Explore or Maker - by cuttingforbusiness.com
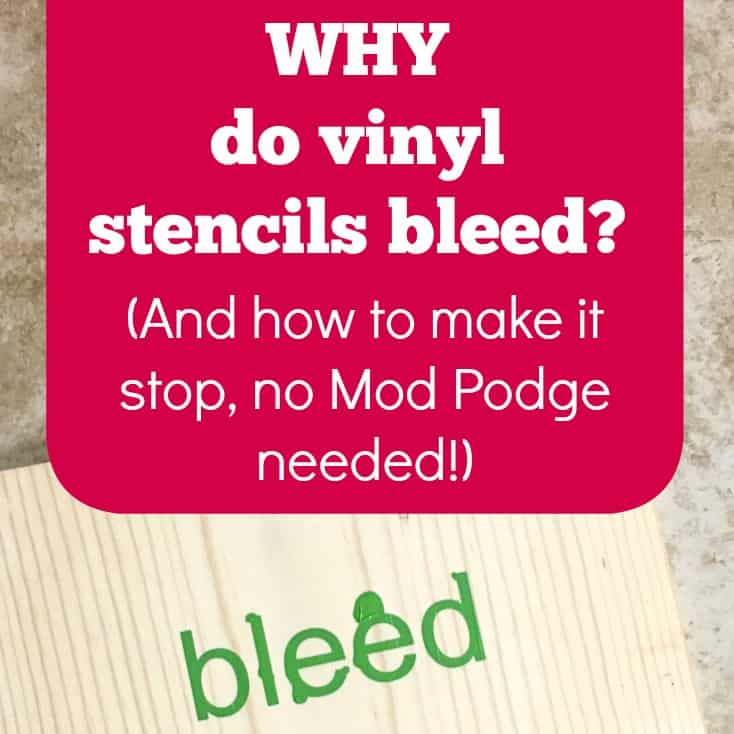
      Why do vinyl stencils bleed - and how to fix it - no Mod Podge needed! A great article for Silhouette Cameo and Cricut crafters who make wooden signs. By cuttingforbusiness.com
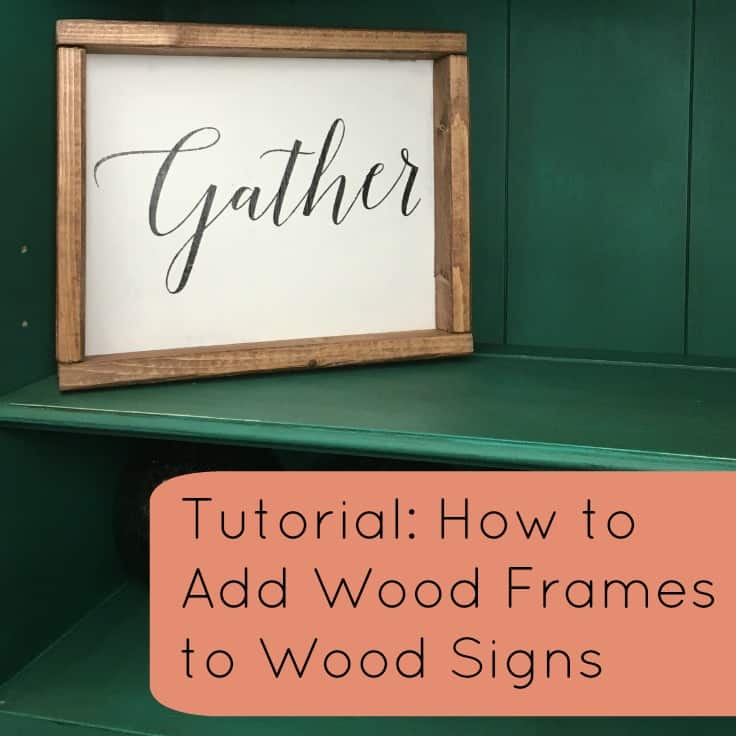
    5. Consider adding a frame: Tutorial: How to Add Frames to Wood Signs - Great for Silhouette Cameo or Cricut Explore Crafters - by cuttingforbusiness.com
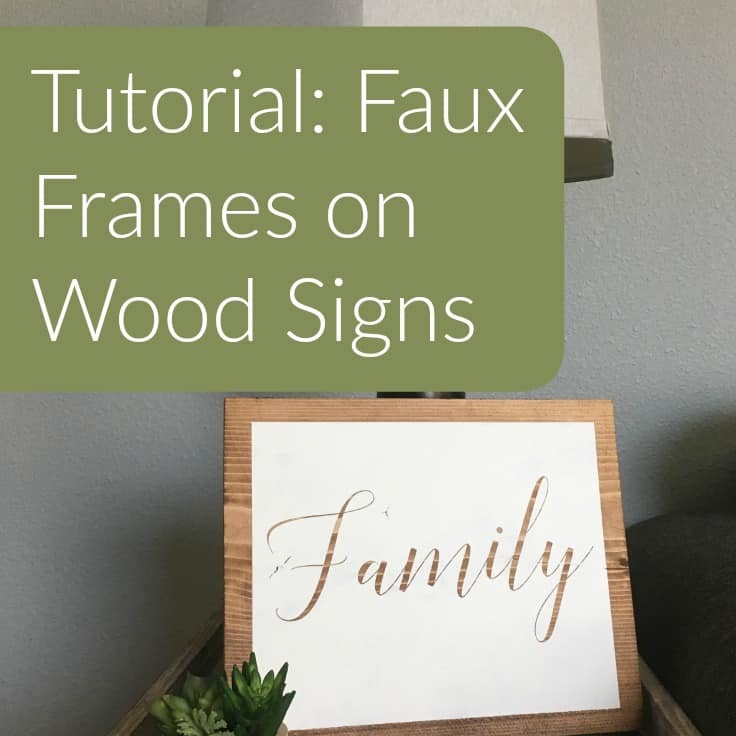
      Tutorial: Faux Wood Frames on Wooden Signs with Your Silhouette Cameo or Cricut Explore - by cuttingforbusiness.com
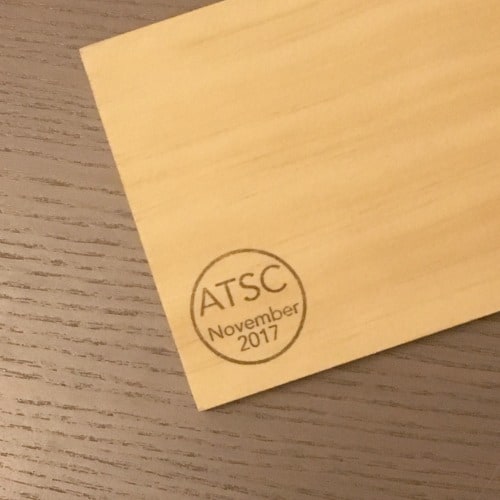
    6. Selling your sign? Brand your sign with a stamp on the back with your Silhouette Mint. See the photo below for an example and read more about buying a Silhouette Mint hereWood Sign Making 101 - Everything You Need to Perfectly Paint Signs with Your Silhouette Portrait or Cameo and Cricut Explore or Maker - by cuttingforbusiness.com
    7. Finally, package your sign to mail: How to Ship Extra Large Signs made with your Silhouette Cameo or Cricut Explore - by cuttingforbusiness.com

    Once you get the hang of making wood signs, here’s some advanced tutorials:

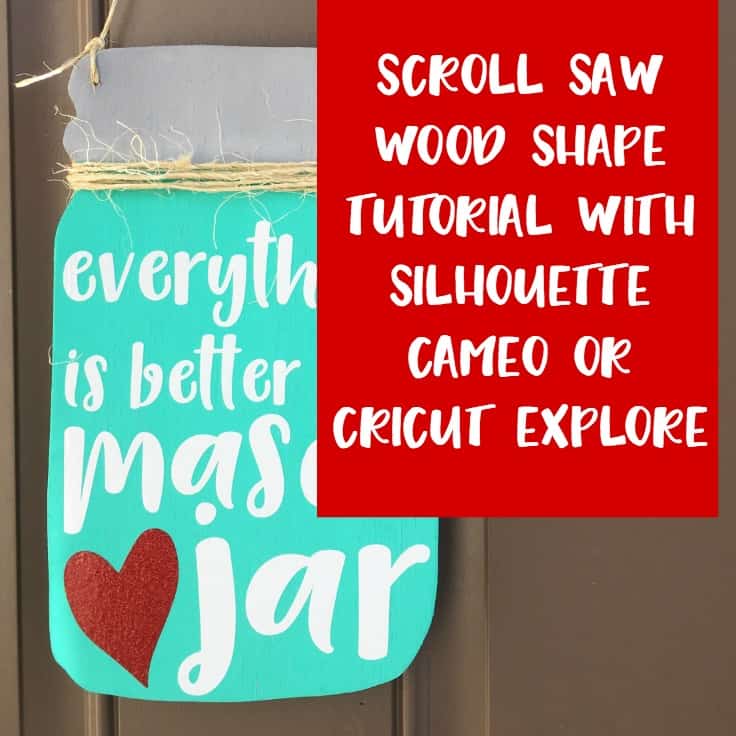
    1. Get fancy with shaped wood blanks: Scroll Saw + Silhouette Cameo or Cricut Explore Wood Shape Tutorial - Mason jar project - by cuttingforbusiness.com
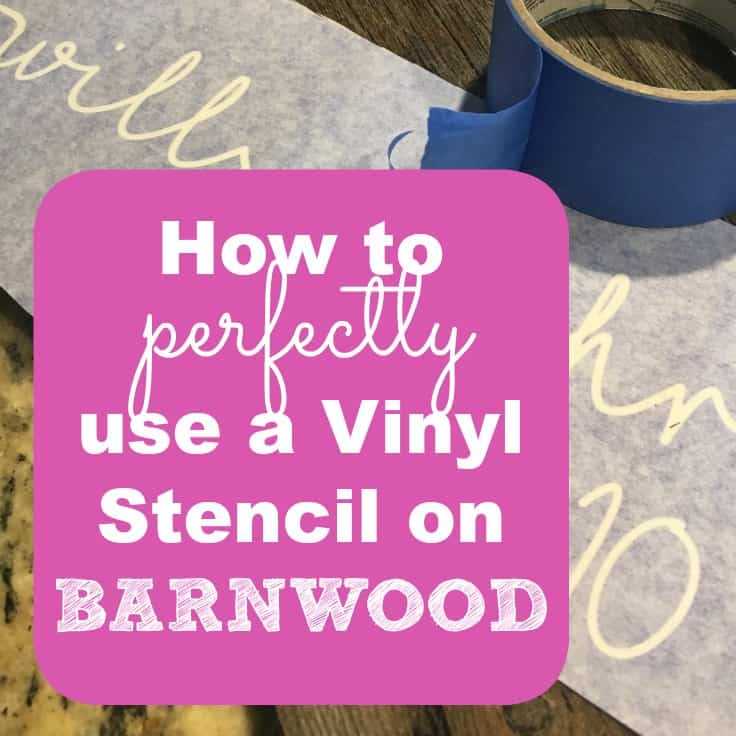
    2. Get in touch with your rustic side with barnwood: How to Use a Vinyl Stencil on Barnwood or Reclaimed Wood with your Silhouette Cameo or Cricut - by cuttingforbusiness.com
    3. Or host a party with friends: Step by Step Guide to Hosting a Paint Your Own Sign Party with your Silhouette Cameo or Cricut - by cuttingforbusiness.com

    I promise, if you sand your wood well, use only a tiny amount of paint on your signs, and dab your brush up and down – you will be successful making signs with your Silhouette or Cricut.

    Why not save this post on Pinterest so you can find it when you need it?

    Wood Sign Making 101 - Everything You Need to Perfectly Paint Signs with Your Silhouette Portrait or Cameo and Cricut Explore or Maker - by cuttingforbusiness.com

  • Wood Signs: How to Prevent Your Vinyl Stencil from Peeling Your Paint Up

    Hey Silhouette and Cricut wood sign makers, are you having problems with your vinyl stencil peeling up the paint on your wooden sign? You know the struggle: you’ve cut your wood, sanded your wood, painted the background, applied your vinyl stencil, stenciled the sign, and you when you pull off the stencil little bits of the painted background come up, too! Today, I’m sharing a tip to help you prevent this.

    How to Prevent Your Vinyl Stencil from Peeling Your Paint Up

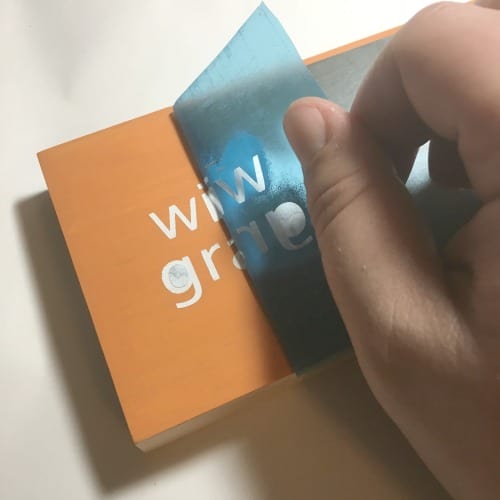
    When you pull up your vinyl stencil, pull it up against the grain of the wood. That’s it, it’s just that simple!

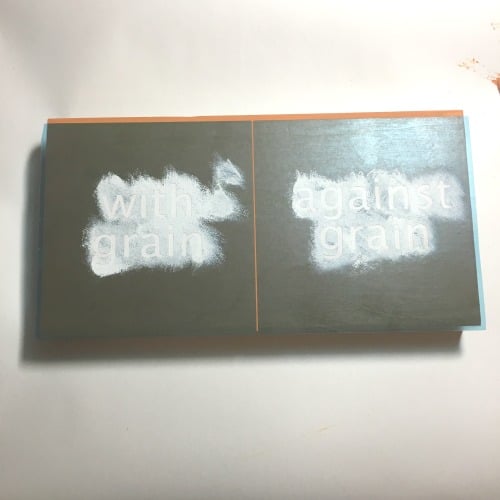
    Let’s look at some pictures to demonstrate.

    I’ve got my sign stenciled and I am ready to remove the vinyl stencil. (By the way, I prefer to use Oramask 813 stencil film.)

    Handmade Wood Signs: How to Prevent Your Vinyl Stencil from Peeling Your Paint Up - Silhouette Portrait or Cameo and Cricut Explore or Maker - by cuttingforbusiness.com

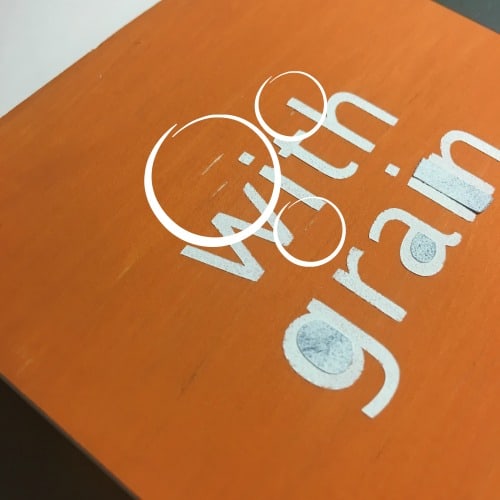
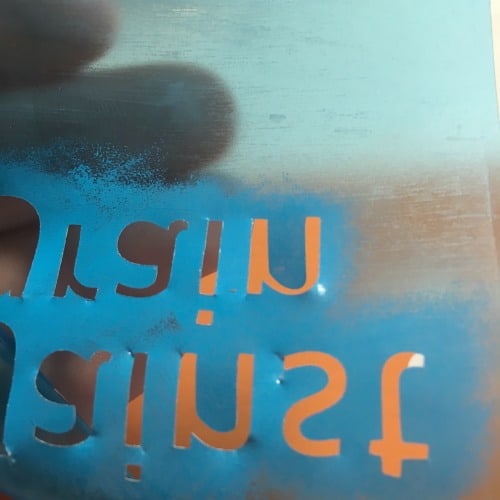
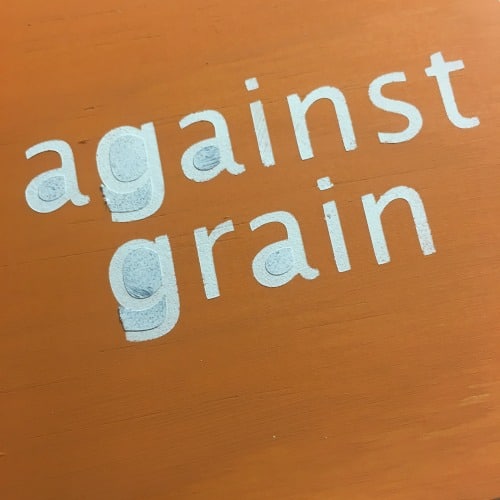
    On the left side, I have pulled off the Oramask 813 stencil in the direction of the wood grain. Handmade Wood Signs: How to Prevent Your Vinyl Stencil from Peeling Your Paint Up - Silhouette Portrait or Cameo and Cricut Explore or Maker - by cuttingforbusiness.comYou’ll see that several slivers of wood have pulled off onto with the stencil. I’ve circled them in the photo below.Handmade Wood Signs: How to Prevent Your Vinyl Stencil from Peeling Your Paint Up - Silhouette Portrait or Cameo and Cricut Explore or Maker - by cuttingforbusiness.com
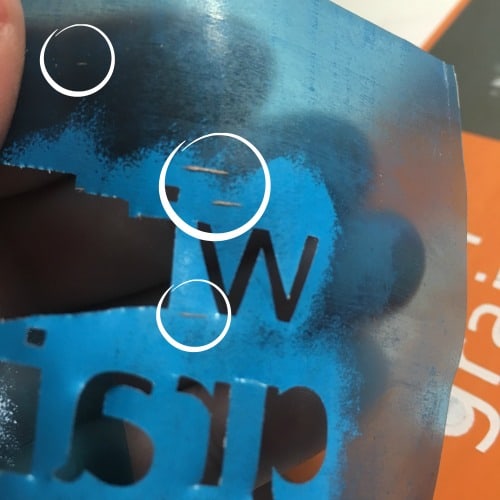
    Handmade Wood Signs: How to Prevent Your Vinyl Stencil from Peeling Your Paint Up - Silhouette Portrait or Cameo and Cricut Explore or Maker - by cuttingforbusiness.com

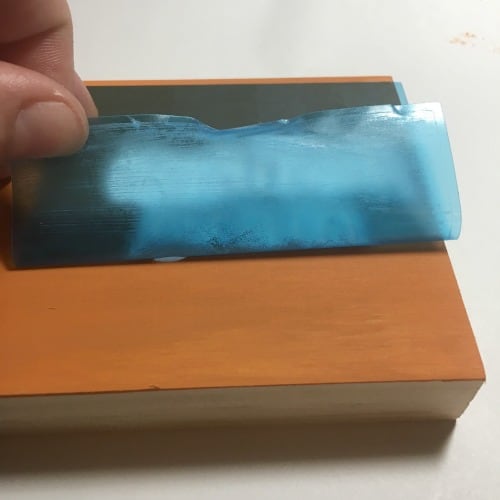
    On the other side of the sign, I’ve pulled off the Oramask 813 against the wood grain. Handmade Wood Signs: How to Prevent Your Vinyl Stencil from Peeling Your Paint Up - Silhouette Portrait or Cameo and Cricut Explore or Maker - by cuttingforbusiness.com

    From the photos, you can see that the stencil didn’t pull up the wood slivers. Handmade Wood Signs: How to Prevent Your Vinyl Stencil from Peeling Your Paint Up - Silhouette Portrait or Cameo and Cricut Explore or Maker - by cuttingforbusiness.com
    Handmade Wood Signs: How to Prevent Your Vinyl Stencil from Peeling Your Paint Up - Silhouette Portrait or Cameo and Cricut Explore or Maker - by cuttingforbusiness.com

    That’s it! One simple tip to prevent your vinyl stencil from pulling up the painted background when you remove it.

    Love this tip? Save it to Pinterest:

    Handmade Wood Signs: How to Prevent Your Vinyl Stencil from Peeling Your Paint Up - Silhouette Portrait or Cameo and Cricut Explore or Maker - by cuttingforbusiness.com

  • Tutorial: How to Make Wood Sign Christmas Ornaments

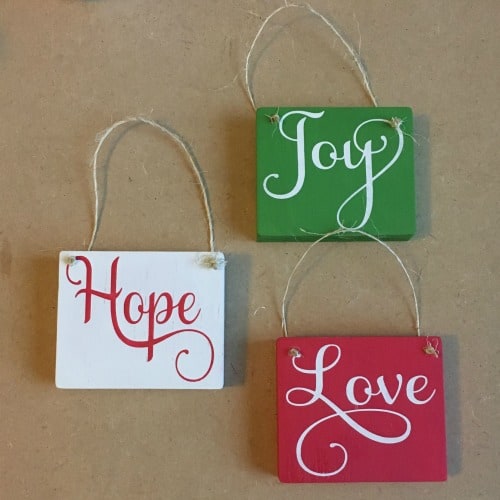
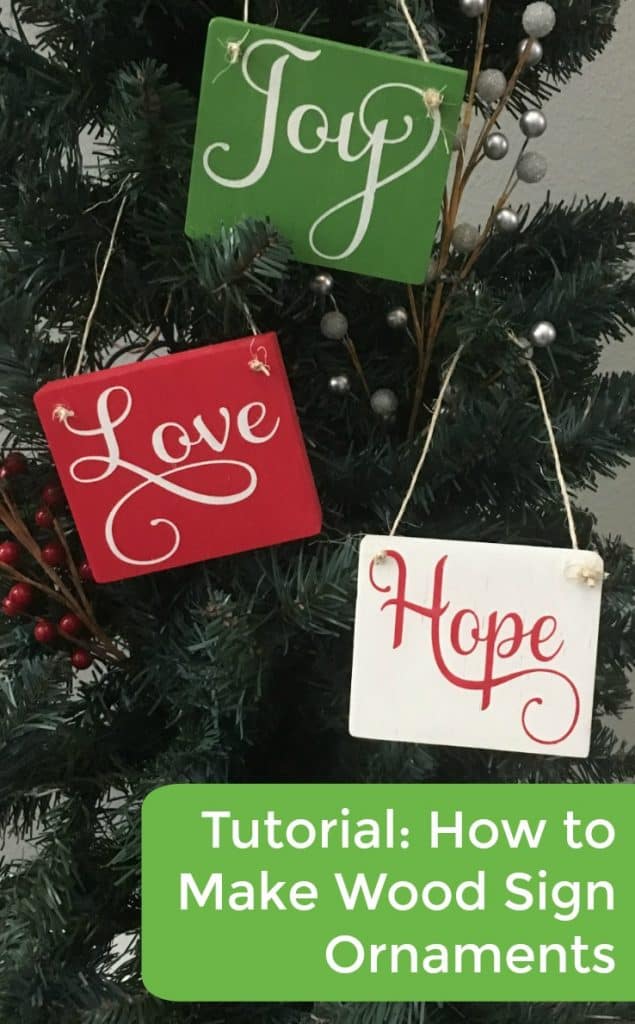
    When I share tips for selling at craft shows, I always remind small business owners to bring a variety of products in all price ranges. However, if you sell painted wooden signs made with your Silhouette or Cricut, it isn’t always easy to bring products in the under $5 range. It certainly doesn’t make sense to sell glass ornaments if your entire brand is wood signs! Today, I’m sharing how I created some mini wood sign ornaments that would sell for less than $5.

    Tutorial: How to Make Wood Sign Christmas Ornaments

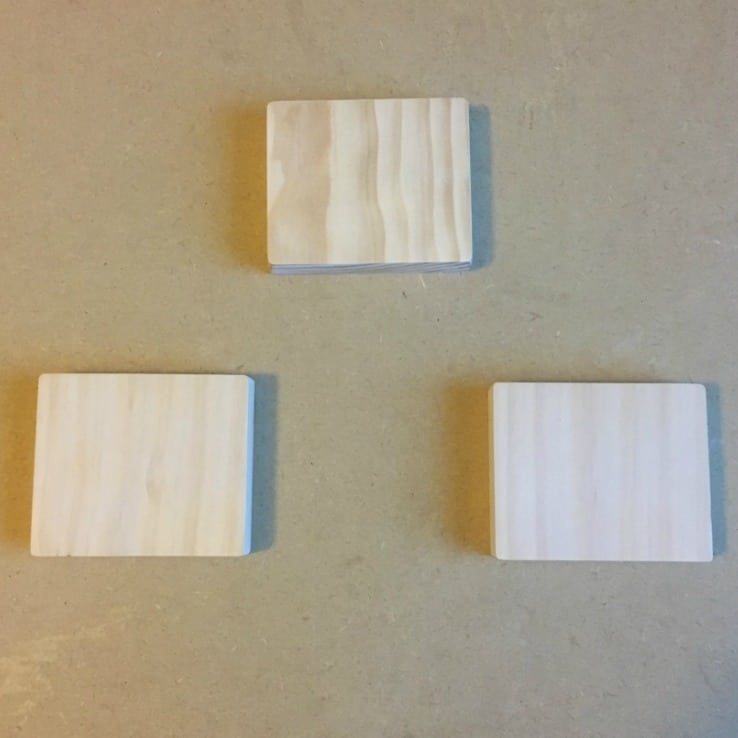
    1. Cut and sand your wood. I used 1 inch by 3 inch common pine and my signs measure 3 inches by 3.5 inches. For a refresher on sanding your wood properly, head to this postTutorial: How to Make Wood Sign Christmas Ornaments with your Silhouette Cameo or Cricut Explore or Maker - by cuttingforbusiness.com
    2. Paint your wood blanks. Feel free to use your favorite paint. Tutorial: How to Make Wood Sign Christmas Ornaments with your Silhouette Cameo or Cricut Explore or Maker - by cuttingforbusiness.com
    3. Cut your stencil, weed it, and apply it to your wood blank. I used Oramask stencil film.Tutorial: How to Make Wood Sign Christmas Ornaments with your Silhouette Cameo or Cricut Explore or Maker - by cuttingforbusiness.com
    4. Paint your wood sign. Tutorial: How to Make Wood Sign Christmas Ornaments with your Silhouette Cameo or Cricut Explore or Maker - by cuttingforbusiness.com
    5. Remove your stencil film immediately after painting.Tutorial: How to Make Wood Sign Christmas Ornaments with your Silhouette Cameo or Cricut Explore or Maker - by cuttingforbusiness.com
    6. After the signs are dry, drill holes in the corners and string a piece of twine through the holes and tie it off. Tutorial: How to Make Wood Sign Christmas Ornaments with your Silhouette Cameo or Cricut Explore or Maker - by cuttingforbusiness.com

    Cost to Make Wood Sign Ornaments

    Let’s talk numbers. Here’s a general cost breakdown to make wood sign ornaments:

    • Wood. A 1″ x 3″ that is 8 feet long costs $8.72 at my local Home Depot. That means you’d be able to get 20 to 25 mini signs from one board. (I lose about 1/8 of an inch for every cut due to the thickness of my saw blade – yours may vary if it’s thinner or thicker.) If I get 20 mini sign blanks, they’d cost me $0.44 each. Don’t forget to check your wood scrap pile – this is a great way to use odds and ends pieces.
    • Paint, twine, transfer tape, and stencil vinyl. Since it literally takes a few drops of paint to complete each one, a small amount of stencil vinyl, a few inches of twine, and one piece of transfer tape that I reused – I’m going to estimate the costs at $0.50 (although I think that’s a bit high).
    • Labor. I like to make $20 an hour when making wood signs. I could paint at least 20 in one hour. So, for one sign, the labor costs are about $1.

    When added together, my total cost becomes $1.94 per wood sign ornament. If I sold at $4 each, that’s a profit margin of 51.5%. At $5 each, the profit margin goes up to 61.2%. While you won’t get rich selling them, it’s a good margin – especially if you can sell many.

    I recommend that you put your business information on the back so that customers can shop with you for a larger sign down the road. I use a Silhouette Mint to stamp the backs of mine.

    If you are wondering, I used the Samantha font for the designs. You can pick up the font (usually on sale!) at this site.

    Save this post to Pinterest so you can find it:

    Tutorial: How to Make Wood Sign Christmas Ornaments with your Silhouette Cameo or Cricut Explore or Maker - by cuttingforbusiness.com

  • How to Properly Sand Wood for Painted Wooden Signs

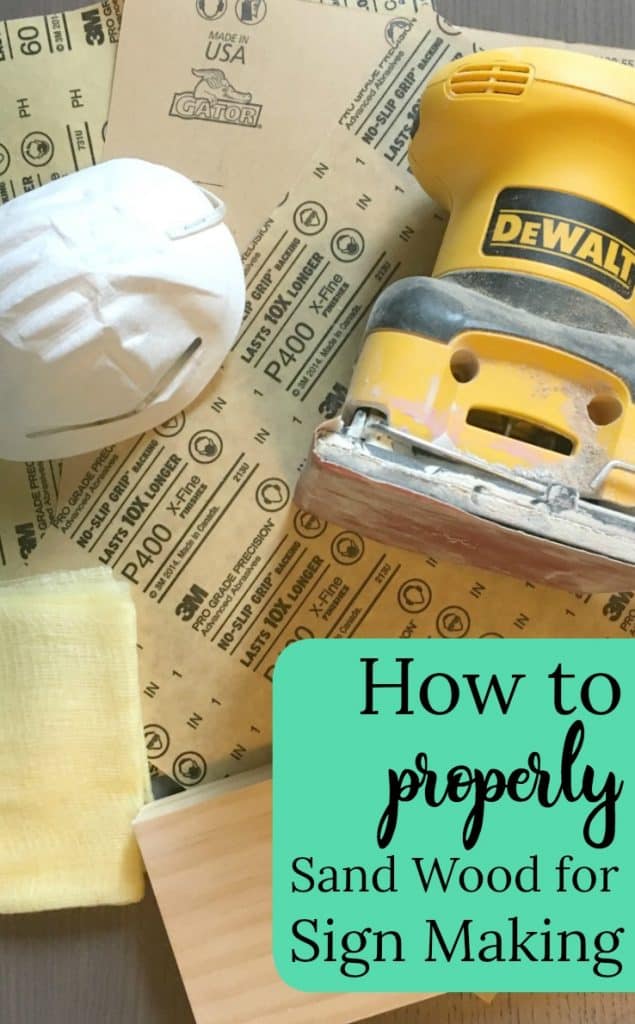
    This post is a bit of a followup to a popular post on Cutting for Business: Why Does Paint Bleed when Using a Vinyl Stencil. I’ve had some readers read that post and email me stating that they are still experiencing bleeding – even after following my tips. Through a little detective work, I emailed several of those readers and found a common cause in every single case: they didn’t know how to properly sand the wood before painting or staining it. Today, let’s look at how to properly sand wood before making a wood sign with your Silhouette or Cricut cutting machine.

    Before we start, let’s look at what you’ll need:

    • A wood blank – Need tips to picking great wood? Head to this post.
    • Sandpaper – You’ll need a couple of different grits of sandpaper. The grit refers to how coarse the paper is and is determined by the number of sand granules per square inch of paper. The lower the number, the coarser the paper; the higher the number, the more finer the sandpaper.
    • A palm sander – I use (and love!) my DeWalt palm sander. You can buy it here, or read more about power tools in this blog post.
    • Tack cloth – Tack cloth is used to clean up the particles of dust after sanding. Pick up a multi pack at this link.
    • Safety goggles and a mask – Safety first! Protect your eyes, nose, and mouth from sawdust. Amazon has cheap goggles here and masks here.

    How to Properly Sand Wood for Painted Wood Signs

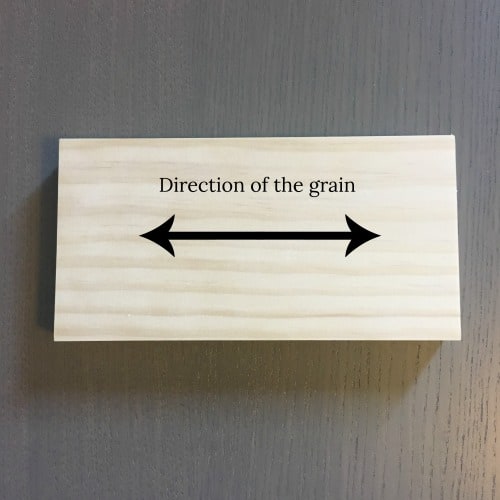
    1. Determine which direction the grain runs on your wood blank. The grain simply refers to the pattern of the wood. You never want to sand against the grain. How to Properly Sand Wood for Painted Wooden Signs - A must read for Silhouette Cameo or Cricut Explore or Maker Crafters - by cuttingforbusiness.com
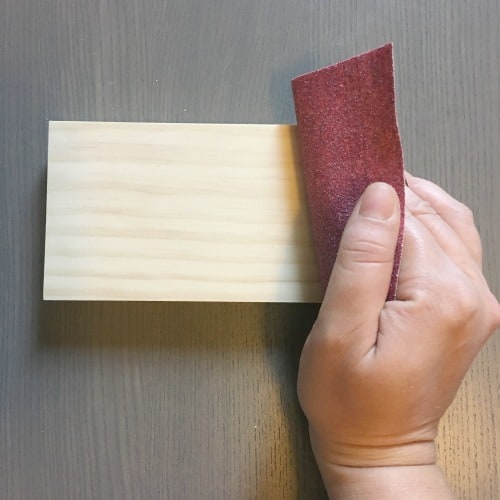
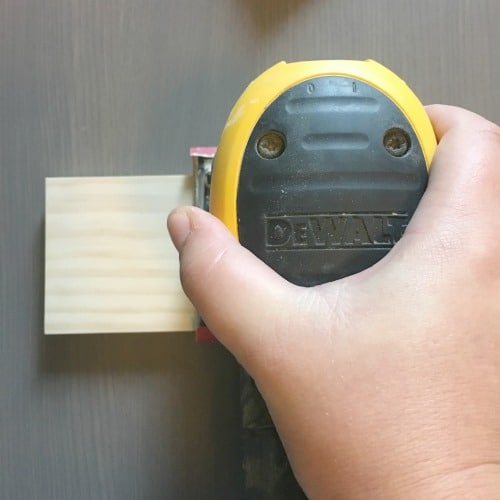
    2. Starting with a medium coarseness sandpaper, sand in the direction of the wood grain until the surface is smooth to the touch. When making wood signs, I generally use 120 grit or 150 grit sandpaper. (The grit number is printed on the back of the sheet.) Be cautious to make sure that you apply even pressure. It doesn’t matter whether you are sanding by hand or using a palm sander.How to Properly Sand Wood for Painted Wooden Signs - A must read for Silhouette Cameo or Cricut Explore or Maker Crafters - by cuttingforbusiness.com
    3. After your surface is smooth, sand it again with a higher grit sandpaper. This removes fine imperfections that you may not be able to see. For this step, I usually use 220 grit sandpaper. Again, be sure to use even pressure with your sandpaper or palm sander. How to Properly Sand Wood for Painted Wooden Signs - A must read for Silhouette Cameo or Cricut Explore or Maker Crafters - by cuttingforbusiness.com
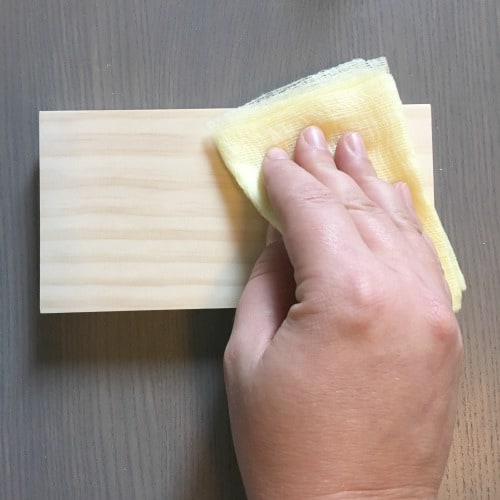
    4. When you’ve sanded the entire wood blank with your fine sandpaper, use a tack cloth to remove the dust. Keep the tack cloth folded. Use the exposed side to remove the dust from the wood blank. Once that side is full of dust, fold it over to a clean side, and so on. You should get many uses from a single tack cloth. How to Properly Sand Wood for Painted Wooden Signs - A must read for Silhouette Cameo or Cricut Explore or Maker Crafters - by cuttingforbusiness.com

    That’s it! Once the dust has been removed, your wood sign blank is ready for staining or painting.

    Help out another crafter – save this post to Pinterest:

    How to Properly Sand Wood for Painted Wooden Signs - A must read for Silhouette Cameo or Cricut Explore or Maker Crafters - by cuttingforbusiness.com

  • Scrapbuster Project: Heat Transfer Vinyl Lanyards

    So my kids needed some way to keep up with their YMCA membership cards – and I needed to get them out of my wallet.

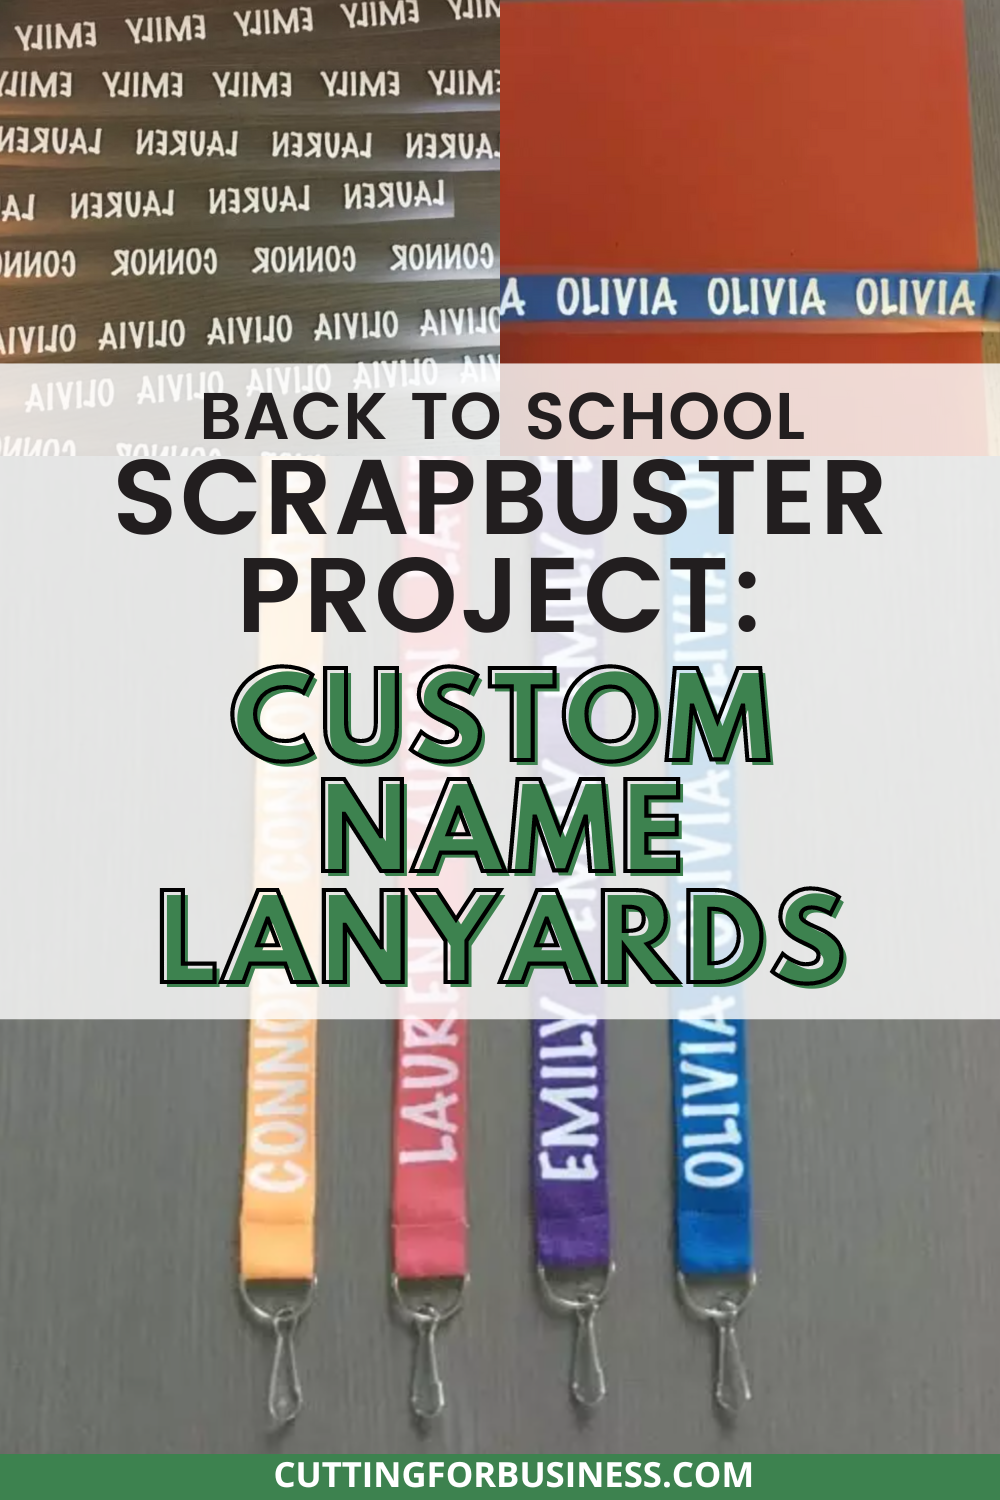
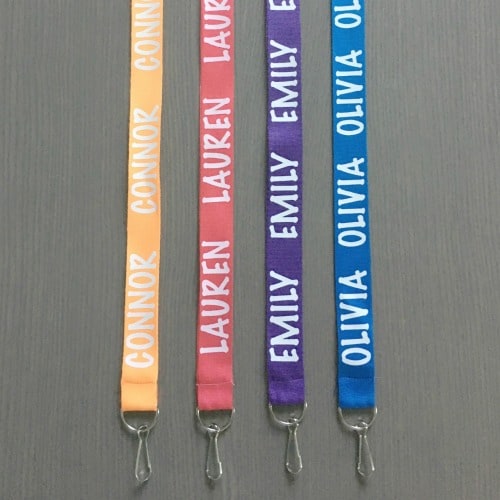
    Heat transfer vinyl, my Silhouette Cameo, and some cheap lanyards to the rescue. As I was making the lanyards, I got to thinking that this would be a fabulous way to use up heat transfer vinyl scraps (which we all have plenty)!

    Scrapbuster Project: Heat Transfer Vinyl Lanyards - cuttingforbusiness.com

    Heat Transfer Vinyl Lanyard Tutorial

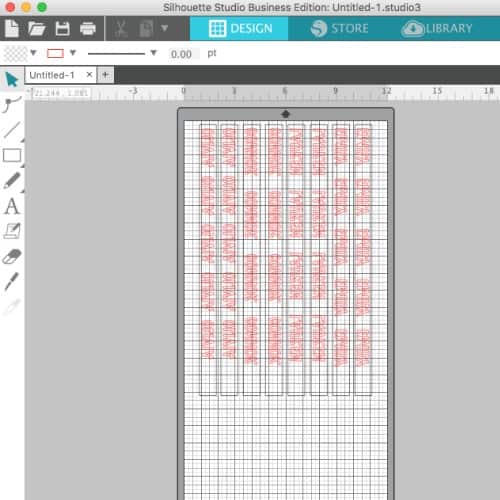
    1. Create your design. Here’s what my Silhouette Studio file looked like: 
      Silhouette Cameo & Cricut Explore or Maker Scrapbuster Project: Heat Transfer Vinyl (HTV) Lanyards - by cuttingforbusiness.com
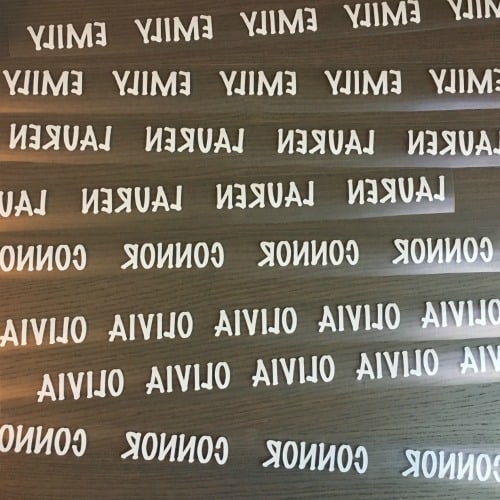
    2. Cut and weed the heat transfer vinyl.
      Silhouette Cameo & Cricut Explore or Maker Scrapbuster Project: Heat Transfer Vinyl (HTV) Lanyards - by cuttingforbusiness.com
    3. Cut your design into strips. I used my Cutterpillar, but your favorite scissors will work. Silhouette Cameo & Cricut Explore or Maker Scrapbuster Project: Heat Transfer Vinyl (HTV) Lanyards - by cuttingforbusiness.com
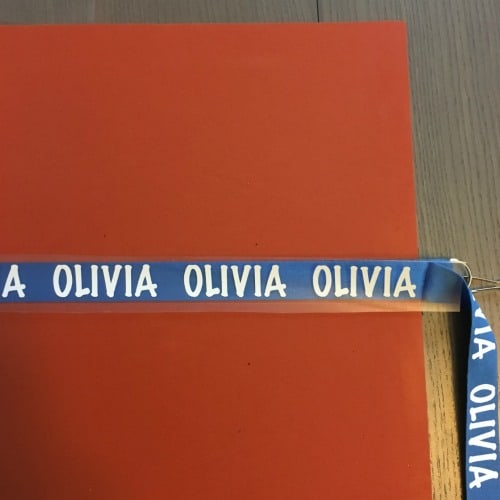
    4. Prepress your lanyards and line up your vinyl. If you are using small scraps and having a hard time keeping them in place, buy some heat resistant tapeSilhouette Cameo & Cricut Explore or Maker Scrapbuster Project: Heat Transfer Vinyl (HTV) Lanyards - by cuttingforbusiness.com
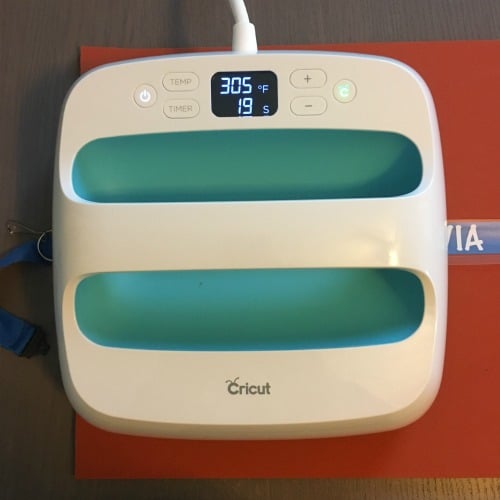
    5. Finally, press your vinyl onto the lanyard. I used my Cricut EasyPress™ because it is convenient for small projects and works well. You can read my thoughts on it in this postSilhouette Cameo & Cricut Explore or Maker Scrapbuster Project: Heat Transfer Vinyl (HTV) Lanyards - by cuttingforbusiness.com
    6. That’s it! Quick and easy project.
      Silhouette Cameo & Cricut Explore or Maker Scrapbuster Project: Heat Transfer Vinyl (HTV) Lanyards - by cuttingforbusiness.com

    Heat Transfer Vinyl Lanyards as Money Makers

    Now, what if you are looking to turn lanyards into a money maker? You can! I think that generic phrases on lanyards like “I Love Nursing”, “I Teach”, or “School is Cool” would be great impulse items at your next craft show and should sell for a few dollars each.

    When thinking of phrases to use on your lanyards – think of who might wear them. Many doctors, nurses, teachers, and students wear lanyards every day.

    Where to Buy Lanyards

    Blank lanyards should cost no more than $0.50 each. Pick some up at your favorite wholesaler or grab a pack to test the market on Amazon. If you sew, there are several DIY lanyard tutorials on Pinterest.

    Update: My kid’s have been using these lanyards for years. They still look as great as the day that I created them!

  • Free SVG – It’s Football Time

    It’s fall and that means football is back!

    Today, I’m sharing a free SVG – It’s Football Time. It’s perfect for a tote bag or a shirt.

    Looking for more football inspiration? Read my list of football sayings.

    Don’t forget: This free SVG includes commercial use. Read the license.

    Free SVG - It's Football Time - cuttingforbusiness.com
  • Tutorial: Inkjet Transfer Paper & Print and Cut

    There’s so many freebie graphics that I see floating around the internet that would look awesome on shirts, canvas, and totes; but they are simply too detailed to use heat transfer materials. While I’ve seen some crafters tackle intricate designs with lots of heat transfer vinyl layering – you’ll never sell the finished product for enough money to compensate for the amount of time it takes to layer (and layer, and layer) deeply intricate multi color designs.

    In the past, I’ve shared a series on sublimation. Sublimation is a great alternative to layering heat transfer materials in intricate designs. However, I know sublimation supplies are a big investment.

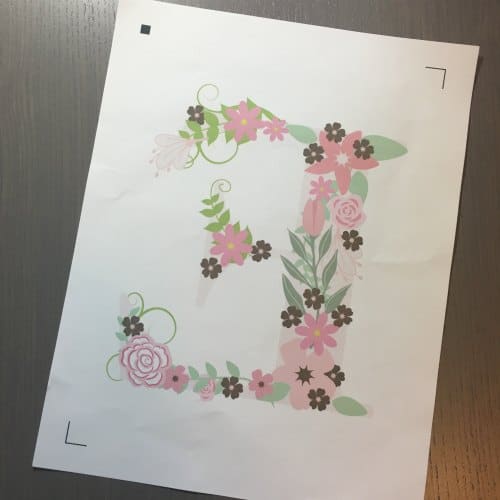
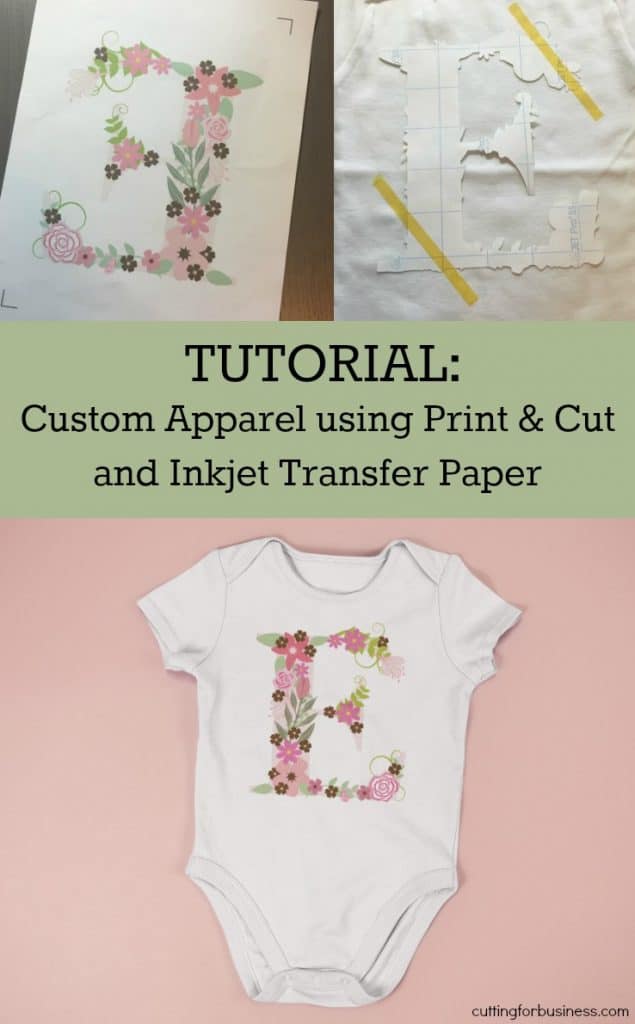
    Another alternative to heat transfer materials with intricate details is to use an inkjet transfer paper like Jetpro SS. Here’s a quick tutorial which uses these floral letters.

    Jetpro SS Inkjet Heat Transfer Paper Tutorial

    1. Design and print your mirrored design onto the Jetpro SS Inkjet Heat Transfer Paper. Using Silhouette Studio, add registration marks. Tutorial: Inkjet Transfer Paper & Print and Cut with Silhouette Cameo - by cuttingforbusiness.com
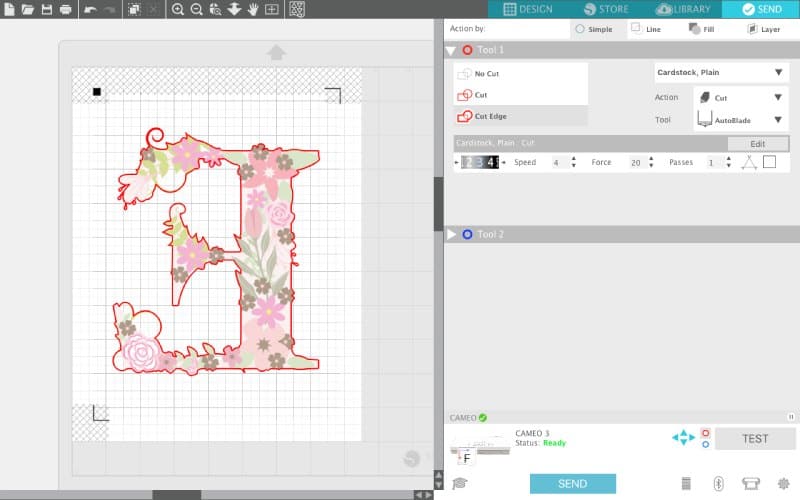
    2. Set Silhouette Studio to “Cut Edge” and cut around the outside of the design. (You can do the same if you are using Cricut Design Space.) This ensures that the blank part of the transfer paper does not transfer to the shirt. Tutorial: Inkjet Transfer Paper & Print and Cut with Silhouette Cameo - by cuttingforbusiness.com
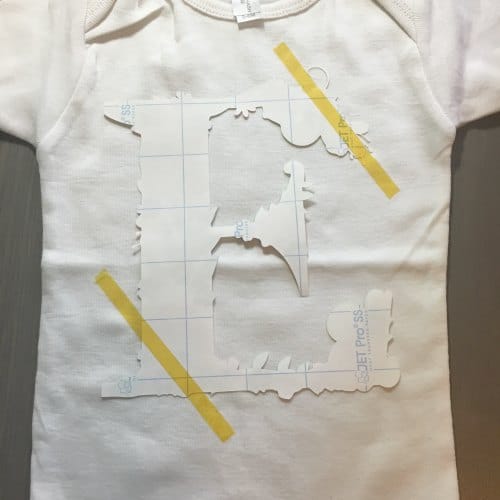
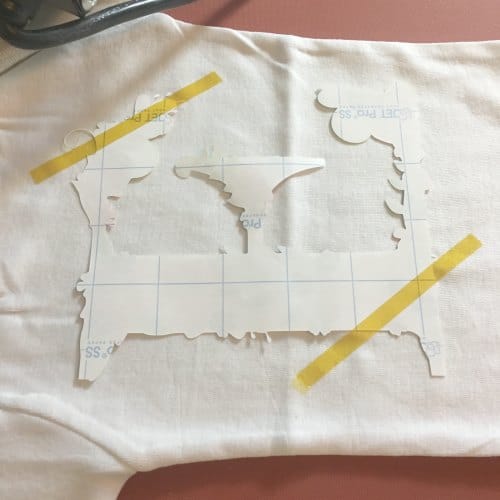
    3. Place your design onto the apparel. Heat resistant tape or painters tape works well to keep the design in place. Tutorial: Inkjet Transfer Paper & Print and Cut with Silhouette Cameo - by cuttingforbusiness.com
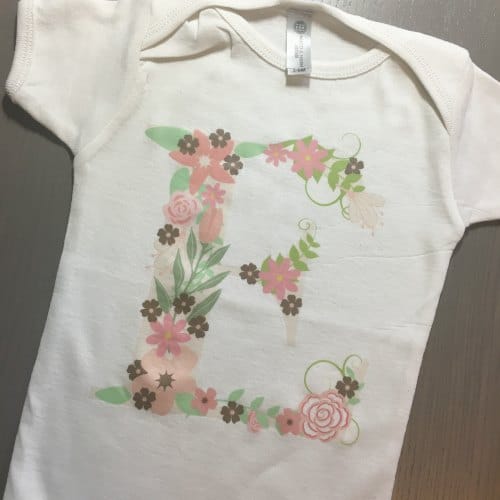
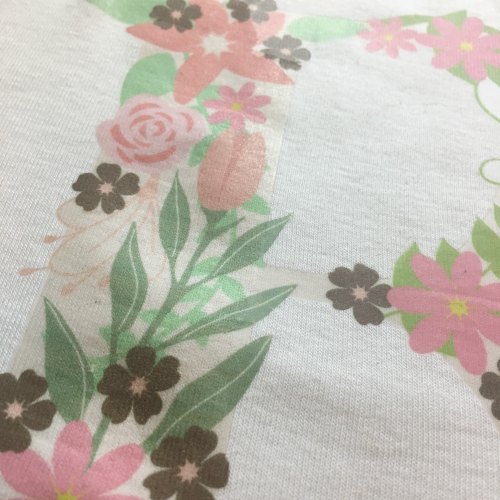
    4. Press your design. I pressed at 380 degrees Fahrenheit for 25 seconds. After pressing, immediately peel off the paper. Tutorial: Inkjet Transfer Paper & Print and Cut with Silhouette Cameo - by cuttingforbusiness.com
    5. That’s it! Way faster than layering heat transfer vinyl, cheaper than investing in sublimation, and fun to do! Tutorial: Inkjet Transfer Paper & Print and Cut with Silhouette Cameo - by cuttingforbusiness.com
      Tutorial: Inkjet Transfer Paper & Print and Cut with Silhouette Cameo - by cuttingforbusiness.com

    As small business owners – nothing is more important than our time. So, work smarter – not harder.

    Save this awesome tutorial to Pinterest:

    Tutorial: Inkjet Transfer Paper & Print and Cut with Silhouette Cameo - by cuttingforbusiness.com