Category: Project Tutorials

  • DIY Macbook Keyboard Skin with Silhouette Cameo

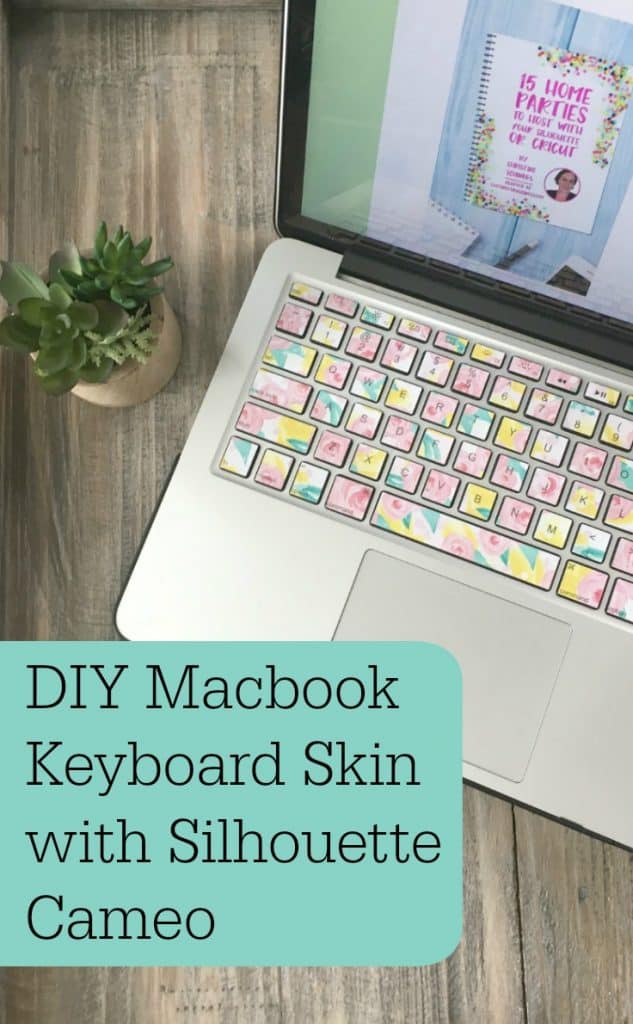
    Whether it is designing and cutting, listing products for sale, or handling customer inquiries – Silhouette and Cricut small business owners spend a lot of time on the computer. I thought today that I would share the tutorial on how I made a keyboard skin for my MacBook Pro. If you have a recent Mac, the files should work for you, too. If you don’t use a Mac computer, I’ve included the method I used to make the file later in the post.

    Supplies Needed

    Silhouette Cameo
    Pixscan mat
    Printable vinyl

    Macbook Pro Keyboard Skin Tutorial

    1. Purchase or download a 300 dpi seamless background of your choice. You can find these all over online. The floral print background that I’ve used on my keyboard can be found in this Etsy shop.
    2. Download the zip file for this tutorial at this link. It’s important that you not resize any of the files I have provided.
    3. Open your background in Silhouette Studio. DIY Macbook Keyboard Skin with Silhouette Cameo by cuttingforbusiness.com
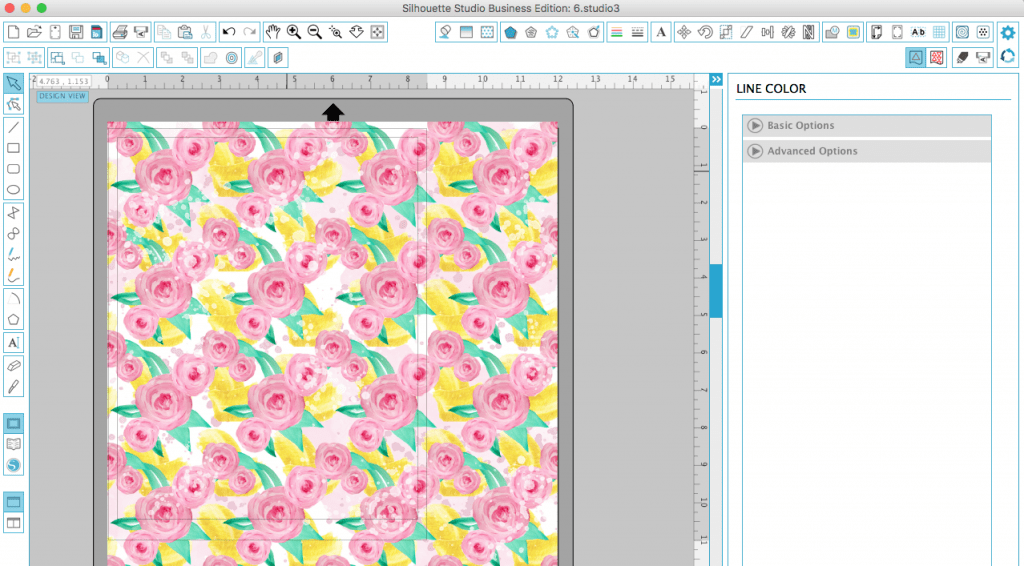
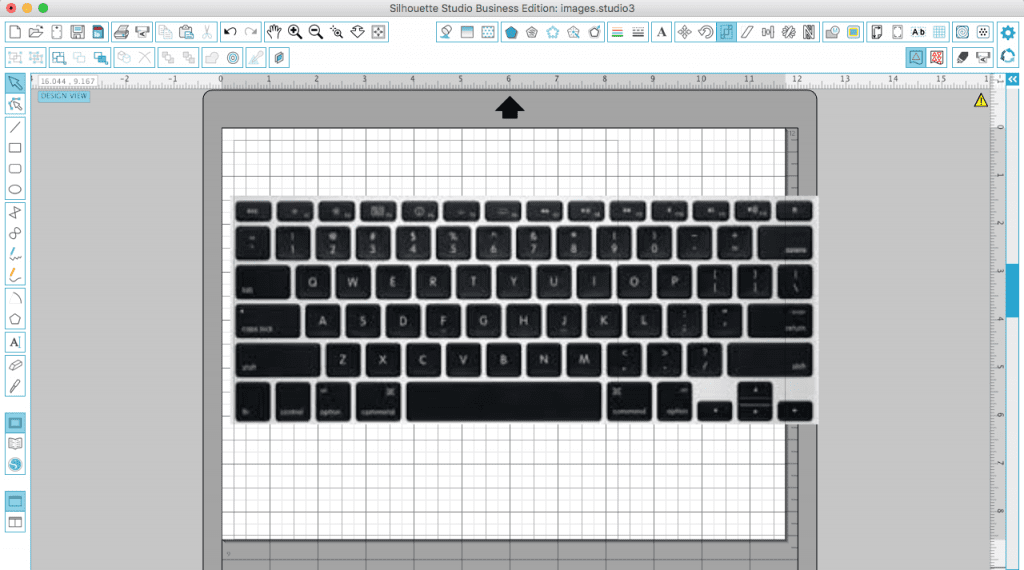
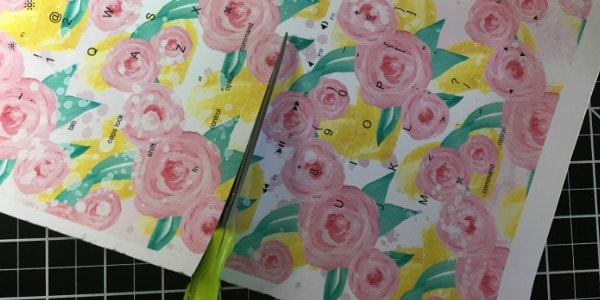
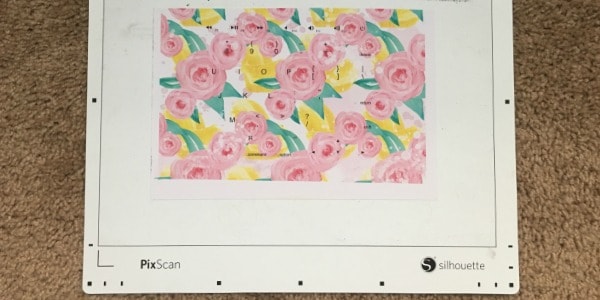
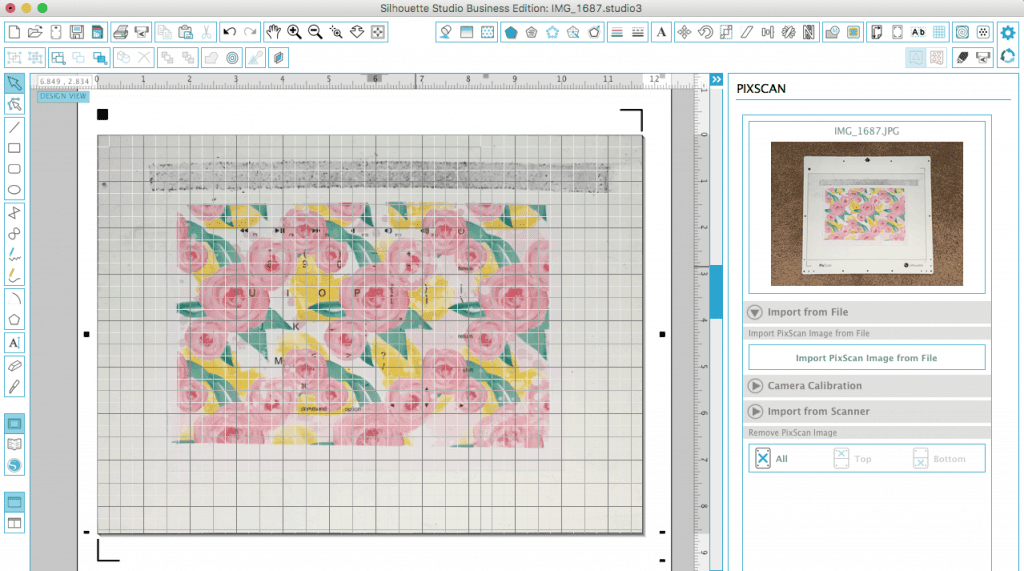
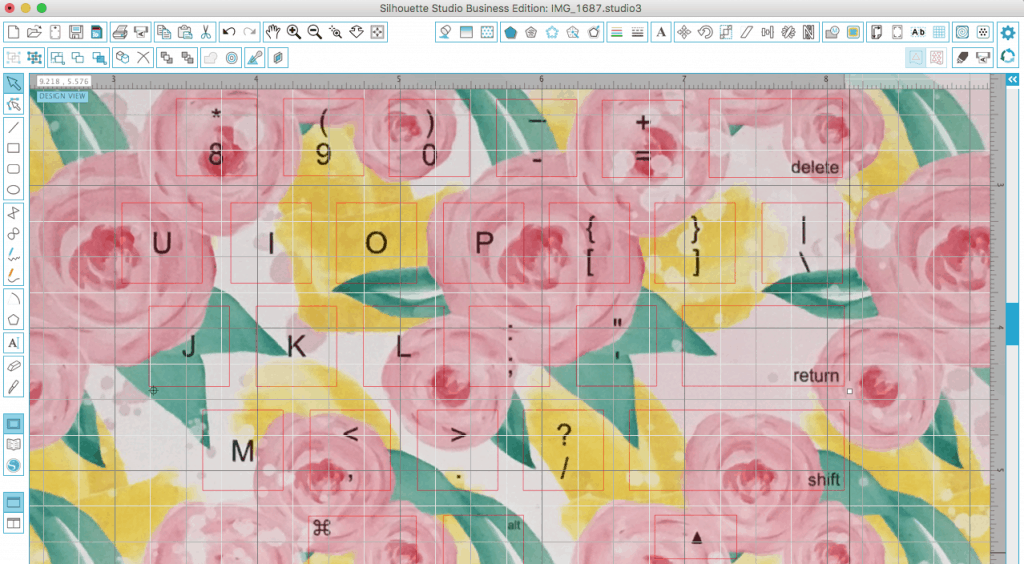
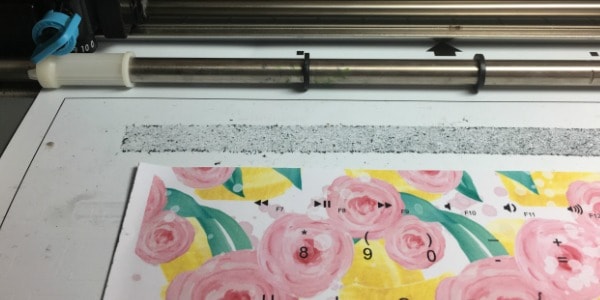
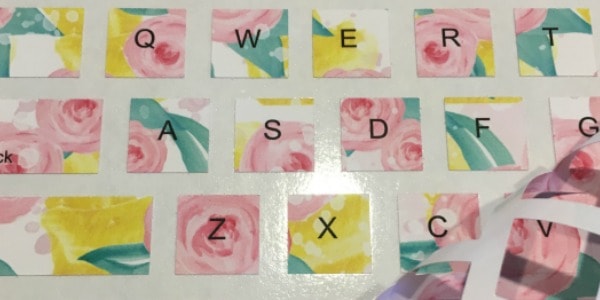
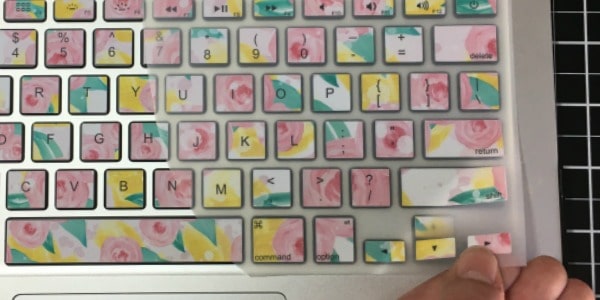
    4. Open the file called “KeyboardLetters.studio3” (downloaded in step 2) and place it on top of your background like shown in the photo. DIY Macbook Keyboard Skin with Silhouette Cameo by cuttingforbusiness.com5. Print the design on printable adhesive vinyl. I used a matte finish vinyl, but you could also use your favorite sticker paper. Cut the design in half. Unfortunately, the keyboard decal is slightly larger than the print area for a standard printer. So, I’ve broken it into two halves. DIY Macbook Keyboard Skin with Silhouette Cameo by cuttingforbusiness.com6. Place the design onto your Picscan mat. Take a clear photo of the design on your mat. DIY Macbook Keyboard Skin with Silhouette Cameo by cuttingforbusiness.com7. Upload the Pixscan image to Silhouette Studio. DIY Macbook Keyboard Skin with Silhouette Cameo by cuttingforbusiness.com8. Overlay the file RightKeyboard.studio3 onto your Pixscan image. You’ll need to move it around to make sure the placement is perfect. I found it easiest to zoom in on the design to get it lined up just right. DIY Macbook Keyboard Skin with Silhouette Cameo by cuttingforbusiness.com9. Load your Pixscan mat into your Silhouette and cut the keyboard decal. DIY Macbook Keyboard Skin with Silhouette Cameo by cuttingforbusiness.com10. Weed the excess vinyl from the keyboard decal. DIY Macbook Keyboard Skin with Silhouette Cameo by cuttingforbusiness.com11. Apply transfer paper to the decal. Turn your computer off and apply the decal to the keys.DIY Macbook Keyboard Skin with Silhouette Cameo by cuttingforbusiness.com12. Repeat steps 6 to 11 to do the other side of your keyboard using the LeftKeyboard.studio3 file you downloaded earlier.
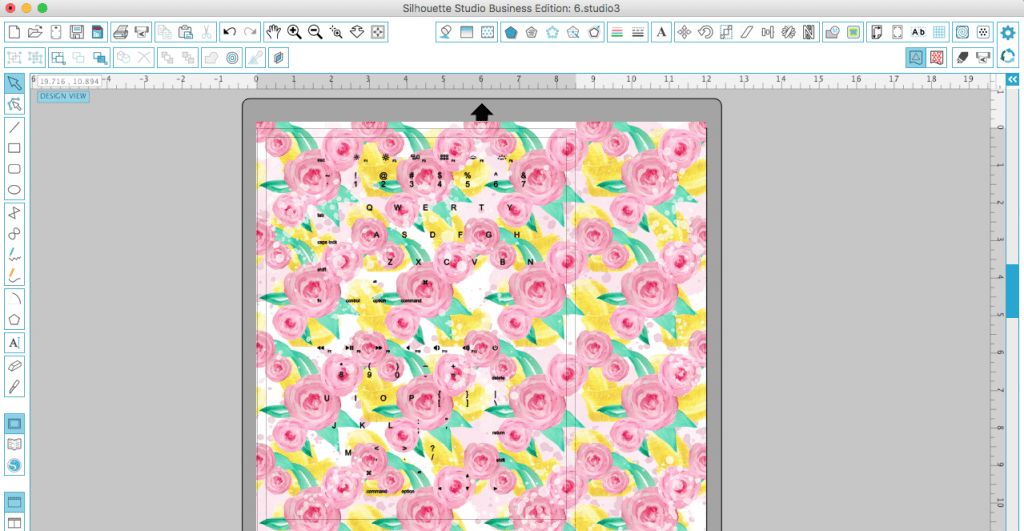
    Now, if you don’t have a recent Mac computer – or you are interested in the process – here’s how I did this:

    1. I took a good photo of my computer keyboard from above. I then opened it in Silhouette Studio. Next, I measured the keyboard and resized it to the exact same size in Silhouette Studio using the “Scale” function.DIY Macbook Keyboard Skin with Silhouette Cameo by cuttingforbusiness.com
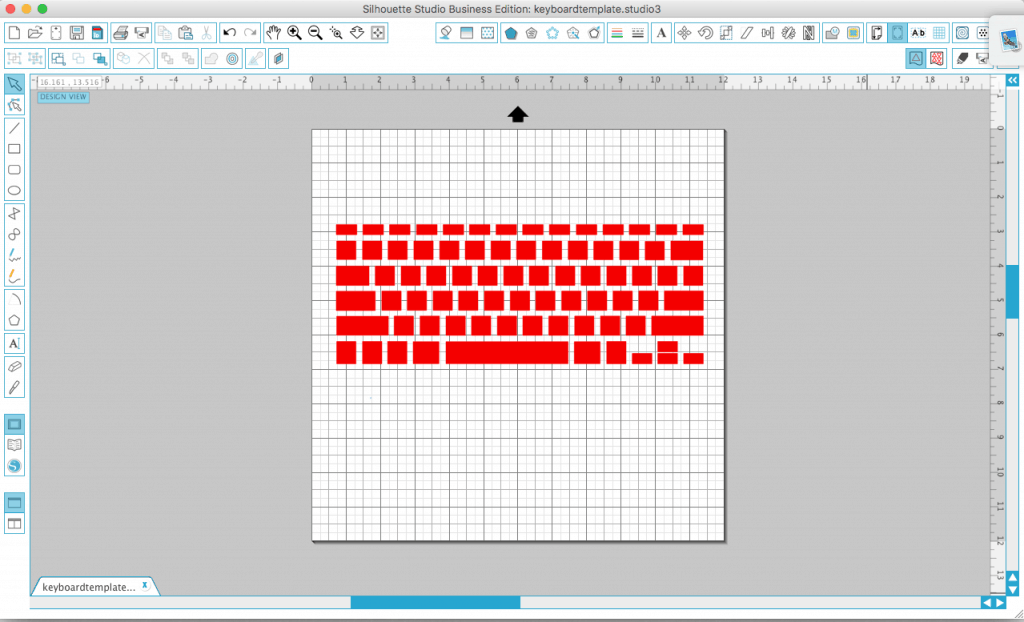
    2. I drew squares and rectangles over each of the keys. I stopped several times and did actual cuts on my Silhouette to make sure that the decals would fit the keys. DIY Macbook Keyboard Skin with Silhouette Cameo by cuttingforbusiness.com
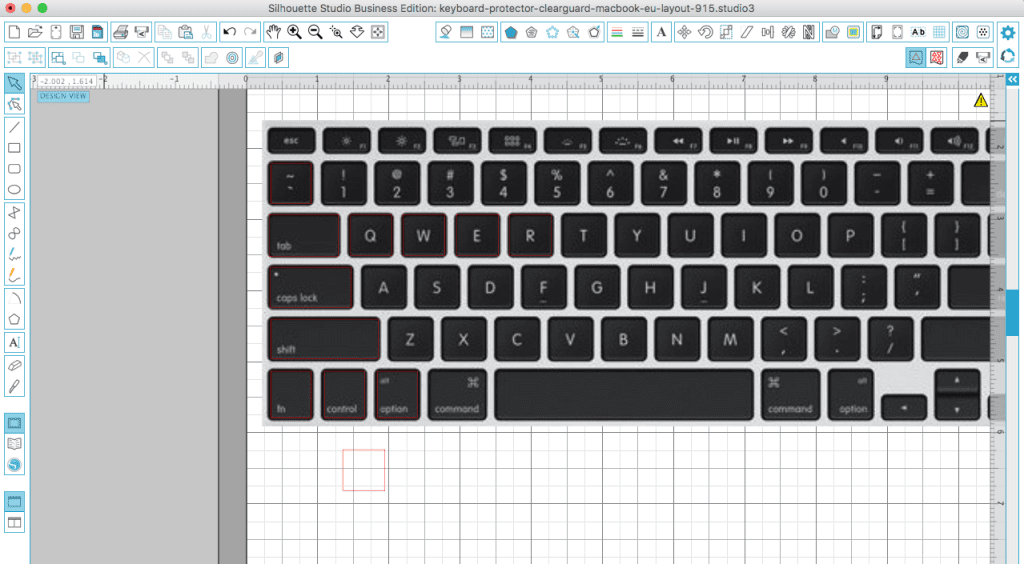
    3. After all the keys had boxes on them, I deleted the photo of my keyboard. Here’s what I was left with:DIY Macbook Keyboard Skin with Silhouette Cameo by cuttingforbusiness.com
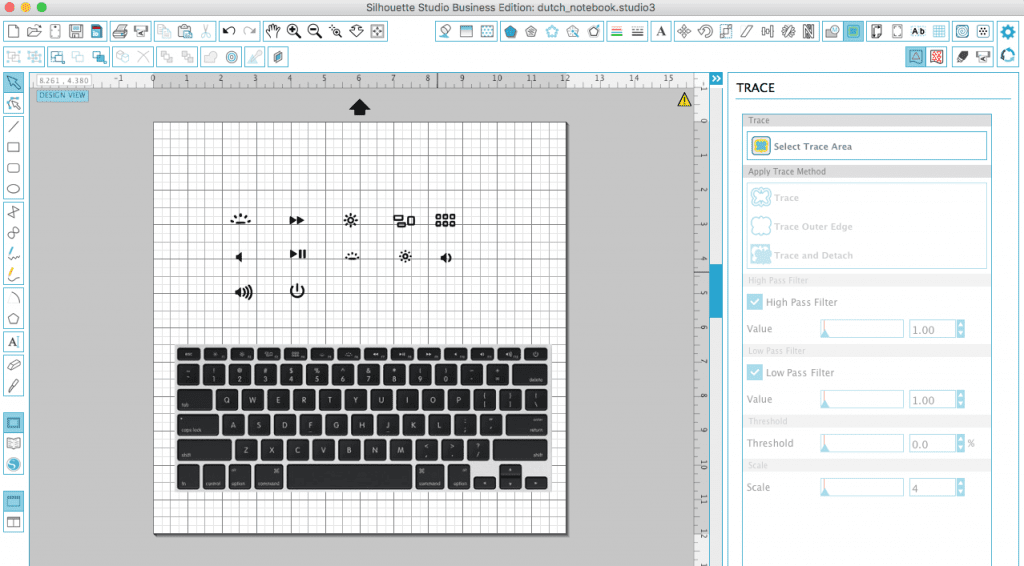
    4. I then typed each letter onto the keys using Arial font. I used the “Align” function to make sure the letters were all lined up. Then, I traced the icons that I couldn’t type using the “Trace” function. DIY Macbook Keyboard Skin with Silhouette Cameo by cuttingforbusiness.com
    I’d be lying if I said this was a quick project to design from scratch. It took me longer than I expected, but I absolutely love my new keyboard decal!

    Save this tutorial to Pinterest or Facebook – just hover over the image below or tap it on mobile:
    DIY Macbook Keyboard Skin with Silhouette Cameo by cuttingforbusiness.com

  • Scroll Saw + Silhouette Cameo or Cricut Wood Shape Tutorial

    If you are a member of the Cutting for Business Insider’s Club on Facebook, you may remember that I got a scroll saw for Christmas. I’ve used it several times and feel that I am comfortable enough with it to write a tutorial today!

    What is a Scroll Saw?

    A scroll saw looks similar to a long arm sewing machine. It has a fixed blade that makes intricate cuts. The process of cutting wood is similar to sewing because you move the wood around to cut it on the blade.

    My Scroll Saw

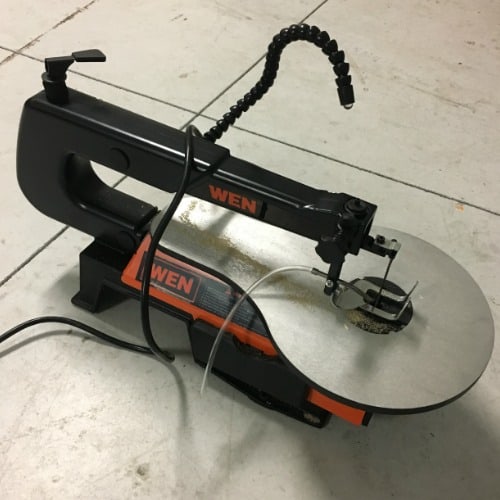
    Santa brought me an inexpensive scroll saw with the promise that if I use and master it – it will be upgraded. Probably a good idea, because sometimes I am convinced that I need things and when I get them – I barely use them! (Anyone else?!) Here’s a picture of my scroll saw and a link to purchase it.

    Scroll Saw + Silhouette Cameo or Cricut Explore Wood Shape Tutorial - Mason jar project - by cuttingforbusiness.com

    Wood Shape Scroll Saw Tutorial

    Supplies Needed

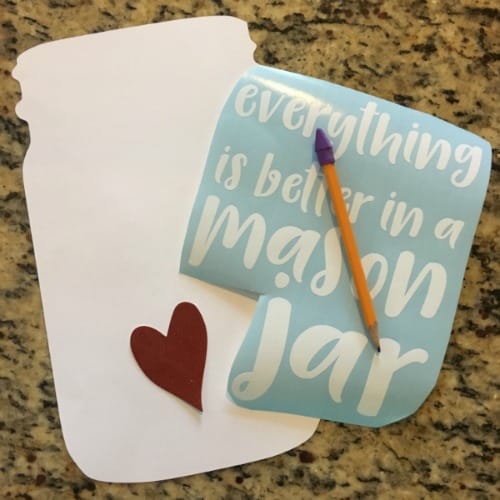
    Prep work before the tutorial begins: Cut all shapes with your Silhouette or Cricut. For this project, I cut the mason jar shape in scrap cardstock and the text and heart in adhesive vinyl.

    Scroll Saw + Silhouette Cameo or Cricut Wood Shape Tutorial - Mason jar project - by cuttingforbusiness.com

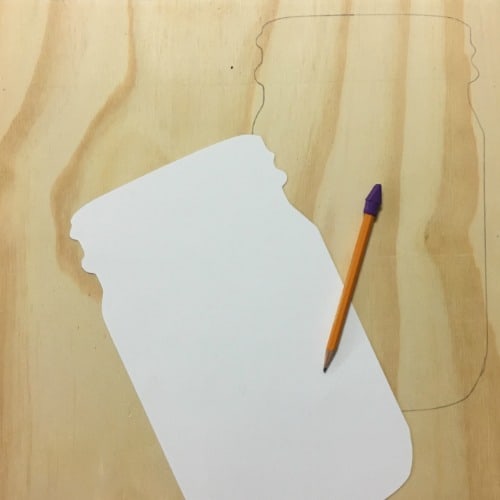
    1. Using a pencil, trace around your shape to create a line to follow when cutting. Scroll Saw + Silhouette Cameo or Cricut Explore Wood Shape Tutorial - Mason jar project - by cuttingforbusiness.com
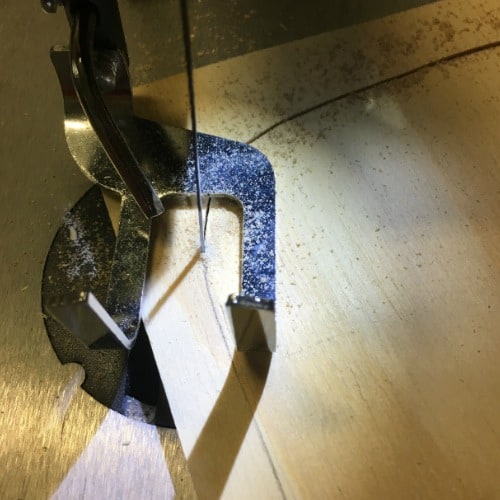
    2. Cut the wood shape out using your scroll saw. Scroll Saw + Silhouette Cameo or Cricut Explore Wood Shape Tutorial - Mason jar project - by cuttingforbusiness.com You’ll see in this photo that I’m using my hands to guide the wood along my pencil line: Scroll Saw + Silhouette Cameo or Cricut Explore Wood Shape Tutorial - Mason jar project - by cuttingforbusiness.com
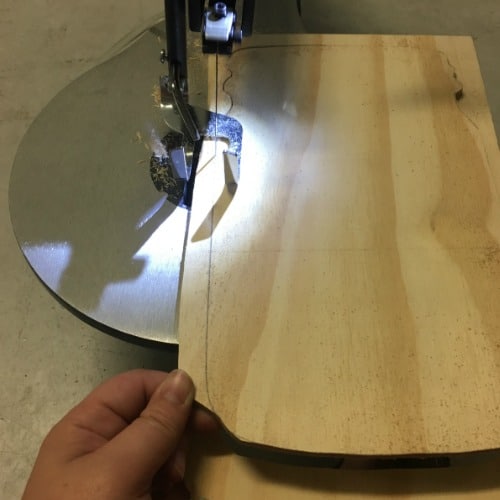
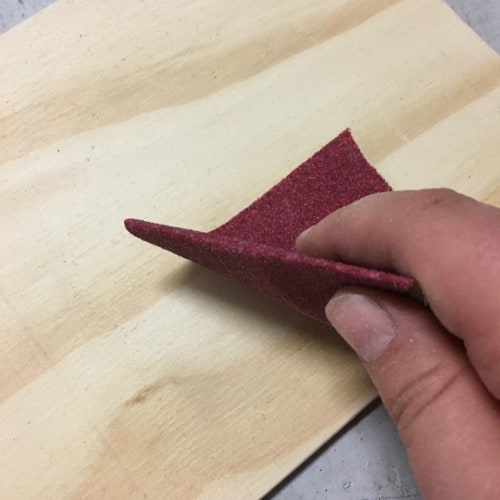
    3. Sand the edges of the wood shape. My cuts were pretty smooth, so I sanded it by hand. Scroll Saw + Silhouette Cameo or Cricut Explore Wood Shape Tutorial - Mason jar project - by cuttingforbusiness.com
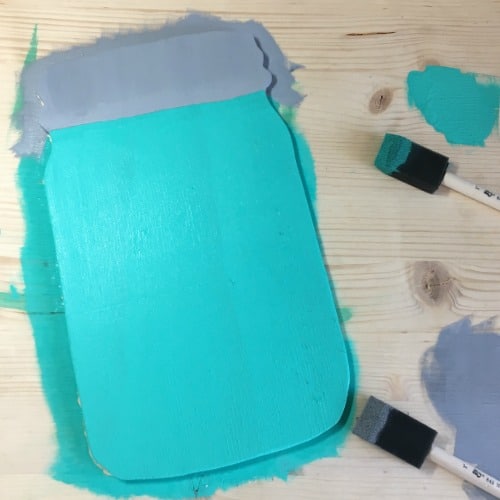
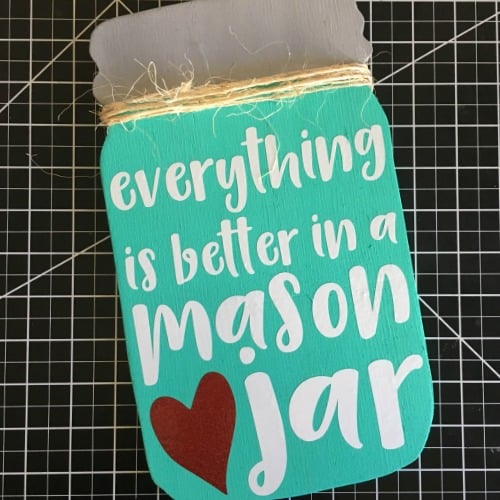
    4. Brush off all the sawdust and paint your wood shape as desired. Scroll Saw + Silhouette Cameo or Cricut Explore Wood Shape Tutorial - Mason jar project - by cuttingforbusiness.com
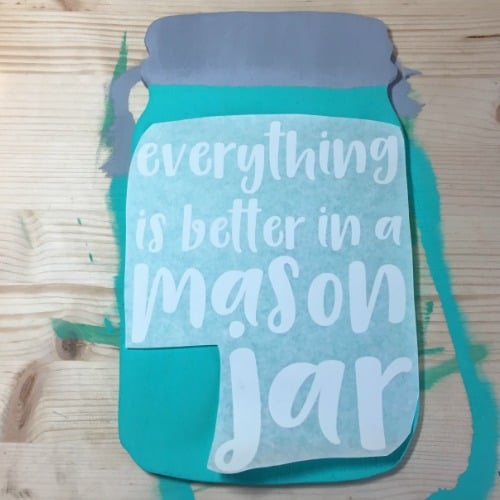
    5. Add vinyl or paint the text onto your shape.Scroll Saw + Silhouette Cameo or Cricut Explore Wood Shape Tutorial - Mason jar project - by cuttingforbusiness.com
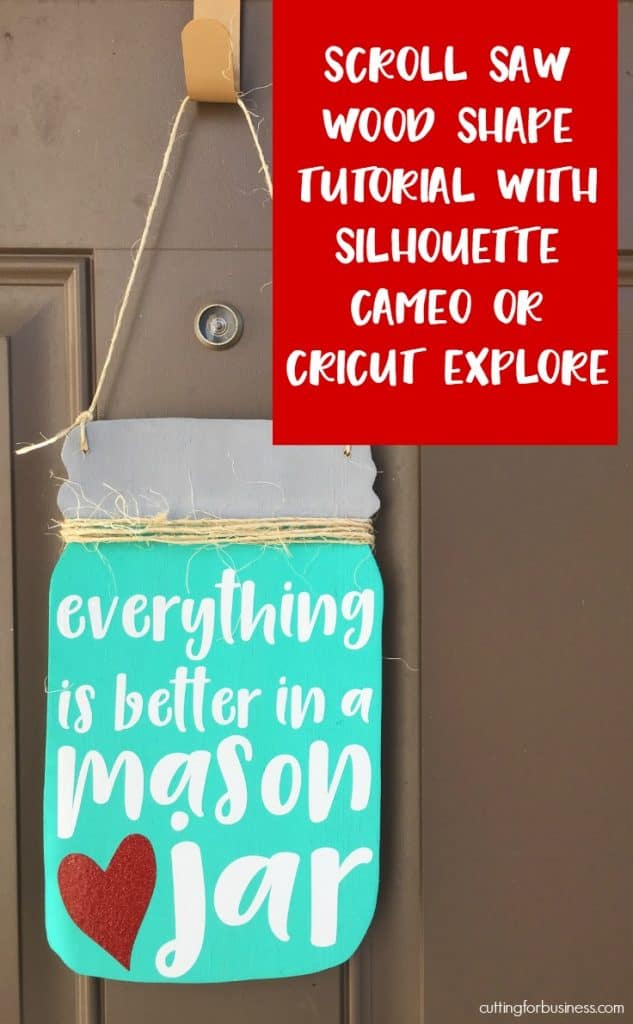
    6. Add some twine to finish off your wood mason jar. I also drilled holes in the top and strung twine through as a hanger.Scroll Saw + Silhouette Cameo or Cricut Explore Wood Shape Tutorial - Mason jar project - by cuttingforbusiness.com

    If you are interested, here is a picture of another cut on my scroll saw. To cut the insides of the letters, I first drilled a large hole then put the blade through the hole and cut.

    Scroll Saw + Silhouette Cameo or Cricut Explore Wood Shape Tutorial - Mason jar project - by cuttingforbusiness.com

    Download the cut files I used in this tutorial at this link.

    If you’ve purchased my book, 15 Parties to Host with Your Silhouette or Cricut, you could easily use this tutorial during a party!

    Save this post to Facebook or Pinterest:

    Scroll Saw + Silhouette Cameo or Cricut Explore Wood Shape Tutorial - Mason jar project - by cuttingforbusiness.com

  • Tutorial: Chemica Magic Flex Heat Transfer Material

    I’m super excited to share a new product tutorial with you today! Chemica recently sent me a sample of their Magic Flex heat transfer material to share with Cutting for Business readers! Magic Flex has been available overseas, but is now being stocked in the USA. The material is a heat transfer that puffs up during application for a raised, 3D look. Let’s get to the tutorial.

    Magic Flex Heat Transfer Tutorial:

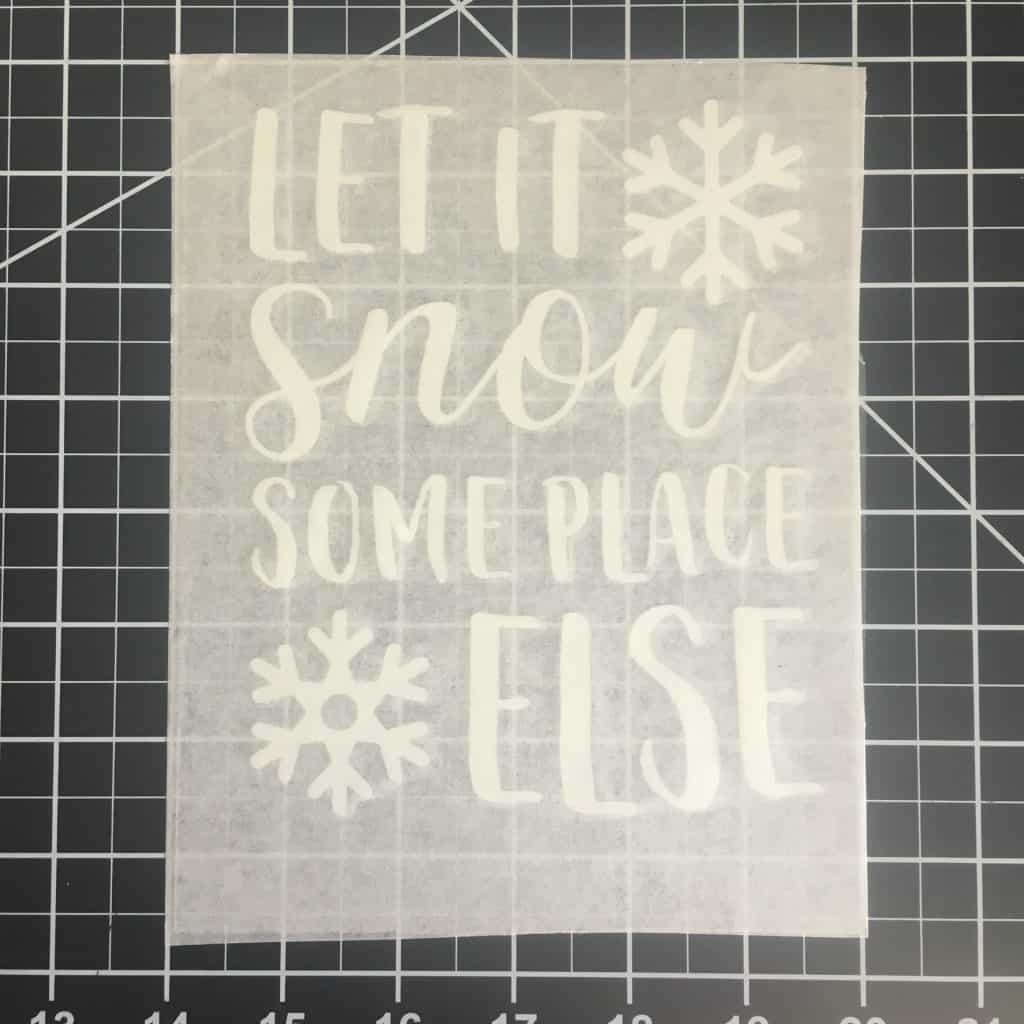
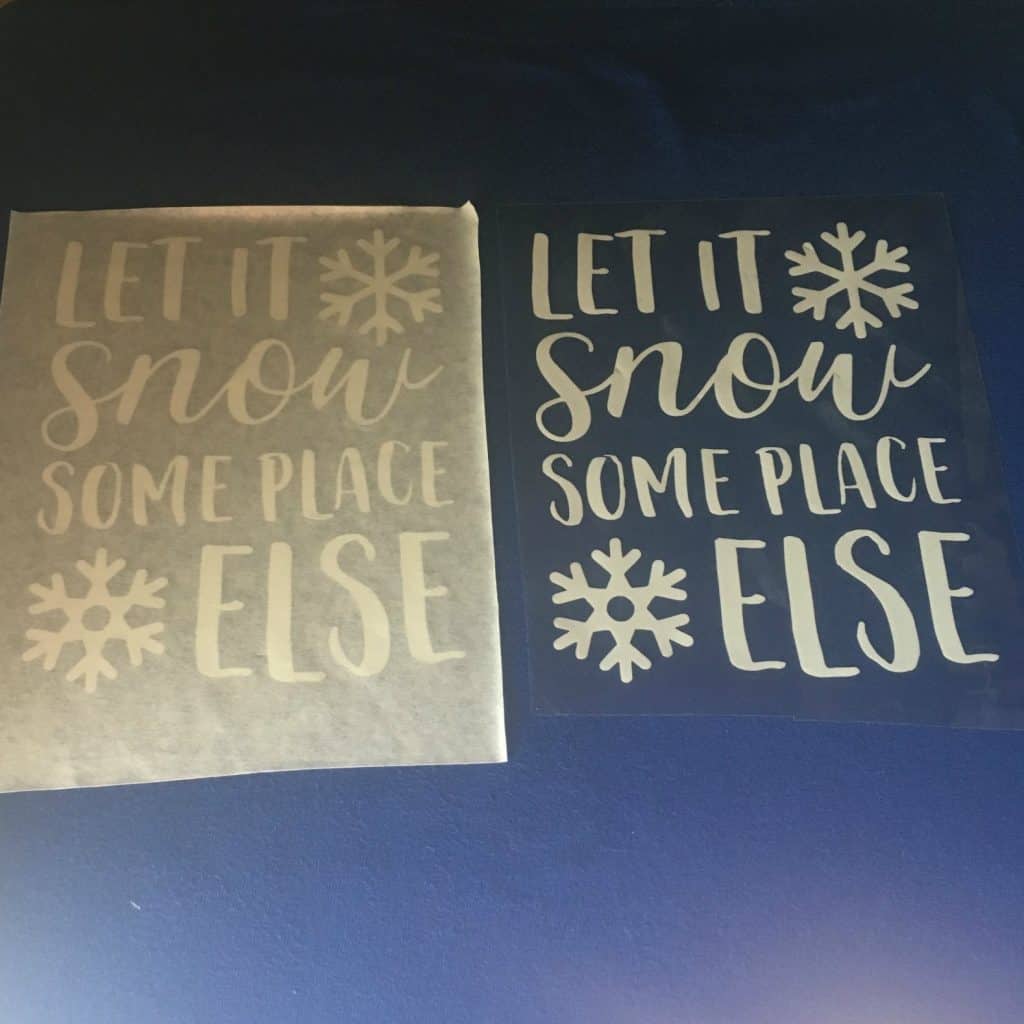
    1. Create your design and do not mirror it. This bears repeating: Do NOT mirror your Magic Flex material. After cutting the design, you’ll weed it. I had no problems weeding the material. If you are using a Silhouette Cameo 3, I used my autoblade with the standard heat transfer vinyl setting (smooth) and I double cut the material. Here’s what it looks like weeded: Tutorial: Chemica Magic Flex Heat Transfer Material with Silhouette Cameo 3 by cuttingforbusiness.com.
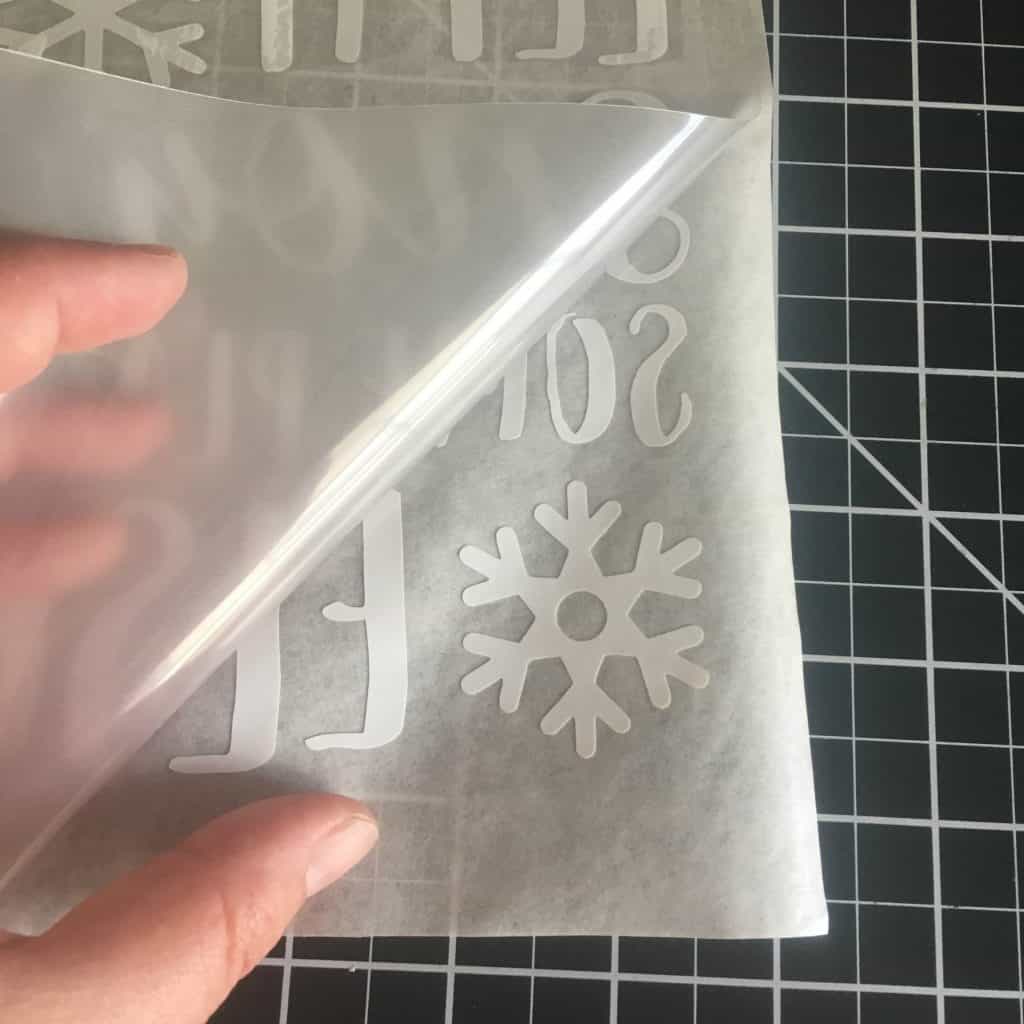
    2. You’l notice that there is no carrier sheet to transfer the vinyl to your apparel. Instead, you’ll need to use a heat resistant tape or paper like this one. Apply the tape. Tutorial: Chemica Magic Flex Heat Transfer Material with Silhouette Cameo 3 by cuttingforbusiness.com.
    3. Now, remove the plastic backing so that your design is on the transfer tape or paper. Tutorial: Chemica Magic Flex Heat Transfer Material with Silhouette Cameo 3 by cuttingforbusiness.com.
    4. You are ready to press using your heat press. I pressed for 30 seconds at 330 degrees using light pressure. You’ll want to be sure to peel the design while it is hot. In the photo below, you’ll see the Magic Flex on the left and regular heat transfer vinyl on the right. Tutorial: Chemica Magic Flex Heat Transfer Material with Silhouette Cameo 3 by cuttingforbusiness.com.
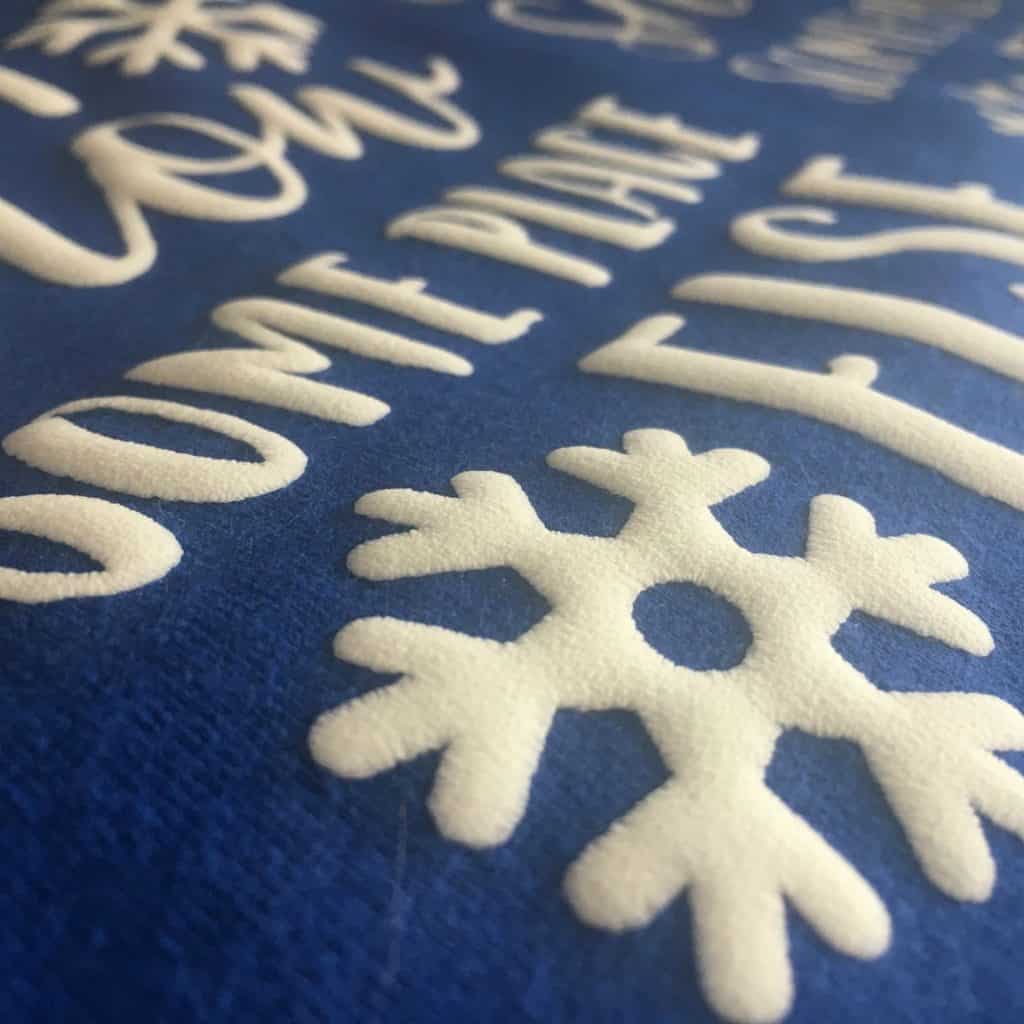
    5. Here’s some photos of how the Magic Flex looks once applied: Tutorial: Chemica Magic Flex Heat Transfer Material with Silhouette Cameo 3 by cuttingforbusiness.com.
    • Here is the same design in regular heat transfer vinyl: Tutorial: Chemica Magic Flex Heat Transfer Material with Silhouette Cameo 3 by cuttingforbusiness.com.
    • Here is a side view so that you can see the puffiness: Tutorial: Chemica Magic Flex Heat Transfer Material with Silhouette Cameo 3 by cuttingforbusiness.com.

    Magic Flex by Chemica is available in white or black and can be purchased through any Chemica distributor. Special thanks to Amy from Chemica US for sending over a sample so that I can show everyone!

    Do you dislike the snow, too? Download the SVG I created for this tutorial at this link. As always, feel free to use the file for commercial use, but you cannot sell the digital file. The font I used in the design can be found here.

    Save this tutorial to Pinterest:

    Tutorial: Chemica Magic Flex Heat Transfer Material with Silhouette Cameo 3 by cuttingforbusiness.com.

  • How to Use a Vinyl Stencil on Barnwood or Reclaimed Wood

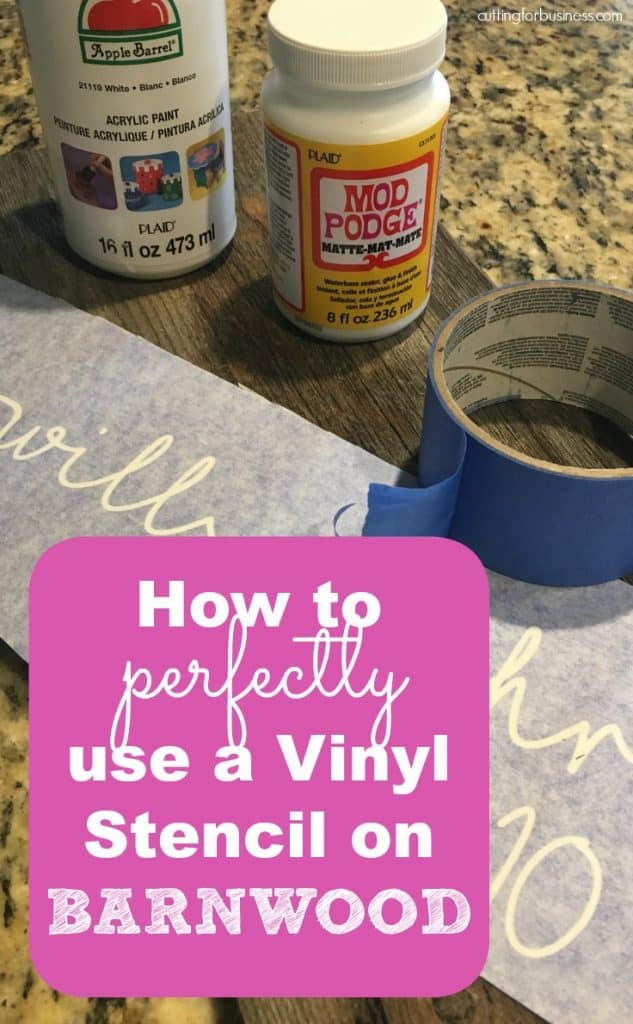
    Today’s post is a follow up to my post Why Does Paint Bleed when Using a Vinyl Stencil? In that post, I showed you how to use a vinyl stencil to get a perfect design every time. The takeaway from that was sand the surface well and use tiny amounts of paint. After posting that article, I got a lot of reader questions about how to stencil on rough wood such as barnwood, pallet wood, or reclaimed wood. Today, let’s tackle that.

    Why Is it Difficult to Stencil on Rough Wood?

    Most crafters who use barnwood or reclaimed wood want to save the texture of the wood, and don’t want to sand it. The uneven surface makes it difficult to get a good seal of the stencil and paint will bleed everywhere. I’ve seen some crafters use Mod Podge over the whole board before applying the stencil, but that discolors the wood and leaves a shiny finish over the wood.

    Supplies Needed

    How to Stencil on Rough Wood

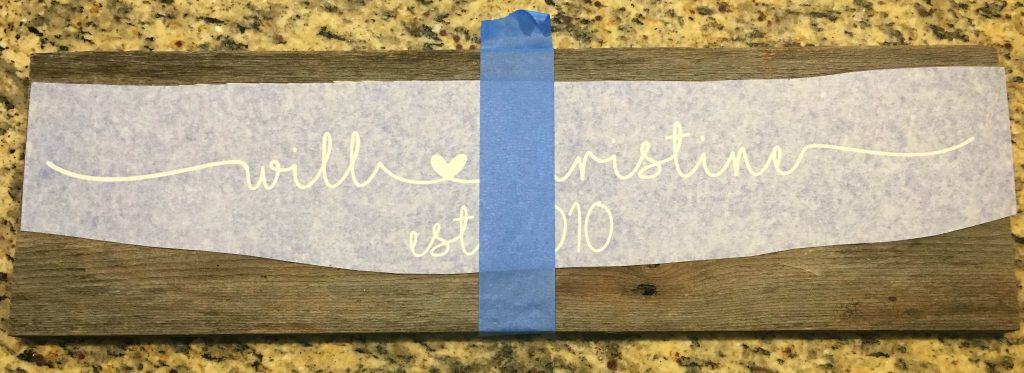
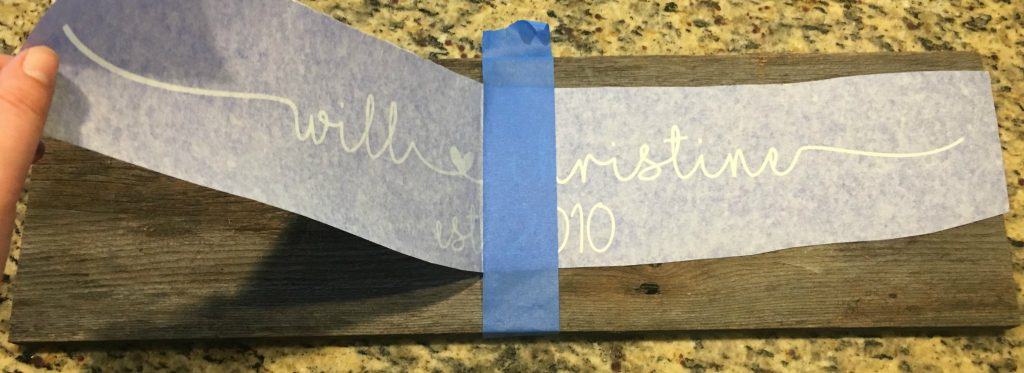
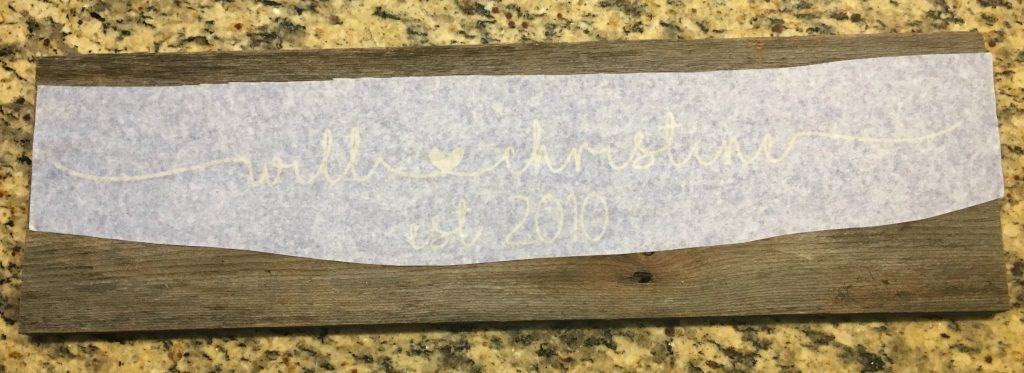
    1. Cut your vinyl stencil using your Silhouette Cameo or Cricut. Weed the design and apply transfer tape. I prefer to use the hinge method to apply the vinyl designs. First, align the design and tape across the center.How to Use a Vinyl Stencil on Barnwood or Reclaimed Wood with your Silhouette Cameo or Cricut - by cuttingforbusiness.com
      Next, remove the paper backing from the left side of the design and apply it to the wood.How to Use a Vinyl Stencil on Barnwood or Reclaimed Wood with your Silhouette Cameo or Cricut - by cuttingforbusiness.com
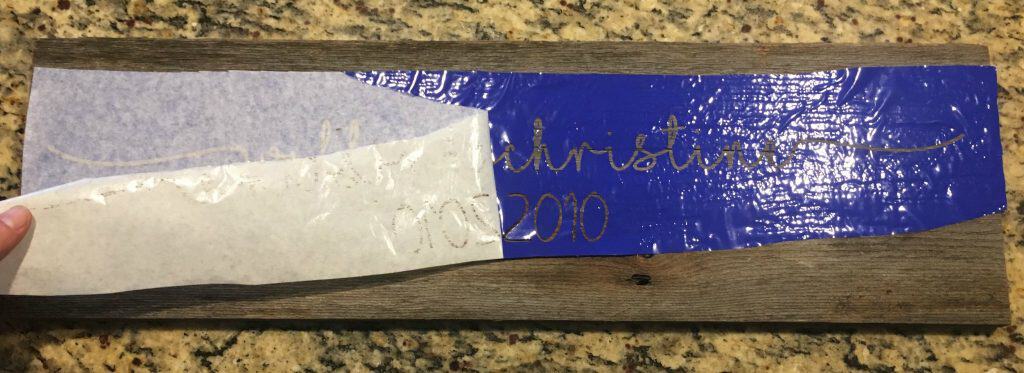
      Remove the painter’s tape and the paper backing from the right side of the wood and apply it.How to Use a Vinyl Stencil on Barnwood or Reclaimed Wood with your Silhouette Cameo or Cricut - by cuttingforbusiness.com
      Last, remove the transfer tape.How to Use a Vinyl Stencil on Barnwood or Reclaimed Wood with your Silhouette Cameo or Cricut - by cuttingforbusiness.com
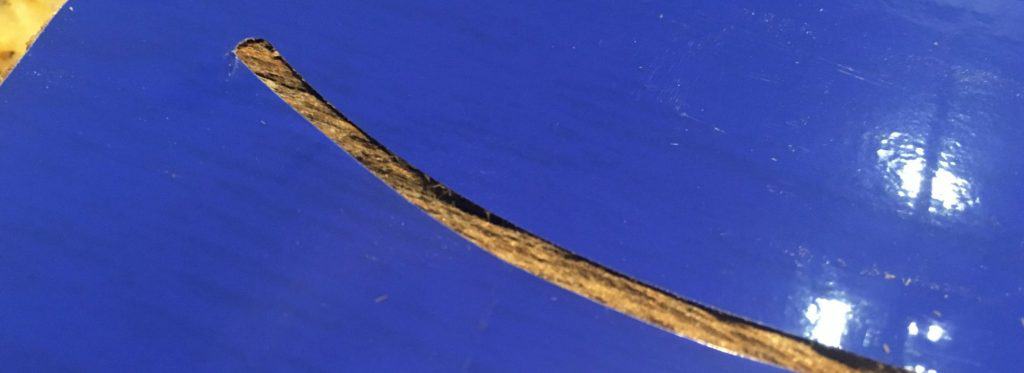
      If you look close, you’ll notice that my vinyl stencil doesn’t stick well to my wood. How to Use a Vinyl Stencil on Barnwood or Reclaimed Wood with your Silhouette Cameo or Cricut - by cuttingforbusiness.com
      You can see in this picture that if I painted this, it would run under the stencil and make a huge mess. Due to the uneven wood texture, the vinyl simply doesn’t stick well.How to Use a Vinyl Stencil on Barnwood or Reclaimed Wood with your Silhouette Cameo or Cricut - by cuttingforbusiness.com
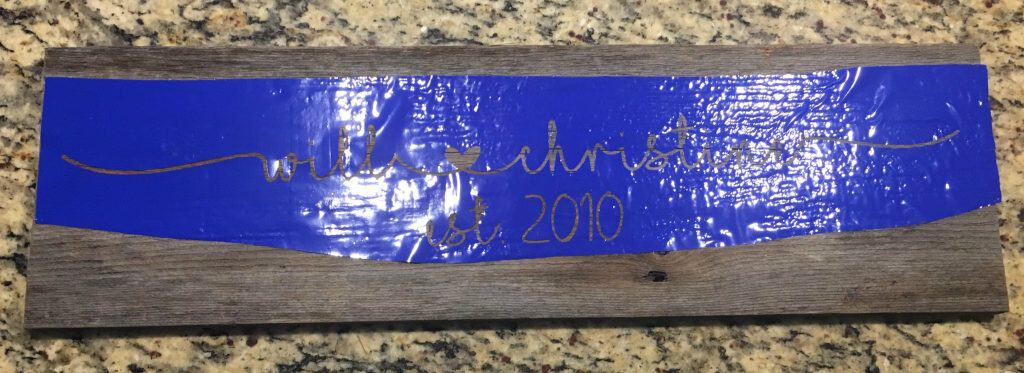
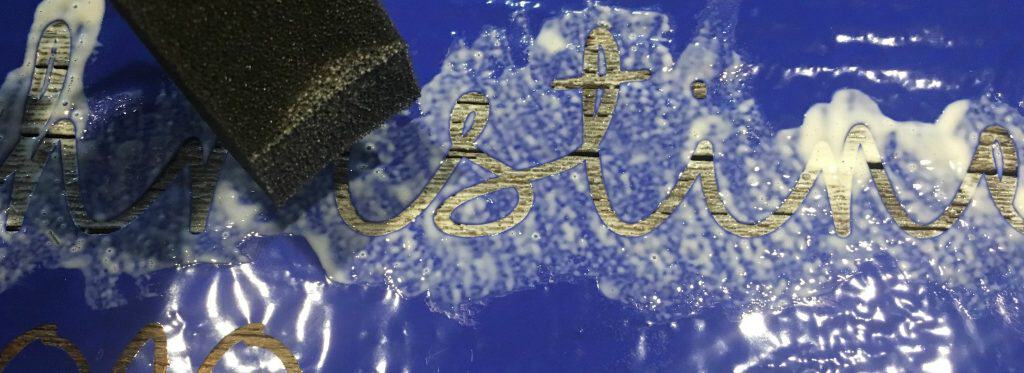
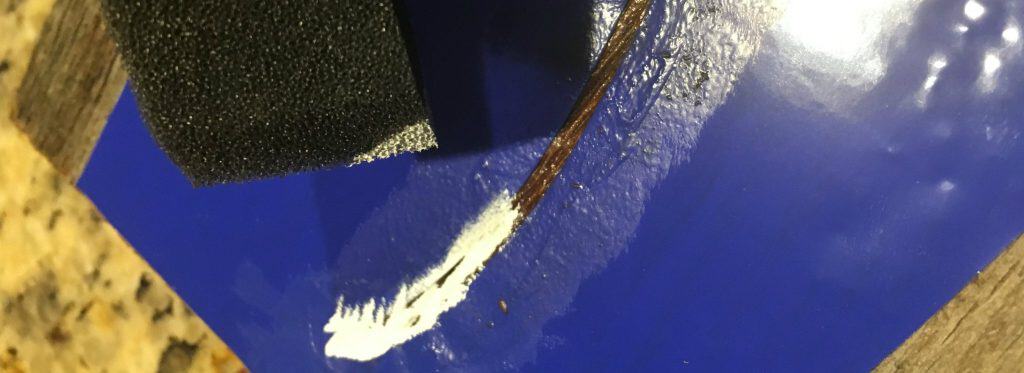
    2. My solution is to apply a coat of Mod Podge to the area I want to paint. (Mod Podge is basically watered down glue. If you don’t have some on hand, make your own with Elmer’s Glue and water.) The Mod Podge glues the stencil in place and seals the edges so the paint won’t bleed. Apply Mod Podge with a foam brush and allow it to dry. How to Use a Vinyl Stencil on Barnwood or Reclaimed Wood with your Silhouette Cameo or Cricut - by cuttingforbusiness.com
    3. After the Mod Podge dries, apply paint with a foam brush. Remember to use a tiny amount of paint! How to Use a Vinyl Stencil on Barnwood or Reclaimed Wood with your Silhouette Cameo or Cricut - by cuttingforbusiness.com
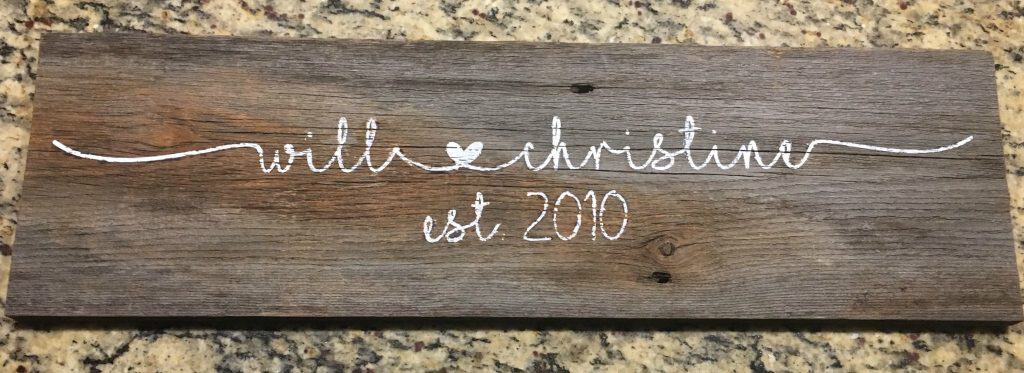
    4. Peel the stencil before the paint is dry. How to Use a Vinyl Stencil on Barnwood or Reclaimed Wood with your Silhouette Cameo or Cricut - by cuttingforbusiness.com

    To finish up your sign, add hanging hardware to the back. Don’t have a source for barnwood? Did you know you can order it on Etsy? Click here.

    Love this tutorial? Save it to Pinterest:

    How to Use a Vinyl Stencil on Barnwood or Reclaimed Wood with your Silhouette Cameo or Cricut - by cuttingforbusiness.com

  • DIY Morse Code Valentine’s Cards

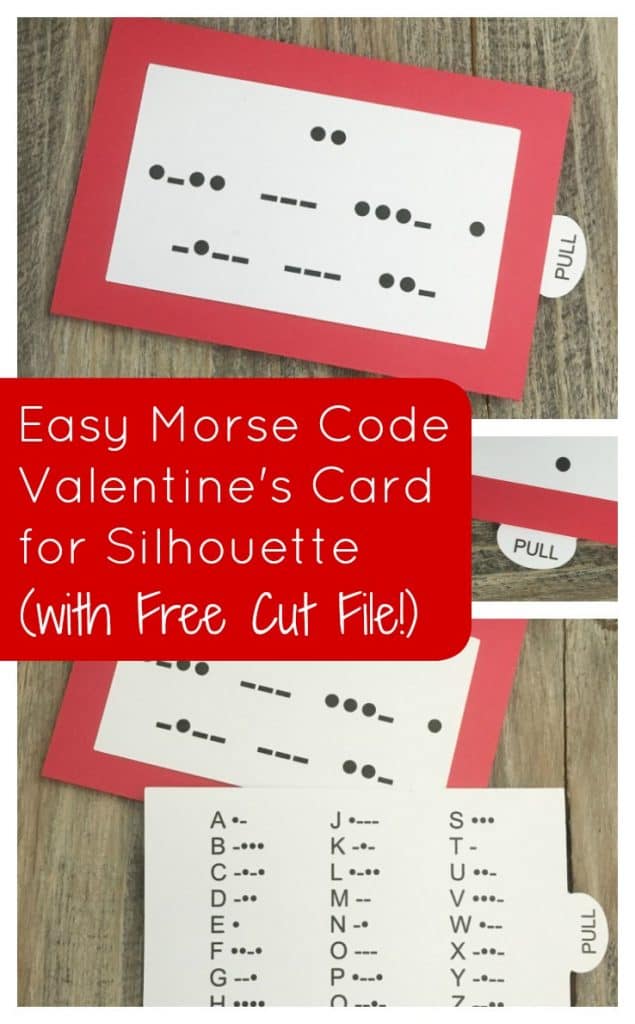
    Remember that post on mind dumping from yesterday? This is one of the projects that I’ve had in my idea book forever. I thought it would be neat to have an Etsy shop called “Morse Cards” and make a line of Morse Code cards. My idea was inspired by all the Morse Code jewelry over on Etsy. If you have seen these, click here to view one of my favorite shops. To create your own Morse Code card using a Silhouette Cameo, continue on.

    DIY Morse Code Valentine’s Cards

    Supplies Needed

    Step by Step Tutorial

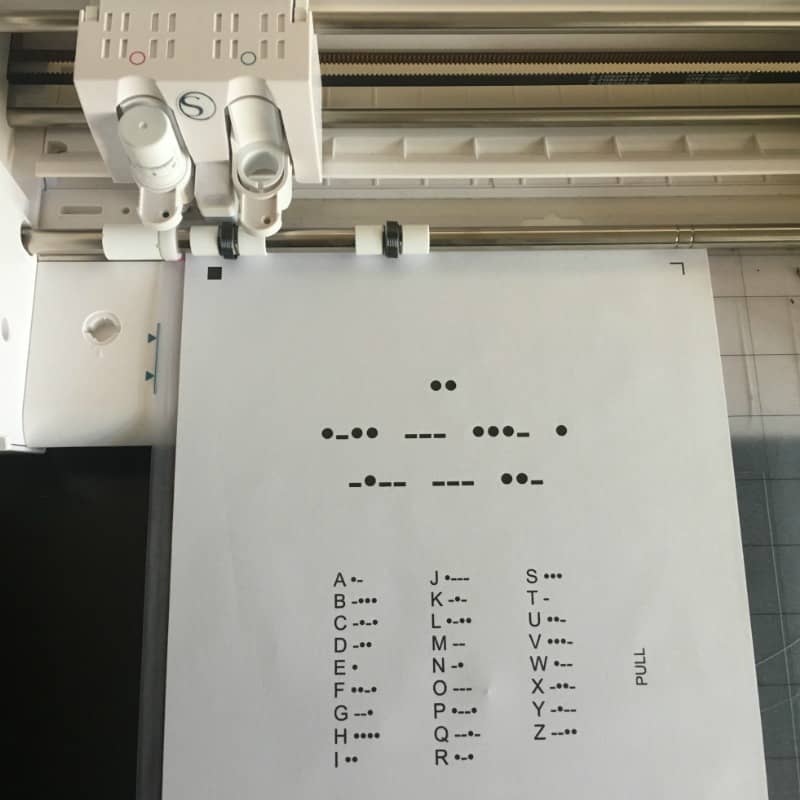
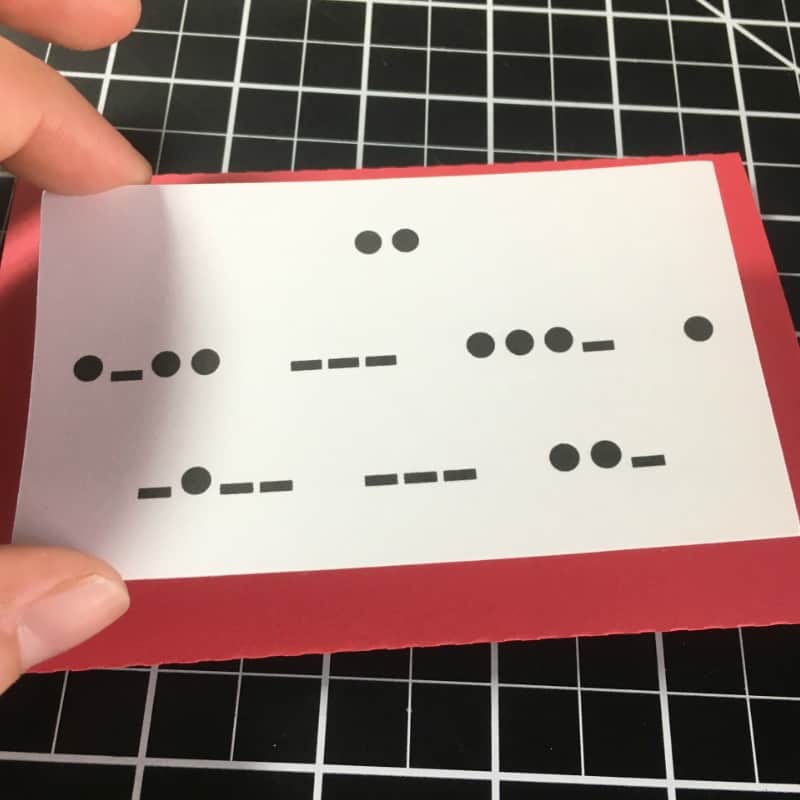
    1. Use print and cut to first print the pull tab insert and the design on the front. The message on the cut file included below is “I love you” To create your own message use the middle dot (Option and 8 on a Mac or ALT 0183 on Windows) and hypens to create each letter. DIY Morse Code Valentine's Cards for Silhouette Cameo (Includes free cut files!) by cuttingforbusiness.com
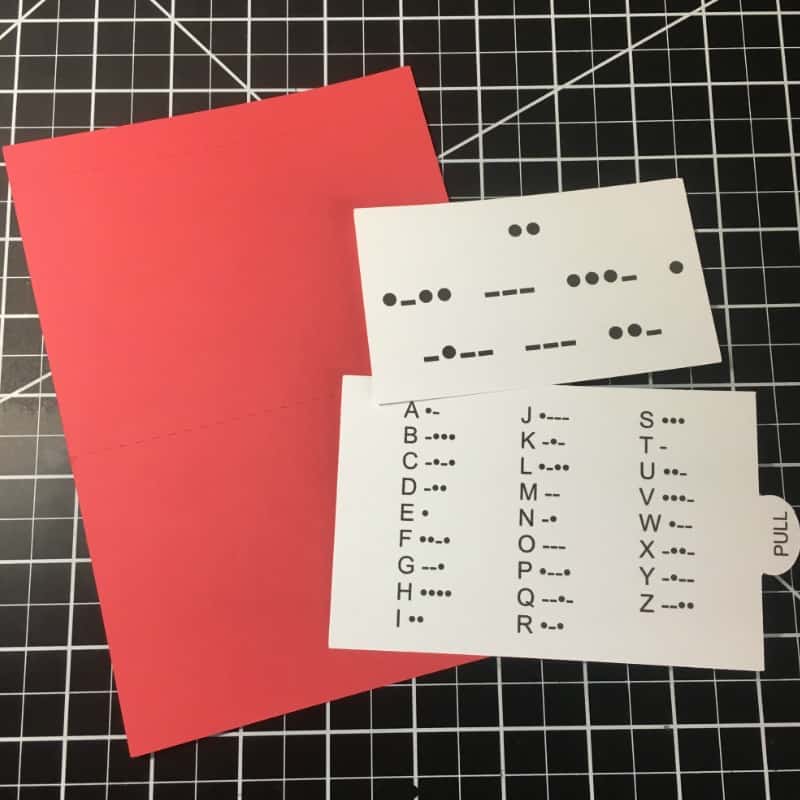
    2. Cut the card using the included cut file on your colored cardstock. DIY Morse Code Valentine's Cards for Silhouette Cameo (Includes free cut files!) by cuttingforbusiness.com
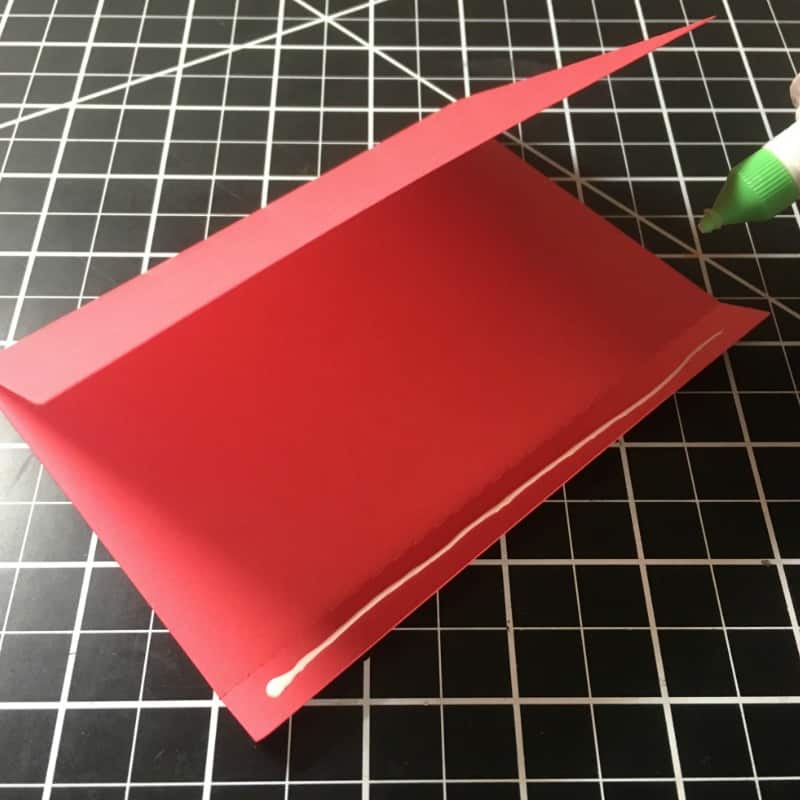
    3. Fold the card on the fold lines and glue the flap together. DIY Morse Code Valentine's Cards for Silhouette Cameo (Includes free cut files!) by cuttingforbusiness.com
    4. Attach the message to the front of the card. DIY Morse Code Valentine's Cards for Silhouette Cameo (Includes free cut files!) by cuttingforbusiness.com
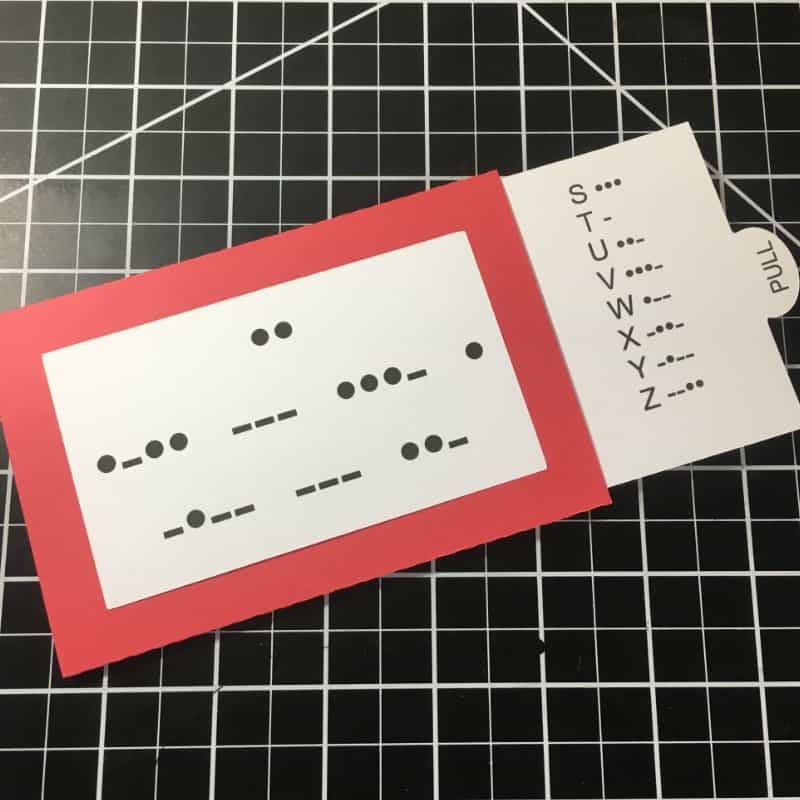
    5. Insert the decoder into the card. DIY Morse Code Valentine's Cards for Silhouette Cameo (Includes free cut files!) by cuttingforbusiness.com

    That’s it! I love a good, quick project!

    Save this tutorial to Pinterest:

    DIY Morse Code Valentine's Cards for Silhouette Cameo (Includes free cut files!) by cuttingforbusiness.com

    Download the cut files in .studio3 format here and here.

  • DIY Christmas Chalkboard Ornaments

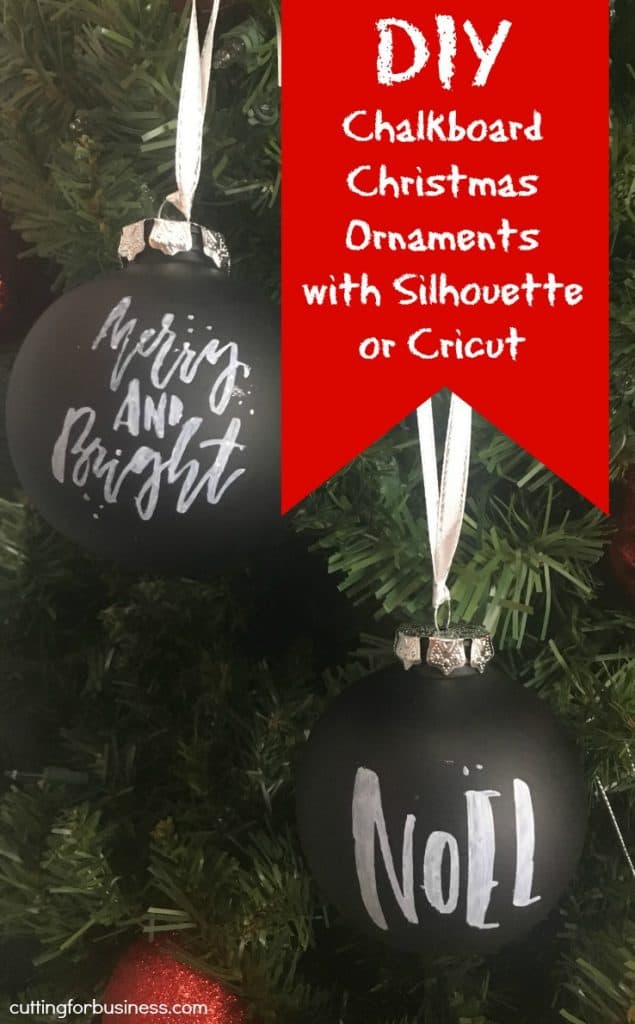
    As you are doing holiday craft shows and fairs, be sure to have products available in all price ranges. Today, I’m showing you how I quickly created chalkboard ornaments using chalk markers and some inexpensive ornaments I picked up at the Target Dollar Spot.

    Supplies Needed

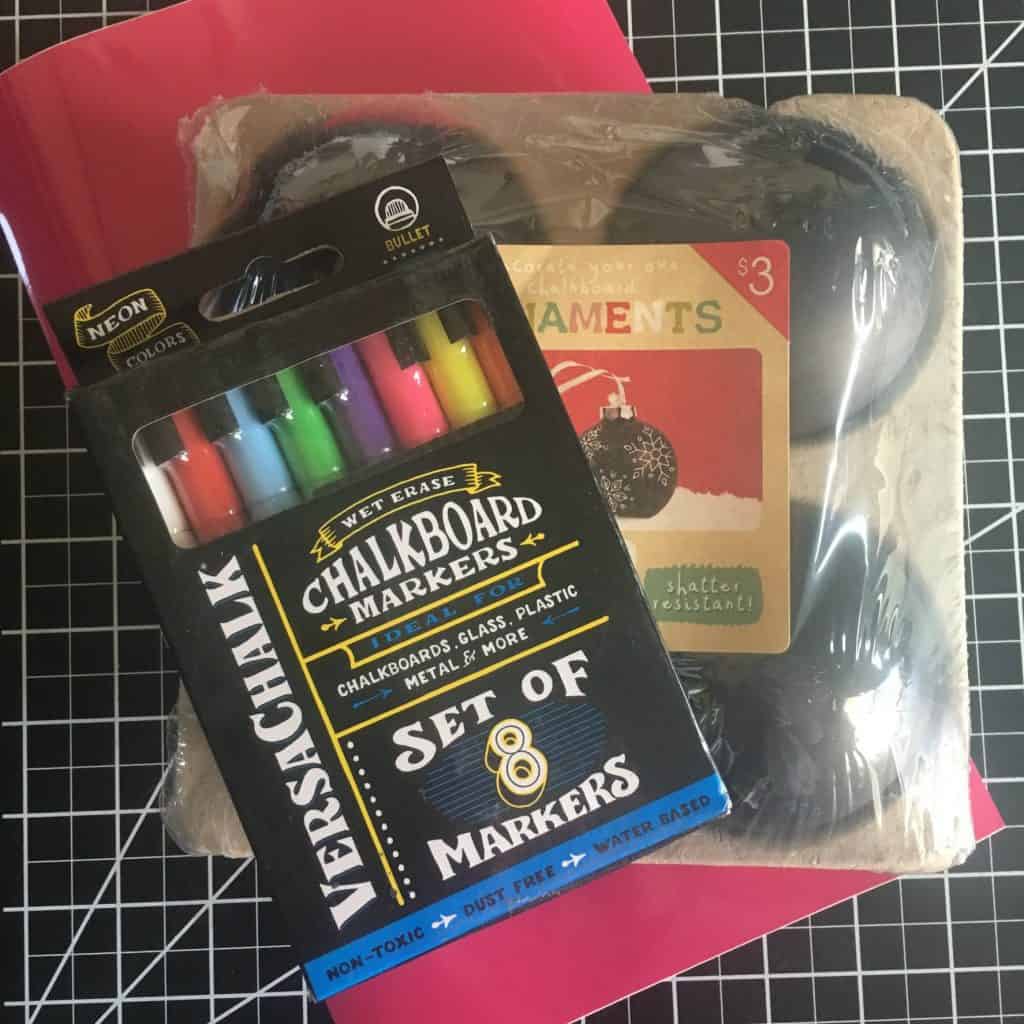
    Chalkboard Ornaments – If your Target Dollar Spot is out, check here for some.
    VersaChalk Chalkboard Markers –  I purchased these.
    Christmas Designs – I purchased this pack and traced the graphics.
    Adhesive Vinyl
    Transfer tape
    Cricut Explore or Silhouette Cameo

    DIY Christmas Chalkboard Ornaments with Silhouette Cameo or Cricut Explore and VersaChalk Markers - by cuttingforbusiness.com.

    Chalkboard Ornament Tutorial with VersaChalk Markers

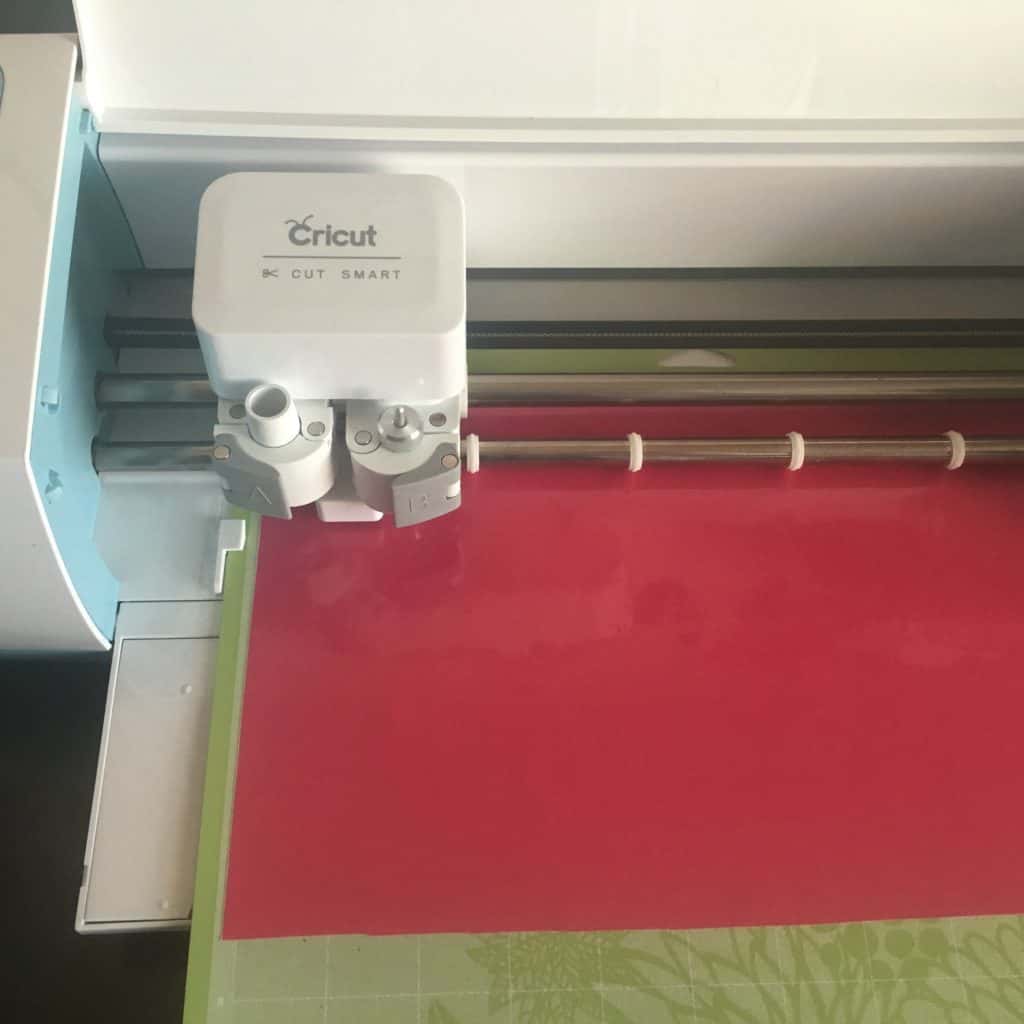
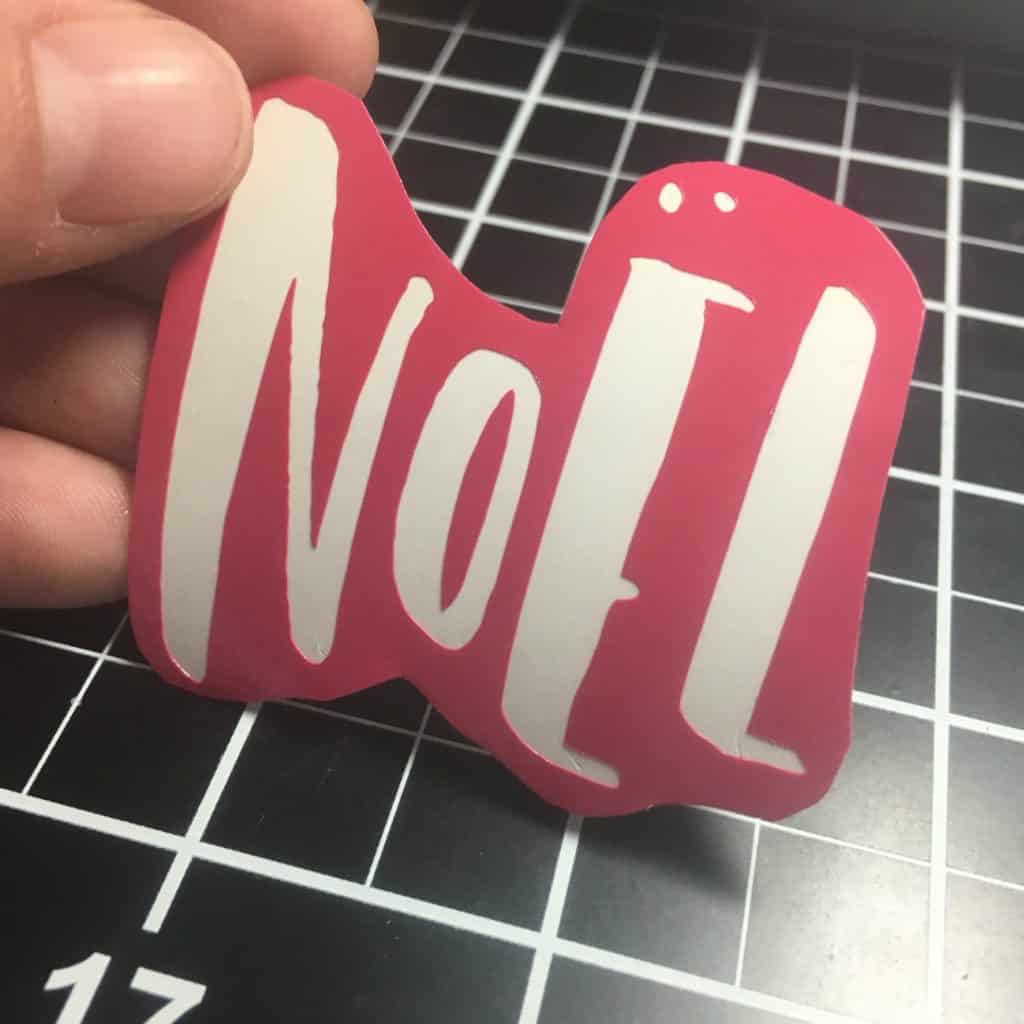
    1. Use scrap vinyl to cut your designs on your Silhouette Cameo or Cricut Explore. DIY Christmas Chalkboard Ornaments with Silhouette Cameo or Cricut Explore and VersaChalk Markers - by cuttingforbusiness.com.
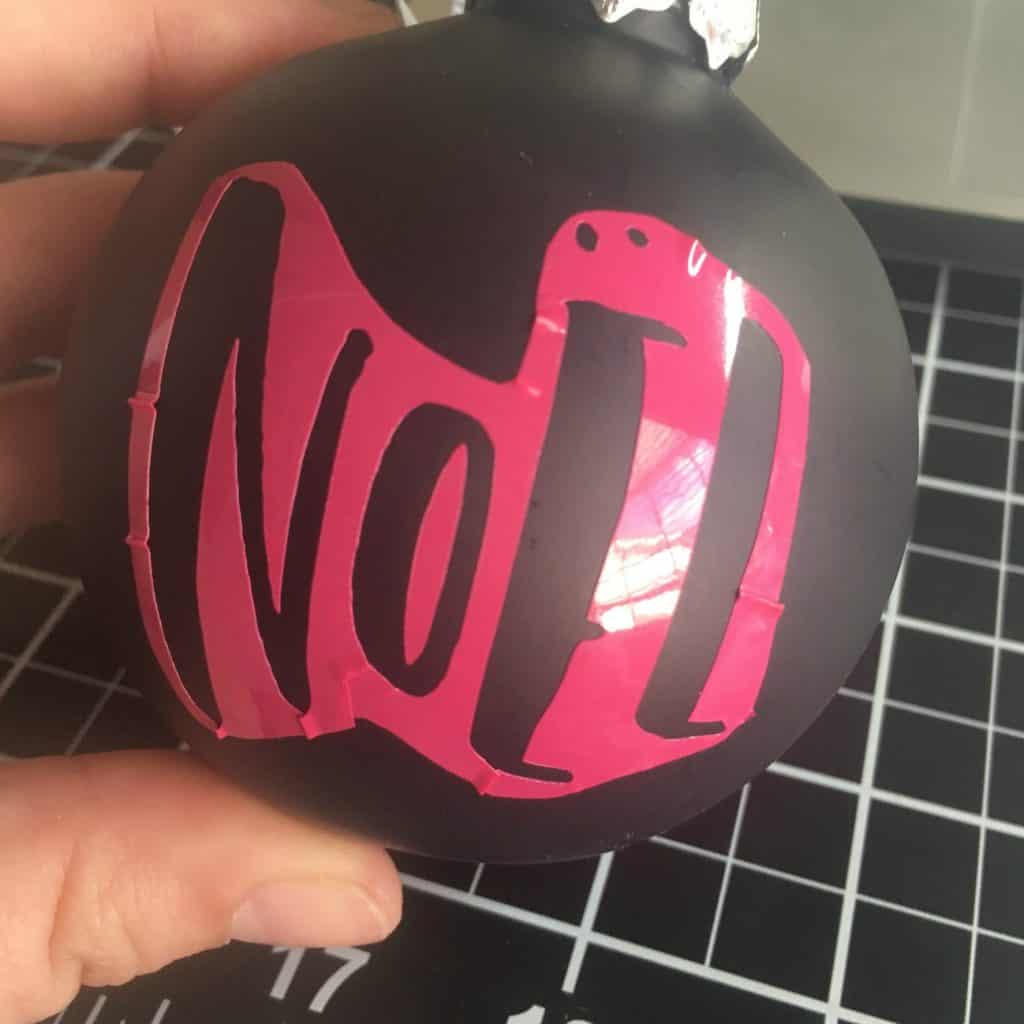
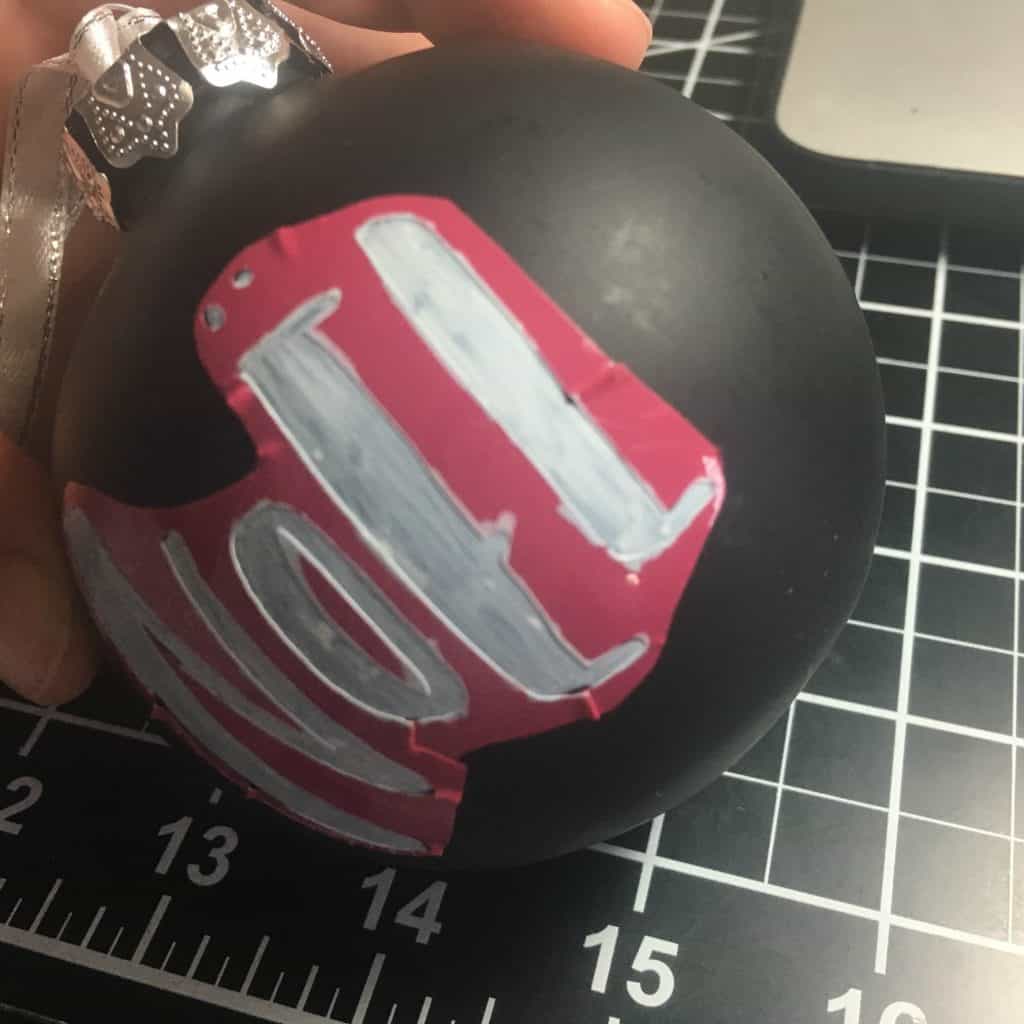
    2. Apply the designs to your ornaments. Since I used round ornaments, I cut the vinyl close to the design to make application easier. DIY Christmas Chalkboard Ornaments with Silhouette Cameo or Cricut Explore and VersaChalk Markers - by cuttingforbusiness.com.
    3. Apply the vinyl using transfer tape to your ornament. I didn’t worry much about bubbles and creases.DIY Christmas Chalkboard Ornaments with Silhouette Cameo or Cricut Explore and VersaChalk Markers - by cuttingforbusiness.com.
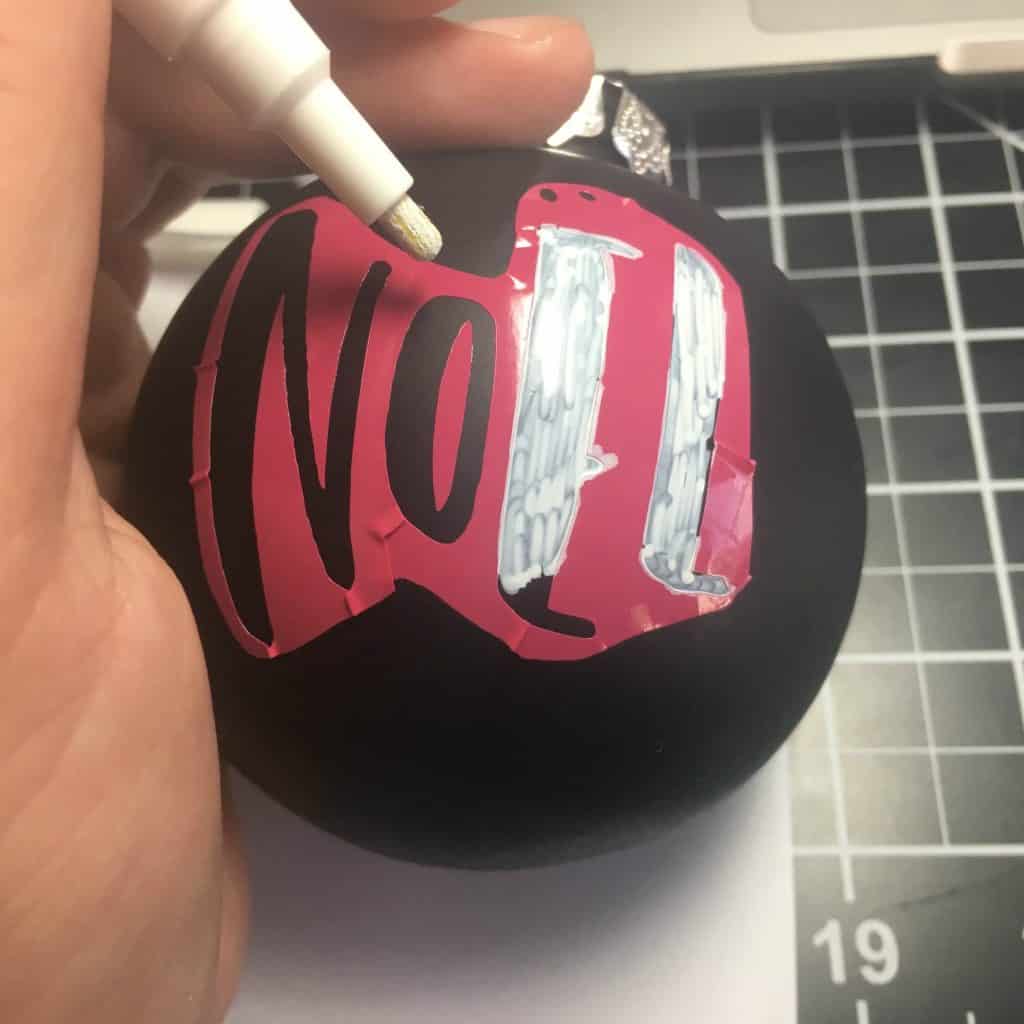
    4. Use the VersaChalk marker and fill in the design. DIY Christmas Chalkboard Ornaments with Silhouette Cameo or Cricut Explore and VersaChalk Markers - by cuttingforbusiness.com.
    5. You’ll need a few coats to make sure it isn’t streaky.DIY Christmas Chalkboard Ornaments with Silhouette Cameo or Cricut Explore and VersaChalk Markers - by cuttingforbusiness.com.
    6. Peel off the vinyl when you are done! Use a wet cotton swab to fix any mistakes. DIY Christmas Chalkboard Ornaments with Silhouette Cameo or Cricut Explore and VersaChalk Markers - by cuttingforbusiness.com.

    If you are selling these, you might consider putting them in a box so that they don’t smear. Here’s a link to a post to create your own.

    Want to do a different style ornament? Try my tutorial for wood grain ornaments – it’s like a wooden sign in an ornament!

    OH! Doing some holiday shopping this year online at Target? (Me, too!) Get free shipping on your order over $25 when you use this link.

    Save this post to Pinterest:

    DIY Christmas Chalkboard Ornaments with Silhouette Cameo or Cricut Explore and VersaChalk Markers - by cuttingforbusiness.com.

  • DIY Wood Sign Christmas Advent Calendar Tutorial

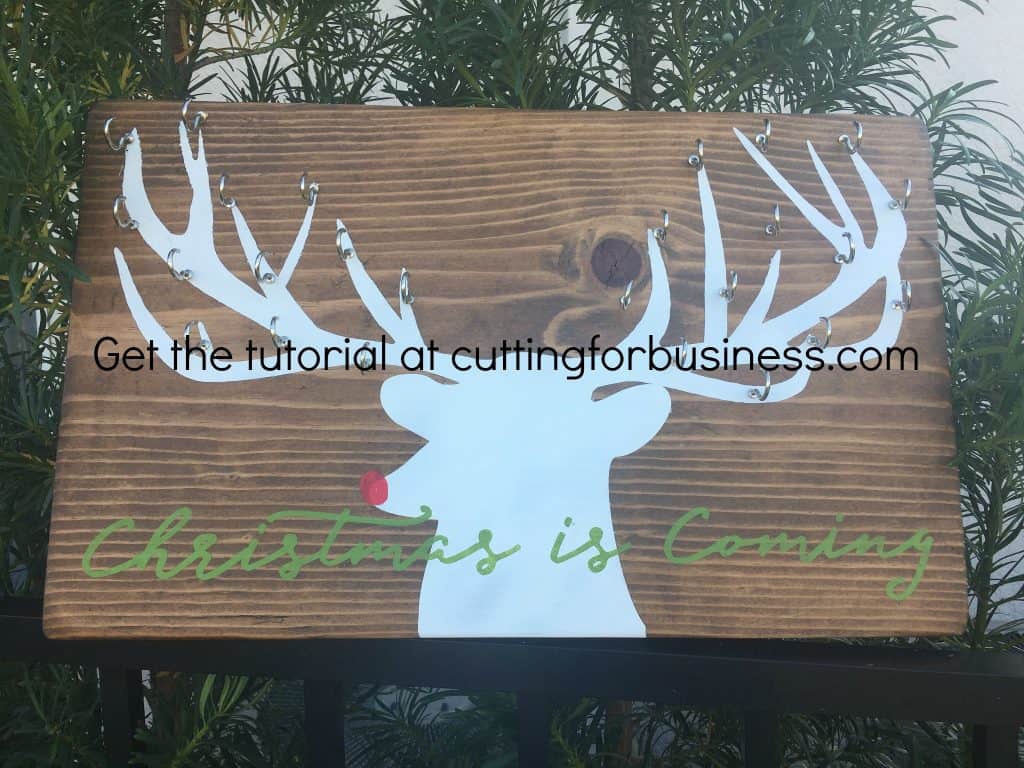
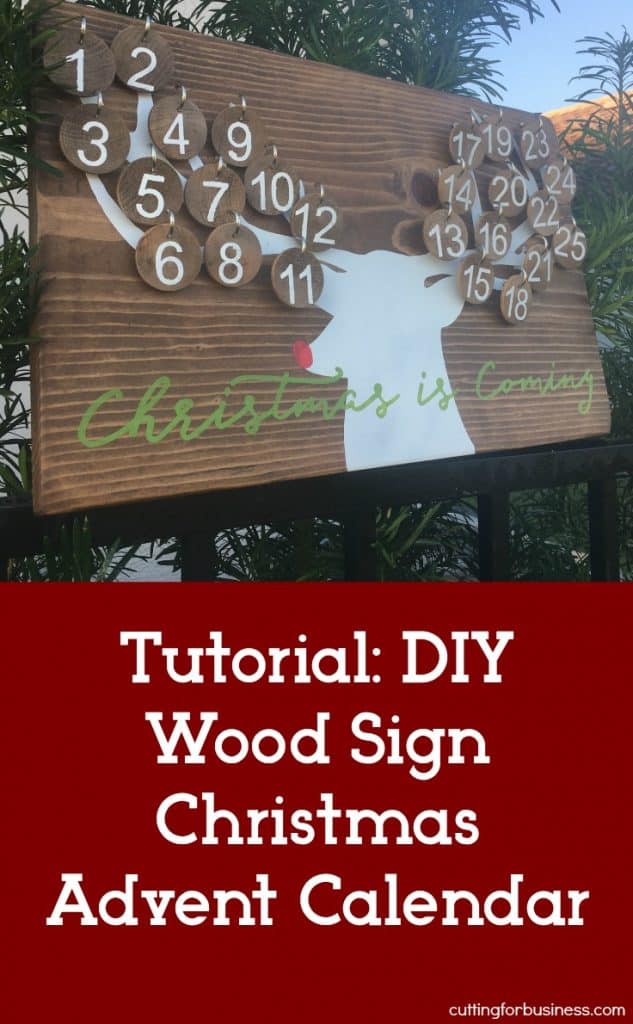
    It’s no secret that Silhouette Cameo and Cricut small business owners that sell unique products often do better than those that sell the same thing as other shops. Today, I’m offering a tutorial to create a wood sign advent calendar to sell this holiday season.

    Supplies Needed

    Step by Step Wood Sign Advent Calendar Tutorial

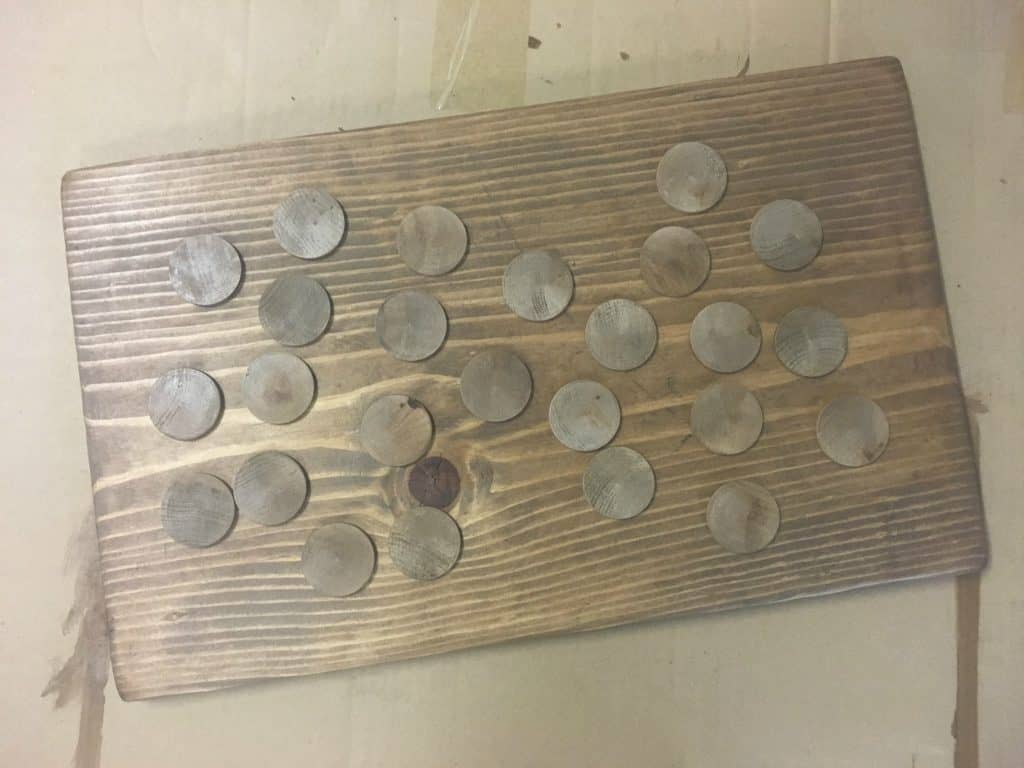
    1. Cut, sand, and stain your wood and 25 wood discs. Allow everything to dry completely. DIY Wood Sign Christmas Advent Calendar Tutorial. Great for small business Silhouette Cameo and Cricut Explore crafters. By cuttingforbusiness.com.
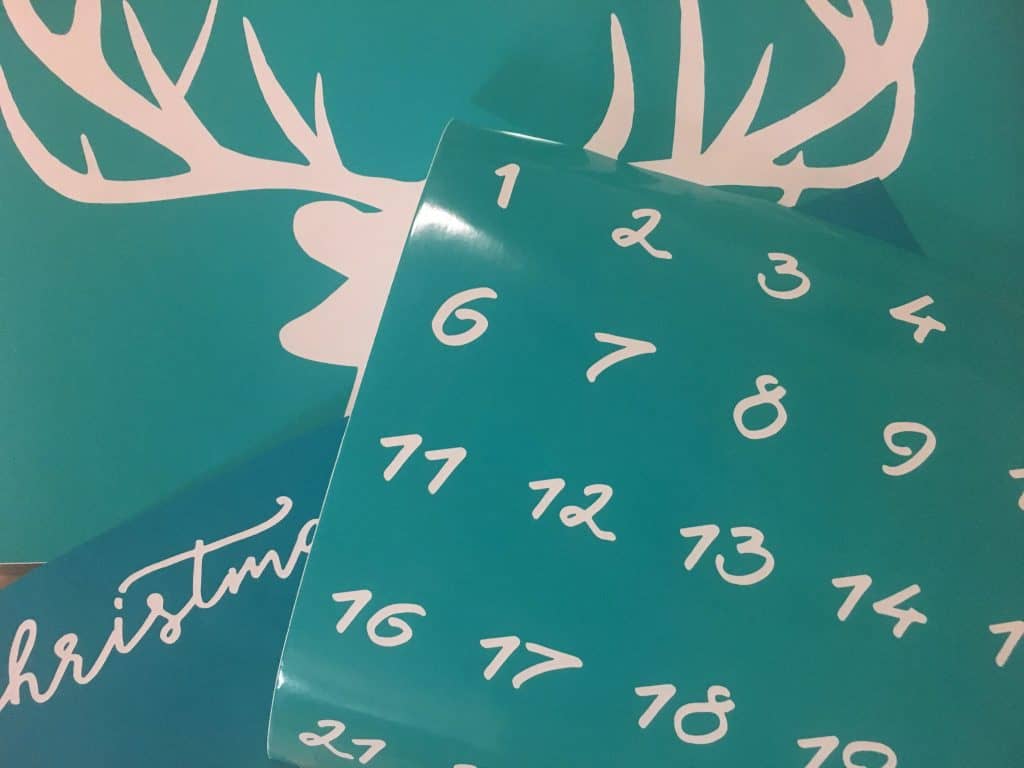
    2. Cut all three stencils in vinyl using your Silhouette or Cricut and weed them. DIY Wood Sign Christmas Advent Calendar Tutorial. Great for small business Silhouette Cameo and Cricut Explore crafters. By cuttingforbusiness.com.
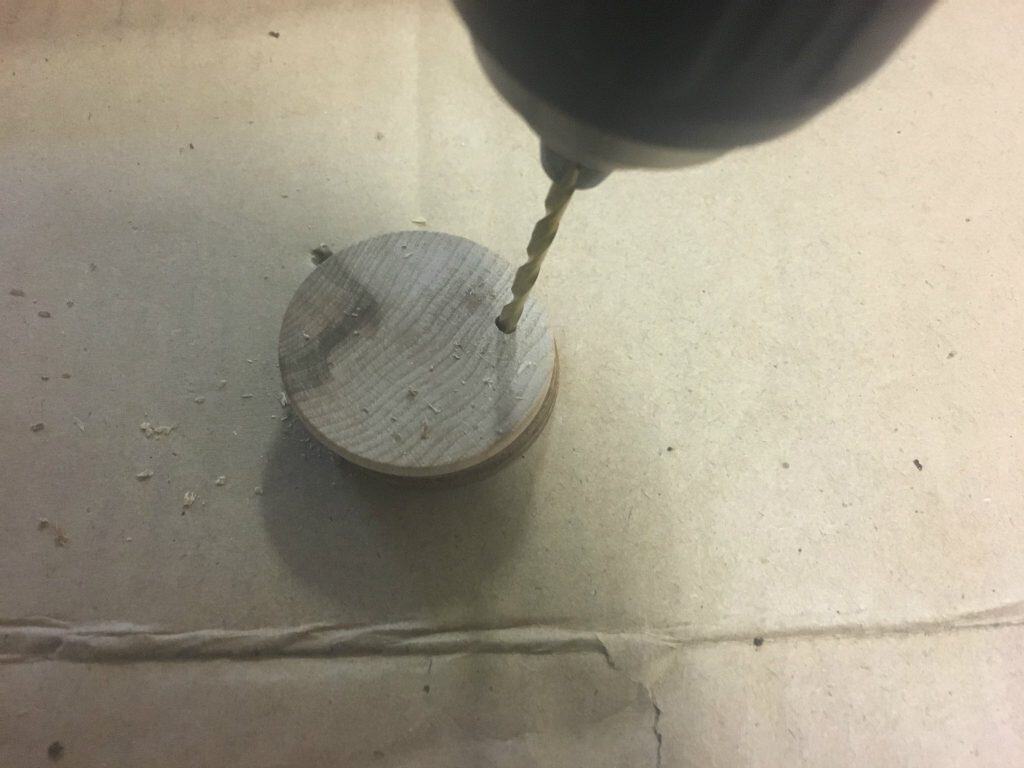
    3. Drill holes in each wood disc. I put the hole centered and near the middle. DIY Wood Sign Christmas Advent Calendar Tutorial. Great for small business Silhouette Cameo and Cricut Explore crafters. By cuttingforbusiness.com.
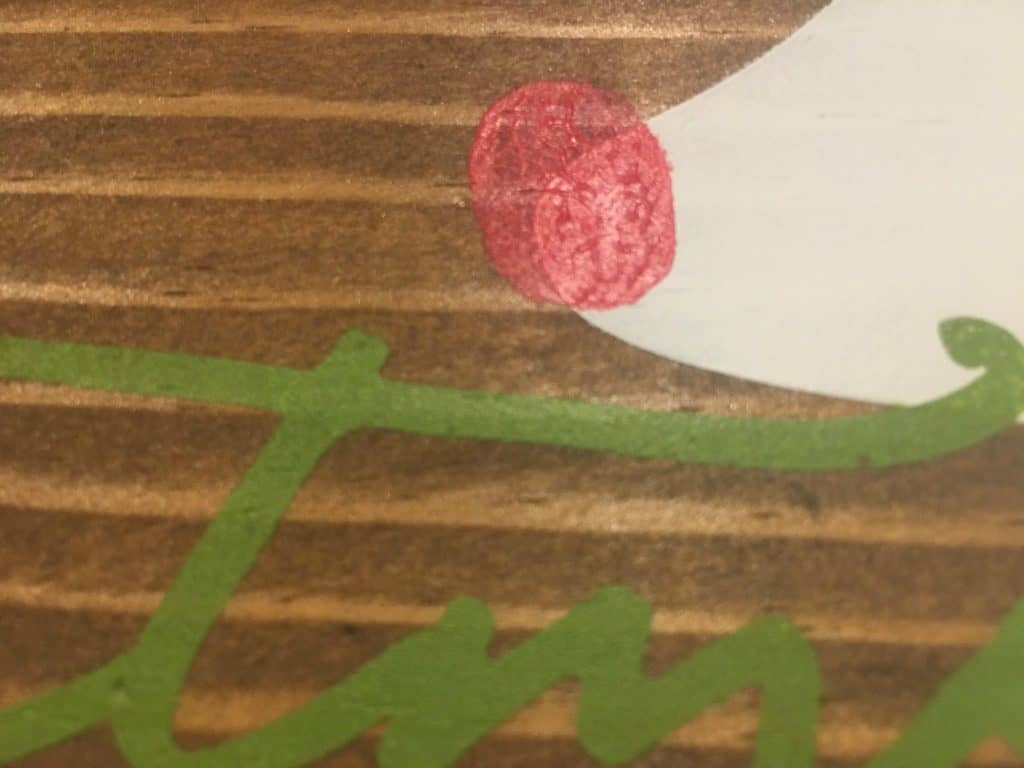
    4. Using the stencils, paint the sign. First paint the reindeer, then add the lettering after the stencil has dried. I like to add a personal touch to my signs, so I used my fingerprint to make a red nose for Rudolph. Need help with crisp paint lines? See this postDIY Wood Sign Christmas Advent Calendar Tutorial. Great for small business Silhouette Cameo and Cricut Explore crafters. By cuttingforbusiness.com.
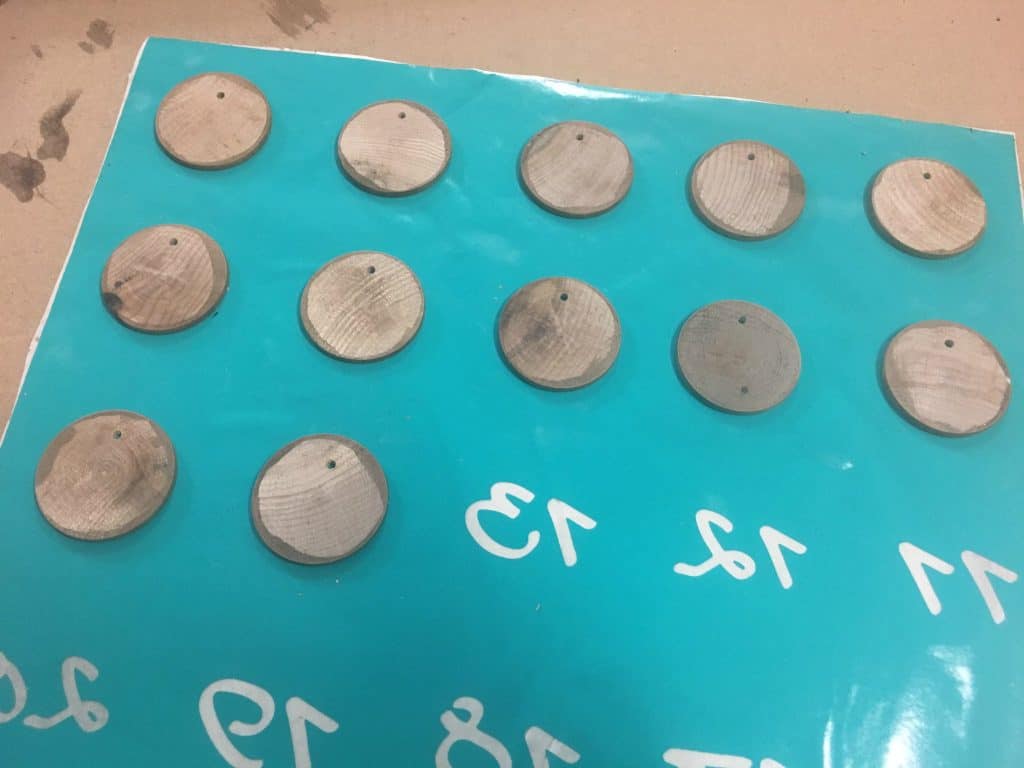
    5. While your sign is drying, paint numbers onto the wooden discs. I turned my stencil upside down and put the discs on, then turned it over, removed the transfer tape, and spray painted them all at once.DIY Wood Sign Christmas Advent Calendar Tutorial. Great for small business Silhouette Cameo and Cricut Explore crafters. By cuttingforbusiness.com.
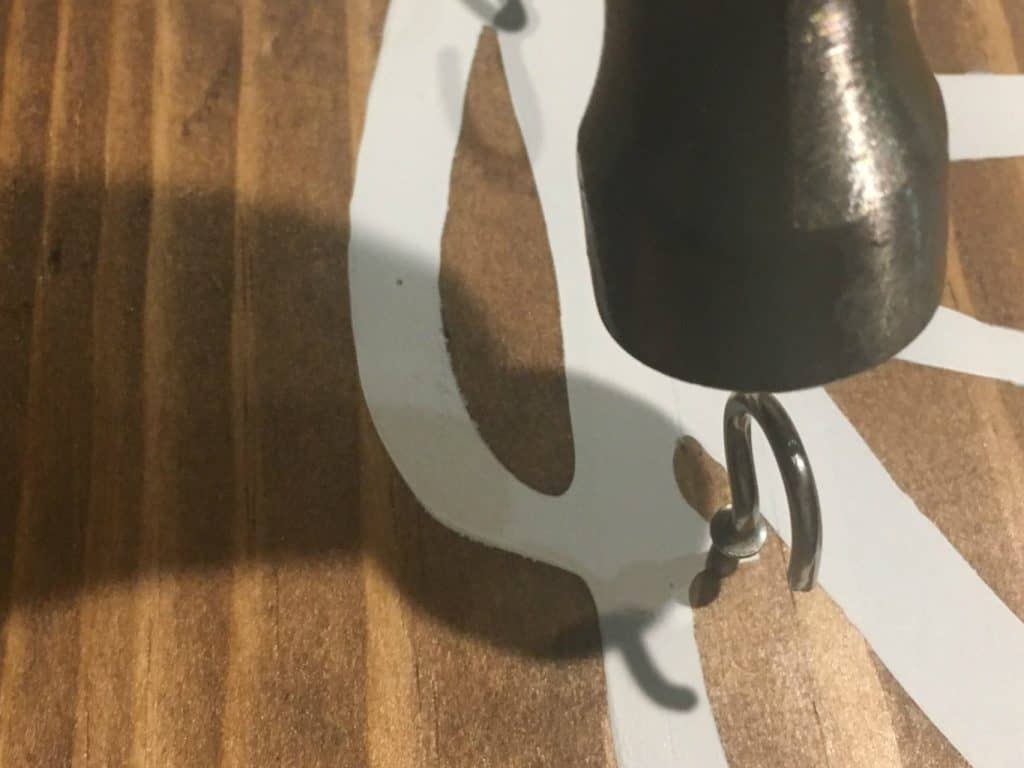
    6. Next, screw in your hooks throughout the antlers. There is no right or wrong placement. I found it helpful to use a hammer to tap each hook in and then screw it the rest of the way. Be careful not to overtighten or you’ll crack the board. DIY Wood Sign Christmas Advent Calendar Tutorial. Great for small business Silhouette Cameo and Cricut Explore crafters. By cuttingforbusiness.com.
      DIY Wood Sign Christmas Advent Calendar Tutorial. Great for small business Silhouette Cameo and Cricut Explore crafters. By cuttingforbusiness.com.
    7. Hang your discs on the hooks, add a hanger of your choice to the back, and you are done!

    This is a labor intensive product to create, so be sure that you price accordingly. In my area, I would sell for $80 to $100+.

    Download the files used in this tutorial: Reindeer SVG, Christmas is Coming SVG, Numbers SVG or these Numbers SVG. (There’s two sets of numbers to choose from depending on your preference.) The font I used can be found here.

    Love this tutorial? Save it to Pinterest:

    DIY Wood Sign Christmas Advent Calendar Tutorial. Great for small business Silhouette Cameo and Cricut Explore crafters. By cuttingforbusiness.com.

  • Tutorial: Wood Disc Jewelry with Silhouette Curio

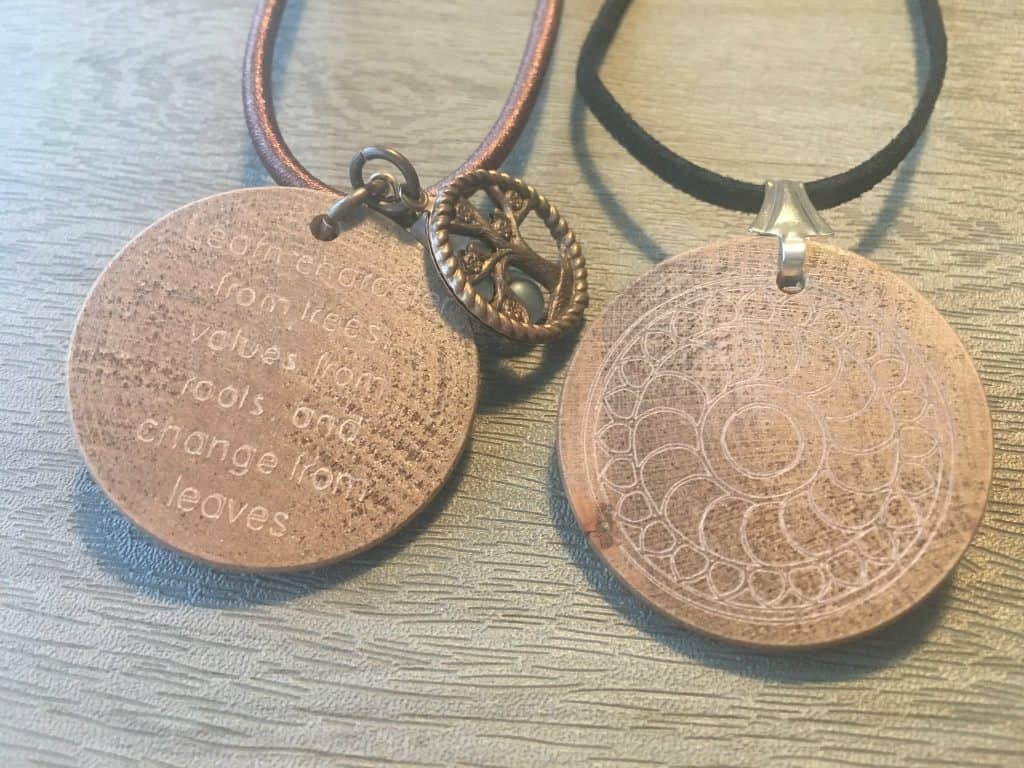
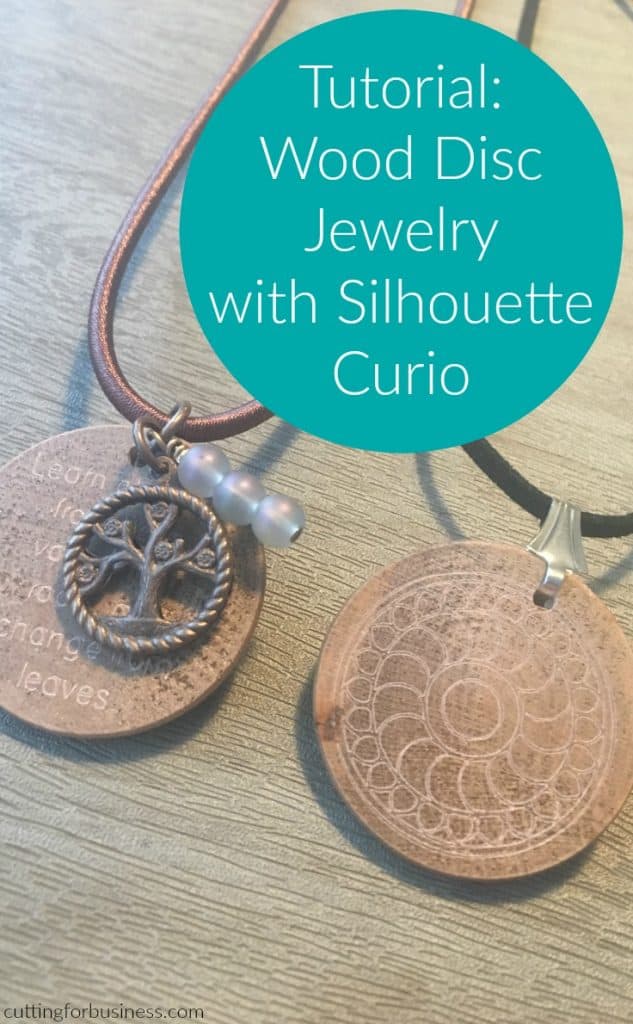
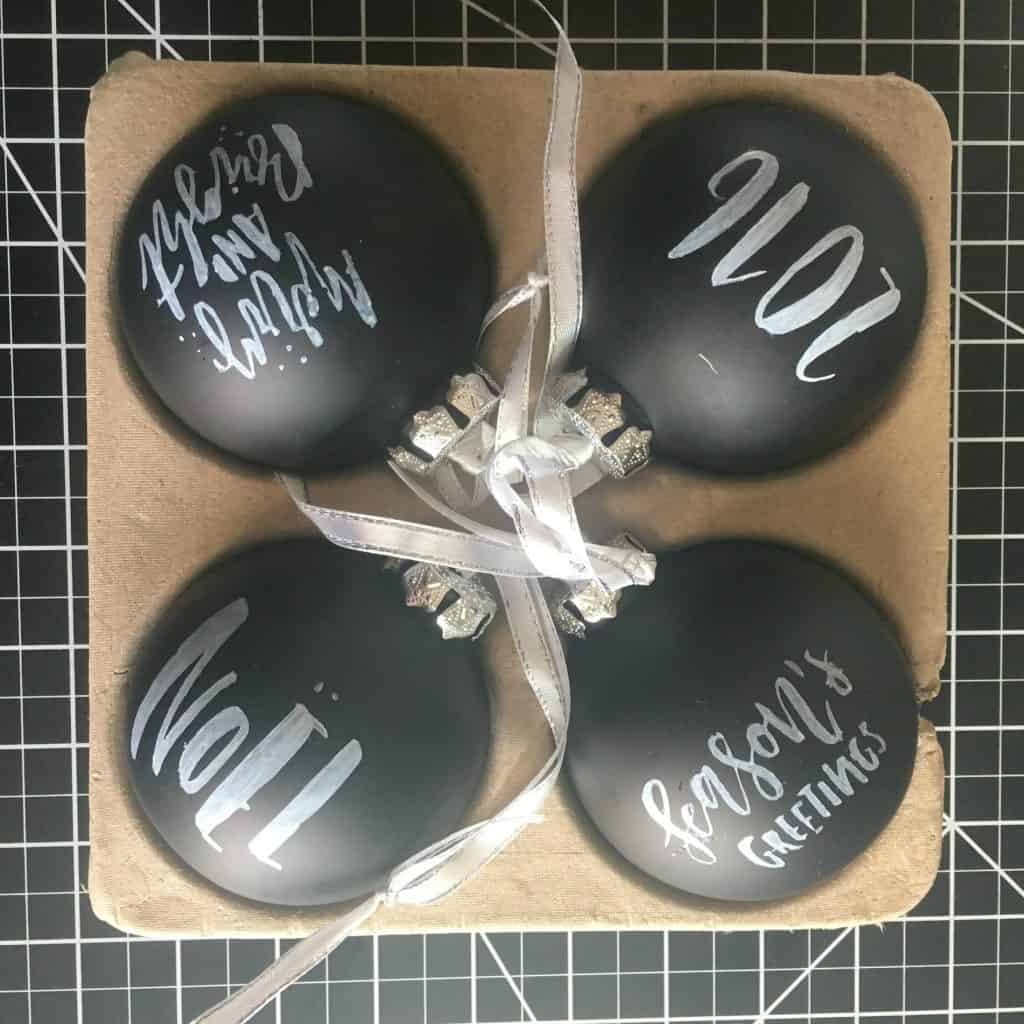
    Like most crafters and small business owners – I hate wasting materials! Remember all those leftover wooden discs after yesterday’s Christmas advent calendar tutorial? I decided to make them into jewelry using my Silhouette Curio.

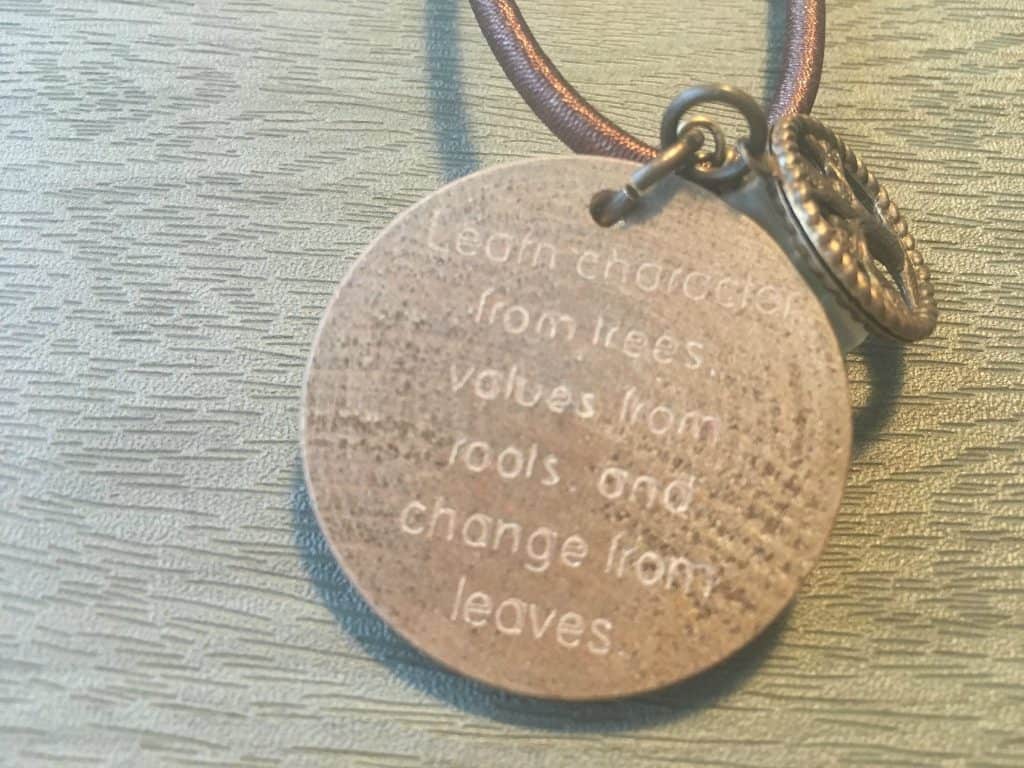
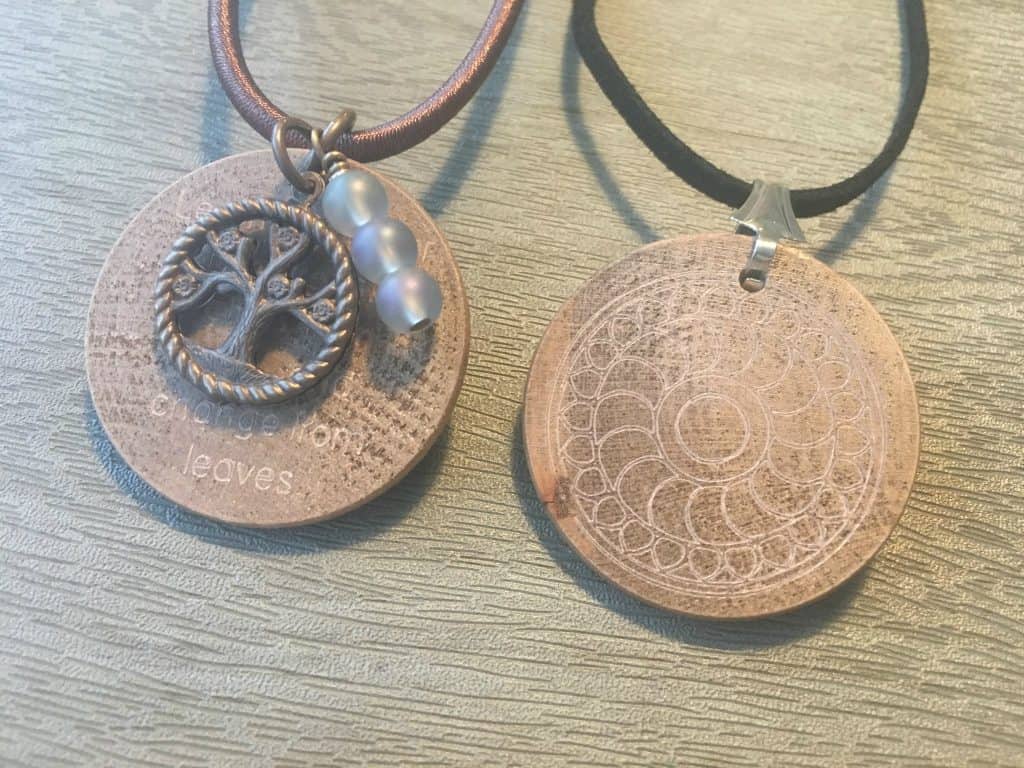
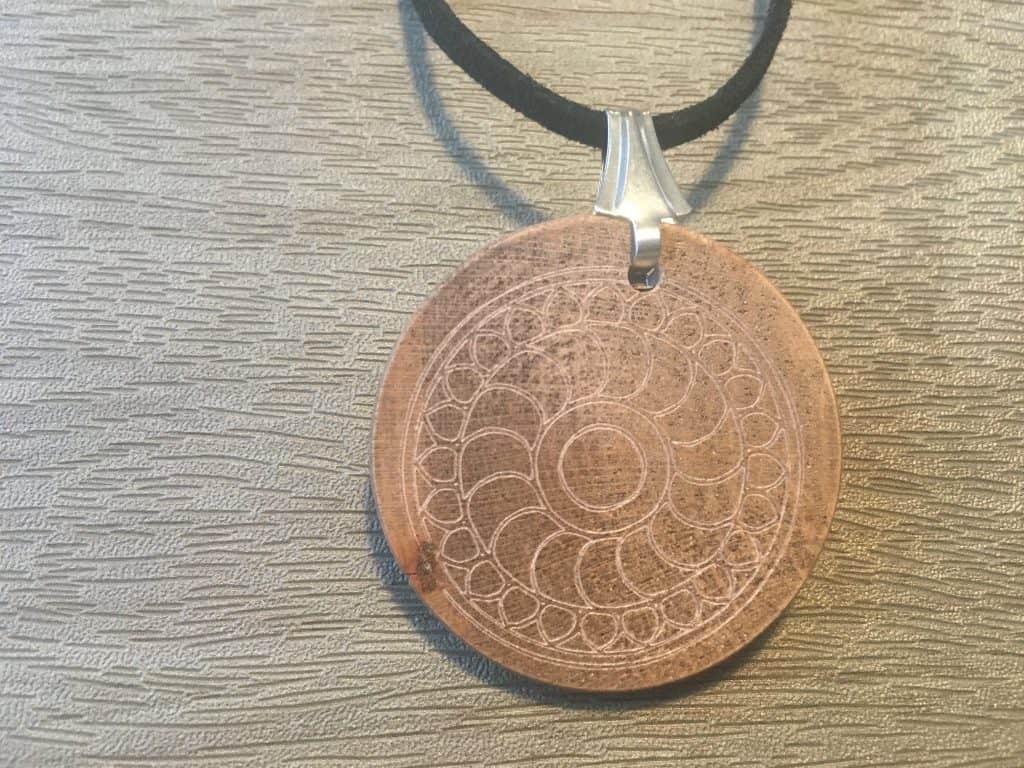
    Here’s pictures of the two necklaces I made:
    Tutorial: Wooden Disc Jewelry with Silhouette Curio by cuttingforbusiness.com.
    Tutorial: Wooden Disc Jewelry with Silhouette Curio by cuttingforbusiness.com.
    Tutorial: Wooden Disc Jewelry with Silhouette Curio by cuttingforbusiness.com.
    Tutorial: Wooden Disc Jewelry with Silhouette Curio by cuttingforbusiness.com.

    Here’s how I made these:

    1. Created designs in Silhouette Studio. For the text, I used a one line font. You can find a list of free single line fonts (good for engraving, etching, and sketching) from this blogger’s post.
    2. Stain the wooden disc and let it dry.
    3. Load the disc into the Curio. I used just a mat with no platforms. The discs are a little bit over 3mm thick, so once I put them on the embossing mat, I was set to go.
    4. My settings were Emboss (Fine), speed 5, thickness 33, double cut using the Chomas Etching Tool.
    5. After the discs were etched, string them on to your favorite corded necklace using jump rings or bails.

    Save this post to Pinterest:

    Tutorial: Wooden Disc Jewelry with Silhouette Curio by cuttingforbusiness.com.

  • Tutorial: Wood Grain Christmas Ornaments with Silhouette or Cricut

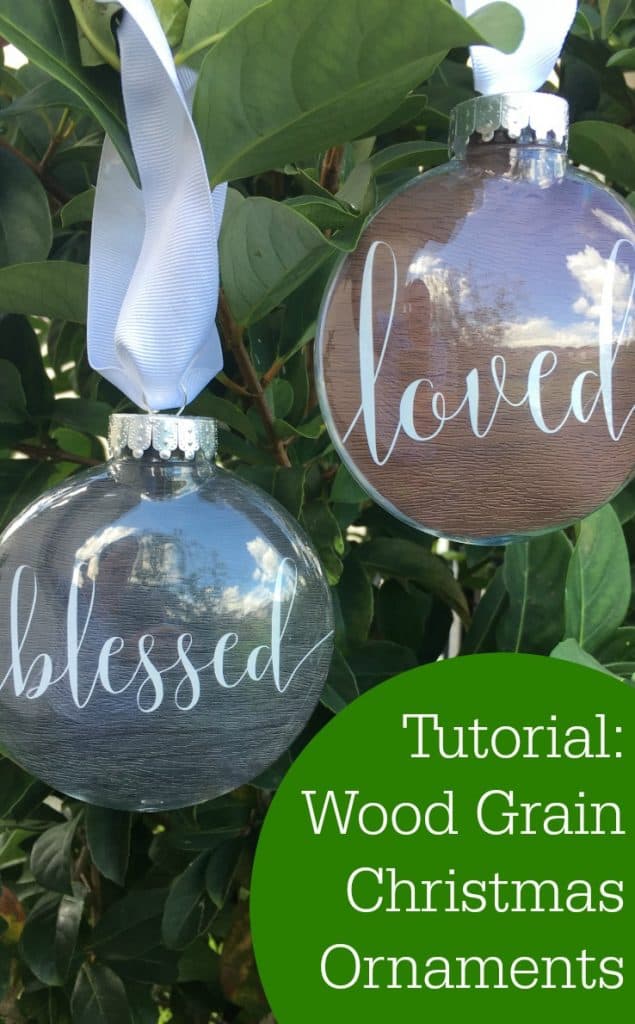
    I’ve seen so many Silhouette Cameo and Cricut small business owners preparing to sell glitter Christmas ornaments for the upcoming holiday season. While I love seeing so many beautiful glittered ornaments – I know that this ultimately means that sellers are likely to face more competition and a lower selling price this year. Why not skip the glittered ornaments for today and try out something a little different? Today, I’m sharing a tutorial for wood grain ornaments:

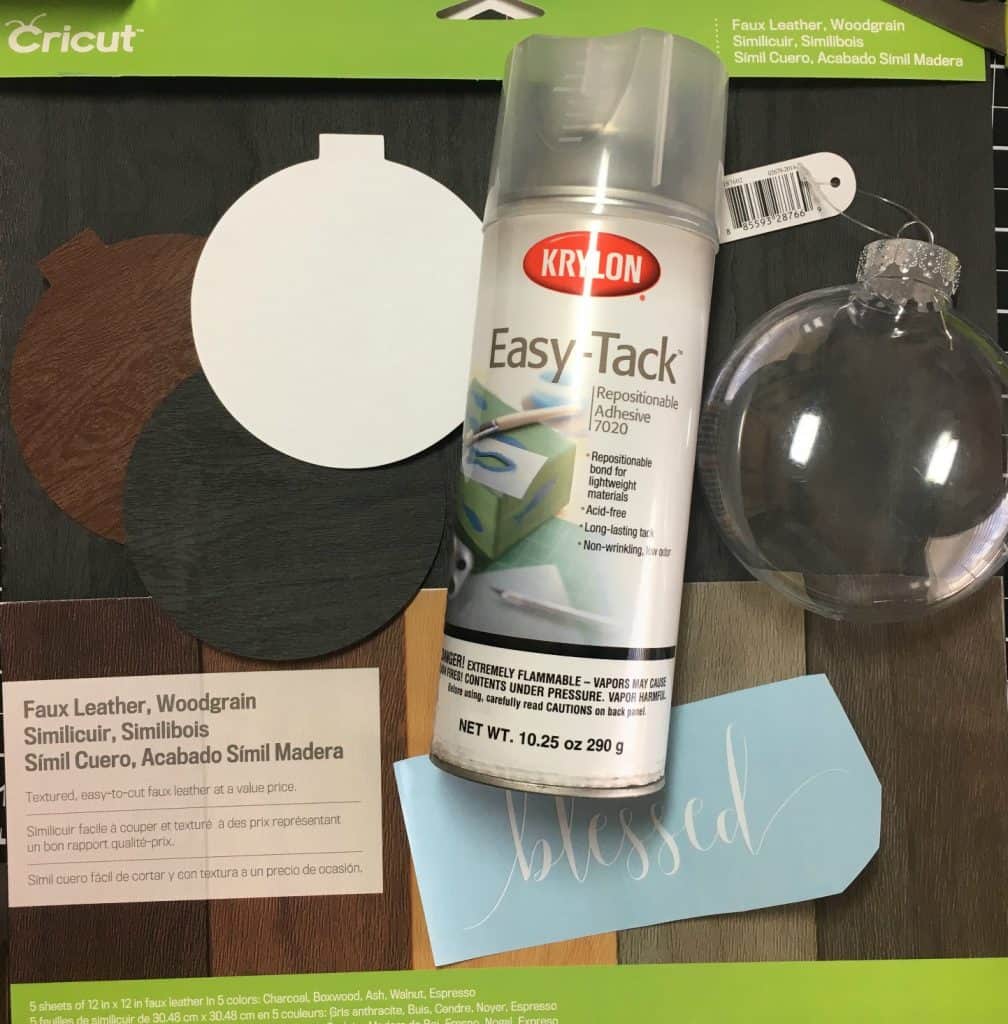
    Supplies

    Tutorial: Wood Grain Christmas Ornaments with Silhouette Cameo or Cricut by cuttingforbusiness.com

    Wood Grain Christmas Ornament Tutorial

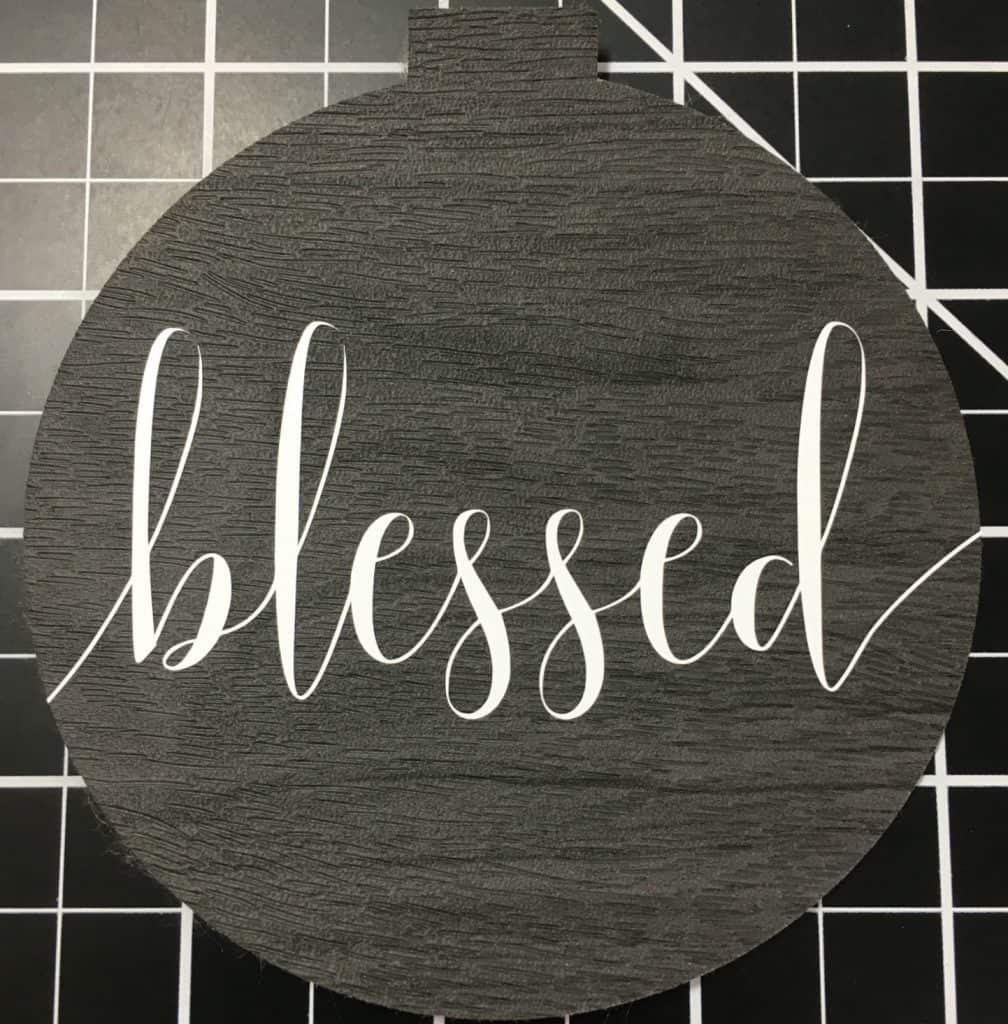
    1. Gather all your supplies and create a design in Silhouette Studio or Design Space. I created two simple text designs (blessed and loved) using Smoothline Script.
    2. Cut a circle insert shape for your ornament using cardstock. Download the insert I designed (depending on the size of your ornament, you may need to size up or down) or create your own.
    3. Cut out the faux leather woodgrain the same size as you made your insert in the last step. I cut it on my Silhouette using the preset chipboard settings. Cut settings for Cricut are listed in the package.
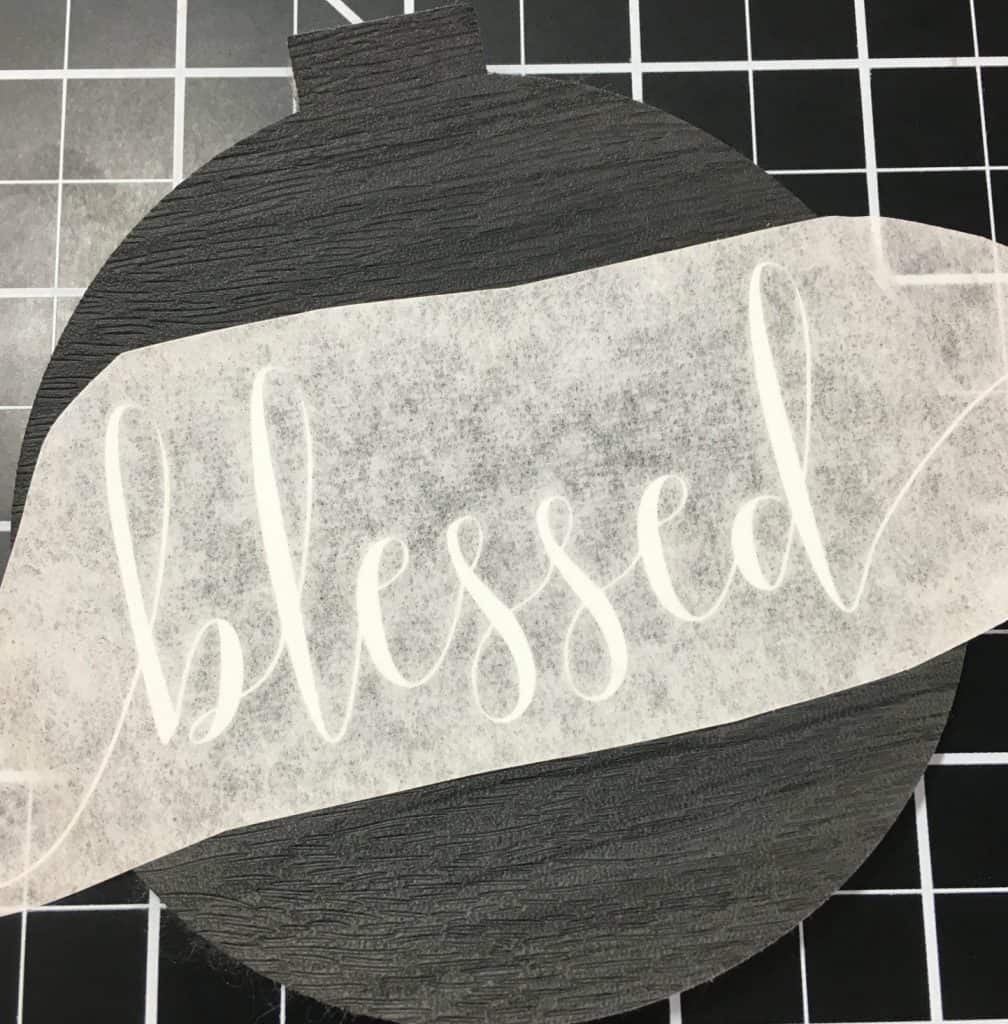
    4. Place your vinyl design onto the faux material using transfer tape. Tutorial: Wood Grain Christmas Ornaments with Silhouette Cameo or Cricut by cuttingforbusiness.com
      Tutorial: Wood Grain Christmas Ornaments with Silhouette Cameo or Cricut by cuttingforbusiness.com
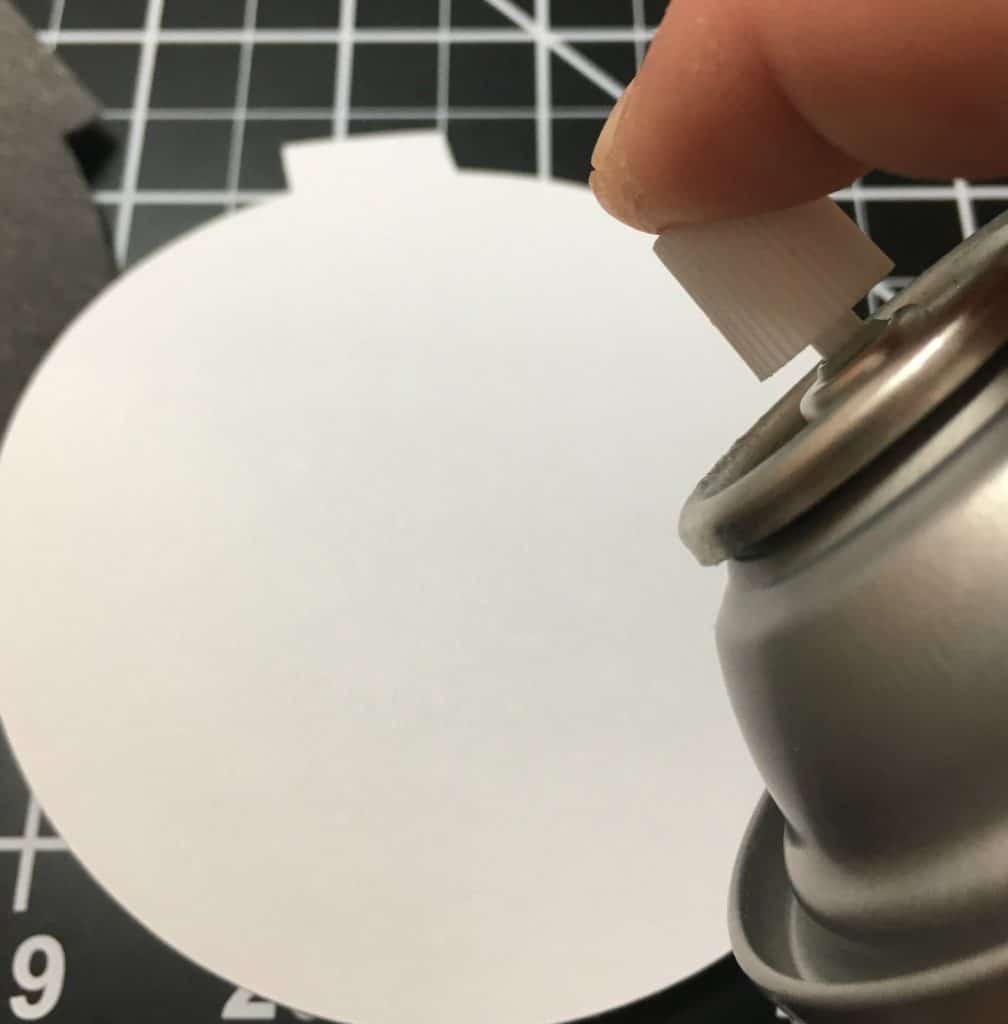
    5. Use glue or spray adhesive to attach your faux material to the cardstock. The faux material is a little floppy, so you’ll need to reinforce it. Allow a few minutes for it to set before moving on.Tutorial: Wood Grain Christmas Ornaments with Silhouette Cameo or Cricut by cuttingforbusiness.com
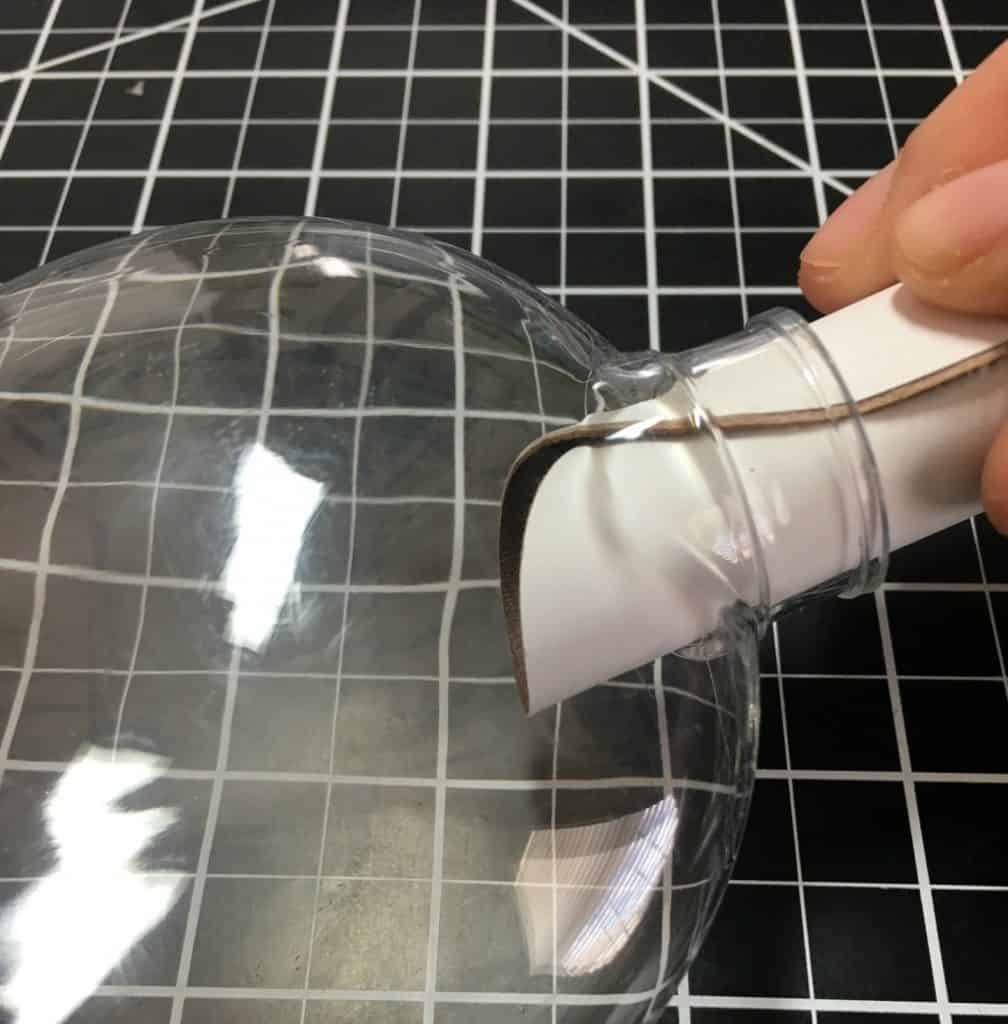
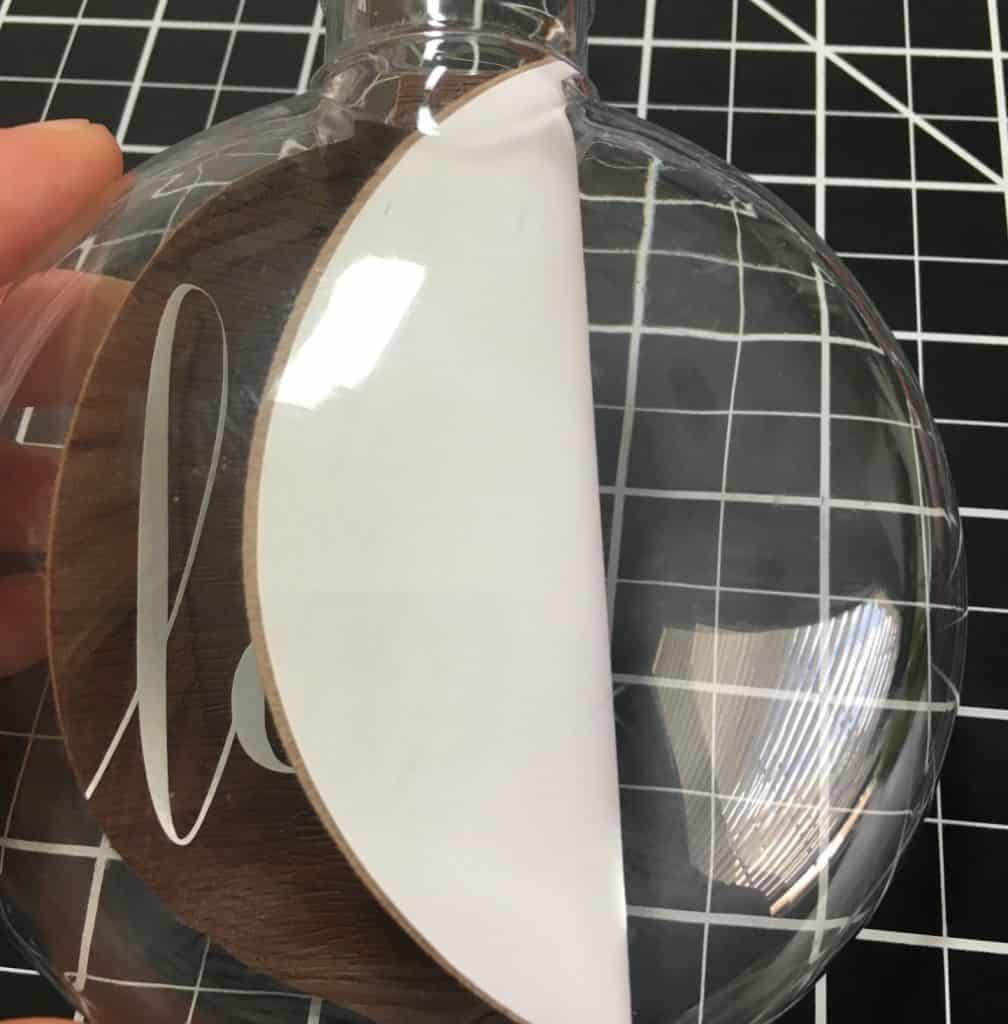
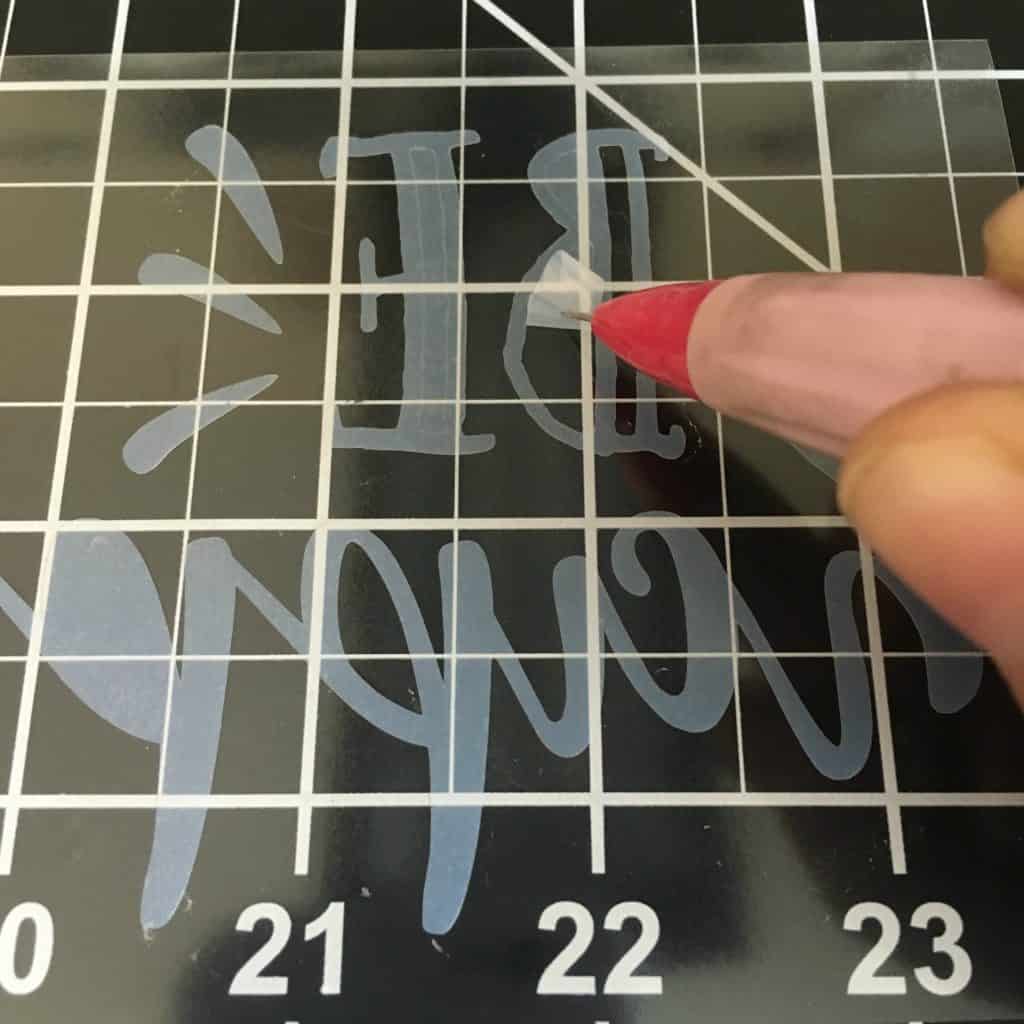
    6. Roll the cardstock and faux material and place it inside your blank ornament. You may need to use the end of a pencil to help it unroll. Tutorial: Wood Grain Christmas Ornaments with Silhouette Cameo or Cricut by cuttingforbusiness.com
      Tutorial: Wood Grain Christmas Ornaments with Silhouette Cameo or Cricut by cuttingforbusiness.com
    7. That’s it! Place the ornament top back on and finish with a ribbon for hanging. See both my finished Christmas ornaments in the photo below.

    Did you like this tutorial? Save it to Pinterest:

    Tutorial: Wood Grain Christmas Ornaments with Silhouette Cameo or Cricut by cuttingforbusiness.com

  • Foil on Apparel: Tutorial – Siser Adhesive & Crown Leaf Foil

    There’s no argument that foil and metallics are trendy right now! One aspect of owning your own Silhouette or Cricut based business is choosing what products are best for you and for your customers. Today and tomorrow, I’ll show you two different products to add foil (or the foil look) to your Silhouette or Cricut small business.

    First, let’s look at one of Siser’s newer products – adhesive heat transfer material.

    Here’s how it works:

    1. Once you’ve created your design, mirror it and cut out the adhesive heat transfer material on your Silhouette or Cricut. You’ll then weed it as you would with any other heat transfer vinyl product. I found that it weeds easily. Foil on Apparel: Tutorial - Siser Easyweed & Crown Leaf Foil by cuttingforbusiness.com
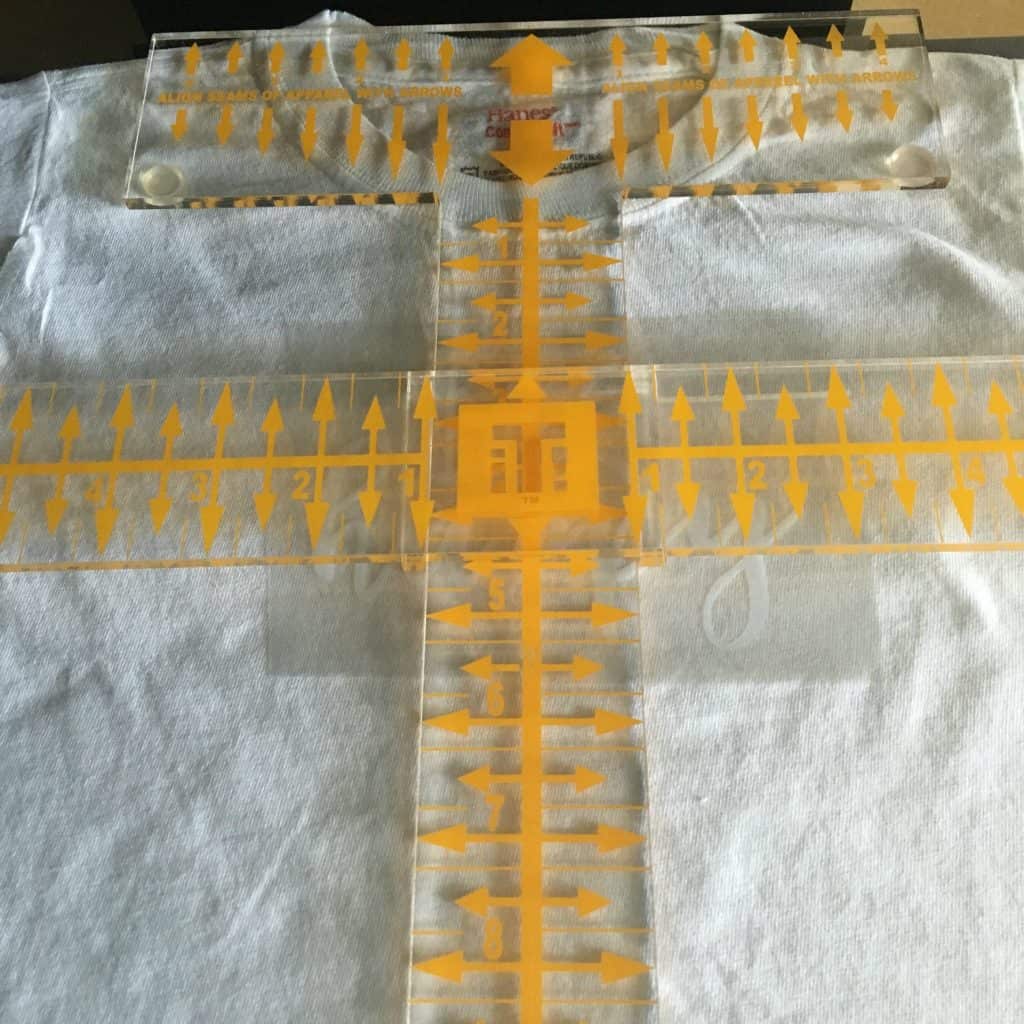
    2. Line up the adhesive vinyl and press it onto your apparel with your heat press. I used medium pressure, and pressed for about 20 seconds at 305 degrees. (Of course, I used a Tee Square It to align everything!) Foil on Apparel: Tutorial - Siser Easyweed & Crown Leaf Foil by cuttingforbusiness.com
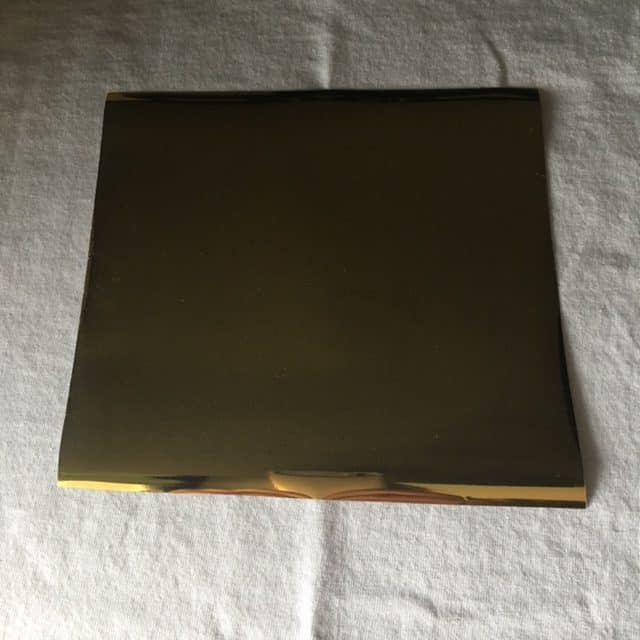
    3. Now, you’ll take your foil (in this tutorial I used Crown Leaf Foil I purchased here) on top of the Siser Adhesive. You’ll place it foil up and press with medium pressure for 15 seconds at 305 degrees on your heat press. Foil on Apparel: Tutorial - Siser Easyweed & Crown Leaf Foil by cuttingforbusiness.com
    4. Last, peel the foil off once it is cooled. Here’s the finished product shown below.
      Foil on Apparel: Tutorial - Siser Easyweed & Crown Leaf Foil by cuttingforbusiness.com

    Easy, right? Continue on to the next post where I show you another way to achieve the foil look with your Silhouette or Cricut. Then, you can make an informed decision about which product is best for you and your customers.

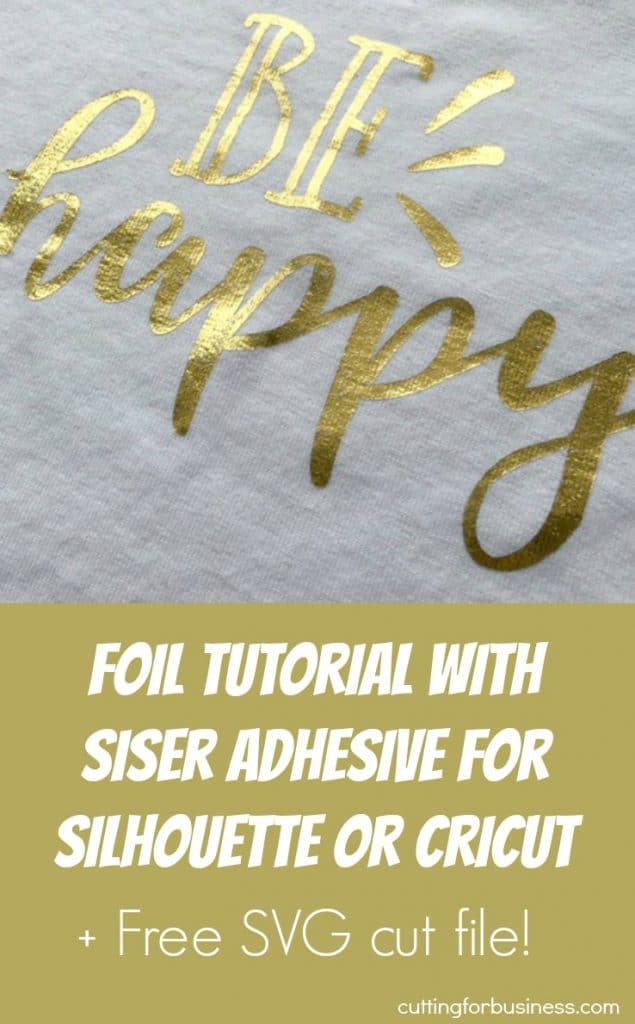
    Before you go, if you’d like the Be Happy file above – download it here. Feel free to use it for commercial use, no credit to me required. Then, share this post on Pinterest:

    Foil on Apparel for Silhouette Cameo or Cricut Crafters: Tutorial - Siser Easyweed & Crown Leaf Foil by cuttingforbusiness.com