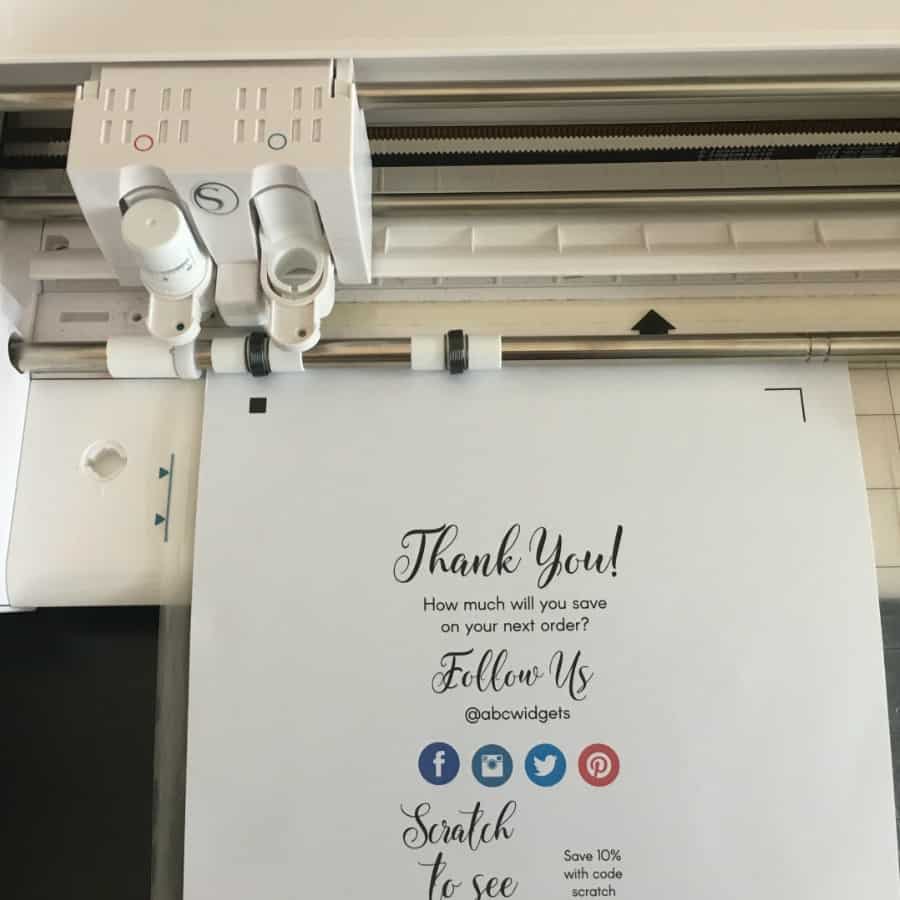
Category: Project Tutorials

  • Painted Rocks – A Good Craft Show Impulse Product

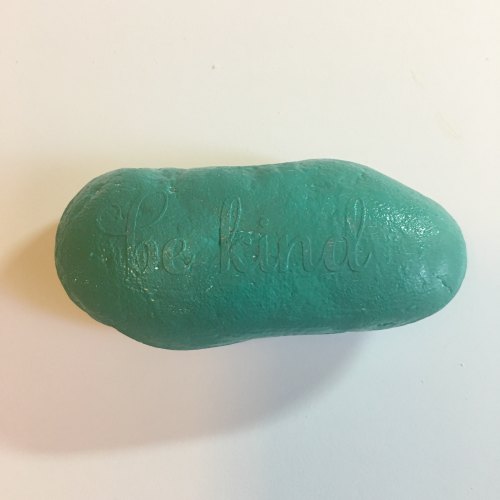
    Unless you’ve been living under a rock, you know that painted rocks are trending right now. (I love puns!) If you are behind on trends, I’m happy to catch you up. People paint rocks, hide them, and others find them. Once a rock is found, you can rehide it or keep it. If you are interested in doing this in your community, simply search for local painted rocks groups on Facebook. But today, let’s talk about selling painted rocks.

    Now, you are not likely to make millions off painted rocks.  However, a basket of painted rocks makes for great impulse items at your next craft show. If you aren’t a great painter, use your Cricut or Silhouette to quickly make painted rocks.

    Tutorial to Create Painted Rocks

    1. Get a bag of rocks. I found a huge bag of river rocks at Home Depot. It was about $12 for 40 pounds. There will be similar products at any home improvement store. You’ll want to be sure to rinse your rocks well before painting on them. Rocks can be any size or shape.
    2. Paint your entire rock a base color. I used matte acrylic paint, but any acrylic paint works as well. Allow your rock to dry. Painted Rocks - A Good Craft Show Impulse Product for Silhouette Cameo or Portrait or Cricut Explore Small Business Owners - by cuttingforbusiness.com
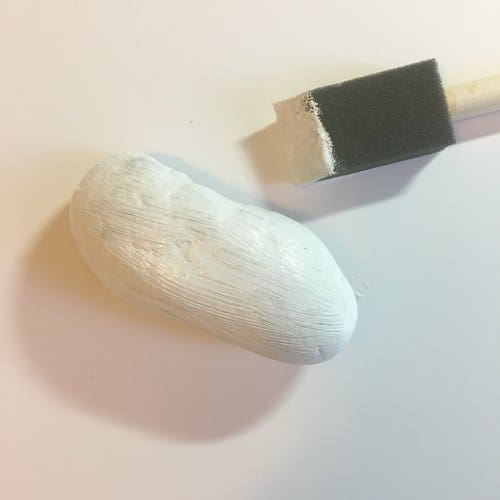
    3. Using adhesive vinyl, cut a stencil, weed it, and use transfer paper to place it on your rock. Painted Rocks - A Good Craft Show Impulse Product for Silhouette Cameo or Portrait or Cricut Explore Small Business Owners - by cuttingforbusiness.com
    4. Remove your transfer paper and be sure to burnish your vinyl well (really well!)
      Painted Rocks - A Good Craft Show Impulse Product for Silhouette Cameo or Portrait or Cricut Explore Small Business Owners - by cuttingforbusiness.com
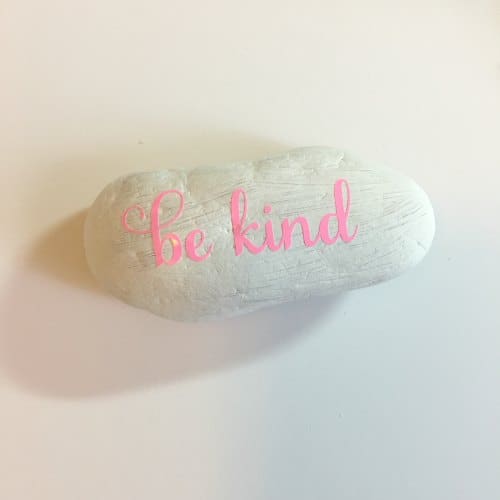
    5. Paint over the vinyl and the entire rock.Painted Rocks - A Good Craft Show Impulse Product for Silhouette Cameo or Portrait or Cricut Explore Small Business Owners - by cuttingforbusiness.com
    6. Using your favorite weeding tool, remove the vinyl and allow the paint to dry. Painted Rocks - A Good Craft Show Impulse Product for Silhouette Cameo or Portrait or Cricut Explore Small Business Owners - by cuttingforbusiness.com
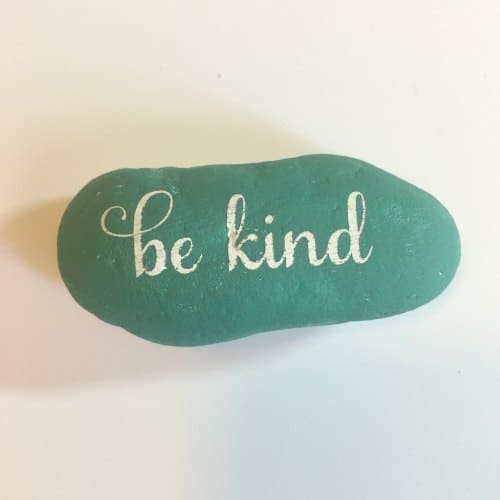
    Painted Rock Pricing

    I’d suggest pricing painted rocks between $1 and $3. Your cost to make each one should be pennies and it should take you less than 5 minutes per rock (not counting drying time).

    Care to share? I’d love for your to share this post on Pinterest!
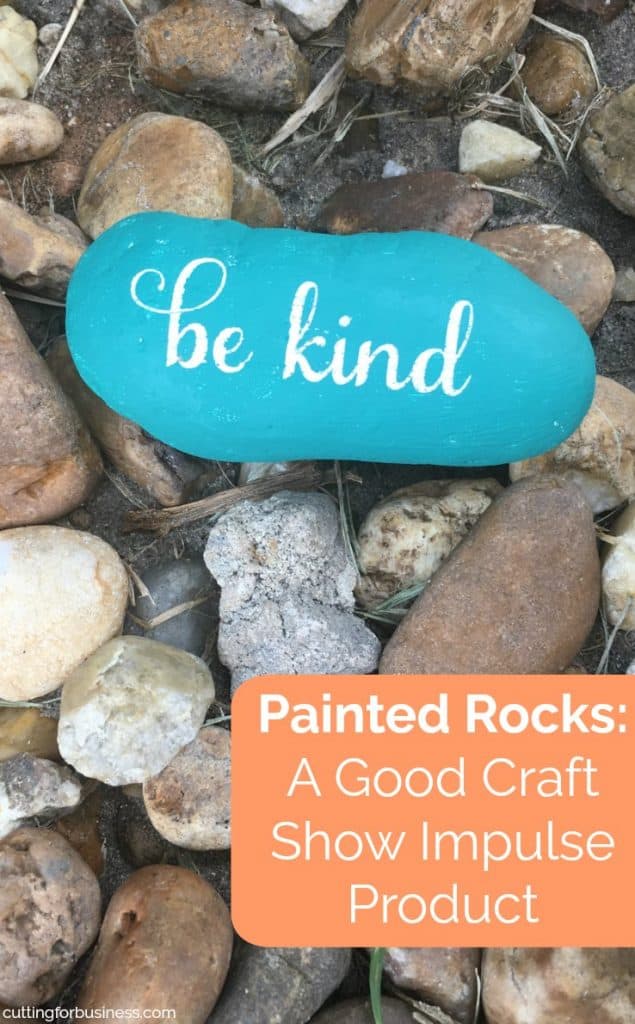
    Painted Rocks - A Good Craft Show Impulse Product for Silhouette Cameo or Portrait or Cricut Explore Small Business Owners - by cuttingforbusiness.com

  • 3 Things I Learned about Cutting Leather with Cricut Maker

    If you follow me over on Instagram, you’ll know that I spent the majority of last week learning the ins and outs of Cricut’s newest machine – the Cricut Maker.

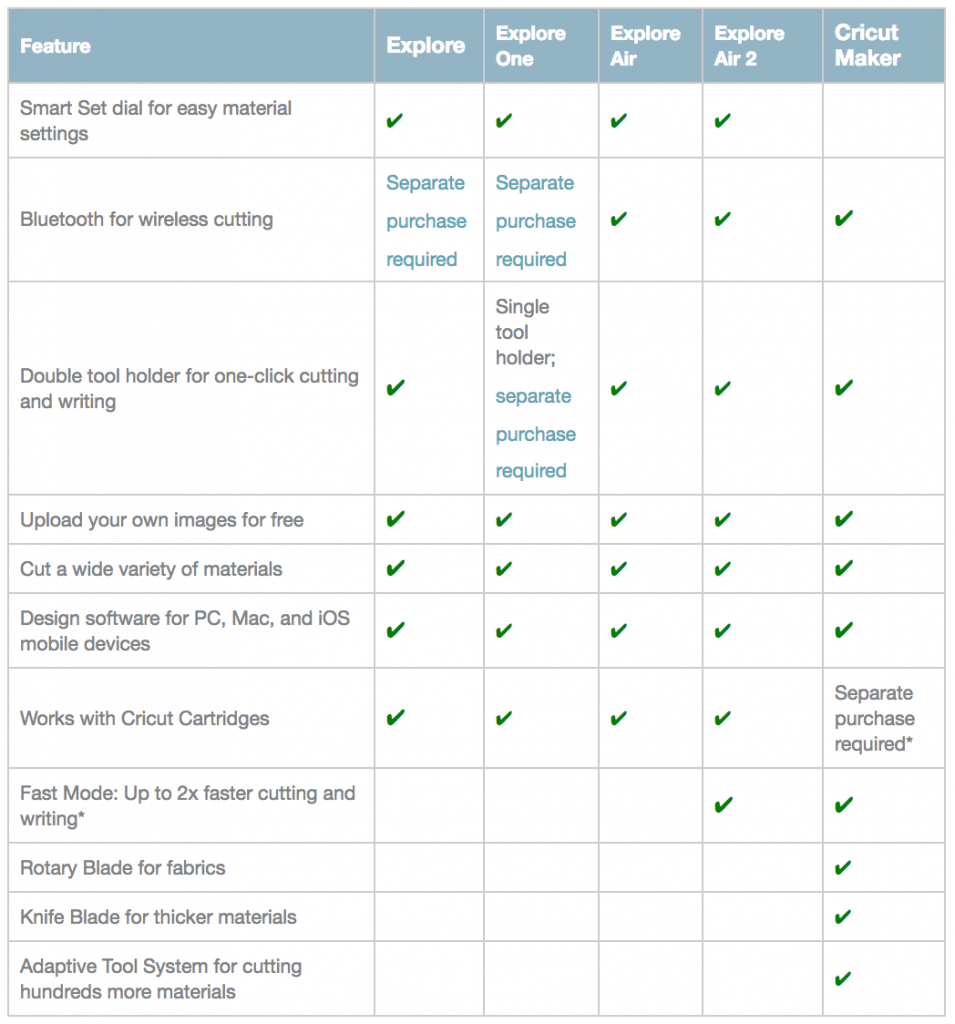
    What is different about the Cricut Maker from other Cricut machines?

    1. Greater cutting force. The cutting force on a Cricut Maker is 4 kilograms of force – which is about 10 times more than a Cricut Explore. (Both the Silhouette Cameo 3 and Silhouette Curio have a cutting force of 210 grams – significantly less than the Cricut Maker.)
    2. Adaptive Tools. Cricut has stated that additional tools will be released for Cricut’s Maker. This would make it an “all-in-one” tool with no need to upgrade.
    3. Knife Tool. This adaptive tool cuts through thicker materials, but is not being released until Winter, 2017.
    4. Rotary Tool. One of the first in the line of adaptive tools is the rotary blade. This tool functions the same as a handheld rotary tool and allows you to cut fabrics and heavy materials like leather.
    5. Access to Sewing Patterns. With the rotary tool, you can now cut fabric without any type of backing or preparation. Cricut has teamed up with several pattern makers (including Simplicity) to bring patterns to Design Space.
    6. Dial Removed. The dial found on the top to set materials has been removed.

    *These are the highlights of the differences. For a full list, see Cricut’s chart. Image credit: cricut.com.

    3 Things I Learned about Cutting Leather with Cricut Maker - Explore - Air - by cuttingforbusiness.com

    Tips for Cutting Leather with Cricut Maker

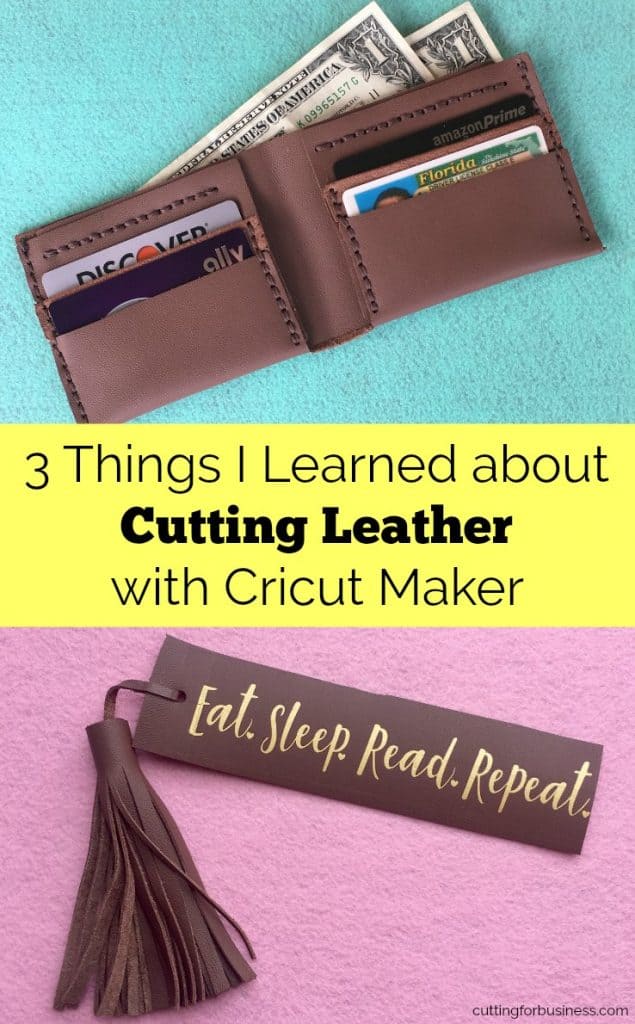
    Last week, I made two projects: a leather wallet and a bookmark. Here’s my tips to cutting leather with your Cricut Maker:

    • Make sure your material is stuck to the mat well – very well! Once you put your leather onto your mat, use a brayer tool or vinyl squeegee to make sure it is stuck. If the material bunches it will jam your machine – ask me why I know!
    • Cut the leather with the rough (inside) side up. This will prevent the rollers from marring your leather.
    • Clean the mat frequently. Leather leaves behind little bits and pieces. I cleaned my mat between each cut to ensure that the leather could come into contact with the adhesive. I used water and a lint free tea towel.

    Resources for the Wallet and the Bookmark

    Want to make your own leather wallet or bookmark? Here’s what you’ll need:

    • Wallet: I followed these instructions and patterns from the team at Bison Made/Ezra Arthur. I used 2 square feet of this tanned leather and this thread. I first used a marker to have the Cricut Maker draw a mark for each hole, then cut the pieces using the rotary tool, and sewed them together.
    • Bookmark: Made from the scraps of the wallet. I used a shape in Design Space to make the rectangle and Cricut’s Leather Tassel Keychain – although I made it smaller and left off the trim work. I used Craft Perfect heat transfer vinyl for the wording on the bookmark, because it adheres to leather.

    Loving this post? Save it to Pinterest:

    3 Things I Learned about Cutting Leather with Cricut Maker - Explore - Air - by cuttingforbusiness.com

  • Custom Button Tutorial with Silhouette Cameo and Button Maker

    Several years ago, I found myself attending a conference and needing an inexpensive product to trade with other crafters during a swap.

    If you aren’t familiar with craft swaps, it’s a fun activity where crafters create a project and trade their project with other crafters.

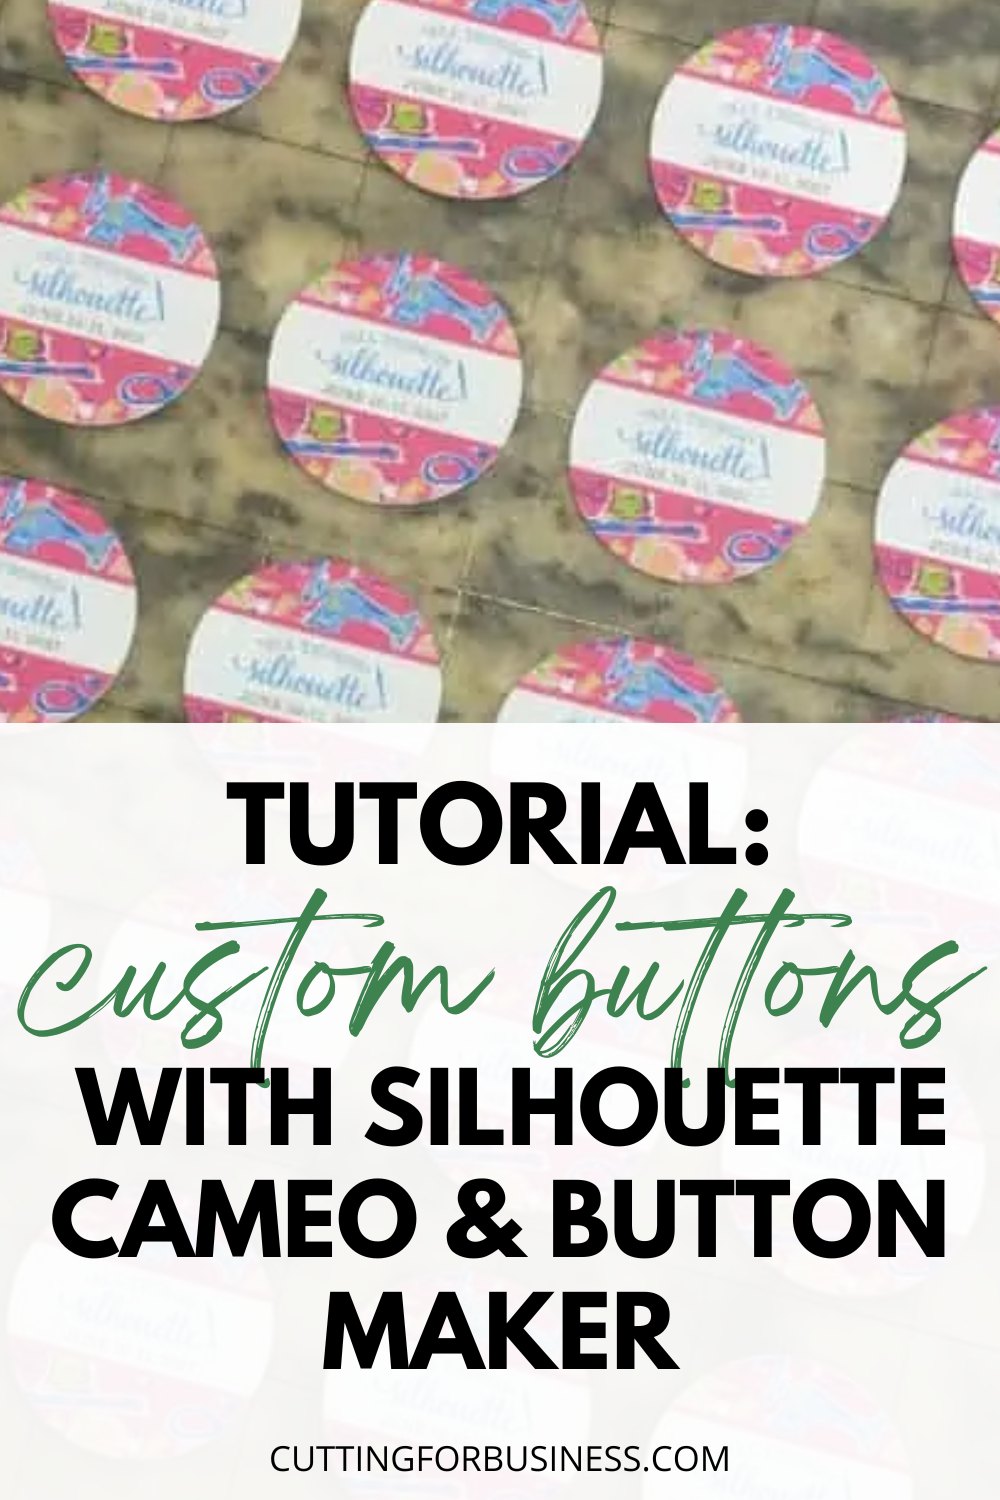
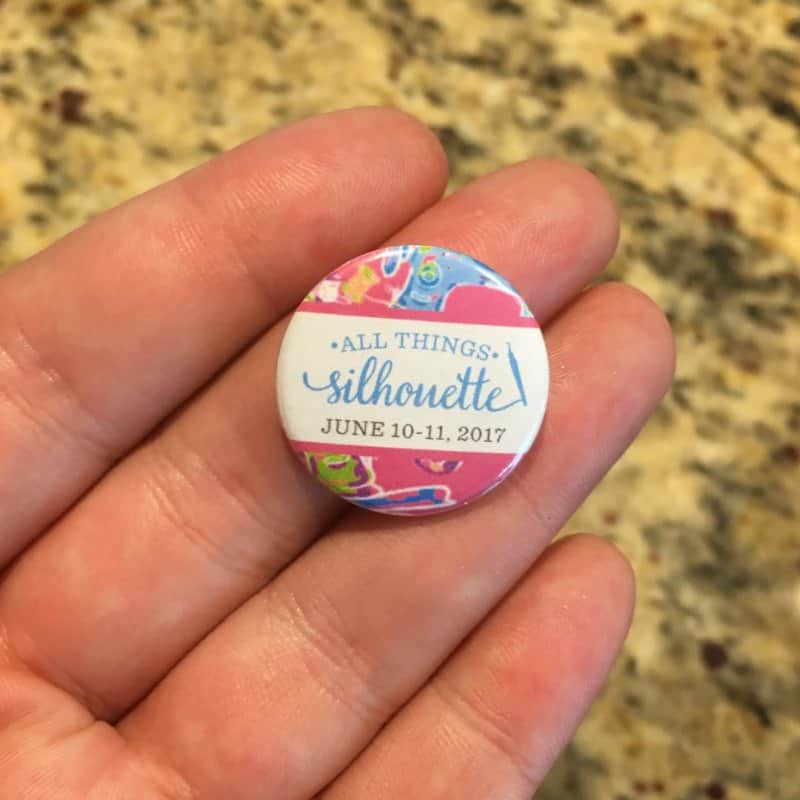
    I decided to create buttons to trade at the swap. They worked out great, and I’m happy to share a custom button tutorial today.

    Custom Button Tutorial with Silhouette Cameo and Button Maker - cuttingforbusiness.com.

    Why Did I Choose Buttons for the Swap?

    Of all the projects I could have done for the swap, why did I choose buttons? Well, buttons are fast to make and great for small businesses.

    I also chose buttons so I could give you ideas on how to use them in your own small business.

    4 Ways to Use Buttons in Your Craft Business

    • Great inexpensive impulse items at craft shows and fairs.
    • Perfect for kids. Imagine this – you have a basket of assorted buttons at your table at a craft show. A mother is trying to have a conversation with you as her child is at her side. She can hand him/her the basket of buttons to dig through and you can finish the conversation quietly. (She will likely buy one as well!)
    • Branded buttons make great giveaways to put in orders because they are cheap to make.
    • While not directly business related, buttons make for great fundraisers for kids. My eldest child recently had to make and sell goods at school – and buttons were our go to.

    Custom Button Tutorial

    Supplies Needed

    Custom Button Tutorial

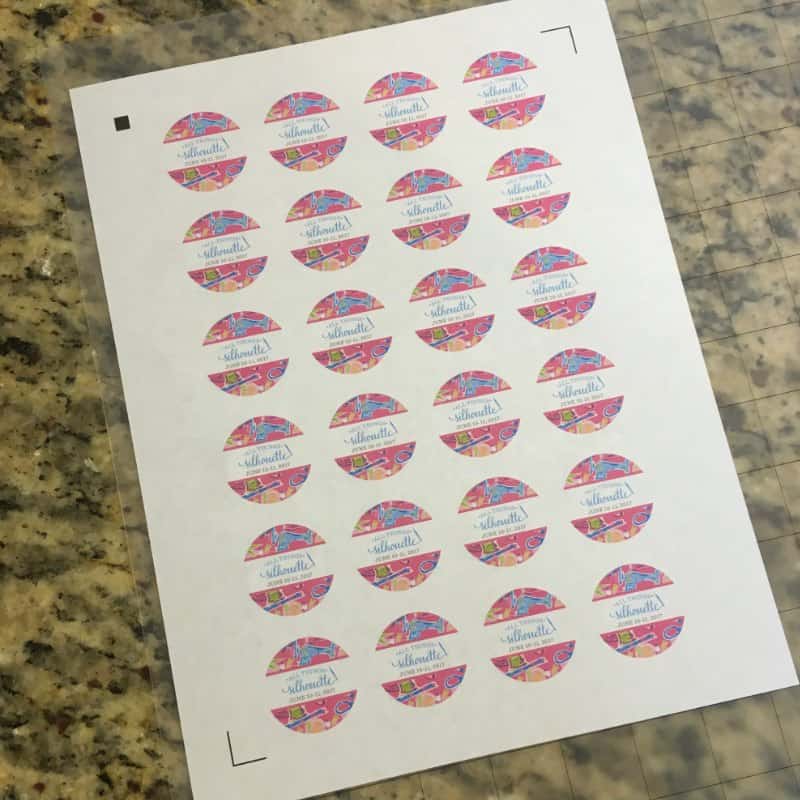
    1. Using Print and Cut (Silhouette) or Print then Cut (Cricut), create your button designs and print them on copy paper. I created the design using Silhouette Studio.
       Tutorial: Custom Buttons with Silhouette Cameo and Button Maker - by cuttingforbusiness.com
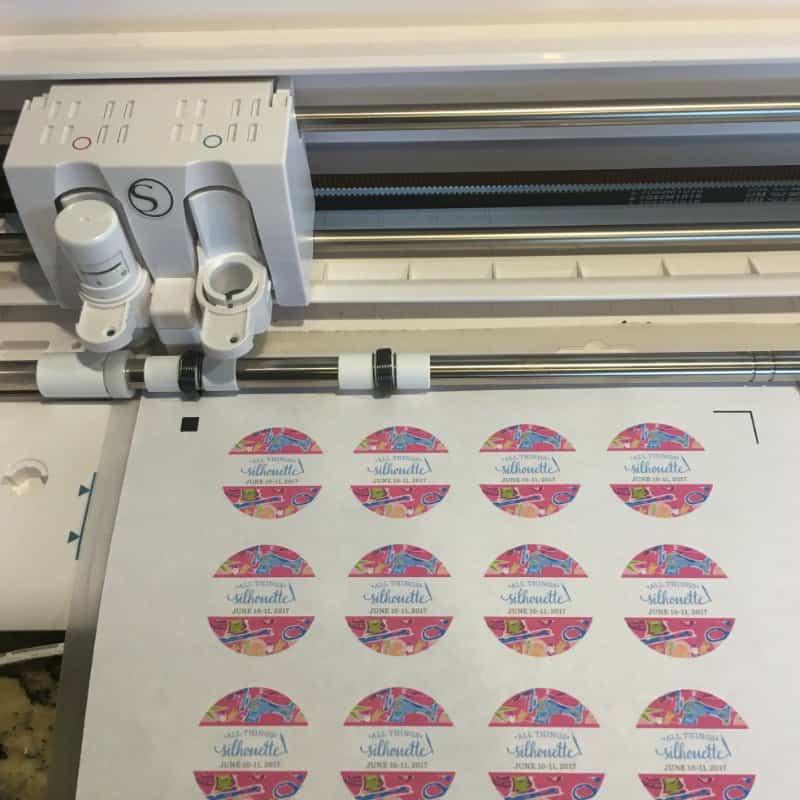
    2. Cut them with the Silhouette or Cricut.
       Tutorial: Custom Buttons with Silhouette Cameo and Button Maker - by cuttingforbusiness.com
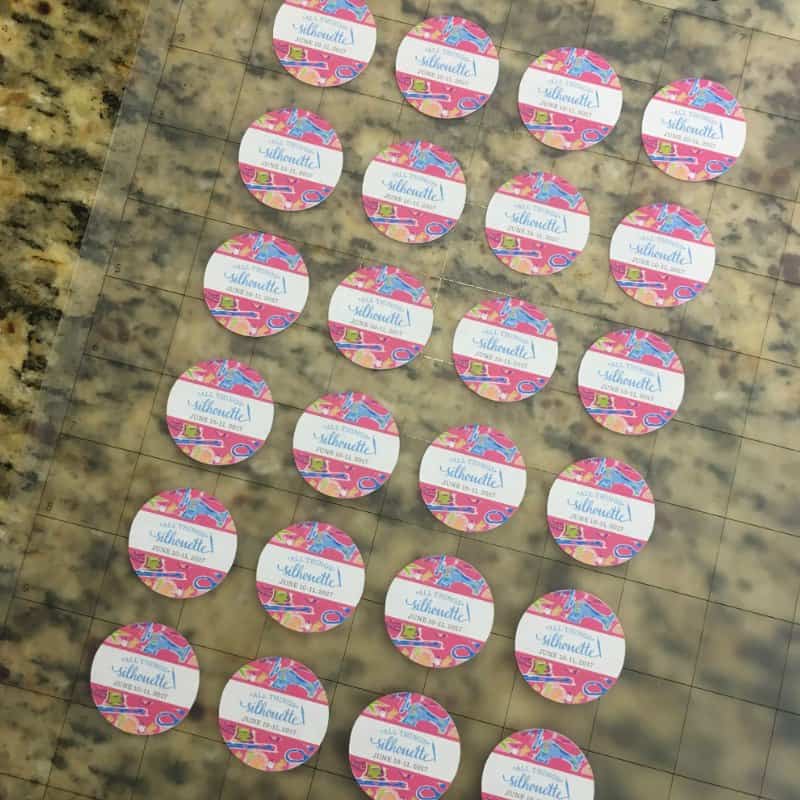
    3. Remove the excess paper.
       Tutorial: Custom Buttons with Silhouette Cameo and Button Maker - by cuttingforbusiness.com
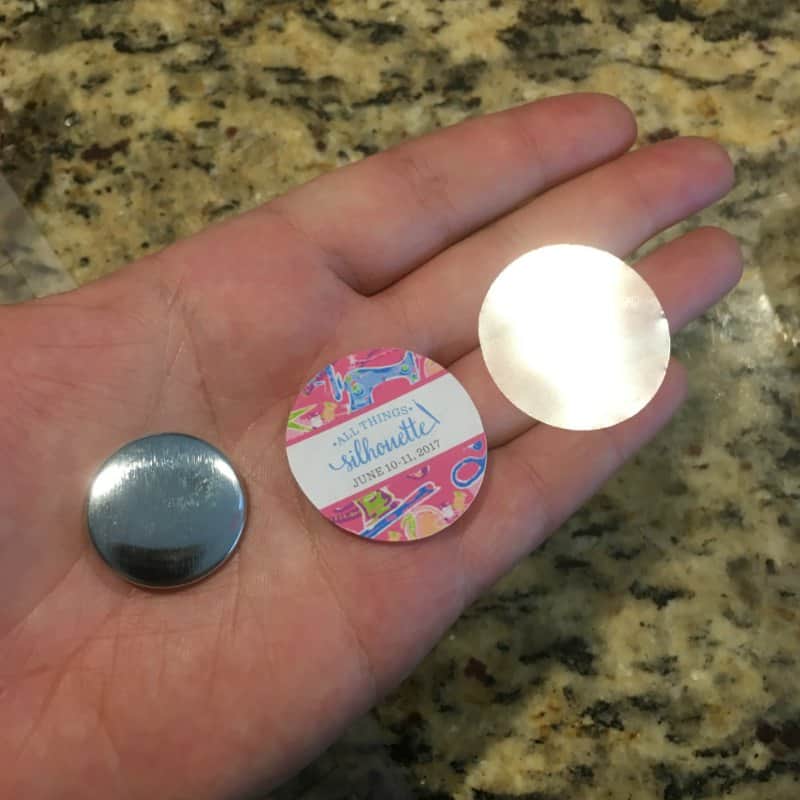
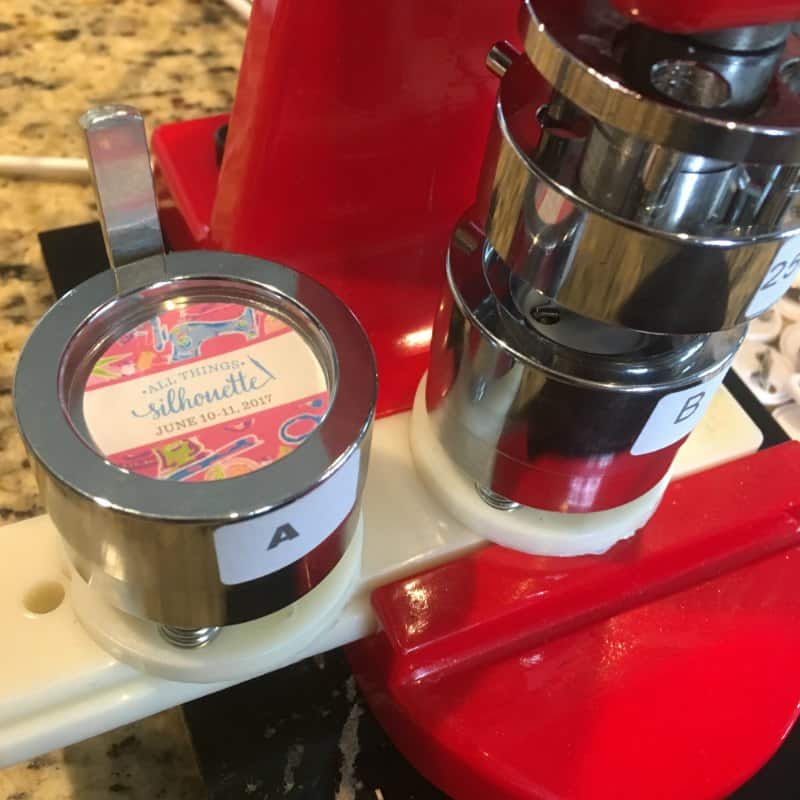
    4. Now, use the button maker to quickly put them together. My button maker has two steps. Quickly, here is how it works. Take the flat metal portion, the circle paper, and the mylar film and place them in that order into the first hole in the button maker. Then, pull the lever down. Tutorial: Custom Buttons with Silhouette Cameo and Button Maker - by cuttingforbusiness.com
      Tutorial: Custom Buttons with Silhouette Cameo and Button Maker - by cuttingforbusiness.com
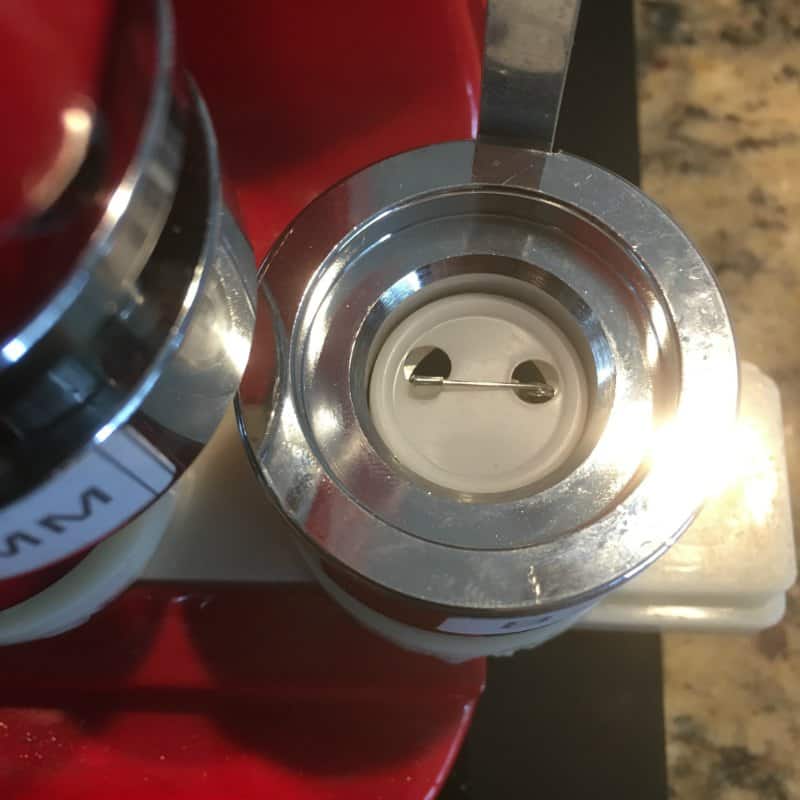
    5. Place the button back in the second space, and pull the lever down. Tutorial: Custom Buttons with Silhouette Cameo and Button Maker - by cuttingforbusiness.com
      Tutorial: Custom Buttons with Silhouette Cameo and Button Maker - by cuttingforbusiness.com

    In less than an hour, I cut and assembled 120 buttons.

    What if You Don’t Have a Silhouette or a Cricut?

    If you don’t have a Silhouette or a Cricut, you’ve got two options: 1) You can cut the circles for the buttons using scissors. 2) You can use a circular craft punch.

    Magnets Instead of Buttons

    For another project alternative, you could remove the pin from the backing and glue a magnet back instead.

    Tell me in the comments: Have you ever made buttons?

  • Tutorial: Stained Glass Look Tulip Window Cling Using Transparent Vinyl

    When Adele from Homesteader Chic asked about sharing a tutorial using window cling material, I couldn’t say yes fast enough! Adele and her daughter Sarah sell commercial use digital cut files featuring country-themed and farmhouse sign designs. Homesteader Chic is a mom-daughters-granddaughters business–each household in the family has at least one cutting machine, and several family members design cut files. Adele’s granddaughters (and grandsons!) are busy makers too! I’ll turn it over to Adele for the tutorial:

    When Sarah was young, our family lived in Germany, where hand-snipped paper crafts were enjoyed by all ages. We learned to make Fensterbilder, stained glass-like window hangings made with colored transparent paper. Three decades later and back in the US, Sarah applies the same principles to make beautiful designs for glass and clear plastic projects using transparent vinyl.

    Stained Glass Window Cling Tutorial

    Supplies:

    Steps:

    1. Download the design file and save to your computer. Open the file in your cutting machine design software. Select all and group (this is important so all pieces will nest well). With the design grouped, adjust size of design so the gray circle is the size you’d like the finished window cling to be. For more tips, see the layout guide included in your zip file.
    1. Ungroup design. Separate the design elements on your design screen.
    1. Cut the design elements from vinyl and weed. If you are new to cling vinyl or transparent vinyl, test cut to check settings. We use a slighter higher blade setting than we do for Oracal 651.
      • Large gray circle = clear cling vinyl solid circle
      • Outline piece = dark opaque vinyl (keep outlines)
      • Colored pieces = colored transparent vinyl (keep cutout shapes)

    Tutorial: Stained Glass Look Tulip Window Cling Using Transparent Vinyl - For Silhouette Cameo or Cricut Explore - by homesteaderchic.com for cuttingforbusiness.com

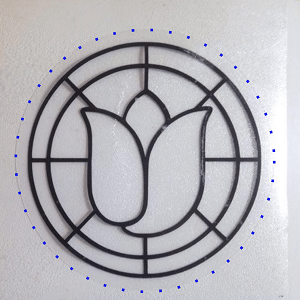
    1. Leave the clear cling vinyl circle on its backing and lay vinyl-side up on table. Press out any wrinkles or bubbles.
    1. Apply transfer tape to the outline piece.
    1. Prepare to apply outline vinyl carefully to the cling vinyl. Cling vinyl may stretch if the adhesive vinyl is removed, so we try to get it placed correctly the first time to avoid this.
    2. First lay the outline piece, with unsticky transfer tape side down, over the cling vinyl circle and center it to get an idea of the width of the cling vinyl margin. Lift the outline piece off.

    Tutorial: Stained Glass Look Tulip Window Cling Using Transparent Vinyl - For Silhouette Cameo or Cricut Explore - by homesteaderchic.com for cuttingforbusiness.com

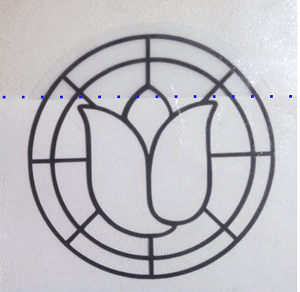
    1. Place the scrap backing sheet, shiny side up, over most of the cling vinyl, leaving an inch or two of the circle exposed at the top. Hold the top of the outline piece, adhesive side down, just above the top of the cling vinyl and center it, allowing for a cling vinyl margin. Gently lay the outline piece in place on the small exposed part of the cling vinyl circle and press to adhere.

    Tutorial: Stained Glass Look Tulip Window Cling Using Transparent Vinyl - For Silhouette Cameo or Cricut Explore - by homesteaderchic.com for cuttingforbusiness.com

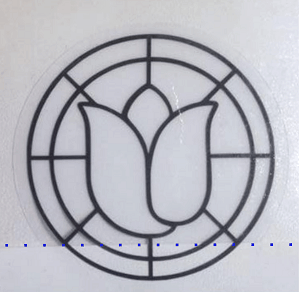
    1. Gradually pull the backing sheet down and smooth the outline piece farther downward until the entire outline is adhered to the cling vinyl.

    Tutorial: Stained Glass Look Tulip Window Cling Using Transparent Vinyl - For Silhouette Cameo or Cricut Explore - by homesteaderchic.com for cuttingforbusiness.com

    1. Remove transfer tape, again with a gentle touch. Instead of pulling the tape up, peel the tape backwards flat over itself, while holding the adhesive vinyl in place.

    Tutorial: Stained Glass Look Tulip Window Cling Using Transparent Vinyl - For Silhouette Cameo or Cricut Explore - by homesteaderchic.com for cuttingforbusiness.com

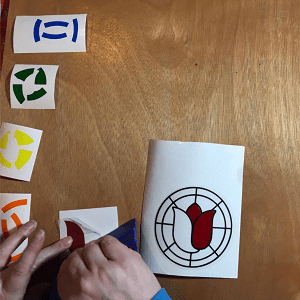
    1. Using small pieces of transfer tape, your fingers, or tweezers, add the colored pieces one at a time, fitting them into the outline piece like a puzzle. If you need to adjust pieces, remember to peel instead of pulling. Press to set in place.

    Tutorial: Stained Glass Look Tulip Window Cling Using Transparent Vinyl - For Silhouette Cameo or Cricut Explore - by homesteaderchic.com for cuttingforbusiness.com

    Tutorial: Stained Glass Look Tulip Window Cling Using Transparent Vinyl - For Silhouette Cameo or Cricut Explore - by homesteaderchic.com for cuttingforbusiness.com

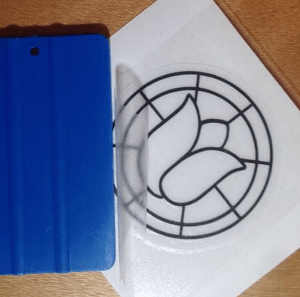
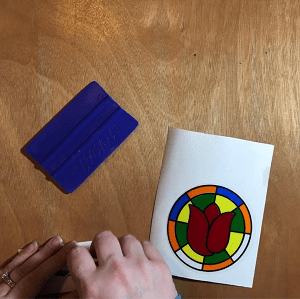
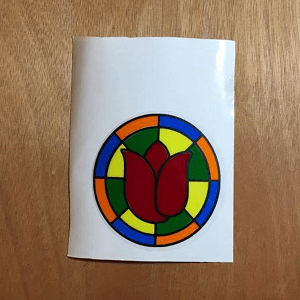
    1. Lay the vinyl backing sheet over the design and go over the design with a scraper or a brayer to secure all pieces. Voila! It’s finished!Tutorial: Stained Glass Look Tulip Window Cling Using Transparent Vinyl - For Silhouette Cameo or Cricut Explore - by homesteaderchic.com for cuttingforbusiness.com
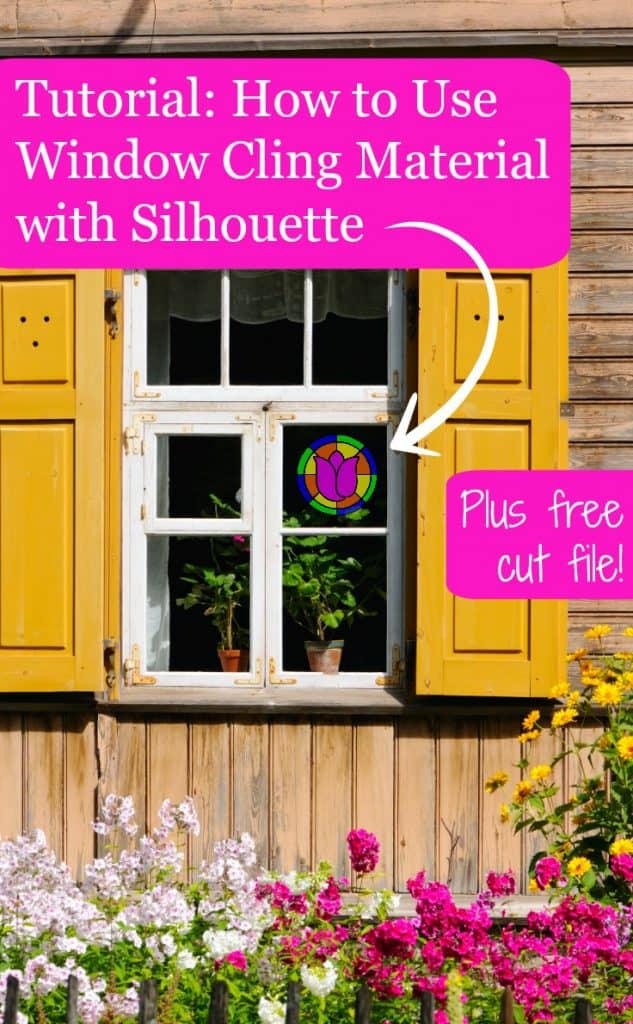
    1. Remove window cling from backing. Moisten cling vinyl side and attach to window or other surface. The cling vinyl will be on the window side, the colored vinyl towards you.

    View more stained glass cut files (plus a whole lot more!) at Homesteader Chic. Love this tutorial? Save it to Pinterest:

    Tutorial: Stained Glass Look Tulip Window Cling Using Transparent Vinyl - For Silhouette Cameo or Cricut Explore - by homesteaderchic.com for cuttingforbusiness.com

  • Tutorial: How to Etch Acrylic with your Silhouette Curio

    In the crafting small business world, I think that the Silhouette Curio is underutilized! To inspire you to try out a Silhouette Curio in your business  – I’ve invited Jamie from Craft Chameleon over to show us how to etch with the Curio. I’m turning it over to Jamie now:
    Up your game and etch your customer’s acrylic items for a value added product with your Silhouette
    Curio. This tutorial assumes you have a working knowledge of your curio machine. Let’s get started!

    Supplies Needed

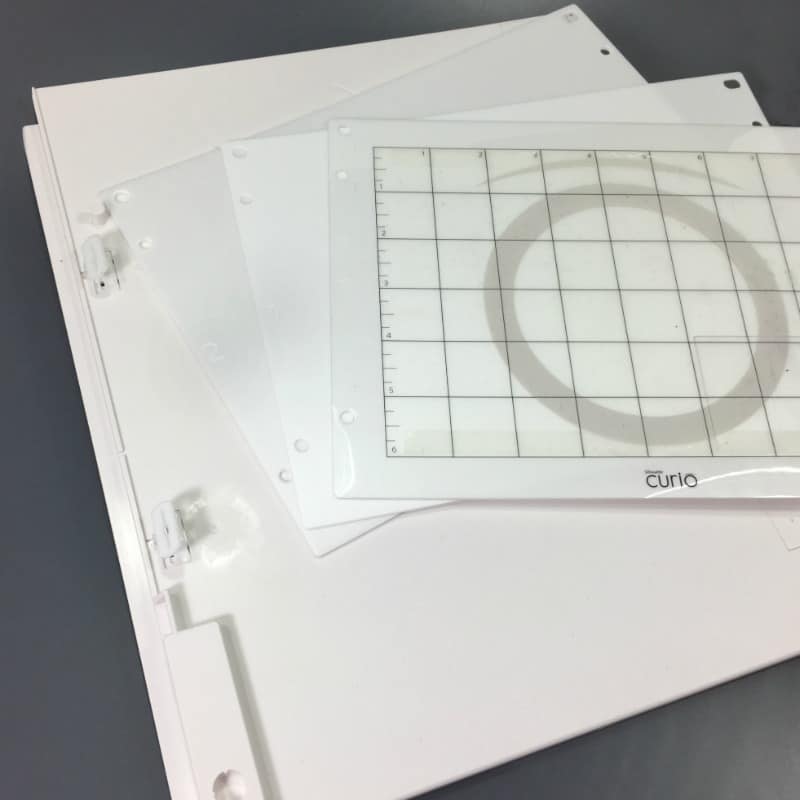
    Small platform and mats 2, 1 and top mat (1)
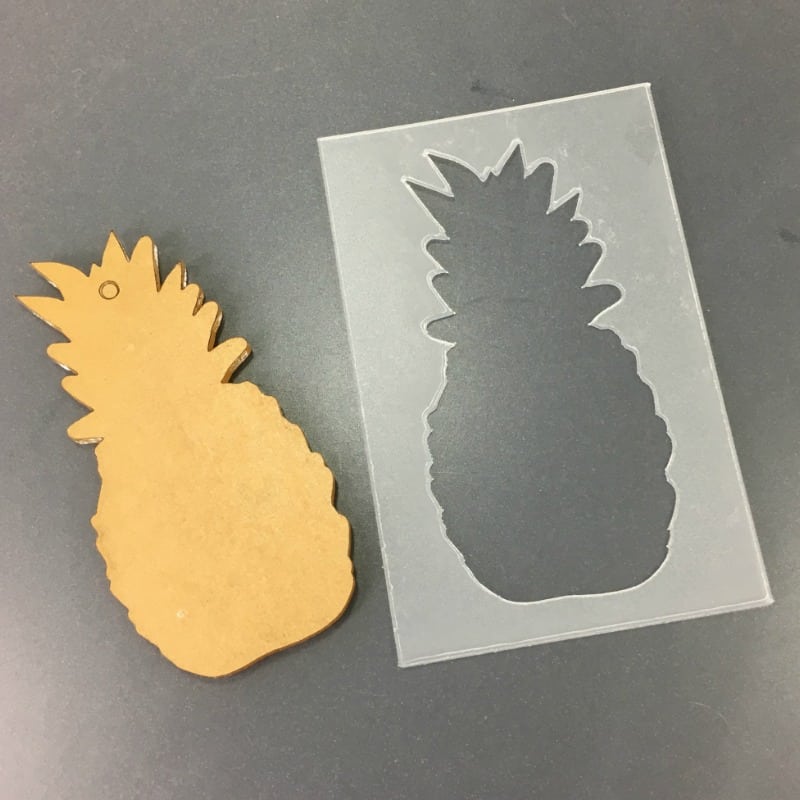
    Acrylic Shape
    Plastic or cardboard template
    Tutorial: Etch Acrylic with your Silhouette Curio - by cuttingforbusiness.com Tutorial: Etch Acrylic with your Silhouette Curio - by cuttingforbusiness.com Tutorial: Etch Acrylic with your Silhouette Curio - by cuttingforbusiness.com

    Tutorial: How to Etch Acrylic with a Silhouette Curio

    First set up your small platform with mats 2, 1 and the top cutting mat. This will give you a platform of 4.
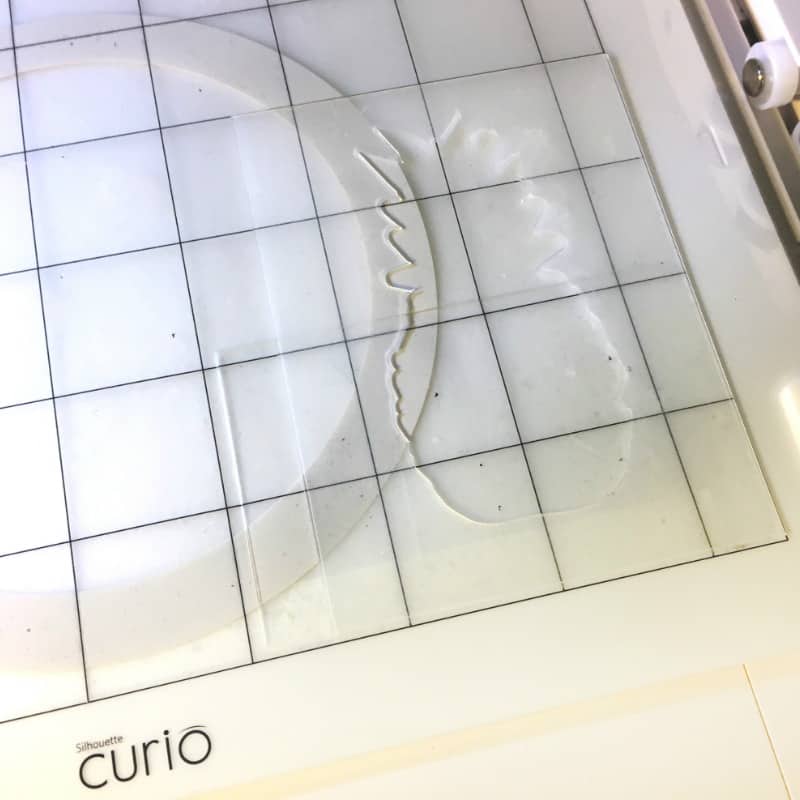
    Next take your acrylics template and determine where to put it on your mat. This needs to be a precise
    location. I used the lower right hand corner. Make sure your mat is very sticky. If the mat is not sticky
    your template and acrylic will move which will cause a failure in etching your acrylic. Press the template
    down firmly.
    Tutorial: Etch Acrylic with your Silhouette Curio - by cuttingforbusiness.com
    Remove the protective coverings on top and bottom of acrylics. If the bottom covering is paper it can be
    left on, your option.
    Tutorial: Etch Acrylic with your Silhouette Curio - by cuttingforbusiness.com
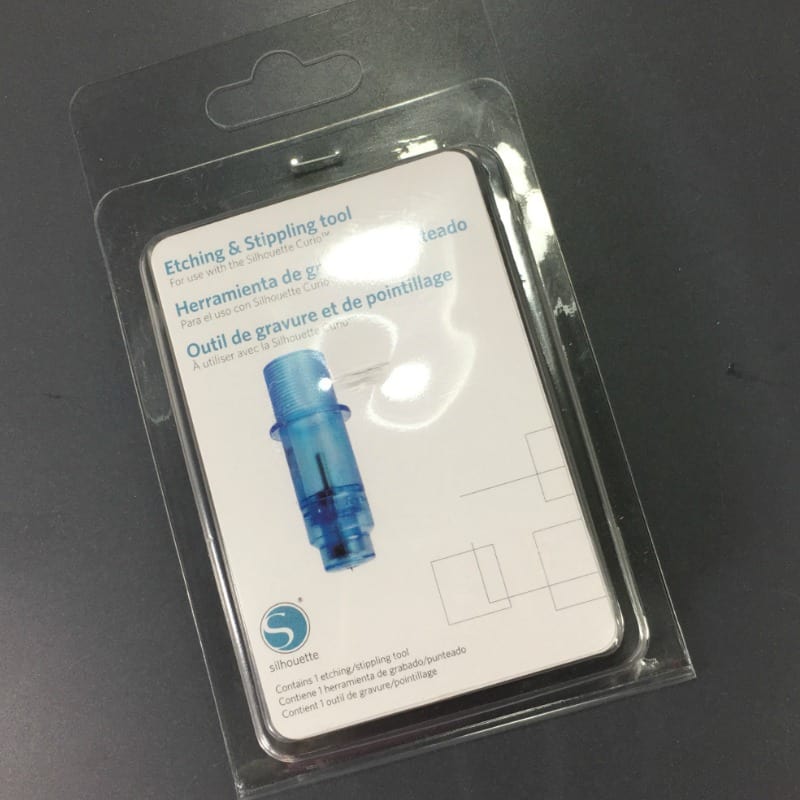
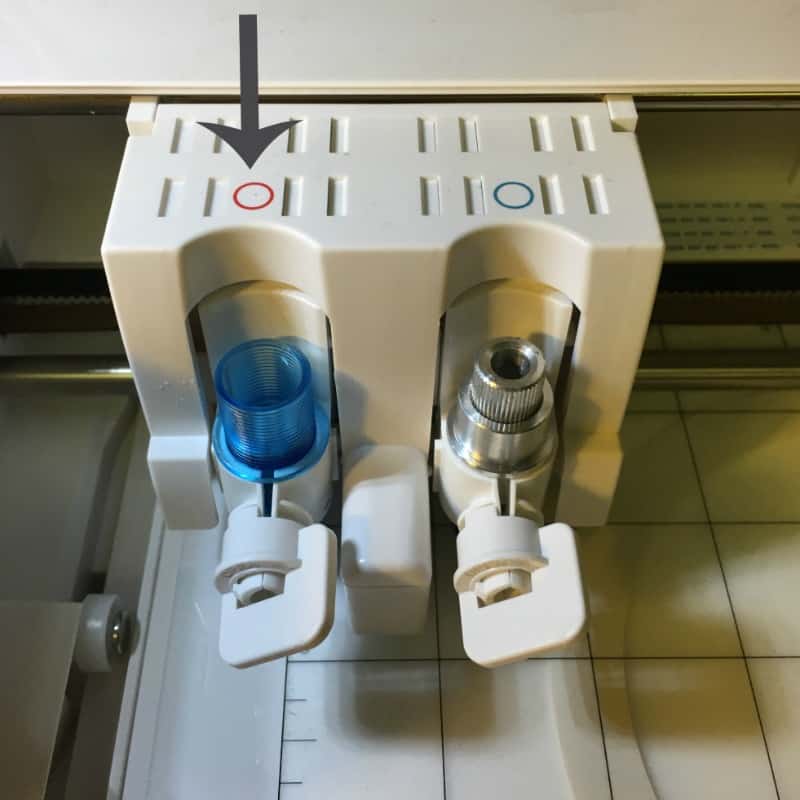
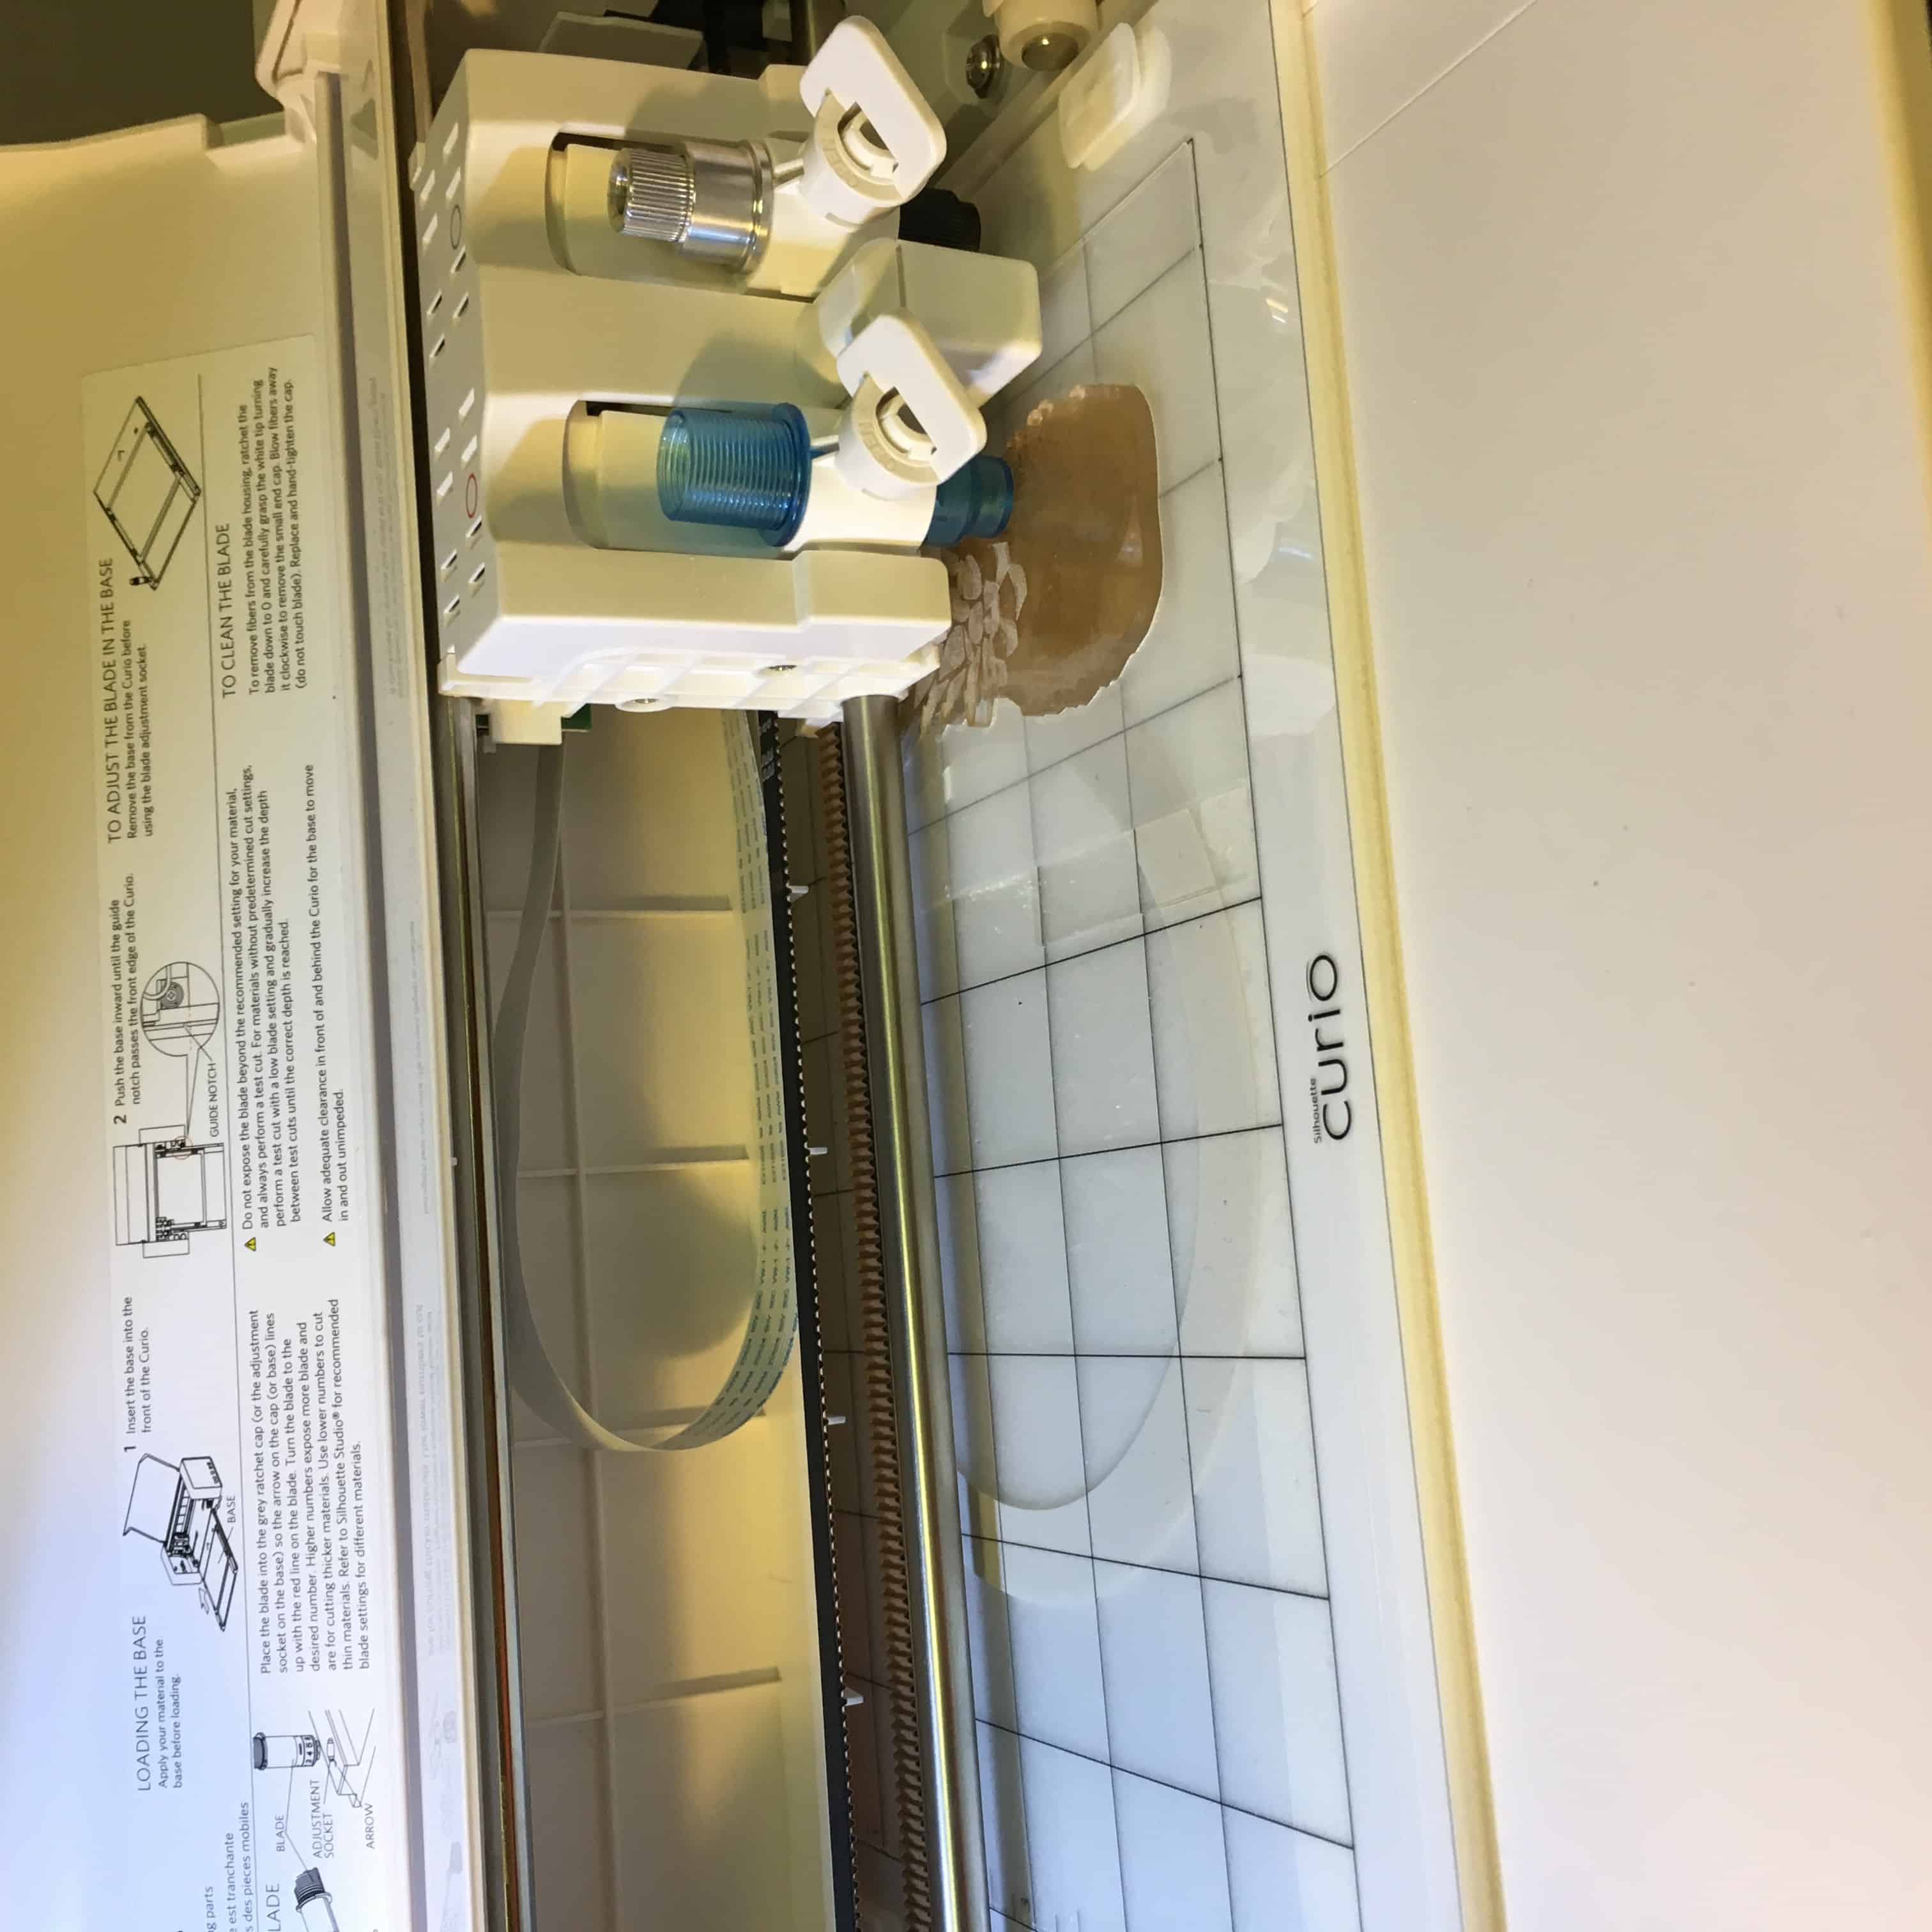
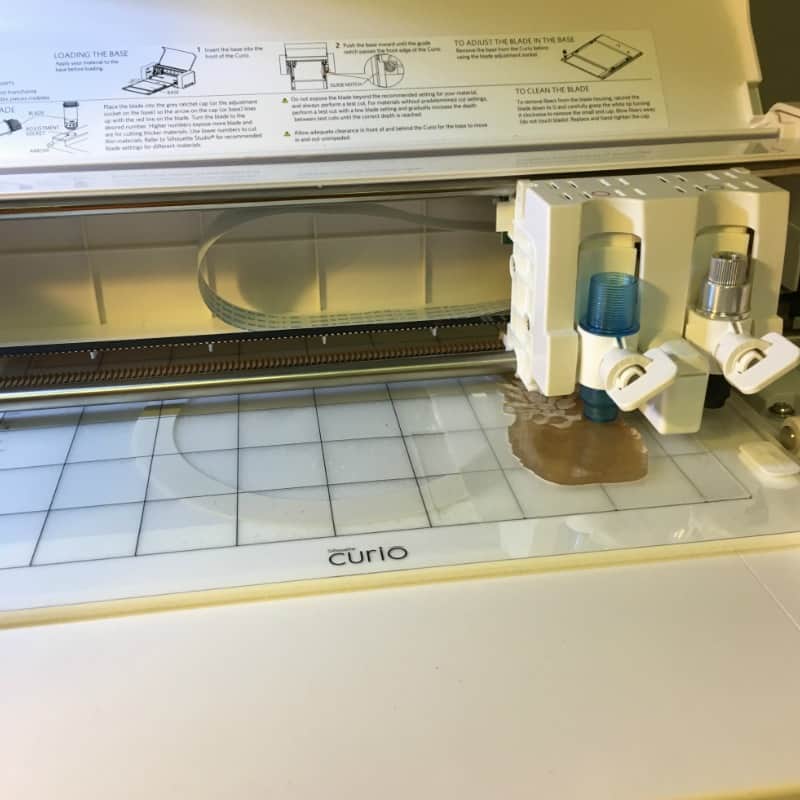
    Load the platform into the curio and add the etching tool into the first or red section of the cutting head.
    Tutorial: Etch Acrylic with your Silhouette Curio - by cuttingforbusiness.com
    Place your acrylic inside the template. Press firmly. Then open your file on the curio software. Tutorial: Etch Acrylic with your Silhouette Curio - by cuttingforbusiness.com
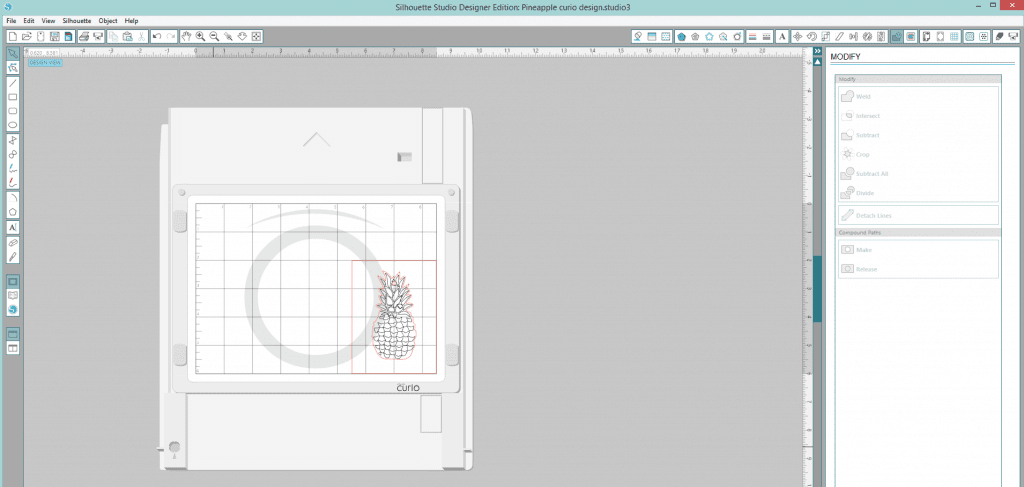
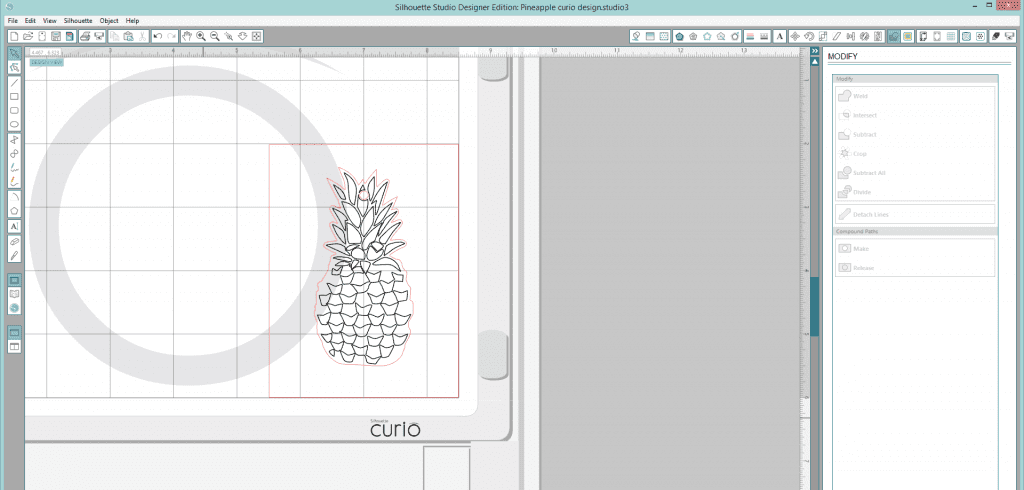
    Set up your template and acrylic cut file in your software to match the exact layout on the machine. Remember your rule is your friend in this step. Precision is key!
    Tutorial: Etch Acrylic with your Silhouette Curio - by cuttingforbusiness.com
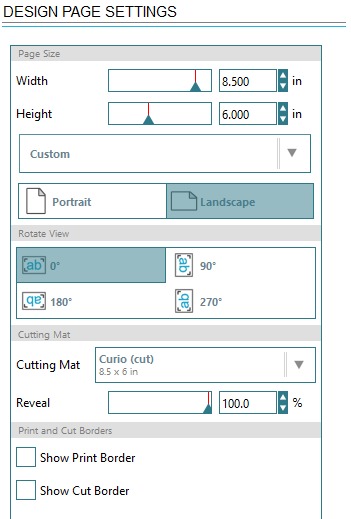
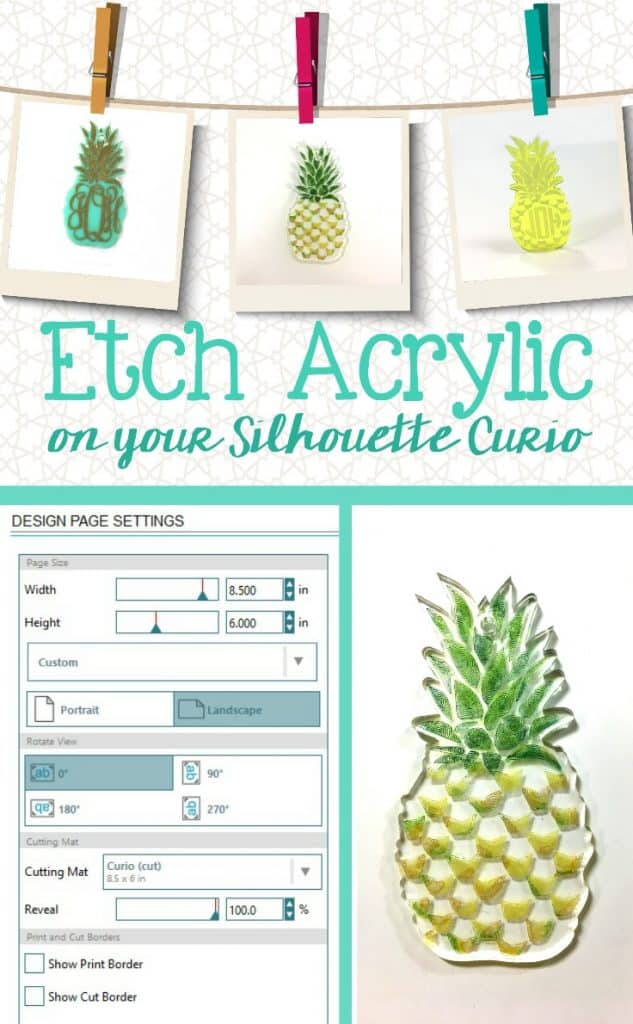
    Open the Design Page Settings tab. Using the settings shown in the photo below to set up your page. Tutorial: Etch Acrylic with your Silhouette Curio - by cuttingforbusiness.com
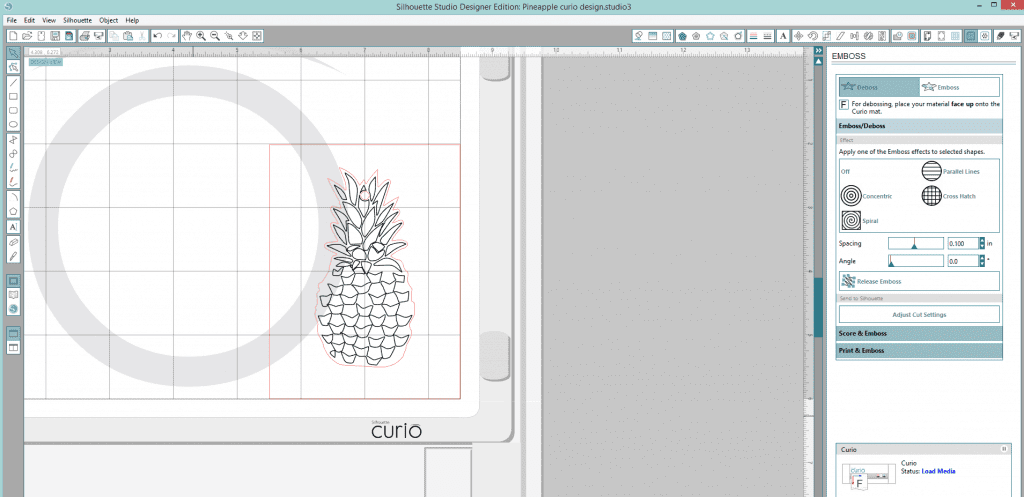
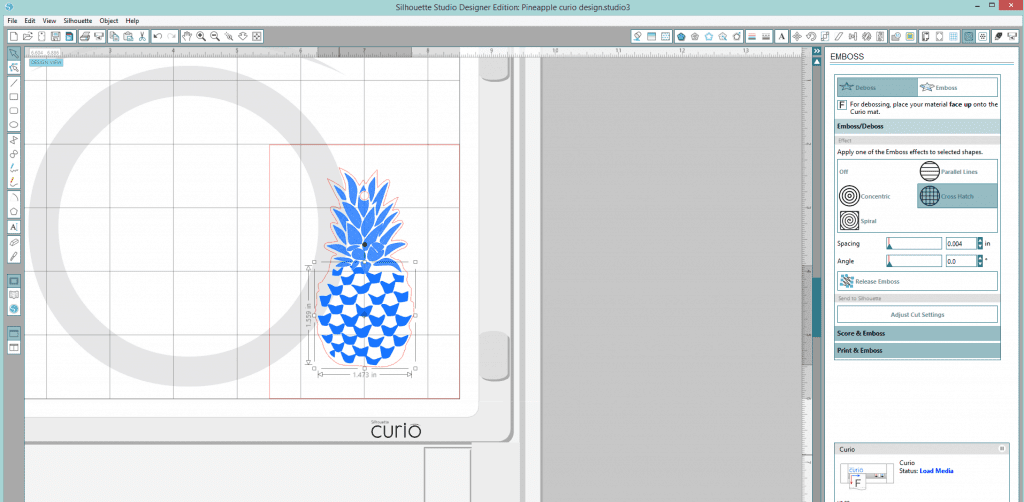
    Next open the Emboss/Deboss tab.
    Tutorial: Etch Acrylic with your Silhouette Curio - by cuttingforbusiness.com
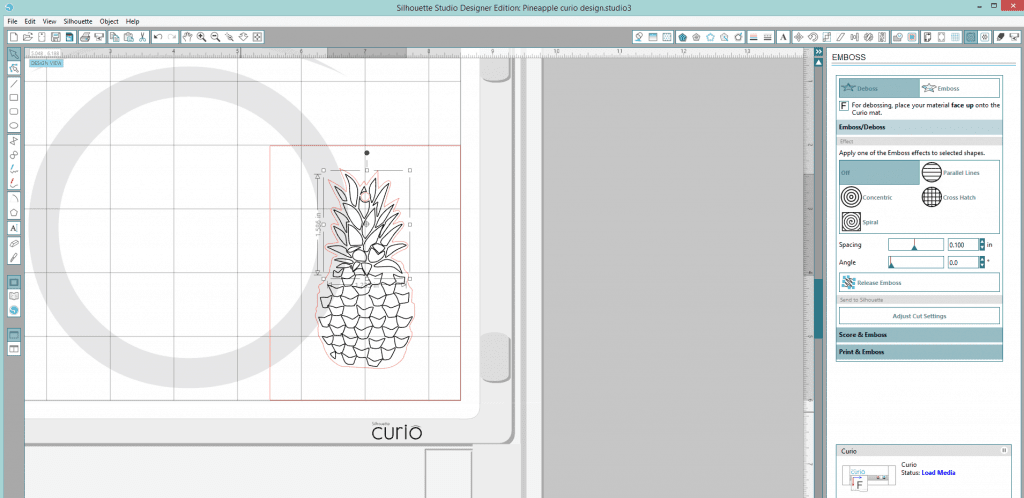
    Select the area to deboss or emboss. I use deboss as my setting.
    Tutorial: Etch Acrylic with your Silhouette Curio - by cuttingforbusiness.com
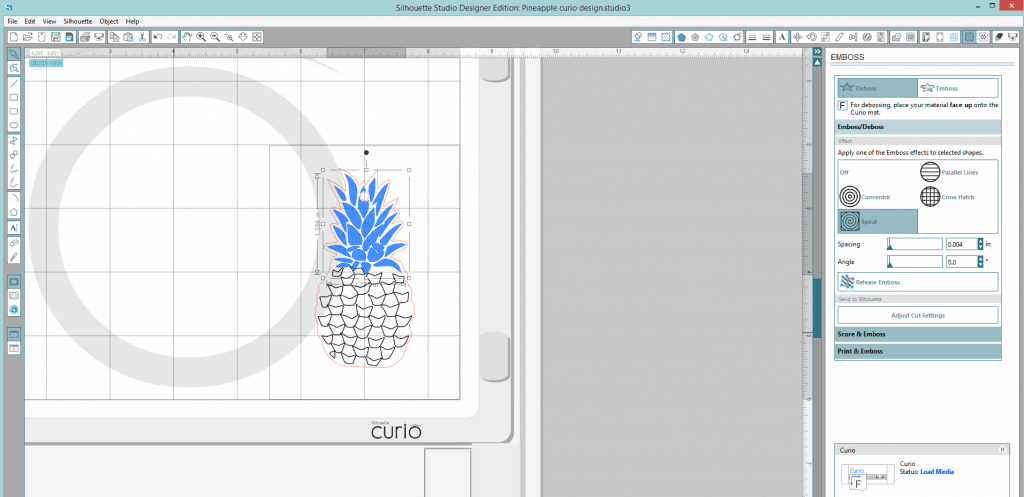
    Now choose the effect you want for that section. I choose the spiral for the leaves. Next you will set the
    spacing, the smallest spacing is .004 and will need to be typed into the box. The slider and arrows will
    not allow you to go this low.
    Tutorial: Etch Acrylic with your Silhouette Curio - by cuttingforbusiness.com
    Continue selecting the various sections you want to etch and the effects. Shown below is the cross hatch
    for the lower section of the acrylic.
    Tutorial: Etch Acrylic with your Silhouette Curio - by cuttingforbusiness.com
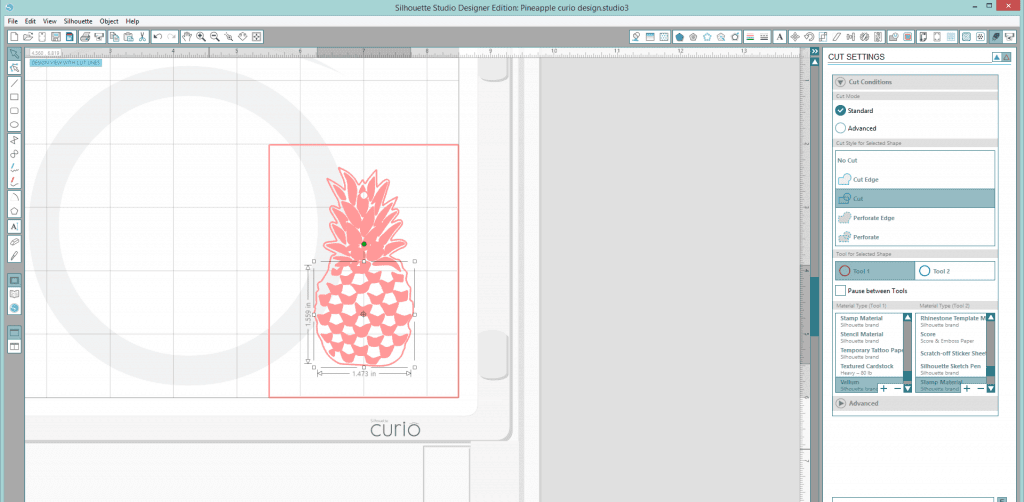
    Move over to the Cut Settings tab. Select the Cut setting followed by the Red Tool 1. Next we will
    select the material type for the Red Tool 1.
    Tutorial: Etch Acrylic with your Silhouette Curio - by cuttingforbusiness.com
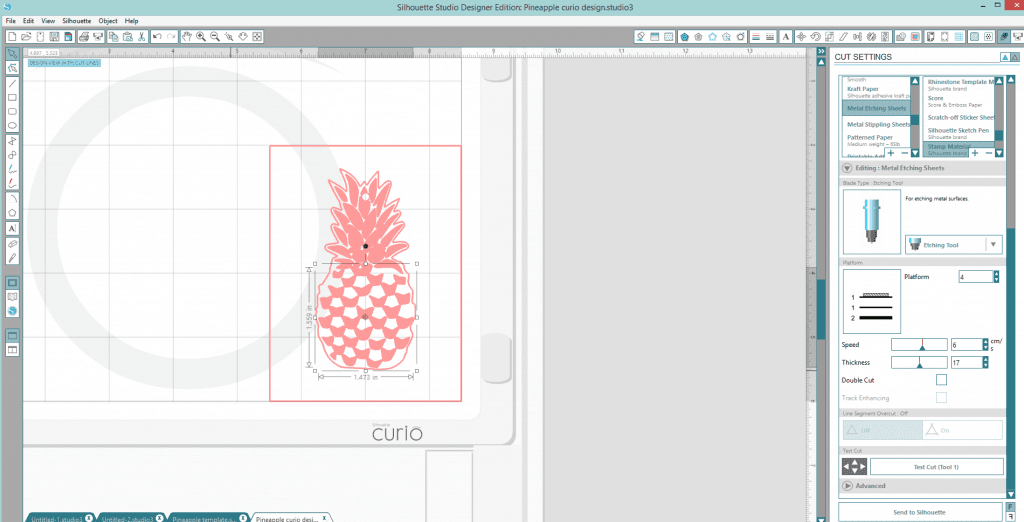
    Choose the metal etch settings for the Red Tool 1. We will modify the settings below to accommodate
    the acrylic. Our platform is set to 4, the speed is 6 and the thickness is 17.
    Tutorial: Etch Acrylic with your Silhouette Curio - by cuttingforbusiness.com
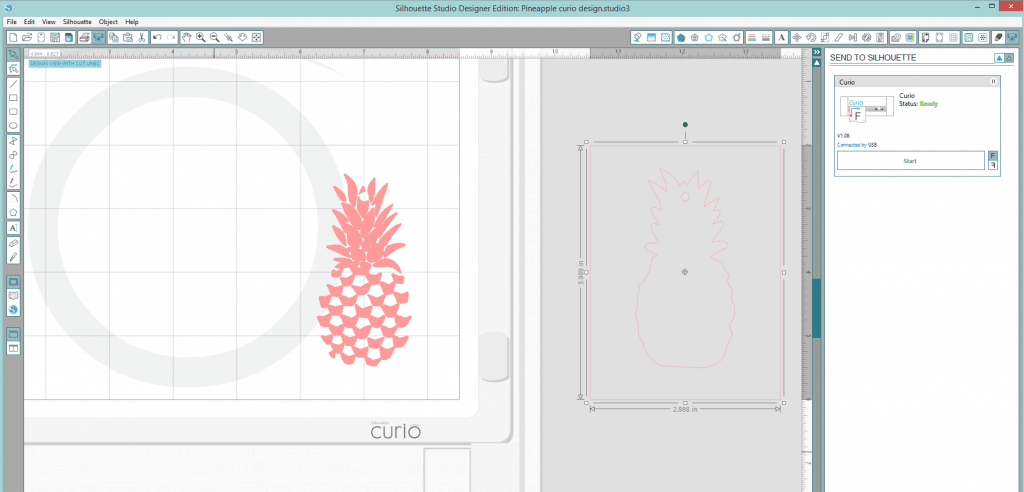
    Prior to etching, you will want to cut off the cut lines for your template or move it so it will not be etched. Then send your etching job to your curio.
    Tutorial: Etch Acrylic with your Silhouette Curio - by cuttingforbusiness.com
    Tutorial: Etch Acrylic with your Silhouette Curio - by cuttingforbusiness.comNow watch the magic happen!
    Tutorial: Etch Acrylic with your Silhouette Curio - by cuttingforbusiness.comTutorial: Etch Acrylic with your Silhouette Curio - by cuttingforbusiness.com
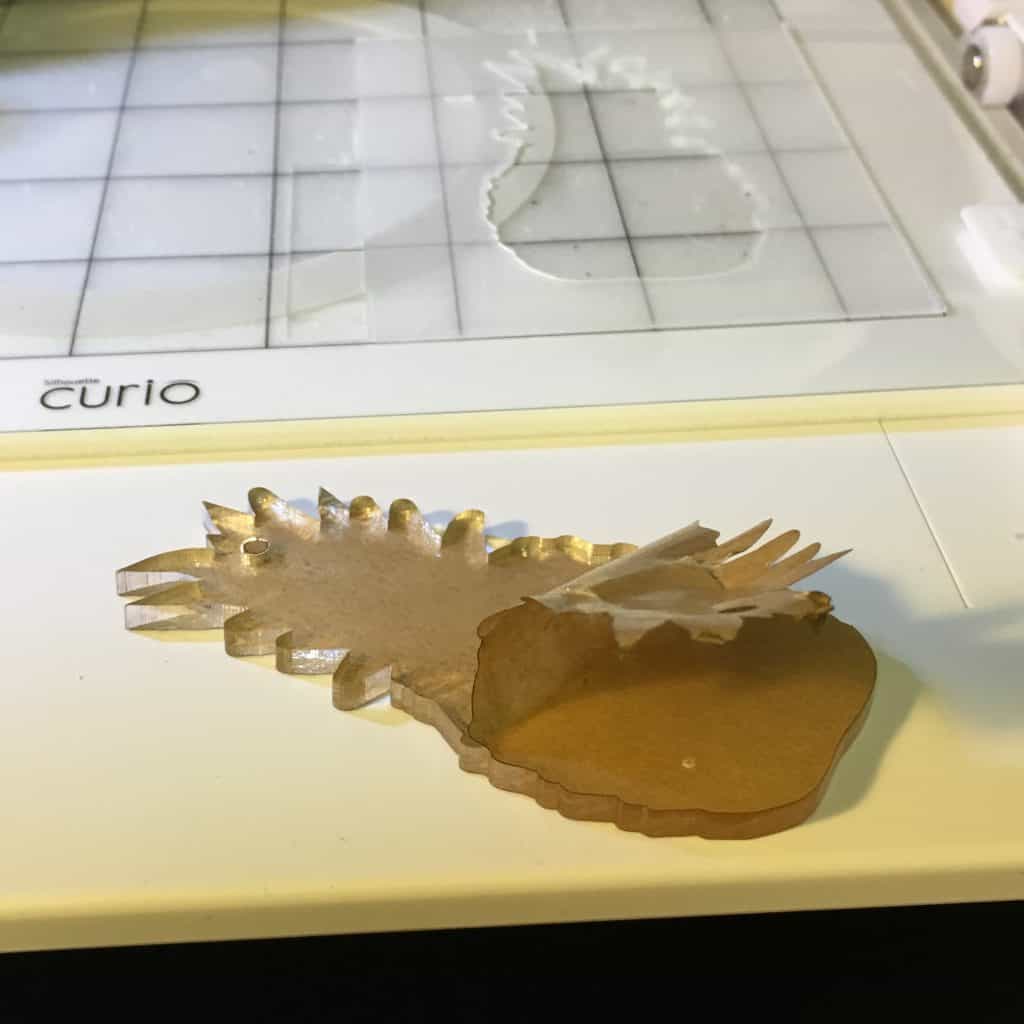
    When the item is etched carefully remove from the template with debris in place. You do not want that
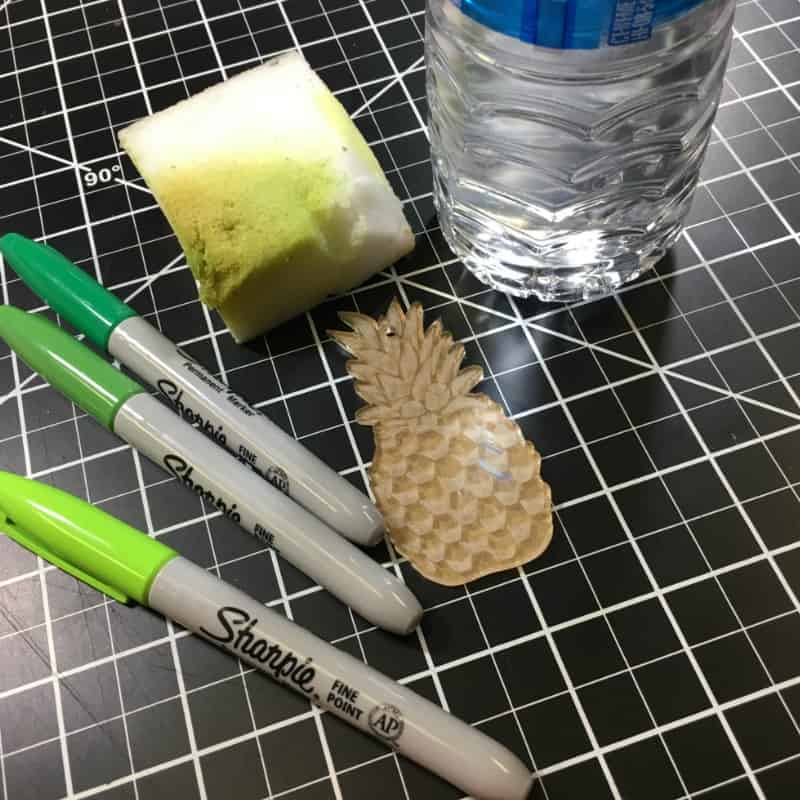
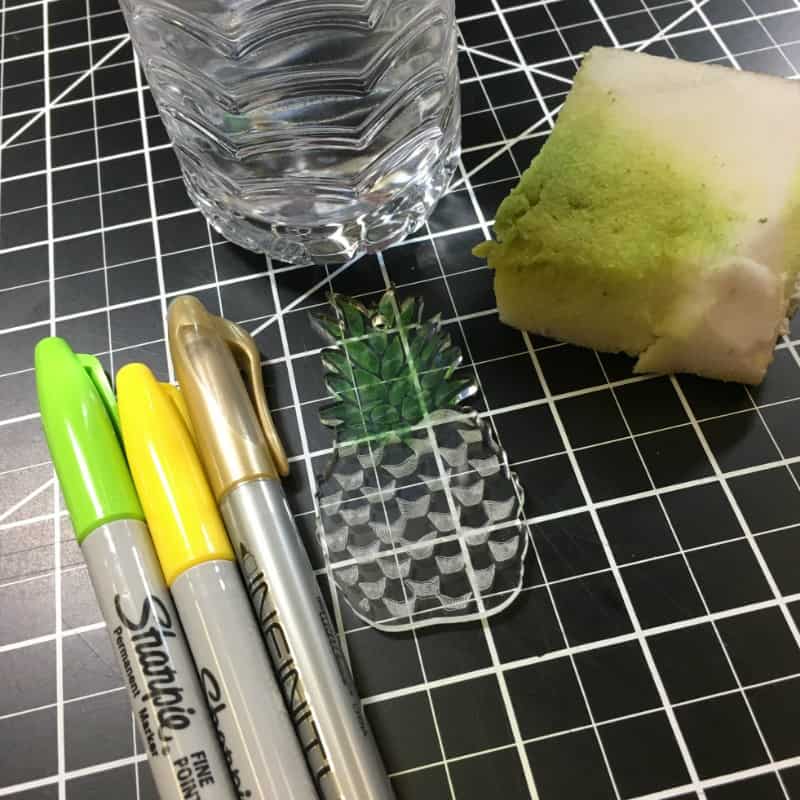
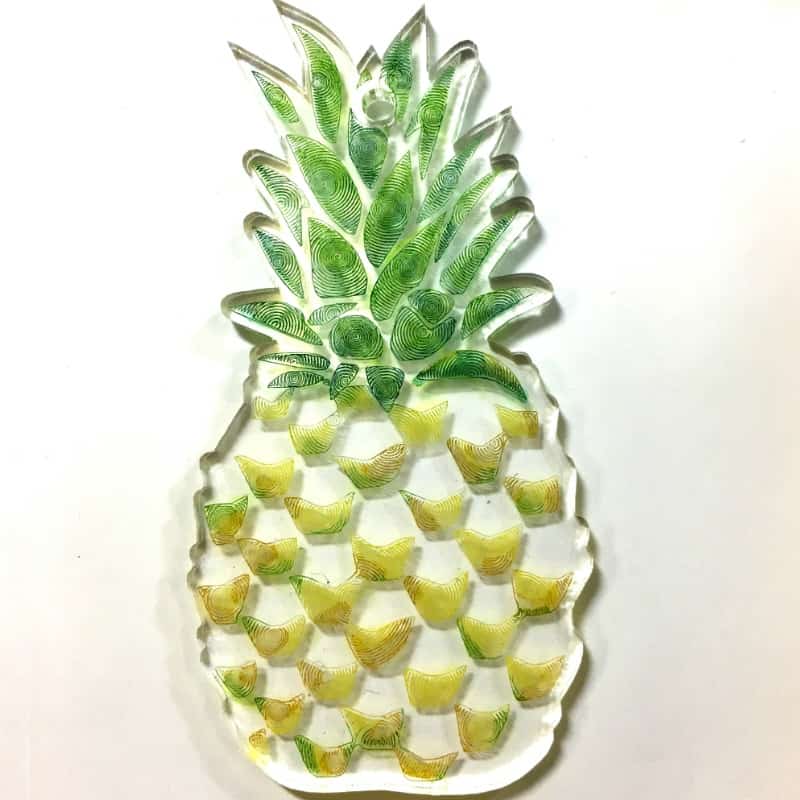
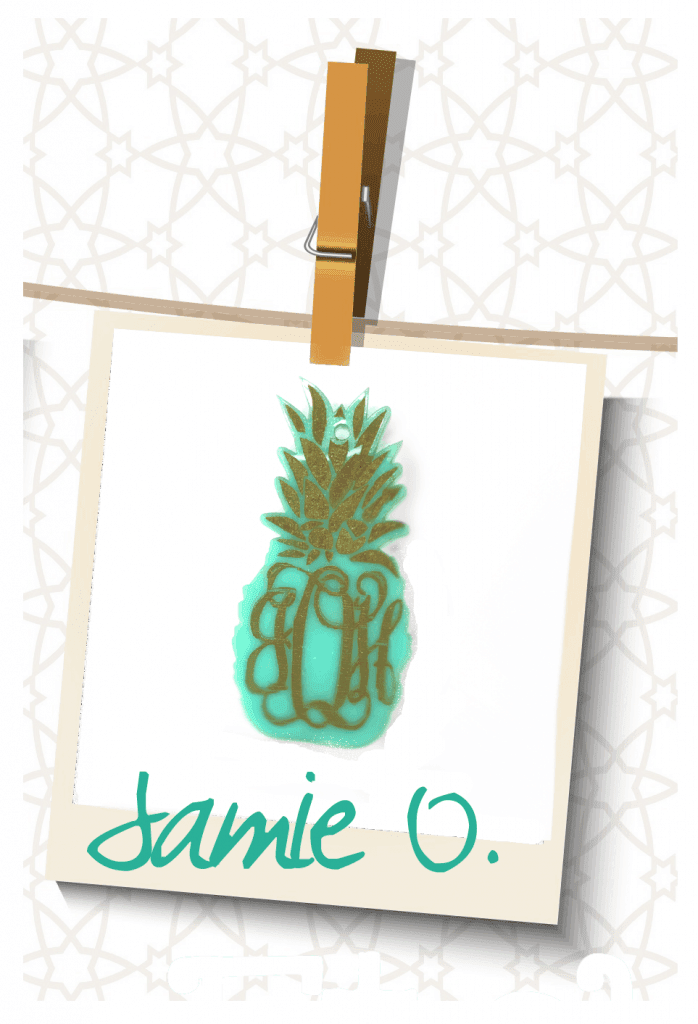
    to get on your mat as it will affect the mat’s stickiness. Once removed from the Curio, clean the surface of the acrylic with water and a soft rag. Now it is complete or ready to embellish. Shown here we used sharpies and a wet magic eraser to add color.
    Tutorial: Etch Acrylic with your Silhouette Curio - by cuttingforbusiness.com
    Tutorial: Etch Acrylic with your Silhouette Curio - by cuttingforbusiness.com
    Tutorial: Etch Acrylic with your Silhouette Curio - by cuttingforbusiness.com
    Now let’s see what you create for your customers using your Silhouette Curio!
    Jamie
    Craft Chameleon
    For more information on purchasing acrylics with etching cut files and coordinating plastic templates please join the Craft Chameleon Blanks Facebook group.
    Craft Chameleon
    Thanks so much Jamie for stopping in today – I can’t wait to try out etching with my Curio!
    Save this post to Pinterest:
    Tutorial: Etch Acrylic with your Silhouette Curio - by cuttingforbusiness.com
  • Tutorial: Craft Perfect Heat Transfer Vinyl on Leather

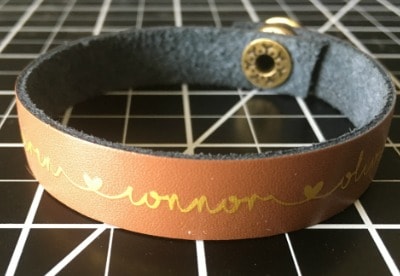
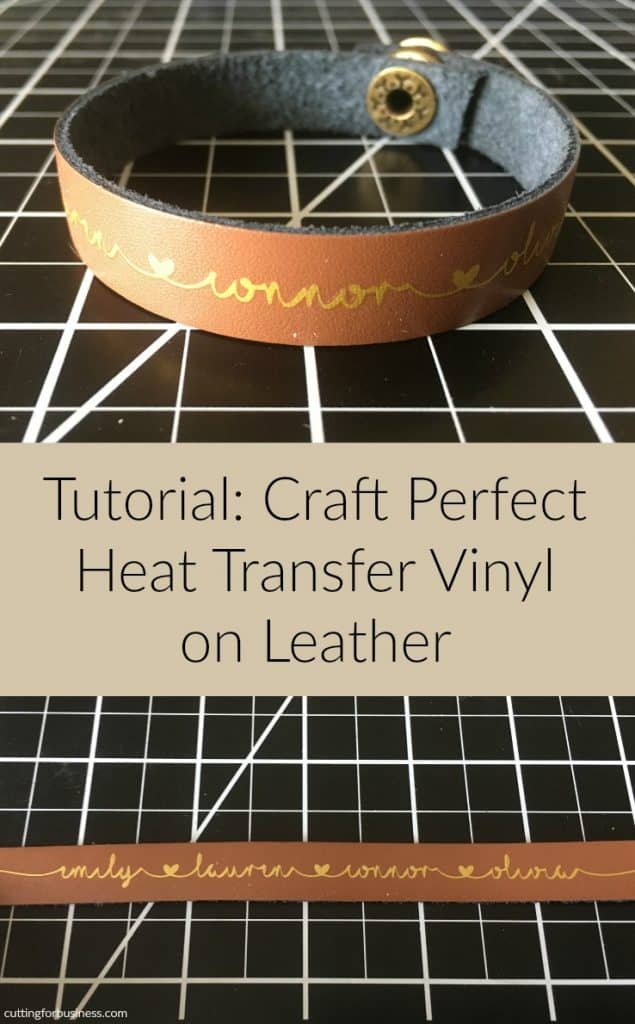
    Yesterday when I was doing research on my post about Happy Crafter’s new heat transfer vinyl product, Craft Perfect, I noticed that it was advertised as “works on leather”. Since I had some leather laying around, I put it to the test by making a leather bracelet.

    Using Craft Perfect on Leather

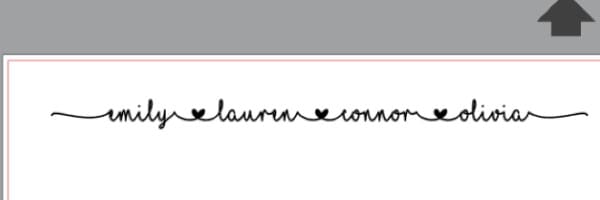
    1. First, create your design in Silhouette Studio or Cricut Design Space. I used Silhouette Studio (version 4 beta) and the MF I Love Glitter font: Tutorial: Craft Perfect Heat Transfer Vinyl on Leather - by cuttingforbusiness.com
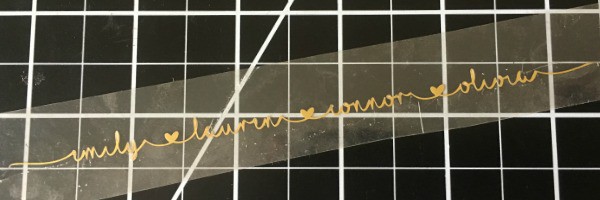
    2. Mirror the design, cut the Craft Perfect on your machine, and weed it: Tutorial: Craft Perfect Heat Transfer Vinyl on Leather - by cuttingforbusiness.com
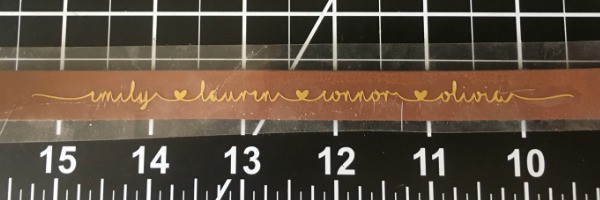
    3. Lay the weeded Craft Perfect on your leather blank. In this tutorial, I’m using a half inch wide leather strip that I have cut to size for a bracelet. You can pick up the same leather hereTutorial: Craft Perfect Heat Transfer Vinyl on Leather - by cuttingforbusiness.com
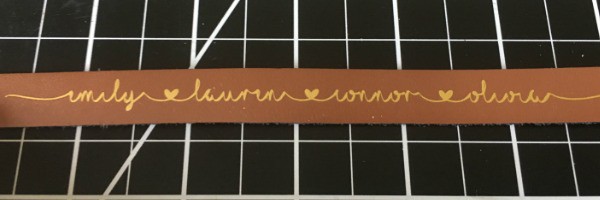
    4. Using a heat press at medium pressure and 300 degrees for 15 seconds, press the Craft Perfect onto the leather. Mine turned out perfect: Tutorial: Craft Perfect Heat Transfer Vinyl on Leather - by cuttingforbusiness.com

    Now, you can finish your bracelet off by adding any kind of closure you’d like. For me, I finished it off with a simple snap: Tutorial: Craft Perfect Heat Transfer Vinyl on Leather - by cuttingforbusiness.com

    Interested in learning to set snaps in leather? Tandy Leather has a wonderful video tutorial here. It’s pretty easy once you do a few, but you’ll need to have a few tools on hand: 1) Snap setter and anvil. I own this one. 2) A mallet – any will do – like this one. 3) A leather hole punch. 4) And, snaps for leather!

    Ready to try out Craft Perfect on leather? Before you do, save this post to Pinterest:

    Tutorial: Craft Perfect Heat Transfer Vinyl on Leather - by cuttingforbusiness.com

  • Tutorial: Reverse Glass Etching with Silhouette or Cricut

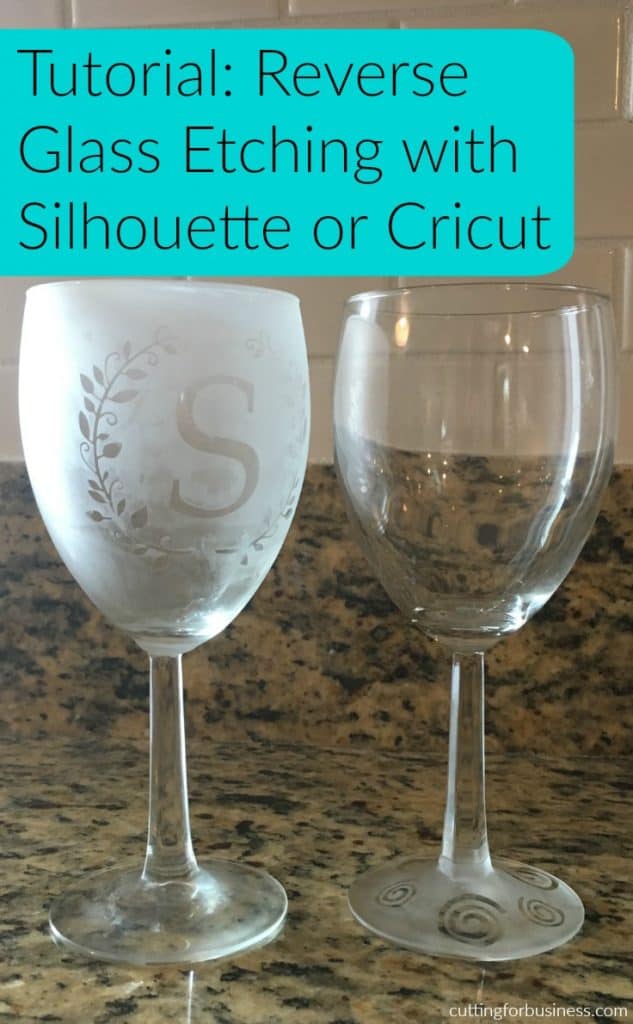
    Today, let’s look at something a bit different! I’m calling this ‘Reverse Etching’ – and it’s something I haven’t seen done among Silhouette or Cricut crafters. Usually, when people etch a surface they use vinyl as a stencil and etch inside the stencil. I was thinking to myself recently, why not use the negative space for the design? That’s just what I did over the weekend. Here’s how my two samples turned out and a tutorial.

    Reverse Glass Etching

    Supplies

    Process

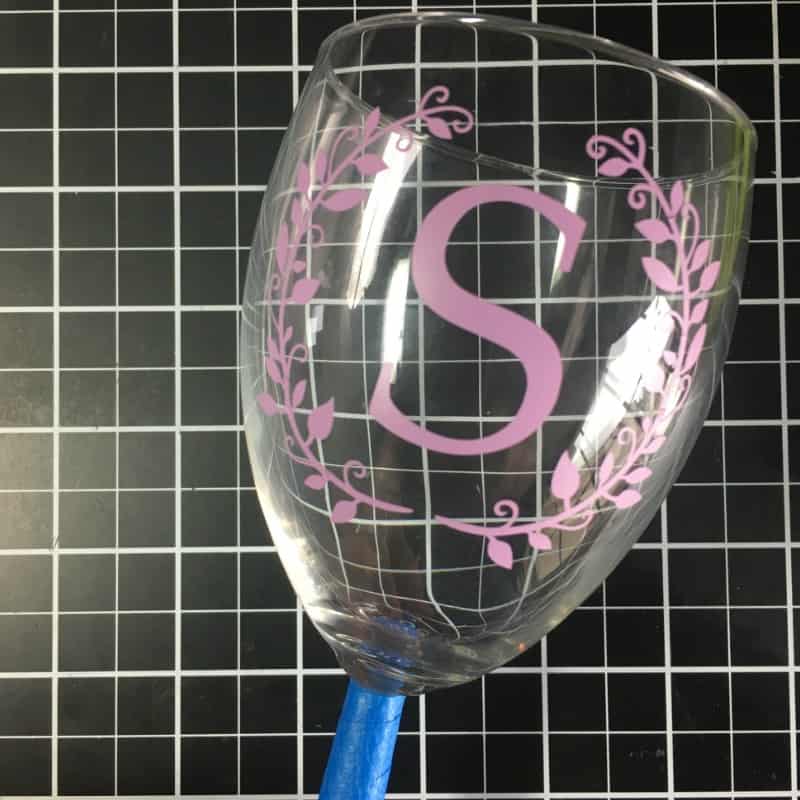
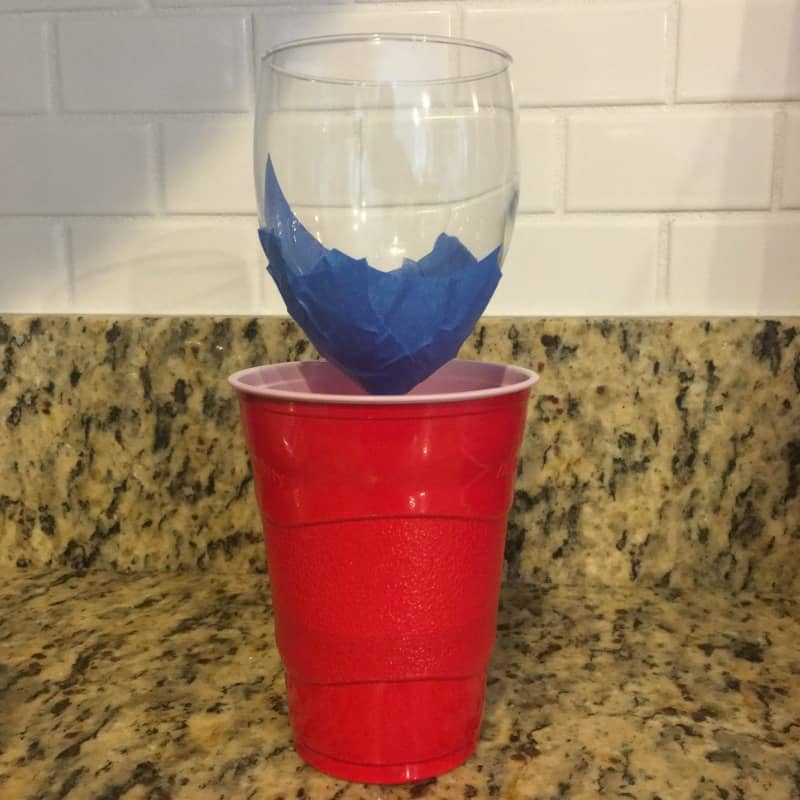
    1. Cut your design in vinyl, weed it, and apply it to the items to etch. For this tutorial, I made two different wine glasses. On one, I did just the base; while on the other I did the top half. Be sure to have anything that you don’t want etched covered. Painter’s tape is helpful! Tutorial: Reverse Glass Etching with Silhouette Cameo or Cricut Explore - by cuttingforbusiness.com
      Tutorial: Reverse Glass Etching with Silhouette Cameo or Cricut Explore - by cuttingforbusiness.com
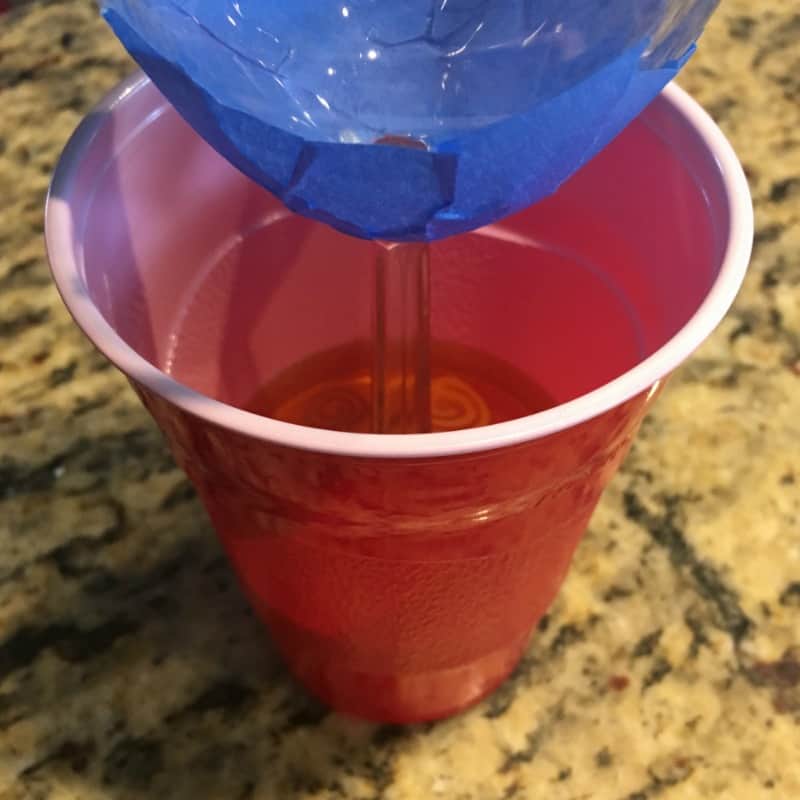
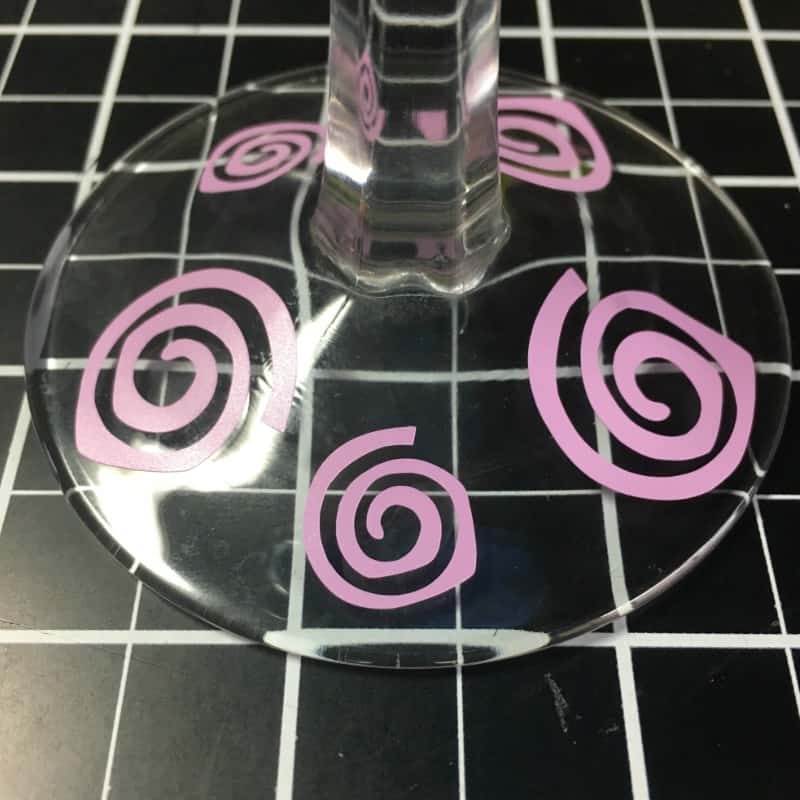
    2. Put your item to be etched into a plastic container and pour the Etchall Dip ‘n Etch over it. Allow the item to sit in the Etchall Dip ‘n Etch for 15 minutes. I just used a plastic cup. Tutorial: Reverse Glass Etching with Silhouette Cameo or Cricut Explore - by cuttingforbusiness.com
      Tutorial: Reverse Glass Etching with Silhouette Cameo or Cricut Explore - by cuttingforbusiness.com
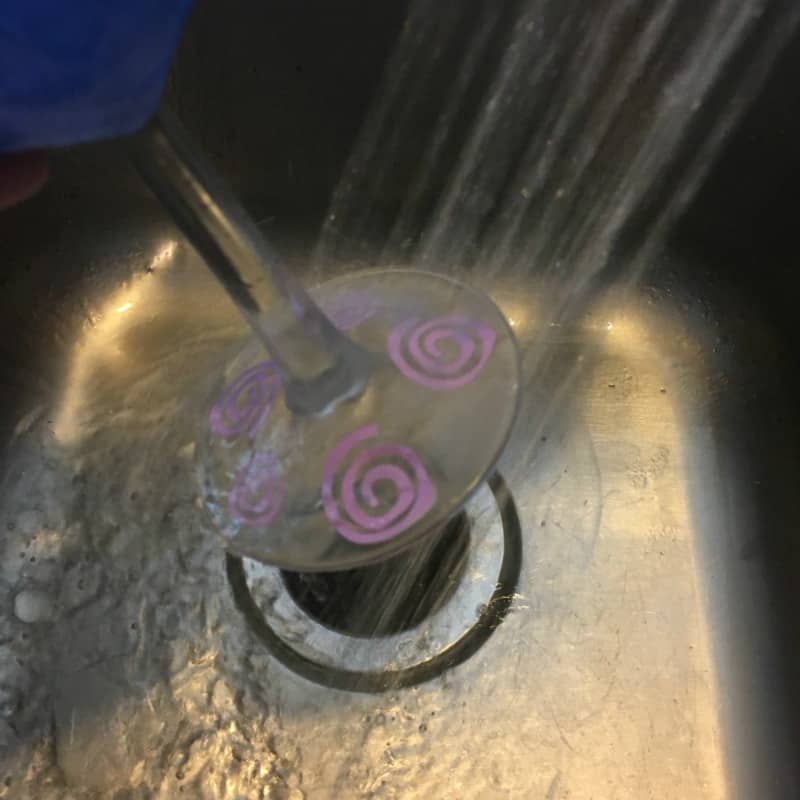
    3. After 15 minutes, remove the glass item and rinse it in a stainless steel sink. Pour the remaining Etchall Dip ‘n Etch back into the container to use again.Tutorial: Reverse Glass Etching with Silhouette Cameo or Cricut Explore - by cuttingforbusiness.com
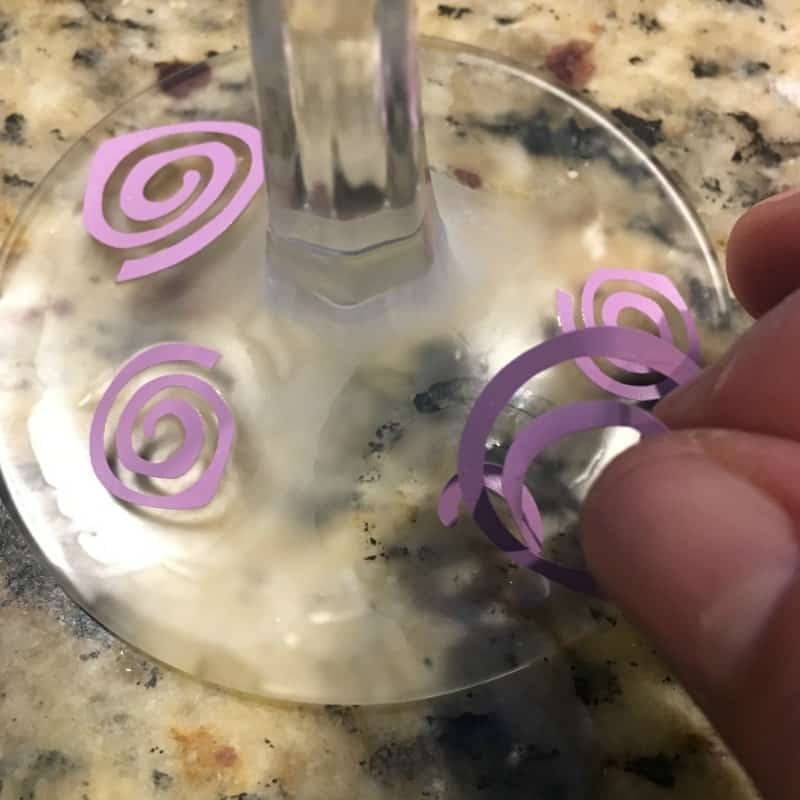
    4. Remove the vinyl and allow the item to dry. Tutorial: Reverse Glass Etching with Silhouette Cameo or Cricut Explore - by cuttingforbusiness.com
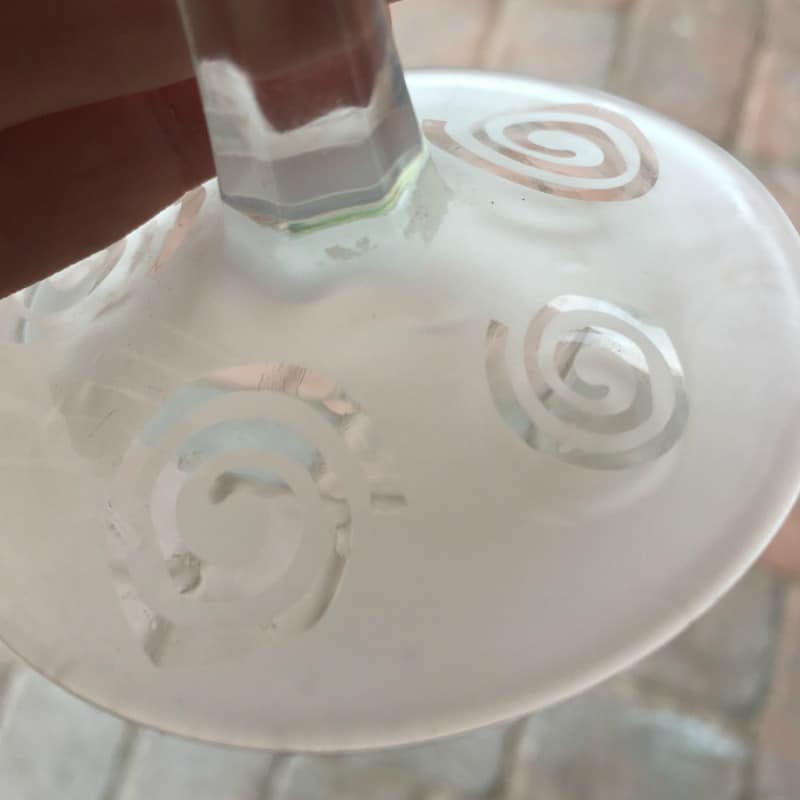
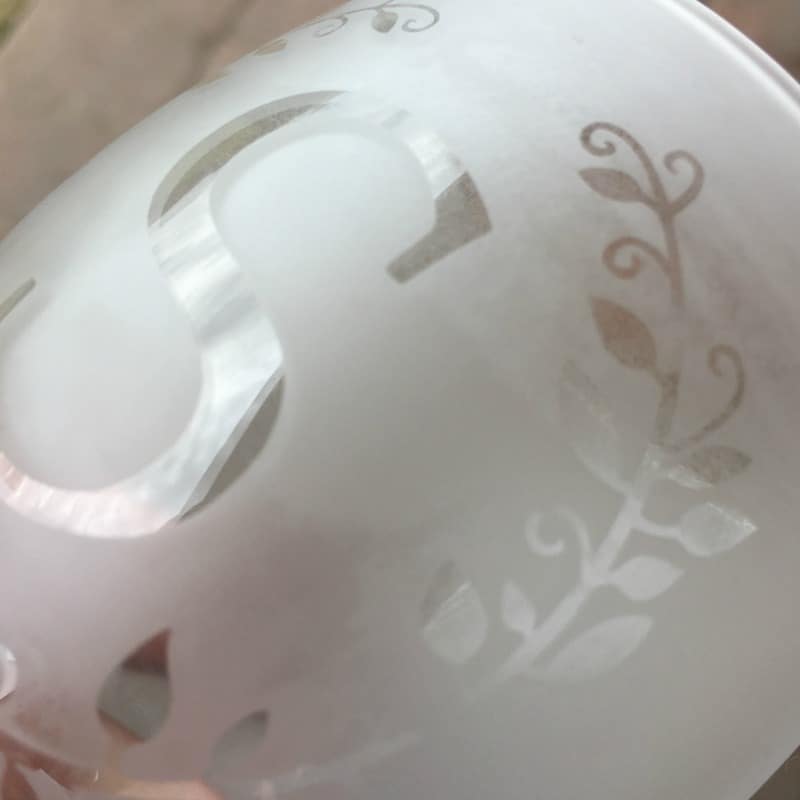
    5. My finished samples turned out great!Tutorial: Reverse Glass Etching with Silhouette Cameo or Cricut Explore - by cuttingforbusiness.com
      Tutorial: Reverse Glass Etching with Silhouette Cameo or Cricut Explore - by cuttingforbusiness.com

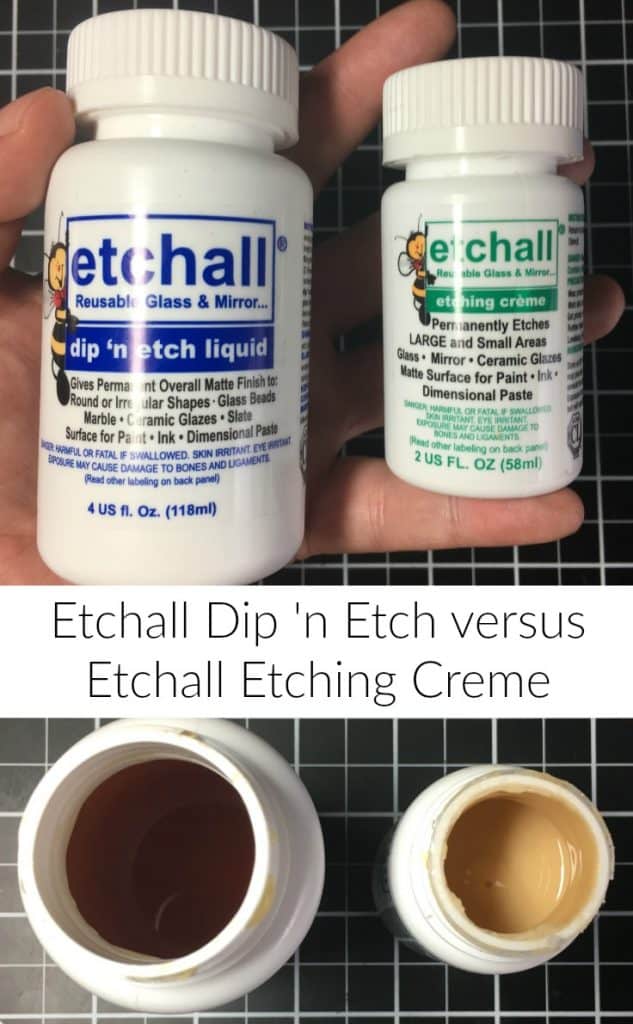
    Etchall Dip ‘n Etch versus Etchall Etching Creme

    These are two different products, but either can be used for this tutorial. Etchall Dip ‘n Etch is a amber colored liquid that you dip your item to be etched into for about 15 minutes. It is the consistency of water. Etchall Etching Creme is a thicker creme (think sunscreen) and is applied with a cotton swab or brush. You leave it on for only a few minutes. Both Dip ‘n Etch and Etching Creme can be reused.

    Tutorial: Reverse Glass Etching with Silhouette Cameo or Cricut Explore - by cuttingforbusiness.com

    Wondering about the vine I used above? Download it free at this link.

    Save this tutorial to Pinterest:

    Tutorial: Reverse Glass Etching with Silhouette Cameo or Cricut Explore - by cuttingforbusiness.com

  • Tutorial: Sea Glass Jewelry with Silhouette or Cricut and Dremel

    Being the owner of a Silhouette Cameo or Cricut Explore can be totally life changing – because the machines are so flexible to be incorporated into so many different projects. Today, I’m thinking “outside the box” and sharing sea glass jewelry I recently made.

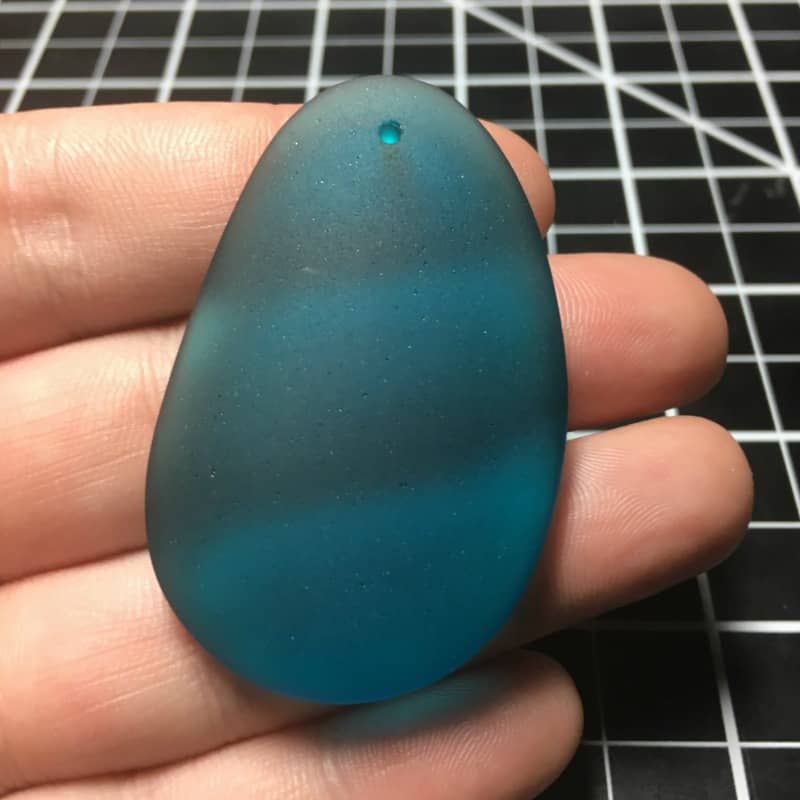
    First, I have to share my failure. Originally, this post was supposed to be an etched sea glass necklace tutorial using Etchall Etching Creme. When I etched the sea glass, the etch was so light that it was barely noticeable. So, I started over. I soaked my sea glass pendant in Etchall Dip ‘N Etch to erase my failure and started again. Now, here’s a tutorial to create a sea glass pendant using a Dremel tool.

    Sea Glass Jewelry Tutorial

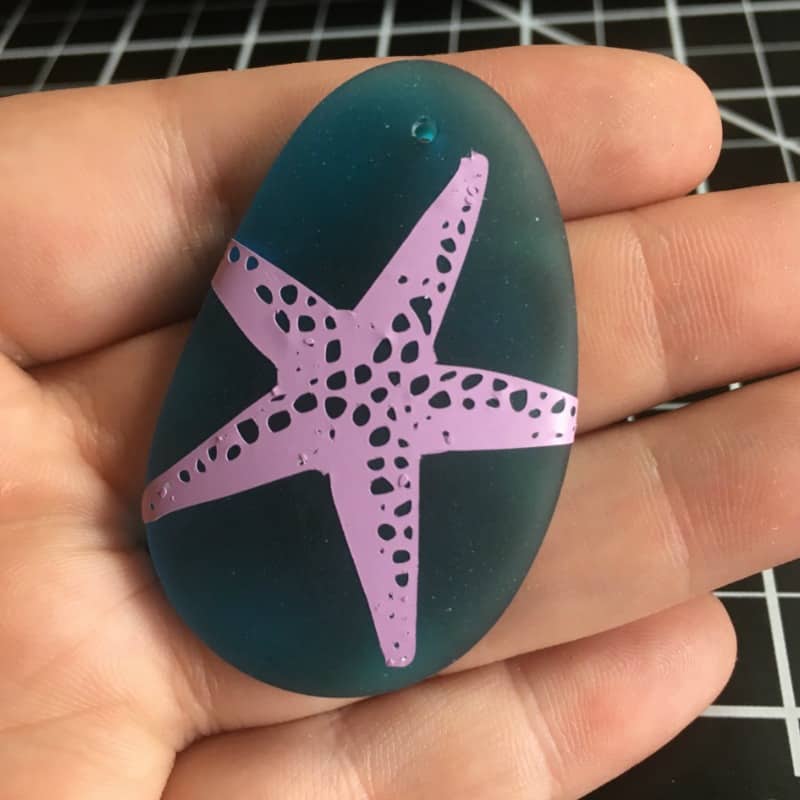
    1. Find some sea glass. If you aren’t familiar, sea glass is glass (from bottles, windows, etc) that was discarded or lost in the ocean. The waves tumble it to a nice frosted finish and it eventually washes on shore. It’s getting harder to find sea glass – because society uses less glass and more plastic in modern times. If you don’t live near the beach – you can order some here on Etsy (which is what I did). You’ll need to buy predrilled or drill a hole in it (mine came predrilled).Tutorial: Sea Glass Jewelry with Silhouette Cameo or Cricut Explore and Dremel - by cuttingforbusiness.com
    2. Create a design in Silhouette Studio or Cricut Design Space and cut it in vinyl. Weed it and apply it to your sea glass. You’ll see that there were little bits along the way that I didn’t weed out. No big deal.Tutorial: Sea Glass Jewelry with Silhouette Cameo or Cricut Explore and Dremel - by cuttingforbusiness.com
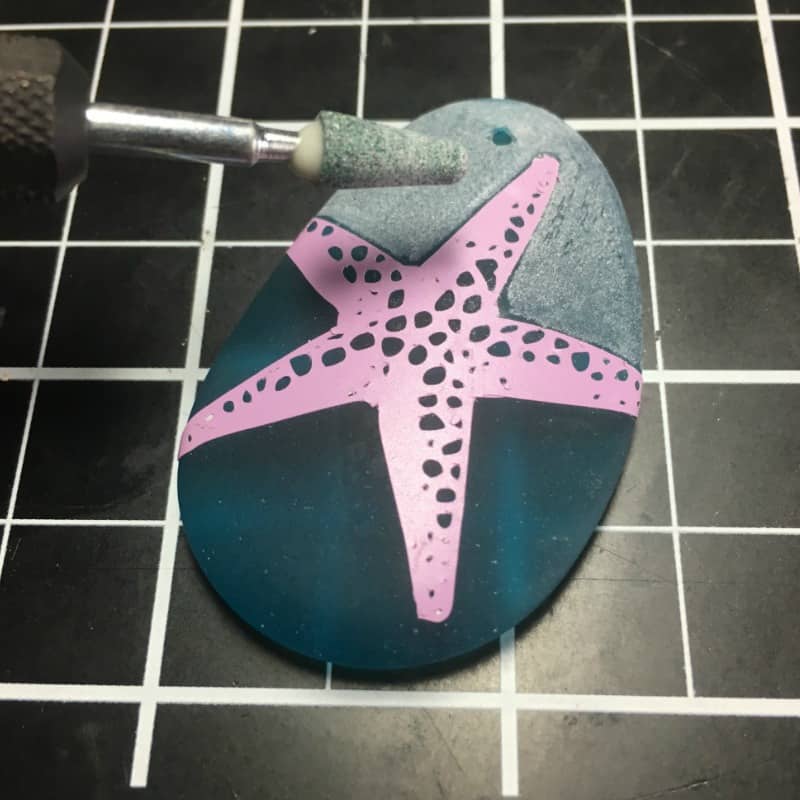
    3. Using a Dremel tool (I have a model 4000), and a grinding attachment you are going to grind off the top layer of glass around your vinyl.Tutorial: Sea Glass Jewelry with Silhouette Cameo or Cricut Explore and Dremel - by cuttingforbusiness.com
    4. Continue grinding until your go around your entire stencil and any bits in the middle. A smaller grinding tip would have been useful to me, but it wasn’t a big deal. Tutorial: Sea Glass Jewelry with Silhouette Cameo or Cricut Explore and Dremel - by cuttingforbusiness.com
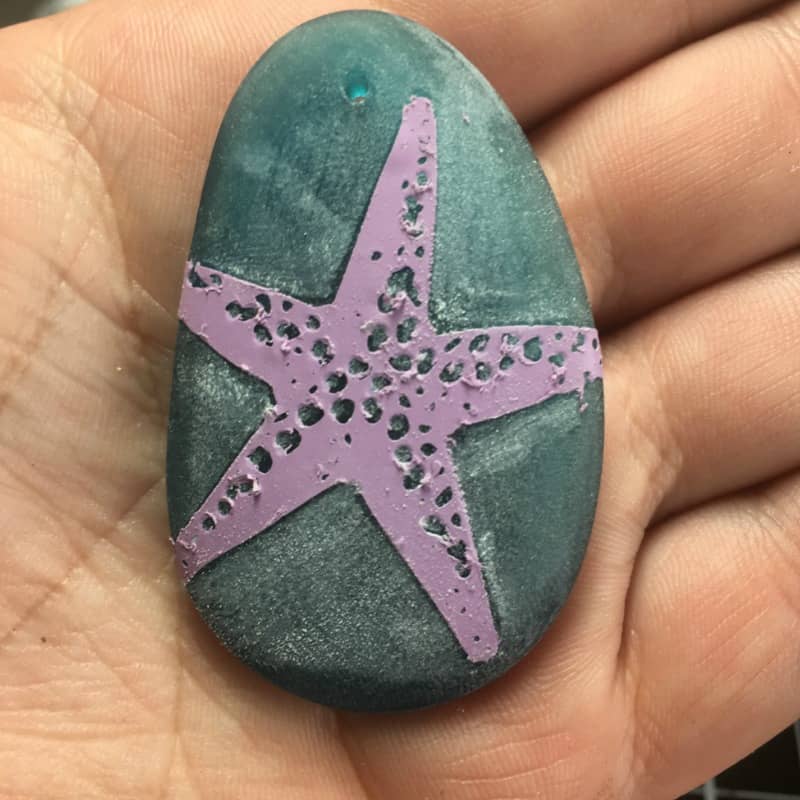
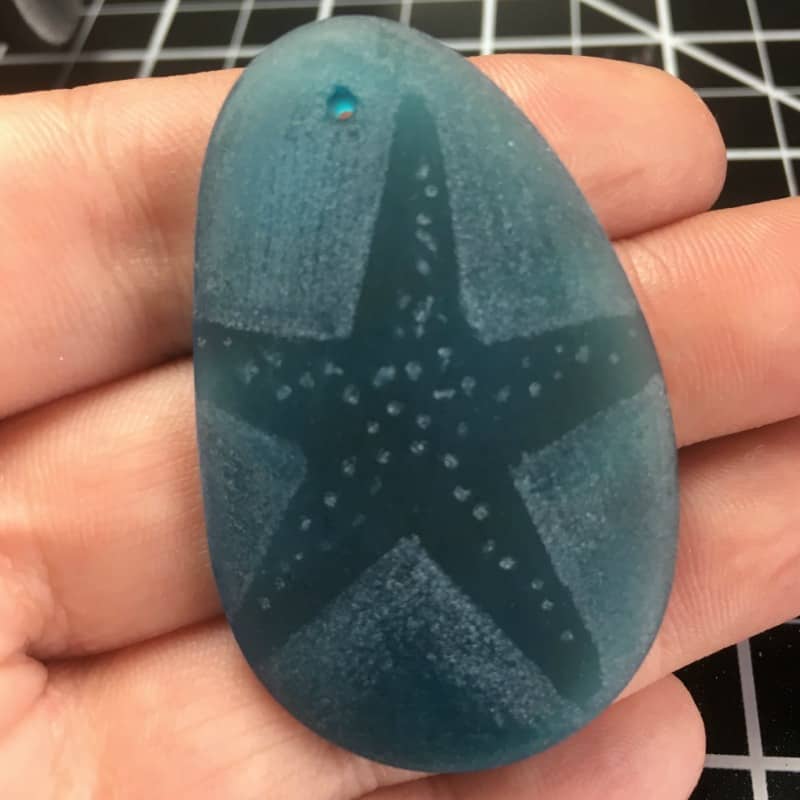
    5. Remove the stencil and rinse off the sea glass. Tutorial: Sea Glass Jewelry with Silhouette Cameo or Cricut Explore and Dremel - by cuttingforbusiness.com
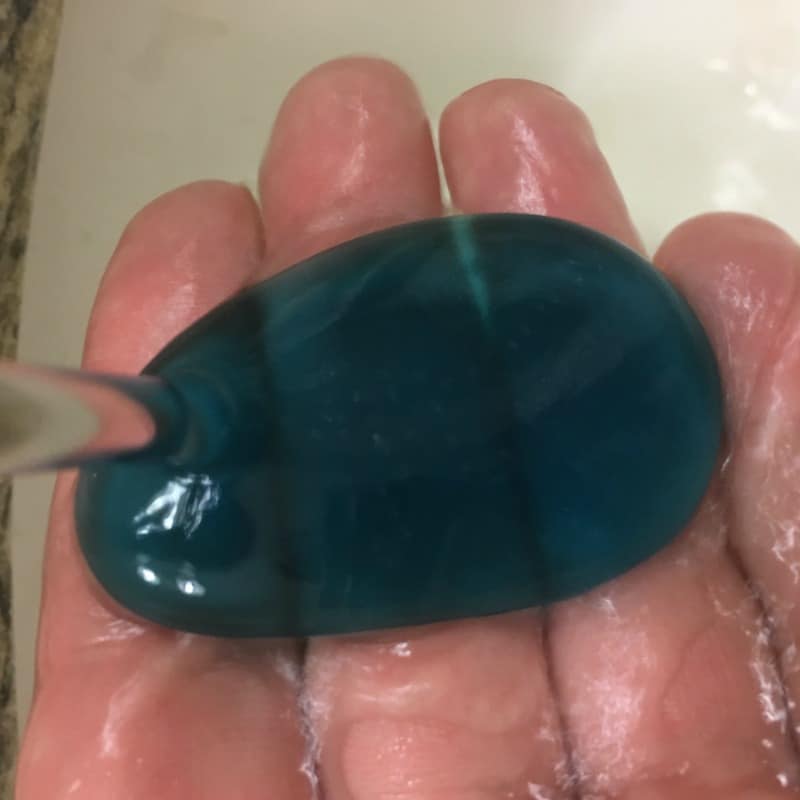
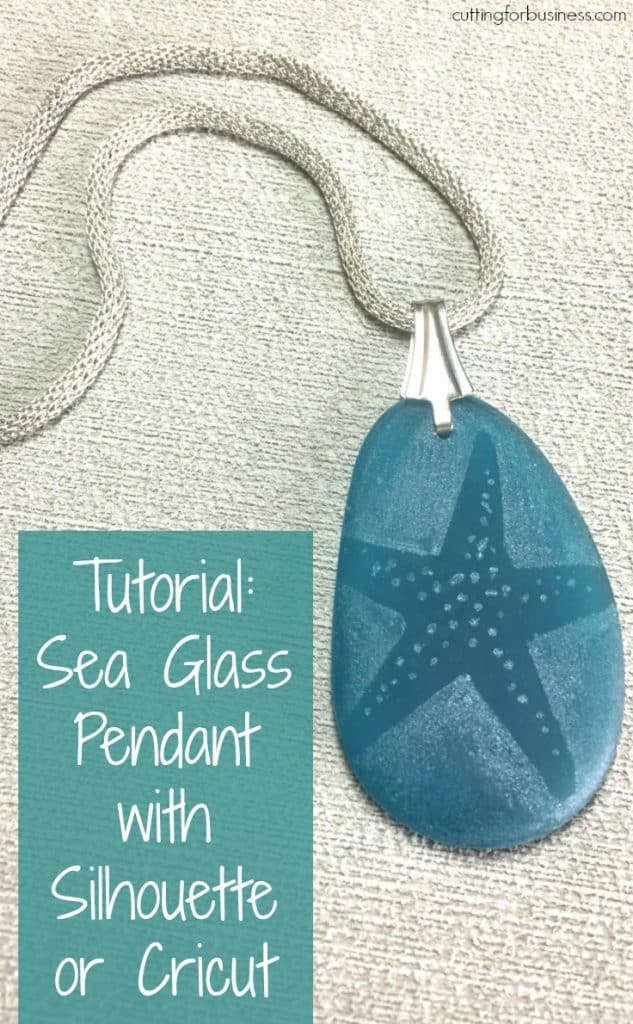
    6. When your sea glass dries, you’ll be able to touch up any spots you missed. Then, add a bail (that’s the mounting at the top that allow is to hang on a chain) and wear it – or sell it! Tutorial: Sea Glass Jewelry with Silhouette Cameo or Cricut Explore and Dremel - by cuttingforbusiness.com

    As I’ve said before, and I will continue to say – don’t be afraid to try new things with your Silhouette Cameo or Cricut Explore. Experiments can sometimes turn into profitable ventures!

    Save this post to Pinterest:

    Tutorial: Sea Glass Jewelry with Silhouette Cameo or Cricut Explore and Dremel - by cuttingforbusiness.com

  • Tutorial: Faux Wood Frames on Wooden Signs

    Yesterday, I shared a tutorial to create wood frames on wood signs. I understand that not everyone has the tools or time to do them. Today, I’m sharing a tutorial for faux wood frames.

    Faux Wood Frame Tutorial

    Supplies Needed

    • Wood for sign – For help choosing wood, see this post.
    • Paint/vinyl stencil to create your sign – This tutorial will work with whatever method and supplies you like best: vinyl, stencil, paint, stain, and so on.
    • Painters tapeBuy it in bulk to save.

    Tutorial

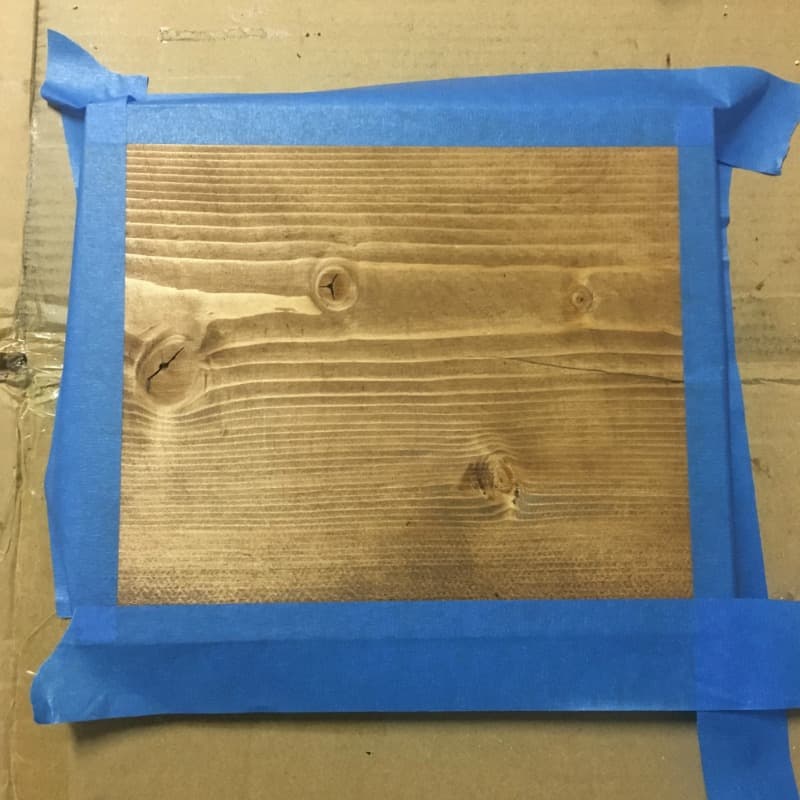
    1. Cut your wood to size (or have your local home improvement store cut it) and stain or paint it the color you want your “frame”. Then, tape all the edges with painter’s tape. When taping, you’ll want to be sure that you tape off the same width on all sides. Tutorial: Faux Wood Frames on Wooden Signs with Your Silhouette Cameo or Cricut Explore - by cuttingforbusiness.com
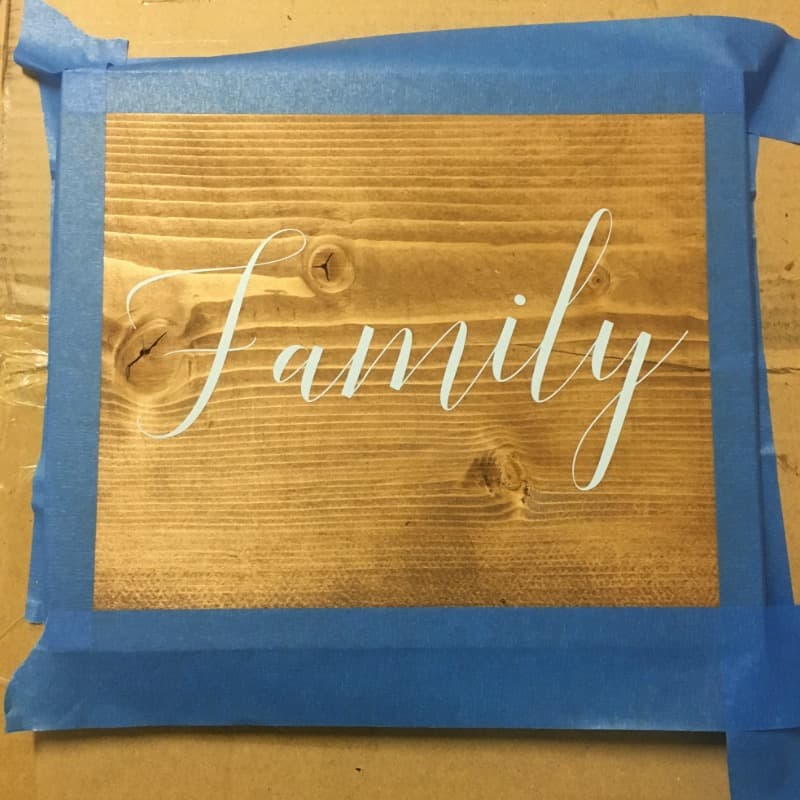
    2. Apply your vinyl design to the wood. Tutorial: Faux Wood Frames on Wooden Signs with Your Silhouette Cameo or Cricut Explore - by cuttingforbusiness.com
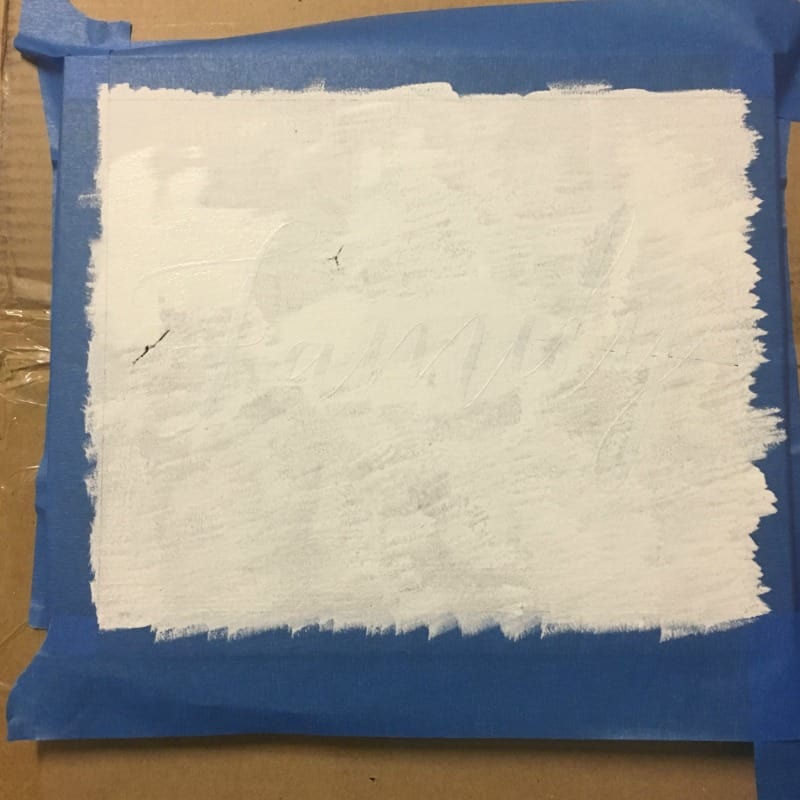
    3. Paint the entire sign. Tutorial: Faux Wood Frames on Wooden Signs with Your Silhouette Cameo or Cricut Explore - by cuttingforbusiness.com
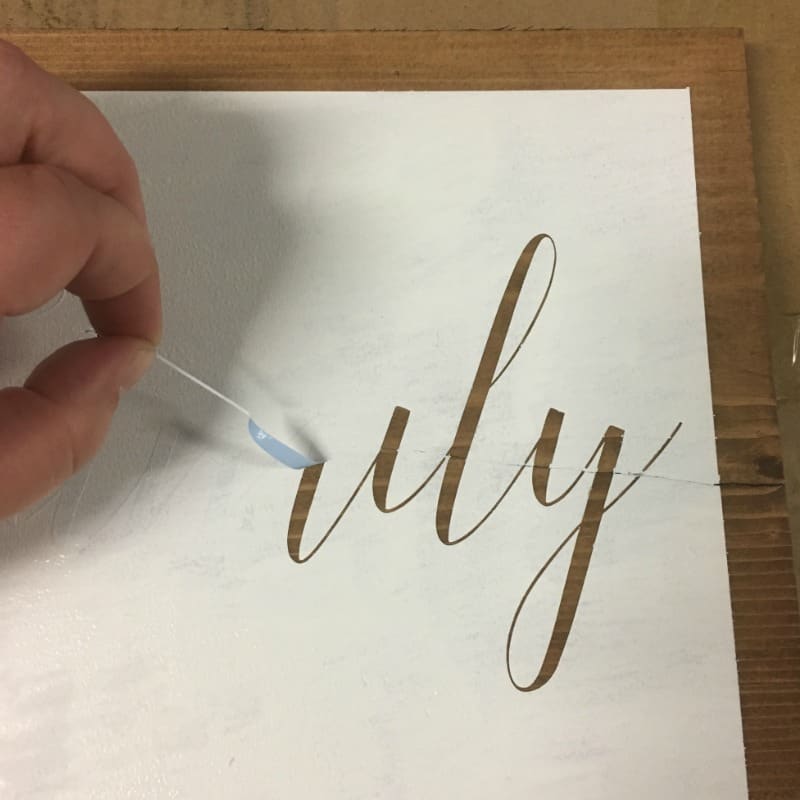
    4. Peel of the vinyl and painter’s tape and allow your sign to dry. Tutorial: Faux Wood Frames on Wooden Signs with Your Silhouette Cameo or Cricut Explore - by cuttingforbusiness.com

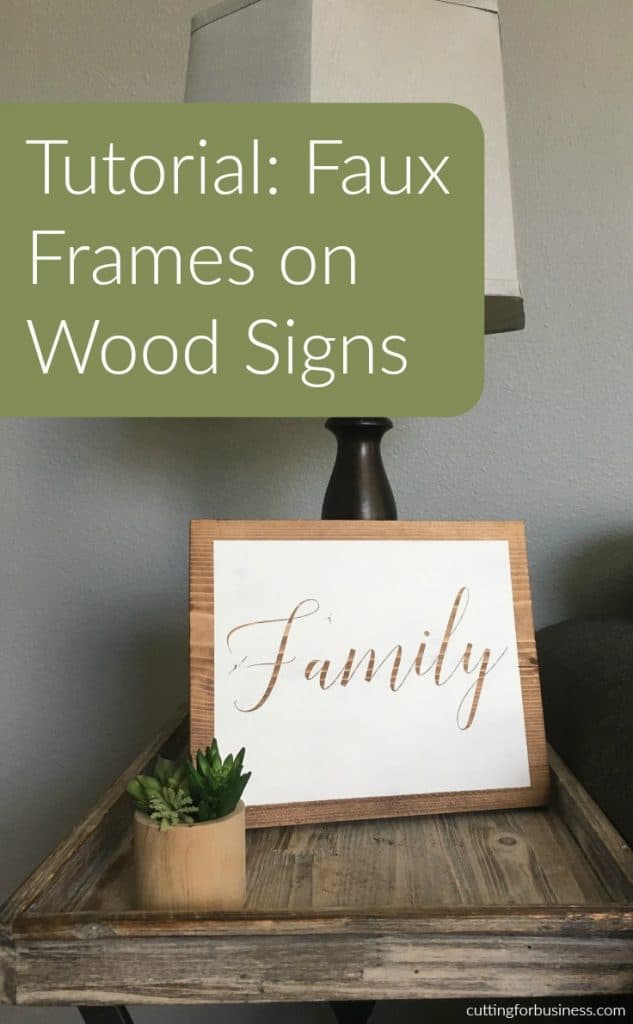
    That’s it! You can see my finished product in the photo below. This technique is a really quick and easy way to — not add a frame to your wood sign!
    Save this tutorial to Pinterest:

    Tutorial: Faux Wood Frames on Wooden Signs with Your Silhouette Cameo or Cricut Explore - by cuttingforbusiness.com

  • Tutorial: How to Create Bounce Back Scratch Off Coupons

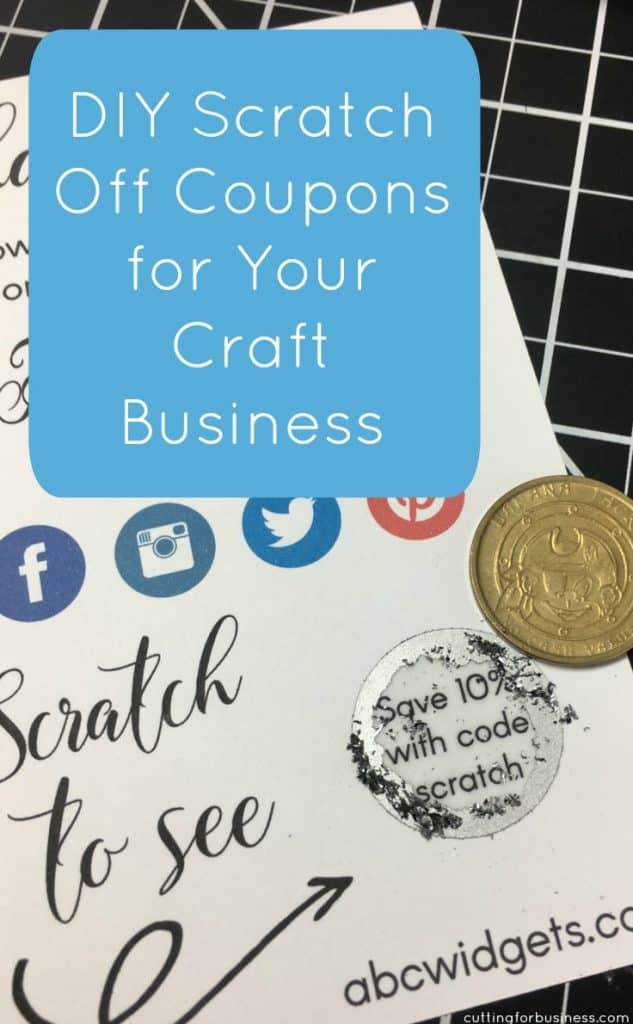
    Bounce back offers are those that customers receive when they purchase and item and open their package. We see them in all kinds of business: cruises and vacations, online purchases, and receipts at big box stores. The goal of a bounce back offer is to bring a customer back to your business after they make a purchase. As Silhouette Cameo and Cricut Explore small business owners, we can do the same. This is as simple as putting a card in your package with a coupon code for the next order. But, let’s have a little fun with it! Today, I’m showing you how to use scratch off material to create custom scratch off cards.
    Scratch Off Coupon Tutorial

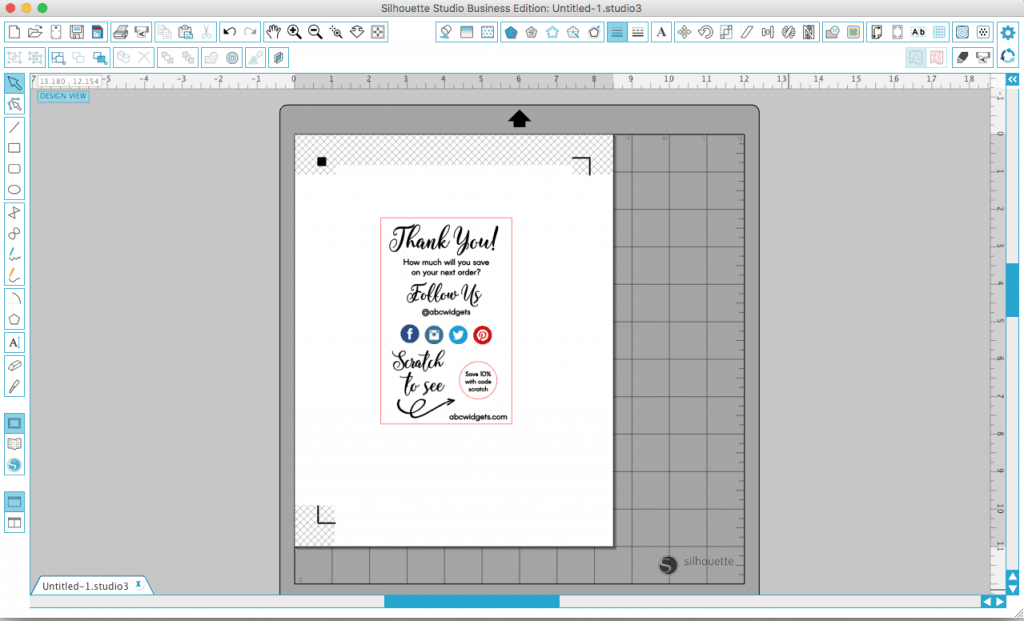
    1. Design a thank you for your purchase card in Silhouette Studio or whatever program you feel comfortable working with. Tutorial: How to Create Bounce Back Scratch Off Coupons - Great for Silhouette Cameo or Cricut Small Business Owners - by cuttingforbusiness.com
    2. Print and cut (or print then cut) your card. Tutorial: How to Create Bounce Back Scratch Off Coupons - Great for Silhouette Cameo or Cricut Small Business Owners - by cuttingforbusiness.com
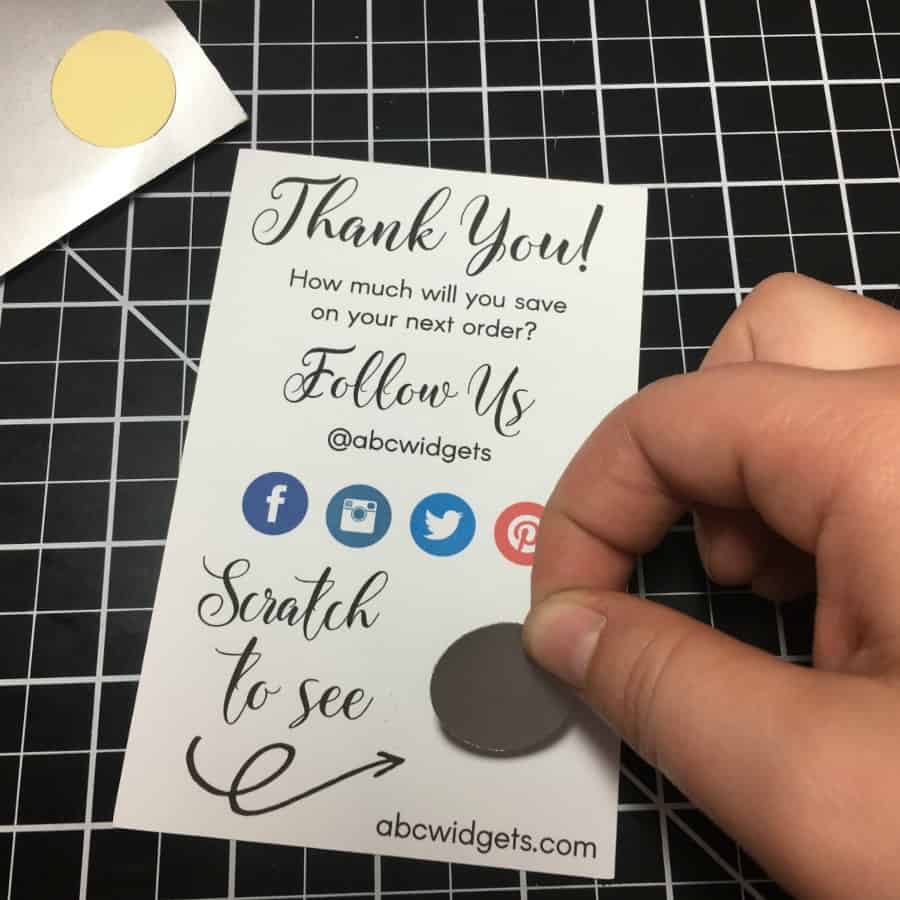
    3. Cut Silhouette scratch off material in a shape to cover your coupon code. I used a 1 inch by 1 inch circle. Tutorial: How to Create Bounce Back Scratch Off Coupons - Great for Silhouette Cameo or Cricut Small Business Owners - by cuttingforbusiness.com
    4. After cutting, peel off the scratch off material sticker and place it over your coupon code. Tutorial: How to Create Bounce Back Scratch Off Coupons - Great for Silhouette Cameo or Cricut Small Business Owners - by cuttingforbusiness.com

    That’s it! When customers receive their card, they will scratch it to reveal a coupon code to use in your shop. Have fun with this – the possibilities are endless!

    Note: If you don’t have a Silhouette Cameo or a Cricut Explore, you can do this without: Either print and cut out your cards or have them printed at a Vistaprint. Then, purchase precut scratch off stickers and assemble.

    Save to Pinterest:

    Tutorial: How to Create Bounce Back Scratch Off Coupons - Great for Silhouette Cameo or Cricut Small Business Owners - by cuttingforbusiness.com