Author: christine

  • The Secret to Photographing Glitter and Holographic Material

    I’ve been there so many times: I’ve made the absolute most beautiful, wonderful, gorgeous creation known to anyone in this world using glitter or holographic materials and when I take a photo of it – it doesn’t sparkle! Instead, it looks flat, and usually pretty dark compared to the rest of the photo. Have you experienced this, too? If so, read on for my trick.

    Super, secret trick: Add more light! What I usually do is hold a flashlight off camera (an non-LED flashlight works best) pointed directly at the specialty material while taking the photograph.

    Examples

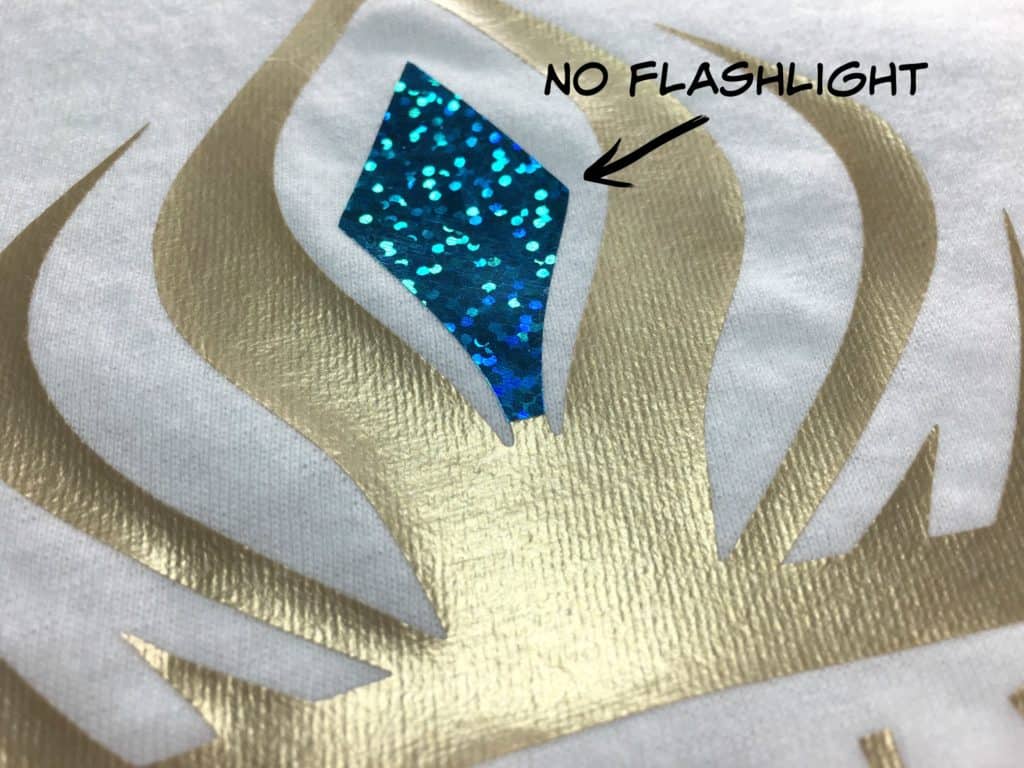
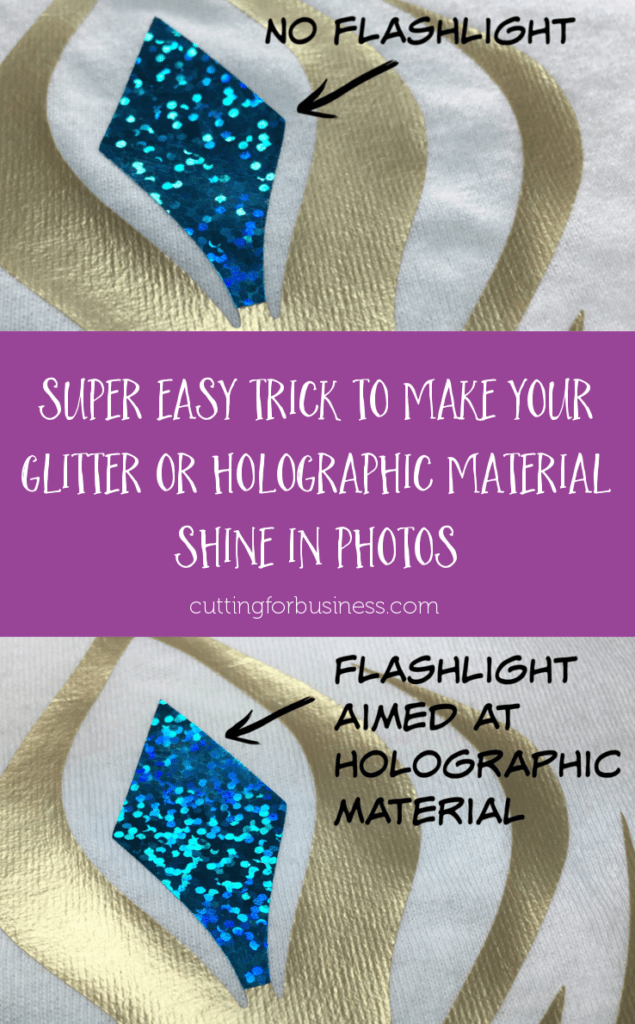
    In this first picture, you can clearly see the holographic material (it’s Siser’s holographic aqua heat transfer material), but it’s got several sections that are dark and dull.
    The Secret to Photographing Glitter and Holographic Material for Silhouette Cameo and Cricut crafters - by cuttingforbusiness.com

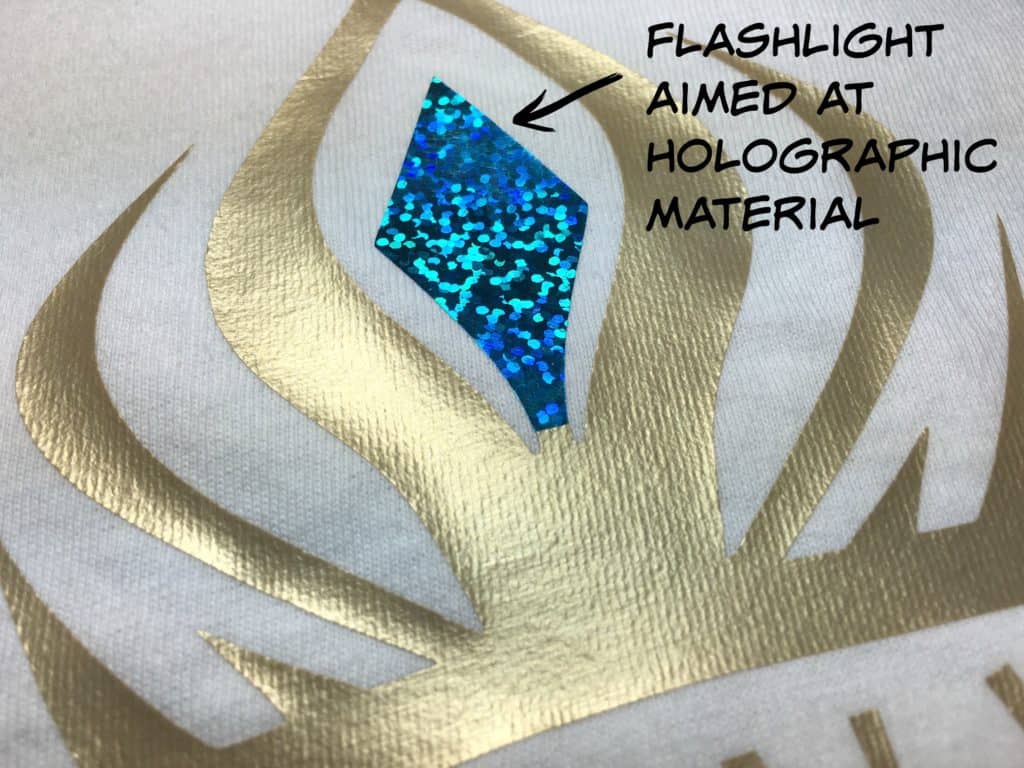
    When I shine a flashlight onto the material, it brightens and the dark, dull sections shine! Pretty neat, huh?
    The Secret to Photographing Glitter and Holographic Material for Silhouette Cameo and Cricut crafters - by cuttingforbusiness.com

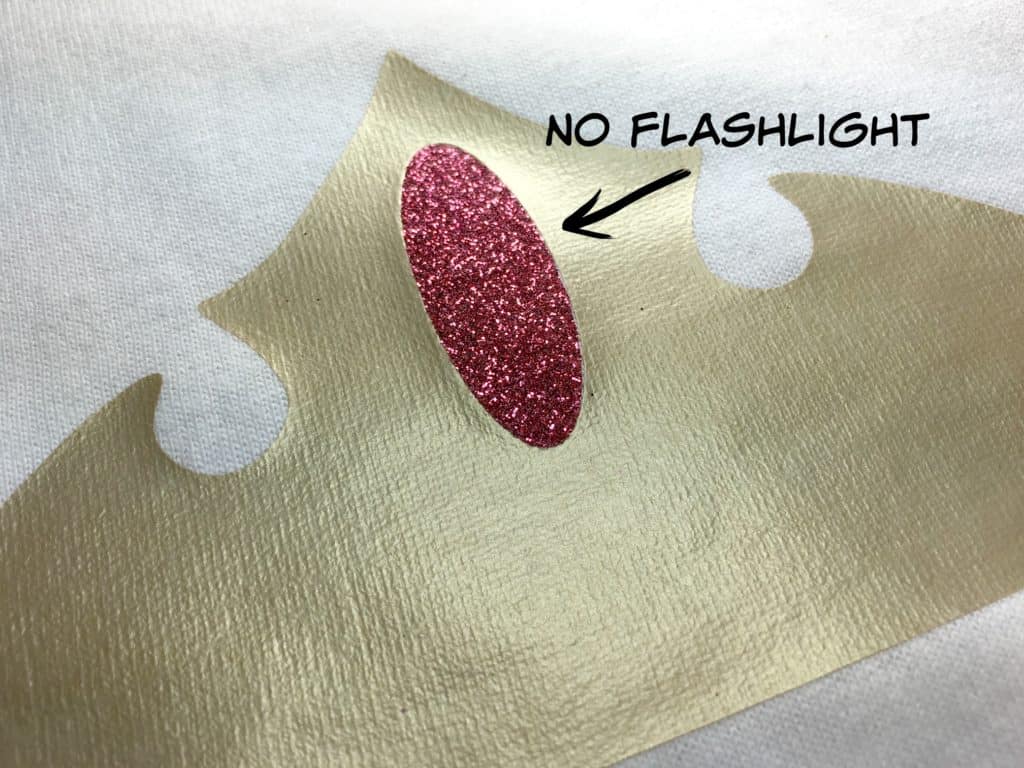
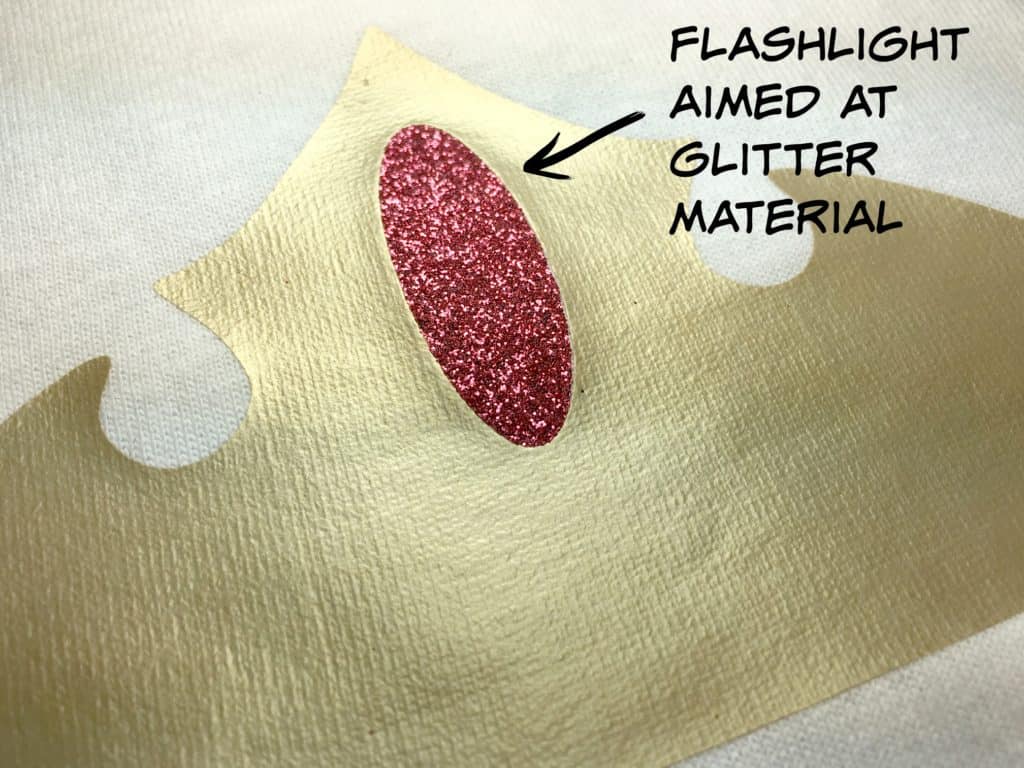
    You can see the same thing happen below in this photo of glitter heat transfer vinyl (it’s Siser’s blush glitter heat transfer material). The glitter appearance is overall dull and dark in sections.
    The Secret to Photographing Glitter and Holographic Material for Silhouette Cameo and Cricut crafters - by cuttingforbusiness.com

    When I shine a flashlight onto the glitter, it brightens up the glitter and you can see each of the glitter specks!
    The Secret to Photographing Glitter and Holographic Material for Silhouette Cameo and Cricut crafters - by cuttingforbusiness.com

    Photographing a larger product? Grab a garage worklight, a photography spotlight, or a larger lamp to shine on the specialty material. Just an easy way to brighten up your up photos with holographic or glitter designs!

    Save this post to Pinterest and then try it out:
    The Secret to Photographing Glitter and Holographic Material for Silhouette Cameo and Cricut crafters - by cuttingforbusiness.com

  • Tutorial: How to Easily Cut Down Vinyl Rolls

    Have some wide rolls of vinyl that you’d like to cut down to save time? No problem. Today, I will show you how to easily cut down vinyl rolls.

    Many crafters use a Silhouette or Cricut with a maximum cutting width of 12″. Unfortunately, most heat transfer vinyl sold in rolls comes wider than 12 inches. It can be time consuming to use scissors, a rotary cutter, or guillotine cutter to cut down your vinyl rolls.

    To save time, I usually cut down my rolls as soon as they arrive with a table saw. Yep, believe it or not, I use a table saw.

    Tutorial: How to Easily Cut Down Vinyl Rolls - cuttingforbusiness.com

    Silhouette Cameo Pro

    Before I show you how to easily cut down vinyl rolls, did you know that the Silhouette Cameo Pro has a maximum cutting width of 24″?

    Shop Silhouette Cameo Pro.

     Tutorial: How to Easily Cut Down Vinyl Rolls with a Saw

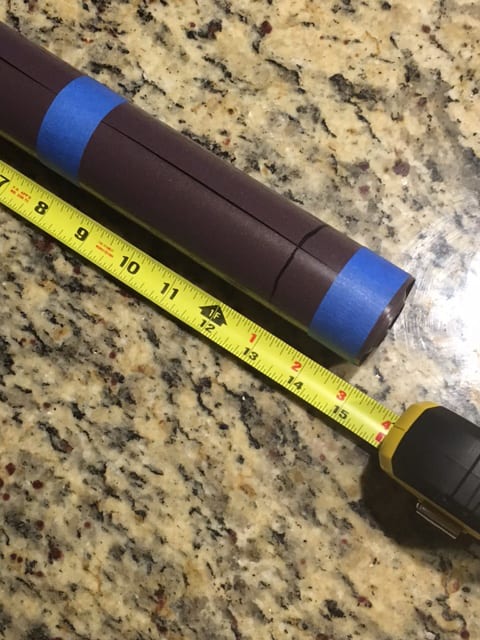
    Step 1) Make sure the vinyl is rolled very tightly. Using tape (I use painter’s tape), tape the roll together on both ends.

    Step 2) Use a permanent marker to mark where you will cut the vinyl roll. I usually purchase 15 inch rolls and cut them down to 13 inches. 13 inches still fits on a Silhouette or Cricut mat well or feeds into a Silhouette Cameo without a mat. Tip: You could also purchase 24 inch rolls and cut them in half to make 12 inch rolls!

    How to Easily Cut Down Vinyl Rolls - Great for Silhouette Cameo or Cricut owners - by cuttingforbusiness.com
    Measure and tape the vinyl roll.

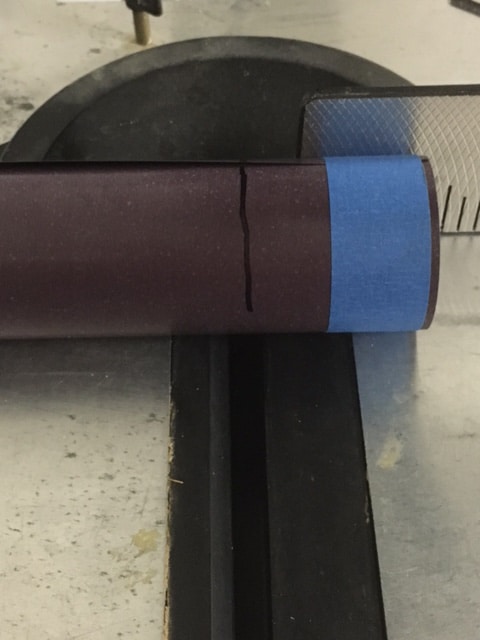
    Step 3) Cut the vinyl roll down. I use a table saw, but you could also use a circular saw. If you aren’t comfortable with power tools, you could probably use a hacksaw (depending on the thickness of the roll).

    How to Easily Cut Down Vinyl Rolls - Great for Silhouette Cameo or Cricut owners - by cuttingforbusiness.com
    Cut the vinyl roll.
    How to Easily Cut Down Vinyl Rolls - Great for Silhouette Cameo or Cricut owners - by cuttingforbusiness.com
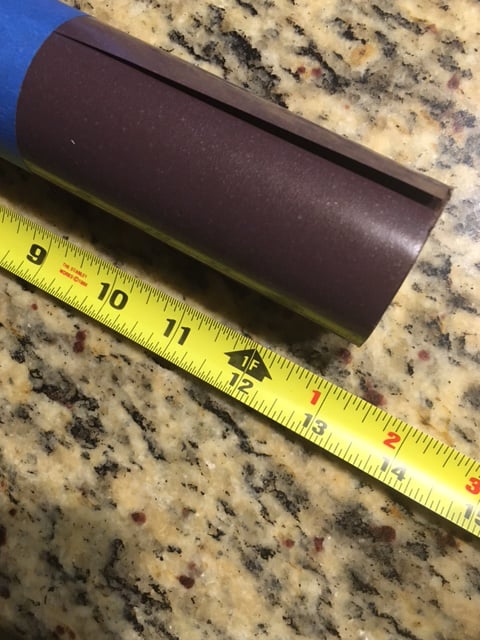
    After cutting the vinyl roll.

    That’s it – it’s just that easy to save time in your Silhouette or Cricut business.

    Looking for my favorite places to buy patterned vinyl? See my list of the best places to buy patterned vinyl. And, let me know in the comments – how do you cut down vinyl rolls?

  • Where to Buy Sublimation Printers, Supplies, and Blanks

    I’ve had such a great time talking sublimation on the blog this week. If you missed anything, find it all in this Sublimation Roundup for Silhouette and Cricut crafters.

    Recommended Sublimation Supplier

    I buy most of my sublimation supplies through Heat Press Nation. Not only do I appreciate their fast shipping and great customer service – I have actually had the opportunity to meet them in person several times. Here’s some of the team:

    Heat Press Nation - Where to Buy Sublimation Printers, Supplies, and Blanks - by cuttingforbusiness.com

    Sublimation Shopping List

    Sublimation printer and ink
    Sublimation transfer paper
    Sublimation blanks
    Heat press and/or mug press or mug wraps
    Heat resistant tape
    Heat resistant gloves (if you will be working with ceramics)

    Sublimation for Cheap

    I entirely understand if you can’t afford $700+ for a sublimation printer. If you’d like to try out sublimation, but it isn’t in your budget, you can purchase an Epson printer and change out the ink. Here’s a list of what exactly you would need:

    Epson C88+ (Around $160)
    Sublimation Ink (Around $30)
    Empty Ink Cartridges (Around $48)
    Industrial Syringes for filling cartridges (Around $4)

    One important thing to remember if you purchase the Epson C88 is that the ink may clog if you don’t regularly use the printer.

    If you do sublimation, share something you’ve made in the comments to inspire others!

    Save this post to Pinterest so that you’ll be able to find it when you need it:

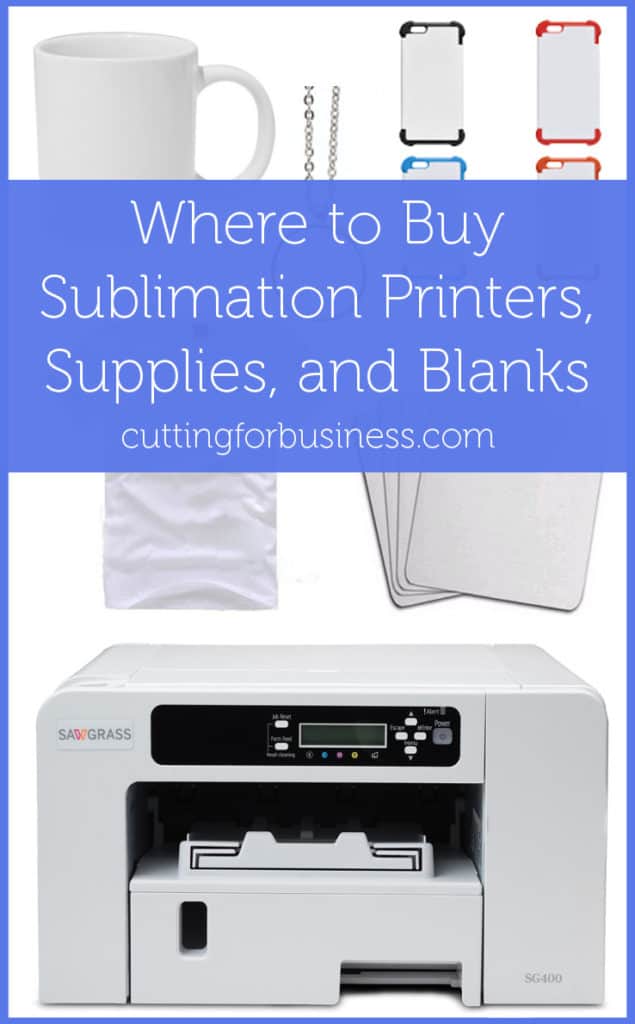
    Where to Buy Sublimation Printers, Supplies, and Blanks - Great for Silhouette Cameo and Cricut crafters - by cuttingforbusiness.com

  • Tutorial: Two Methods to Sublimate Mugs

    Hey sublimation fans! We started with an introduction to sublimation, then a tutorial for sublimation on apparel, and today I’m showing you how to do sublimate mugs.

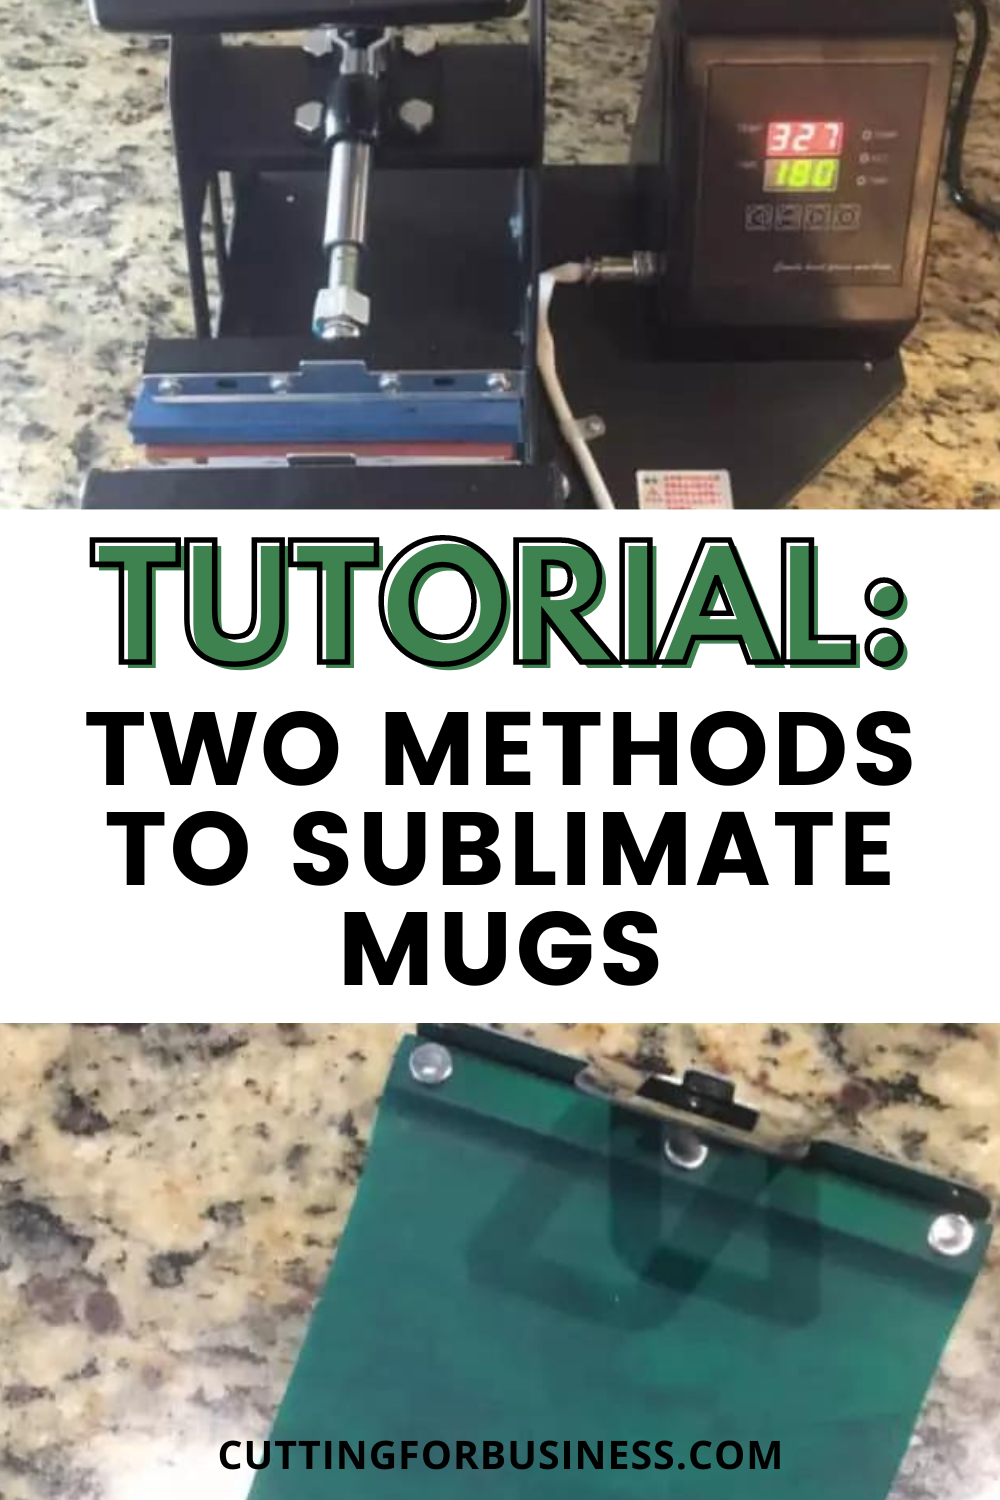
    Tutorial: Two Methods to Sublimate Mugs - cuttingforbusiness.com

    Supplies Needed

    Method 1: Sublimation with a Mug Press

    1) Create a design and print it on your sublimation printer (don’t forget to mirror!).

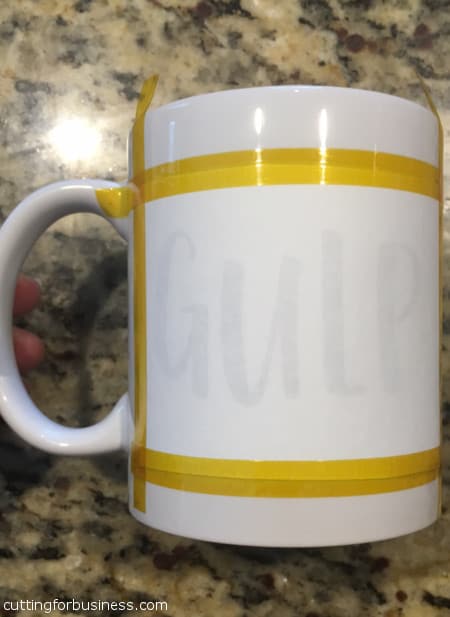
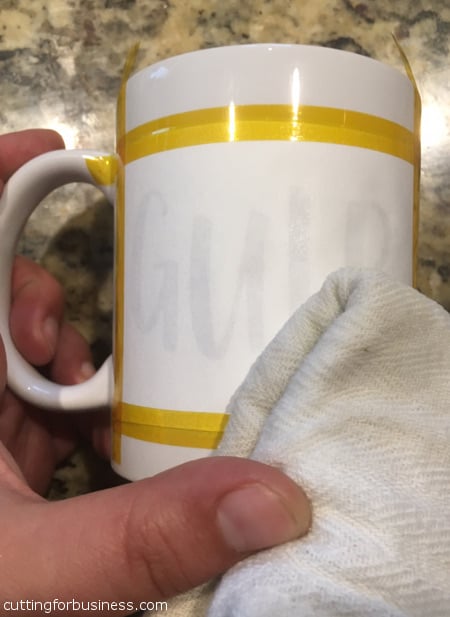
    2) Line up your design and tape into place with heat resistant tape.

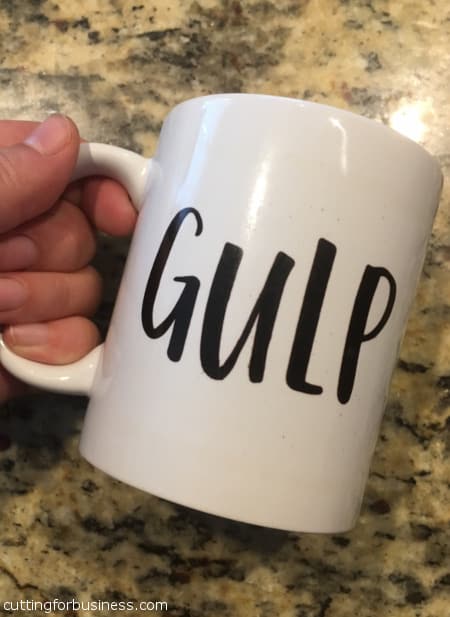
    Tutorial: How to Sublimate Mugs - Two ways - A great intro for Silhouette Cameo and Cricut crafters - by cuttingforbusiness.com

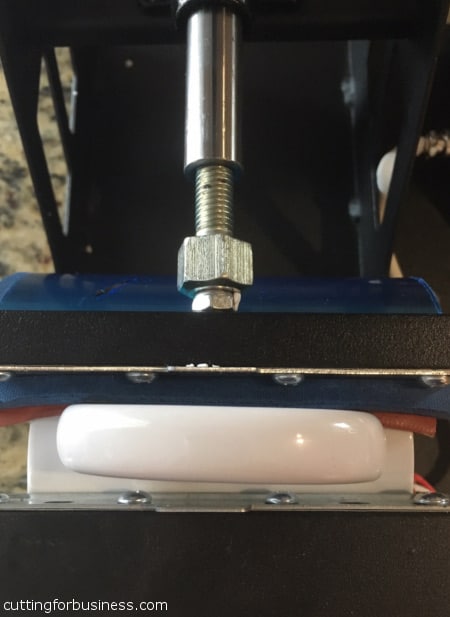
    3) Set up your mug press machine and load mug into your mug press. The actual operation of mug presses vary – follow the instructions that came with yours. (I bought this one. A quick note about buying a mug press: read, read, read. Some mug presses only work with certain sized mugs.)

    4) Press mug with firm pressure according to transfer paper and mug recommendations. I used 380/385 degrees for 185 seconds. When pressing, you’ll want to make sure that the handle of the mug isn’t touching the metal edges – that’s too much pressure.

    Tutorial: How to Sublimate Mugs - Two ways - A great intro for Silhouette Cameo and Cricut crafters - by cuttingforbusiness.com

    5) Using pot holders or gloves, remove the mug and transfer paper immediately. (These gloves worked much better than a pot holder – get 2.)

    6) Place the mug in warm water or place it in front of a fan to cool it off and prevent bleeding. Final product:

    Tutorial: How to Sublimate Mugs - Two ways - A great intro for Silhouette Cameo and Cricut crafters - by cuttingforbusiness.com

    That’s it! It’s pretty simple to use the mug press, but time consuming because each mug has to press for so long.

    Method 2: Sublimation with Mug Wraps

    1) Create a design and print it on your sublimation printer.

    2) Line up your design and tape into place with heat resistant tape.

    3) Slightly dampen the transfer paper. I used a towel and it worked well.

    Tutorial: How to Sublimate Mugs - Two ways - A great intro for Silhouette Cameo and Cricut crafters - by cuttingforbusiness.com

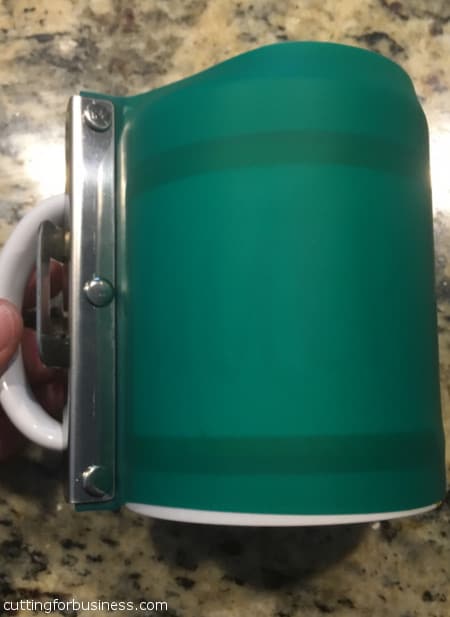
    4) Carefully place the mug wrap around the mug. Be careful not to wrinkle the transfer paper, and clamp it closed. Here is a link to the mug wraps.

    Tutorial: How to Sublimate Mugs - Two ways - A great intro for Silhouette Cameo and Cricut crafters - by cuttingforbusiness.com

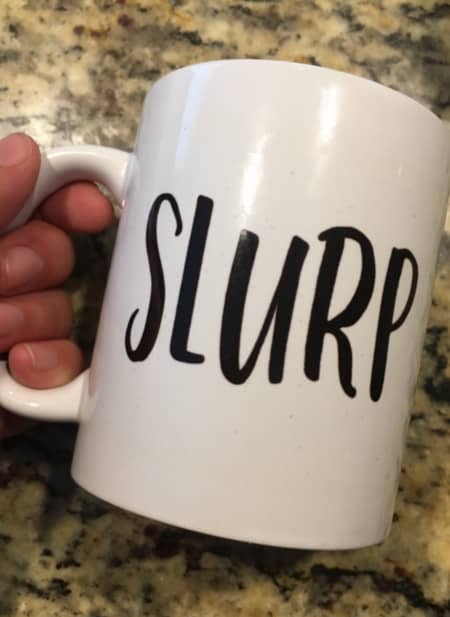
    5) Bake in oven (not a toaster oven or microwave!) according to the settings that came with your transfer paper. I baked for 14 minutes at 425 degrees. Final product:

    Tutorial: How to Sublimate Mugs - Two ways - A great intro for Silhouette Cameo and Cricut crafters - by cuttingforbusiness.com

    Both mugs are washable, can withstand scrubbing, and are dishwasher and microwave safe. If you plan to sell mugs, I’d highly recommend you choose sublimation over vinyl.

    Where to Buy Sublimation Supplies

    My favorite place to buy sublimation supplies is Heat Press Nation. Read why I love Heat Press Nation.

  • Tutorial: How to Sublimate T-shirts or Apparel

    Yesterday we talked about what sublimation is and today I’m showing you how to sublimate onto tee t-shirts, apparel, or other soft goods.

    Tutorial: How to Sublimate T-shirts or Apparel - cuttingforbusiness.com

    Supplies Needed

    Tutorial: How to Sublimate T-shirts or Apparel

    Step 1) Create a design. For this tutorial, I used Silhouette Studio, but you can use any photo editor you have.

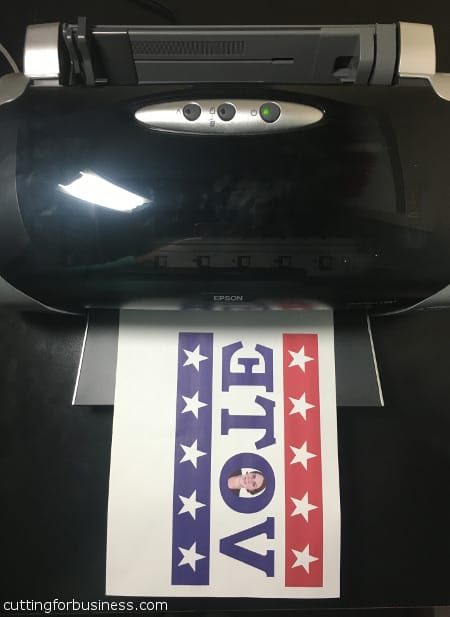
    Step 2) Mirror your design and print it on your sublimation printer.

    Tutorial: How to do Sublimation on Tee Shirts or Apparel - Great for Silhouette Cameo and Cricut small business owners - by cuttingforbusiness.com

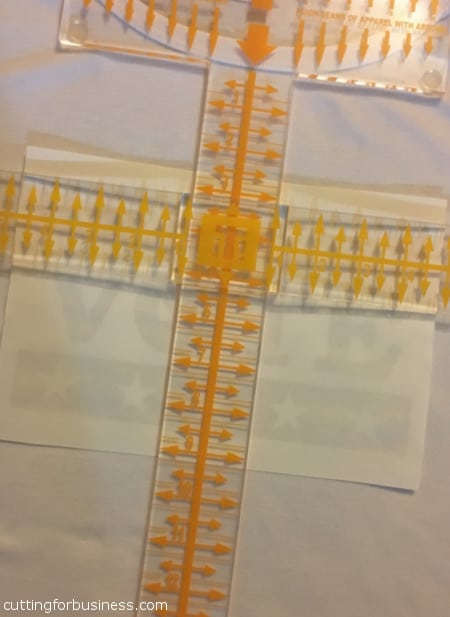
    Step 3) Line your up your design. I use a Tee Square It, but feel free to line it up however you’d like.

    Tutorial: How to do Sublimation on Tee Shirts or Apparel - Great for Silhouette Cameo and Cricut small business owners - by cuttingforbusiness.com

    Step 4) Press your design onto your apparel using a heat press. Your transfer paper should have recommended pressing times and temperatures. I pressed with medium pressure at 385 degrees for 35 seconds.

    Step 5) Remove the transfer paper.

    sub6

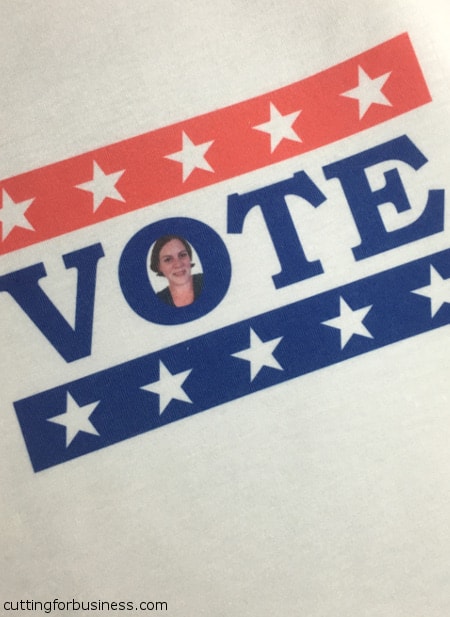
    That’s it – it’s so easy!

    Sublimation Versus Vinyl

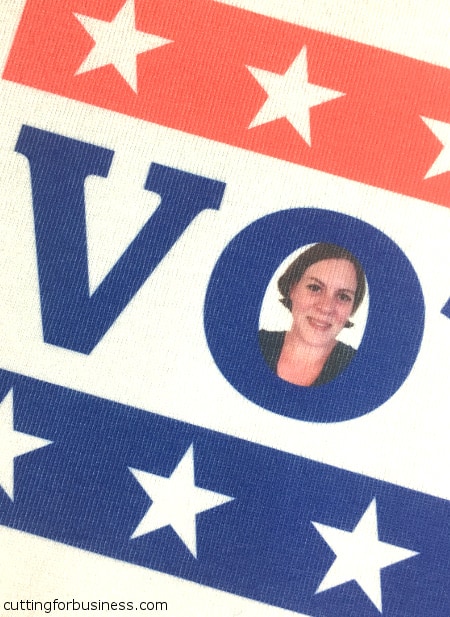
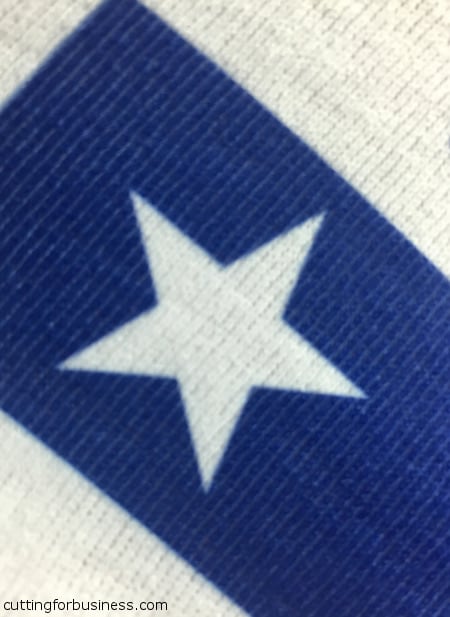
    I took a few closeup photos for you to see how sublimation looks. Unlike vinyl, the design becomes part of the apparel. This means that when the fabric stretches; the design stretches!

    Tutorial: How to do Sublimation on Tee Shirts or Apparel - Great for Silhouette Cameo and Cricut small business owners - by cuttingforbusiness.com
    Tutorial: How to do Sublimation on Tee Shirts or Apparel - Great for Silhouette Cameo and Cricut small business owners - by cuttingforbusiness.com

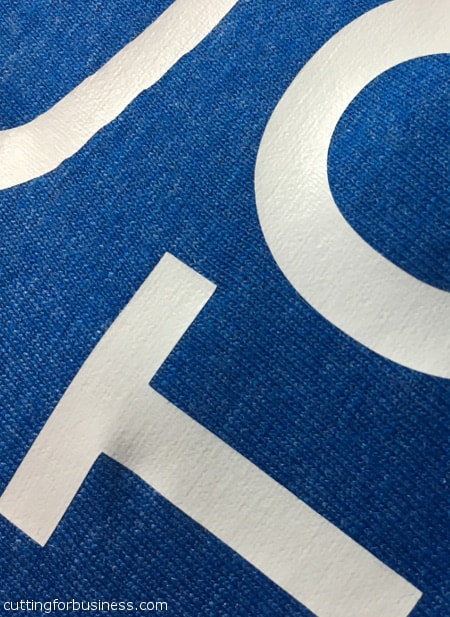
    This photo shows how vinyl compares to sublimation. Notice how the vinyl design sits on top of the apparel.

    Tutorial: How to do Sublimation on Tee Shirts or Apparel - Great for Silhouette Cameo and Cricut small business owners - by cuttingforbusiness.com

    More Sublimation Information & Tutorials

    Guide to Sublimation for Crafters
    Two Ways to Make Mugs Using Sublimation

    (Oh! Please get out and vote this year, but don’t write me in as a candidate. I’m pretty tied up with the blog.)

  • A Guide to Sublimation for Crafters

    Why is sublimation on a blog focused on using your Silhouette or Cricut in your business? Sublimation is a natural progression from using vinyl and is a great way to handle larger orders.

    A Guide to Sublimation - cuttingforbusiness.com

    A Guide to Sublimation

    What Exactly is Sublimation?

    Sublimation, or dye sublimation printing, is a process where you use a special printer, special inks, and special paper to create a design to put on a variety of blank products. You then use a heat press to transfer the design onto a specially coated product blank.

    For my science nerd blog readers (that includes me!): This process works because sublimation ink can go from a solid to a gas without a liquid form – much like dry ice.

    FAQ About Sublimation

    Q: Will any printer work?
    A: No, you must have a sublimation printer with sublimation ink and use sublimation paper.

    Q: Will any blank product work?
    A: No, you must use specially coated blank products. You cannot easily coat blank products yourself.

    Q: Why would I use sublimation instead of vinyl?
    A: In cases of adhesive vinyl, the vinyl can ultimately be peeled off. When you sublimate a design, it becomes part of the product and is permanent. In cases of heat transfer vinyl, sublimation gives you more possibilities including using photos and completing intricate designs without weeding or intensive layering.

    What Products Can You Make with Sublimation?

    There is a wide range of products that you use with sublimation, including:

    • Apparel: Tee shirts, tank tops, hoodies, sweat pants, shorts.
    • Baby items: Bibs, clothing, hats, blankets.
    • Winter gear: Hats, ear warmers, scarves.
    • Accessories: Socks, hats, bandanas, tote bags, shoulder bags.
    • Home decor: Blankets, throw pillows, towels, clocks.
    • Kitchen goods: Cutting boards, mugs, steins, water bottles, tiles, coasters, aprons.
    • Electronics accessories: Phone cases, tablet cases, mouse pads, laptop cases.
    • Other: Pet bowls, picture frames, jewelry, magnets, license plates, keychains, puzzles.
    • …and much more!

    Now, move on and see how sublimation works.


  • Where to Buy Colored Infant Bodysuits and Gowns

    Another #supplierspotlight on the blog today with a harder to find blank product: infant bodysuits and gowns – particularly colored ones. (Friendly reminder: the word “onesie” is trademarked to Gerber. Unless you are using Gerber brand onesies, you cannot use this term to sell). View previous #supplierspotlight posts at this link.

    Where to Colored Infant Bodysuits and Gowns

    My go to supplier for infant layette is Monag Apparel, who is both a manufacturer and wholesaler. I’ve previously tried Rabbit Skins, Gerber, Carter’s, and Laughing Giraffe and strongly prefer Monag because they are higher quality. You will need a tax ID to order from Monag, and they ship from New York.

    Gowns and bodysuits are generally available in these colors: Aqua, red, white, black, chocolate, fuschia, heather, kelly green, navy, pink, purple, red, sky, slate, steel blue, and turquoise. Sample pricing on infant bodysuits is around $3 each, but once you buy 6 or more the price goes down about 10%. Sample pricing on gowns is around $5 each with price breaks at 6 as well. What I really love about Monag is that they also carry several styles of blank bibs, blankets, knit caps, and coordinating infant pants. This makes it easy to offer complete outfits or accessories as an upsell.

    Who is your favorite supplier for colored infant bodysuits or do you prefer to dye them yourself? Share with other readers in the comments.

    Help a fellow crafter out by pinning this post on Pinterest. Just hover over the image below or tap on mobile to pin it:

    Where to Buy Colored Infant Bodysuits and Gowns for Silhouette Cameo and Cricut small business crafting - by cuttingforbusiness.com

    To find this post again quickly, use keyword LAYETTE.

  • 8 Places to Buy Tumblers for Crafting

    Whether you are looking for stainless steel tumblers to glitter and epoxy, plastic tumblers to add vinyl, or specialty tumblers, I’ve got you covered.

    Let’s look today at where to buy tumblers for crafting.

    Where to Buy Tumblers for Crafting - cuttingforbusiness.com

    8 Places to Buy Tumblers for Crafting

    Save a Cup

    • What They Sell: Save a Cup offers clear and colored tumblers, metal tumblers, wine tumblers, mason jar tumblers, skinny tumblers, sublimation tumblers, and more.
    • Shipping: Free shipping on all orders.
    • Company Location: California
    • Tips: The best way to order from Save a Cup is in bulk. They offer assortable bulk pricing, which means you can mix and match colors (same style) to reach their price breaks. They run sales all the time (including flash sales) so be sure to follow them on social media and sign up for their mailing list.
    • Shop: Save a Cup

    Makerflo Crafts

    • What They Sell: Makerflo Crafts sells stainless steel, sublimation, and pre-sanded tumblers.
    • Shipping: Free shipping on orders over $125.
    • Company Location: Arizona
    • Tips: Sign up for their rewards program to earn points to redeem for branded products and craft supplies.
    • Visit: Makerflo Crafts

    Discount Mugs

    • What They Sell: Discount Mugs offers printed and blank products and carries a wide variety of tumblers and other drinkware in plastic, metal, and glass.
    • Shipping: Free shipping over $75.
    • Company Location: Florida
    • Tips: The ordering minimums are higher than Save a Cup, but if you are buying a large amount in bulk you can save a lot of money.
    • Shop: Discount Mugs

    The Stainless Depot

    • What They Sell: The Stainless Depot sells stainless steel tumblers individually and by the case.
    • Shipping: Calculated at checkout.
    • Company Location: New Jersey
    • Tips: Follow The Stainless Depot on social media for discounts.
    • Shop: The Stainless Depot

    Totally Promotional

    • What They Sell: Totally Promotional offers a variety of printed and blank plastic drinkware, as well as a selection of stainless steel tumblers.
    • Shipping: Some products offer free shipping.
    • Company Location: Ohio
    • Tips: View their promotions page for current deals.
    • Shop: Totally Promotional

    Bulk Craft Supply

    • What They Sell: Bulk Craft Supply sells stainless steel and sublimation tumblers. All stainless steel tumblers come pre-sanded.
    • Shipping: Free shipping on orders over $49.
    • Company Location: Ohio
    • Tips: Subscribe to their newsletter for promotions and new product news.
    • Shop: Bulk Craft Supply

    Dollar Tree

    • What They Sell: Dollar Tree has a small selection of plastic and metal tumblers.
    • Shipping: Shipping is free if you get the order delivered to your local store. Otherwise, shipping fees are based on weight and distance.
    • Company Location: Nationwide.
    • Tips: I don’t mind using Dollar Tree tumblers for one time use events. I prefer to shop in store, as many crafters have reported cracked or scratched tumblers when ordering online. For a higher quality product, skip Dollar Tree.
    • Shop: Dollar Tree

    Amazon

    • What They Sell: Amazon has a variety of plastic and stainless steel tumblers individually and in bulk.
    • Shipping: Varies, free with a Prime membership.
    • Tips: Amazon is usually priced higher than ordering directly from a supplier. If I’m on a time constraint or need only one tumbler, I’ll order from Amazon.
    • Shop: Amazon
  • How to Organize Your Craft Room: 8 Tips from Pros

    I know it is something that every crafter can relate to: A disastrous craft room. For me, my craft space usually looks like a tornado went through it.

    I recently got the chance to talk to four professional organizers and asked them for tips on how to organize your craft room.

    How to Organize Your Craft Room: Tips from Pros - cuttingforbusiness.com

    Meet the Organizers

    Naomi from Open Doors Organizing Services
    Robyn from Organize 2 Harmonize
    Christina from Streamlined Living
    Amy from Amy Trager

    How to Organize Your Craft Room Tips

    Q: What are the best containers to store craft supplies in?

    A: All the professional organizers agreed that clear plastic bins are the best containers to store craft supplies in. Why? Because you can see what’s inside them and they can stack. Naomi noted that once you “…add on labels you’ve got a great start to an organizational system”. Christina reminded crafters to also leave room for more supplies to be added later when planning your storage.

    Q: When setting up a craft workspace, what are some rules to follow for good workflow?

    Christina suggests keeping everything at arm’s reach to minimize the time spent going and getting supplies.

    Naomi noted that you should keep your most used supplies closer to you and less used supplies can be farther away if needed. She also said, “However, it is best if all of those stored supplies are still visible, whether in a closet with the door open or on shelves.”

    Q: What is your advice on multi purpose rooms? (Example: Crafting at the dining room table.)

    Amy suggests that a rolling cart so that it can be moved out of the way when the needs of the room change. She also noted that a mat on the table that is portable and can be picked up and moved at the end of crafting time is a great idea.

    Naomi also recommended a rolling cart and even shared one of her favorites which is the RASKOG utility cart from IKEA. Then, add magnetic caddies to the side of the cart like those from the Urbio collection at The Container Store.

    Q: Where to start organizing when your craft room is bursting with stuff?

    Amy suggests that you first sort everything into categories and decide what things you want to keep. After everything is then sorted, then purchase containers to store the items you plan to keep.

    Naomi suggests starting with one drawer or bin or shelf. She likes to start at one end of the room and work her way around. Set a timer for 15 minutes and do what you can. When the timer dings, if you are feeling overwhelmed, stop, but if you are feeling motivated, then continue!

    Christina agreed to work in 15 minute increments and to remember that you craft space didn’t become a mess in one day, so don’t expect it to be clean in just a day.

    Robyn reminds us that a little each day will make a huge difference.

    Q: What tips do you have for organizing small/tiny spaces?

    Robyn says that the key to organizing small spaces is to only keep what is necessary. She also notes to look for multi functional furniture like end tables with drawers or an ottoman with storage inside.

    Naomi reminds us to use wall space for small spaces. Specifically, she said the best thing to do is to think vertically. You may not have the square footage on the floor, but look up at the walls at all the unused potential! Use tall bookshelves, shelving units and floating shelves for storage, magnetic boards for your ideas, and white boards for writing down supplies that you need to buy.

    Q: What advice do you have for maintaining order once everything is organized?

    Christina shared an awesome tip: “Put everything back where you got it from as soon as you are done with it. Craft spaces can get messy in a hurry because there’s usually lots of pieces parts involved. Simply cleaning up at the end of each project or at the end of the day makes all the difference in maintaining the organized space. Build that clean up time into your crafting time. I know it isn’t as much fun as crafting, but you’ll thank yourself later!” How simple is that? I’m kind of embarrassed that I didn’t think to build in clean up time to my crafting schedule!

    Amy noted that you should “Try your best to make order a new habit. Just like anything else you’ll have to remind yourself of where items belong now – and make sure they’re put away when you’re done using them. Use labels on drawers and containers, if it will help you remember where it all goes.”

    Q: How can crafters get in contact with a professional organizer?

    Crafters can find professional organizers through NAPO – the National Association of Professional Organizers.

    Q: What is the average cost of using a professional organizer?

    The professional organizers noted that professional organizer rates generally fall between $25 to $150 per hour, depending on the experience of the organizer. Naomi also noted that some organizers may offer a discounted package or a flat rate if you are looking to work on a large craft space and it may take longer than one day to complete.

    How I Organize My Craft Room

    I recently got a DreamBox from Create Room. And, it’s been life changing as far as the mess in my craft room. Read more about my DreamBox and get a coupon code.

    Have More Questions? Ask the Professional Organizers

    Reach out to any of the professional organizers through social media:

  • Why Does Paint Bleed When Using a Vinyl Stencil?

    If you want to sell wooden signs, they need to look nearly perfect because the market is competitive. I often see wooden sign makers struggling to get crisp paint lines when using a vinyl stencil cut on a Silhouette Cameo or Cricut. When they ask for help from fellow crafters, someone always tells them to use Mod Podge. I love Mod Podge, but it is expensive – and unnecessary when making wooden signs.

    Why does paint bleed when using a vinyl stencil?

    There’s actually a couple of reasons:

    1. The paint seeps underneath the vinyl stencil because the wood was not sanded well enough. This is probably the biggest problem I see. You should sand your wood with multiple grits of sandpaper, starting with 120 or 150 grit sandpaper and finishing with 220. When the wood is not sanded well enough, the vinyl cannot get a good seal because the surface is uneven (even if you can’t see the uneven spots). Read more about sanding wood in this post.
    2. The vinyl was not burnished (rubbed) well enough onto the wood. Again, the paint seeps underneath the stencil. Use a squeegee to be sure that the vinyl adheres well to the wood.
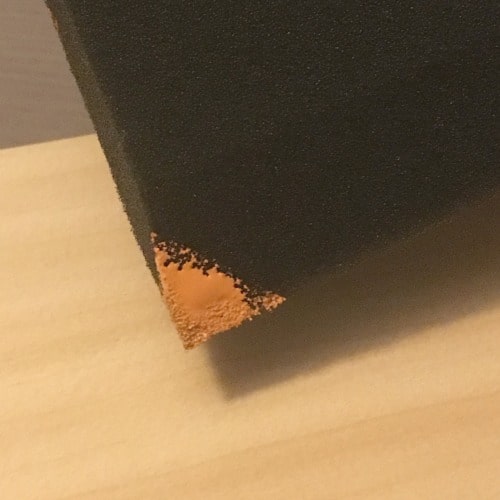
    3. You are using too much paint. I recommend using a foam sponge brush or a makeup sponge and dabbing the paint on in an up and down motion. It is best to only dip the corner of your brush/sponge into the paint and use a tiny amount of paint. Here’s a photo of what my brush looks like when I stencil – I use a tiny amount of paint at once: Why do vinyl stencils bleed - and how to fix it - no Mod Podge needed! A great article for Silhouette Cameo and Cricut crafters who make wooden signs. By cuttingforbusiness.com

    Tip: If you try the 3 things above and are still having paint bleed, try this: After placing your vinyl stencil on the wood, paint over it using the same color as you used on the background. This seals the edges the same way that Mod Podge does – for much cheaper.

    When I do recommend using Mod Podge

    There is one time when I would use Mod Podge: if you are not painting the background of the sign (leaving it natural wood) AND purposely leaving the wooden surface rough. Mod Podge will help keep your paint from bleeding due to the rough surface. See the tutorial for using a stencil on rough wood at this link.

    Looking for more tips about buying wood for your Silhouette Cameo or Cricut business? Head to this post. Have a ton of Mod Podge you need to use now? Check out Mod Podge Rocks for lots of craft projects.

    Be sure to pin the image below on Pinterest so you can try these tips later:

    Why do vinyl stencils bleed - and how to fix it - no Mod Podge needed! A great article for Silhouette Cameo and Cricut crafters who make wooden signs. By cuttingforbusiness.com