Author: christine

  • Where to Buy Tee Shirts for Silhouette or Cricut Crafting

    The absolute most often asked question that I receive is, “Christine, where is the best place to buy (name of item)?” I cover great places to buy items to embellish and use in your Silhouette Cameo or Cricut small business in supplier spotlights. (See more of these at this link.) Today, we are looking at where to buy tee shirts. I asked my savvy small business owners in The Insider’s Club their favorite places to shop for tee shirts to create this list – and added a few of my own.

    Where to Buy Tee Shirts for Crafting

    List includes notes about suppliers.

    • Jiffy Shirtsjiffyshirts.com – No tax ID needed, orders over $59 ship free. Warehouses in 10 states.
    • Sanmarsanmar.com – Tax ID needed to order. Warehouses in 8 states.
    • Blank Shirtsblankshirts.com – Retail and wholesale accounts available. Warehouses in 7 states.
    • SS Activewearssactivewear.com – Tax ID needed. Free shipping on orders over $200. Warehouses in Illinois, Kansas, California, and New Jersey.
    • Sassy Apparel Blankssassyapparelblanks.com – No tax ID needed. Ships from New York area.
    • Shirt Champsshirtchamps.com – No tax ID needed. Warehouses in 9 states.
    • One Stop Inconestopinc.com – Tax ID needed to order. Shipping site varies depending on style purchased. Refer to shipping maps on website.
    • Mission Imprintablesmissionimprintables.com – Tax ID needed to order. Warehouse in California.
    • Kaviokavio.com – Tax ID needed to order from wholesale area. Warehouse in California.
    • American Apparelamericanapparel.com – Need tax ID to order, orders over $50 ship free. Warehouse located in California.
    • Soffesoffebusiness.com – Retail and wholesale accounts available, orders over $60 ship free. Warehouse located in North Carolina.
    • TSC Appareltscapparel.com – Tax ID needed to order. Warehouses located in Colorado, Ohio, California, Georgia, Texas, and New Jersey.
    • Boxercraft – boxercraft.com – Tax ID needed to order. Warehouse located in Georgia.
    • Shirts In Bulkshirtsinbulk.com – No tax ID needed, $ 50.00 free shipping, and flat rate shipping of $4.95 if the order is less than $50.00.
    • Alpha Broderalphabroder.com – Tax ID needed, multiple warehouses.

    How to Decide Which Supplier is Best for Your Business?

    Here is a step-by-step list to decide which supplier is right for you:

    1. Browse the websites above and eliminate the ones that don’t have the style of shirt that you are looking for.
    2. Research online reviews for your chosen suppliers.
    3. View the shipping times and warehouse locations. To save on shipping and get your products faster, pick a supplier near your location. (This is great when you run out of something and need it quickly!)
    4. Look at return policies and support materials for sellers available on the supplier’s website.
    5. Contact the supplier and ask any questions you may have before placing an order. Pay attention to how quickly and thoroughly your questions are answered.

    Did I leave off your favorite supplier? Leave it in the comments and I will add it.

    Sharing this post helps support Cutting for Business. Just hover over the image below or tap on mobile to pin it:
    Where to buy tee shirts for your Silhouette Cameo or Cricut crafting or small business - by cuttingforbusiness.com

    To quickly find this post again, search SHIRTSUPPLIERS.
  • What is a Ring Spun Cotton Shirt?

    A Cutting for Business reader recently stumped me on a question: “What is the difference between a ring spun cotton shirt and a regular cotton shirt?” Honestly, I have some ring spun tee shirts and I know that they are softer than regular cotton shirts – but why?

    Regular Cotton versus Ring Spun Cotton

    The cotton fibers used in both regular cotton and ring spun cotton are the same; however the process to make the two types of shirts are different:

    Regular cotton: When creating regular cotton shirts, the strands of cotton fiber are twisted together to make yarn. The cotton yarn is then woven together to make cotton fabric. From the fabric, shirts are created.

    Similarly, ring-spun cotton yarn is made by constantly twisting and thinning the cotton strands to make yarn. The higher number of times that the strands are twisted will determine how soft the cotton yarn becomes. (This similar to thread count in sheets: the higher the thread count – the better the quality.) Ring spun shirts generally look slightly fuzzier than regular cotton.

    Which one is better in your Silhouette Cameo or Cricut Business?

    It’s a personal choice. Both types of shirts will accept heat transfers, vinyl, and rhinestones. From the explanation above you can guess that ring spun cotton shirts are more expensive than regular cotton shirts. However, ring spun cotton shirts are more durable and softer than their regular cotton counterparts. If you offer ring spun cotton shirts, be sure to highlight this in your listing by noting that ring spun cotton is higher quality and softer.

    Wondering the best place to buy tee shirts? Head over to this post.

    Pin it now so you don’t forget, just hover over it:

    What is the difference between a ring spun cotton shirt and a regular shirt? Which one is better for your Silhouette Cameo or Cricut small business? By cuttingforbusiness.com.

  • 6 Best Places to Buy Popsicle Sleeves

    Summer is here, and popsicle sleeves make great, inexpensive products to make with your Silhouette or Cricut.

    Today, I’m sharing where to buy popsicle sleeves.

    Best Places to Buy Popsicle Sleeves - cuttingforbusiness.com.

    Best Places to Buy Popsicle Sleeves

    Buy From the Manufacturer

    Where are the sellers I listed above getting their popsicle sleeves to sell? Resellers are likely buying directly from the manufacturer.

    If you need large quantities, there are plenty of manufacturers on both Temu and Alibaba selling popsicle sleeves. Pricing averages $.60 each without accounting for shipping (solid colors) and $1.50 each without shipping (patterns).

    Sew Popsicle Sleeves Yourself

    If you are handy with a sewing machine, consider making them yourselves. You’ll need a good sewing machine (or serger) and neoprene. Neoprene is the same material that wetsuits and mouse pads are made from. Many online fabric stores carry it.

    What Kind of Vinyl to Use with Popsicle Sleeves

    You would use heat transfer vinyl and a heat press or iron to personalize the popsicle sleeves.

    Alternative Uses for Popsicle Sleeves

    Popsicle sleeves can also be used as pencil holders or utensil holders for lunch boxes – it’s just how you market them!

    Love making popsicle sleeves? Find out where to buy can koozies.

  • 25 Calls to Action to Use in Your Craft Business

    Previously, I’ve talked about basic copywriting tactics to use in your Silhouette or Cricut small business. Today, let’s look at some calls to action. A call to action is the words you use to get your customer to do something. The something could be click a button, buy a product, like your Facebook page, share something with a friend, or anything else. Calls to action are great within your product descriptions, social media, emails, and more.

    With the holidays creeping closer, good calls to action can help you make more sales. (And, who doesn’t want more sales?)

    25+ Calls to Action to Use in Your Craft Business

    Share this post with a friend.
    Like this picture if you can relate.
    Limited number available, order today.
    While supplies last, order now.
    Message me now to start your custom order.
    Email me to learn more.
    Order today and get free shipping.
    Sign up for our mailing list and get a coupon in your inbox.
    Double tap if you agree. (Great for Instagram!)
    Click here for a sneak peek of a new product.
    Tag a friend that would love (name of your product).
    Order now to get your free gift.
    Learn more about (your product).
    Discover how to (do something). (Great for how to videos!)
    Watch this video to learn more.
    Follow (name of company/us) on (social media network).
    Browse the entire collection.
    Click here to receive a quote.
    Share why you love (product name).
    Upload a photo of your new (product name).
    Preorder to make sure you get one.
    Hurry, sale ends at midnight.
    Get one before I run out.
    Shop with us now.

    When you are creating your own calls to action, be sure to use verbs. If you need a refresher, verbs are action words like join, click, order, stop, or start.

    Before you go, consider using negative calls to action, too. Words such as worried, sick, or confused work well. Here’s a few examples:

    Worried that your package won’t arrive on time? Upgrade to overnight shipping.
    Sick of searching for the perfect birthday gift? Click here.
    Confused about the choosing the perfect colors? Email me now.

    Save this post to Pinterest so you can find it when you need it.

    25 Calls to Action to Use in Your Craft Business - Silhouette Portrait or Cameo and Cricut Explore or Maker - by cuttingforbusiness.com

  • Copywriting Tips for Craft Businesses

    Words are powerful. We’ve all seen this through famous speeches, literary works, and quotes. Words can also be powerful in our product descriptions and social media marketing. Today, let’s look at copywriting – specifically in our product descriptions.

    Not sure what copywriting means? It’s just a fancy term for the words that you use to describe your products to your customers or get your message across in marketing. Good copywriting can go a long way, so let’s look at a few tips:

    Tips for Copywriting in Your Craft Business

    • Find a voice and use it. Small and micro businesses (those run by one or two people) are special. Many customers seek out small businesses – so talk like a small business. Use first person language like, “I created this product” or “I chose this design”. You aren’t a large corporation, so don’t try to make yourself sound like one.
    • Tell a story. Since your customer can’t see your item, put it in their virtual hands. You can do this by highlighting the texture, colors, smell, and usefulness of your product.
    • Be to the point. Customers are busy and won’t take the time to read overly wordy descriptions. When customers don’t read descriptions, problems arise. You can help customers read things by being to the point. I also find that using lists or bullet points helps customers get the main points.
    • Steer clear of empty words. Words like “best”, “finest”, “prettiest”, and more. Couldn’t every seller say their product was the “best”? Empty words don’t help your listing, so skip them.
    • Use a diamond pattern of information. When creating your listings, put the most important information at the top. Put supporting information and details in the middle, and repeat your important information at the end.
    • Qualify your information. This means that you tell your customer the why behind your listing. There is an older psychology study that highlights the importance of qualifying information to people and using the word “because”. Take 5 minutes and read it here. The shortened version is that people respond better to phrases when you use the word “because”. Try it out in your descriptions. A few examples: “This framed vinyl quote will look great on your wall because the neutral colors blend with any decor.” Or: “Be sure to buy today because the sale ends tomorrow.”
    • Rhyming works. Think of some large brands or companies. Do they have rhyming jingles? They probably do because rhyming helps your brain remember things. Try it out in your social media.

    Have a few free hours today? Why not take a few minutes to look over your product descriptions and see where you can improve them? Need more tips? Here’s 11 questions your product description must answer.

    Love this post? Save it to Pinterest:


    Copywriting Tips for Craft Businesses - Silhouette Portrait or Cameo and Cricut Explore or Maker - by cuttingforbusiness.com

  • How To Easily Build Up Stock in Your Craft Business

    Are you planning on a craft show in the future, but thinking of making all the products daunting? Don’t worry, I’ve got an idea for you.

    Today, I’m going to share how to easily build up stock in your craft business. The best thing about this method is that it works whether you are prepping for a craft show or just wanting to build up ready to ship inventory.

    How To Easily Build Up Stock in Your Craft Business - cuttingforbusiness.com

    Sell One, Stock One Method

    My method for building up stock is called Sell One, Stock One. If you’ve never heard of it before, don’t worry – I made it up (kind of like the product based business cards).

    The basic premise is that you carry on with your business as usual. Each time you get an order, make two of the product. If the product is custom, make a generic version if possible.

    Then, you ship one to your customer and set the other one aside to sell at a later time. Easy as that! Before you know it, your stockpile of ready to ship products or inventory for your next craft fair is overflowing.

    Tip: You can also use this method to get ready for handmade holiday gift giving.

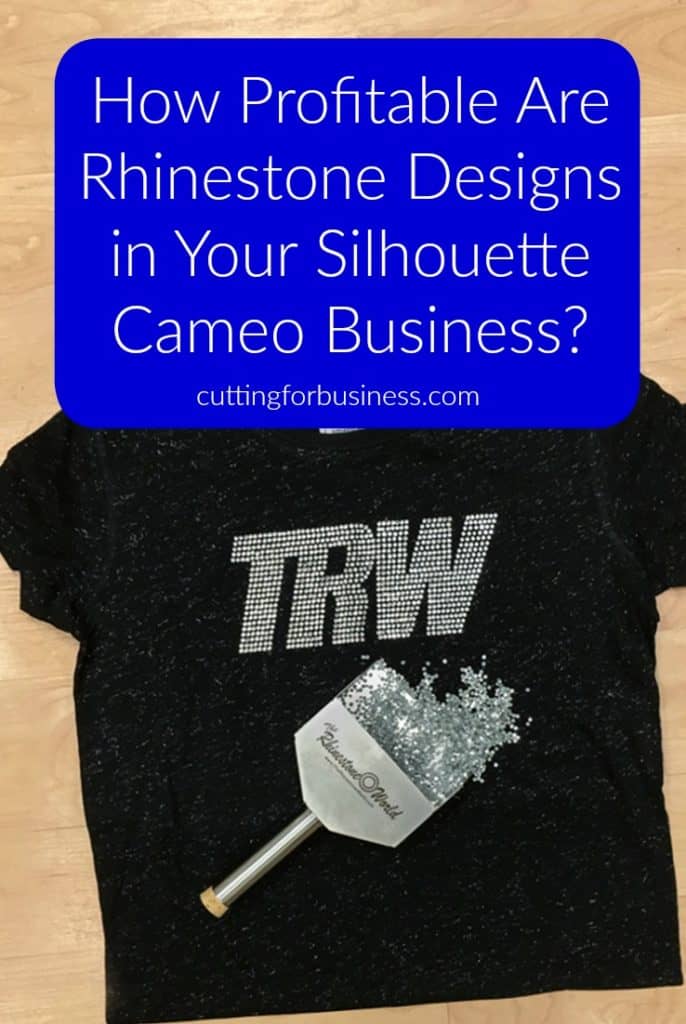
  • How to Add Rhinestones to Your Silhouette Cameo Business

    I’ve had several Cutting for Business readers ask me about rhinestones, more specifically – are rhinestones a profitable addition to my Silhouette or Cricut business? I’ll be honest with you, I am not much of a “bling” person. However, I know someone who is! Welcome Lisa Potts from The Rhinestone World. I’ll turn it over to her:

    One of the most common statements I hear from people is, “I have always wanted to do rhinestones, but I am too intimidated!” In your Silhouette business, rhinestones are an easy item to start using with high profits. Due to the demand of bling shirts with weddings, dance moms, and sport moms; a Silhouette business can quickly increase their profits by simply adding rhinestones to their existing offerings.

    What do you need to get started?

    If you already own a Silhouette, then the biggest investment is already purchased! With just a few more items, you’ll be ready to start cranking out some awesome bling!

    Rhinestones

    This is the most obvious item needed, of course. Be advised, there is a difference in rhinestone quality. Your products carry your business’ reputation, so make sure you are purchasing the best quality stones for your customers so you can proudly stand behind your work. Apparel rhinestones are called “hot-fix” rhinestones. These have a heat activated glue on the back and are best applied with a heat press. They can be pressed to most fabrics and Bling N-E-Thing decal material. Rhinestones are not recommended to be pressed to 100% nylon, ribbed garments, satin, or denim due to the likelihood of the stones falling off over time. TRW uses and recommends Korean low lead rhinestones for customers and businesses as they are the best quality for an affordable price. While rhinestones can be applied with a home iron, a heat press is the best option because you can regulate the pressure and temperature.

    Rhinestone Sizes and Types

    Rhinestones come in a variety of sizes, measured in “ss” units. The larger the number, the bigger the stone. SS10 rhinestones are the most common stones with the widest variety of colors.

    • SS6: 2mm
    • SS10: 3mm
    • SS16: 4 mm
    • SS20: 5 mm

    Rhinestones can come in other sizes, but SS6, SS10, SS16, and SS20 are the most commonly found and easiest to work with. In addition to the basic colors, you can also purchase Korean low lead stones in Arora Borealis or “AB” colors. These stones have an iridescent coat on the stone that reflects light more and creates a more “sparkling” appearance.

    Machine cut rhinestones contain more facets than our Korean low lead stones, which results in a higher quality and a brighter shine. These are most commonly used for accent pieces in designs due to their higher cost.

    Template Material

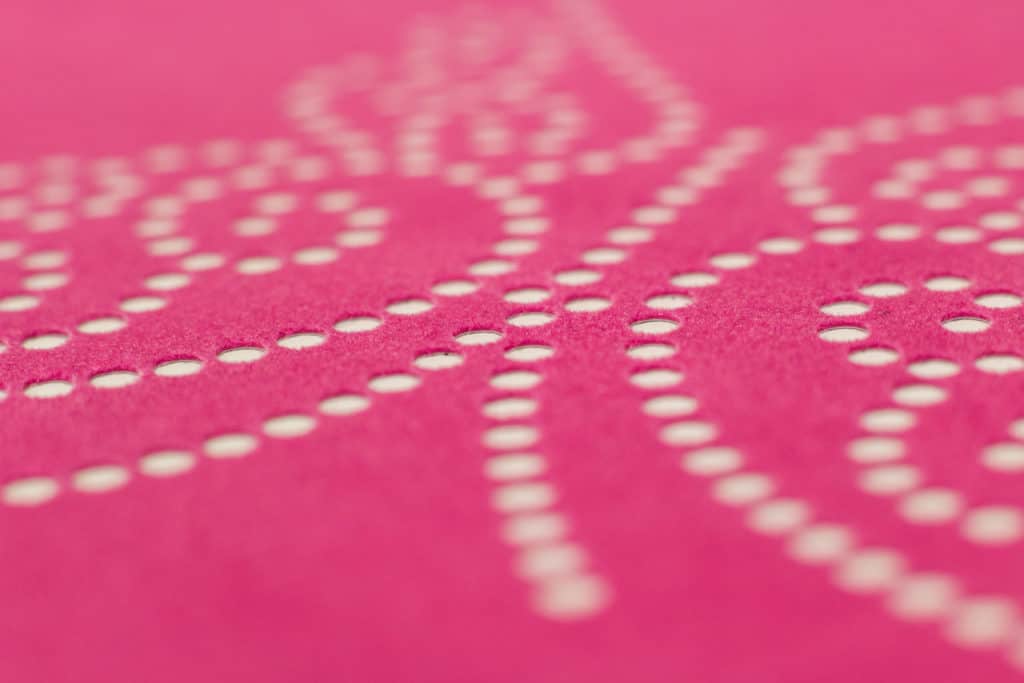
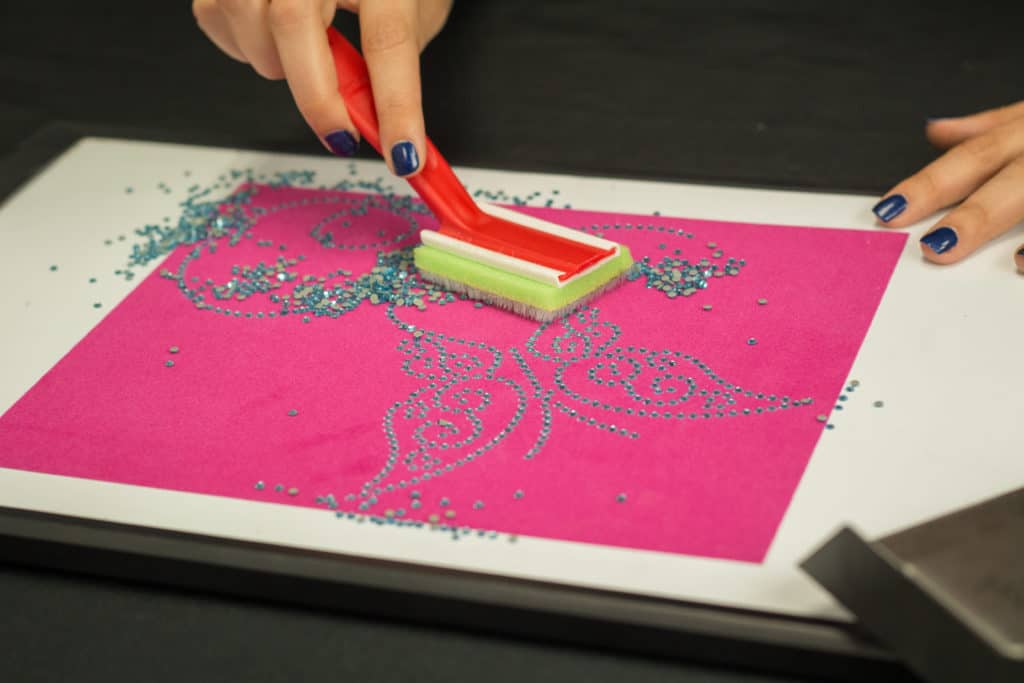
    Let’s be honest here, you’re thinking that these rhinestones are going to be hand placed, right? That’s the beauty of template material. Cut out a template with holes, brush the stones in, and you’ve got a rhinestone transfer ready in minutes! A common complaint about template material is that not all the stones go in and you will have to flip over the stones. We recommend Sticky Flock template material. A brush is needed to make your template. A simple paint brush from the hardware store will be perfect for the job. Brush your stones in, and it will be nearly perfect, requiring minimal adjustments. The best part? The template material is reusable! Cut it one time and you can use it over 50 times!

    How to Add Rhinestones to Your Silhouette Business by therhinestoneworld.com for cuttingforbusiness.com

    How to Add Rhinestones to Your Silhouette Business by therhinestoneworld.com for cuttingforbusiness.com

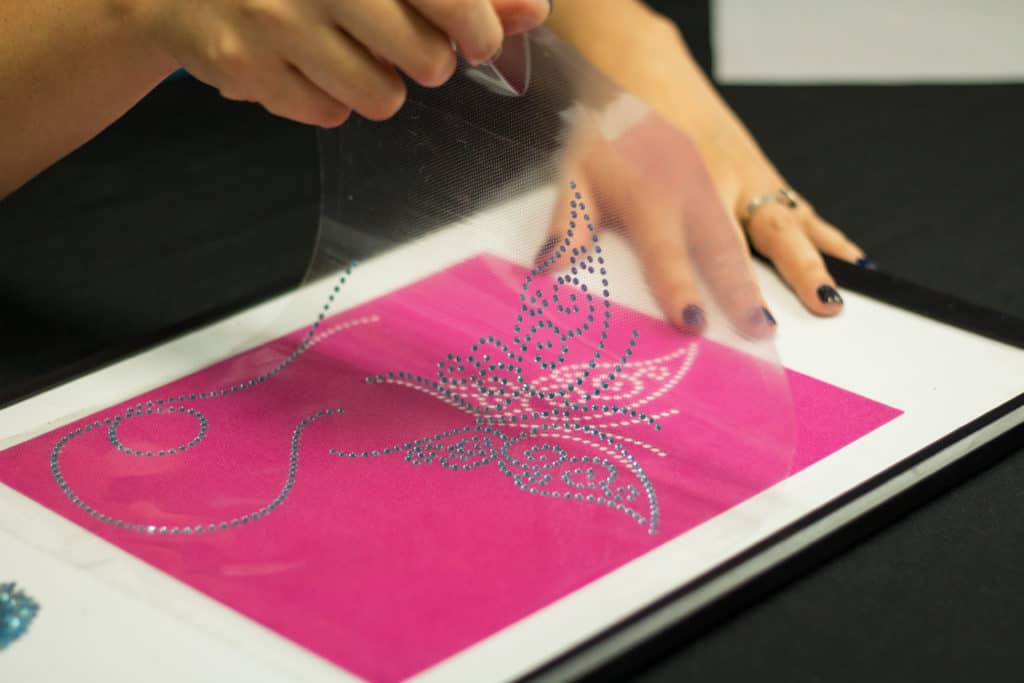
    Just like adhesive vinyl, transfer tape is used to move your design onto the item you are putting it on. Acrylic Hot-Fix Tape is needed to move rhinestones and is made to withstand the heat of your application. Like Sticky Flock, Hot-Fix Tape can be reused a few times.

    How to Add Rhinestones to Your Silhouette Business by therhinestoneworld.com for cuttingforbusiness.com

    The Cost and Profits

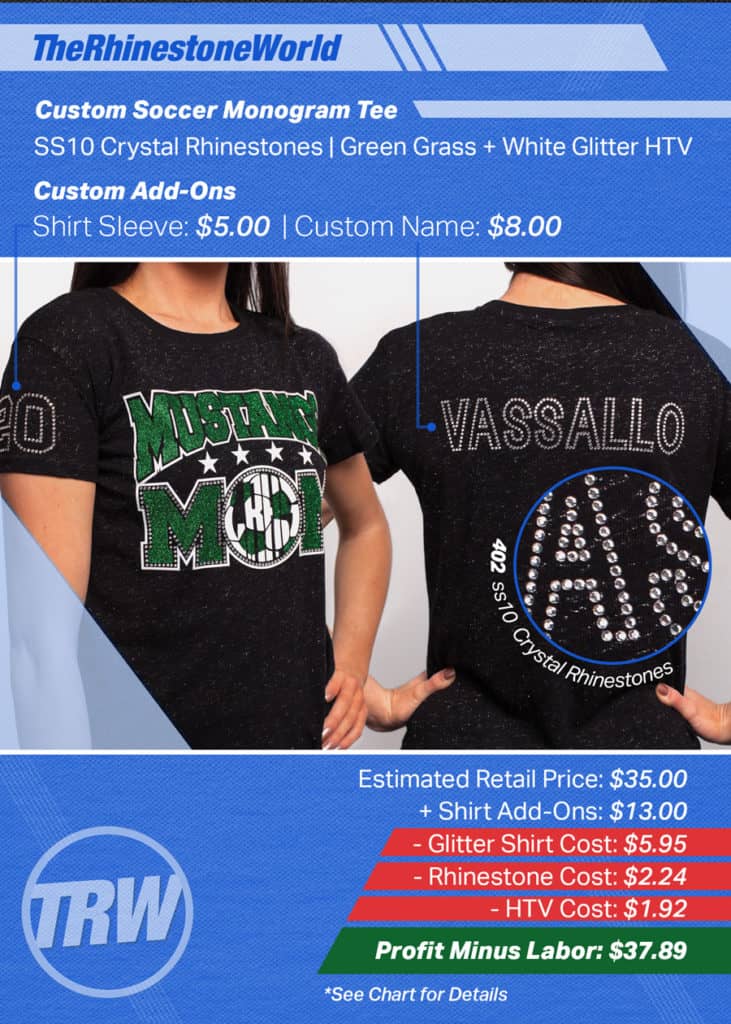
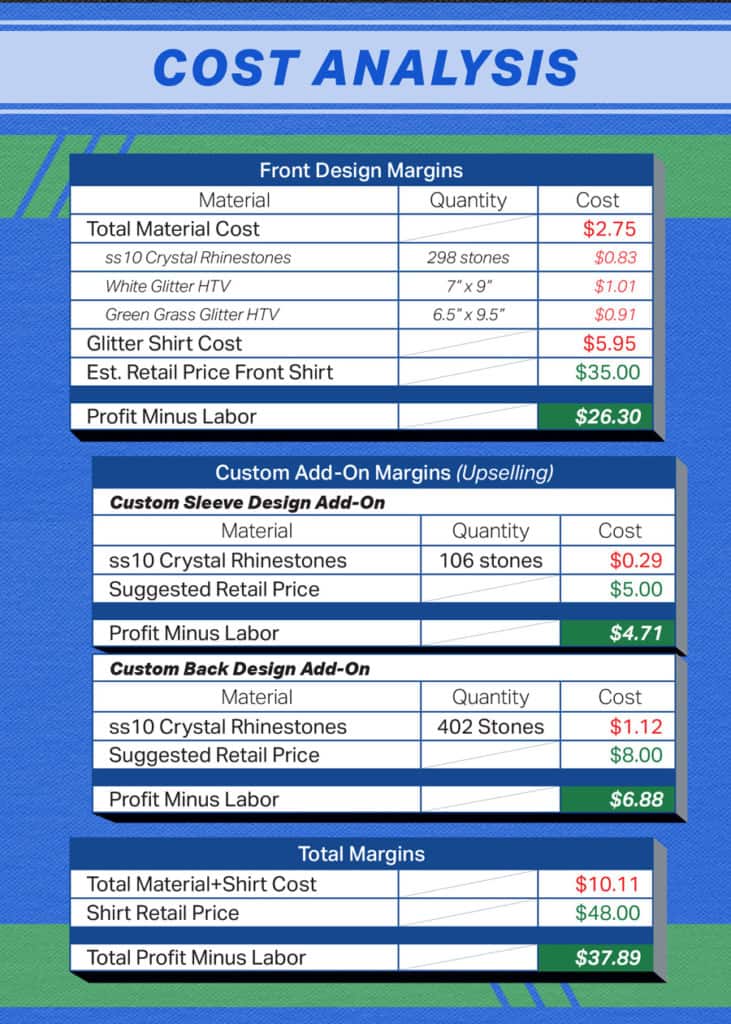
    The highest up front cost you would have for rhinestones is the Sticky Flock template material, which is normally around 7-8 dollars a foot. The good part is that because the material is reusable, your cost will be made up in just a few shirts. The average material cost in a shirt could range from 5-9 dollars, but can sell for over $30. Customizations, like an added name or number, can easily raise your retail price with an even lower material cost. Cutting an alphabet in advance (called pre-cuts) can allow you to piece together names for any customization, further increasing the profits you can make from your material.

    The following images are one example of a shirt cost and what it can retail for:

    How to Add Rhinestones to Your Silhouette Business by therhinestoneworld.com for cuttingforbusiness.com

    How to Add Rhinestones to Your Silhouette Business by therhinestoneworld.com for cuttingforbusiness.com

    A special thanks to Lisa (from The Rhinestone World) for stopping in and showing us how profitable (and easy!) rhinestones can be to add to your existing product line up. Be sure to thank her by pinning the image below on Pinterest or sharing with a friend on Facebook (just hover or tap the image below):

    How to Add Rhinestones to Your Silhouette Business by therhinestoneworld.com for cuttingforbusiness.com

  • Advertising with Feature Accounts on Instagram

    Do the sales in your Silhouette Cameo or Cricut small business need a boost? Are you looking for more exposure? If so, a feature through a dedicated feature account on Instagram might be a good option for you.

    What is a Feature Account on Instagram?

    Within the handmade community on Instagram, there are accounts that exist only to promote handmade products. These accounts often have large followings, and affordable prices from free upwards to $20 or $30 for a one time feature. I know that most Cutting for Business readers have small advertising budgets, and feature accounts often provide a good return on investment.

    How do Feature Accounts Work?

    First, you’ll need a locate a feature account on Instagram that you like. Do a little digging and look at the types of products the account has previously featured, how many followers they have, and the amount of interaction the account has. After you have located an account that is in line with your products, you will generally fill out a form with your basic information, a link to where you sell, a description, and a photo of your product for sale. In most cases, you will choose one product to feature – so make sure your photo is AH-MAZING! (Note: The form to apply for features is usually located in the bio line of the Instagram account. If you don’t see one, send a direct message for information.)

    Links to Feature Accounts

    Ready to get featured? Here’s link to some of my favorite feature accounts on Instagram:

    @etsyUSA
    @EtsyFavorites
    @EtsyFavorites_baby
    @EtsyFavorites_wedding
    @ExclusivelyEtsy
    @UniquelyEtsy
    @EtsyTown
    @FaveHandmade
    @HelloImHandmade
    @HandmadeCurator
    @MakersVillage

    Have a favorite that I didn’t include in the list? Leave it in the comments and I will add it.

    Share with a small business crafting friend, just hover over the image and post to social media:

    Advertising with Feature Accounts on Instagram for Your Silhouette Cameo or Cricut Small Business - by cuttingforbusiness.com

  • Step by Step Guide to Hosting a Sign Party

    Today, I’ve got a special guest on Cutting for Business! Welcome Sarah Strunk – a longtime blog reader and owner of Simply Sarah. She’s sharing her method of hosting sign painting parties with her Silhouette Cameo (or Cricut). After you read this post, pick up her new ebook with more information about hosting a party with your Silhouette at this link. I’ll let her take over:

    I’ve known for a long time I wanted to do sign parties. I love those paint your own canvas nights, but lets be honest, I’m not great at freehand – that’s why I have a Silhouette! I knew parties to paint stuff I ACTUALLY wanted to hang on my walls would be a great idea. Logistically though, how was I going to pull it off? A few months ago I finally just decided to grab my closest girlfriends and give it a spin. If it was awful they wouldn’t hate me and I needed a easy group to practice on. Definitely do a few trial runs!

    Pricing

    • I charge $40 per person, but am raising the party rates to $45 per person.
    • It costs me $10 per board for each person. That figure does not include time – the prep work is fairly labor intensive, but when you love what you do it doesn’t really feel like work!

    Sign Ups­

    • I create a Facebook Event. Then, add the people who want to come and post a picture of what you’ll be making. Make a demo yourself, don’t do a mock up. You want to be able to see how long it takes you to make it and you want to have an example at the party. Get everyone signed up and collect payment UP FRONT.
    • Make payments non refundable or tell them it’s non refundable but can be applied to a future party if they need to cancel.
    • When signing up, I got everyone’s last names and established dates.

    Prep Work

    • Head to Lowe’s, Home Depot, or Menards and grab 1×4’s in pine. (Alternatively, you could use pallets but I don’t have patience for that and wanted them to take stain/paint easily.)
    • I cut the boards down into 24 inch pieces so that I could easily just cut 12×24 sheets for the stencil.
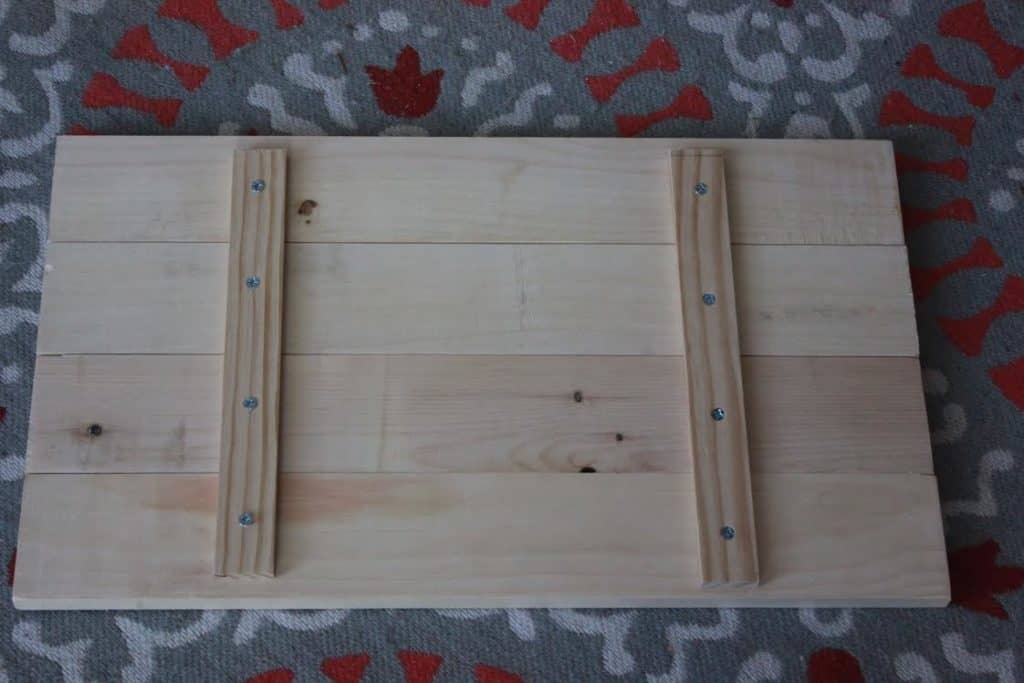
    • I then planked them together making 12×24 inch plank boards. I just used strips that I also found in the wood department at Lowes and cut those down. I used 1 1⁄2 in screws on the boards.
    • It takes me an hour or 2 to plank 10 boards. That includes cutting, sanding, and planking. TIP: Don’t offer varying sizes. The process goes quickly because you’re doing all one size.
    • Alternative: Instead of planks for your first sign, you could buy larger wood planks and cut them down. I did that for my first few parties and it was great!
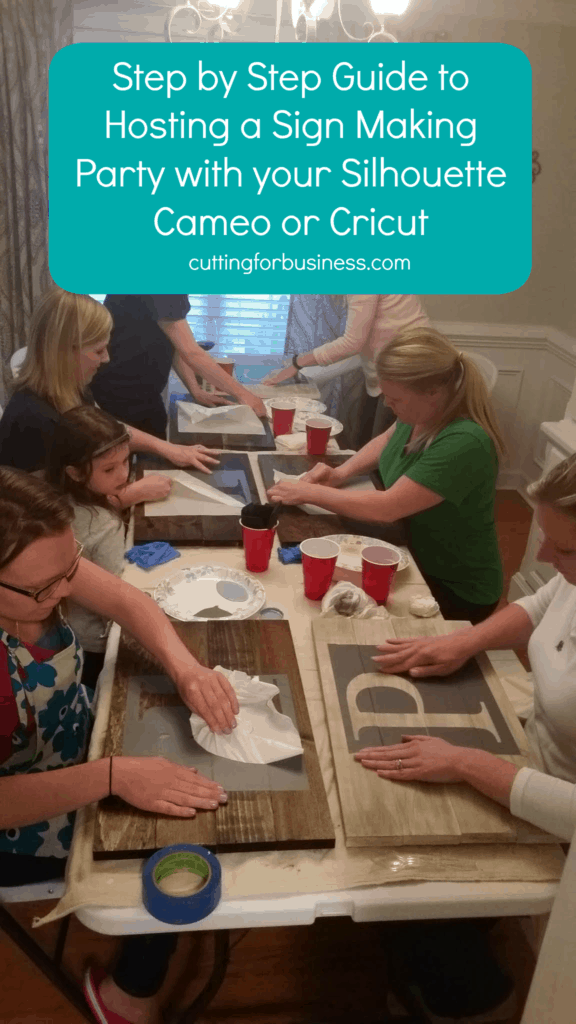
      Step by Step Guide to Hosting a Paint Your Own Sign Party with your Silhouette Cameo or Cricut - by cuttingforbusiness.com

    Creating the Stencil­

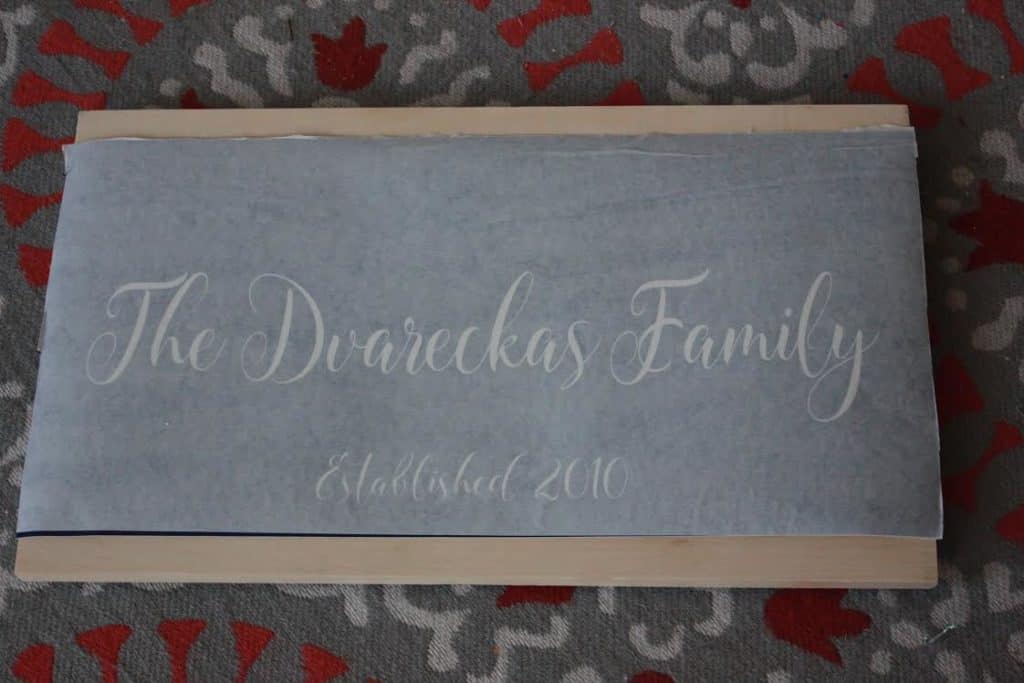
    • I created a stencil in 2 parts, using Oracal 631 vinyl. The first stencil was the big last initial. Then, I made a stencil of each person’s last names. Cut each last name on a single 12×24 sheet. This is easy for them to line up on their board and everything will be centered. Step by Step Guide to Hosting a Paint Your Own Sign Party with your Silhouette Cameo or Cricut - by cuttingforbusiness.com

    Party Day

    • Set up folding tables or your own tables and lay down drop clothes. Purchase foam brushes, burnishing squeegees, exacto knives, staining sponges, rags, and paper plates (for paint).
    • I highly recommend hosting the party at your own house, that way you have everything you need. I did a few parties at the hostesses’ home and it was chaotic and I always was forgetting something.

    At the Party

    • I had each person bring a snack and I provided wine (you can also do BYOB). You’ll need something to do while you wait for paint to dry – that’s why you need snacks and drinks!
    • After everyone visited for a bit we sat down to start the signs.
    • I offered 3 stain options: Gray, dark walnut, and a whitewash technique with antiquing glaze on top. At my last party, most picked the dark walnut with two opting for the whitewash. I poured some stain into little cups and had staining sponges I got from Lowes. Be sure to watch everyone as they put on the stain so it doesn’t go on too heavy or it won’t dry. I went by everyone after they stained and wiped off excess with a paper towel. I then helped the whitewash folks get their first coats done. I had a hair dryer on hand to help with drying times but we didn’t need it. After about 30 minutes, everyone’s boards felt dry so we moved on.
    • We then laid down the last initial, You can just show everyone how to peel their stencil from the backing paper and then lay it down on the board, have painters tape and a ruler handy as it will help attendees center theirs on their board. You then want to show everyone how to smooth out the bumps, and make sure all the edges are down really well. I double checked each person’s board to make sure the stencils had a good seal.
    • Then we took foam brushes and sponged on our paint in light coats! I use Waverly brand chalk paint (available at walmart and less than $6 a jar, it goes far, and dries fast).
    • Next, take a break to let the first coat of paint dry. Chat, snack, and drink!
    • Once they letters are dry, you’re ready to go do the final step and put the family name. You’ll give everyone their stencil and you may need to help to apply it. If you have any more than 6 people you may want to have a helper to help those get stencils down and peel off transfer tape. Then, attendees will lightly sponge on their color and then peel off the stencils right away. You don’t want any of the base color coming up, so don’t leave the stencil on more than maybe 10 to 15 minutes.
    • Help everyone with any minor touchups. When you’re doing plank boards you may get slight bleeding around the planks, but you can go by with an exacto knife and scrap it and it will lift right off without messing up the stain or paint underneath.

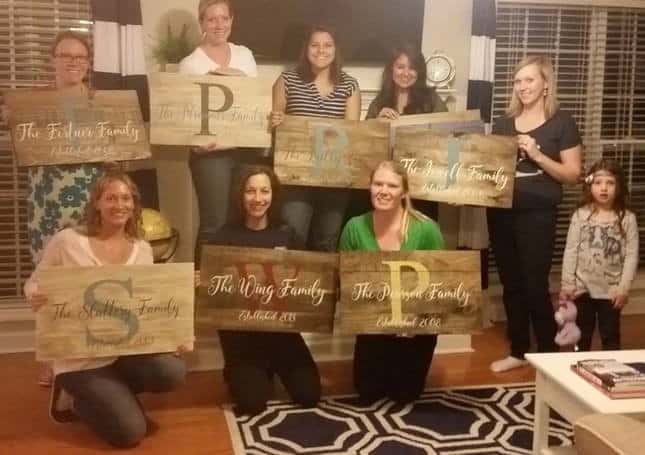
    You did it! Don’t forget to take a picture at the end. That picture is how you will get people to sign up for more parties! A note on hostesses: I find that you do not need to offer any sort of hostess reward but you can. Generally, I have no problem booking parties. In my opinion, providing hostess rewards is something that is popular with a lot of direct sale companies to help get people “in the door”.

    Step by Step Guide to Hosting a Paint Your Own Sign Party with your Silhouette Cameo or Cricut - by cuttingforbusiness.com

    A huge thank you to Sarah for stopping in to share her “secrets”! Please thank Sarah for stopping in by visiting her website Simply Sarah or picking up her new book. I’ve got a few other home party posts that you can read here. As always, if you loved this post, pin it or share it on Facebook by hovering over the image below or tapping it on mobile.

    Step by Step Guide to Hosting a Paint Your Own Sign Party with your Silhouette Cameo or Cricut - by cuttingforbusiness.com

  • How to Package Decals in Your Silhouette or Cricut Business

    Several readers ask me every week how to package decals they made on their Silhouette or Cricut for shipping to customers. Today, I’ll show you how I package them.

    Two Ways to Package Decals for Shipping

    Method 1 – Put the decal in an envelope and put a stamp on it.

    • Pros – This is cheap and you can offer free shipping.
    • Cons – You can’t have tracking on the package. In the event that the package is lost or damaged, you will need to replace the decal at your expense.

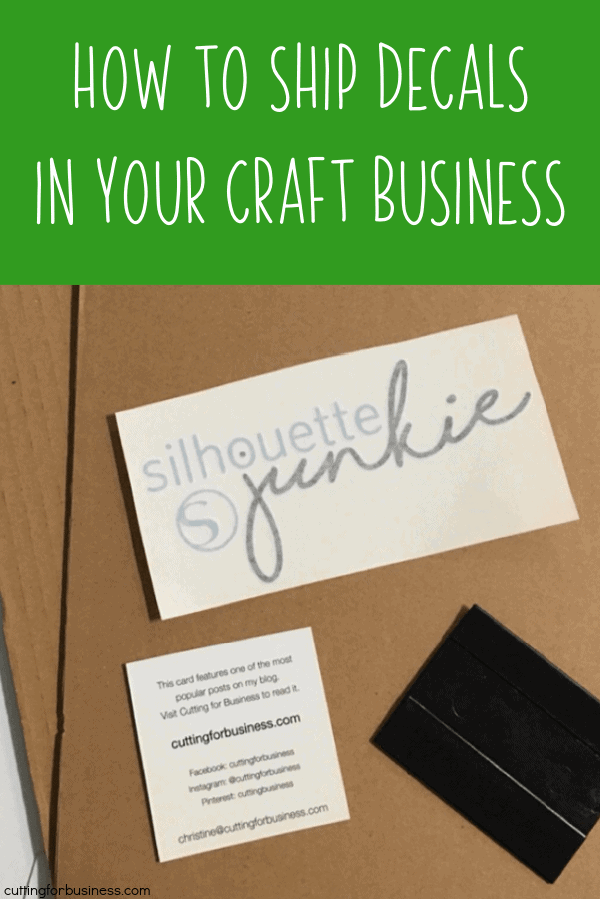
    Method 2 – A better solution to packaging decals for shipping is to use a non-bendable photo mailer and cardboard inserts.

    • Pros – This is a more professional presentation to your customer.
    • Cons – This method is slightly more expensive.

    Things to Remember When Shipping Decals

    • Be sure to put instructions in your package. If you’d like my free unbranded car decal application instructions, visit this post. Free unbranded wall decal application instructions are in this post.
    • Larger decals should be shipped in a mailing tube.
    • Always include a business card.
    • Transfer tape or paper should already be applied.
    • Layered decals should be assembled before shipping.
    • Including an applicator is a good idea. For cheap applicators, a popsicle stick works.
    • Consider sending a prepackaged alcohol wipe with your decal for the customer to clean the surface before application.
    • You could make a “Do Not Bend” stamp with your Silhouette Mint to stamp on the outside of the package.

    How do you package your decals for shipping? Let me know in the comments. Don’t forget to pin this post on Pinterest:

    How to Package & Ship Decals in Your Silhouette or Cricut (Portrait, Cameo, Explore, Maker, Joy) Business - by cuttingforbusiness.com