Category: Starting Your Business

  • How to Accept Payments for Your Handmade Products – Selling in Person

    If you plan on selling your handmade items, you’ll need to be able to accept payments. When selling through an online marketplace (like Etsy or Artfire), the marketplace collects the payment from the customer on your behalf. The marketplace then takes a portion of the sale (their processing fees) and deposits the rest into your account. But, if you are selling in person, you’ll need a method of collecting payments.

    How to Collect Payments in Person

    1) Cash or checks. Cash or checks are the easiest way to collect funds from local customers. Remember to allow checks to clear before giving the customer their item.

    2) Credit card readers. There are a number of small business credit card readers available. The credit card readers use your smartphone or tablet and process the customer payment on your behalf. The company then takes a portion of the sale for processing the payment and deposits the remaining funds into your account. The needs of each small business vary, so compare your options to figure out which reader suits your small business best. For example, if you primarily take orders over the phone, make sure you choose a credit card reader with lower fees for keyed in transactions. To help you decide which will work best for your needs, I’ve summarized some main points about each in the chart below. Links to each credit card reader can be found at the end of the article.

    Information below updated 4/11/16.

    Reader Cost Fees Deposit Availability Other Notes
    Square Free. Order online. $10 in office or electronic stores that is credited back to your account after use. Swiped: 2.75%, Keyed in: 3.5% + $0.15 1 business day, includes all business processed before 8pm ET the preceding day. Additional features likes a register app, Square store, and more available. Email only customer service.
    PayAnywhere Free. Order online. $15 in office or electronic stores that can be credited back to your account after use. Swiped: 2.69%, Keyed: 3.49% + $0.19 1 business day, includes all business processed before 5pm ET the preceding day. Storefronts available for larger vendors. Rates for storefronts from 1.69% (and up) per swipe.
    Quickbooks
    GoPayment by Intuit
    Free. Order online. Two plans available. 1) $0 monthly, Swiped: 2.40% + $0.25, Keyed in: 3.40% + $0.25 2) $19.95 monthly, Swiped:  1.75% + $0.25, Keyed in: 3.15% + $0.25 2-3 business days Automatically imports information into Quickbooks for easy accounting.
    Etsy Card Reader Free. Order online. Swiped: 2.75%, Keyed in: 3% + $0.25 Money goes to your Etsy shop account and is deposited each Monday. Earlier deposits are available. No Etsy transaction fees from items listed in your shop and paid via the card reader. No listing fees for items sold via the Quick Listing (not listed in your Etsy shop).
    Paypal Here by Paypal Free. Order online. Swiped: 2.7%, Keyed in: 3.5% + $0.15 Money goes to your Paypal account for you to transfer to your bank when ready. Money is instantly available with the Paypal debit card. Can also accept payment from your customer’s Paypal account.
    Amazon Local Register

    No longer accepting customers.

    $10, but receive a credit for transaction fees once you use reader. Order online. Swiped: 2.5%, Keyed in: 2.75% Capable of next business day deposits, just need to set it up. Amazon states that they have stabilized the card reader to make swiping easier. Card reader is larger than other brands.
    Flint No reader needed. App is free from Google Play or App Store. Processes through Stripe. 2.9% + $0.30. Within 2 business days. Simply take a photo of the card and it is securely processed. Image is not stored on your device. Optional integration with Quickbooks. Mixed reviews online.

    Update 10/26/15: The USA has recently switched to EMV credit card readers. Learn more about them in this post.

    Always Collect Payment First

    A quick (but important) note for newer sellers: Always collect payment before you begin working on any item for any customer. No seller ever wants to put the supplies and time into an item, especially a custom item that you might not be able to resell, and then have the customer not follow through with the sale.

    Having customers pay in person is great for fairs and local sales, but what if you need to collect payment for items that you aren’t selling through an online marketplace, and the customer is not local? Online invoicing is a great way to easily do so. Read on to part two of this article, which covers online invoicing.

    But first, save this post to Pinterest:
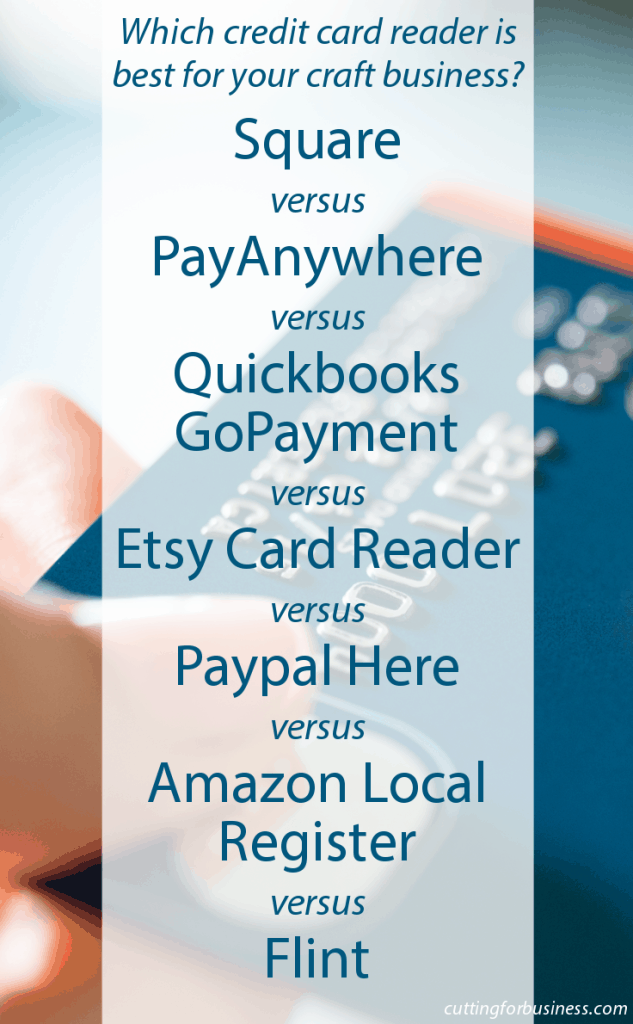
    Which credit card reader is best for your craft business? - by cuttingforbusiness.com


    Links to credit card reader websites

    Square
    PayAnywhere
    Quickbooks GoPayment by Intuit
    Etsy Card Reader
    Paypal Here
    Flint
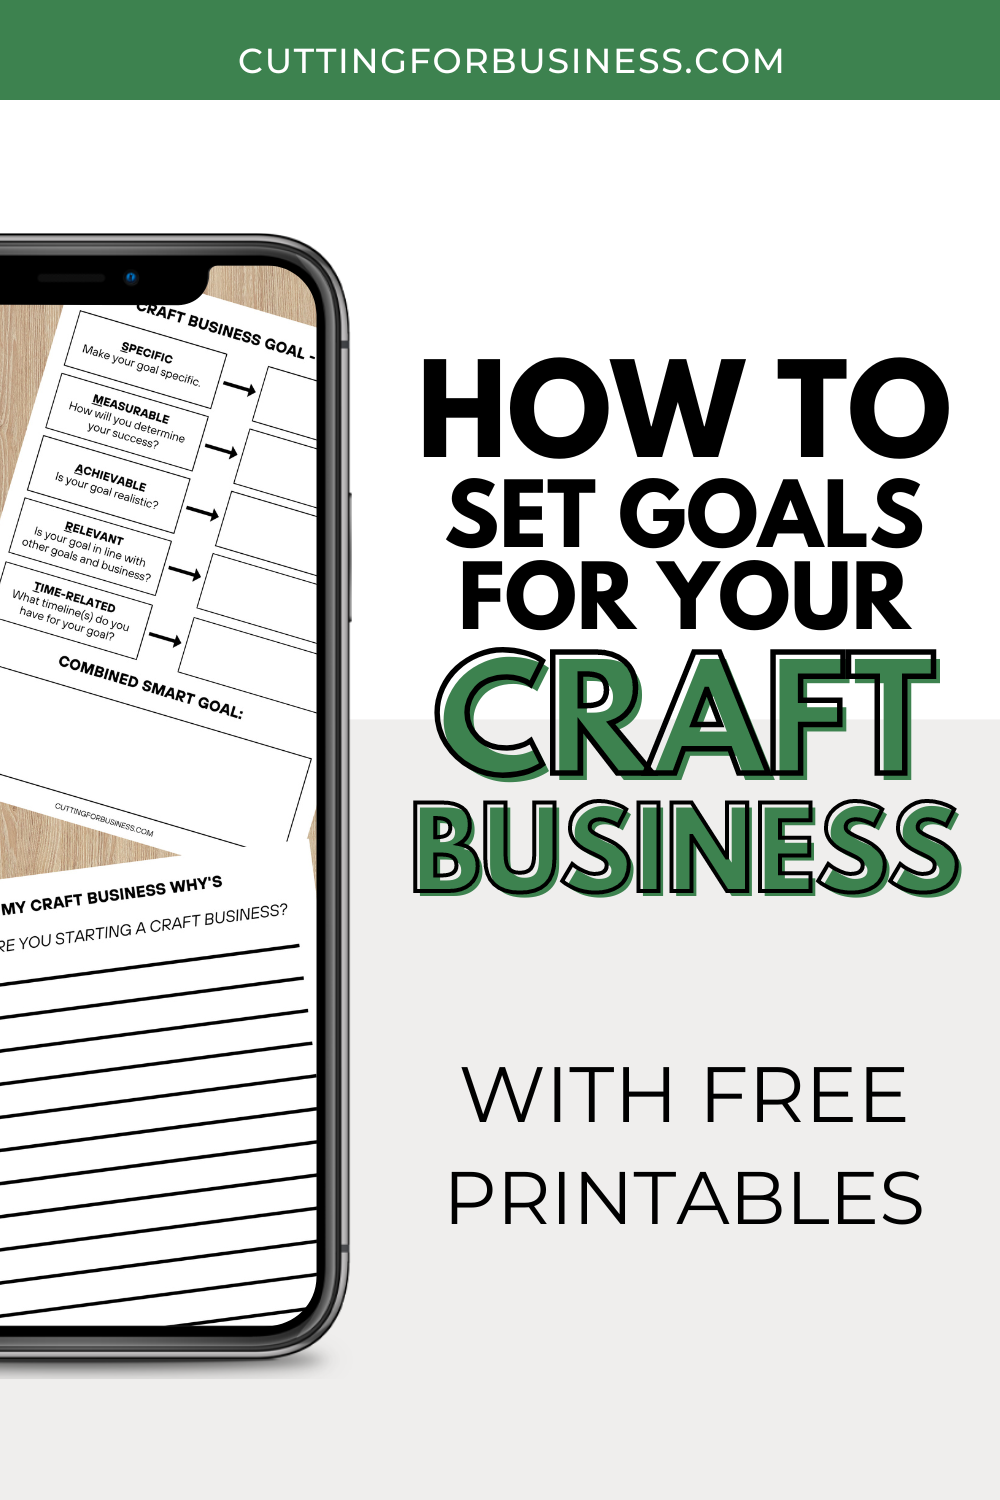
  • How to Set Goals for Your Craft Business – The SMART Way with Free Printables

    Do you want to start a craft business? Great! Today, let’s talk about how to set goals for your craft business – the SMART way.

    Before you start writing down goals, you have to understand how to set them.

    How to Set Goals for Your Craft Business - The SMART Way with Free Printables - cuttingforbusiness.com.

    What is Your Craft Business Reason Why?

    Before I start writing down my goals, I always write down my whys. Why am I doing this? What is the end goal?

    Take a few minutes and write down your whys. Here are some ideas to get you started:

    • Do you want to make extra money to take your family out for special events?
    • Would you like to stockpile money for a large purchase such as a vacation, a new car, or a home?
    • Is your household budget tight and you’d like to supplement it?
    • Do you have debt and you’d like to pay it down?
    • Do you eventually want to quit your full time job or become part time and craft for money?
    • Do you just need a creative outlet to relieve stress?

    What are SMART Goals?

    In 1981, George T. Duran wrote a paper on writing goals for corporate managers. In it, he introduced his SMART method. If you’d like to read it, Temple University has a copy online.

    The acronym SMART stands for:

    • Specific
    • Measurable
    • Assignable Achievable
    • Realistic Relevant
    • Time-related

    Since 1981, the acronym has evolved and there are several variations of it. One variation substitutes ‘assignable’ with ‘achievable’. Since many craft businesses are run by one person, it makes sense to use this version. Another variation substitutes ‘realistic’ with ‘relevant’. It also makes sense to use this variation because ‘achievable’ and ‘realistic’ become too similar.

    The idea with SMART goals is to include each SMART criteria in your goal.

    SMART Goals Criteria

    Specific. This criteria reminds us to make our goal specific.

    • Goal: Expand my craft business to make more money.
    • Goal with SMART criteria: Expand my craft business by adding Print on Demand products to make more money.

    Measurable. It’s hard to evaluate progress towards a goal without a way to measure it. This SMART criteria tells us to make sure our goals are measurable.

    • Goal: Sell Print on Demand products to make more money in my craft business.
    • Goal with SMART criteria: Sell $500 worth of Print on Demand products per month for the first three months.

    Achievable. Goals must be achievable, and this SMART criteria makes sure our goals can be met. Don’t confuse this with easy, though. Your goal should still challenge you – but be realistic.

    • Goal: Add Print on Demand products next month and sell enough to buy a new car in 7 days. (This goal isn’t very realistic – nor achievable for most of us.)
    • Goal with SMART criteria: Add 30 Print on Demand products to my craft business within the next 30 days, and sell $500 worth of products in each of the first three months.

    Relevant. This SMART criteria reminds us that our goal should be relevant. In this example, a craft business.

    • Ask yourself: Does my goal fit in with my other goals and my ultimate vision? In this example, I want to bring up overall sales in my craft business.
    • Answer: Yes, to bring up overall sales in my craft business, adding Print on Demand products is relevant.

    Time-related. All goals need to have an expiration or timeline. This SMART criteria helps us know when the goal ends.

    • Goal: Add Print on Demand products to my craft business.
    • Goal with SMART criteria: Add 30 Print on Demand products in the next 30 days, then re-evaluate goal progress at 60, 90, and 120 days.

    Combining them all into one SMART goal:

    Expand my craft business to make more money by adding Print on Demand products. Introduce Print on Demand by adding 30 Print on Demand products to my store in 30 days with a goal of selling $500 a month for the first three months. Re-evaluate goal progress at 60, 90, and 120 days.

    Follow Up on Your Goals

    Wait! We aren’t quite done yet. If I can stress anything about writing goals, it is that you have to check in with your goal progress regularly.

    You’ll see that in the time-related SMART criteria, I added specific intervals at which to check on my progress. At that point, I can re-evaluate to see what is working and what isn’t.

    I find it helpful to keep my goal in front of me as much as possible. I do this by using a simple worksheet I created and hanging it in my workspace.

    Free Printable Worksheets

  • How to Price Crafts for Sale – Pricing Formula

    Wondering how to price crafts for sale? Before you start a craft business, you must know how to price your handmade items. There is nothing worse than designing an item, creating it, packaging it, selling it, and then realizing you made no profit – or worse – you lost money selling an item!

    Craft Pricing Formula

    There are a number of pricing formulas out there, but this is the one I like the most. It takes into account supplies, labor, and overhead costs.

    Generally, a handmade item is priced using a formula similar to this:

    Cost of Supplies + Labor + Portion of Overhead = Total Costs
    Total Costs x 2 = Wholesale Price
    Wholesale Price x 2 = Retail Price

    Let’s break down the parts of the formula.

    How to Price Crafts for Sale - by cuttingforbusiness.com.

    How to Figure Out the Cost of Supplies

    The cost of your supplies is how much you paid for the supplies. This is straightforward. However, it can get tricky if you use a portion of a supply in a project for sale.

    For example, if you make a tshirt using a half a sheet of vinyl, you’d only use half of the cost of the sheet of vinyl in your formula. Similarly, if you use a third of a container of glitter in your product – you’d only use 1/3rd the total cost of the glitter in your formula.

    How to Figure Out Labor Costs

    The labor costs are how much you want to pay yourself. There are too many times where I have seen crafters selling products, and not paying themselves. Sadly, you are not going to be in business long if you aren’t making any money.

    So how much should you pay yourself? I talk in length about how much to pay yourself in another post.

    How to Figure Out Overhead Costs

    Don’t forget: When figuring out your overhead costs, you’ll need to take into account everything you used to create your item. From the software costs, machine costs, actual supplies used, packaging (box or envelope, packing supplies, tape, the label paper you used), the cost of the scale you used, the amount of electricity used, the space in your home or studio, even a portion of your advertising costs or store fees.

    How to Price Crafts for Sale - Great for Silhouette Cameo or Portrait and Cricut Explore or Maker crafters - by cuttingforbusiness.com.

    How to Price Crafts for Sale Example

    Example: I’m selling a personalized glitter tumbler sealed with epoxy. After creating the tumbler, the customer will pick up.

    Supplies and costs:

    • Stainless steel tumbler. $1.39.
    • Glitter. I use one quarter of a container that cost $5.99. One quarter of $5.99 is roughly $1.50.
    • Epoxy. I purchase epoxy by the gallon for $50.00 and can make 35 tumblers with one gallon. 1/35th of a gallon costs $1.42.
    • Vinyl. I use one quarter of a sheet of adhesive vinyl to add personalization to the tumbler. One sheet of adhesive vinyl costs $1.42. One quarter of a sheet is $0.36.
    • Total supply costs: $5.56.

    Labor:

    • I pay myself $10 an hour to make tumblers, based on my experience and expertise. It takes me one hour to make the tumbler.

    Overhead: Things like electricity, space in my home studio, online store fees, legal fees, and more all go into the overhead of your business. You can think of your business overhead as the amount it costs you each month to keep your business running – or your break even point.

    Here’s how to figure out your monthly overhead:

    1. List out all expenses in your business for the previous month.
    2. Add these expenses together. This was your total overhead for the month.
    3. Divide by 744 (the total number of hours per month in a month with 31 days).

    Let’s do it: $450 (total expenses)/744 = .60

    What does .60 mean? This figure is your monthly overhead cost by hour. Simply add it to your labor rate in the formula and the overhead costs are accounted for.

    My adjusted labor rate is $10.60 an hour.

    Put the numbers into the formula:

    Cost of Supplies + Labor + Portion of Overhead = Total Costs
    Total Costs x 2 = Wholesale Price
    Wholesale Price x 2 = Retail Price

    $5.56 + $10.00 + (which includes my overhead) = $16.16

    $16.16 x 2 = $32.32

    $32.32 x 2 = $64.64.

    This gives us a selling price of $33 wholesale and $65 retail.

    How to Price Your Silhouette Cameo or Cricut Crafts for Sale - by cuttingforbusiness.com

    Online Craft Calculators

    There are a number of online craft calculators available, as well as a handful of apps. Honestly, they will all use a different variation of one of the popular pricing formulas. If you find one you love, use it. If not, just grab your calculator and the formula above to price crafts for sale.

    One more thing: Have you ever heard of dynamic pricing? You may not have, but you see it every day. Your prices should be dynamic, not static. Read more about dynamic and static pricing.

  • Tutorial: How to Send a Paypal Invoice

    Yesterday, I compared credit card readers to help you decide which credit card reader worked best of your small business. But, how can you accept payments from customers that are not ordering through an online marketplace and they are not local? Besides having the customer mail you a check, you can also use online invoicing. Online invoicing means that a customer is emailed an invoice with links for them to pay with their credit card. After paying the invoice, they will be emailed a receipt and you will be notified. Depending on which invoicing system you use, the money is either deposited to your bank account or into your account.

    If you are using an accounting program like Quickbooks, Xero, or Wave, an online invoicing tool is usually built into the program. Similarly, if you are using a credit card reader, many of those services also have online invoicing available.

    If you already use Paypal to accept payments, you can also use it to send customer invoices. Your customer does not have to have a Paypal account to pay the invoice.

    How to Send a Paypal Invoice

    1) Log into your Paypal account.

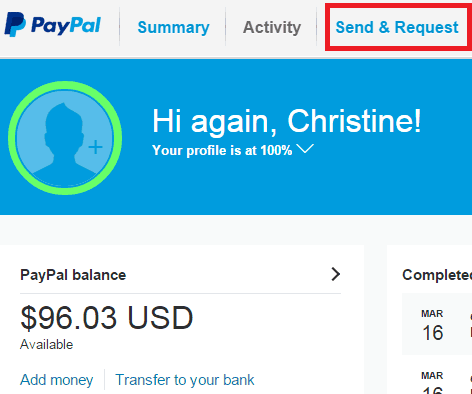
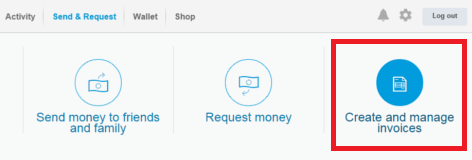
    2) Click “Send & Request” from the choices across the top.

    Selling items made with your Silhouette Cameo - Online Invoicing - by cuttingforbusiness.com

    3) Choose “Create and manage invoices” from the next screen.

    Selling items made with your Silhouette Cameo - Online Invoicing - by cuttingforbusiness.com

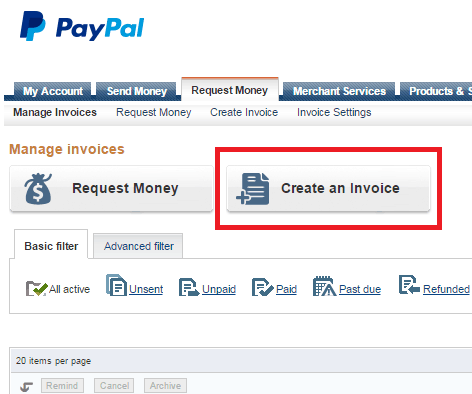
    4) Click “Create an Invoice”.

    Selling items made with your Silhouette Cameo - Online Invoicing - by cuttingforbusiness.com

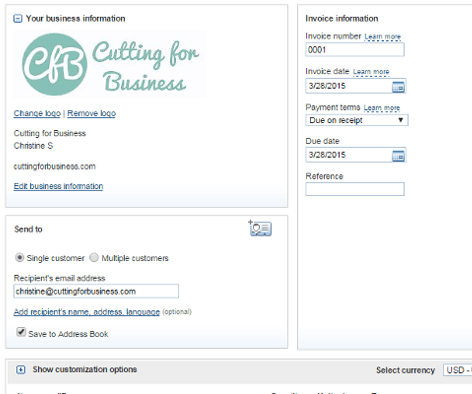
    5) Enter your business information and your customer information. You can give your invoice any number you want, and set the due date for whenever. I chose to leave mine, “Due on Receipt”.

    Selling items made with your Silhouette Cameo - Online Invoicing - by cuttingforbusiness.com

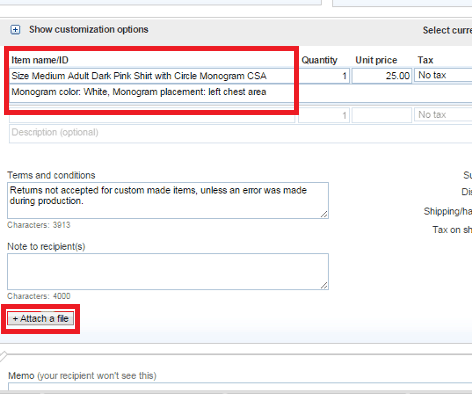
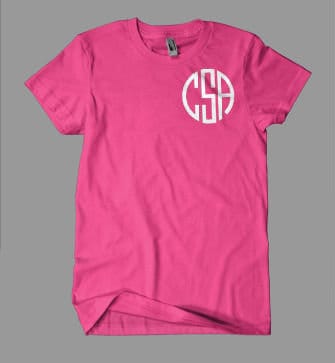
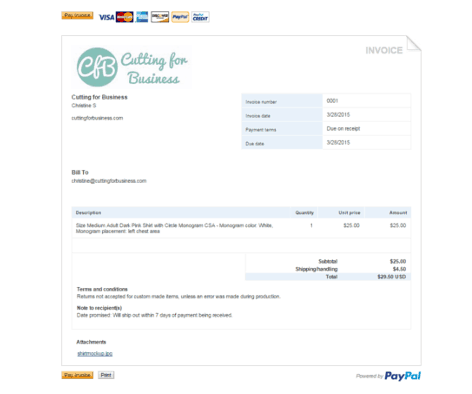
    6) Pay close attention to the description of the item, and be as specific as possible when writing the description. In this example my customer is buying a pink shirt with a white monogram on the chest area. My description states “Size Medium Adult Dark Pink Shirt with Circle Monogram CSA, Monogram color: White, Monogram placement: left chest area”. In the event there is a problem with the transaction, a thorough description may prevent you from having to refund a customer.

    Selling items made with your Silhouette Cameo - Online Invoicing - by cuttingforbusiness.com

    Near the bottom of the Paypal invoice, you can also attach a file. This is a great place to attach a mockup of the item or a sample photo of the item if you have one available. I attached a simple mockup of the shirt design.

    Selling items made with your Silhouette Cameo - Online Invoicing - by cuttingforbusiness.com

    7) Once you are satisfied with the invoice, click “Preview” to see it. If you will be selling a similar item, you can also choose to save the invoice as a template. Here is what my completed invoice looks like when it is sent to my customer:

    Selling items made with your Silhouette Cameo - Online Invoicing - by cuttingforbusiness.com

    8) After previewing the invoice, click “Send” to email it to your customer. Once the customer pays, you will receive a notification that payment has been made, and you’ll be ready to start creating!

    Again, it is a wise business move to always get your customer to pay for your item before you begin making it. No seller ever wants to put the supplies and time into an item, especially a custom item that you might not be able to resell, and then have the customer not follow through with the sale.

    Save this post to Pinterest:

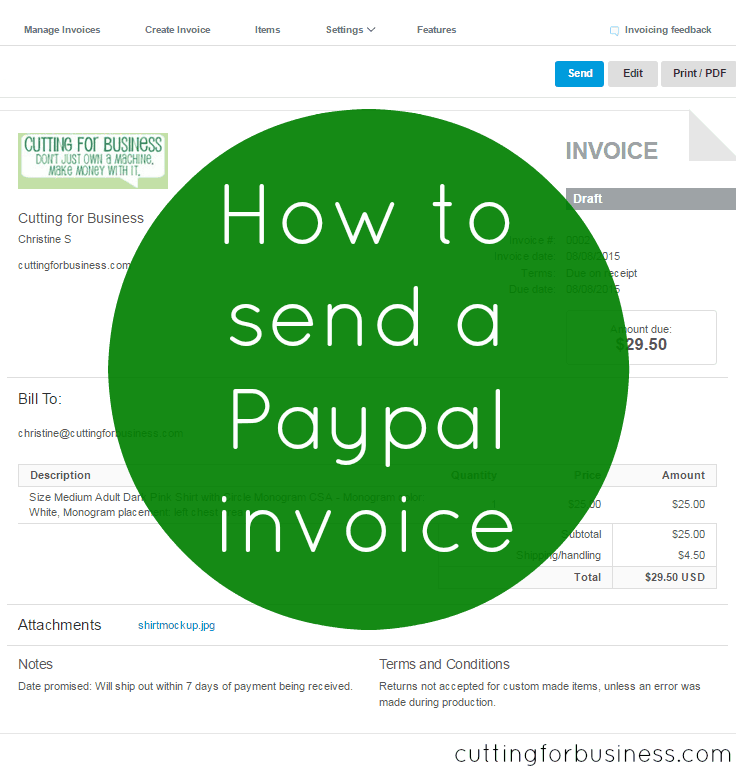
    How to send a Paypal invoice - by cuttingforbusiness.com