Reader question: “Hi Christine, It seems like every crafter online has a gorgeous craft room straight out of a magazine. I don’t have the extra space for a craft room, is it still possible for me to have a profitable business?”
My answer: Absolutely! As long as you have a place to store your craft supplies and a space to work, you don’t have to have a craft room to sell items made with your Silhouette or Cricut.
My Former Work Space
Kitchen cabinets: While I now have a full fledged craft room (get a tour here), I haven’t always had that luxury. I used to keep all my supplies in a few extra cabinets in my kitchen. I used to keep everything in this space except for my heat press, Silhouette and Cricut, and wood and power tools – which stayed in the garage. My work space then became the countertop above the cabinets.
Storage & Organization Ideas
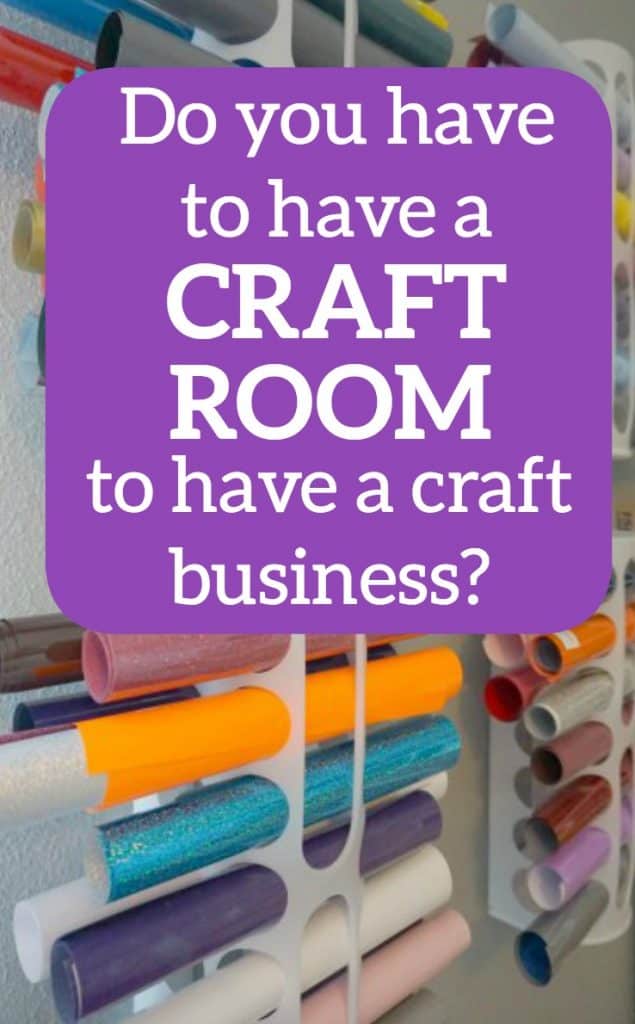
Hanging shoe racks: The small cubbies of over the door shoe racks are perfect for holding rolled vinyl and other crafting goods.
An armoire or a dresser: Scour Craigslist or local garage sales and find an inexpensive armoire or dresser that matches your decor. Store your craft supplies inside. The best part is once the armoire or dresser is closed, no one will know what’s inside! I also found several armoires on Amazon.com for under $200, I linked a few below:
Under the bed/under the couch storage: This space is wasted in a lot of homes, so pick up some flat plastic containers, fill them with craft supplies, and slide them under the bed or couch.
Extra closet: If you have an extra closet, add a few shelves and some plastic drawers and store your supplies inside. (We have a coat closet and live in Florida – this space could easily be converted to craft storage!)
Laundry room: If you have a spacious laundry room, how about a laundry room/craft room combo?
Garage: If you have a climate controlled garage, or live in a moderate climate – head out to the garage. Be cautious of the garage being too hot or too cold. Certain craft supplies (anything with adhesives) shouldn’t be stored in extreme temperatures).
I have two Pinterest boards that may interest you if you are looking to organize your craft supplies. The first is full of craft rooms and creative storage solutions, while the second can help you tame your vinyl supply, which can be difficult to store:
Most business owners receive orders and complete them in the order they were received, or in another method that makes sense to the crafter.
But, what happens when a customer inquiries if they can get their order in a hurry? You should charge the customer a rush order fee for rush orders. But how much to charge for rush orders?
Depending on the product being made, it is appropriate for crafters to charge from 20% to 100% of the item’s final cost to get the order sent out before the stated turnaround time plus the cost of expedited shipping, if applicable.
How Much to Charge for Rush Orders
When deciding what to set your rush fee at, you’ll need to be careful to set it high enough that the average buyer won’t want to add it unless they really need an expedited order. For example, if I am selling custom made decals for $8.00 each, a 20% rush order fee is only $1.60 – not enough to keep the average buyer who doesn’t need it quickly from tacking it on to get their item faster. Unfortunately, when your rush order fees are too low, you’ll receive too many rush orders.
A general rule of thumb for rush order fees: The lower the price of the item, the higher the rush order percentage should be.
How to Tell Your Customers About Rush Order Fees
Rush order fees, and standard turnaround times, should be disclosed to customers prior to ordering. Here are a few example blurbs about turnaround times and rush orders. Feel free to use them in your Silhouette or Cricut craft business.
(Name of company’s) turnaround time is two weeks, not including shipping. If you need your item sooner, we can accommodate you with a rush order fee and expedited shipping. This allows us to put your order at the head of our production queue.
(Name of company’s) turnaround time is currently four weeks, plus shipping time. We can accommodate rush orders with a flat rate of xx% of the total item’s cost, plus the cost of USPS Express Mail. Please contact us for an exact quote.
(Name of company’s) turnaround time is one week. If you need your item to be ready for pickup in sooner than one week, please contact us to arrange payment of our xx% rush fee charge.
What If You Don’t Want to Take Rush Orders
If you don’t want to take rush orders, then don’t. Again, you should be disclose that you do not accept rush order with your turnaround times.
Alright readers, I have a challenge for you today! Answer these questions quickly (and accurately!):
How much money did you make in your Silhouette Cameo based business last month?
What did you spend in expenses for the month before last?
How many supplies do you have on hand right now?
If you can’t answer these questions in less than a few minutes, then this blog post is for you.
When running any small business, you need to know your numbers. You should be keeping records for 1) All sales made 2) All expenses incurred 3) All supplies on hand. There are numerous ways to keep track of these things, and I’ve seen everything from envelope systems to binders or notebooks, custom made spreadsheets, and online accounting programs that range from free to hundreds of dollars per month.
For Silhouette Cameo small business owners, I highly recommend Craftybase. Craftybase is an online accounting and bookkeeping system created especially for professional crafters. Among it’s features:
Inventory tracking of all supplies and equipment
Supplier information lists for every site or company that you purchase from
Order tracking
Labor cost calculation
Expense and purchase recording
Ability to list projects with the required amount of supplies
Various reports on the health of your business
Automatic imports from Etsy shops, Shopify stores, with integrations from Paypal and Square coming soon
And standard features like a great support team, 256 bit SSL security, and secure backups
A few of my favorite features of Craftybase include that you can customize many sections of the program. For example, if you sell vinyl items, you can track your inventory in rolls, inches, feet, or yards – it’s up to you. Next, I love that you can add photos next to your supplies. This means no more digging through old orders to figure out which name you gave your favorite printed fabric in your accounting records! Lastly, the program itself is broken down in to easy to understand language. There are help tutorials throughout the program, and I never feel like I need an advanced accounting degree to navigate it. When using Craftybase, you’ll just need to keep your purchase receipts in an envelope and all other records will be online.
Craftybase offers a free (no credit card needed) trial available for 14 days. After that, you can choose from 3 different plans – the most expensive being $19.99 per month. But, after you become a paid subscriber, you can earn your Craftybase program free of charge if you refer 10 new customers to the program. Today, Cutting for Business is able to offer you 10% off your Craftybase subscription by clicking the banner below:
I’ve mentioned the need for small business crafters to stay safe on this blog before when I wrote about handling local pickups. Similarly, keeping your personal information (and your customer’s personal information) private while owning a small business is equally important. Here are a few of my tips for keeping your personal information, well, personal!
1) Use a post office box (PO Box) for your business needs. Once you register or incorporate your business, some of your information becomes public records. This includes the address you use for your business. To keep your privacy, you can use a PO Box in most states as your official address. PO Boxes are inexpensive, mine runs about $30 per year. Additionally, use your PO Box for your domain registration, return address on packages, and mailing address for customer returns or customer payments by paper check. If you don’t want to invest in a post office box, consider a virtual mailbox.
2) When creating sample items for sale with identifying information, such as a street address, last name, or other identifying details, make up an address. Or, when sharing completed items online, always remember to blur or cover personal identifying details. You can easily edit photos with your favorite photo editor or download free apps for your smartphone. (My personal favorites are Pic Monkey – free online, Gimp – an open source photo editor, and Blur It Free – from the Apple App Store.)
3) When sharing customer submitted photos, especially those of children, if the person in the photograph can easily be recognized you’ll need to get a photo release form signed. Free photo release forms can be obtained from the American Society of Media Photographers.
Remember, it’s always better to err on the side of caution when putting someone else’s personal information or photos online.
Keep another crafter safe by sharing this on Pinterest:
Hey crafter! Doing some research on heat presses? Let’s talk today about everything you need to know to get started with a heat press in your Silhouette, Cricut, or sublimation small business.
Before we get started, this article isn’t a list of the best heat press machines and me telling you to go buy them all. Instead, it’s helpful information about all the different types of heat presses available – and my recommend supplier.
What is a Heat Press?
A heat press is a tool used in crafting to apply heat transfer materials to blank products like shirts, bags, and hats.
What are Heat Transfer Materials?
Heat transfer materials are those that are applied to blanks using a heat press. They can be: heat transfer vinyl (HTV), printed designs on heat transfer paper, printed sublimation transfers, screenprint transfers, embroidered patches, rhinestones, infusible inks, and more.
How Does a Heat Press Work?
A heat press uses heat and pressure to either adhere materials to your blank product (heat transfer vinyl or transfers) or transfers specialty ink to your blank product (sublimation).
Do You Really Need a Heat Press?
If you are planning on selling products using heat transfer materials, you’ll need a heat press.
Different heat press materials are designed to be applied at an exact temperature and pressure. Unfortunately, when you use an iron (even top of the line irons), you can’t guarantee the temperature you are using, and you cannot replicate the even pressure that a heat press provides.
Customers expect merchandise to last and designs to not fall off after a few uses. It is always better to offer a quality product that follows manufacturer’s application guidelines rather than open your business to poor reviews, unhappy customers, or customers needing items remade or refunded.
What Types of Heat Presses Are Available?
Flat Heat Press
These are the most common heat presses. They feature a large, flat space to place your blank product. After placing your material on top of your blank product, you close the heat press and the material or ink adheres to your blank product.
Flat heat presses come in a few different styles:
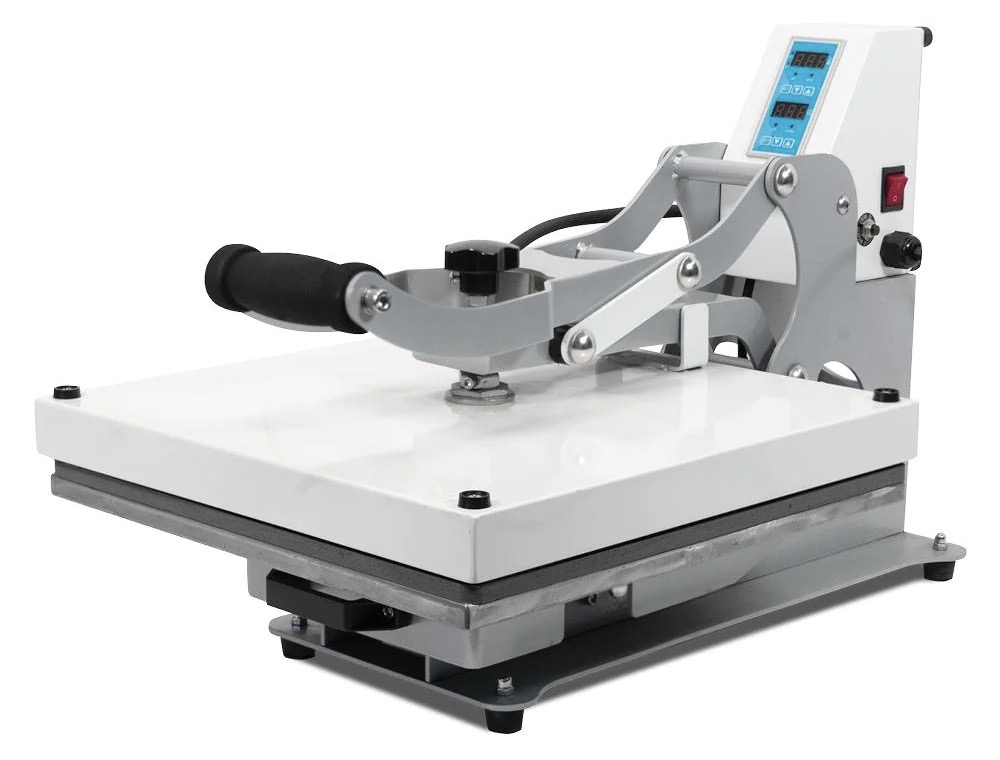
Clam Shell
These heat presses have a hot top platen that you pull straight down to press your items. Clam shell presses are often cheapest to buy and are readily available.
This is an example of a clamshell heat press.
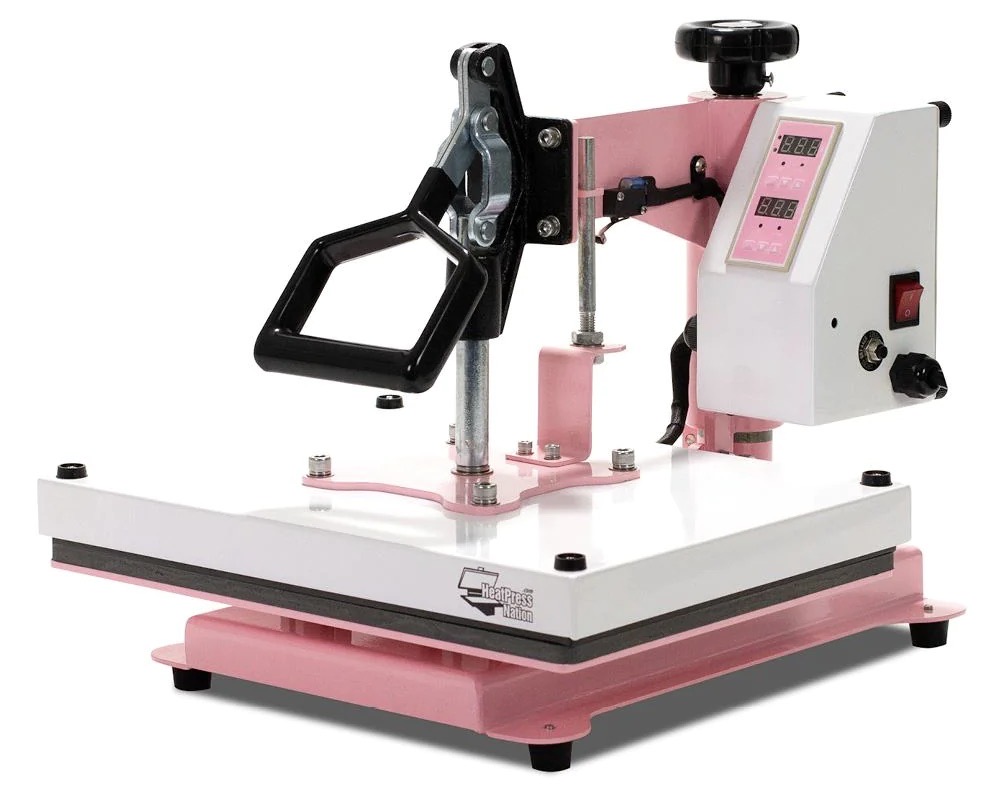
Swing Away
The top platen on a swing away press lifts up and swings to one side. Swing away presses give you more space to work (and you are less likely to bump your arms on the hot platen), but take up a larger footprint in your workspace. Also, they are perfect for pressing thicker materials – like wood frames.
This is an example of a swing away heat press.
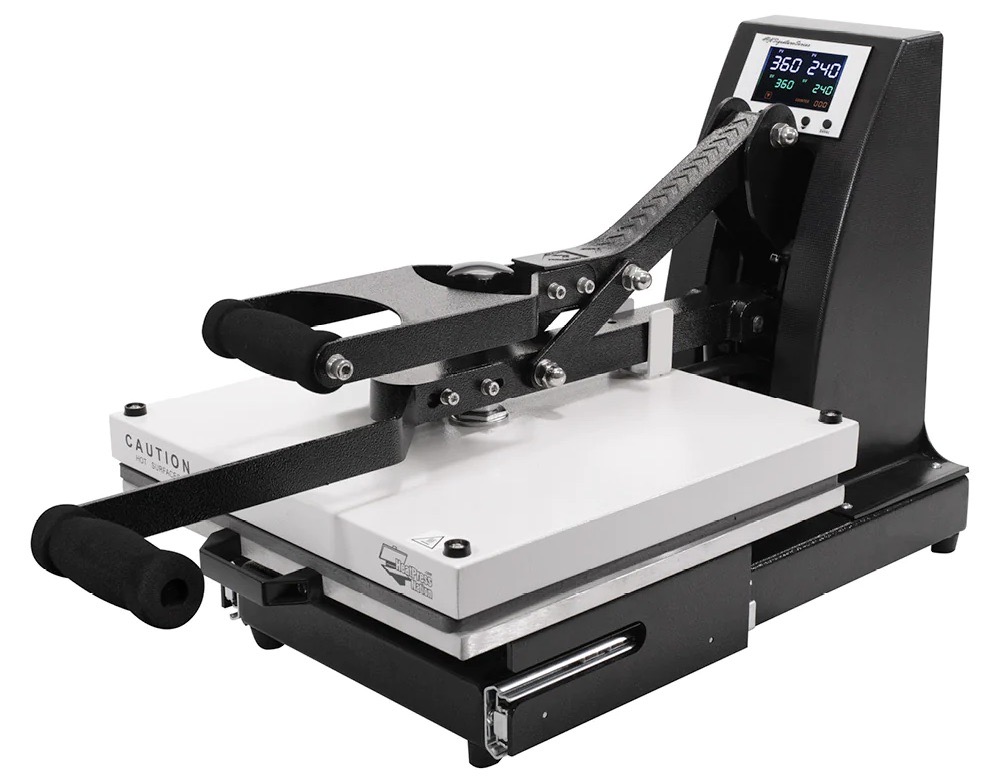
Slide Out Drawer
The bottom platen of this heat press pulls out like a drawer giving you more workspace. I have an ultra clumsy friend who swears by her slide out drawer heat press so she doesn’t accidentally bump the heating element.
This is an example of a slide out drawer heat press.
Mug Press
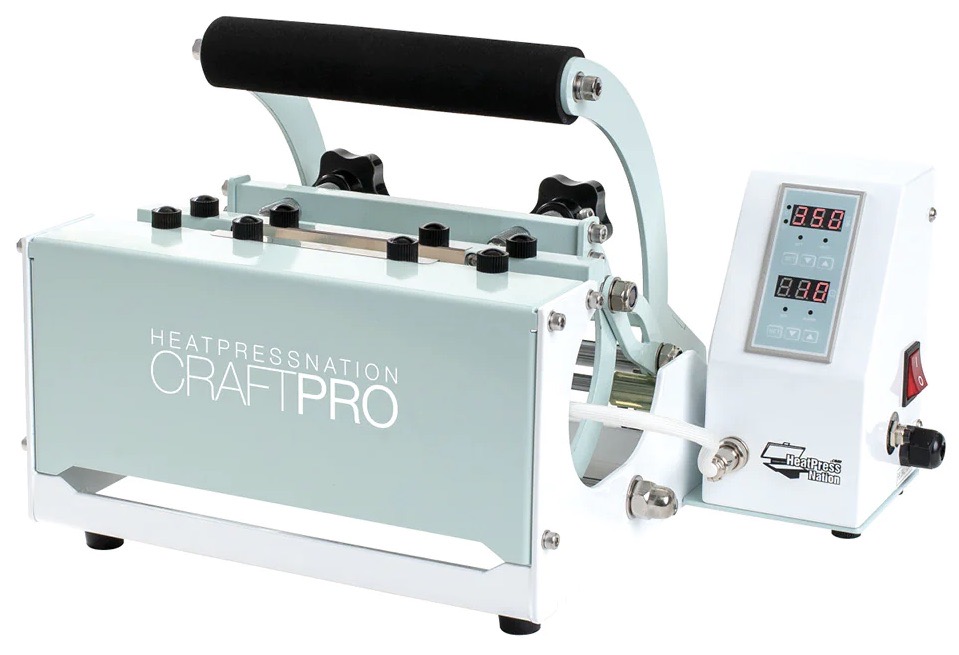
Mug Presses are heat presses used to transfer designs to cups, mugs, and tumblers.
This is an example of a Mug Press.
Cap Press
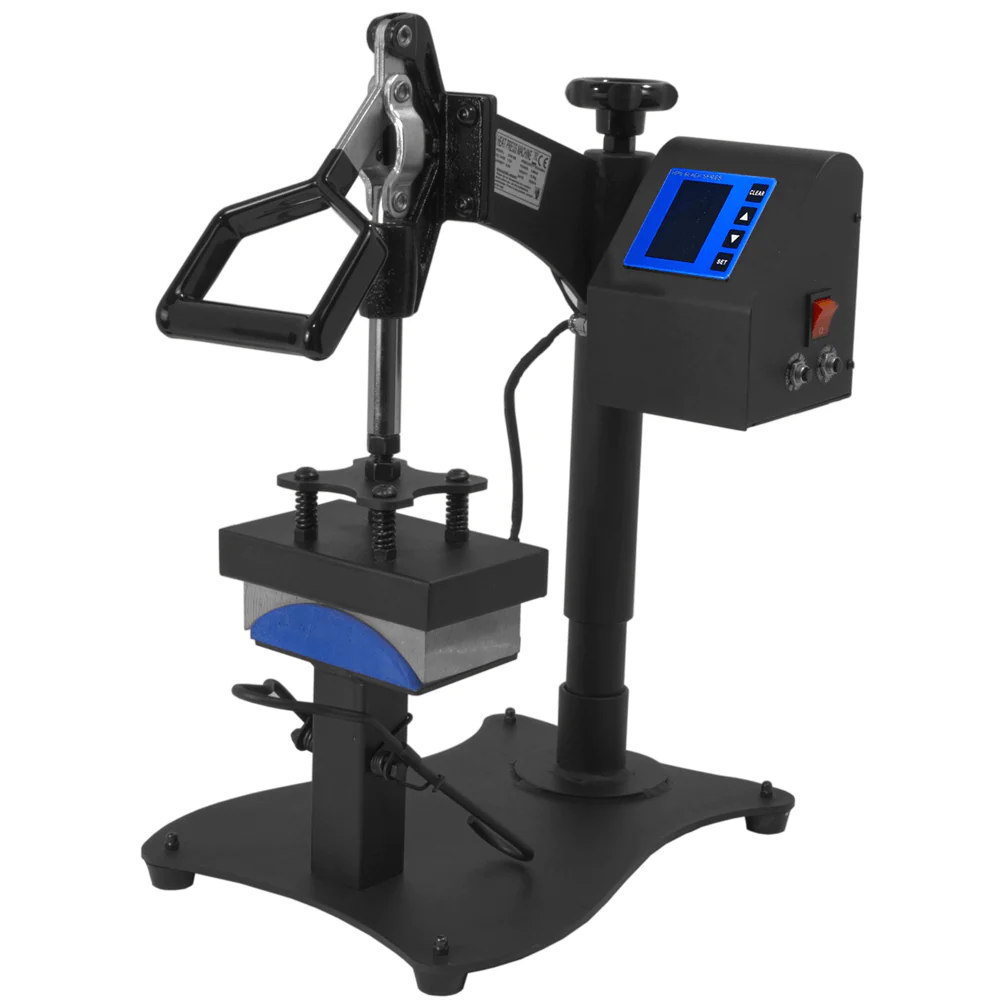
Cap presses are heat presses that are used to apply heat transfer materials to baseball caps.
This is an example of a cap press.
Multi Function Presses
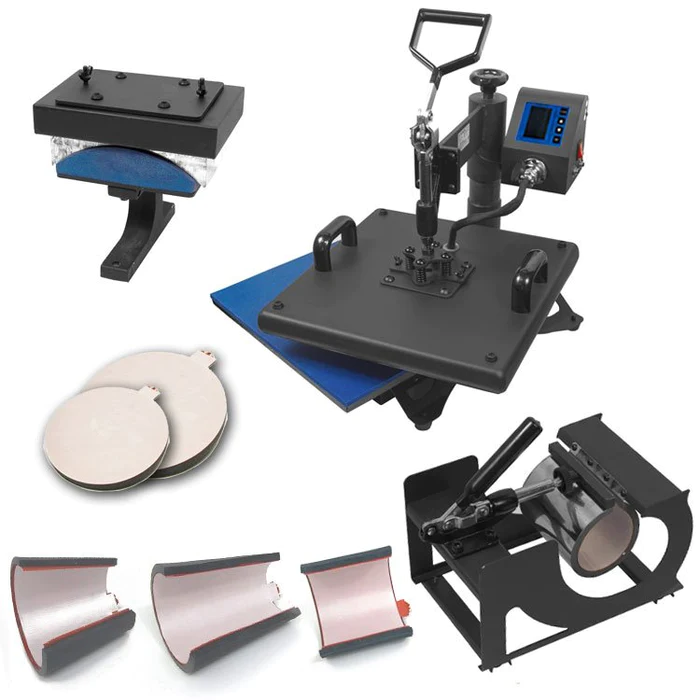
Multi function or all-in-one heat presses have various plate attachments to make the machine more versatile.
This is an example of a multi function or all-in-one heat press.
Heat Press Accessories
In addition to a heat press, you’ll need some accessories:
Teflon Sheets: These nonstick sheets help protect your design from getting stuck to the platen.
Pressing Pillows: These help level an area you are pressing, especially when pressing along collars, seams, buttons, or zippers.
HTV Remover: Made a mistake? VLR will get it off – easily.
Where Should You Buy a Heat Press?
I’ve worked with a few different heat press companies since 2015 when I started this blog, Cutting for Business. Hands down, I recommend Heat Press Nation. (And no, I’m not being paid to say that.)
Why Do I Recommend Heat Press Nation?
They know their stuff. Heat presses is what they do! The whole business of Heat Press Nation is… well, heat presses! They know how they work, they know what doesn’t work, and they know the different features of each model.
I’ve met many of them in person. They aren’t just an internet company I’ve found and partnered with. I’ve worked events side by side with the team. And, when I can, I just watch how they interact with customers.
I trust them. There are some companies out there who will upsell you on something you don’t need. I am confident in sending Cutting for Business readers over to Heat Press Nation, because I know they will take the time needed to match you with the right heat press for your price point.
They know better than I do. Heat Press Nation will be able to keep you up to date with the latest news, best presses for home crafters, and the best options for professional use.
Before I send you over to Heat Press Nation to start shopping, I want to leave you with my opinion on heat presses.
I recommend getting the largest heat press that you can afford. This will ensure that you don’t outgrow it shortly after getting it.
I started with a 9″ by 12″ heat press. Then I extended the shirt sizes I was offering into 3X, 4X, and 5X. Well, bigger shirts need larger designs. While I could use a 15″ by 15″ press, a 16″ by 20″ heat press made larger projects easier.
Tell me in the comments, what heat press do you have?
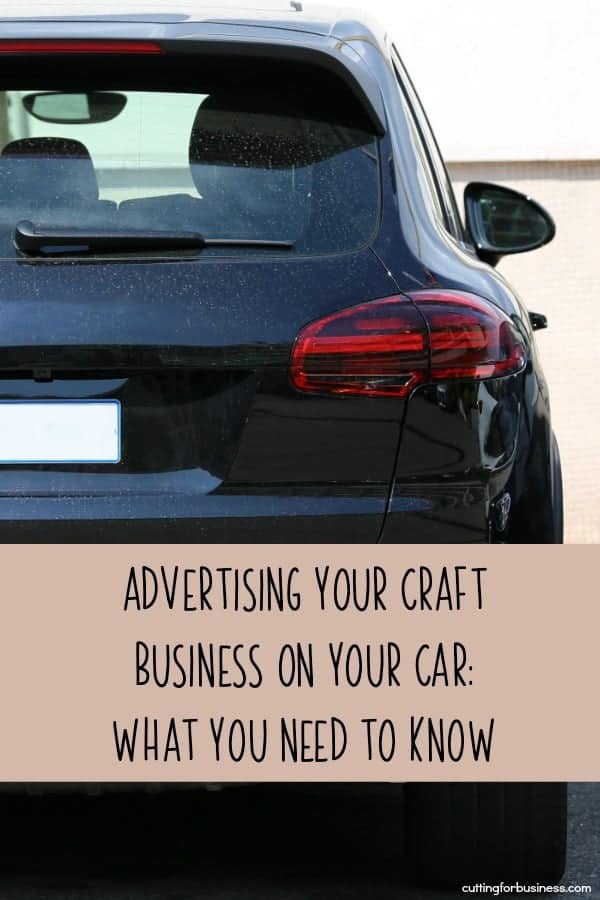
Adding a decal to your car or truck is a great way to advertise your Silhouette or Cricut based business. In fact, it is easy to cut the vinyl yourself and have a custom decal for your car in only a few minutes!
But, did you know that adding your business details to your vehicle may mean that you have to upgrade your car insurance to a commercial policy – even if you are not doing any business related activities in the vehicle? Today’s public service announcement: Before you place your business details on your vehicle, call your insurance company, your insurance agent, or consult your policy paperwork to make sure that it is allowed. In the event that you need to file a claim with your insurance company, they may decline it if you have business advertising on your vehicle and only hold a personal insurance policy.
If you find out that it is okay to add your business details to your vehicle, you can cut your own from vinyl using your machine, you can order car magnets or bumper stickers from Vistaprint.com, or consider full window decals from Signazon.com (I’ve used them twice to add rear window decals to the back of my vans – the decals are easy to apply, you’ll just need a buddy).
Spread the word and save the image below to Pinterest.
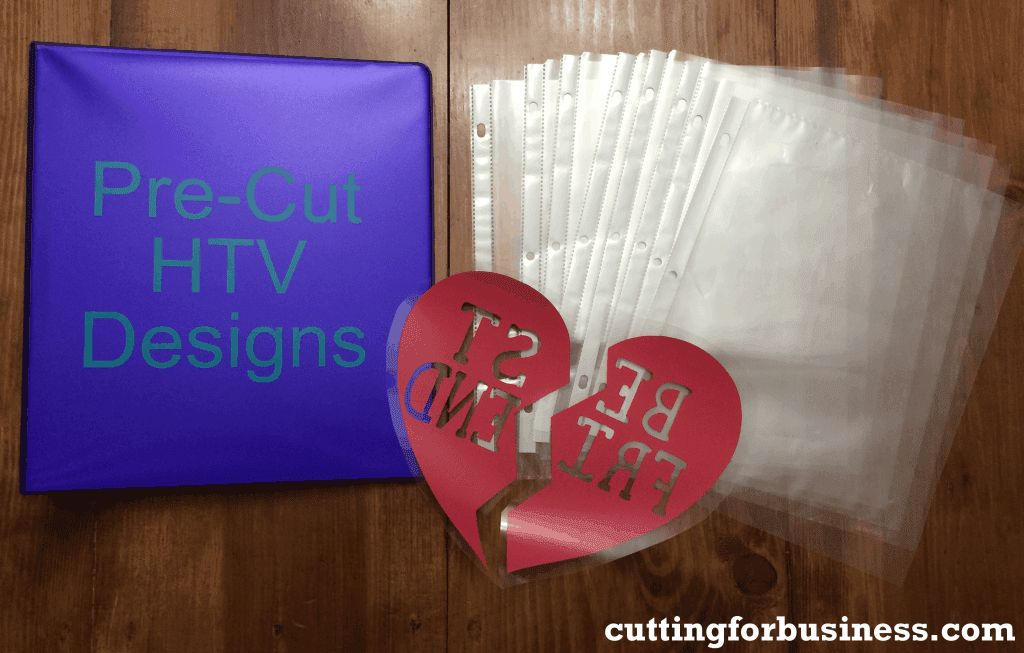
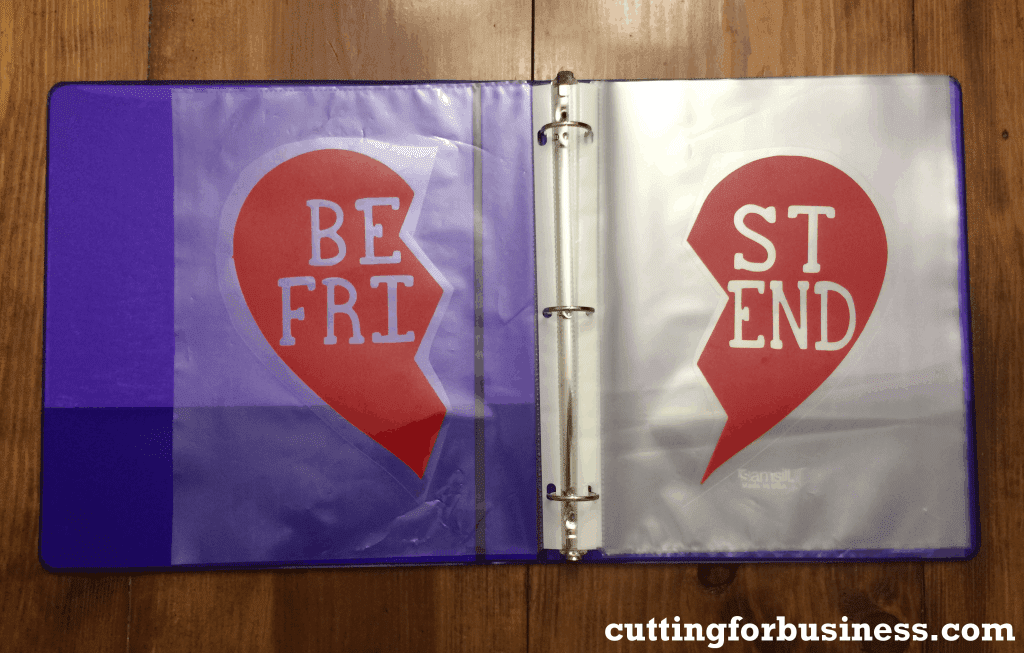
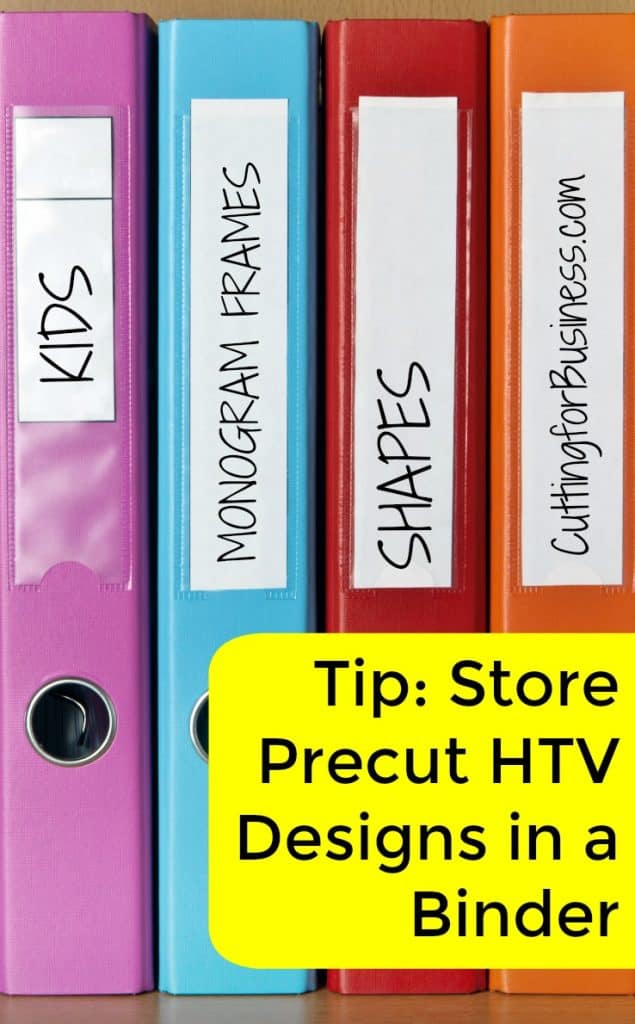
Do you like to cut and weed several designs at once? If you do, you’ll know that the heat transfer vinyl (HTV) carrier sheet picks up hair, lint, and dust if you leave it exposed. I used to put a piece of wax paper or freezer paper over the design to keep it clean before pressing. The problem with this method is that I still had to find a place to put the design so that it wouldn’t get crinkled or damaged. Then, I picked up this tip on the internet ages ago: Use a binder and page protectors to temporarily store your designs that are waiting to be pressed! You just weed your design and stick it the the outside of the page protector! Genius, right? I’ve found it timesaving when creating items, especially if I am working on cutting layers for a project that I may not finish on the same day.
Happy Tax Day! Do you ever wonder if your side hustle is a hobby or a business? Let’s take a look from the eyes of the IRS.
While you might call yourself a hobbyist – you’d better be sure that the IRS agrees with you. Today, I’m sharing criteria about how to IRS defines a business, and I’m giving you a list of benefits if you decide to incorporate your business.
Did you know that in many states you can register a new business online – without the help of an attorney!
IRS Criteria for Businesses versus Hobbies
“In making the distinction between a hobby or business activity, take into account all facts and circumstances with respect to the activity. No one factor alone is decisive. You must generally consider these factors to establish that an activity is a business engaged in making a profit:
Whether you carry on the activity in a businesslike manner.
Whether the time and effort you put into the activity indicate you intend to make it profitable.
Whether you depend on income from the activity for your livelihood.
Whether your losses are due to circumstances beyond your control (or are normal in the startup phase of your type of business).
Whether you change your methods of operation in an attempt to improve profitability.
Whether you or your advisors have the knowledge needed to carry on the activity as a successful business.
Whether you were successful in making a profit in similar activities in the past.
Whether the activity makes a profit in some years and how much profit it makes.
Whether you can expect to make a future profit from the appreciation of the assets used in the activity.” Source
Benefits to Registering or Incorporating Your Business
Reputation: You are no longer just a person that crafts at home, you are a registered business. For many potential customers, this increases your credibility.
Tax deductions: All the supplies that you’ve been buying become tax deductions!
Legal protection of your name: Once registered, another company cannot legally use your business name (this varies state to state).
Loans and grants: Once you have a registered business, you may be able to qualify for small business loans or small business grants to help grow your business.
Liability: Rather than being personally liable for the products you make, in many cases, the business becomes liable.
Wholesale pricing: Registered businesses and companies can apply for tax ID numbers which allow you to purchase from select wholesale sites, or buy items for resale and not pay taxes on them.
Credit card processing: Businesses can often negotiate better credit card processing rates – which will ultimately allow to you save money.
How to Register Your Business or Incorporate It
Unfortunately, each state is different for registering a business and requires different forms and fees. Head to this post for links to where to go in your home state. If you are not confident about the process of starting a business in your state, or don’t want to take a chance of omitting something, I have used incorporate.com in the past. They make it really easy and it’s fast – generally a few business days.
Was this information helpful? Save the image below to Pinterest.
Wondering where to sell your crafts online? Thinking about selling handmade products made with your Silhouette or Cricut?
I’ve compiled a list of places to sell crafts online – and I’ve included some pros and cons to each.
10 Places to Sell Crafts Online
Locally/Word-of-Mouth
When first starting out, your friends and family make great customers. It is not uncommon to give a gift to a friend or family member, and have them return to you to ask you to create something for them.
Pro: Friends and family want to see you succeed, and will often pass on your information to their friends.
Con: Friends and family often want items made for really cheap (or free!) – remember to take into account your time, supplies, and talents.
Costs: Free. Don’t forget to give your friends and family members business cards.
Locally Online
Most areas have local Buy and Sell groups through Facebook, Facebook Marketplace, and hyperlocal apps.
Pro: It’s usually free to list in these groups.
Con: With region specific groups, you have a limited market.
Cost: Free.
Craft Shows, Fairs, and Co-ops
These types of sales require you to bring items to a location and set up a display with other crafters.
Pro: Potential buyers can see and touch your items, and meet you in person.
Con: Depending on your location, craft fairs may be hard to find. Also, it is a lot of work to haul items to a place, set up a display, and take it all down later. Some craft fairs require submitting products for sale before acceptance into the show, while others require you be legally set up as a business – so be sure to get information in advance.
Costs: Range from a few dollars for a local crafts fair to $1000’s for well known shows.
Local Stores and Boutiques
Local stores and boutiques will often accept items to be sold in their store from crafters. Arrangements are often made based on a commission or consignment model.
Pro: Local stores can increase your exposure.
Con: Dealing with store owners, potential theft, and damaged products can be difficult. Make sure to have your agreement in writing.
Probably the most well known and popular marketplace for handmade items online.
Pro: Lots of buyers, and easy to set up, relatively inexpensive.
Con: Lots of competition and many shops may offer items similar to your own. Finding a name that isn’t in use for your Etsy shop can be difficult. Additionally, many overseas importers are on the site selling goods for a fraction of the price of actual handmade.
Cost: Setting up a shop is free, and each item listed is $0.20 for four months (or until sold – whichever comes first). For items that sell, an additional fee is required. Additionally, payment processing costs may apply.
Amazon has its own division of the website for handmade products.
Pro: Amazon mixes Handmade on Amazon products with regular catalog products for better exposure.
Con: It can be difficult and slow to get accepted into Amazon Handmade.
Cost: Handmade deducts a 15% referral fee, with no additional listing or payment processing fees.
Your Website
A stand alone website that you create (or you pay to have a web designer create).
Pro: Low amount of overhead costs for selling items.
Con: Time consuming to set up, there is a constant need to promote your website to drive traffic to it, and sales are often slow (or non-existent) until your website is well established.
Cost: Free to $1000’s.
Social Media
Many social media channels have a way to sell directly in the app or through the platform.
Facebook: Crafters can sell through Facebook Groups, Marketplace, or your own Business Page. Remember, it is against the terms and conditions to sell through your personal page.
Pro: Facebook is the largest social media network online. Selling on Facebook is well suited to people that have a large amount of friends that will help support the new business page by liking posts and sharing them.
Con: Facebook is constantly changing their algorithms for pages, which means the posts you make from your business page may only be shown to a small portion of people that “like” your page. Most recently, Facebook is pushing for business pages to pay for ads on Facebook to receive exposure.
Cost: Marketplace fees vary. There is no fee to sell in Facebook Groups or Marketplace.
Instagram: Crafters can sell products with Instagram Shopping directly in the app.
Pro: Instagram is highly visual with a supportive handmade community.
Con: You must use amazing photos to be successful on Instagram.
Cost: The fees can be steep at 5% flat fee per shipment. For products under $8.00, a flat fee of $0.40 is charged.
TikTok: Through Shopify, crafters can sell directly on TikTok.
Pro: TikTok is growing at a rapid pace.
Con: Selling directly on TikTok is limited to a few partnerships at the moment, but there is a strong suspicion that TikTok Shops is on the way.
Cost: Currently through Shopify or Teespring.
Pinterest: Crafters can on Pinterest through Pinterest Shopping.
Pro: Pinterest continues to be a high traffic site.
Con: You’ll still need a site for users to actually purchase through.
Cost: Using Pinterest Shopping features are free.
Smaller Marketplaces
There are a number of smaller marketplaces that are either very niche, are up and coming, or area out of the United States. Here are a few of them:
Artfire.com: Artfire is an artisan marketplace that was built by artisans for artisans. In addition to handmade items, you can also find artisan goods, fine art, supplies, and more.
Folksy: Folksy is an online marketplace for handmade goods and craft supplies based in the U.K.
Misi: Misi is an other online marketplace for handmade products based in the U.K.
Ebay: Over the years, Ebay has evolved into a wonderful place to sell items. Handmade items don’t do as well as they used to on Ebay.
iCraft: Icraft is a smaller marketplace for handmade products.
Mercari: Mercari is an app that allows selling all kinds of products. Some crafters do well on the platform.
Goimagine: Goimagine is an up and coming marketplace that donates its profits to charity. I’ve written an article on Goimagine with more information about the marketplace.
IndieCart: IndieCart (formerly Hyena Cart) is an older marketplace that has been merged with Hyena Cart. The marketplace offers handmade goods.
Felt: Felt is an online platform for crafters based in New Zealand.
Where Do I Recommend You Sell?
I often give this advice to new sellers when they ask me where the best place to sell is: First, start with your friends and family. This allows you to get a feel for selling products and dealing with customers.
Next, open a shop on Etsy or another marketplace. Etsy is a great first step into online selling, because they can provide the buyers.
Last, strive to move to your own website. After you master online selling, stop relying on a marketplace and quit paying the fees. After you’ve started your own website, feel free to leave your Etsy store (or other marketplace) open with a limited number of products to help drive traffic to your website. This idea may seem overwhelming at first, but remember to start small and take it one step at a time.
The first step to selling your handmade items is setting some goals for your new business, so read on.
If you plan on selling your handmade items, you’ll need to be able to accept payments. When selling through an online marketplace (like Etsy or Artfire), the marketplace collects the payment from the customer on your behalf. The marketplace then takes a portion of the sale (their processing fees) and deposits the rest into your account. But, if you are selling in person, you’ll need a method of collecting payments.
How to Collect Payments in Person
1) Cash or checks. Cash or checks are the easiest way to collect funds from local customers. Remember to allow checks to clear before giving the customer their item.
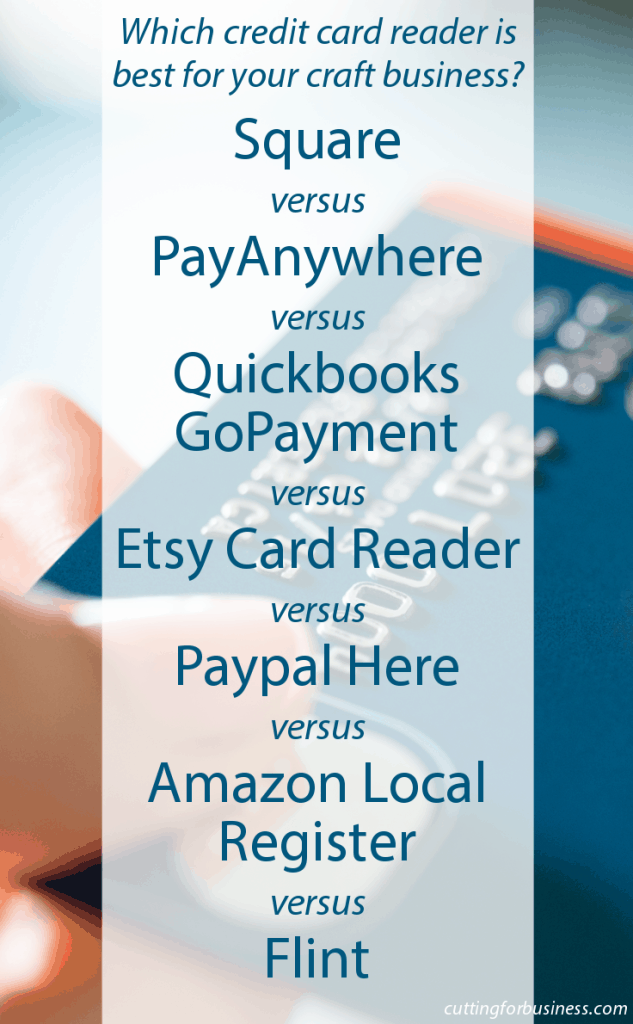
2) Credit card readers. There are a number of small business credit card readers available. The credit card readers use your smartphone or tablet and process the customer payment on your behalf. The company then takes a portion of the sale for processing the payment and deposits the remaining funds into your account. The needs of each small business vary, so compare your options to figure out which reader suits your small business best. For example, if you primarily take orders over the phone, make sure you choose a credit card reader with lower fees for keyed in transactions. To help you decide which will work best for your needs, I’ve summarized some main points about each in the chart below. Links to each credit card reader can be found at the end of the article.
Information below updated 4/11/16.
Reader
Cost
Fees
Deposit Availability
Other Notes
Square
Free. Order online. $10 in office or electronic stores that is credited back to your account after use.
Swiped: 2.75%, Keyed in: 3.5% + $0.15
1 business day, includes all business processed before 8pm ET the preceding day.
Additional features likes a register app, Square store, and more available. Email only customer service.
PayAnywhere
Free. Order online. $15 in office or electronic stores that can be credited back to your account after use.
Swiped: 2.69%, Keyed: 3.49% + $0.19
1 business day, includes all business processed before 5pm ET the preceding day.
Storefronts available for larger vendors. Rates for storefronts from 1.69% (and up) per swipe.
Automatically imports information into Quickbooks for easy accounting.
Etsy Card Reader
Free. Order online.
Swiped: 2.75%, Keyed in: 3% + $0.25
Money goes to your Etsy shop account and is deposited each Monday. Earlier deposits are available.
No Etsy transaction fees from items listed in your shop and paid via the card reader. No listing fees for items sold via the Quick Listing (not listed in your Etsy shop).
Paypal Here by Paypal
Free. Order online.
Swiped: 2.7%, Keyed in: 3.5% + $0.15
Money goes to your Paypal account for you to transfer to your bank when ready. Money is instantly available with the Paypal debit card.
Can also accept payment from your customer’s Paypal account.
Amazon Local Register
No longer accepting customers.
$10, but receive a credit for transaction fees once you use reader. Order online.
Swiped: 2.5%, Keyed in: 2.75%
Capable of next business day deposits, just need to set it up.
Amazon states that they have stabilized the card reader to make swiping easier. Card reader is larger than other brands.
Flint
No reader needed. App is free from Google Play or App Store.
Processes through Stripe. 2.9% + $0.30.
Within 2 business days.
Simply take a photo of the card and it is securely processed. Image is not stored on your device. Optional integration with Quickbooks. Mixed reviews online.
Update 10/26/15: The USA has recently switched to EMV credit card readers. Learn more about them in this post.
Always Collect Payment First
A quick (but important) note for newer sellers: Always collect payment before you begin working on any item for any customer. No seller ever wants to put the supplies and time into an item, especially a custom item that you might not be able to resell, and then have the customer not follow through with the sale.
Having customers pay in person is great for fairs and local sales, but what if you need to collect payment for items that you aren’t selling through an online marketplace, and the customer is not local? Online invoicing is a great way to easily do so. Read on to part two of this article, which covers online invoicing.