Category: Starting Your Business

  • How Much to Pay Yourself in Your Craft Business

    I’ve talked pricing on the blog before. First, I outlined how to price your craft items for sale. Then, I talked about pricing products when your supplies were on sale. There’s no right or wrong way to determine how much to pay yourself – it’s completely subjective. Today, let’s look at how much to pay yourself.

    Two Ways to Guide Yourself

    1. If you recently worked outside of your home, you should pay yourself at least the equivalent to what you previously paid. There are some limitations to using this method. For example, if you previously made $120,000 working in a high demand job you likely won’t be able to set your prices competitively enough in the craft market.
    2. You should pay yourself at least minimum wage for your state. Here in Florida, that means at least $8.05. In contrast, minimum wage in California is $10.00 an hour; while minimum wage in New York is $9.00. As your skills increase and your products get more technically difficult – you’ll raise your hourly wage.

    It’s just that simple! Remember, your business won’t get far if you don’t pay yourself enough. Underpaid working from home crafters are likely to get burned out faster, too.

    How much do you pay yourself per hour? Share in the comments.

    Save this post to Pinterest:

    How Much to Pay Yourself in Your Craft Business - Great for Silhouette Cameo or Cricut Small Business Owners - by cuttingforbusiness.com

  • How Efficient is Your Craft Space?

    An easy way to increase the time you have in your Silhouette Cameo or Cricut small business is to improve the efficiency in your workspace. Recently, I noticed while working on projects, I kept having to get up from my project to retrieve a supply, my camera, etc. So, I set out to fix the lack of efficiency in my workspace. Today, I am challenging you to do the same!

    How to Improve the Efficiency in Your Craft Workspace

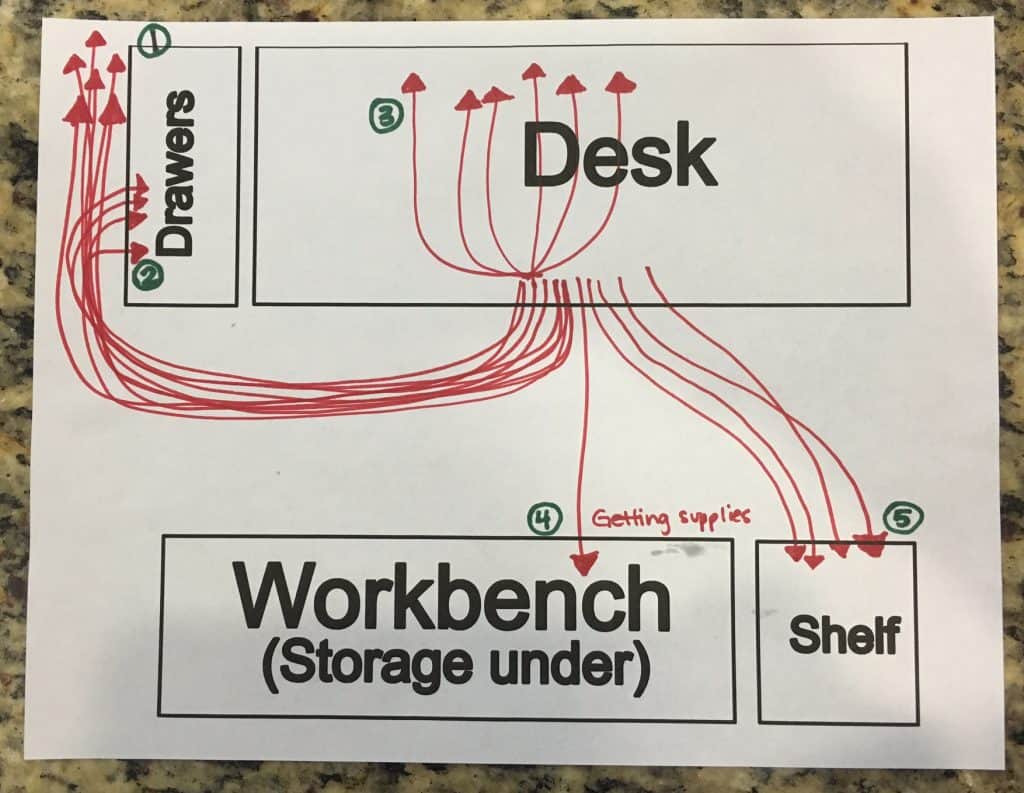
    1. Draw a map of your workspace.
    2. When working on your next projects, draw a line every time you get up to get a supply or reach for something.
    3. Evaluate the lines and see which ones you can eliminate either by moving supplies you use frequently or rearranging furniture.

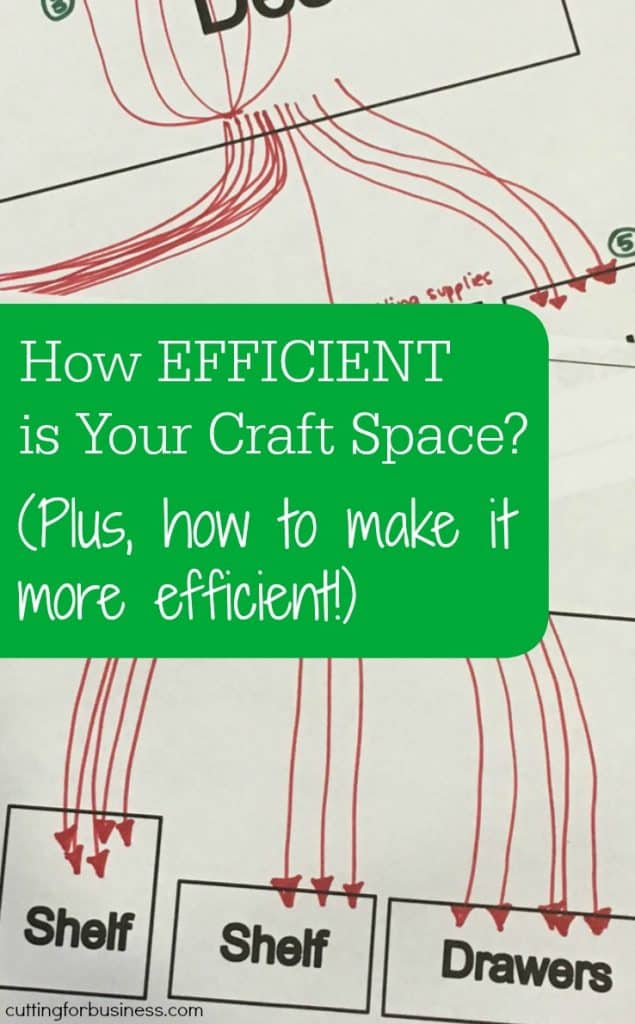
    Let’s take a look at my efficiency map.
    To make it easier to explain, I’ve numbered each section.

    How Efficient is Your Craft Space? Great for Silhouette Cameo or Cricut Crafters. By cuttingforbusiness.com.

    1. These arrows denote trips to a closet where I store some craft supplies (mostly vinyl).
    2. A short chest of drawers where I store blank products. My heat press also sits on top of it. I have a tiny craft space and have to walk around the chest to use the heat press.
    3. The arrows above my desk refer to hanging buckets I have mounted on the wall for small supplies like markers and blades.
    4. In addition to my desk, I have a second workspace in my craft area. I rarely used the workbench top. Instead, I only use the storage below it.
    5. This shelf houses all of my machines.

    What I learned from my efficiency map:

    1. I really need to move all the craft supplies into my craft room.
    2. It’s a pain to walk around the drawers to use the heat press.
    3. I don’t really need the second workspace in my craft space because it is only being used a storage.

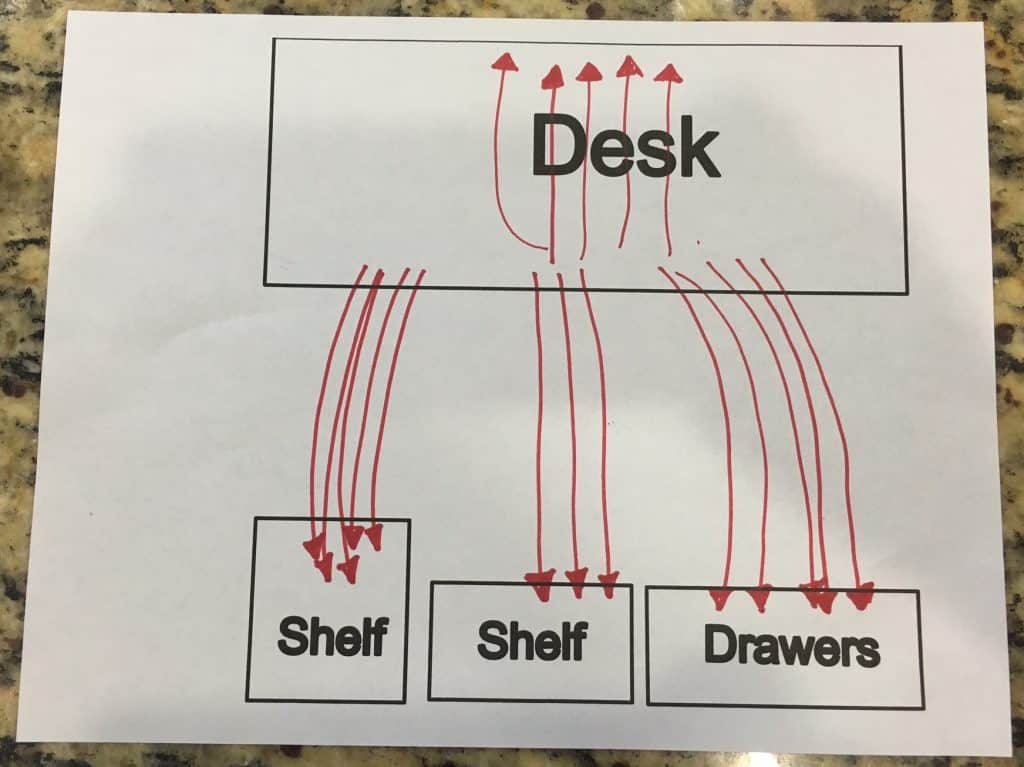
    What I did next and my improved workflow:

    I moved the workbench out of my space, turned the drawers, and added an additional shelf. You do not have to make a second map, but I did to show you how my efficiency improved with a few simple changes. Look at my improved workflow:

    fullsizerender-10

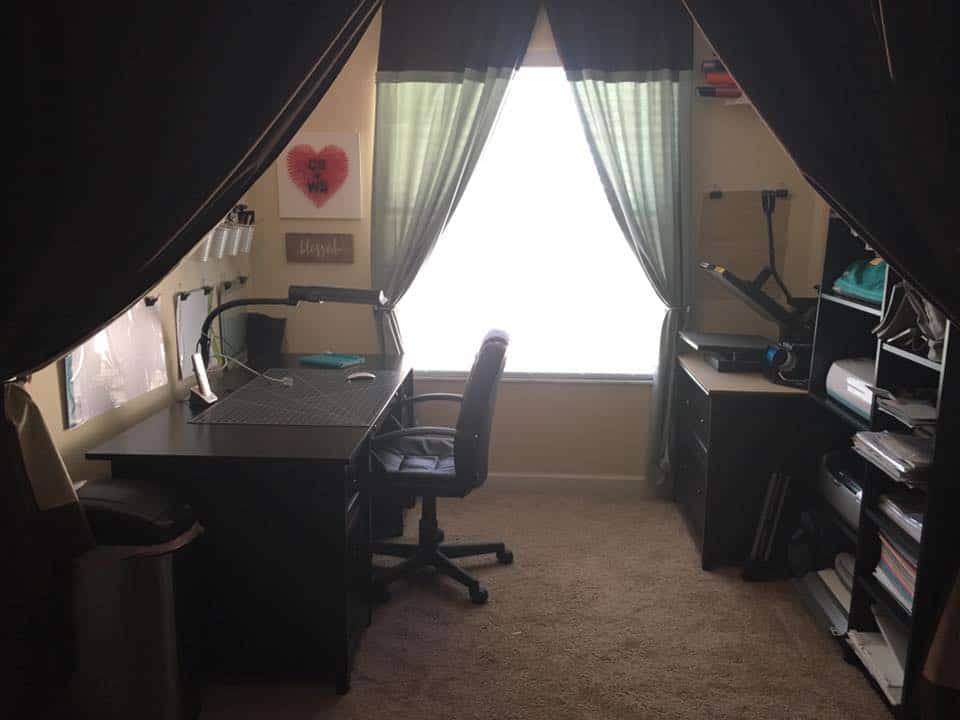
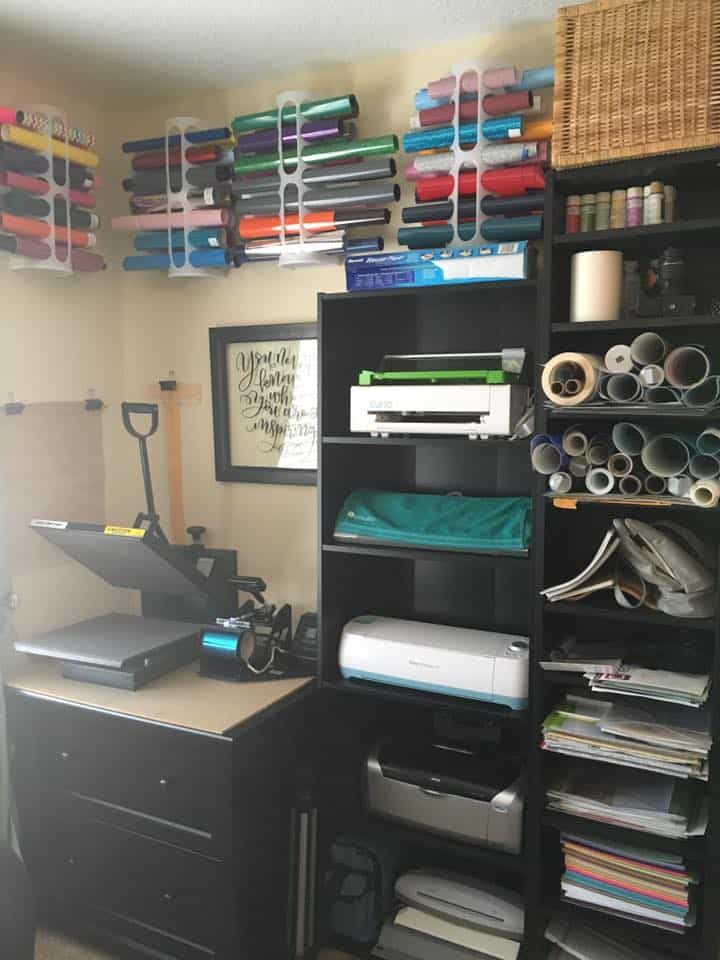
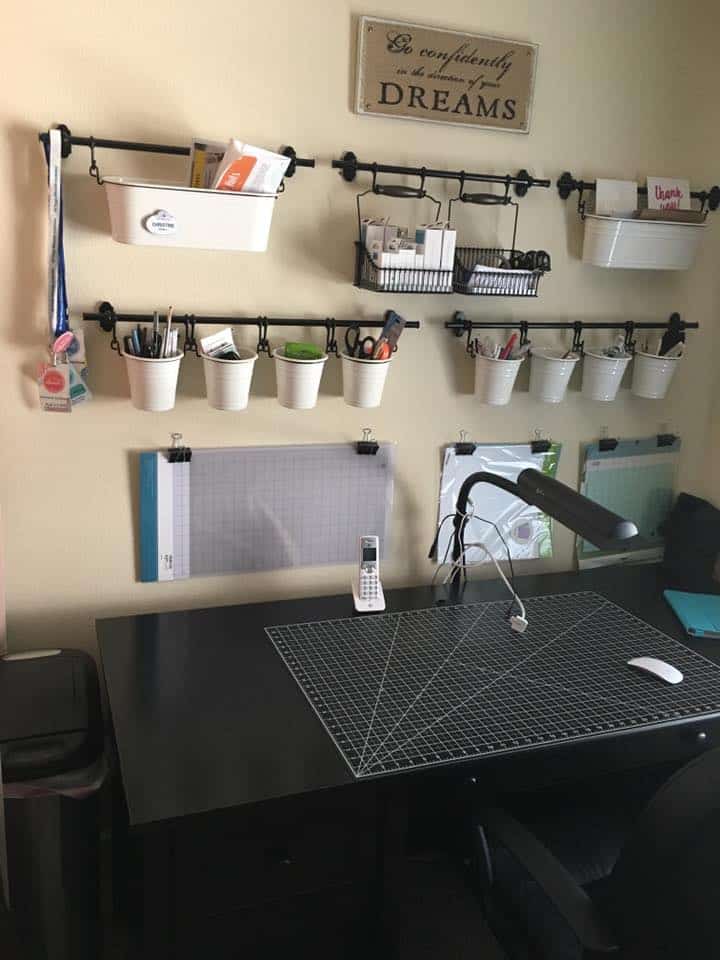
    Need inspiration for a teeny tiny craft space? As professional organizers pointed out in this post, go vertical. Here’s a peek at my craft space:

    How Efficient is Your Craft Space? Great for Silhouette Cameo or Cricut Crafters. By cuttingforbusiness.com.

    How Efficient is Your Craft Space? Great for Silhouette Cameo or Cricut Crafters. By cuttingforbusiness.com.

    How Efficient is Your Craft Space? Great for Silhouette Cameo or Cricut Crafters. By cuttingforbusiness.com.

    Now, it’s your turn to look at the efficiency in your workspace.

    Save this post to Pinterest before you start drawing your map:

    How Efficient is Your Craft Space? Great for Silhouette Cameo or Cricut Crafters. By cuttingforbusiness.com.

  • How to Prepare Your Craft Business in Case of Accident or Death

    Someday, each one of us will pass away. While I hope it is many, many years down the road – people pass away unexpectedly every day. Similarly, you could get into an accident or fall ill without warning and be unable to maintain your business. As a small business owner, you have a responsibility to your customers to leave someone in charge of your business in unforeseen circumstances.

    No one likes thinking about or planning for these things, so I’m making it easy for you! I’m giving you a printable outline to download and fill out. Once you have filled it out, put it in an envelope, and place it with your important paperwork. Tell your significant other, a close friend, or family member about the envelope and your plans. Remember to keep the printable up to date.

    Download the printable here in pdf or here in .docx.

    It’s always wise to double check your business plans with an estate lawyer or your small business legal team if you have one. Additionally, be sure that your business and bank accounts have beneficiaries listed.

    Before you go, the Silhouette crafting world lost a crafter this week in an ATV accident in Florida. Feel free to read more here.

    This post is important – save it to Pinterest:

    How to Prepare Your Silhouette Cameo, Curio, Mint, or Cricut Craft Business in Case of Accident or Death - cuttingforbusiness.com

  • 10 Ways to Use Vinyl Scraps for Big Profits

    Cutting for Business readers are in for a treat today, because Jamie stopped in from Craft Chameleon (formerly Punch Place Plus). I’m turning it over to Jamie:

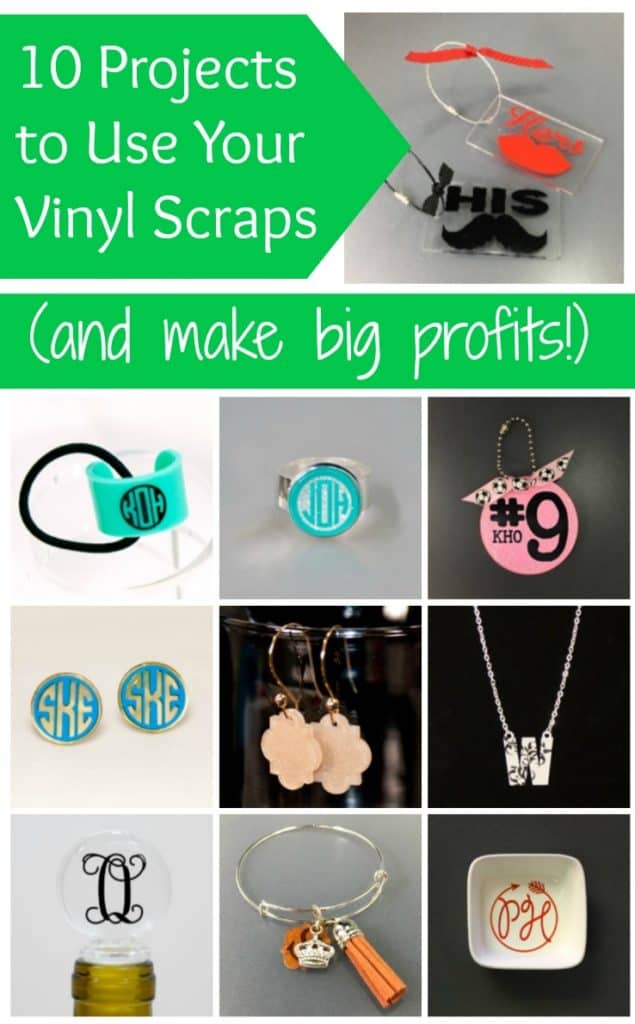
    Hi everyone, Jamie here. Let’s talk vinyl scraps today! I don’t know if it was my grandmothers’ influence, living through The Great Depression, or what but it’s tremendously hard for me to throw away small pieces of unused vinyl. Whether Granny or genetics was the cause, the effect is this list of 10 low cost items from Craft Chameleon to use with those vinyl scraps. Read on to see how you can turn your small scraps into big profits!

    Please note the figures below show only ‘Gross Profits’. This means it does not take into account the following items: wear and tear on equipment, labor, shipping, selling expenses, rent, inventory expenses, interest charges, and other expenses your business might incur.

    Now let’s make Granny proud and use up our scraps!

    1) Post Earrings
    10 Ways to Use Vinyl Scraps for Big Profits by cuttingforbusiness.com


    Scrap size needed:  1” x 2”

    Cost of Earrings $.60/pair to $.89/pair (without shipping)
    Selling Price: $5 to $12 per pair
    Gross Profit: $4.40 to $11.11

    2) Dangle Earrings
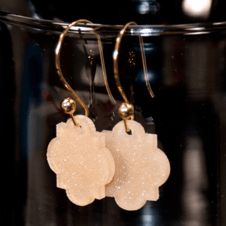
    10 Ways to Use Vinyl Scraps for Big Profits by cuttingforbusiness.com


    Scrap size needed: 1.5” x 2.5”

    Cost of Earrings: Blanks $.67/pair & Wires $.24/pair (without shipping)
    Selling Price: $5 to $15 per pair
    Gross Profit:  $4.09 to $14.09

    3) Charm Bracelet
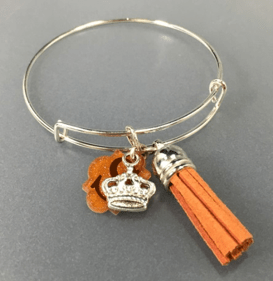
    10 Ways to Use Vinyl Scraps for Big Profits by cuttingforbusiness.com


    Scrap size needed: 1.75” x 1.75”

    Cost of bracelet and components: Bangle $.55, acrylic charm $.34, 3 Side Cut Oval Jump Rings $.12, 1.5” Tassel $.23, crown charm $.43 (without shipping)
    Selling Price: $6.00 to $12 per bracelet
    Gross Profit*:  $4.33 to $10.33

    4) Necklace
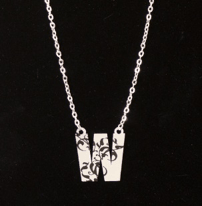
    10 Ways to Use Vinyl Scraps for Big Profits by cuttingforbusiness.com


    Scrap size needed: 2” x 2.5”

    Cost of Components:  Letter Pendant $.69, Necklace with jump rings $.54 (without shipping)
    Selling Price: $5.00 to $10.00
    Gross Profit:  $3.77 to $8.77

    5) Ring Dish
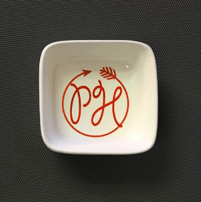
    10 Ways to Use Vinyl Scraps for Big Profits by cuttingforbusiness.com


    Scrap size needed: 2.5” x 2.5”

    Cost of Square Ring Dish: $2.12 each with shipping ($1.06 without shipping but these are heavy so doubling the cost)
    Sales Price: $7.50 to $12.00
    Gross Profit:  $5.38 to $9.88

    6) Glass Bottle Stopper
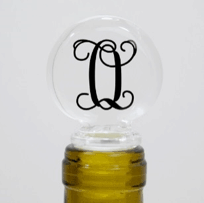
    10 Ways to Use Vinyl Scraps for Big Profits by cuttingforbusiness.com


    Scrap size needed: 2” x 2.5”

    Cost of Stopper:  $2.15 (without shipping)
    Sales Price: $7 to $15
    Gross Profit: $4.85 to $12.85

    7) Bag Tags
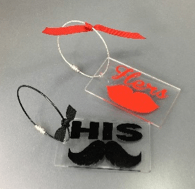
    10 Ways to Use Vinyl Scraps for Big Profits by cuttingforbusiness.com


    Scrap size needed: 2.5 x 3.5”

    Cost of components:  1 Tag $.75, 1 Luggage Strap $.35 (without shipping) Ribbon Scrap Optional $0
    Selling Price: $4.00 to $10
    Gross Profit: $2.90 to $8.90

    8) Keyrings

    10 Ways to Use Vinyl Scraps for Big Profits by cuttingforbusiness.com


    Scrap size needed: 3” x  3”

    Cost of Components:  2” Glitter (1 side) Circle $.65, Ball chain included (without shipping) Ribbon Scrap Optional $0
    Selling Price: $3.50 to $8.50
    Gross Profit: $2.85 to $7.85

    9) Rings
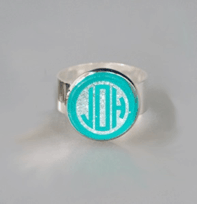
    10 Ways to Use Vinyl Scraps for Big Profits by cuttingforbusiness.com


    Scrap size needed: 1“ x 1”

    Cost of Ring:  $.94 Adjustable Wideband Ring (without shipping)
    Sales Price: $5.00 to $10.00
    Gross Profit:  $4.06 to $9.06

    10) Pony Tail Cuffs
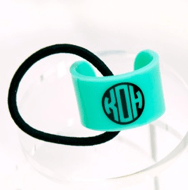
    10 Ways to Use Vinyl Scraps for Big Profits by cuttingforbusiness.com


    Scrap size needed: 1.5” x 2”

    Cost of Cuff: $.95 (without shipping)
    Selling Price:  $5.00 – $6.00
    Gross Profit: $4.05 to $5.05

    Now I have some questions for you: Have you seen anything that you could cut from your small scraps? What would the price point be in your area? What would your gross profit be? Better yet what would your Net Profit be? Did this set your creativity in motion and give you ideas for other scrap busting projects?

    Have an answer to any or all of these questions? If so, Craft Chameleon would love to hear you – leave a comment or visit us at Craft Chameleon.

    Wow, a huge thanks to Jamie for stopping in and sharing so many ideas with Cutting for Business readers today. I guess I need to go pull out my scrap box and get to work.

    Don’t forget to save this to Pinterest so that you’ll have all of Jamie’s links when you get ready to start creating:
    10 Ways to Use Vinyl Scraps for Big Profits by cuttingforbusiness.com

  • Why It’s Important to Set Office Hours for Your Craft Business

    I swear, Cutting for Business blog readers are some of the hardest working people that I know. Why do I say that? Because I keep in pretty close contact with a lot of blog readers through different social media outlets including the Cutting for Business Insider’s Club. It’s recently come to my attention that a lot of readers could have a better work/life balance. Running a home business is just like having a 9-5 job. While I understand that often, you have to work odd hours (evenings, weekends, or late nights), that doesn’t mean you can’t have a regular schedule.

    Today, I challenge you to write out a working schedule. This will vary per small business, but write out the times per day that you will work and the times that you are off. After you’ve got it in writing, hang it somewhere you will always see it – and stick to it! Feel free to also advertise your office hours to customers. This way, if a customer emails you after you are closed for the day – they will know to expect a response at a later time.

    When writing out your schedule, be sure to include time for these tasks:

    • Designing and creating products
    • Inventory and workspace clean up
    • Scheduling social media
    • Customer service – like answering emails
    • Networking
    • Advertising for new customers

    This whole post can be summed up with one question: When you die, do you want your kids to remember you constantly working or do you want them to remember the laughing, smiling, and time you spent with them? If you don’t have kids, think of your partner, your family, or your close friends.

    If you need some help with time management, head to this post.

    Save this reminder to Pinterest:

    Why it's important to set office hours for your Silhouette Cameo or Cricut based home business - by cuttingforbusiness.com

  • Why Does Paint Bleed When Using a Vinyl Stencil?

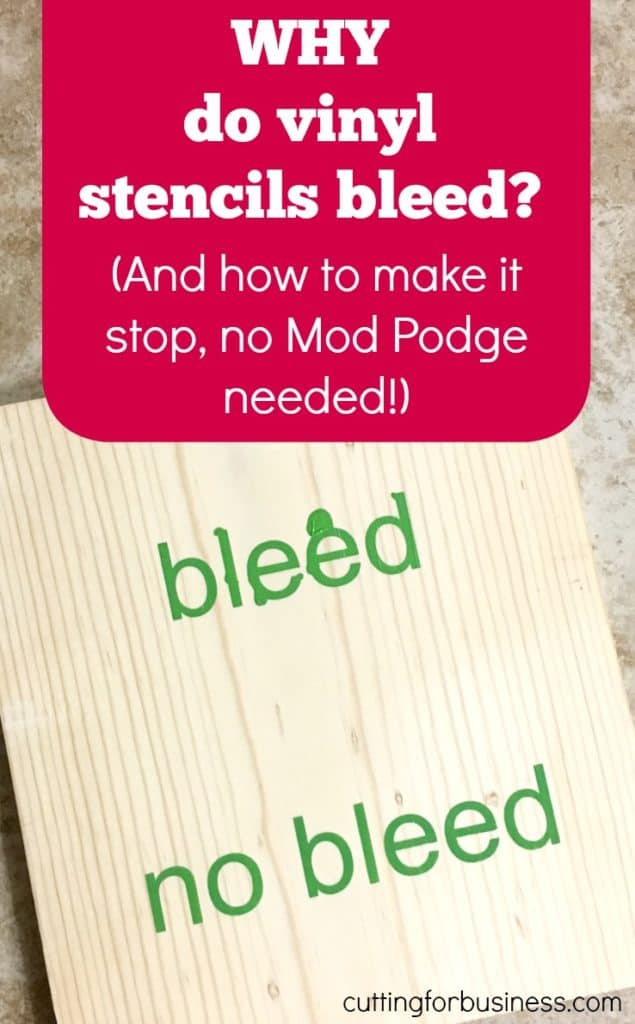
    If you want to sell wooden signs, they need to look nearly perfect because the market is competitive. I often see wooden sign makers struggling to get crisp paint lines when using a vinyl stencil cut on a Silhouette Cameo or Cricut. When they ask for help from fellow crafters, someone always tells them to use Mod Podge. I love Mod Podge, but it is expensive – and unnecessary when making wooden signs.

    Why does paint bleed when using a vinyl stencil?

    There’s actually a couple of reasons:

    1. The paint seeps underneath the vinyl stencil because the wood was not sanded well enough. This is probably the biggest problem I see. You should sand your wood with multiple grits of sandpaper, starting with 120 or 150 grit sandpaper and finishing with 220. When the wood is not sanded well enough, the vinyl cannot get a good seal because the surface is uneven (even if you can’t see the uneven spots). Read more about sanding wood in this post.
    2. The vinyl was not burnished (rubbed) well enough onto the wood. Again, the paint seeps underneath the stencil. Use a squeegee to be sure that the vinyl adheres well to the wood.
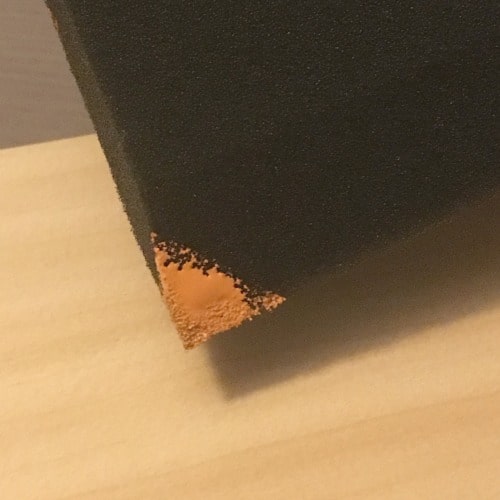
    3. You are using too much paint. I recommend using a foam sponge brush or a makeup sponge and dabbing the paint on in an up and down motion. It is best to only dip the corner of your brush/sponge into the paint and use a tiny amount of paint. Here’s a photo of what my brush looks like when I stencil – I use a tiny amount of paint at once: Why do vinyl stencils bleed - and how to fix it - no Mod Podge needed! A great article for Silhouette Cameo and Cricut crafters who make wooden signs. By cuttingforbusiness.com

    Tip: If you try the 3 things above and are still having paint bleed, try this: After placing your vinyl stencil on the wood, paint over it using the same color as you used on the background. This seals the edges the same way that Mod Podge does – for much cheaper.

    When I do recommend using Mod Podge

    There is one time when I would use Mod Podge: if you are not painting the background of the sign (leaving it natural wood) AND purposely leaving the wooden surface rough. Mod Podge will help keep your paint from bleeding due to the rough surface. See the tutorial for using a stencil on rough wood at this link.

    Looking for more tips about buying wood for your Silhouette Cameo or Cricut business? Head to this post. Have a ton of Mod Podge you need to use now? Check out Mod Podge Rocks for lots of craft projects.

    Be sure to pin the image below on Pinterest so you can try these tips later:

    Why do vinyl stencils bleed - and how to fix it - no Mod Podge needed! A great article for Silhouette Cameo and Cricut crafters who make wooden signs. By cuttingforbusiness.com

  • How to Organize Your Craft Room: 8 Tips from Pros

    I know it is something that every crafter can relate to: A disastrous craft room. For me, my craft space usually looks like a tornado went through it.

    I recently got the chance to talk to four professional organizers and asked them for tips on how to organize your craft room.

    How to Organize Your Craft Room: Tips from Pros - cuttingforbusiness.com

    Meet the Organizers

    Naomi from Open Doors Organizing Services
    Robyn from Organize 2 Harmonize
    Christina from Streamlined Living
    Amy from Amy Trager

    How to Organize Your Craft Room Tips

    Q: What are the best containers to store craft supplies in?

    A: All the professional organizers agreed that clear plastic bins are the best containers to store craft supplies in. Why? Because you can see what’s inside them and they can stack. Naomi noted that once you “…add on labels you’ve got a great start to an organizational system”. Christina reminded crafters to also leave room for more supplies to be added later when planning your storage.

    Q: When setting up a craft workspace, what are some rules to follow for good workflow?

    Christina suggests keeping everything at arm’s reach to minimize the time spent going and getting supplies.

    Naomi noted that you should keep your most used supplies closer to you and less used supplies can be farther away if needed. She also said, “However, it is best if all of those stored supplies are still visible, whether in a closet with the door open or on shelves.”

    Q: What is your advice on multi purpose rooms? (Example: Crafting at the dining room table.)

    Amy suggests that a rolling cart so that it can be moved out of the way when the needs of the room change. She also noted that a mat on the table that is portable and can be picked up and moved at the end of crafting time is a great idea.

    Naomi also recommended a rolling cart and even shared one of her favorites which is the RASKOG utility cart from IKEA. Then, add magnetic caddies to the side of the cart like those from the Urbio collection at The Container Store.

    Q: Where to start organizing when your craft room is bursting with stuff?

    Amy suggests that you first sort everything into categories and decide what things you want to keep. After everything is then sorted, then purchase containers to store the items you plan to keep.

    Naomi suggests starting with one drawer or bin or shelf. She likes to start at one end of the room and work her way around. Set a timer for 15 minutes and do what you can. When the timer dings, if you are feeling overwhelmed, stop, but if you are feeling motivated, then continue!

    Christina agreed to work in 15 minute increments and to remember that you craft space didn’t become a mess in one day, so don’t expect it to be clean in just a day.

    Robyn reminds us that a little each day will make a huge difference.

    Q: What tips do you have for organizing small/tiny spaces?

    Robyn says that the key to organizing small spaces is to only keep what is necessary. She also notes to look for multi functional furniture like end tables with drawers or an ottoman with storage inside.

    Naomi reminds us to use wall space for small spaces. Specifically, she said the best thing to do is to think vertically. You may not have the square footage on the floor, but look up at the walls at all the unused potential! Use tall bookshelves, shelving units and floating shelves for storage, magnetic boards for your ideas, and white boards for writing down supplies that you need to buy.

    Q: What advice do you have for maintaining order once everything is organized?

    Christina shared an awesome tip: “Put everything back where you got it from as soon as you are done with it. Craft spaces can get messy in a hurry because there’s usually lots of pieces parts involved. Simply cleaning up at the end of each project or at the end of the day makes all the difference in maintaining the organized space. Build that clean up time into your crafting time. I know it isn’t as much fun as crafting, but you’ll thank yourself later!” How simple is that? I’m kind of embarrassed that I didn’t think to build in clean up time to my crafting schedule!

    Amy noted that you should “Try your best to make order a new habit. Just like anything else you’ll have to remind yourself of where items belong now – and make sure they’re put away when you’re done using them. Use labels on drawers and containers, if it will help you remember where it all goes.”

    Q: How can crafters get in contact with a professional organizer?

    Crafters can find professional organizers through NAPO – the National Association of Professional Organizers.

    Q: What is the average cost of using a professional organizer?

    The professional organizers noted that professional organizer rates generally fall between $25 to $150 per hour, depending on the experience of the organizer. Naomi also noted that some organizers may offer a discounted package or a flat rate if you are looking to work on a large craft space and it may take longer than one day to complete.

    How I Organize My Craft Room

    I recently got a DreamBox from Create Room. And, it’s been life changing as far as the mess in my craft room. Read more about my DreamBox and get a coupon code.

    Have More Questions? Ask the Professional Organizers

    Reach out to any of the professional organizers through social media:

  • Tutorial: How to Easily Cut Down Vinyl Rolls

    Have some wide rolls of vinyl that you’d like to cut down to save time? No problem. Today, I will show you how to easily cut down vinyl rolls.

    Many crafters use a Silhouette or Cricut with a maximum cutting width of 12″. Unfortunately, most heat transfer vinyl sold in rolls comes wider than 12 inches. It can be time consuming to use scissors, a rotary cutter, or guillotine cutter to cut down your vinyl rolls.

    To save time, I usually cut down my rolls as soon as they arrive with a table saw. Yep, believe it or not, I use a table saw.

    Tutorial: How to Easily Cut Down Vinyl Rolls - cuttingforbusiness.com

    Silhouette Cameo Pro

    Before I show you how to easily cut down vinyl rolls, did you know that the Silhouette Cameo Pro has a maximum cutting width of 24″?

    Shop Silhouette Cameo Pro.

     Tutorial: How to Easily Cut Down Vinyl Rolls with a Saw

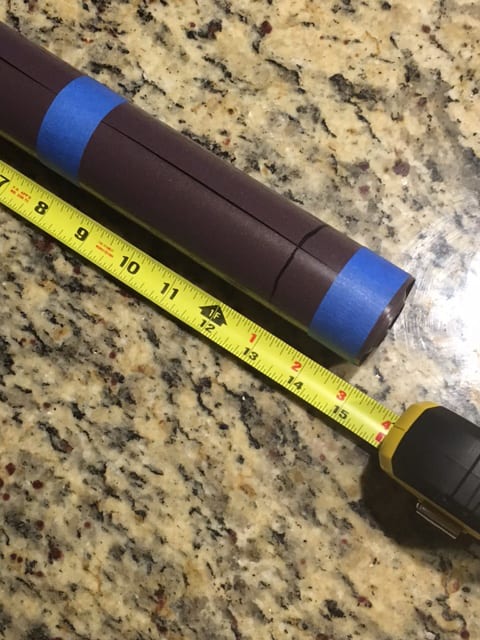
    Step 1) Make sure the vinyl is rolled very tightly. Using tape (I use painter’s tape), tape the roll together on both ends.

    Step 2) Use a permanent marker to mark where you will cut the vinyl roll. I usually purchase 15 inch rolls and cut them down to 13 inches. 13 inches still fits on a Silhouette or Cricut mat well or feeds into a Silhouette Cameo without a mat. Tip: You could also purchase 24 inch rolls and cut them in half to make 12 inch rolls!

    How to Easily Cut Down Vinyl Rolls - Great for Silhouette Cameo or Cricut owners - by cuttingforbusiness.com
    Measure and tape the vinyl roll.

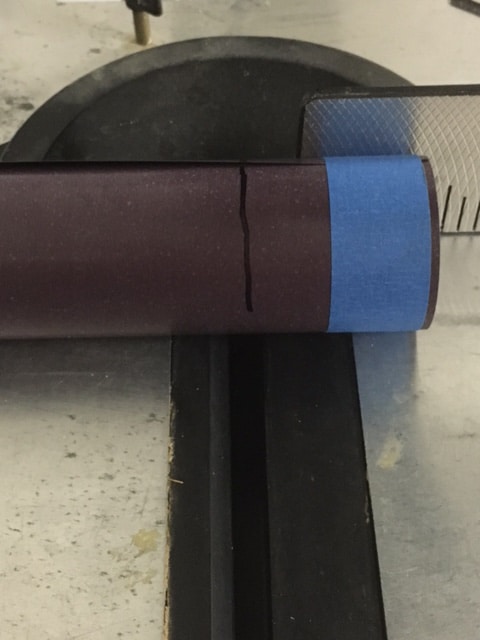
    Step 3) Cut the vinyl roll down. I use a table saw, but you could also use a circular saw. If you aren’t comfortable with power tools, you could probably use a hacksaw (depending on the thickness of the roll).

    How to Easily Cut Down Vinyl Rolls - Great for Silhouette Cameo or Cricut owners - by cuttingforbusiness.com
    Cut the vinyl roll.
    How to Easily Cut Down Vinyl Rolls - Great for Silhouette Cameo or Cricut owners - by cuttingforbusiness.com
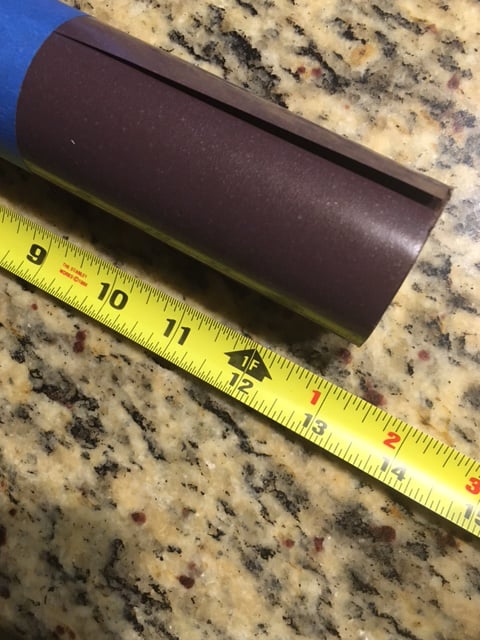
    After cutting the vinyl roll.

    That’s it – it’s just that easy to save time in your Silhouette or Cricut business.

    Looking for my favorite places to buy patterned vinyl? See my list of the best places to buy patterned vinyl. And, let me know in the comments – how do you cut down vinyl rolls?

  • 13 Tips for Designing a Logo

    Need a logo for your craft business? Whether you are starting from scratch, or redesigning your logo, Sarah Guillot from Sarah Design is sharing tips for designing a small business logo.

    Sarah has previously guest blogged on Cutting for Business about designing with fonts.

    13 Tips for Designing a Logo - cuttingforbusiness.com.

    Should You DIY Your Logo or Hire a Professional Logo Designer?

    It’s your decision whether you create your own logo or hire a professional to create your logo. If you are on a tight budget, try your hand at creating one – especially if you have some basic design skills.

    As a crafter, if you can create your own files to cut with your Silhouette or Cricut, you can create your own logo.

    If you have no design skills, it’s better to hire a logo designer than trying to learn to design while creating a logo.

    Adobe Illustrator

    Illustrator is my number one recommendation for designing a logo from scratch. As a vector program, designs are built mathematically and can be made as large or as small as you want without losing quality.

    Silhouette Studio

    You can create a logo in Silhouette Studio. When saving your logo, you’ll want to make sure you save as a PNG file so that you have a transparent background.

    Cricut Design Space

    Cricut Design Space can be used to create your own logo, however, you’ll have to save your logo for offline use. This help article from Cricut provides a walkthrough on how to export to your computer.

    Font Choice Matters

    If your business is fanciful or fun then decorative fonts are perfect. But, if you’re a serious business then you probably want simpler fonts. Either way, make sure they’re readable!

    Mix & Match

    I often see logos with a script font of a word or two, paired with a simpler font that describes the service. This is the tactic I chose when creating my logo for Sarah Design.

    Text, Icon, and Text + Icon

    Don’t use an icon with no words. This only works for huge corporations that spend a bazillion dollars on marketing. The Nike swoosh symbol is recognizable without the word “Nike” because they have marketed their brand extensively for years. As a new business, you don’t have this luxury. So to be safe, I recommend using text alone, or text with an icon near it.

    Readability

    Make sure that the font, the size, the colors, etc., all work together to make your logo readable. If people can’t make it out, they will not remember you or your business!

    3 Logo Creators

    If you don’t have any ideas for your logo, start with an online logo creation tool.

    Graphic Springs

    Great for simple designs, and it is free to try. Graphic Springs has tiered pricing. For example, for $19.99, you’ll get a high resolution logo file. But, for $99.99, you’ll receive high resolution files in several formats, the graphic in your logo will be removed from their database so no one else can use it, and more.

    Screenshot of graphicsprings.com - cuttingforbusiness.com.
    Logo creator at Graphic Springs.

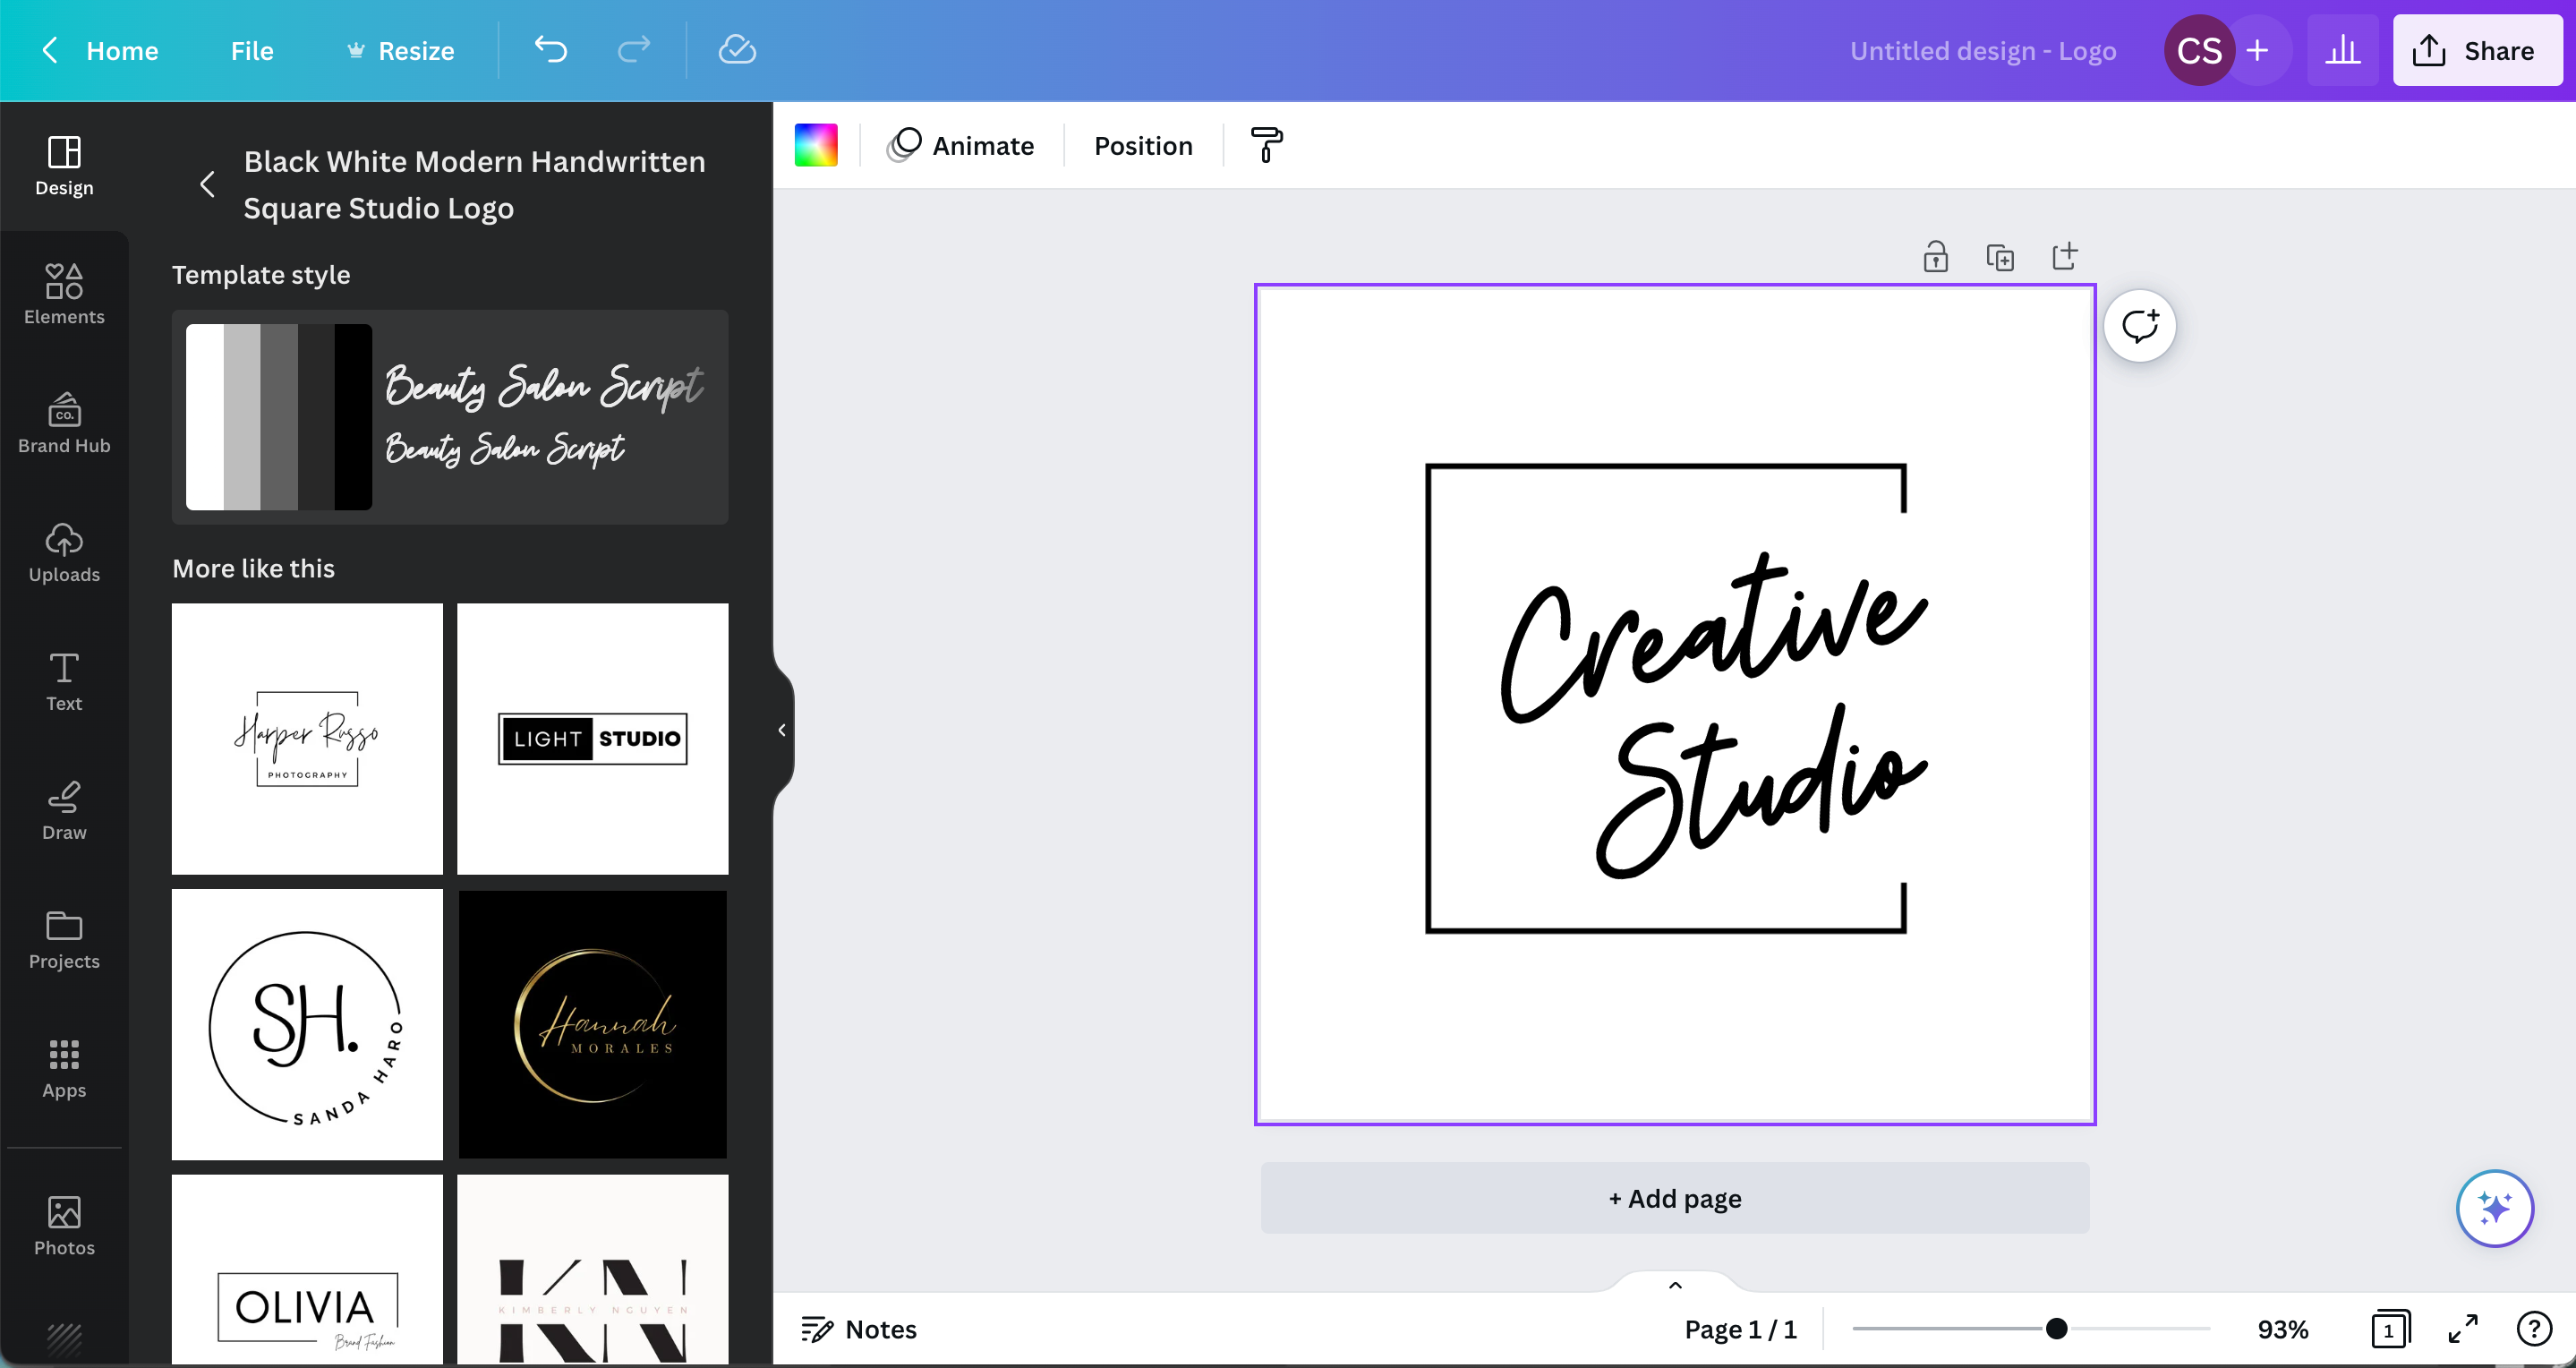
    Canva

    Canva has a number of templates available for creating your own logo. If you are already a Canva Pro user, the logo design templates are included in your monthly subscription.

    If you are not a Canva Pro user, it’s $12.99 per month. If you do not want to subscribe, there are a handful of free logo templates.

    Screenshot of canva.com - cuttingforbusiness.com.
    Logo creator at Canva.

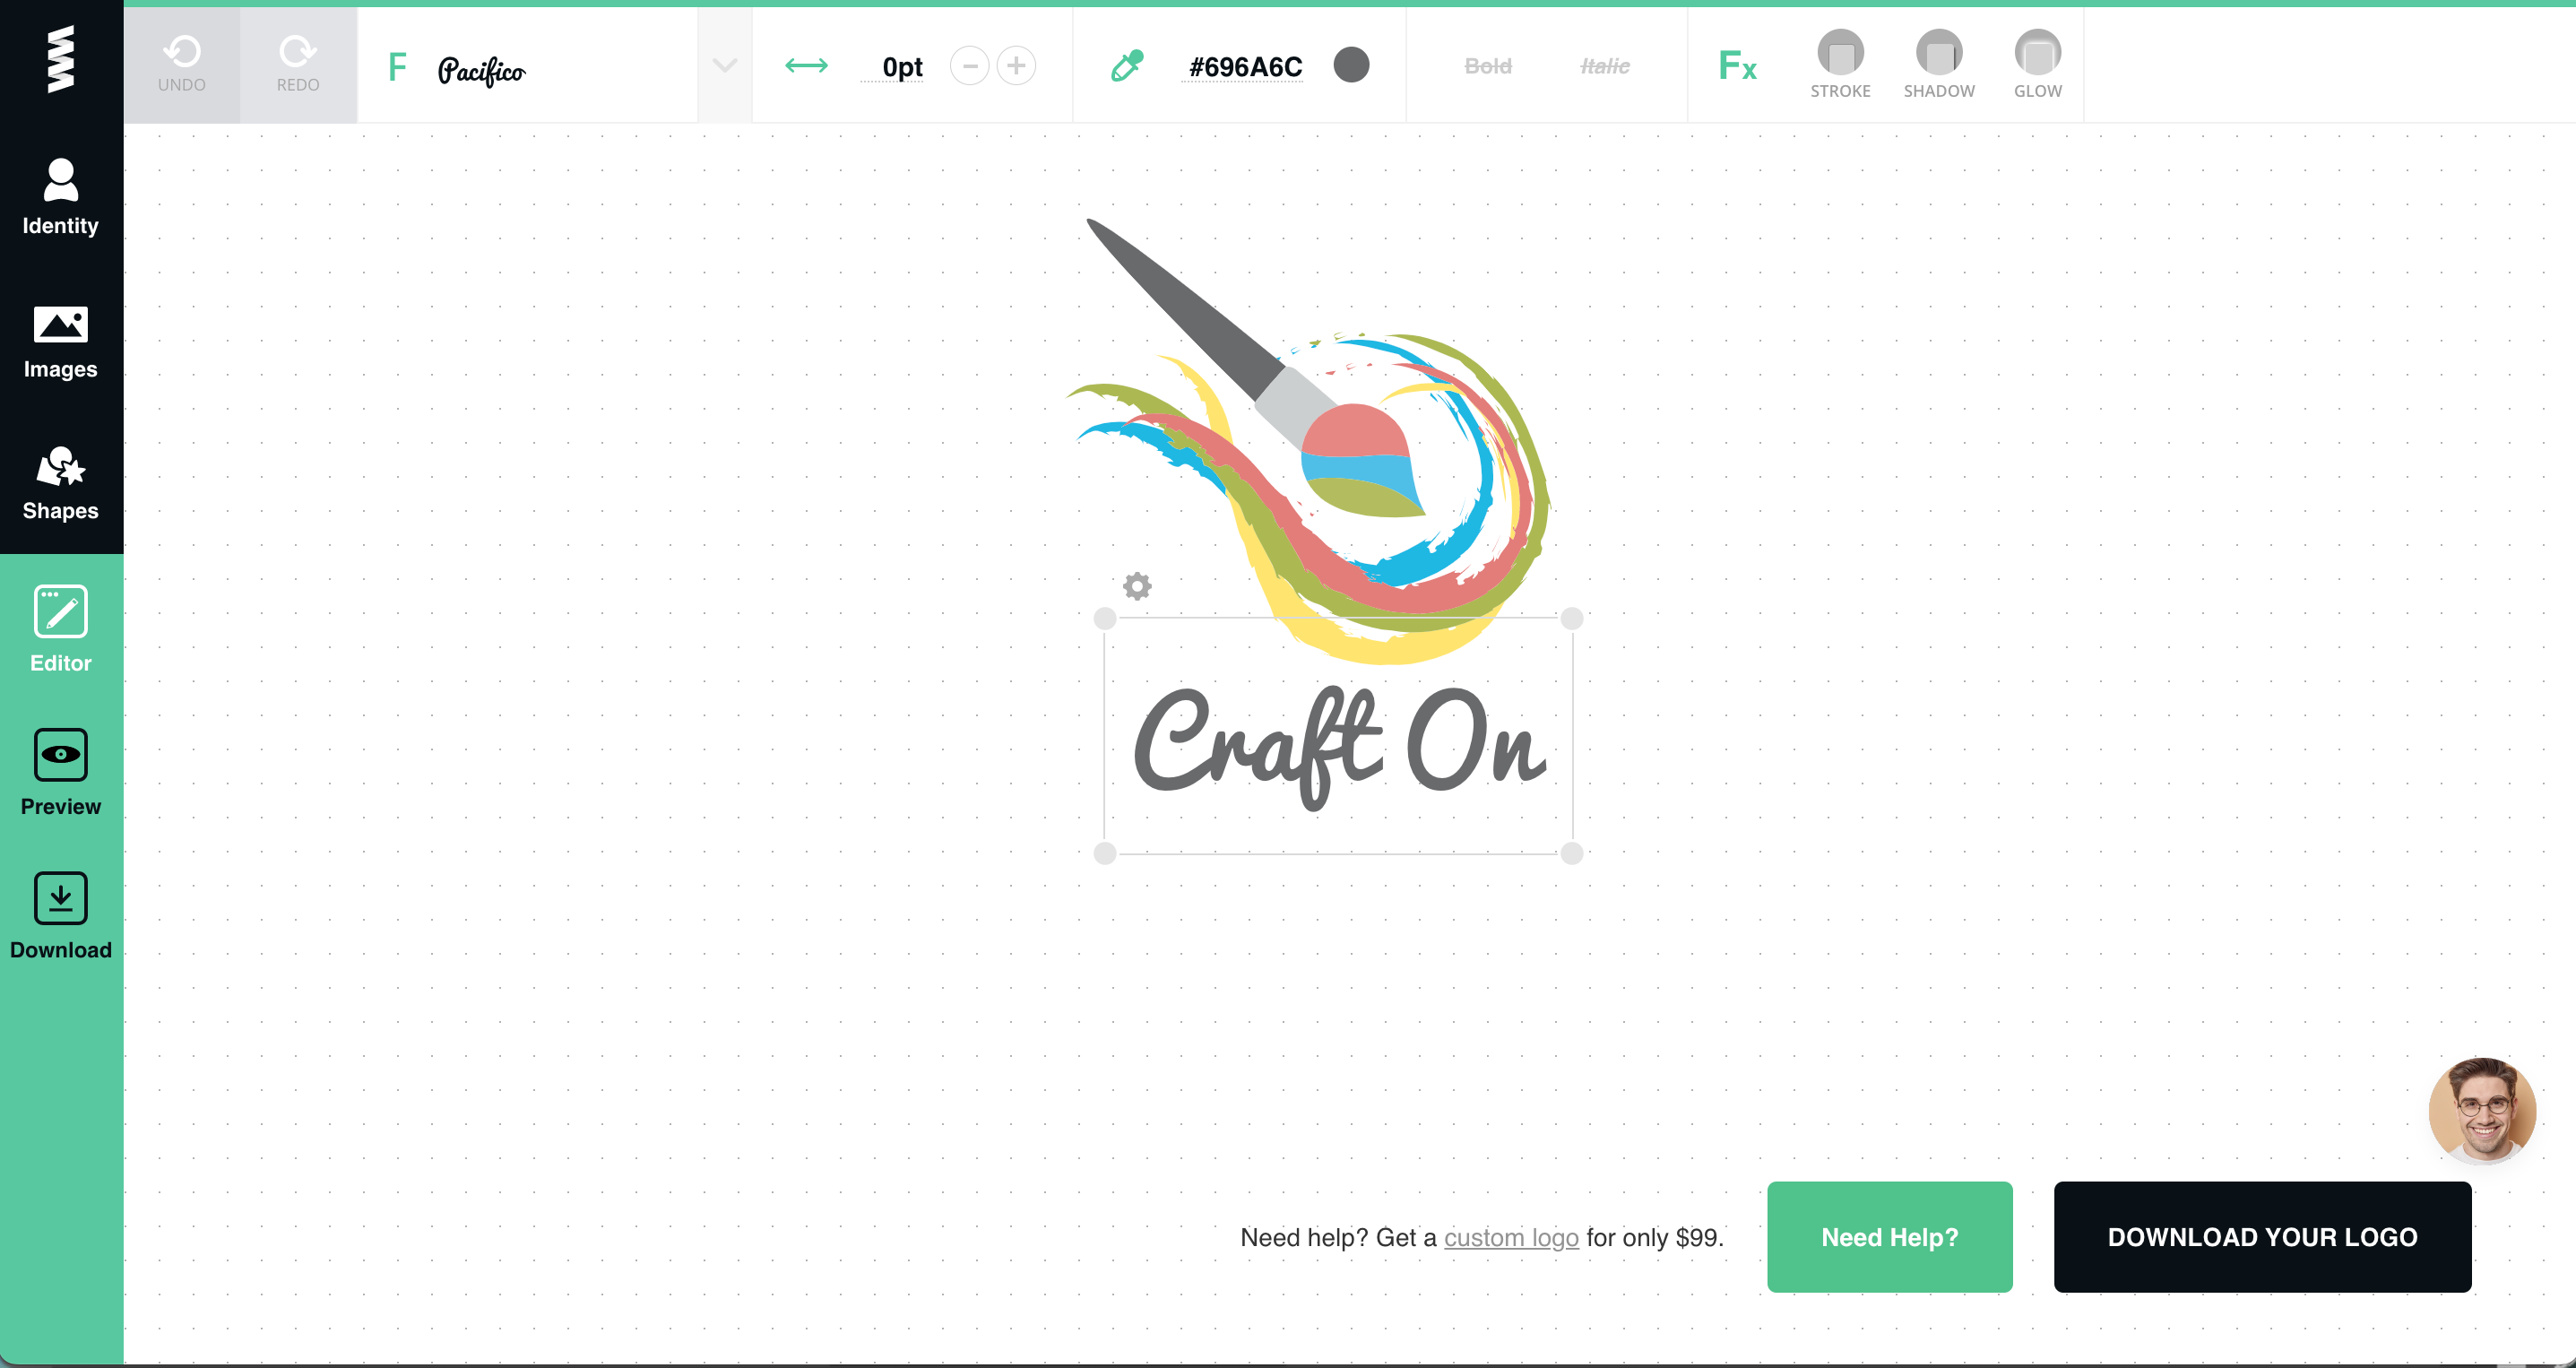
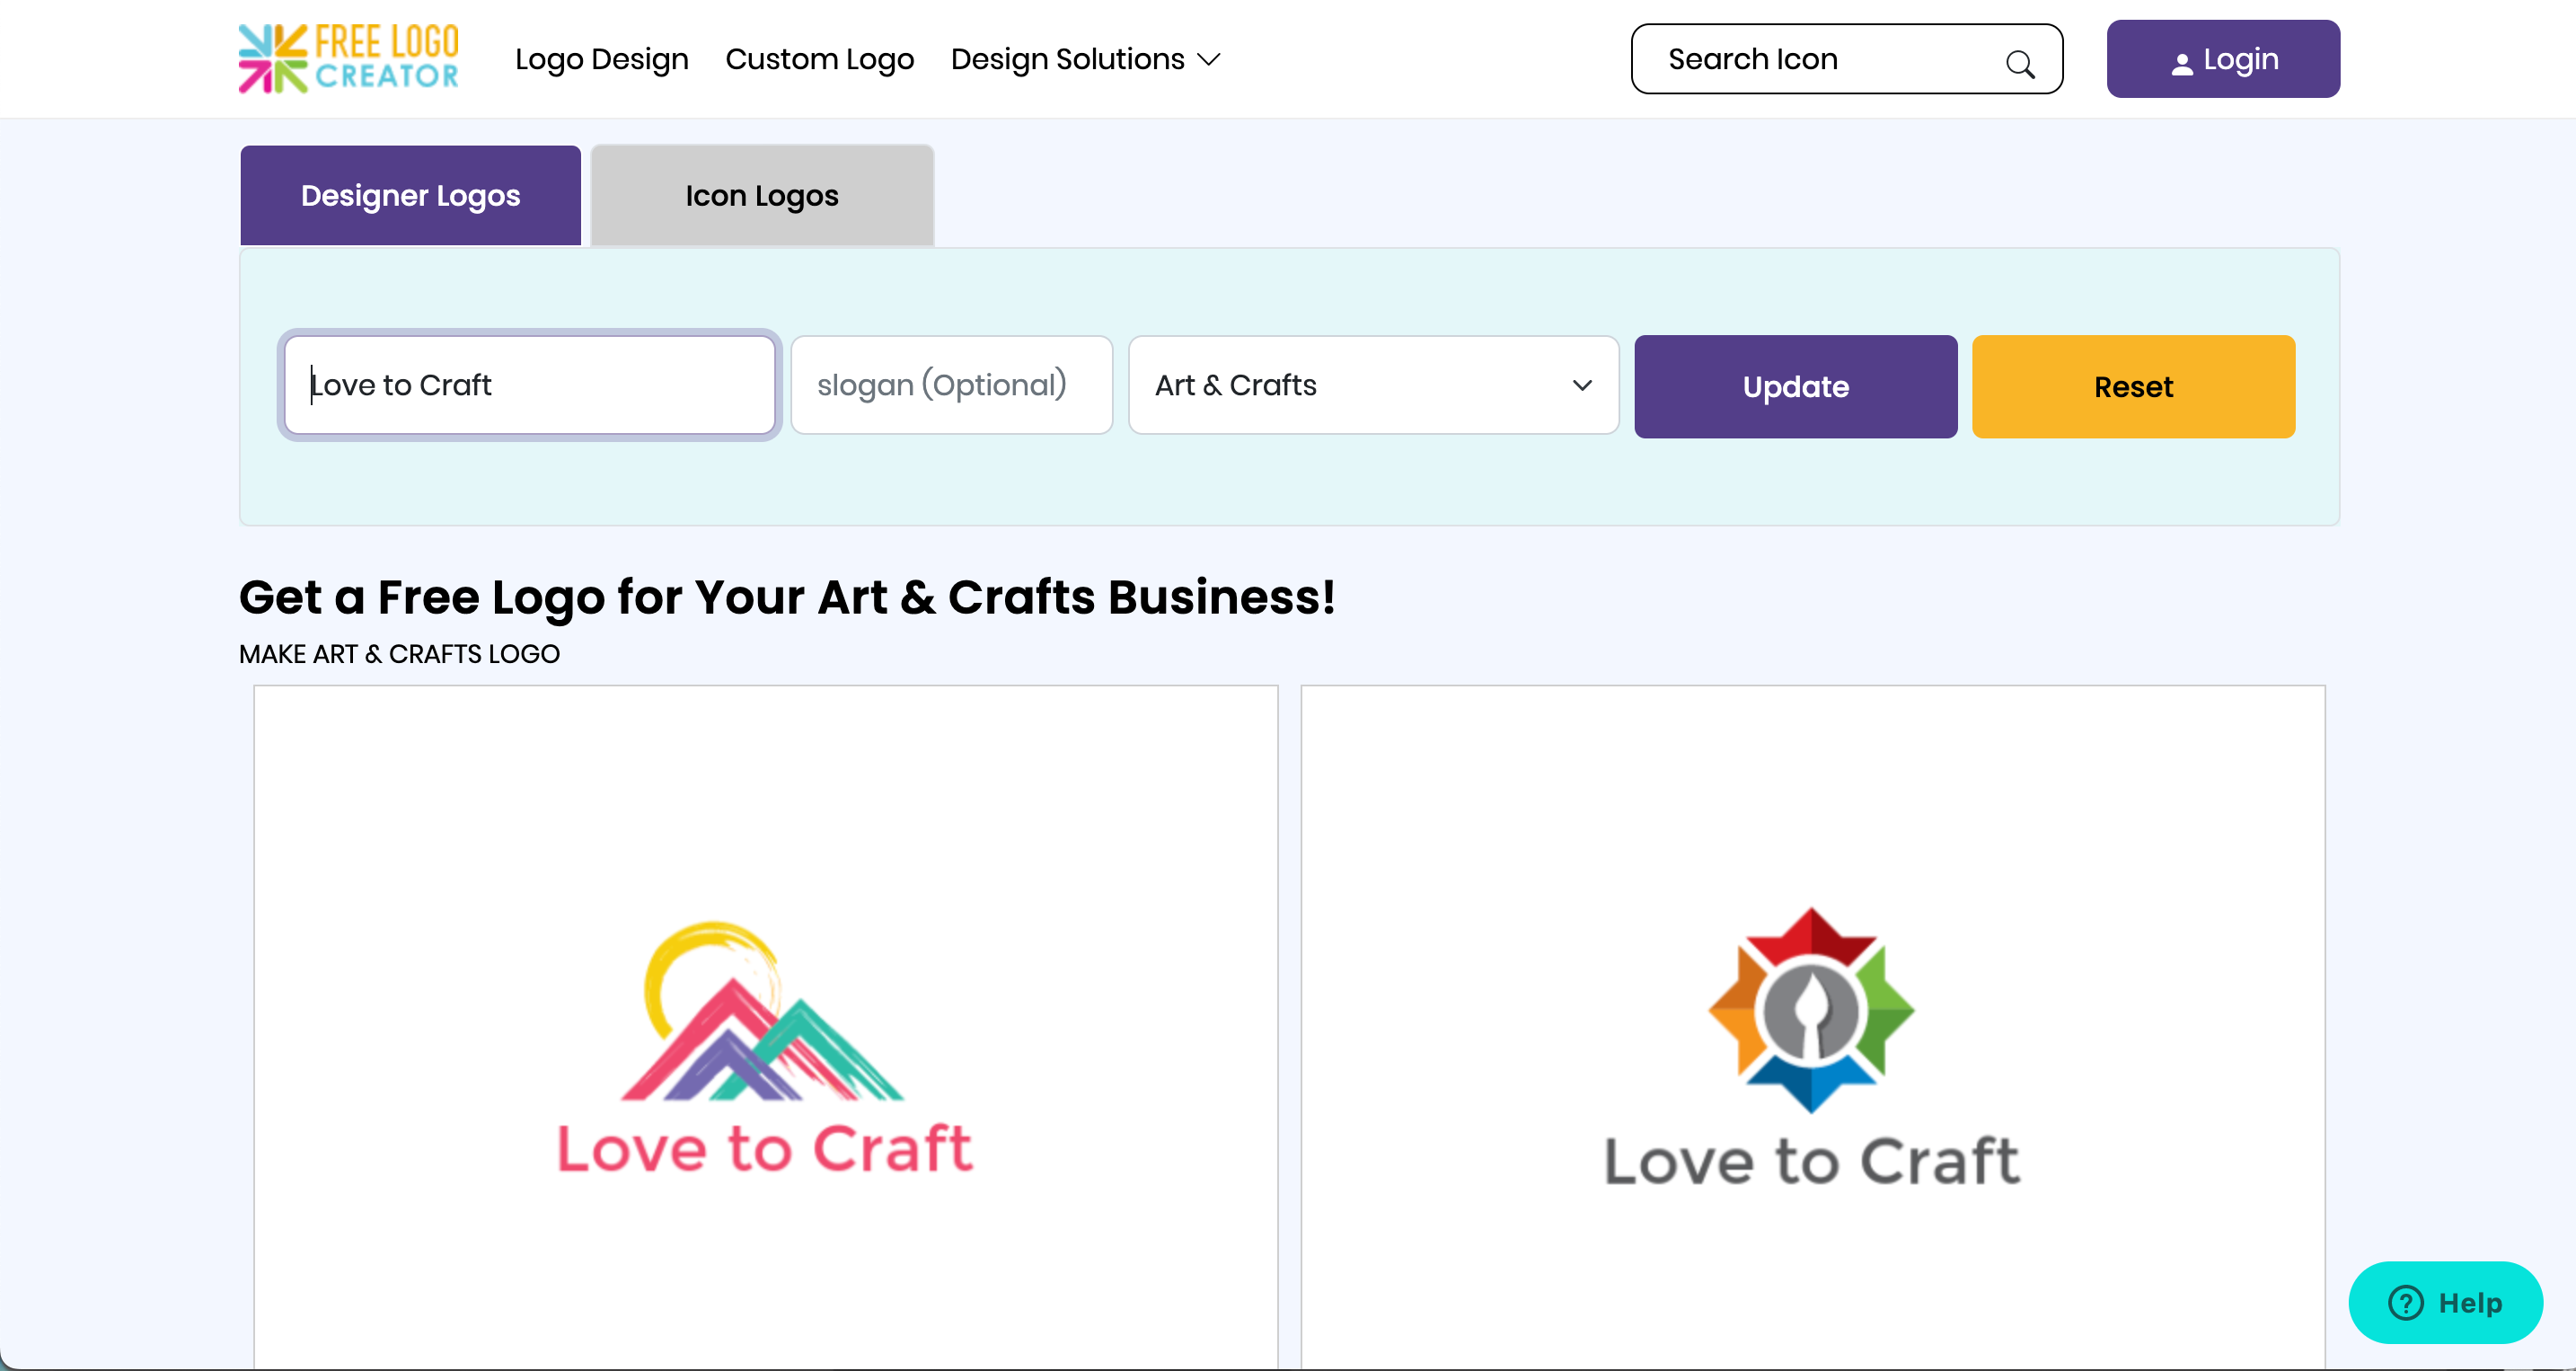
    Free Logo Creator

    Free Logo Creator is easy to use. You type in the name of your business and select a category. The website then gives you premade logo options.

    If you find a design you like, it’s as low as $37 with options to upgrade.

    Screenshot of freelogocreator.com - cuttingforbusiness.com.
    Logo creator at Free Logo Creator.

    3 Places to Find Logo Designers

    Etsy

    Etsy has many designers specializing in logos and branding. You can buy an already created logo, or have something custom made for you.

    99Designs

    99Designs is an online marketplace (owned by Vistaprint!) where you can hire design professionals – including logo designers.

    Fiverr

    Fiverr is another marketplace, where jobs (they call them gigs) start at $5.

    Tell me in the comments: Did you design your logo?

  • 6 Mistakes New Silhouette & Cricut Business Owners Make

    There seems to be a lot of new Silhouette and Cricut owners lately, and many of them are interested in using their machine to make money. If you are one of them (congratulations!), but I urge you to learn from the mistakes of the small business owners that came before you. Today, I’m sharing the most common mistakes I see from new small business owners.

    6 Mistakes New Silhouette & Cricut Business Owners Make

    1. Jumping into a new business before you know how to use your machine. Please, figure out the in’s and out’s of using your machine and troubleshooting before you start selling. I mean, you wouldn’t want someone to operate on you because they bought a set of surgical tools, so don’t sell products before you know how to use the machine.
    2. Starting a Silhouette or Cricut business just to make money. Many people want to make more money; but if you don’t love what you do you are likely to burn out quickly, be miserable all the time, or both.
    3. Not researching copyrights and trademarks before you start selling products.  Nothing is going to hurt your business more than getting sued over making something that you don’t own the rights to. I have lots of information about trademarks and copyrights – you just have to read it.
    4. Copying another designer’s design or products. It’s frowned upon in the crafting world to blatantly copy another crafter’s design. Your business is likely to do better if you can come up with your own ideas anyway! See this post for more information; or head to this post if you’ve been copied.
    5. Putting your products online and expecting them to sell themselves. In recent years, handmade marketplaces have become more popular and competition has become greater. If you want your products to sell well, you have to have a certain amount of hustle in you. You have to be able to put yourself out there and promote your products. If you can’t, this business might not be for you.
    6. Not registering with your city, county, or state and making your small business an official business. In many cases, the process isn’t difficult and the pros outweigh the cons! Read about the benefits in this post.

    If you are doing some of these things right now, don’t panic – just work to correct them and set your business up for success!

    6 Mistakes New Silhouette Portrait or Cameo & Cricut Explore or Maker Business Owners Make - by cuttingforbusiness.com