Blog

  • Tutorial: How to Create a Product Listing on Amazon

    Yesterday, I shared different ways to sell handmade products through Amazon and gave you some information about the fees to expect. Today, I wanted to share with you exactly how to create a product listing in Amazon’s catalog – officially called Amazon Marketplace.

    How to Create a Product Listing on Amazon

    1. Decide which selling account is best for you: Individual or Professional. To recap: the Individual plan is best for sellers that sell less than 40 products per month; while the Professional plan is best if you sell more than 40 products per month. This walkthrough assumes you have an Individual account. (By the way, if you are new to selling on Amazon, I’d recommend you start with an Individual account.)
    2. Go to Amazon.com and log into your account. If you already have an Amazon account that you use to buy products, you are ready to start selling. If you want to create a new account solely for your small business, create one. Once you are logged into Amazon, head to Seller Central at this link.
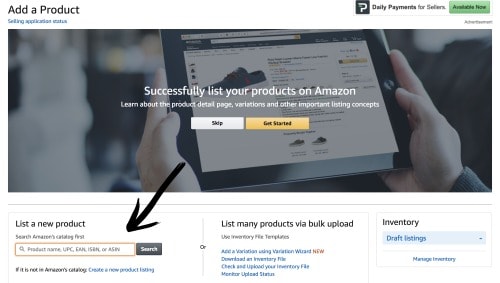
    3. From the navigation menu at the top, go to ‘Catalog’, then ‘Add Products’. On the next screen, you will either be able to search for an existing product or create a new product. If the product you are selling is already on Amazon, you simply need to locate it. For example, if you are selling blanks or vinyl, it’s likely already on Amazon. However, to add a new product to Amazon (like a tee shirt or tumbler you’ve made) click ‘Create a new product listing’. Tutorial: How to Create a Product Listing on Amazon - by cuttingforbusiness.com
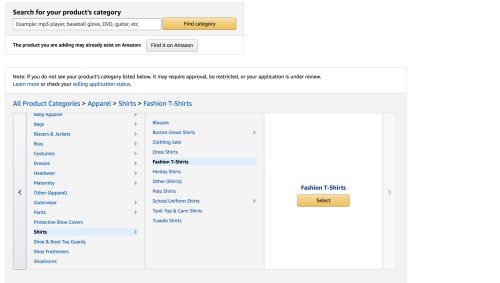
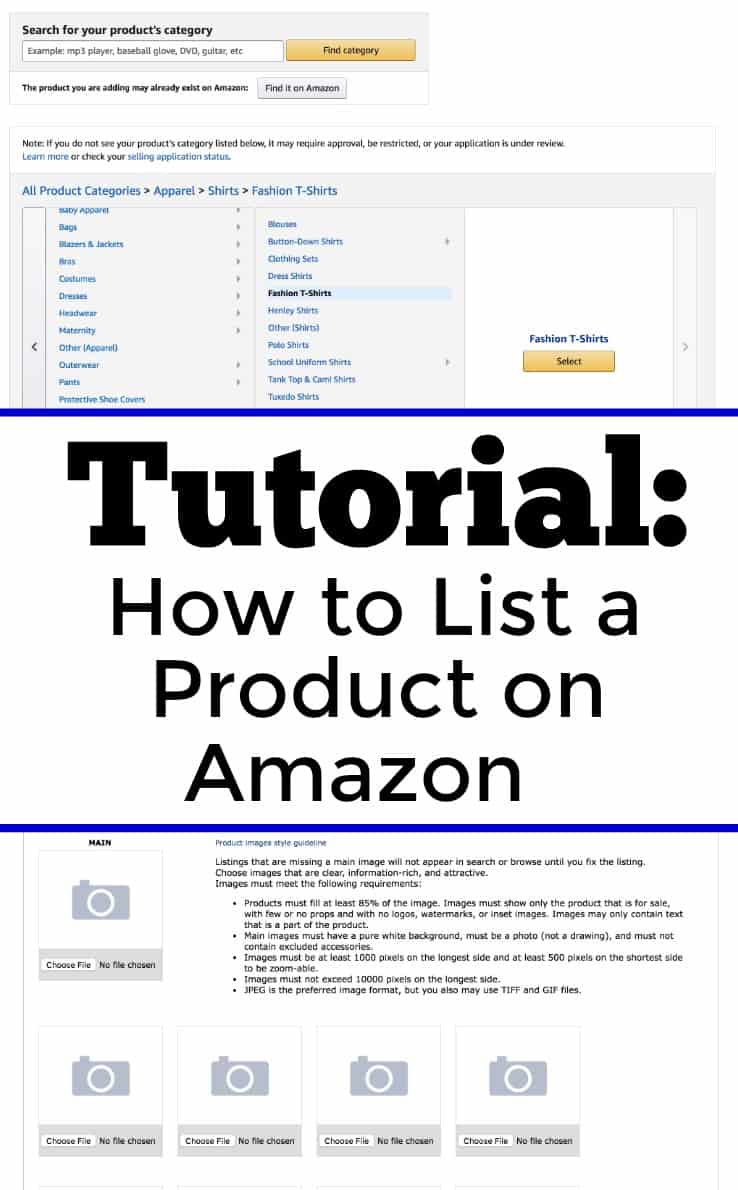
    4. Choose a category by working your way through the hierarchy. Click the ‘Select’ button once you narrow the category down. In this example, I’m listing a tee shirt that I made. Tutorial: How to Create a Product Listing on Amazon - by cuttingforbusiness.com
    5. Next, you’ll fill in all of the information about your product on the ‘Vital Info’ tab. Depending on your product, the options will be different. Any box in red will need to be completed before moving on. The one thing that often trips up new sellers is the requirement to have a barcode number. If your product is handmade, you will not have one. Instead, go to Ebay and search UPC numbers. You can buy a bulk lot of them and use them to list products on Amazon. Tutorial: How to Create a Product Listing on Amazon - by cuttingforbusiness.com
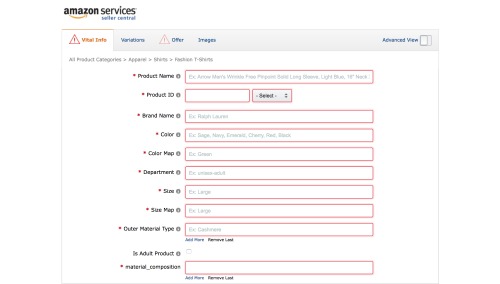
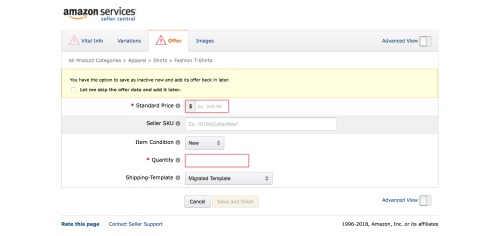
    6. After completing the ‘Vital Info’ tab, move to the remaining tabs and work your way through inputting the information. The ‘Variations’ tab is where you would enter size or color choice information and the ‘Offer’ tab is where you set the pricing. Tutorial: How to Create a Product Listing on Amazon - by cuttingforbusiness.com
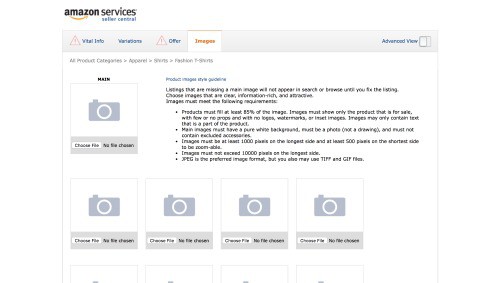
    7. Last, add images to your product listing. Amazon does not allow images with watermarks, borders, or additional text. Amazon prefers photos to be taken on a solid white background when available. Additional photos requirements are listed on the image upload page. Tutorial: How to Create a Product Listing on Amazon - by cuttingforbusiness.com
    8. Once your pictures are uploaded, click the ‘Save and finish’ button at the bottom of the page. You’ve now added your first product to the Amazon catalog!

    You Don’t Own the Listing

    Quickly, now that you’ve created a product in Amazon’s catalog, any other seller can list the same item for sale using your product page. Unlike other marketplaces, the listing you created is not owned by you.

    Shipping on Amazon

    You may have noticed when listing your product that you couldn’t specify shipping prices. Unlike other marketplaces, Amazon has a standard cap for every category. This means they have a maximum price your customer can be charged for shipping. In many, many cases, this price is not enough to ship your item to your customer. To compensate for this, remember to price your product accordingly.

    How You Get Paid Through Amazon

    Sellers on Individual selling plans get paid once a week and the payment is initiated through ACH directly to your bank account. New sellers will often have a hold on their payments for a period of time (21 days is standard, but I’ve also seen longer).

    Sellers on Professional selling plans are paid every 14 days or twice a month. Again, new sellers may be subject to a hold period.

    You cannot request payment sooner through wither the Individual or Professional selling plan.

    Save the information below to Pinterest so you can find it when you need it!
    Tutorial: How to Create a Product Listing on Amazon - by cuttingforbusiness.com

  • 5 Ways to Sell Handmade Products on Amazon

    Let’s talk about Amazon today. Amazon is the largest online retailer, and it seems that they are growing by the day. Amazon has changed many things about online shopping and aims to be “Earth’s Most Customer-Centric Company.”

    I’m sure you’ve heard a number of Amazon success stories floating around the internet of sellers making millions through the platform. Personally, I am an experienced Amazon seller with hundreds of thousands of dollars in sales in the last few years. Today, I wanted to take some time to tell you different ways you can sell handmade goods through Amazon.

    5 Ways to Sell Handmade Products on Amazon

    1. Amazon Marketplace – Selling through Amazon’s catalog is the first way to sell handmade goods. This option is best for ready to ship products that aren’t customized. You simply create a new product, add pictures, a description, and a UPC number. (Tip: You can buy UPC numbers through Ebay.)
      1. Costs to sell on Amazon Marketplace: There are two plans available: Individual or Professional. The Individual plan is best for those selling less than 40 items per month and costs $0.99 per item sold plus a referral fee and a closing fee. These fees vary per category and are listed at this link. On the Professional Plan, you pay $39.99 per month (instead of $0.99 per item) plus a referral fee and a closing fee.
    2. Fulfillment by Amazon – Fulfillment by Amazon is a selling program where you list your products in the Amazon Marketplace and then ship your inventory to Amazon. Amazon handles packing and shipping to your customer. This program works best for sellers of handmade items who make and sell only a small number of designs. For example, a tee shirt with a specific design that sells well.
      1. Costs to sell through FBA: Fees vary greatly and are listed at this link.
    3. Amazon Handmade – Amazon Handmade is Amazon’s answer to Etsy. This program is only open to sellers of handmade products. This is a juried program. Much like a juried craft show; you first request access to the program then submit photos of your work and details about your existing business. This program is best for sellers with moderately and higher priced handmade products due to higher selling fees.
      1. Costs to sell through Amazon Handmade: $39.99 per month plus 15% of item sold cost. (To attract new sellers, Amazon frequently waives the $39.99 fee. Currently, the fee is being waived for new sellers for a period of time.)
    4. Merch by Amazon – Merch by Amazon is a print on demand service for shirts. In this program, you create the design for a shirt and list it on Amazon. After Amazon receives an order, they print the shirt for the customer and ship it. This program is invite only and the turnaround time is six to eight weeks to get a response. Request an invitation at this link.
      1. Costs to sell through Merch by Amazon: Free. You set the price for your shirts and receive a royalty for each shirt you sell. Here is an example: If you price your short sleeve shirt at $15.99, you’d receive $2.36. For a shirt that sells at $25.99, you’d receive $9.92. While the royalties may seem low, you have no inventory to stock, no shirts to create, and no shipping or customers to deal with. If you have popular designs, it can add up fast.
    5. Amazon Custom – Amazon Custom is a program for sellers who sell things that can be customized with a name or image. These things aren’t necessarily handmade – but can be. For example, if you sell cutting boards, wine glasses, or customized mouse pads this program might be for you. This is another program that you apply to join, but applications are approved or denied within an hour.
      1. Costs to sell through Amazon Custom: You are required to be on the Professional selling plan for $39.99 per month, plus standard referral and closing fees.

    Okay, so you’ve read about the programs and are ready to start selling on Amazon? The first step is to get a seller account and start listing! I’d recommend starting out in the Marketplace and fulfilling your own orders to get a good feel for the platform. Tomorrow, I will walk you step by step through how to create your first catalog listing in Amazon’s Marketplace.

    Was this post informational? Great! Save it to Pinterest.

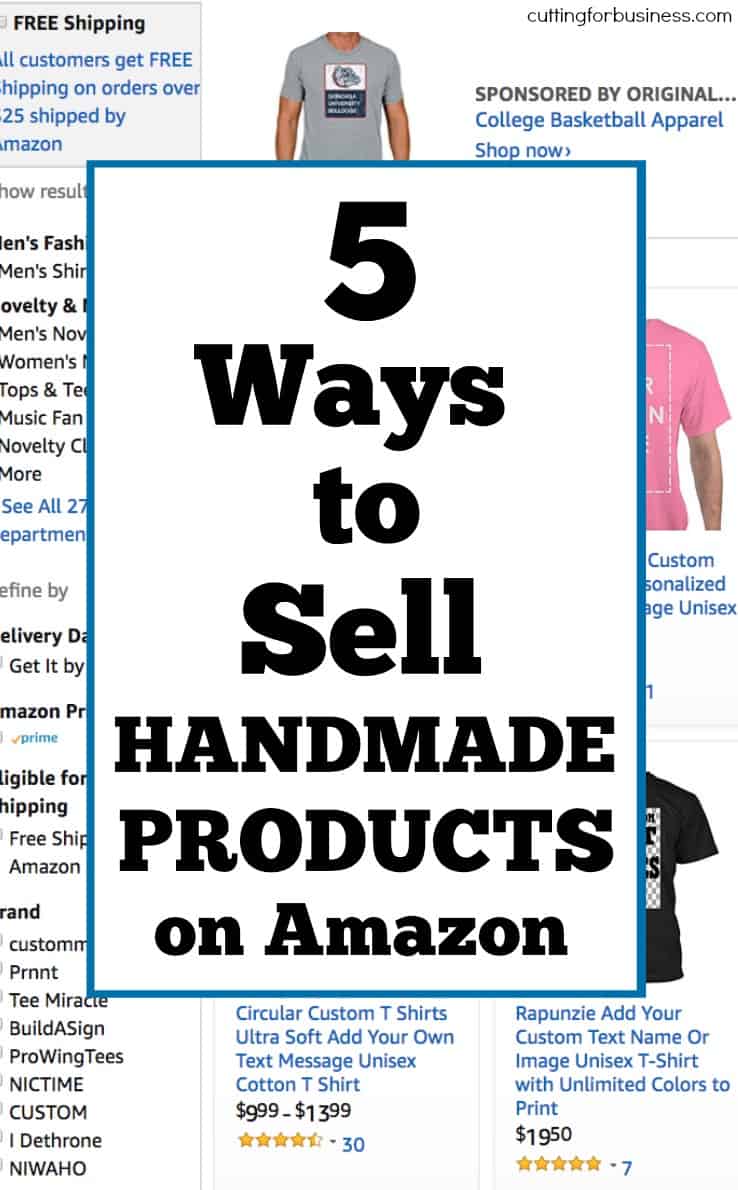
    5 Ways to Sell Handmade Products on Amazon - Great for Silhouette Portrait or Cameo and Cricut Explore or Maker - by cuttingforbusiness.com

  • New Feature: Pinterest Cover Photos + Minor Updates

    If you are like me and a regular Pinterest user, you might have been experiencing some glitches and bugs in the last few weeks. For example, when I logged in the other day – Pinterest showed that I wasn’t following any other users – and I had no followers! The following day, everything was displaying like normal.

    My guess is that the bugs were being worked out as Pinterest rolled out a few new features. Let’s take a quick look at the new additions.

    New Features on Pinterest: Cover Photos

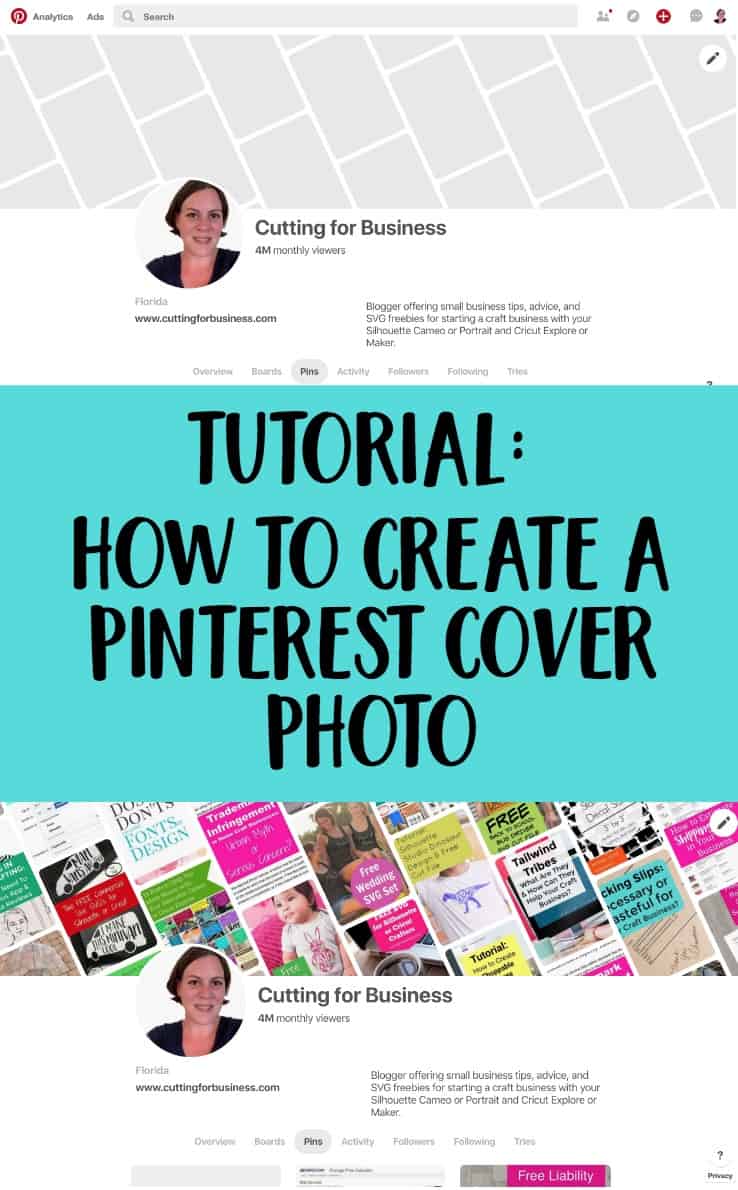
    Your Pinterest profile now gives you a place to put a cover photo. Unlike other social media networks – you aren’t able to choose or create a specific photo – it’s an automatic compilation of your pins. However, you can customize which pins are seen. Briefly, here’s how it works:

    1. Log into Pinterest and navigate to your profile. For example, mine is pinterest.com/cuttingforbusiness.
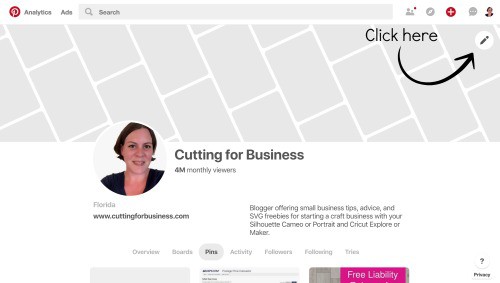
    2. At the top, you should see a cover photo spot. Click the pencil in the top right hand corner. New Feature: Pinterest Cover Photos + Minor Updates - Great for bloggers and small business owners - by cuttingforbusiness.com
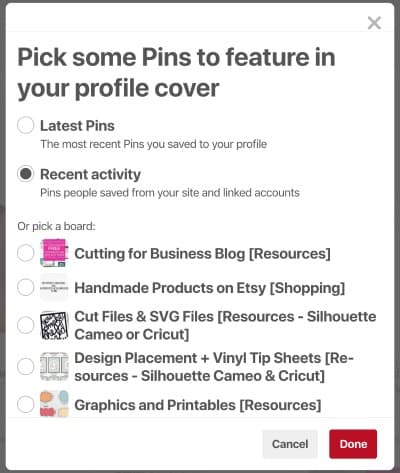
    3. You can choose from three options on the popup screen to be featured in this space:
      1. Latest pins from your account – Great if you pin a lot of your own stuff or seasonal stuff.
      2. Recent activity – Great for showing off what pins of yours are being saved.
      3. A specific board – Perfect to highlight specific pins. You could create a specific board so you have more control over what appears in the cover photo space. New Feature: Pinterest Cover Photos + Minor Updates - Great for bloggers and small business owners - by cuttingforbusiness.com
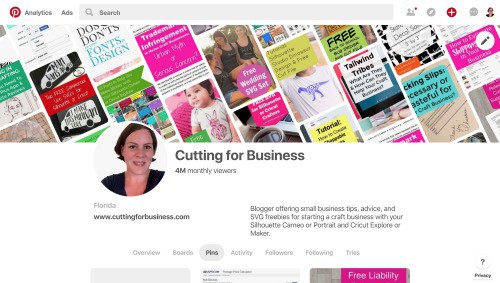
    4. After selecting an option, click done and your profile cover photo will be updated. It’s important to note that the pins that show up are not clickable, but there is a link to get to the board. New Feature: Pinterest Cover Photos + Minor Updates - Great for bloggers and small business owners - by cuttingforbusiness.com

    Other Pinterest Updates

    There’s been a few other minor updates as well, I’ll quickly mention them:

    1. Your monthly Pinterest reach it now publicly shown on your profile page. For example, mine is 4 million. I think this will be valuable when working with other accounts to see how widespread their account is. Also, I think when joining group boards it will be nice to see the reach of members.
    2. Activity, Followers, and Following are now shown on your Pinterest profile in an easier to see spot.

    Need help getting your small business onto Pinterest? Pick up my Pinterest Boot Camp ebook at this link.

    Was this post informational? Save it to Pinterest!

    New Feature: Pinterest Cover Photos + Minor Updates - Great for bloggers and small business owners - by cuttingforbusiness.com

  • How to Schedule a Package Pickup Using the USPS Mobile App

    I’ve teamed up with the United States Postal Service (USPS) today to remind craft businesses that ship packages that the USPS offers free package pickup on all regular mail delivery days. For me, I take advantage of the USPS’s free package pickup nearly every single day. It saves me both time and gas – and only takes a minute to schedule.

    How to Schedule a USPS Package Pickup through the Mobile App

    1. Download the official USPS mobile app from the Apple App Store or Google Play.
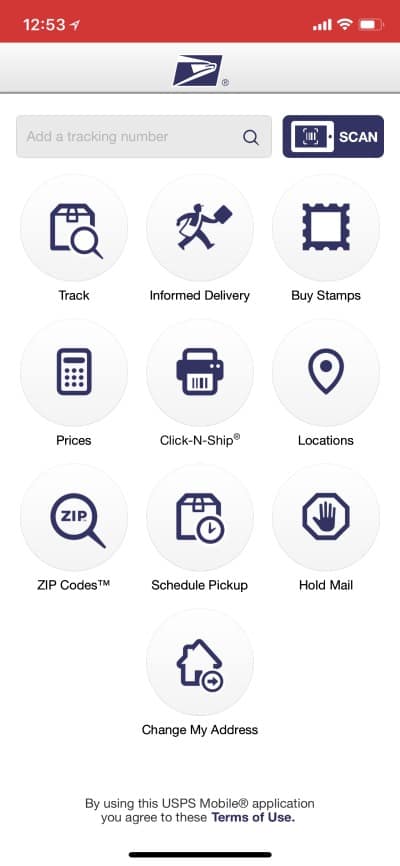
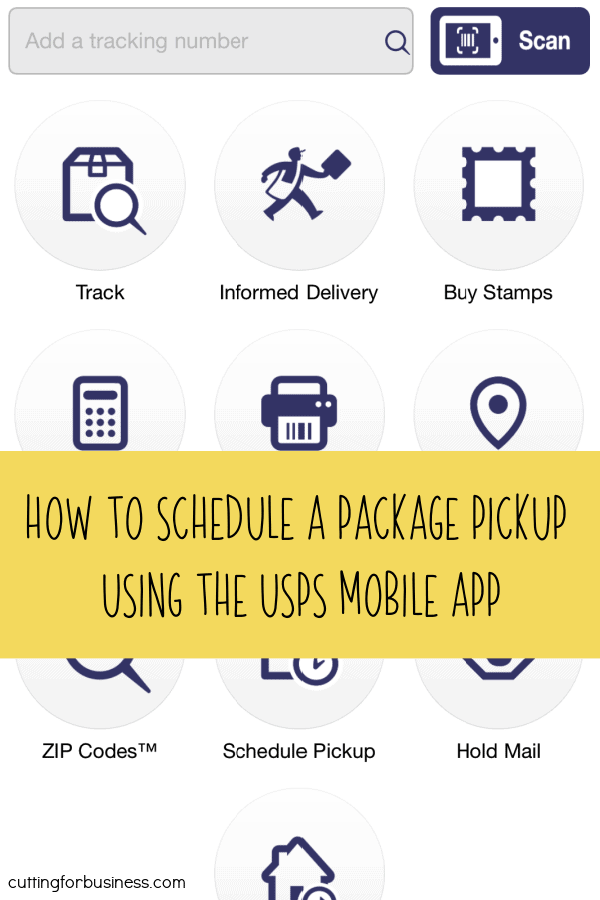
    2. Open the app and select ‘Schedule Pickup’, then select ‘Schedule a New Pickup’.How to Schedule a Package Pickup Using the USPS Mobile App - Great for Etsy shop owners and Silhouette Portrait or Cameo and Cricut Explore or Maker business owners - by cuttingforbusiness.com
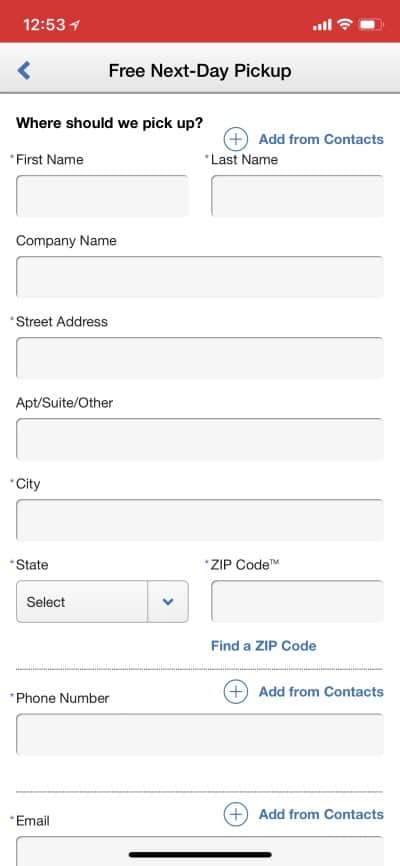
    3. Input the basic details including your name, street address, phone number, and email address. Then, select the ‘Confirm Address’ button at the bottom. How to Schedule a Package Pickup Using the USPS Mobile App - Great for Etsy shop owners and Silhouette Portrait or Cameo and Cricut Explore or Maker business owners - by cuttingforbusiness.com
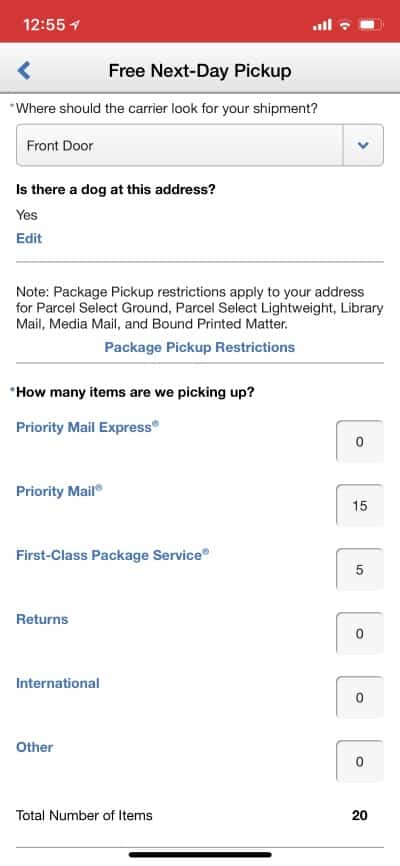
    4. Enter the locations you will leave your package(s), and the estimated number of packages along with their combined weight. Last, read the Terms and Conditions of the package pickup. Then, click the ‘Schedule Pickup’ button. How to Schedule a Package Pickup Using the USPS Mobile App - Great for Etsy shop owners and Silhouette Portrait or Cameo and Cricut Explore or Maker business owners - by cuttingforbusiness.com

    That’s it! On the day of your package pickup, leave the packages outside your home. If you’d prefer to schedule via the USPS website, click here.

    Good to Know

    • All packages should have postage attached and be ready for mailing.
    • No one package can weigh more than 70 pounds for free package pickup.
    • You must have at least one Priority Mail Express, Priority Mail, First-Class Package, Return, or International package to qualify for free USPS package pickup.
    • International packages must have both the sender and recipient copies of the GXG label along with your signature.
    • The USPS will not take any responsibility for lost or stolen packages related to their free package pickup.
    • If you are concerned about the security of your packages, invest in a video door bell system like this one.

    Need more shipping tips? Find them in this section of the blog.

    If you thought this information was helpful, save it to Pinterest.

    How to Schedule a Package Pickup Using the USPS Mobile App - Great for Etsy Shop Owners and New Sellers - by cuttingforbusiness.com.
  • 3 Reasons to Include a Packing Slip in Your Orders

    I had a Cutting for Business reader recently send me an email about whether or not she should include a printed packing list/invoice in packages she sends to customers in her craft business. So, let’s talk about it.

    3 Reasons to Include a Packing Slip in Your Orders

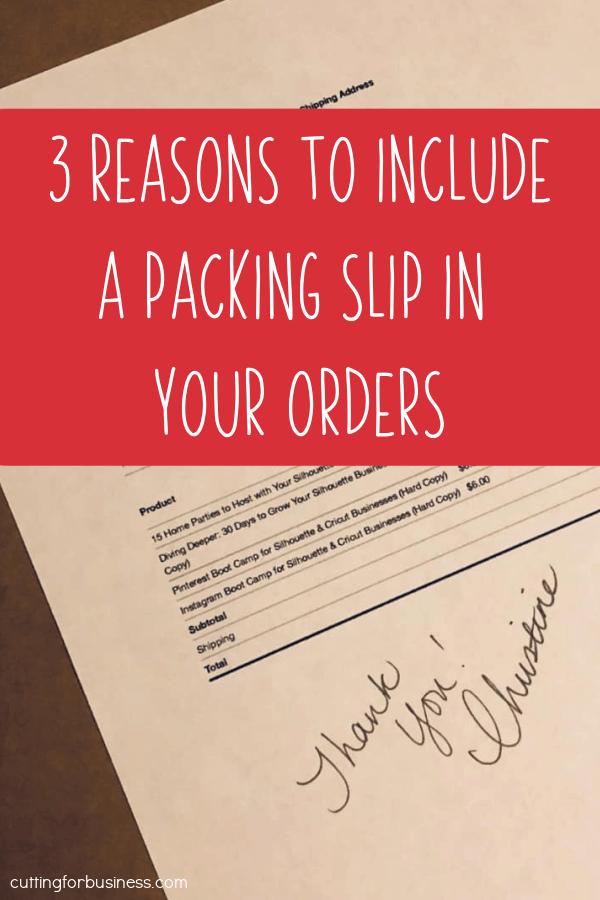
    1. In the event the label falls off. If the label on the package falls off or gets damaged – the post office can (and will) open the package to reveal the contents. They do this in response to missing package inquiries. If there is a packing slip inside that shows the recipient’s address or the return address. They are able to get the package moving to where it should go. (Disclaimer: I can’t say that every post office will do this, but if the slip is in there it’s possible. Without a packing slip – all they’d have is products.)
    2. It clears up customer confusion. Let’s face it: Customers don’t always read product details before they purchase. By including a packing slip/invoice in each package you send, the customer can compare what they received to what they ordered.
    3. It’s a great place to write a handwritten note or sentiment. See more about the power of handwritten notes in this post.

    Tell me in the comments – do you include a packing slip/invoice in your packages?

    3 Reasons to Include a Packing Slip in Your Orders - Silhouette Portrait, Cameo, Cricut Explore, Maker - Craft Business - cuttingforbusiness.com.
  • 4 Tips to Overcome a Disappointing Craft Show

    I’ve said it before and it bears saying again: Craft shows are always a gamble. Despite your best efforts, there’s no guarantee for any show that it will be profitable.

    Today, I’m sharing four tips to help you overcome a disappointing craft show.

    4 Tips to Overcome a Disappointing Craft Show - cuttingforbusiness.com

    4 Tips to Overcome a Disappointing Craft Show

    Don’t Leave Early

    You’ll know a few hours into the show how successful the show is. Keep at it through the entire scheduled timeframe. Even if you only stand in front of your booth and pass out business cards to shoppers – you are still getting your business name out there.

    Network with Other Vendors

    If you are at a craft show and traffic is slow for everyone, take time to walk around and introduce yourself to other vendors. One of my dearest friends and I met over 15 years ago at a failed craft show. We were both selling jewelry – along with everyone else. While I no longer sell jewelry, we still talk weekly and visit each other when we are in the same state. There’s no reason why you couldn’t find a few new friends or a potential business relationship.

    Take Notes and Photos Immediately After the Show

    Give yourself the opportunity to learn from this ‘bad’ show. How does your set up look? Why do you think things didn’t go well? Did you have enough inventory in several price points and for several demographics? Were your products not a good fit for this type of show? Was the entire show just void of buyers? Did other sellers have a bad show as well? Use your notes to improve on your next show.

    Realize that a Disappointing Craft Show May Not Be Your Fault

    Unfortunately for show organizers, unsuccessful shows often fall onto their shoulders. As a seller, you aren’t involved in the advertising, show location assignment, or selecting vendors. You cannot (and should not) blame yourself.

    No matter the reason for the poor show performance; keep your chin up and starting planning for your next show. ❤️

    And please, ask the organizer of the next craft show you attend these questions before you sign up.

  • What is a Sales Funnel & How Can It Help Your Craft Business?

    Sales funnels. They seem to be the buzz word in so many online trainings. However, I’m telling you today that you don’t need fancy online training to set up a sales funnel

  • Tutorial: Wedding Gift Wine Bottles

    Yesterday, we talked wedding sayings. Today, I’m sharing a simple Print and Cut Silhouette project I made for a wedding I’m attending tonight: Wedding Gift Wine Bottles.

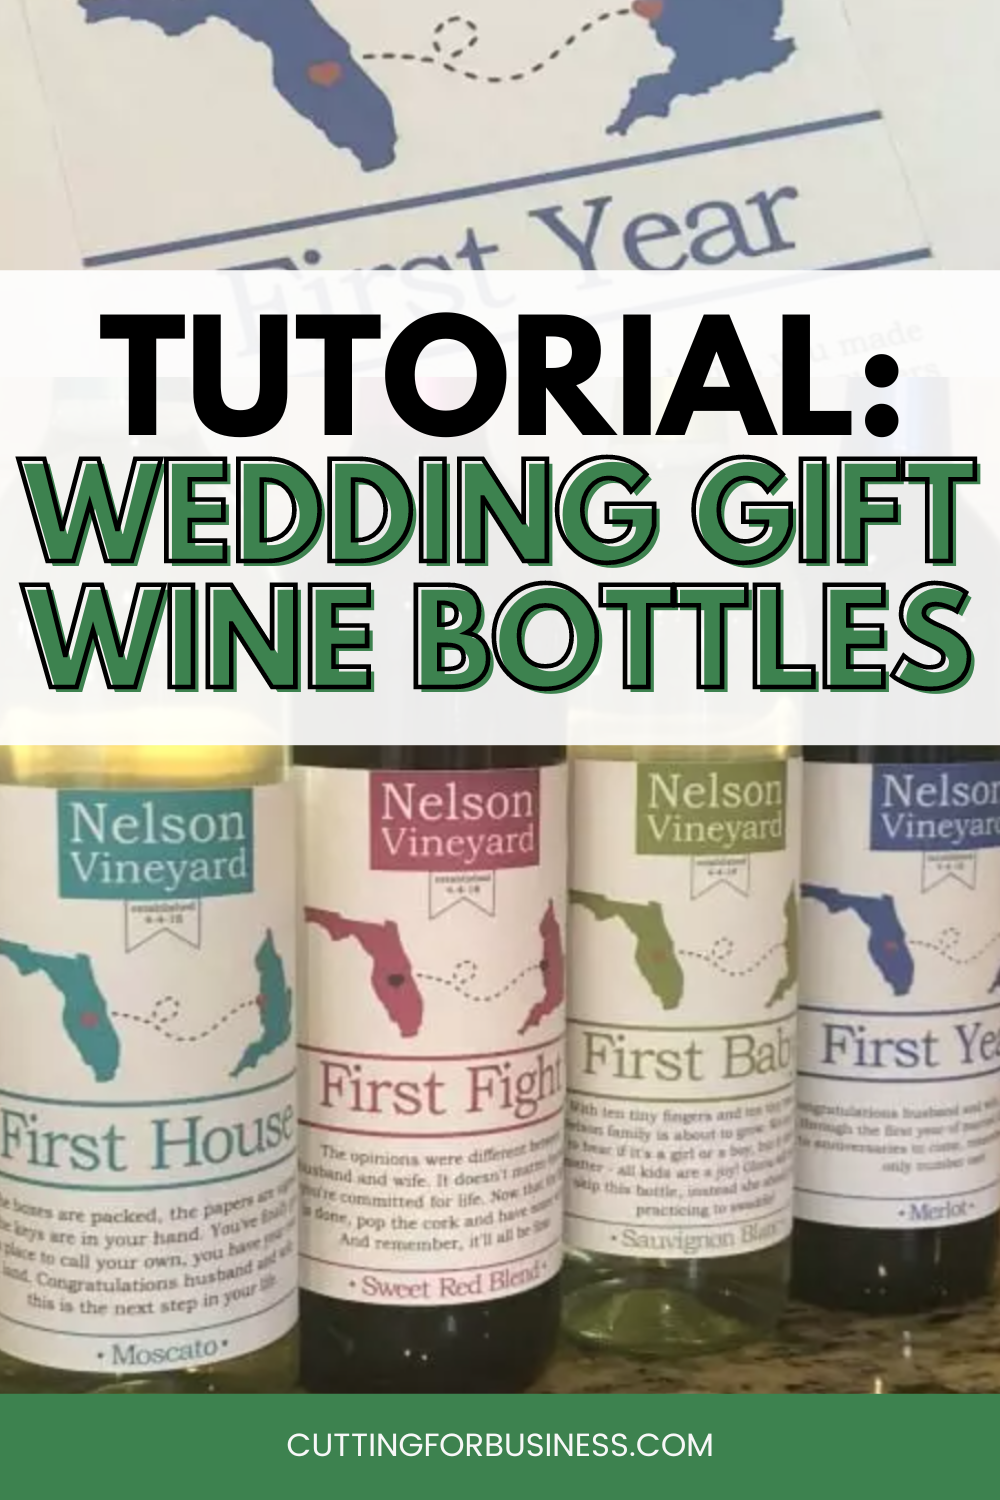
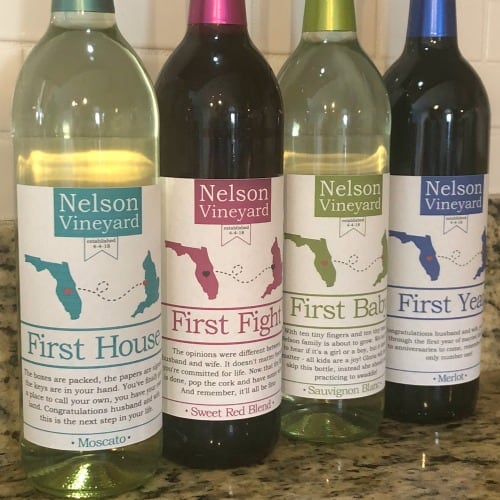
    We are gifting the happy couple four different milestone bottles of wine: One for their first house purchase, one for their first baby, one for their first fight, and one for their first anniversary.

    Tutorial: Wedding Gift Wine Bottles - cuttingforbusiness.com

    Supplies Needed

    Tutorial: Print and Cut Wedding Wine Bottle Labels

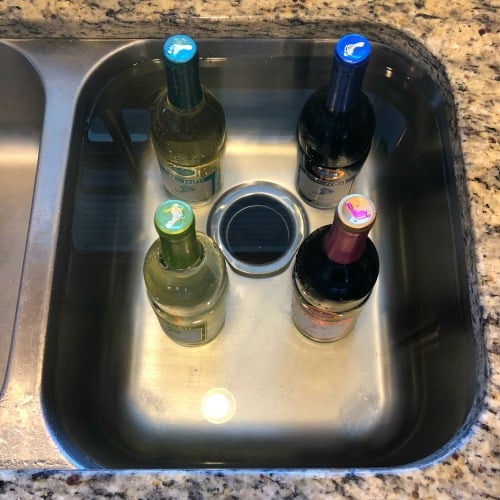
    1. While you are designing your labels, soak your wine bottles in water to remove the existing labels. If any residue is left behind, carefully use a razor blade or scraper to remove it. 

      Tutorial: Print and Cut Wedding Wine Bottle Labels with Silhouette Cameo - Great gift or product idea for Etsy shop owners - by cuttingforbusiness.com
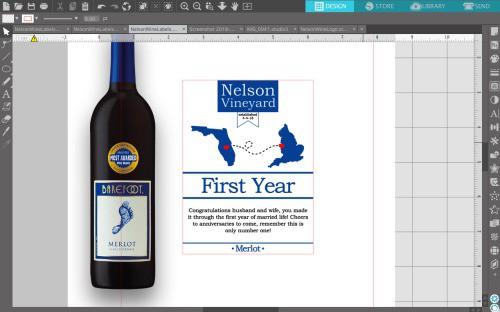
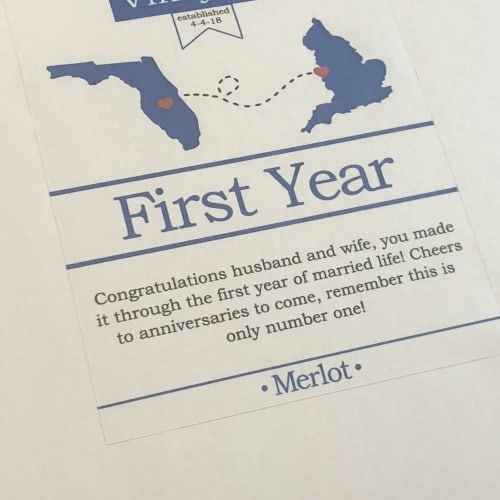
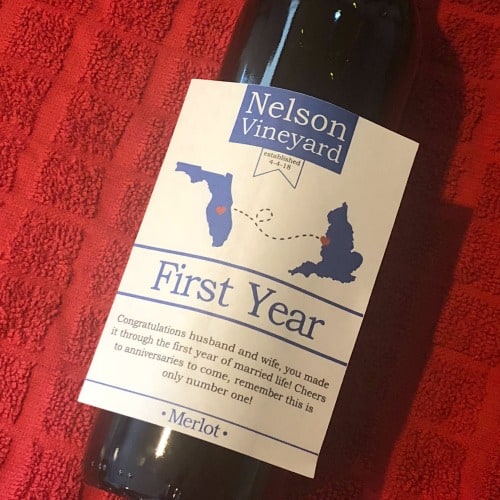
    2. Create a design in Silhouette Studio for your label. My labels measure 3.75″ by 5″. You can put whatever you want on them. I created a design that features Florida (where the groom lives) and England (where the bride is from), and their wedding date. I also wrote a text blurb for each occasion. Here’s the occasions and text that I used:
      • First House: The boxes are packed, the papers are signed, the keys are in your hand. You’ve finally got a place to call your own, you’ve got your own land. Congratulations husband and wife, this is the next step in life.
      • First Fight: The opinions were different between husband and wife. It doesn’t matter because you’re committed for life. Now that the fight is done, pop the cork and have some wine. And remember, it’ll all be fine.
      • First Baby: With ten tiny fingers and ten tiny toes, the Nelson family is about to grow. We can’t wait to hear if it’s a girl or a boy, but it does not matter – all kids are a joy! Gloria will have to skip this bottle, instead she should start practicing to swaddle.
      • First Year: Congratulations husband and wife, you made it through the first year of married life! Cheers to anniversaries to come, remember this is only number one!
    3. I matched the colors in the labels to their existing foil seals. I did this by simply taking a screenshot of each bottle from the Barefoot Wine website, and using the eyedropper tool to get the matching color. 

      Tutorial: Print and Cut Wedding Wine Bottle Labels with Silhouette Cameo - Great gift or product idea for Etsy shop owners - by cuttingforbusiness.com
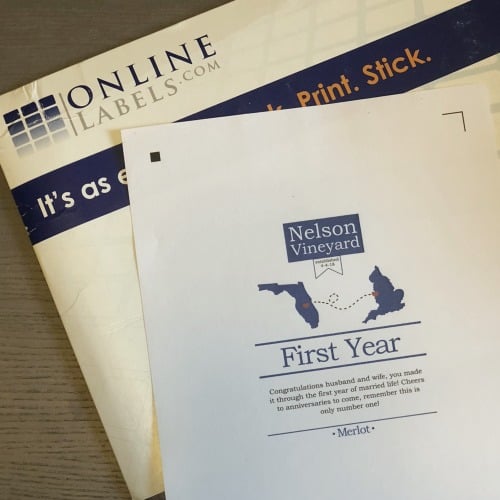
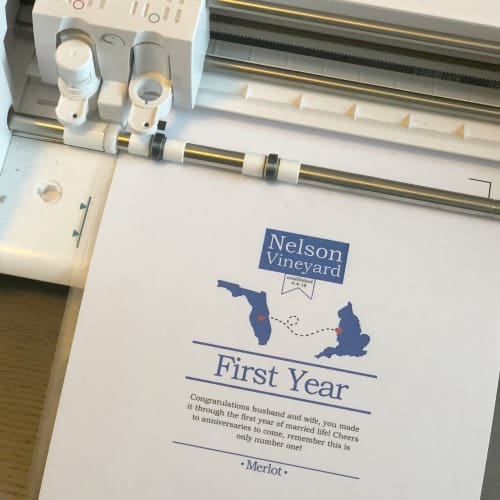
    4. After designing, it’s a simple Print and Cut/Print then Cut. In Silhouette, be sure to turn on your registration marks. I used the standard cut settings for ‘Sticker Paper’ and it cut perfectly. 

      Tutorial: Print and Cut Wedding Wine Bottle Labels with Silhouette Cameo - Great gift or product idea for Etsy shop owners - by cuttingforbusiness.com
      Tutorial: Print and Cut Wedding Wine Bottle Labels with Silhouette Cameo - Great gift or product idea for Etsy shop owners - by cuttingforbusiness.com
      Tutorial: Print and Cut Wedding Wine Bottle Labels with Silhouette Cameo - Great gift or product idea for Etsy shop owners - by cuttingforbusiness.com
    5. To apply your labels, make sure your bottles are dry and stick them on. I laid the wine bottle on a towel on my kitchen counter so that it wouldn’t slide around as I applied each label. 

      Tutorial: Print and Cut Wedding Wine Bottle Labels with Silhouette Cameo - Great gift or product idea for Etsy shop owners - by cuttingforbusiness.com

    Finished Wedding Gift Wine Bottles

    Here’s a picture of the whole set together: 

    Tutorial: Print and Cut Wedding Wine Bottle Labels with Silhouette Cameo - Great gift or product idea for Etsy shop owners - by cuttingforbusiness.com

    Reminder: You Can’t Sell Wine

    Remember, if you plan to sell printable wine bottle labels, sell only the label and include application instructions for your customer. Why? Because you can’t sell wine without the proper license. Another option would be to sell generic labels directly to a winery or wine retailer and they could sell them to their customers.

  • 8 Questions to Ask a Craft Show Organizer Before You Sign Up

    With the changing of seasons from Winter to Spring, you’ll likely see more craft shows and fairs popping up. While I’ve shared a lot of information related to fairs and markets before, I realized I haven’t given you any advice on how to choose craft shows that might work best for your business.

    The best way to determine if a craft show is right for your business is to ask the organizer some questions. Below, you’ll find those questions.

    8 Questions to Ask a Craft Show Organizer Before You Sign Up - cuttingforbusiness.com

    8 Questions to Ask a Craft Show Organizer Before Signing Up

    1. How many shows have you hosted in the past? It’s no secret: First year events (and not just craft shows and fairs) rarely do off without issues. If the organizer hasn’t had experience hosting other large events in the past, you may want to skip it.
    2. How many vendor spaces are available and how many spaces remain? This is a good question to ask because you can see if the show will be full or not. If it is two weeks to the event and there are 100 out of 150 vendor spaces remaining, it might be a red flag to not attend the show.
    3. How many vendors are returning from last year? If the event was held last year, the organizer should be able to give you an estimate of how many returning vendors will be present. If very few vendors from last year are returning this year, it’s probably a sign that last year’s show didn’t perform well.
    4. Is this a juried event? A juried event means that vendors must submit samples before being accepted into the show. This helps organizers know how many of each type of vendor will be at each show. (Read more about juried craft shows.) I’ve seen shows where there have been 50 spaces and 35 of them have been jewelry. If you sell jewelry, it might not be the show for you.
    5. How many people are expected to attend? A good organizer will have an estimate of the number of people that will attend the show and should be able to give you the demographic of those being advertised to. Knowing how many potential customers (and information about them) can help you make a decision about whether or not the booth fee is worth it – and it can help you determine how much inventory to bring. (I also have information on how much inventory to bring.)
    6. Is there a fee to attend the show? Put simply, if shoppers have to pay to get through the door to shop – you will have more serious shoppers. Keep this in mind as you choose craft shows.
    7. Besides the booth fee, what other costs are there? At many shows, it is expected that all vendors donate a giveaway product for a raffle or donate loot to giveaway bags. Be sure you are clear on the expectations before you sign up for the show.
    8. The show specifics. Be sure to ask the event organizer all the logistics questions: How large is the booth space? Is it inside or outside? Is electricity available? For outside shows, what happens if it rains/snows? What time is setup? What time is tear down? Are there cancellation fees? While most show organizers will have a sheet with all of this information covered, be sure to go over the information carefully. If anything you need to know is missing, don’t be afraid to ask.

    Craft shows and fairs can be hit or miss. If you attend a show and don’t do as well as you expected – don’t put the blame entirely on yourself. A lot of the success of vendors falls onto the shoulders of the organizers.

    Read my craft show tips.

  • 6 Signs You Might Be Ready to Quit Your Full Time Job to Run Your Craft Business

    It’s a dream that so many makers share: Quitting the 9-5 full time job to craft full time. Or maybe right now you are weighing your options in an uncertain time with kids that may or may not be physically going back to school.

    While working at home can be an amazing way to raise your family and free yourself from the stresses of corporate life; I don’t recommend that craft business owners immediately quit their full time gigs to solely pursue a work from home business.

    Instead, you’ve got to be ready for the change – and prepare for it. Today, let’s look at the signs that you are ready to put in your notice and stop working full time to run your Silhouette or Cricut craft business.

    6 Signs You Are Ready to Craft Full Time

    1. Your craft business is well established and profitable. Too many, and I mean too many times, I get emails that say someone just purchased their machine and is thinking of quitting their job because they see the successes of others online. Unfortunately, the successes you see online of other makers are not your successes. It’s probably been a long road with failures and successes that have led other makers to quitting their jobs. I have no doubt that your time will come, but wait until your small business is making at least the same amount of income you receive in your day job before you think of quitting.
    2. You have built up a nest egg of savings. The handmade market can be hot and cold. In busy times you’ll have so many orders that you have to cut them off; while in slow times, you have to search for customers who want to purchase. You’ll need a healthy savings account to compensate for the slow times in your business. Ideally, everyone should have 3 to 6 months of living expenses available in liquid cash at all times.
    3. You are self motivated and can stay on task. Working from home presents itself with a lot of distractions. From the tv to pets or kids, if you aren’t focused your day can slip away and you may not even realize it. To help with the distractions and keep a home/work balance – a dedicated workspace is essential.
    4. You’ve figured out a health insurance solution. One stumbling block for work at home people is figuring out health insurance – and being able to afford it. While you can look to the health insurance marketplace, private companies, or religious based organizations – you’ll need to get this detail worked out if your current job provides your health insurance. The first step? Look at your current pay stub and see how much you currently pay for health insurance. Then, start comparing the rates you pay to the current rates available.
    5. You can deal with solidarity. While working in pajamas is a plus, working at home in a craft business can be lonely. If you thrive on interaction with others throughout your day; ask yourself if you will really be able to handle working alone day in and day out.
    6. You’re prepared for people to not take you seriously. From someone who works at home: when you tell people you work from own in a craft business you may get negative or puzzled expressions. To this day, I have family and friends that constantly offer me tips on places that are hiring or ask me when I’m going to get a real job. If you don’t mind dealing with this, you might be ready to work from home.

    If you’ve read the list and you aren’t there yet – don’t panic. Your time will come, just keep at it. If you are just starting out in your Silhouette or Cricut business. Here’s a great list of things to consider before you start your business.

    Love this post? Save it to Pinterest – just hover over the image below or tap on it on mobile.

    6 Signs You Might Be Ready to Quit Your Full Time Job to Run Your Craft Business - Silhouette Cameo 4 - Cricut Maker - Joy - by cuttingforbusiness.com.