Blog

  • 3 Methods to Determine How Much Inventory to Take to a Craft Show

    Craft show season will be upon us soon, and I know that many Cutting for Business readers are already signing up for shows and events. Today, let’s tackle how much inventory you should take to your next show.

    First, there are no set rules on how much inventory you should take.

    You should strive to have your craft show booth full (but not overcrowded) of inventory for customers to browse and buy. Also, you should also have enough stock on hand that you can replenish your display as customers purchase your products. Ideally, your back stock should be under the table or behind your display so that replenishment is easy.
    3 Methods to Determine How Much Inventory to Take to a Craft Show - cuttingforbusiness.com

    3 Methods to Determine How Much Inventory to Take to a Craft Show

    Based on Vendors Fees

    Some sellers set inventory goals based on the fee for being a vendor. Ideally, you should sell 8 to 10 times the show entrance fee.

    For example: If the vendor fee is $50 you should plan to sell $400 to $500 in merchandise and bring at least double the products, or $800 to $1000 in inventory. Be sure to spread your inventory across several price points.

    Unfortunately, if you are selling large and expensive products only; this formula doesn’t work well.

    Based on Sales Goals

    Other sellers set inventory goals based on their sales goals. If I attend a show and want to sell $1000 in products, I’d typically bring around 3 times my sales goal in product or $3000 worth of inventory. Again, be sure to spread this across many price points.

    Based on Attendance Numbers

    Other sellers compute their inventory based on past show numbers. At an average show you should expect that 1% to 3% of attendees will purchase something from your booth.

    First, figure out what your average product will sell for. Let’s say my average product costs $18. And, let’s say that a particular show has 2,000 attendees. If 2% of the attendees make a purchase (40), you’d multiply this by your average product price. In this case, I’d expect to sell $720 worth of product and should bring at least double the amount in product or $1440.

    Like the first two, you’d need to have products in a variety of price points.

    Remember, these are just suggestions on how to determine your ideal inventory to bring to a craft show; but there are no hard fast rules. If I’m attending several shows in one season, I might bring much more inventory to a particular show since I can always use it at a show at a later date. If I am not attending another craft show, I might bring less so that I don’t have a lot left over at the end.

    More Craft Show Tips

    Worried about having enough time to create all these products before a show? Read my strategy to quickly build up inventory.

    Or, read my favorite craft show tips.
  • Photos: All Things Silhouette Conference Fall 2017

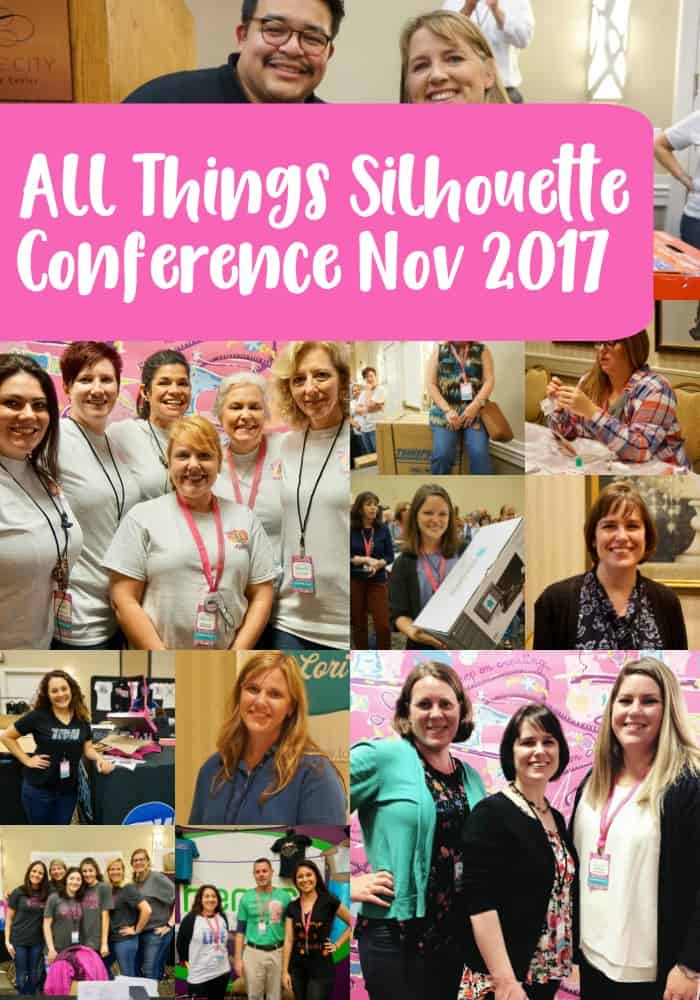
    I’m back from the latest All Things Silhouette Conference, and I can’t wait to share my photos with you! During this conference, I enjoyed teaching classes on copyrights and trademarks for Silhouette small business owners, growing your Silhouette business through social media, creating digital mockups in Silhouette Studio, and hosting home parties with your Silhouette. While not in class, I enjoyed meeting Cutting for Business readers, taking selfies, and selling and signing my books.

    Here’s a look at the conference from my point of view:

    Have questions about the conference? Head to this post to get answers.

    Share on Pinterest to let other Silhouette lovers know about the conference:

    Photos: All Things Silhouette Conference Fall 2017 - Cameo, Curio, Portrait, Mint - cuttingforbusiness.com

  • Scrapbuster Project: Heat Transfer Vinyl Lanyards

    So my kids needed some way to keep up with their YMCA membership cards – and I needed to get them out of my wallet.

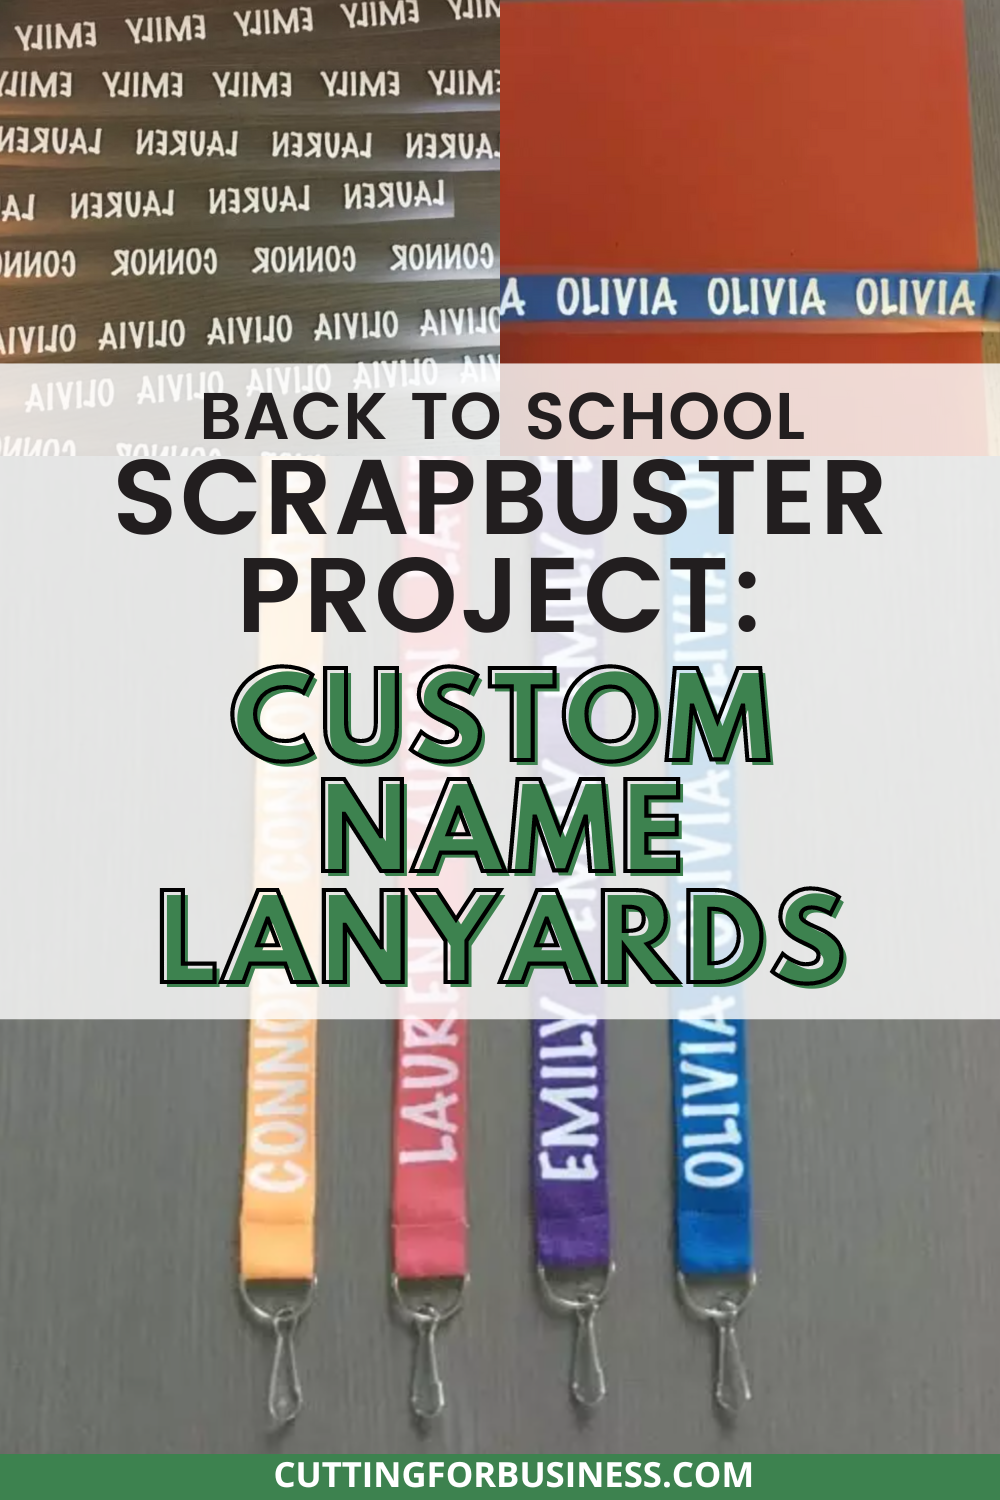
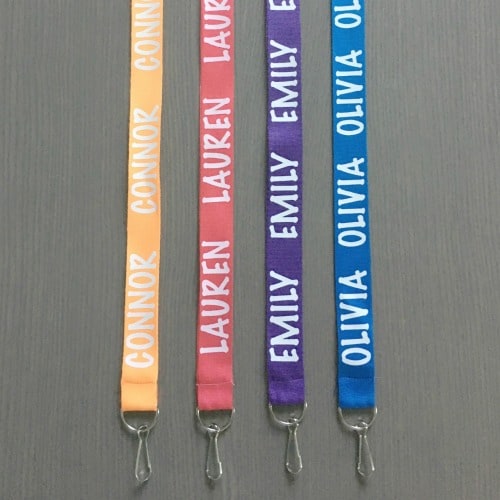
    Heat transfer vinyl, my Silhouette Cameo, and some cheap lanyards to the rescue. As I was making the lanyards, I got to thinking that this would be a fabulous way to use up heat transfer vinyl scraps (which we all have plenty)!

    Scrapbuster Project: Heat Transfer Vinyl Lanyards - cuttingforbusiness.com

    Heat Transfer Vinyl Lanyard Tutorial

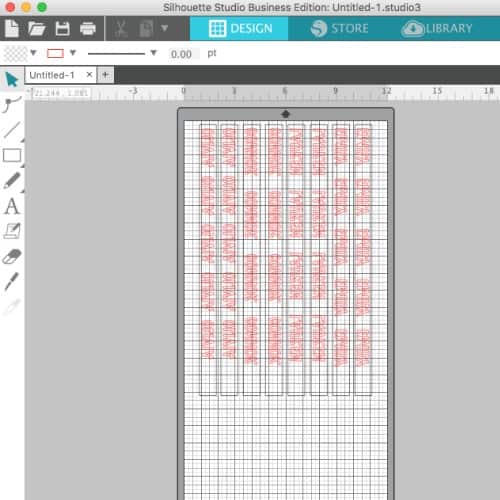
    1. Create your design. Here’s what my Silhouette Studio file looked like: 
      Silhouette Cameo & Cricut Explore or Maker Scrapbuster Project: Heat Transfer Vinyl (HTV) Lanyards - by cuttingforbusiness.com
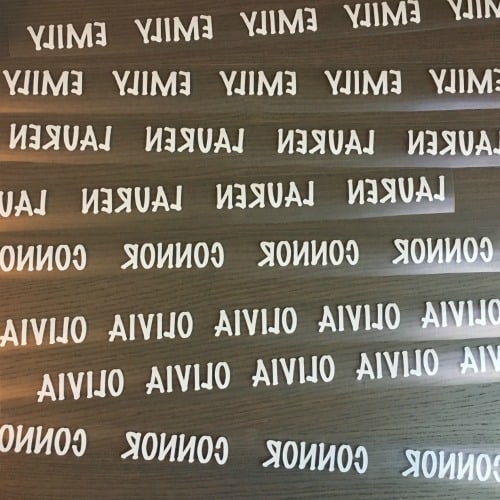
    2. Cut and weed the heat transfer vinyl.
      Silhouette Cameo & Cricut Explore or Maker Scrapbuster Project: Heat Transfer Vinyl (HTV) Lanyards - by cuttingforbusiness.com
    3. Cut your design into strips. I used my Cutterpillar, but your favorite scissors will work. Silhouette Cameo & Cricut Explore or Maker Scrapbuster Project: Heat Transfer Vinyl (HTV) Lanyards - by cuttingforbusiness.com
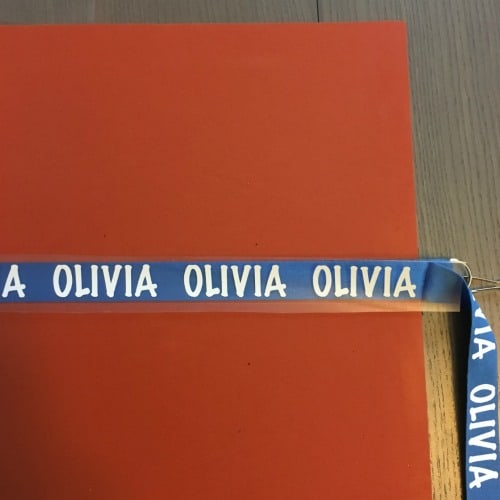
    4. Prepress your lanyards and line up your vinyl. If you are using small scraps and having a hard time keeping them in place, buy some heat resistant tapeSilhouette Cameo & Cricut Explore or Maker Scrapbuster Project: Heat Transfer Vinyl (HTV) Lanyards - by cuttingforbusiness.com
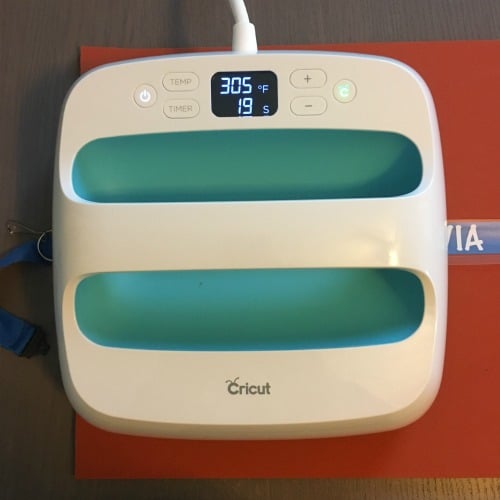
    5. Finally, press your vinyl onto the lanyard. I used my Cricut EasyPress™ because it is convenient for small projects and works well. You can read my thoughts on it in this postSilhouette Cameo & Cricut Explore or Maker Scrapbuster Project: Heat Transfer Vinyl (HTV) Lanyards - by cuttingforbusiness.com
    6. That’s it! Quick and easy project.
      Silhouette Cameo & Cricut Explore or Maker Scrapbuster Project: Heat Transfer Vinyl (HTV) Lanyards - by cuttingforbusiness.com

    Heat Transfer Vinyl Lanyards as Money Makers

    Now, what if you are looking to turn lanyards into a money maker? You can! I think that generic phrases on lanyards like “I Love Nursing”, “I Teach”, or “School is Cool” would be great impulse items at your next craft show and should sell for a few dollars each.

    When thinking of phrases to use on your lanyards – think of who might wear them. Many doctors, nurses, teachers, and students wear lanyards every day.

    Where to Buy Lanyards

    Blank lanyards should cost no more than $0.50 each. Pick some up at your favorite wholesaler or grab a pack to test the market on Amazon. If you sew, there are several DIY lanyard tutorials on Pinterest.

    Update: My kid’s have been using these lanyards for years. They still look as great as the day that I created them!

  • Cheap Tee Shirt Packaging + How to Fold a Shirt

    Here’s a fun fact that you definitely don’t know: When I was a teenager, I worked at Sears in the children’s department. This is where I learned to properly fold a shirt for retail. Since that was quite a few years ago (I won’t tell you how many!), I might be a bit rusty – but I’m showing you to properly fold a shirt today.

    How to Properly Fold a Shirt for Retail

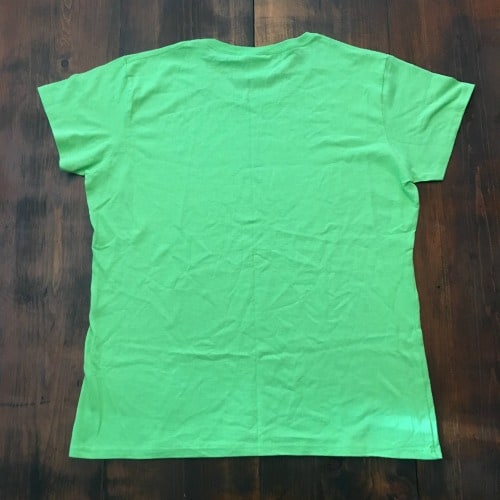
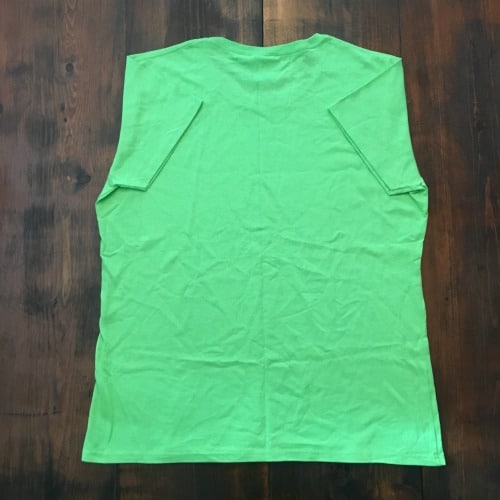
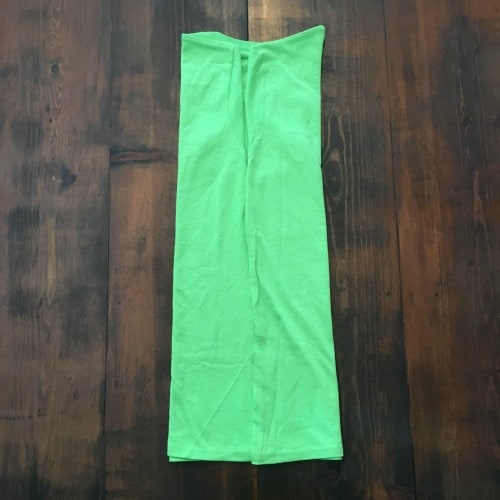
    1. Lay the shirt face down on a flat surface. Cheap Tee Shirt Packaging for Silhouette Cameo and Cricut Explore or Maker Crafters + How to Fold a Shirt - by cuttingforbusiness.com
    2. Fold the sleeves inward. Cheap Tee Shirt Packaging for Silhouette Cameo and Cricut Explore or Maker Crafters + How to Fold a Shirt - by cuttingforbusiness.com
    3. Fold each side of the shirt towards the center. The edges should meet at the middle of the shirt. Cheap Tee Shirt Packaging for Silhouette Cameo and Cricut Explore or Maker Crafters + How to Fold a Shirt - by cuttingforbusiness.com
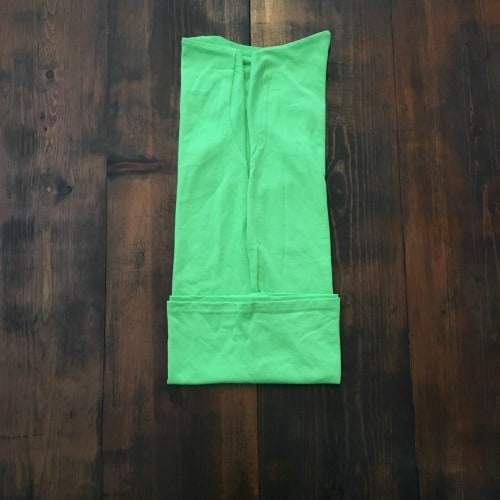
    4. Fold the bottom portion of the shirt up – about 1/4 of the way. (Note: On smaller shirts, you can often skip this step.) Cheap Tee Shirt Packaging for Silhouette Cameo and Cricut Explore or Maker Crafters + How to Fold a Shirt - by cuttingforbusiness.com
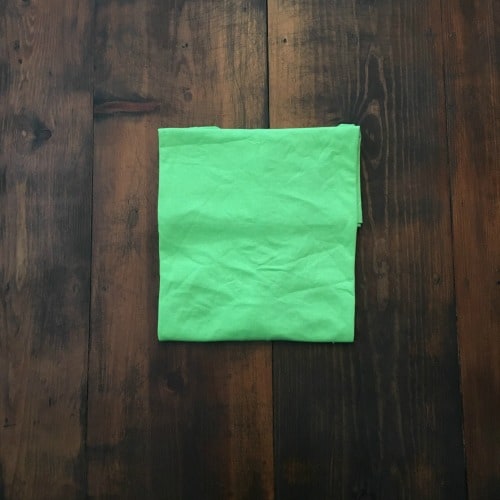
    5. Fold the bottom corners of the shirt in half to meet with the top corners. Cheap Tee Shirt Packaging for Silhouette Cameo and Cricut Explore or Maker Crafters + How to Fold a Shirt - by cuttingforbusiness.com
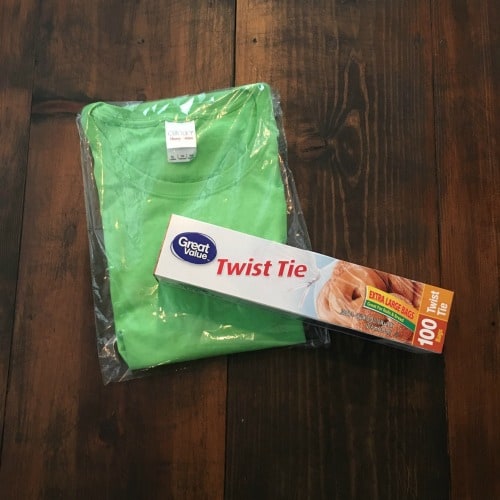
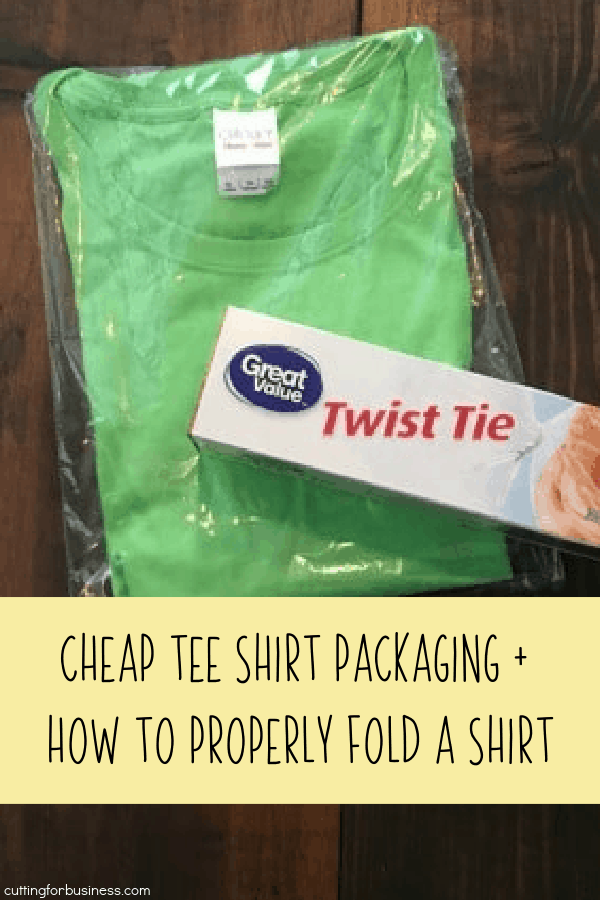
    6. Slide the shirt into a bag. Now, there are a lot of wholesalers and retailers that sell bags and packages. I know that many small sellers simply cannot meet the minimum order quantities. If you can’t, head to your local big box retailer and pick up some Twist Tie Bags. The ones shown in the photo below are from Walmart, and are perfect for tee shirts! A box of 100 cost $2.96, which is $0.03 each. To hold them closed, tape the edge or finish with a sticker with your brand name.Cheap Tee Shirt Packaging for Silhouette Cameo and Cricut Explore or Maker Crafters + How to Fold a Shirt - by cuttingforbusiness.com

    That’s it – it is really that cheap and easy! Struggling with folding shirts? You can buy shirt folding boards to help you save time and get perfect creases – click here to view them.

    Looking for other cheap packaging ideas? Click here.

    Love this post? Share it on Pinterest:

    Cheap Tee Shirt Packaging for Silhouette and Cricut Crafters + How to Fold a Shirt - by cuttingforbusiness.com
  • How to Estimate USPS Shipping in Your Craft Business

    One of the emails that I get a lot of through Cutting for Business is: “I just shipping my first package and lost money because shipping was way more expensive than I thought it would be!” Honestly, I hate to hear this because it is completely preventable! The United States Postal Service (USPS) has a shipping cost estimator on their website that you can use to help provide an accurate price quote to your customer. Today, let’s look at where to find it and how to use it.

    Where to Find the USPS Postage Price Calculator

    Visit https://postcalc.usps.com to access the tool.

    How to Use the USPS Postage Price Calculator

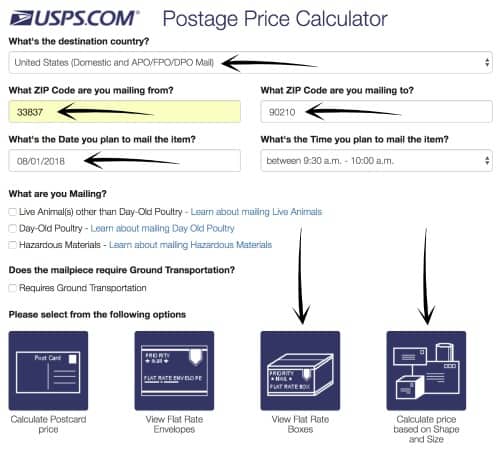
    1. Input your zip code, the customer’s zip code, and the date of mailing. (The time isn’t too important.) Then choose whether you will use flat rate mailing boxes or your own box. As a note: Flat rate boxes are great if your item will fit in the box and is heavy, otherwise, choose “Calculate price based on shape and size”. Flat rate boxes are available free through the USPS at this link.How to Estimate USPS Shipping in Your Craft Business - Perfect for Silhouette Cameo or Cricut Explore or Maker small business owners - by cuttingforbusiness.com
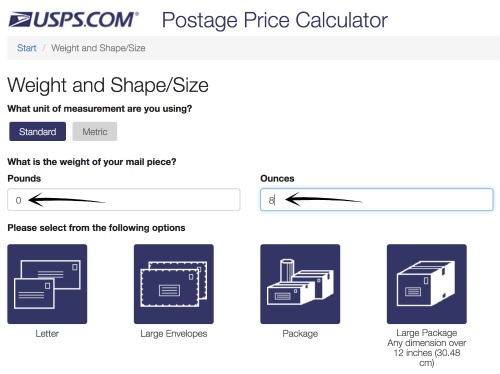
    2. On the next screen, enter the weight of your product and choose the type of package. In most cases, you’ll choose ‘Package’ or ‘Large Package’.How to Estimate USPS Shipping in Your Craft Business - Perfect for Silhouette Cameo or Cricut Explore or Maker small business owners - by cuttingforbusiness.com
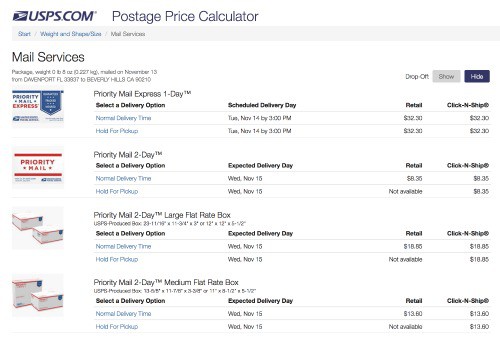
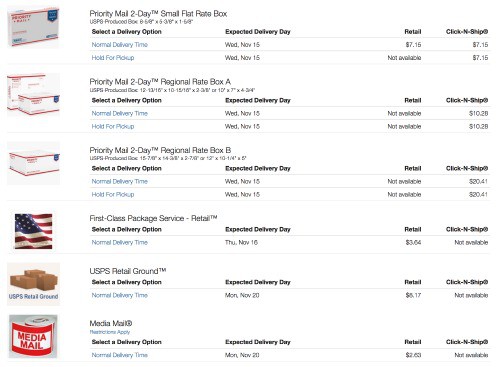
    3. The USPS Postage Price Calculator will now show you pricing for different mailing services that you can use to quote your customer. The retail price is the price you will pay if you walk into a post office and pay at the counter. The Click-N-Ship price is the price you will pay if you print your shipping label at home using your printer. How to Estimate USPS Shipping in Your Craft Business - Perfect for Silhouette Cameo or Cricut Explore or Maker small business owners - by cuttingforbusiness.comHow to Estimate USPS Shipping in Your Craft Business - Perfect for Silhouette Cameo or Cricut Explore or Maker small business owners - by cuttingforbusiness.com

    Shipping Tips & Tricks

    • If your package weighs less than 15.99 ounces it can ship First Class Mail but you CANNOT ship using Click-N-Ship from home. If you have a Paypal account, you can ship from home using this ‘secret’ link: www.paypal.com/us/cgi-bin/webscr?cmd=_ship-now
    • If you ship through a marketplace like Etsy, Ebay, Paypal, or third party shipping sites, you’ll qualify for Commercial Base Pricing which provides discounted shipping. The actual discount is between 5% and 55%, but varies from site to site.
    • Prefer to ship through FedEx or UPS? They both have similar calculators on their websites.

    No excuses now for inaccurate shipping quotes to your customers! It takes less than 2 minutes to provide an accurate quote.

    Need more shipping help? Check out these posts on Cutting for Business.

    Sharing is caring! Why not save this post to Pinterest?

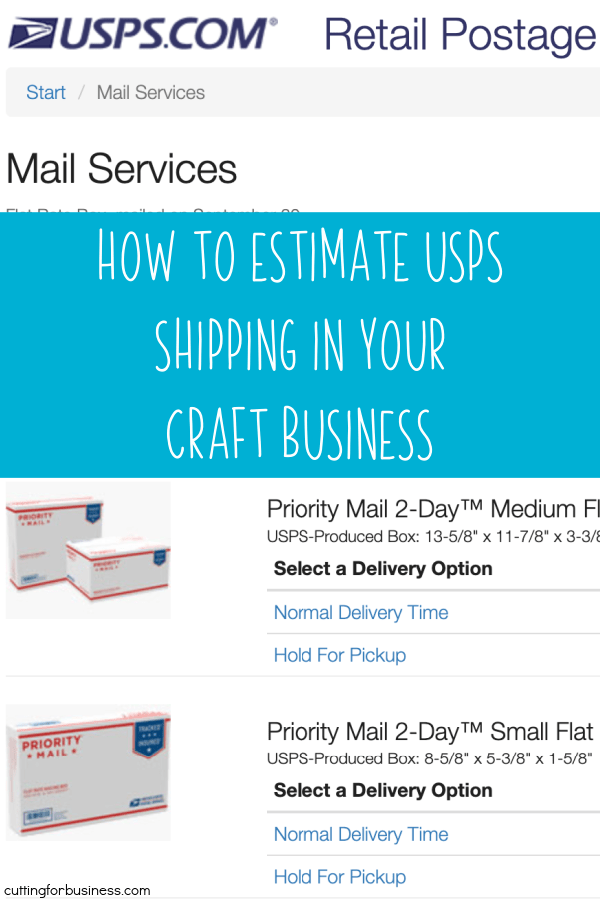
    How to Estimate USPS Shipping in Your Craft Business - Silhouette Cameo, Curio, Mint or Cricut Explore, Maker, or Joy Small Business Owners - by cuttingforbusiness.com
  • How to Properly Sand Wood for Painted Wooden Signs

    This post is a bit of a followup to a popular post on Cutting for Business: Why Does Paint Bleed when Using a Vinyl Stencil. I’ve had some readers read that post and email me stating that they are still experiencing bleeding – even after following my tips. Through a little detective work, I emailed several of those readers and found a common cause in every single case: they didn’t know how to properly sand the wood before painting or staining it. Today, let’s look at how to properly sand wood before making a wood sign with your Silhouette or Cricut cutting machine.
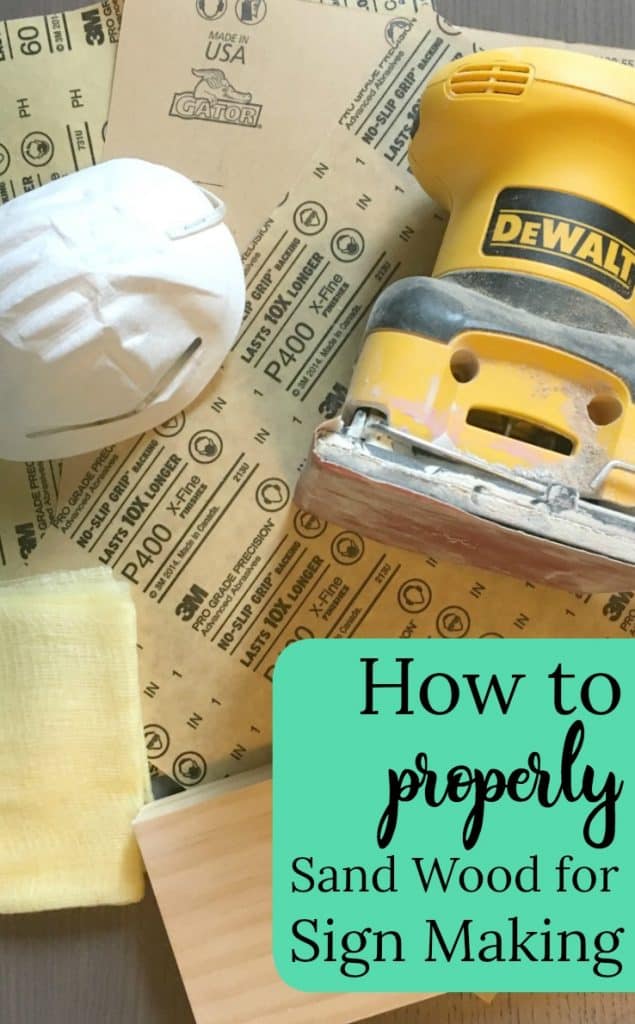
    Before we start, let’s look at what you’ll need:

    • A wood blank – Need tips to picking great wood? Head to this post.
    • Sandpaper – You’ll need a couple of different grits of sandpaper. The grit refers to how coarse the paper is and is determined by the number of sand granules per square inch of paper. The lower the number, the coarser the paper; the higher the number, the more finer the sandpaper.
    • A palm sander – I use (and love!) my DeWalt palm sander. You can buy it here, or read more about power tools in this blog post.
    • Tack cloth – Tack cloth is used to clean up the particles of dust after sanding. Pick up a multi pack at this link.
    • Safety goggles and a mask – Safety first! Protect your eyes, nose, and mouth from sawdust. Amazon has cheap goggles here and masks here.

    How to Properly Sand Wood for Painted Wood Signs

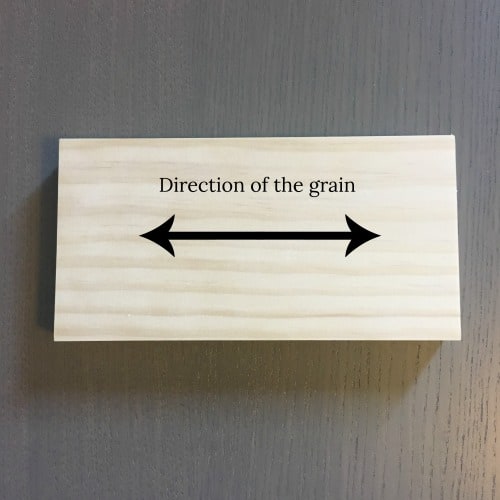
    1. Determine which direction the grain runs on your wood blank. The grain simply refers to the pattern of the wood. You never want to sand against the grain. How to Properly Sand Wood for Painted Wooden Signs - A must read for Silhouette Cameo or Cricut Explore or Maker Crafters - by cuttingforbusiness.com
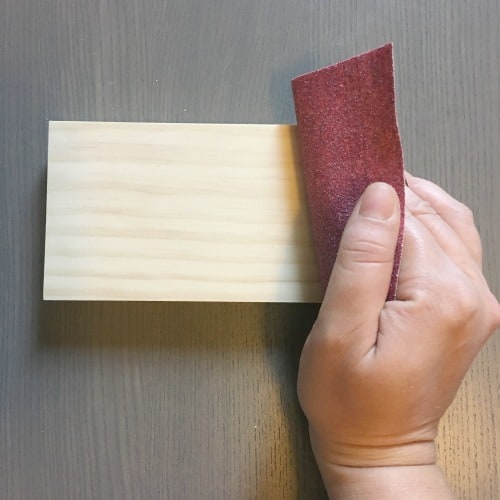
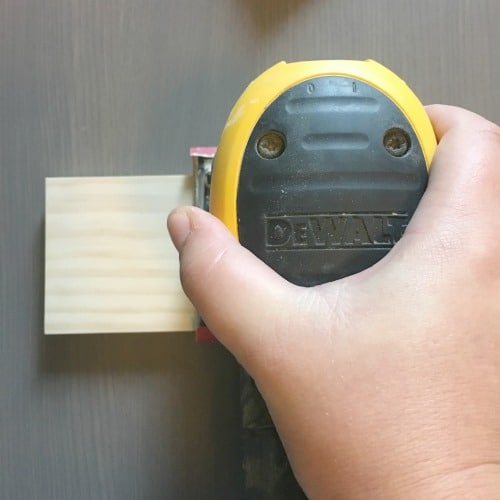
    2. Starting with a medium coarseness sandpaper, sand in the direction of the wood grain until the surface is smooth to the touch. When making wood signs, I generally use 120 grit or 150 grit sandpaper. (The grit number is printed on the back of the sheet.) Be cautious to make sure that you apply even pressure. It doesn’t matter whether you are sanding by hand or using a palm sander.How to Properly Sand Wood for Painted Wooden Signs - A must read for Silhouette Cameo or Cricut Explore or Maker Crafters - by cuttingforbusiness.com
    3. After your surface is smooth, sand it again with a higher grit sandpaper. This removes fine imperfections that you may not be able to see. For this step, I usually use 220 grit sandpaper. Again, be sure to use even pressure with your sandpaper or palm sander. How to Properly Sand Wood for Painted Wooden Signs - A must read for Silhouette Cameo or Cricut Explore or Maker Crafters - by cuttingforbusiness.com
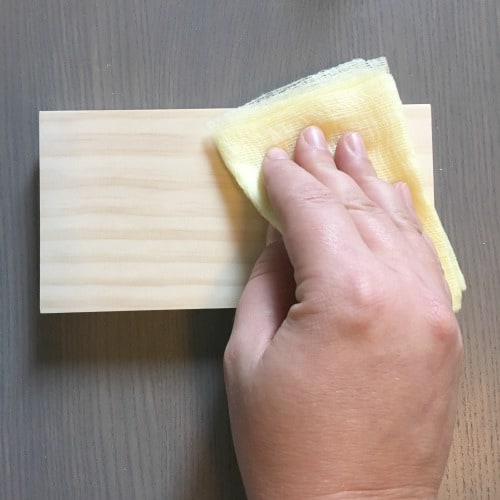
    4. When you’ve sanded the entire wood blank with your fine sandpaper, use a tack cloth to remove the dust. Keep the tack cloth folded. Use the exposed side to remove the dust from the wood blank. Once that side is full of dust, fold it over to a clean side, and so on. You should get many uses from a single tack cloth. How to Properly Sand Wood for Painted Wooden Signs - A must read for Silhouette Cameo or Cricut Explore or Maker Crafters - by cuttingforbusiness.com

    That’s it! Once the dust has been removed, your wood sign blank is ready for staining or painting.

    Help out another crafter – save this post to Pinterest:

    How to Properly Sand Wood for Painted Wooden Signs - A must read for Silhouette Cameo or Cricut Explore or Maker Crafters - by cuttingforbusiness.com

  • Review: TaxJar Automatic Sales Tax Filing Service for Small Business

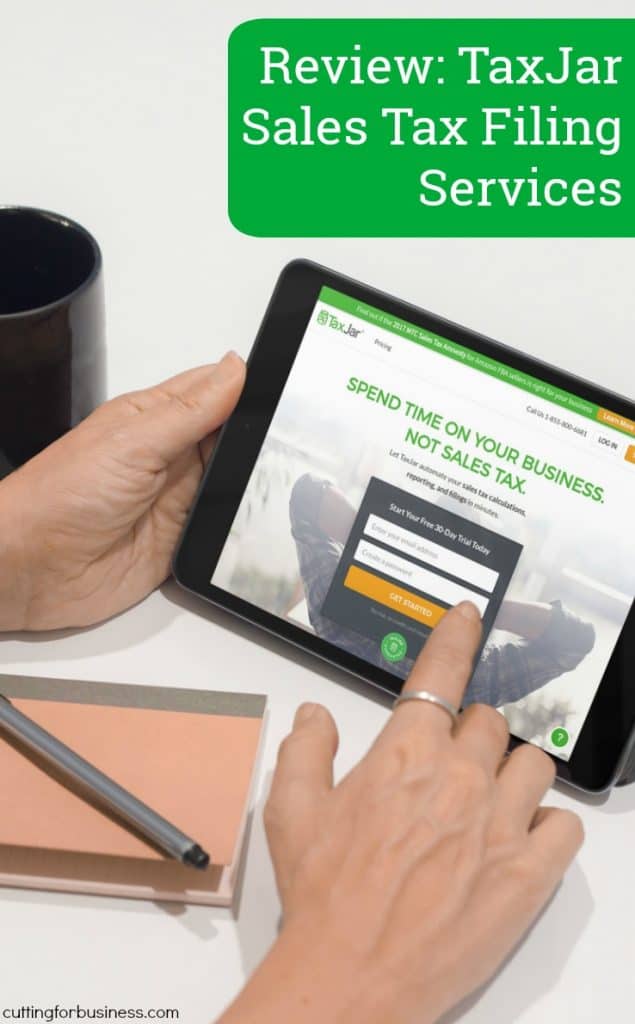
    Taxes. No one likes them and I’m sure that small business crafters certainly would rather be creating products than crunching numbers to file sales tax returns. Today, I’m taking a minute to highlight a service called TaxJar which automatically computes your sales tax and will even file for you. Before I tell you all about them, this post has been a long time coming. Last week, I celebrated my one year anniversary of using TaxJar. I was not solicited to write this post.

    Need a refresher on sales tax? Check out this post.

    What is TaxJar?

    TaxJar is an online service that computes your sales tax and either gives you a report with accurate numbers to file your sales tax return, or you can set TaxJar to file it automatically for you.

    How does it Work?

    When you sign up and create an account with TaxJar you will connect the marketplaces you sell through to your TaxJar account. TaxJar automatically pulls over your sale amounts and crunches the numbers, allowing you to quickly and accurately file your sales tax return – or have them automatically file it. That’s it! Currently, TaxJar is compatible with:

    • Etsy
    • Paypal
    • Square
    • Shopify
    • Stripe
    • Amazon
    • Ebay
    • Woocommerce
    • Ecwid
    • Big Commerce
    • …and more!

    How much does TaxJar Cost?

    TaxJar is billed monthly based on the number of transactions you do. For most craft businesses, you’ll fall into either the Basic or Plus plans – 1,000 transactions or 5,000 transactions – for $19 a month or $49 a month. If you’d like TaxJar to automatically file your return, it’s $19.95 per filing per state.

    My Thoughts After a Year

    Like I mentioned earlier, as of last week, I’ve now used TaxJar for a year and have had zero issues. I file sales tax in the state of Florida monthly. The first several months, I used the end of month report to manually file sales tax on the state of Florida website. On the fourth month, I put my faith in TaxJar and let it file my return automatically. To date, TaxJar is still filing my returns automatically.

    If you’d like to give TaxJar a try, they offer a 30 day free trial if you click here.

    Help another crafter save time and save to Pinterest:

    Review: TaxJar Automatic Sales Tax Filing Service for Small Business - Great for Silhouette Cameo or Cricut Small Business Crafters - by cuttingforbusiness.com

  • Secret Trick: How to Take Better Pictures of Glass Etchings

    I get reader emails and comments all the time asking for tips about how to take better pictures of etchings on glass in products you’ve made with your Silhouette or Cricut.

    How to Take Better Pictures of Glass Etchings

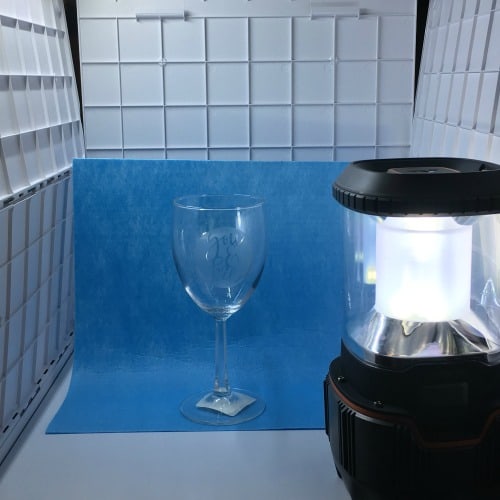
    My super secret trick is to add more lighting to your setup. You can use either a flashlight or a small lamp. For the sample below, I used a battery lantern from our hurricane supply container, because I didn’t have enough hands to hold the camera and a flashlight at the same time.

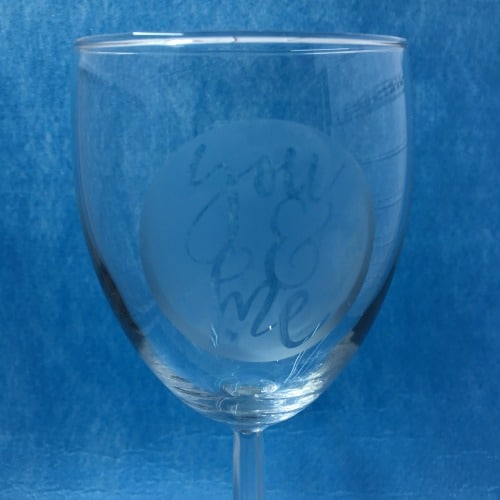
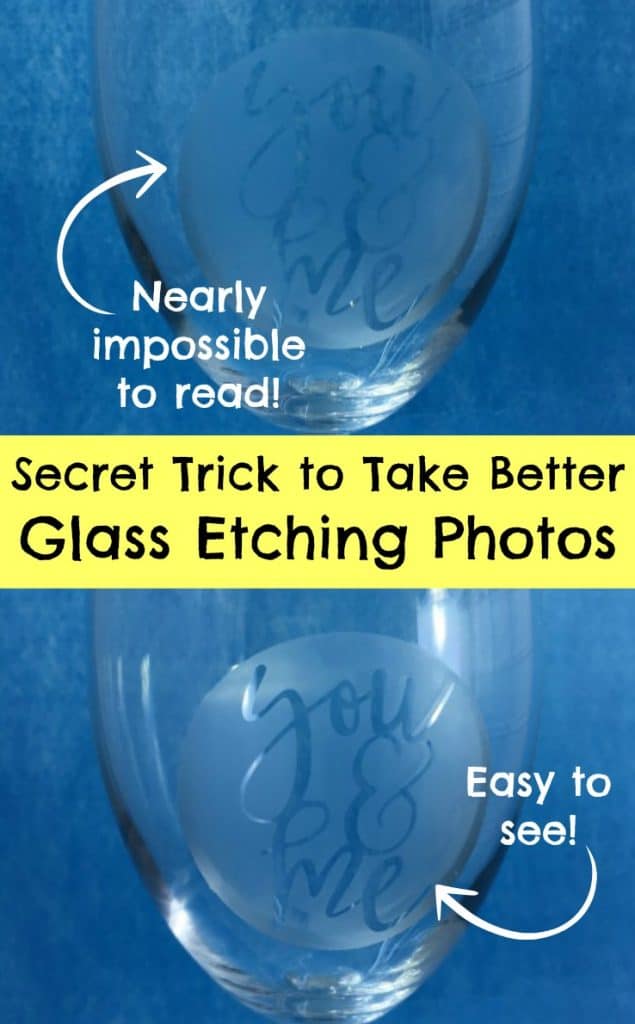
    First picture. No additional lighting. Unfortunately, you have to look really hard to see the text in the etching: Secret Trick: How to Take Better Pictures of Glass Etchings in Your Silhouette Cameo or Cricut Explore or Maker Small Business - by cuttingforbusiness.com

    Second picture. Added more lighting with a lantern. You can light it from above or the side – you’ll just want to experiment with your particular setup. You’ll see that you can now read the etching clearly:

    Secret Trick: How to Take Better Pictures of Glass Etchings in Your Silhouette Cameo or Cricut Explore or Maker Small Business - by cuttingforbusiness.com

    (In case you are wondering, my camera settings were identical in both pictures and were taken with my iPhone 6. The photos were taken 11 seconds apart.)

    Here’s my setup in my Shotbox:

    Secret Trick: How to Take Better Pictures of Glass Etchings in Your Silhouette Cameo or Cricut Explore or Maker Small Business - by cuttingforbusiness.com

    In addition to adding more light, I have better luck taking glass etchings photos on a solid background. In the sample above, no fancy background – just a piece of craft felt.

    This same trick works for holographic and specialty materials, too. Read more about this here.

    The ‘You & Me’ design is perfect for weddings, anniversaries, and more. Download it free in this post on the blog.

    Save this post to Pinterest:

    Secret Trick: How to Take Better Pictures of Glass Etchings in Your Silhouette Cameo or Cricut Explore or Maker Small Business - by cuttingforbusiness.com

  • FAQ: Cricut EasyPress™ and Your Silhouette or Cricut Business

    Update: I’m still loving my Cricut EasyPress™. And, I’ve got great news: Cricut is now has released additional sizes:

    6″ by 7″, 9″ by 9″ ,and 12″ by 10″! Learn more at this link.


    Cricut recently released a machine, EasyPress™, for applying heat transfer materials to apparel and soft goods. If you aren’t familiar with it, I’d describe it as a hybrid between an iron and a heat press. It’s 9 inches by 9 inches square and heats up to 350 degrees Fahrenheit in minutes. Today, I’m sharing my thoughts on it.

    Things I Love about the Cricut EasyPress™

    1. On demand personalizing. The Cricut EasyPress™ is convenient to take to shows and fairs to personalize on demand. If you don’t want to lug your full sized press to your next vendor event and don’t want to invest in a smaller heat press, take your EasyPress™. It’s lightweight, easy to handle, and heats up quickly so you won’t have to leave your heat press running the entire time. It’s also ideal to take to home parties you are hosting!
    2. Great for occasional use. If you only work with heat transfer occasionally and don’t have a need for a full sized heat press, the EasyPress™ is your answer.
    3. Low price point. In relation to a high quality traditional heat press, the EasyPress™ is cheap with a release price point of $149. I’d be confident selling items made with the EasyPress™. Remember, to make sure that your heat transfer material has been applied well, you should be able to see the texture of the fabric in the heat transfer material.
    4. Small size. The EasyPress™ doesn’t take up a lot of space and can be stored in even the smallest of craft spaces. It’s small size lends itself well to traveling as well.
    5. Fast to heat up. The EasyPress™ heats up in minutes and has an auto off feature – just little bonuses that I love!

    Stop! You should know these things before you buy:

    1. If you are working with heat transfer materials that rely heavily on pressure, the Cricut EasyPress™ is not for you. You cannot adjust the pressure of the EasyPress™.
    2. The EasyPress™ is not hot enough to do sublimation. Most sublimation relies on a temperature of around 400 degrees Fahrenheit. The maximum temperature of the EasyPress™ is 350 degrees Fahrenheit.
    3. If you mostly apply materials that are larger than 9 inches by 9 inches, it’ll save you time to just purchase a traditional heat press instead of the EasyPress™.

    Cricut EasyPress™ Instructions

    You’ll want to use your EasyPress™ on a flat, hard surface – not on a padded ironing board. I’m using the pad from my heat press to protect my table top. Cricut does plan to release a pad to accompany the EasyPress™, but it is not yet available.

    1. Turn the EasyPress™ on and set the time and temperature.
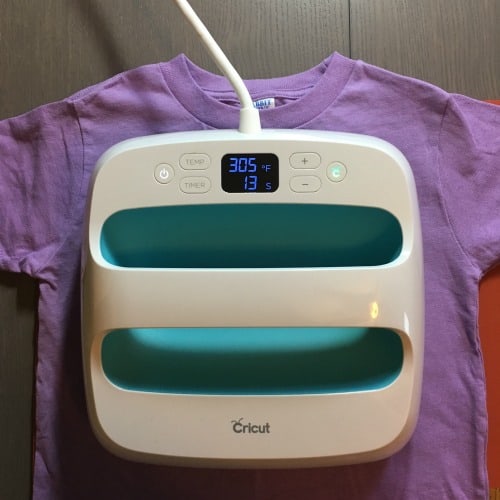
    2. Prepress your blank to remove wrinkles and moisture. FAQ: Cricut EasyPress™ and Your Silhouette or Cricut Business - cuttingforbusiness.com
    3. Place your transfer onto your apparel or soft good. FAQ: Cricut EasyPress™ and Your Silhouette or Cricut Business - cuttingforbusiness.com
    4. Hold the EasyPress™ on your transfer and press the Cricut button to start the timer. There is no need to move the EasyPress™ around while pressing. Instead, hold it in place with a bit of pressure. Remove the EasyPress™ when it beeps. FAQ: Cricut EasyPress™ and Your Silhouette or Cricut Business - cuttingforbusiness.com
    5. Turn your apparel over and repeat step 3 on the back. FAQ: Cricut EasyPress™ and Your Silhouette or Cricut Business - cuttingforbusiness.com
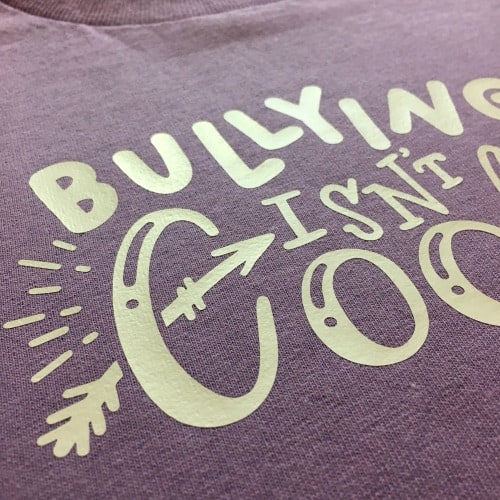
    6. Check for a good press. You’ll know your press was successful when the heat transfer material has the texture of the blank. FAQ: Cricut EasyPress™ and Your Silhouette or Cricut Business - cuttingforbusiness.com

    This shirt has now been washed two times and has held up well. Other users are reporting that materials applied with the EasyPress™ are holding up fine to standard washing and drying.

    Ready to buy? Pick up the EasyPress™ at this link.

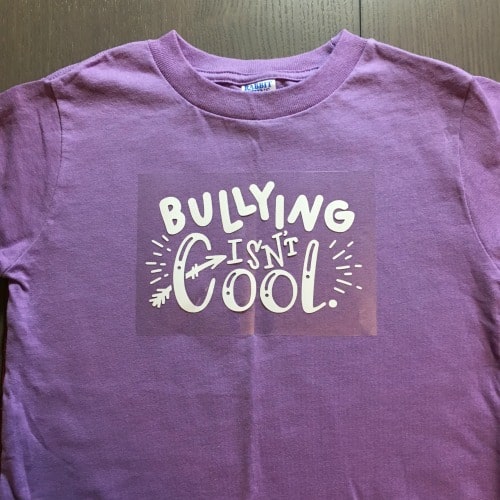
    Love the design? I made it for anti-bullying day at one of the girls’ schools. You can pick it up and more handlettered designs by Rachel at The Smudge Factory.

    Spread the word on Pinterest:

    FAQ: Cricut EasyPress™ and Your Silhouette or Cricut Business - cuttingforbusiness.com

  • Video Marketing in Your Silhouette or Cricut Craft Business

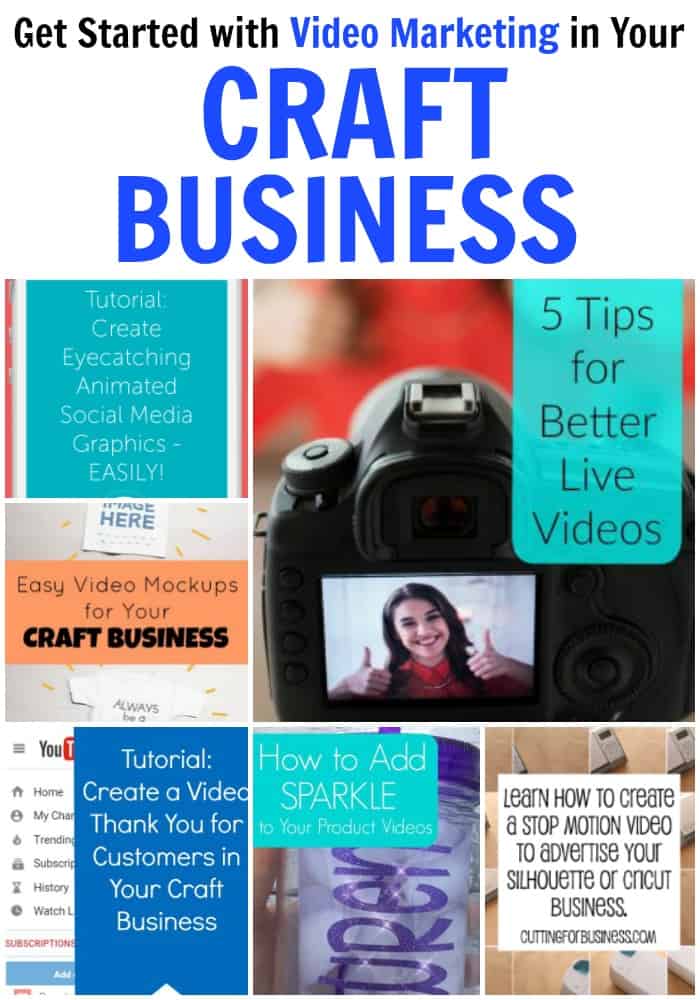
    I’ve got a challenge for you this week: Decide on a video technique to use in your Silhouette or Cricut small business and create a video to post to social media by the end of the week. Here’s a look at the video marketing related posts on the blog:

    Why Video Marketing?

    According to Wordstream, more than one-third of online activity is spent watching video! They further go on to state that the millennial age group watches the most online videos. If that isn’t enough, it is estimated that videos on social media networks generate more shares than text and images combined!

    Get out there and get recording!

    Save this post to Pinterest:

    Video Marketing in Your Silhouette or Cricut Craft Business - by cuttingforbusiness.com