Blog

  • Tutorial: How to Make Photo Jewelry using Silhouette Studio & Sublimation

    I’m pretty sure that many Silhouette users don’t realize how powerful Silhouette Studio is – and it is free! If you sew or embroider, you’ll know that not only are the machines are expensive – but you often have to pay separately for the software to use the machine. As you’ve seen me do in other posts, you can use Silhouette Studio and sublimation to create products. Today, I’m going to show you how to create custom made photo jewelry.

    Need a refresher on sublimation? Here’s a list of previous posts:

    Now, onto the tutorial.

    Supplies Needed

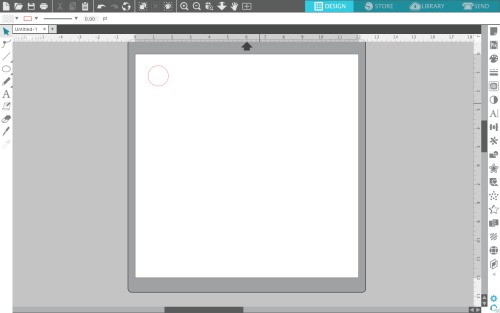
    1. Draw a shape in Silhouette Studio that is slightly larger than your pendant. In this case, I’m using a one inch circle blank and I made my shape 1.2 inches.Tutorial: How to Make Photo Jewelry using Silhouette Studio & Sublimation - by cuttingforbusiness.com
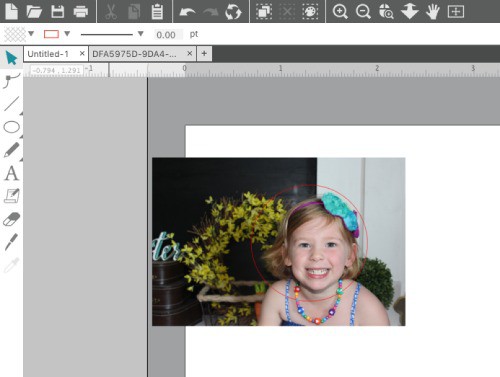
    2. Open your photo in Silhouette Studio and copy it to your canvas with the circle template. Tutorial: How to Make Photo Jewelry using Silhouette Studio & Sublimation - by cuttingforbusiness.com
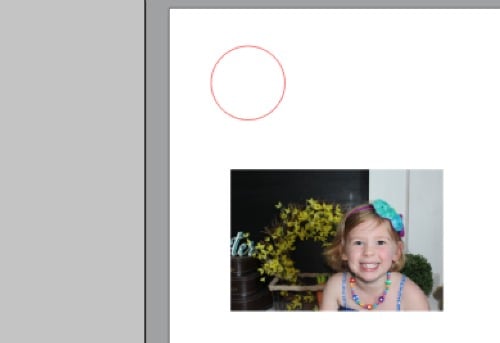
    3. Send the photo to the back layer (right click, then ‘Send to back’) and resize it to fill your circle template.Tutorial: How to Make Photo Jewelry using Silhouette Studio & Sublimation - by cuttingforbusiness.com
    4. To save ink, I’m going to subtract the circle from my picture. Simply select the photo, then hold down the shift key and select the circle. Then, go to ‘Object’, ‘Modify’, and ‘Crop’. Tutorial: How to Make Photo Jewelry using Silhouette Studio & Sublimation - by cuttingforbusiness.com
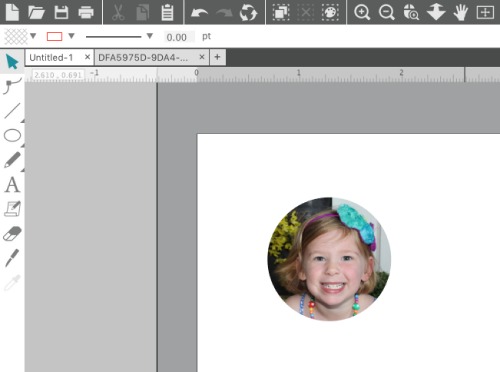
    5. Mirror your image by going to ‘Object’, ‘Mirror’, ‘Flip Horizontally’. Tutorial: How to Make Photo Jewelry using Silhouette Studio & Sublimation - by cuttingforbusiness.com
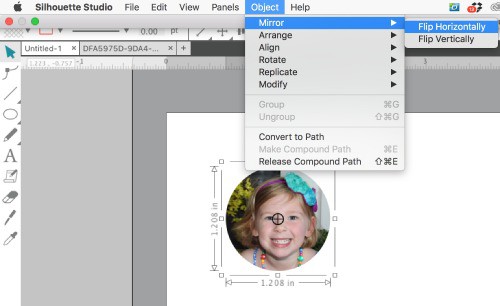
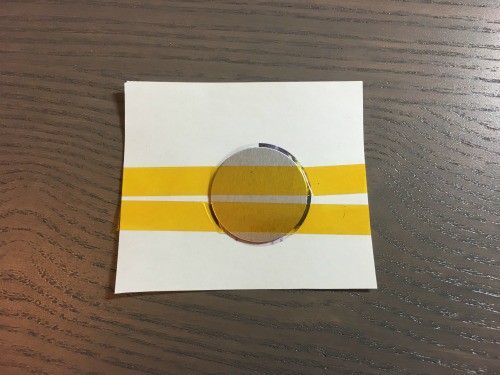
    6. Next, you are ready to print on your heat transfer paper. After printing, line up your blank with the white side down and tape into place using heat resistant tape.Tutorial: How to Make Photo Jewelry using Silhouette Studio & Sublimation - by cuttingforbusiness.com
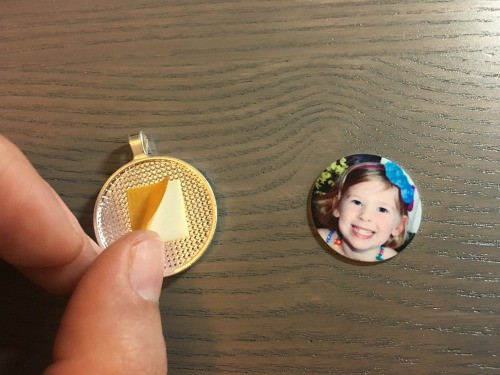
    7. Press your jewelry blank at 400 degrees Fahrenheit for 60 seconds with heavy pressure. After pressing, remove the blank carefully from the paper. The metal sublimation blank will be VERY HOT. Be extra cautious or use heat resistant gloves to protect your fingers. You’ll now be able to mount your photo charm into the bezel holder with the included tape square. Tutorial: How to Make Photo Jewelry using Silhouette Studio & Sublimation - by cuttingforbusiness.com
    Available Unisub Jewelry Blanks

    Unisub is the manufacturer of the sublimation jewelry blanks and does not sell direct. Instead, you’ll have to purchase blanks from a distributor. My favorite sublimation distributor is Coastal Business Supplies. Here are links to the exact jewelry pieces shown in the photo below.

    Sharing is caring! Save the image below to Pinterest:
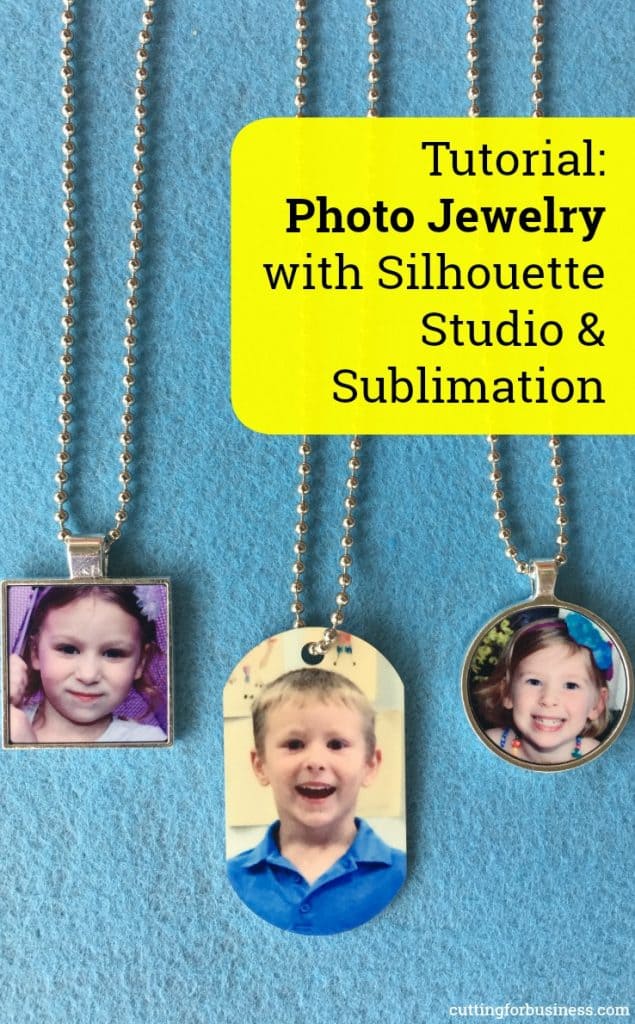
    Tutorial: How to Make Photo Jewelry using Silhouette Studio & Sublimation - by cuttingforbusiness.com

  • 3 Things I Learned about Cutting Leather with Cricut Maker

    If you follow me over on Instagram, you’ll know that I spent the majority of last week learning the ins and outs of Cricut’s newest machine – the Cricut Maker.

    What is different about the Cricut Maker from other Cricut machines?

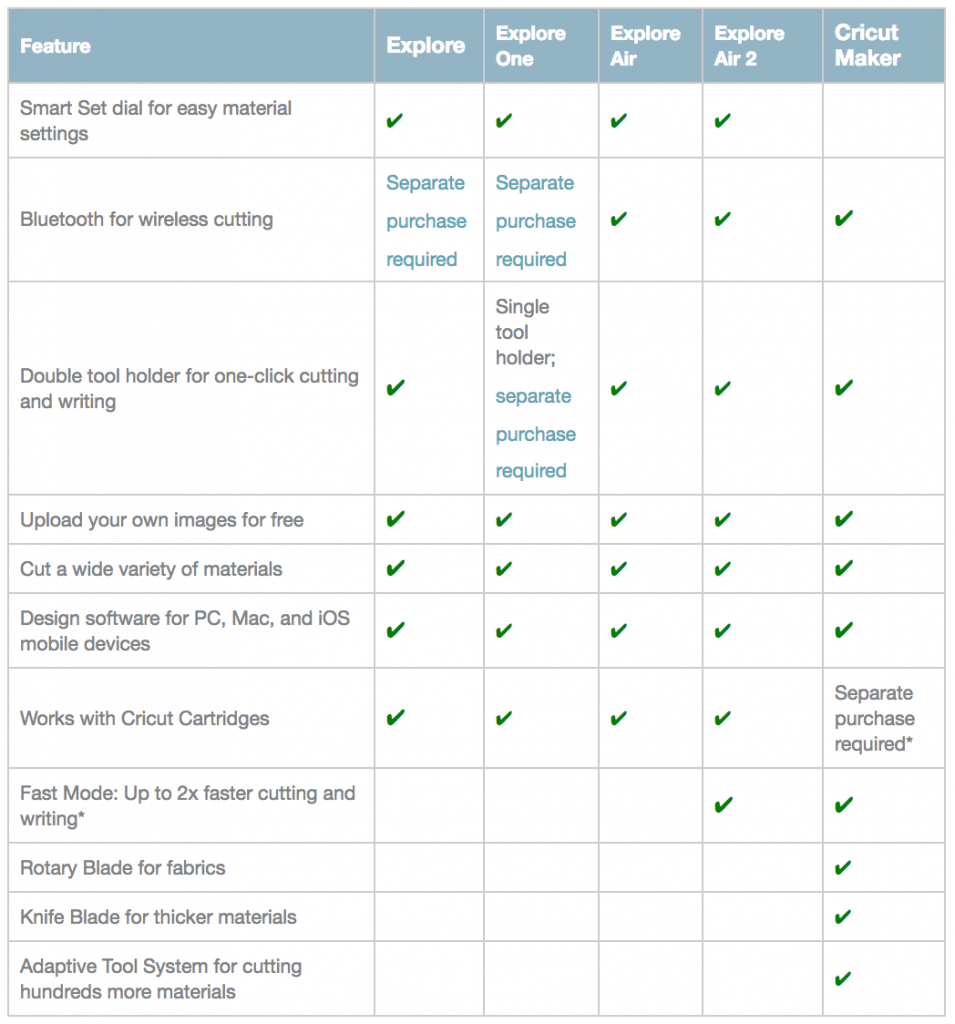
    1. Greater cutting force. The cutting force on a Cricut Maker is 4 kilograms of force – which is about 10 times more than a Cricut Explore. (Both the Silhouette Cameo 3 and Silhouette Curio have a cutting force of 210 grams – significantly less than the Cricut Maker.)
    2. Adaptive Tools. Cricut has stated that additional tools will be released for Cricut’s Maker. This would make it an “all-in-one” tool with no need to upgrade.
    3. Knife Tool. This adaptive tool cuts through thicker materials, but is not being released until Winter, 2017.
    4. Rotary Tool. One of the first in the line of adaptive tools is the rotary blade. This tool functions the same as a handheld rotary tool and allows you to cut fabrics and heavy materials like leather.
    5. Access to Sewing Patterns. With the rotary tool, you can now cut fabric without any type of backing or preparation. Cricut has teamed up with several pattern makers (including Simplicity) to bring patterns to Design Space.
    6. Dial Removed. The dial found on the top to set materials has been removed.

    *These are the highlights of the differences. For a full list, see Cricut’s chart. Image credit: cricut.com.

    3 Things I Learned about Cutting Leather with Cricut Maker - Explore - Air - by cuttingforbusiness.com

    Tips for Cutting Leather with Cricut Maker

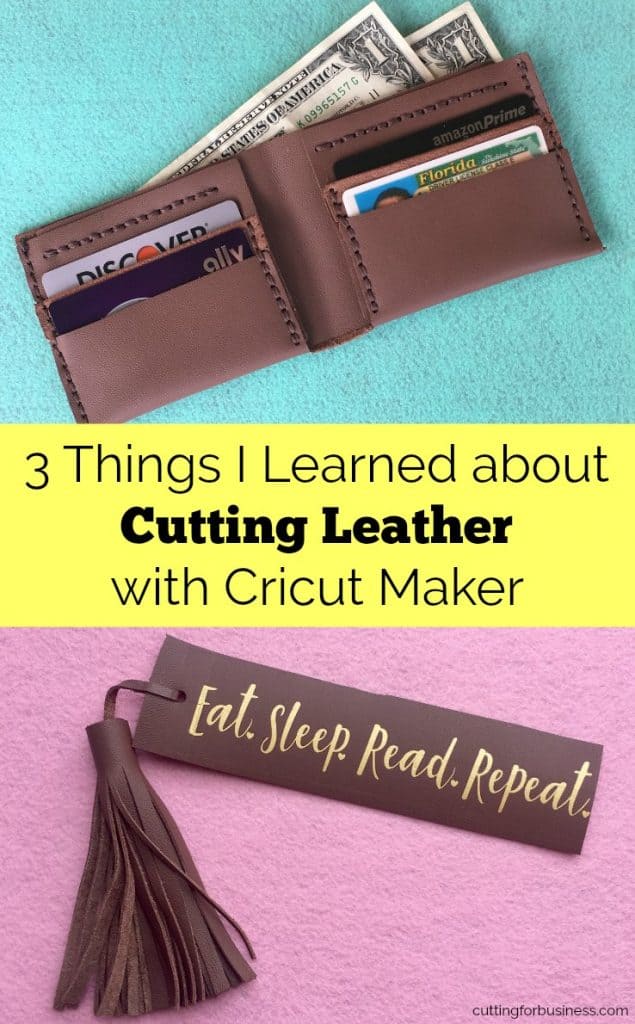
    Last week, I made two projects: a leather wallet and a bookmark. Here’s my tips to cutting leather with your Cricut Maker:

    • Make sure your material is stuck to the mat well – very well! Once you put your leather onto your mat, use a brayer tool or vinyl squeegee to make sure it is stuck. If the material bunches it will jam your machine – ask me why I know!
    • Cut the leather with the rough (inside) side up. This will prevent the rollers from marring your leather.
    • Clean the mat frequently. Leather leaves behind little bits and pieces. I cleaned my mat between each cut to ensure that the leather could come into contact with the adhesive. I used water and a lint free tea towel.

    Resources for the Wallet and the Bookmark

    Want to make your own leather wallet or bookmark? Here’s what you’ll need:

    • Wallet: I followed these instructions and patterns from the team at Bison Made/Ezra Arthur. I used 2 square feet of this tanned leather and this thread. I first used a marker to have the Cricut Maker draw a mark for each hole, then cut the pieces using the rotary tool, and sewed them together.
    • Bookmark: Made from the scraps of the wallet. I used a shape in Design Space to make the rectangle and Cricut’s Leather Tassel Keychain – although I made it smaller and left off the trim work. I used Craft Perfect heat transfer vinyl for the wording on the bookmark, because it adheres to leather.

    Loving this post? Save it to Pinterest:
    3 Things I Learned about Cutting Leather with Cricut Maker - Explore - Air - by cuttingforbusiness.com

  • How to Start a Monthly Subscription Box Paint Club with Your Silhouette or Cricut

    Subscription boxes, DIY, and painted signs are hot right now! Today, let’s look at how you can combine all three into a money maker!

    How to Start a Monthly Paint Club with Your Silhouette or Cricut

    How it Works

    Your customers sign up to receive a monthly ‘project in a box’ on your website or social media page. Each month, you mail them the supplies to complete the project along with step-by-step instructions. Think of it as a painting party in a box!

    What to Include in the Box

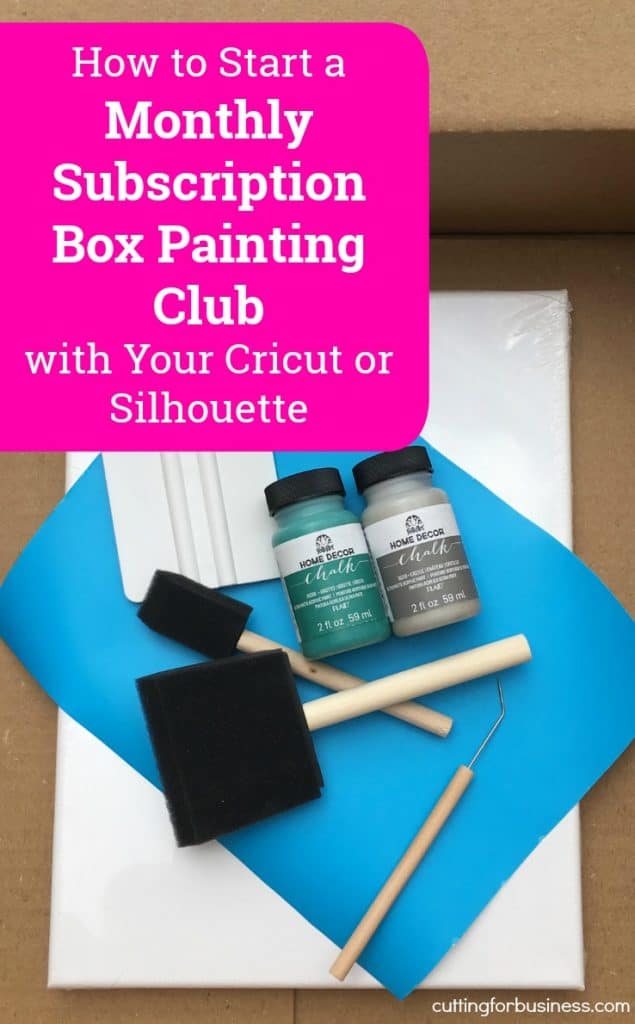
    You’ll want to be sure to include all supplies necessary to complete the project. A sample list of supplies may be:

    • Wood or canvas blank. If you are using a wood blank, be sure that it is sanded and ready to paint.
    • A precut vinyl stencil. You can either send the vinyl stencil weeded or have the customer weed it themselves.
    • Transfer tape. Precut transfer tape with backing works well.
    • Paint and brushes or sponges. You could include premeasured paint in a small container that has been well sealed, or send a whole 2 ounce bottle of acrylic craft paint. When Sarah and I held a painting party for 100+ people, we found that makeup sponges and foam brushes were inexpensive and worked well for stenciling.
    • Tools: Weeding tools, vinyl squeegee, square of sandpaper. (Tip: You can use blank plastic cards as squeegees.)
    • Instruction sheet. The instruction sheet is the most important part of the box you will create. You can either include a printed instruction sheet with photos of how to complete each step, or you can include a card with a website address of the video instructions.
    • List of additional or helpful supplies. Customers are able to supply things like water, paper towels, newspaper to cover their workspace, scissors and basic craft supplies.
    • A list of common troubleshooting solutions. While not required, it may cut down questions to you if you include a list of things that commonly go wrong. For example, if the paint bleeds under the stencil, you are using too much paint – and so on.

    Pricing & Payments

    The cost of your subscription paint club boxes are up to you. It will depend on the cost of the supplies in the box. Ideally, I’d recommend a price between $20 and $40 per box per month. Whatever price you decide, the cost of your monthly box should be the same every month. Of course, payment should be collected before the box ships to the customer. Most payment processors (including Paypal) offer reoccurring billing agreements. Don’t forget: Be sure to set up your payment collection date a few days before your monthly shipping date.

    Get Creative

    If you’ve got a scroll saw (or a great supplier for shaped wooden blanks), consider offering shaped wooden blanks in your box.

    Limit the Choices

    Personally, if I were sending out a subscription box every month, I would stay away from personalized designs or color choices. Allowing choices in boxes slows down packing and increases the work involved. Instead, I would choose a design and color scheme that appeal to a wide audience and include it in the box. If the customer hates the paint colors I chose, she could always drop in her local craft store and choose different colors for only a few dollars.

    Another Spin on this Idea

    If monthly subscriptions aren’t your thing and you love this idea, you could take this a bit farther by truly offering a “painting party in a box”. To do this, you’d sell the host enough premade kits to have a party in her home, along with instructions for her on how to compete the project. This would allow her to have her friends over for a paint party night and she will be able to show them how to complete the project.

    Interested in hosting paint parties? Learn more in this article or my ebook.

    Loving this post? Save it to Pinterest:
    How to Start a Monthly Subscription Box Paint Club with Your Silhouette or Cricut - by cuttingforbusiness.com


  • Tutorial: Etsy’s New Sale Scheduling Tool

    You love sales and your customers love sales – so let’s talk sales today! Recently, Etsy rolled out a new tool for scheduling sales. Previously, Etsy sellers had to manually set up sales on the day of the sale or use a third party tool like Etsy on Sale (see more in this post). Now, let’s take a look at how the tool works.

    Tutorial: Etsy’s Sale Scheduling Tool

    1. Log into your Etsy shop and navigate to the ‘Marketing’ tab on the left hand side of the screen.
    2. Click the ‘New Special Offer’ button at the top of the page. Tutorial: Etsy's New Sale Scheduling Tool - by cuttingforbusiness.com
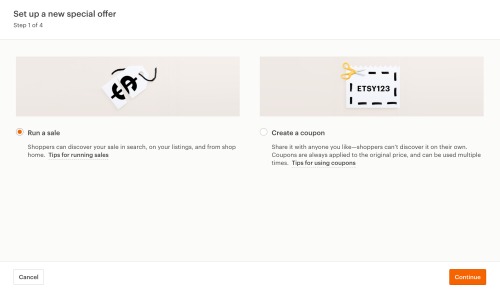
    3. To set up a sale, choose the ‘Run a sale’ option, then ‘Continue’.Tutorial: Etsy's New Sale Scheduling Tool - by cuttingforbusiness.com
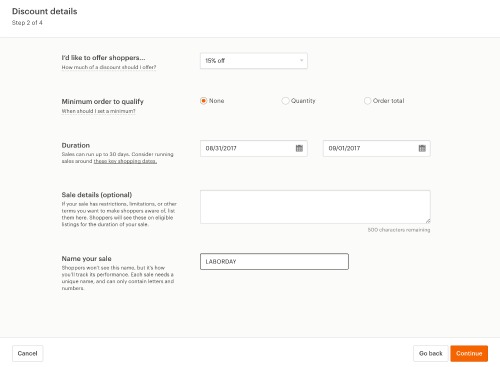
    4. On the next screen, you’ll fill in the details of your upcoming sale. Tutorial: Etsy's New Sale Scheduling Tool - by cuttingforbusiness.com
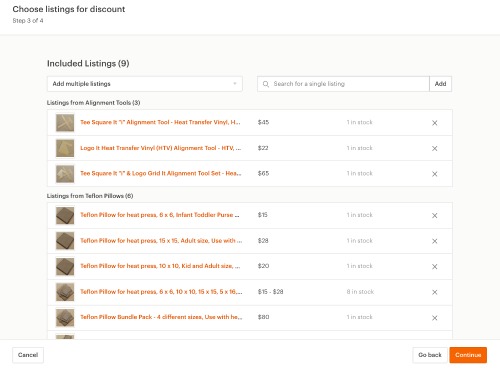
    5. Next, choose which listings in your shop the sale will be active on.Tutorial: Etsy's New Sale Scheduling Tool - by cuttingforbusiness.com
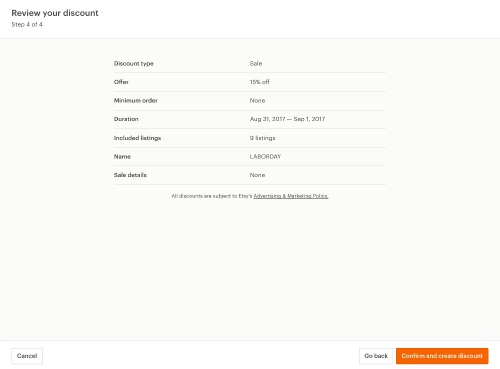
    6. Finally, review the details of your sale and save it by clicking, ‘Confirm and create discount’. Tutorial: Etsy's New Sale Scheduling Tool - by cuttingforbusiness.com
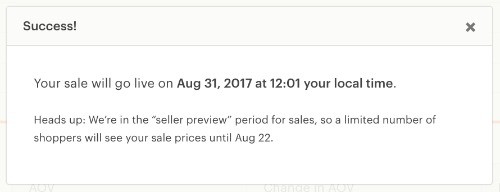
    7. That’s it! You should receive a success message: Tutorial: Etsy's New Sale Scheduling Tool - by cuttingforbusiness.com

    I think that Etsy’s new sale tool is easy for sellers to use and is a great addition to their site. The one downfall was that I didn’t see a way to schedule a sale with multiple percentages off depending on the products chosen. To do this, I simply created a second sale to run at the same time.

    Before you go, Etsy is holding a site wide Labor Day sale! Get more information at this link – but hurry – the deadline to schedule your sale is today (August 22nd).

    Psst! Watch my Etsy Shop from August 31st to September 4th for a Labor Day sale featuring 15% to 70% off select products while supplies last!

    Love this post? Save it to Pinterest:
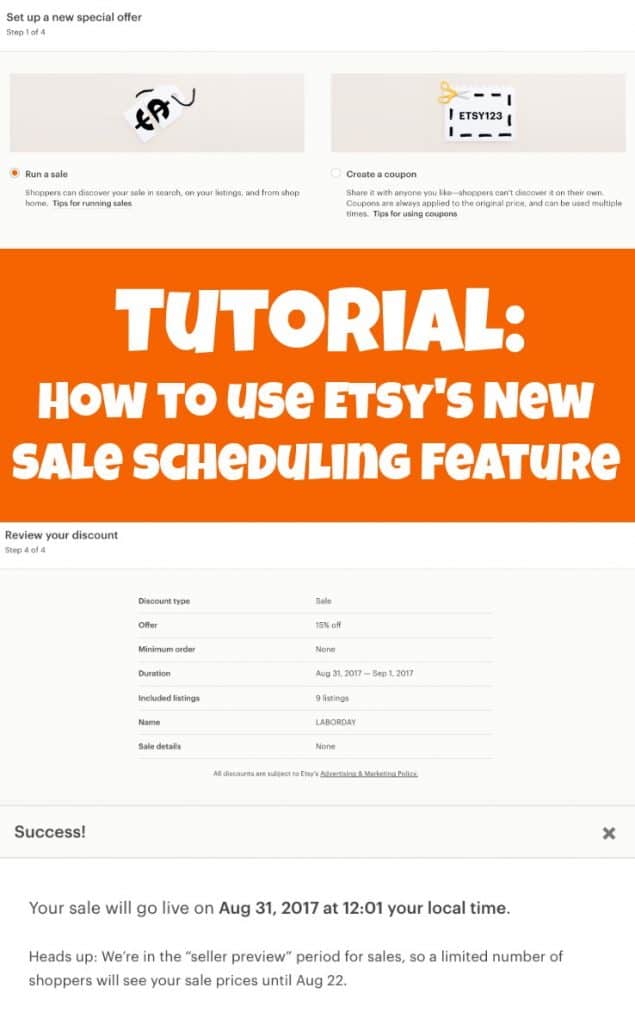
    Tutorial: Etsy's New Sale Scheduling Tool - by cuttingforbusiness.com

  • Review: Custom Printed Tape from Sticker Mule

    I’ve talked before about packaging products on the blog, but today, we are going to look at an easy way to jazz up your packages – custom printed packing tape!

    I talked to a handful of companies about custom printing packing tape in small batches before writing this post. I found that most companies have really high minimum orders – and most are simply too high for an at home business to meet.

    Minimum Order

    Then, I started talking to the team at Sticker Mule. The minimum order at Sticker Mule for custom printed packing tape is one roll (which is 3 inches wide and 300 feet long). Now, it costs $39 for only one roll – which is a little high. However, the pricing goes down the more you order.

    FYI: It’s Paper Tape

    Before we go any farther, let me tell you that there are two different types of packing tape: plastic shipping tape and paper shipping tape called “gummed tape”. At Sticker Mule (and many of the other printing companies) you’ll get gummed shipping tape that has to be moistened to use. You can either use a sponge (included from Sticker Mule) or a tape dispenser like this one.

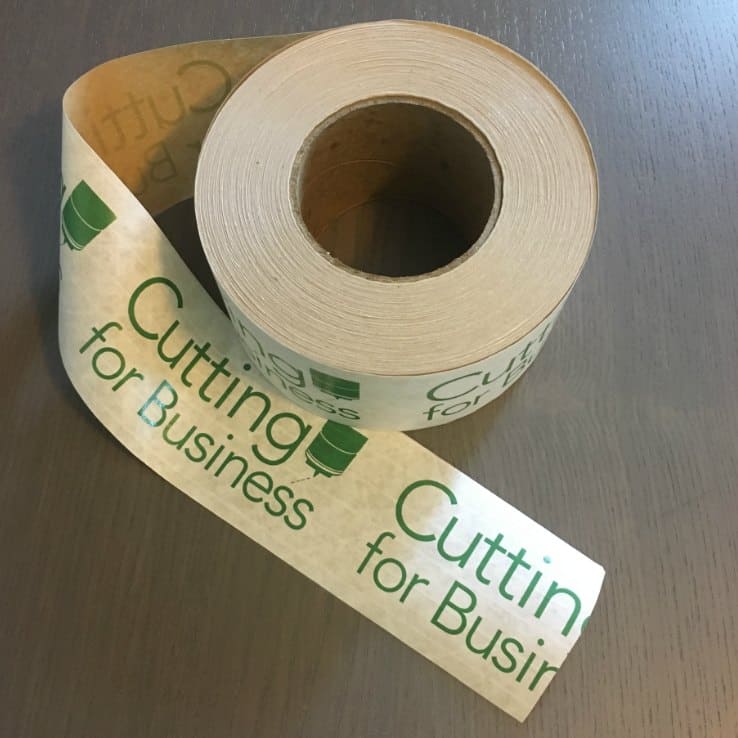
    Here’s a peek at my custom printed gummed tape from Sticker Mule:

    Packaging: All About Custom Printed Tape - by cuttingforbusiness.com

    Order Process

    The process was easy: I visited Sticker Mule, selected the quantity of tape I wanted, and uploaded artwork. Within 1 hour, I received a proof of my tape order to approve, then it was off to print. My tape arrived 4 days later. I’m now shipping all of the packages in my Etsy shop with custom printed tape!

    Save $10 on Your Order

    Interested in ordering from Sticker Mule? Enjoy $10 on me when you visit their site using this link. If you aren’t in the market for custom printed tape, you can use the $10 towards stickers, labels, buttons, magnets, and more.

    Review: Custom Printed Tape from Sticker Mule - A good way to brand packages in your craft business - by cuttingforbusiness.com.
  • 5 Things I Love About Save A Cup

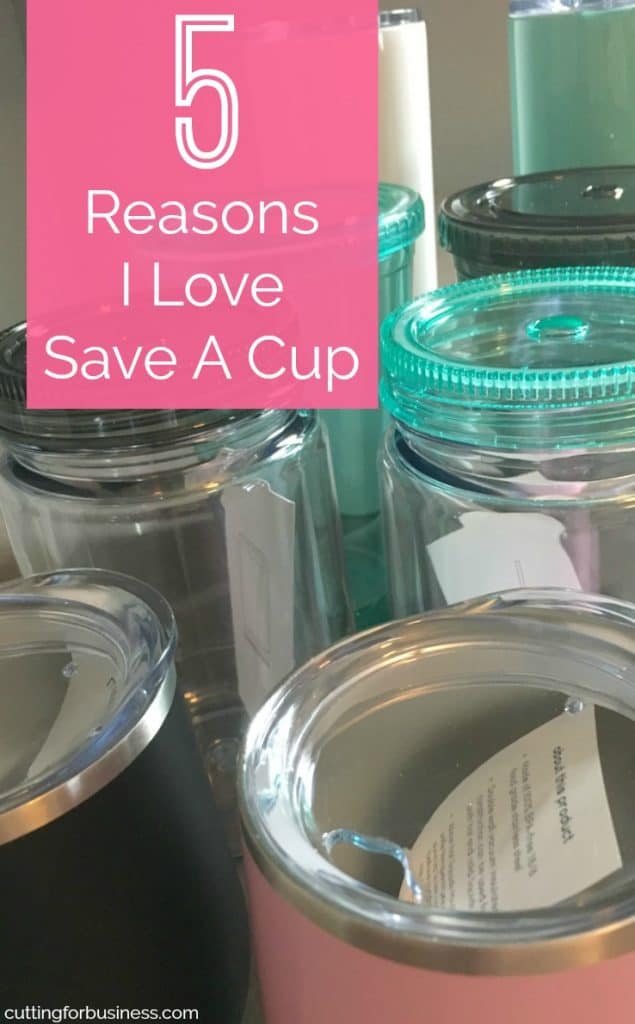
    I get asked a lot where to buy tumblers and mugs. In fact, I’ve written a post on this already – with Save A Cup as my top listed supplier for Silhouette Cameo and Cricut small business owners. A Cutting for Business reader recently asked me, “Why do you recommend Save A Cup?” I don’t like keeping secrets on the blog, so here’s why I love Save A Cup.

    5 Things I Love about Save A Cup

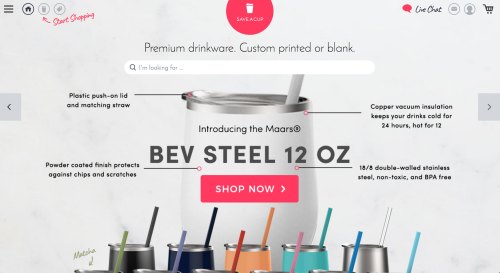
    1. Website. Their website is fast, user friendly, and modern. It’s a breeze to browse and order from. Have a peek:5 Things I Love About Save A Cup - by cuttingforbusiness.com
    2. Fast Shipping. Not only is shipping lightning fast, it’s free. That’s right, no minimum order to trigger free shipping.
    3. Helpful. The staff is extremely helpful. I’ve had to reach out with questions a few times over the years via email and I’ve always gotten a response quickly. Not only do they offer fast responses, they offer multiple ways to reach them: phone (888) 268-0021, live website chat, or email.
    4. Selection. Save A Cup offers acrylic, glass, ceramic, and metal cups in dozens of colors and styles. I like that I can get everything I need in one place. In addition to the huge selection, touch can mix and match products and receive price breaks for larger orders (price breaks start at 12 cups).
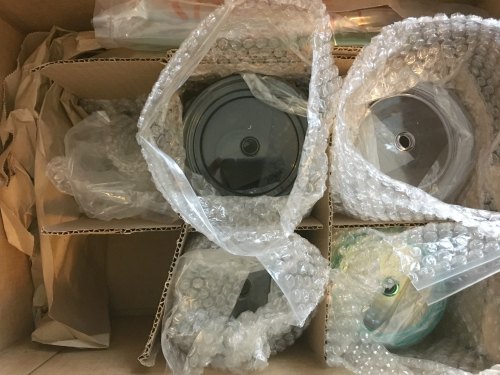
    5. Well packaged. I’ve ordered cups from suppliers before and the packaging is well, less than to be desired. Here’s a recent order from Save A Cup that I can share photos of packaging from. I’ve already used a few cups from this order; however you can see that each cup is bagged and bubble wrapped, then placed into a cardboard divider. 5 Things I Love About Save A Cup - by cuttingforbusiness.com

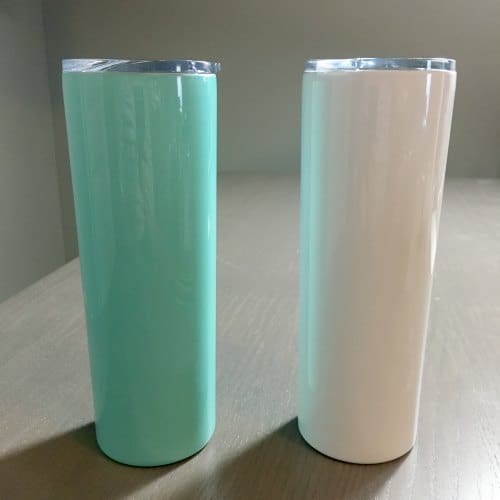
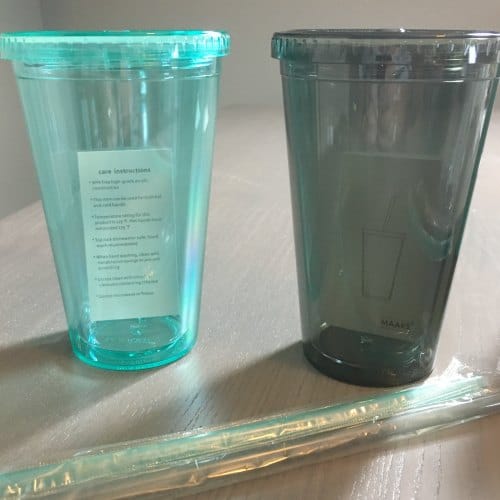
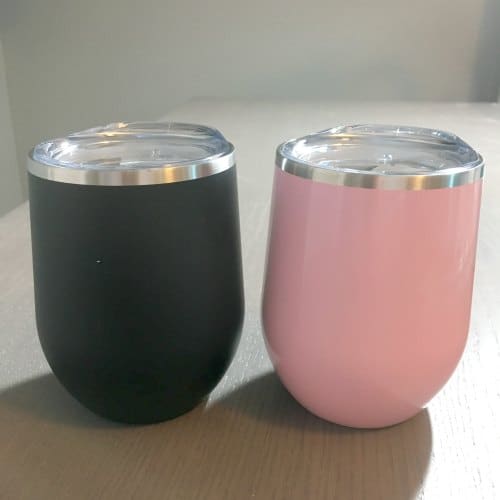
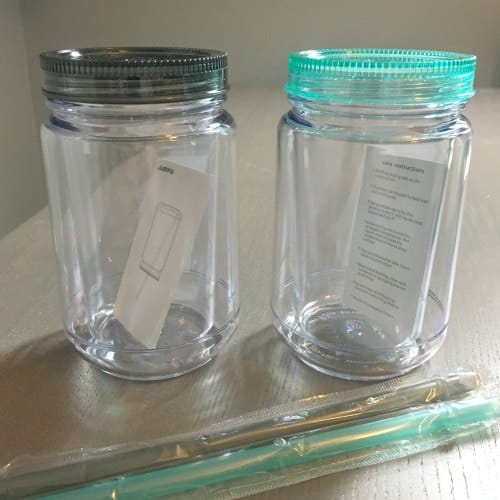
    After I let Save A Cup know I was doing this post, they sent me a few of their best sellers:

    Skinny Steel Tumblers

    5 Things I Love About Save A Cup - by cuttingforbusiness.com

    Classic Tumbler

    5 Things I Love About Save A Cup - by cuttingforbusiness.com

    Bev Steel

    5 Things I Love About Save A Cup - by cuttingforbusiness.com

    Mason Jar Tumblers

    5 Things I Love About Save A Cup - by cuttingforbusiness.com

    Now, go shop – and tell them I sent you!

    While we are talking tumblers, here’s a few more posts for you:

    Save this post to Pinterest – because everyone loves a good supplier:

    5 Things I Love About Save A Cup - by cuttingforbusiness.com

  • How to Easily Add Sparkle to Your Product Videos

    I’ve told you before: Videos are the “thing” on social media right now. Today, I’m sharing a quick (and fun!) way to add a sparkle effect to your videos. But first, Let’s look at the posts related to videos on Cutting for Business:

    Now, bring on the sparkle! Don’t you hate it when you photograph a specialty material and it looks dull in the photo but shines in real life? There’s an app for Apple devices called Kirakira+ that allows you to take video and it automatically adds a sparkle to anything reflective. (For the Android users, I couldn’t find anything that works similarly. I’m sorry. Although there are a few apps that look similar in your store.)

    Tutorial to Use Kirakira+

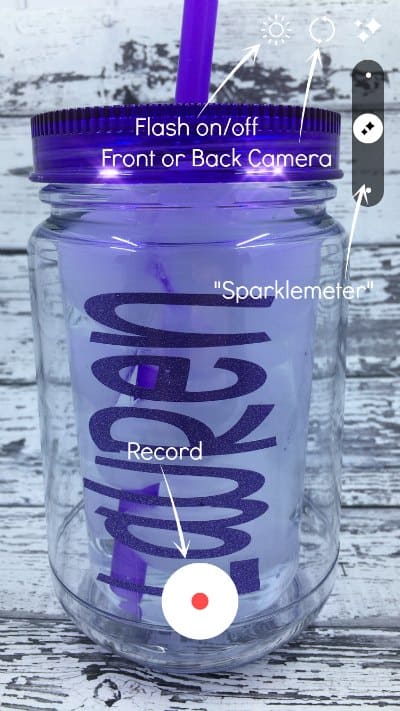
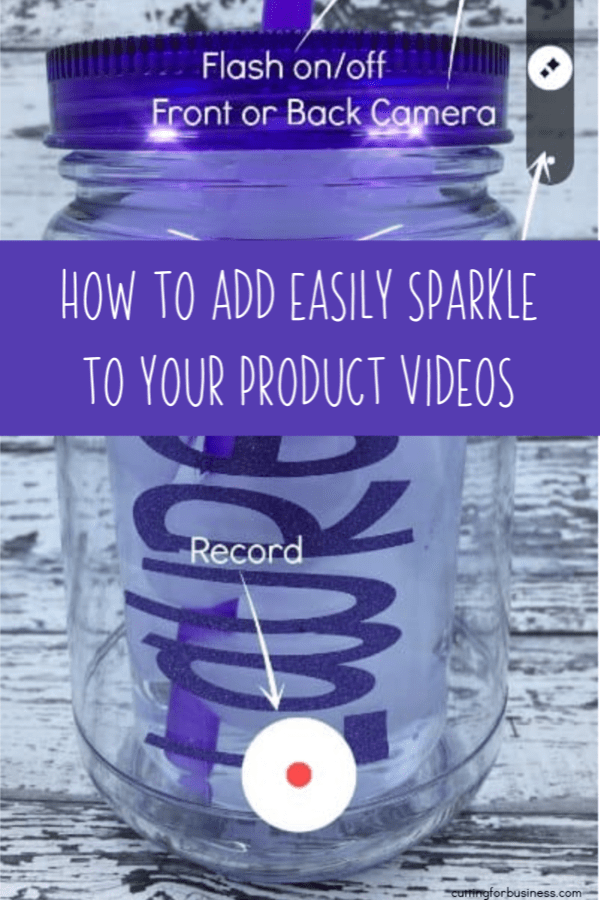
    It’s really simple: After downloading it in the Apple App Store, open it and choose the “kirakira” effect. Once open, you’ll simply record a video within the app.  Here’s what the app interface looks like, along with a few notes:

    How to Easily Add Sparkle to Your Product Videos - Great for Silhouette Cameo or Cricut Explore Small Business Owners - by cuttingforbusiness.com

    After recording your video, it will be saved to your camera roll and you can use it.

    Here’s my sample video:

    A few tips for using Kirakira+

    • Use this sparingly! Everyone loves a little sparkle, but too much of a good thing is bad!
    • Try this app with glitter materials, holographic materials, and reflective materials.
    • The sparkle placement is automatic, however, you can manipulate it somewhat using the “Sparklemeter”. Also, for more sparkle, use a bright light and move the product or camera a lot. For less sparkle, use a darker room and keep the camera still (or move it only slightly).
    • Unfortunately, you have to record your video using the app. At this time, it does not support importing existing videos.
    • There’s other settings in the Kirakira+ App, go explore!

    Wondering about the video? I shot the video in my Shotbox (read more here), the mason jar tumbler is this one (straw included) from Save A Cup, and the adhesive glitter vinyl is from this pack. The font I used can be picked up here.

    Love this post? Save it to Pinterest:

    How to Easily Add Sparkle to Your Product Videos for Social Media - Great for Silhouette or Cricut Small Business Owners - by cuttingforbusiness.com
  • Painted Rocks – A Good Craft Show Impulse Product

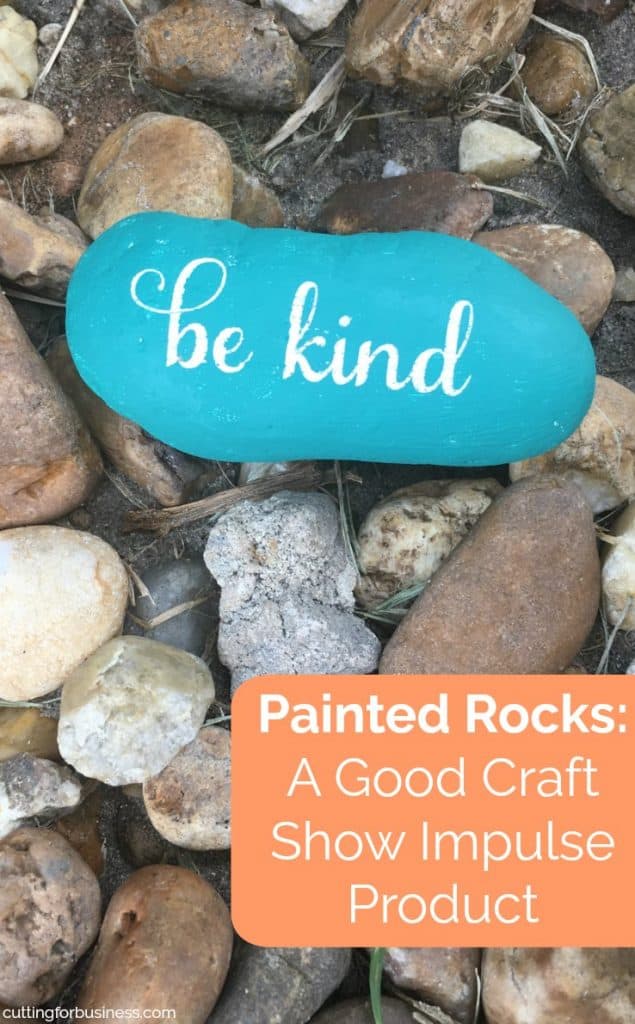
    Unless you’ve been living under a rock, you know that painted rocks are trending right now. (I love puns!) If you are behind on trends, I’m happy to catch you up. People paint rocks, hide them, and others find them. Once a rock is found, you can rehide it or keep it. If you are interested in doing this in your community, simply search for local painted rocks groups on Facebook. But today, let’s talk about selling painted rocks.

    Now, you are not likely to make millions off painted rocks.  However, a basket of painted rocks makes for great impulse items at your next craft show. If you aren’t a great painter, use your Cricut or Silhouette to quickly make painted rocks.

    Tutorial to Create Painted Rocks

    1. Get a bag of rocks. I found a huge bag of river rocks at Home Depot. It was about $12 for 40 pounds. There will be similar products at any home improvement store. You’ll want to be sure to rinse your rocks well before painting on them. Rocks can be any size or shape.
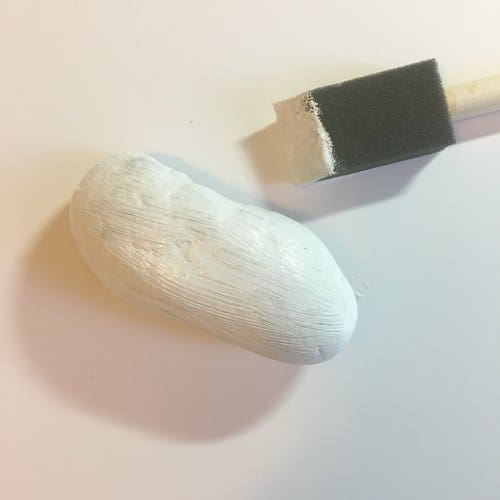
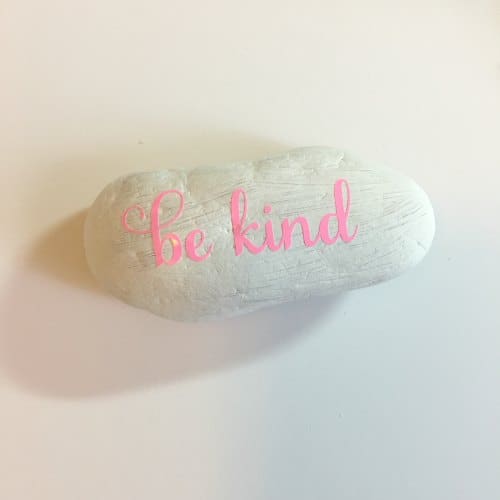
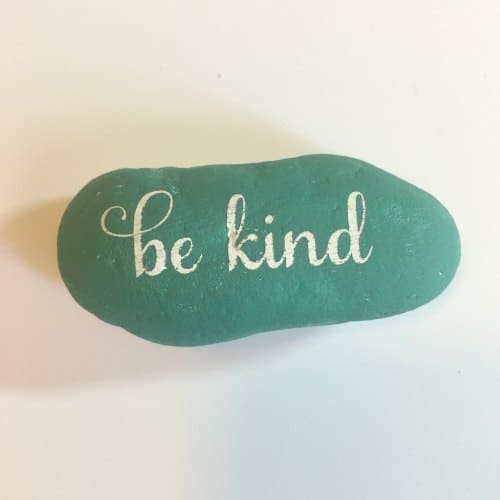
    2. Paint your entire rock a base color. I used matte acrylic paint, but any acrylic paint works as well. Allow your rock to dry. Painted Rocks - A Good Craft Show Impulse Product for Silhouette Cameo or Portrait or Cricut Explore Small Business Owners - by cuttingforbusiness.com
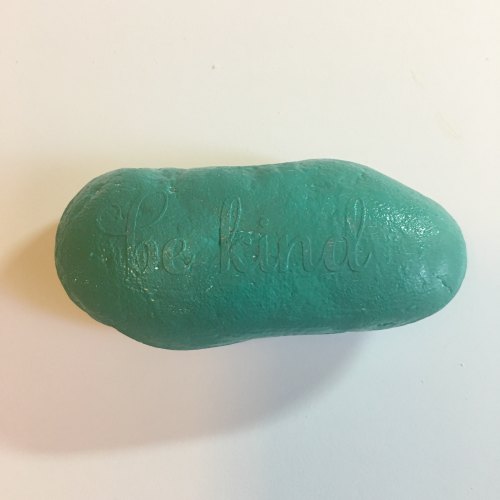
    3. Using adhesive vinyl, cut a stencil, weed it, and use transfer paper to place it on your rock. Painted Rocks - A Good Craft Show Impulse Product for Silhouette Cameo or Portrait or Cricut Explore Small Business Owners - by cuttingforbusiness.com
    4. Remove your transfer paper and be sure to burnish your vinyl well (really well!)
      Painted Rocks - A Good Craft Show Impulse Product for Silhouette Cameo or Portrait or Cricut Explore Small Business Owners - by cuttingforbusiness.com
    5. Paint over the vinyl and the entire rock.Painted Rocks - A Good Craft Show Impulse Product for Silhouette Cameo or Portrait or Cricut Explore Small Business Owners - by cuttingforbusiness.com
    6. Using your favorite weeding tool, remove the vinyl and allow the paint to dry. Painted Rocks - A Good Craft Show Impulse Product for Silhouette Cameo or Portrait or Cricut Explore Small Business Owners - by cuttingforbusiness.com

    Painted Rock Pricing

    I’d suggest pricing painted rocks between $1 and $3. Your cost to make each one should be pennies and it should take you less than 5 minutes per rock (not counting drying time).

    Care to share? I’d love for your to share this post on Pinterest!

    Painted Rocks - A Good Craft Show Impulse Product for Silhouette Cameo or Portrait or Cricut Explore Small Business Owners - by cuttingforbusiness.com

  • Budgeting Business Expenses: 3 Different Types

    Every small business has expenses. It is wise to take some time each month to look over your expenses from the previous month and make sure you are keeping them in check. Maybe you spent too much on something and need to scale back spending for the next month, perhaps you have forgotten about a subscription you are being billed for, or maybe a larger profit will allow you to buy a piece of equipment you’ve had your eye on. In any case, let’s look at the three types of expenses.

    3 Types of Business Expenses

    1. Fixed Expenses. These expenses are fixed monthly and must be budgeted for. In terms of a month to month basis, these items can’t really be controlled. Examples include: Store or studio space rent, website or store hosting fees, insurance, business licenses, association memberships, and loan payments.
    2. Semi Fixed Expenses. These types of expenses are more flexible than fixed expenses, but are likely to occur monthly. Examples include: Shipping costs, wages for employees, legal fees, phone and internet costs, and electricity.
    3. Variable or Non Fixed Expenses. Of the expenses to look at each month, the easiest to keep in check are the variable expenses. These expenses change monthly and if you are looking to cut down spending, these are the ones you can cut back on. These include: Consumables like mats and blades, materials for creating products (paper, vinyl, embellishments), equipment purchases (a new Silhouette or Cricut or a heat press), advertising costs, subscription costs for website memberships, and office supplies.

    Today, why not take a few minutes to look over your expenses from last month? It’s great habit to get started.

    Need help tracking your expenses? I like and recommend Craftybase for Silhouette Cameo and Cricut Explore crafters.

    Confess in the comments – do you review your expenses monthly?

    Save this post to Pinterest:
    Budgeting Business Expenses: 3 Different Types - Great for Silhouette Cameo or Cricut Explore Small Business Owners - by cuttingforbusiness.com

  • Tutorial: Inkjet Transfer Paper & Print and Cut

    There’s so many freebie graphics that I see floating around the internet that would look awesome on shirts, canvas, and totes; but they are simply too detailed to use heat transfer materials. While I’ve seen some crafters tackle intricate designs with lots of heat transfer vinyl layering – you’ll never sell the finished product for enough money to compensate for the amount of time it takes to layer (and layer, and layer) deeply intricate multi color designs.

    In the past, I’ve shared a series on sublimation. Sublimation is a great alternative to layering heat transfer materials in intricate designs. However, I know sublimation supplies are a big investment.

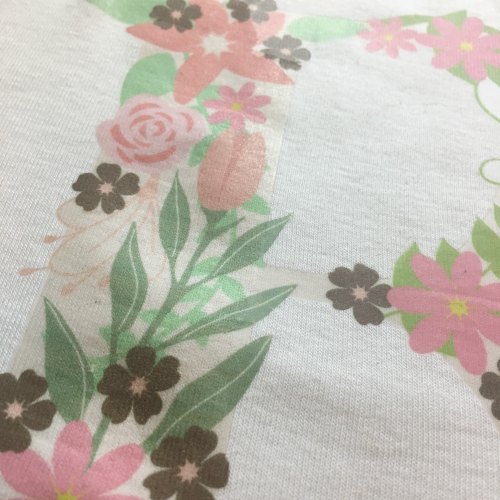
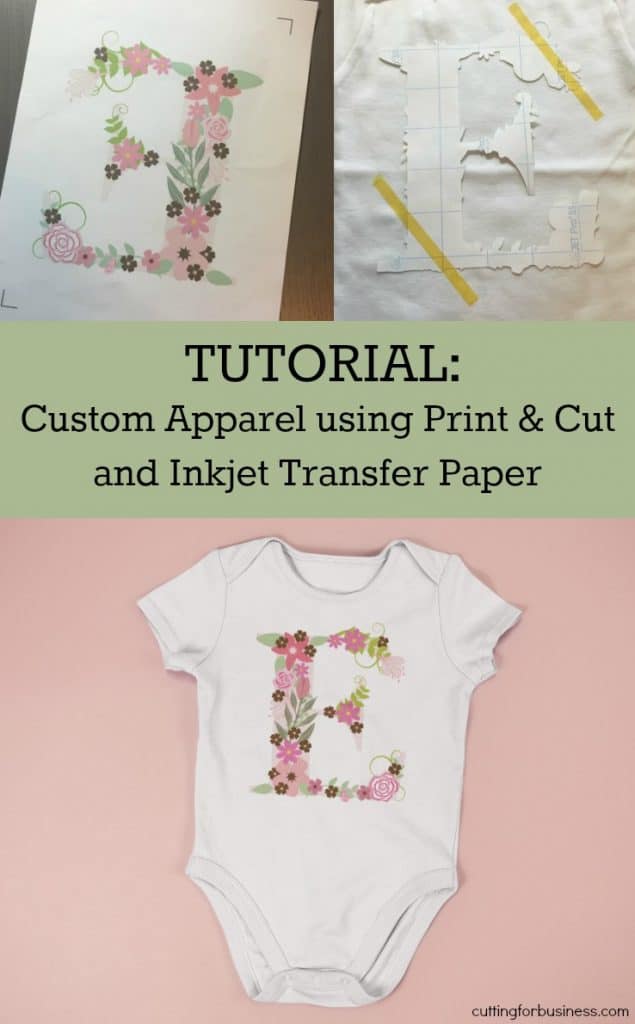
    Another alternative to heat transfer materials with intricate details is to use an inkjet transfer paper like Jetpro SS. Here’s a quick tutorial which uses these floral letters.

    Jetpro SS Inkjet Heat Transfer Paper Tutorial

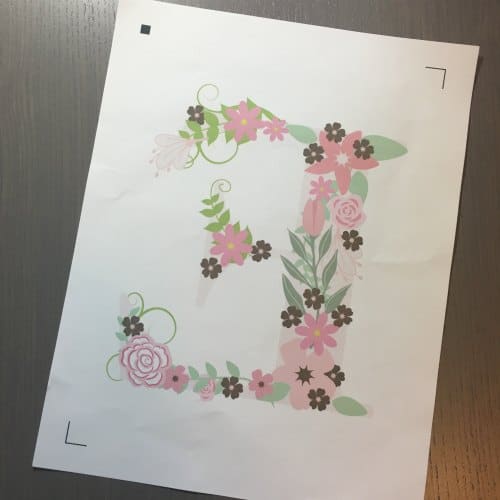
    1. Design and print your mirrored design onto the Jetpro SS Inkjet Heat Transfer Paper. Using Silhouette Studio, add registration marks. Tutorial: Inkjet Transfer Paper & Print and Cut with Silhouette Cameo - by cuttingforbusiness.com
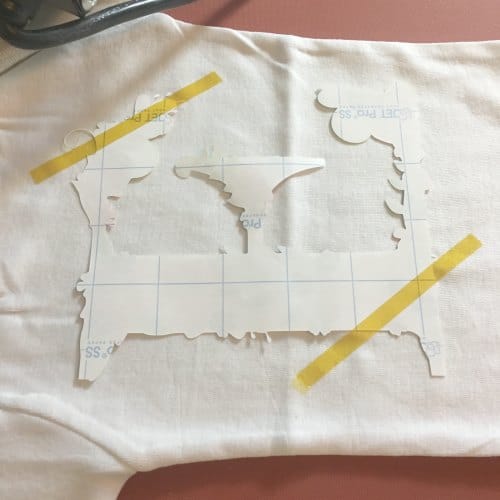
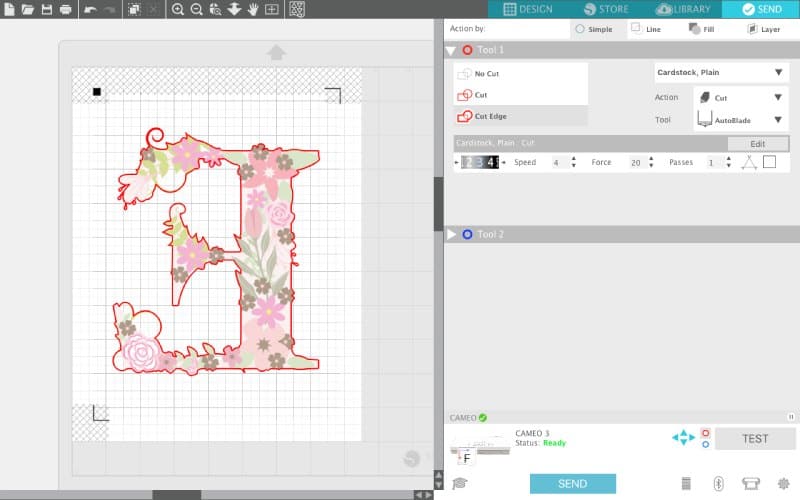
    2. Set Silhouette Studio to “Cut Edge” and cut around the outside of the design. (You can do the same if you are using Cricut Design Space.) This ensures that the blank part of the transfer paper does not transfer to the shirt. Tutorial: Inkjet Transfer Paper & Print and Cut with Silhouette Cameo - by cuttingforbusiness.com
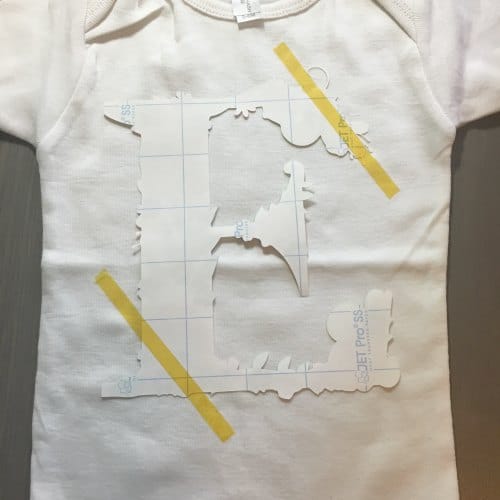
    3. Place your design onto the apparel. Heat resistant tape or painters tape works well to keep the design in place. Tutorial: Inkjet Transfer Paper & Print and Cut with Silhouette Cameo - by cuttingforbusiness.com
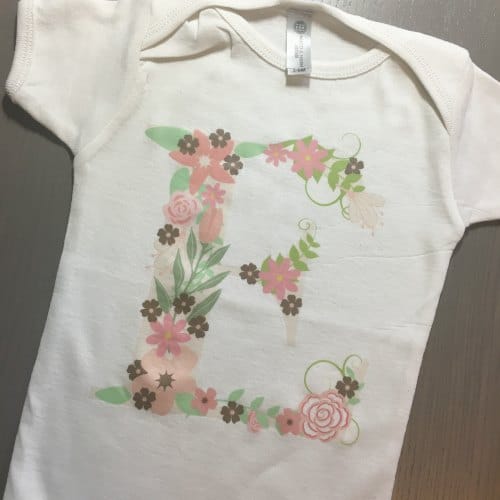
    4. Press your design. I pressed at 380 degrees Fahrenheit for 25 seconds. After pressing, immediately peel off the paper. Tutorial: Inkjet Transfer Paper & Print and Cut with Silhouette Cameo - by cuttingforbusiness.com
    5. That’s it! Way faster than layering heat transfer vinyl, cheaper than investing in sublimation, and fun to do! Tutorial: Inkjet Transfer Paper & Print and Cut with Silhouette Cameo - by cuttingforbusiness.com
      Tutorial: Inkjet Transfer Paper & Print and Cut with Silhouette Cameo - by cuttingforbusiness.com

    As small business owners – nothing is more important than our time. So, work smarter – not harder.

    Save this awesome tutorial to Pinterest:
    Tutorial: Inkjet Transfer Paper & Print and Cut with Silhouette Cameo - by cuttingforbusiness.com