Blog

  • Negative Marketing for Crafters

    Looking for a new-to-you way to market your craft business? Let me introduce you to negative marketing. It commonly used by big box stores, and once I explain it to you – you’ll start seeing it everywhere. Negative marketing sounds bad, but it isn’t. Let’s take a look.

    What is Negative Marketing?

    • Marketing that taps into the buyer’s emotions of anger, rage, annoyance, jealousy, and other negative emotions.
    • Using words with a negative connotation or writing/speaking in a negative voice.
    • Sharing (negative) bad experiences in an effort to connect with customers.
    • Focusing your advertising on the customer’s problems or things they are missing.

    What is Not Negative Marketing?

    • Publicly shaming or making fun of your customers.
    • Encouraging your customers to belittle other customers.
    • Leaving fraudulent negative reviews on your competition’s social media profiles.

    Examples of Negative Marketing in a Silhouette or Cricut Small Business

    I know that negative marketing can be a bit obscure. So, I’ll illustrate with a couple of examples:

    • As a seller of digital cut files, I post this on Facebook: “Don’t you hate it that it takes so long for custom cut files to be designed? Me, too! That’s why my company guarantees custom cut file requests in less than 24 hours! Message me to learn more.” In this example, I’m connecting with the customer and their problem. I focus on the problem (slow delivery of custom made cut files) and offering a positive solution (working with my company which guarantees cut file in only 24 hours).
    • As a seller of handmade gifts, I use this copy in an ad: “Don’t show up without a gift.” with a link to my website. In this example, I’m using negative language (don’t) and alerting the customer to a potential problem: showing up to the party without a gift. Of course, a link is included with my ad to lead customers to my website.
    • As a seller of heat transfer vinyl, I use this wording on a social media network: “It infuriates me when I receive packages that are poorly packed! What about you? Here’s how I make sure your vinyl gets to you safely (with picture of my packaging).” In this example, I’m tapping into an annoyance and anger spot with buyers – poorly packaged craft supplies. Of course, by posting a photo of my awesome packaging, I’m also solving the buyer’s problem.

    Why not give negative marketing a try? Studies have shown that the human mind has a bias towards negativity – and a little bit of it can go a long way. Of course, there’s a fine line between always being mad or a downer and using it sparingly!

    Spread the word and save this post to Pinterest:
     

    Negative Marketing for Crafters - Silhouette Cameo and Portrait or Cricut Explore or Maker - by cuttingforbusiness.com

  • Tutorial: How to Make Cut Files with Dingbat Fonts

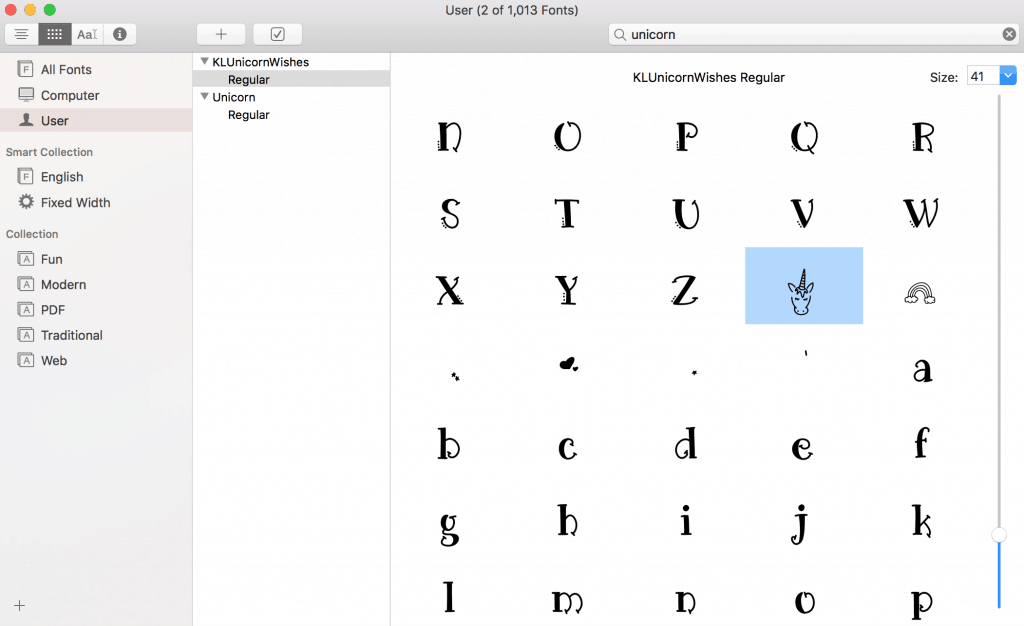
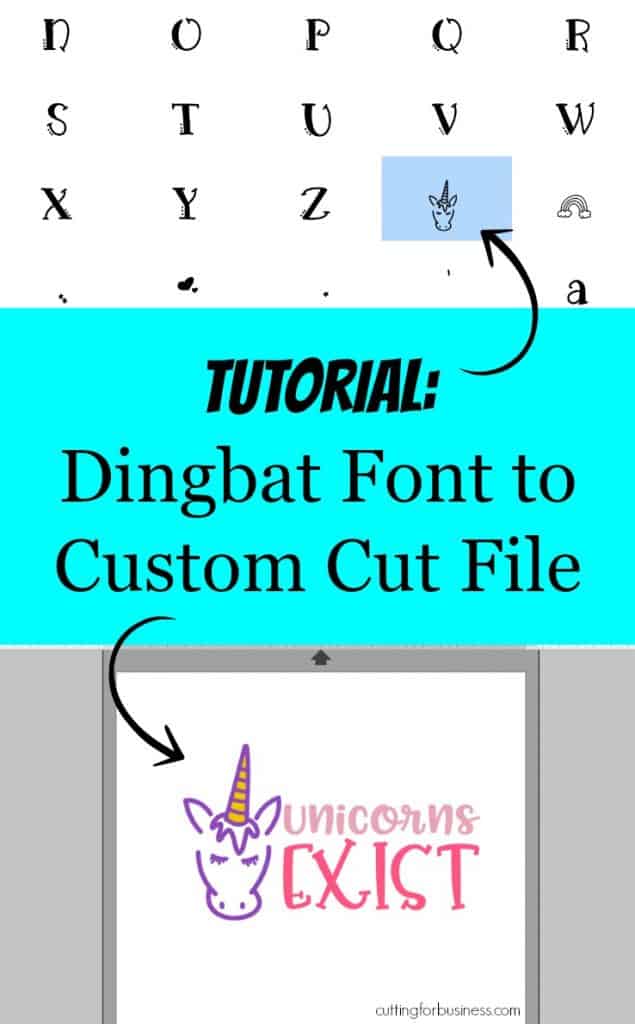
    A few days ago I downloaded The Best Sellers Font Bundle Vol IV by Font Bundles and it had several fonts with dingbats in it. (If you don’t know: A dingbat is a symbol or image included with a font. Also, some fonts are made entirely of dingbats.) Personally, I love dingbats! Why? You can use dingbat fonts to create custom cut files to use in your Silhouette or Cricut small business.

    How to Use Dingbats to Create Custom Cut Files

    Tutorial: How to Make Cut Files for Silhouette Cameo or Cricut Explore with Dingbat Fonts - by cuttingforbusiness.com

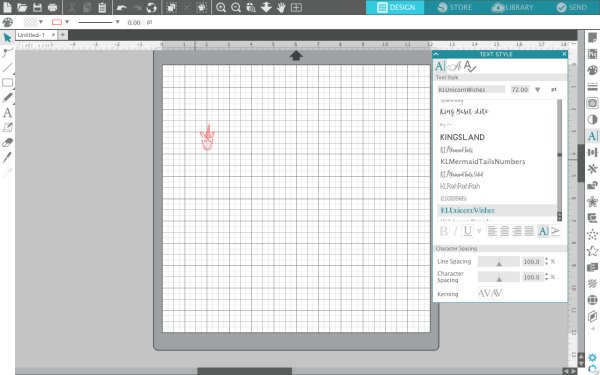
    • Copy and paste it into Silhouette Studio (or Cricut Design Space):

    Tutorial: How to Make Cut Files for Silhouette Cameo or Cricut Explore with Dingbat Fonts - by cuttingforbusiness.com

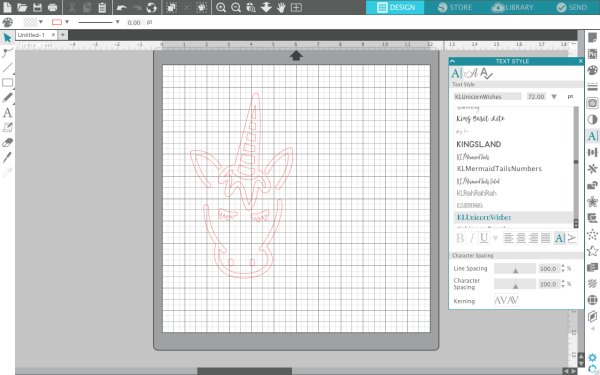
    • Resize the dingbat as needed.

    Tutorial: How to Make Cut Files for Silhouette Cameo or Cricut Explore with Dingbat Fonts - by cuttingforbusiness.com

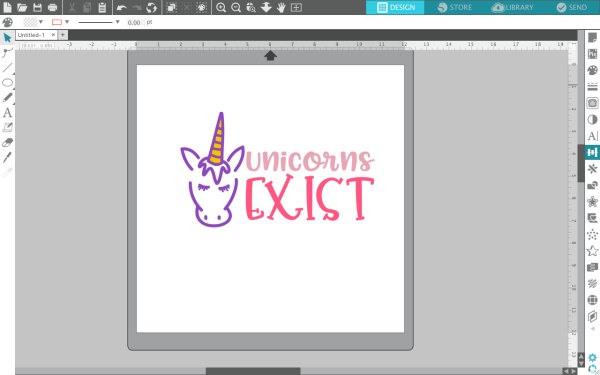
    Now, the file is ready to cut as is – or you can add other images or text:

    Tutorial: How to Make Cut Files for Silhouette Cameo or Cricut Explore with Dingbat Fonts - by cuttingforbusiness.com

    Wondering about the fonts I used? You can find them all in The Best Sellers Font Bundle Vol IV for a limited time only. Not up for purchasing the whole bundle? You can buy them a la carte: the unicorn head is Unicorn Wishes, the “unicorns” text is Pinsetter Littles, and the word “exist” is Pinsetter Tails.

    Note: If you are using a dingbat in a product or design for sale – be sure that you have a commercial use license with the font. Learn more in this post.

    Save this image to Pinterest, then download the Unicorns Exist cut file below.

    Tutorial: How to Make Cut Files for Silhouette Cameo or Cricut Explore with Dingbat Fonts - by cuttingforbusiness.com

    Download the commercial use Unicorns Exist SVG at this link.

  • 5 Tips to Approach Schools for Custom T-Shirt Orders

    Do you make t-shirts or apparel in your craft business? As a new school year is about to start, have you considered selling shirts or other gear to schools?

    If selling to schools interests you, here are 5 tips on how to approach schools with your products.

    5 Tips to Approach Schools for Custom T-Shirt Orders - cuttingforbusiness.com

    How to Approach Schools for Custom Tee Shirt Orders

    1. Reach out via phone. Starting to work with schools can be as easy as picking up the phone and calling the office number for more information. Once you get someone on the phone, simply introduce yourself and ask who you would need to talk to for more information. For example, “Hello, my name is Christine and I make custom tee shirts. I’m looking for the contact person to discuss the shirt needs for XYZ School.” Once you get that person on the phone, try to arrange an in person meeting to show off the designs you’ve made for the school. These could be physical samples (shirt made with heat transfer vinyl, rhinestones, etc) or high quality photo mockups.
    2. Contact through social media. Most schools have a Facebook or Instagram page. Again, reaching out is as easy as introducing yourself and asking for contact information. Don’t forget to search for the school’s PTA/PTO page, as it may be separate from the main school’s social media accounts. If you don’t score a deal with the school itself, you may be able to work out something for the PTA/PTO to buy directly.
    3. Talk to your child’s teacher. If you have a child at the school already, you’ve already got a foot in the door. You can ask your child’s teacher for the contact information of the person in charge of buying shirts or other apparel. To take this idea further, you could gift a sample shirt to the teacher when you are asking for contact information. Once the teacher wears it – you’re likely to at least get orders from other teachers.
    4. Make a sample and take it to the office. While it may cost you a small amount of money to make a sample, the benefit of people seeing your work in person is priceless. Simply drop into the office and leave the sample shirt along with a business card and ask that they get given to the person in charge of purchasing. Personally, I think it is best to attach your business card or custom tag to the shirt so that they don’t get separated.
    5. Don’t go for the “top”. Most schools are likely to have a deal with a screen printer/embroiderer that currently provides shirts for the school. Consider approaching teachers who head up clubs, groups, or sports. For example: The yearbook staff, the art club, the chess club, the drama group, the French club, and so on. It is likely harder for these smaller clubs to get shirts because they won’t meet the minimum order amounts for larger wholesalers – but will need large enough orders to make it worth your time.

    What Happens After You’ve Got the School’s Interest?

    In some cases you’ll need to request the permission of the school, district, or school board to use their logo(s). You’ll want to keep a written record of any permissions or licensing given to you. Also, don’t be surprised if the school wants to pay through a purchase order written directly to your business. This is common. It does mean that you’ll need to be a registered business to be able to get paid.

    And don’t forget – shirts aren’t the only thing you can sell to schools. There’s headbands, shorts, sweatpants, hoodies, decals, and more! The tips I listed above will work for any products.

  • What is Teachers Pay Teachers – An Intro for Digital Sellers

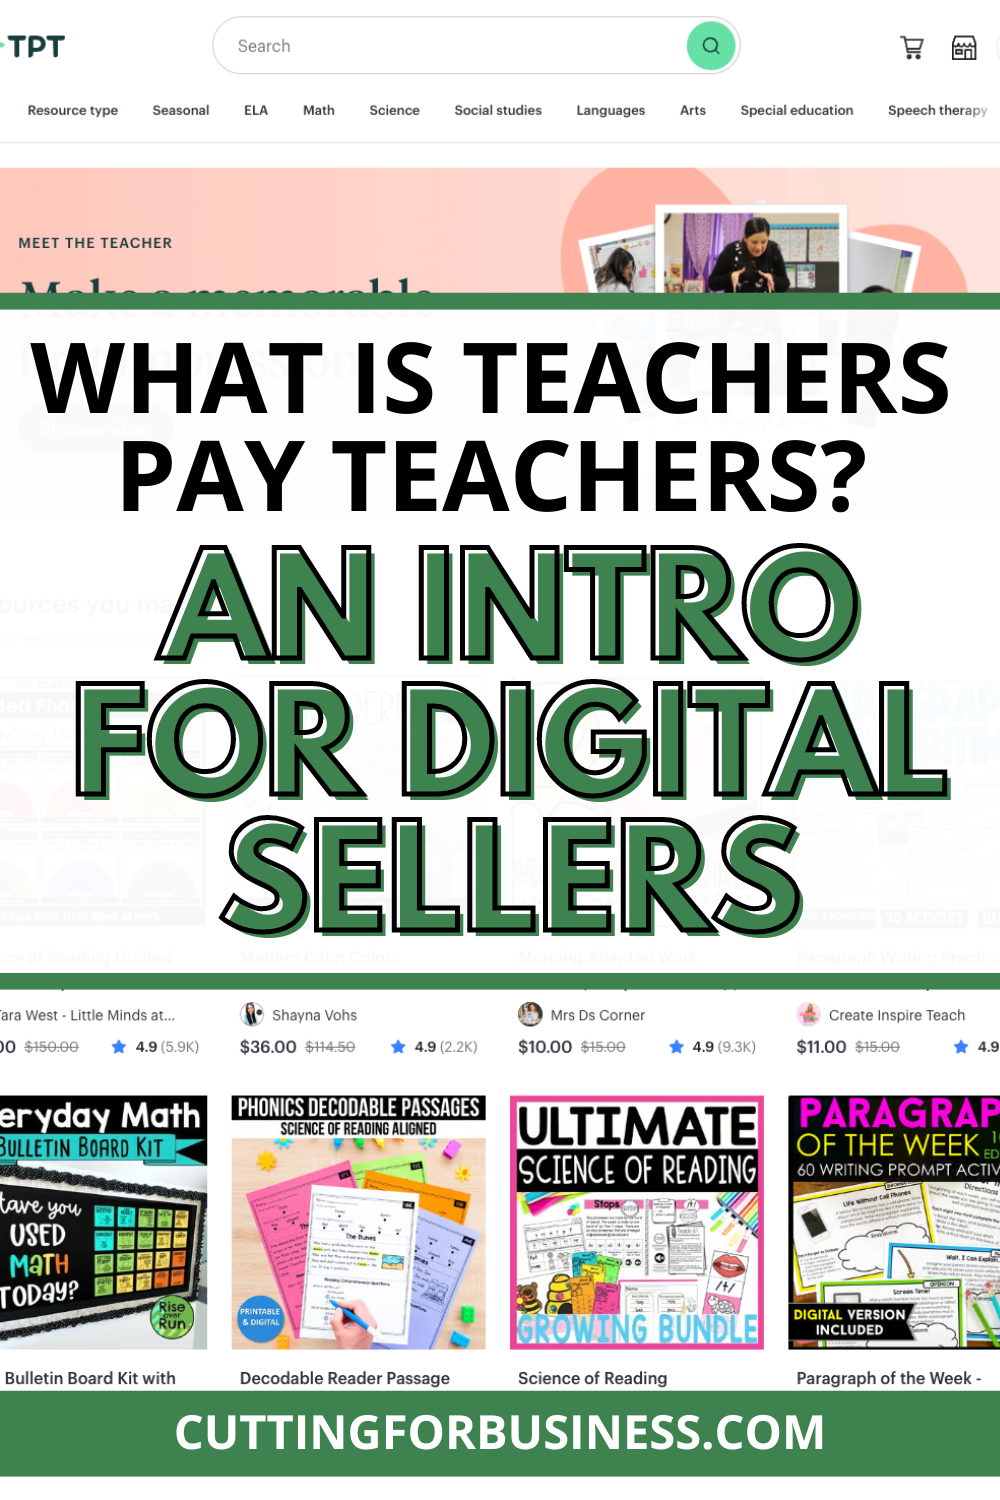
    With back to school time here, teachers are likely well into prepping their classrooms and materials for their new students. If you sell digital goods, consider opening a shop at Teachers Pay Teachers.

    What is Teachers Pay Teachers - An Intro for Digital Sellers - cuttingforbusiness.com

    What is Teachers Pay Teachers?

    As the name suggests, Teachers Pay Teachers is an online marketplace for teachers to sell digital goods to other teachers. But, they also have publisher accounts where non-teachers can sell to teachers and the educational community. Teachers Pay Teachers (known as TpT, for short) boasts a marketplace with over 7 million active members in 2024.

    What Can You Sell at Teachers Pay Teachers?

    The Teachers Pay Teachers marketplace features digital goods for educators. Here’s a sample list of what’s for sale on the site:

    Lesson Plans and Units
    Interactive Notebooks
    Center Ideas
    Task Cards
    Activities
    Games
    Common Core Resources
    Classroom Decor
    Cut Files
    and much more…

    How Much Does It Cost to Sell at Teachers Pay Teachers?

    There are two different selling arrangements on Teachers Pay Teachers.

    For Teacher Sellers

    Two different plans; Basic is free – Premium is $59.95 a year. Here’s a chart from the Teachers Pay Teachers website outlining the differences: 

    Screenshot from Teachers Pay Teachers - cuttingforbusiness.com

    For Publishers

    If you are not a teacher/educator and want to create educational related digital resources, you can join Teachers Pay Teachers as a Publisher. Publisher accounts cost $29 to create and there is a 50/50 split on the sales of your digital goods.

    To create a Publisher account, you have to reach out to the Teachers Pay Teachers support team.

    Screenshot from Teachers Pay Teachers - cuttingforbusiness.com

    More Information

    Teachers Pay Teachers has an awesome help section of their website that will answer all basic questions related to selling (and buying) on the site. Click here, then click the “Help” link located along the top of the page.

    Tell me in the comments, will you try selling on Teachers Pay Teachers?

  • Back to School Money Maker: Vinyl Name Decal Sheets

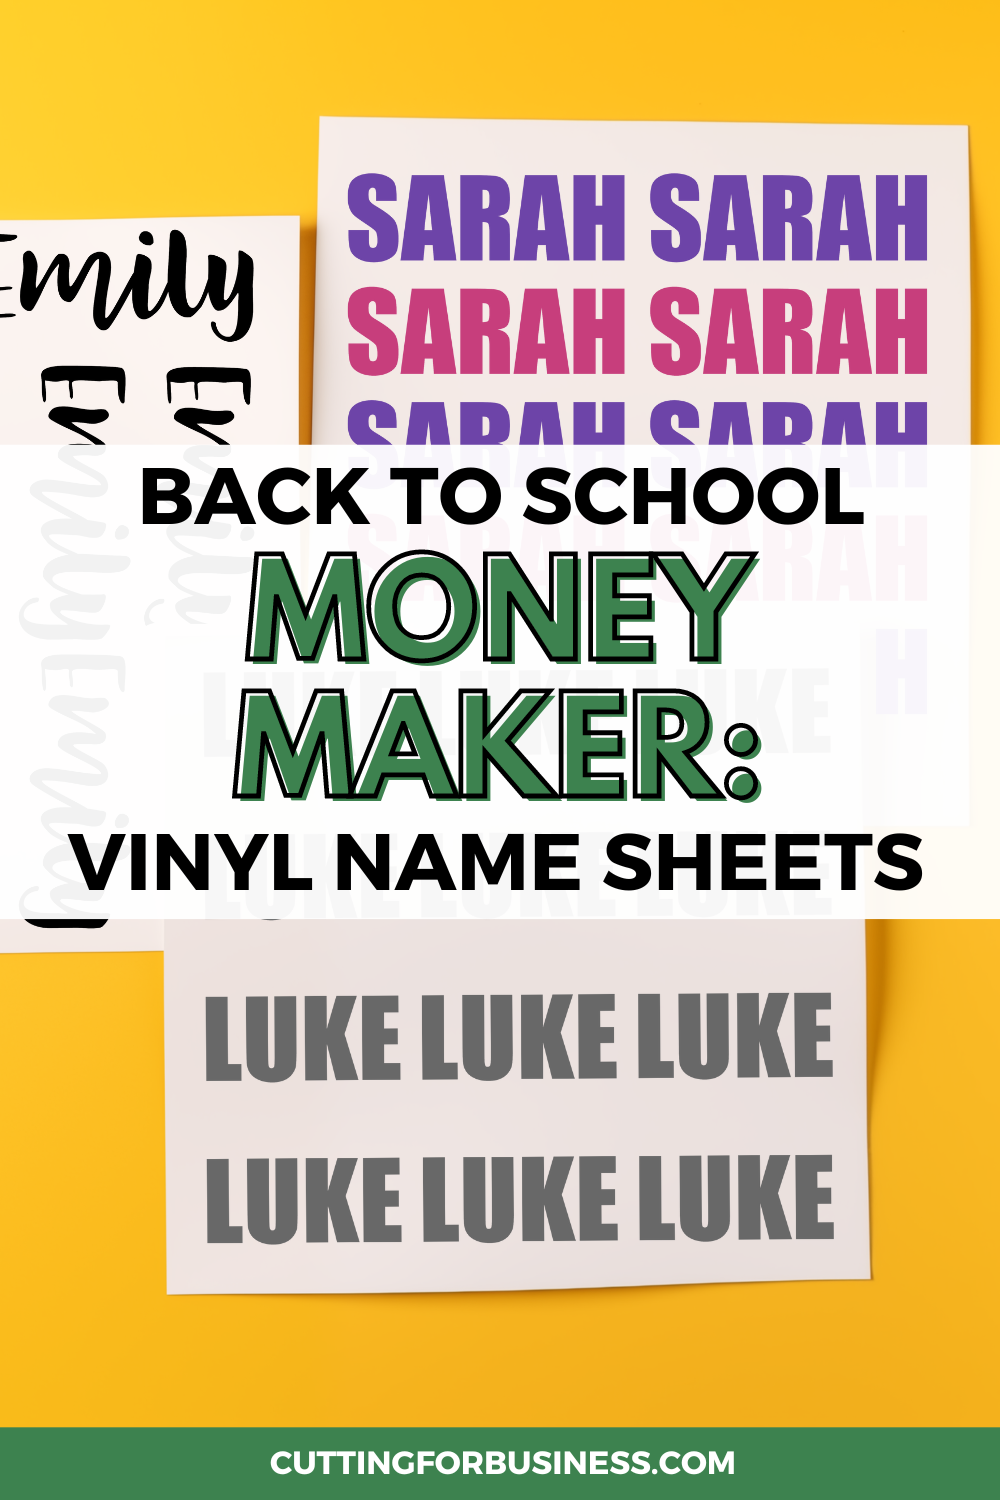
    For the kids heading back to school setting, these adhesive vinyl name decal sheets are always a quick money maker!

    Why do they sell well? Since most schools require that everything you send with your child be labeled with their name – parents need to be able to label everything with something nicer than a permanent marker.

    Back to School Money Maker: Vinyl Name Decal Sheets - cuttingforbusiness.com

    What is a Name Decal Sheet?

    It’s a sheet of adhesive vinyl where you have cut out names of a child for their parent to place on their items, including pencil cases, notebooks, lunch containers, and more.

    Two Ways to Make and Sell Name Decal Sheets

    • All names on one page in a single size and font.
    • Names in a variety of fonts and sizes. (You could also mix in a few monograms or initial sets!)

    Neither choice is better than the other, it is a personal preference.

    Price Point for Name Decal Sheets

    I’d suggest between $10 and $15 for and 12″ by 12″ sheet of names. You can expect to fit between 20 and 30 names per page, depending on the length of the name.

    Odds and Ends

    • Transfer tape. Don’t forget to apply transfer tape to your name decals before shipping them out to your customer.
    • Customer instructions. Don’t forget to include instructions for your customer. Here’s a few free sets.
    • Easy to weed fonts. Choose fonts that are easy to weed so this quick money maker doesn’t become a chore.
    • Adhesive vinyl. I’d suggest creating name decal sheets with Oracal 631 or equivalent. (I prefer 631 for all indoor uses, but you could use 651. Just another personal preference.)
    • What about heat transfer vinyl? You could make this same idea work with heat transfer vinyl (htv). This would allow parents to iron names onto backpacks, clothing, and more. If you give this a try, you can include this instruction sheet with your orders.
  • 6 Things to Consider Before Going into Business with a Partner

    Today, we are looking at partnerships in your Silhouette Cameo or Cricut Explore small business. While history has shown us many great business partnerships that have led to amazing things (hello, Ben and Jerry’s Ice Cream!) – there are also as many stories of people opening a business together and it ruining their relationship forever. Before you decide to take on a partner in your business or start something entirely new with a friend – consider the points below.

    6 Things to Consider Before Going into Business with a Partner

    1. Ask yourself: Do I really need a partner? If you are a type A personality and always want things your way – taking one a partner may not work well for you. Similarly, if you are more a loner who enjoys crafting alone – a partnership may not be suited for you.
    2. Talk about goals before agreeing to partner. A partnership is doomed to fail if you and your partner aren’t working towards a similar goal. For example, if you eventually want your products sold in big box stores and your partner only wants to make enough money to stay home with her kids – this situation likely won’t work.
    3. Clearly define each person’s role. If you are taking on a partner, be sure to write out the specific roles of each partner. For example, if one partner excels in product design and creation and the other in marketing – write out and agree to these responsibilities.
    4. Lay out a plan for disagreements. Before your partnership even gets started, you’ll want to have a plan to deal with disagreements.
    5. Consider how you will split expenses and profits. If you are opening a new business with a partner, it is easier to put in an equal amount of money from each partner and use it for purchases and the like. If you are an existing business adding a partner, you’ll need to determine how much of the company the new partner will own and how you end up splitting expenses and profits.
    6. Don’t skip the legal paperwork. If you truly want to go into business with another person, don’t skip getting everything written out by a lawyer and signed by both parties. In the event that something goes astray, you’ll have legal rights.

    Not looking to take on a partner? Read about hiring virtual help or your first employee.

    Loving this post? Save it to Pinterest:

    6 Things to Consider Before Going into Business with a Partner - Great for Silhouette Cameo or Cricut Explore small business - by cuttingforbusiness.com

  • 10 Things to Know About Renting a Commercial Space

    I keep hearing from Cutting for Business readers that they are in the process of opening their own retail stores or that they are beginning to do research to do so. I’m hearing about everything from wooden sign workshops to vinyl and blank suppliers and even a few gift stores and boutiques! Since I’ve been asked a lot of questions about renting commercial spaces; here are ten things you need to know before you start looking at leasing a commercial space.

    10 Things to Know About Renting a Commercial Space

    1. Lease lengths. Unlike renting a house, most commercial space leases are not for 1 year. It is most common to see lease terms of 3 to 5 years or more.
    2. Lease renewals usually go up in price. Referred to as escalation, if you renew your lease after it expires – the price will usually go up.
    3. Leases are not standard. In the housing market, most leases are standardized. In the commercial world, leases are usually lengthier and tailored to the landlord or space. I’d recommend having a lawyer familiar with commercial leasing review the lease before you sign.
    4. Gross versus net. There’s two varieties of commercial leases: Gross and net. In gross leases, everything you pay is bundled into one price that you pay monthly. In net leases, you pay a rent amount plus taxes, insurance, and CAM. It is important when looking at spaces to know which you are looking at.
    5. Common area maintenance (CAM) or Triple Net (taxes, insurance, and CAM). In addition to the monthly lease rate, most commercial leases require a monthly CAM or Triple Net. This amount goes to maintaining common areas such as hallways, parking lots, elevators, and property taxes and insurances.
    6. Prepaid rent. In many cases, new businesses moving into their first space are required to prepay a certain amount of rent.
    7. Maintenance. Before you sign on the dotted line, be sure you know who is responsible for building maintenance. In some commercial spaces, the landlord handles repairs – in others – the lessee takes care of them. For a new business, it can be quite expensive to fix something large that breaks – like an AC system!
    8. Build outs. What you see when you tour the space is likely what you’ll get. In most cases, improvements to the space (called the build out) are done at your expense; in others you may receive an allowance. Also, the landlord may require that you use their contractors.
    9. Signage. Be sure to ask what signs are required and what parameters must be followed. For example, some landlords require signs in a certain color scheme, while others may require lit signs. (Commercial signs can be very expensive.)
    10. You’ll pay even if your business closes. If your business fails, you are still required to pay rent and maintain the space. Some leases and landlords will allow you to sublet (rent it to someone else) the space – while others will not.

    My final words of advice in renting a commercial use space? Negotiate! Everything is negotiable in commercial real estate! And, it’s best to use a real estate agent that is familiar with commercial rentals.

    Tell me in the comments, do you hope to rent a space in the future?

    Was this post informational? Save it to Pinterest!

    10 Things to Know About Renting a Space for Your Craft Business - Great for Silhouette Portrait and Cameo or Cricut Explore or Maker crafters - by cuttingforbusiness.com

  • 5 Tips for Better Live Videos

    While we are talking product photography this week, we need to take a few minutes and look at videos. I’ve mentioned before – more than a few times – that videos on social media are a great way to reach your followers. Before we look at tips for live videos in your Silhouette Cameo or Cricut Explore small business, let’s take a look at video related posts on Cutting for Business:

    And now, 5 tips for better live videos:

    1. Advertise to your social media following the date and time of upcoming live video. So many times I see crafters just decide to do a Facebook Live at the spur of the moment. While that is great, you miss customers who may like to interact with you because they didn’t know to expect it.
    2. Prepare ahead of time and practice, practice, practice. It’s obvious when watching live videos if the person in the video has practiced ahead of time or not. A polished video will leave a much better impression on your customers than one where you wing it. Once you’ve got several videos under your belt, then you can go live on the fly. Also, having a general written schedule you can refer to will make sure that you don’t forget anything during your video. As you prepare, be sure that your recording space will be quiet during the video (nothing worse than a child screaming in the background of your company’s product launch video)!
    3. Use a tripod for still videos and an image stabilizer if you are moving. For the love of all things crafty, there is nothing worse than viewing a crafters video that is shaking! (Personally, I get motion sickness and it makes me turn it off!) So, use a tripod (click here to see super cheap ones Amazon) or an image stabilizer (again, find them on Amazon) if you will be walking around.
    4. Decide when you will answer questions before you start. Facebook Live allows broadcasters to see questions from viewers in real time. Decide whether you will answer questions in real time or tackle them at the end. If you aren’t taking questions until the end, say this at the beginning of the video.
    5. Follow up after the video. If you are using Facebook Live, go through the comments immediately at the end of the broadcast and answer them all. This helps those viewing a replay of the video at a later time; but it also lets viewers know that they are important to you.

    Now that you are armed with tips, get out there and get broadcasting! Need a few ideas for your first live video? How about a simple DIY related to the products you sell, a sneak peek at a new design you will be selling soon, your brand new product packaging, or you working on an order?

    Save this post to Pinterest:
    5 Tips for Better Live Videos in your Silhouette Cameo or Cricut Explore small business - by cuttingforbusiness.com

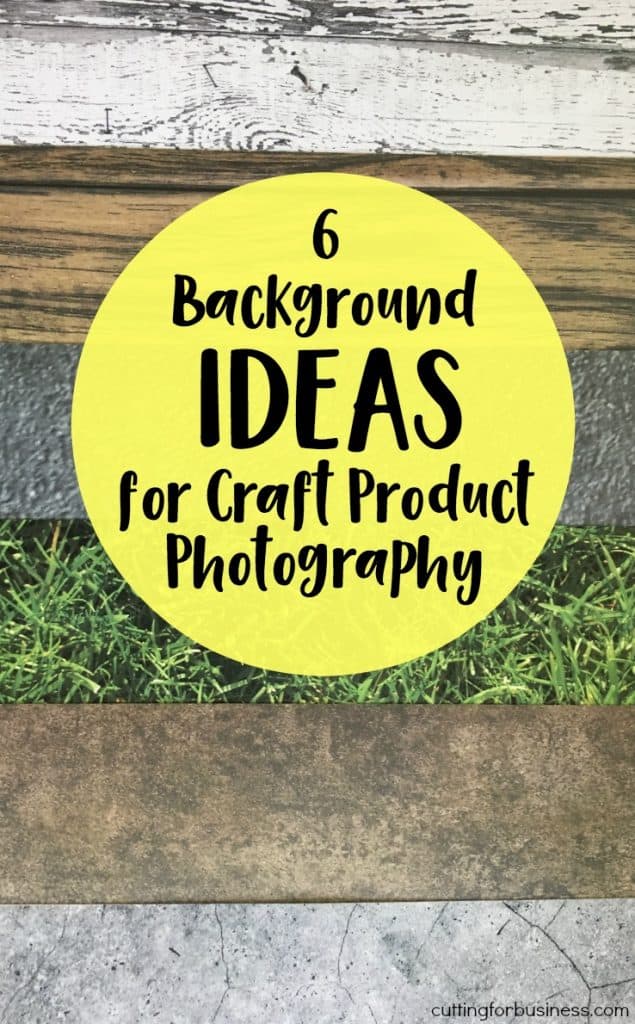
  • 6 Background Ideas for Product Photos

    Photography week continues! While I’ve mentioned photography backdrops a few times in the week already, let’s look at some specific products and places that make great product photo backgrounds.

    6 Background Ideas for Product Photos

    1. The great outdoors. The light is bright and perfect for taking product photos, so find a natural setting and shoot away. Country settings are great for rustic and farmhouse products, but the concrete of an urban area works well for products with modern or funky themes.
    2. Photography backdrops. Just like the ones they use in photo studios, you can purchase photo backdrops. I have several and there are pros and cons. Pros: Easy to use, inexpensive, available in several colors and styles. Cons: If you want a large number of backgrounds – you have to buy several, the large size can make them difficult to store, they wrinkle easily and need ironed before each use. Where to buy: Amazon – click here to see options.
    3. Scrapbook paper. It’s no secret that many Silhouette Cameo and Cricut Explore small business owners use scrapbook paper as photo backgrounds. It’s cheap, readily available, and easy to store. Unfortunately, for larger products – it doesn’t work well. Where to buy: Your local craft store.
    4. Fabric. If you can’t use scrapbook paper, consider fabric. It’s available in thousands of colors, just don’t forget to iron it before you use it. Where to buy: Fabric.com.
    5. Poster board. Solid colored poster board is great for taking product photos. Tip: If you want to make your product look like it is floating, simply curve the board and set the product on top. (This style of background is referred to as an infinity background. Your local big box store.
    6. Shelves, fireplaces, and tables around your house. If your products fit the decor of your home well, stage the product somewhere within your home. Best of all: it’s free!

    Ewwww, Skip These

    Whatever you decide to do for backgrounds in your product photos steer clear of carpets and beds. No one wants to think that their gorgeous handmade product is on dirty carpet where people walk or in someone’s bed!

    Keep it Uniform

    Once you decide on a background that works well for your product photos, keep it similar throughout your product line or shop. This not only helps with your brand recognition, but it makes your shop present better.

    Tell me in the comments – what do you use for backgrounds in your Silhouette Cameo or Cricut Explore small business?

    6 Background Ideas for Product Photos in your Silhouette Cameo or Cricut Explore small business - by cuttingforbusiness.com

  • What is a Photography Light Box (and Shotbox Review)

    As Photography Week continues here on the blog, today we are going to talk about light boxes and tents. So, what exactly is a light box or light tent? They are basically boxes with translucent sides that diffuse light onto your product without producing shadows. To use a light box, you place your product inside and point lights through each side and the top to illuminate your product. Light boxes are available in all sizes and shapes. Here’s a few from Amazon:


    DIY Light Boxes

    It’s not hard to craft your own DIY light box with a cardboard box, some tissue paper, and some desk lamps or photography lights. I dug up a few tutorials around the internet for you: click here, or here, or even here.

    Storage Concerns with Light Boxes

    Most commercial use light boxes collapse flat – and are easy to store. What’s not easy to store are the lighting components because they are bulky and fragile. Similarly, if you have crafted your own light box from a cardboard box and tissue paper or fabric – it’s even harder to store! Fortunately, the team at Shotbox has solved this problem.

    Tell Me About the Shotbox

    So glad you asked! The Shotbox is a collapsible light box with lighting inside it! Here’s a few pictures of the features and how it works.

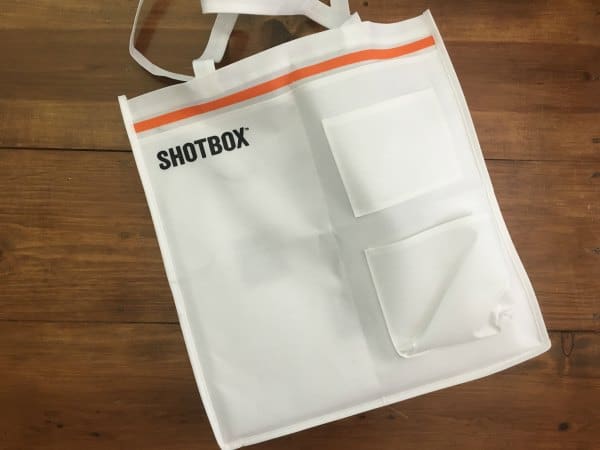
    First, the Shotbox includes a tote to carry it and all its accessories fit nicely inside – this fixes the storage issue completely!What is a Photography Light Box (and Shotbox Review) - Great for Silhouette Cameo and Cricut Explore Small Business Owners who take Product Photos - by cuttingforbusiness.com

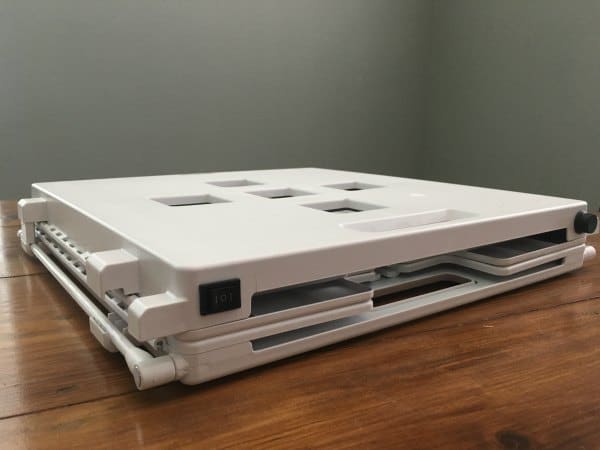
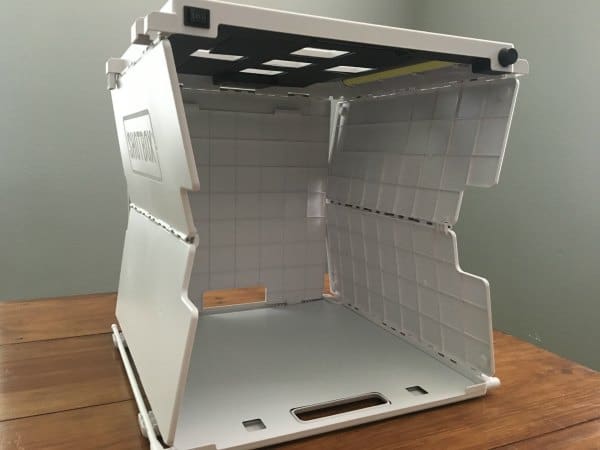
    When you pull it out, it’s about 4 inches thick in the collapsed state:

    What is a Photography Light Box (and Shotbox Review) - Great for Silhouette Cameo and Cricut Explore Small Business Owners who take Product Photos - by cuttingforbusiness.com

    To set it up, just pull on the top and it pops together – measuring about 15 inches tall:
    What is a Photography Light Box (and Shotbox Review) - Great for Silhouette Cameo and Cricut Explore Small Business Owners who take Product Photos - by cuttingforbusiness.com

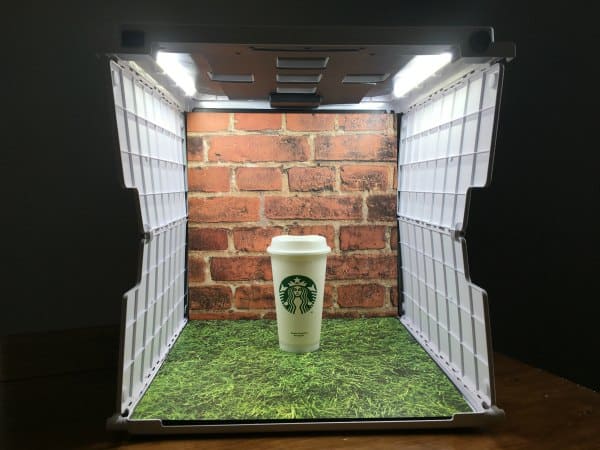
    Then, plug it in, insert backgrounds, put your product inside – and shoot away! What is a Photography Light Box (and Shotbox Review) - Great for Silhouette Cameo and Cricut Explore Small Business Owners who take Product Photos - by cuttingforbusiness.com

    One awesome thing about the Shotbox is that you can shoot overhead photos as well as straight on due to open spaces on the top of the box. The Shotbox has additional accessories like a cell phone holder (the Sideshot) that connects to the top and additional background packages.

    Where Can I Buy the Shotbox?

    You can pick up your own at this link. The link provided includes 4 infinity backgrounds, the Sideshot holder accessory, and a similar carrying case. A pack of 48 additional backgrounds (including the ones seen in this post) can be found here.

    Sample Photos from the Shotbox

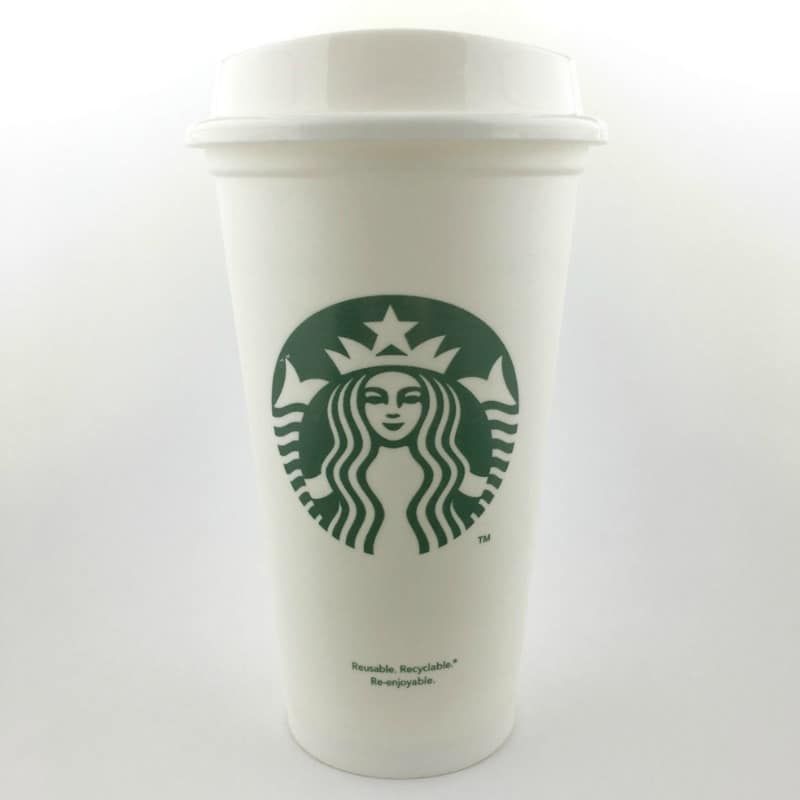
    (All photos were taken with my iPhone 6.)

    What is a Photography Light Box (and Shotbox Review) - Great for Silhouette Cameo and Cricut Explore Small Business Owners who take Product Photos - by cuttingforbusiness.com

    What is a Photography Light Box (and Shotbox Review) - Great for Silhouette Cameo and Cricut Explore Small Business Owners who take Product Photos - by cuttingforbusiness.com

    What is a Photography Light Box (and Shotbox Review) - Great for Silhouette Cameo and Cricut Explore Small Business Owners who take Product Photos - by cuttingforbusiness.com

    Before you go – I know you are going to ask: Would I recommend it? I absolutely would recommend the Shotbox if product photography isn’t your thing or if you are just beginning. If you’ve already invested in other lighting and backgrounds and have a good understanding of product photography – skip it. So far, I’ve been impressed with the photos I have taken using it. Do take note that if your products are large, this is not a good solution for you.

    I wanted to let you know that I wasn’t paid by Shotbox for this review and I didn’t receive the product from Shotbox. Instead, it was gifted to me by a friend who wasn’t using it.

    Tell me in the comments: Do you use a light box for your product photos? Which one?

    Share this post with a friend on Pinterest:

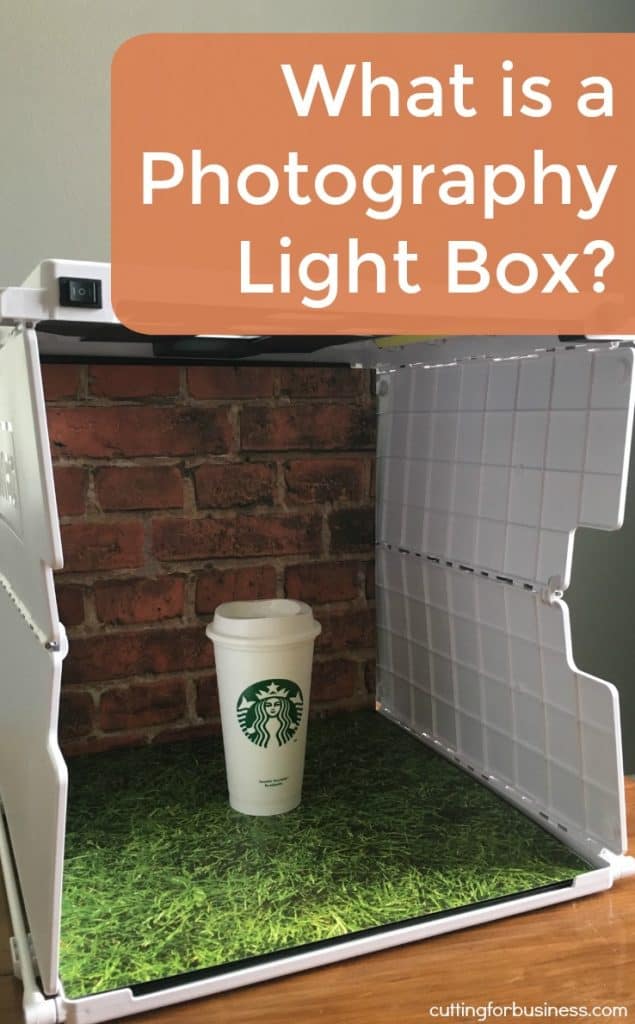
    What is a Photography Light Box (and Shotbox Review) - Great for Silhouette Cameo and Cricut Explore Small Business Owners who take Product Photos - by cuttingforbusiness.com