Blog

  • 7 Tips for Fundraising for Disasters and Tragedies in Your Craft Business

    The world has had multiple crises lately. Since crafters are a caring, generous bunch who often jump into action to raise funds for various charities I wanted to give you some tips on how to fundraise successfully for disasters and tragedies in your craft business.

    7 Tips to Fundraising for Disasters & Tragedies in Your Craft Business

    1. Choose the causes that matter to you. Your small business is a reflection of you. When you choose to fundraise causes that matter to you; you will often be more successful. As part of your fundraising, share why you are raising funds. For example, do you live locally? Does your family live in the affected area? This is one situation where connecting with your buyers can be impactful. Also, be careful to not let current events or natural disasters interfere too much with your normal business dealings.
    2. Set a fundraising goal. When you start your fundraising campaign, let shoppers know how much you are trying to raise. Be realistic in your goals.
    3. Keep shoppers updated on your progress. You should regularly update your customers of your fundraising progress. This is easily done through social media or website updates.
    4. Set an end date and donation date. Using an end date for fund collecting as a call to action is helpful to get shoppers to buy sooner rather than later. (Don’t know what a call to action is? See this post.) You should also set and advertise the date you will donate the funds.
    5. Be transparent about the portion of sales to be donated. It is important to set out specifics of how much money or what percentage of money raised will go to a charity. For example: 100% of profits will go to XYZ charity. In this case, you subtract your supply and labor costs from the money you bring in and all profits are donated. In contrast, $10 of every sale goes to ABC charity. In this case, only a portion of the sale is going to the charity.
    6. Be cautious on social media. There’s a very fine line on social media when raising funds, especially if people have lost their lives. Be sure that you don’t use hashtags that are set up in memory of specific people or those reserved for news updates. If your followers think that you are using popular hashtags to profit, your business could be in jeopardy.
    7. Hold your business accountable. Unfortunately, as a single person home based business, it is easy to raise funds and not donate them. I recommend complete transparency by providing proof that the donation has been made by your business. If you are donating online, a screenshot of the donation confirmation is acceptable. If you are donating in person, a photo of the donation receipt or you handing the check over are both fine to use.

    Need help finding a reputable charity? Head to Charity Navigator.

    My thoughts and prayers to those still dealing with the disasters and tragedies of the last few months.

    If you feel like this is important information, feel free to share it on social media.

    7 Tips for Fundraising for Disasters and Tragedies in Your Silhouette or Cricut Craft Business - by cuttingforbusiness.com

  • 6 Glow-in-the-Dark Materials to Try Out in Your Craft Business

    I’m sure that you are in full swing with your Halloween product making! In my opinion, there’s no better time than Halloween to illuminate up your products with glow-in-the-dark materials. Today, let’s look at what’s available:

    Glow-in-the-Dark Heat Transfer Material (HTV)

    Products to use on: Clothing including shirts, pants, socks, trick or treat bags.
    Where to buy: Happy Crafters has great pricing on glow-in-the-dark HTV. Pricing is about $0.37 an inch at this link. This listing on Amazon costs $0.51 an inch.

    Glow-in-the-Dark Inkjet Heat Transfer Paper

    Products to use on: If you don’t want to use heat transfer vinyl to make apparel, try out glow-in-the-dark heat transfer paper. Just print on your home computer, and use an iron or heat press to transfer the design.
    Where to buy: I used HT glow-in-the-dark transfer paper last year for a personal project and loved it. Pick it up here for $1.50 per 8.5″ by 11″ sheet.

    Glow-in-the-Dark Adhesive Vinyl

    Products to use on: Hard surfaces. Great for decals, plastic trick or treat containers, foam and real pumpkins, glasses, and tumblers.
    Where to buy: H&H Sign Supply has great pricing on glow-in-the-dark adhesive film. It’s $10.50 for 24″ wide priced by the foot. Add $0.10 for custom cuts (like cutting the 24″ width to two 12″ widths).

    Glow-in-the-Dark Paint

    Products to use on: Wood signs, painted canvas products, or fabric paint for tote or clothes. Whether you choose to paint the entire background with glow-in-the-dark paint for a bold effect, or just the details for a more subtle effect, be sure to try it out! A reader recommended Tulip soft brand with freezer paper to make shirts.
    Where to buy: This time of year, big box retailers and craft stores carry several glow-in-the-dark paint brands – don’t forget a coupon! Don’t want to head out of your house? Amazon has several varieties you can see at this link.

    Glow-in-the-Dark Sticker Paper

    Products to use on: Any paper craft like stationary, cards, banners, planner stickers, and more.
    Where to buy: Of all the Silhouette brand materials, the glow-in-the-dark sticker paper is one that I love. (You can use in Cricut, too.) Pick it up at this link.

    Glow-in-the-Dark Glitter & Mod Podge

    Products to use on: Tumblers, mugs, paper crafts.
    Where to buy: Check your local big box craft store with a coupon, or head to this link on Amazon. Personally, I love Martha Stewart’s glow-in-the-dark glitter that you can find here. If you are using Mod Podge to adhere your loose glitter – consider purchasing glow-in-the-dark Mod Podge for extra glow.

    *Note: Pricing may change from time of writing.

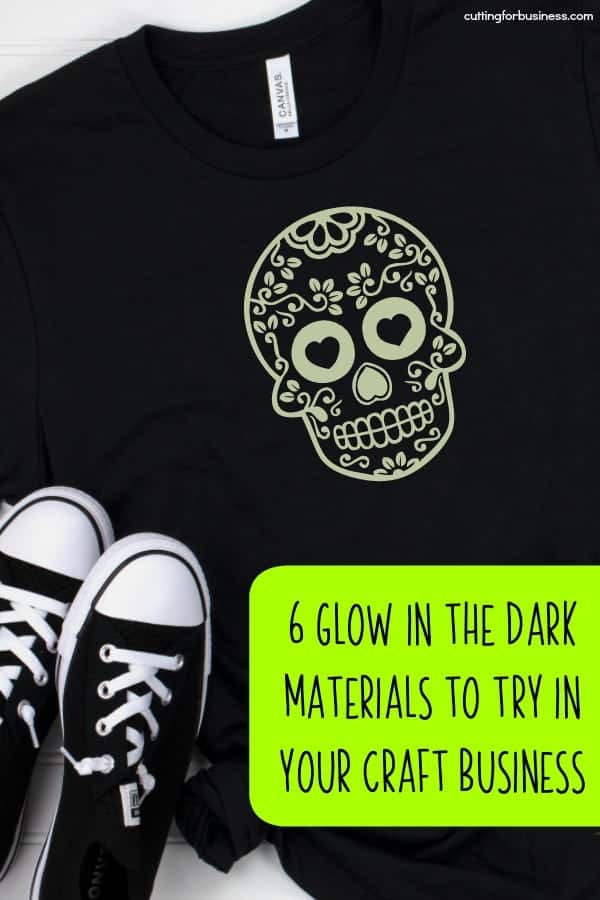
    Psst, wondering about the skull shirt I made in the photo below? It’s so easy: Download the ‘Mexican Skull’ font here (100% free), choose a skull, cut and weed it in glow-in-the-dark heat transfer material, and apply it to your shirt with a heat press.

    6 Glow in the Dark Materials to Try This Halloween in Your Silhouette or Cricut Craft Business - by cuttingforbusiness.com
  • 6 Tips for Adding Gift Wrapping Services in Your Craft Business

    With the holiday shopping season starting just weeks away, we should take a quick look at gift wrapping services in your online listings. I highly recommend offering gift wrapping of your listings for sale in time for the holiday season. For one, it is an easy way to increase your average order total. Additionally, here’s a few tips I wanted to share with you:

    My Favorite Gift Wrapping Tips for Craft Businesses

    1. Create a variation (Etsy sellers). One your most popular listings consider creating a variation for your gift wrap services rather than an add on option in a separate listing. For example, if you are selling a small wooden sign you would create a variation called ‘Gift Wrapping’ with two options: ‘No’ or ‘Yes’. The price for the ‘No’ option is the regular price of the product, while the cost of the ‘Yes’ option is the product price plus the gift wrap. For someone who is new to Etsy, they will not know to look in your shop for add ons. Etsy has finally added a built in gift wrap feature! Read more about it here.
    2. Consider using gift wrapping as a promotion. If it won’t take too much or your time, gift wrapping services make for great promotions. Simply advertise ‘Free Gift Wrapping with Purchases of More than $XX.’
    3. Price to sell. It’s entirely up to you how much you will charge for gift wrapping services. For basic small packages, anything from free to $1 and up is acceptable. For larger items, $10 or more may be appropriate.
    4. Share pictures. Show pictures of what your gift wrapped products look like either on your website or social media. This can help those on the fence about gift wrap decide.

    5. Consider offering cards. You don’t send a present without a card, so consider offering cards with a personal message, too!
    6. Make sure the gift wrap complements your branding. While it isn’t necessary to have your name or logo on the gift wrapping; it’s a nice touch to have the gift wrap match the overall feel of your brand.

    Now, get out there and add gift wrapping to your listings before the holiday rush.

    Love this post? Save it to Pinterest:

    Tips About Gift Wrapping Services in Your Craft Business - Great for Silhouette Cameo or Cricut Explore or Maker Owners - by cuttingforbusiness.com

  • Free Download: Customer Applied Liability Release for Heat Transfer Vinyl (HTV)

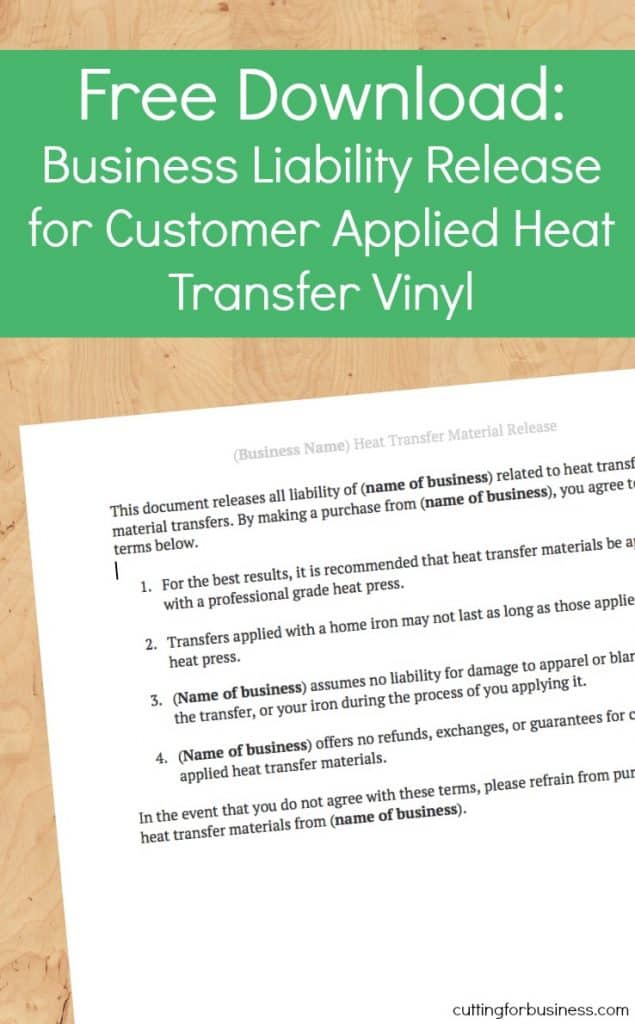
    A while back I shared an instruction set for you to give your customers when you sell them heat transfer vinyl designs to apply themselves. (Find it at this link.) Several Cutting for Business readers have asked for a liability sheet to go with the instructions. This is a bit tricky. When selling online your customer can’t sign your liability release at the time of purchase. Instead, I’ve worded this release to imply consent to the terms with the purchase of the listing. I’d recommend that you edit the document to add your business name and any additional text, upload it as a picture to your online listings, and mention it in the text of your listing.

    Ready to download? First, save this post to Pinterest. Then, download the form below.

    Free Download: Customer Applied Liability Release for Heat Transfer Vinyl (HTV) - Silhouette Cameo - Cricut Explore - cuttingforbusiness.com
  • Design with Me: Two Color Repeating Text Designs

    I’ve said it many, many times: If you want your business to stand out from others online – you should create your own designs. Why? When no one else has the same designs as you, you put your business ahead. Creating your own designs is not hard at all, so today I’m going to walk you through an easy way to create a dramatic text design.

    This tutorial uses Silhouette Studio Business Edition, but you can do the same thing in any graphics program.

    How to Create Two Color Text Block Designs

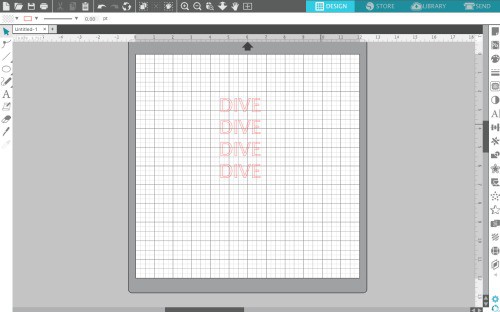
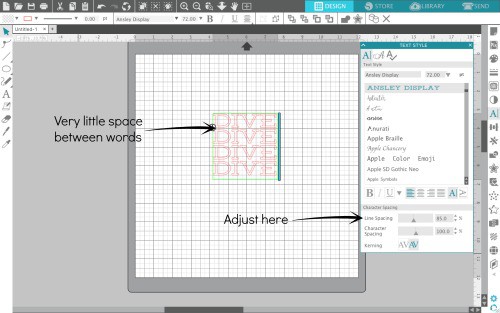
    1. Choose a word that is 3, 4, or 5 letters long and type it as shown in the image below. If your word has 3 letters, type it 3 times; if your word has 4 letters, type it 4 times; if your word has 5 letters, type it 5 times, and so on. (You can use this for any length word, but it looks better with shorter words.)Design with Me: Two Color Repeating Text Designs for Silhouette Cameo, Curio, Mint, Cricut Explore, Maker - by cuttingforbusiness.com
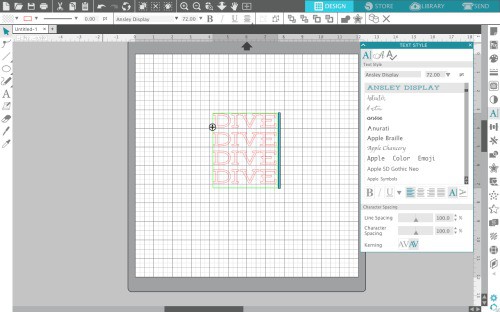
    2. Choose a block, bold, or chunky font style. For my design, I used Ansley which you can grab here for free with commercial use.Design with Me: Two Color Repeating Text Designs for Silhouette Cameo, Curio, Mint, Cricut Explore, Maker - by cuttingforbusiness.com
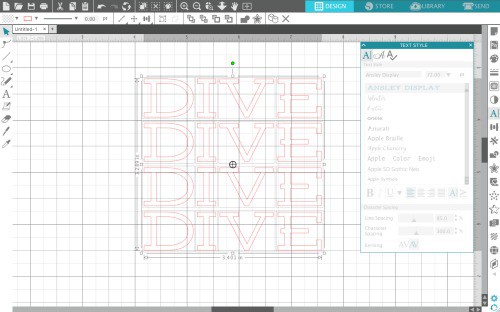
    3. Depending on your font, you may need to change the line spacing. You can do this from ‘Panels’, ‘Text Style’. You’ll want to make your text close enough together to create a square or rectangle. Design with Me: Two Color Repeating Text Designs for Silhouette Cameo, Curio, Mint, Cricut Explore, Maker - by cuttingforbusiness.com
    4. To prepare for cutting, you’ll want to ungroup the letters so they are single. Select the text, right click, and select ‘Ungroup’. All letters are now independent of each other. Design with Me: Two Color Repeating Text Designs for Silhouette Cameo, Curio, Mint, Cricut Explore, Maker - by cuttingforbusiness.com
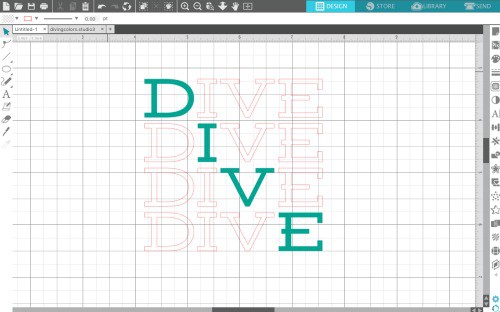
    5. Now, you’ll need to regroup some of the letters. First, select the letter in the top left hand corner and each letter in your word diagonally (hold the shift key to select multiple letters). Then, right click and choose ‘Group’. Last, fill your diagonal word with a color. Design with Me: Two Color Repeating Text Designs for Silhouette Cameo, Curio, Mint, Cricut Explore, Maker - by cuttingforbusiness.com
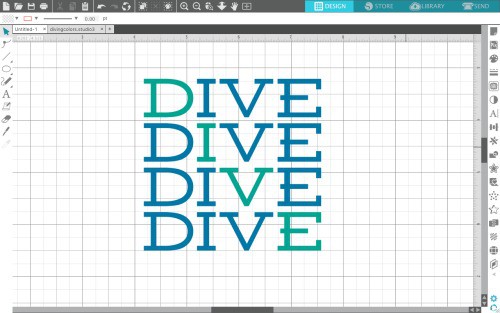
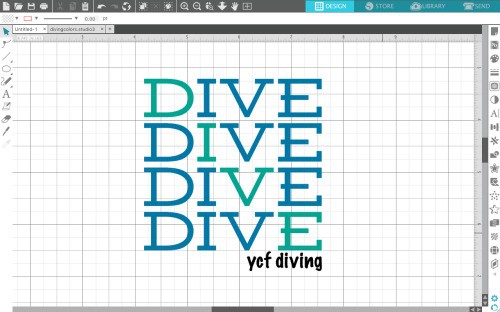
    6. Repeat step 5 for all the remaining letters. When finished, your design should look similar to this: Design with Me: Two Color Repeating Text Designs for Silhouette Cameo, Curio, Mint, Cricut Explore, Maker - by cuttingforbusiness.com
    7. Add additional text as desired. Design with Me: Two Color Repeating Text Designs for Silhouette Cameo, Curio, Mint, Cricut Explore, Maker - by cuttingforbusiness.com
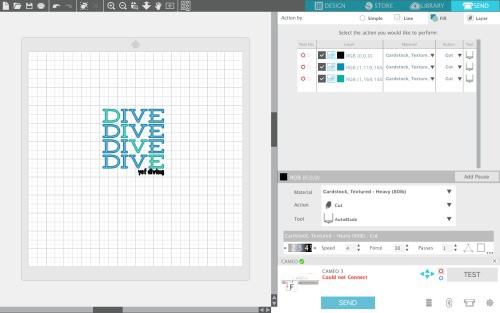
    8. That’s it! When cutting your design, try cutting by fill color. Design with Me: Two Color Repeating Text Designs for Silhouette Cameo, Curio, Mint, Cricut Explore, Maker - by cuttingforbusiness.com

    Looking for more designing tutorials? Try here, here, here, or even here.

    Here’s my finished shirt – don’t forget to save the tutorial to Pinterest:

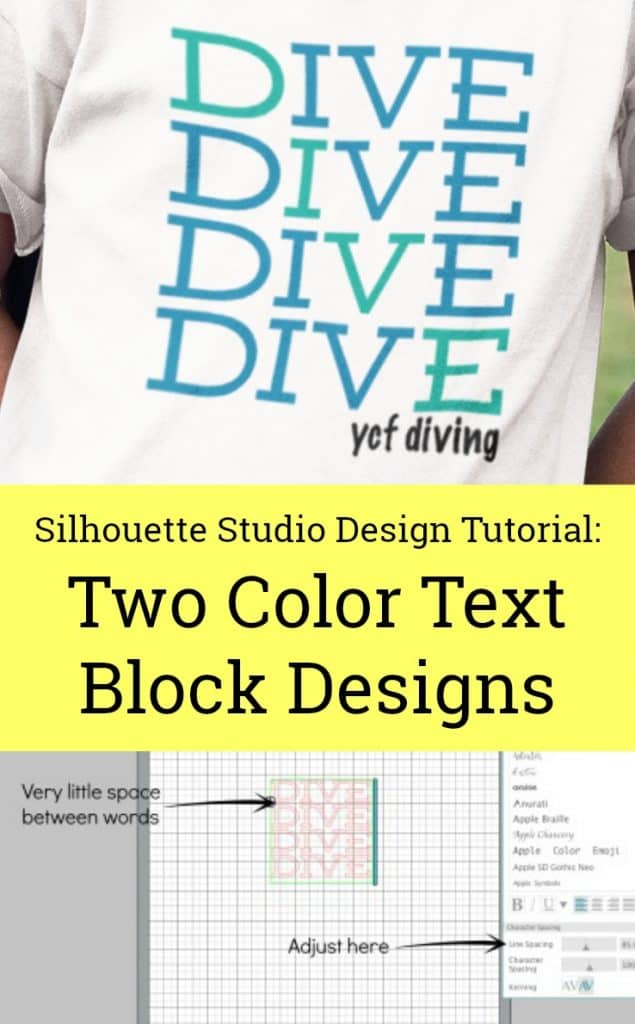
    Design with Me: Two Color Repeating Text Designs for Silhouette Cameo, Curio, Mint, Cricut Explore, Maker - by cuttingforbusiness.com

  • Sublimation Roundup for Silhouette & Cricut Owners

    One of the topics I am emailed about most is sublimation. Why? First, there isn’t a lot of information online about sublimation. Second, some of the information shared online is – well – inaccurate! Today, I’m compiling everything sublimation related on Cutting for Business in one post so you can easily find it – and SHARE IT!

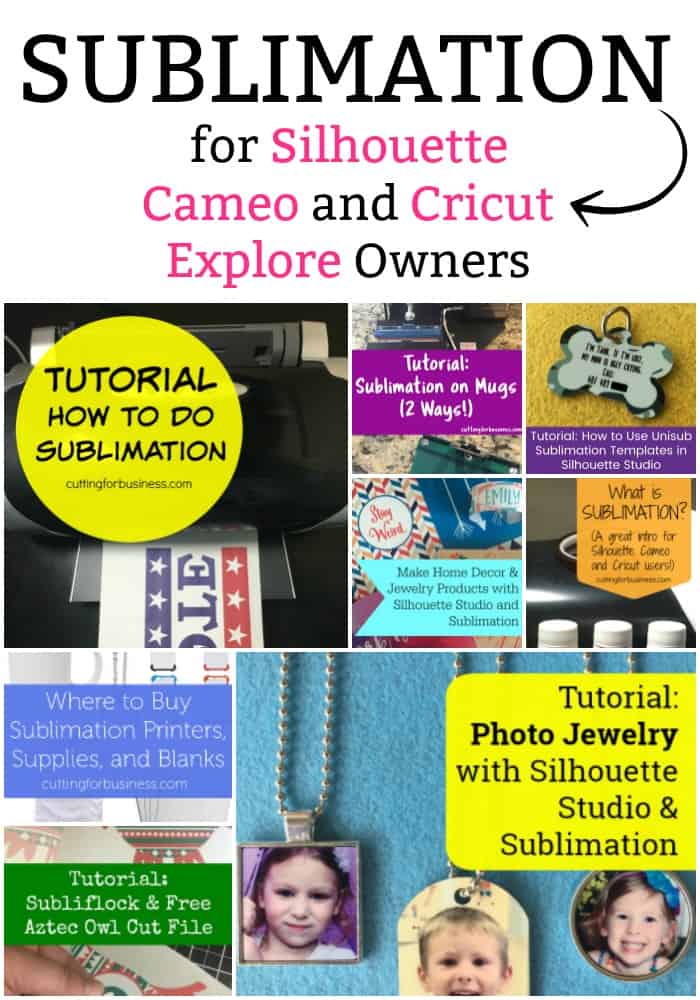
    Click any picture to read the post.

    First, the basics: What is sublimation?

    What is Sublimation? A great intro for Silhouette Cameo and Cricut small business owners - by cuttingforbusiness.com

    Sublimation on shirts or soft products:

    Sublimation on mugs, tumblers, cups:

    Tutorial: How to Sublimate Mugs - Two ways - A great intro for Silhouette Cameo and Cricut crafters - by cuttingforbusiness.com

    Where to buy sublimation products and equipment (plus a cheap way to get started):

    Sublimation for home decor:

    Use Silhouette Studio to Create Home Decor and Jewelry with Sublimation - by cuttingforbusiness.com

    How to use specialty sublimation materials:

    Photo jewelry using sublimation:

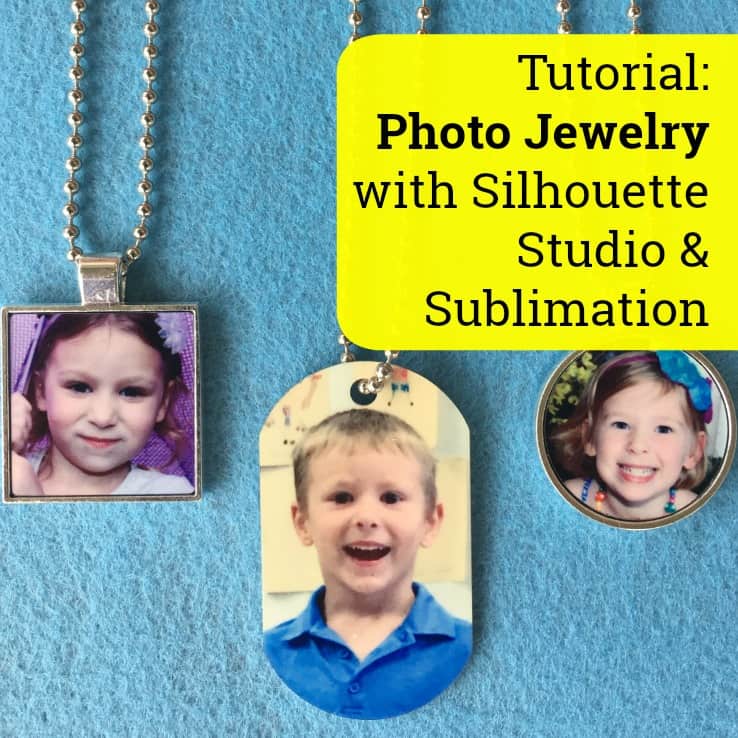
    Tutorial: How to Make Photo Jewelry using Silhouette Studio & Sublimation - by cuttingforbusiness.com

    Using Unisub templates in Silhouette Studio for sublimation:

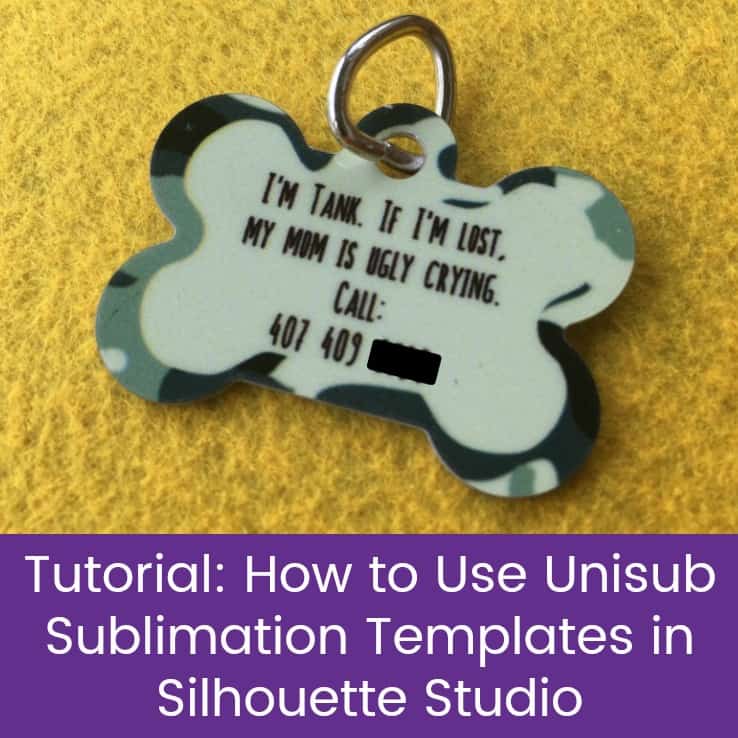
    Tutorial: How to Use Unisub Sublimation Templates in Silhouette Studio to Make a Custom Pet (Dog or Cat) Tag - by cuttingforbusiness.com

    Don’t have a sublimation printer but still want to try it out? Learn about these sublimation markers:

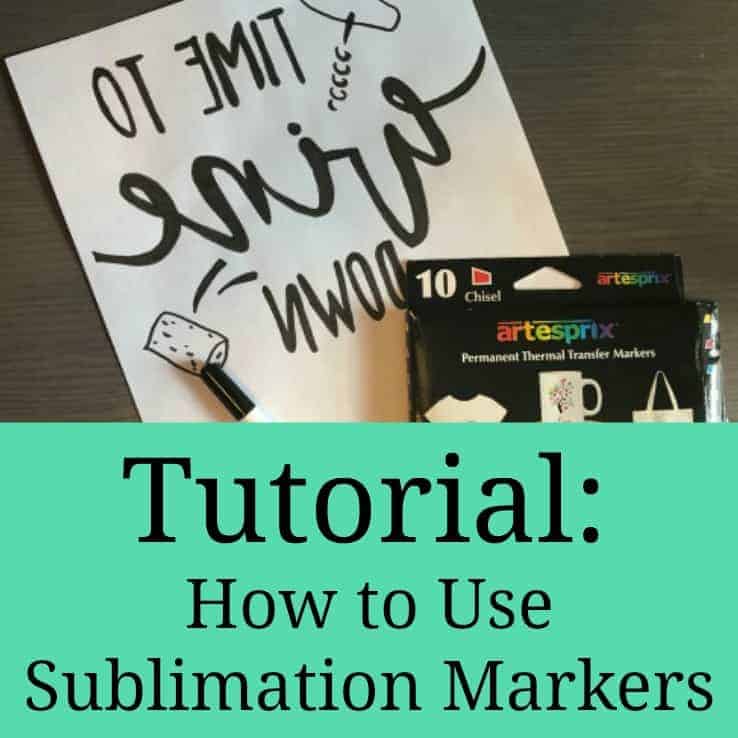
    Tutorial: How to Use Sublimation Markers - No sublimation printer needed! - by cuttingforbusiness.com

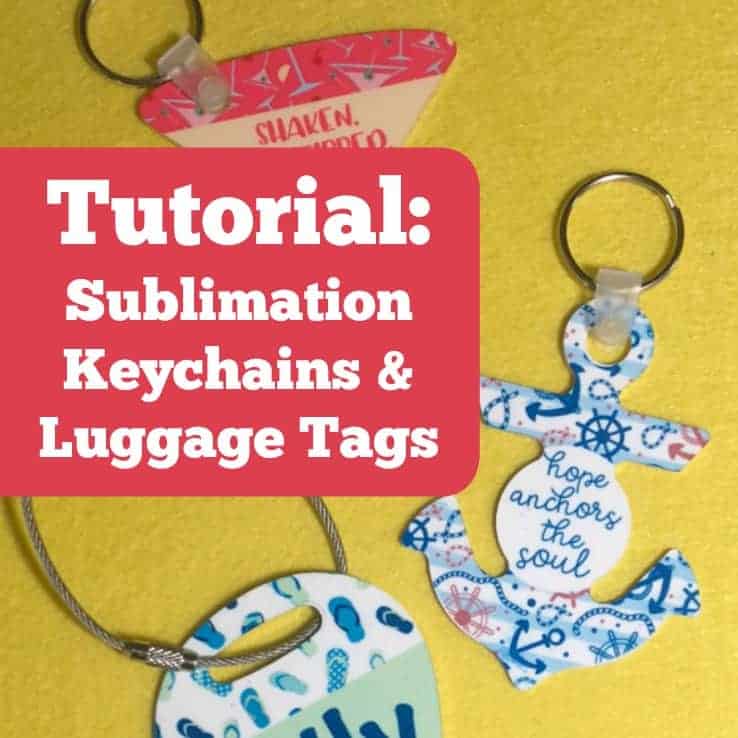
    Interested in making keychains or luggage tags? Find out how in this post:

    Tutorial - Sublimation Keychains & Luggage Tags - by cuttingforbusiness.com

    Want to spread the word about sublimation? Just save the image below on Pinterest!

    Sublimation Round Up for Silhouette Cameo and Cricut Explore Maker Crafters - by cuttingforbusiness.com

  • How to Host a Facebook Live Sale Event in Your Craft Business

    Maybe you’ve seen them before: direct sales consultants selling their products through Facebook Live. While the idea is newer to Facebook, the idea isn’t new. Shows on QVC and HSN have been selling through live shows for decades. Today, let’s look how you can implement this in your Silhouette or Cricut craft business.

    Weeks Before the Event

    • Create all the products you will have for sale. In live shows, you can’t use mockups and you’ll need to have a number of products made before the event. You can make one of each product or several – it’s your choice.
    • Decide on a date and time. When looking at your calendar, take into account what your customers might be doing on an average day: Do they work during the day? Are they free in the evenings or weekends? Does the time you chose work well for people across several time zones?
    • Advertise, advertise, advertise! I’d suggest you make up graphics to advertise the time and date of your live event. You can make your advertising fun by saying that shoppers can bring their own snacks and drinks – or even shop in their pajamas.
    • Plan giveaway products. If you give away products throughout your event, you are likely to keep people tuned in through the whole thing.

    Event Prep

    • Set up your space. In the days before the event, you’ll want to set up your space. You can use anywhere in your home, but be sure that it has good lighting (near a window is perfect), is quiet, and is free from distractions (like significant others, children, and televisions or phones).
    • Setup idea. An easy setup is to use a long table with your products on display on both the table and the wall behind you. Then, stand behind the table as you show off your products.
    • Prepare notes to help guide you during the event. This could be the order of products to show off, the size of the products, the prices, and the numbers.
    • Know your technology. Be sure you know how to work any technology component you use during the broadcast. There is nothing worse than tuning into a Facebook event and the host is fiddling around with the camera!

    At the Event

    • Sell! Once your live shopping event starts, introduce yourself and start selling! You should hold up each product in front of the camera and give basic details about it (size, colors, ideas on how to use it, what makes it awesome).
    • Remind shoppers how to buy. As you see new shoppers join your event, welcome them and remind them how to order. There are two easy ways to collect orders during a live event: 1) Have customers comment the item, size or color, and email address. After the event, you’d send invoices to each customer to pay. 2) Use a program like CommentSold or Soldsie.
    • Answer shopper questions. Don’t ignore shoppers while using Facebook Live. Respond to their questions and ask them to be involved.
    • Give stuff away. The absolute easiest way to keep shoppers through the entire event is to give away stuff at the beginning, middle, and end of the event. Require participation to be able to win giveaways.

    After the Event

    • Send invoices. Send invoices to shoppers as quickly after the event as you can if needed.
    • Follow up. Be sure to follow up with shoppers who had questions or requested custom orders during the event.
    • Ship items. Don’t forget to ship items to your shoppers in a timely manner.
    • Start planning your next event! Remember, after each event take a few minutes to write down what worked and what didn’t so you’ll remember for next time.

    Need tips for Facebook Live? Head to this post.

    Love this post? Share it on Pinterest:

    How to Host a Facebook Live Sale Event in Your Craft Business - Silhouette Cameo - Cricut Explore Maker - cuttingforbusiness.com
  • Free SVG – It’s Football Time

    It’s fall and that means football is back!

    Today, I’m sharing a free SVG – It’s Football Time. It’s perfect for a tote bag or a shirt.

    Looking for more football inspiration? Read my list of football sayings.

    Don’t forget: This free SVG includes commercial use. Read the license.

    Free SVG - It's Football Time - cuttingforbusiness.com
  • New Mini Guide Launch: 4 Ways to Make Product Mockups

    I’m so excited to introduce my brand new mini guide: 4 Ways to Make Product Mockups For Silhouette and Cricut Small Business Owners!

    More Information

    • Offers 4 methods of creating mockups for your craft business: Silhouette Studio (based on Version 4), Cricut Design Space, PicMonkey, and through a 3rd party service.
    • Bonus tutorials detail how to create mockups using glitter or patterns in both Silhouette Studio and Cricut Design Space.
    • You do not need to be technically inclined to follow the step-by-step instructions included in this guide.
    • As always, I’m available to answer any and all questions you may have. My contact information is available in the guide.

    Buy Now

    • 4 Ways to Make Product Mockups For Silhouette and Cricut Small Business Owners is a 38 page ebook and costs $10. Click here to purchase. After purchasing, it will be emailed to you automatically at the address registered with Paypal. (Please check your spam/junk folder if you don’t see it.)

    Share on Pinterest

    Sharing is caring! I can only continue to write awesome content if readers like you share it – please save the image below to Pinterest.

    New Mini Guide Launch: 4 Ways to Make Product Mockups For Silhouette and Cricut Business Owners - by cuttingforbusiness.com (Silhouette Studio, Cricut Design Space, PicMonkey, and more!)

  • Tutorial: How to Use Unisub Sublimation Templates in Silhouette Studio

    Yesterday, I led you through a tutorial to create custom photo jewelry with Silhouette Studio and sublimation. Today, we are going to tackle odd shaped sublimation blanks – like a shaped pet tag – using templates provided by Unisub. Why do we need a tutorial? Unfortunately for Silhouette Studio users, Unisub provides templates in formats that Silhouette Studio doesn’t open. No worries though, through tracing you can still use them.

    How to Use Unisub Templates for Sublimation in Silhouette Studio

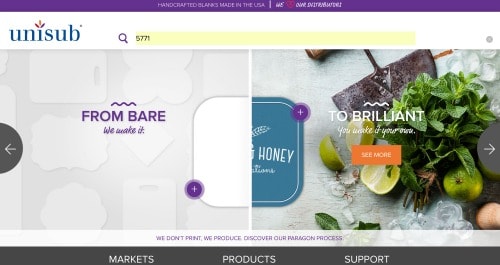
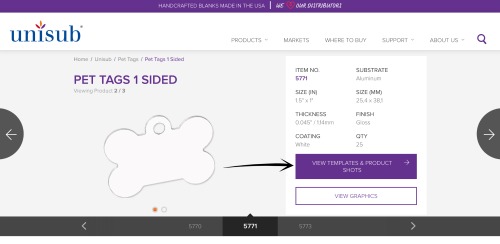
    1. Visit unisub.com and enter the SKU of your sublimation blank into the search bar at the top of the website. In this case, I’m using 5771 – a bone shaped pet tag. (Want to buy pet tags for sublimation? Click here.)Tutorial: How to Make Custom Pet Tags with Silhouette Studio & Sublimation - by cuttingforbusiness.com
    2. After locating your shape, click the “View Templates & Product Shots” button.Tutorial: How to Make Custom Pet Tags with Silhouette Studio & Sublimation - by cuttingforbusiness.com
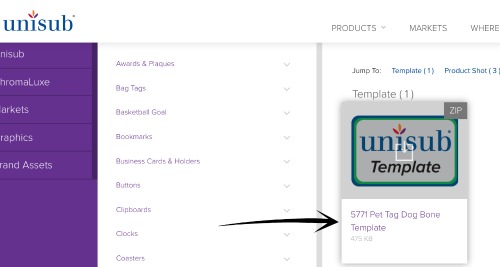
    3. Click the template to download it. Tutorial: How to Make Custom Pet Tags with Silhouette Studio & Sublimation - by cuttingforbusiness.com
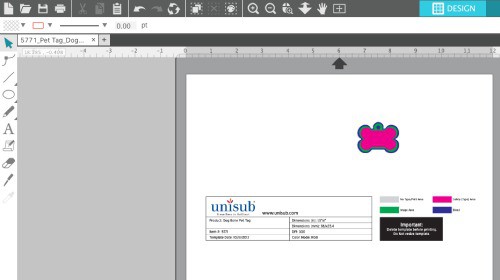
    4. Once unzipped, open the .JPG version in Silhouette Studio. Tutorial: How to Make Custom Pet Tags with Silhouette Studio & Sublimation - by cuttingforbusiness.com
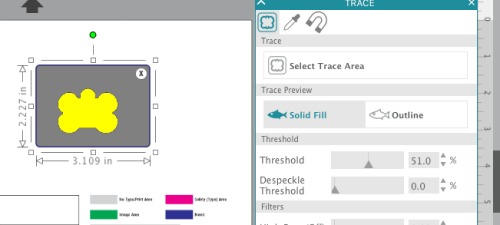
    5. From the ‘Trace’ panel, trace the template (‘Panels’, then ‘Trace). Tutorial: How to Make Custom Pet Tags with Silhouette Studio & Sublimation - by cuttingforbusiness.com
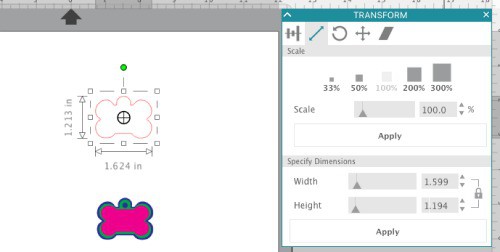
    6. Now, you’ll resize the template according to the sizing listed on unisub.com. Go to the ‘Transform’ panel, then click on the ‘Scale’ tab. For the bone shaped pet tag, it’s 1.5″ by 1″. I made my template slightly larger in case I made an error lining it up.Tutorial: How to Make Custom Pet Tags with Silhouette Studio & Sublimation - by cuttingforbusiness.com
    7. Now, you can create your design, print, and press! A step by step tutorial was featured in yesterday’s post.

    Did you know: Unisub offers templates for every product they manufacture and they are free on their website.

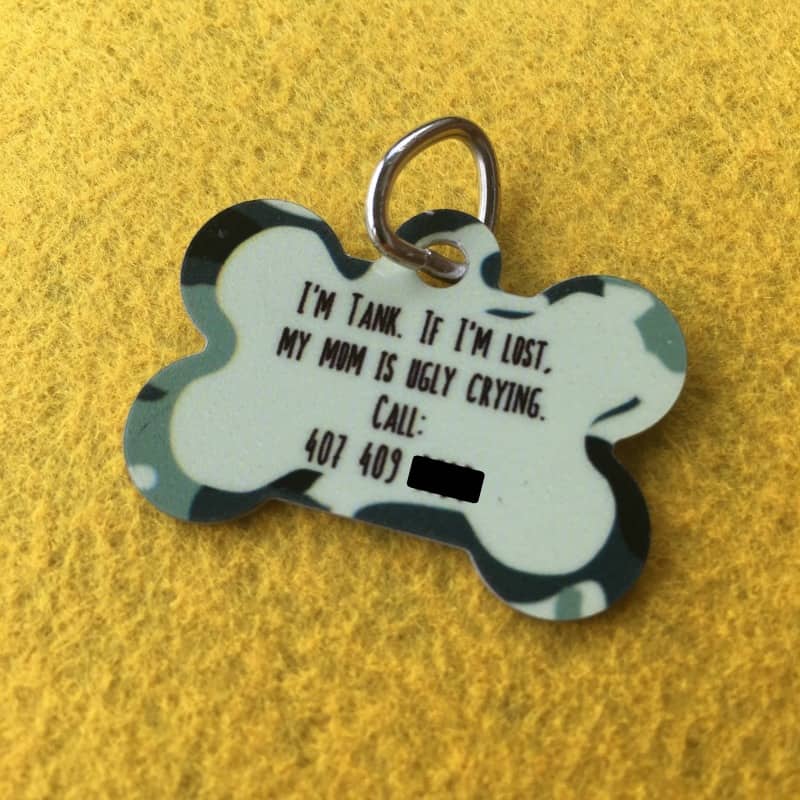
    Here’s a peek at my dog’s new tag:

    Tutorial: How to Make Custom Pet Tags with Silhouette Studio & Sublimation - by cuttingforbusiness.com

    You can pick up pet tags for sublimation here.

    Like this post? Save the image below to Pinterest: