Blog

  • 9 More Ways to Use ChatGPT in Your Craft Business

    A few days ago, I shared an article, 10 Ways to Use ChatGPT in Your Craft Business. If you haven’t had a chance to read it yet, go back and read it. It gives you a good introduction of how to use ChatGPT in your craft business. The article also talks about ChatGPT’s limitations and potential copyright issues.

    Today, I wanted to dig deeper and show you how you can phrase your prompts for more in depth information from ChatGPT. I’m doing that by showing you nine additional examples. With these examples, I’m giving you information about how to phrase your prompts and what you can do with the information.

    9 More Ways to Use ChatGPT in Your Craft Business - cuttingforbusiness.com.

    How to Access ChatGPT

    You can access ChatGPT for no cost.

    9 More Ways to Use ChatGPT in Your Craft Business

    1. Deciding on Color Palettes

    • Use ChatGPT to help decide on brand colors for your business. In this case, I’m specific in the prompt that I want natural color palettes and that I want five choices.
      • Prompt I put into ChatGPT: “Brainstorm a list of color palettes for a woodworking shop. I want muted, soft, natural colors. Provide five color palettes.”
      • ChatGPT response: “Here are five color palettes for a woodworking shop with muted, soft, natural colors:
        • Warm and Cozy: This palette includes warm, earthy tones with hints of orange, brown, and beige. It creates a welcoming atmosphere that can inspire creativity and productivity. Colors include:
          • Rusty red
          • Burnt orange
          • Caramel brown
          • Muted yellow
          • Beige
        • Cool and Calm: This palette features soothing cool tones that evoke feelings of calmness and relaxation. Colors include:
          • Pale blue
          • Soft green
          • Light grey
          • Cream
          • Ivory
        • Natural and Earthy: This palette is inspired by the colors found in nature, including wood, stone, and earth. It creates a natural, organic feel in the woodworking shop. Colors include:
          • Rich brown
          • Soft green
          • Warm grey
          • Cream
          • Sandy beige
        • Rustic and Vintage: This palette features muted, vintage-inspired colors that are perfect for a woodworking shop with a rustic or vintage feel. Colors include:
          • Faded blue
          • Olive green
          • Deep brown
          • Creamy white
          • Muted yellow
        • Neutrals and Pastels: This palette is perfect for a woodworking shop that wants to create a soft, peaceful ambiance. It features pastel shades of neutral colors like beige, grey, and cream. Colors include:
          • Light pink
          • Pale grey
          • Beige
          • Cream
          • Soft brown”
      • What I can do with this information: I can now take each color profile and look up the hexadecimal color codes to begin to put together a palette that will work for my business.

    2. Helping You Understand Your Demographic Better

    • Let’s say you help new Silhouette Cameo users learn how to use their machines. In this case, you want to learn more about the problems faced by this new user demographic.
      • Prompt I put into ChatGPT: “What are pain points of brand new Silhouette Cameo users?”
      • ChatGPT response: “As an AI language model, I do not have access to user data, but based on common experiences, some pain points that brand new Silhouette Cameo users may encounter include:
        • Software Installation: The Silhouette Cameo comes with a software called Silhouette Studio, which can be challenging to install for some users. The software may also require frequent updates that could be confusing for beginners.
        • Learning Curve: The Silhouette Cameo has a lot of features, and it can be overwhelming for new users to figure out how to use them all. Some users may struggle with the learning curve, especially if they are not familiar with graphic design software.
        • Cutting Errors: One of the most common pain points for new Silhouette Cameo users is cutting errors. This can include problems like misaligned cuts, incomplete cuts, or jagged edges. These errors can be frustrating, and may require troubleshooting to resolve.
        • Material Selection: Choosing the right materials to use with the Silhouette Cameo can be a challenge, especially for new users. Different materials require different settings, and it can be tricky to get everything set up correctly.
        • Maintenance: The Silhouette Cameo requires regular maintenance to keep it working properly. This can include cleaning the blade and cutting mat, as well as adjusting the blade depth and pressure settings. Some users may find the maintenance requirements to be time-consuming or confusing.”
      • What I can do with this information: I can now take this information and apply it to creating lesson plans, video tutorials, blog posts, or a schedule for a weekend retreat.

    3. Create Your Own Content Calendar

    • Keeping up with social media content can be tough. You could use ChatGPT to create a content calendar. You’ll notice when writing my prompt I included that the company was brand new and what it sold.
      • Prompt I put into ChatGPT: “Create a content calendar for Facebook to post every day for 30 days for my brand new company that sells outdoor related t-shirts.”
      • ChatGPT response: “Sure! Here’s a content calendar for your brand new company that sells outdoor-related t-shirts for the next 30 days:
        • Day 1: Introduction post – Introduce your brand and your product to your audience.
        • Day 2: T-Shirt Design Reveal – Show off one of your t-shirt designs and talk about the inspiration behind it.
        • Day 3: Customer Testimonial – Share a testimonial from a happy customer.
        • Day 4: Fun Outdoor Quiz – Create a quiz that tests your audience’s knowledge of outdoor activities and share it on your page.
        • Day 5: Product Photography – Share some high-quality photographs of your t-shirts in different outdoor settings.
        • Day 6: Share a blog post – Share a blog post on your website about your love for the outdoors and why you started your company.
        • Day 7: #ThrowbackThursday – Share a photo of a classic outdoor activity and ask your audience to share their own throwback photos.
        • Day 8: Share a Video – Share a short video showcasing your product and how it fits in with an outdoor lifestyle.
        • Day 9: Featured T-Shirt of the Week – Highlight a different t-shirt each week and explain why it’s special.
        • Day 10: Inspiring Quote – Share a quote that inspires people to get outside and enjoy nature.
        • Day 11: Customer Photo – Share a photo of a customer wearing one of your t-shirts on an outdoor adventure.
        • Day 12: Share a blog post – Share a blog post about the benefits of spending time in nature.
        • Day 13: Photo Contest – Run a photo contest on your page with the theme “Outdoor Adventures”.
        • Day 14: Share a Video – Share a video showcasing one of your favorite outdoor activities.
        • Day 15: Featured T-Shirt of the Week – Highlight a different t-shirt each week and explain why it’s special.
        • Day 16: Throwback Thursday – Share a photo of an outdoor activity from your childhood and ask your audience to share their own throwback photos.
        • Day 17: Share a blog post – Share a blog post about the importance of sustainability in the outdoor industry.
        • Day 18: Customer Photo – Share a photo of a customer wearing one of your t-shirts in a unique outdoor location.
        • Day 19: Inspiring Quote – Share a quote that inspires people to explore new outdoor destinations.
        • Day 20: Share a Video – Share a video showcasing the beauty of nature in your local area.
        • Day 21: Featured T-Shirt of the Week – Highlight a different t-shirt each week and explain why it’s special.
        • Day 22: Share a blog post – Share a blog post about how to prepare for a camping trip.
        • Day 23: Customer Testimonial – Share a testimonial from a happy customer.
        • Day 24: Photo Contest – Run a photo contest on your page with the theme “Beautiful Sunsets”.
        • Day 25: Share a Video – Share a video showcasing one of your favorite outdoor destinations.
        • Day 26: Featured T-Shirt of the Week – Highlight a different t-shirt each week and explain why it’s special.
        • Day 27: Share a blog post – Share a blog post about the benefits of hiking for mental health.
        • Day 28: Customer Photo – Share a photo of a customer wearing one of your t-shirts on a challenging outdoor adventure.
        • Day 29: Inspiring Quote – Share a quote that inspires people to push themselves to new limits in the outdoors.
        • Day 30: Final Post – Thank your audience for following along with your brand and encourage them to continue exploring the outdoors in their new t-shirts.”
      • What I can do with this information: I would head to the Meta Business Suite (Facebook) and start scheduling posts. With this outline, writing a month of social media content should go quickly.

    4. Increasing Sales by Writing a Cart Abandonment Email

    • Lots of customers (myself included!) put things in carts and forget about them. On several occasions, I’ve gone back to purchase a specific item after receiving a cart abandonment email. In this case, let’s pretend I sell SVG cut files. You’ll notice that I included information about the tone I wanted and the coupon code.
      • Prompt I put into ChatGPT: “Write a two email series for customers that abandon their carts with digital SVG cut files inside. Keep the tone playful and light. Include a discount in the second email of 10% off with coupon code FORGOT.”
      • ChatGPT response:
        • “Email 1: Subject: Oops! Did You Forget Something?
          • Dear [Customer Name],
          • We noticed that you left something behind – your digital SVG cut files! We totally understand if you were distracted by a cute cat video or a sudden urge for snacks, but we wanted to make sure you didn’t miss out on your purchase.
          • Our SVG cut files are the perfect addition to your crafting collection, and we wouldn’t want you to miss out on the opportunity to create something amazing. Plus, we think you’ll love the variety of designs we offer, from adorable animals to intricate patterns.
          • If you have any questions about our cut files or need any assistance with your purchase, please don’t hesitate to reach out to our customer service team. We’re always here to help!
          • Thank you for considering our SVG cut files, and we hope to see you soon.
          • Best regards, [Your Company Name]
        • Email 2: Subject: Your Discount Code Awaits!
          • Dear [Customer Name],
          • We noticed that you still haven’t completed your purchase of our digital SVG cut files. We’re guessing you got sidetracked again, but don’t worry, we’ve got you covered with a special offer.
          • As a thank-you for considering our cut files, we’re offering you a 10% discount on your purchase with the coupon code FORGOT. Just enter the code at checkout to redeem your discount.
          • We don’t want you to miss out on the opportunity to create something amazing with our SVG cut files, so be sure to take advantage of this offer before it expires.
          • Thank you for choosing [Your Company Name], and we hope you have a great crafting experience!
          • Best regards, [Your Company Name]”
      • What I can do with this information: I can head over to my newsletter provider and use these templates to set up an abandoned cart email sequence to (hopefully!) increase sales.

    5. Research Your Competitors

    • You can use ChatGPT to research your competitors. Let’s say that you are starting a customized sock business. You compile a list of possible competitors to your products and company.
      • Prompt I put into ChatGPT: “Provide a list of potential competitors for my customized sock business.”
      • ChatGPT response: “Here are some potential competitors for your customized sock business:
        • CustomInk
        • Sock Club
        • Stance
        • Boldfoot Socks
        • Sockprints
        • DeadSoxy
        • Sock Fancy
        • Happy Socks
        • Sock It To Me
        • Strideline
        • It’s important to note that each of these companies may have different focuses or target markets than your customized sock business, so it’s important to research each one and analyze their strengths and weaknesses to determine your unique selling proposition.”
      • What I can do with this information: I now have a starting point for researching my potential competitors. But, why not use ChatGPT to start the research?
        • In this case, I copied and pasted the list ChatGPT created in another prompt: “What kinds of socks do each of these companies sell? CustomInk Sock Club Stance Boldfoot Socks Sockprints DeadSoxy Sock Fancy Happy Socks Sock It To Me Strideline”
        • ChatGPT response: “Here is a brief overview of the kinds of socks that each of the companies you mentioned sells:
          • CustomInk: CustomInk primarily specializes in customizable apparel and accessories, including socks. Their socks can be personalized with custom designs and logos.
          • Sock Club: Sock Club is a subscription-based service that delivers high-quality, stylish socks to its members every month. They offer a variety of styles, including dress socks, casual socks, and athletic socks.
          • Stance: Stance is a popular brand of socks that offers a wide range of styles, from casual everyday socks to performance socks for athletics. They also offer themed collections featuring pop culture icons, sports teams, and more.
          • Boldfoot Socks: Boldfoot Socks offers American-made socks that are designed to be both comfortable and durable. They offer a variety of styles, including dress socks, athletic socks, and casual socks, all made from high-quality materials.
          • Sockprints: Sockprints specializes in custom-printed socks that can be personalized with photos, logos, and other designs. They offer a variety of styles, including crew socks, ankle socks, and knee-high socks.
          • DeadSoxy: DeadSoxy offers a variety of men’s and women’s socks that are designed to be both stylish and comfortable. Their socks feature unique patterns and designs, and they are made from high-quality materials to ensure durability.
          • Sock Fancy: Sock Fancy is another subscription-based sock service that delivers high-quality, stylish socks to its members every month. They offer a variety of styles, including dress socks, casual socks, and athletic socks.
          • Happy Socks: Happy Socks is a popular brand of colorful, patterned socks that are designed to add a pop of fun to any outfit. They offer a wide range of styles, from dress socks to athletic socks, and they frequently collaborate with artists and designers for special collections.
          • Sock It To Me: Sock It To Me offers a variety of fun, whimsical socks for men, women, and kids. Their socks feature unique designs, including animals, food, and pop culture icons.
          • Strideline: Strideline is a brand of performance socks that are designed to be both comfortable and functional. Their socks feature specialized cushioning and compression technology to support the foot during athletic activities. They also offer casual and dress socks.”
        • Now, I can narrow down what companies might be competition and which ones won’t be before I continue my research.

    6. Compile a List of Potential Speakers for a Weekend Retreat

    • If you are in the planning stages for a weekend retreat, you can use ChatGPT to give you ideas of bloggers who you may want to invite to speak at a session. You’ll notice in my prompt, I give clear guidelines to what I am looking for.
      • Prompt I put into ChatGPT: “Compile a list of 20 craft bloggers who write Silhouette tutorials with a Facebook following of at least 100,000 to speak at an event.”
      • ChatGPT response: “As an AI language model, I do not have access to current Facebook followers count for all bloggers, but here’s a list of 20 craft bloggers who frequently write Silhouette tutorials and have a significant following on Facebook:
        • Silhouette School Blog – Facebook page: 173,000+ followers
        • Cutting for Business – Facebook page: 106,000+ followers
        • The Pinning Mama – Facebook page: 147,000+ followers
        • Hey, Let’s Make Stuff – Facebook page: 106,000+ followers
        • That’s What Che Said – Facebook page: 181,000+ followers
        • The Country Chic Cottage – Facebook page: 235,000+ followers
        • A Girl and a Glue Gun – Facebook page: 184,000+ followers
        • Laura’s Crafty Life – Facebook page: 135,000+ followers
        • Persia Lou – Facebook page: 126,000+ followers
        • Printable Crush – Facebook page: 100,000+ followers
        • The Crafted Sparrow – Facebook page: 165,000+ followers
        • Leap of Faith Crafting – Facebook page: 141,000+ followers
        • Kimber Dawn + Co. – Facebook page: 141,000+ followers
        • Crafting in the Rain – Facebook page: 155,000+ followers
        • Simply Made Fun – Facebook page: 118,000+ followers
        • Liz on Call – Facebook page: 126,000+ followers
        • It Happens in a Blink – Facebook page: 133,000+ followers
        • Happiness is Homemade – Facebook page: 266,000+ followers
        • Tried & True Creative – Facebook page: 106,000+ followers
        • Crafting Chicks – Facebook page: 278,000+ followers
        • Please note that the number of followers may have changed by the time you read this, and this list is not exhaustive.”
      • What I can do with this information: I can now reach out to these bloggers and invite them to speak at my event. (The ChatGPT shout out to me, Cutting for Business, is pretty cool!)

    7. Critique Your Own Work

    • I’ve had Cutting for Business readers say to me that my writing style and tone is too direct – especially when it comes to things like trademarks. Let’s see if ChatGPT picks up the same.
      • Prompt I put into ChatGPT: “What tone of writing does this piece invoke? I then copied and pasted this entire article: Can You Legally Sell Disney Crafts?
      • ChatGPT response: “The tone of this piece is informative and straightforward. It presents the facts and guidelines about Disney licensing, trademarks, and copyright laws without any emotional or persuasive language. The writer aims to educate the reader on the policies and procedures involved in obtaining Disney licensing and avoiding copyright and trademark infringement.”
      • What I can do with this information: You know what? This is exactly what I aim for: Emotion free, fluff free, direct writing to pass information onto crafters.

    8. Create a Marketing Plan

    • Marketing (and knowing what order to do specific steps) can be difficult. You can use ChatGPT to help you outline what needs to be done.
      • Prompt I put into ChatGPT: “Describe how to create an email funnel to sell wholesale adhesive vinyl decals to pet rescue organizations.”
      • ChatGPT response:
        • “Creating an email funnel to sell wholesale adhesive vinyl decals to pet rescue organizations can help you generate more leads and convert them into customers. Here are the steps to follow:
          • Define your target audience: In this case, your target audience is pet rescue organizations. You need to identify the type of organizations you want to target, their needs, and preferences.
          • Develop a lead magnet: A lead magnet is something that you can offer to your target audience to entice them to sign up for your email list. It could be an e-book, a guide, or a free sample of your product. In this case, you could offer a free sample pack of adhesive vinyl decals that pet rescue organizations can use.
          • Create a landing page: Your landing page should be designed to capture the attention of your target audience and entice them to sign up for your email list. Make sure that the landing page is easy to navigate and includes a clear call-to-action.
          • Set up an email sequence: Once you have collected email addresses from your landing page, you need to set up an email sequence. The sequence should be designed to educate and inform your target audience about the benefits of your product, how it can help them, and why they should choose your product over your competitors. The sequence should be automated, so it is sent to your subscribers in a timely manner.
          • Create a sales page: A sales page is designed to convert your email subscribers into customers. Make sure that the sales page is optimized for conversions and includes a clear call-to-action.
          • Monitor and optimize: Monitor the performance of your email funnel and optimize it to improve its effectiveness. Test different subject lines, email copy, and calls-to-action to see what works best.
          • By following these steps, you can create an effective email funnel to sell wholesale adhesive vinyl decals to pet rescue organizations. Remember to provide value to your subscribers, build trust, and position yourself as an expert in your niche.”
      • What I can do with this information: Now, I can print this out and get to work on each step. Of course, I can use ChatGPT at each step to assist with this marketing funnel.”

    9. Get Inspiring Quotes

    • Inspiring quotes can improve your social media engagement, because followers often comment and share them. In this case, I want to use ChatGPT to find quotes about mompreneurs (moms who are entrepreneurs) that I can use to make social media graphics. You’ll note that I told ChatGPT exactly how long I wanted the quotes.
      • Prompt I put into ChatGPT: “Give me a list of inspiring quotes about new mompreneur business owners to use in social media graphics. Make the quotes shorter than 100 characters.”
      • ChatGPT response:
        • “Motherhood gave me the courage to start my own business.”
        • “Mom + Entrepreneur = Mompreneur. The ultimate multitasker!”
        • “Being a mompreneur is tough, but so am I.”
        • “No one can stop a mompreneur with a vision.”
        • “Mompreneurs: because starting a business is just another item on our to-do list.”
        • “Being a mompreneur means working hard for your dreams and your family.”
        • “Mompreneurs: juggling motherhood and entrepreneurship like pros.”
        • “From sleepless nights to successful business owner: the mompreneur journey.”
        • “The best thing a mompreneur can wear is her confidence.”
        • “A mompreneur is a force to be reckoned with.”
      • What I can do with this information: I can take this list straight to a design program like Canva and start creating graphics.

    100+ ChatGPT Prompts for Craft Businesses

    Ready to get started with ChatGPT? I’ve got a list of ChatGPT prompts for craft businesses.

    So, now that I’ve shown you more in depth uses for ChatGPT, what do you think of it? Will you use it or do you think AI is a passing trend?

    Don’t forget (if you haven’t already) to go back and read the last article, 10 Ways to Use ChatGPT in Your Craft Business.
  • 10 Ways to Use ChatGPT in Your Craft Business

    ChatGPT has taken the internet by storm in the last few months. I’ve been playing with it for a while now and I am finally confident to write an article about it.

    I recently took some time to explore some of the ways to use ChatGPT in your craft business.

    10 Ways to Use ChatGPT in Your Craft Business - cuttingforbusiness.com.

    What is ChatGPT?

    ChatGPT is an artificial intelligence tool created by OpenAI. It is designed to understand natural language input and generate human-like responses to a wide range of prompts and questions. Users can use ChatGPT to answer questions, provide information, or engage in conversations on various topics.

    How to Access ChatGPT?

    You can access ChatGPT for free on the website.

    When Was ChatGPT Released?

    ChatGPT (at least the current form of it) was released November 30, 2022. It has taken the internet by storm and, according to CBS, ChatGPT is growing faster than TikTok and averages 13 million unique visitors a day.

    10 Ways to Use ChatGPT in Your Craft Business

    1. Writing Product Descriptions

    • Writing product descriptions. If you are stuck on writing a product description for a particular product, head to ChatGPT for help.
      • Prompt I put into ChatGPT: “Write a product description for a 20 ounce epoxied tumbler with blue and green glitter”
      • ChatGPT response: “Introducing our stunning 20-ounce epoxied tumbler, designed to impress and elevate your drinking experience! This gorgeous tumbler features a mesmerizing combination of blue and green glitter, creating a sparkling, one-of-a-kind aesthetic that’s sure to catch everyone’s eye.

        Crafted from high-quality, durable materials, this tumbler is built to last and can withstand regular use. The epoxy coating adds an extra layer of protection, ensuring that the glitter stays in place and won’t flake or peel off over time. Plus, the 20-ounce size is perfect for holding your favorite cold beverages, keeping them refreshingly chilled for longer.

        Whether you’re sipping on a cool drink by the pool or enjoying a hot beverage on a chilly day, this tumbler is the perfect companion. Its sleek, smooth design makes it comfortable to hold and easy to grip, while the secure lid ensures that your drink stays put, even if you’re on the go.

        So if you’re looking for a stylish and practical way to upgrade your drinking experience, our 20-ounce epoxied tumbler with blue and green glitter is the perfect choice. Order yours today and get ready to sip in style!”

    2. Getting Inspiration to Create

    • Getting inspiration to create. Let’s say you are looking to create a new t-shirt line of funny Christmas shirts. You can use ChatGPT to give you ideas.
      • Prompt I put into ChatGPT: “Write a list of funny Christmas t-shirt sayings.”
      • ChatGPT response:
        • “All I want for Christmas is a nap.”
        • “I’m on the naughty list and I regret nothing.”
        • “Merry Christmas Ya Filthy Animal” (a reference to Home Alone movie)
        • “Dear Santa, I can explain…”
        • “I’m just here for the cookies.”
        • “I’m dreaming of a white Christmas, but if the white runs out, I’ll drink the red.”
        • “I’m the reason we can’t have nice things (especially during Christmas).”
        • “Sleigh all day.”
        • “This is my Christmas Pajama Shirt.”
        • “Bah Humbug (with a picture of a grumpy cat).”
        • “I’m not Santa, but you can sit on my lap.”
        • “I’m not short, I’m Elf-sized.”
        • “It’s all fun and games until Santa checks the naughty list.”
        • “Christmas calories don’t count, right?”
        • “Let’s get elfed up!”
        • “I’m not arguing, I’m just explaining why I’m right about Christmas.”
        • “I put the ‘ho ho ho’ in holidays.”
        • “I’m not lazy, I’m just conserving my energy for Christmas.”
        • “Santa’s not the only one coming to town.”
        • “I’m only a morning person on Christmas.”

    3. Writing Social Media Posts

    • Writing social media posts. If you can’t come up with what to say on social media, let ChatGPT help.
      • Prompt I put into ChatGPT: “Write a Facebook post to tell followers about a 50% off sale for my birthday.”
      • ChatGPT response: “Hey everyone! Today is my birthday and I wanted to celebrate by offering you all a special gift! For a limited time only, I’m having a 50% off sale on all items in my online store! ️

        This is the perfect opportunity to grab that item you’ve had your eye on or to try something new at a great discount! Don’t miss out on this amazing birthday sale!

        Thank you all for your continued support and I hope you enjoy this birthday treat! #BirthdaySale #50PercentOff #LimitedTimeOffer #ShopNow #ThankYouForYourSupport”

    4. Brainstorming Hashtags

    • Brainstorming hashtags. When you are working on social media marketing, use ChatGPT to brainstorm.
      • Prompt I put into ChatGPT: “Write a list of hashtags related to custom made stationery.”
      • ChatGPT response:
        • #CustomStationery
        • #PersonalizedStationery
        • #BespokeStationery
        • #HandmadeStationery
        • #StationeryDesign
        • #PaperGoods
        • #LuxuryStationery
        • #StationeryAddict
        • #StationeryLove
        • #UniqueStationery
        • #CustomizedStationery
        • #StationeryObsessed
        • #MadeToOrderStationery
        • #CustomNotepads
        • #CustomNotebooks
        • #CustomJournals
        • #StationeryEnthusiast
        • #CustomCards
        • #CustomInvitations
        • #StationeryShop

    5. Course or Lesson Planning

    • Course planning. If you teach classes in your craft business, you can use ChatGPT to help plan your content.
      • Prompt I put into ChatGPT: “Write an outline for a one hour beginner’s Cricut class.”
      • ChatGPT response:
        • I. Introduction
          A. Welcome and Introductions
          B. Overview of Cricut
          C. Explanation of the purpose of the class

          II. Understanding Cricut Machine
          A. Types of Cricut Machines
          B. Parts of a Cricut Machine
          C. How to setup Cricut Machine

          III. Basic Designing in Cricut Design Space
          A. Introduction to Cricut Design Space
          B. Overview of Design Space interface
          C. Basic Design Elements
          1. Shapes
          2. Text
          3. Images
          D. Creating a simple project

          IV. Working with Materials and Tools
          A. Introduction to Cricut Materials
          B. Types of Materials compatible with Cricut
          C. Understanding Cutting Mats
          D. Understanding Cricut Tools
          1. Blades
          2. Weeding Tools
          3. Scoring Stylus
          E. Tips for best results

          V. Cutting Your Project
          A. Preparing your design for cutting
          B. Choosing the right material and tools
          C. Loading your material onto the mat
          D. Setting up the machine
          E. Cutting your project

          VI. Conclusion
          A. Q&A
          B. Recap of key points
          C. Next Steps
          1. Advanced Designing Techniques
          2. Additional Materials and Tools
          3. Troubleshooting Tips.

    6. Keyword Planning

    • Keyword planning. If you are writing content related to crafting for your craft business, you could look to ChatGPT for help.
      • Prompt I put into ChatGPT: “Create a list of keywords related to heat presses.”
      • ChatGPT response:
        • Heat transfer
        • Sublimation
        • T-shirt press
        • Vinyl cutting
        • Heat platen
        • Transfer paper
        • Heat-resistant gloves
        • Digital timer
        • Temperature control
        • Swing-away design
        • Clamshell press
        • Mug press
        • Cap press
        • Plate press
        • Fabric printing
        • Heat transfer vinyl
        • Iron-on transfers
        • Heat press machine
        • Heat press accessories
        • Heat press designs

    7. Creating Surveys

    • The next time you need to get feedback from customers, let ChatGPT help you create a survey.
      • Prompt I put into ChatGPT: “Write a short email survey for customers who attended my Make and Take Craft Event last Friday.”
      • ChatGPT response:
        • Subject: Feedback Survey for Make and Take Craft Event
        • Dear [Customer Name],
          • We hope this email finds you well. We would like to take a moment to thank you for attending our Make and Take Craft Event last Friday. We hope that you had an enjoyable and creative experience.
          • As part of our commitment to providing the best possible events for our customers, we would appreciate your feedback on your experience. We kindly ask that you take a few moments to complete this short survey. Your responses will help us improve future events and ensure that we continue to meet your expectations.
          • How did you hear about the event?
            • Social media
            • Word of mouth
            • In-store promotion
            • Other (please specify)
          • Did the event meet your expectations?
            • Yes
            • No
          • How would you rate the quality of the materials provided?
            • Excellent
            • Good
            • Average
            • Poor
            • Very Poor
          • Did you feel that the instructions provided were clear and easy to follow?
            • Yes
            • No
          • Did you complete the craft project during the event?
            • Yes
            • No
          • Would you attend a similar event in the future?
            • Yes
            • No
          • Do you have any suggestions for improving future events?
          • Thank you in advance for taking the time to complete this survey. Your feedback is important to us and will be used to improve our future events. If you have any additional comments or concerns, please feel free to contact us directly.
          • Best regards,
          • [Your Name] [Your Business Name]

    8. Research Before Buying

    • Thinking of purchasing a new tool? Let ChatGPT help you do research before you buy.
      • Prompt I put into ChatGPT: “Compile a list of pros and cons for the Cricut EasyPress Mini.”
      • ChatGPT response: “The Cricut EasyPress Mini is a compact heat press designed for small heat transfer projects such as hats, shoes, and stuffed animals. Here are some of the pros and cons of the Cricut EasyPress Mini:
        • Pros:
          • Compact and portable: The Cricut EasyPress Mini is small and lightweight, making it easy to transport and store.
          • Precise temperature control: The Mini has a temperature range of 205°F to 400°F, allowing for precise temperature control for various types of heat transfers.
          • Easy to use: The Mini is straightforward to operate, with an easy-to-read temperature display and simple controls.
          • Safety features: The Mini has a safety base to prevent accidental burns, and an auto-shutoff feature that turns off the device after 60 minutes of inactivity.
          • Affordable: The Mini is relatively affordable compared to larger heat presses, making it an excellent choice for beginners or those with a tight budget.
        • Cons:
          • Small pressing surface: The Mini’s small size means that it has a limited pressing surface, making it unsuitable for larger heat transfer projects.
          • Limited pressure: The Mini does not offer the same level of pressure as larger heat presses, which can impact the quality of the transfer.
          • Limited versatility: The Mini is designed for small, flat surfaces, making it unsuitable for more complex projects such as sleeves or pockets.
          • Limited temperature range: While the Mini’s temperature range is precise, it may not be suitable for some types of heat transfers, such as sublimation.
          • Long heat-up time: The Mini can take several minutes to reach the desired temperature, which can be frustrating for some users.

    9. Scripts for Videos

    • If you struggle with what to say in videos, ChatGPT can help you create a script.
      • Prompt I put into ChatGPT: “Write a script for a 30 second Instagram Reel about heat presses.”
      • ChatGPT response:
        • Opening shot: Close-up of a heat press machine with steam rising from the top plate.
        • Voiceover: Hey guys, have you heard about heat presses? They’re the hottest trend in the world of printing right now.
        • Cut to a shot of someone placing a shirt on the bottom plate of the heat press.
        • Voiceover: With a heat press, you can easily transfer designs onto t-shirts, hats, bags, and more.
        • Cut to a shot of the top plate closing onto the shirt.
        • Voiceover: The heat and pressure from the press work together to create a high-quality, long-lasting print.
        • Cut to a shot of the top plate opening and the person removing the shirt.
        • Voiceover: And the best part? You can create custom designs in just a few minutes!
        • Cut to a shot of various finished products.
        • Voiceover: Whether you’re starting a business or just want to make personalized gifts, a heat press is the perfect tool for the job.
        • Closing shot: Close-up of a finished shirt with a beautiful design and the words “Heat press” in bold letters.
        • Voiceover: So what are you waiting for? Get your hands on a heat press today and start creating! #heatpress #customdesigns #DIY

    10. Writing Website Content

    • If you have a hard time coming up with content for your website pages, ChatGPT might be able to help.
      • Prompt I put into ChatGPT: “Write a thank you page for customers to see after they check out. I want to highlight how happy their purchase makes me as a small business owner.”
      • ChatGPT response:
        • Dear valued customer,

          I wanted to take a moment to express my deepest gratitude for your recent purchase. As a small business owner, every sale means the world to me, and I am truly honored that you chose to shop with us.

          Your purchase not only supports my business, but it also allows me to continue doing what I love and providing the best possible products and services to all of my customers.

          I cannot express enough how grateful I am for your support. Every sale, no matter how big or small, means that I am one step closer to achieving my dreams and goals for this business.

          Thank you for choosing to support a small business like mine. I am truly grateful for your trust and loyalty, and I look forward to serving you in the future.

          Warmest regards,
          [Your Name]

    What are the Limitations of ChatGPT?

    As a language model, ChatGPT has several limitations. Some of these limitations include:

    1. Lack of common sense: While ChatGPT can generate text that appears to make sense, it lacks a true understanding of the world, making it difficult for it to provide contextually appropriate responses.
    2. Biases: Like any language model, ChatGPT can reflect biases present in the data it was trained on. This means that it may generate responses that reflect stereotypes or systemic biases.
    3. Inability to handle complex tasks: ChatGPT may struggle with complex tasks that require multi-step reasoning or knowledge from a specific domain.
    4. Limited creativity: While ChatGPT can generate text that is new and novel, it may struggle to create truly creative or original content.
    5. Dependence on input: ChatGPT relies heavily on the input it receives from users. If the input is vague or incomplete, ChatGPT may struggle to generate appropriate responses.
    6. Limited knowledge base: ChatGPT’s knowledge is limited to what it has been trained on and may not have access to the latest information or trends.

    It’s important to keep in mind that ChatGPT is a machine learning model and not a human being. As such, it has its own strengths and limitations, and it’s up to users to recognize these limitations and use the model appropriately.

    As an AI language model, ChatGPT is a computer program that generates text based on patterns learned from a large set of text data. The content generated by ChatGPT is not original work, as it is generated using pre-existing data.

    Therefore, the copyright implications of ChatGPT depend on the ownership and licensing of the underlying data used to train the model. If the data used to train ChatGPT is in the public domain or licensed under an open license such as Creative Commons, then there may be few copyright implications for the use of ChatGPT. However, if the data used to train ChatGPT is subject to copyright protection, then the use of ChatGPT may raise copyright issues.

    It is also worth noting that the use of ChatGPT to generate content that infringes on the copyright of others, such as by reproducing substantial portions of copyrighted works, would likely be considered an infringement of copyright law. As with any tool or technology, it is important to use ChatGPT in a responsible and legal manner.

    9 More Ways to Use ChatGPT in Your Craft Business

    In the next article, I’m digging deeper into ChatGPT to show you how to phrase prompts for better results. Read 9 More Ways to Use ChatGPT in Your Craft Business.
    100 ChatGPT Prompts for Craft Businesses

    Need some inspiration to start using ChatGPT? I’ve got a list of 100+ ChatGPT prompts for craft businesses.

    So, what do you think of ChatGPT? Will you use it in your craft business? If so, what will you use it for?

  • Tutorial: How to Add a Diverse Business Category on Facebook

    Diversity and inclusion continue to be hot topics in the world right now. If you’ve had your Facebook Page for a long time, you probably haven’t included this information on it.

    Let’s take 5 minutes today to add your Diverse Business category.

    Tutorial: How to Add a Diverse Business Category on Facebook - Marketing - cuttingforbusiness.com.

    What Are Diverse Business Categories on Facebook?

    Diverse Business categories are a self selected, categorization system that lets users know if a certain group owns the business.
    Why Add a Diverse Business Category on Facebook?

    It is another way that Facebook users can connect with your business. Many shoppers seek out diverse businesses to support.
    Additionally, Facebook may feature businesses of certain Diverse Business categories.

    What Diverse Business Categories are Available on Facebook?

    Facebook offers 10 different Diverse Business categories:

    • Asian-owned
    • Black-owned
    • Disabled-owned
    • Latin-owned
    • Indigenous-owned
    • LGBTQ+ owned
    • Middle Eastern-owned
    • Pacific Islander-owned
    • Women-owned
    • Veteran-owned

    Tutorial: How to Add Your Diversity Information on Facebook.

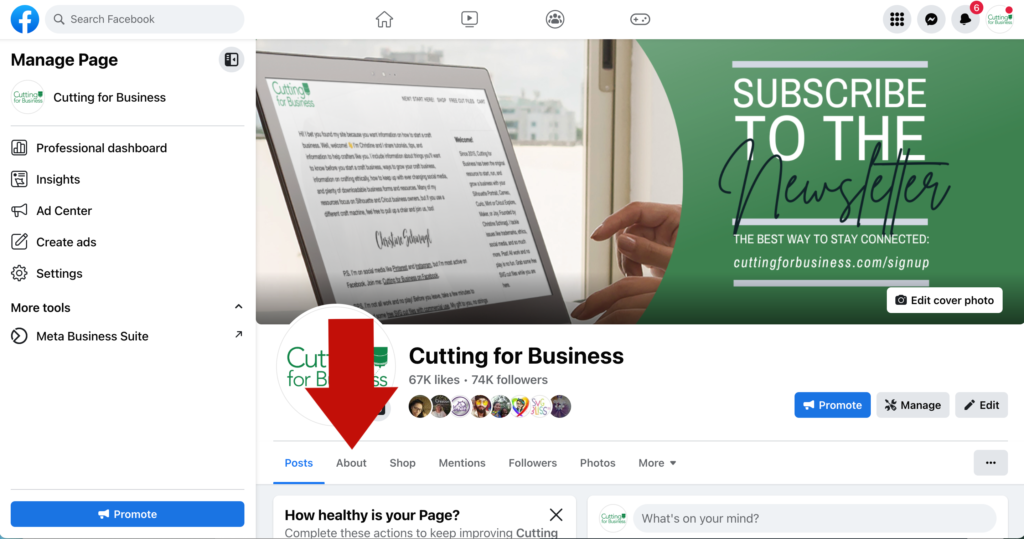
    1. Navigate to your Facebook Page. Then, click ‘About’.
    Tutorial: How to Add a Diverse Business Category on Facebook - Screenshot 1 - cuttingforbusiness.com.

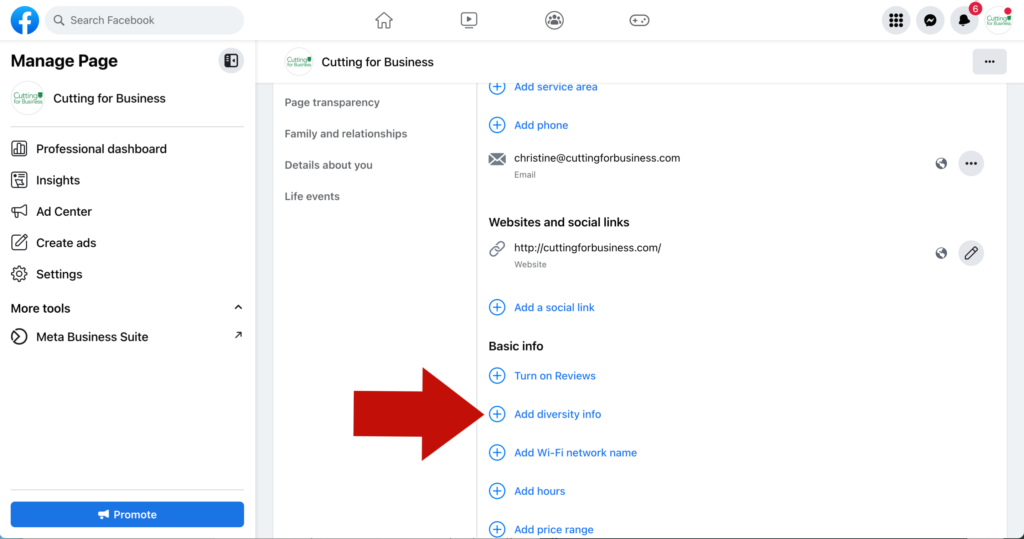
    2. Scroll down to ‘Basic info’. Then, click ‘Add diversity info’.

    Tutorial: How to Add a Diverse Business Category on Facebook - Screenshot 2 - cuttingforbusiness.com.

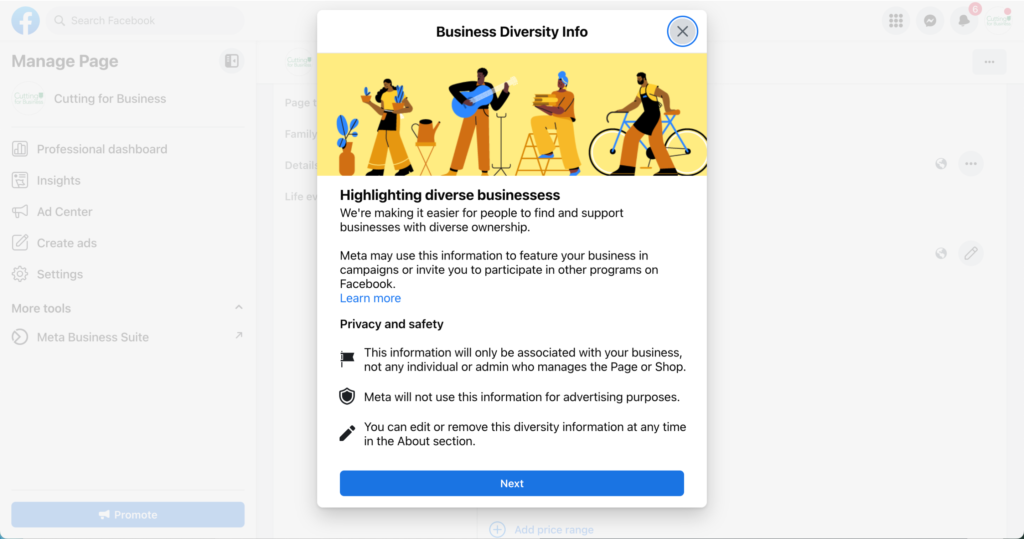
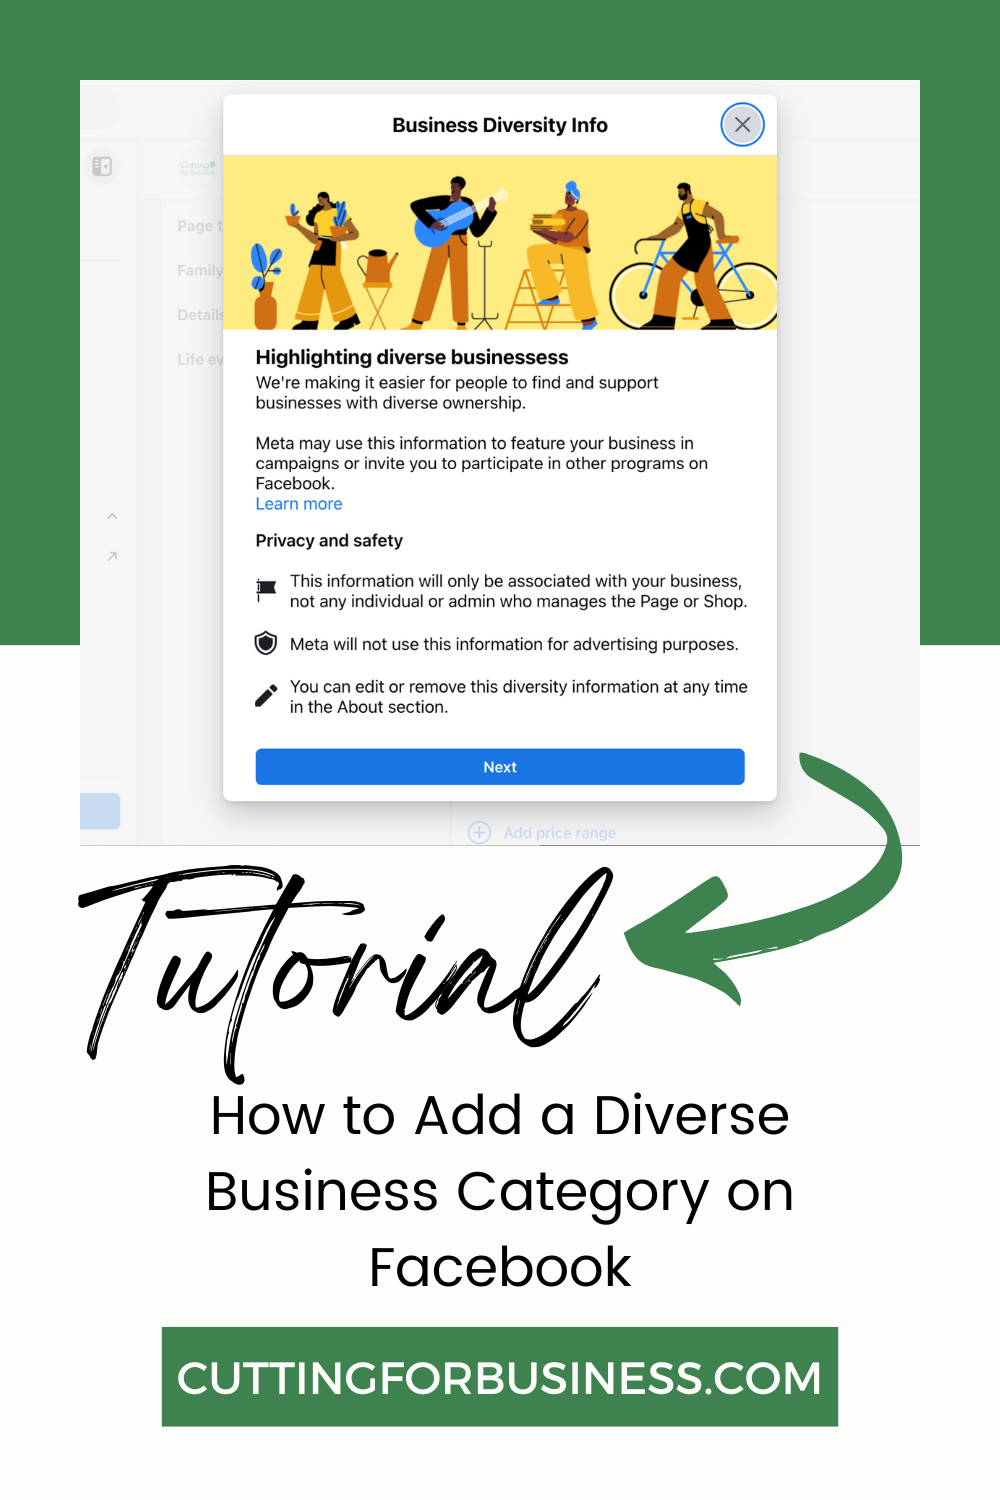
    3. This pop up appears. Read the information, then click the ‘Next’ button.

    Tutorial: How to Add a Diverse Business Category on Facebook - Screenshot 3 - cuttingforbusiness.com.

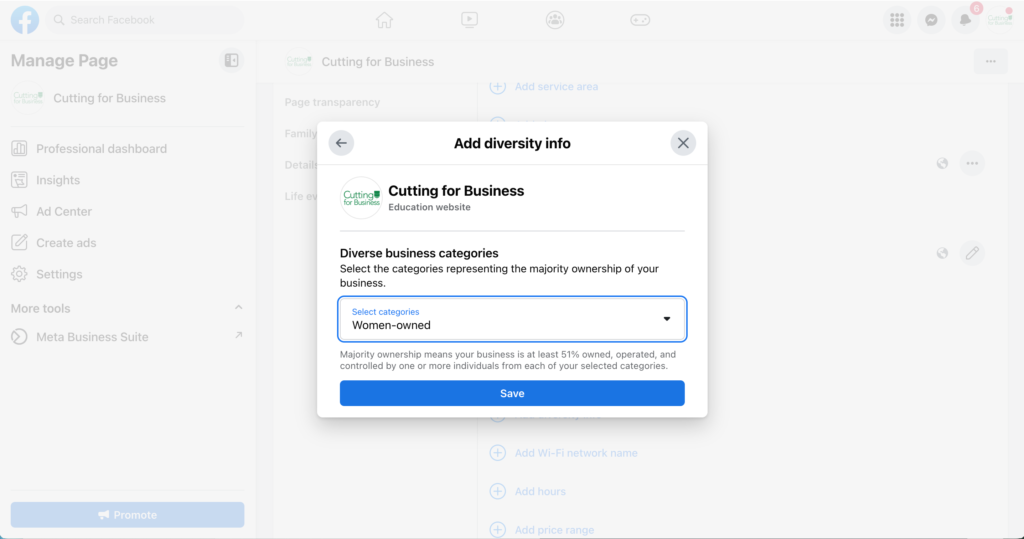
    4. Select your diversity category. You can select more than one category if you qualify. (Qualifying means majority ownership of 51% of the diverse business category.) Click the ‘Save’ button.

    Tutorial: How to Add a Diverse Business Category on Facebook - Screenshot 4 - cuttingforbusiness.com.

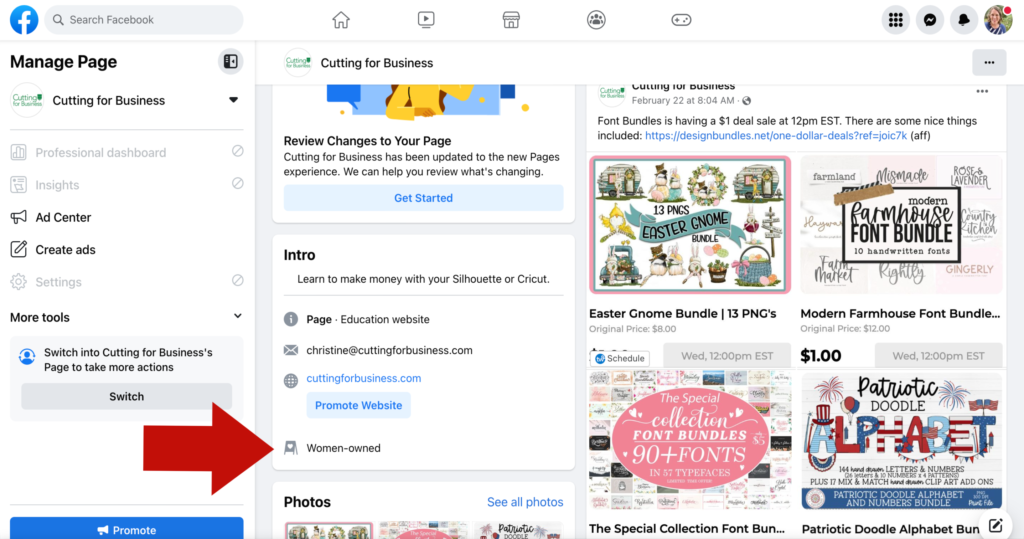
    That’s it! The diversity information you added will appear in the Intro section of your Facebook page.

    Here is what it looks like on a desktop page:

    Tutorial: How to Add a Diverse Business Category on Facebook - Screenshot 5 - cuttingforbusiness.com.

    Here is what it looks like from the Facebook App:

    Tutorial: How to Add a Diverse Business Category on Facebook - Screenshot 6 (Mobile) - cuttingforbusiness.com.

    Note: Diverse Business categories are only available to users located in the US at this time. If you don’t see the option to add a Diverse Business category to your Facebook Page, your page may be registered outside of the US.

  • Glowforge vs xTool: Which One to Buy

    As an owner of both a Glowforge and an xTool, I’m in a great position to be able to share the pros and cons of both machines, along with a comparison of the machines. This article highlights my experience and technical specs of the Glowforge Plus and the xTool M1.

    Before we get started, know that there is no ‘one size fits all’ solution to which machine you should buy. Which machine works better for you will greatly depend on your needs.

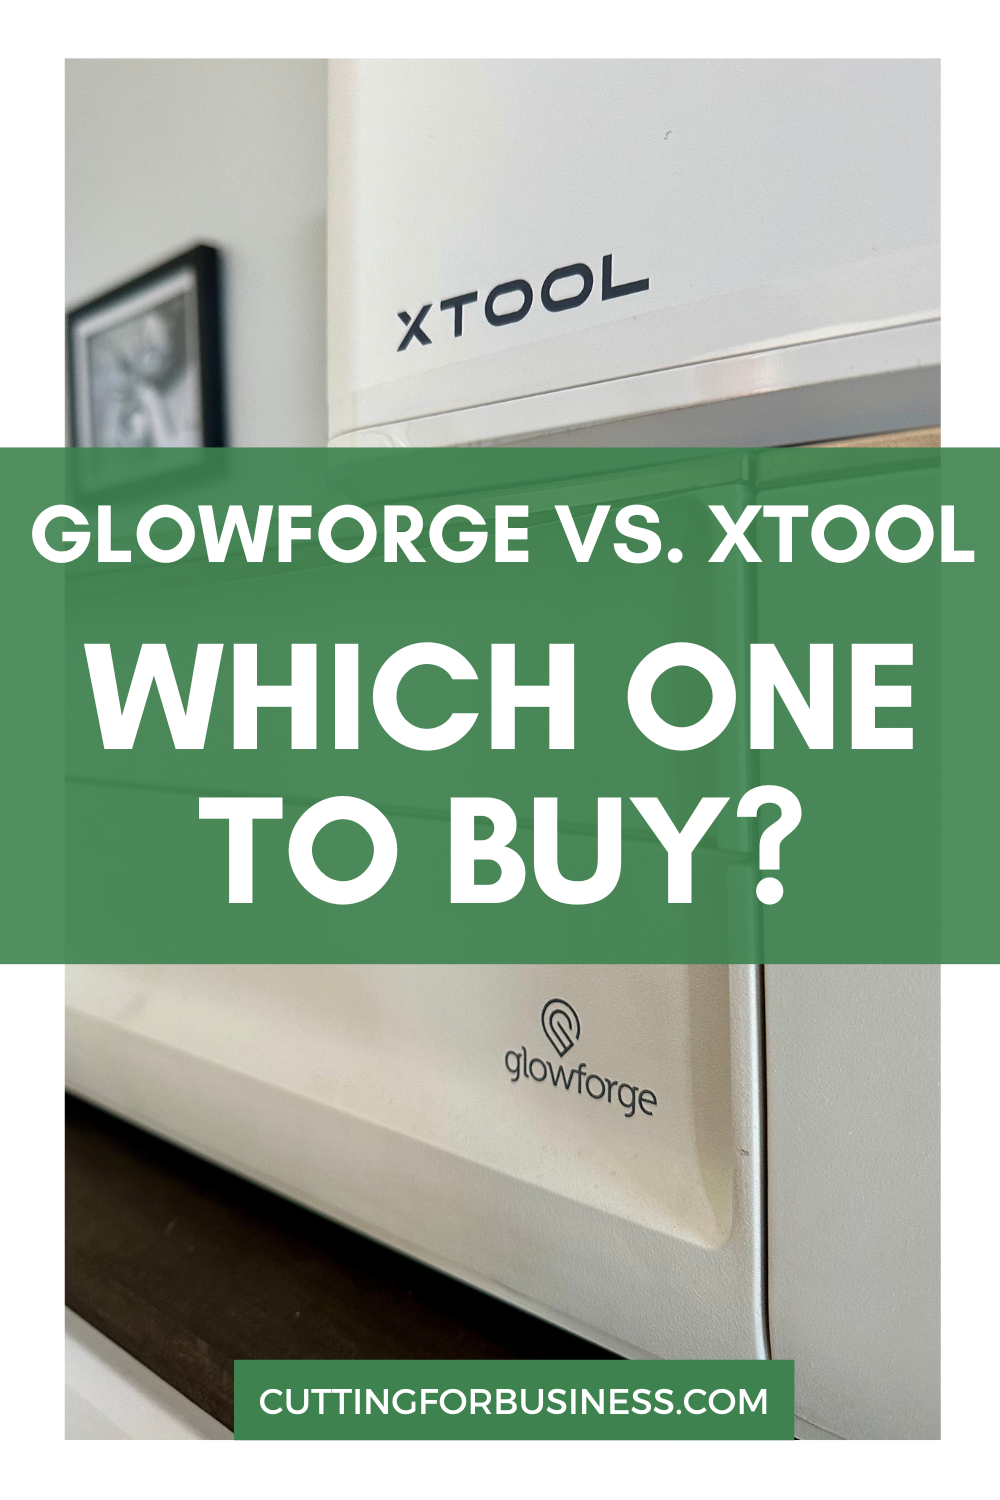
    Glowforge versus xTool - cuttingforbusiness.com.

    Glowforge vs xTool: Size and Weight

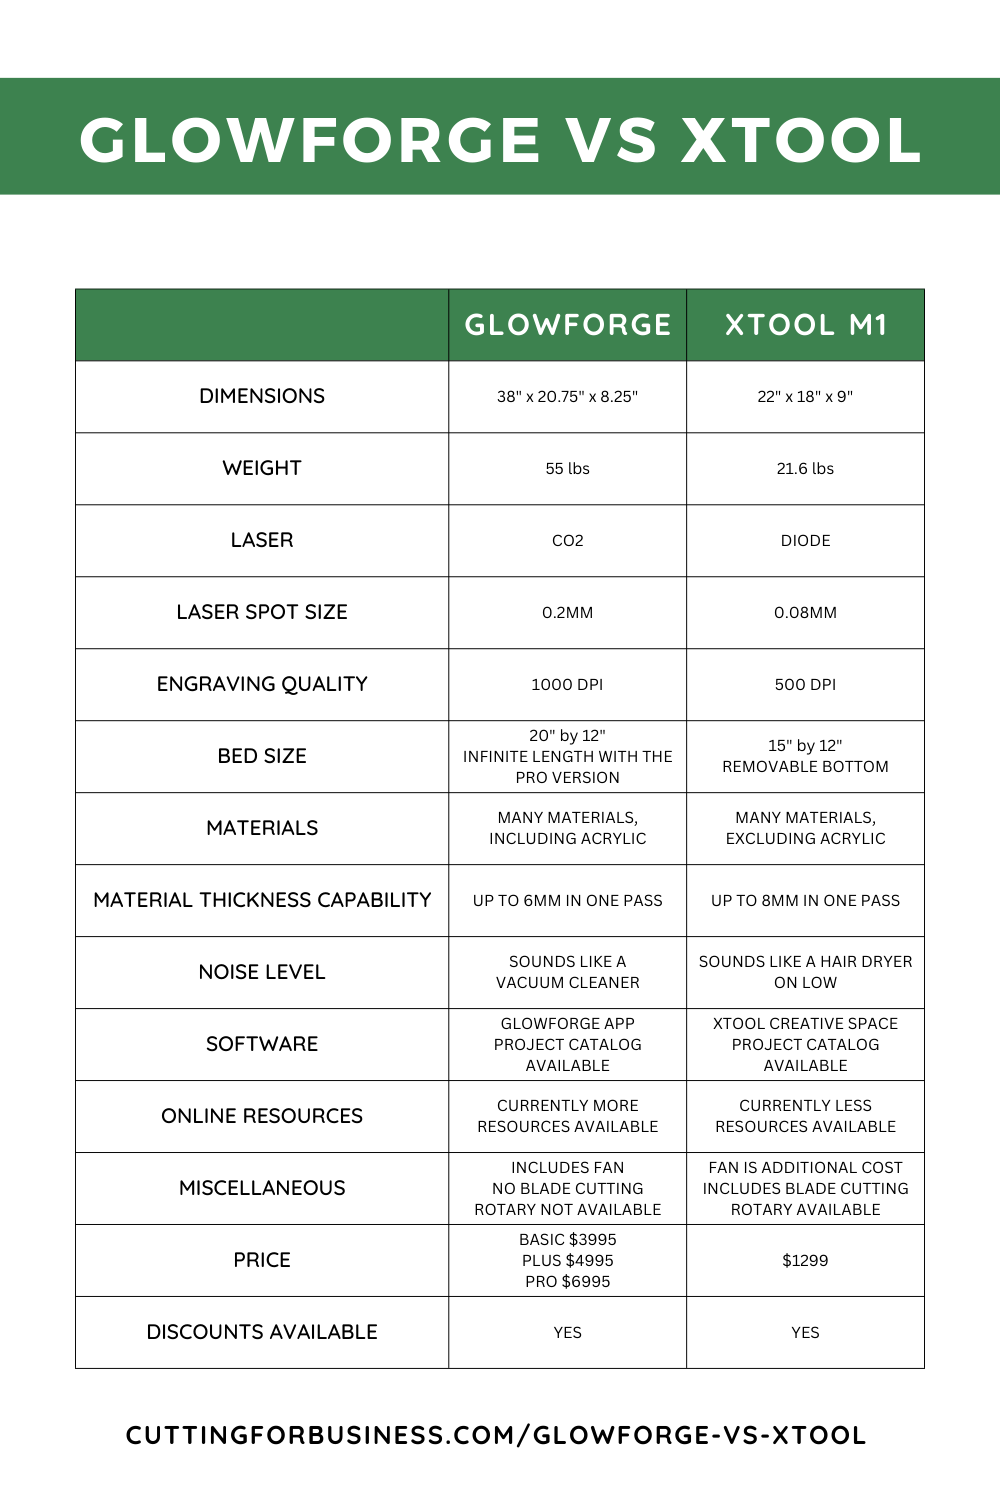
    Glowforge: The Glowforge measures 38 inches by 20.75 inches by 8.25 inches. It weighs 55 pounds.
    xTool: The xTool M1 measures 22 inches by 18 inches by 9 inches. It weighs 21.6 pounds.

    If you have a small workspace or need to be able to move around the machine by yourself, the xTool M1 is a better choice.

    Glowforge vs xTool: Laser

    Glowforge: Contains a CO2 laser. It’s a 40W in the Basic and Plus models, and 45W in the Glowforge Pro. Glowforge’s laser engraves at 1000 dpi.
    xTool: Contains a diode laser. Available in a 5W or a 10W version. xTool’s laser engraves at 500 dpi.

    There is no better choice between the lasers, because they are different types of lasers. CO2 lasers are more powerful and are faster, but diode lasers have a longer lifespan.

    As an aside, xTool also makes a CO2 laser – but I don’t have any experience with it.

    Glowforge vs xTool: Bed Size

    Glowforge: The bed measures 20 inches by 12 inches, and the usable size is about 11 inches by 19.5 inches. For Glowforge’s Pro version, the passthrough slot allows you to cut infinitely long materials.
    xTool: The bed measures 15 inches by 12 inches with the usable area slightly smaller. However, you are not limited to using only the bed. The xTool’s bottom plate is removable which allows you to engrave on items that don’t fit in the machine.

    It’s a tie between the Glowforge and the xTool for bed size. While the Glowforge is larger, the xTool’s ability to (easily!) remove the bottom for larger engraving should be recognized.

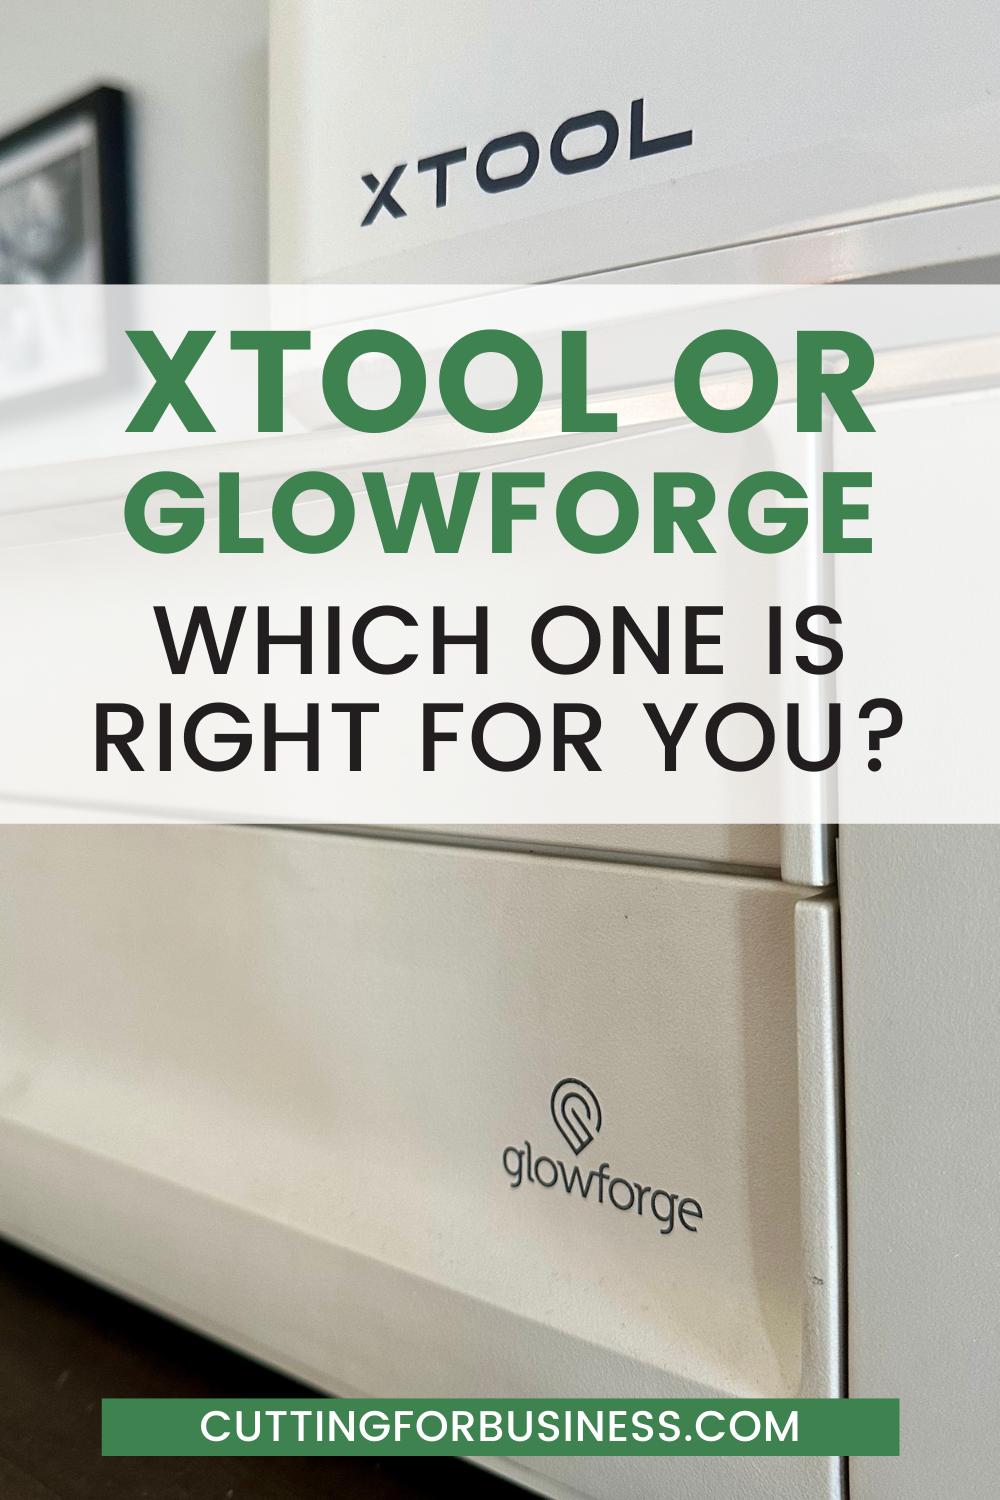
    xTool versus Glowforge - Which one is right for you - cuttingforbusiness.com.

    Glowforge vs xTool: Materials to Cut and/or Engrave

    The Glowforge and the xTool can handle many, many of the same materials.

    Both: Leather, paper, wood, fabric, cardstock, cardboard, MDF, stone, rubber stamp material, cork, metal, leatherette, and so on.

    Now, let’s take a look at the differences:

    Material Thickness: The Glowforge can cut through materials up to 6mm in one pass. Thicker materials can be cut using multiple passes, or by flipping the material over. The xTool M1 can cut through materials up to 8mm in one pass. Again, thicker materials can be cut using multiple passes and flipping the material over.
    Acrylic: The Glowforge can cut and engrave acrylics. However, the xTool cannot. This isn’t a fault of the machine, rather a circumstance of the diode laser (blue light). Unfortunately, the diode laser passes through the material. I was able to get red acrylic to cut – but if you want to cut all colors of acrylic you’ll want to stick with a CO2 laser like a Glowforge.

    Vinyl: Vinyl should not be cut in CO2 lasers. However, xTool’s M1 also has a blade that can be used for vinyl cutting.

    Curved Surfaces: The Glowforge can engrave on curved surfaces provided they are less than 2 inches in height – like a pen, flask, or shotglass. Using the rotary attachment, the xTool M1 can engrave on larger products like tumblers, baseball bats, and rolling pins.

    Both Glowforge and xTool have a materials store where you can purchase their private label materials.

    Glowforge vs xTool: Noise Level

    While noise levels aren’t a huge factor for me (I mean, I can barely hear the machines over all these kids screaming! ), I was shocked at how quiet the xTool was when running. I’d compare the noise of the Glowforge to a vacuum cleaner and the noise of the xTool to a hair dryer on low or medium.

    If you live in an apartment setting, you may need to opt for the quiet machine – the xTool M1.

    Glowforge vs xTool: Software

    I’ll be honest, designing complex designs in either the Glowforge App or the xTool Creative Space isn’t ideal. I’ll assume you be designing elsewhere and importing into the software. Both software programs accept a variety of file formats.

    Additionally, both companies offer a project catalog. Glowforge’s project catalog is larger than xTool’s. I assume you’ll see the catalog grow over time.

    Glowforge vs xTool: Online Resources

    Glowforge: The Glowforge has a robust community full of helpful answers, plenty of YouTube tutorials by both Glowforge and their users, and lots of free help through creators that own and use the Glowforge.
    xTool: xTool has a small community that doesn’t seem very active. Not as many creators are currently using xTool’s machines. However, I see such a large push from xTool to get their machines out there – I expect you’ll see more resources available in the coming months.

    If community resources are important to you, Glowforge has the edge.

    Glowforge versus xTool - Comparison chart - cuttingforbusiness.com.

    Glowforge vs xTool: Price

    Glowforge: Three models – Basic, Plus, and Pro which cost $3995, $4995, and $6995.
    xTool: The M1 costs $1299. However, the base model is currently on sale for $899.

    Additionally, both companies offer third party installment plans. Or, buy on Amazon and take advantage of 0% interest using your Amazon Prime card: Glowforge on Amazon and xTool M1 on Amazon.

    Glowforge vs xTool: Discounts

    Glowforge: I can give you a coupon for up to $500 off. Click here to use it.
    xTool: Has been regularly running sales. Click here to check the current promotions.

    Glowforge vs xTool: Which One to Buy

    I mentioned at the very beginning of this article that whether you choose Glowforge, xTool, or another brand altogether – it would be based on your needs. Here are a few of my opinions.

    • On a budget? Choose the xTool M1.
    • Want to work with acrylic? Choose a Glowforge.
    • Want to engrave tumblers? Choose the xTool M1.
    • Running a business where you need to replicate products quickly? Choose Glowforge, however, I’ve seen many creatives grow past Glowforge quickly as their business scales.
    • First laser? Choose xTool M1.
    • Want to be able to choose premade designs from a large catalog? Choose Glowforge.
    • Fellow content creator looking for a machine? Choose xTool M1. Since there is not a lot of content published about xTool, you’ll be able to quickly jump in the conversation.
    • Easier to hide from spouse? Choose xTool M1. You should be able to stash it in a closet on short notice.

    No matter what machine you ultimately choose, I think we can all agree: Competition is good for consumers. As more lasers come onto the market, the existing companies are forced to innovate. And for consumers, that’s great!

    More Glowforge & xTool Content

  • Tutorial: Engraved Tumbler with xTool M1

    The aspect of the xTool M1 that excites me most is that it can engrave tumblers! Of all the machines I have (I have a lot of them! ), no other machine can engrave tumblers.

    Before we get started, be sure to check back at the other projects I’ve already shared. Don’t forget: xTool provided me the machine for review purposes. The experiences and opinions are my own.

    So, let’s take a look at how to create an engraved tumbler with xTool.

    Tutorial: Engraved Tumblers with xTool - by cuttingforbusiness.com.

    Tutorial: Engraved Tumbler with xTool M1

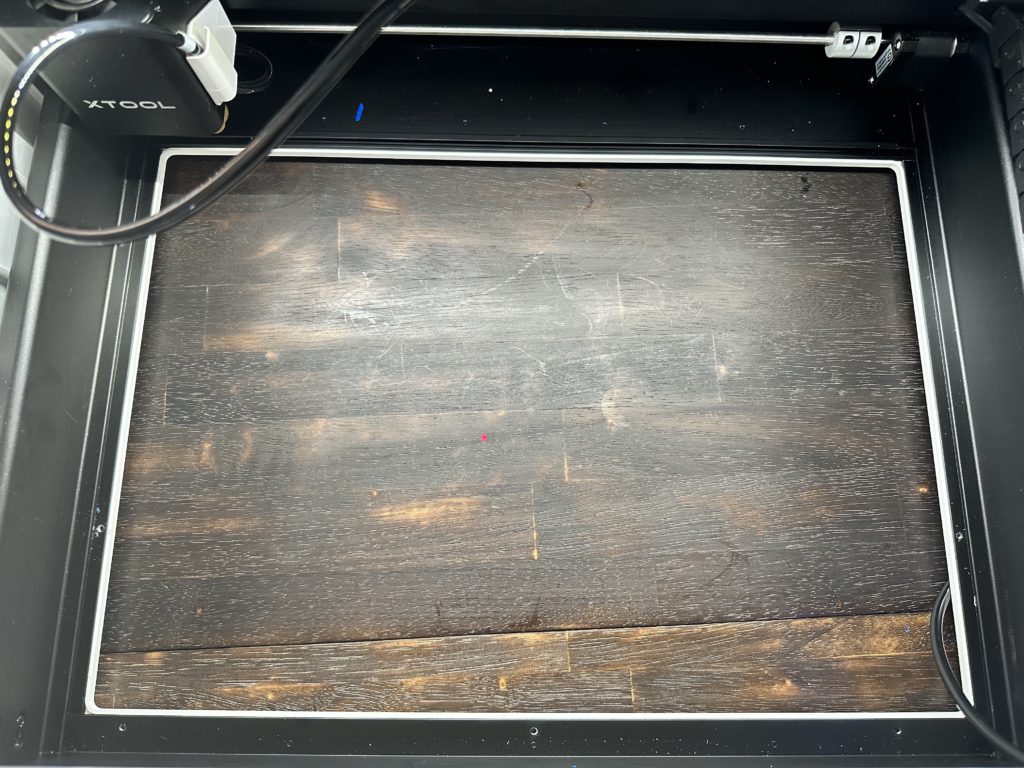
    1. Remove the bottom of the xTool by removing the five screws.
    Tutorial: Engraved Tumblers with xTool - Remove bottom - by cuttingforbusiness.com.

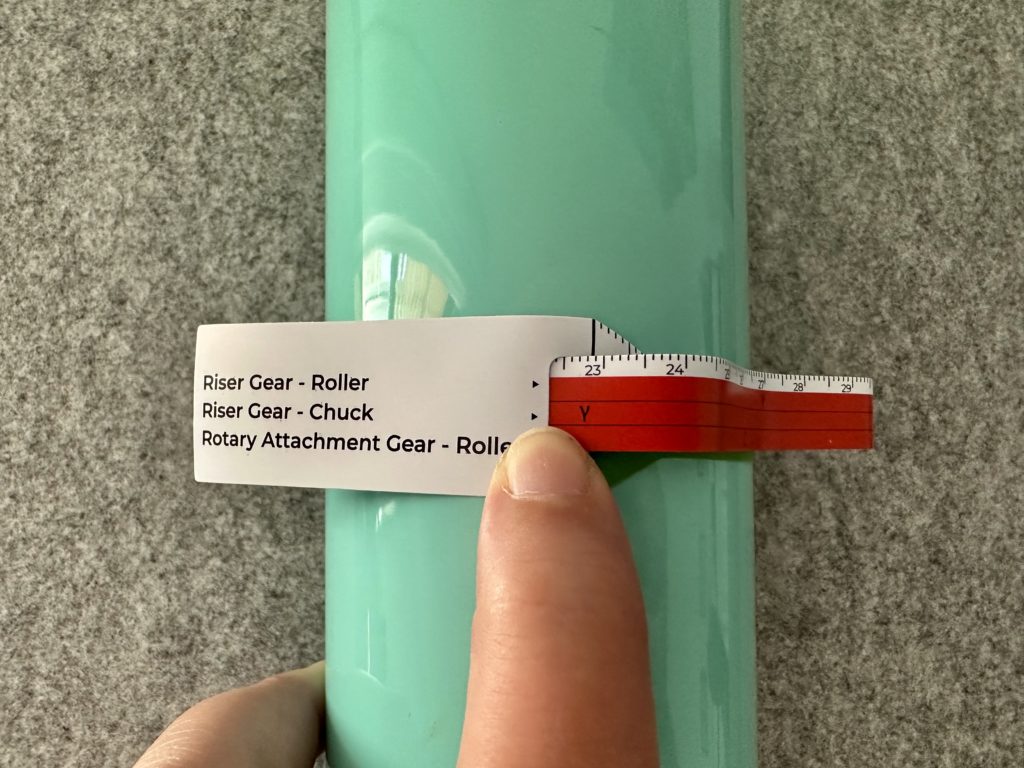
    2. Measure around your tumbler with the included tape measure. The included tape measure gives you settings for the roller, chuck, and rotary attachment. Take note of each of the settings.

    Tutorial: Engraved Tumblers with xTool - Measure tumbler - by cuttingforbusiness.com.

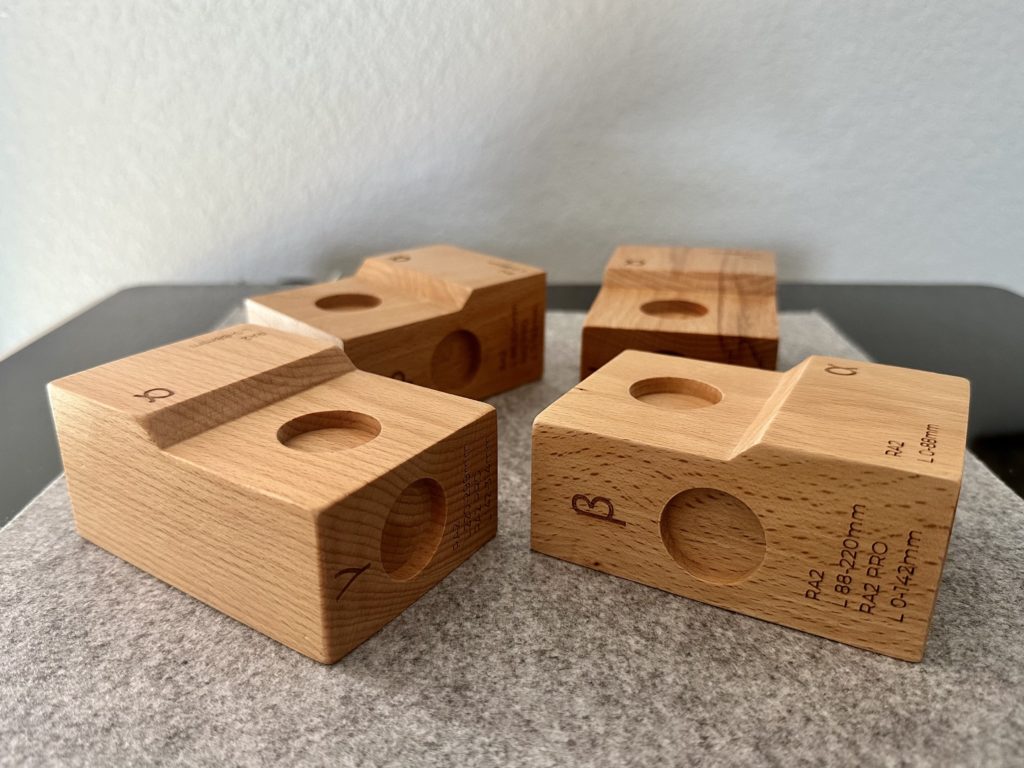
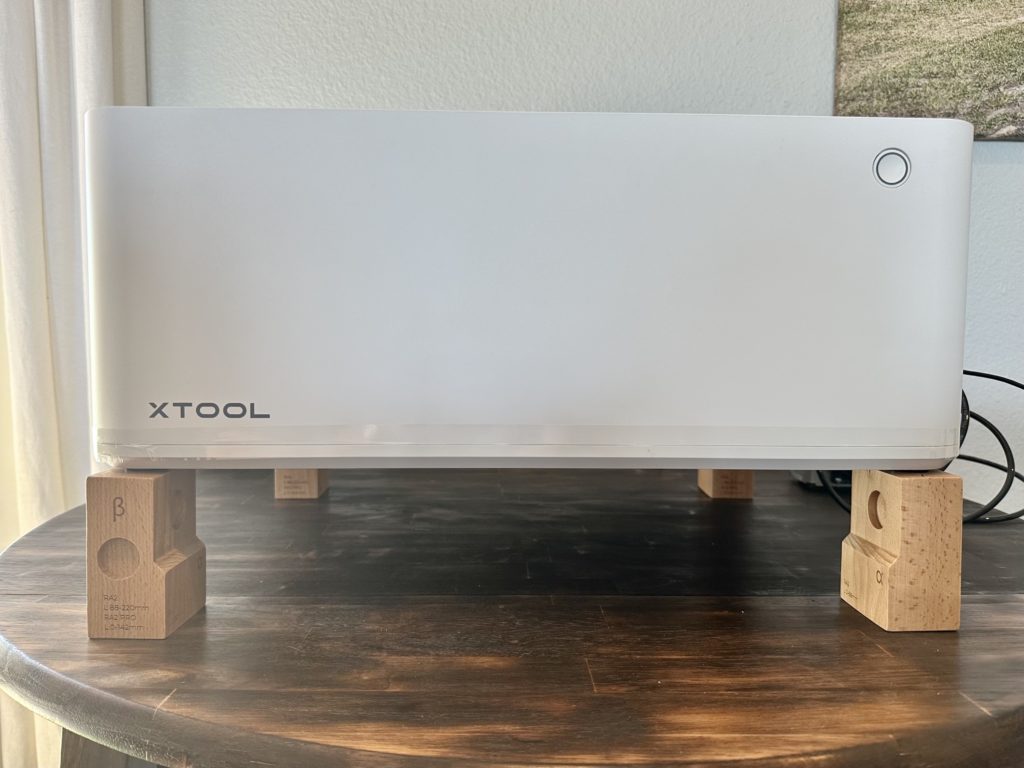
    3. Place the chucks under each corner of the machine with the letter on the tape measure facing up. The machine needs to be raised because the laser has to be a certain distance from the item to be engraved. The only way to do this is through raising the machine.

    If you don’t want to use the included chucks, xTool also sells a riser base.

    Tutorial: Engraved Tumblers with xTool - Chucks - by cuttingforbusiness.com.
    Tutorial: Engraved Tumblers with xTool - Raise machine - by cuttingforbusiness.com.

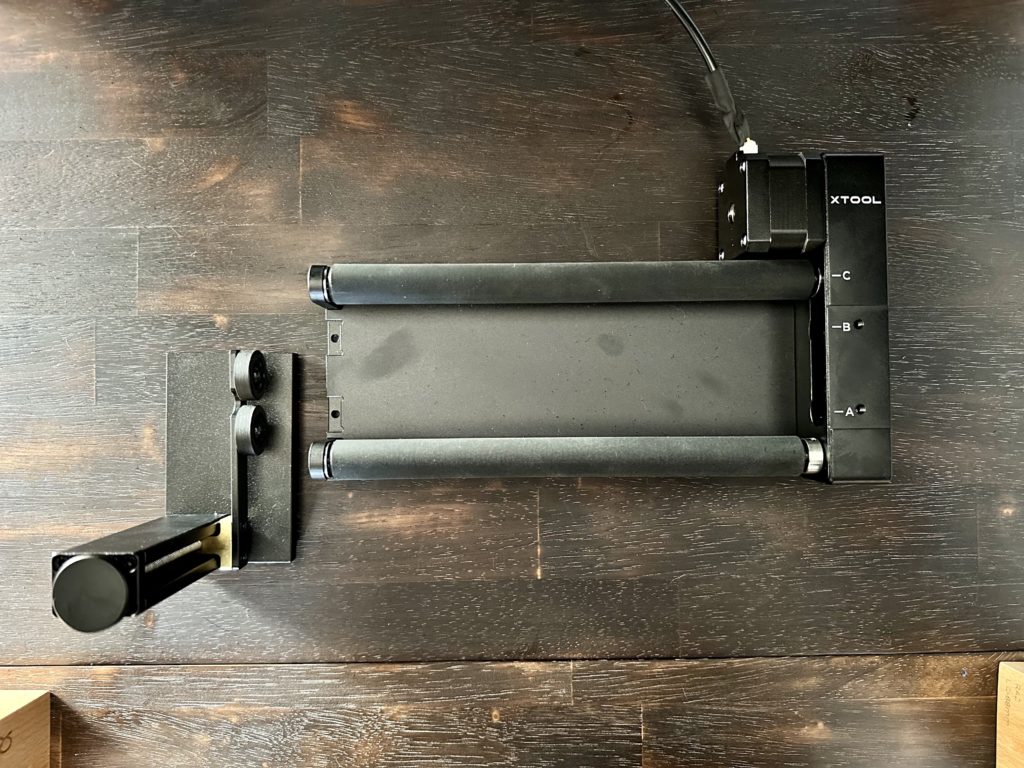
    4. Place the rotary attachment inside the machine with the rollers adjusted to the letter shown on the tape measure. Connect it to the xTool.

    Tutorial: Engraved Tumblers with xTool - Rotary attachment - by cuttingforbusiness.com.

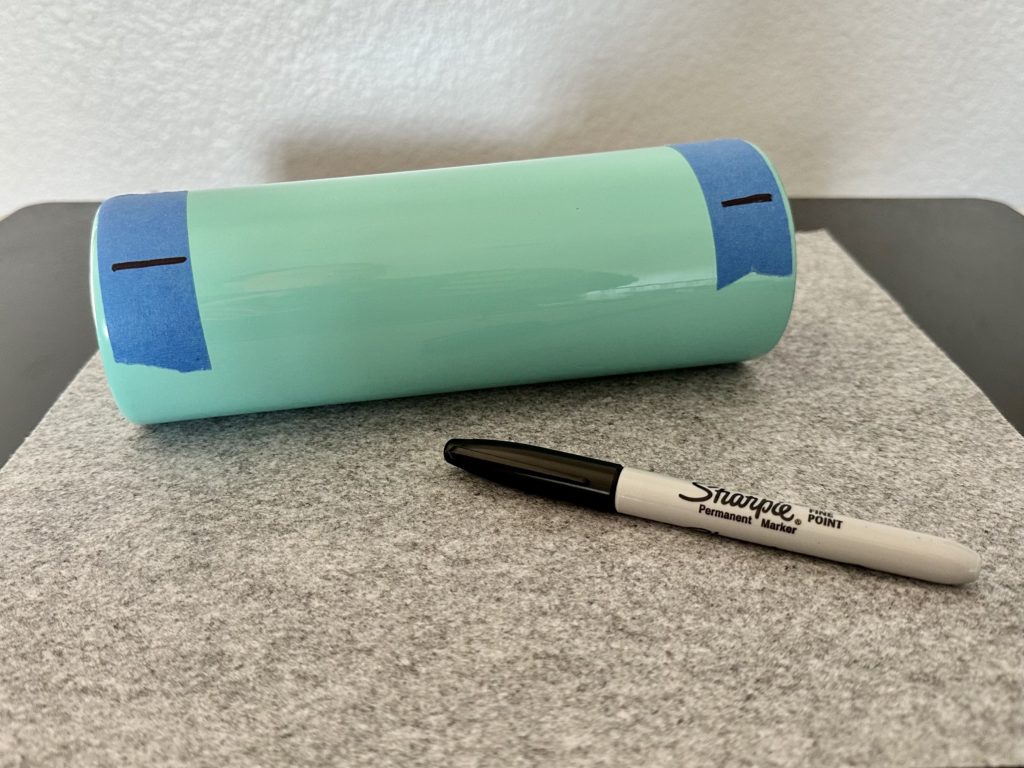
    5. Using tape and a marker, measure and mark both the top and the bottom of where you want the engraving to start.

    Tutorial: Engraved Tumblers with xTool - Mark tumbler - by cuttingforbusiness.com.

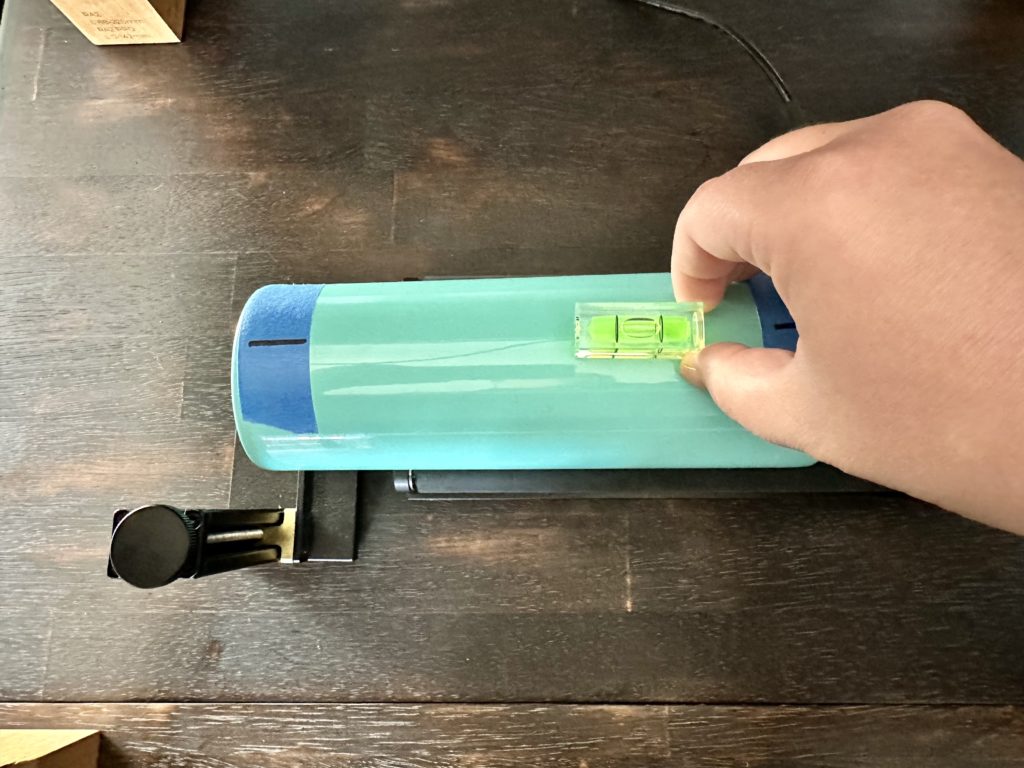
    6. Place the on the rotary rollers. Using the included level, you’ll need to level the surface of the tumbler. Since my tumbler has a slight taper, I use the included support. Leveling with the support is easy: Turn the knob until the bubble lines up in the level.

    Tutorial: Engraved Tumblers with xTool - Level tumbler - by cuttingforbusiness.com.

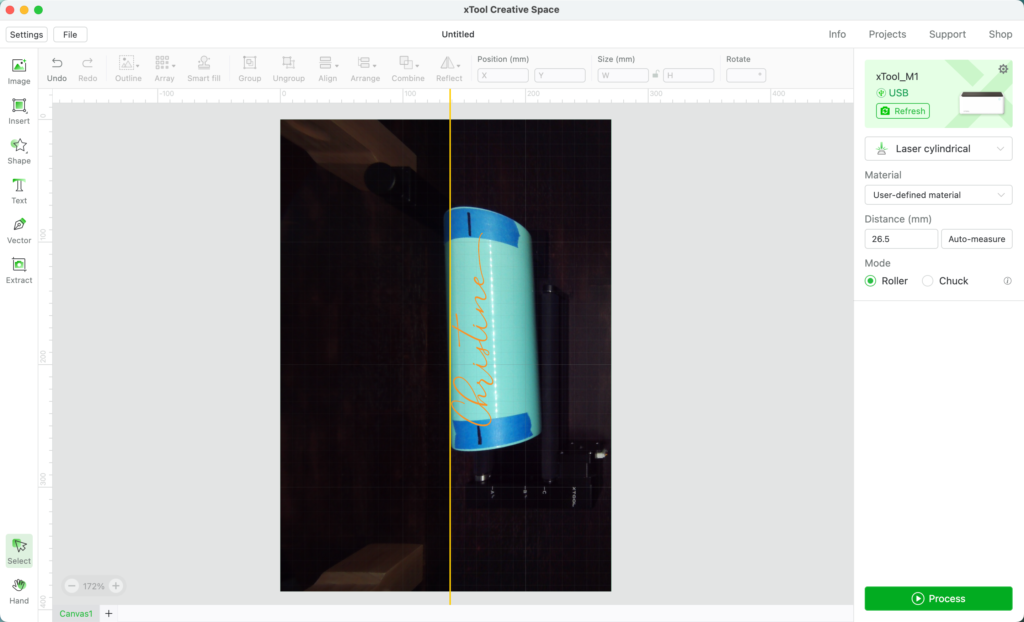
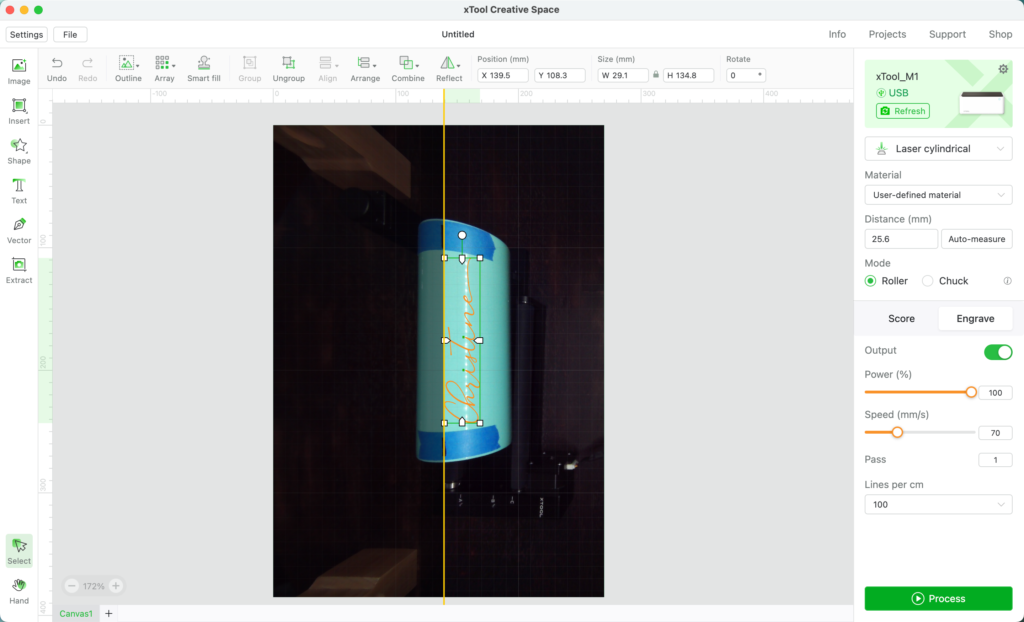
    7. Turn on the xTool and open the software. Once the machine connects, you’ll see a slightly distorted view of the your tumbler.

    Tutorial: Engraved Tumblers with xTool - Line up tumbler - by cuttingforbusiness.com.

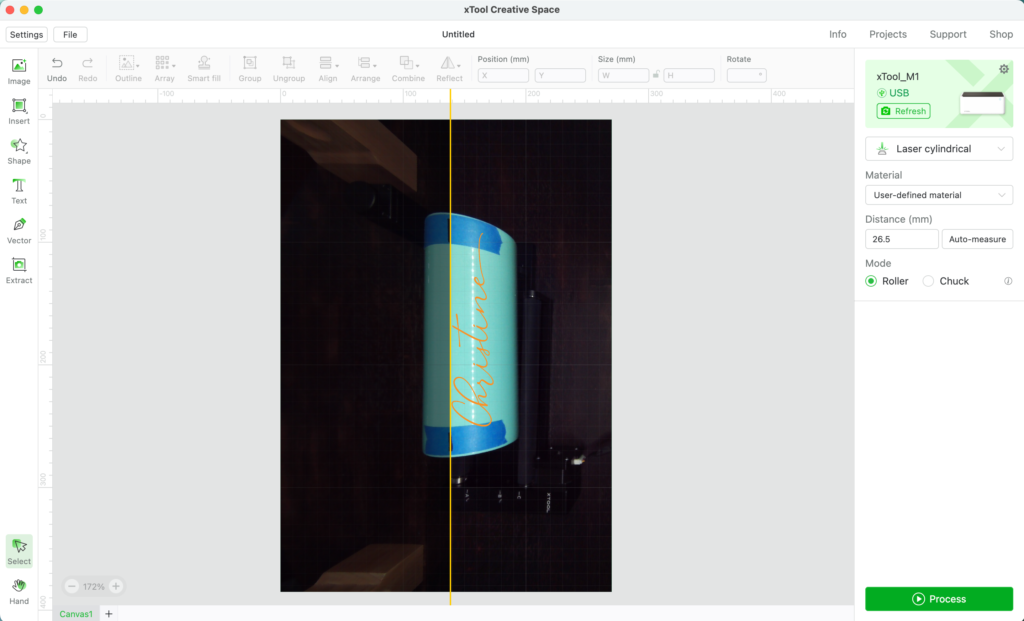
    8. The yellow line down the center of the software is important: This is where the engraving will start. So, you’ll want to line up the marker lines you made with the yellow line by moving the tumbler and rollers. When I live it up, I don’t open the lid, I just reach under the machine – then click ‘Refresh’ in the software.

    Tutorial: Engraved Tumblers with xTool - Align tumbler - by cuttingforbusiness.com.

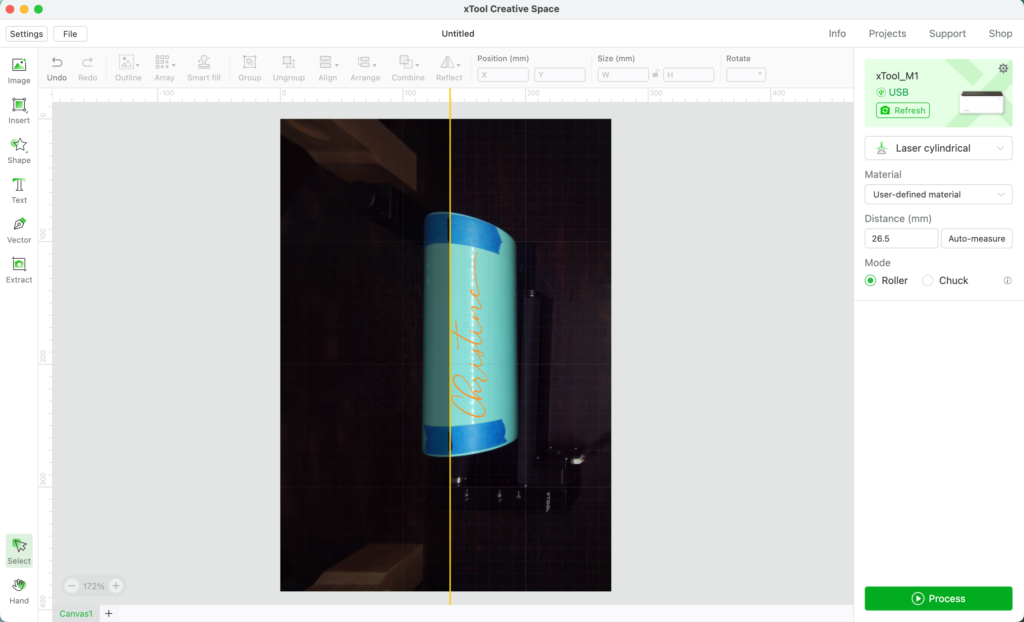
    9. Adjust your artwork.

    Tutorial: Engraved Tumblers with xTool - Adjust artwork - by cuttingforbusiness.com.

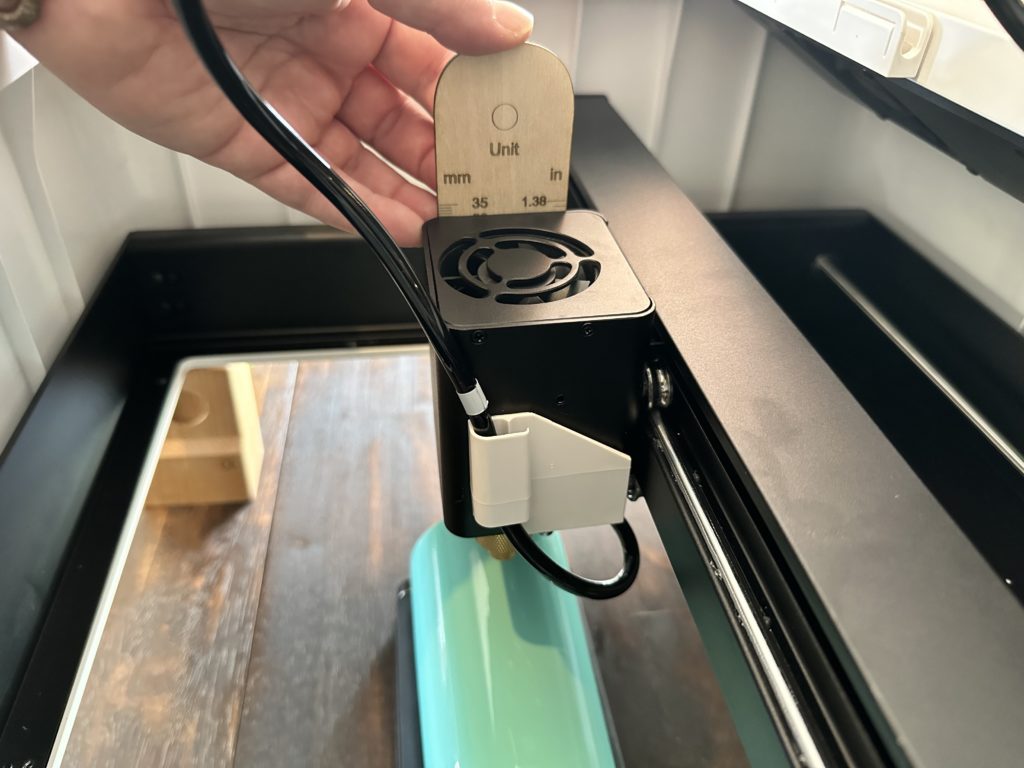
    10. In the xTool software, click ‘Auto Measure’. The machine automatically measures my tumbler as 25.6mm. This is the distance between the tumbler and the laser. (Remember the discussion above about rising the machine? The laser beam is strongest right at the 30mm mark.)

    In the event the item won’t measure, download a measuring tool from xTool. To use the measuring tool, cut it out, then place it on top of the item to be measured. Measure to the top of the laser unit and manually enter the value.

    Tutorial: Engraved Tumblers with xTool - Manually measure - by cuttingforbusiness.com.

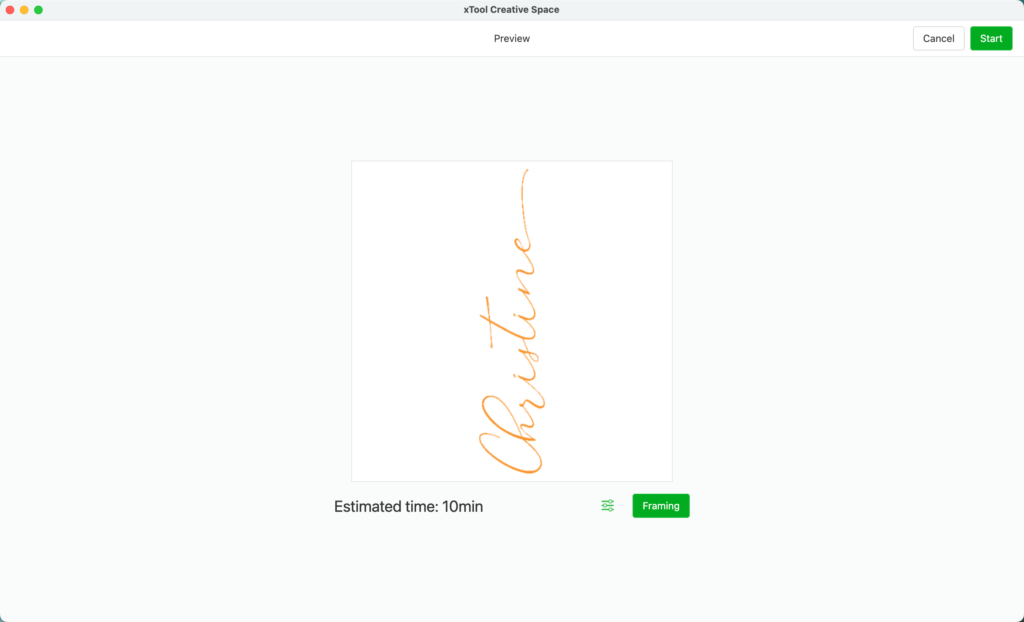
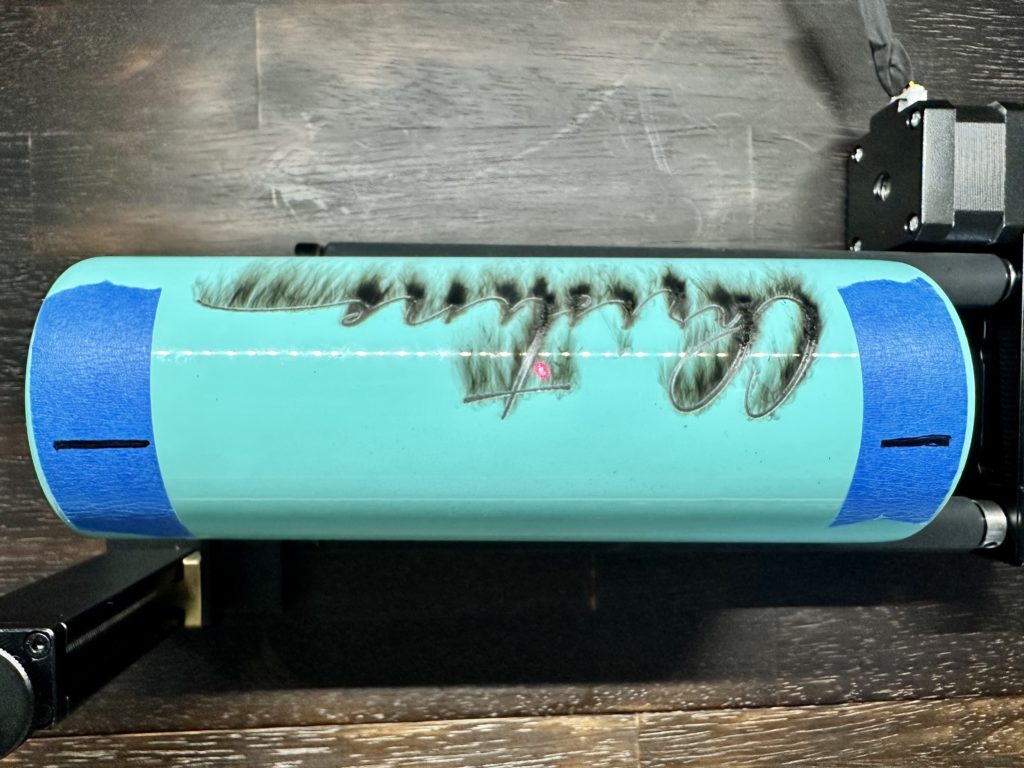
    11. Adjust the settings in the software. I used 100% power and speed 70. Process the design.

    Tutorial: Engraved Tumblers with xTool - Process design - by cuttingforbusiness.com.
    Tutorial: Engraved Tumblers with xTool - xTool software screenshot - by cuttingforbusiness.com.

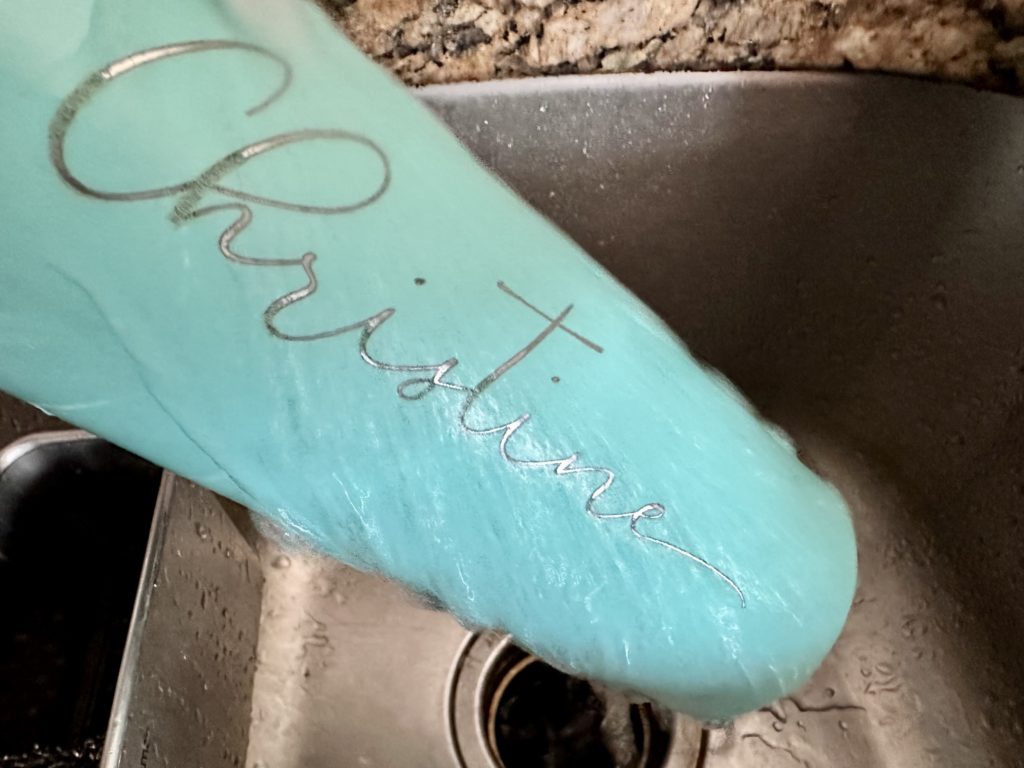
    12. Take the tumbler out of the xTool and rinse it off.

    Tutorial: Engraved Tumblers with xTool - Wash off residue - by cuttingforbusiness.com.
    Tutorial: Engraved Tumblers with xTool - Rinse tumbler - by cuttingforbusiness.com.

    Business Use

    Do I think you could use the xTool M1 to engrave tumblers to sell in your craft business? Yes! You could engrave tumblers with company logos, names, bride/groom, sports teams, and more.

    There are a lot of possibilities for engraved products with the xTool, because the product doesn’t have to fit inside the machine. This means you could engrave baseball bats or rolling pins, among a lot of other things.

    Tomorrow, we are wrapping up this xTool series with a discussion on the Glowforge versus the xTool.

  • Tutorial: Cutting Vinyl with the xTool M1

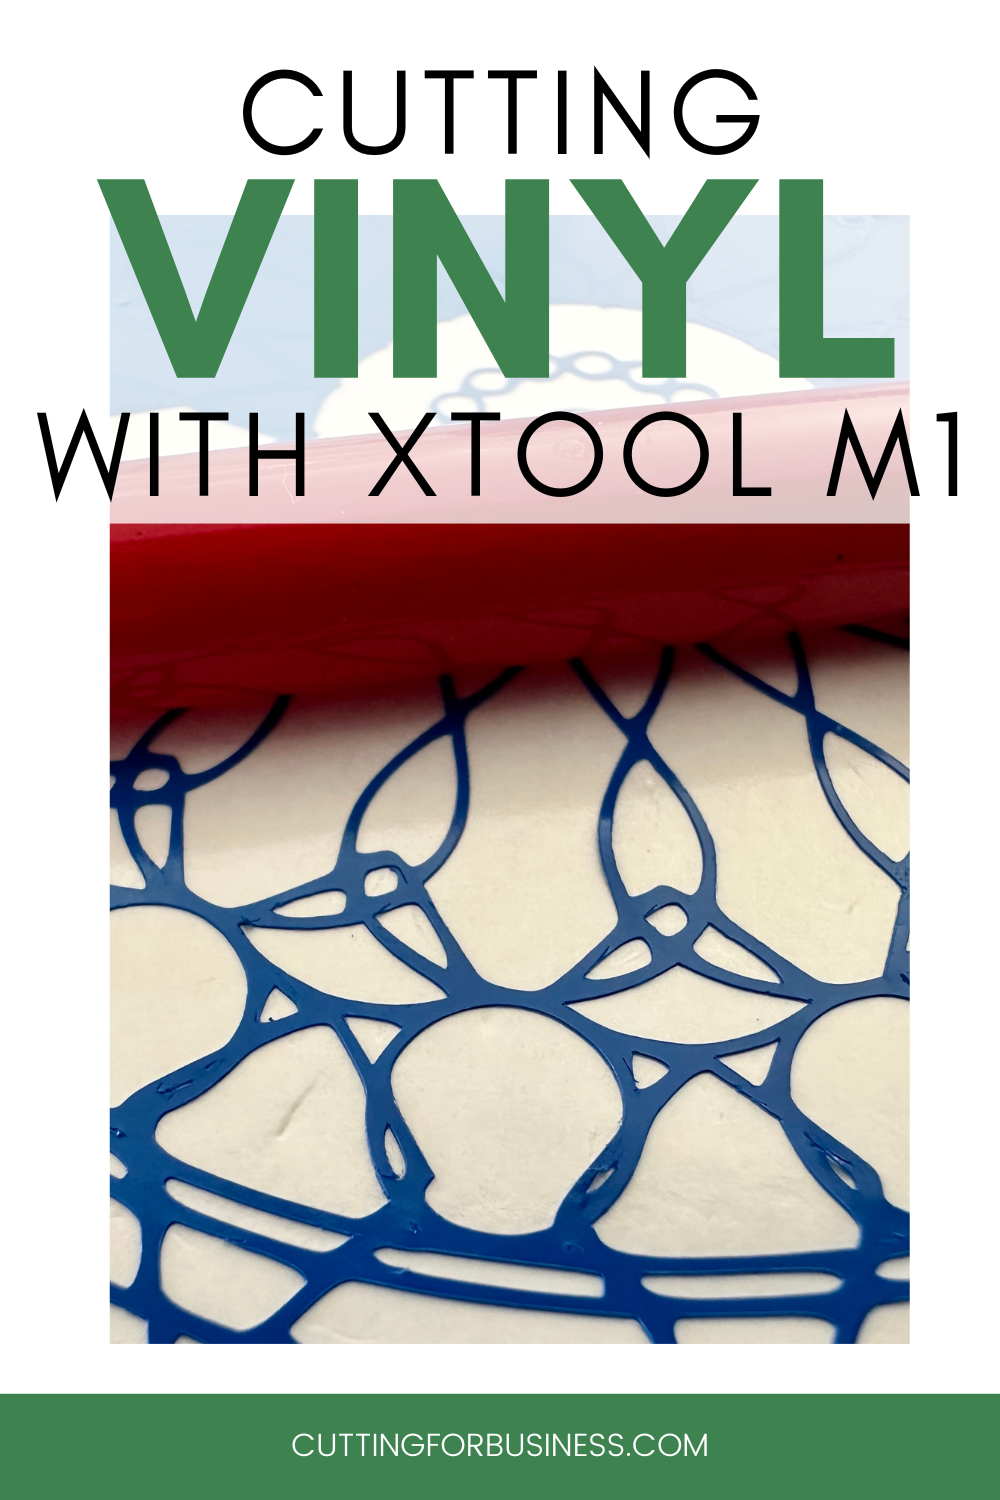
    One aspect of the xTool M1 that I have only briefly touched on is that it is a hybrid machine. It contains both a diode laser and a blade. You can think of it as a laser and Silhouette or Cricut – all in one.

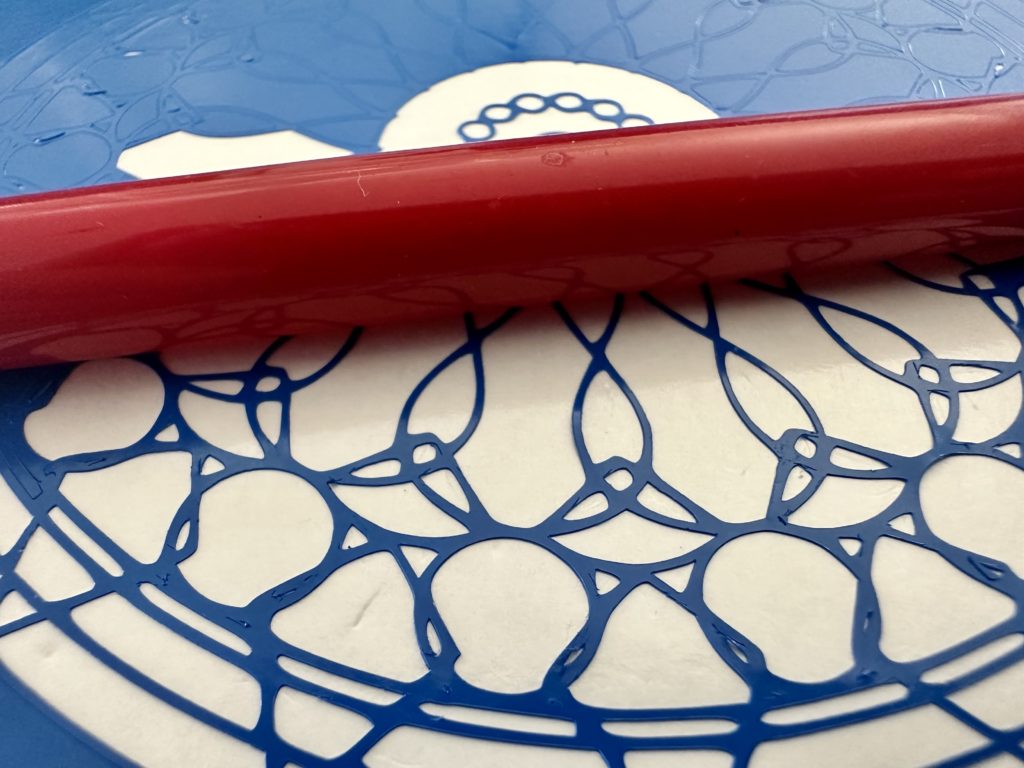
    Today, I want to put that blade to the test and see about cutting vinyl with the xTool. I went through the files on my computer and found an intricate mandala I created while teaching my How to Design SVGs course.

    Before we get started: It isn’t safe to ever cut vinyl in a laser cutter. The PVC based material releases gasses that can damage the machine and your lungs. I did notice that there is not a notice in the sample material package from xTool about this.

    Tutorial: Cutting Adhesive Vinyl with the xTool M1 - Review - cuttingforbusiness.com.

    Tutorial: Cutting Vinyl with the xTool M1

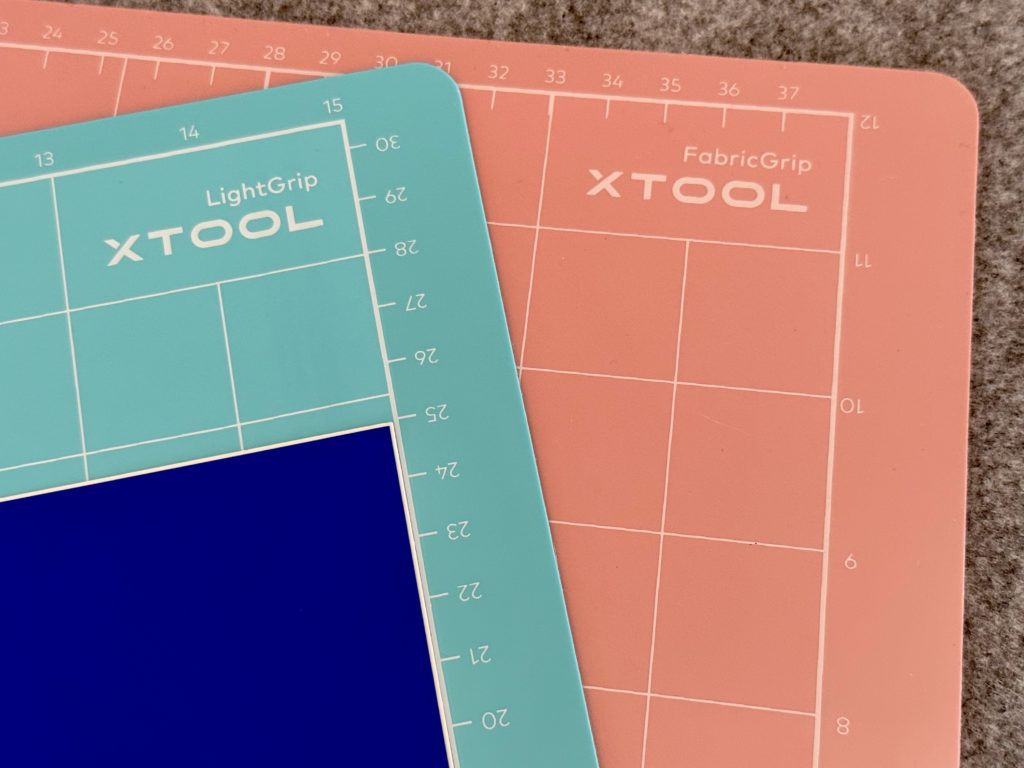
    1. To cut vinyl, you’ll want to use one of the included sticky mats. If you’ve been around the craft world for a while, the mats look like Cricut mats but are thinner like Silhouette mats. Place your vinyl onto the mat. I’m using the LightGrip mat (blue).

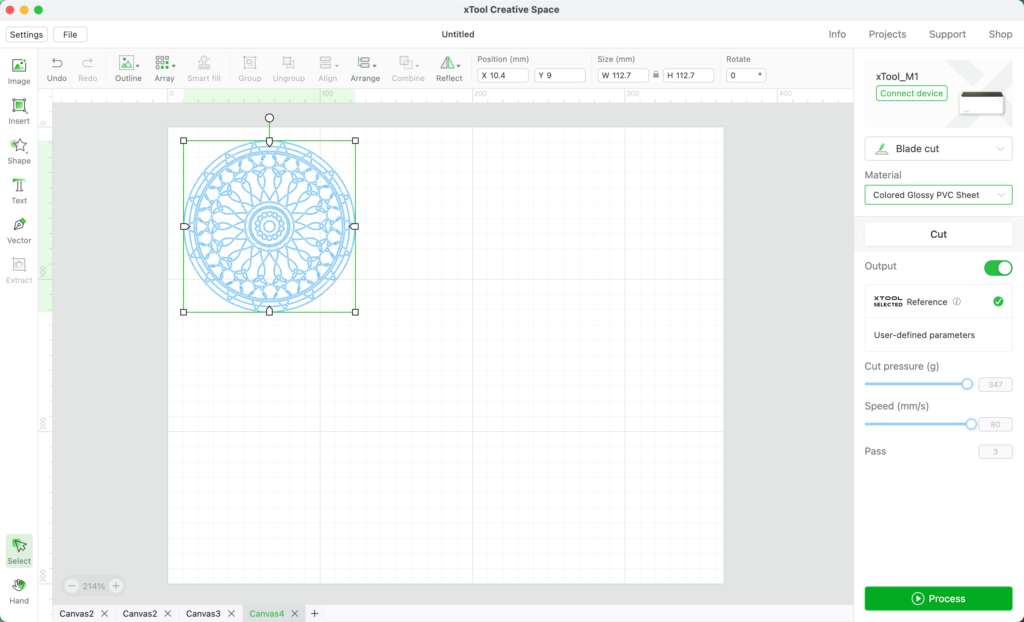
    2. Load the design into the xTool software, and place the mat inside the machine. The mat is sticky on both sides, and must be adhered to the bottom of the machine. Choose your settings and process the design.

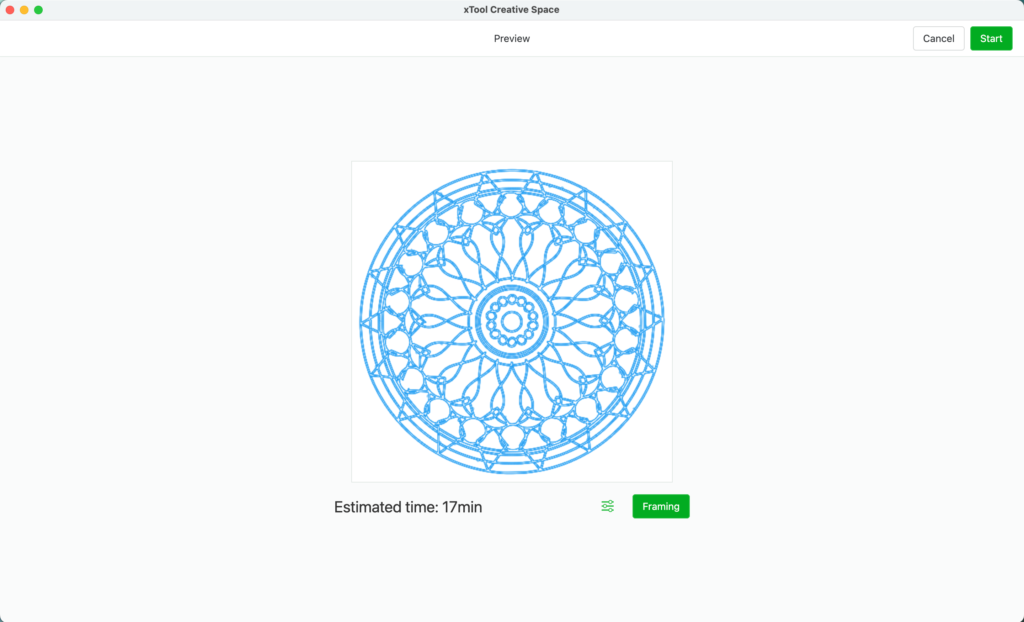
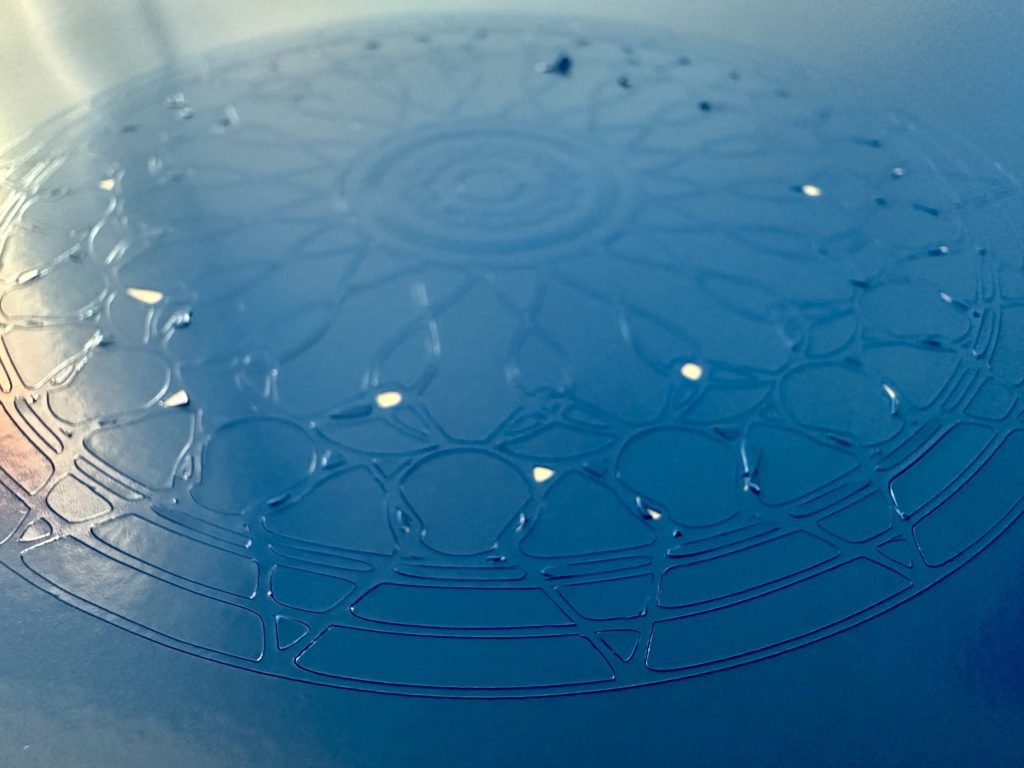
    It took the xTool M1 about 20 minutes to cut the design. I lost a few small bits along the way, but the cut is similar to what any of my Silhouettes or Cricuts would cut. Weeding is very easy.

    I’m pretty sure that if the xTool can handle this tiny, intricate cut – it will be fine with whatever vinyl you decide to cut using the blade.

    Is the xTool Good for Vinyl Businesses?

    If you only plan to cut vinyl, an xTool is going to be too expensive for your needs. Instead, stick with a Silhouette or a Cricut.

    However, if you plan to mostly cut or engrave other materials with an occasional vinyl cut – the xTool might work for your needs.

    More xTool Content

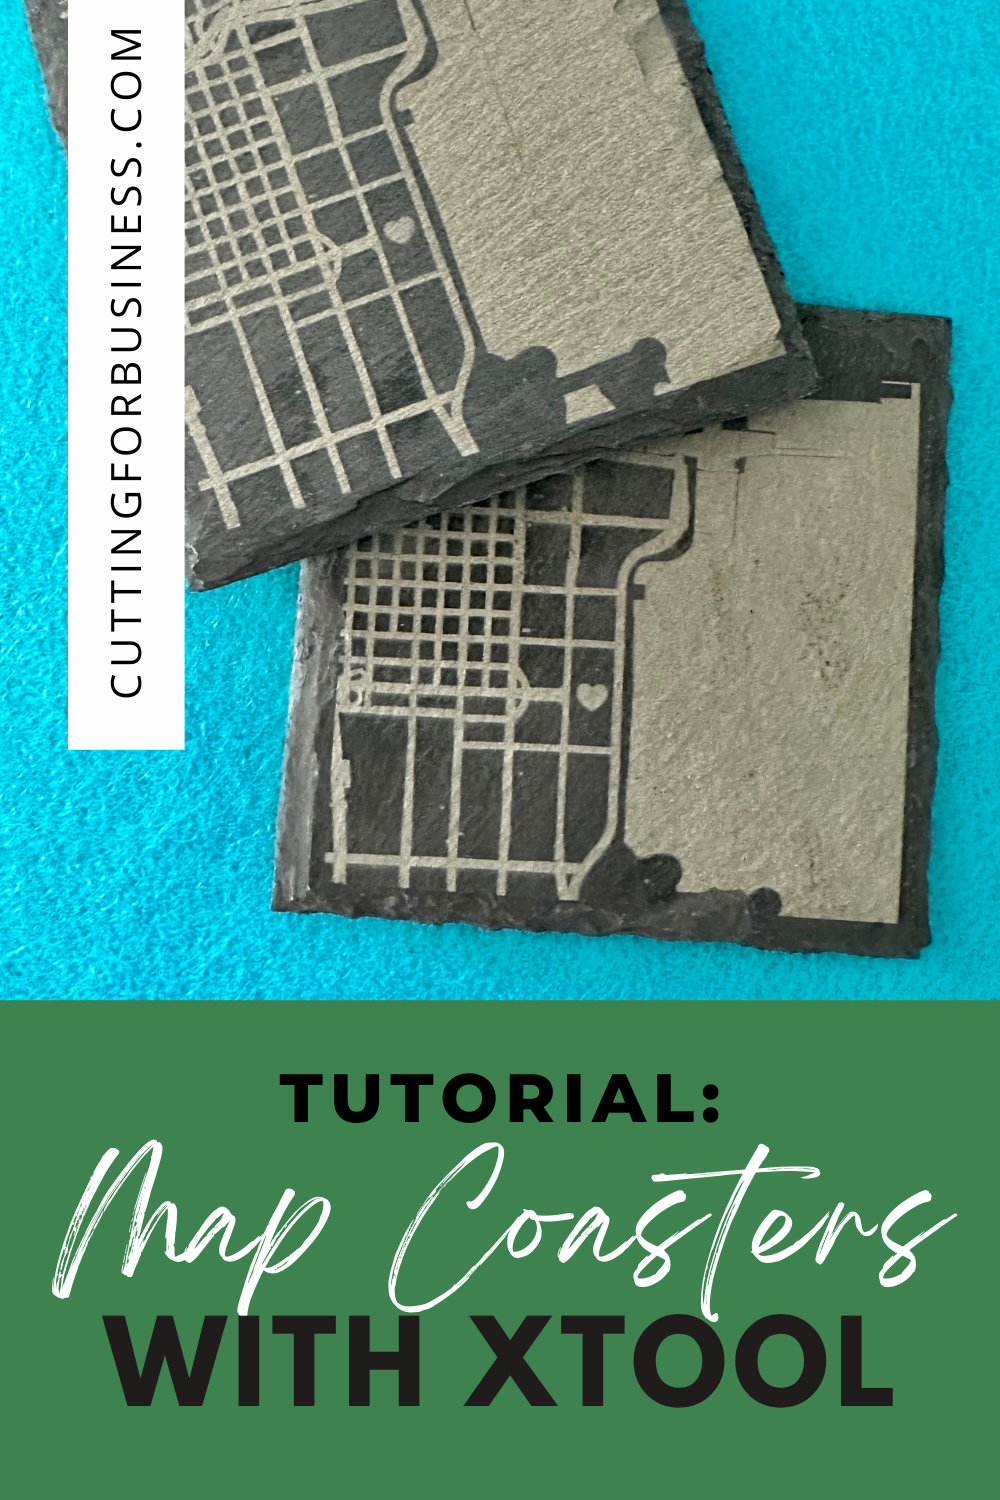
  • Tutorial: Engraved Map Coasters with xTool M1

    All week long, I’ve been sharing my thoughts, experiences, and opinions on the xTool M1 machine that was sent to me for review. As always, the opinions and experiences are my own.

    I’ve already shared my unboxing and setup, a tutorial for engraved paw print jewelry, and my opinions on designing in the xTool software.

    My xTool M1 came with a large package of starter materials. One thing I found interesting was the stone coasters. I think they would make a perfect anniversary gift for Mr. Cutting for Business – with whom I’ll be celebrating our 13th wedding anniversary this year.

    Let’s take a look at how I created the engraved map coasters.

    Tutorial: Engraved Map Coasters with xTool M1 - cuttingforbusiness.com.

    Tutorial: Engraved Map Coasters with xTool M1

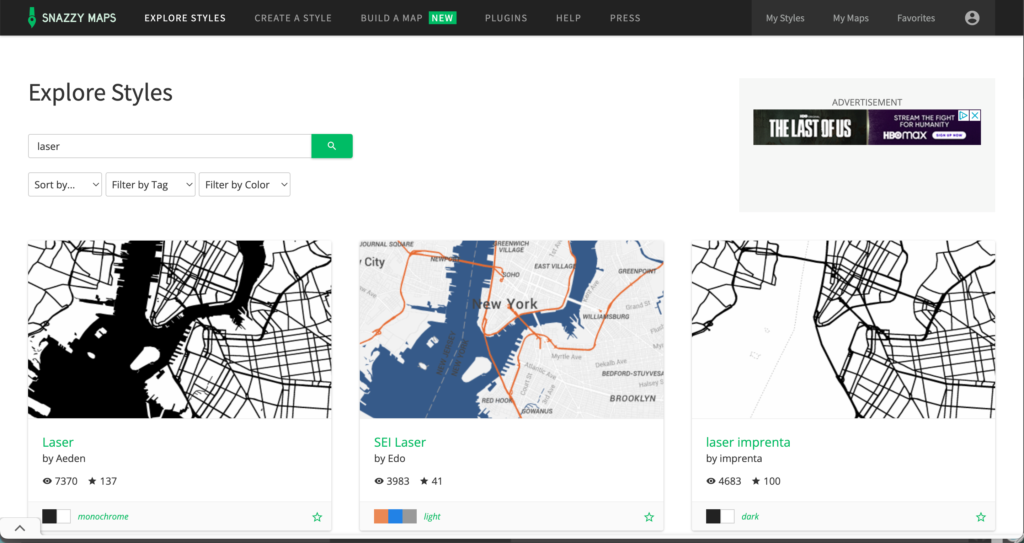
    1. Decide on what you will engrave on the coasters. Since I’m creating this for an anniversary – I’m going to engrave a map of where we got married. The first step is to head over to Snazzy Maps and look up the location.
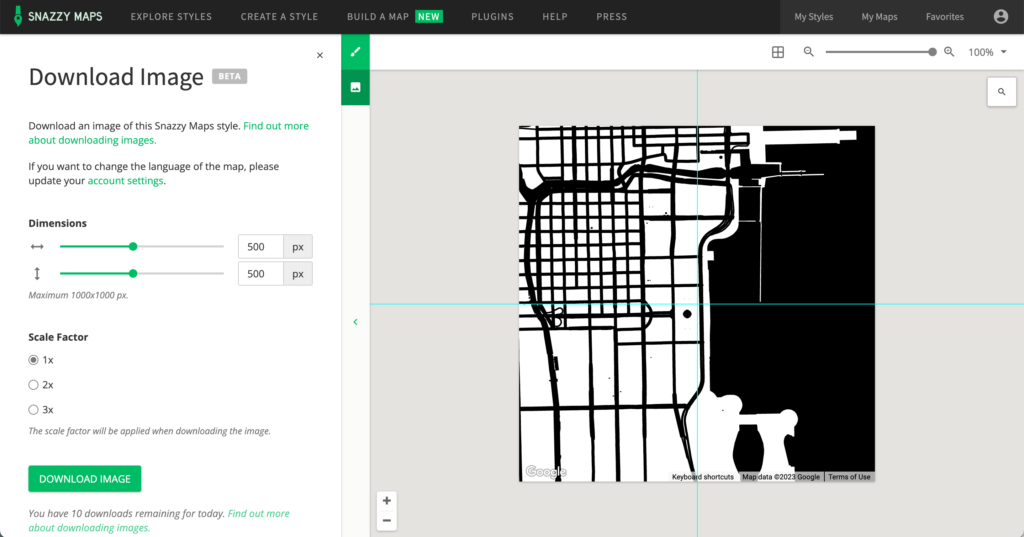
    Tutorial: Engraved Map Coasters with xTool M1 - Snazzy Maps - cuttingforbusiness.com.

    2. If you’ve never used Snazzy Maps, it’s a pretty cool site that allows you to view maps with different filters on it. Once you’ve got your location, click ‘Explore Styles’ on the navigation menu. Type ‘laser’ into the search box. After searching, you’ll find a few different laser styles. Click one of them. In this tutorial, I chose the first one.

    Tutorial: Engraved Map Coasters with xTool M1 - Snazzy Maps - cuttingforbusiness.com.

    3. Your map will now display with the style on it. Click the ‘Download image’ button, then download the map.

    Tutorial: Engraved Map Coasters with xTool M1 - Snazzy Maps - cuttingforbusiness.com.

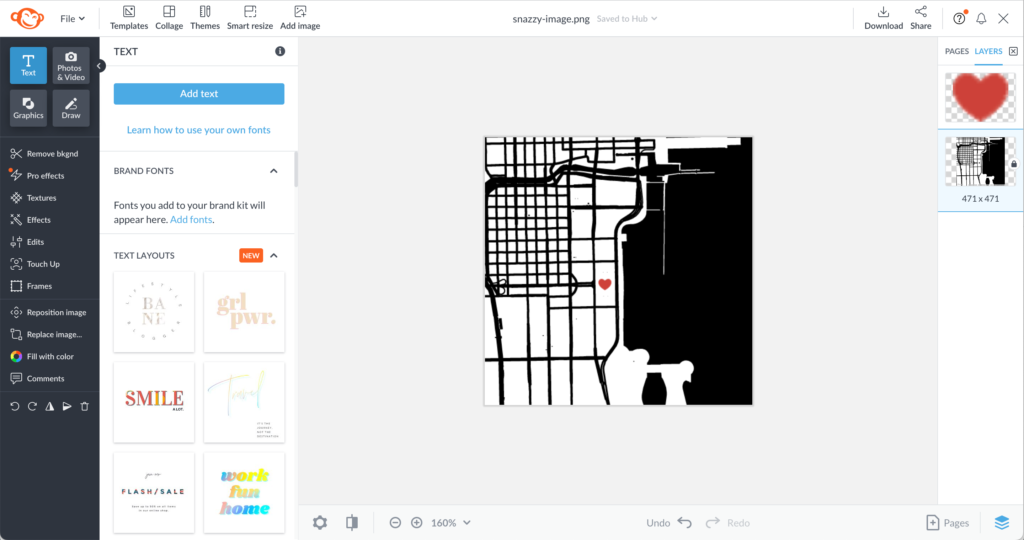
    4. Open your downloaded map in your favorite photo editor. You’ll want to crop the image to remove the text at the bottom. I also added a heart at the spot we got married. Save the image.

    Tutorial: Engraved Map Coasters with xTool M1 - Snazzy Maps - cuttingforbusiness.com.

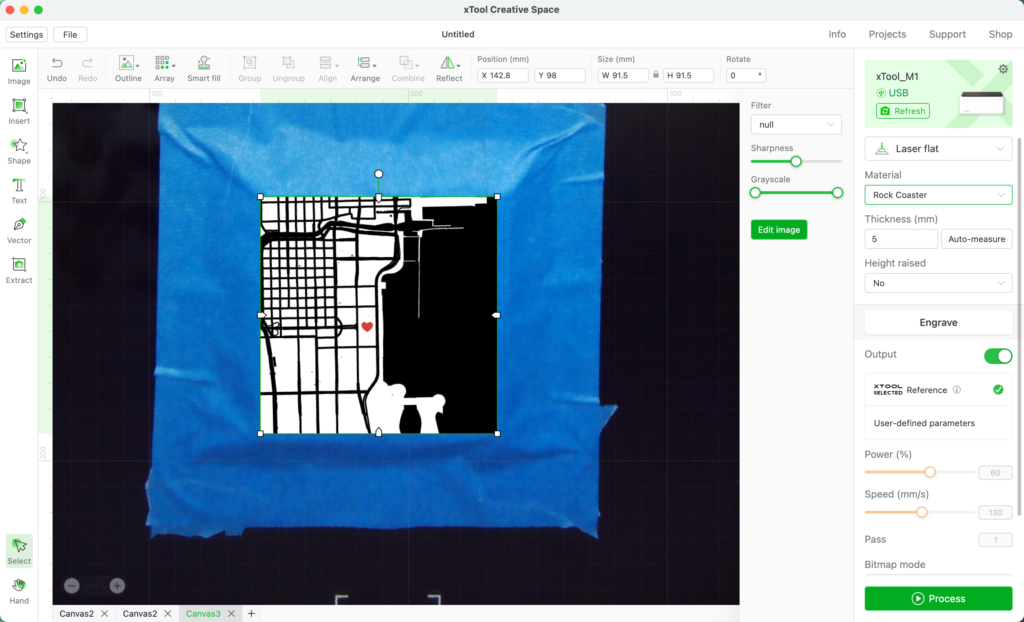
    5. Open your image in the xTool software. Define your settings and process the design.

    Tutorial: Engraved Map Coasters with xTool M1 - Snazzy Maps - cuttingforbusiness.com.

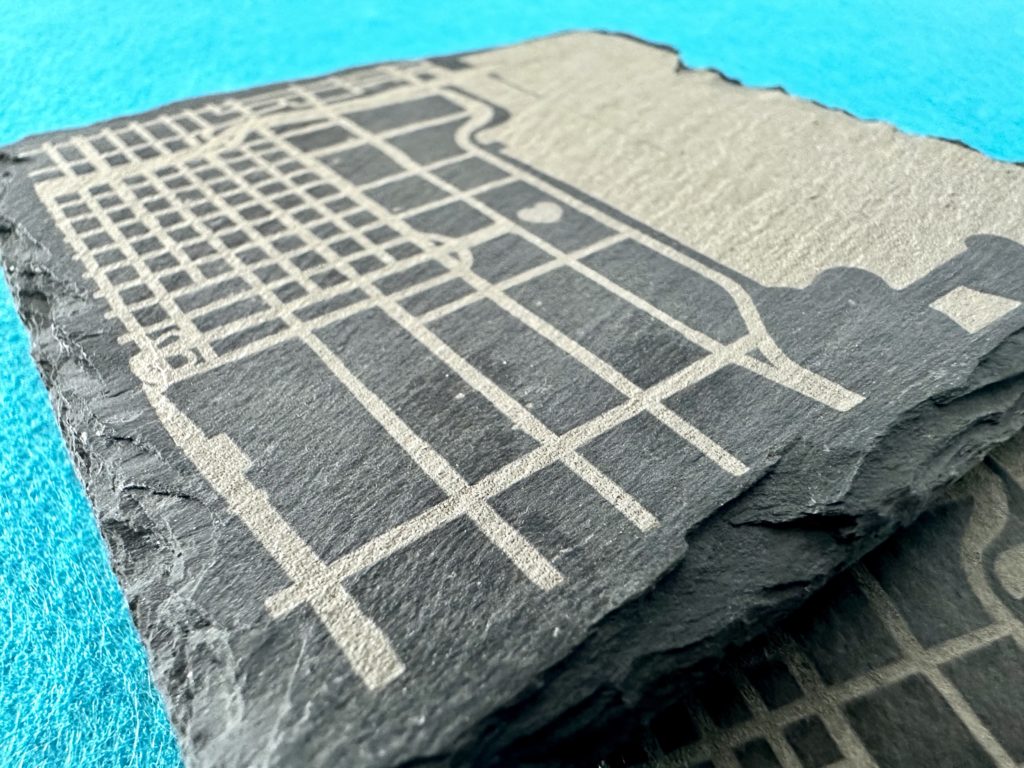
    The finished coasters look nice with a clean engrave. They took about 40 minutes per 4 inch by 4 inch coaster. I think I’ll pair them with a nice whiskey set for our upcoming anniversary.

    Tutorial: Engraved Map Coasters with xTool M1 - Finished project - cuttingforbusiness.com.
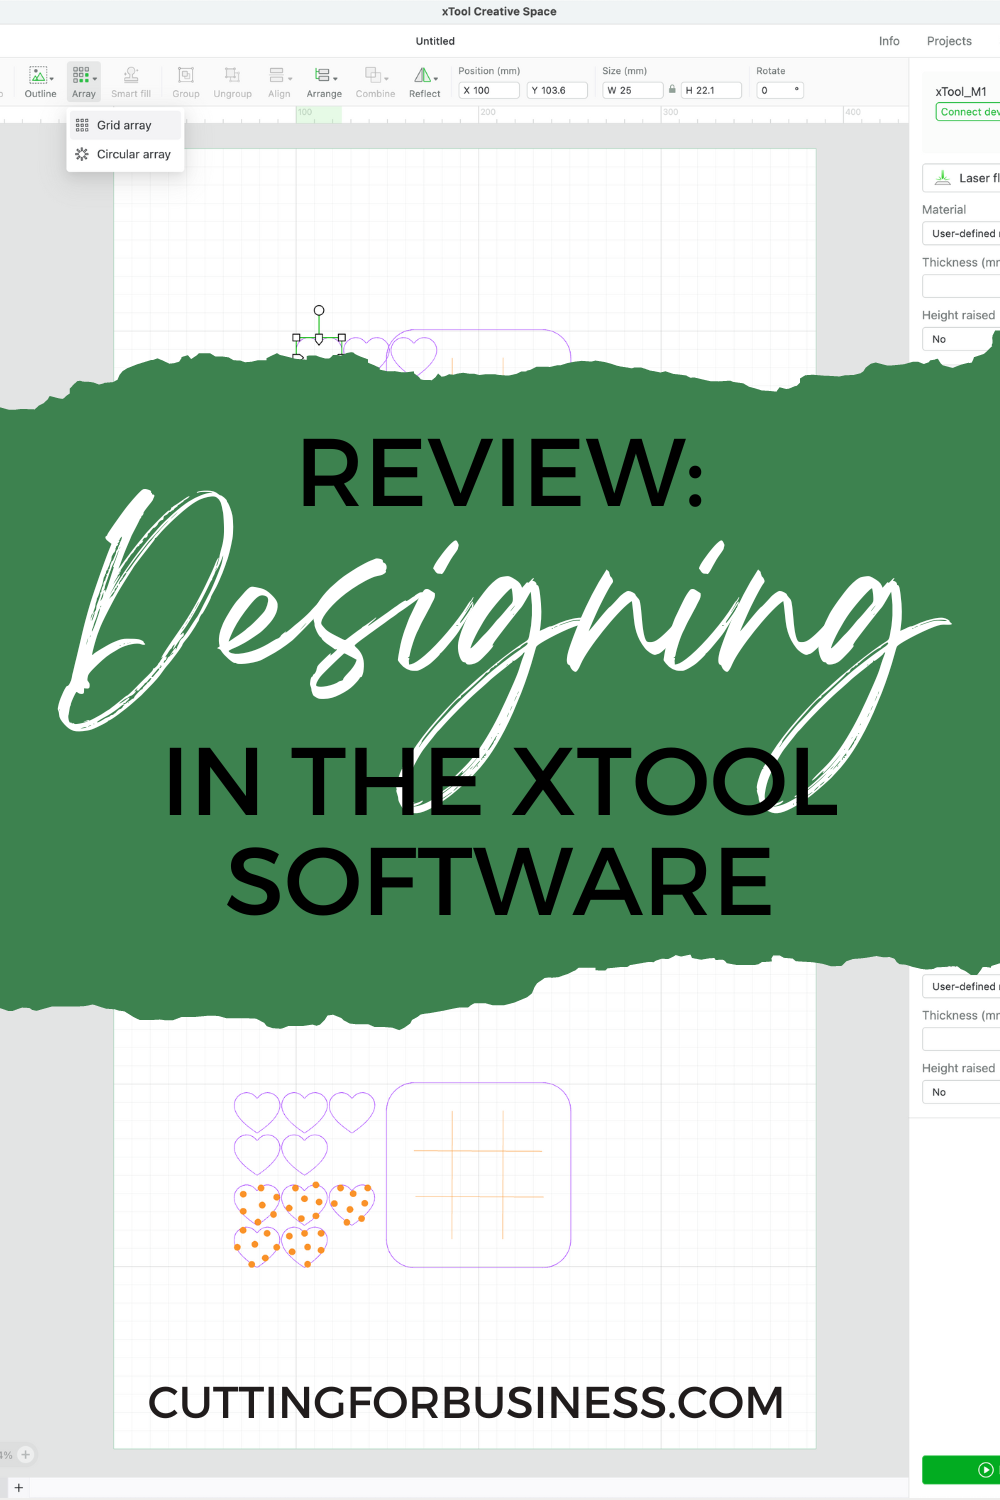
  • Review: Designing in the xTool Software

    My first project with the xTool M1 was engraved paw print jewelry. Today, I’m experimenting with designing right inside the xTool software. Let’s design a Tic Tac Toe game with 10 markers.

    If you missed the previous xTool posts: xTool M1 set up and engraved paw print jewelry.

    As a reminder, I received the xTool M1 machine in exchange for a review. All experiences and opinions are mine.

    Review: Designing in the xTool Software - Tutorial: Tic Tac Toe Board and Markers - cuttingforbusiness.com.

    Designing in the xTool Software

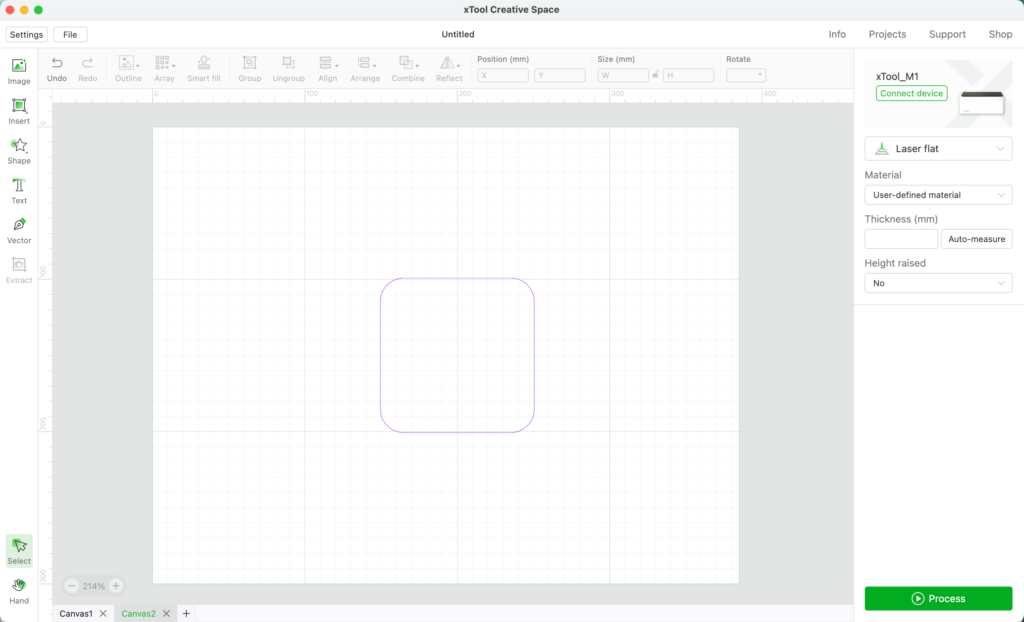
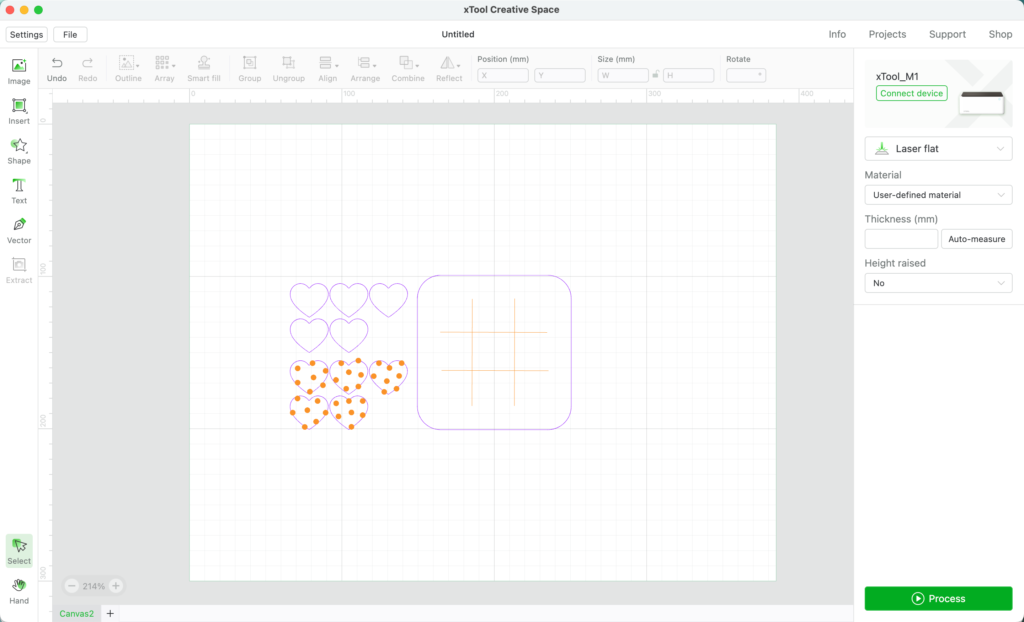
    1. First, we will need a shape for the Tic Tac Toe game. I’ll use a square with rounded corners. The first small issue I ran into was I wasn’t quite sure how big my square was – as sizing is listed in millimeters. I quickly converted mm to inches on Google. 4 inches is about 101 millimeters.
    Screenshot - Review: Designing in the xTool Software - Tutorial: Tic Tac Toe Board and Markers - cuttingforbusiness.com.

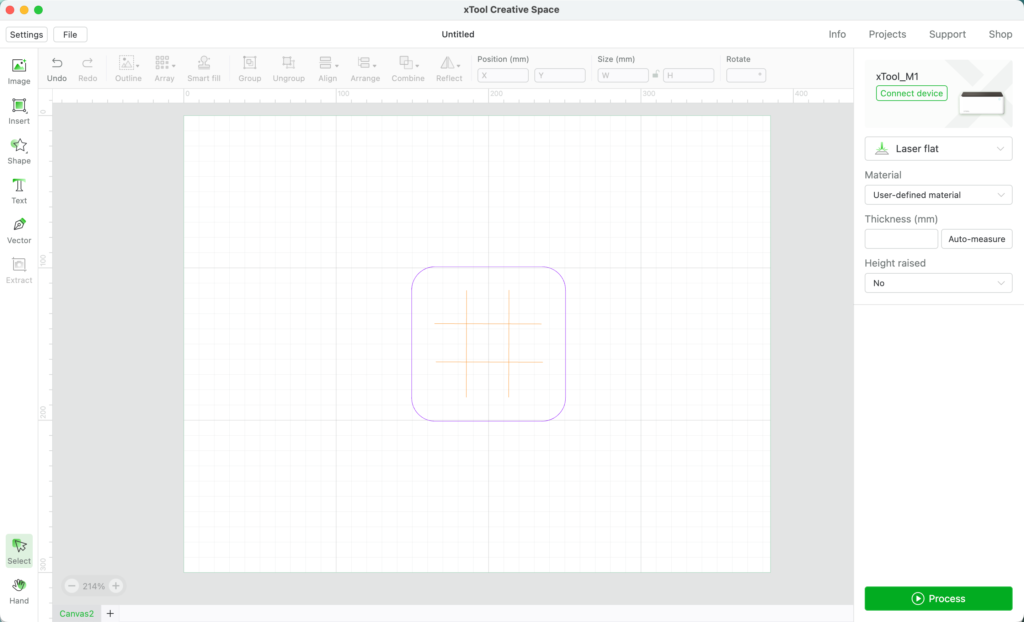
    2. Next, I added lines for the board. I added these from ‘Insert’, ‘Line’. Spacing guides popped up when I was placing the lines. I was able to align the lines using the grid in the program.

    Screenshot - Review: Designing in the xTool Software - Tutorial: Tic Tac Toe Board and Markers - cuttingforbusiness.com.

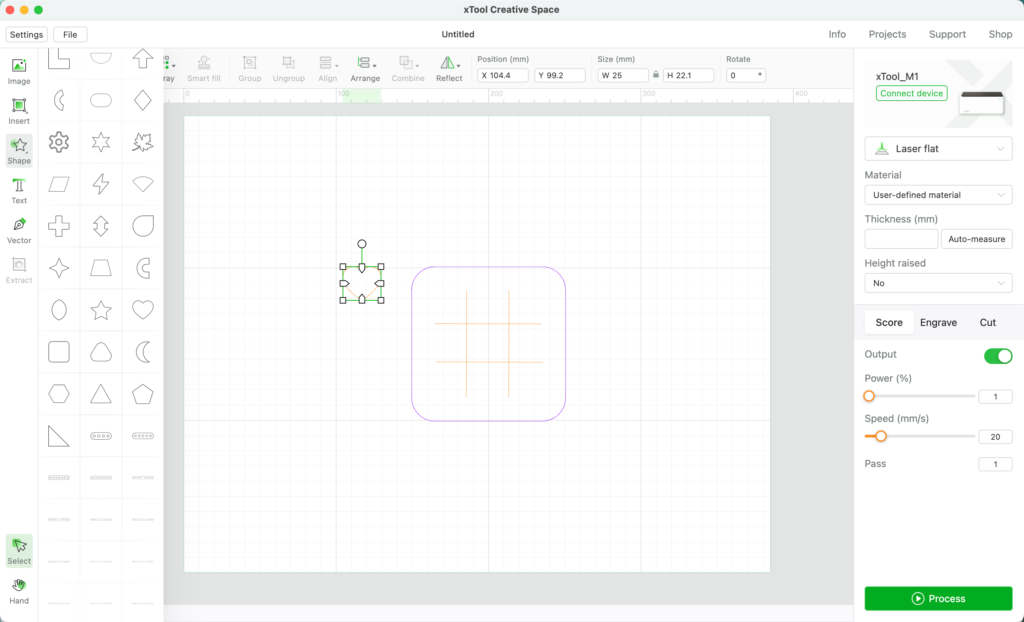
    3. Next, let’s make the game markers. From the ‘Shape’ icon on the left, there are a large number of shapes. I chose a heart – that I made 1 inch (25mm).

    Screenshot - Review: Designing in the xTool Software - Tutorial: Tic Tac Toe Board and Markers - cuttingforbusiness.com.

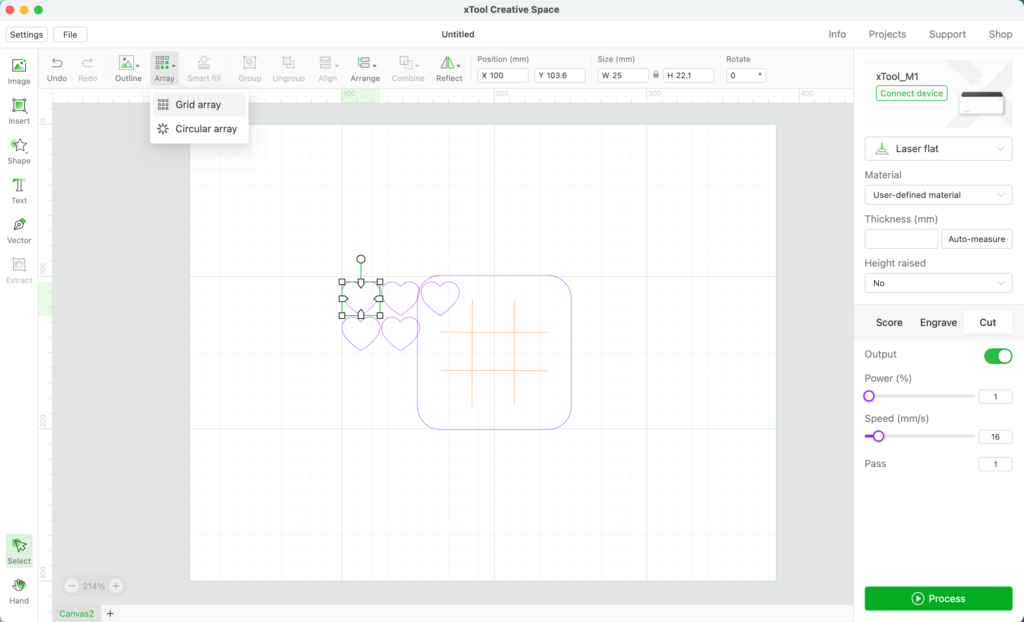
    4. Copy and paste the marker 5 times. I was able to use the ‘Grid Array’ button to duplicate the heart 6 times – then I deleted one. Using copy and paste would have worked, too.

    Screenshot - Review: Designing in the xTool Software - Tutorial: Tic Tac Toe Board and Markers - cuttingforbusiness.com.

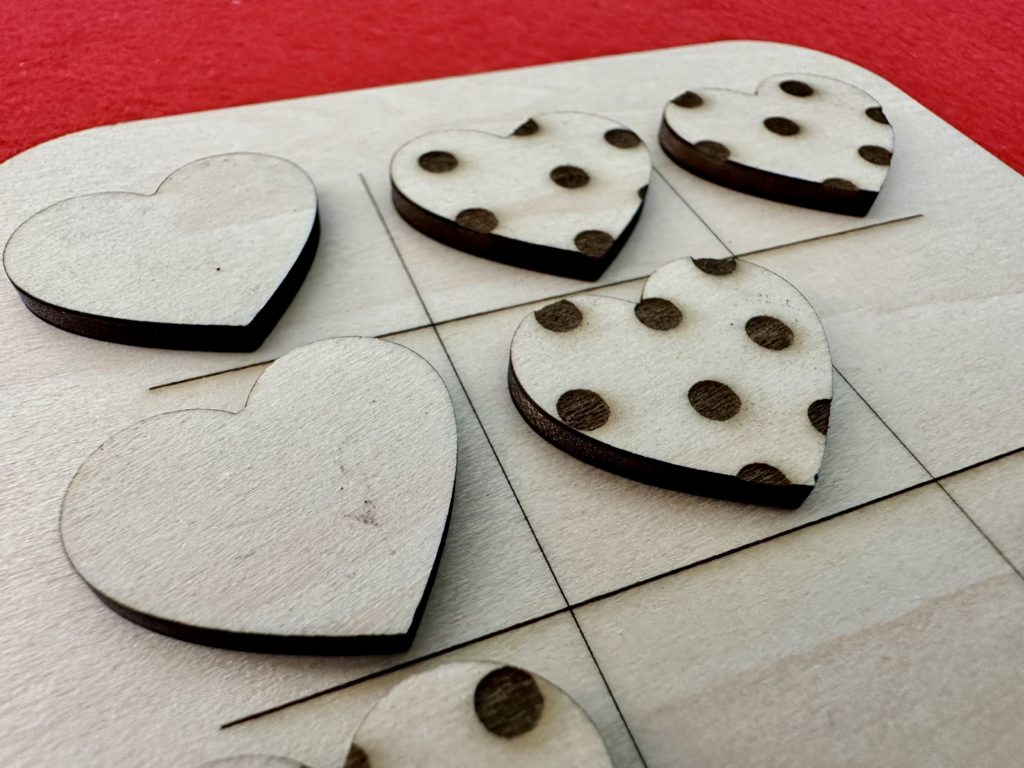
    5. I didn’t find a second shape I liked for the marker, so I added 5 more hearts. I had wanted to fill them with a pattern, but didn’t find a way besides drawing the pattern myself. I added some circles on one set of heart markers to be able to tell them apart.

    Screenshot - Review: Designing in the xTool Software - Tutorial: Tic Tac Toe Board and Markers - cuttingforbusiness.com.

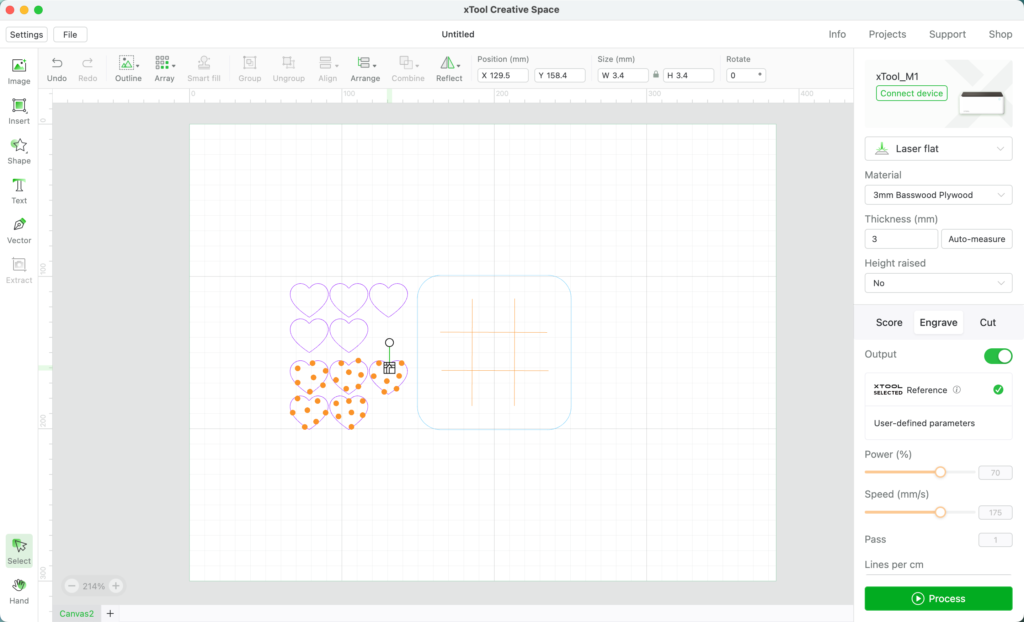
    6. Next, I click on each element and choose either ‘Score’, ‘Engrave’, or ‘Cut’. The program turns the element orange for scoring and engraving and purple for cutting.

    Screenshot - Review: Designing in the xTool Software - Tutorial: Tic Tac Toe Board and Markers - cuttingforbusiness.com.

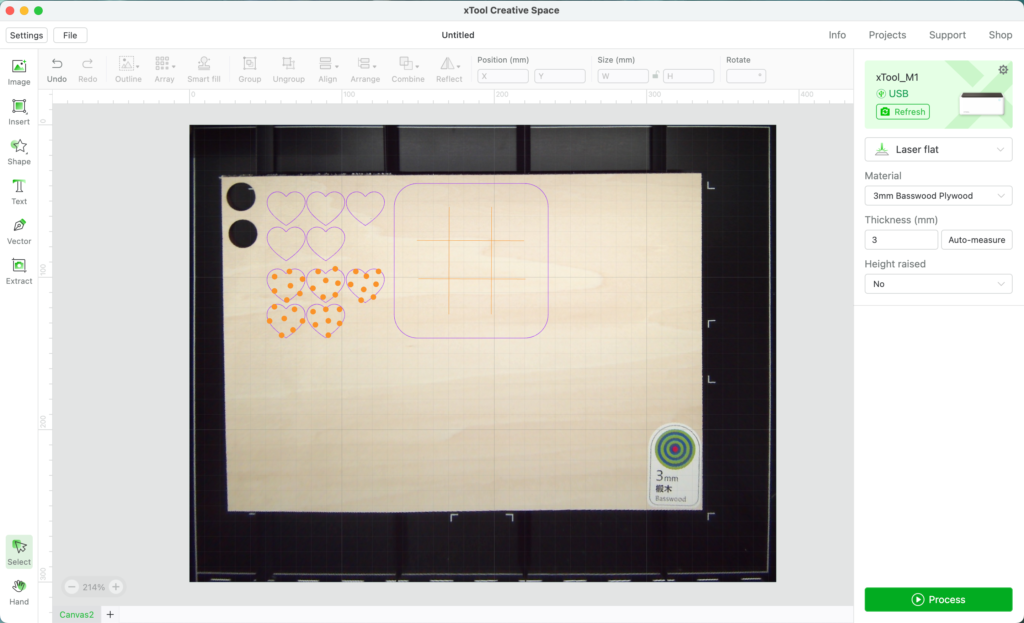
    7. It’s time to connect the xTool M1, turn on the air assist fan, and process the design. I’m creating using sample material from xTool – specifically the 3mm Basswood Plywood. All other settings are already programmed into the software.

    Since I am not masking the plywood, I added the triangle prism risers included with the machine below the material. (You can see the risers in the image below.)

    Screenshot - Review: Designing in the xTool Software - Tutorial: Tic Tac Toe Board and Markers - cuttingforbusiness.com.

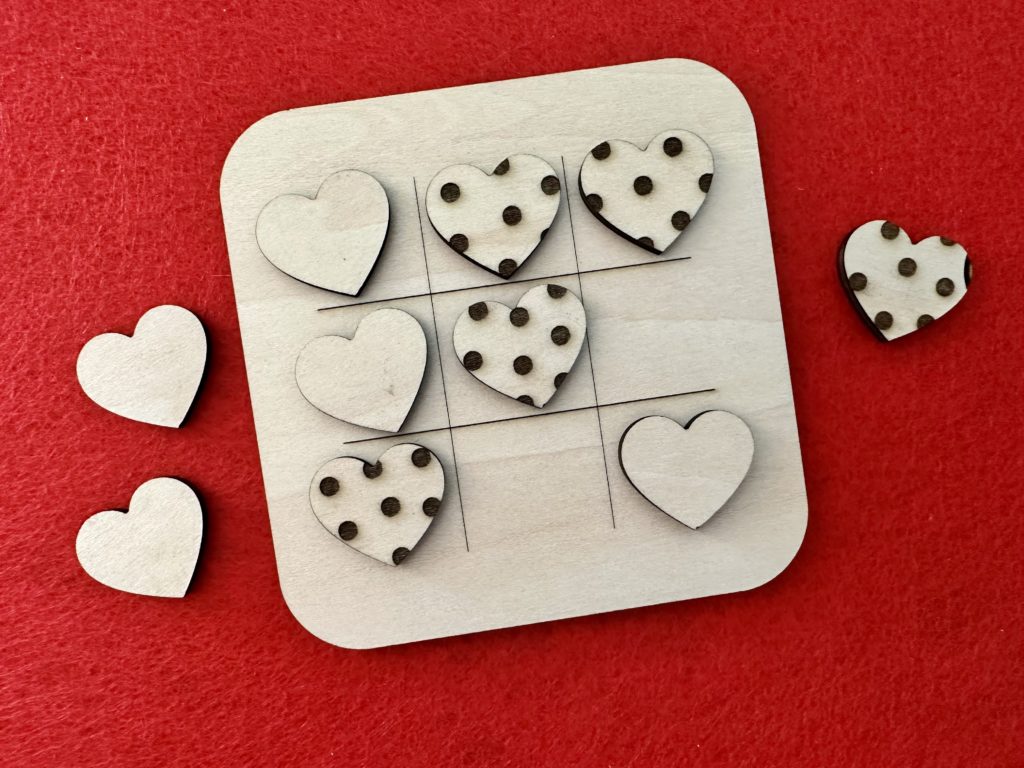
    8. It took just under 13 minutes to process the design. Even without masking, there is no charring on the cut pieces and the board, and very little charring around the engraved dots.

    There is one engraved spot on the heart on the far left that shouldn’t be there. It isn’t in the design, and shouldn’t be there. If I were selling this product, I’d have to recut that heart marker.

    Review: Designing in the xTool Software - Tutorial: Tic Tac Toe Board and Markers - cuttingforbusiness.com.
    Review: Designing in the xTool Software - Tutorial: Tic Tac Toe Board and Markers - cuttingforbusiness.com.

    Opinions on Designing in the xTool Software

    If you are interested in purchasing an xTool, I’d recommend using a different software to design your products. The xTool software is basic – and somewhat clunky to design in with limited options. However, after creating your design, the xTool software accepts many file formats, including: JPG, PNG, JPEG, BMP, TIFF, SVG, and DXF.

  • Tutorial: Engraved Paw Print Jewelry with xTool M1

    If you’ve been on the blog recently, you’ll know that I recently received an xTool M1 machine to try out and share a few projects. If you haven’t seen the first post, go back.

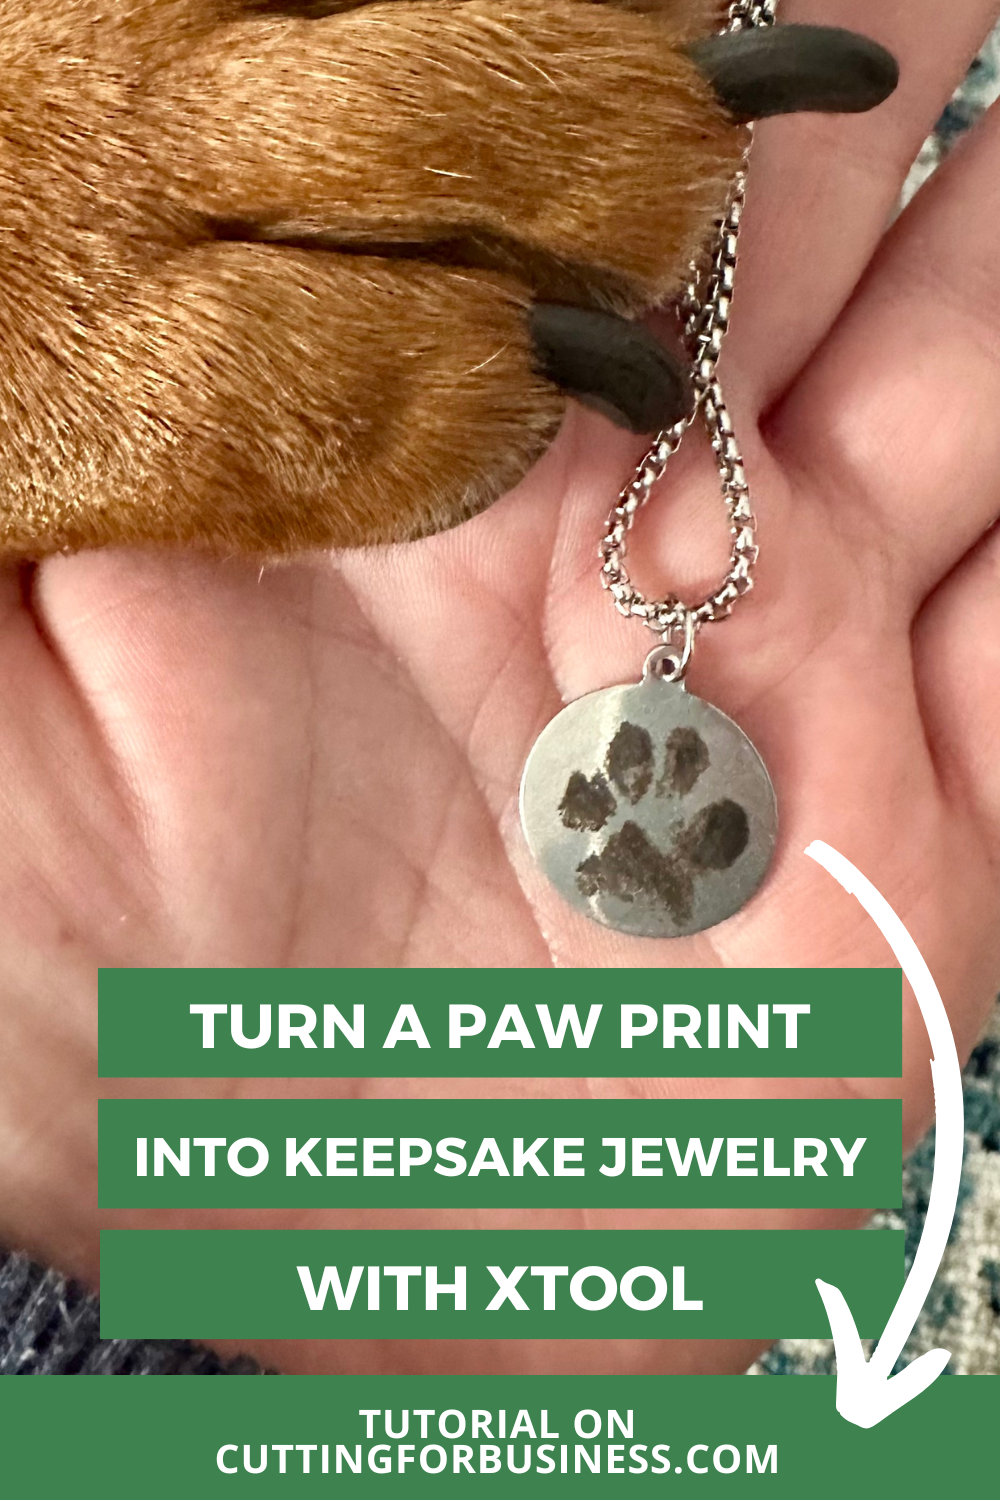
    The first project I’m sharing is a step-by-step tutorial to create engraved paw print jewelry.

    xTool M1 Tutorial: Engraved Pet Paw Print Jewelry - cuttingforbusiness.com

    Tutorial: Paw Print Jewelry with xTool M1

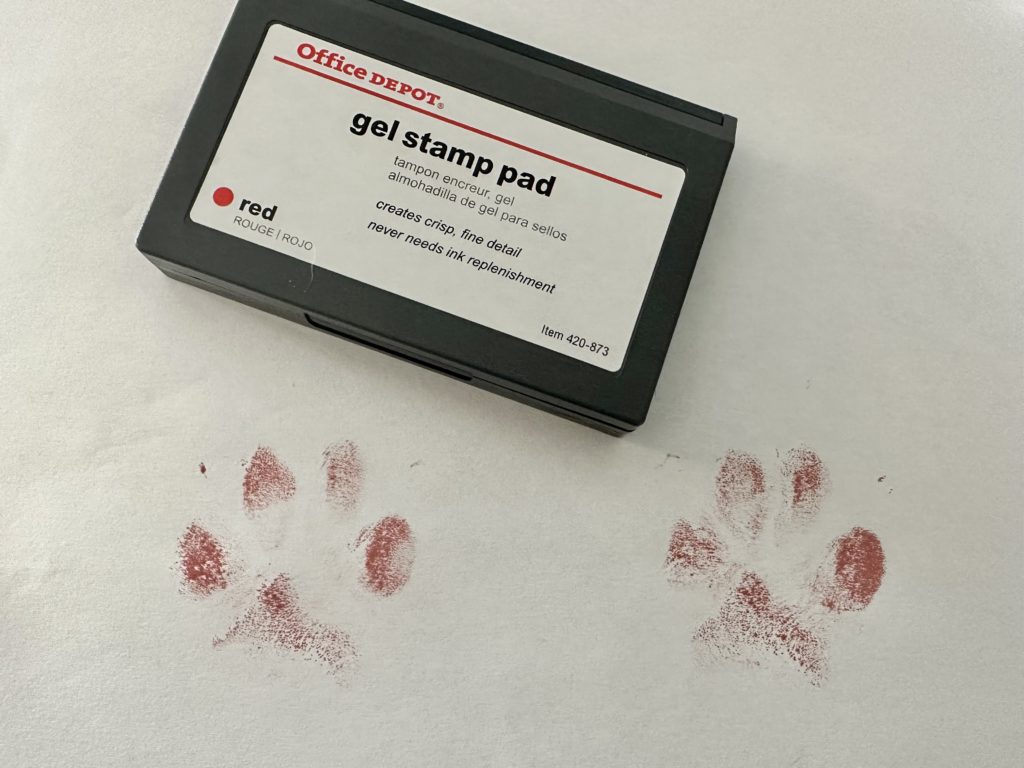
    1. “Fingerprint” your pet. I used an ink pad, patted Tank’s paw onto the pad, stamped it onto a white sheet of printer paper, then washed his paw. I’d share a few photos of the process, but as you can imagine – Tank wasn’t incredibly helpful.
    xTool M1 Tutorial: Engraved Pet Paw Print Jewelry - Stamp pad - cuttingforbusiness.com

    2. Scan the pawprint onto your computer. (I used the paw print on the right.) I no longer have a flatbed scanner, so I used a phone app TinyScanner, which did a pretty good job.

    xTool M1 Tutorial: Engraved Pet Paw Print Jewelry - Paw print scanned - cuttingforbusiness.com

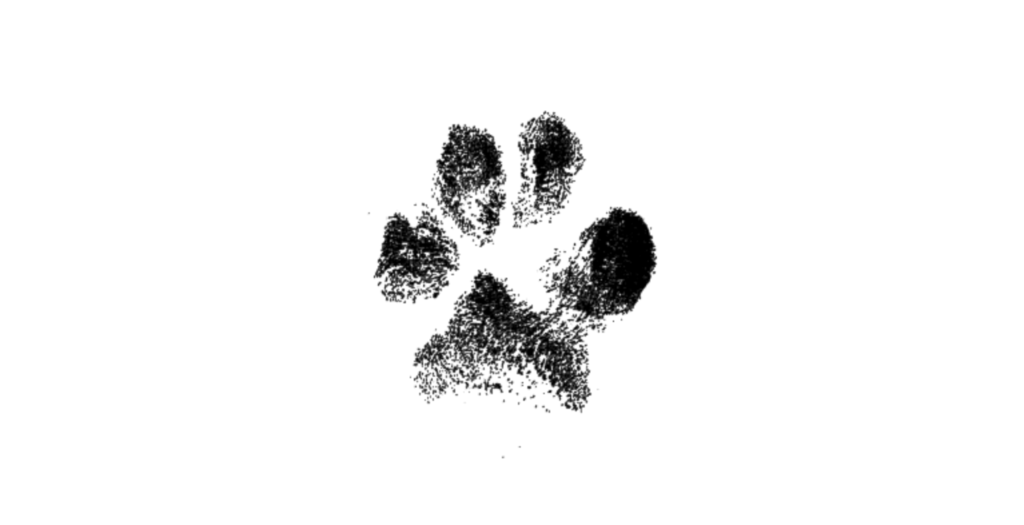
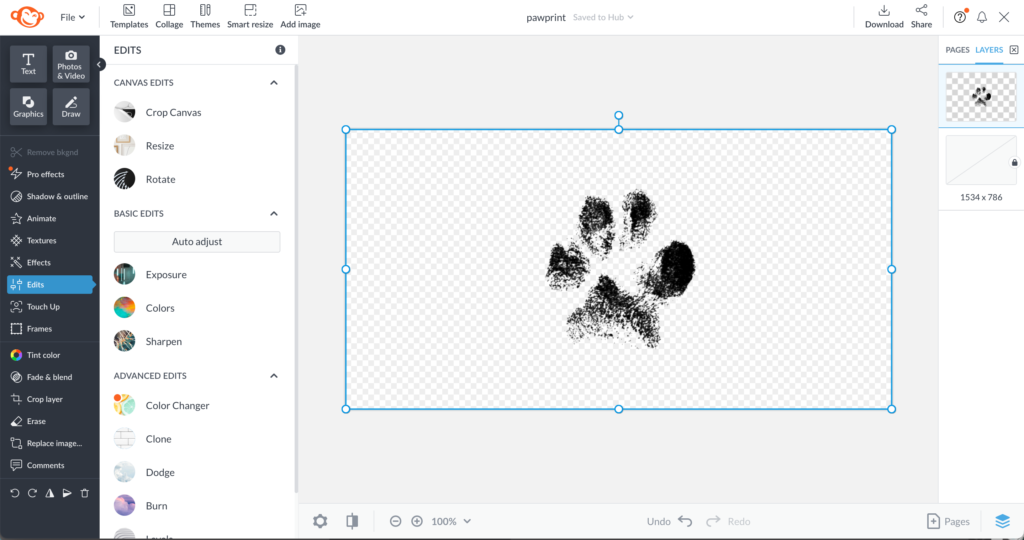
    3. Use an online editor to remove the background. I used PicMonkey, but you could also use LunaPic or Canva.

    xTool M1 Tutorial: Engraved Pet Paw Print Jewelry - Editing paw print - cuttingforbusiness.com

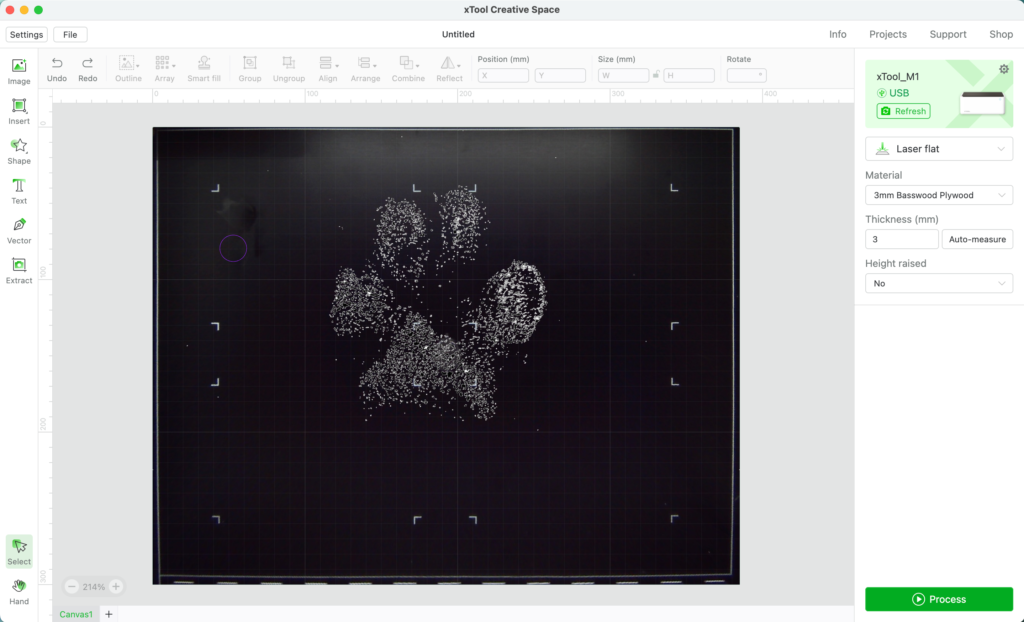
    4. In the xTool software, click the ‘Image’ button to load your image.

    xTool M1 Tutorial: Engraved Pet Paw Print Jewelry - Ready to engrave - cuttingforbusiness.com

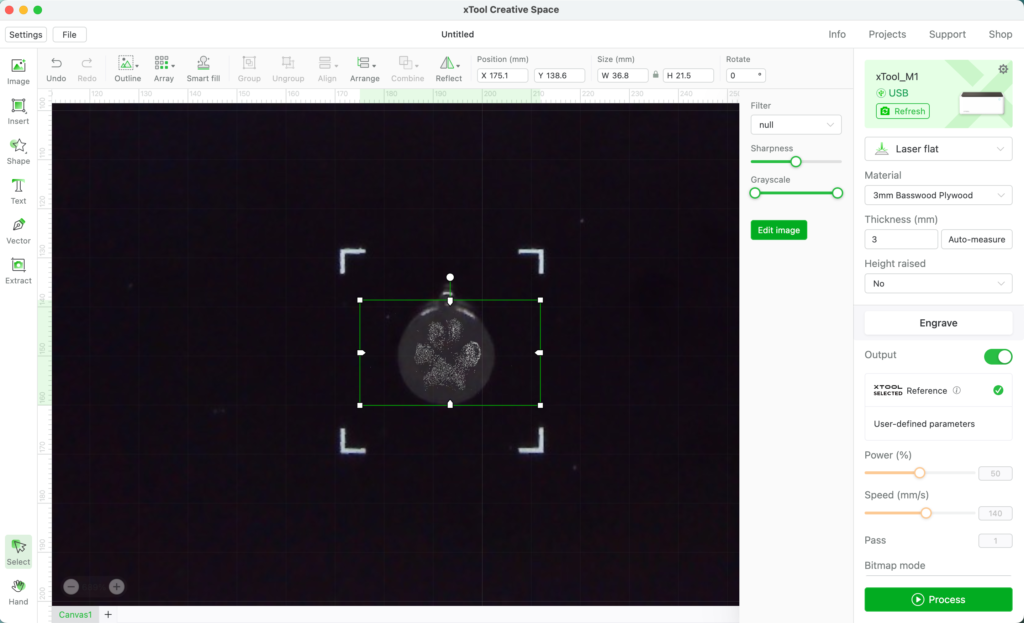
    5. Resize the image and move it on top of the jewelry blank. You can pan the view around the screen with the ‘Hand’ tool on the left bottom corner.

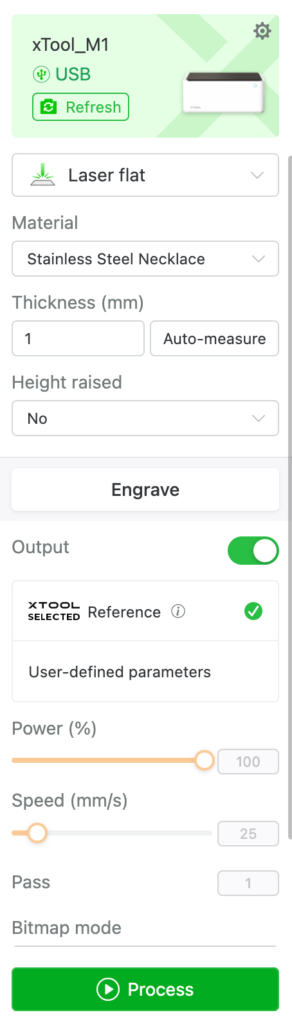
    6. Input the correct settings. In this case, I chose ‘Laser flat’, ‘Stainless Steel Necklace’, and Height raised ‘No’. Click the ‘Process’ button.

    xTool M1 Tutorial: Engraved Pet Paw Print Jewelry - Engrave settings - cuttingforbusiness.com

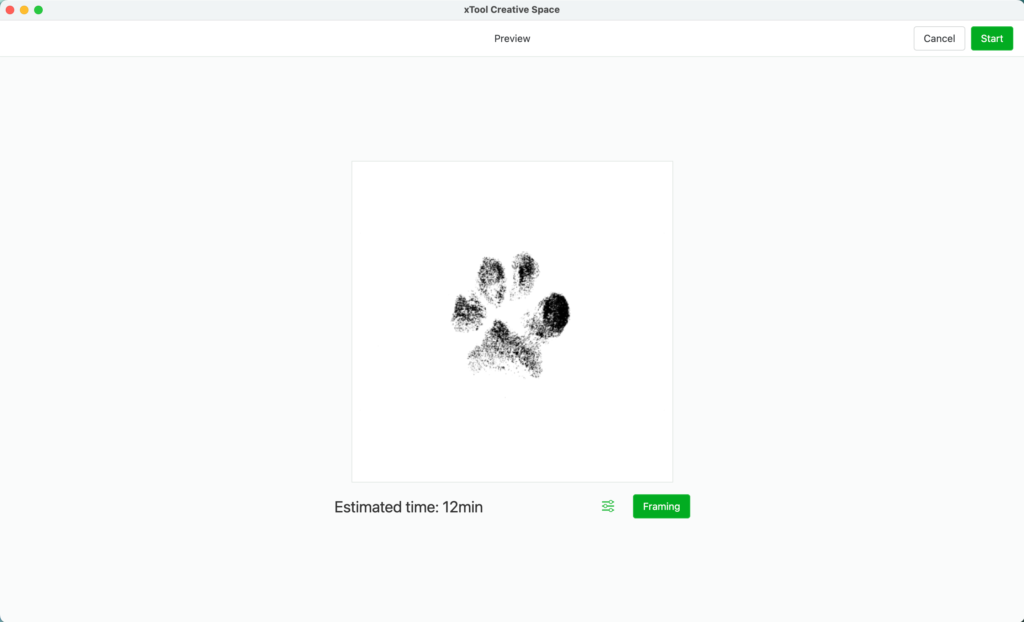
    7. Turn on your xTool, the air assist fan, and then click the ‘Start’ button. The software states it’ll be about 12 minutes. Click the ‘Start’ button and then the button on your xTool.

    xTool M1 Tutorial: Engraved Pet Paw Print Jewelry - Processing - cuttingforbusiness.com

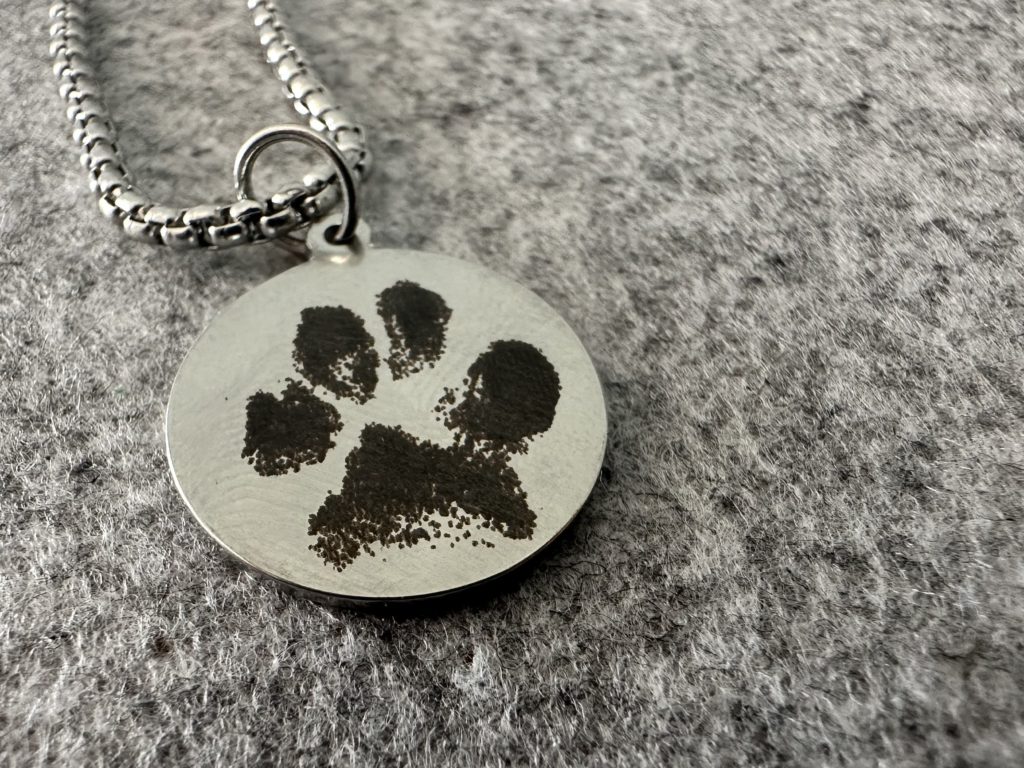
    Here’s how it looks after engraving.

    xTool M1 Tutorial: Engraved Pet Paw Print Jewelry - Finished project - cuttingforbusiness.com

    Fun and successful first xTool project! It’s a nice dark engrave on the stainless steel disk. I added a jump ring and put it on a necklace.

    A Paw Print Jewelry Business Idea

    You could create a niche out of paw print jewelry with the xTool M1. Here’s how I imagine this could work:

    1. Customers buy a small kit on your website containing a piece of paper, a non toxic stamp pad, alcohol wipes, and directions for taking their pet’s paw print.
    2. After the customer takes a print of their dog’s paw, they send it to you digitally – likely through email.
    3. You use the xTool to engrave their jewelry.
    4. Package the jewelry and send it off.

    Thanks, Tank!

    This tutorial wouldn’t be complete without a picture of Tank, who received a Milkbone for his cooperation. (Tank, left. Chopper, right.)

    Next up on this xTool series: Designing in the xTool software.

    xTool M1 Tutorial: Engraved Pet Paw Print Jewelry - My dogs - Tank and Chopper - cuttingforbusiness.com
  • Walkthrough: xTool M1 Set Up

    In the last year or so, my Facebook feed has had so many ads for xTool laser products. In fact, xTool has reached out to me multiple times to review their products and I have declined. In December, curiosity got the best of me and I agreed to review their latest laser machine, the xTool M1.

    This article provides a step-by-step picture tutorial of the xTool M1 set up.

    xTool M1 Set Up - Includes set up of the Air Assist Set - cuttingforbusiness.com.

    What is the xTool M1?

    The xTool M1 advertises as an integrated laser processing and blade cutting system, produced in China. This means that the xTool M1 contains a laser (like a Glowforge) and a blade (like a Silhouette or a Cricut).

    The laser inside the xTool M1 is a diode laser, which differs from the Glowforge’s CO2 laser. There are a number of comparison’s of diode lasers to CO2 lasers all over the internet – including this one written by xTool.

    What Did I Receive from xTool to Review?

    I received the xTool M1 10W Deluxe Package which included the machine, a large package of sample materials, the rotary unit, and the air assist set. In exchange for receiving these materials, I agreed to complete six blog posts for xTool – an unboxing with general information and five projects. While the materials and tools were provided free of charge, the experience and opinions are my own.

    xTool M1 Set Up

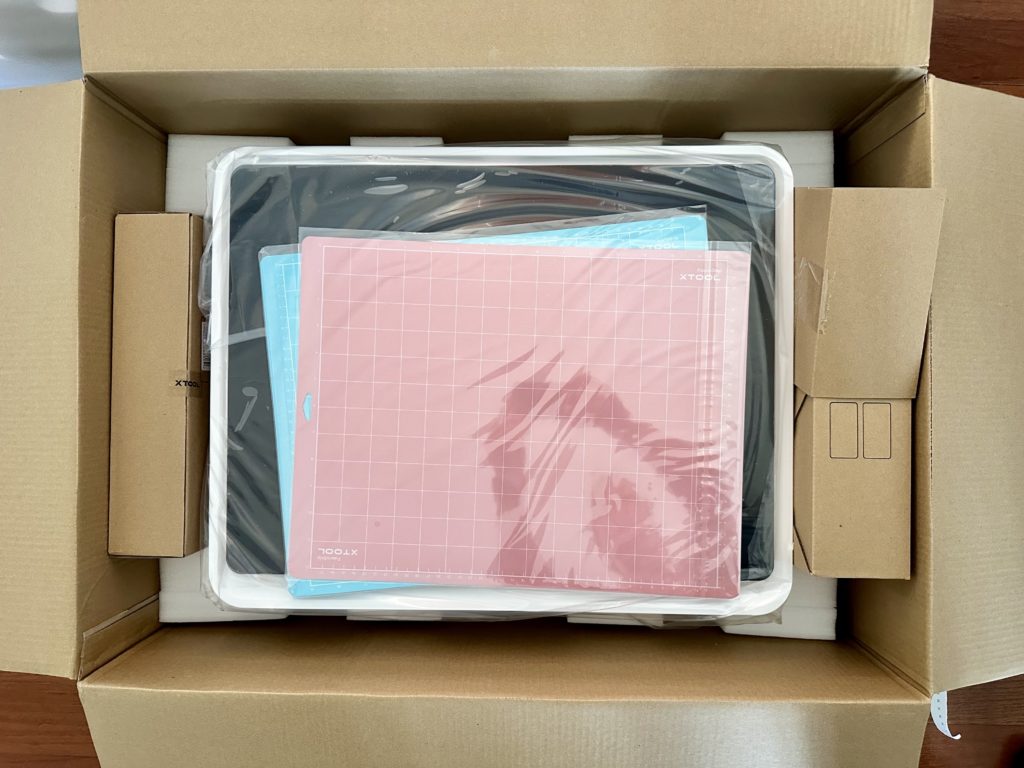
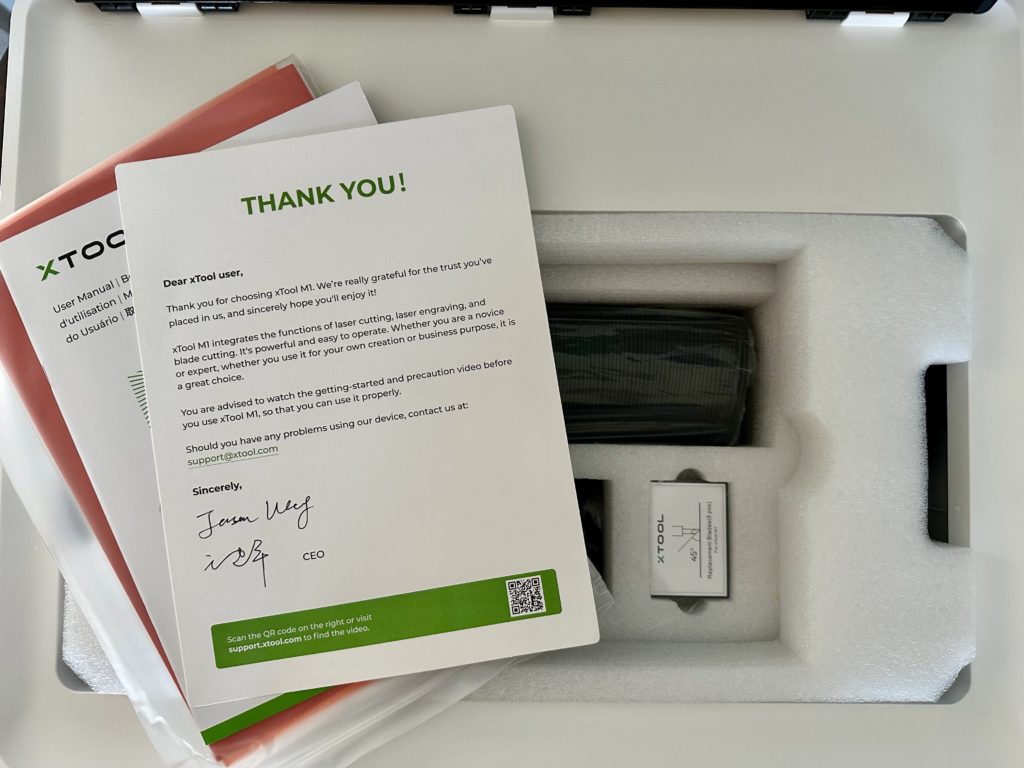
    1. The xTool M1 was packaged well and arrived undamaged. My first thoughts about the unit are that it is smaller than I expected (22″ x 18″ x 8.5″).
    xTool M1 Unboxing & Set Up - Opening the box - cuttingforbusiness.com.
    xTool M1 Unboxing & Set Up - Inside the box - cuttingforbusiness.com.

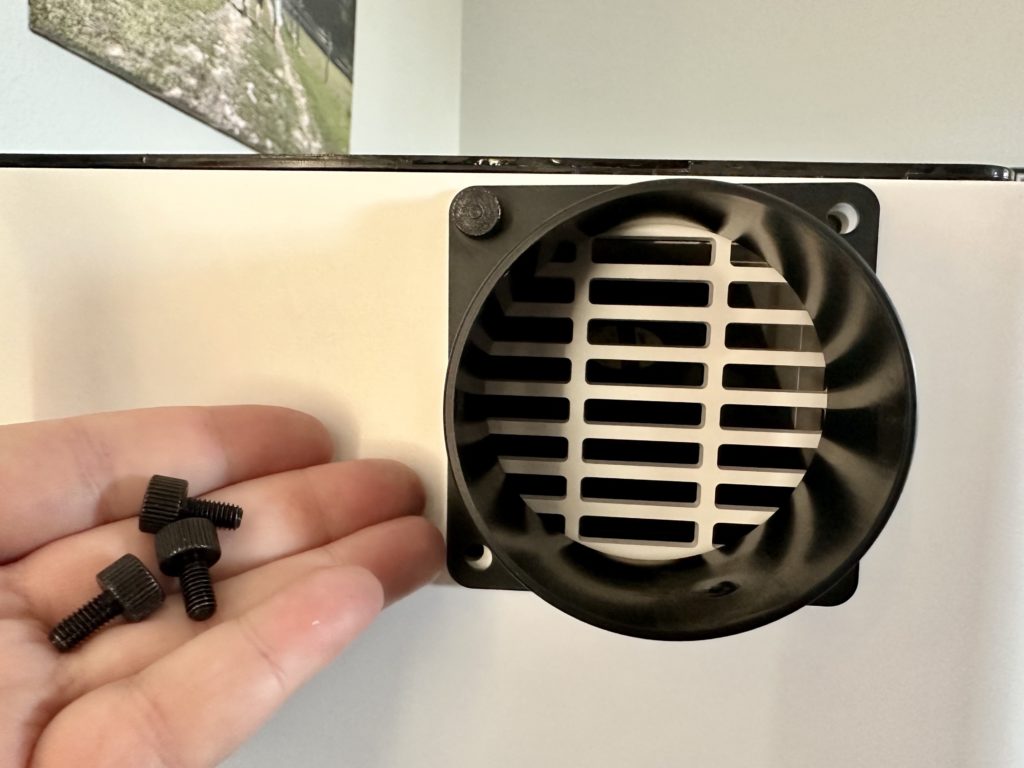
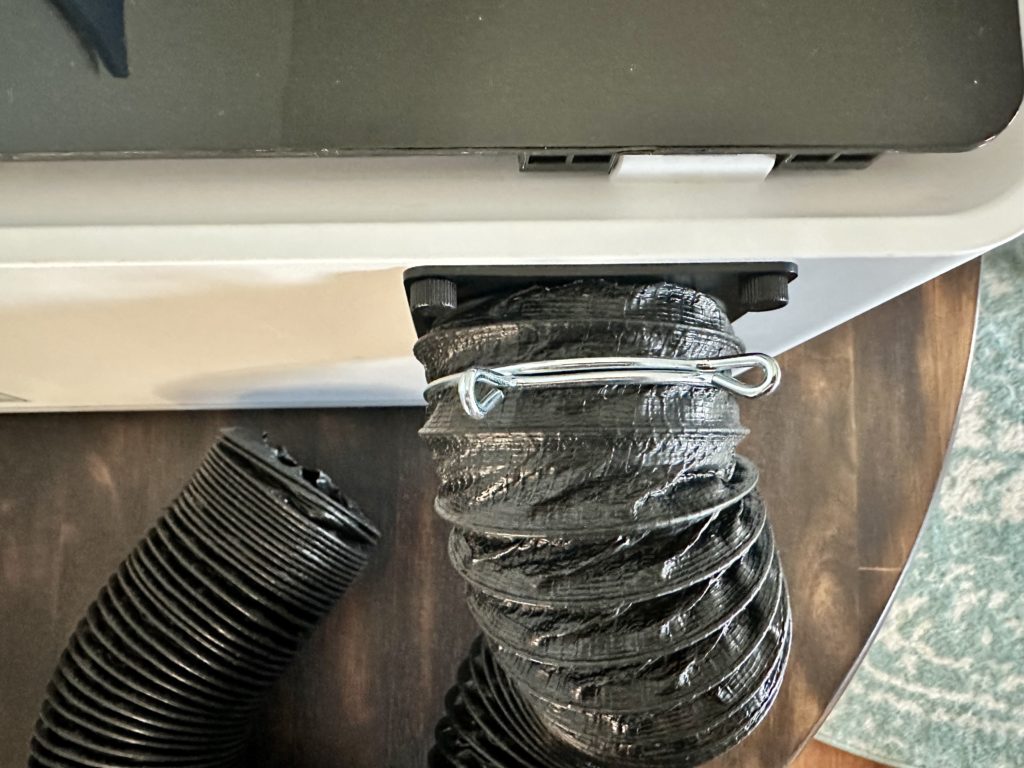
    2. The first step after removing the xTool from the packaging is to attach the hose. Use the four hand screws to place the bracket, then fit the hose over the bracket. The xTool will need to be vented out a window or into a filter.

    xTool M1 Unboxing & Set Up - Hose attached - cuttingforbusiness.com.

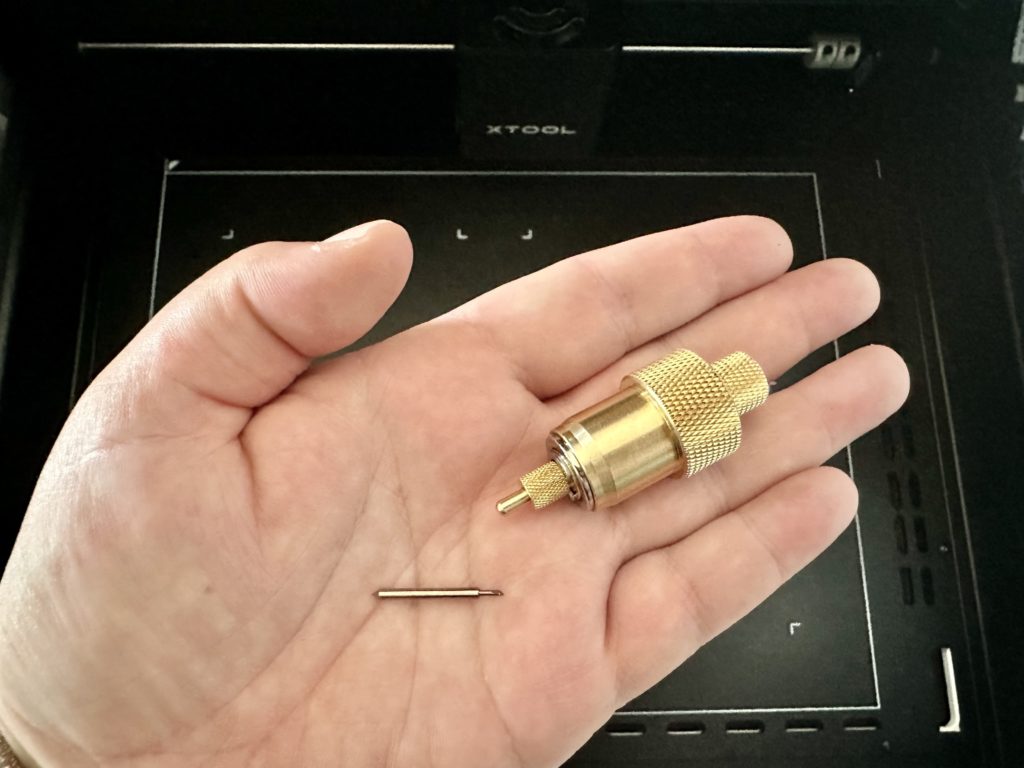
    3. Next, place the blade into the blade housing, then insert the blade housing into the machine. You’ll just have to feel around, but it will snap in using magnets.

    xTool M1 Unboxing & Set Up - Blade and blade housing - cuttingforbusiness.com.
    xTool M1 Unboxing & Set Up - Installing blade housing - cuttingforbusiness.com.

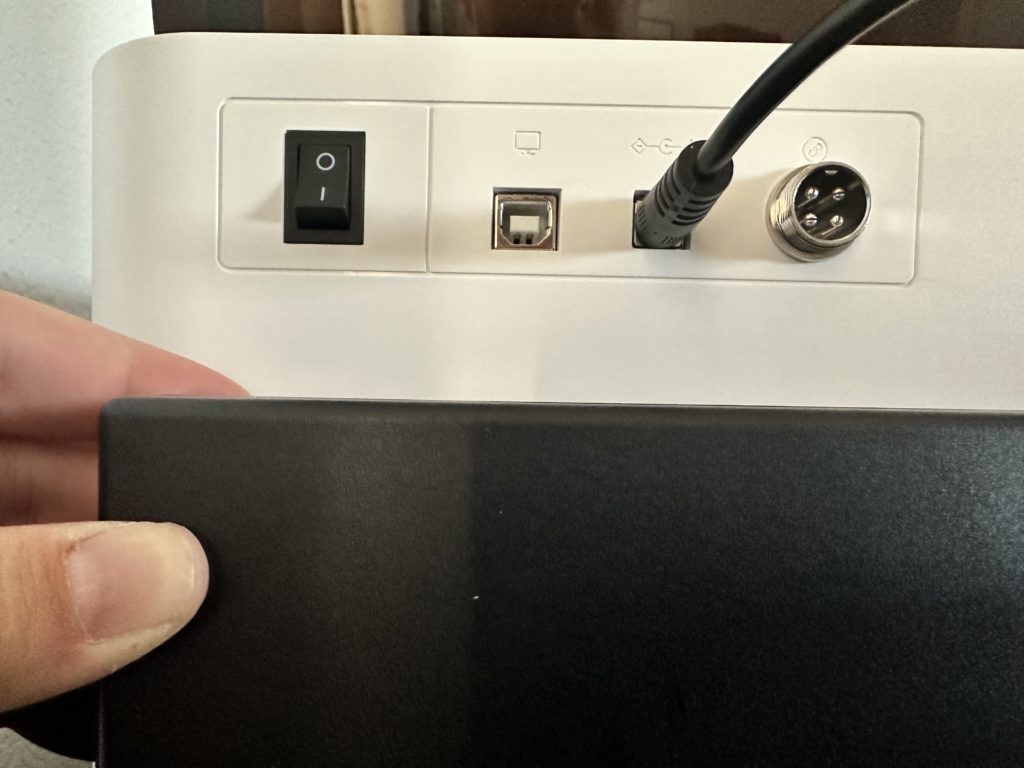
    4. Now, plug in the xTool and turn it on.

    xTool M1 Unboxing & Set Up - Plugging in the machine - cuttingforbusiness.com.
    xTool M1 Unboxing & Set Up - Turning the machine on - cuttingforbusiness.com.
    xTool M1 Unboxing & Set Up - Machine on - cuttingforbusiness.com.

    That’s it. Installing the xTool software on your computer and connecting the machine to your computer is the only thing left to do.

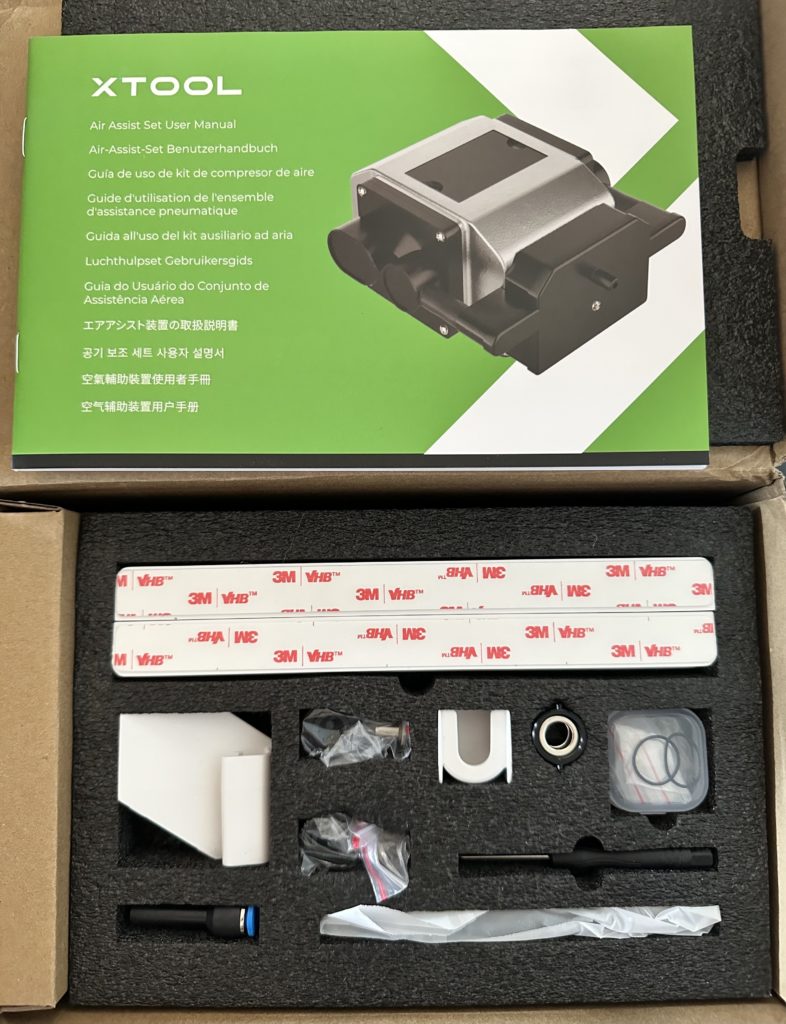
    However, as part of the review materials, I was given the air assist set. Let’s take a look at attaching it.

    xTool M1 Unboxing & Set Up - Air assist set - cuttingforbusiness.com.

    xTool Air Assist Set Installation in the M1

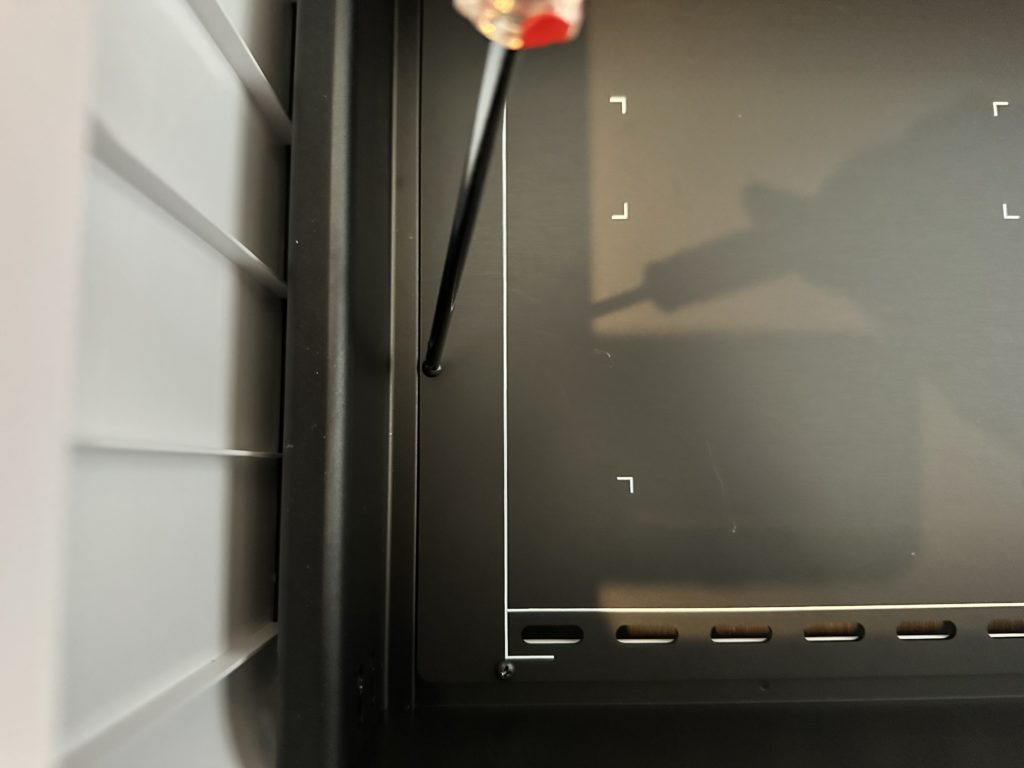
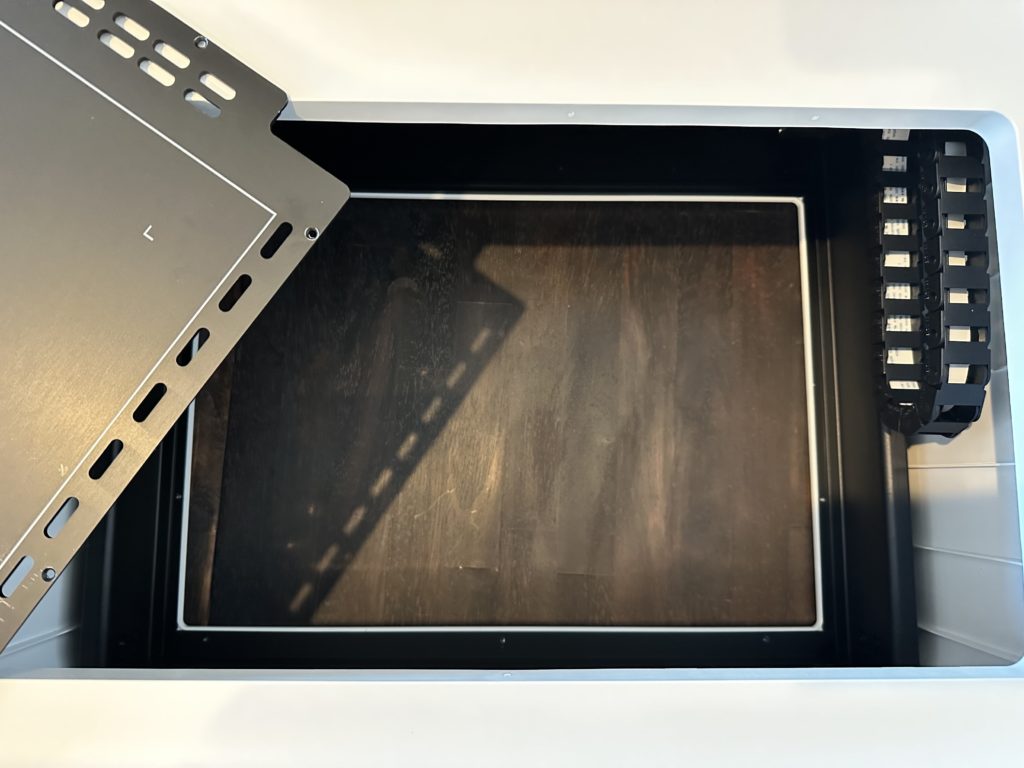
    1. Remove the base by removing 5 screws that hold the base in place. Then, lift the base out.
    xTool M1 Unboxing & Set Up - Removing the bottom of the machine - cuttingforbusiness.com.
    xTool M1 Unboxing & Set Up - Removing the base plate - cuttingforbusiness.com.

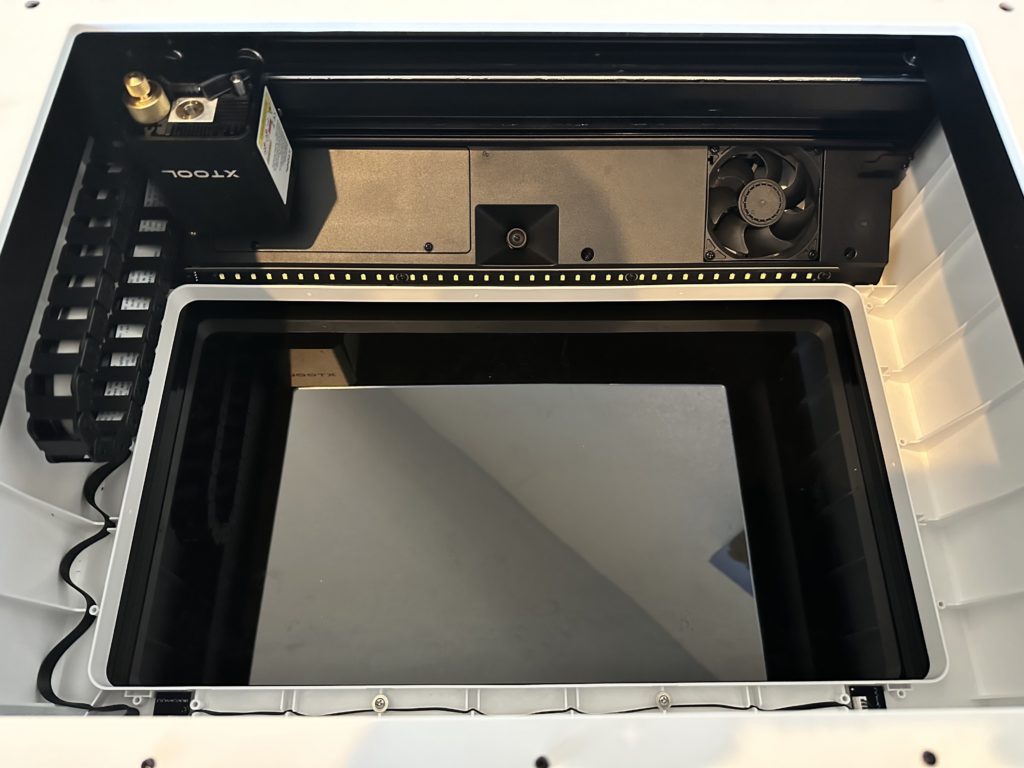
    2. Flip the xTool machine upside down.

    xTool M1 Unboxing & Set Up - Air assist set - Flip the machine over - cuttingforbusiness.com.

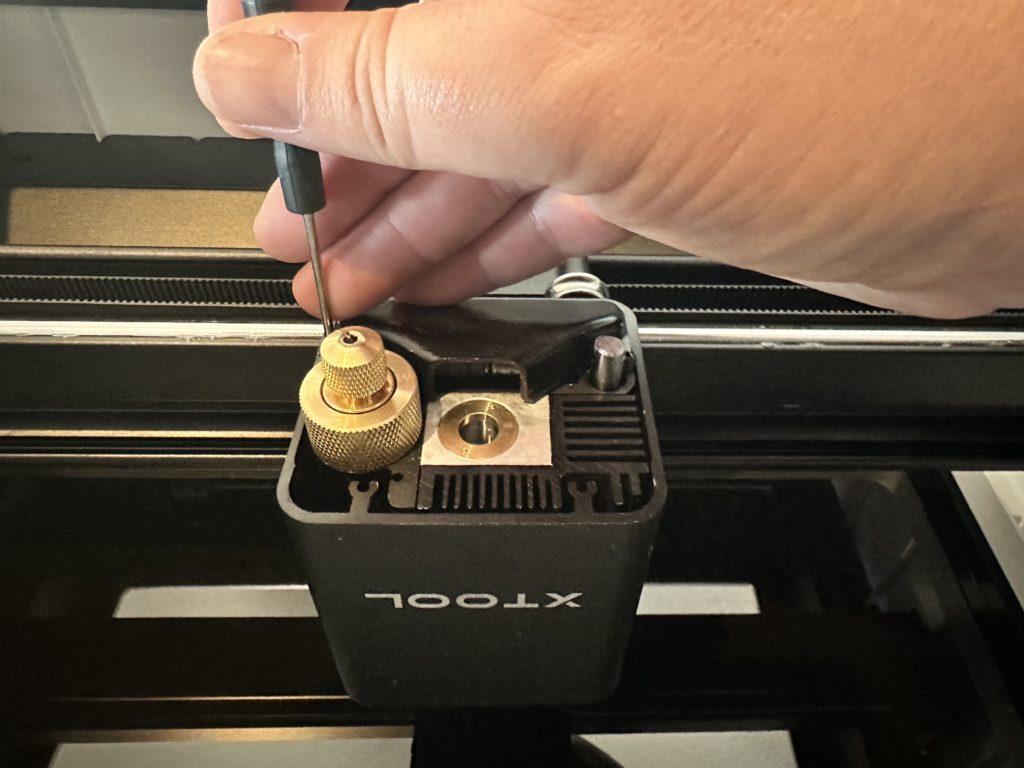
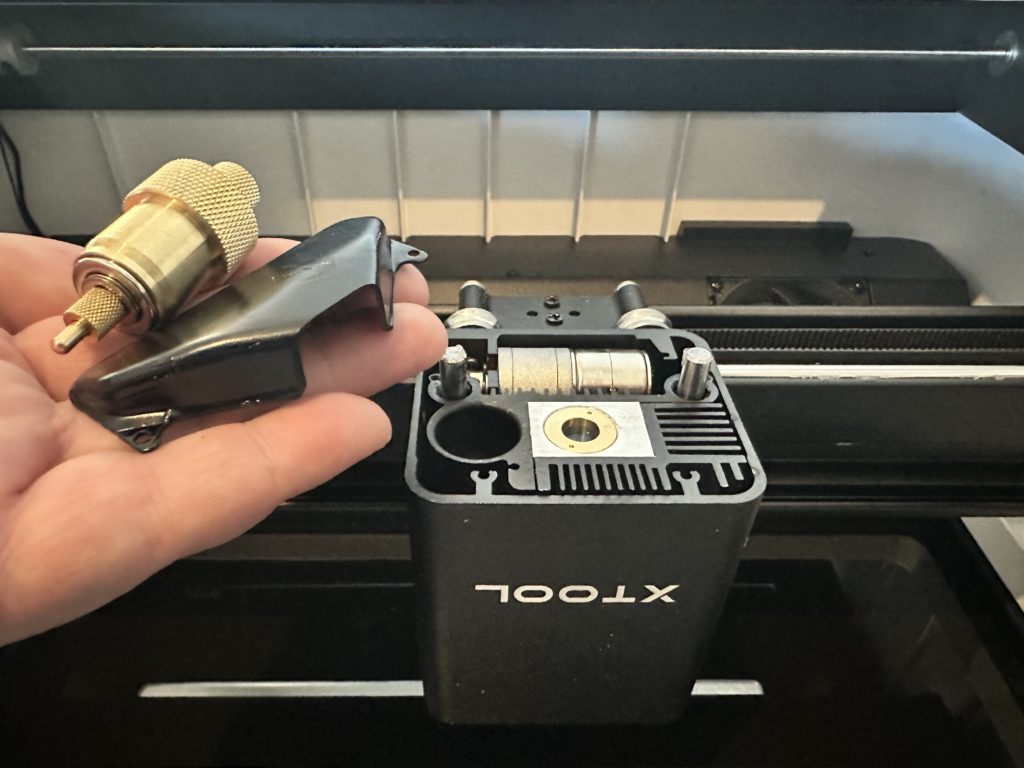
    3. Unscrew the two screws holding the triangular piece in, then remove it and the blade.

    xTool M1 Unboxing & Set Up - Air assist set - Remove guard - cuttingforbusiness.com.
    xTool M1 Unboxing & Set Up - Air assist set - Remove guard and blade - cuttingforbusiness.com.

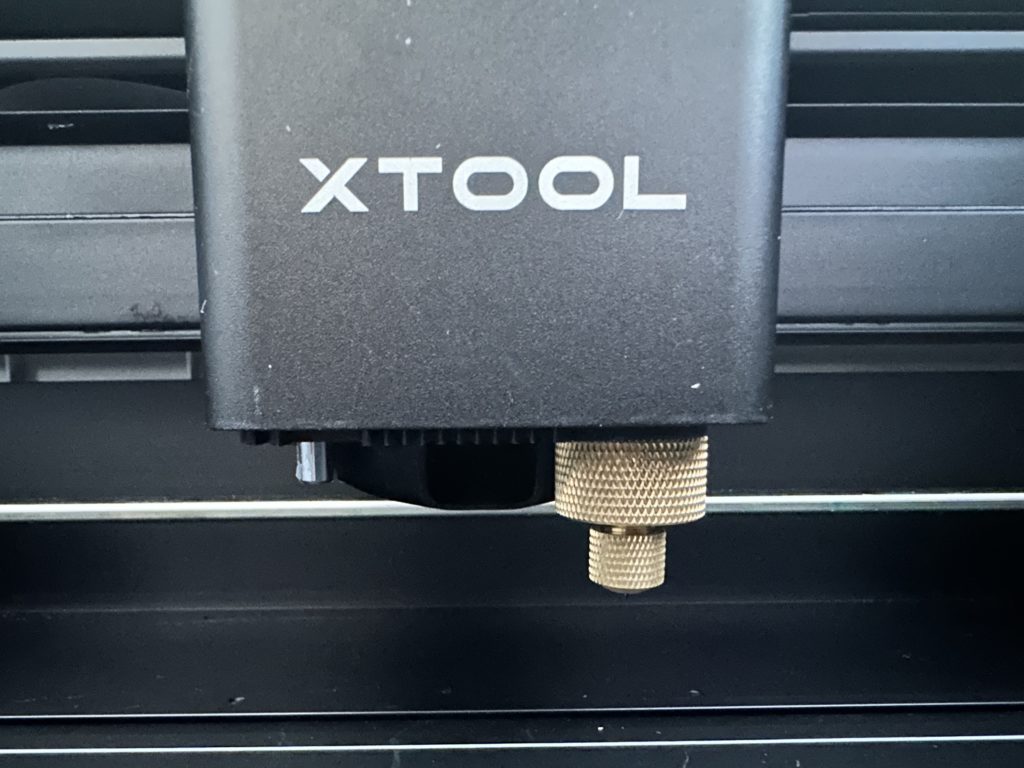
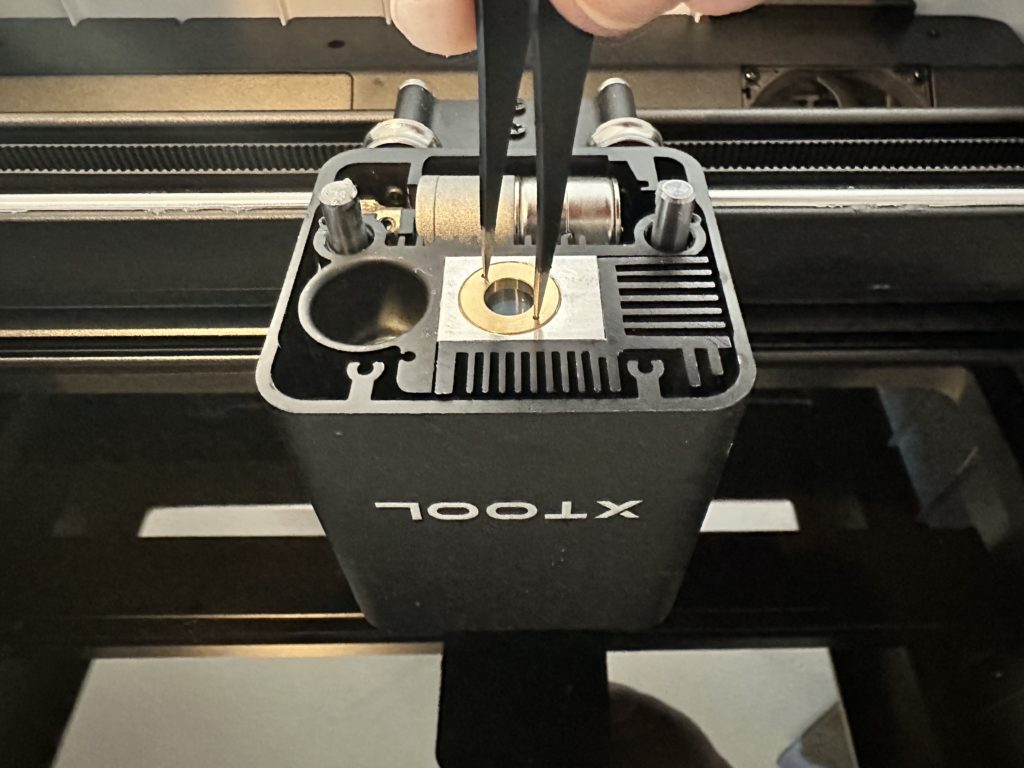
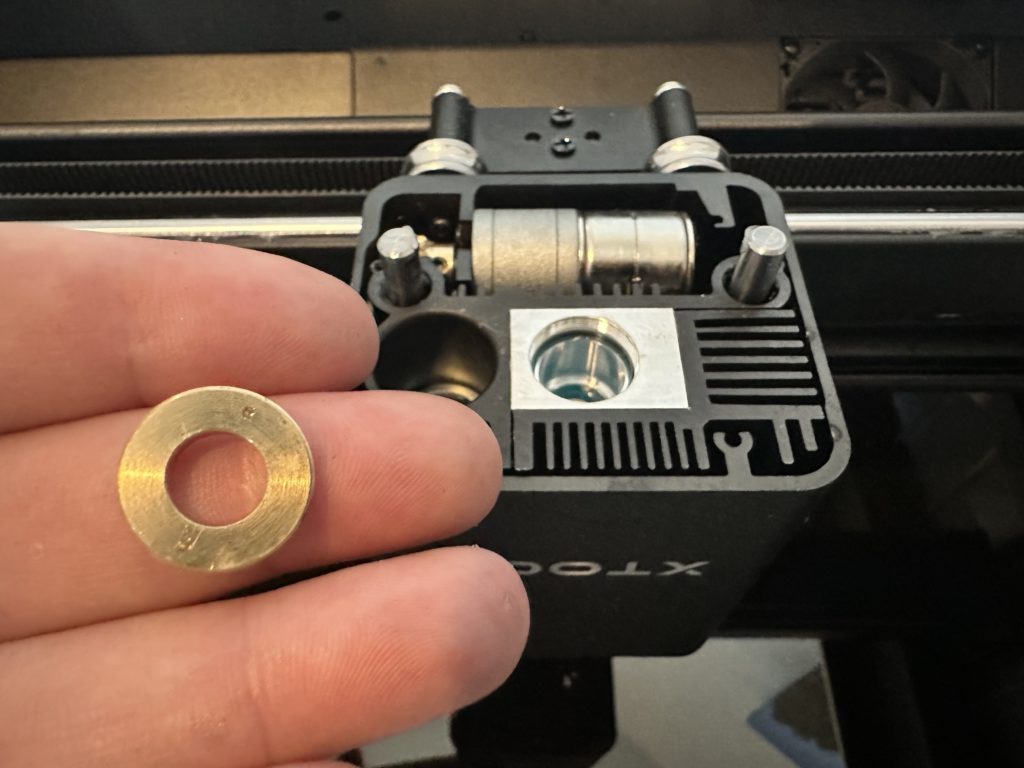
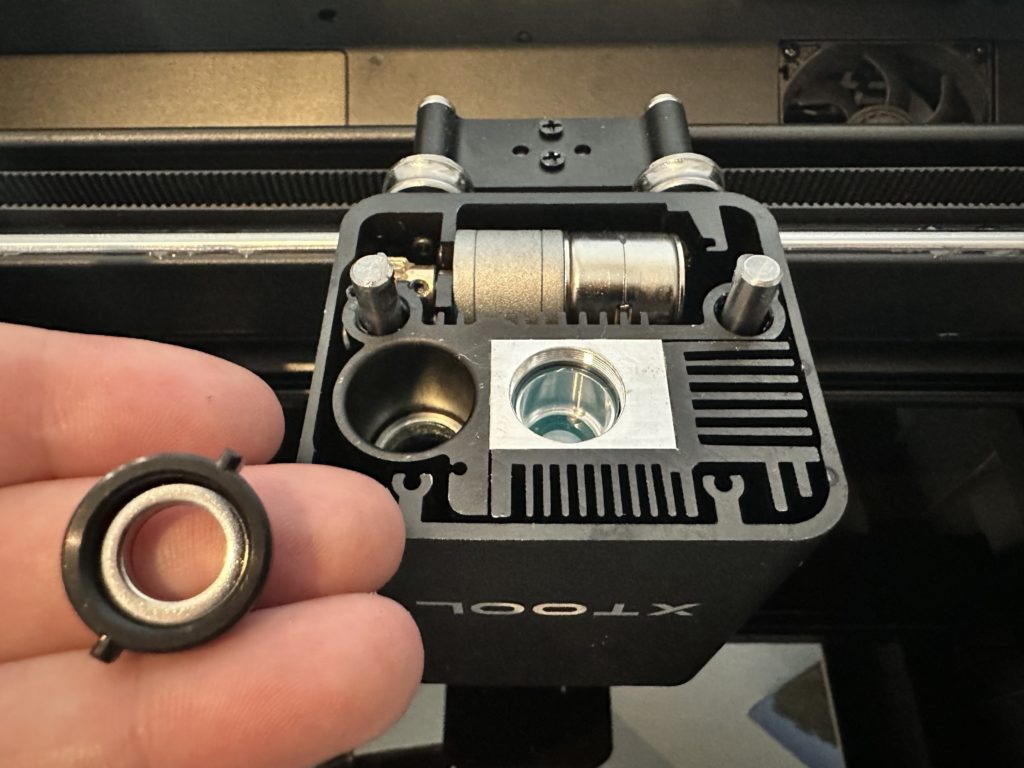
    4. Using the included tweezers, unscrew the gold ring and lift it out.

    xTool M1 Unboxing & Set Up - Air assist set - Remove with tweezers - cuttingforbusiness.com.
    xTool M1 Unboxing & Set Up - Air assist set - Take out - cuttingforbusiness.com.

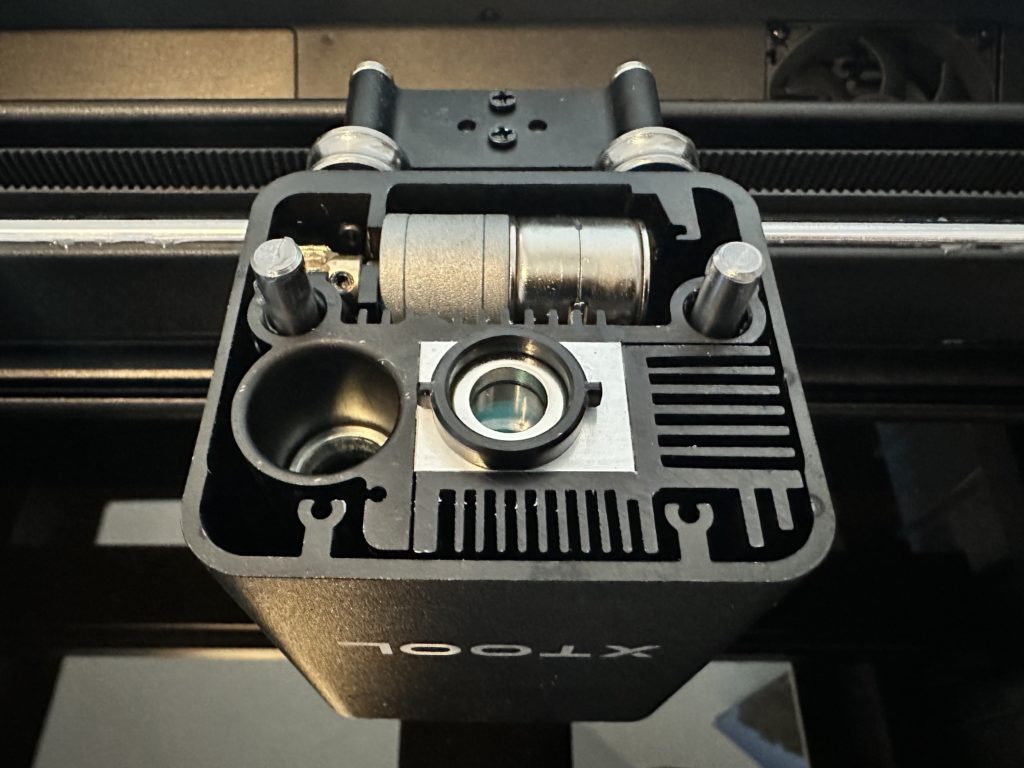
    5. Replace the gold ring with the plastic washer. Ensure that the ridges on the outside are horizontal.

    xTool M1 Unboxing & Set Up - Air assist set - Install washer - cuttingforbusiness.com.
    xTool M1 Unboxing & Set Up - Air assist set - Align washer - cuttingforbusiness.com.

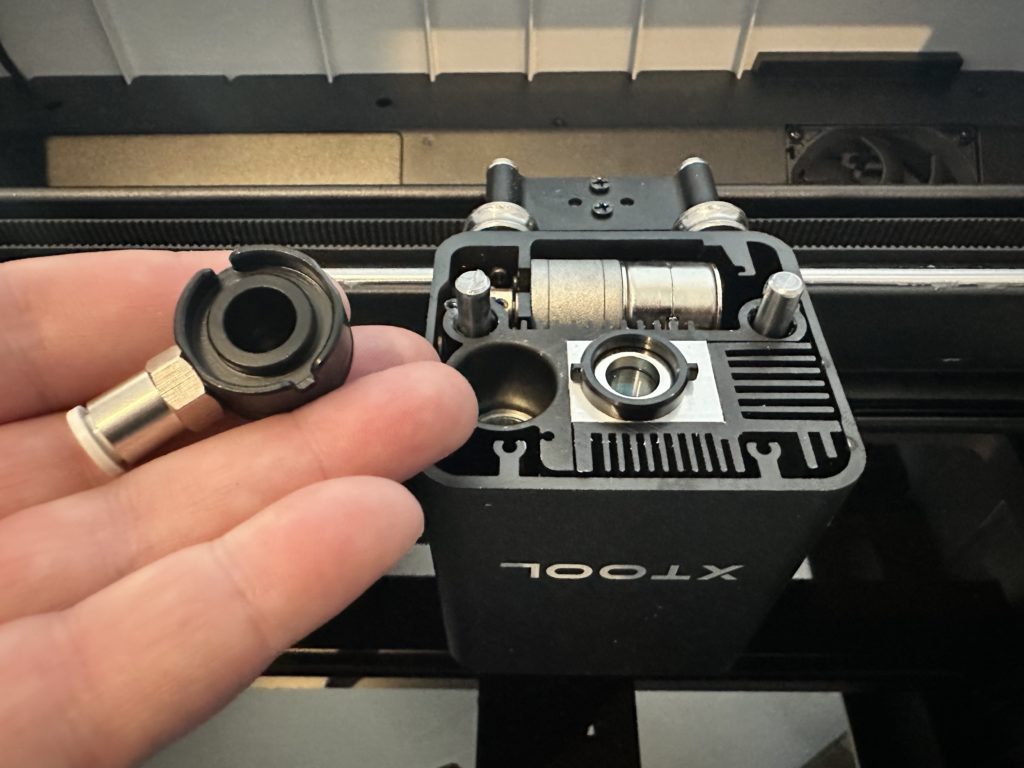
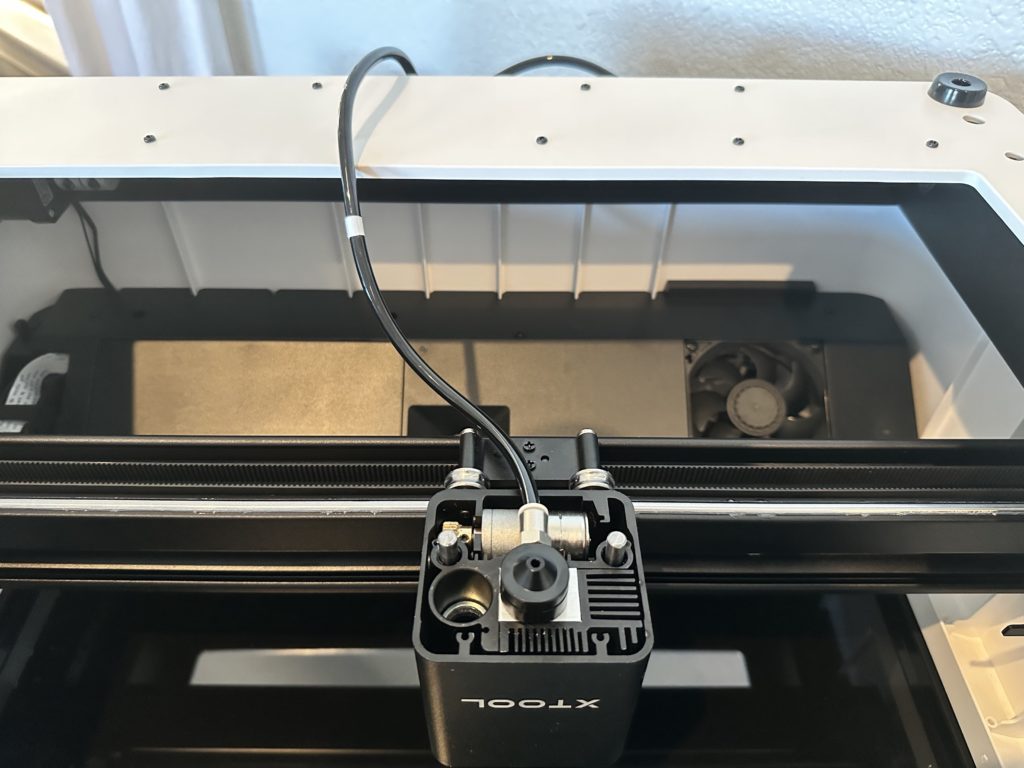
    6. Attach the hose connector to the washer, then connect the air hose.

    xTool M1 Unboxing & Set Up - Air assist set - Connect air hose - cuttingforbusiness.com.
    xTool M1 Unboxing & Set Up - Air assist set - Hose attached - cuttingforbusiness.com.

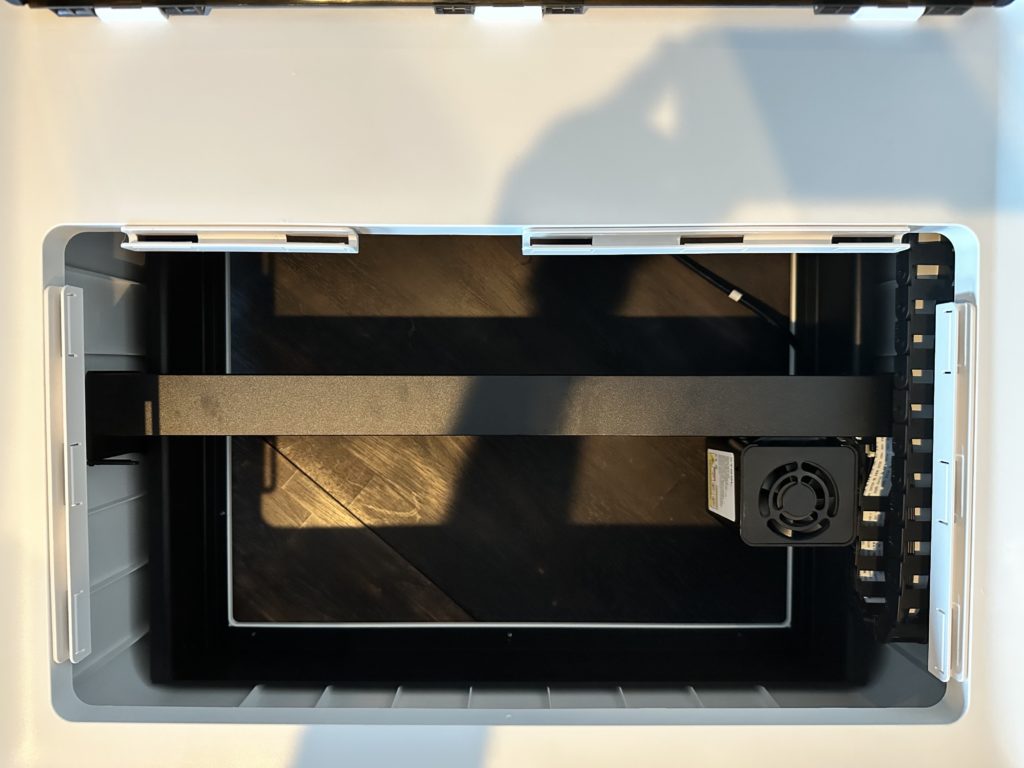
    7. Flip the xTool back over and install the hose guides. These tape into place around the edge of the machine.

    xTool M1 Unboxing & Set Up - Air assist set - Install hose guide - cuttingforbusiness.com.

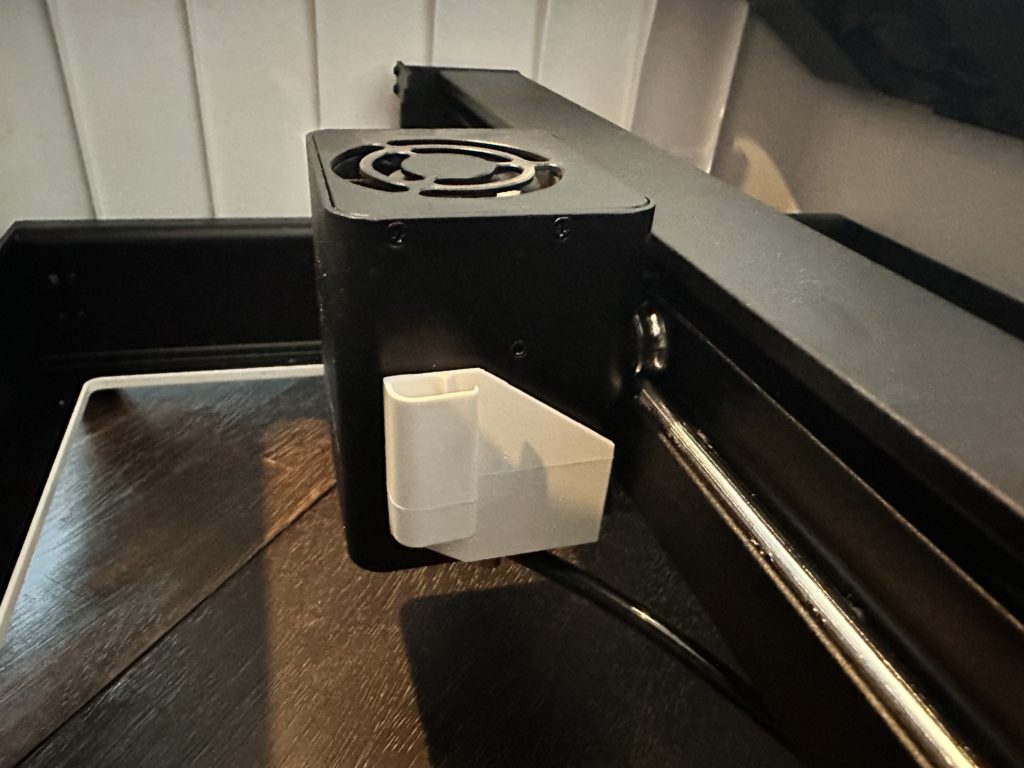
    8. Add the hose holder to the side of the laser housing.

    xTool M1 Unboxing & Set Up - Air assist set - Install hose guide on laser unit - cuttingforbusiness.com.

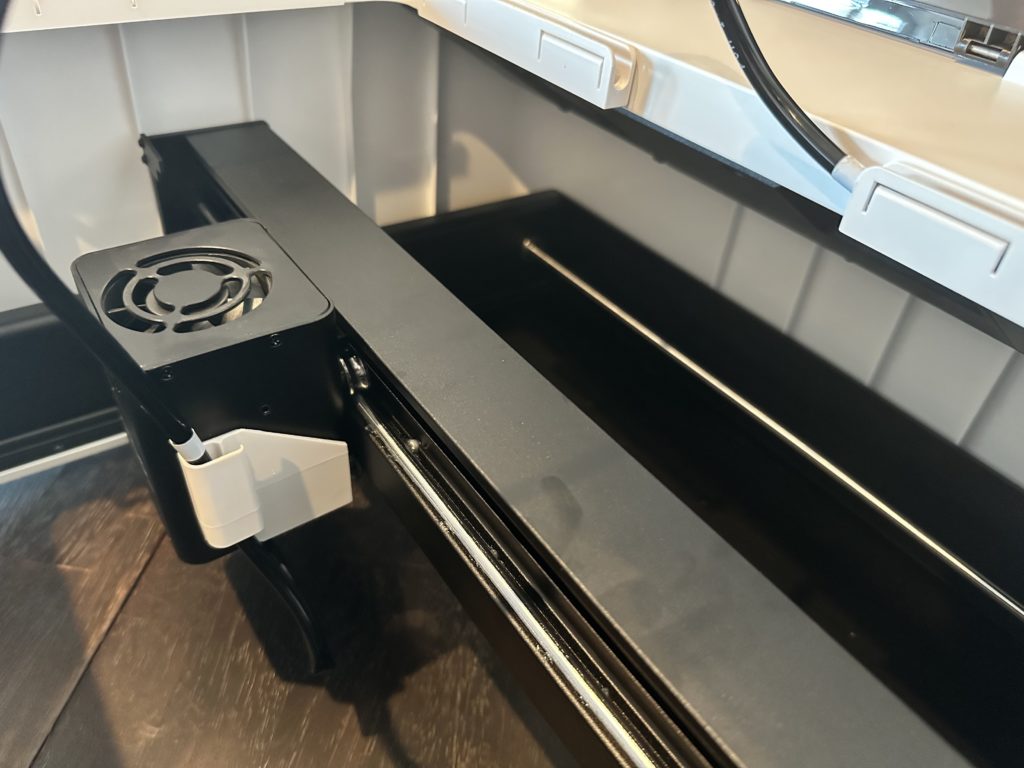
    9. Finally, feed the hose into the guide. There are white marks on the hose to help you figure out where it should snap in.

    xTool M1 Unboxing & Set Up - Air assist set - Feed hose into guide - cuttingforbusiness.com.

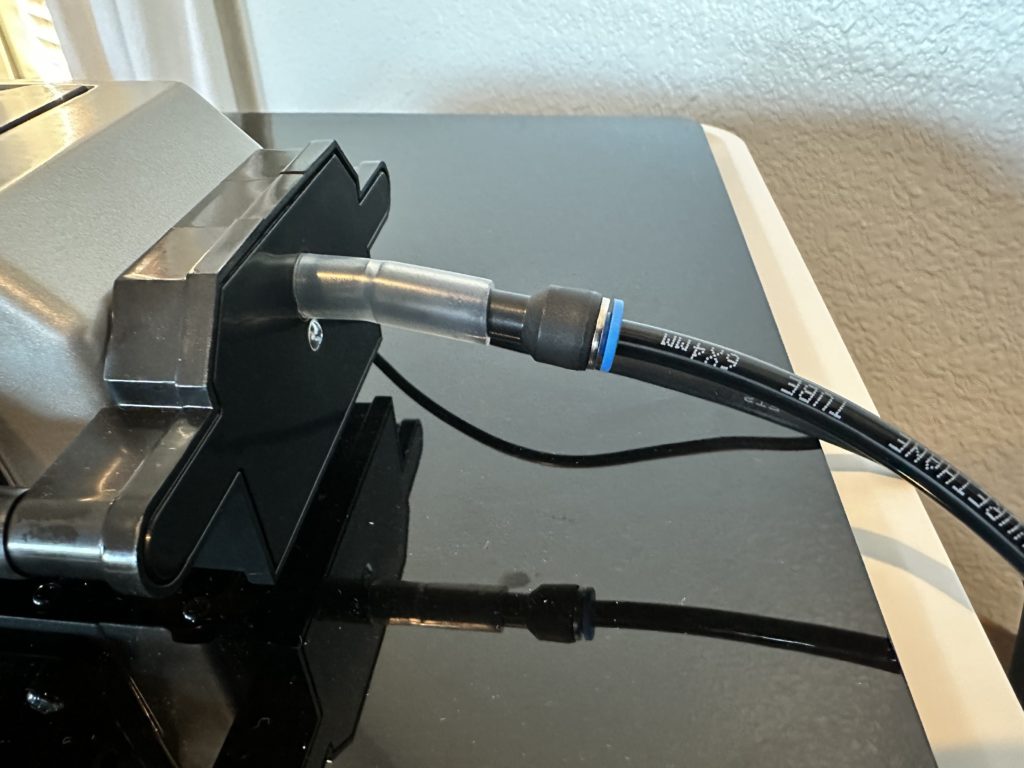
    10. Connect the hose to the xTool Air Assist set.

    xTool M1 Unboxing & Set Up - Air assist set - Attach unit - cuttingforbusiness.com.

    That’s it. The xTool M1 is set to go with the optional air assist set. The air assist is advertised as providing a “cleaner and smoother laser cutting finish”. When turned on, the noise it makes is a slight hum. If you’ve ever had a fish tank before, the unit’s look and feel reminds me of an air pump.

    Tomorrow, I’m tackling my first project: Engraved Paw Print Jewelry!