Design with Me is a new regular feature on Cutting for Business! Each Friday, I’ll bring you a new Silhouette Studio tutorial featuring how to design an SVG.
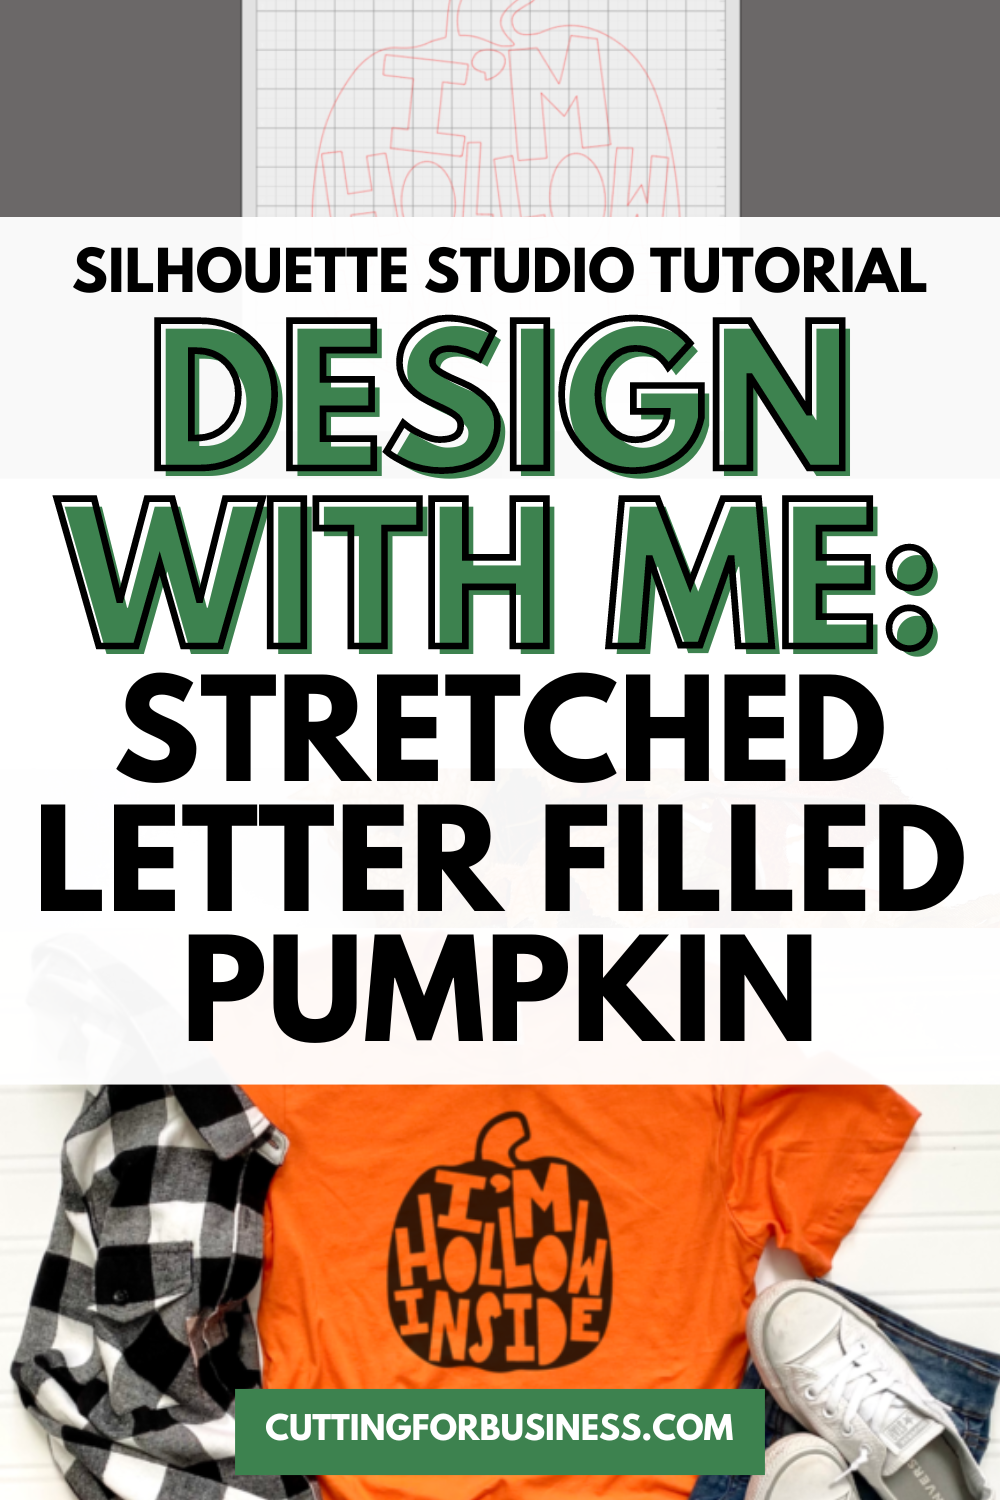
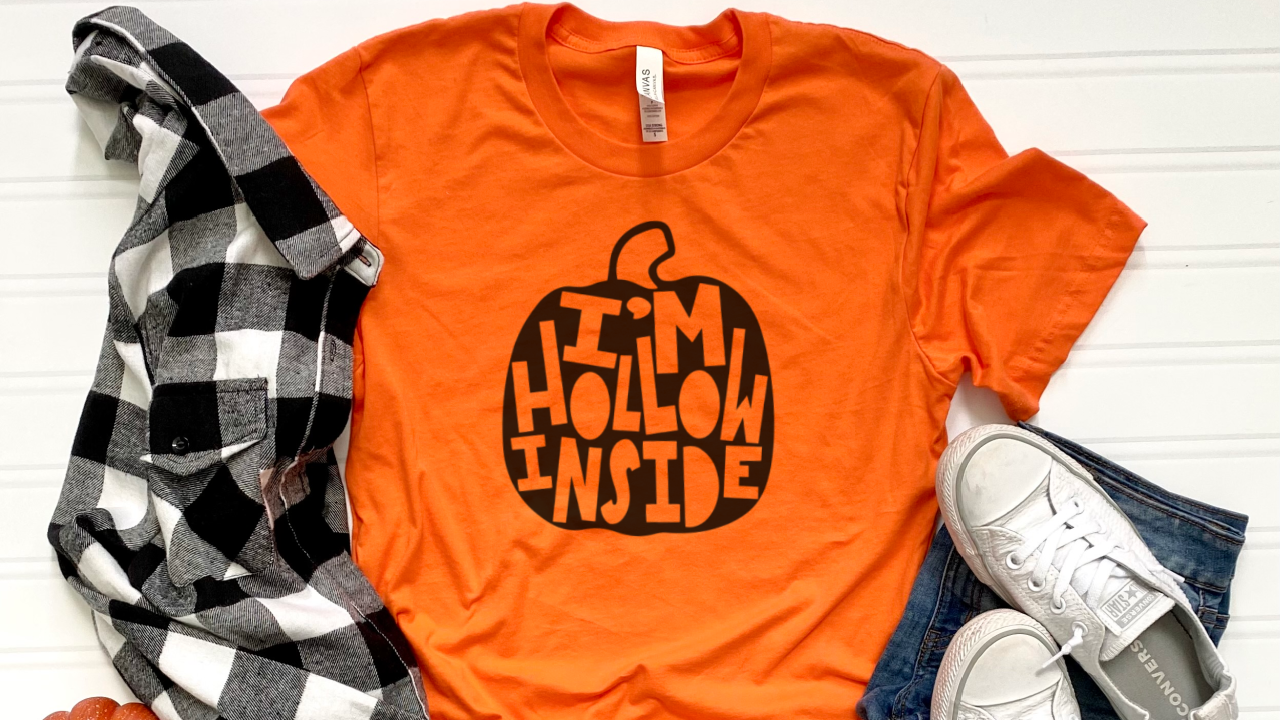
Today, let’s look at creating a stretched letter filled pumpkin SVG.
Silhouette Studio Tutorial: Stretched Letter Filled Pumpkin SVG
Ahhh, smell that? That’s the smell of fall! Let’s look at another tutorial. Today, I’ll use a pumpkin pun to make a letter filled pumpkin design.
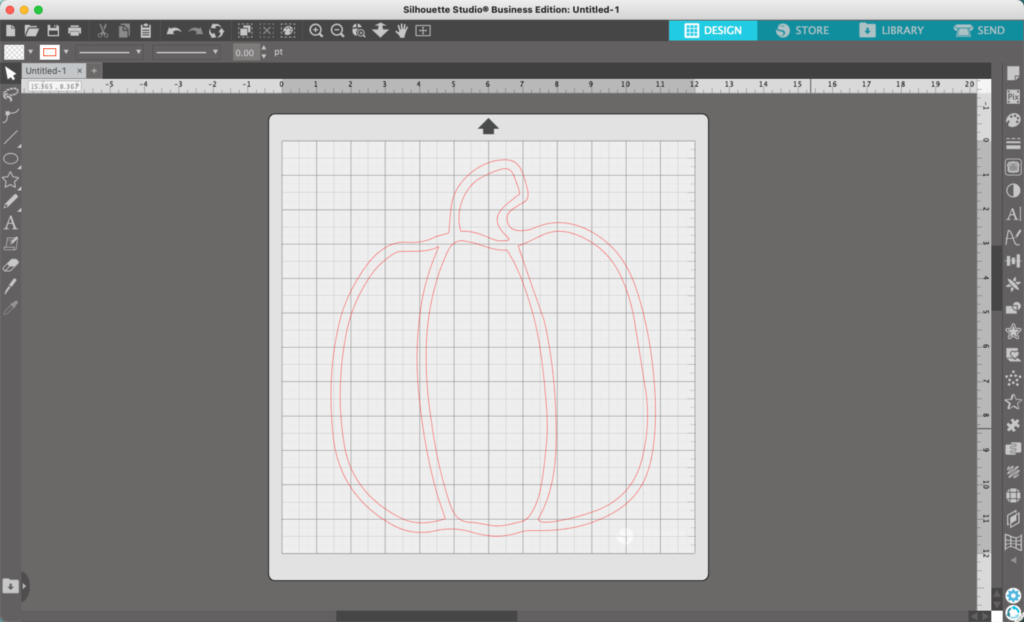
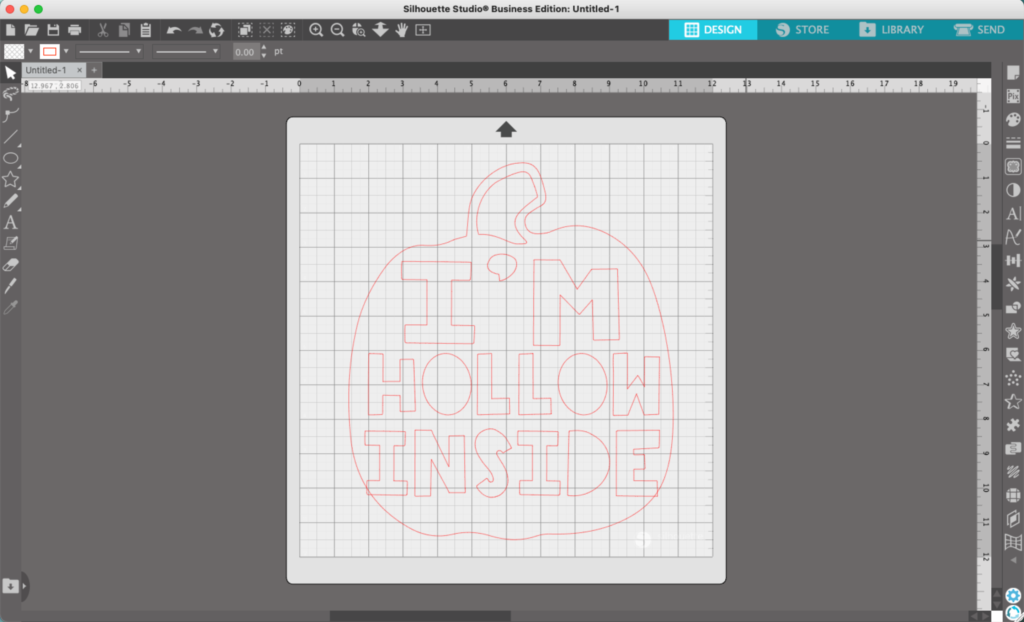
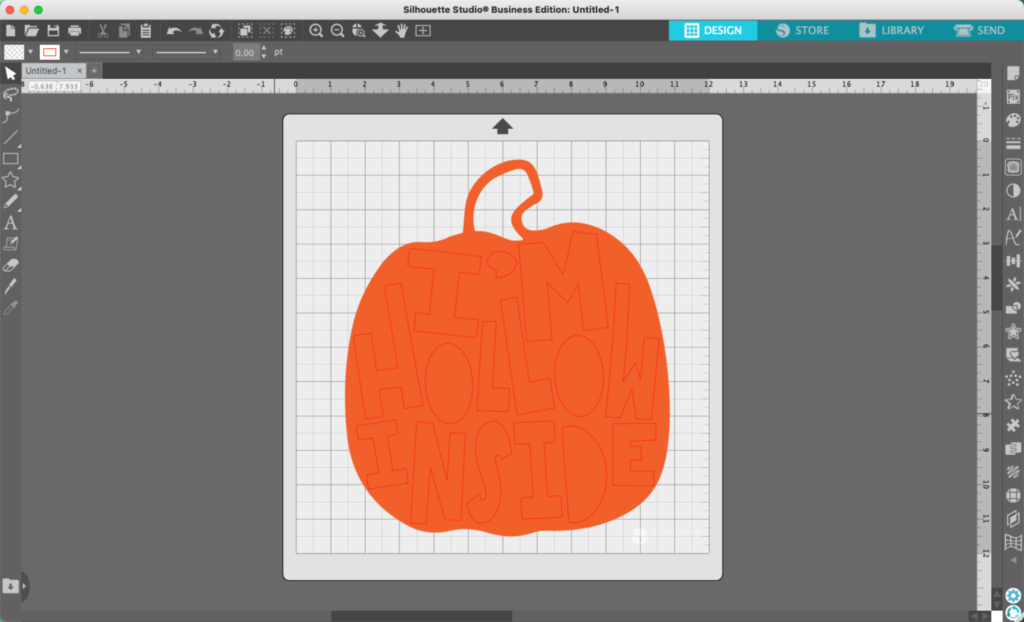
Start with a pumpkin shape. It can be a dingbat from a font, a pumpkin you designed, or a pumpkin you’ve previously designed (hint, hint – view this tutorial). For this tutorial, I’m using a dingbat from the Fall Feels font.
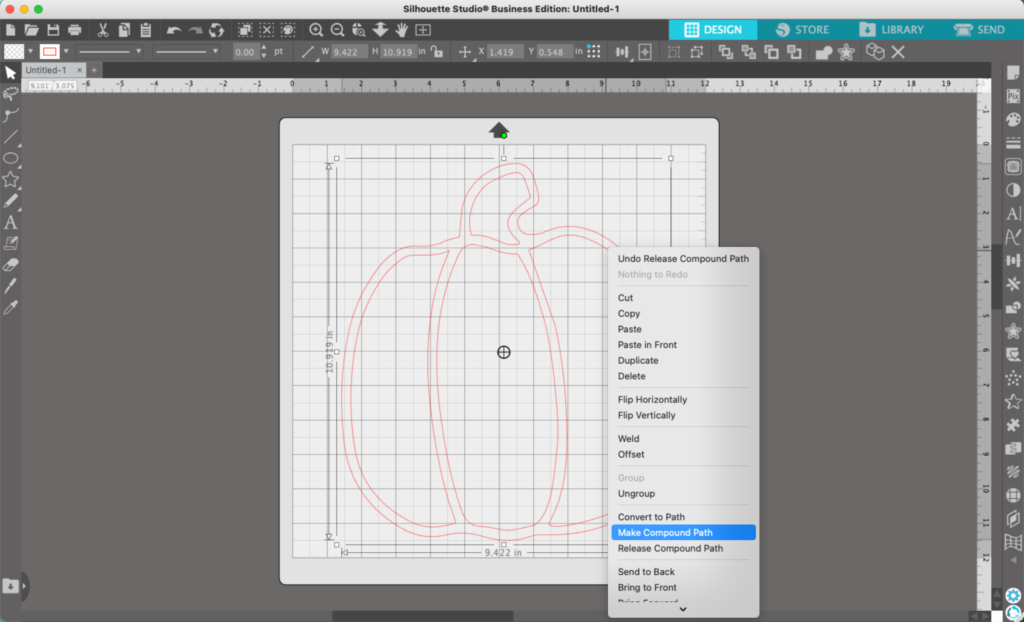
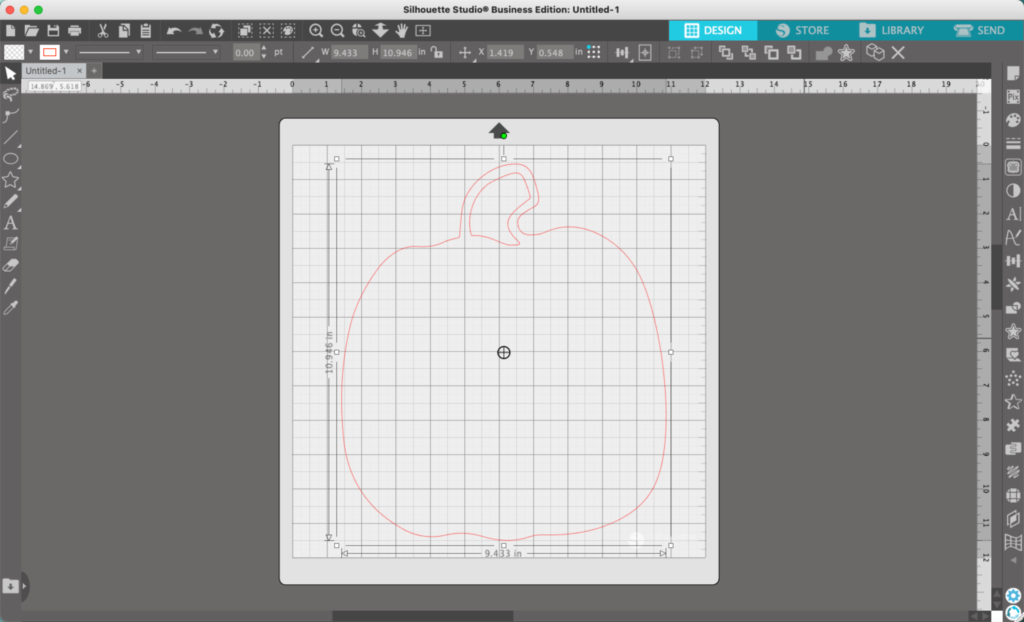
2. (Optional) Right click on the dingbat if needed, then click ‘Make Compound Path’. This will allow you to easily delete anything in the center of your pumpkin. I chose to leave the steam detail inside the pumpkin.
2. Pick a fun or funky font. Something a little different. For this tutorial, I’m using this font. Add your text and put it in place.
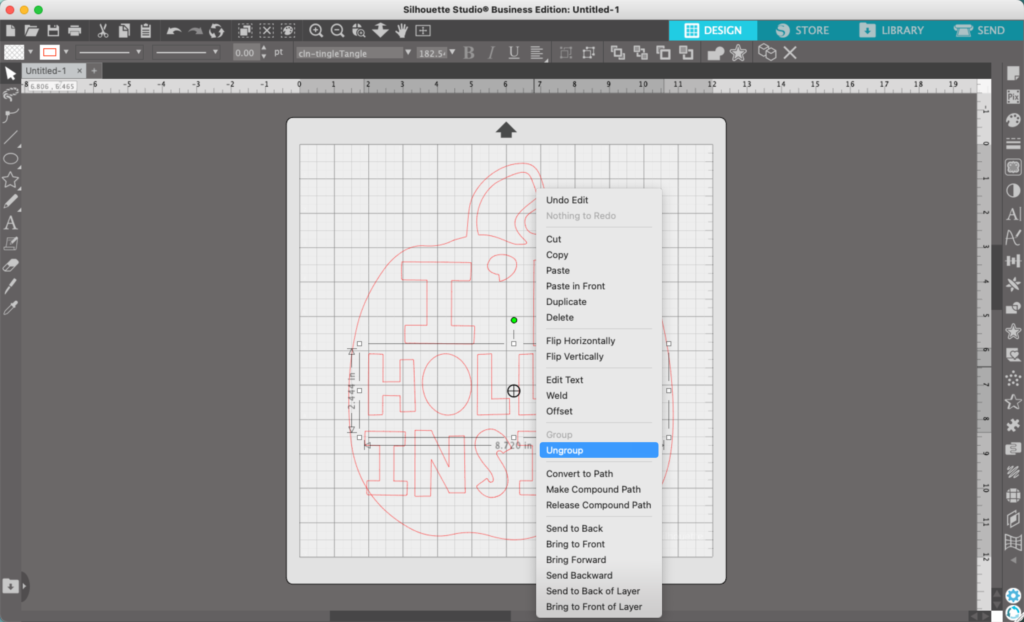
3. Right click on each of the words, then select ‘Ungroup’.
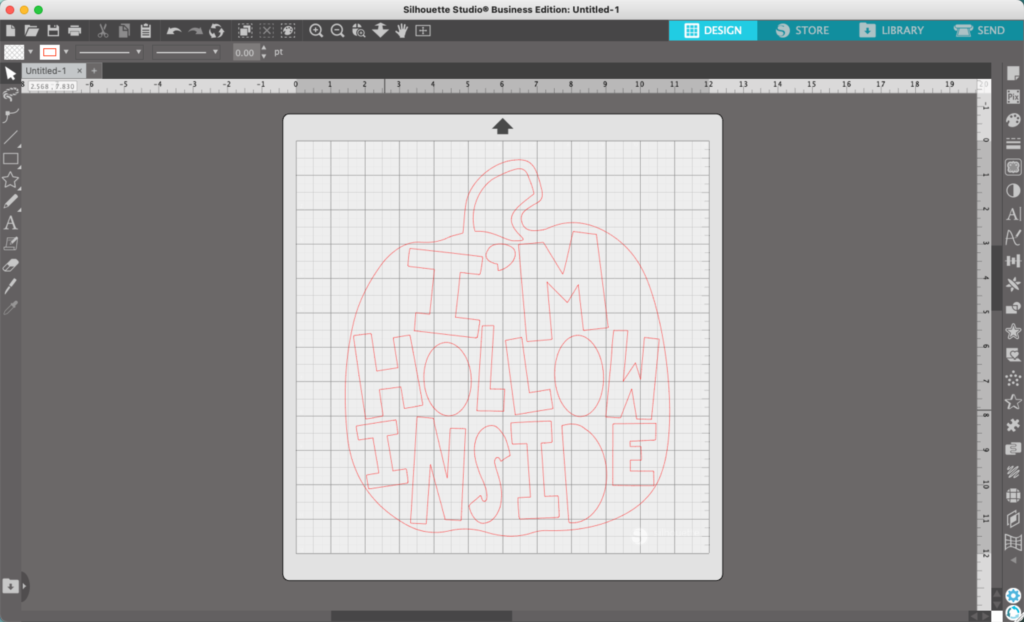
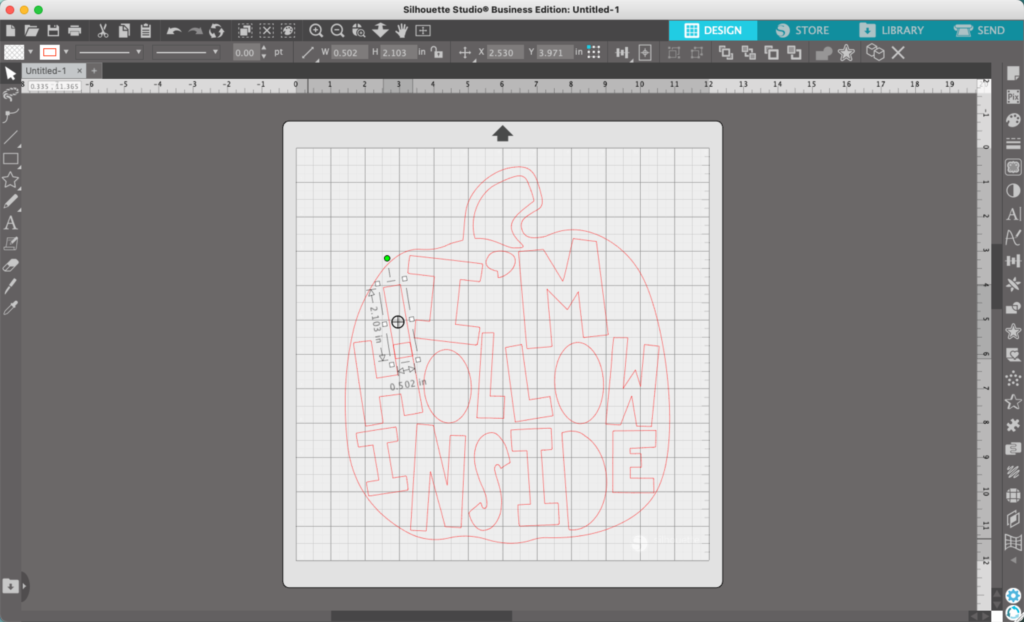
4. You can now rotate, stretch, and move each letter independently. So, move through each word and letter and move it around. Go crazy! The only ‘rule’ is that you cannot go outside the pumpkin outline.
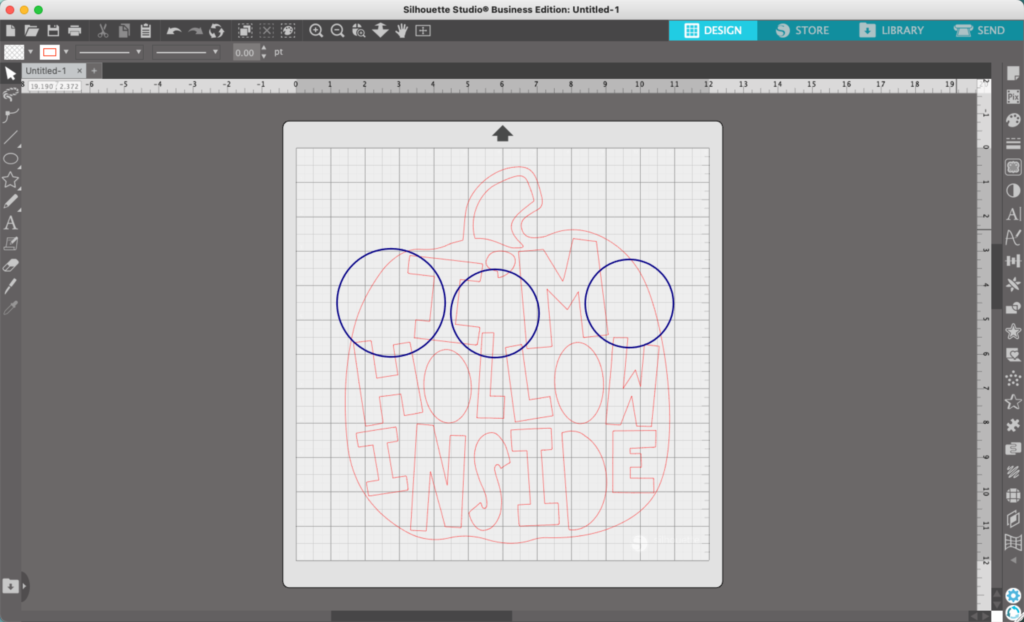
5. After rotating and moving my letters around, I’ve got some empty spaces. I’ve circled them in blue.
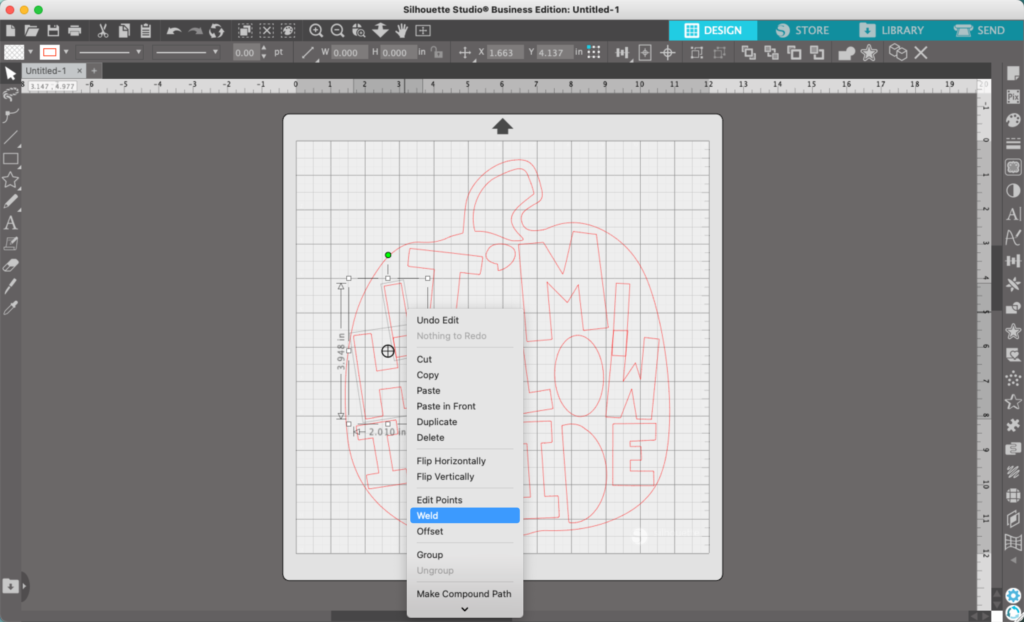
6. To fix the spaces, I extended the letters by adding a rectangle to each, then welding the rectangle to the letter. (Reminder: To weld, select both the rectangle and the letter, then right click and select ‘Weld’.)
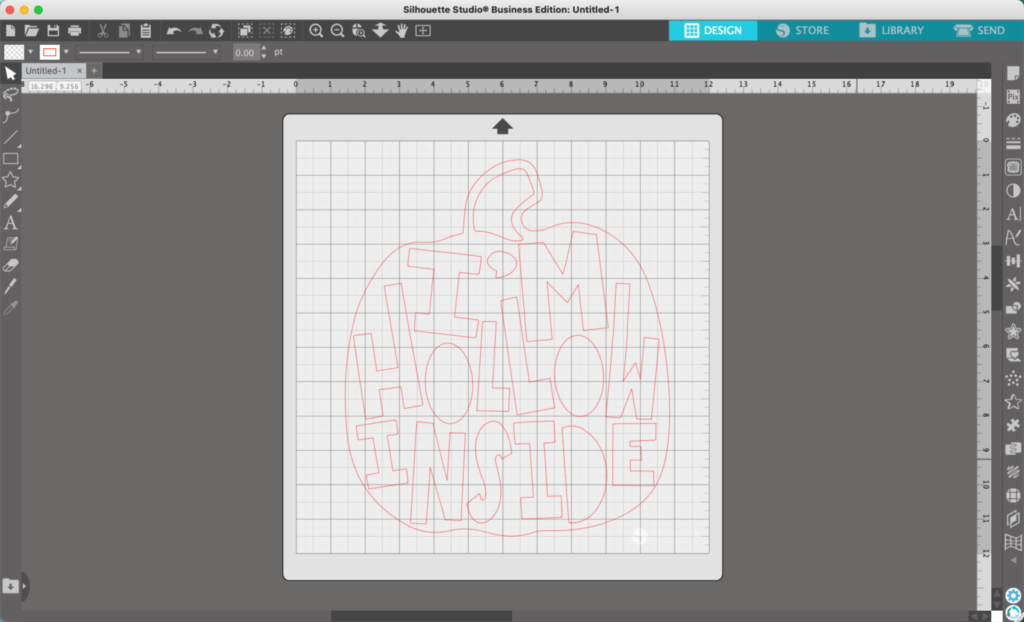
7. Keep fine tuning until you are happy with the final design.
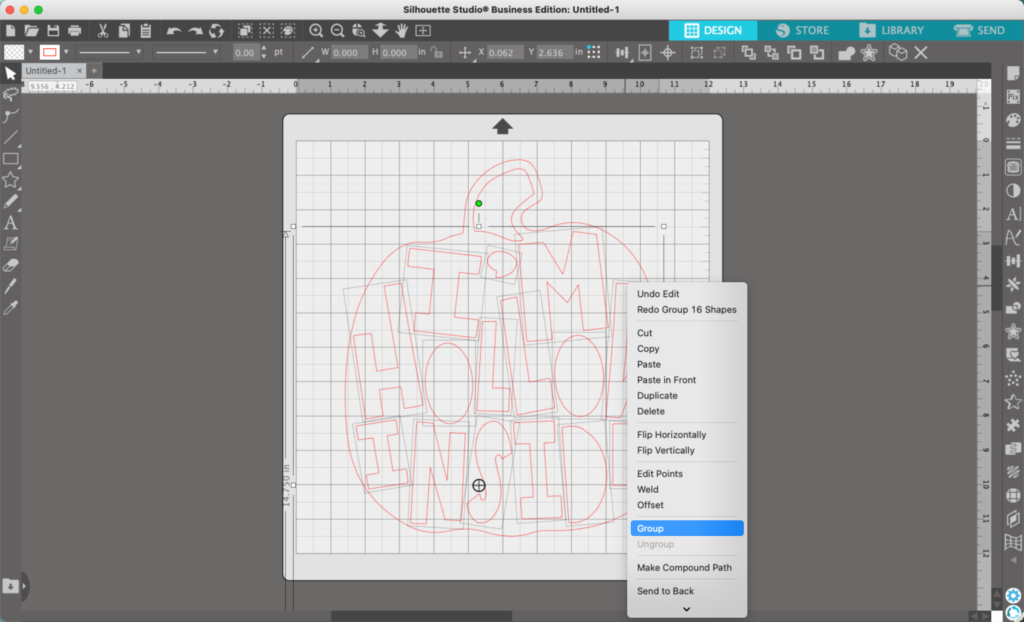
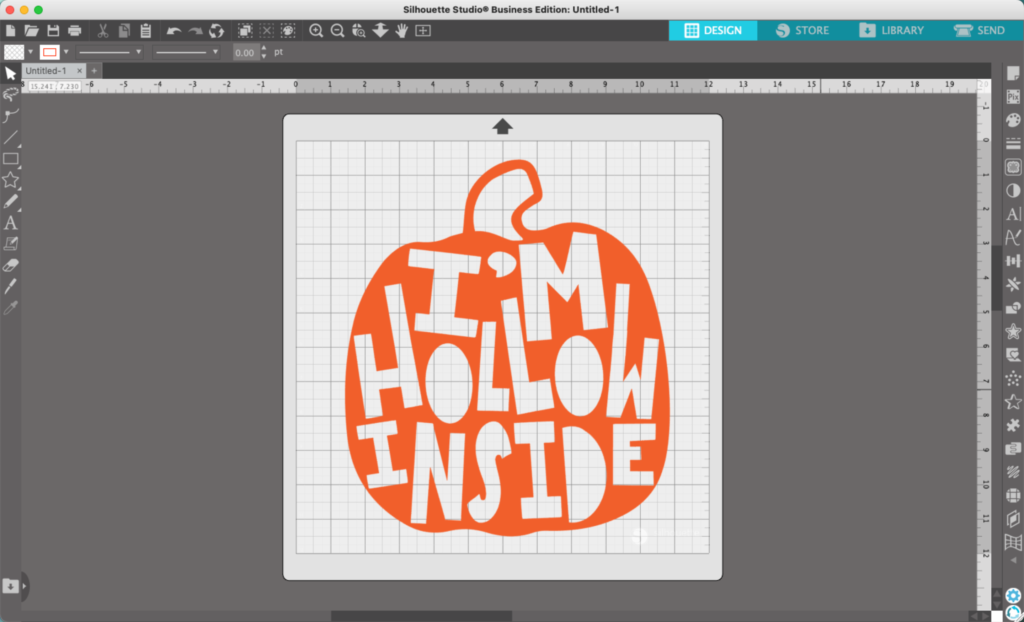
8. Group all the interior letters and pieces together by selecting them all, right clicking, then choosing ‘Group’.
9. Fill the pumpkin shape with color.
10. Select the pumpkin, then interior letters (and pieces if you have any), and head to ‘Object’, ‘Modify’, ‘Subtract’.
That’s it! You could follow these steps with so many different shapes and fonts for unlimited designs.
To save your new SVG creation, head to ‘File’, ‘Save As’, ‘Save to Hard Drive’, name the file, then select ‘SVG’ from the dropdown menu.
Design with Me is a new regular feature on Cutting for Business! Each Friday, I’ll bring you a new Silhouette Studio tutorial featuring how to design an SVG.
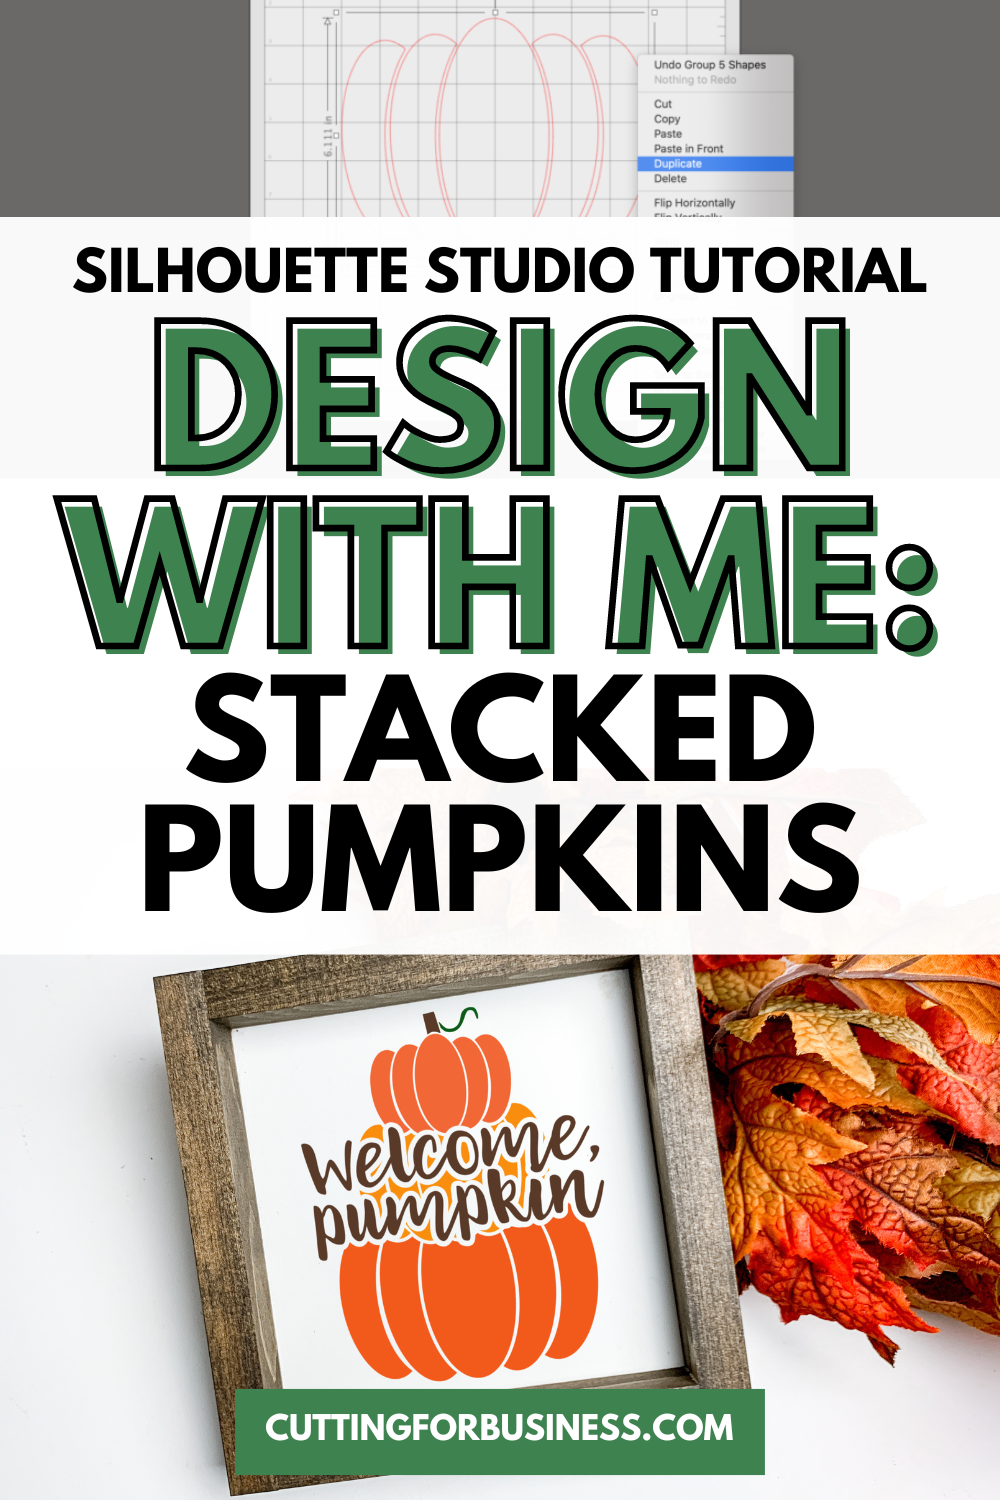
Today, let’s look at creating a stacked pumpkin SVG.
Tutorial: Stacked Pumpkin SVG
It’s almost fall! Let’s take a look at creating a stacked pumpkin cut file today.
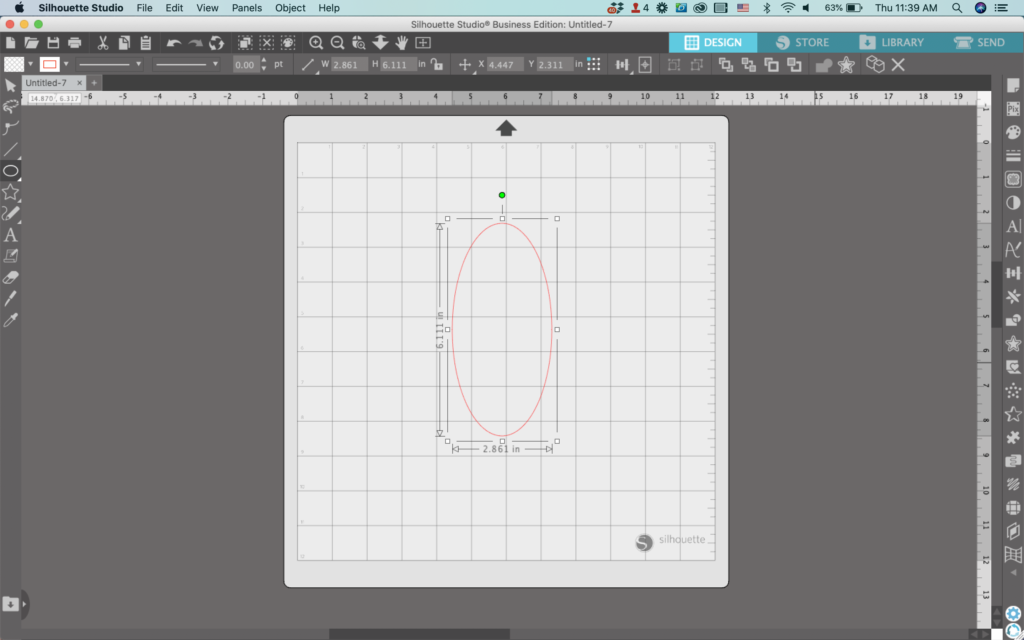
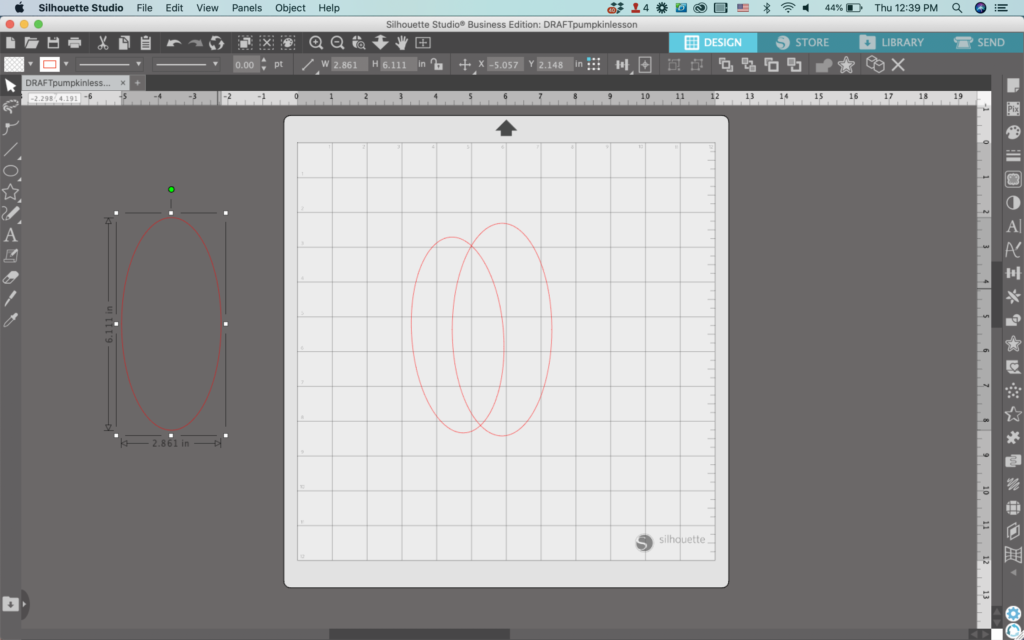
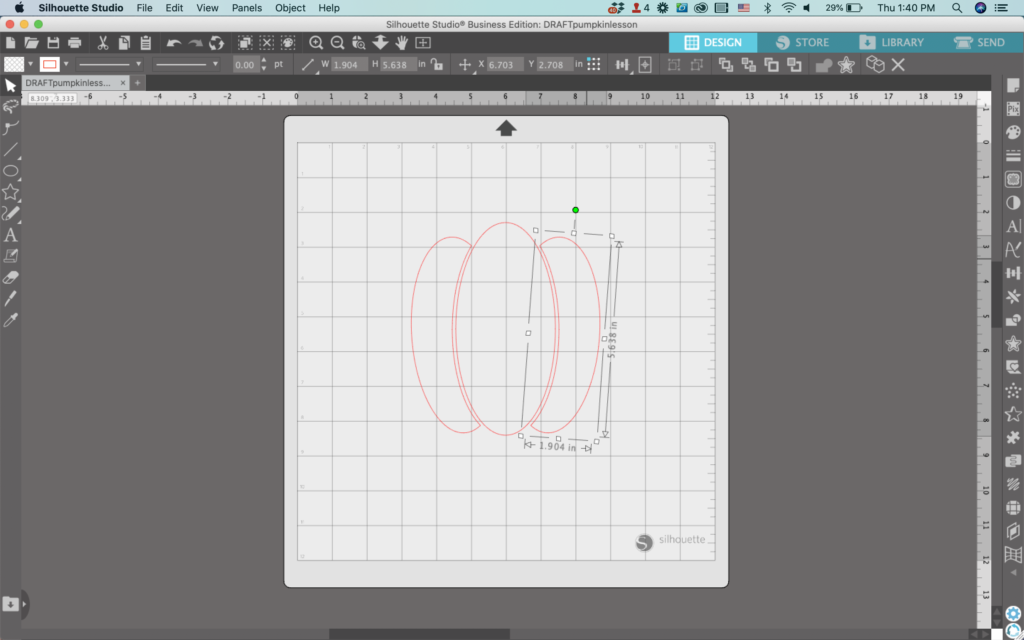
In Silhouette Studio, draw a vertical oval.
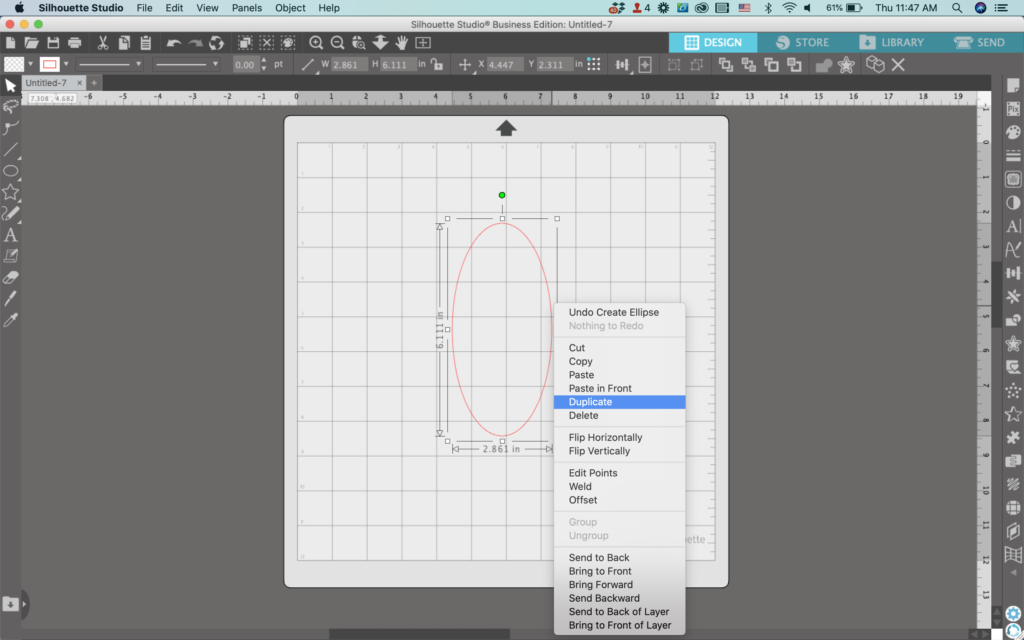
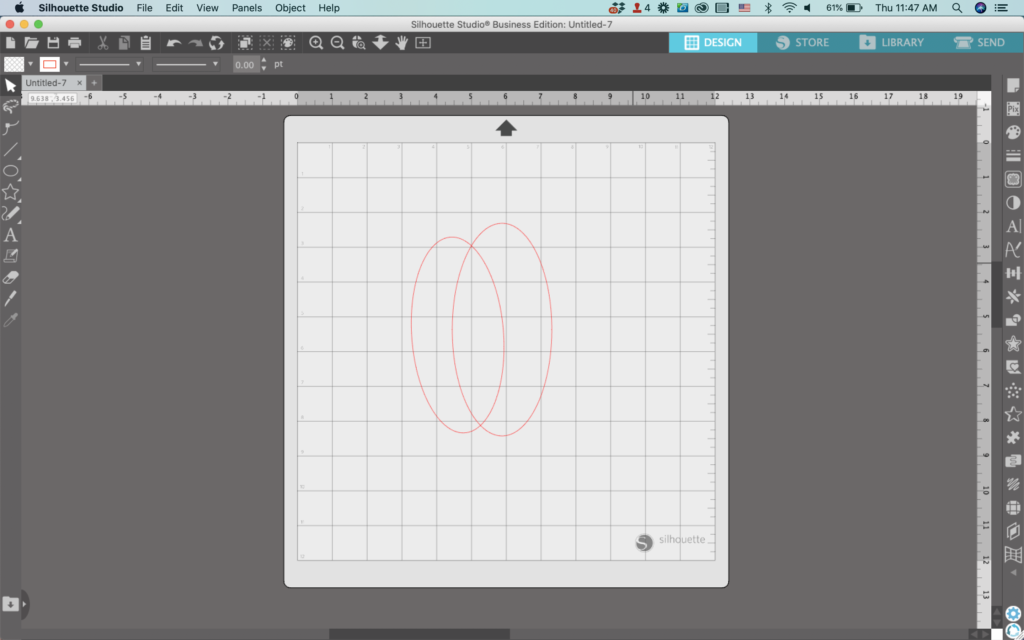
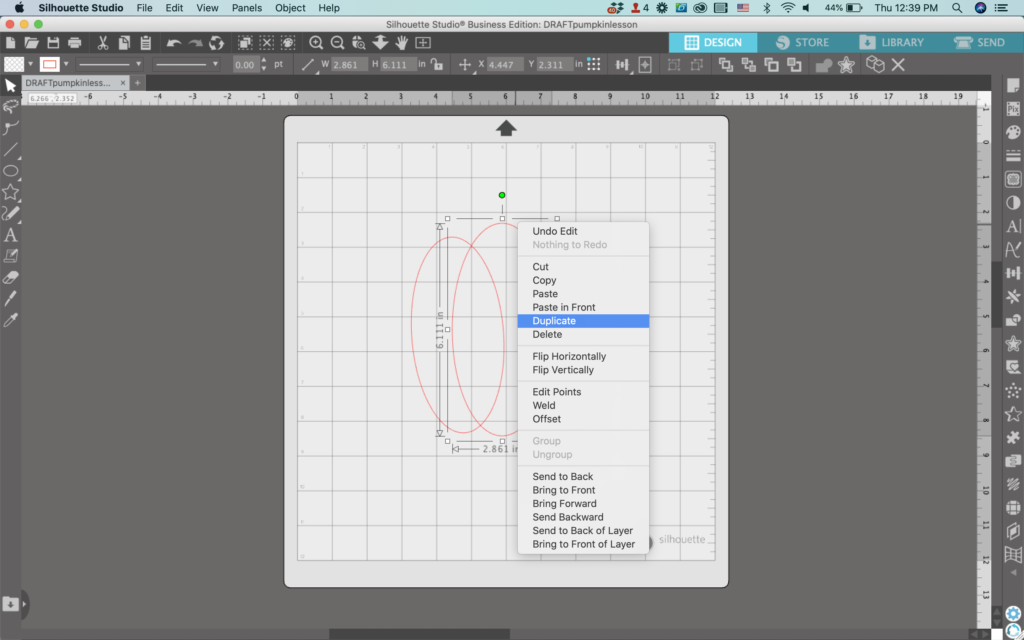
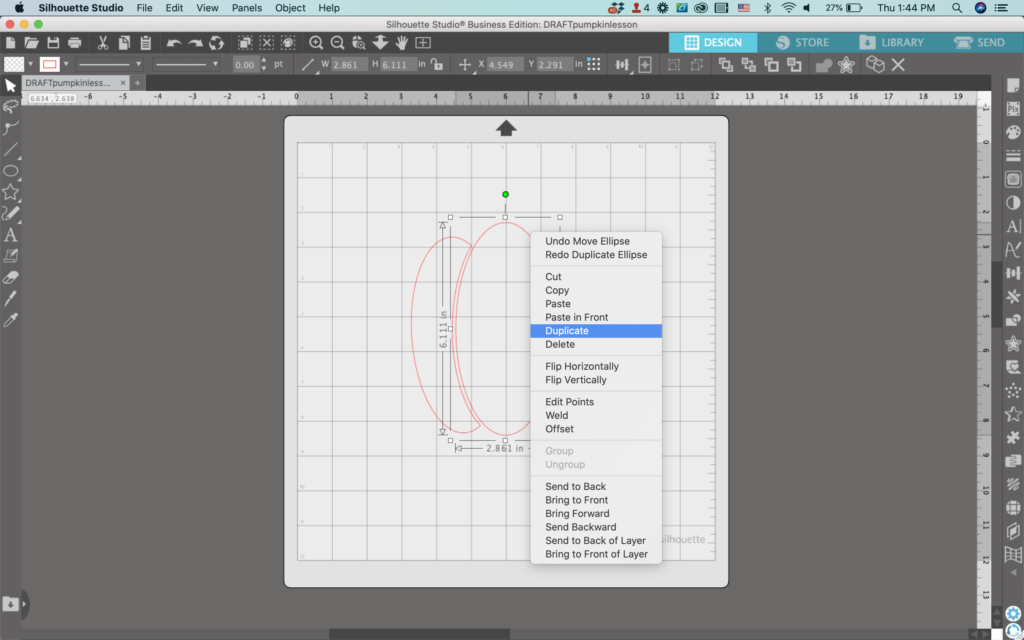
2. Duplicate the oval and move it to the left of the first oval. Rotate it slightly and resize it a little smaller.
3. Duplicate the first oval and move the copy off to the side.
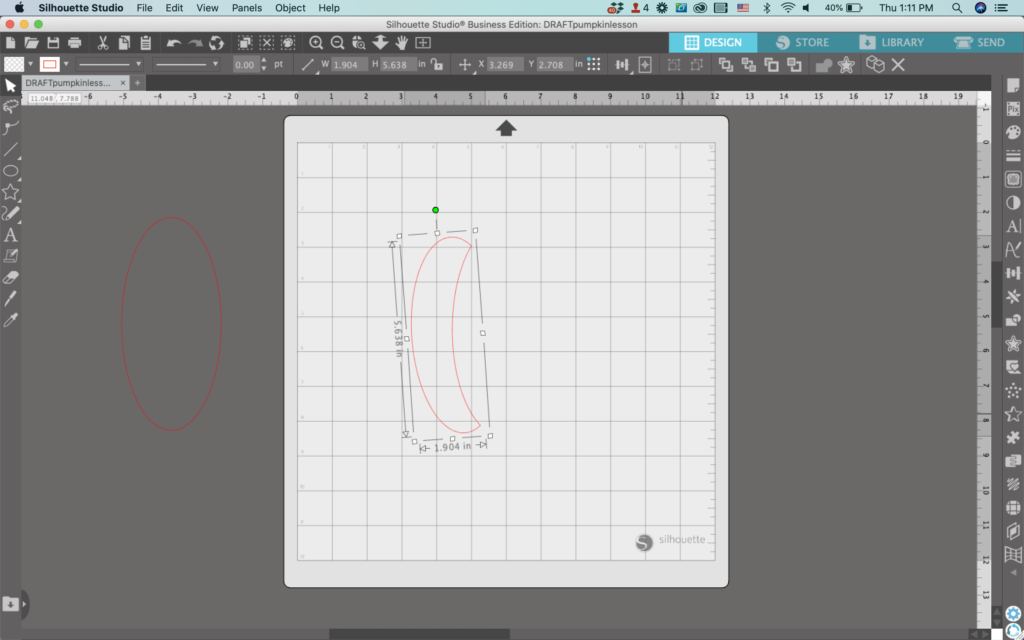
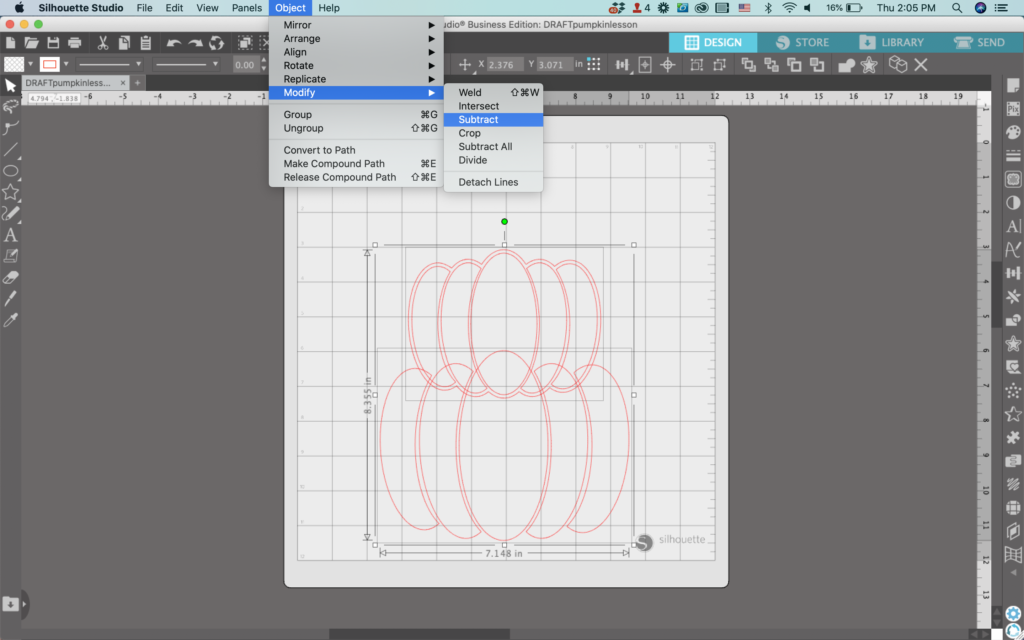
4. Select both ovals and navigate to ‘Object’, ‘Modify’, and ‘Subtract’. This will leave you with a half moon shape.
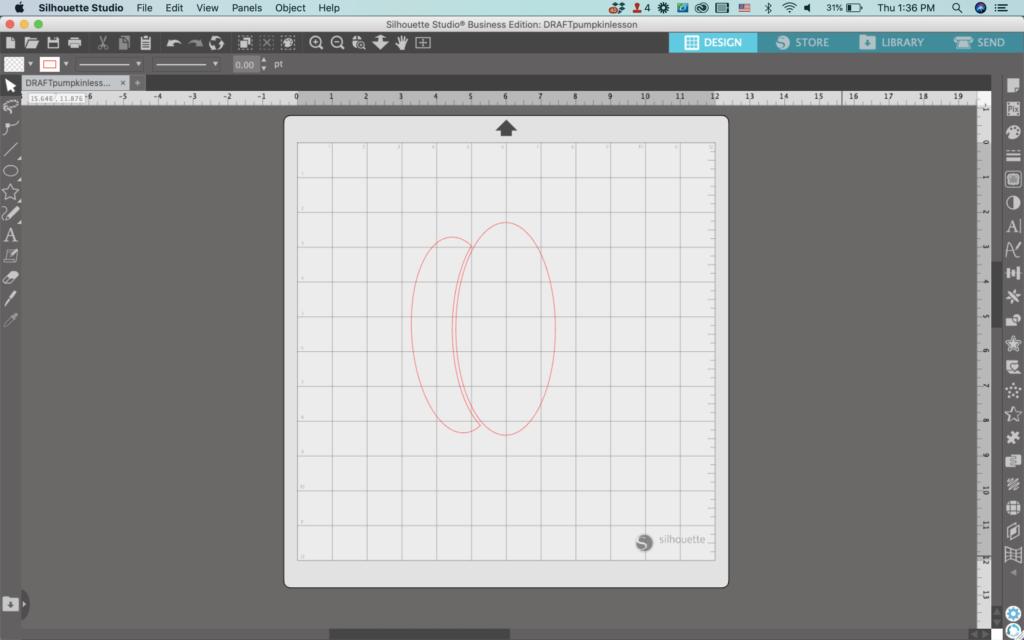
5. Move the extra oval into place. I like to leave a small gap so that it can easily be cut in vinyl, but you can also butt it up against the half moon shape.
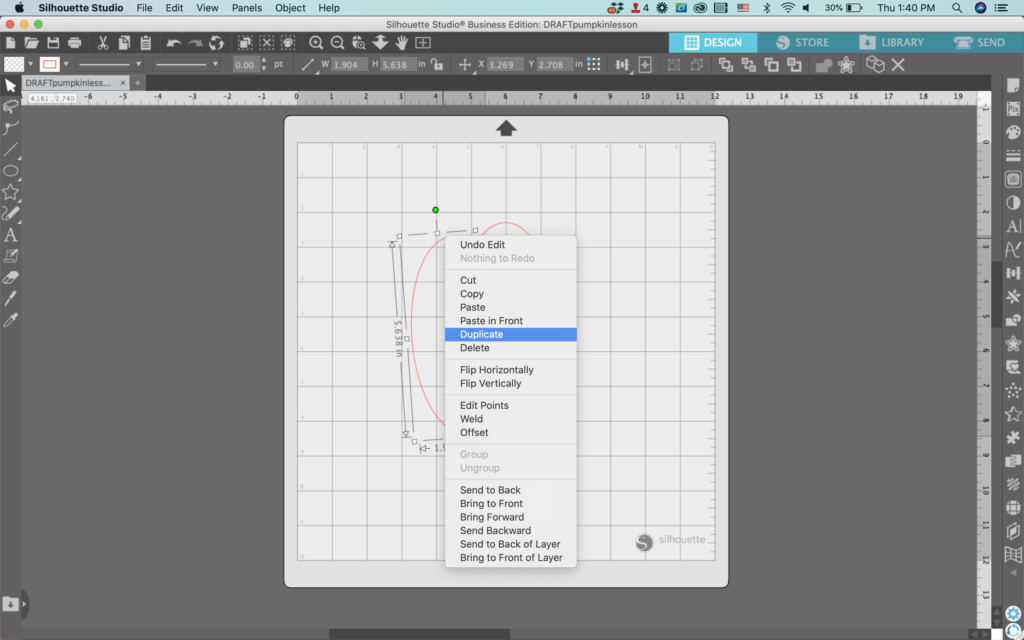
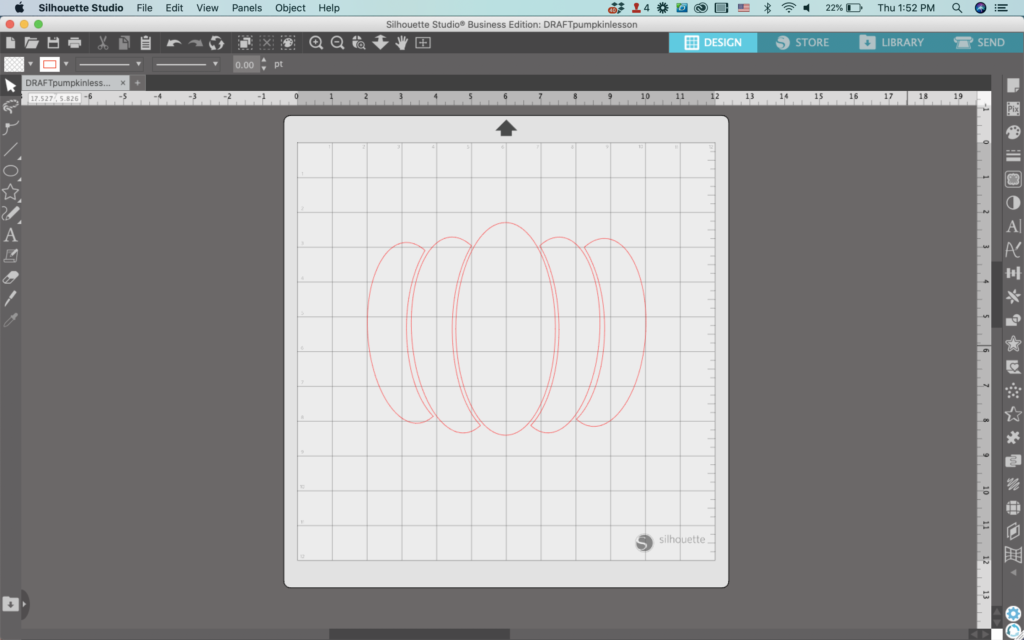
6. Duplicate the half moon shape. Then, navigate to ‘Object’, ‘Flip Horizontally’ to create a mirror image of your oval. Finally, move it into place on the right side of the pumpkin.
7. Duplicate both the outermost sections on each side of the pumpkin. Then, place one on each side of the pumpkin. When finished, you should have something that looks like a pumpkin.
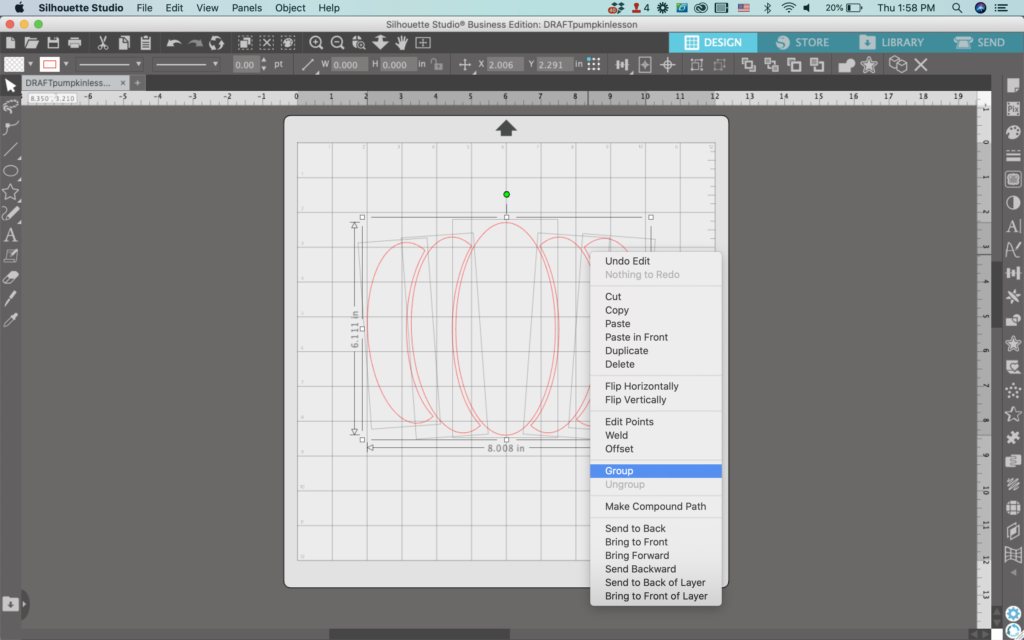
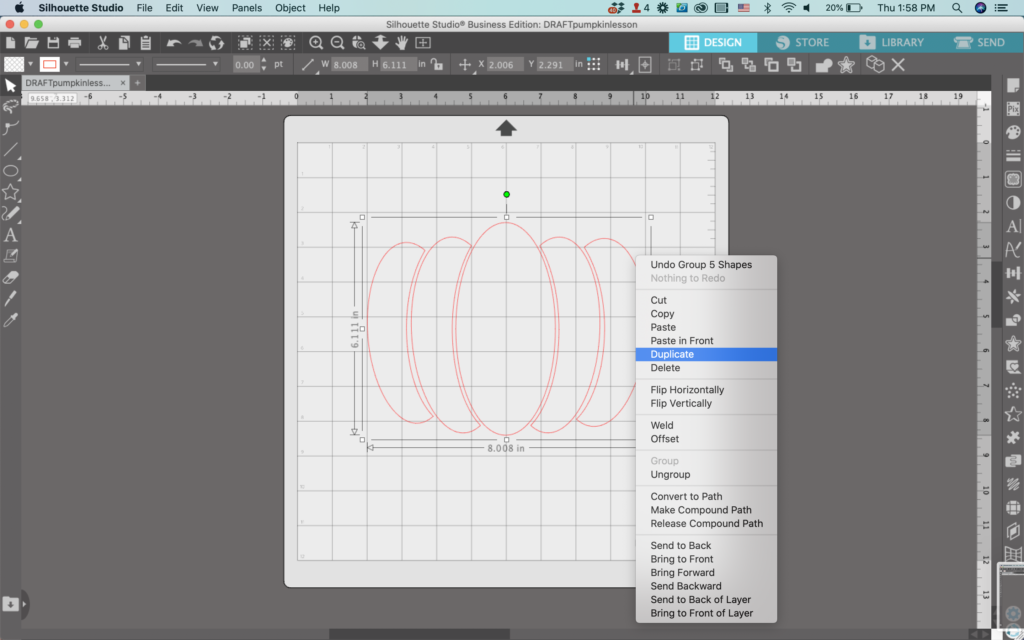
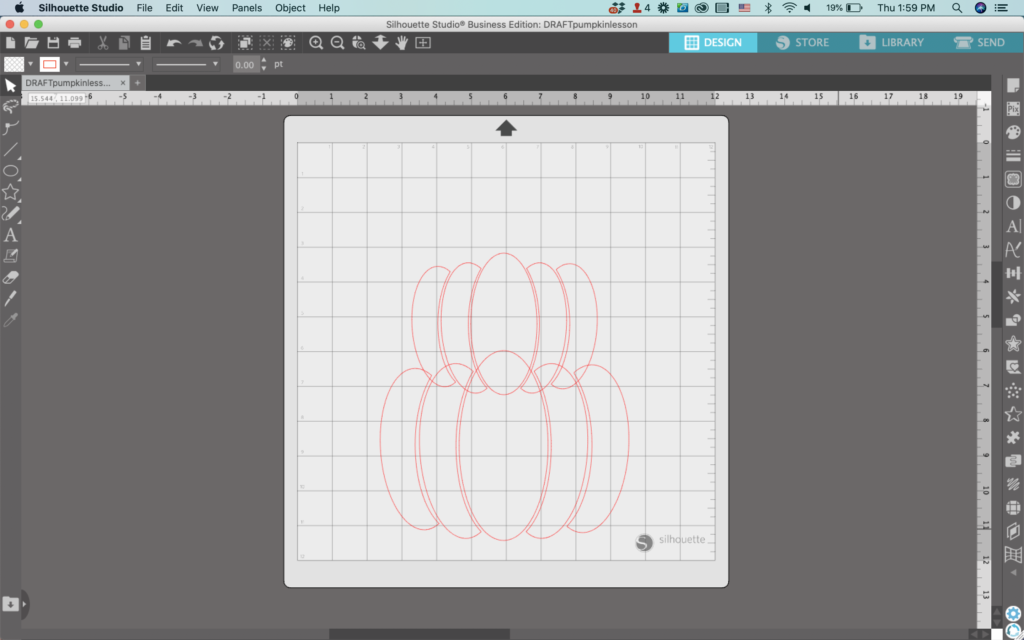
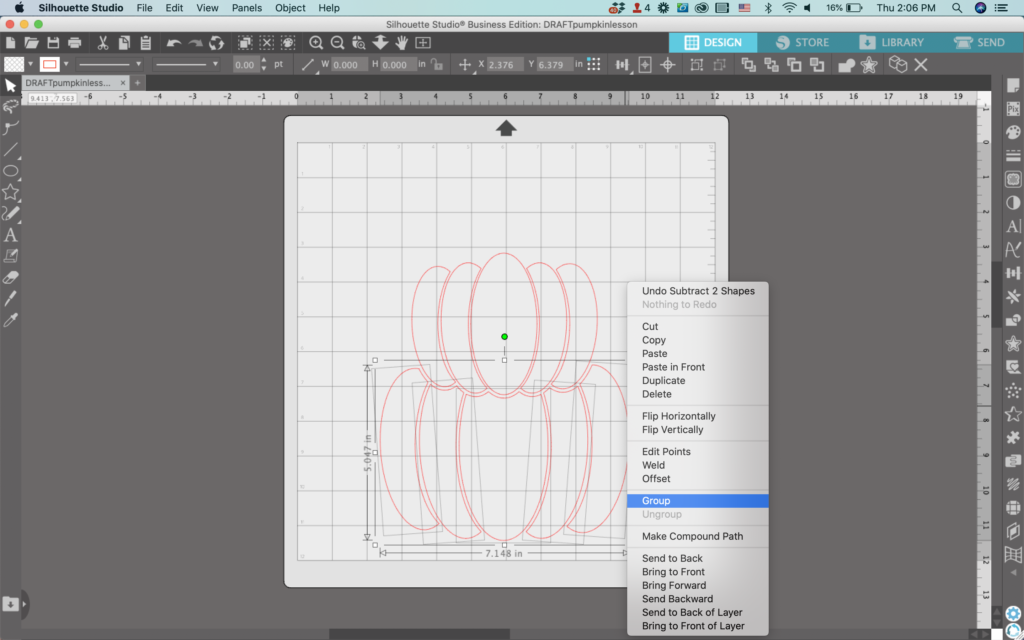
8. Select all your shapes and right click, then select ‘Group’. Next, right click and select ‘Duplicate’ to make a second pumpkin. Arrange your pumpkins on top of each other.
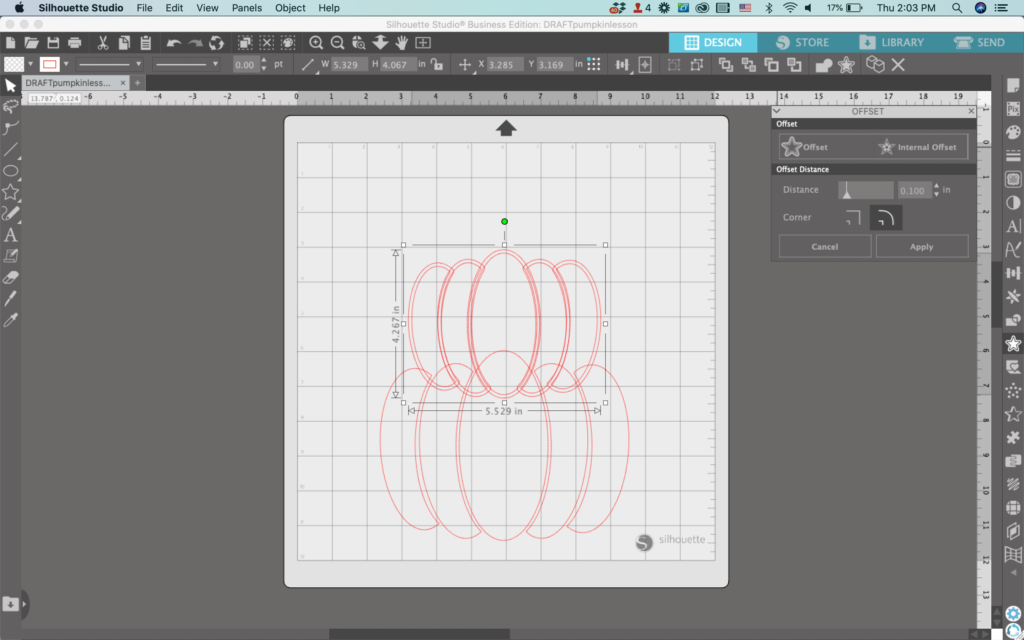
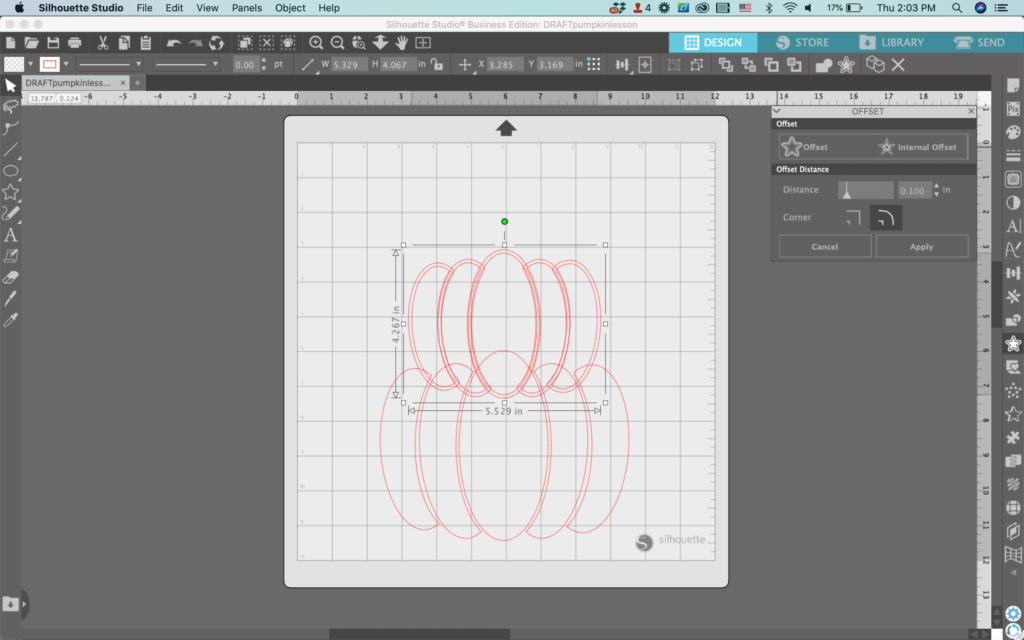
9. Head to ‘Panels’, ‘Offset’, then offset the top pumpkin slightly.
10. Select the bottom pumpkin and the top pumpkin’s offset, and navigate to ‘Object’, ‘Modify’, and ‘Subtract’. Then right click to ‘Group’ it back together.
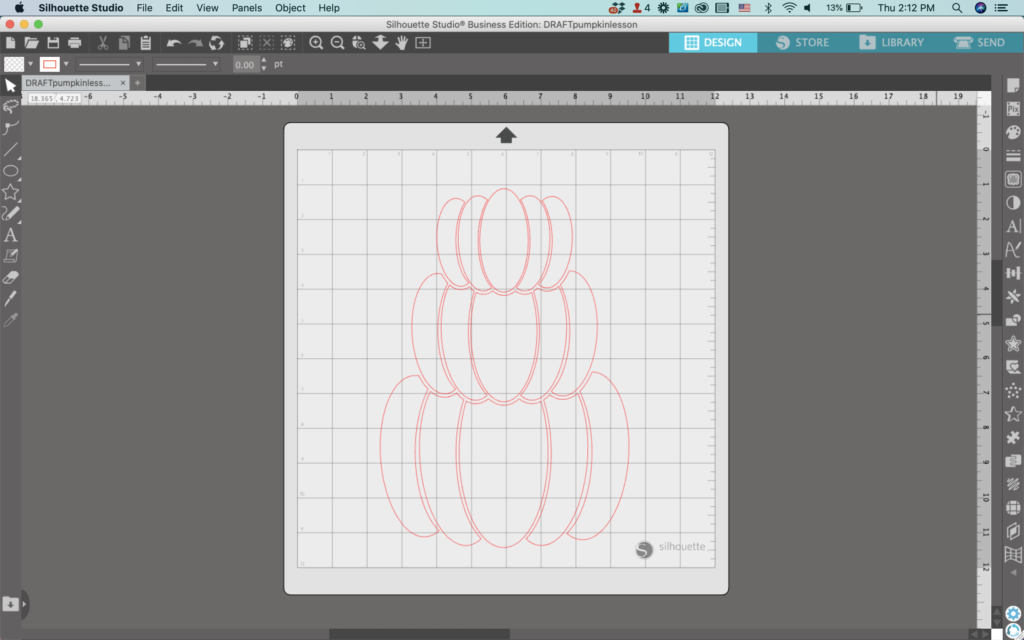
11. Duplicate the top pumpkin and repeat steps 9 and 10 to add a 3rd pumpkin to the stack. When finished, it should look similar to this:
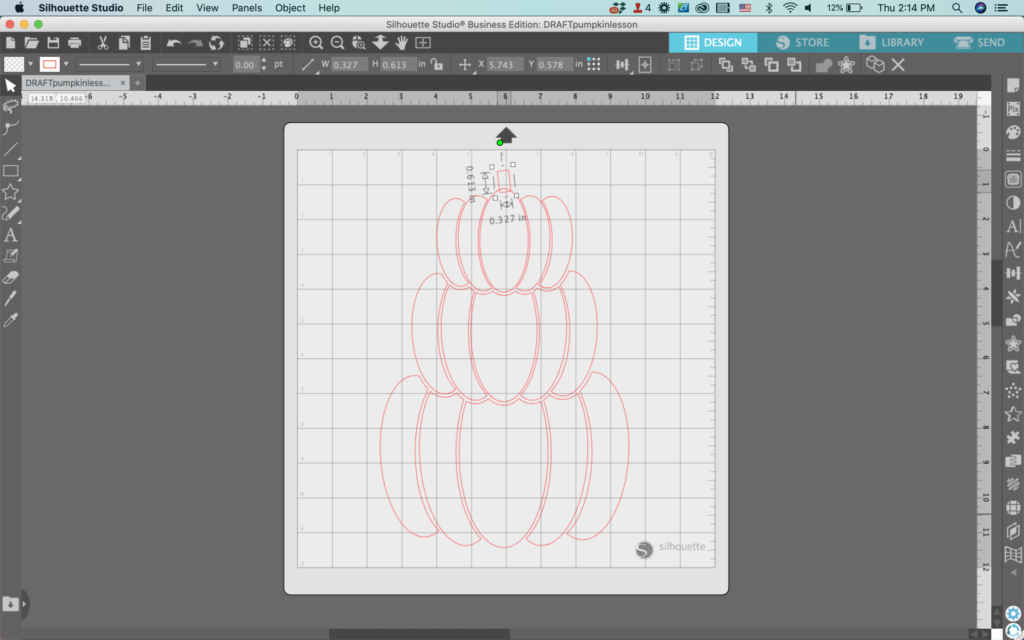
12. Draw a small rectangle and place it in the center of the top pumpkin. Rotate it slightly.
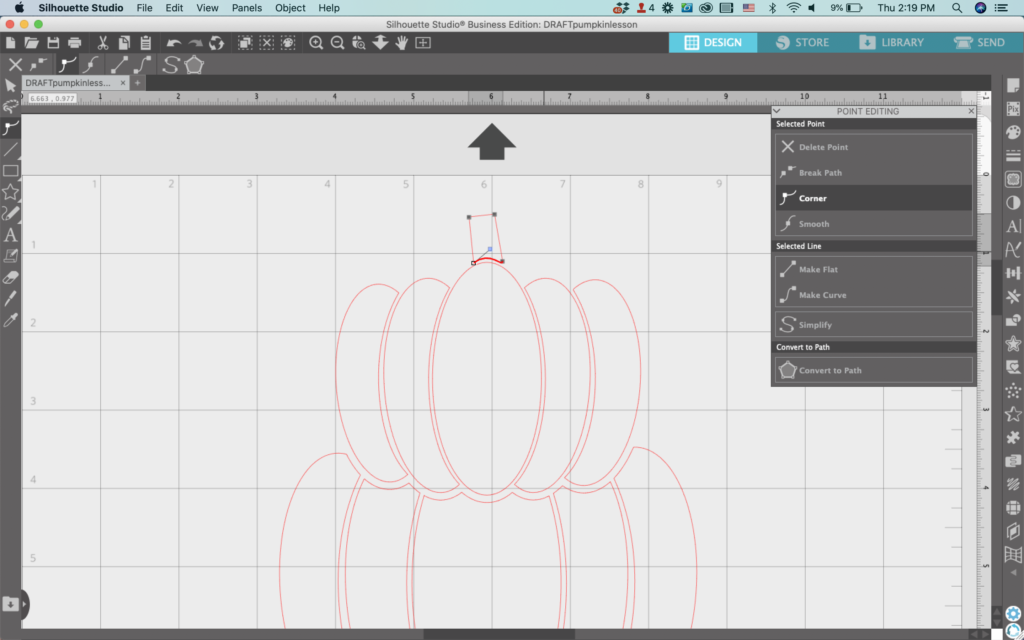
13. Double click the stem to open the ‘Point Editing’ Panel. Make the bottom of the stem curve around the top of the pumpkin.
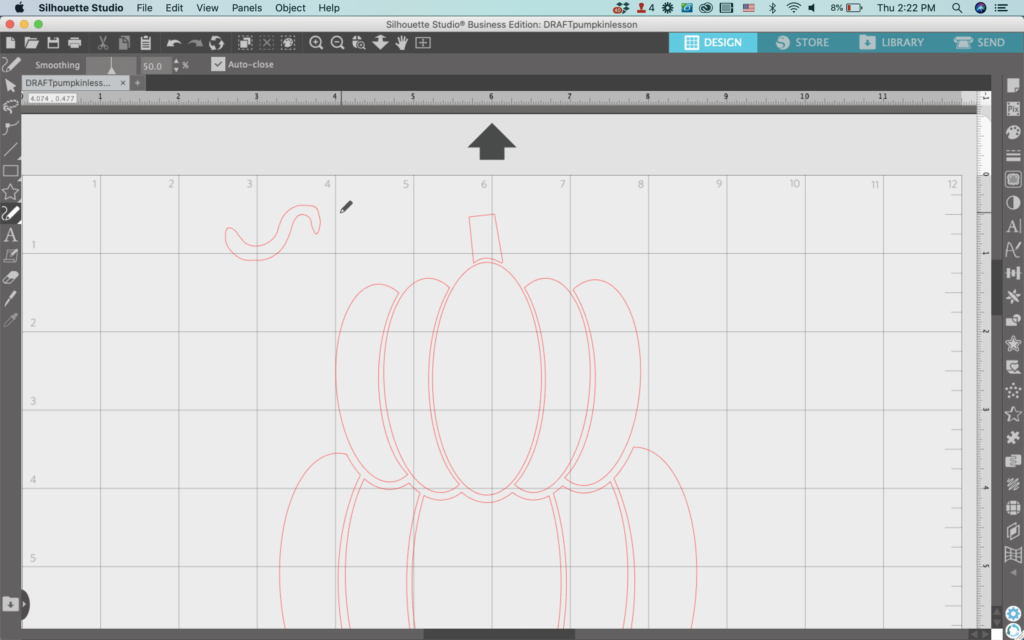
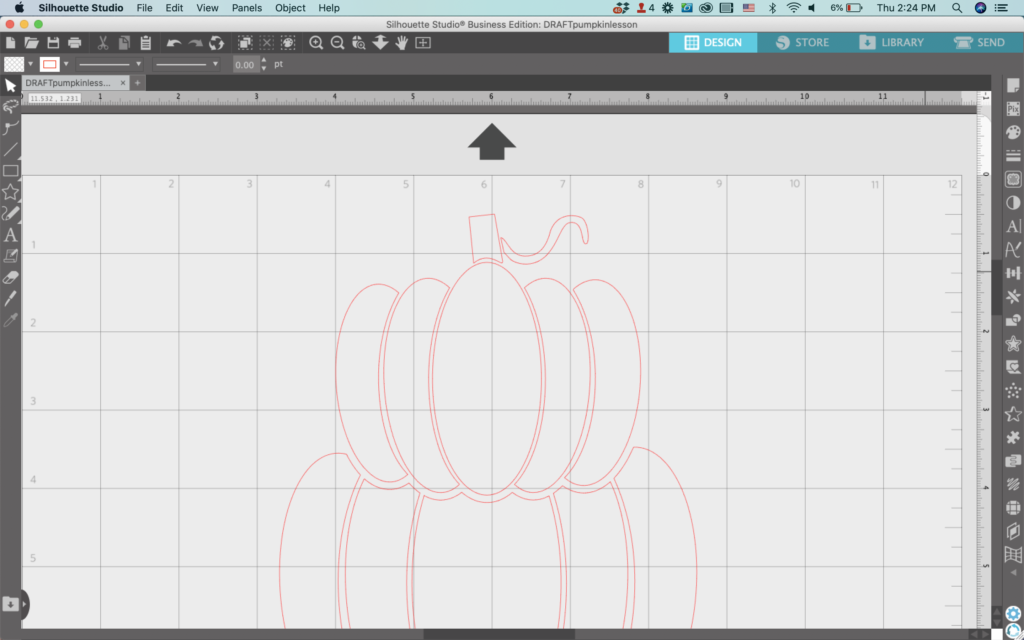
14. Use the ‘Draw Smooth Freehand’ tool to draw a piece of vine. Point edit it if necessary, then move it into place.
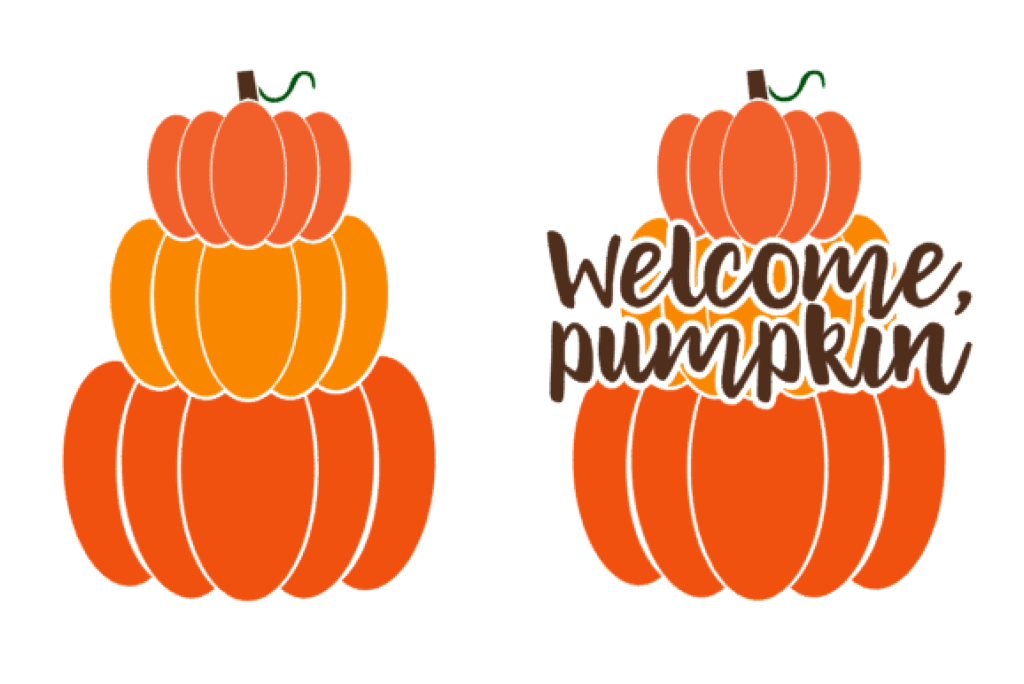
15. Add color, additional details, or text to complete the design. Don’t forget, you can also stop after step 7, add a stem and/or a vine and finish with a single pumpkin.
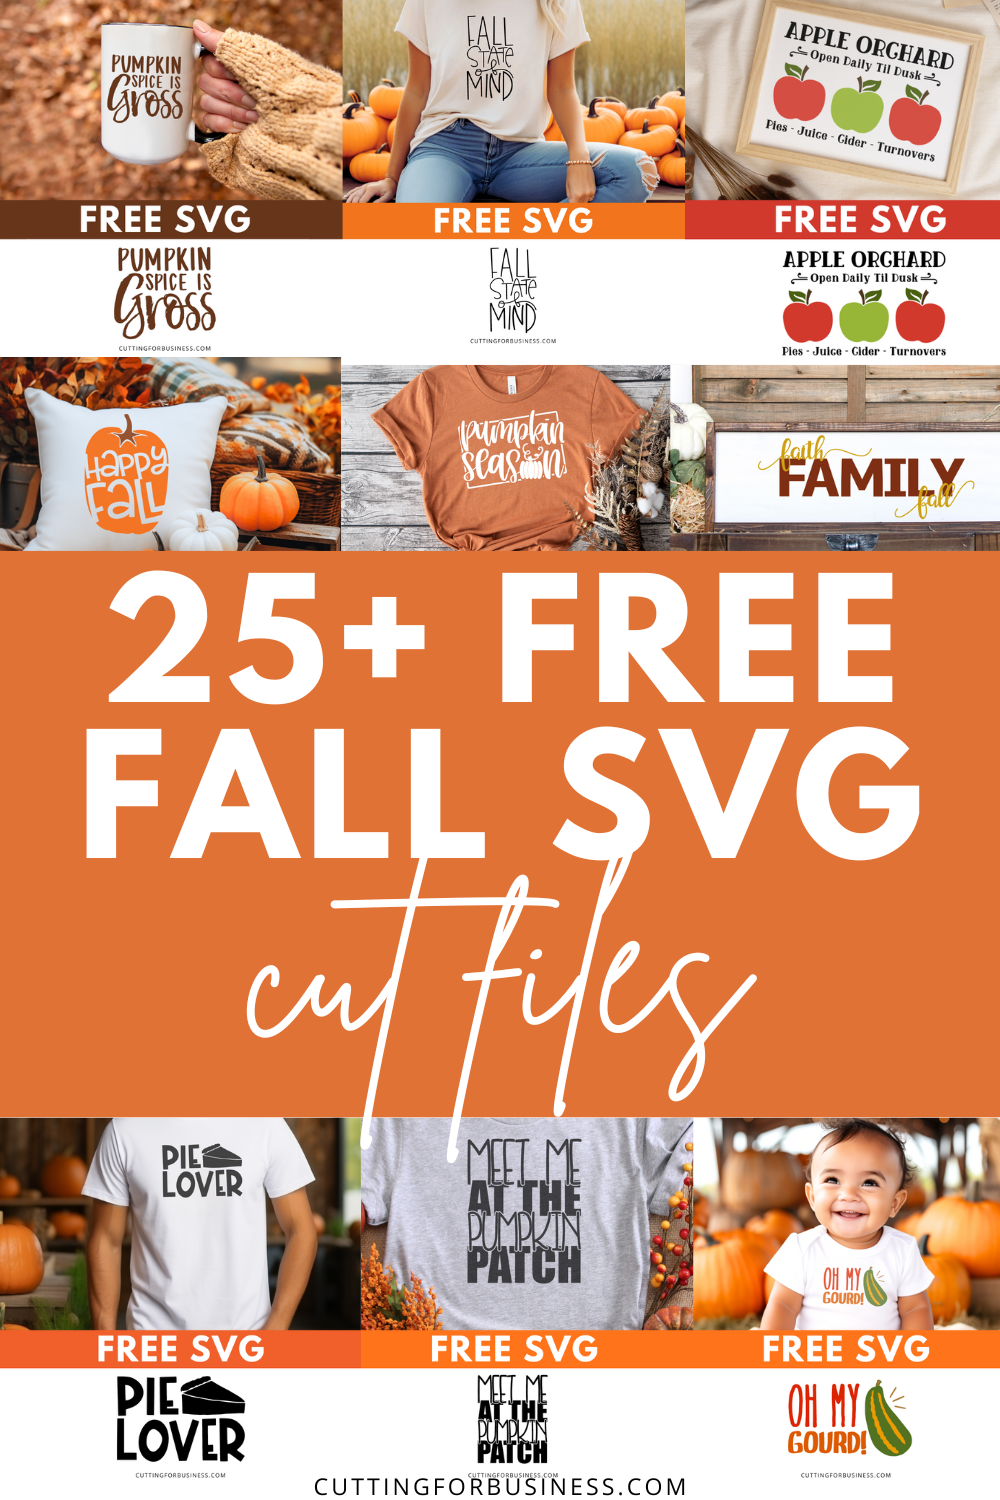
Fall is here! If you haven’t already downloaded my Fall SVG cut files, get to it. Today, I’m sharing my collection of free Fall SVG cut files for crafters.
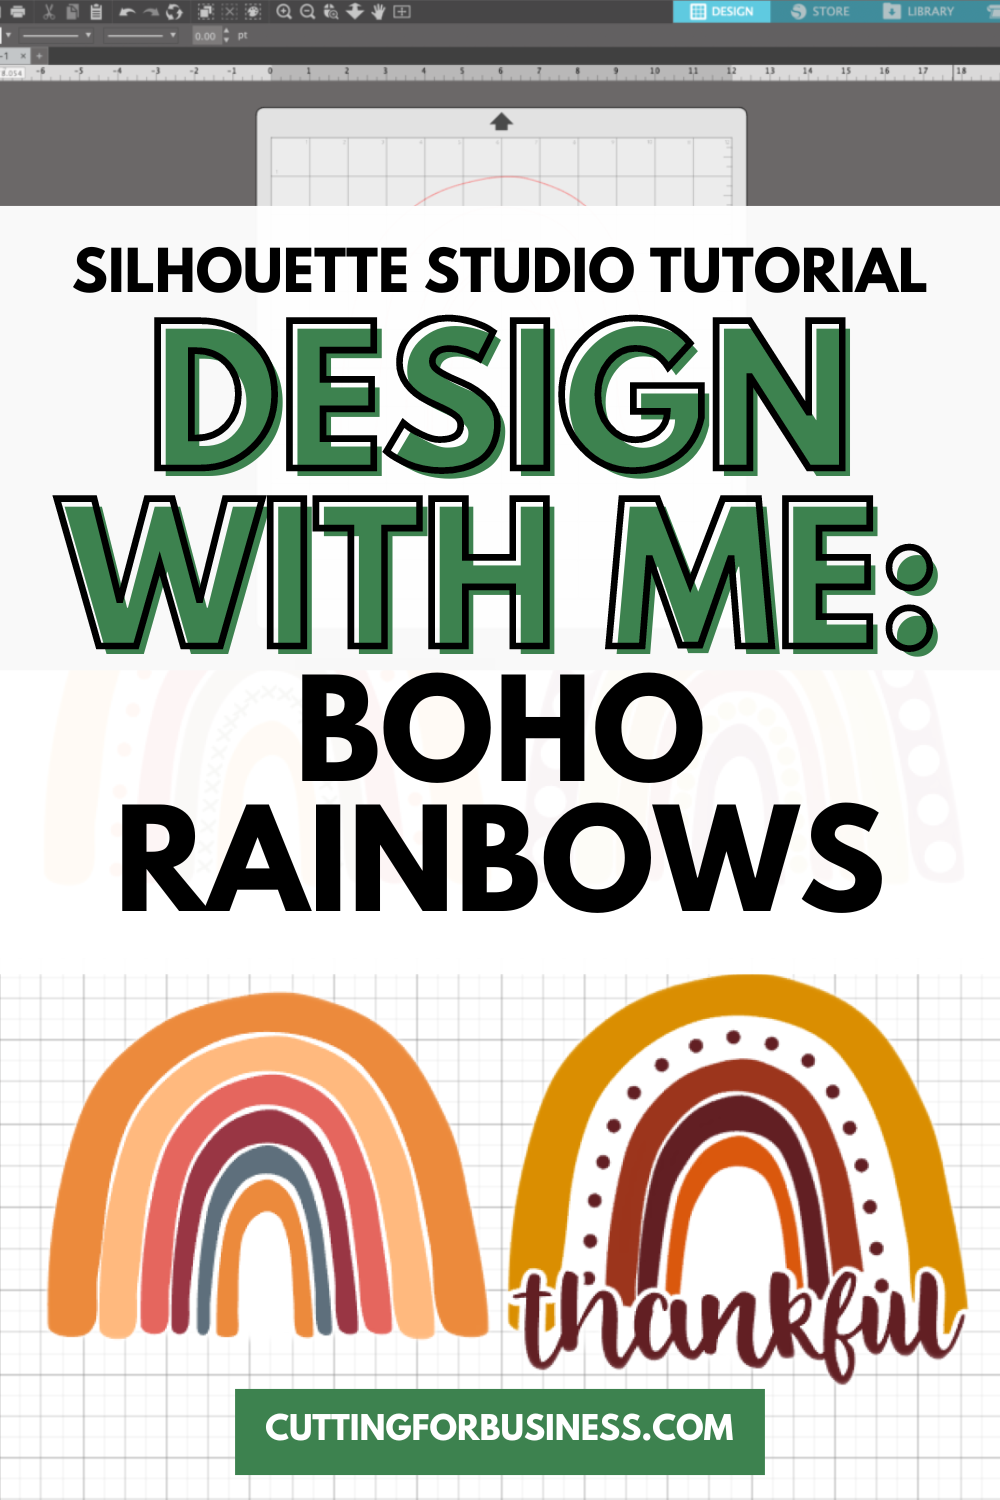
Design with Me is a new regular feature on Cutting for Business and it starts today! Each Friday, I’ll bring you a new Silhouette Studio tutorial featuring how to design an SVG.
Today, we are kicking off this new feature with creating an abstract Boho Rainbow SVG.
Design with Me Tutorials are created with intermediate Silhouette Studio users in mind. It’s helpful to know the basics of designing in Silhouette Studio before starting the tutorials.
All Design with Me tutorials use Silhouette Studio Business Edition. If you do not have Silhouette Studio Business Edition, some tools may not be available in your Silhouette Studio Edition. Get Silhouette Studio Business Edition.
Tutorial: Abstract Boho Rainbow SVG
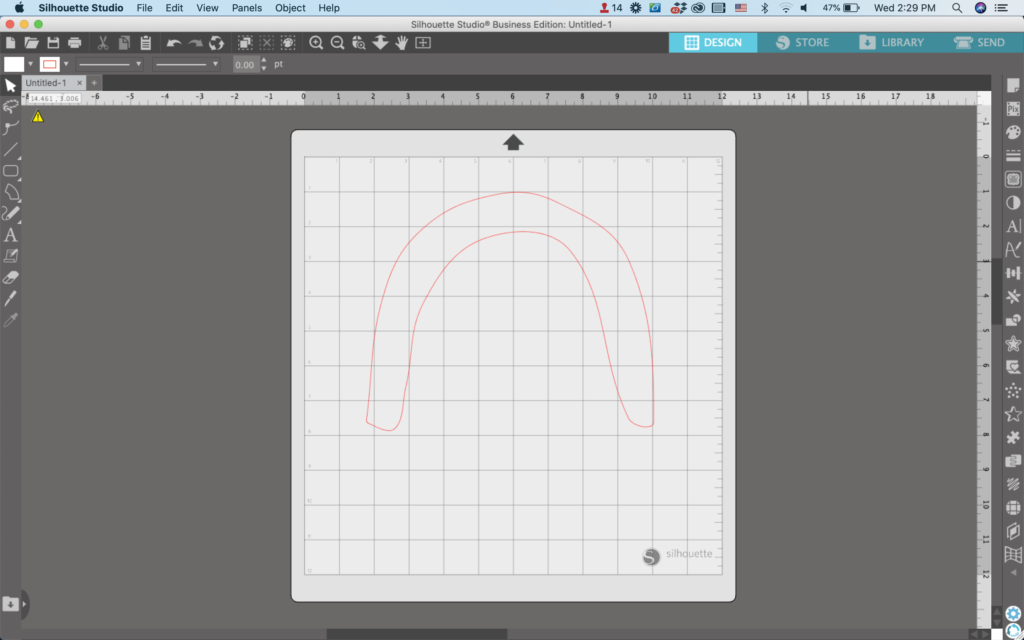
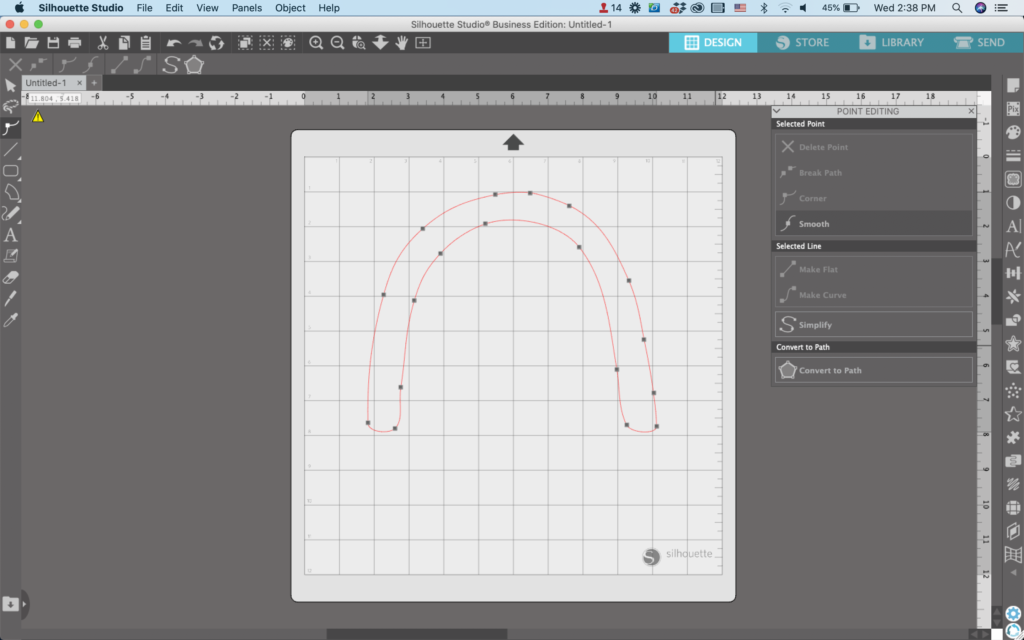
In Silhouette Studio, use the Draw Smooth Freehand tool (7th tool on the left) and draw a shape that resembles a rainbow. Be sure to start and finish at the same spot.
Double click your rainbow to make the Point Editing Panel appear. Use the Point Editing Panel to smooth out edges and make your rainbow more uniform by dragging the points around.
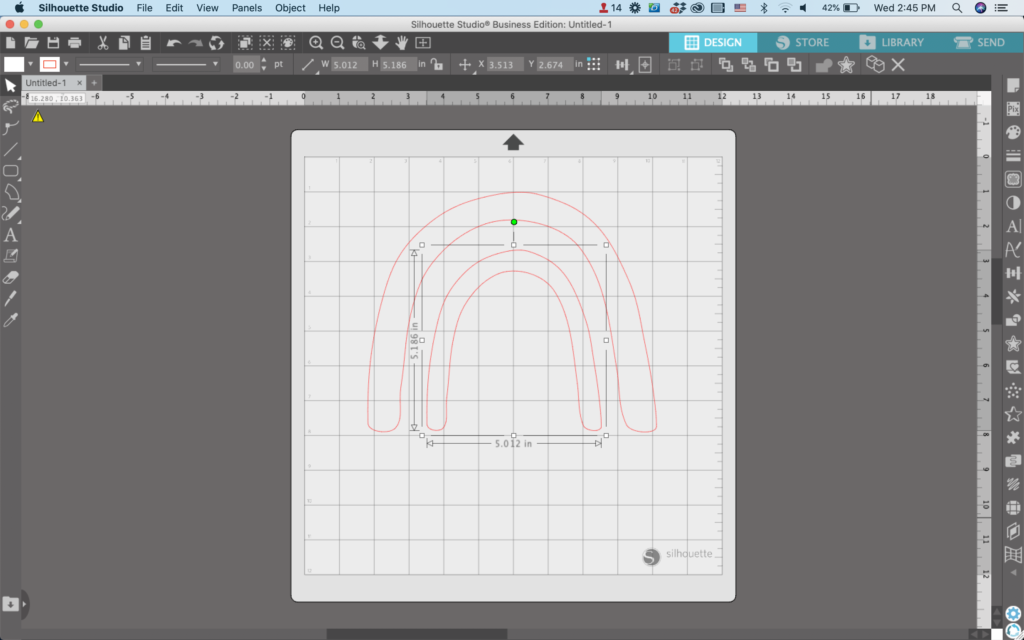
Right click and ‘Duplicate’ your first rainbow. Move the copy inside the first rainbow shape you drew, dragging the edges to make it fit. Leave a negative space layer between the two shapes.
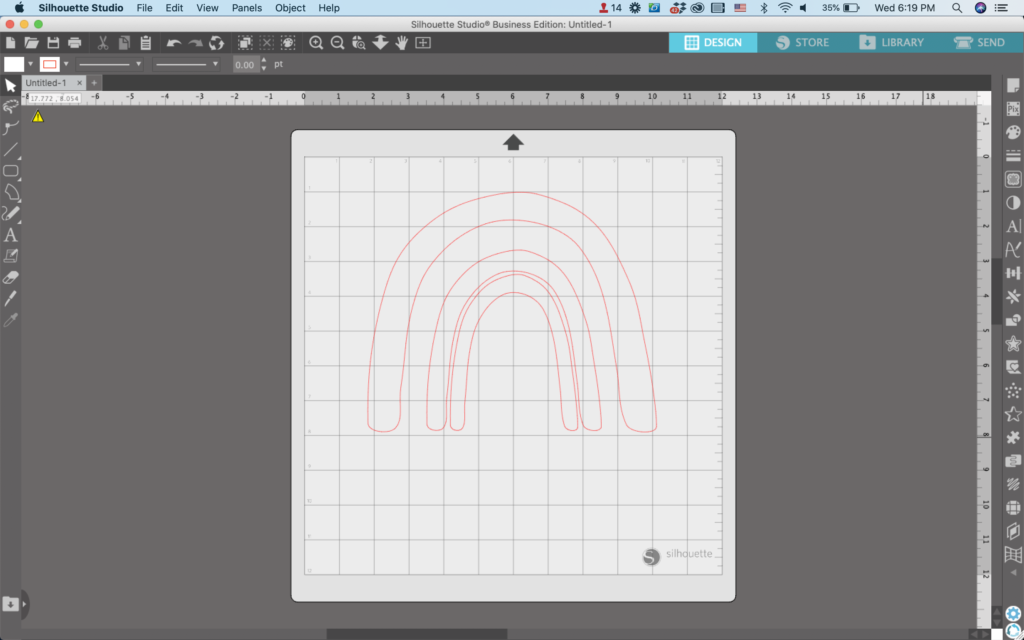
Right click to duplicate the interior rainbow. Resize it to fit in the middle of the other rainbow shapes.
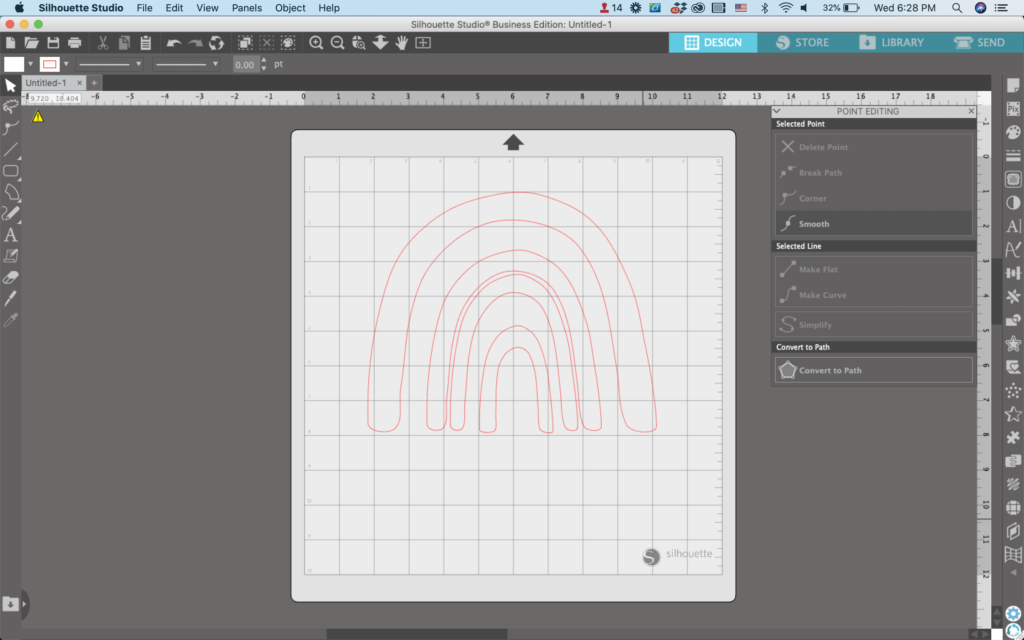
Repeat the above step to duplicate rainbows until only a small space remains in the middle. Point edit the rainbows as desired.
Here’s the fun part: The styling! Once you’ve built the rainbow foundation – there is so much freedom to be creative when you fill in the rainbow pieces. Add patterns, solid colors, dots, dashes, flowers… add anything!
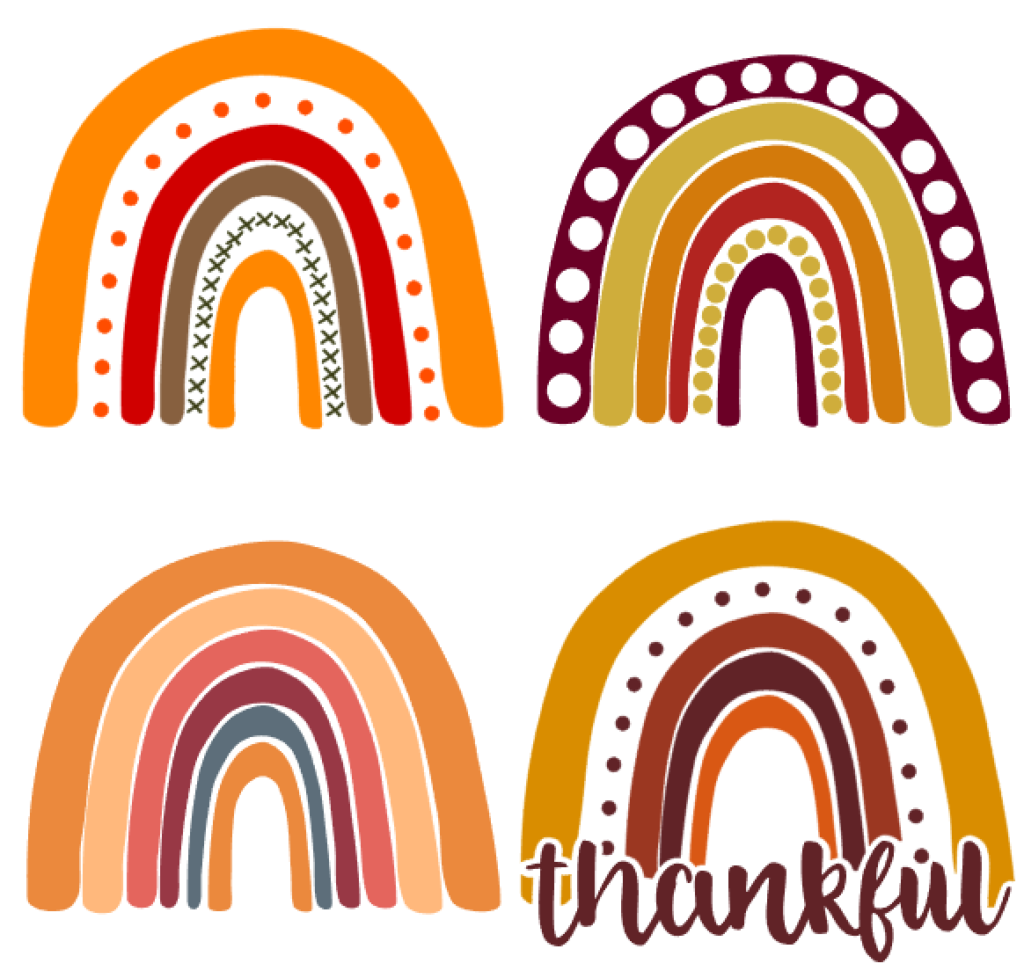
Here are 4 examples of boho rainbows styled for fall:
To save your new SVG creation, head to ‘File’, ‘Save As’, ‘Save to Hard Drive’, name the file, then select ‘SVG’ from the dropdown menu.
With July coming to an end, it’s time to start selling Back to School products in your craft business.
Today, I’m sharing a few ideas with you of Back to School Products for crafters to make and sell. With many of these product ideas, you’ll be able to use your Silhouette, Cricut, laser cutter, sewing machine, and other craft supplies you probably already have.
42+ Back to School Products for Crafters to Make and Sell
Personalized School Supplies
Customized notebooks and journals with unique covers.
Decorated pencils, pens, and pencil cases with fun designs.
Hand-painted or embellished backpacks and lunch boxes.
Customized school supply labels and vinyl decals.
Classroom Decorations
Inspirational posters with motivational quotes for classrooms.
Alphabet and number wall art for younger students.
Bunting, banners, and garland to hang around the classroom.
Teacher Appreciation Gifts
Personalized mugs or tumblers for teachers.
Customized lanyards.
Earrings shaped like school symbols (school supplies, etc.).
Back to School greeting cards with space for a gift card.
School themed tote bags.
Personalized clipboards.
Customized stationery, “From the Classroom of Ms. or Mr…”
School Spirit Accessories
Handmade bracelets, necklaces, and keychains in school colors.
Spirit-themed hair bows and headbands.
Earrings shaped like school symbols (apples, rulers, etc.).
Customized shirts, sweatshirts, hoodies, sweatpants, or socks.
Backpack hang tags, customized with school or sports colors.
Custom Croc charms.
Lunch Gear
Fabric lunch bags or reusable snack pouches.
Customized water bottles with names.
Classroom Decor
Posters and printables with uplifting messages and illustrations.
Acrylic pour paintings in school colors or patterns.
Classroom Door Decor
Themed and colorful door wreaths/welcome signs.
Personalized name plates for teachers’ classroom doors.
Creative Bulletin Board Packs
Create themed bulletin boards, along with a video or guide on how to assemble it. Sell them as a kit.
Classroom Passes & Reward Systems
Handpainted passes for the bathroom, nurse, or office.
Themed classroom treasure boxes filled with rewards.
Digital Goods
Back to school coloring pages, word searches, crossword puzzles.
School related SVG cut files.
Daily or weekly planners, either digital or printable.
Lesson plan templates.
Printable games or escape rooms.
Digital Meet the Teacher templates.
School themed seamless backgrounds.
Photography Props
First/last day of school boards/chalkboards.
Back to School photo booth props and/or backgrounds.
School year photo frames.
Locker Decorations
Magnetic photo frames to personalize lockers.
Fabric covered locker mirrors with fun patterns.
Food & Baking Related
Back to School themed cookie cutters.
Themed cupcake picks or cake toppers.
Before you go, I urge you to think not only of products related to teachers. You might find a niche in making and selling products geared towards coaches, cafeteria staff, office support staff, bus drivers, and janitors.
If you have an unruly craft room, like I did, you are going to want to read this article on my brand new Create Room DreamBox.
Create Room recently reached out to me to see if I’d like to review their DreamBox. In exchange for an honest Create Room DreamBox review, I received a DreamBox and a half set of totes. All upgrades were bought by me. Links in this article are affiliate links. This means if you purchase this product using my discount codes, I will receive a small commission.
Create Room is a company that manufactures and sells all-in-one craft furniture. If you’ve been around the craft industry for a while, you may know Create Room and the DreamBox by a former name – The Original ScrapBox.
My Craft Room – Before My Create Room DreamBox
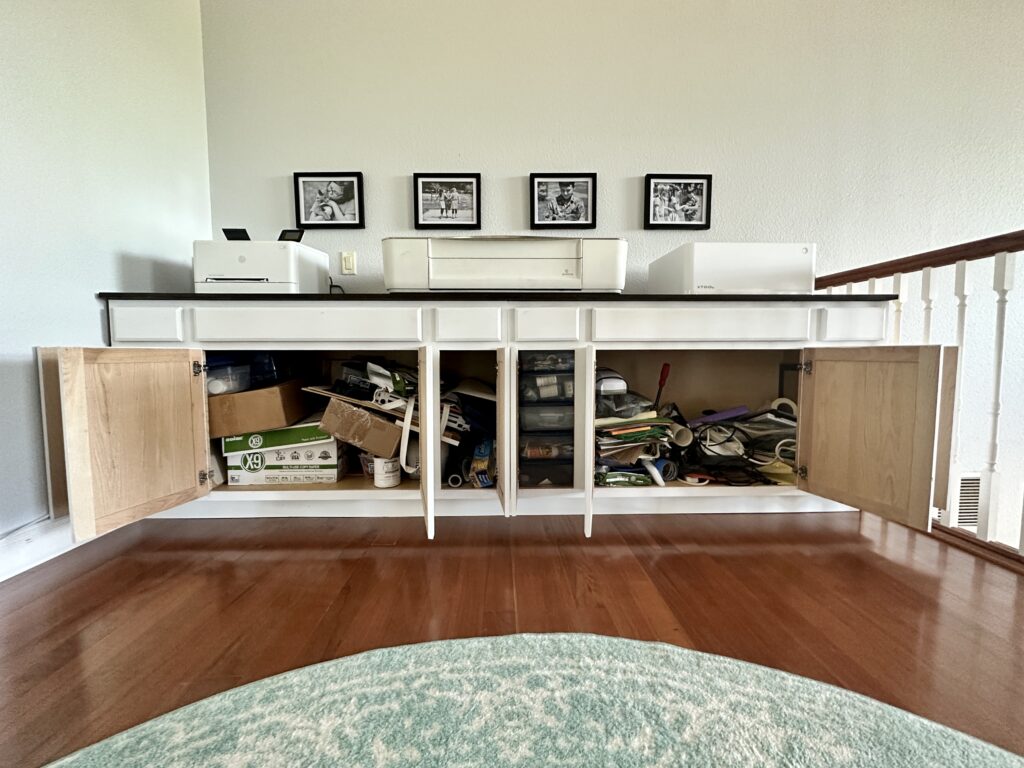
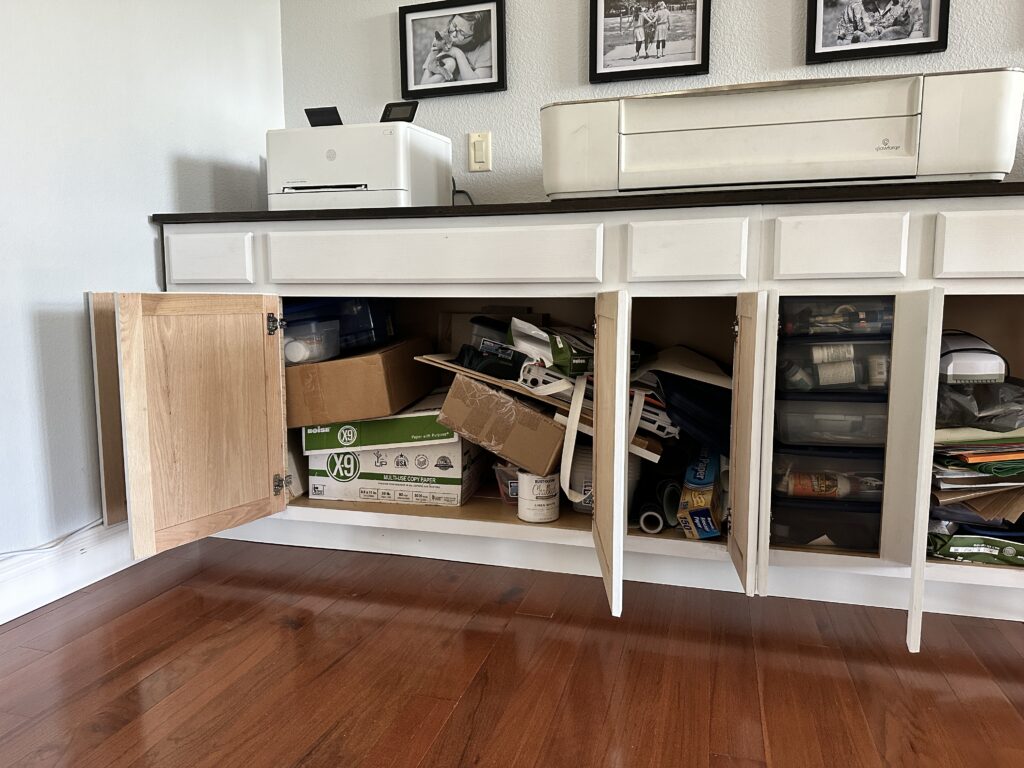
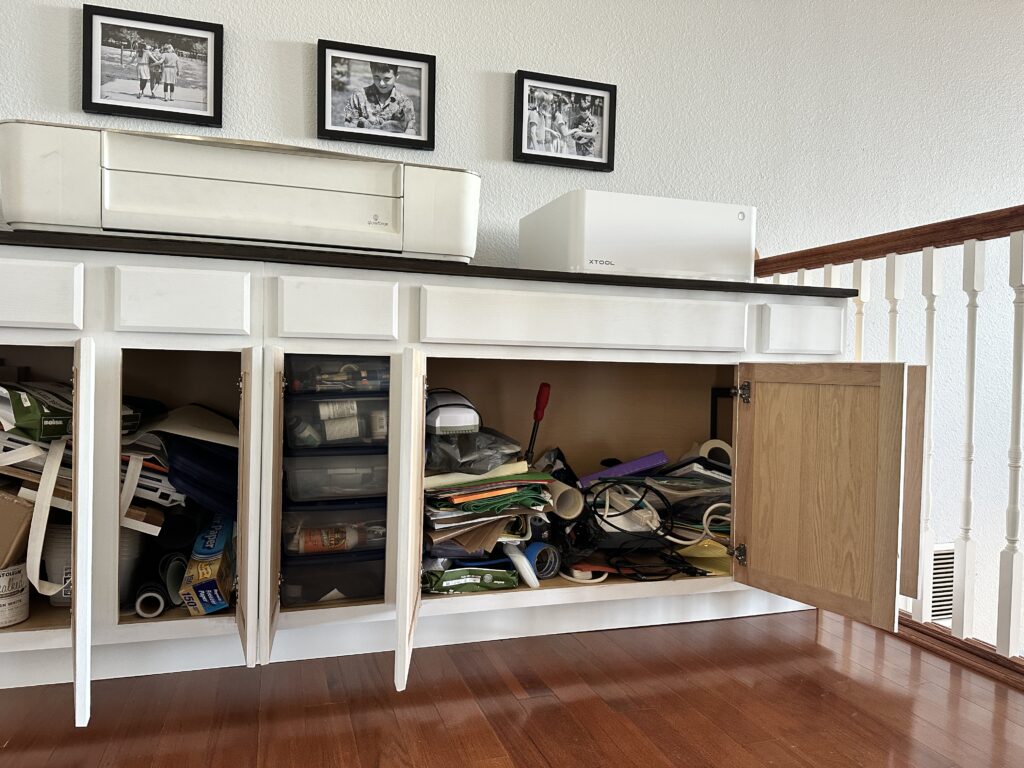
When we moved into our current home four years ago, I traded my craft room with four walls and a door for a loft space that overlooks our great room. While I love the location, the loft is visible from our front door and main living space. This means that every craft room mess I made was on display for anyone that walks into our house. The loft space also meant that I could no longer walk out and close the door to hide my mess.
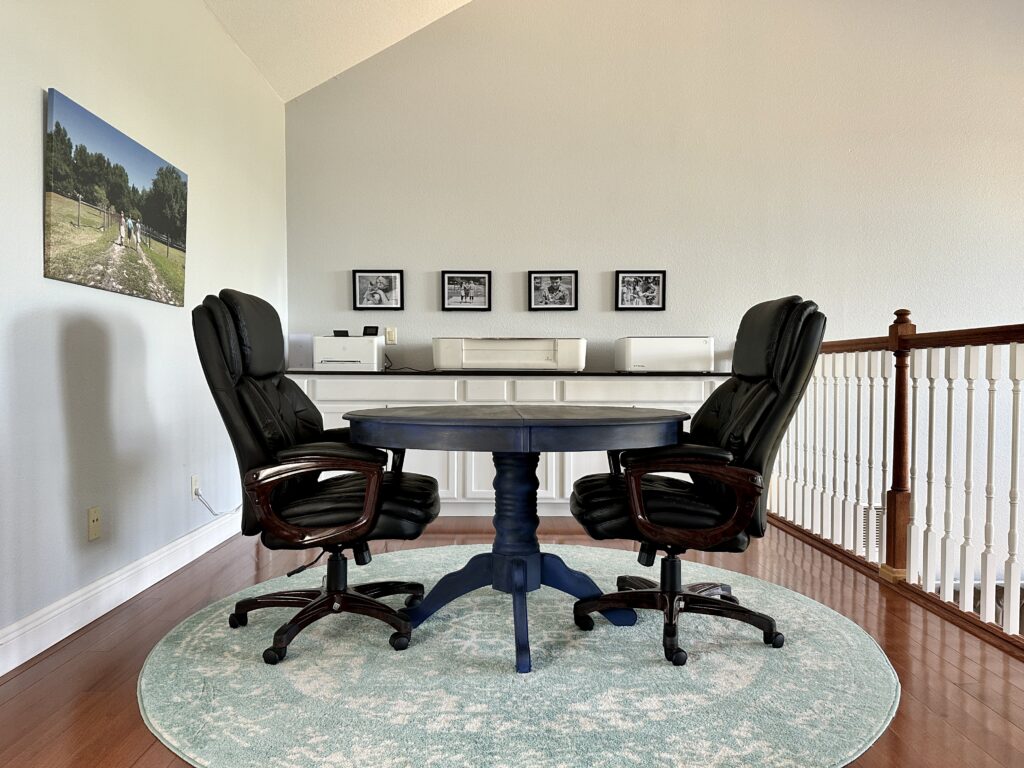
On one side of the loft is a table and office chairs, with a long built in cabinet we created a few years ago. The cabinet itself is two double bathroom vanities attached with a wood top. On top, my laser machines and printer sit. Inside the cabinets all of my craft supplies are neatly shoved inside. This includes 30 plastic shoebox totes to hold the smaller items.
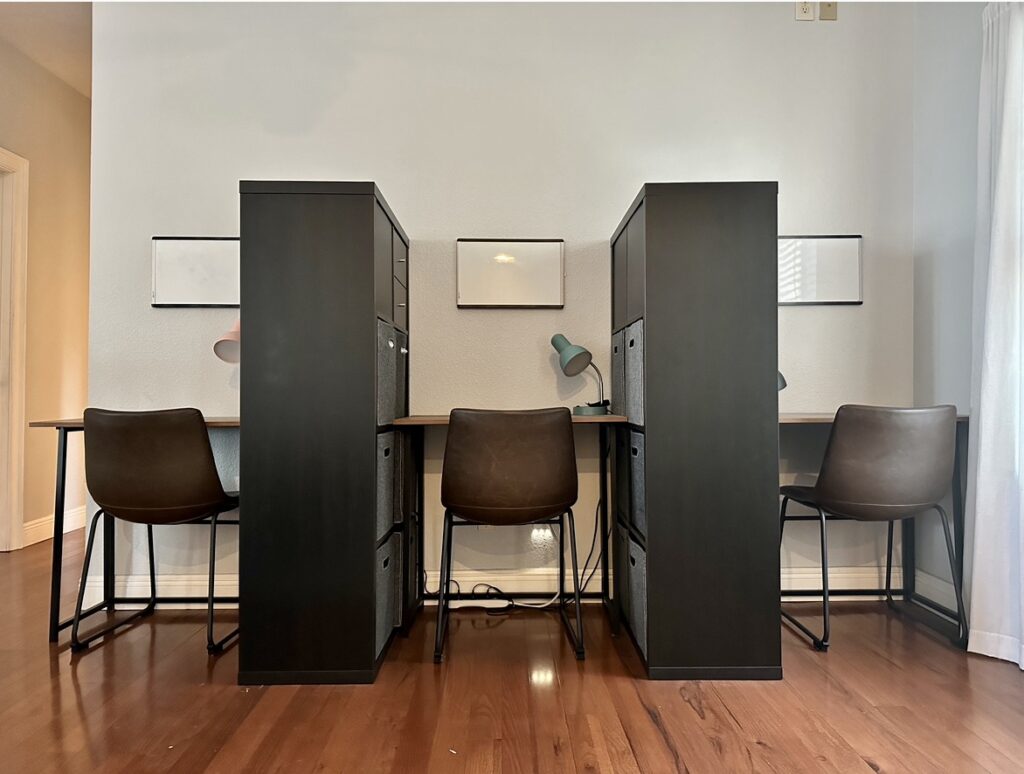
The other side of the loft is a school workstation that was set up in the early pandemic days. It was perfect to keep three elementary aged kids on task with online learning while I was working. However, my kids haven’t used the desk spaces in a long time.
So, I decided it was time to say goodbye to the desks, and hello to a new Create Room DreamBox.
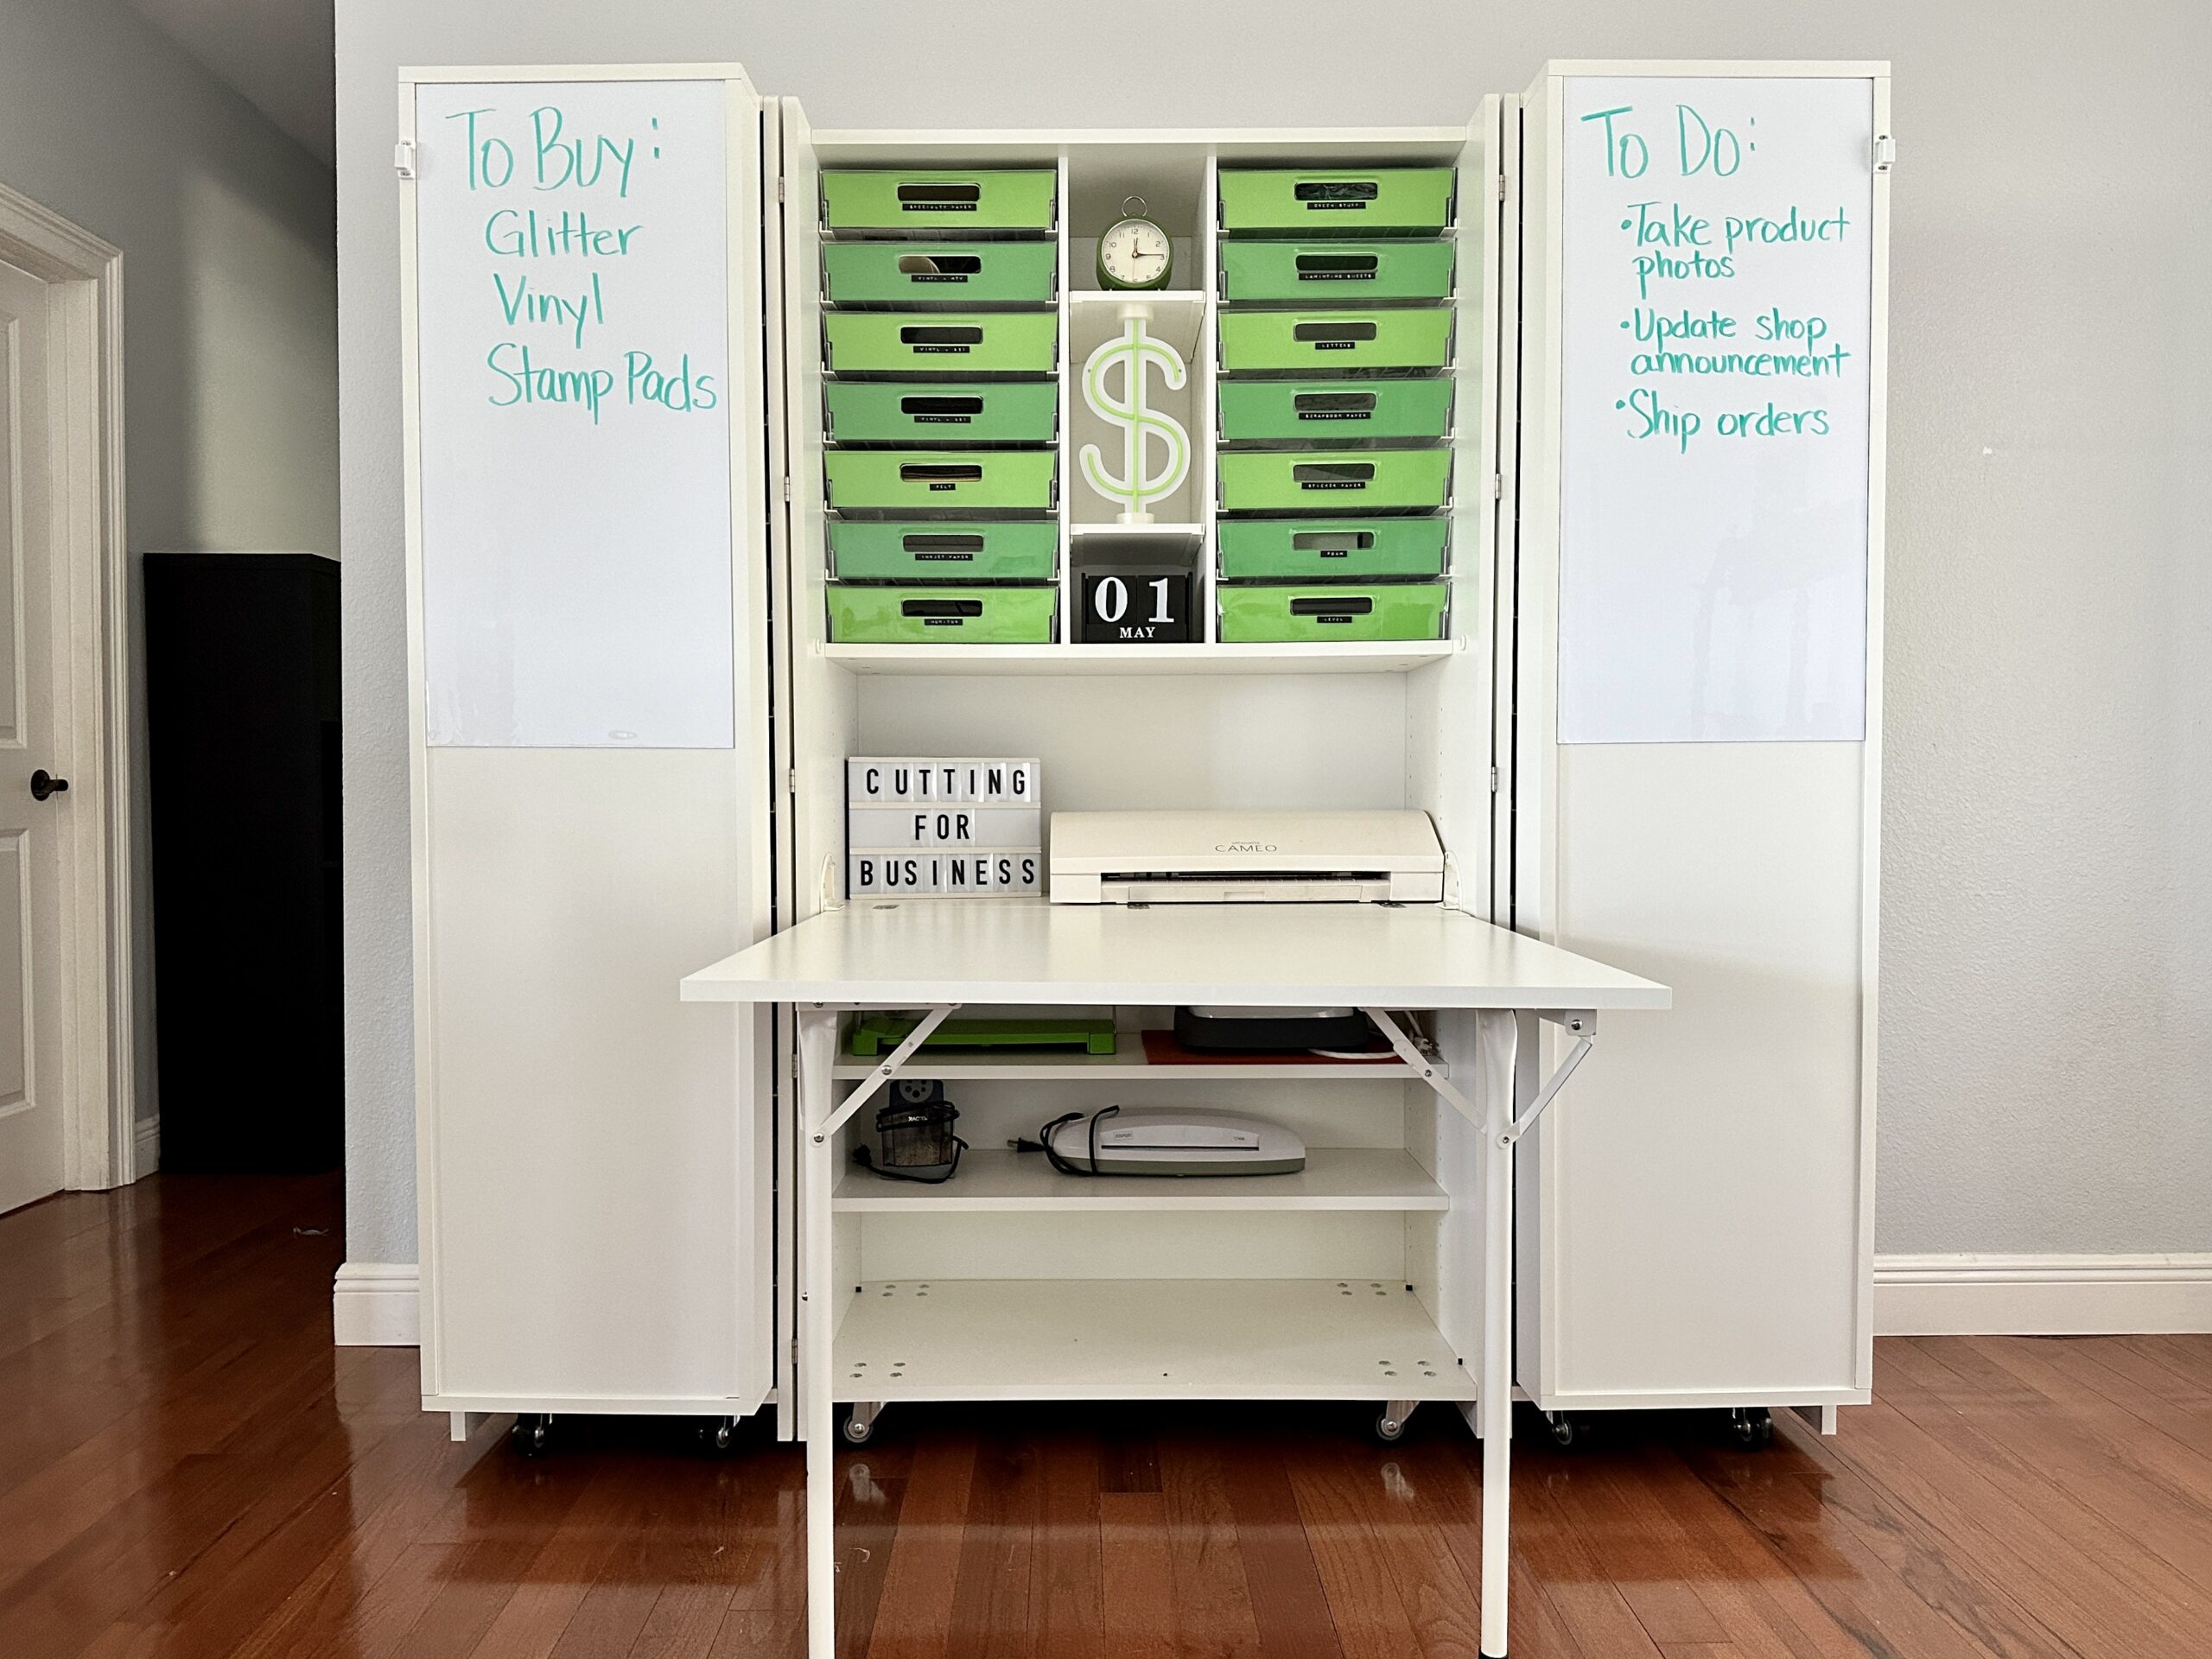
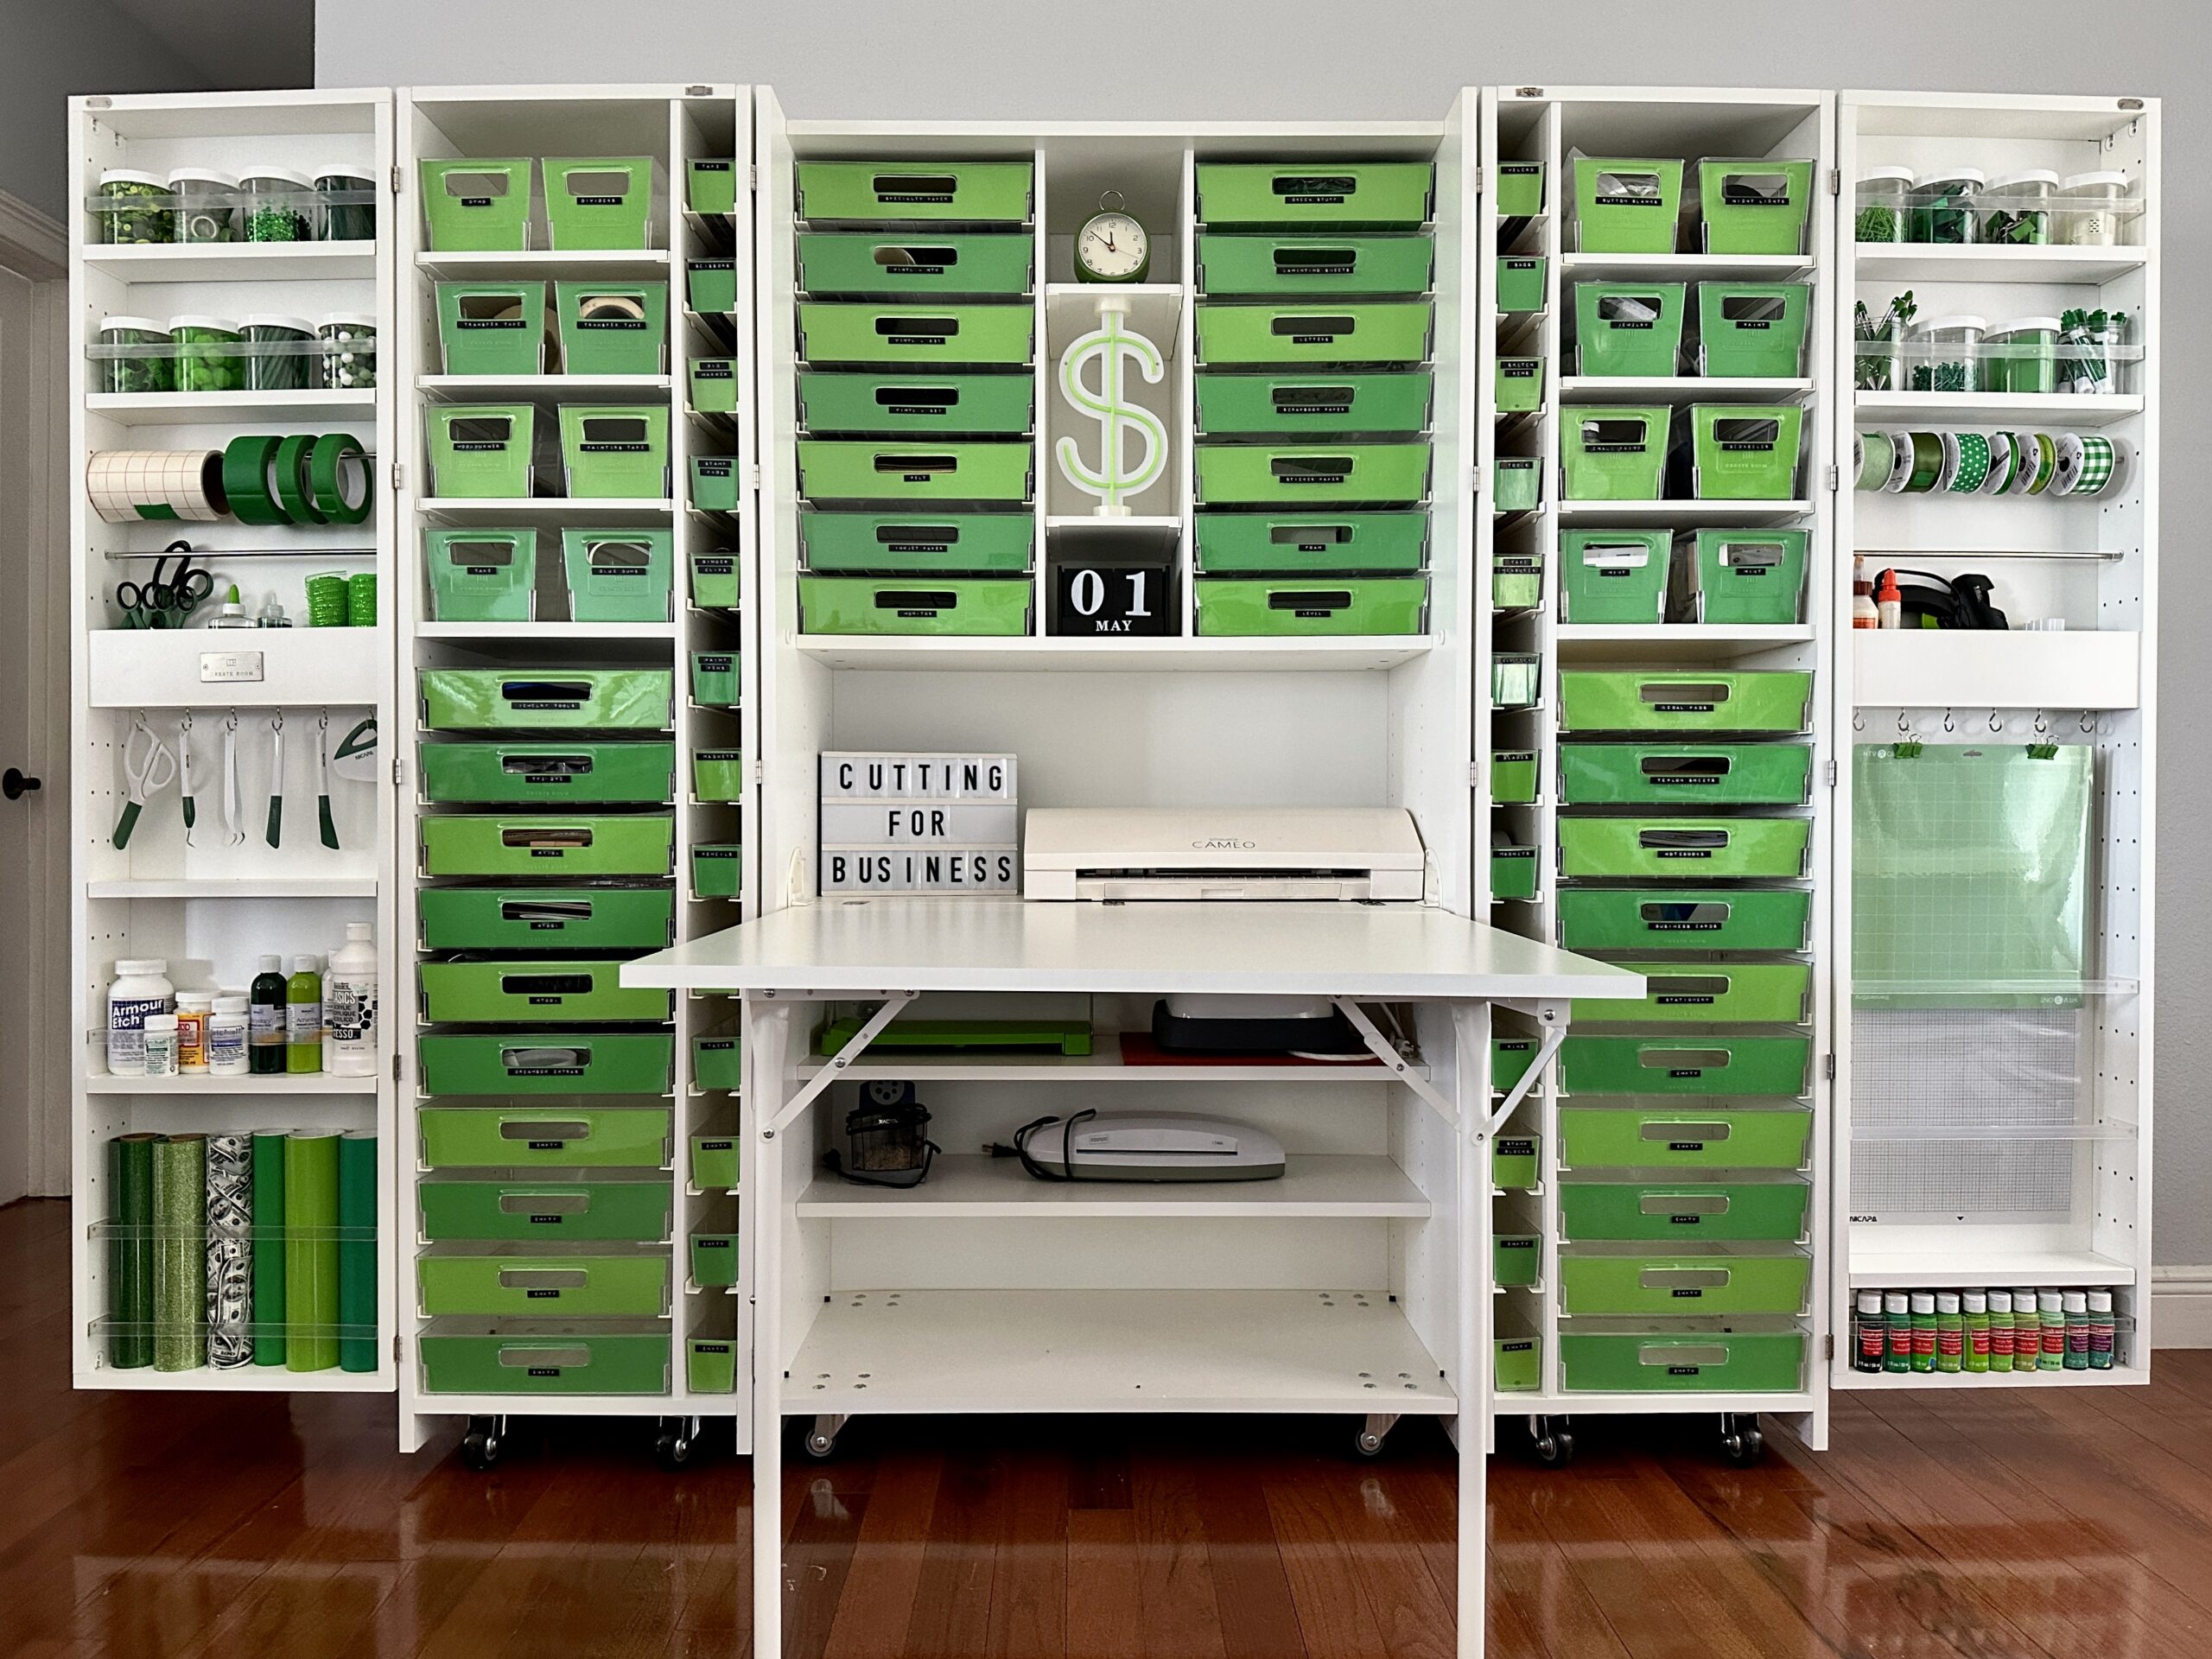
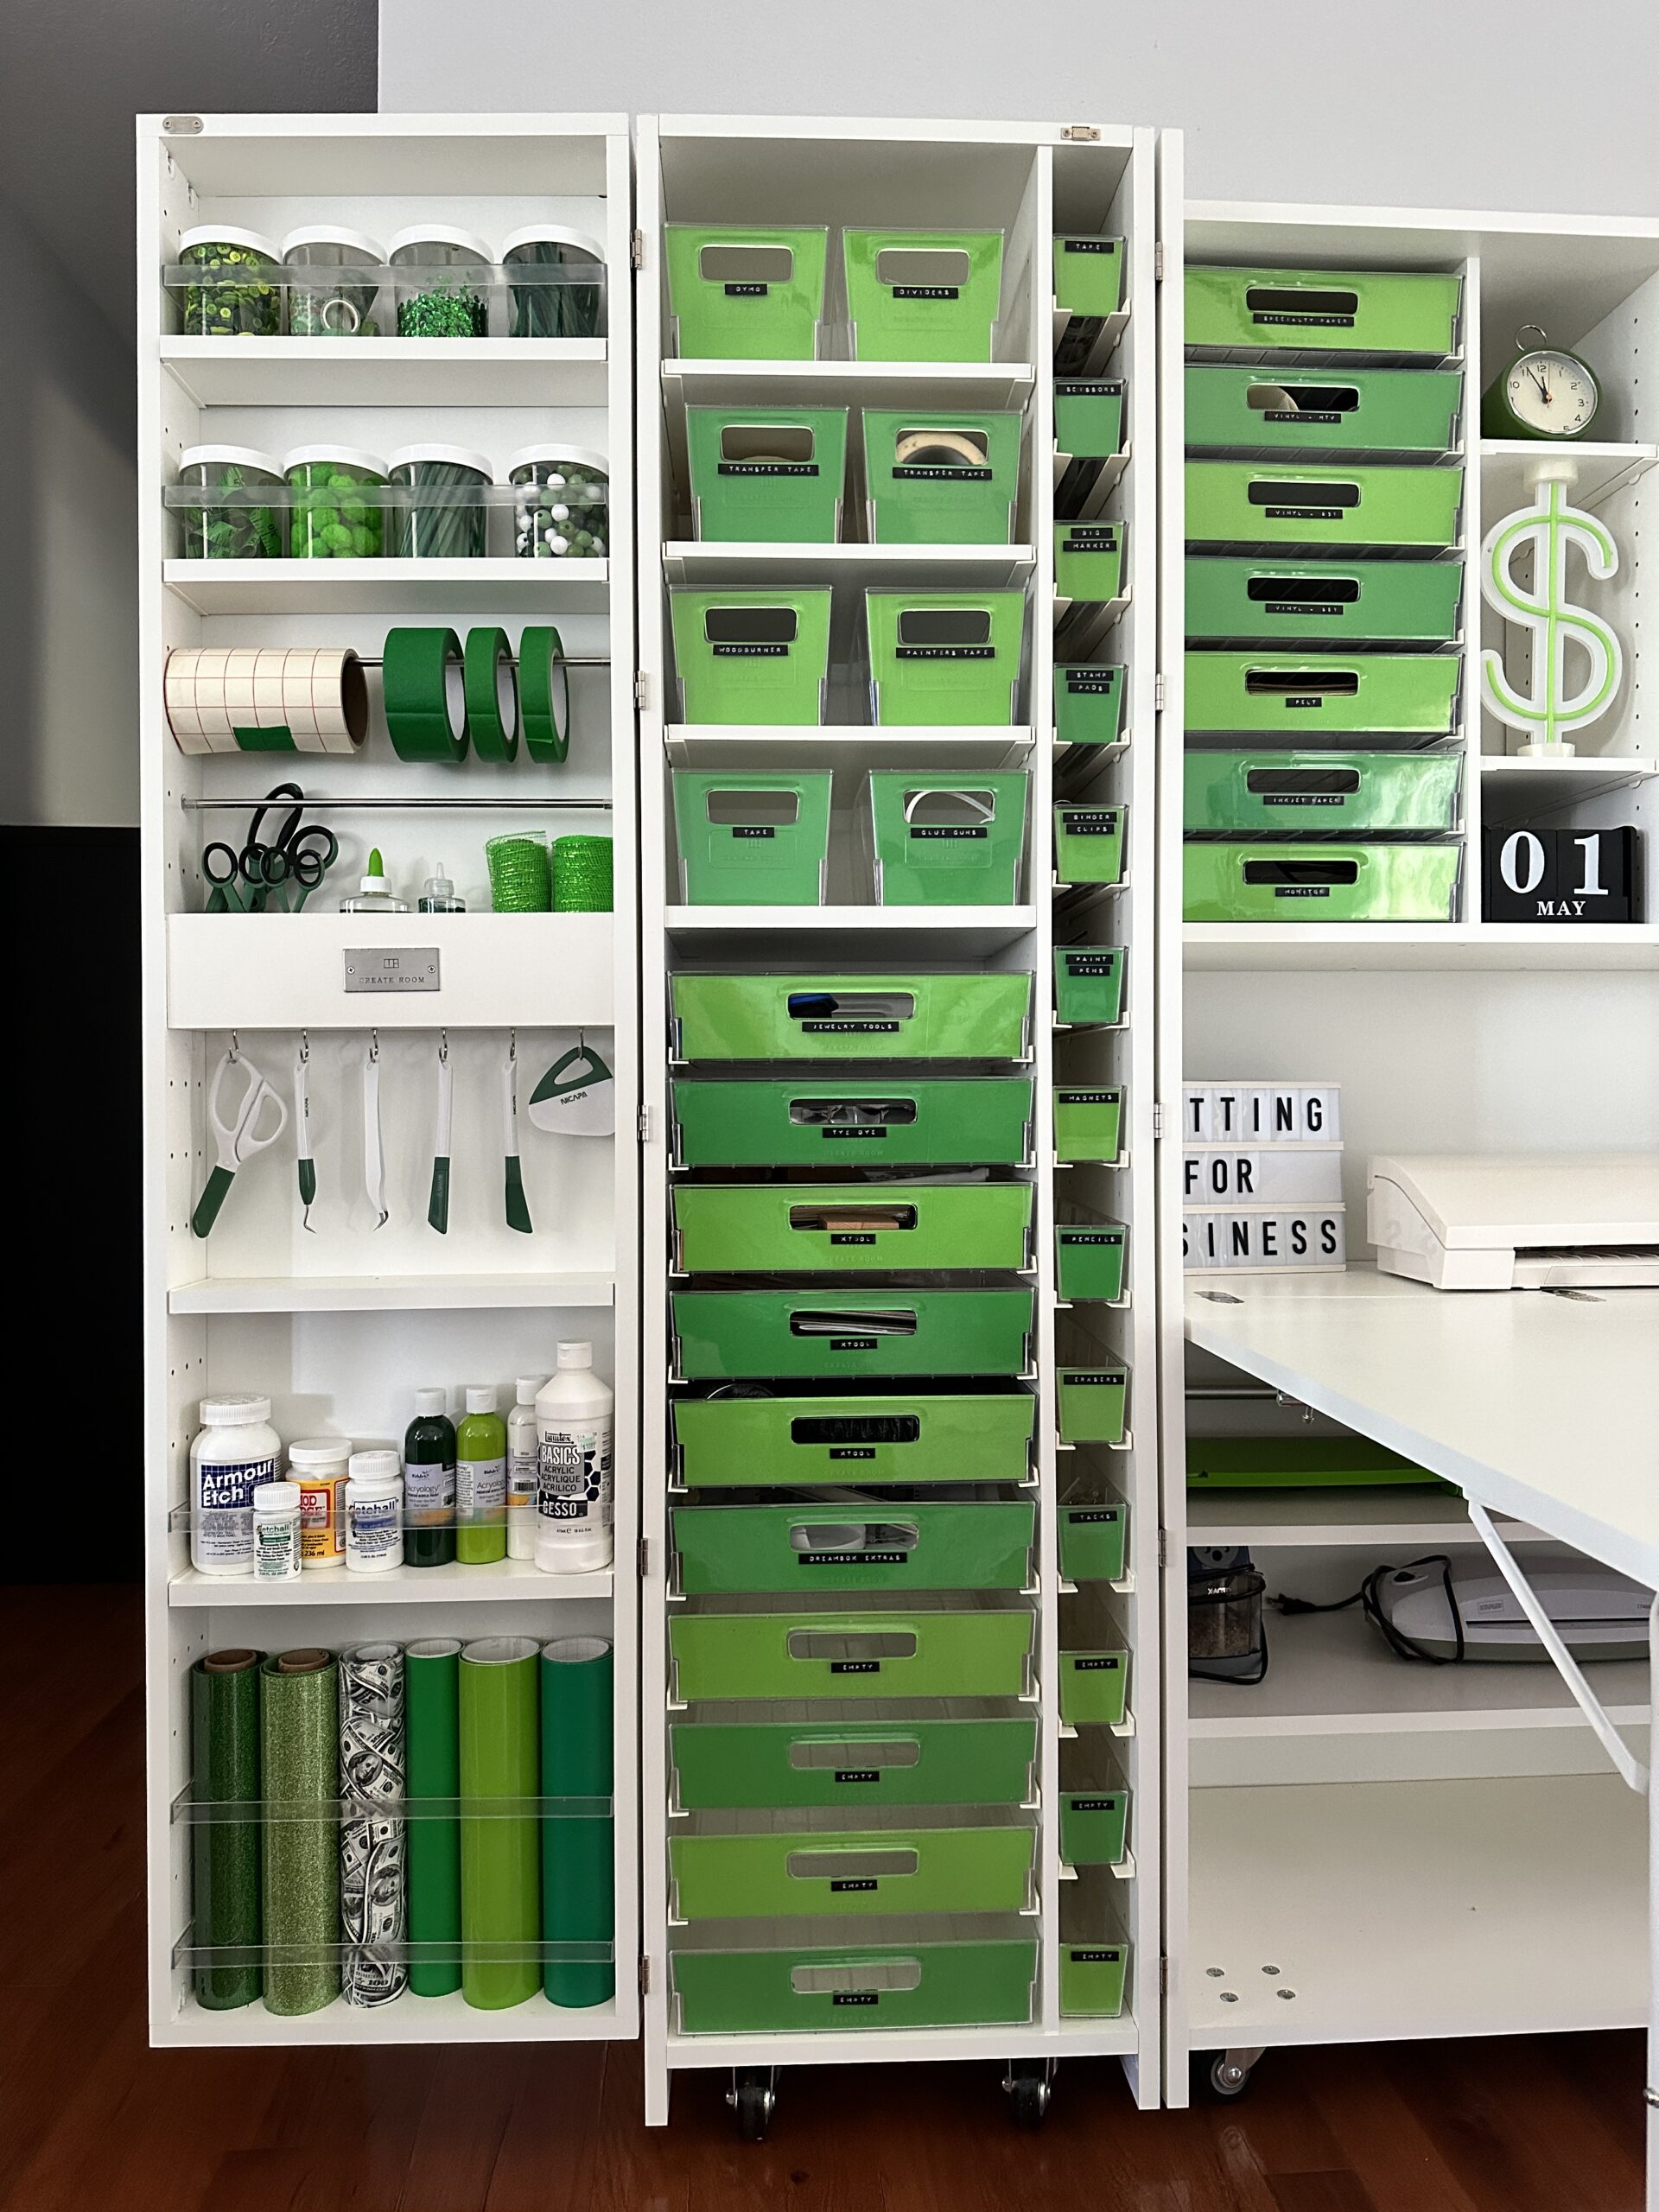
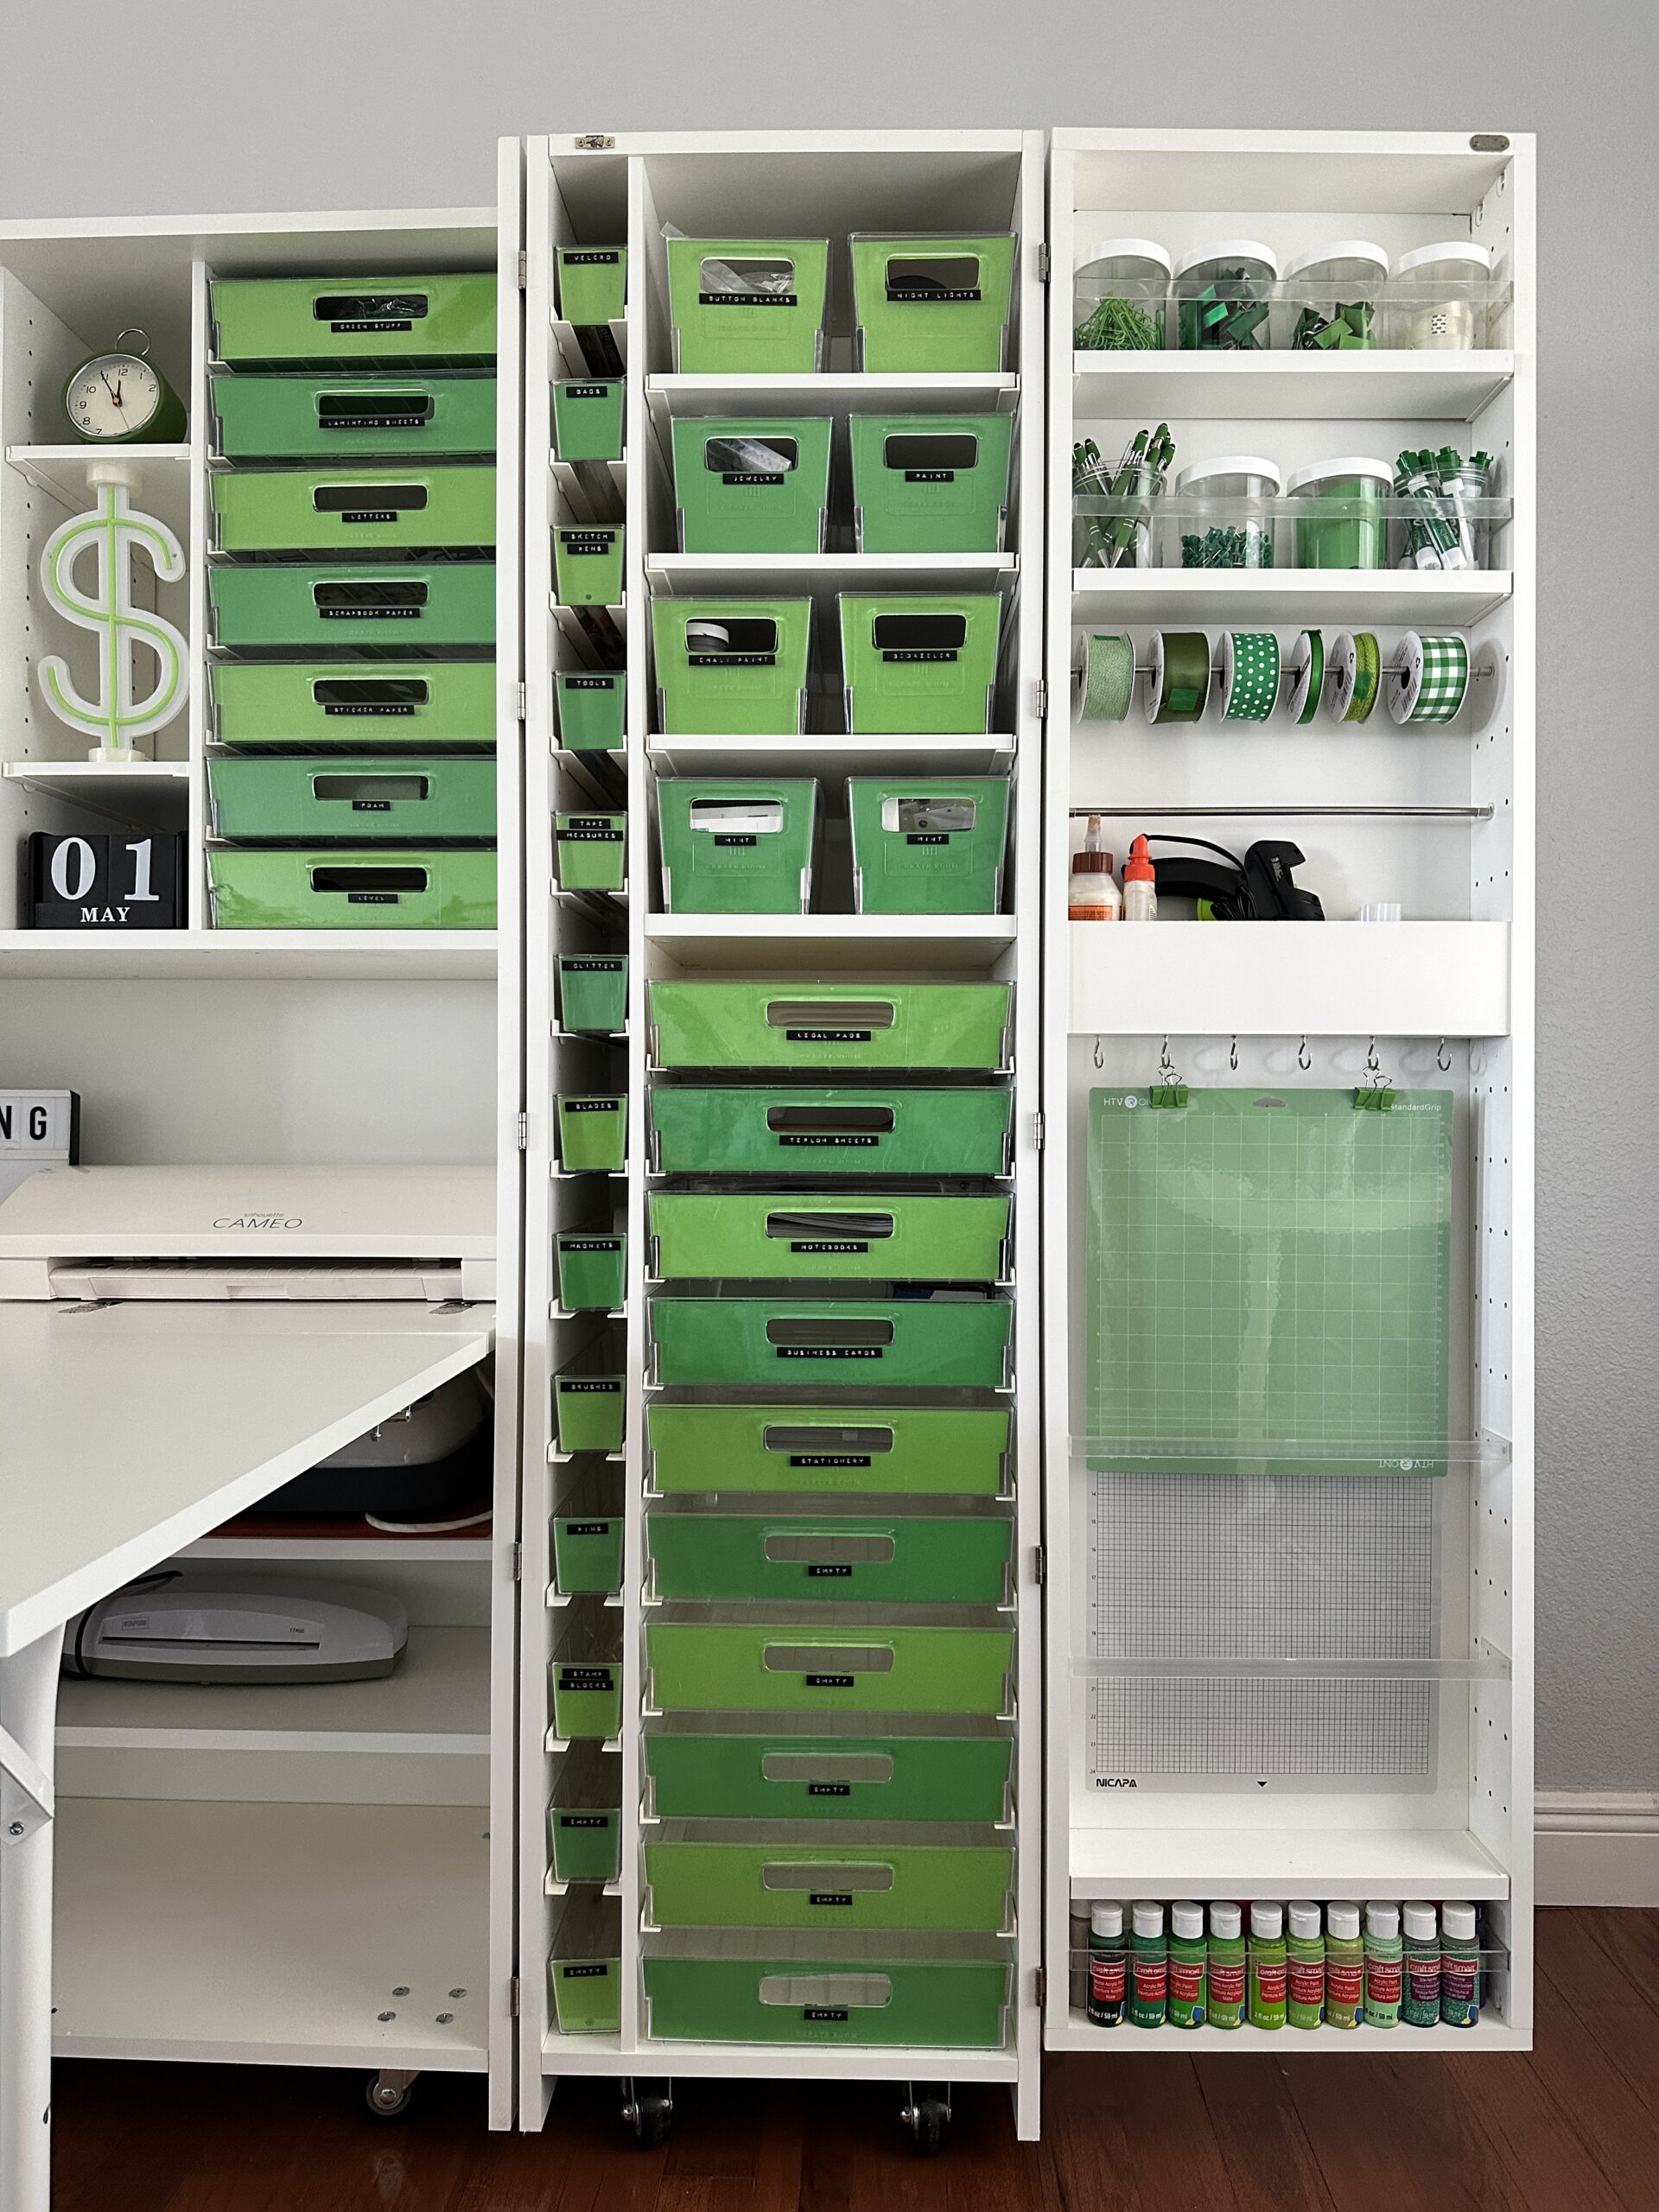
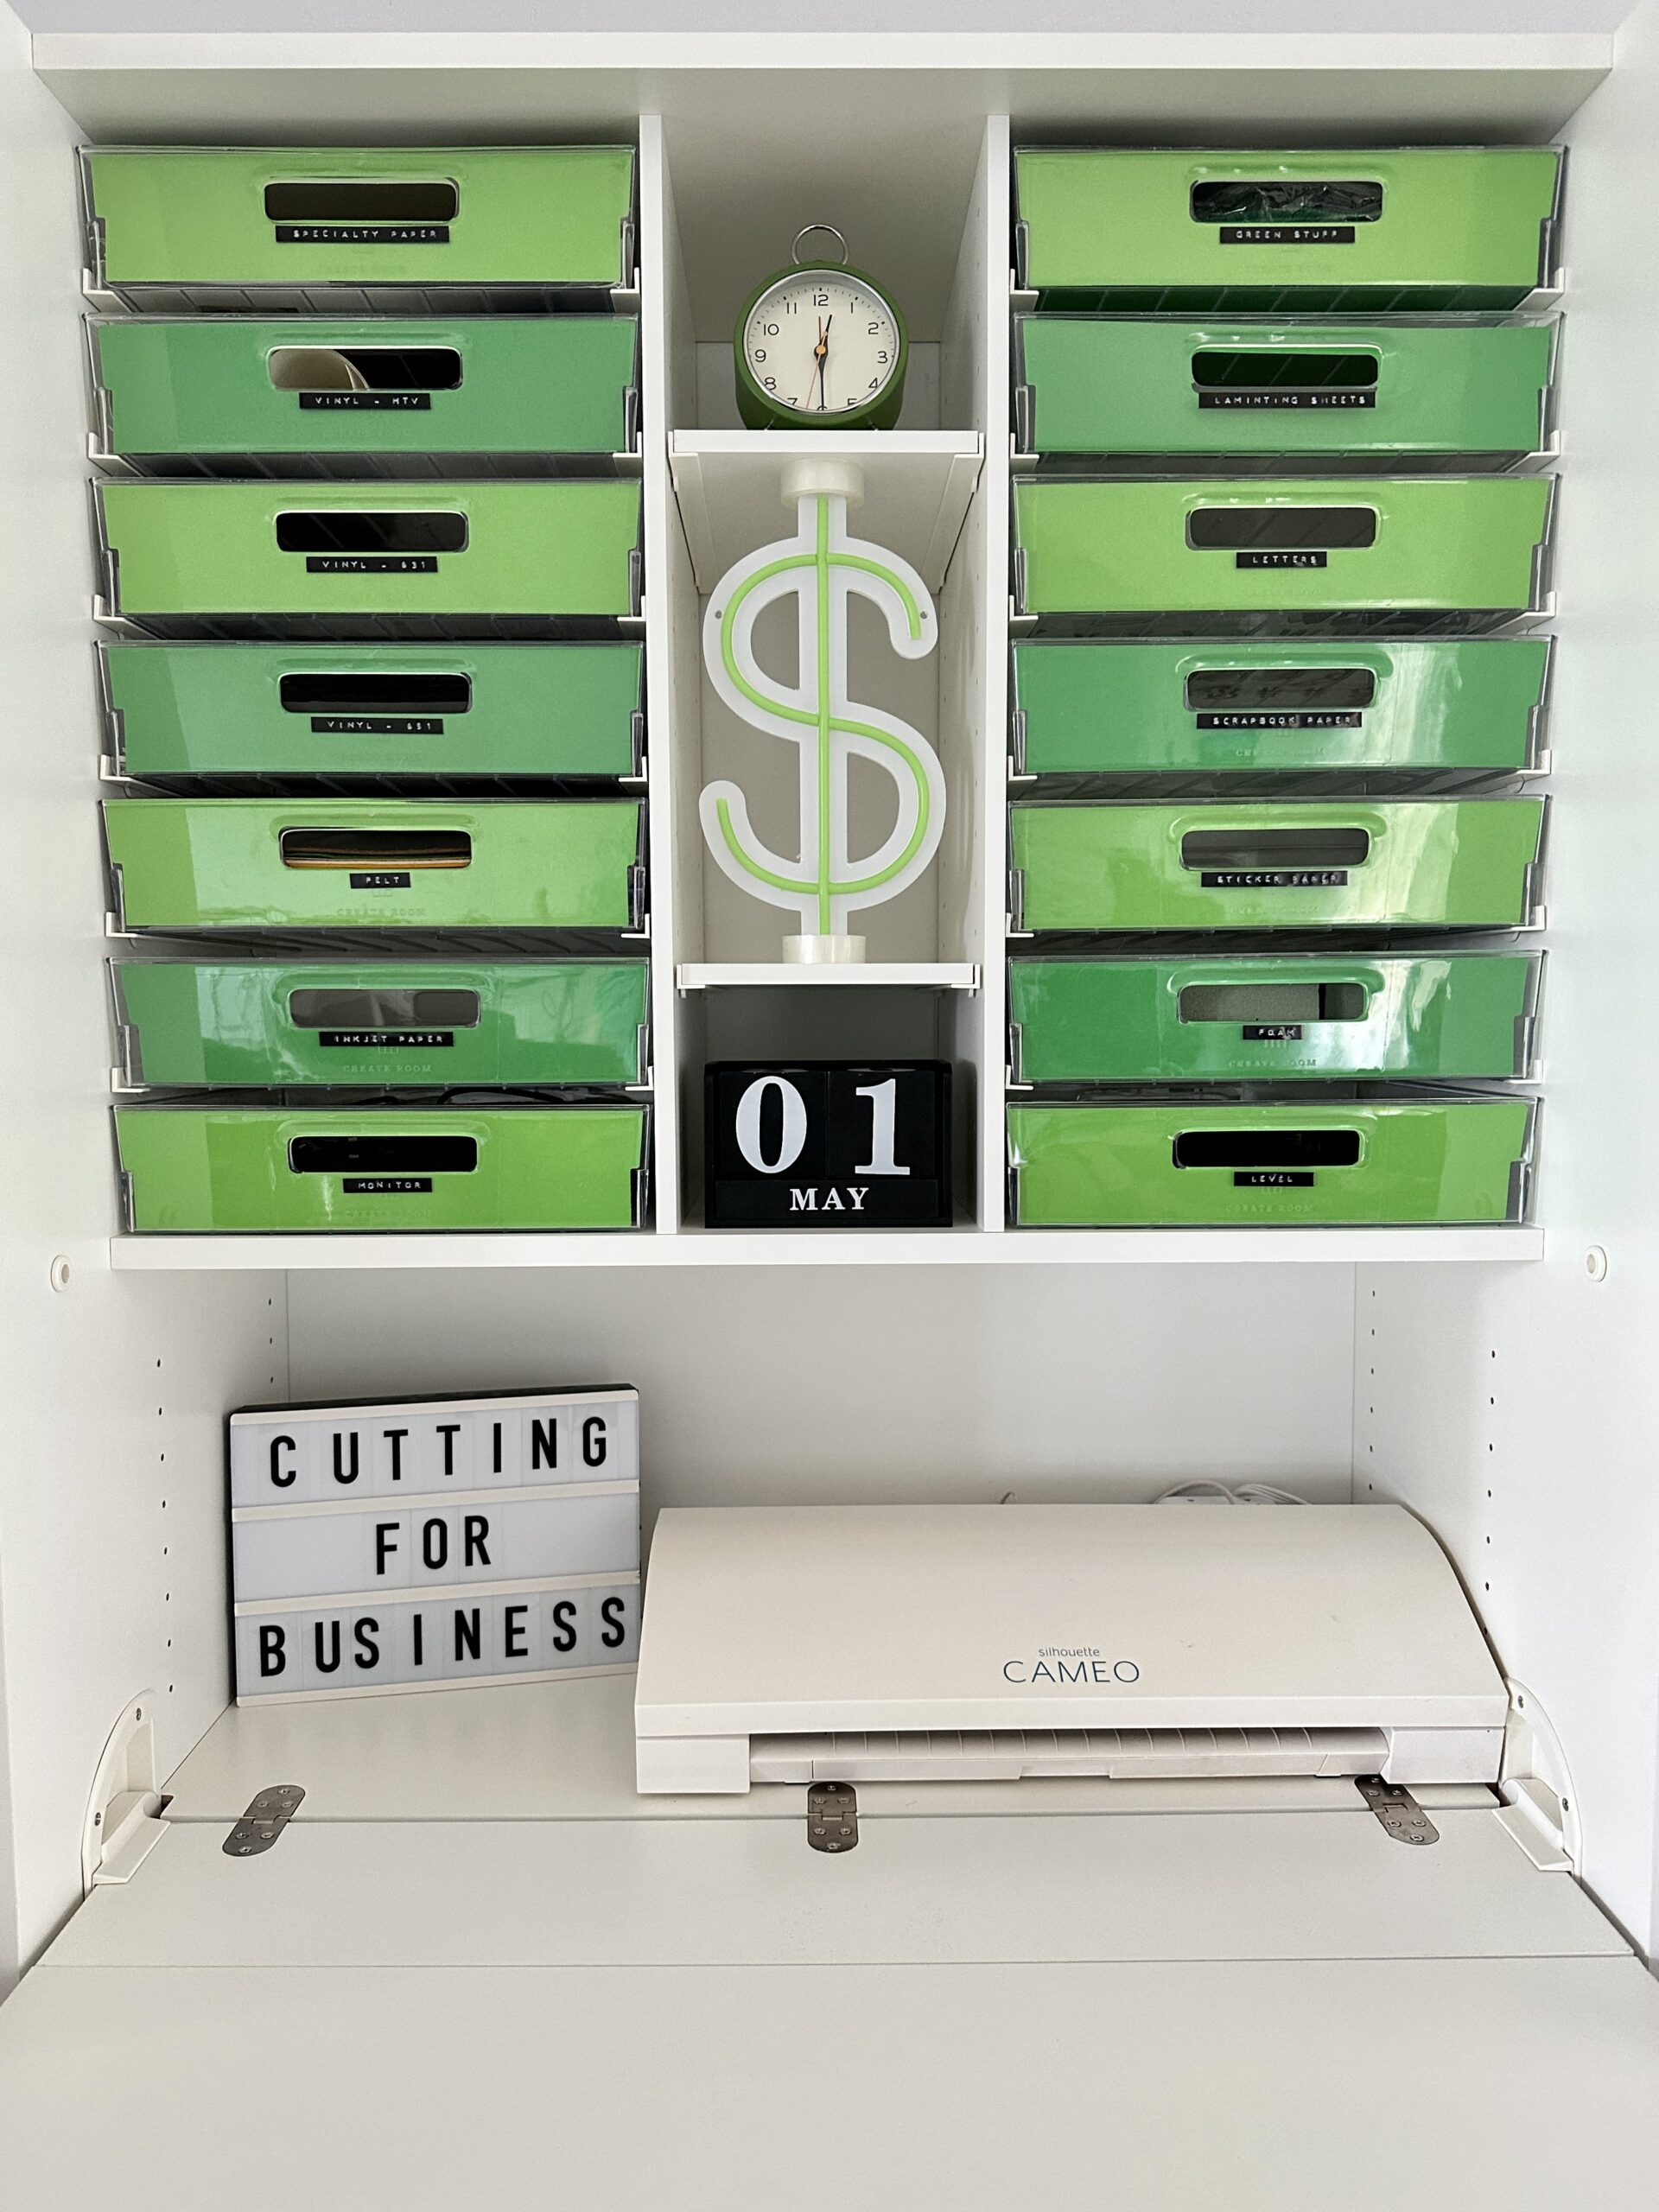
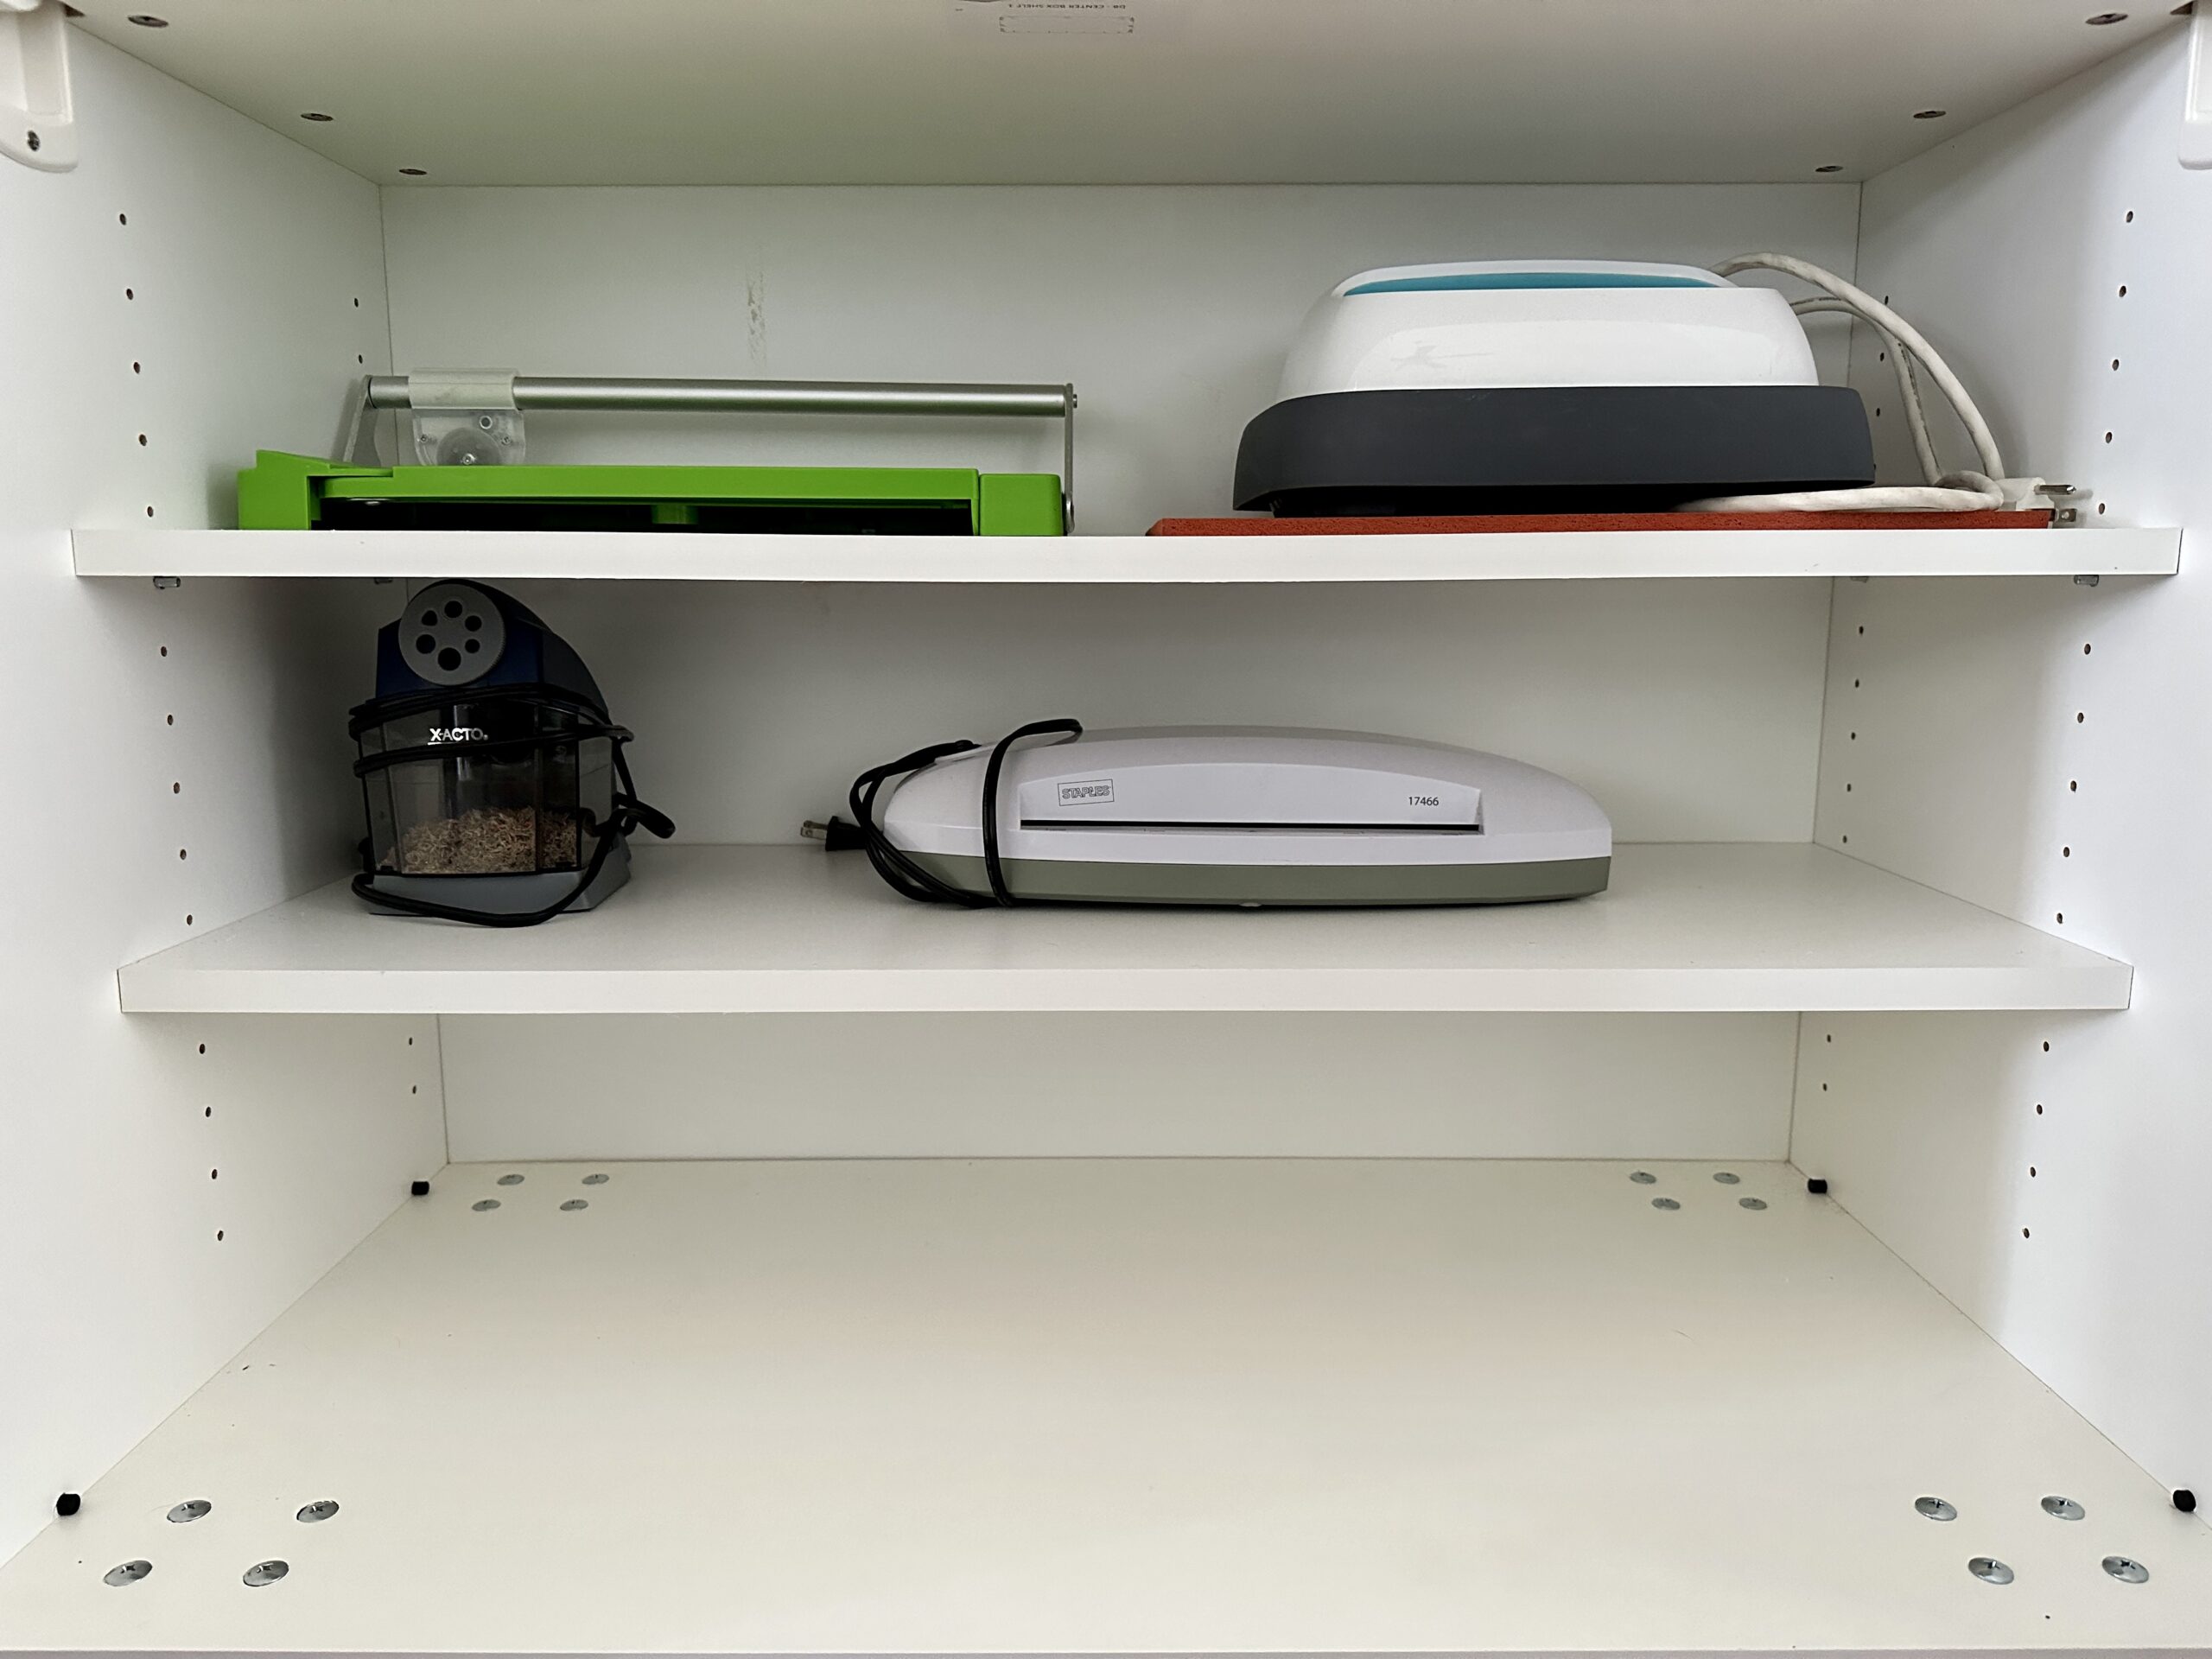
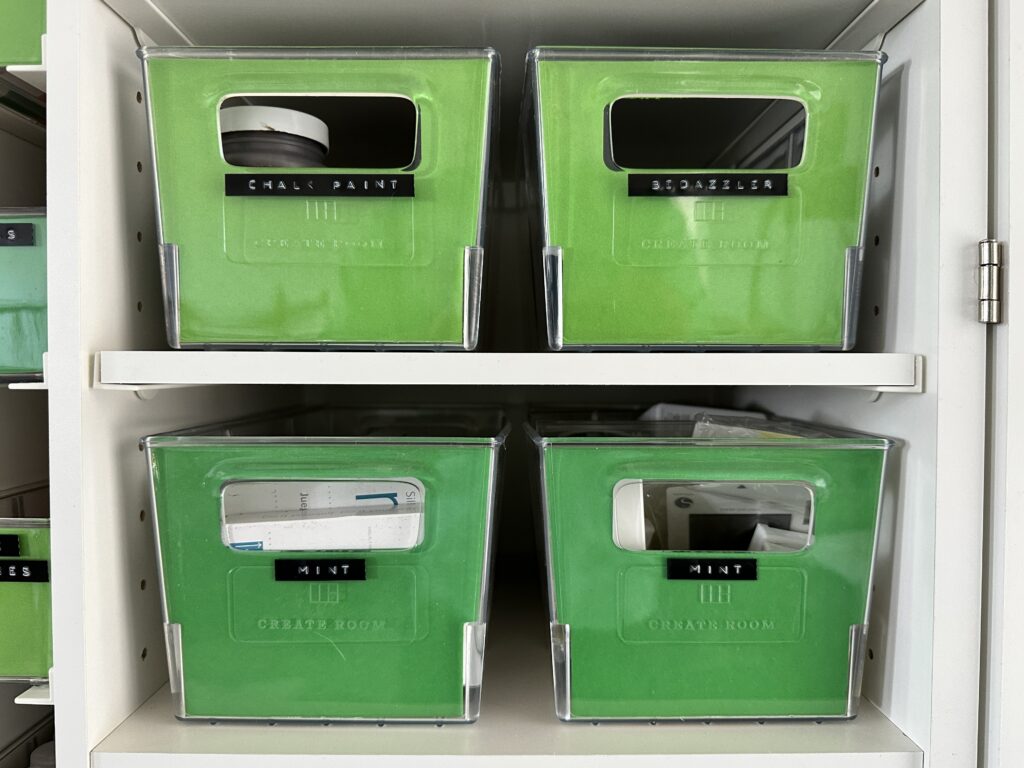
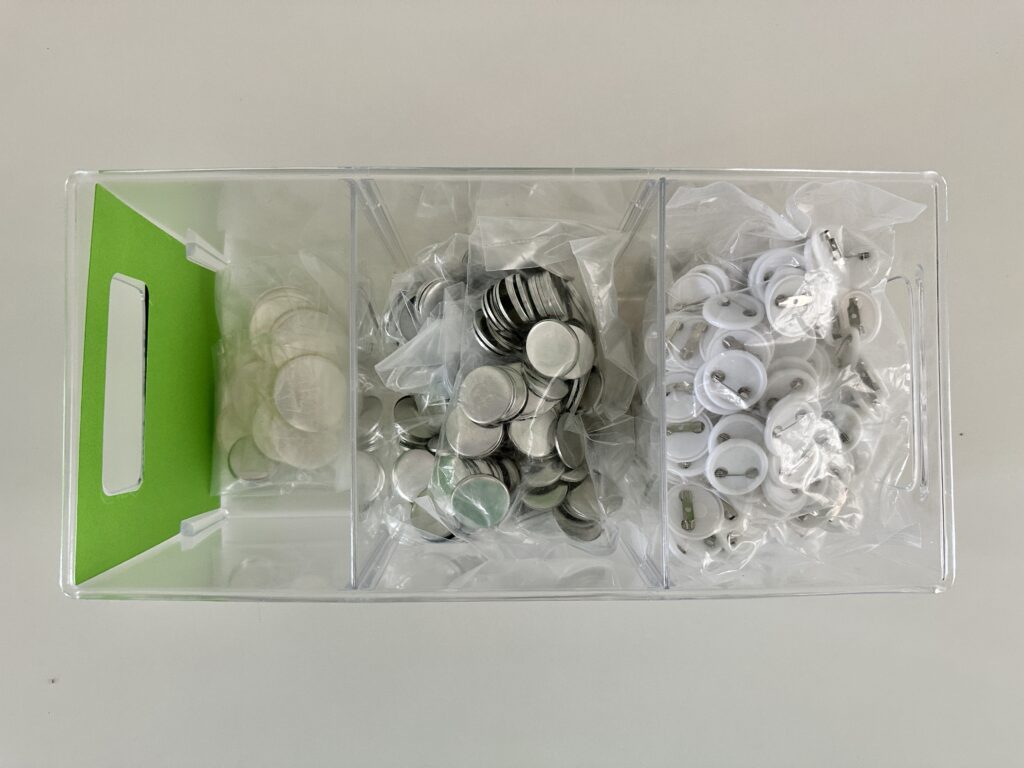
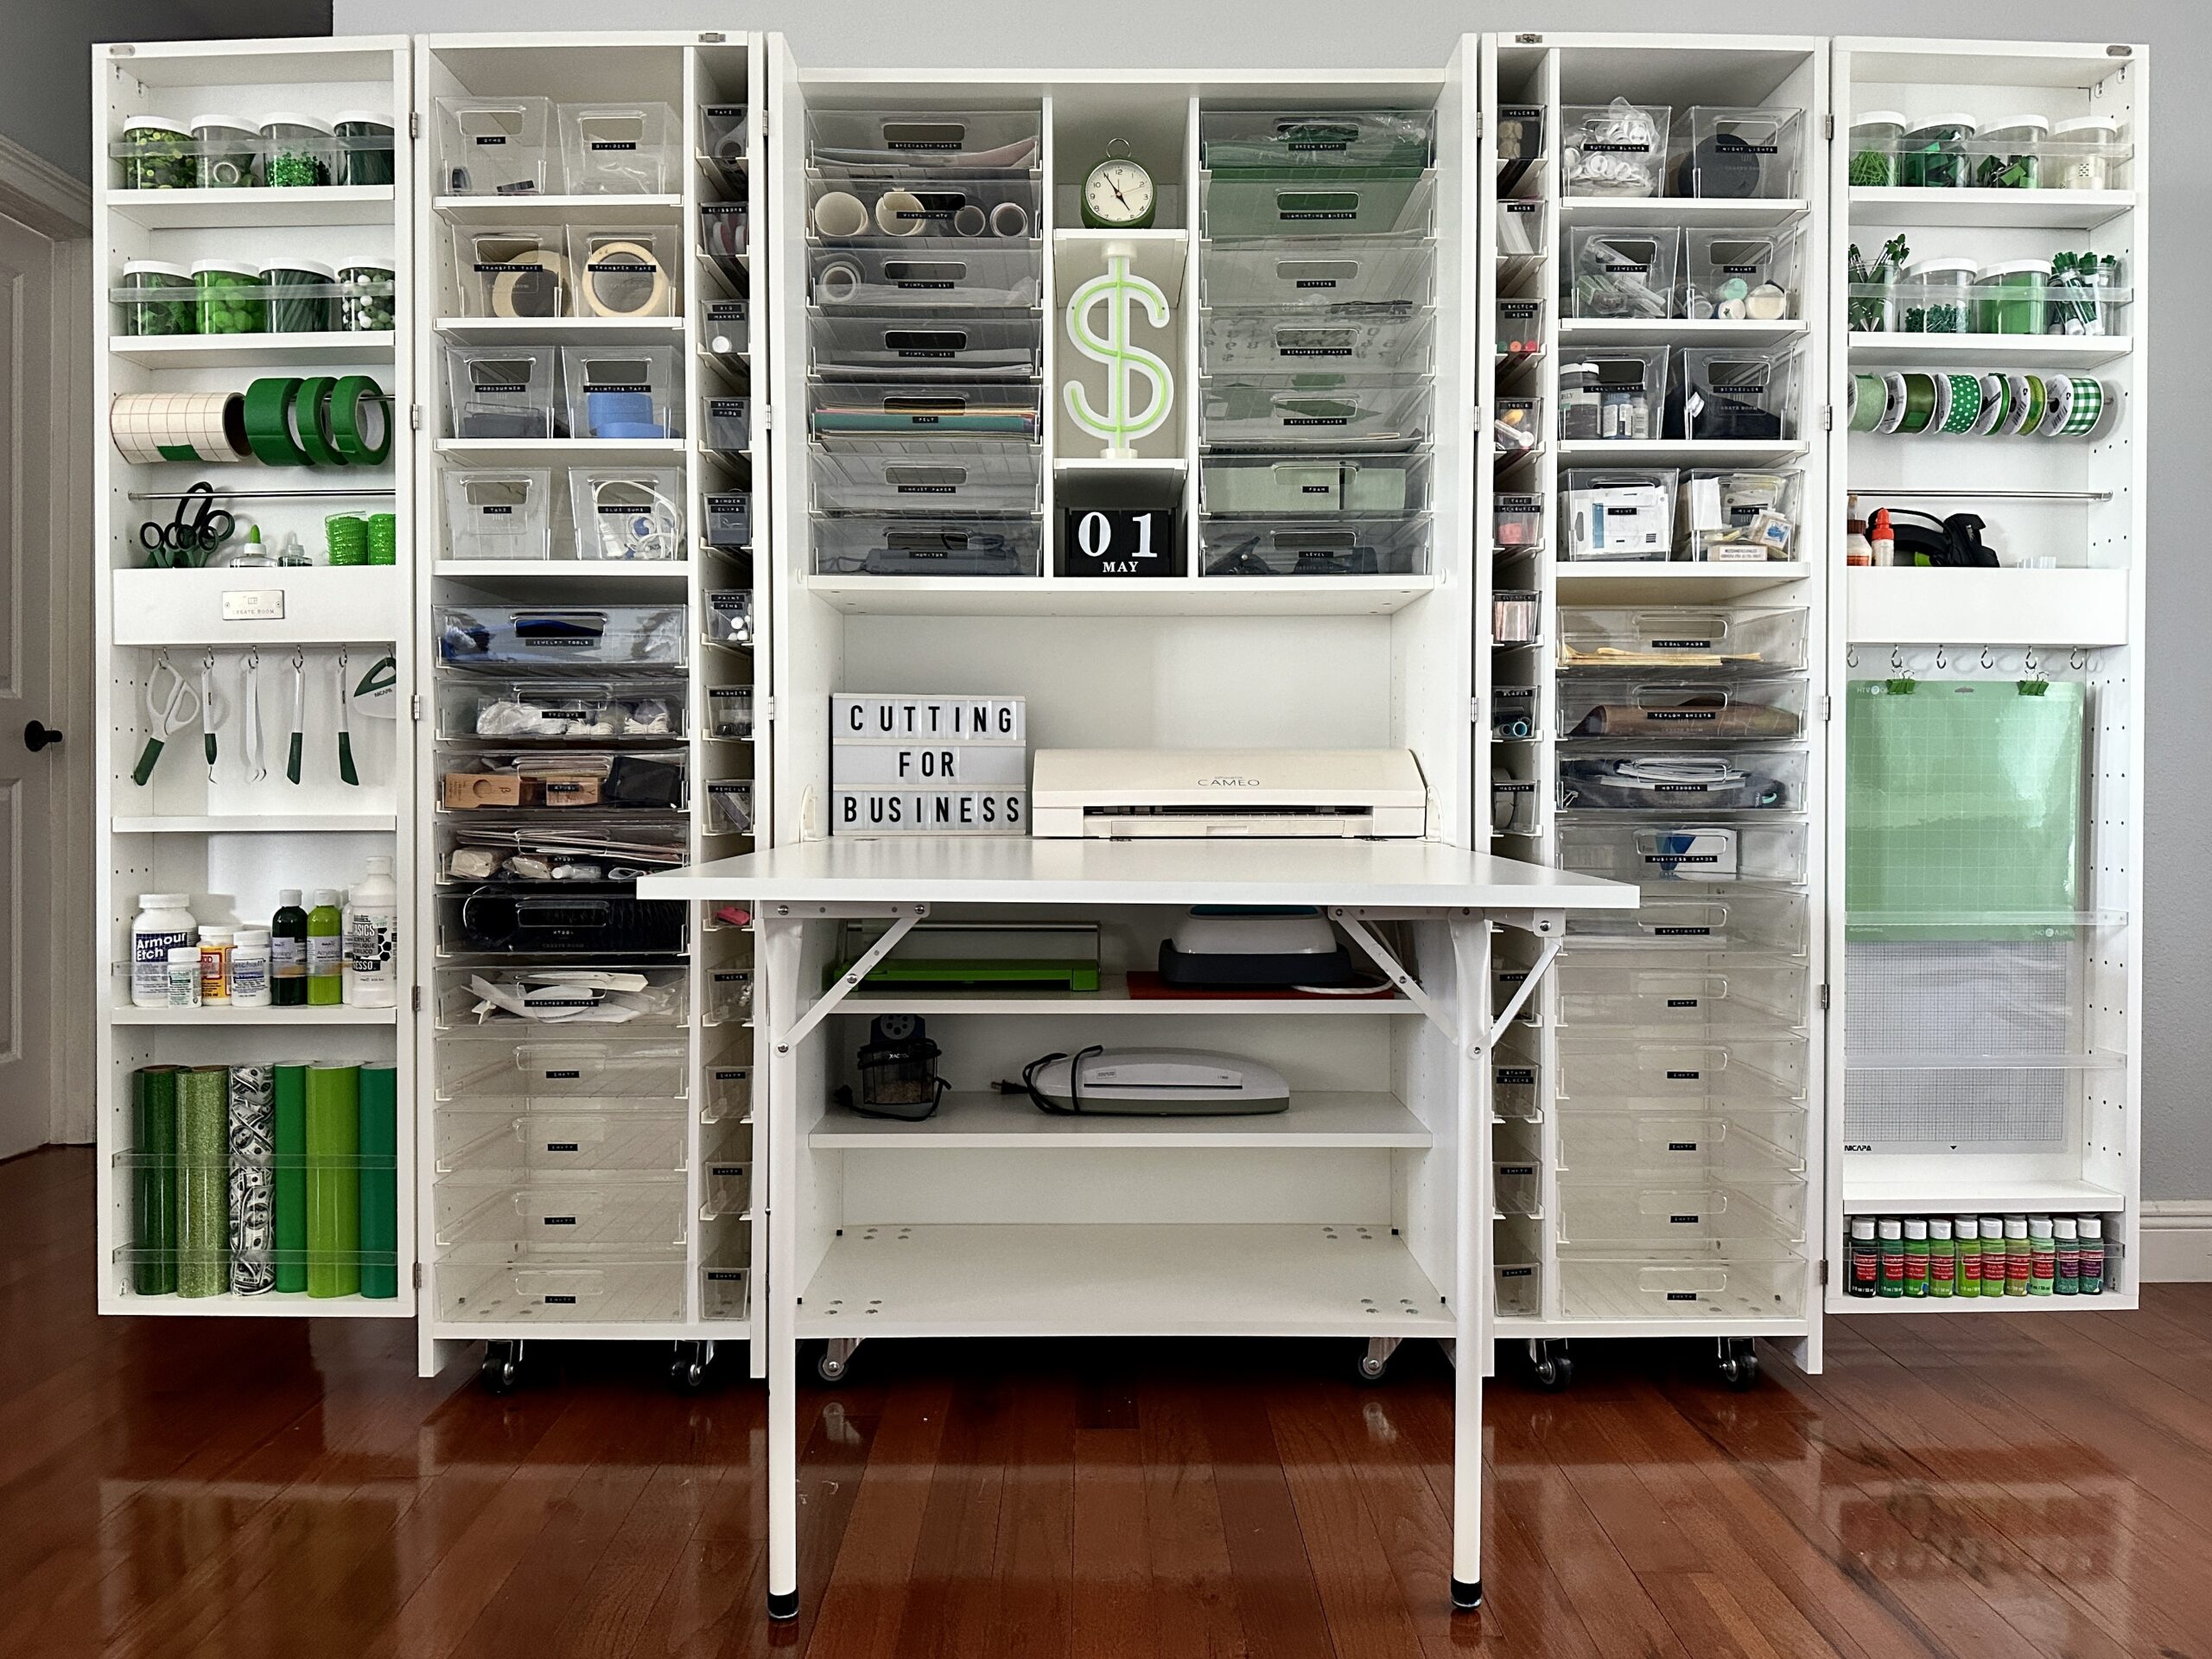
Create Room’s DreamBox – Partially OpenCreate Room DreamBox – Fully OpenCreate Room DreamBox – Left SideCreate Room DreamBox – Right SideCreate Room DreamBox – CenterCreate Room DreamBox – Under TableCreate Room DreamBox – Close up of the Inview totesCreate Room DreamBox – Top view of the Inview Totes
4 Things I Didn’t Know About Create Room’s DreamBox
The table can be adjusted to standing height, or sitting height. This is perfect for me, since I usually stand when using my heat press.
The clear Inview totes are not rigid. Instead, they are a pliable acrylic blend. This means that they are less likely to crack pulling them in and out of the spaces.
In Inview acrylic totes have removable dividers. In the smallest totes, I found these invaluable for small items that I don’t have a lot of – like scrapbooking brads.
It’s heavier than I expected. Each side of the DreamBox weighs 140 pounds; while the center weighs 250 pounds. That’s a combined 530 pounds – empty!
DreamBox Styling
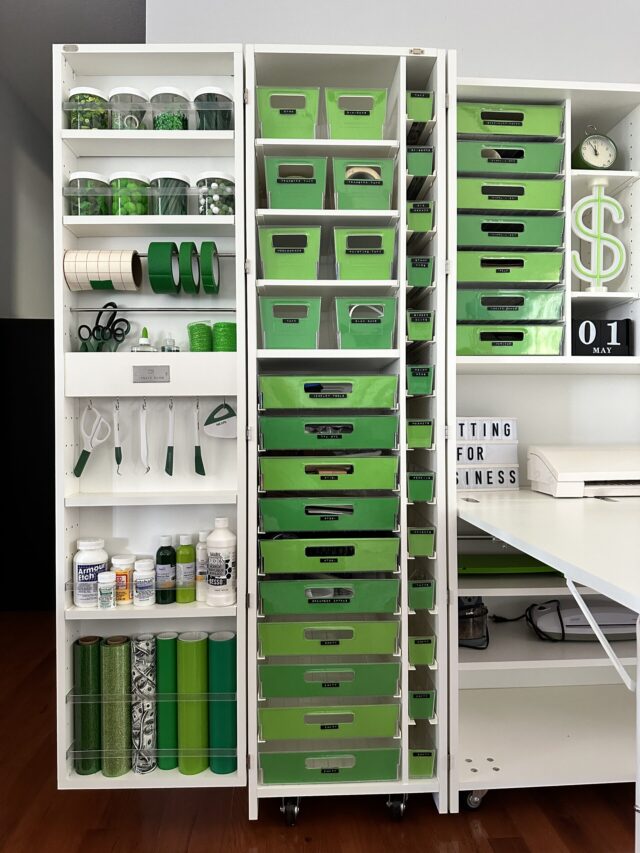
I styled my DreamBox in shades of green to match the colors of my blog – and, of course – money! However, the green you see in the photos is simply colored scrapbook paper that I cut with my Silhouette and slid into the front.
For me, the colored paper blocks the clutter inside the clear totes. But, you may want to be able to see inside your totes. If so, skip the scrapbook paper.
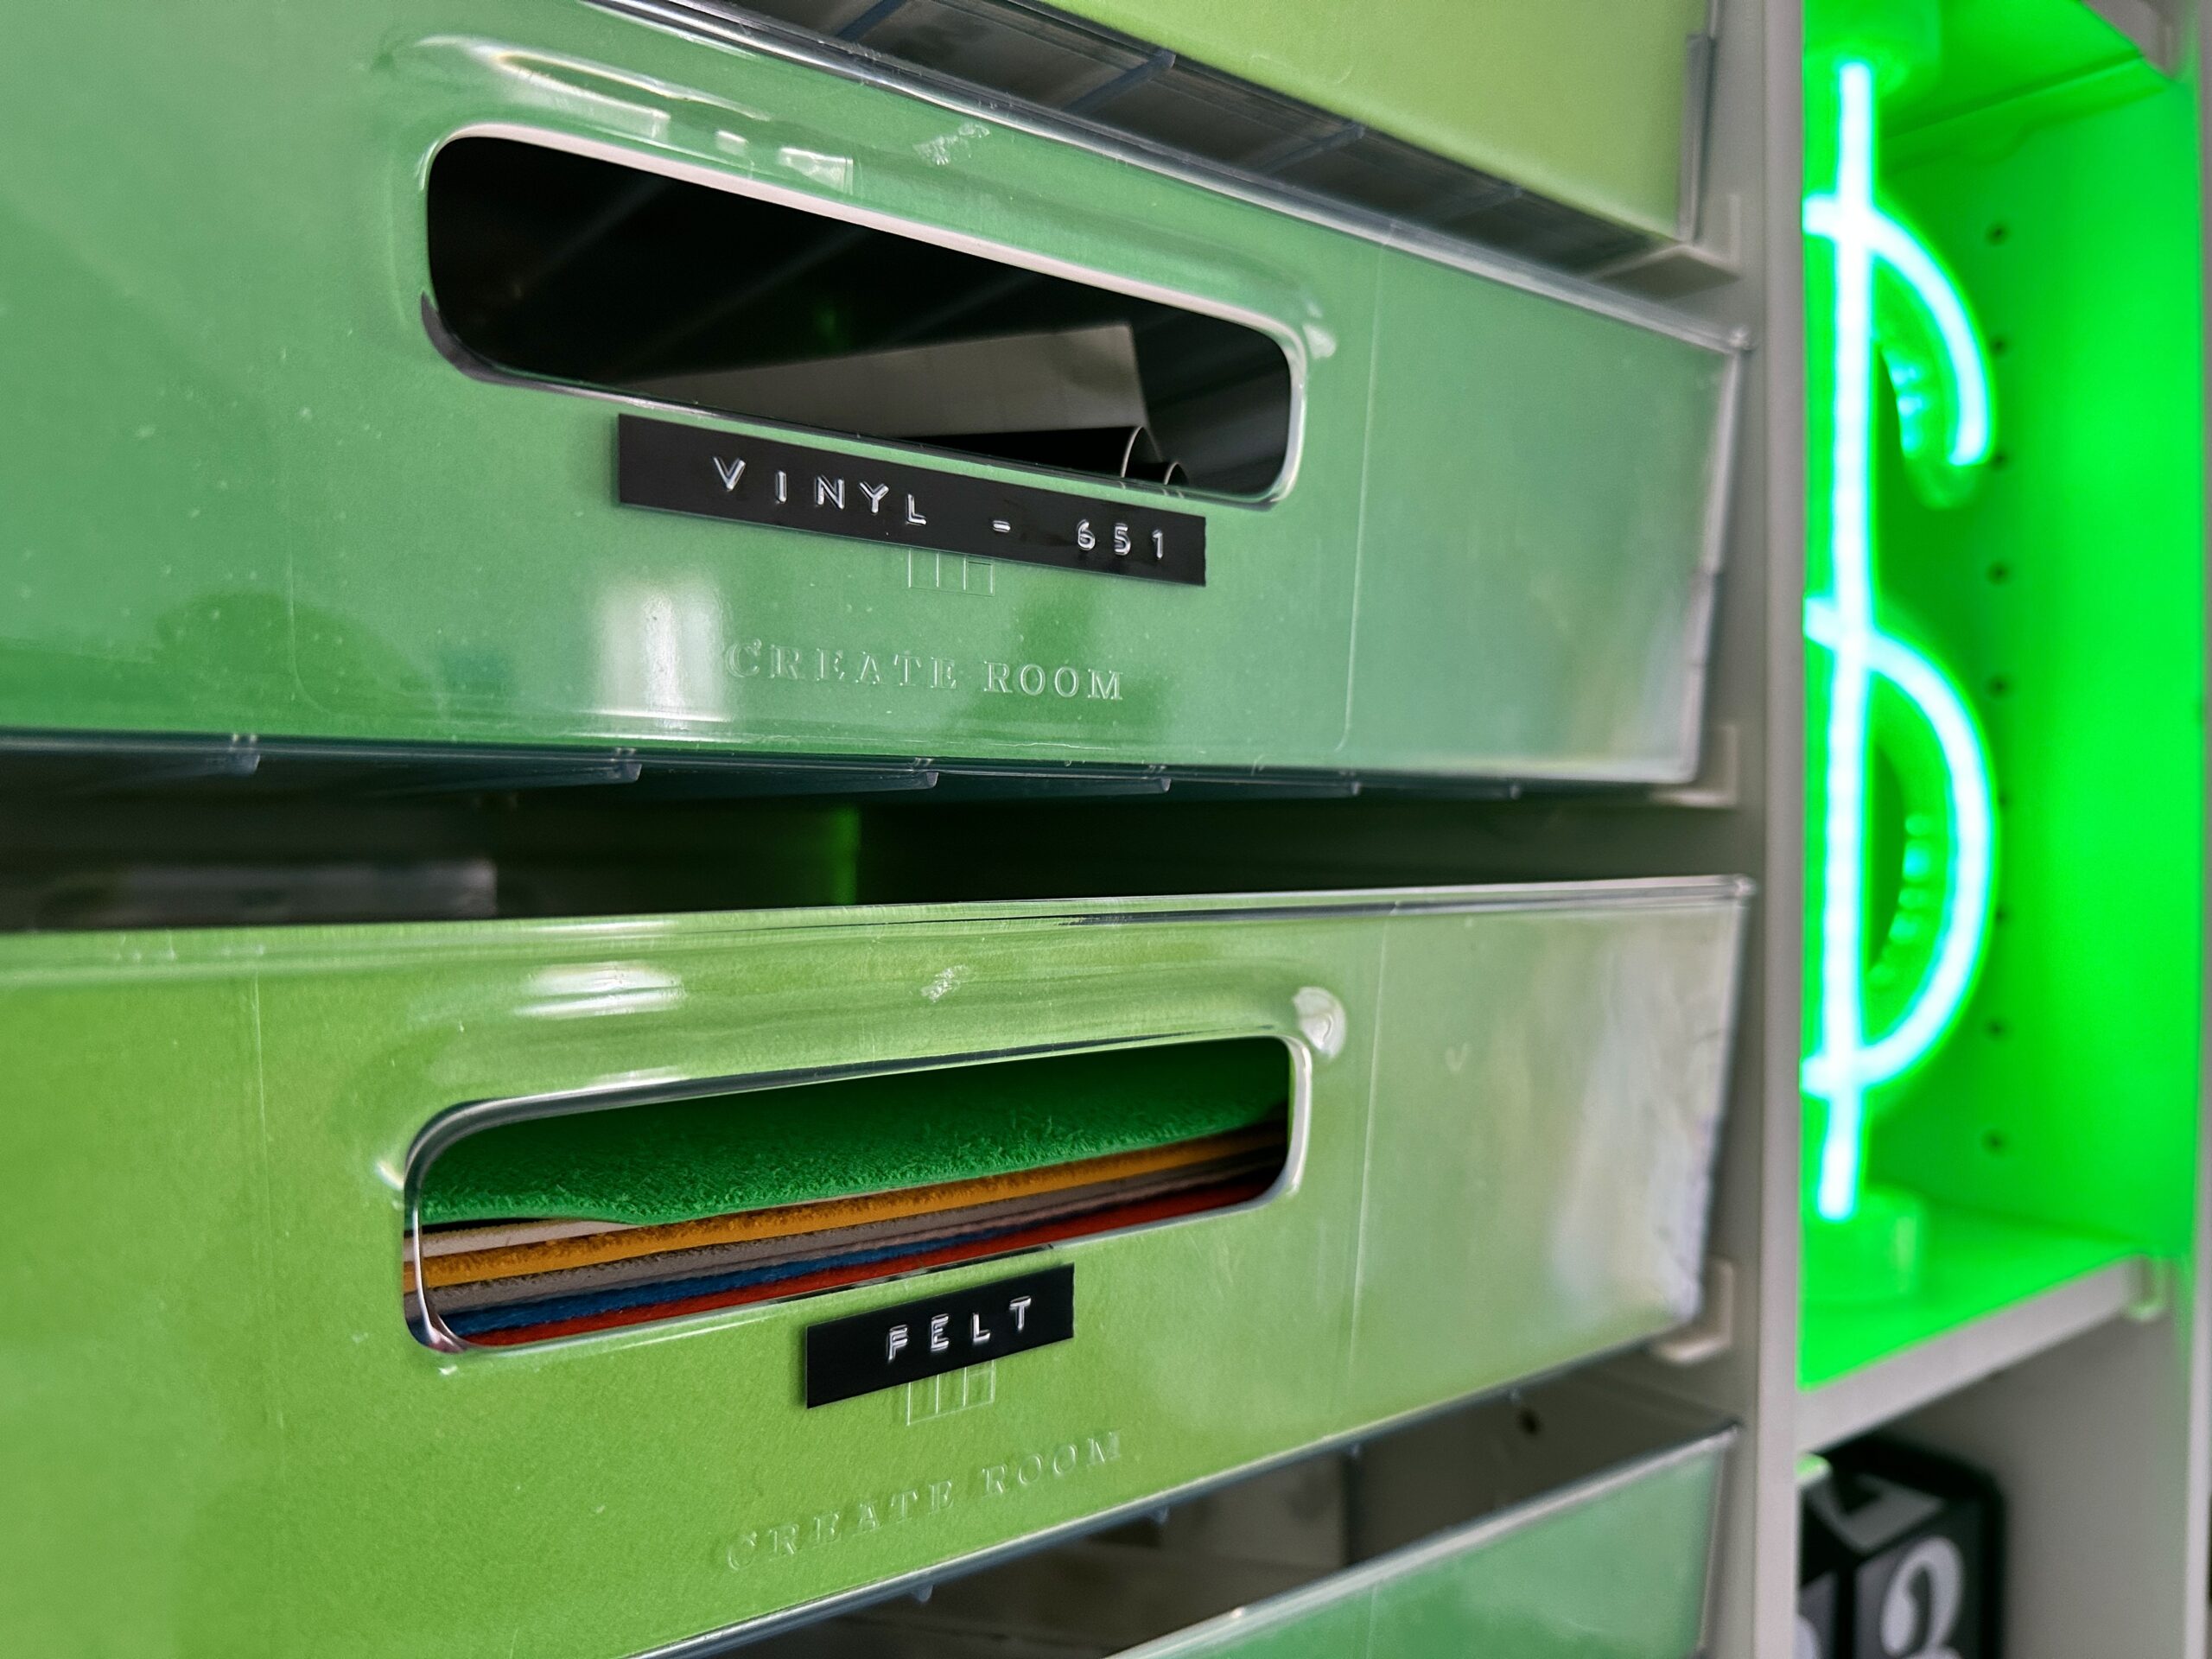
Since I can’t see into the totes, I labeled them with my embossing labeler. I love the look.
Create Room DreamBox – Without the scrapbook paperLabels on the Create Room DreamBox.
What I Love About My DreamBox
Tons of storage. It might not look like it, but there is a ton of storage space. With 80 totes, 16 clear lidded jars, 4 metal rods, and shelves – everything has its place. In fact, I’ve even got a few empty totes to store my next craft supply shopping spree!
It is customizable. You can rearrange and reconfigure your DreamBox to fit your specific needs. For example, I’ve always had an issue with properly storing my cutting mats. Despite trying to keep the protective plastic on them, they always wind up with dog hair on them. In my DreamBox, I removed a few shelves so that I can hang my mats in the door. When not in use, they stay covered and protected from hair and dust.
Machines stay plugged in. I love that I don’t have to plug and unplug my Silhouette each time I want to use it. Instead, it tucks away and can stay plugged in and ready to cut whenever I need it. (Note: Either my Silhouette or Cricut machine will fit in the small cubby at the head of the table. But not both of them at the same time. Some sewing machine models should also fit in this space.)
Everything is within reach. There is no more searching for my supplies. They are (literally) at my fingertips – whenever I’m ready to craft.
Everything tucks away. Next time you are a guest at my house, I promise you won’t see my craft supplies. Instead, they will be put away and my DreamBox folded up. I love that I can go from mess to clean in only a few minutes.
What I Don’t Love About My DreamBox
Just like everything else, there are a few things I don’t love about my DreamBox.
Chips and dings. Several of the corners have chips in the finish. While I appreciate that touch up paint was sent with my DreamBox, maybe corner protectors would help protect the corners during shipping so they wouldn’t get chipped.
The wheels don’t lock. My DreamBox sits on wood flooring, which isn’t perfectly flat. Sometimes, the sides of my DreamBox want to roll open. Locking wheels or included wheel stops would fix this issue – since most homes do not have perfectly flat floors.
Shipping takes a long time. My DreamBox was ordered 2/22/23 and delivered 4/6/23. Wait times are even longer for prebuilt service DreamBoxes. Be sure to keep this in mind when ordering.
Lots of packaging. There is a lot of packaging material with the DreamBox – including a lot of plastic. It was a hassle to get rid of it all.
DreamBox Options and Upgrades
My DreamBox is shown with two upgrades:
Full set of totes. The DreamBox comes with 40 clear Inview totes (a half set). I opted to order the full tote package – which gave me 80.
Dry erase boards. The dry erase boards shown on my DreamBox have already proven to be a great way to compile thoughts – and keep my projects front and center.
PreBuilt or DIY Assembly
Create Room sells the DreamBox either assembled or as a DIY assembly. In planning for the arrival of the DreamBox, we faced two hurdles: 1) The DreamBox comes as a freight delivery, which means that the delivery company delivers it to your driveway. Specifically, it is delivered to the spot where the public street meets your private property. In my case, my house is 500 feet uphill from the road, and there is no way a semi truck is getting up our gravel driveway and turning around. 2) Once the DreamBox made it in the house, it needed to go up a flight of stairs – with two sharp turns.
Ultimately, I decided to order the DIY assembly. I’m glad I did. We were forced to unload the DreamBox on the side of the road and bring it to the house in several trips. If we didn’t have these challenges, I would have ordered it with the prebult service – just to save time.
Mr. Cutting for Business assembled the DreamBox in about 3 hours over the course of a two different days. Unfortunately, my Dreambox arrived with an incorrectly drilled shelf. After a message to Create Room’s customer service, a replacement shelf was shipped a few days later.
Create Room Discount Coupon Code
Create Room’s DreamBox is a big investment. The base price for the DreamBox is $2499. This includes the DreamBox, with a half set of totes (40). If you add in all the upgrades, the total price can easily exceed $4000.
If you are ready to order your own DreamBox, I can help you save some money with a Create Room promo code. For a limited time, I can offer you $250 off of your DreamBox with coupon code: CFBMOMSDAY, and automatic savings on several other Create Room products. (Code expiration date: 5/18/23.) After that, you can save $100 on your DreamBox with coupon code CUTTINGFORBUSINESS. And the best time to buy? Create Room seems to offer the best deals around Mother’s Day and Black Friday.
If you are interested, Create Room offers financing through Bread Pay. This would allow you to make monthly payments on your Create Room order.
Tell me in the comments: Where will you put your new DreamBox? Will it replace your current table in your crafting space? Will it go into your dining room and be folded neatly when you aren’t using it? Or, maybe it’ll go into a combination play room and craft room and the whole family will use it?
One more thing before you go: Every once in a while, I see social media posts for deeply discounted DreamBox units, usually for a few hundred dollars. These are scams. Please be sure you are shopping at the official Create Room website.
You probably encounter low content products every day in your life, you just don’t know that they have a name.
What Are Low Content Products?
Amazon defines low content books as, “A low-content book has minimal or no content on the interior pages. Low-content books are generally repetitive, and designed to be filled in by the user.”
While many low content products are books, they don’t have to be an entire book. Low content products can be a single page. For example: This free habit tracker on Cutting for Business is a low content product.
20 Examples of Low Content Products
Journals & Diaries
Journals are one of the most well known low content products.
Journals & Diaries
Logbooks
Planners
Habit trackers
Business calendars
Worksheet
Content calendars
Checklists
Where Can You Sell Low Content Products?
Low content products can make great products to sell both digitally and in print.
How Can You Design Low Content Products if You Don’t Have Design Skills
Now that you’ve got your head wrapped around how Dall-E 2 works, I wanted to show you around CF Spark.
What is CF Spark?
Our friends over at Creative Fabrica have put together their own AI text-to-image generators. There are seven different aspects of CF Spark: 1) CF Spark Art, 2) CF Spark Patterns, 3) CF Spark Crystalline, 4) CF Spark Sketch, 5) CF Spark ImageMix, 6) CF Spark Prompt Builder, and 7) CF Spark Writer.
I’ll show you around each of them, and provide some examples for using each.
CF Spark Art
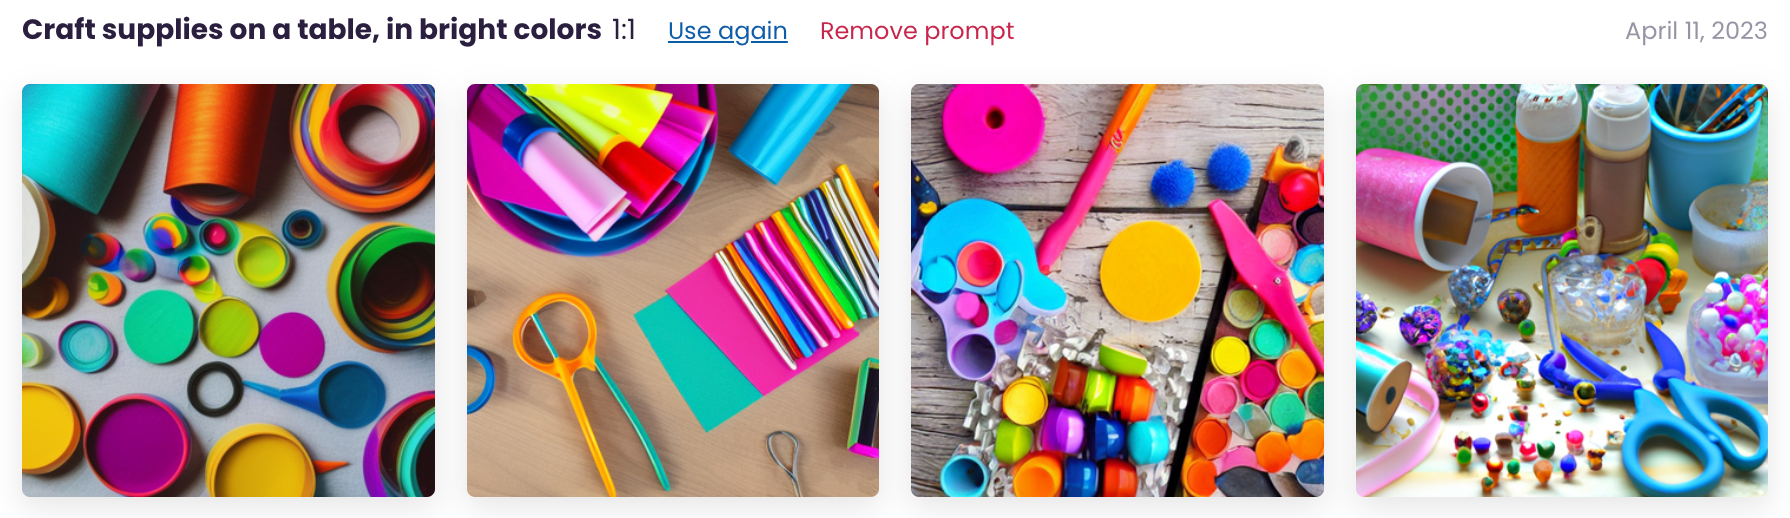
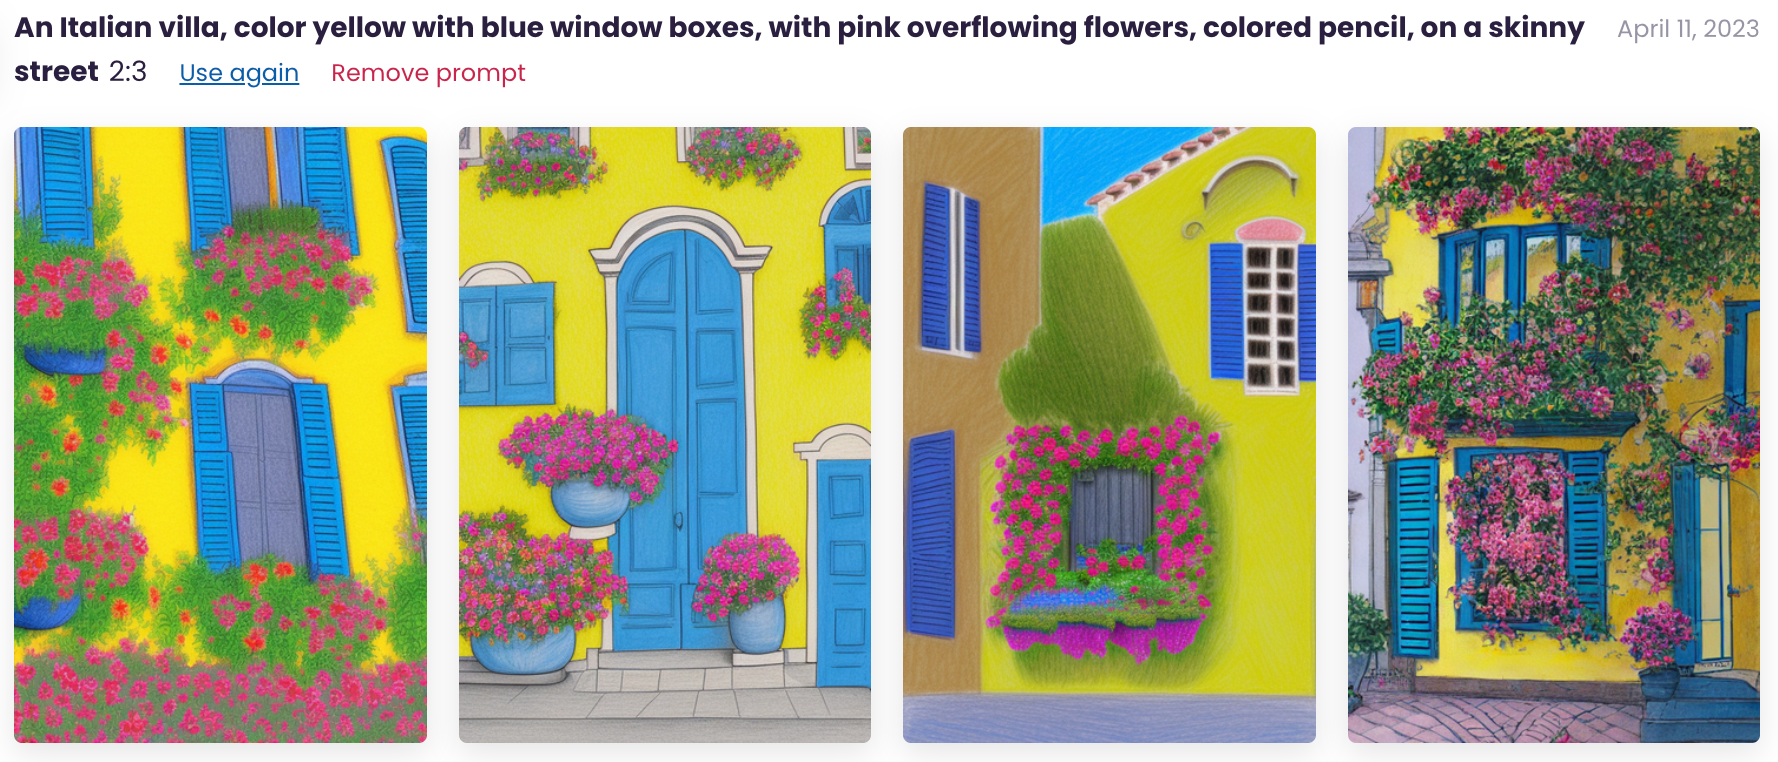
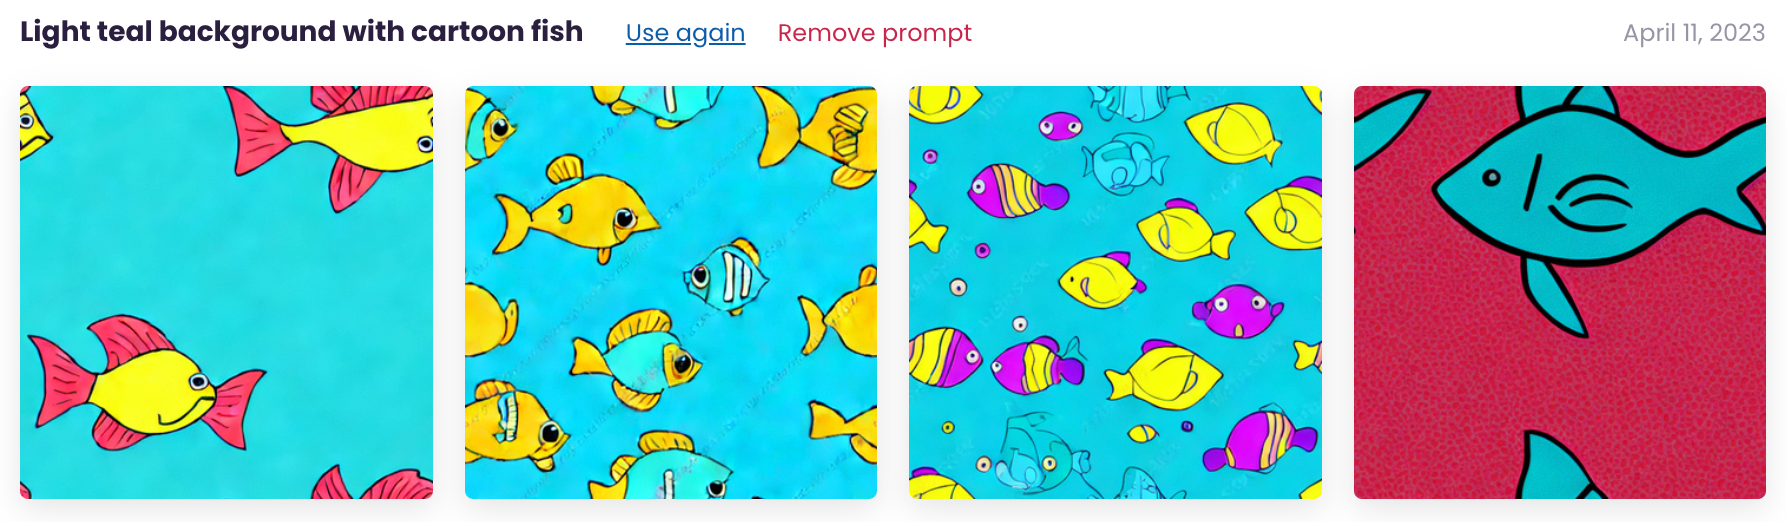
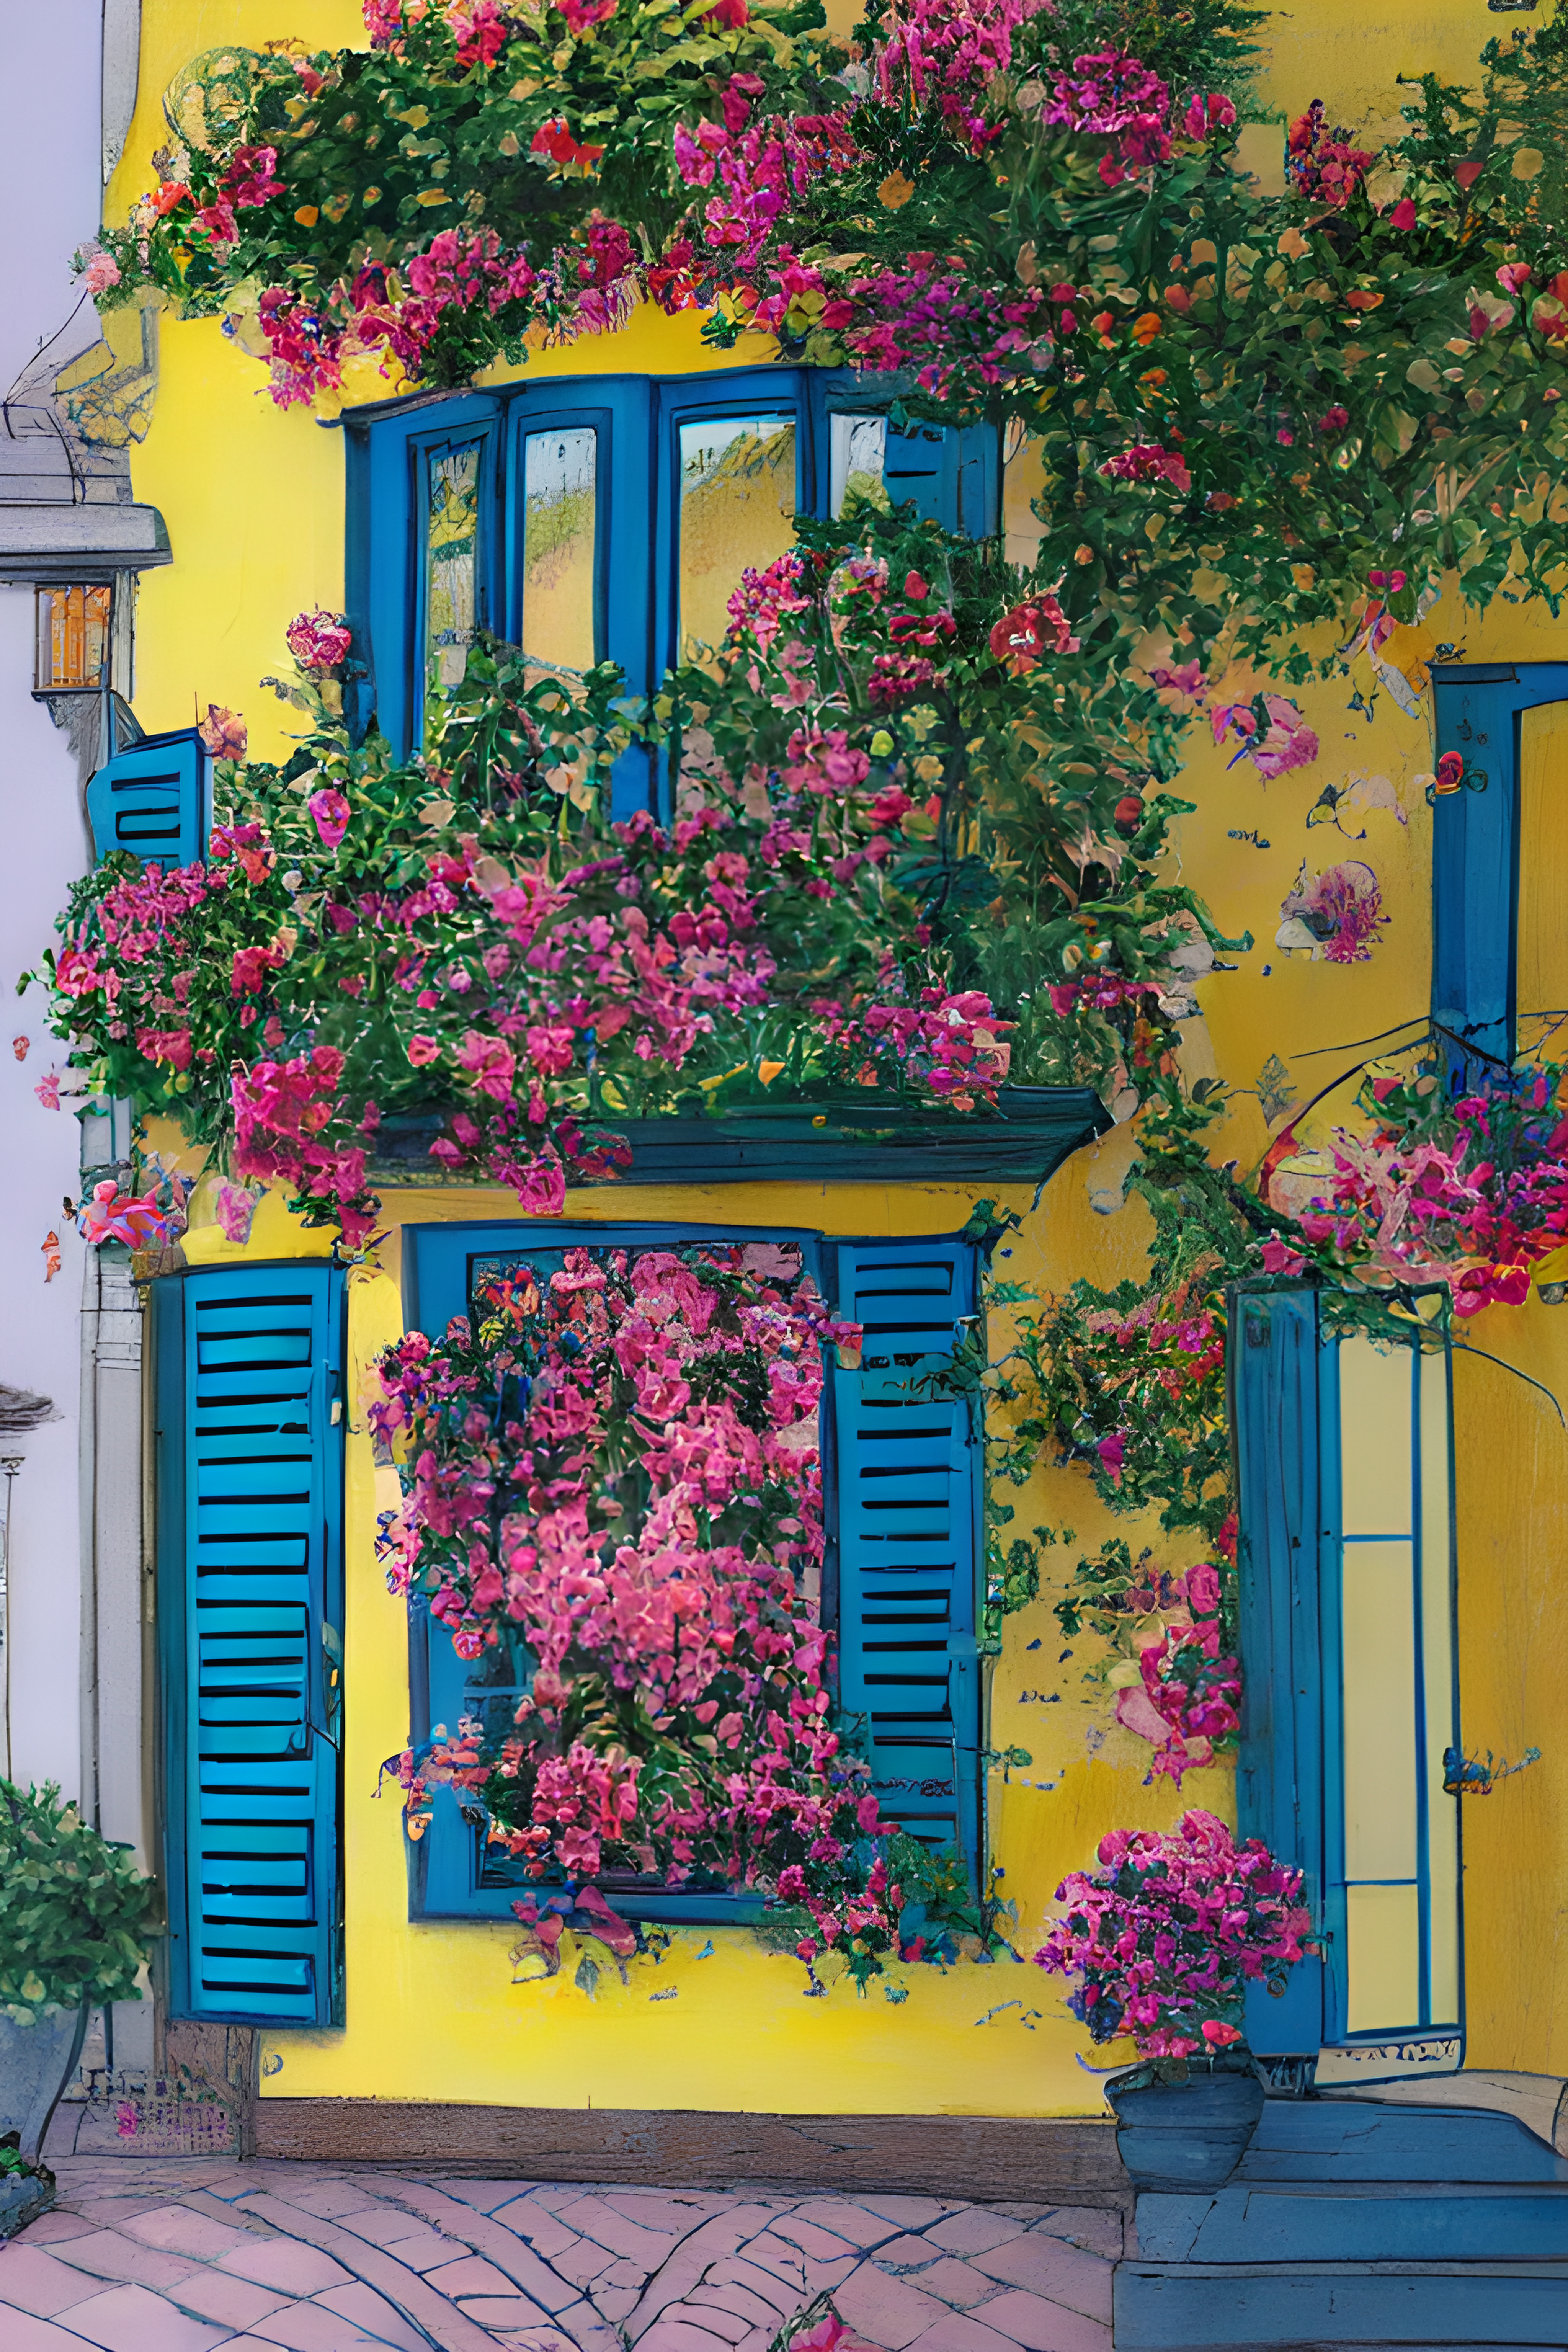
CF Spark Art is going to be most similar to Dall-E 2 – and is built partially on the Dall-E 2 API. Similarly to Dall-E 2, you enter descriptive text to create an image. However, you can change the ratio to fit your project needs. Here are a few examples of CF Spark Art results.
An Italian villa, color yellow with blue window boxes, with pink overflowing flowers, colored pencil, on a skinny street.
Results
CF Spark Patterns
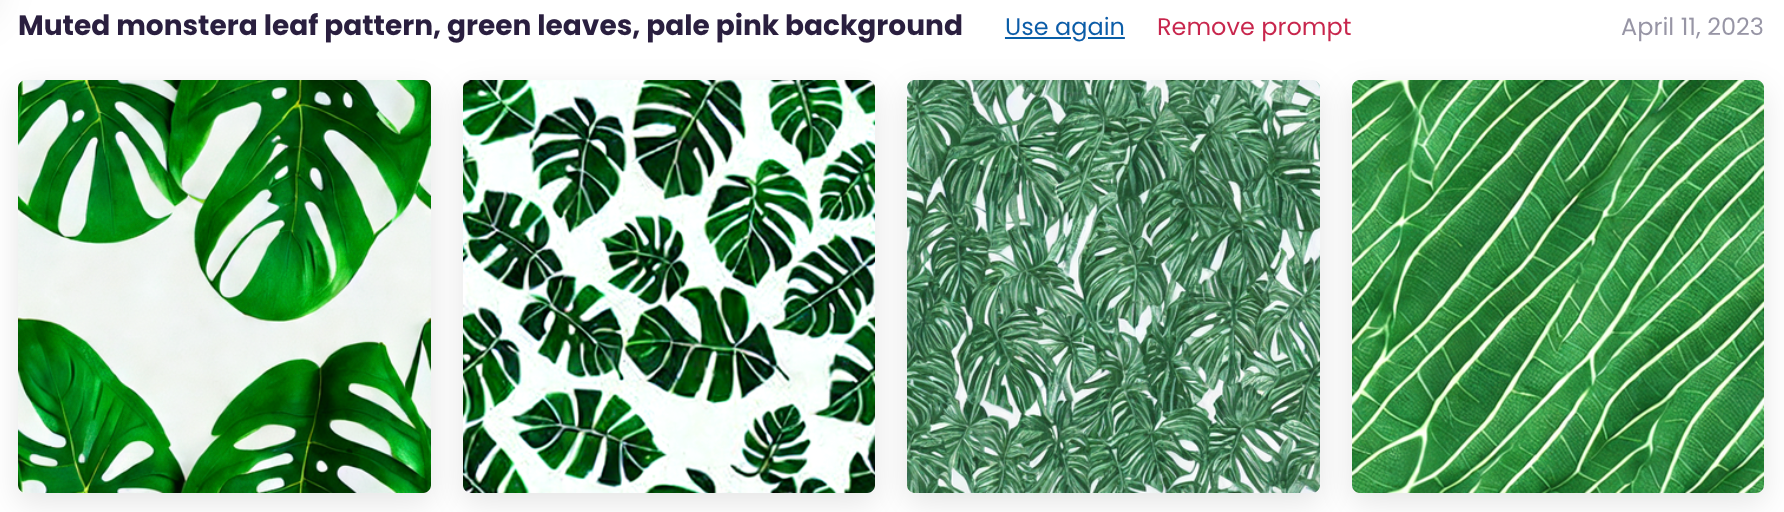
CF Spark Patterns creates seamless tile, repeating patterns. These are perfect for products like clothing with a repeating patterns and printing your own scrapbook paper or vinyl. Let’s take a look at a few examples.
Muted monstera leaf pattern, green leaves, pale pink background.
Results
CF Spark Crystalline
CF Spark Crystalline creates transparent background images – perfect for using as cut files or clip art.
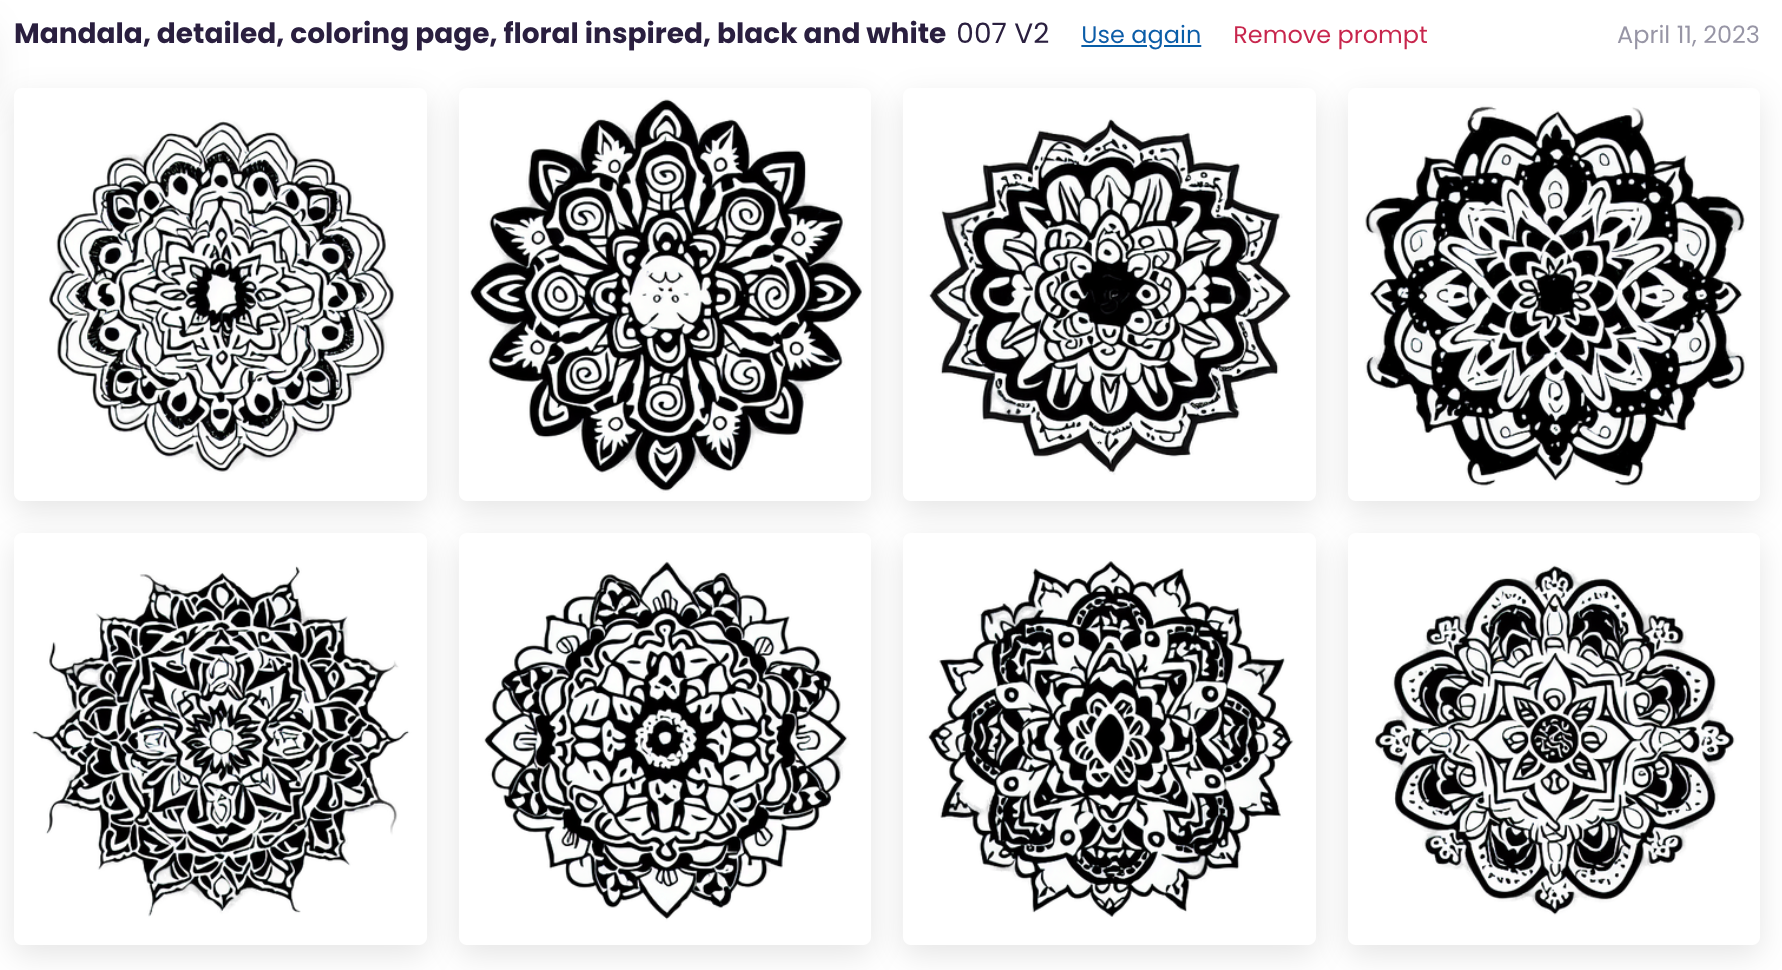
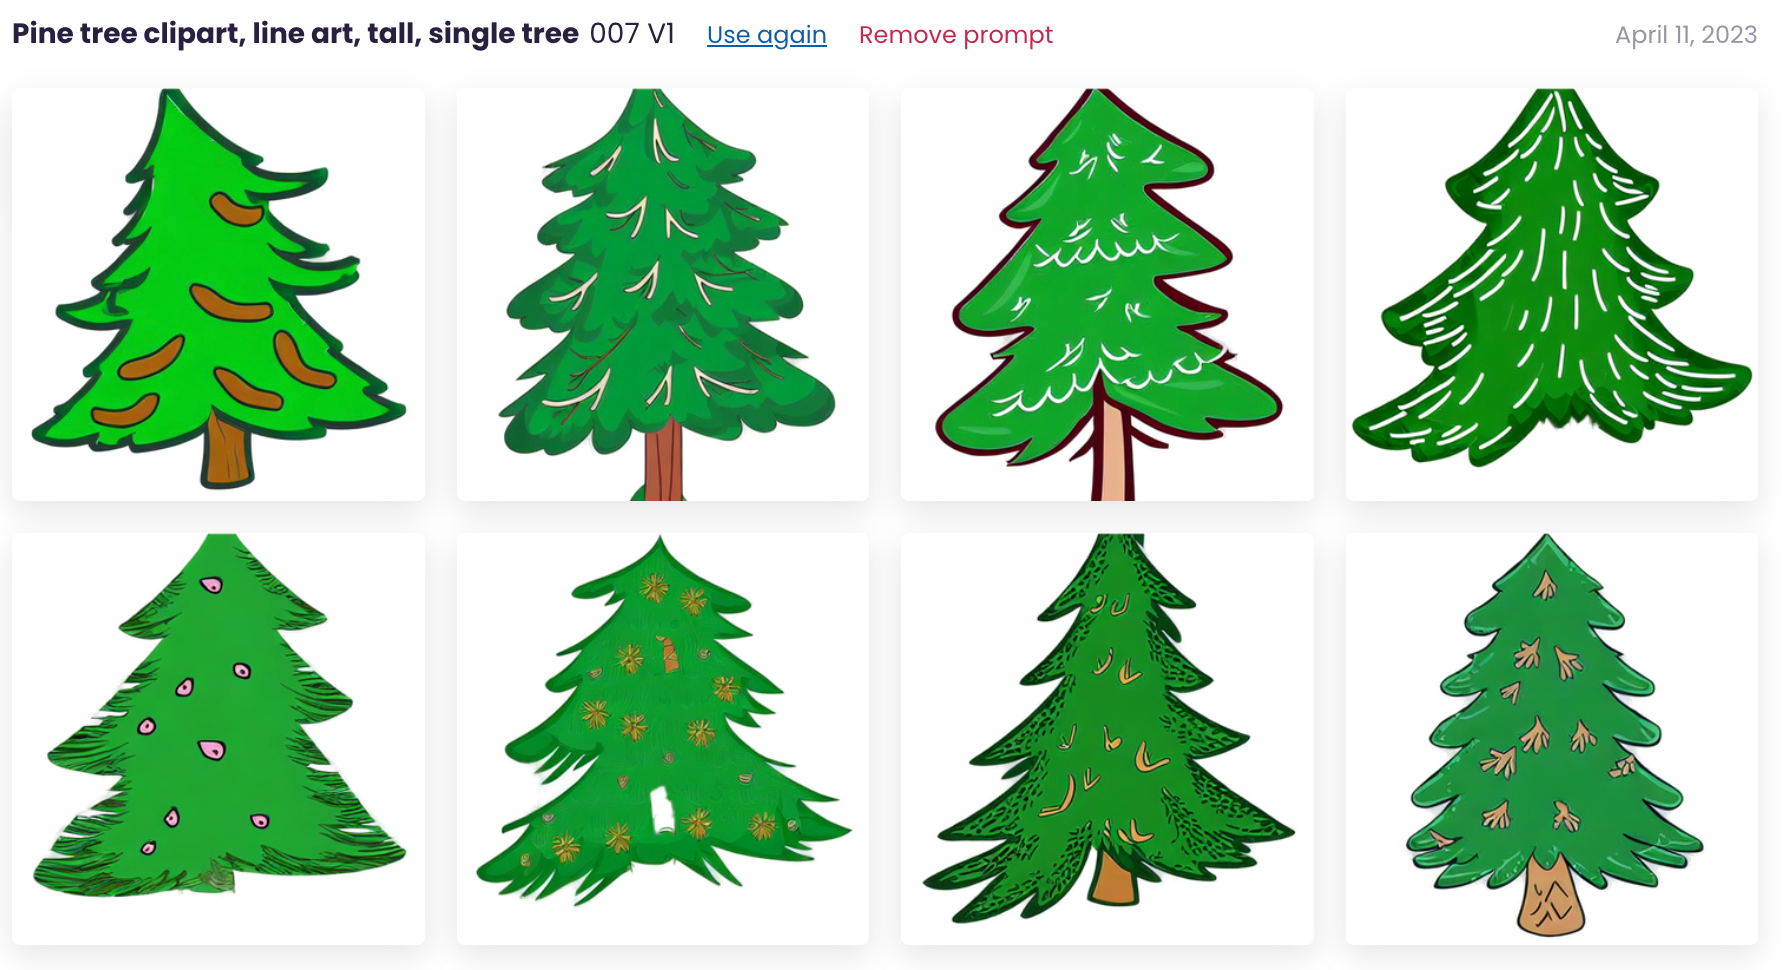
In CF Spark Crystalline, you can choose which model you want to use. The help bubble to the right side of the models shares insight to each model. Origin 2D V1 produces realistic images, while Origin 2D V2 produces cartoony clipart. The 3D V1 model produces 3 dimensional realistic images, while 3D V2 produces “dreamy” images. Finally, the 007 V1 model creates flat, simplistic images while the 007 V2 model creates flat, detailed images.
Mandala, detailed, coloring page, floral inspired, black and white (Used Model 007 V2.)
Results
Prompt
Pine tree clipart, line art, tall, single tree. (Used Model 007 V1.)
Results
CF Spark Sketch
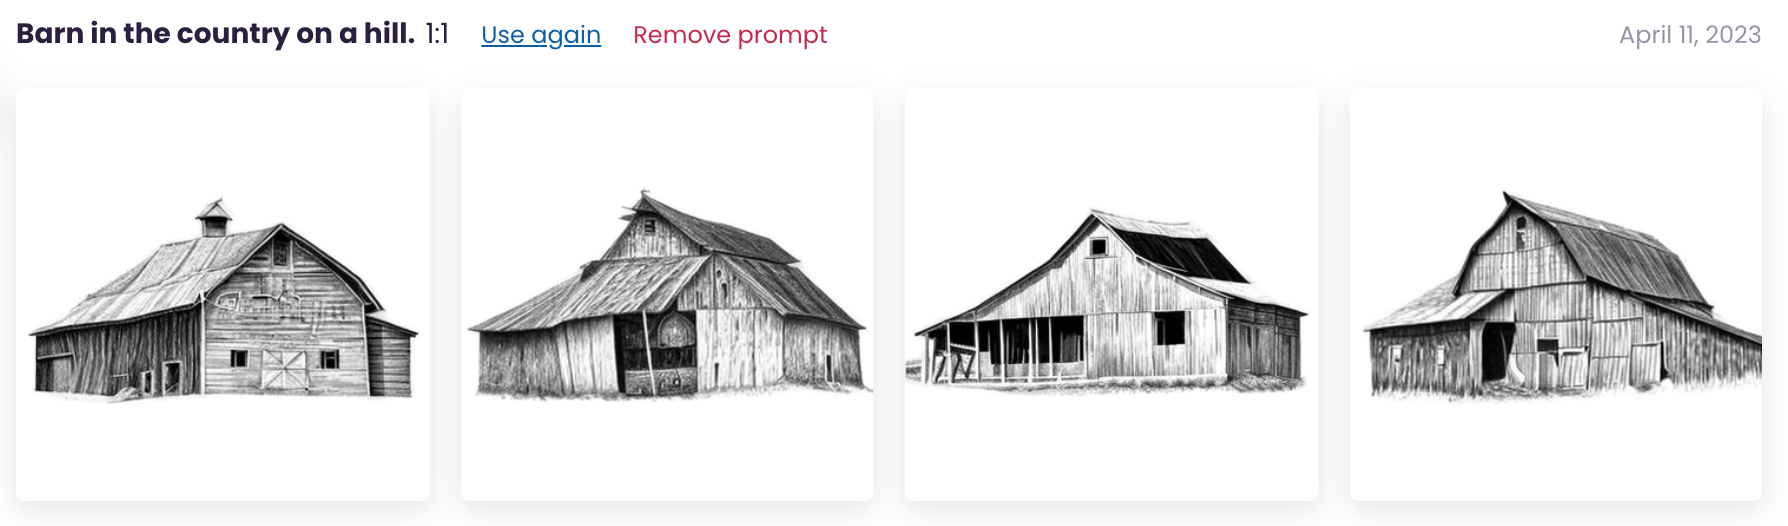
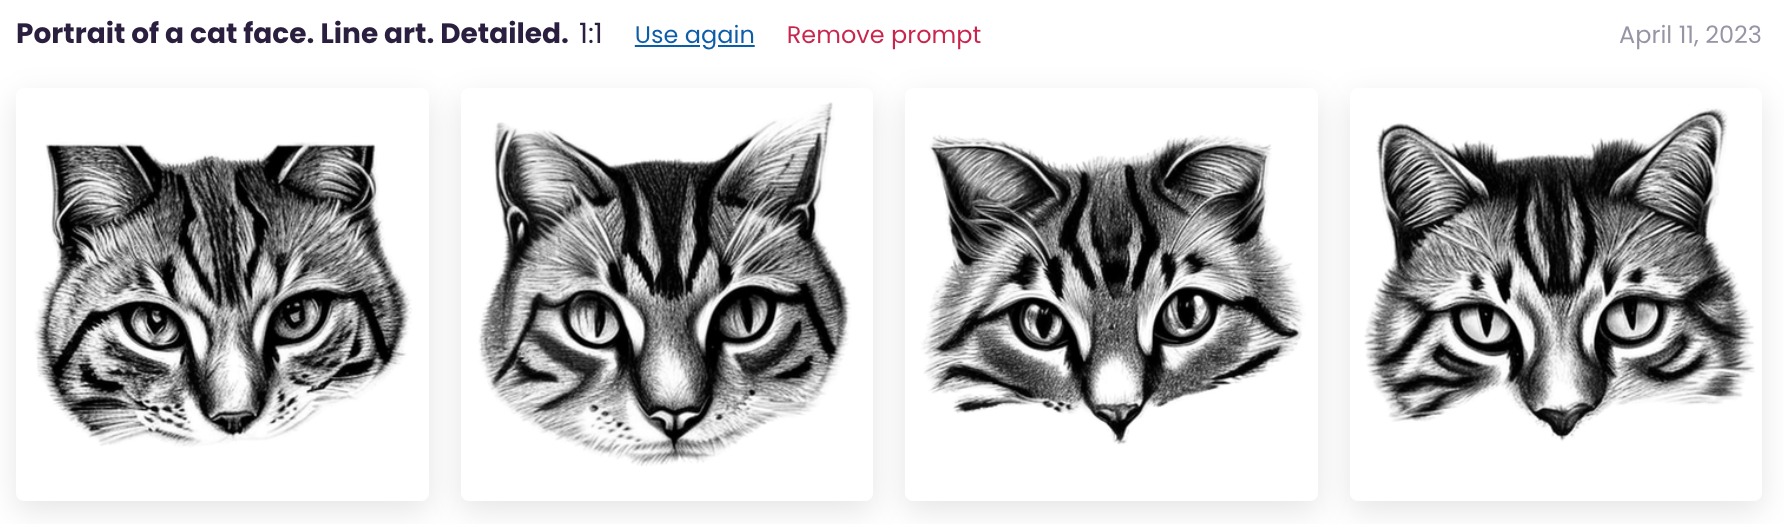
CF Spark Sketch produces line style drawings. I could imagine using this style of sketches on greeting cards, decals, or logos. Let’s take a look at some examples.
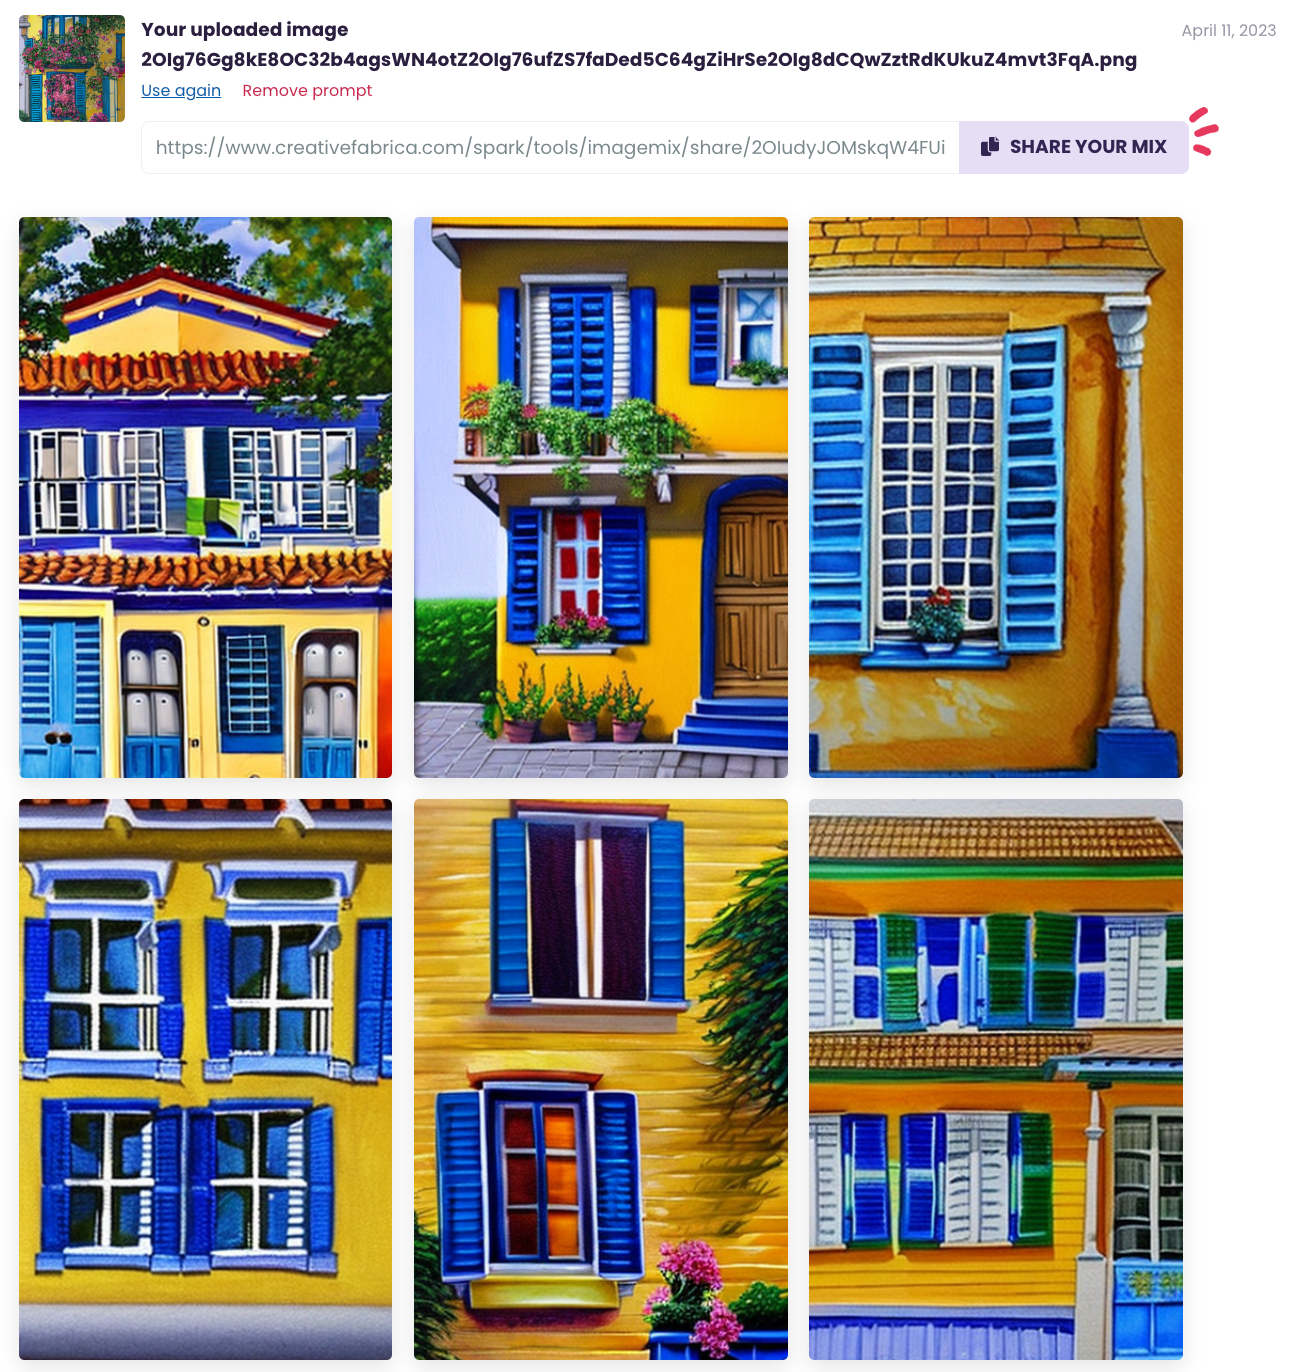
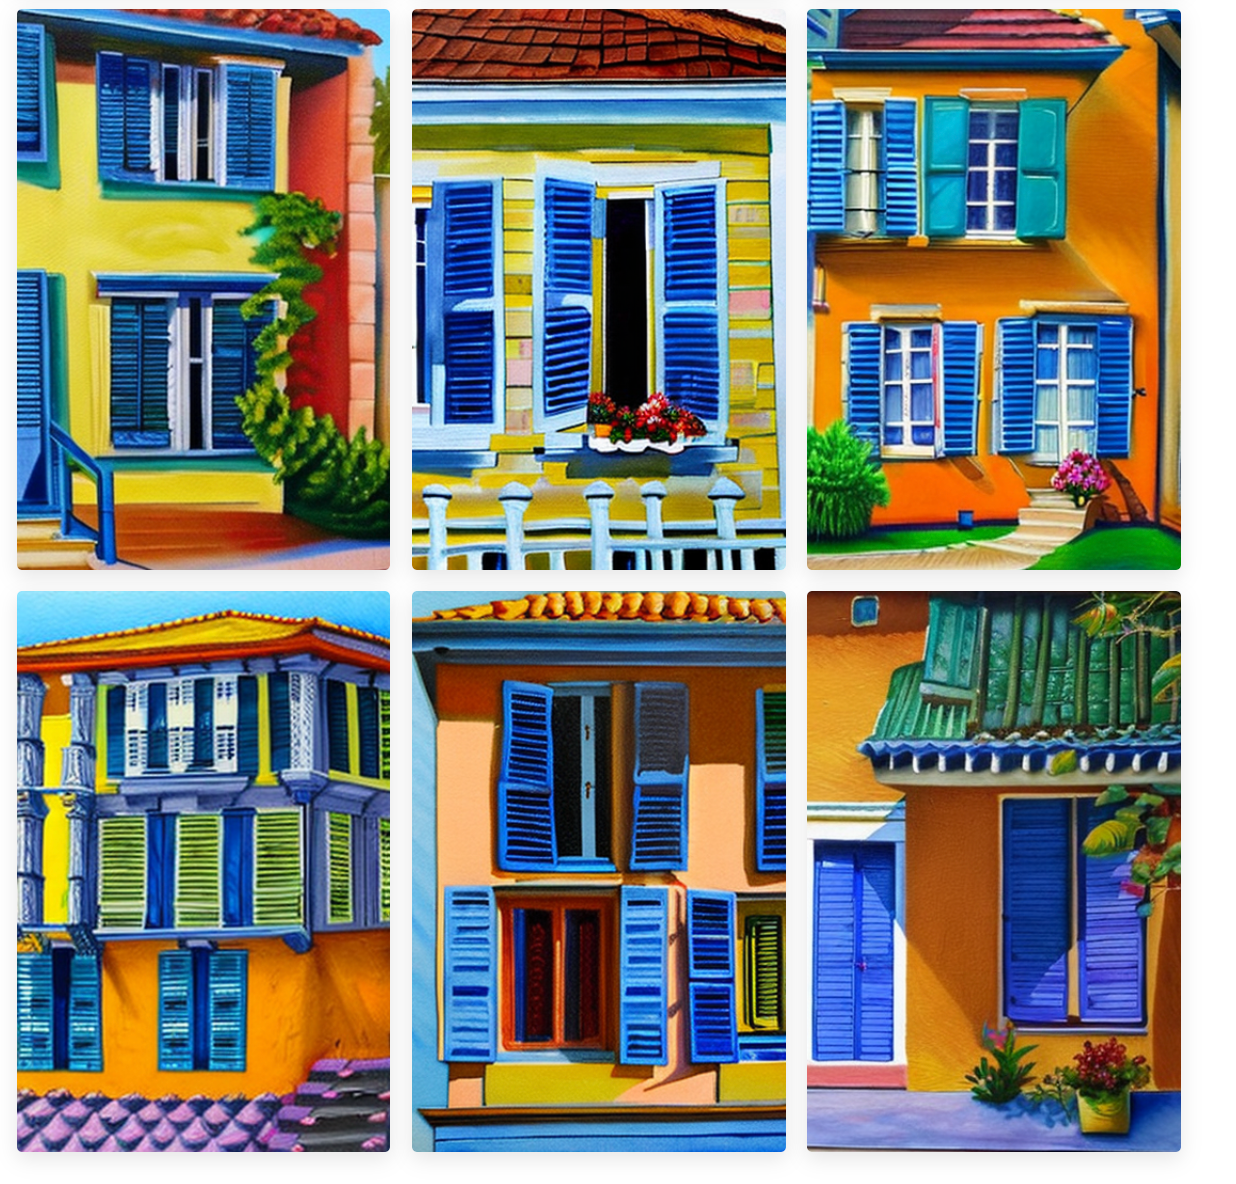
I uploaded a previous image from CF Spark Art. With CF Spark ImageMix, you don’t enter a prompt. Instead, you let the generator… do its thing! In this example, CF Spark ImageMix provided 12 variations of the image I uploaded.
Results
CF Spark Prompt Builder
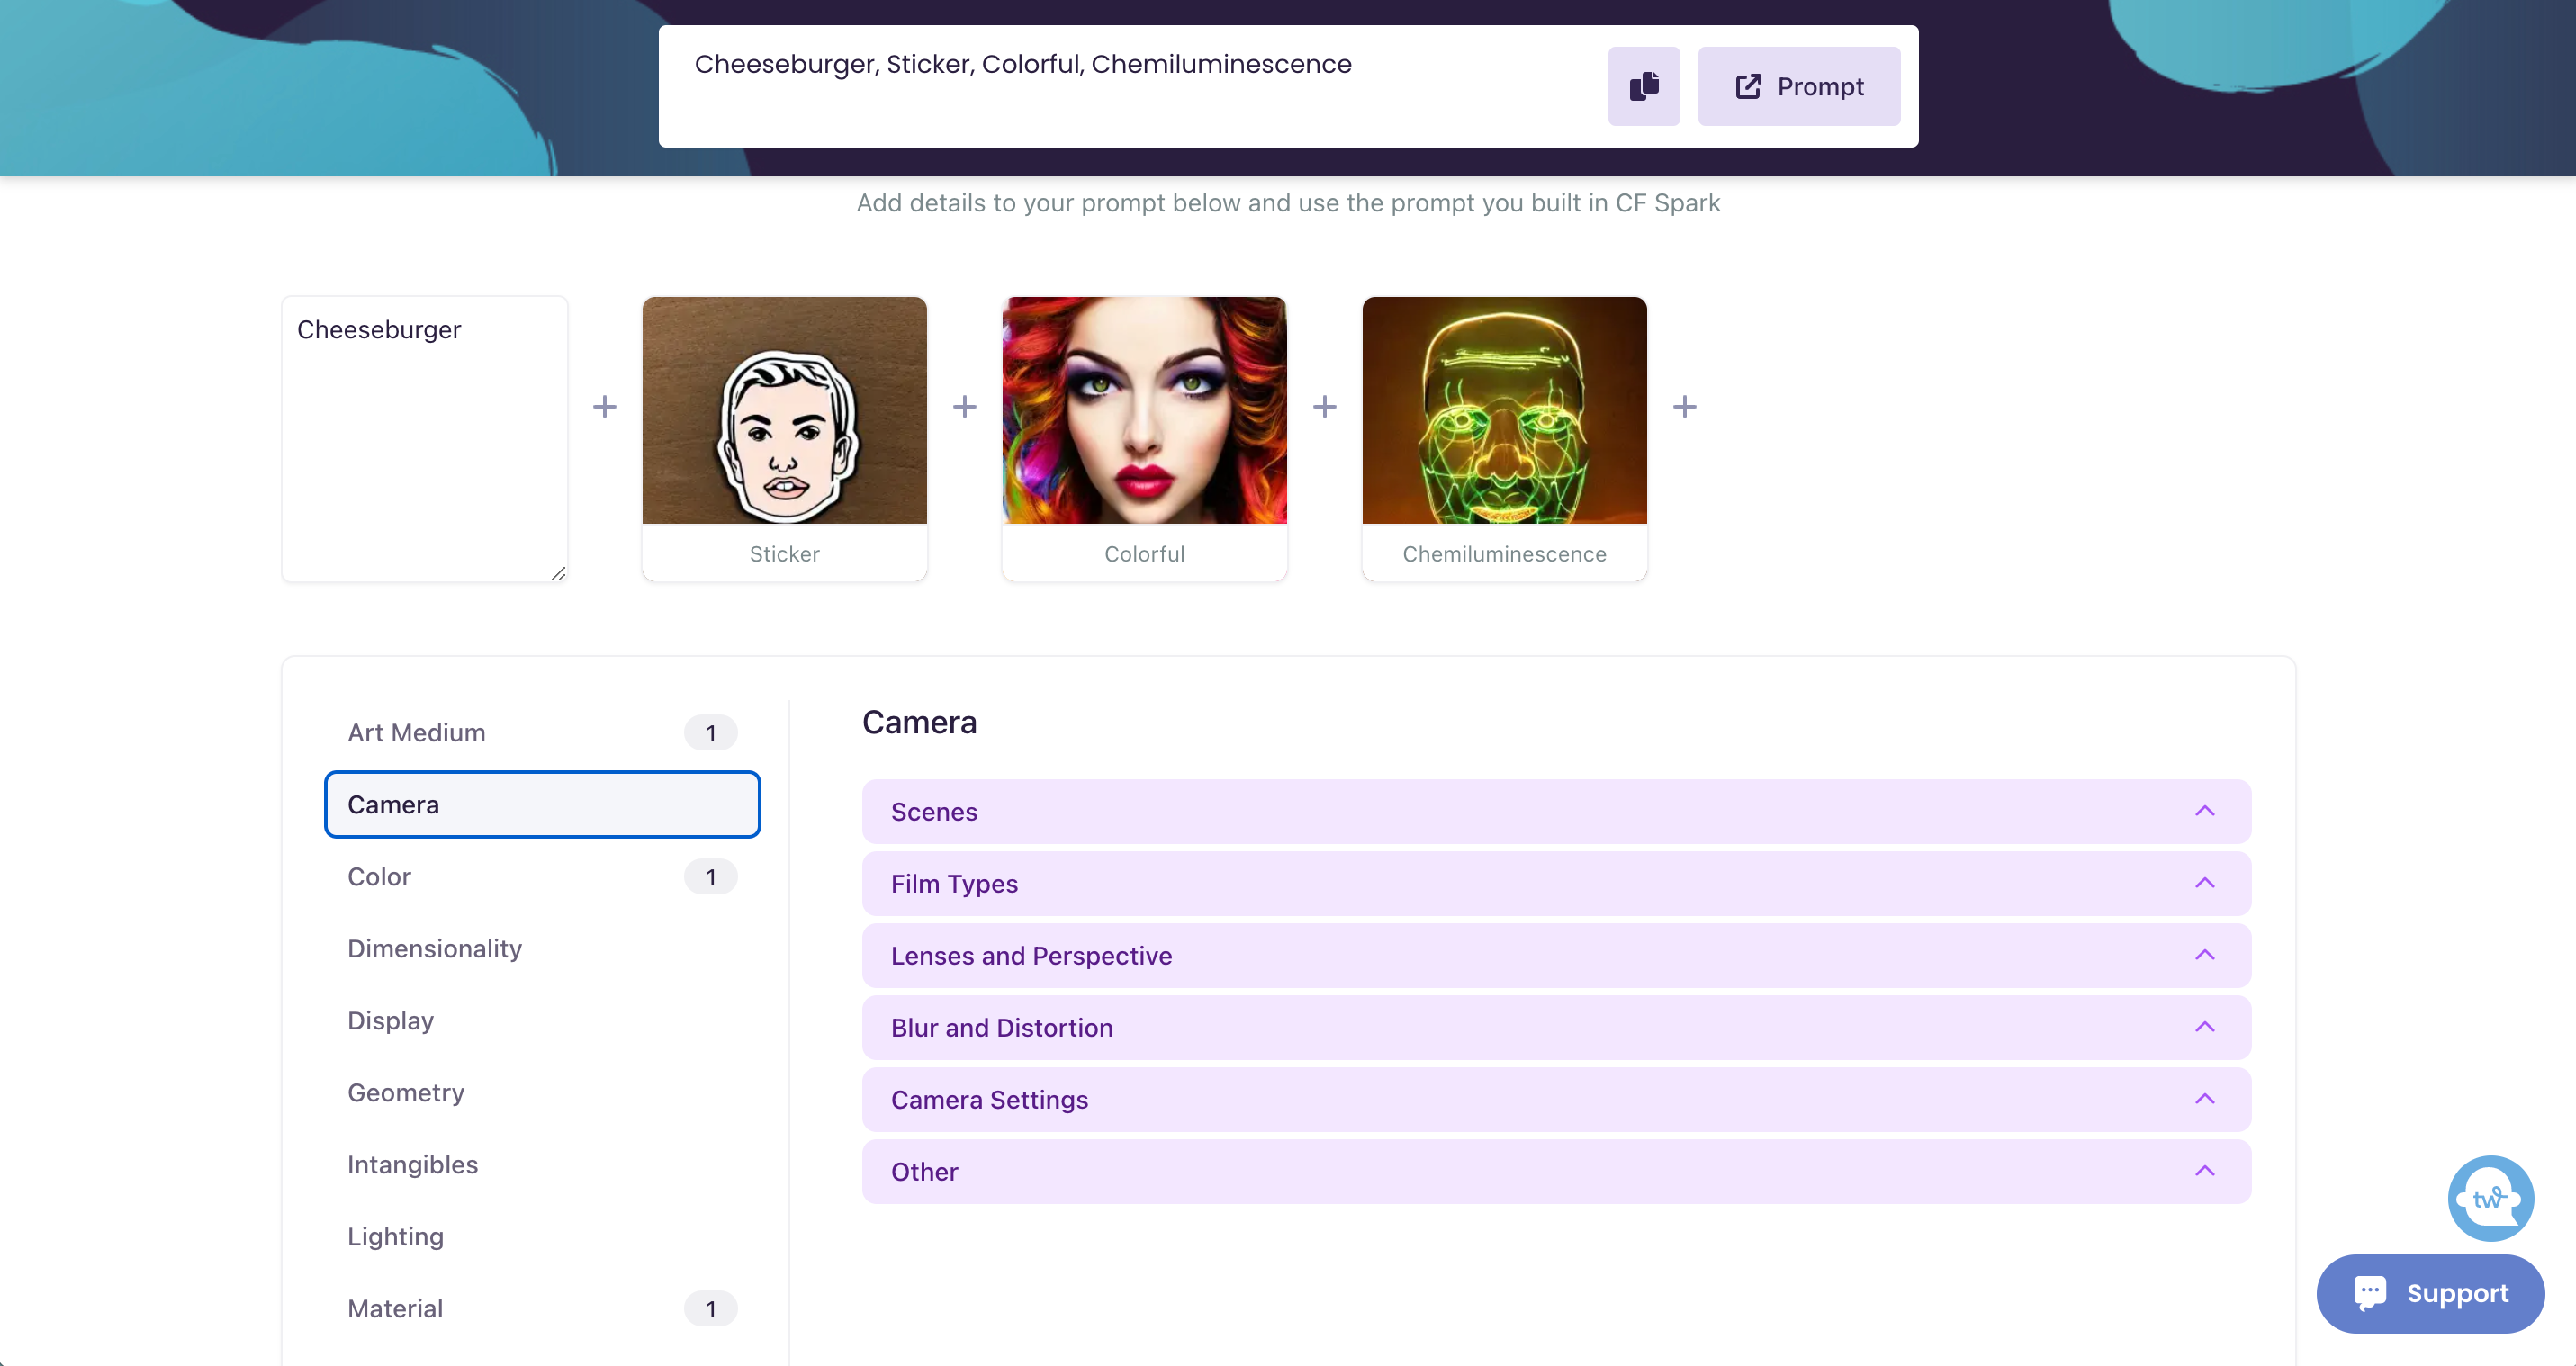
One aspect of CF Spark that I really like is the prompt builder. This section of CF Spark allows you to choose different categories to help you generate more detailed prompts.
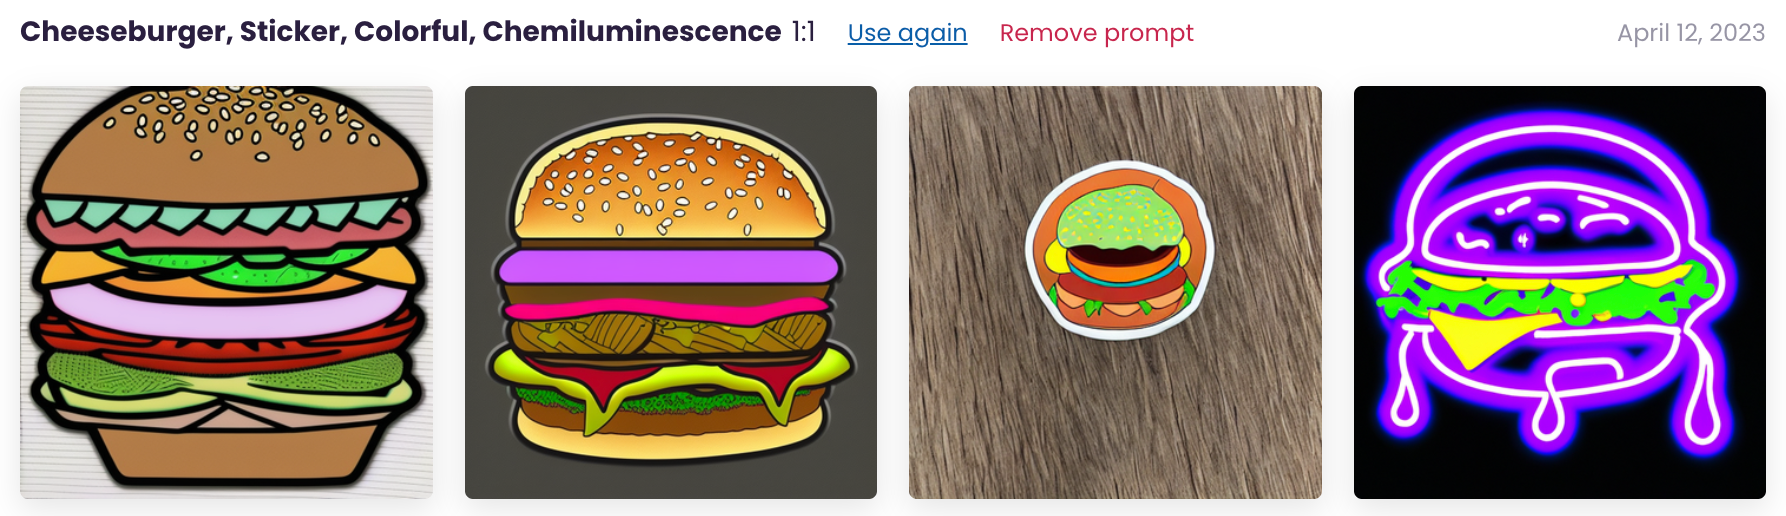
In this example, you first enter the prompt (I entered cheeseburger). Then you click through various categories and can add additional prompts. My final prompt is: cheeseburger + sticker + colorful + Chemiluminescence.
My final generated images are:
CF Spark Writer
If you’ve checked out ChatGPT, CF Spark Writer works the same way.
The interface of CF Spark Writer is broken into various text areas. I like the design, as it helps strike up ideas in my mind to use the tool.
Some of the suggestions Creative Fabrica offers to use CF Spark Writer include:
Etsy store names
Product listing titles
Greeting cards
Excuse writer (my personal favorite!)
Blog writing tools
Facebook ad writing
Email writing
Book writing
Start up ideas
…and more.
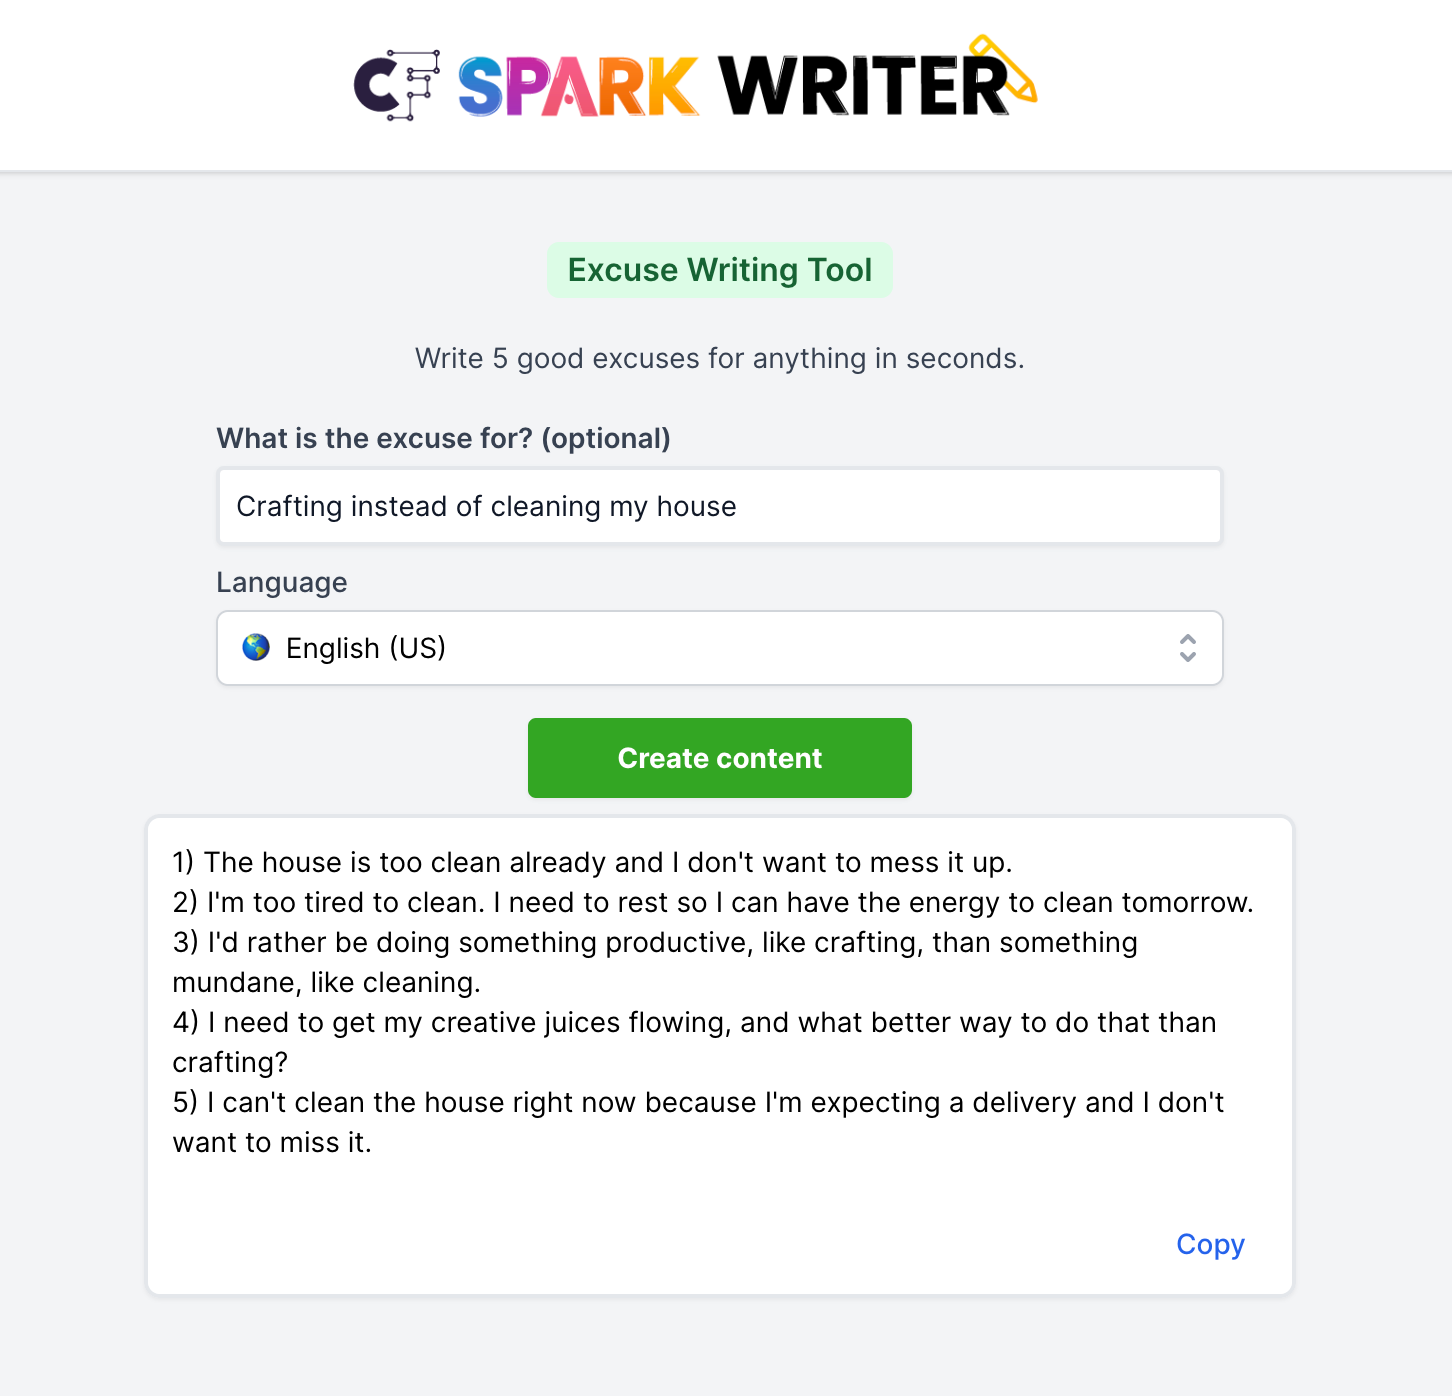
Here’s a quick example:
Honestly, the excuses all work for me. I’ll copy and paste them to Mr. Cutting for Business right away.
CF Spark Community
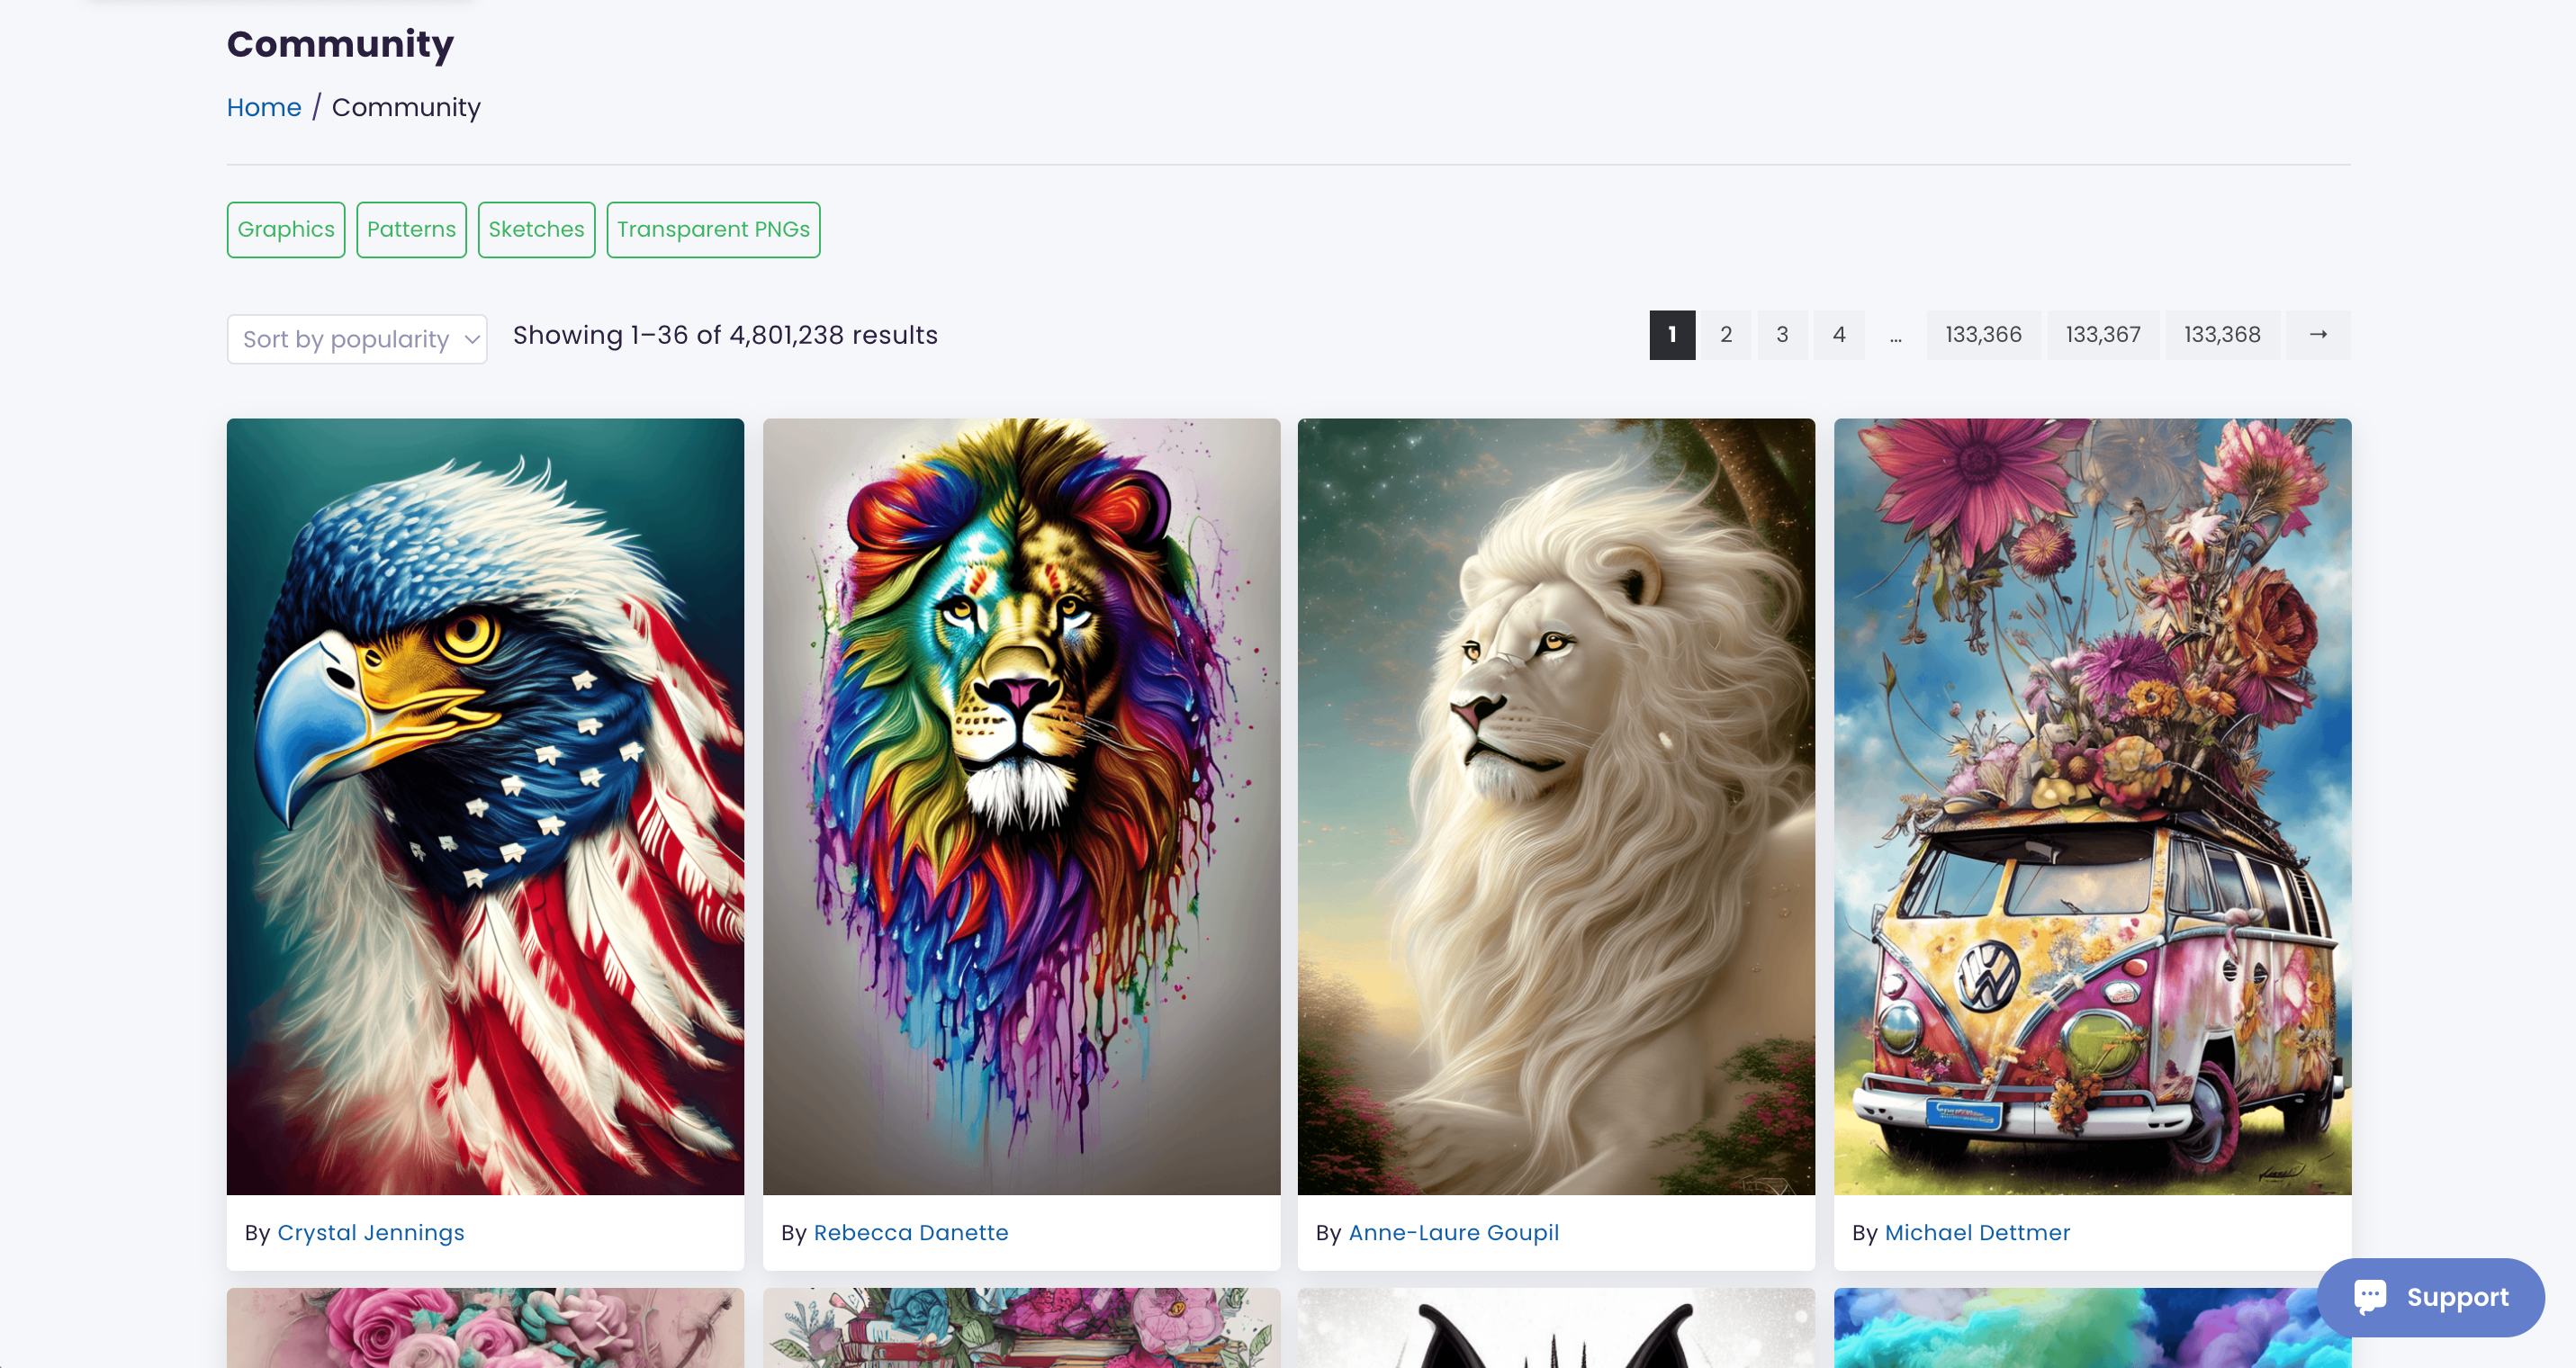
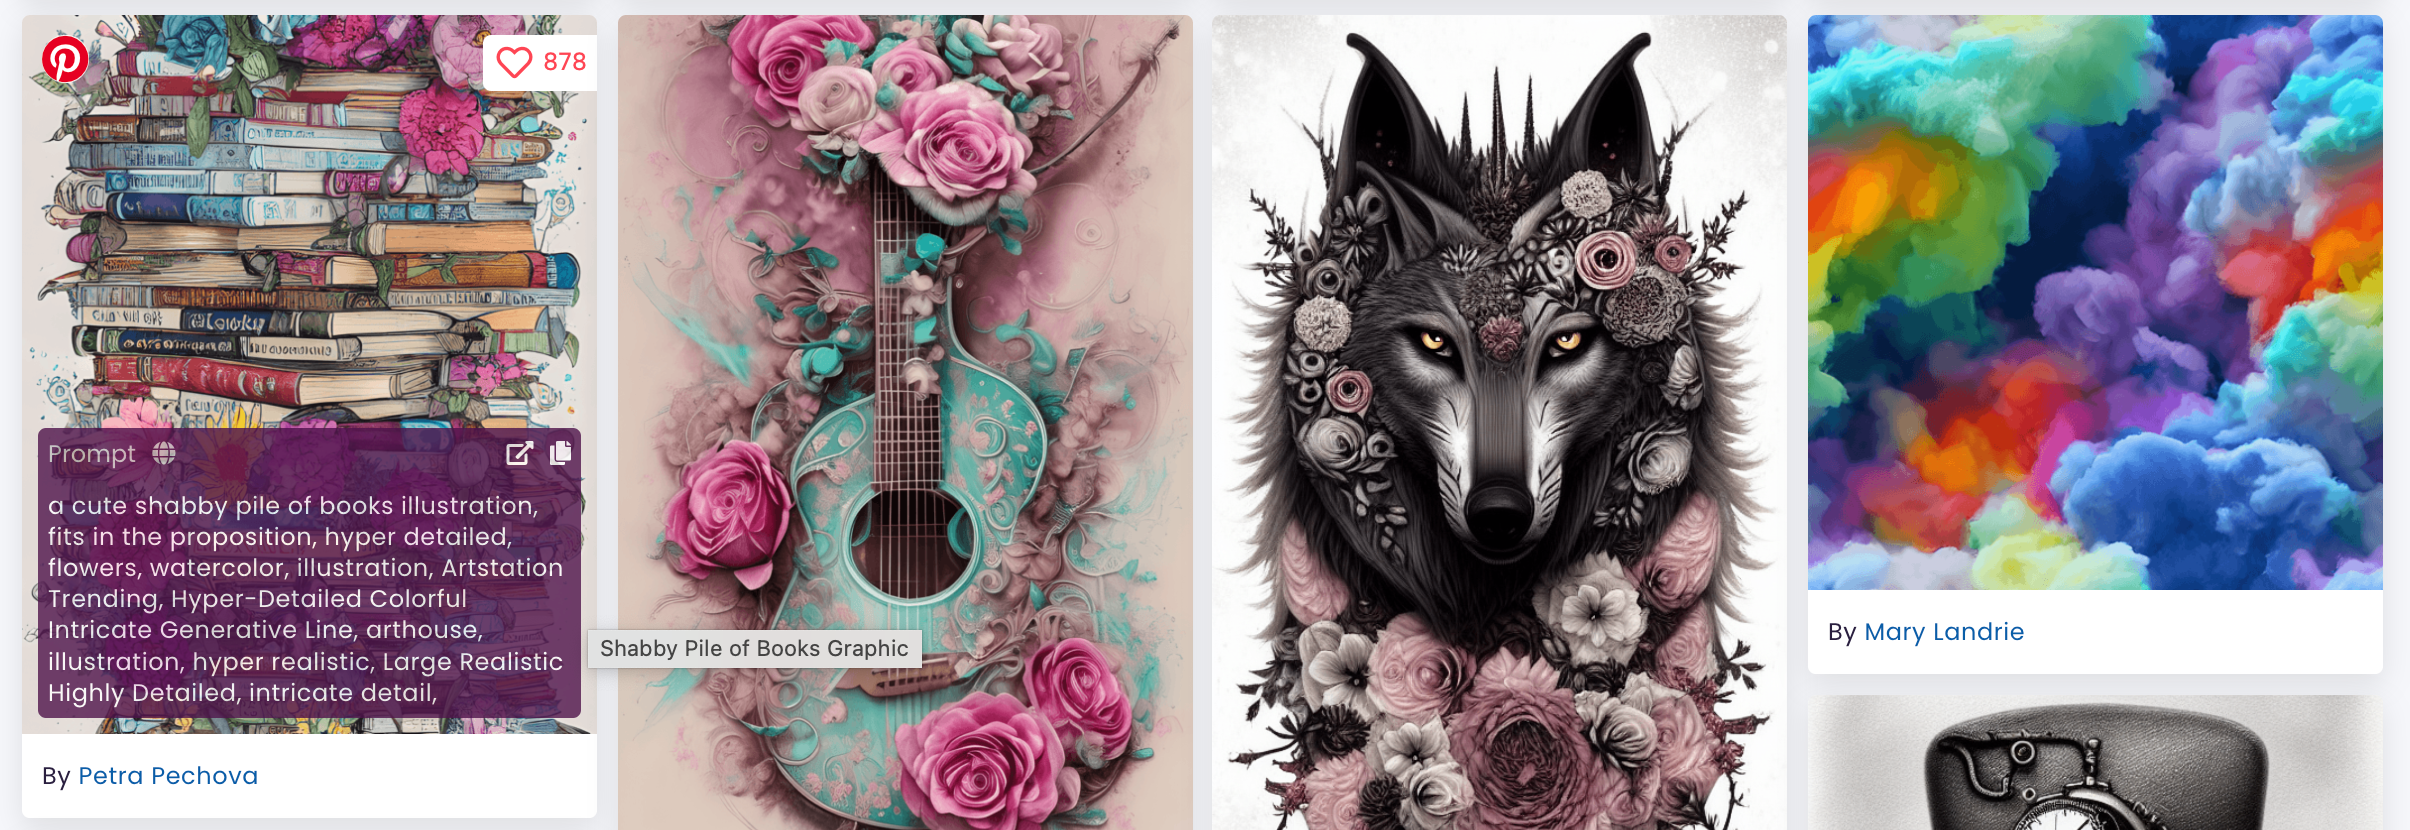
The last aspect of CF Spark is the community feed. The community feed allows users to see what other users are creating. For me, it serves as inspiration, but I’ve also learned a lot from it.
When you drag your mouse over an image in the CF Spark Community feed, you can see the prompt that the user used to create the image.
Of course, if you don’t have to share your prompts. This article details how to hide your prompts from the Community Feed.
How Much Does CF Spark Cost?
CF Spark is entirely free and you can create as many images as you’d like.
However, using it as a free user can be slow. If you want to speed it up, you can upgrade to a paid subscription for $9 a month – which includes 1,000 speed credits.
Additionally, paid users can sell their images in the marketplace.
What About Copyrights and AI?
I’ve talked about copyrights for AI generated content in my article about Dall-E 2, but it is worth repeating.
On March 16, 2023, the US Copyright Office released a new policy that you should read. In short, the policy states that AI generated works are not eligible for copyright.
Now, it is your turn to tell me all your thoughts on AI image generation. Leave your comments below about CF Spark.
A few weeks ago, I published a series on using ChatGPT in your craft business. After completing the series, a reader asked me if I had ever used AI image creation programs – like Dall-E 2.
I’ll be honest, in the months that I was researching ChatGPT, I did play around with a few different AI image creators. Unfortunately, I didn’t have great results. It seems that I could never really get the programs to create what I was picturing in my head. I have a feeling I wasn’t writing the prompts well enough to get good results.
But, in the weeks since that ChatGPT series, I revisited AI image creation. This article details some of my results with AI image creation using Dall-E 2 in your craft business. If you are not familiar with Dall-E 2, it is an AI image generator created by OpenAI. OpenAI is also the creator of ChatGPT.
5 Ways to Use Dall-E 2 in Your Craft Business
1. Patterns and Backgrounds
Prompt I Put into Dall-E 2
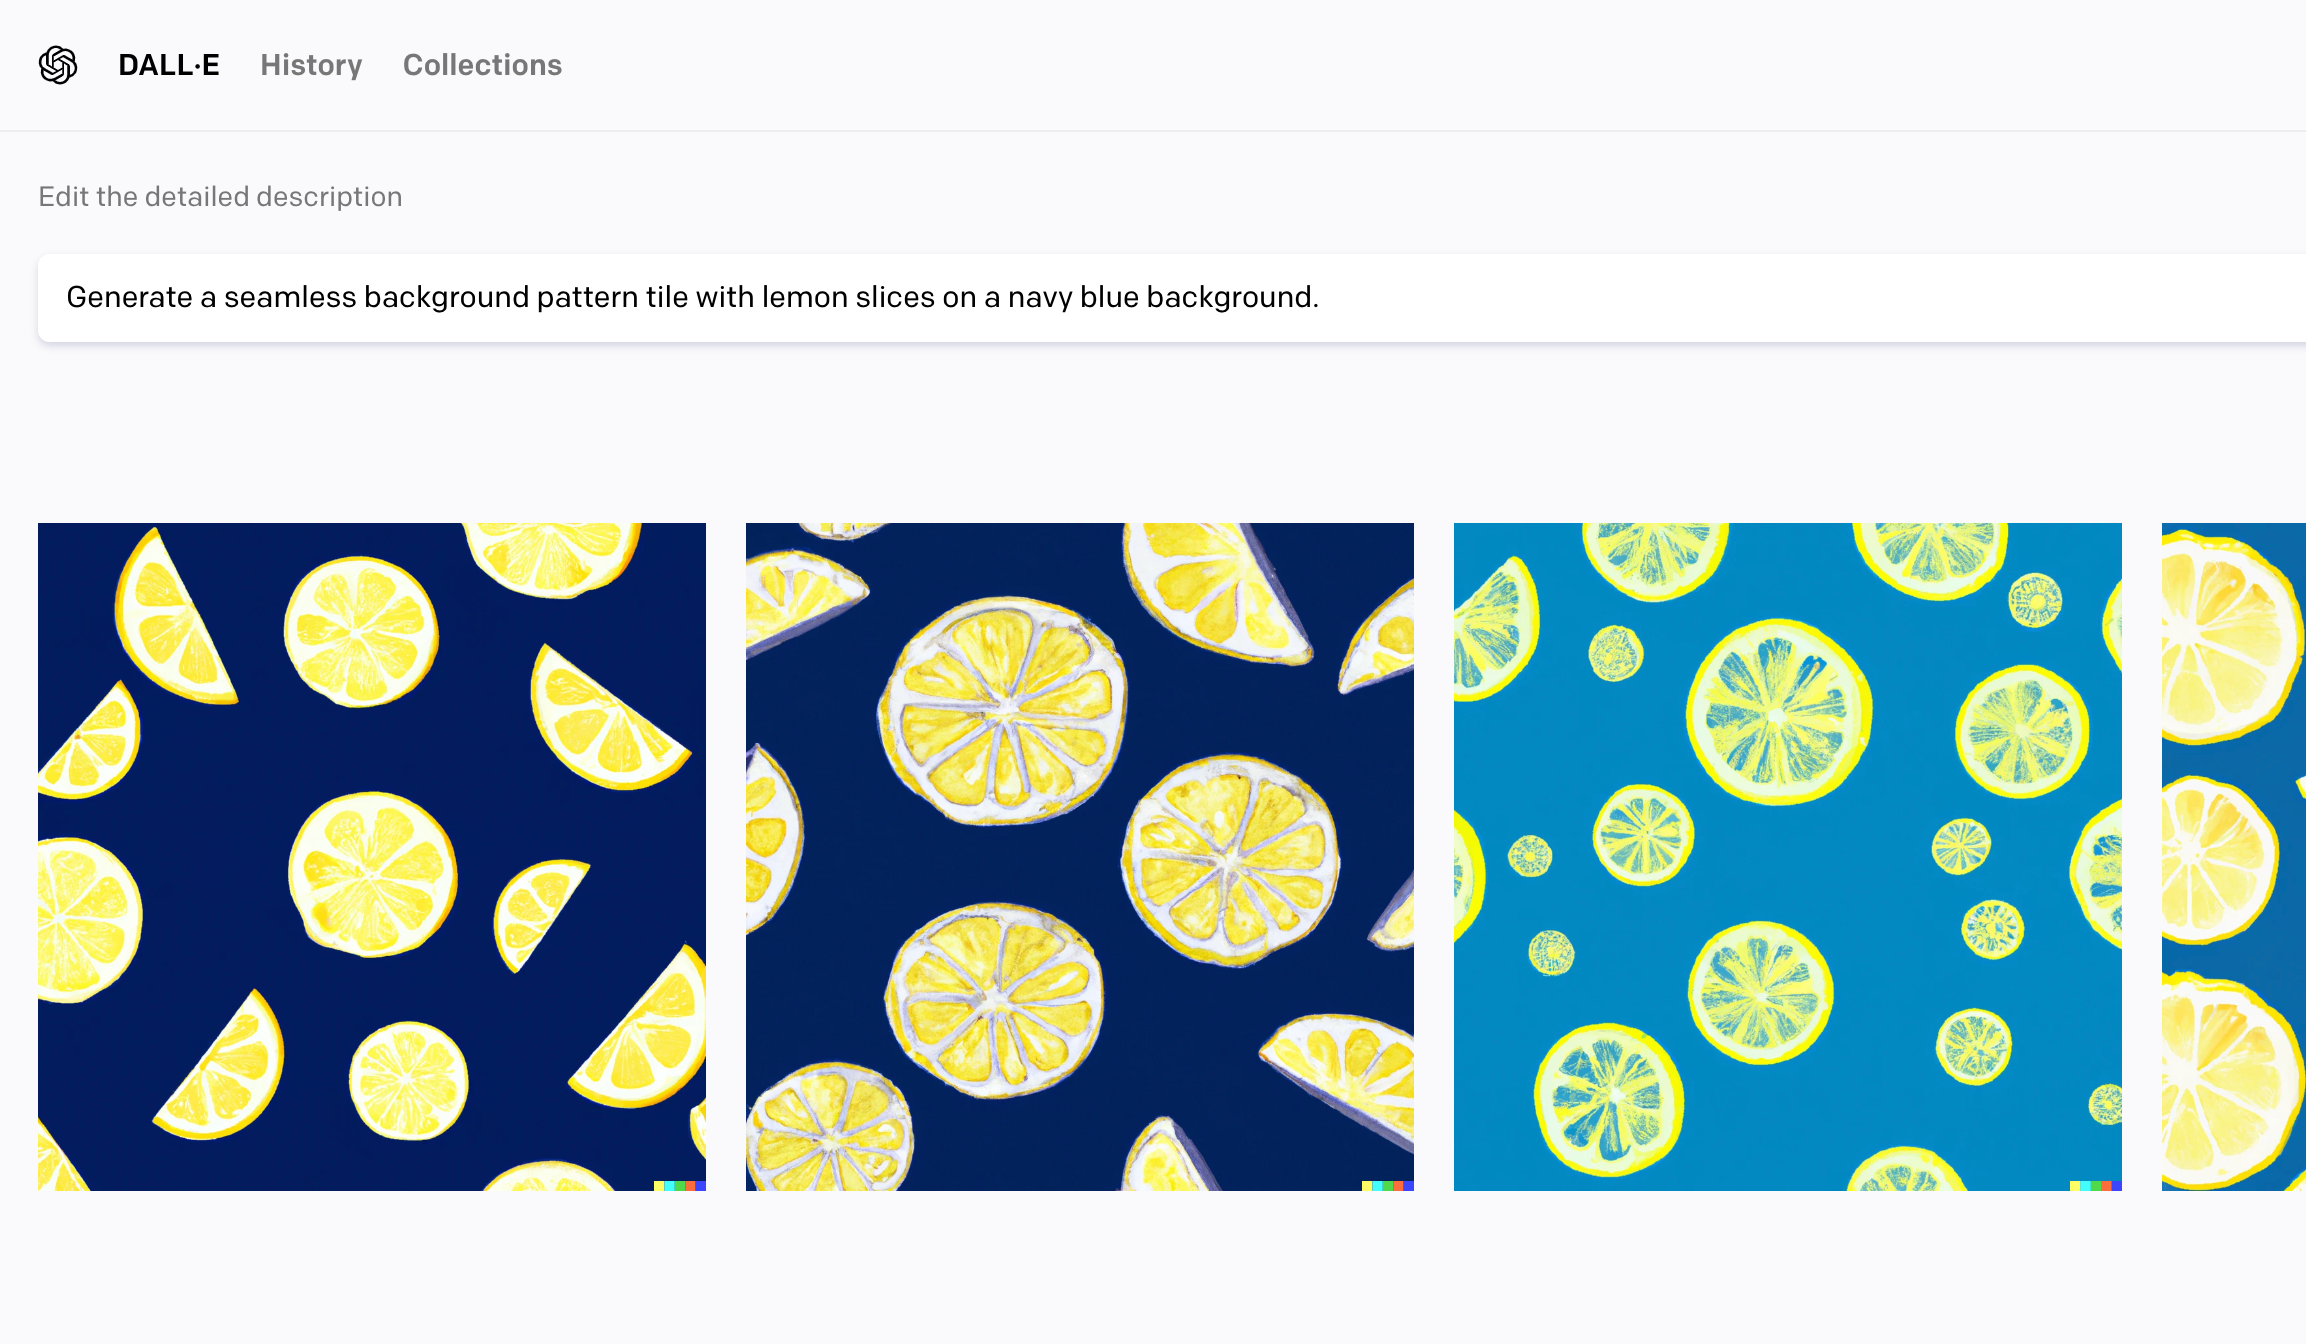
Generate a seamless background pattern tile with lemon slices on a navy blue background.
Dall-E 2Results
What I Could Do with the Images
You could create your own scrapbook paper or printable vinyl, create clothing, or use as a photography background.
Sample Use
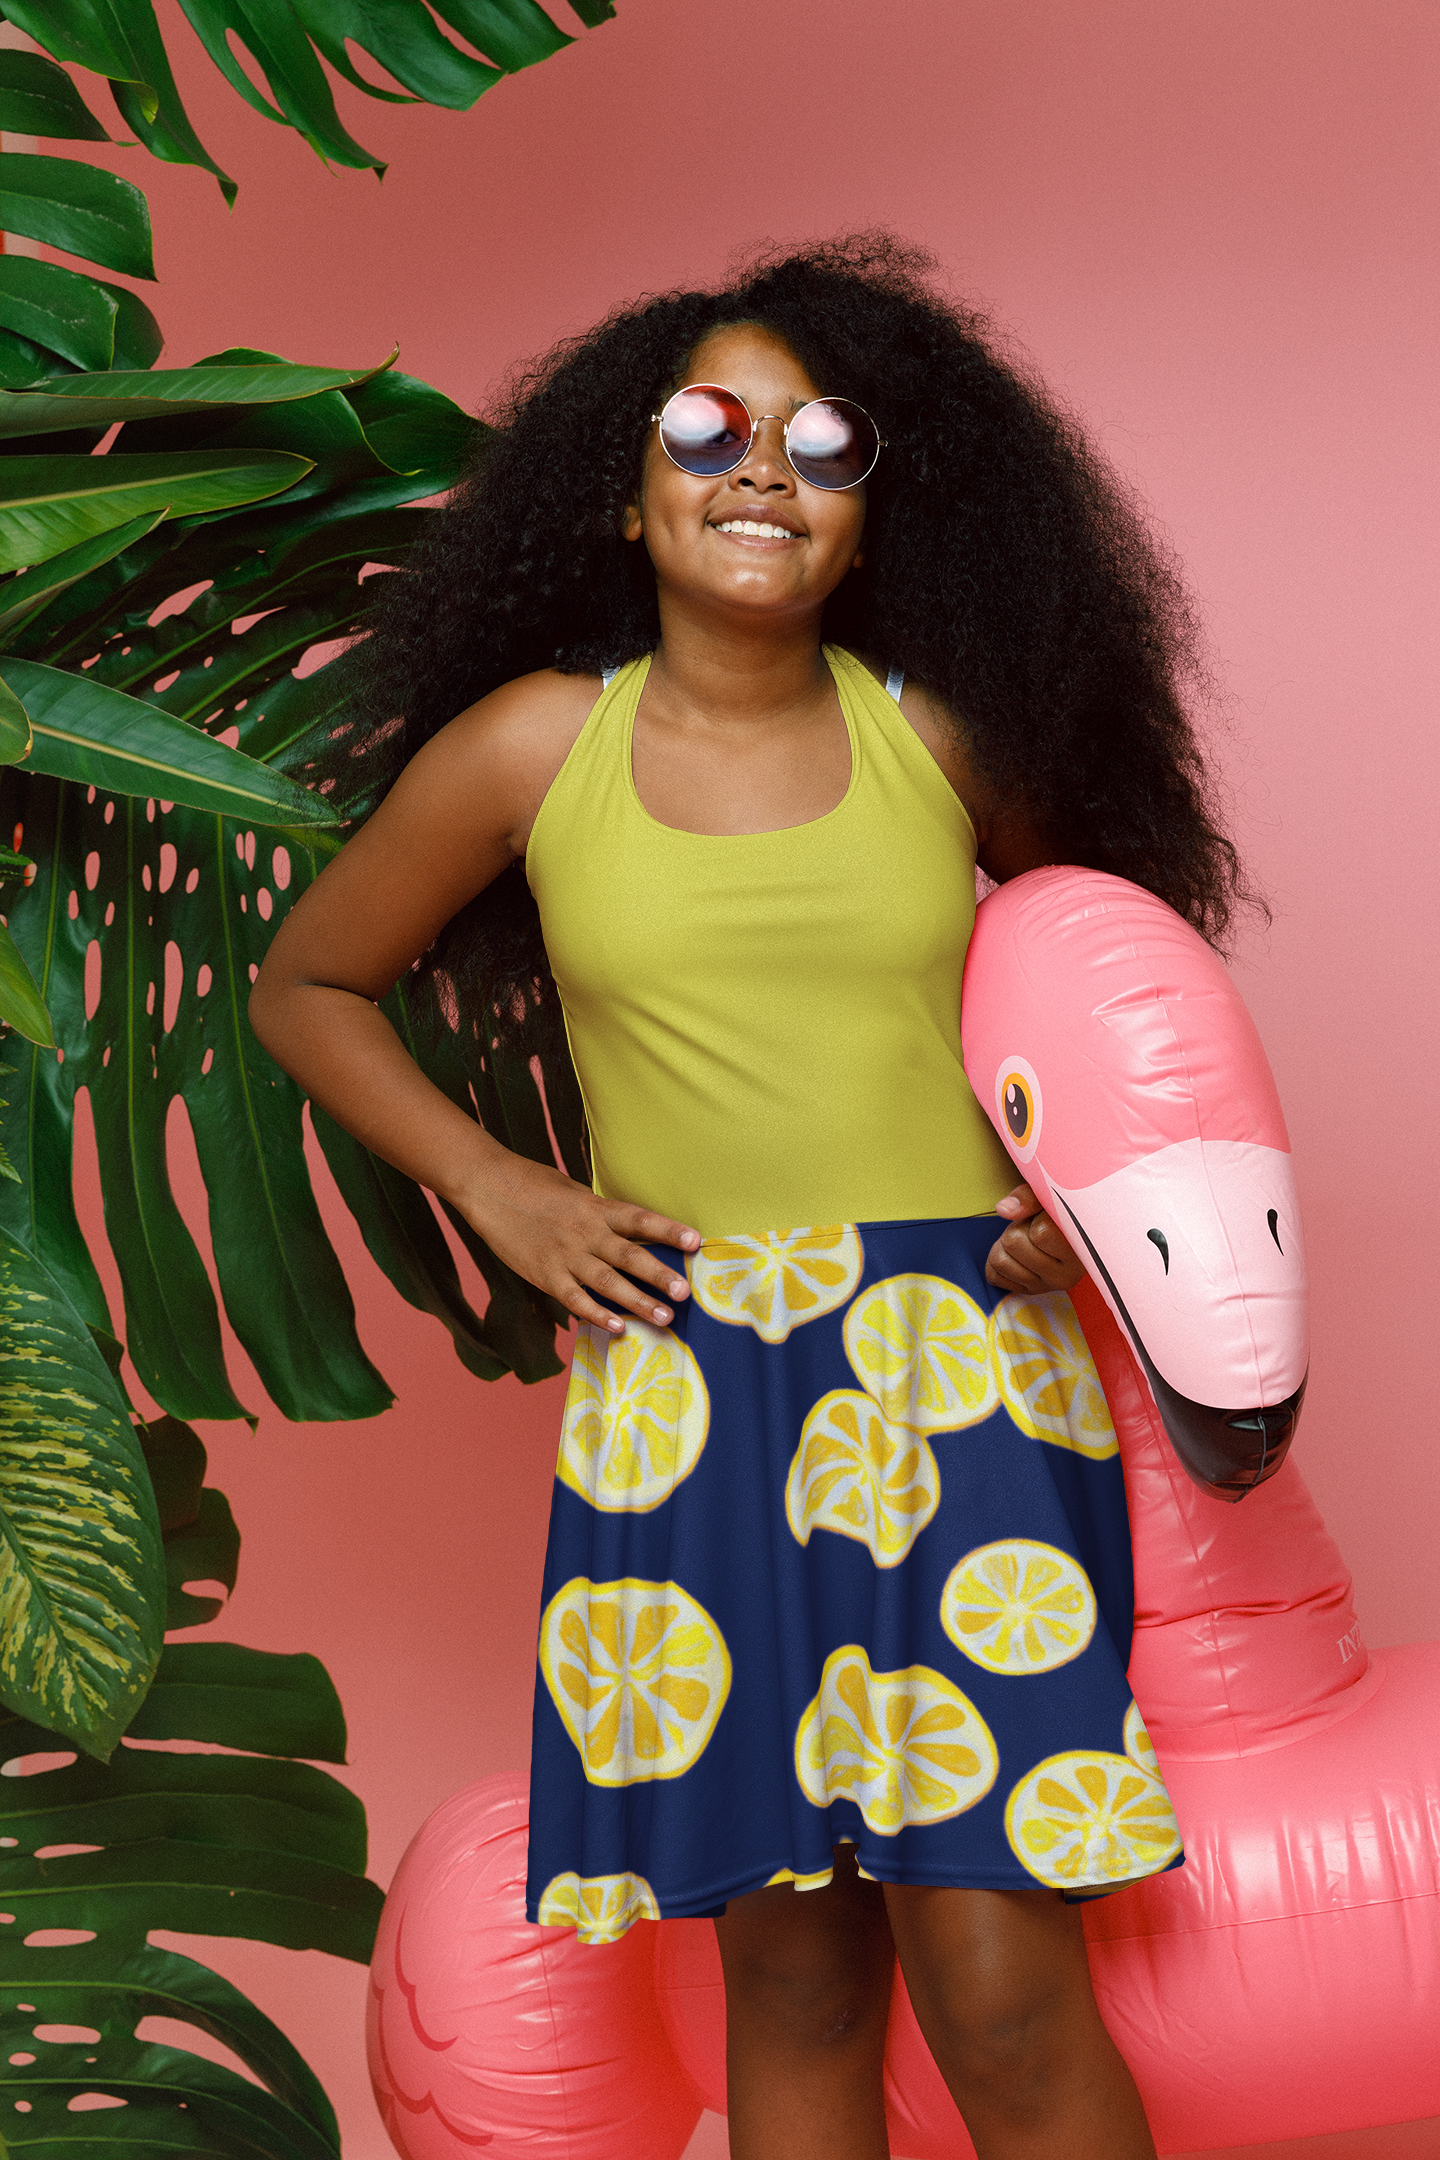
In this example, I used the seamless tile on a printed fabric for a sundress.
2. Clipart and Cut Files
Prompt I Put into Dall-E 2
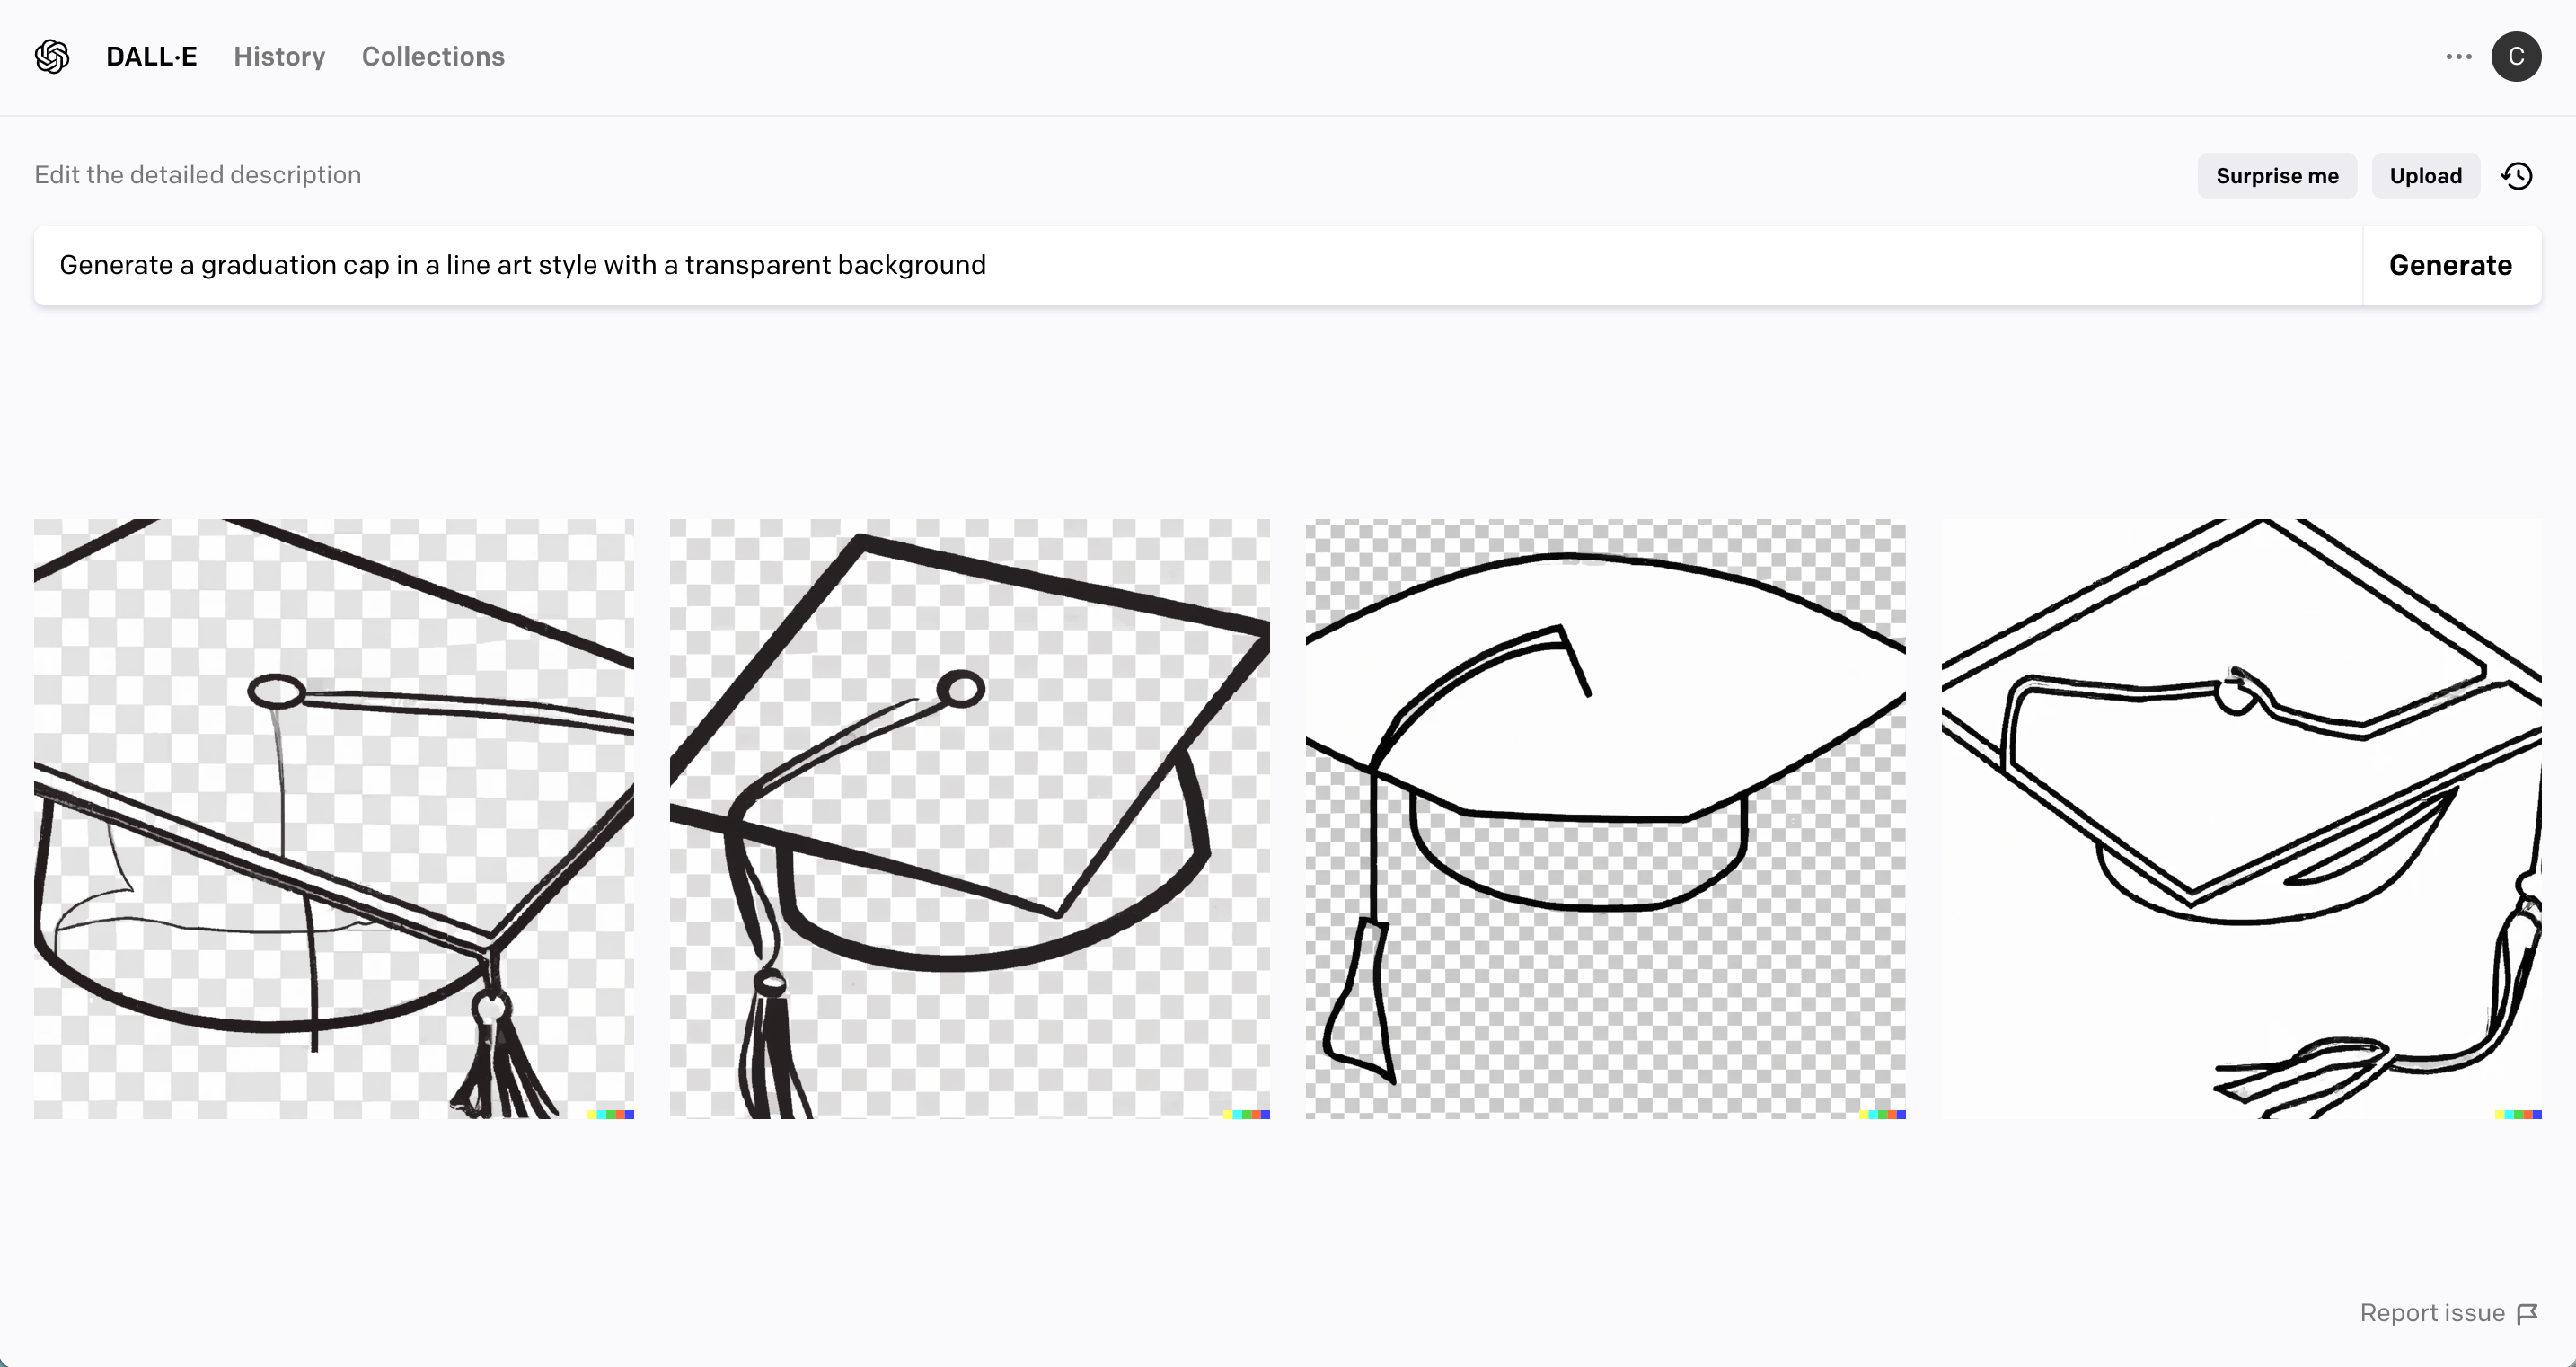
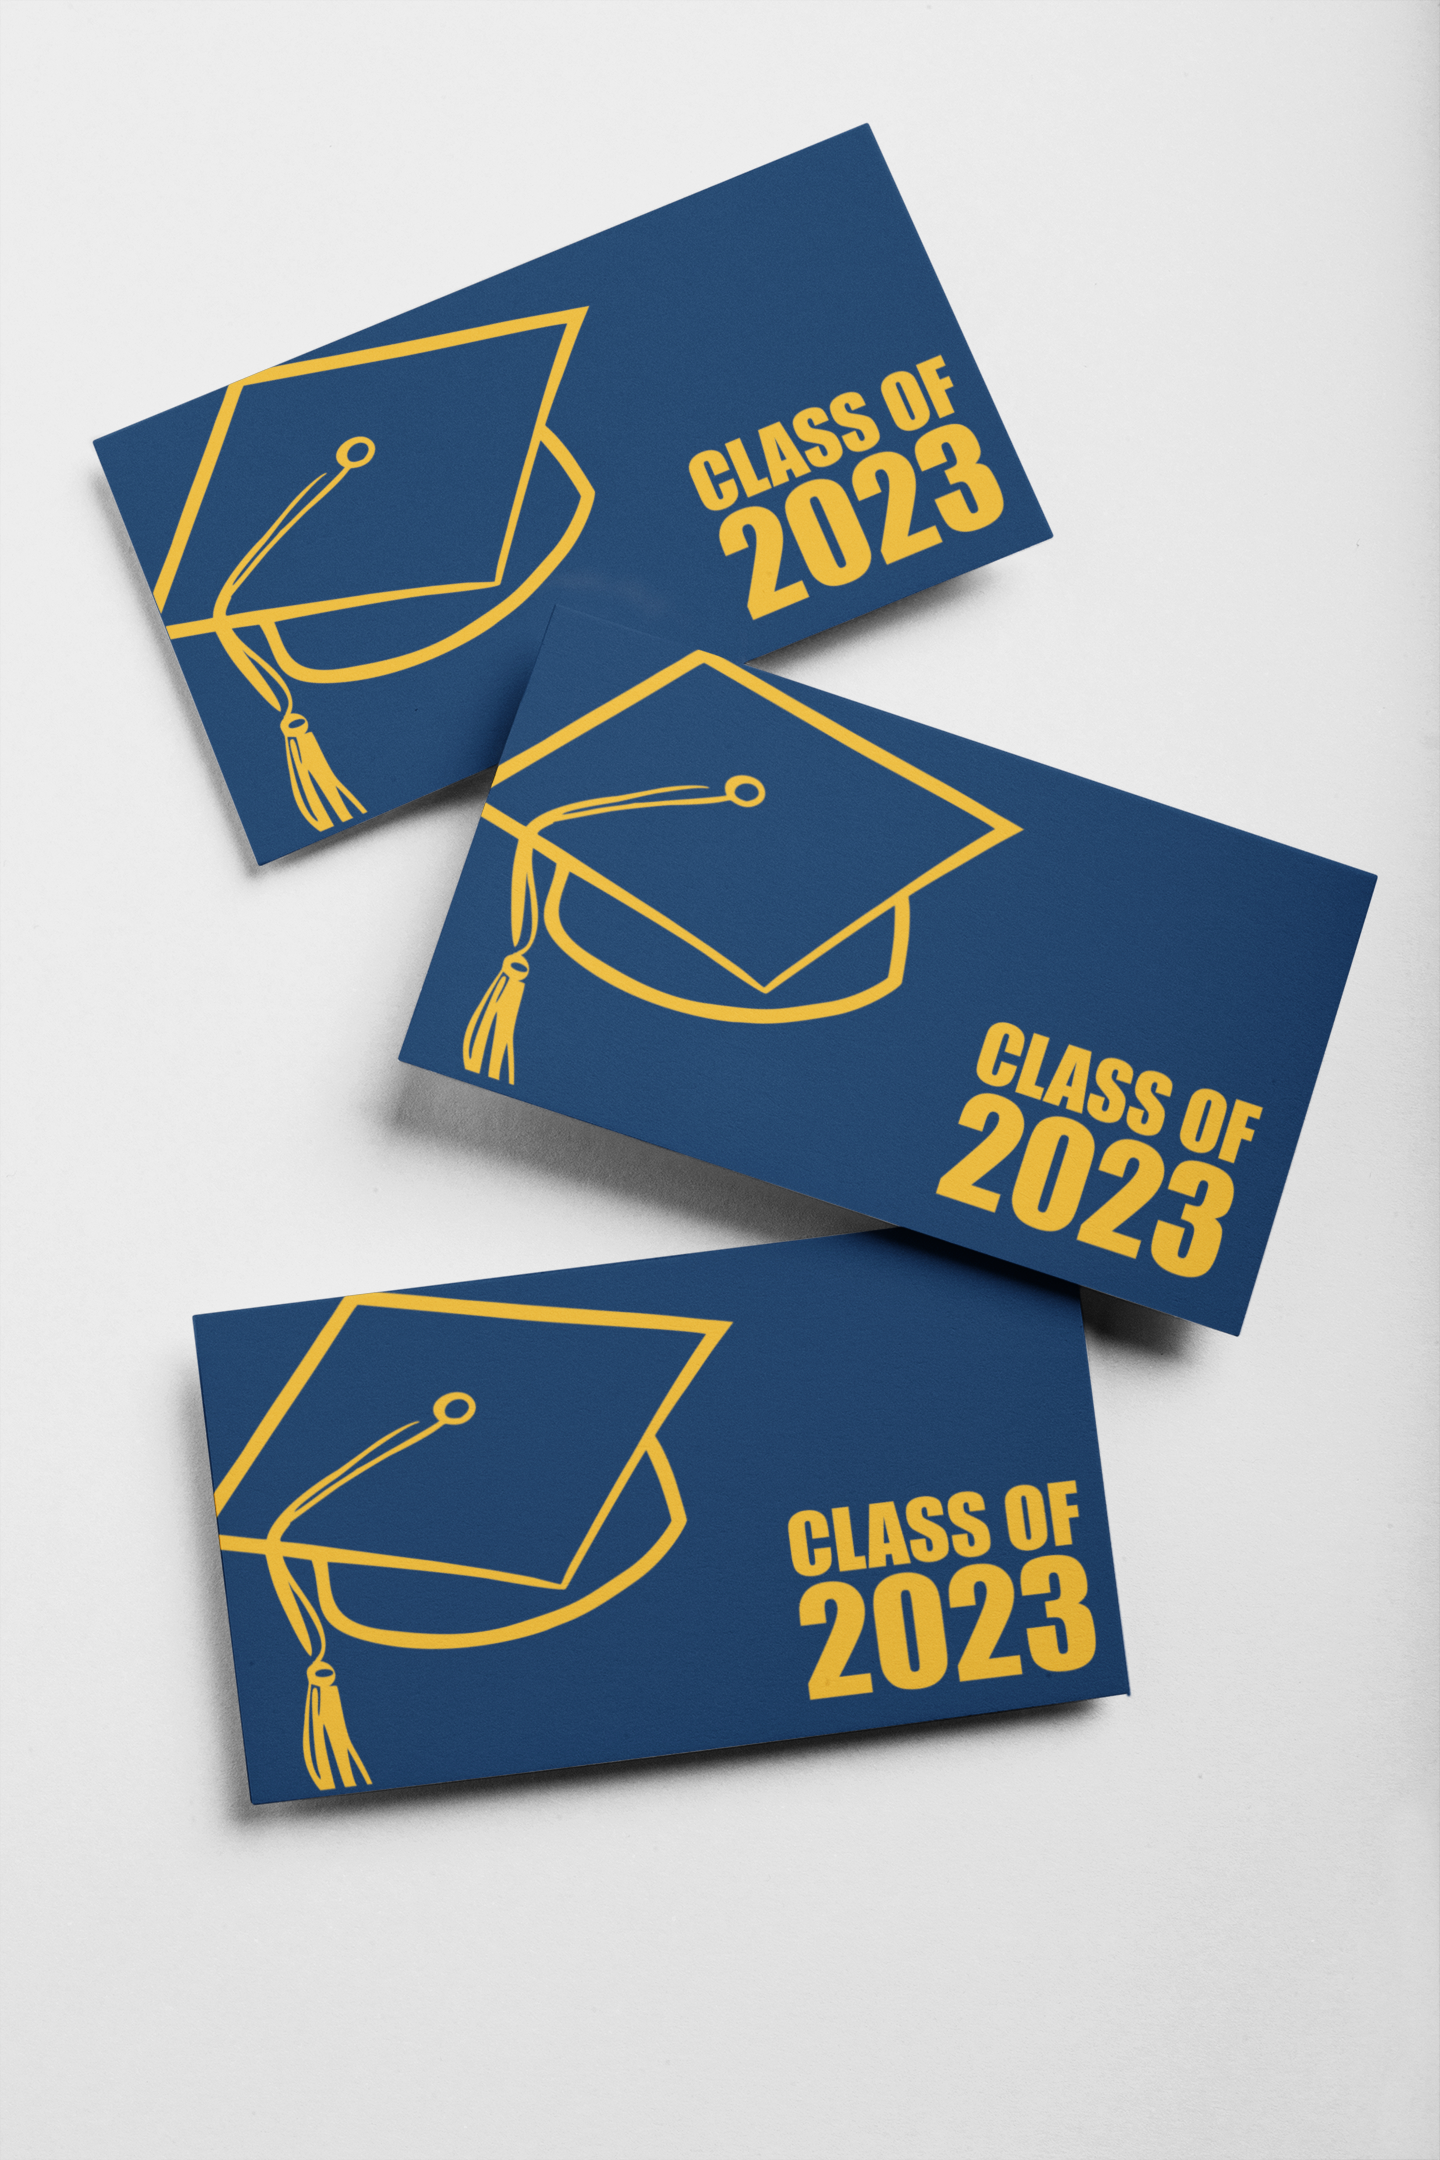
Generate a graduation cap in a line art style with a transparent background.
Dall-E 2 Results
What I Could Do with the Images
Clipart can be used many different ways. In this example, I could cut the design in vinyl, create a stamp using the image, or an SVG cut file.
Sample Use
In this example, I created Class of 2023 Graduation cards.
3. Website Sale Images and Graphics
Prompt I Put into Dall-E 2
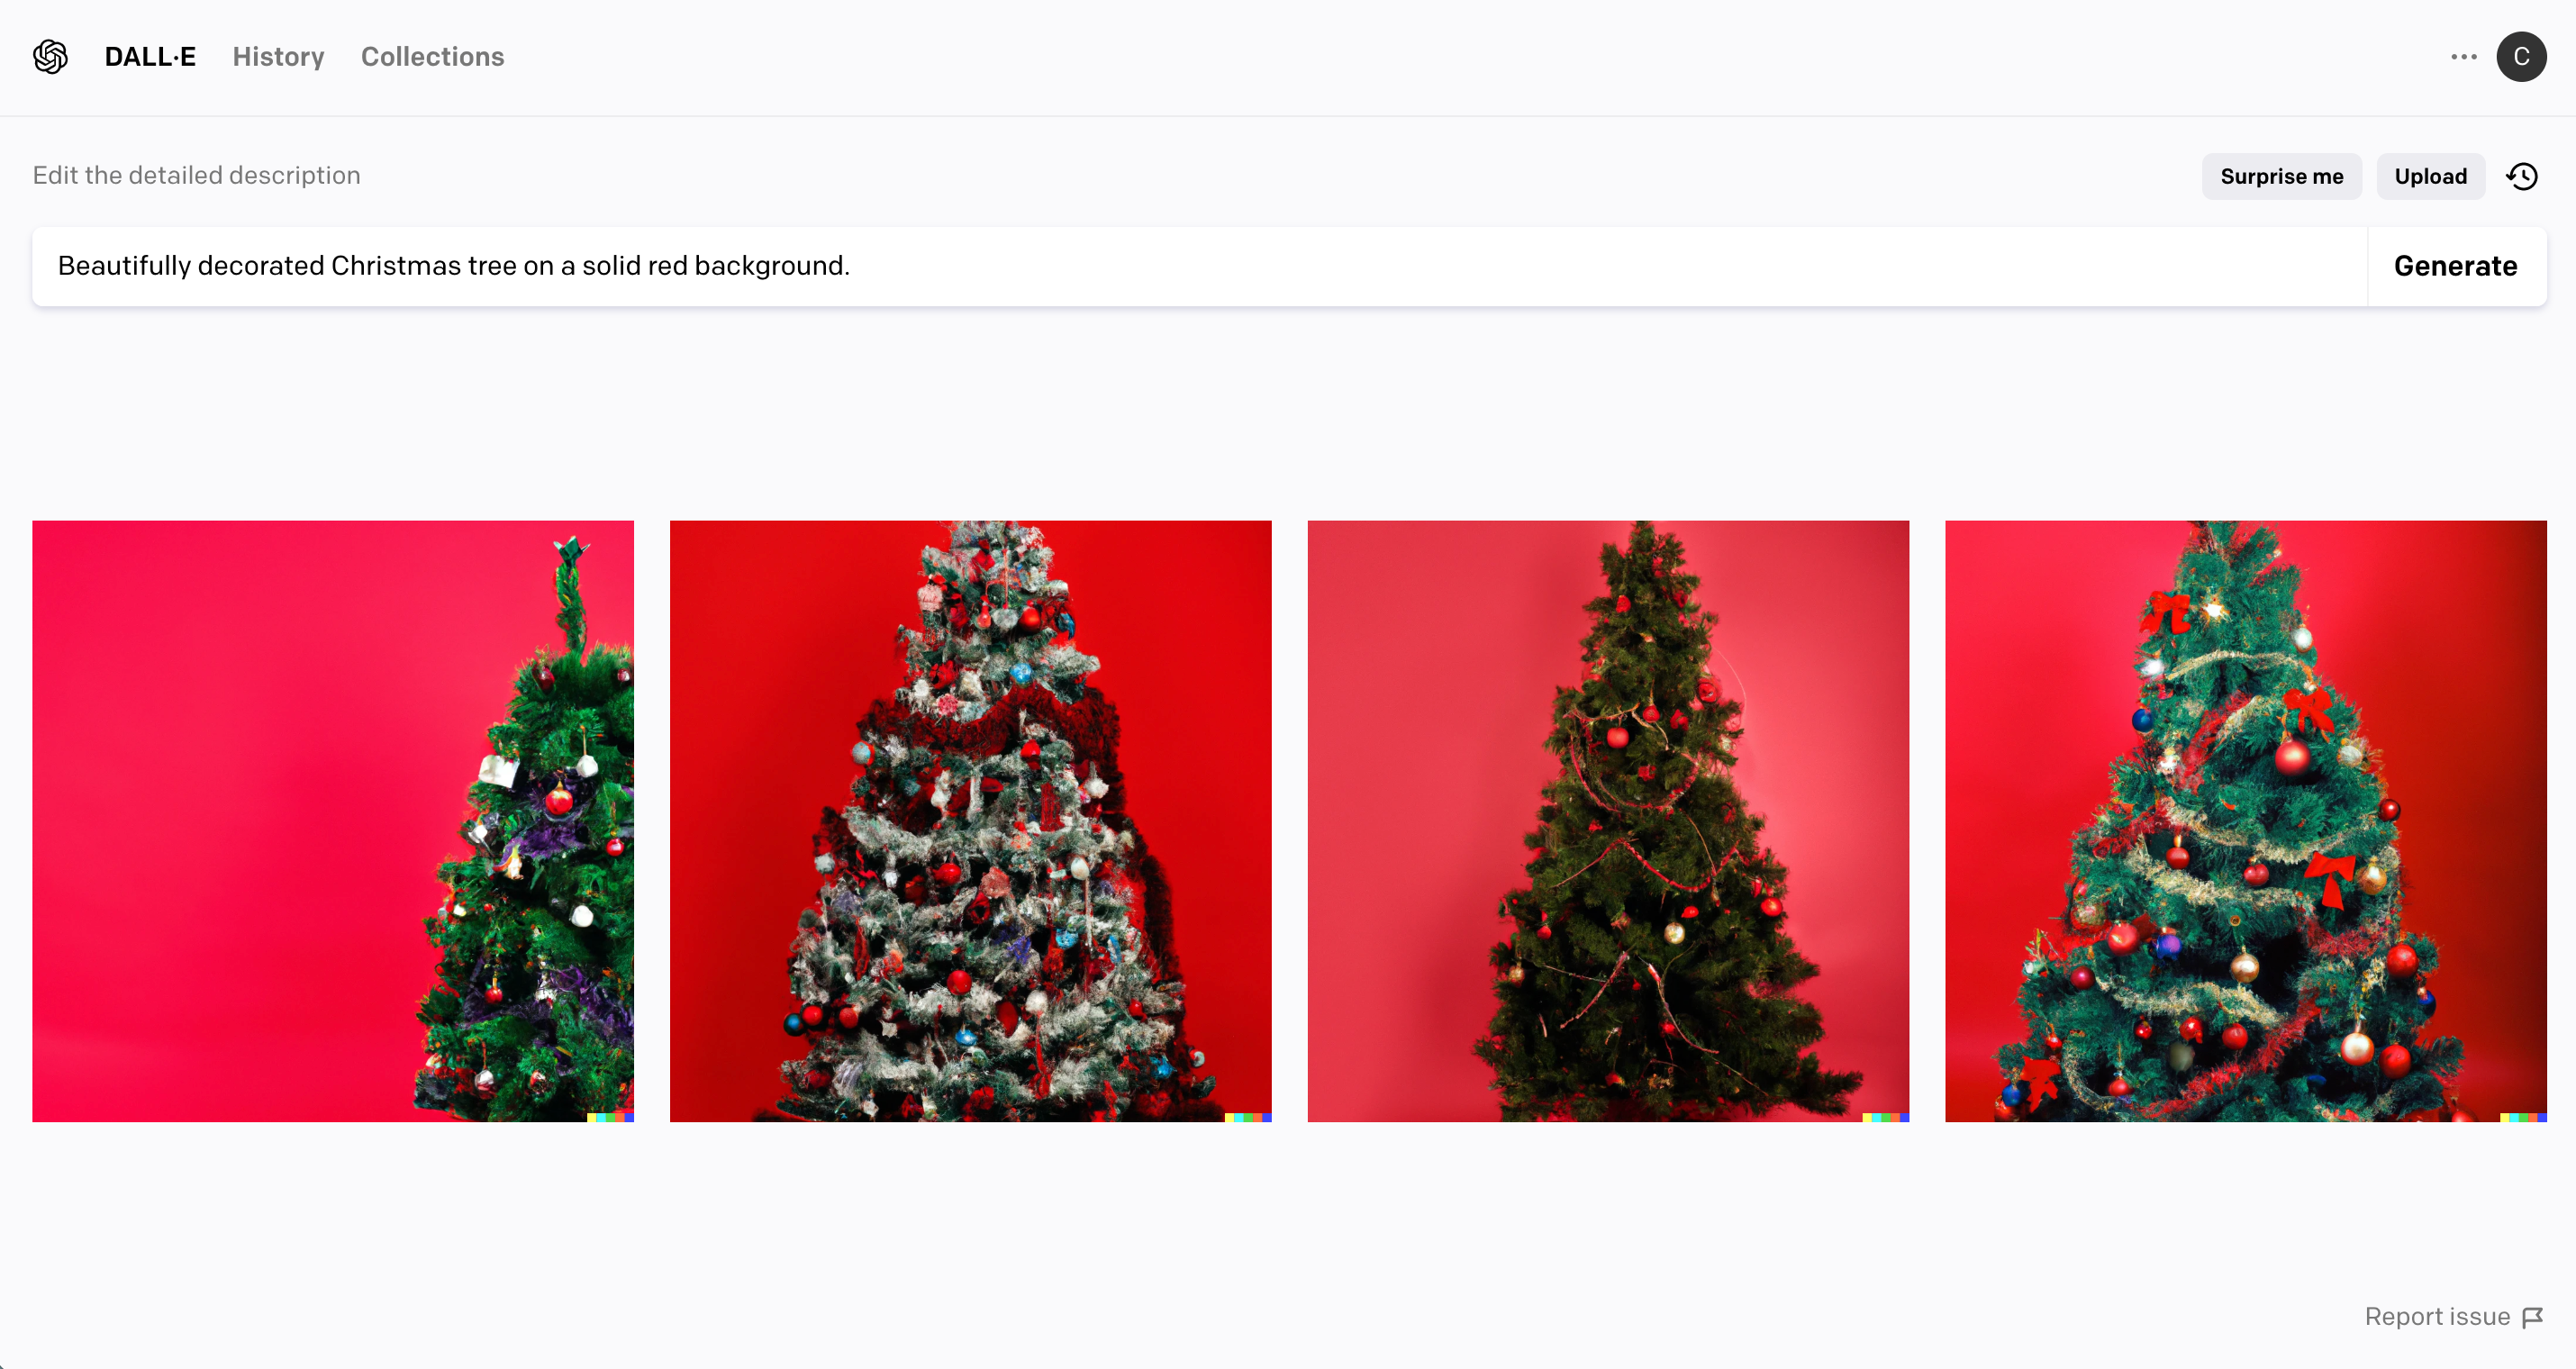
Beautifully decorated Christmas tree on a solid red background.
Dall-E 2 Results
What I Could Do with the Images
Illustrations can be used to make product packaging inserts, mailable post cards, website graphics, social media graphics, and more.
Sample Use
In this example, I used one of the illustrations to create a website graphic.
4. Social Media Graphics
Prompt I Put into Dall-E 2
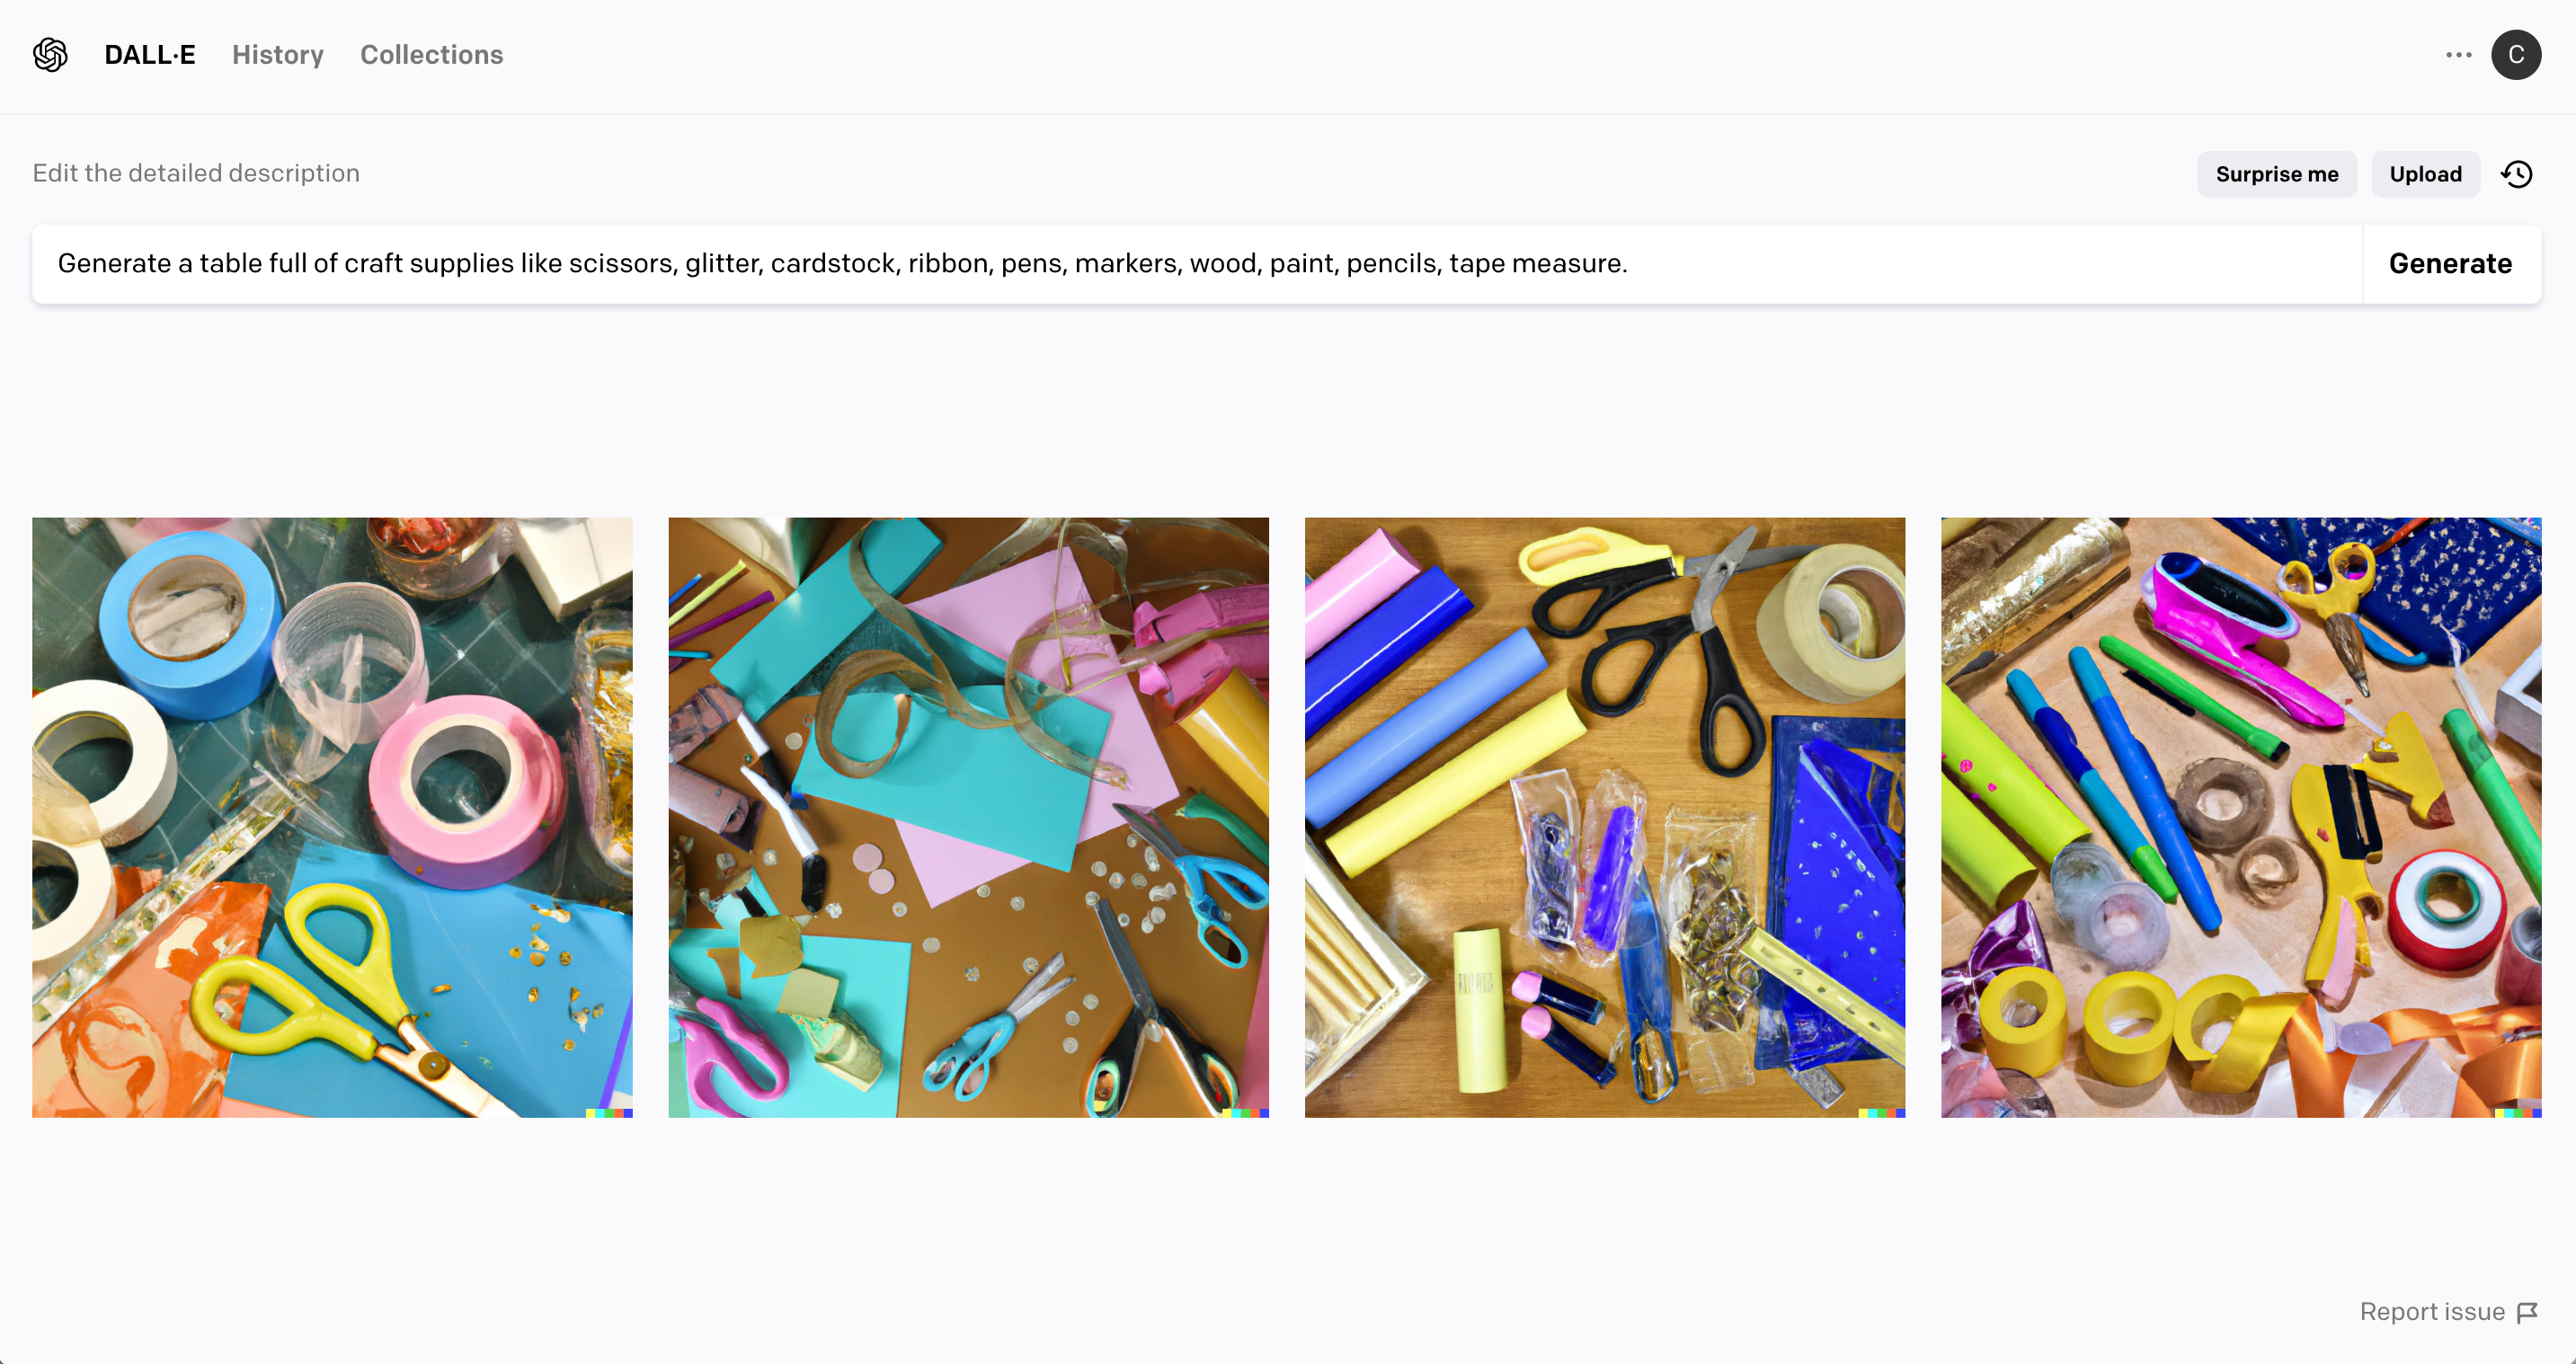
Generate a table full of craft supplies like scissors, glitter, cardstock, ribbon, pens, markers, wood, paint, pencils, tape measure.
(If you look closely at the generated results, you’ll see some errors – especially in the scissors.)
Dall-E 2 Results
What I Could Do with the Images
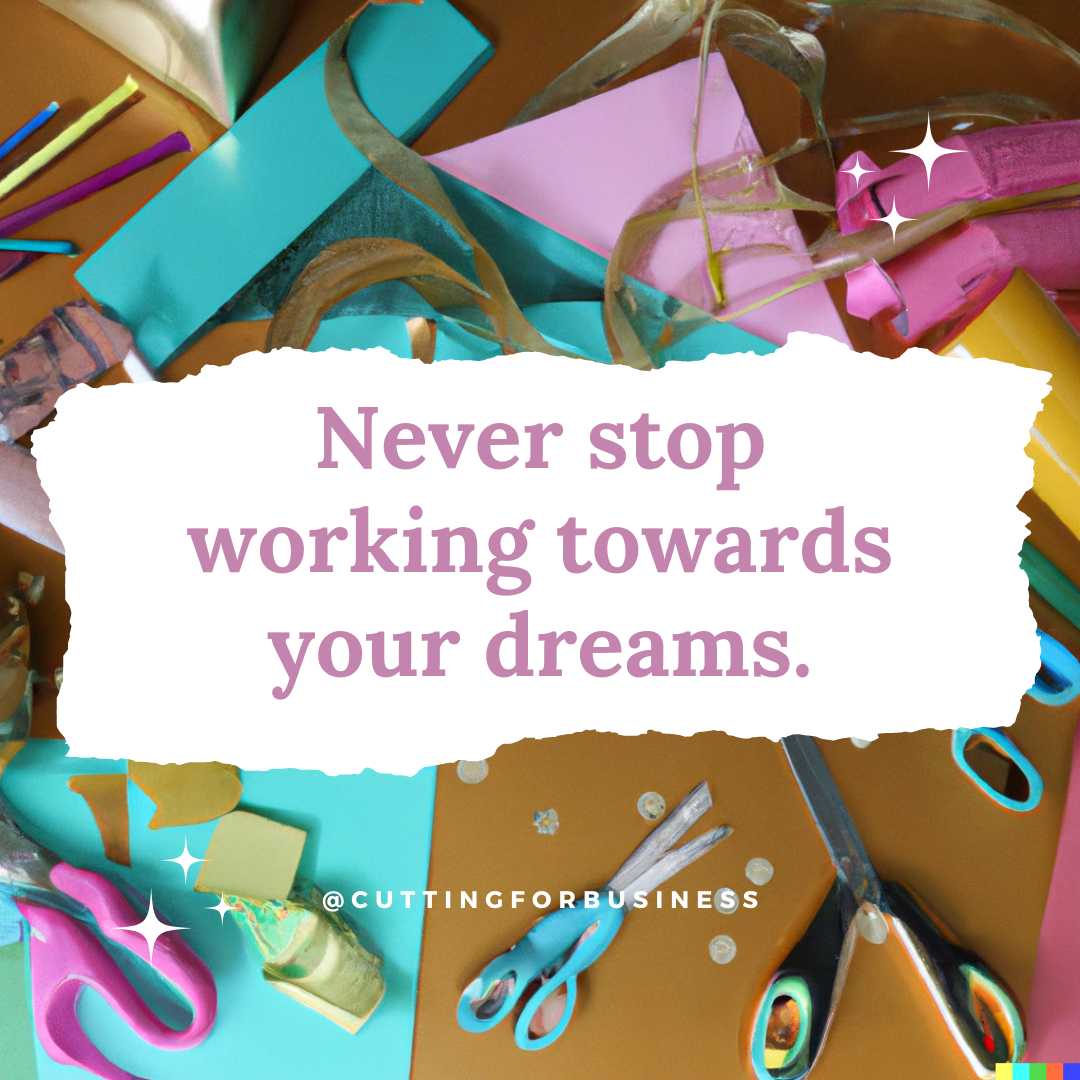
Stock images are helpful when designing websites, on social media, in newsletters, and more.
Sample Use
I used the generated image to create a quote to use on Instagram.
5. Print on Demand Artwork
Prompt I Put into Dall-E 2
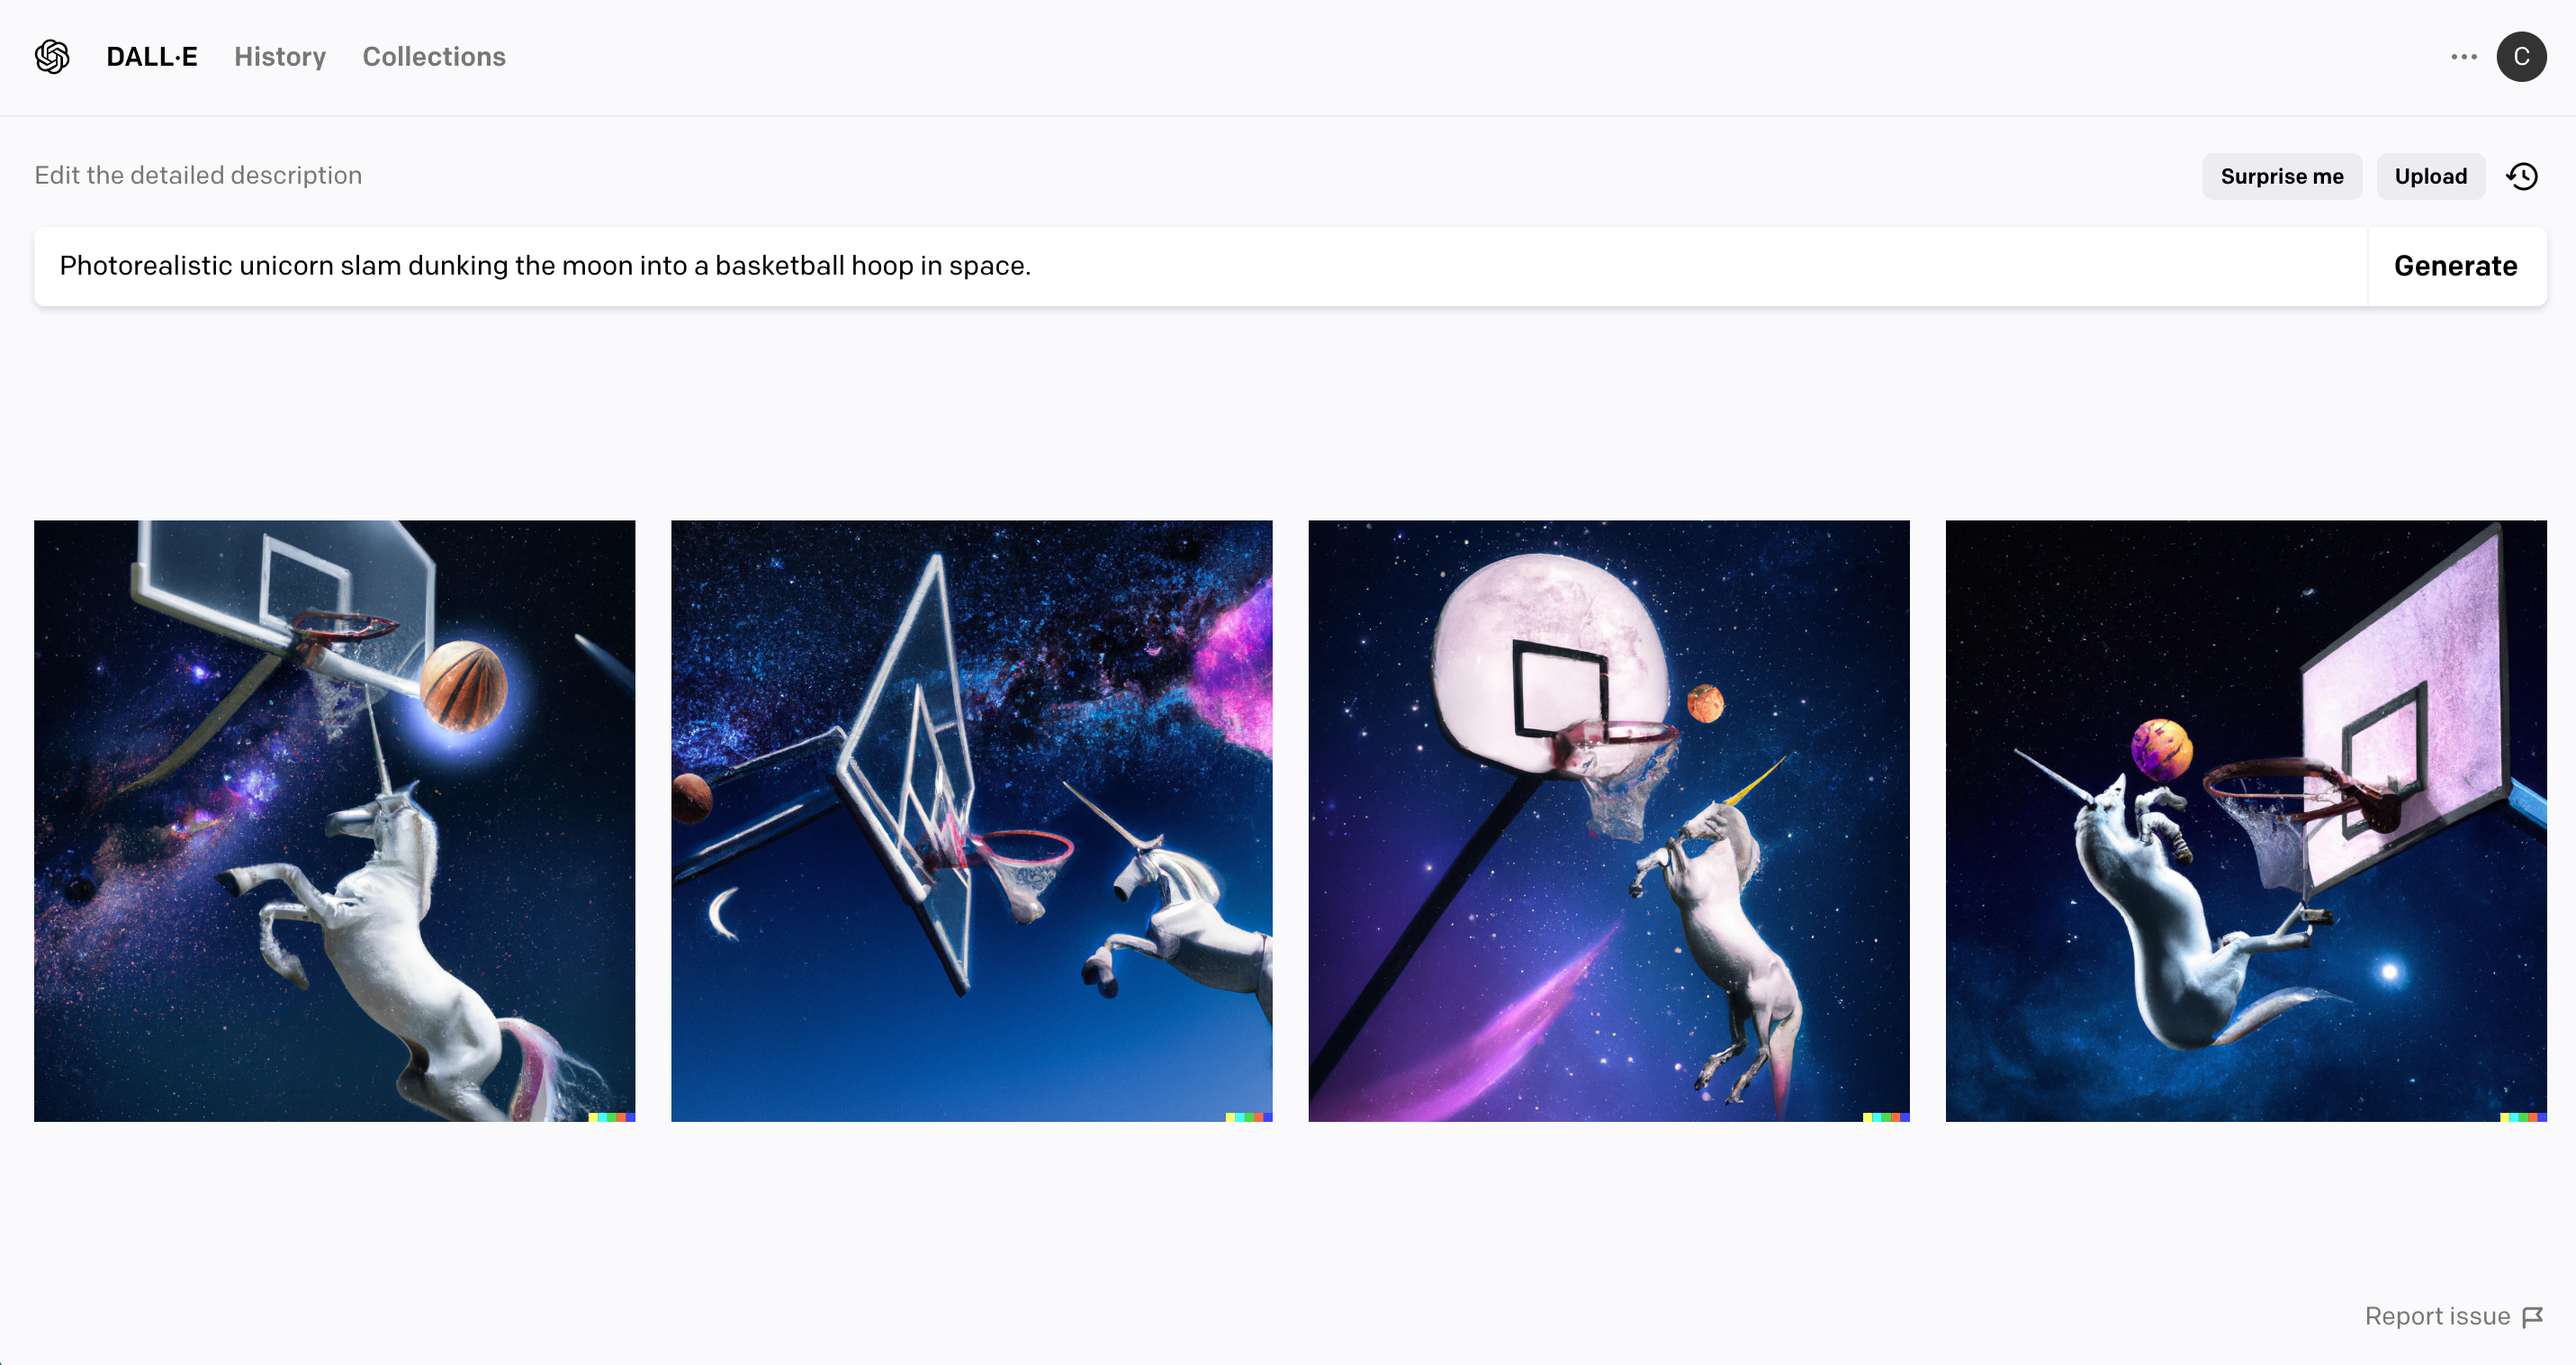
Photorealistic unicorn slam dunking the moon into a basketball hoop in space.
Dall-E 2 Results
What I Could Do with the Images
Using sites like Printful, there are dozens of products you can print on demand including shirts, totes, makeup bags, coffee mugs, notebooks, and more.
Sample Use
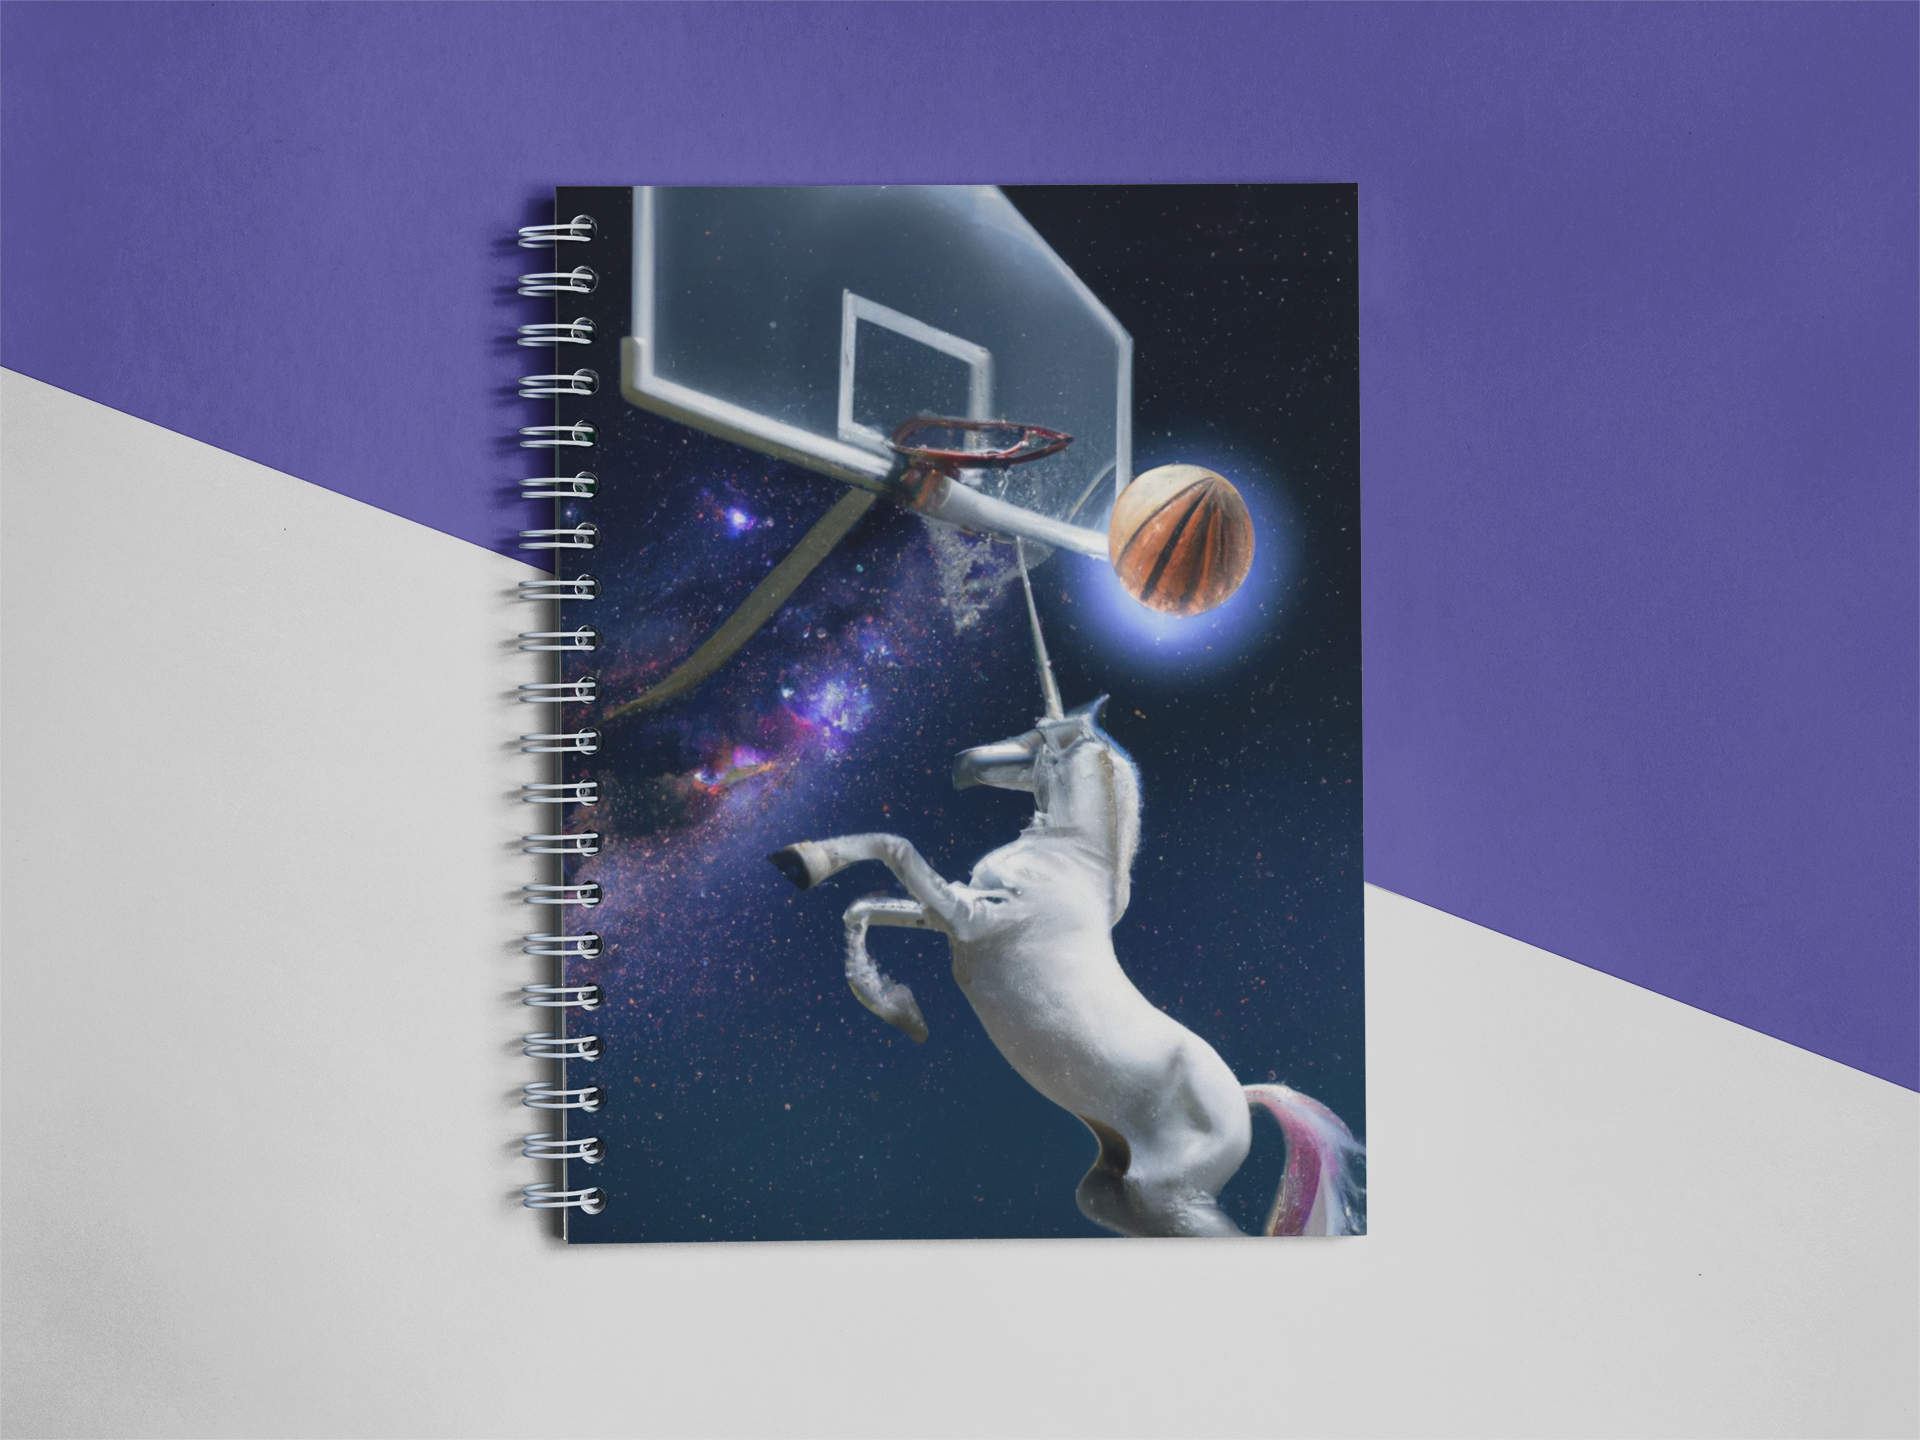
I used the generated image to create a notebook cover to fulfill with print on demand.
Does Dall-E 2 Only Produce Square Images?
Yes, to date, Dall-E 2 produces a 1:1 aspect ratio that cannot be changed – which results in square images.
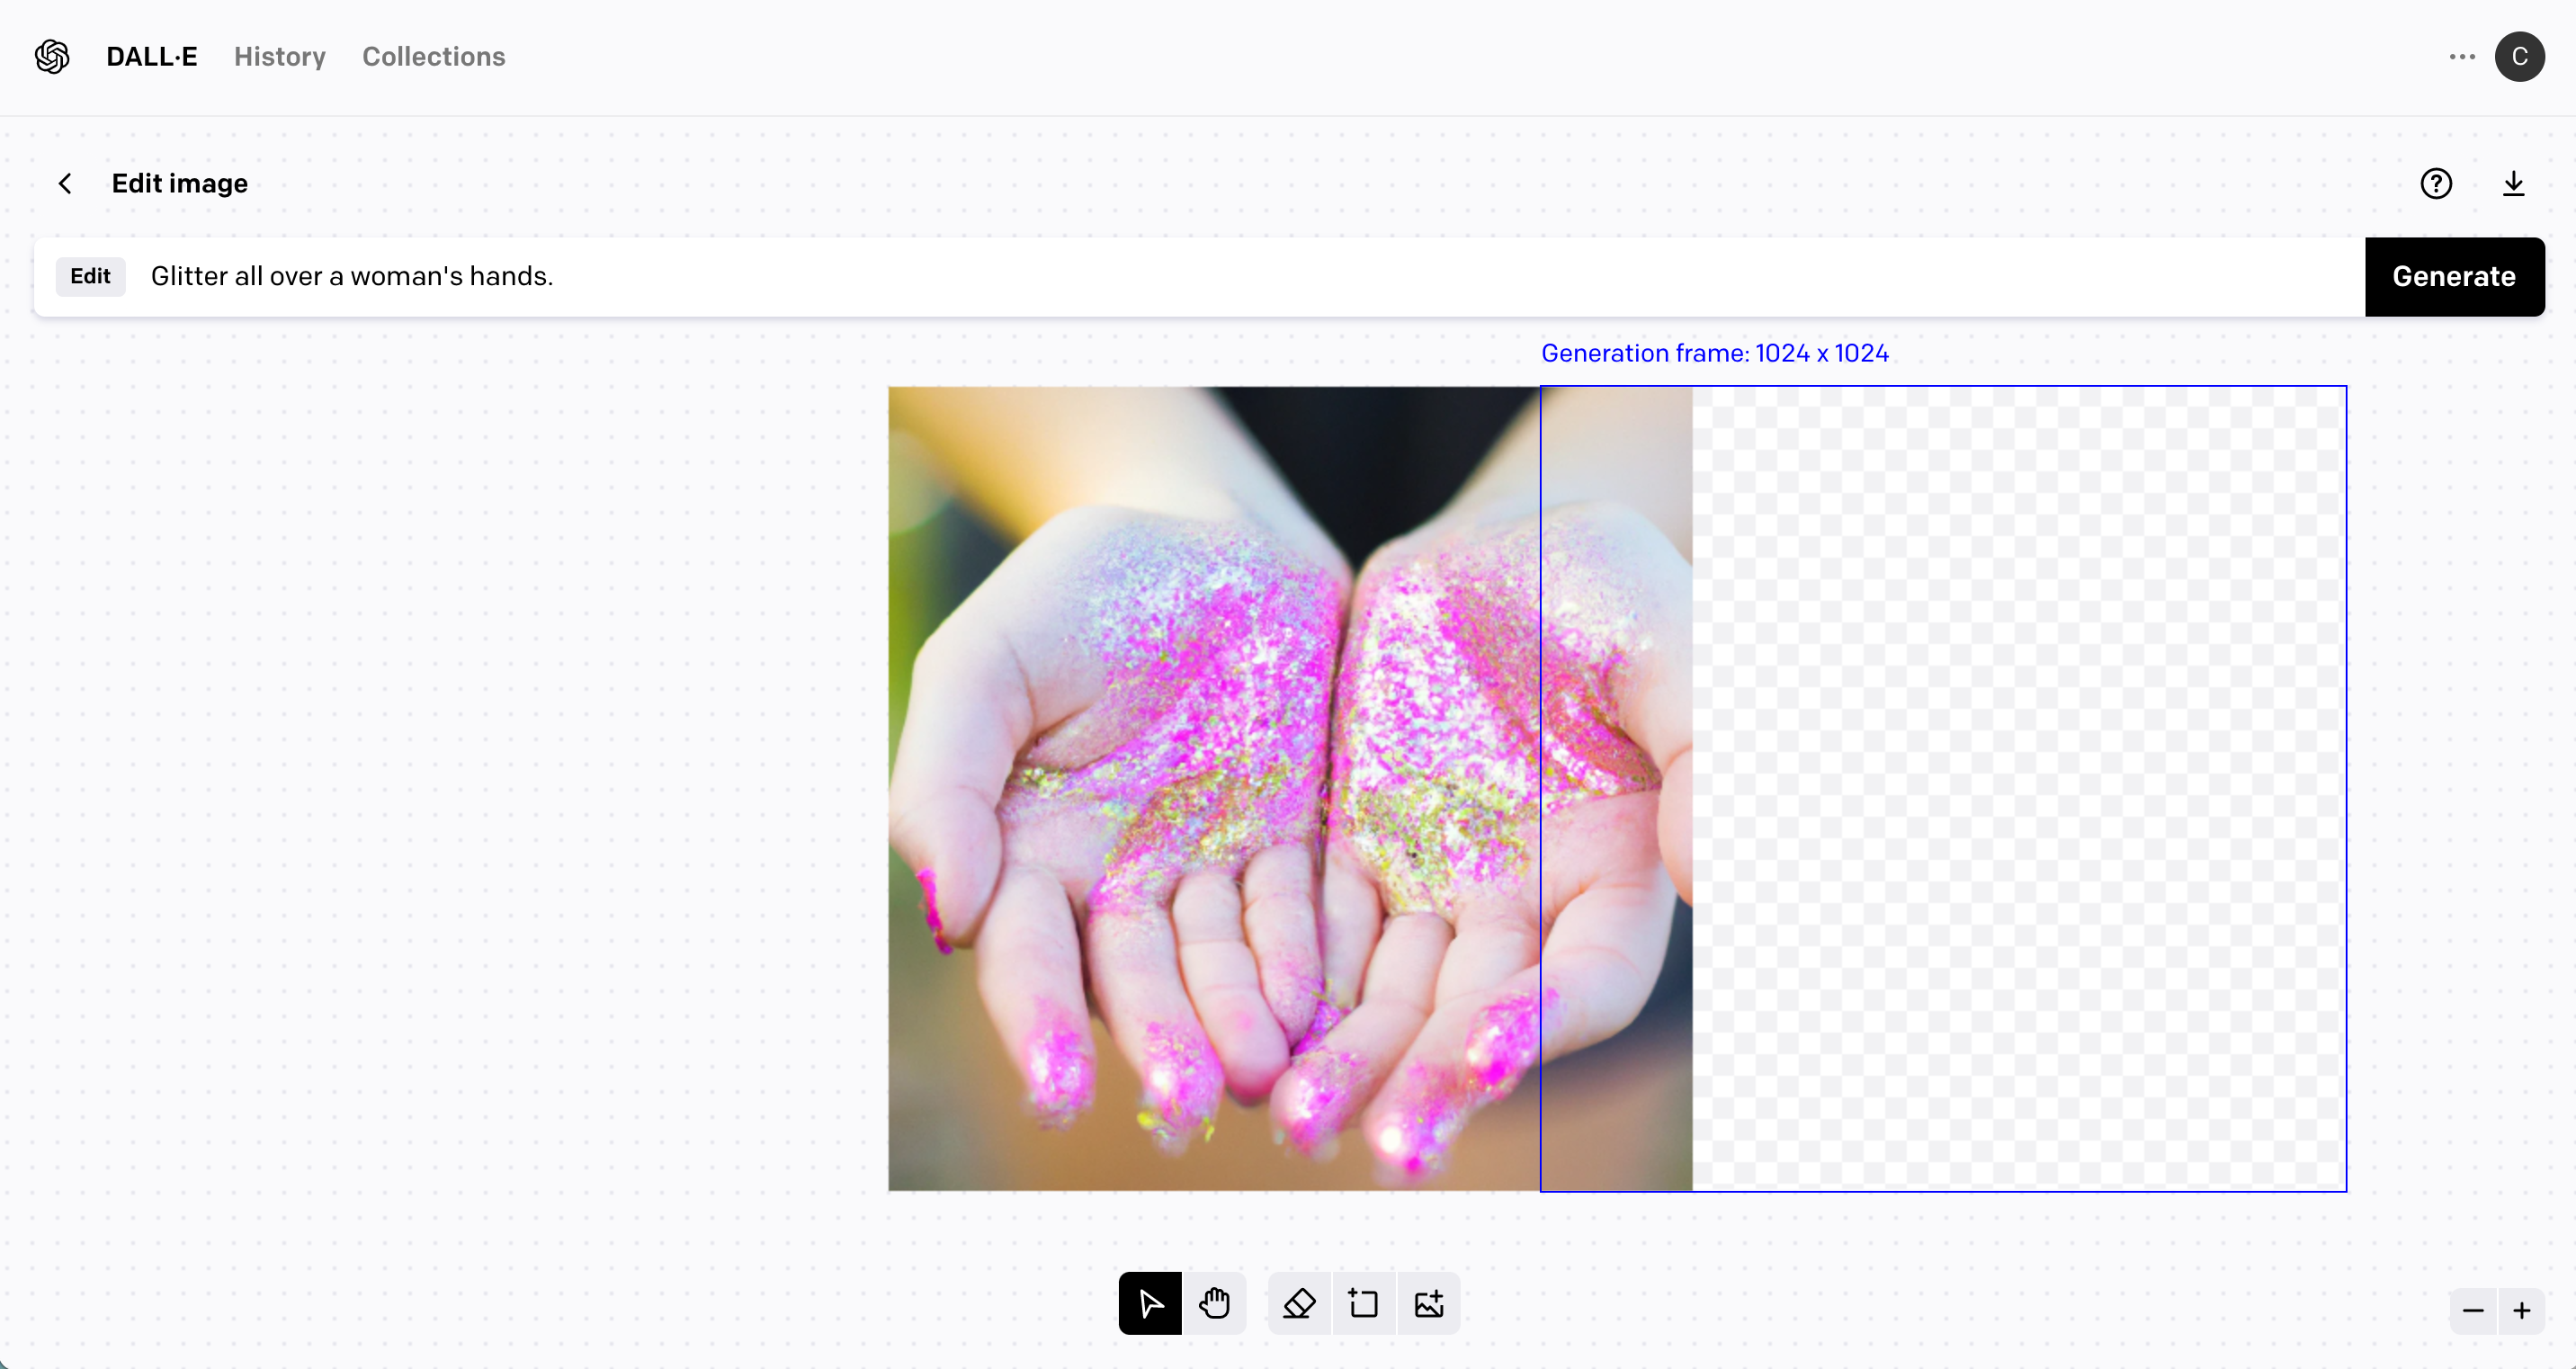
However, you can use the built in editor in Dall-E 2 to expand (called outpainting) your image. Take a look through these screenshots of the process:
Dall-E 2 – How to Use Outpainting
The screenshot below shows the standard results in Dall-E 2.
Select one of the images, then click the ‘Edit’ button.
Now, add another 1024 x 1024 Generation Frame. Be sure it is overlapping the original image. Click the ‘Generate’ button.
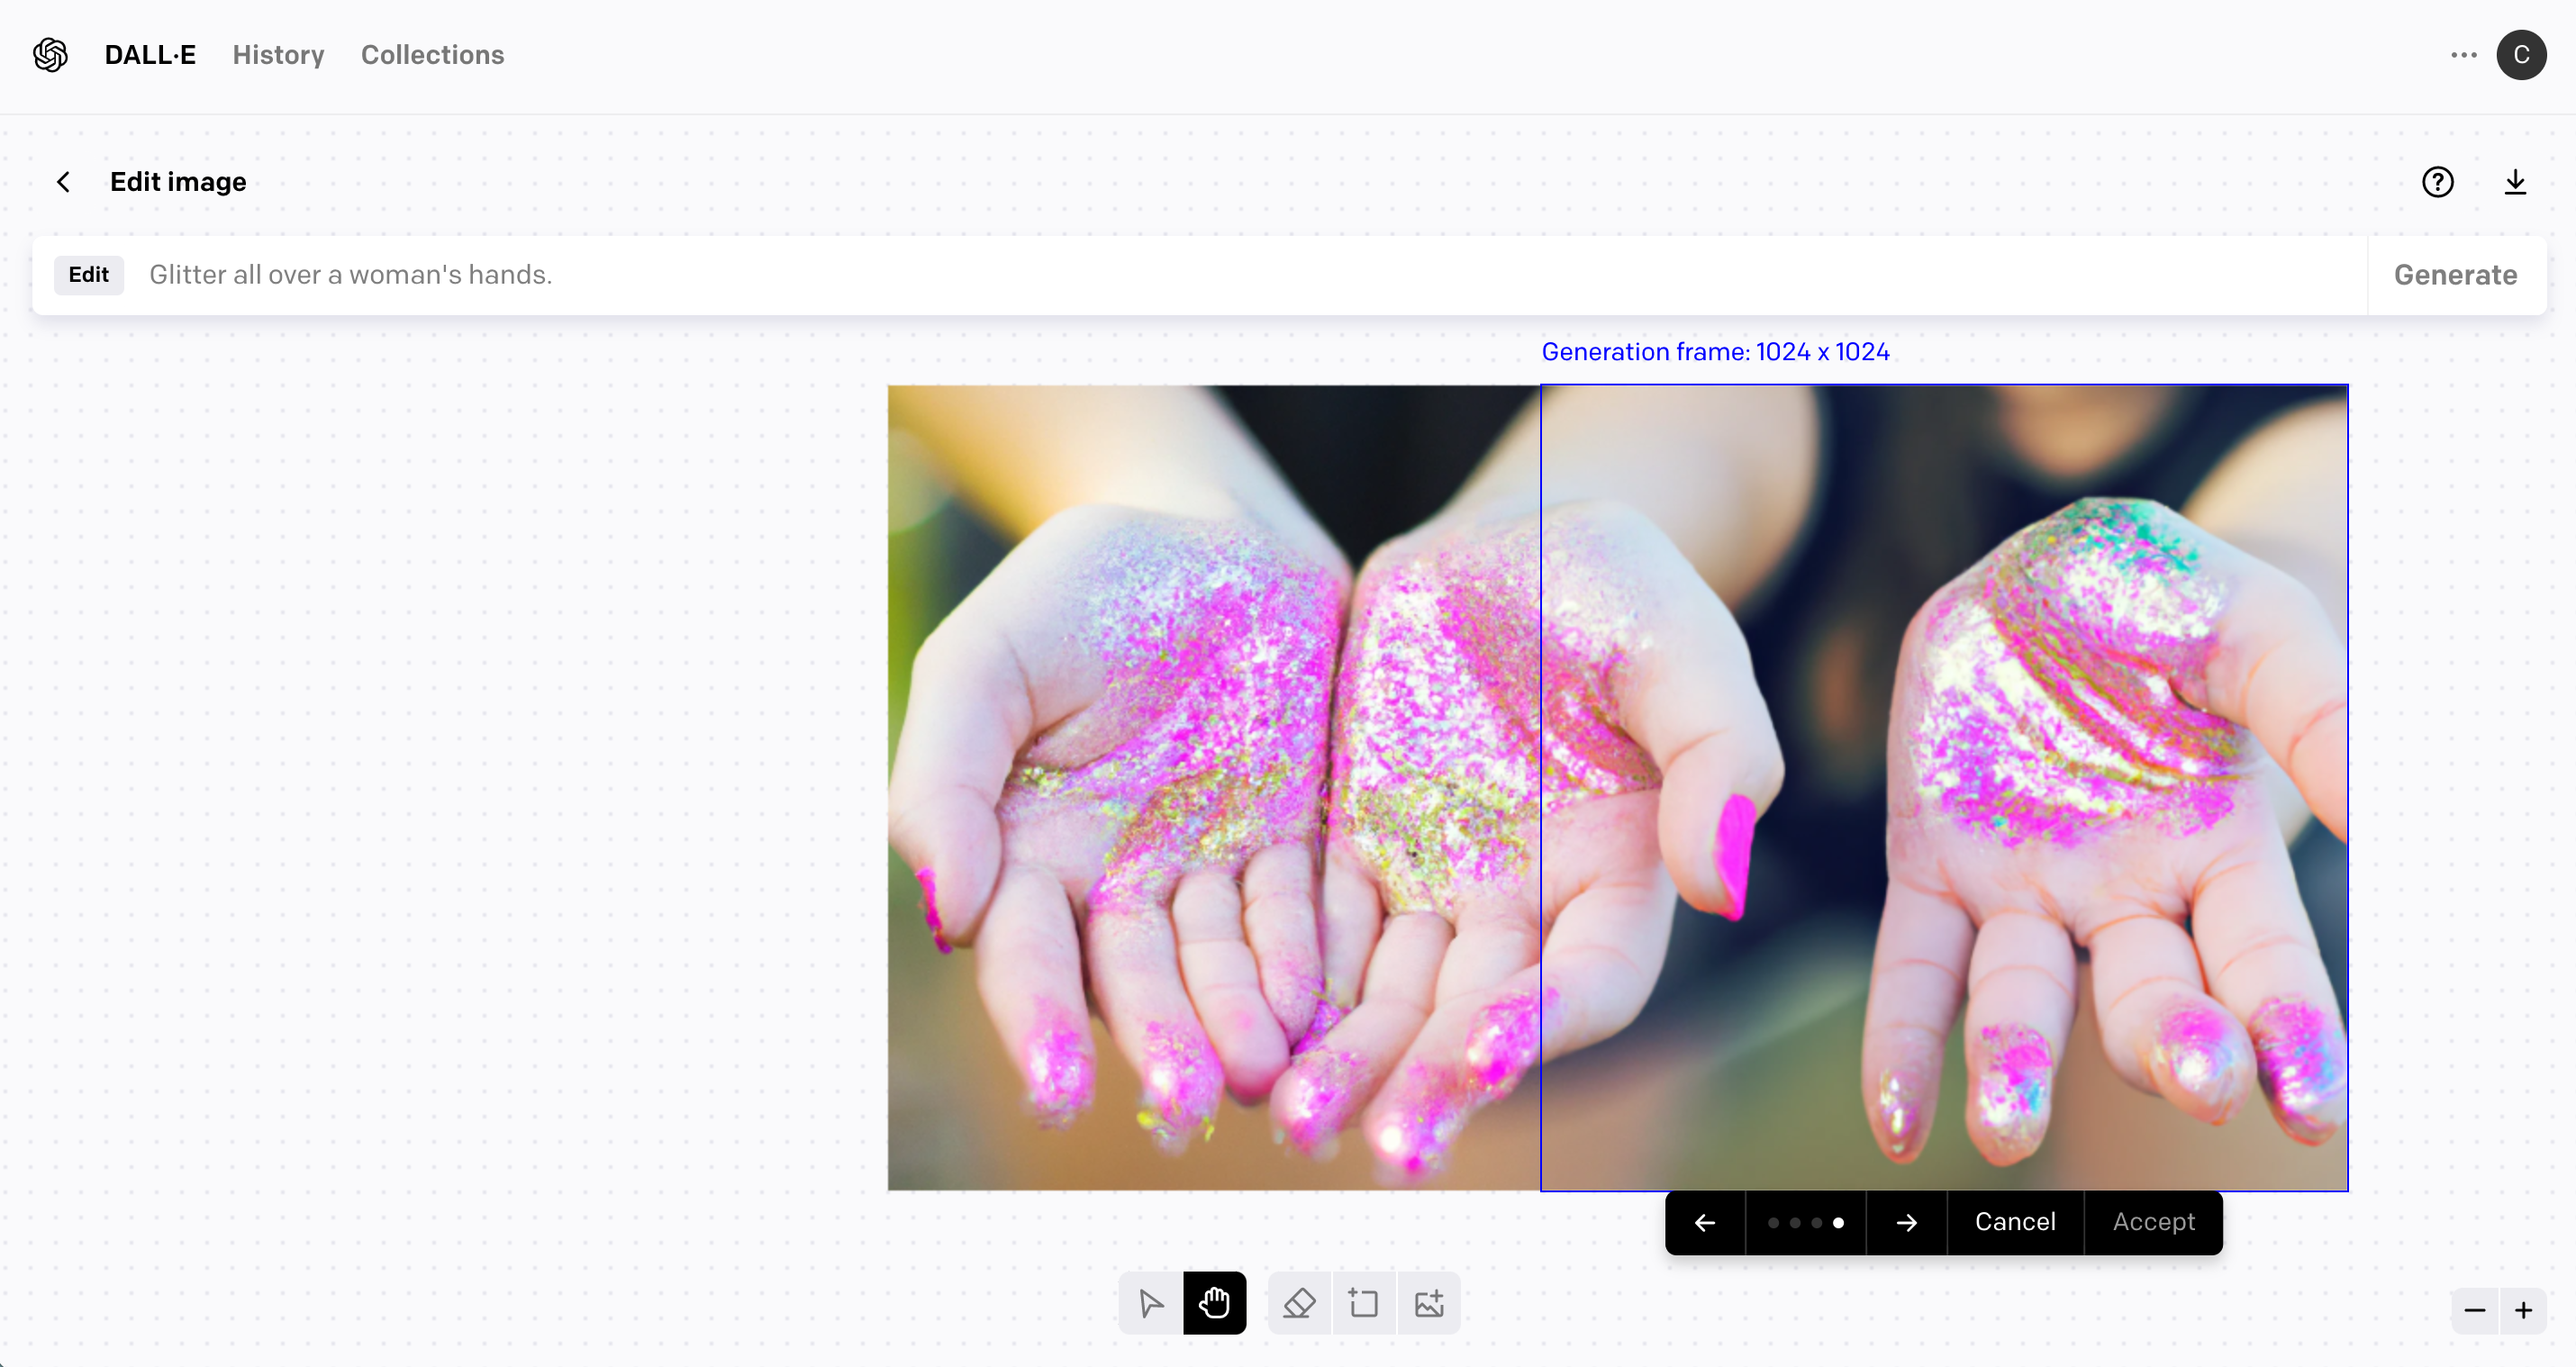
Scroll through the images using the arrows, then click ‘Accept’ on your favorite.
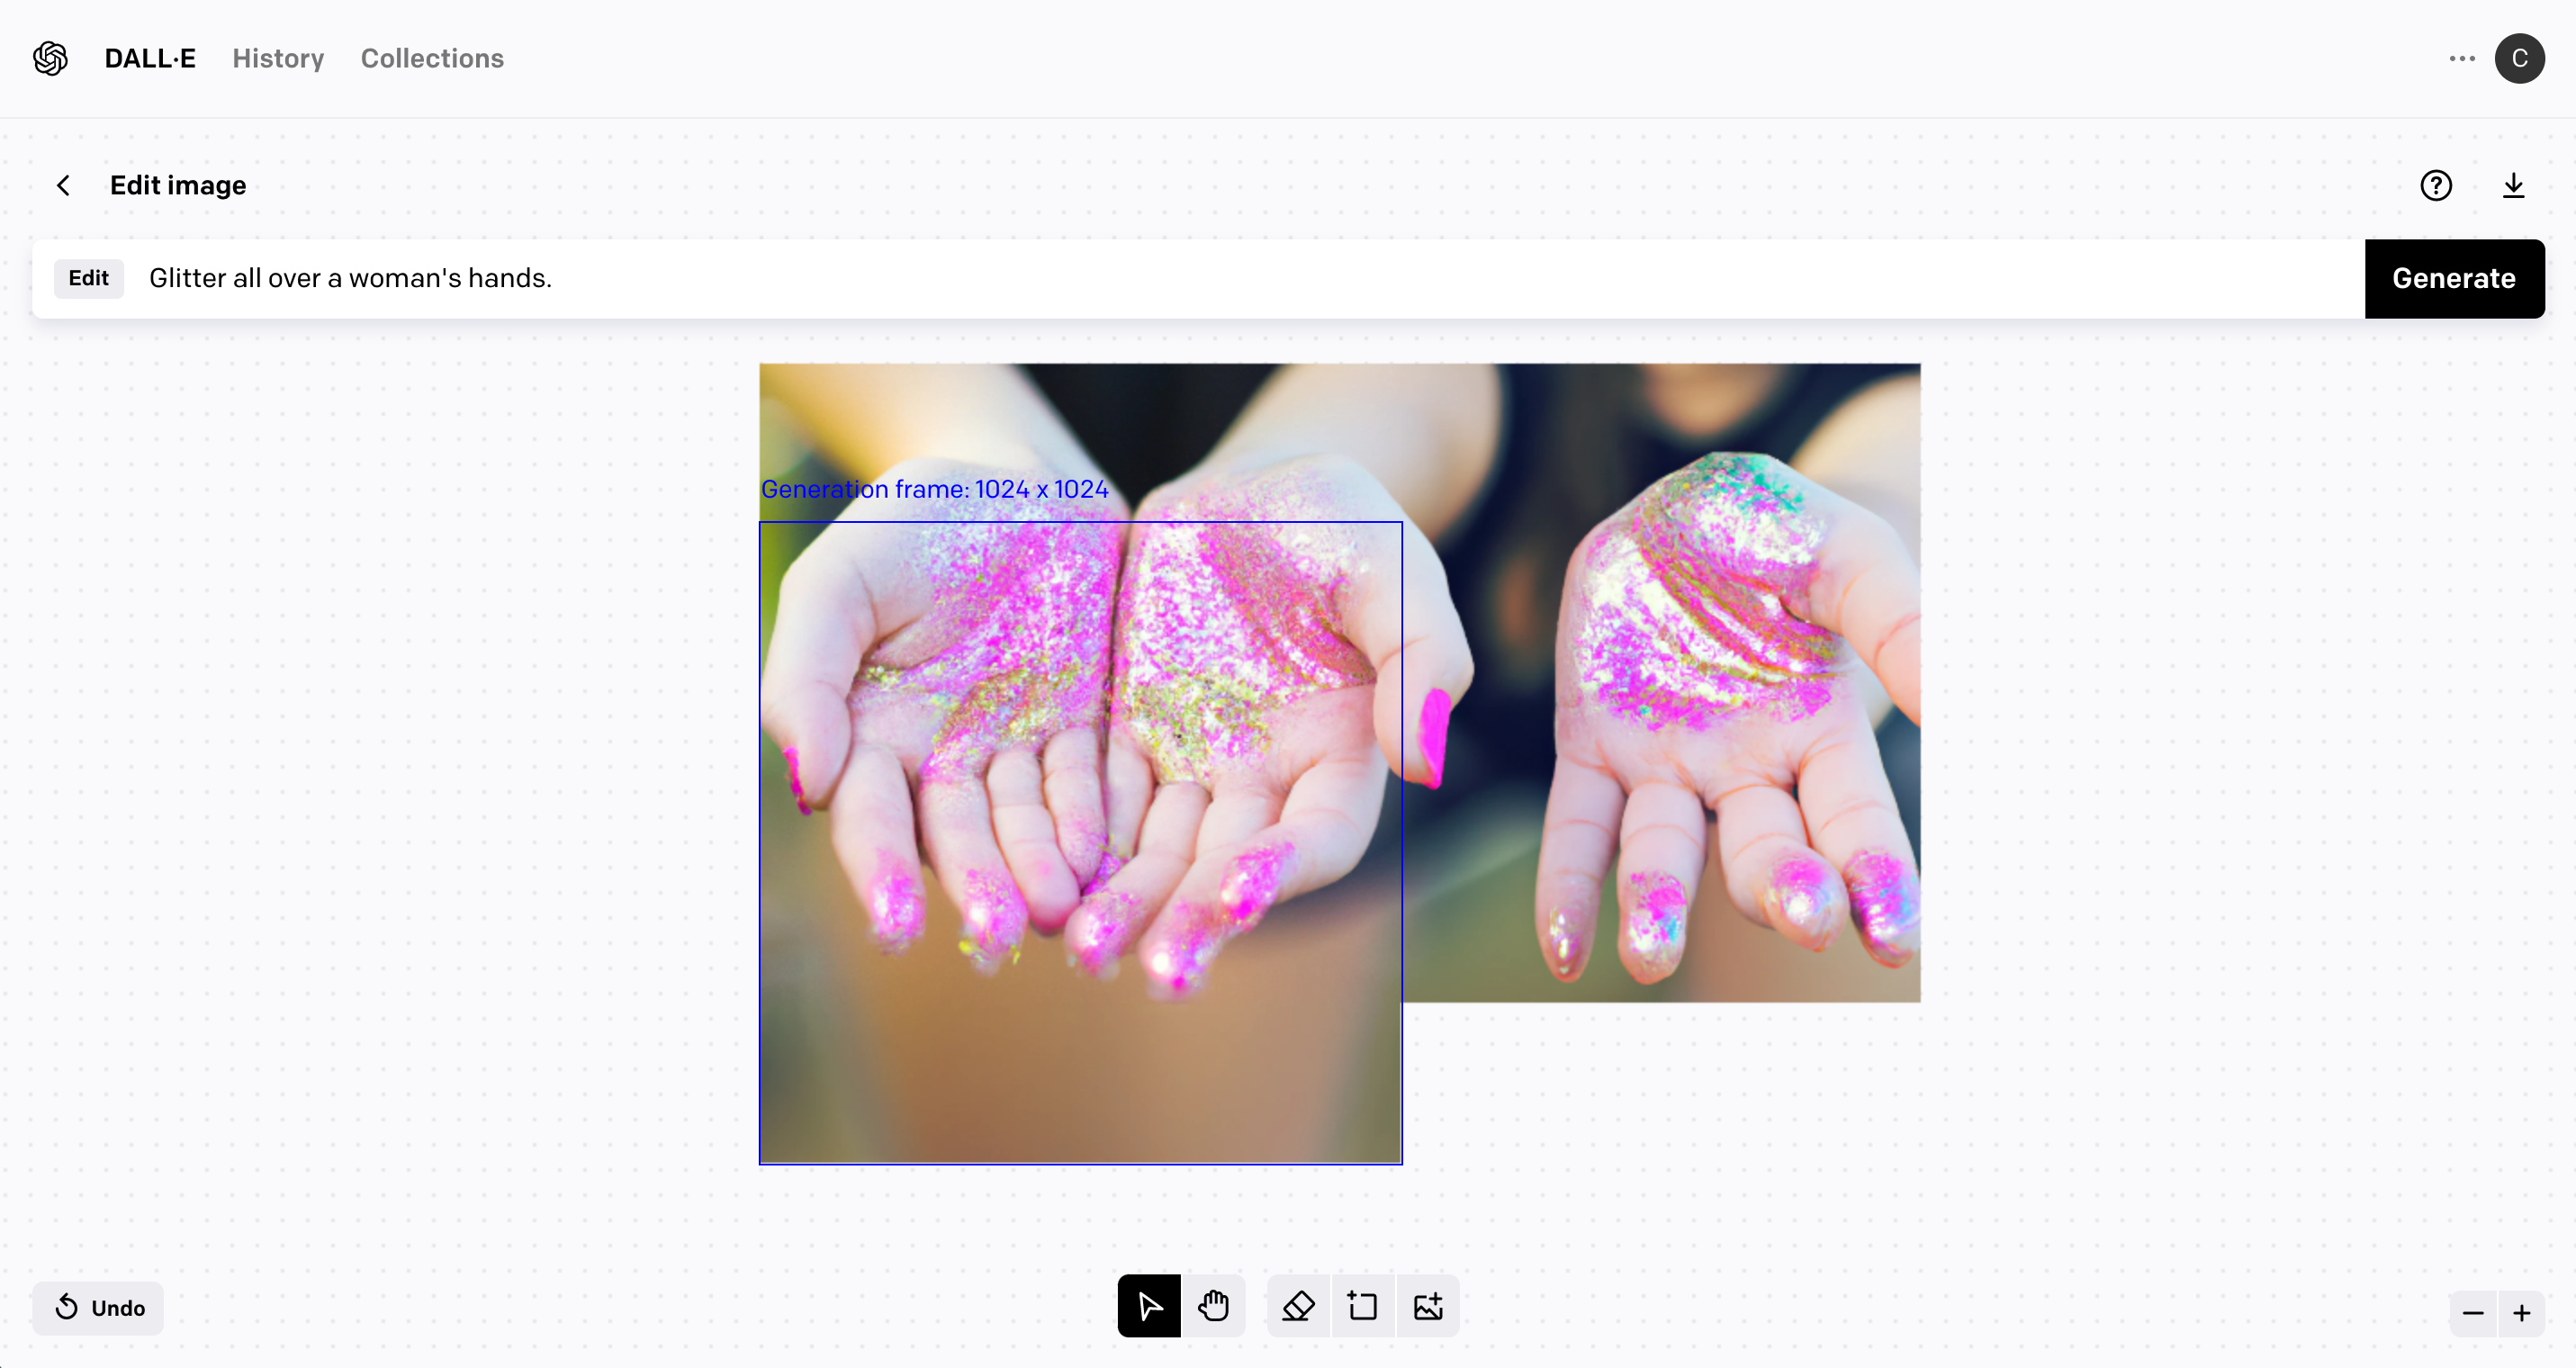
Repeat the process on the other side, or the top, or the bottom, or the same side.
Download the image when you are finished.
How Much Does Dall-E 2 Cost?
Dall-E 2 works on credits. This page on OpenAI’s website details current pricing. At the time of writing this article, 115 credits cost $15 – so, $0.13 per query. Each credit gives you one AI query and produces 4 sample images.
I chose to introduce Cutting for Business readers to Dall-E 2 for two reasons: 1) It’s created by the same company that created ChatGPT. The layout of the site is similar to ChatGPT, so I figured it would be a great starting point. 2) It’s easy to use.
Here is a list of other AI generators to try out:
CF Spark (Made by our friends at Creative Fabrica!)
Today, I’m sharing a list of 100+ ChatGPT prompts for craft businesses. What I want you to do with these prompts is to use them as starting points. Add additional information to be more specific with each prompt, and allow them to spark your own ideas for prompts that will benefit your unique craft business.
The first 25 are available to everyone, the rest are reserved for Cutting for Business blog subscribers. Not a subscriber? Don’t wait – it’s free. And I promise, I’ll put a bunch of good stuff in your inbox.
How to Access ChatGPT
Don’t forget, you can access ChatGPT for free: ChatGPT.
100+ ChatGPT Prompts for Craft Businesses
ChatGPT Prompts for New Craft Businesses
Brainstorm a list of business names for a shop that include these words and ideas: (enter words and ideas).
Compile a list of 20 possible domain names for (type of business).
Brainstorm a list of sales goals for (type of business).
Write a list of the target market for (product).
Write a business plan outline for my new (type of business) to achieve (goal), (goal), (goal).
Help me price my product for wholesale and retail. The product costs: (fill in all costs, including labor).
ChatGPT Prompts for Craft Businesses
Generate a list of questions that a customer might ask related to (product).
Create a survey for customers that recently purchased (product) or attended (event).
Find online shops that sell (product).
Describe how to create an online funnel for (type of product).
Create a list of pain points for (type of customer).
Create a list of questions to ask during an interview for (virtual assistant, accountant, etc).
Brainstorm ways that I can expand my (type of business or product line).
Create a list of the top trends in the (type of industry, like “craft industry”).
Create a list of call to actions for a (product).
Write an email to a customer declining their custom order due to trademark infringement concerns. Use a polite tone.
Translate (copy and paste) into (language).
Suggest inexpensive ways to promote my business locally without using social media.
Create a daily work schedule for me. I want to work from (time) to (time). Each day, I need to (task), (task), (task).
Outline a marketing plan for a new product launch over a (time period).
Create a list of charities whom my business could donate to that work with (type of people or cause).
Suggest popular apps I can use to (task or goal).
Create a list of ways to help me with work/life balance.
Suggest ways to promote (product or business) without using social media.
Create a step-by-step checklist for completing (task or goal).
Write a budget for social media advertising on (network(s)) per month using (dollar amount).
Help me prioritize these projects (projects and due dates).
ChatGPT Prompts for Researching Competition
What are the strengths and weaknesses of (website or business name)?
Compare the pricing of (my product, copy and paste link) to similar competitors?
Which social media channels is (website or business name) using?
Compile a list of possible competitors for (type of business).
ChatGPT Prompts for Product Creation
Generate a list of sayings to put on (type of product) about (theme).
Compile a list of color palettes for an upcoming product launch of (name of product) for (theme/holiday).
Compile a list of trending products in (industry).
I have (list several craft supplies). Suggest projects I can make.
ChatGPT Prompts for Course and Lesson Creation
Compile a list of pain points for new users of (type of craft machine or product).
Create an outline for a course on (subject) for (type of student).
Write a 6 question quiz for this lesson (copy and paste lesson).
Create an outline for a weekend retreat about (topic).
ChatGPT Prompts for Content Creation
Suggest ways to make this text more persuasive (copy and paste text).
Compile a list of keywords related to (subject).
Create an outline for an article on (subject).
Proofread this text (copy and paste).
Generate a product description that lists the features of (product).
Write a social media contract to use with brand ambassadors for (type of product).
Write a list of synonyms/antonyms/analogies for (word or phrase).
Check this text for errors (copy and paste text).
ChatGPT Prompts for Email Marketing
Write a two (or three, four, five) series of emails that promote (new product, upcoming release, new designer).
Create a list of email subject lines to increase open rate. Include information about a sale on (product).
Write a catchy email subject line for a sale on (product).
Write a welcome email to my newsletter for new subscribers. Keep the tone fun, and include (item), (item), and (item).
Write a thank you email after customers check out. Highlight that they purchased from a small business.
Create a persuasive subject line for this email (copy and paste email).
Craft a template for a weekly email newsletter.
ChatGPT Prompts for Networking
Compile a list of popular content creators that create content about (topic).
Create a list of small business types who might want to collaborate with a (type of business or product).
Create a list of networking opportunities for (industry).
Compile a list of networking icebreakers to use online.
ChatGPT Prompts for Facebook
Write an attention grabbing social media post for Facebook to announce (sale/clearance event/new product line).
Create three different Facebook Ad titles and captions to promote (product). Keep captions 125 characters or less.
Give me ideas for memes related to (subject).
Write a Facebook post about (subject).
Create a content calendar for 30 days to post two times per day for my (type of business).
ChatGPT Prompts for Instagram
Brainstorm a list of hashtags to use on Instagram for (type of business, product). Include at least (number of hashtags).
Write a script for an Instagram (Reel/Story).
Create a list of Instagram (Reel/Story) ideas for (business, product, topic).
Write an Instagram caption for (product).
Craft a post celebrating (number of followers, milestone in your business, etc).
Write a catchy bio for (type of business).
ChatGPT Prompts for Pinterest
Generate a list of (number) Pinterest pin titles for (product).
Write 5 different Pinterest pin descriptions for (product/blog post/article).
Create a list of the best times to pin on Pinterest to reach (type of customer/demographic).
Suggest pins to create for Pinterest on the topic of (topic).
Generate a list of (number) of Pinterest boards to create for (type of business).
ChatGPT Prompts for Youtube
Compile a list of topic ideas related to (topic).
Create a list of ways to increase engagement on YouTube.
Create a 3 minute script for a YouTube Video on (subject).
Write an outline of things to cover for a video on (subject). Outline should be (number of minutes) minutes worth of video time.
ChatGPT Prompts for Etsy
Write an Etsy product title for (product).
Write an Etsy product description for (product).
Create 3 possible product descriptions for (product).
Compile a list of tags that I could use on Etsy for (product).
Craft an Etsy Shop Announcement stating (important points). Limit the announcement to 160 characters.
Rewrite my About Me page on Etsy in a more relaxed way: (copy and paste text).
ChatGPT Prompts for Product Comparison/Research
Write a list of pros and cons for (product).
Compile a list of FAQ about (product).
List the most popular size of (product).
Create a list of niches related to (type of product).
Tell me about niches that are growing (fast/slow) in the (industry/market).
ChatGPT Prompts for Fonts & Design
Create a list of fun fonts to use for (describe your project).
Suggest a list of font combos to use for (describe your project or event).
Write a description to use in an AI art program that describes (describe something).
ChatGPT Prompts for Fun
Write a song about (topic).
Compile a list of quotes about (topic).
Write a haiku about (topic).
Create a rap about (topic).
Craft a short story about (subject).
Write a poem about (topic).
Write a fictional news article about (topic).
Compile a list of jokes about (topic).
Explain (topic) as a standup comic.
Explain (topic) in an inaccurate way.
Write a funny dialogue between a (craft machine) and a (craft supply).
Remember, ChatGPT is only as helpful as the prompts that you input. With millions of possible prompts, which ChatGPT prompts for craft businesses are you using?