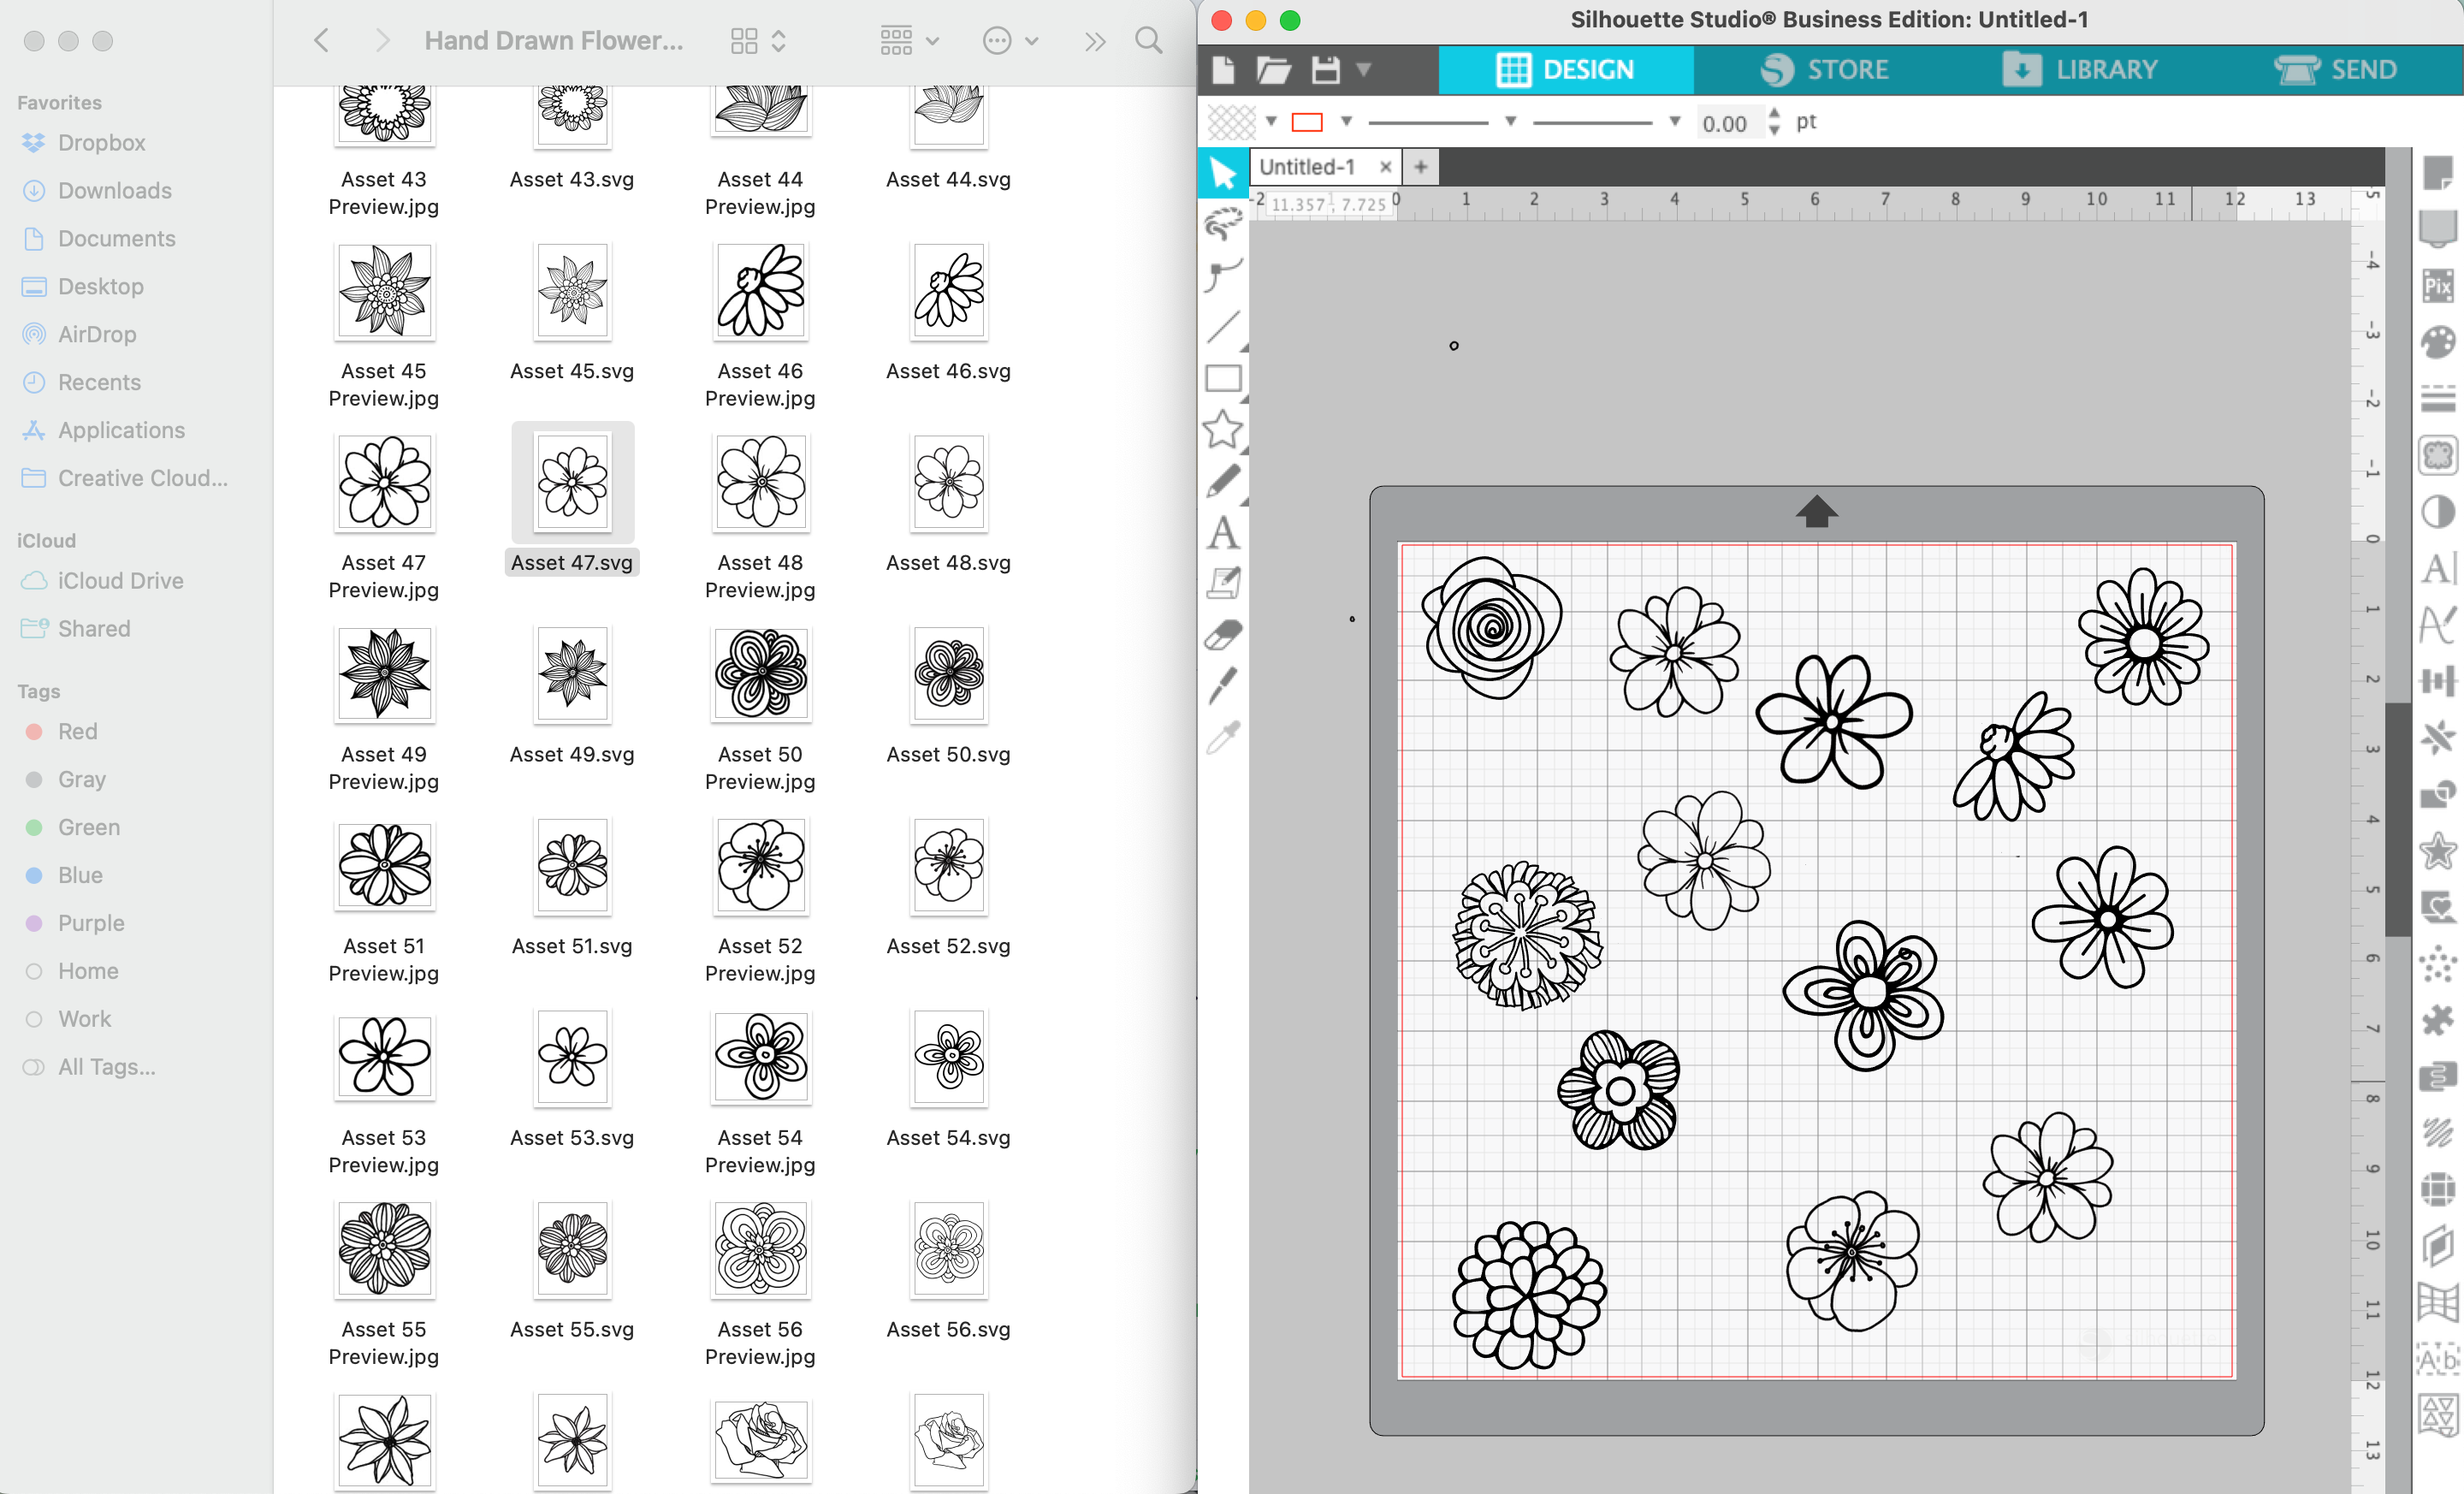
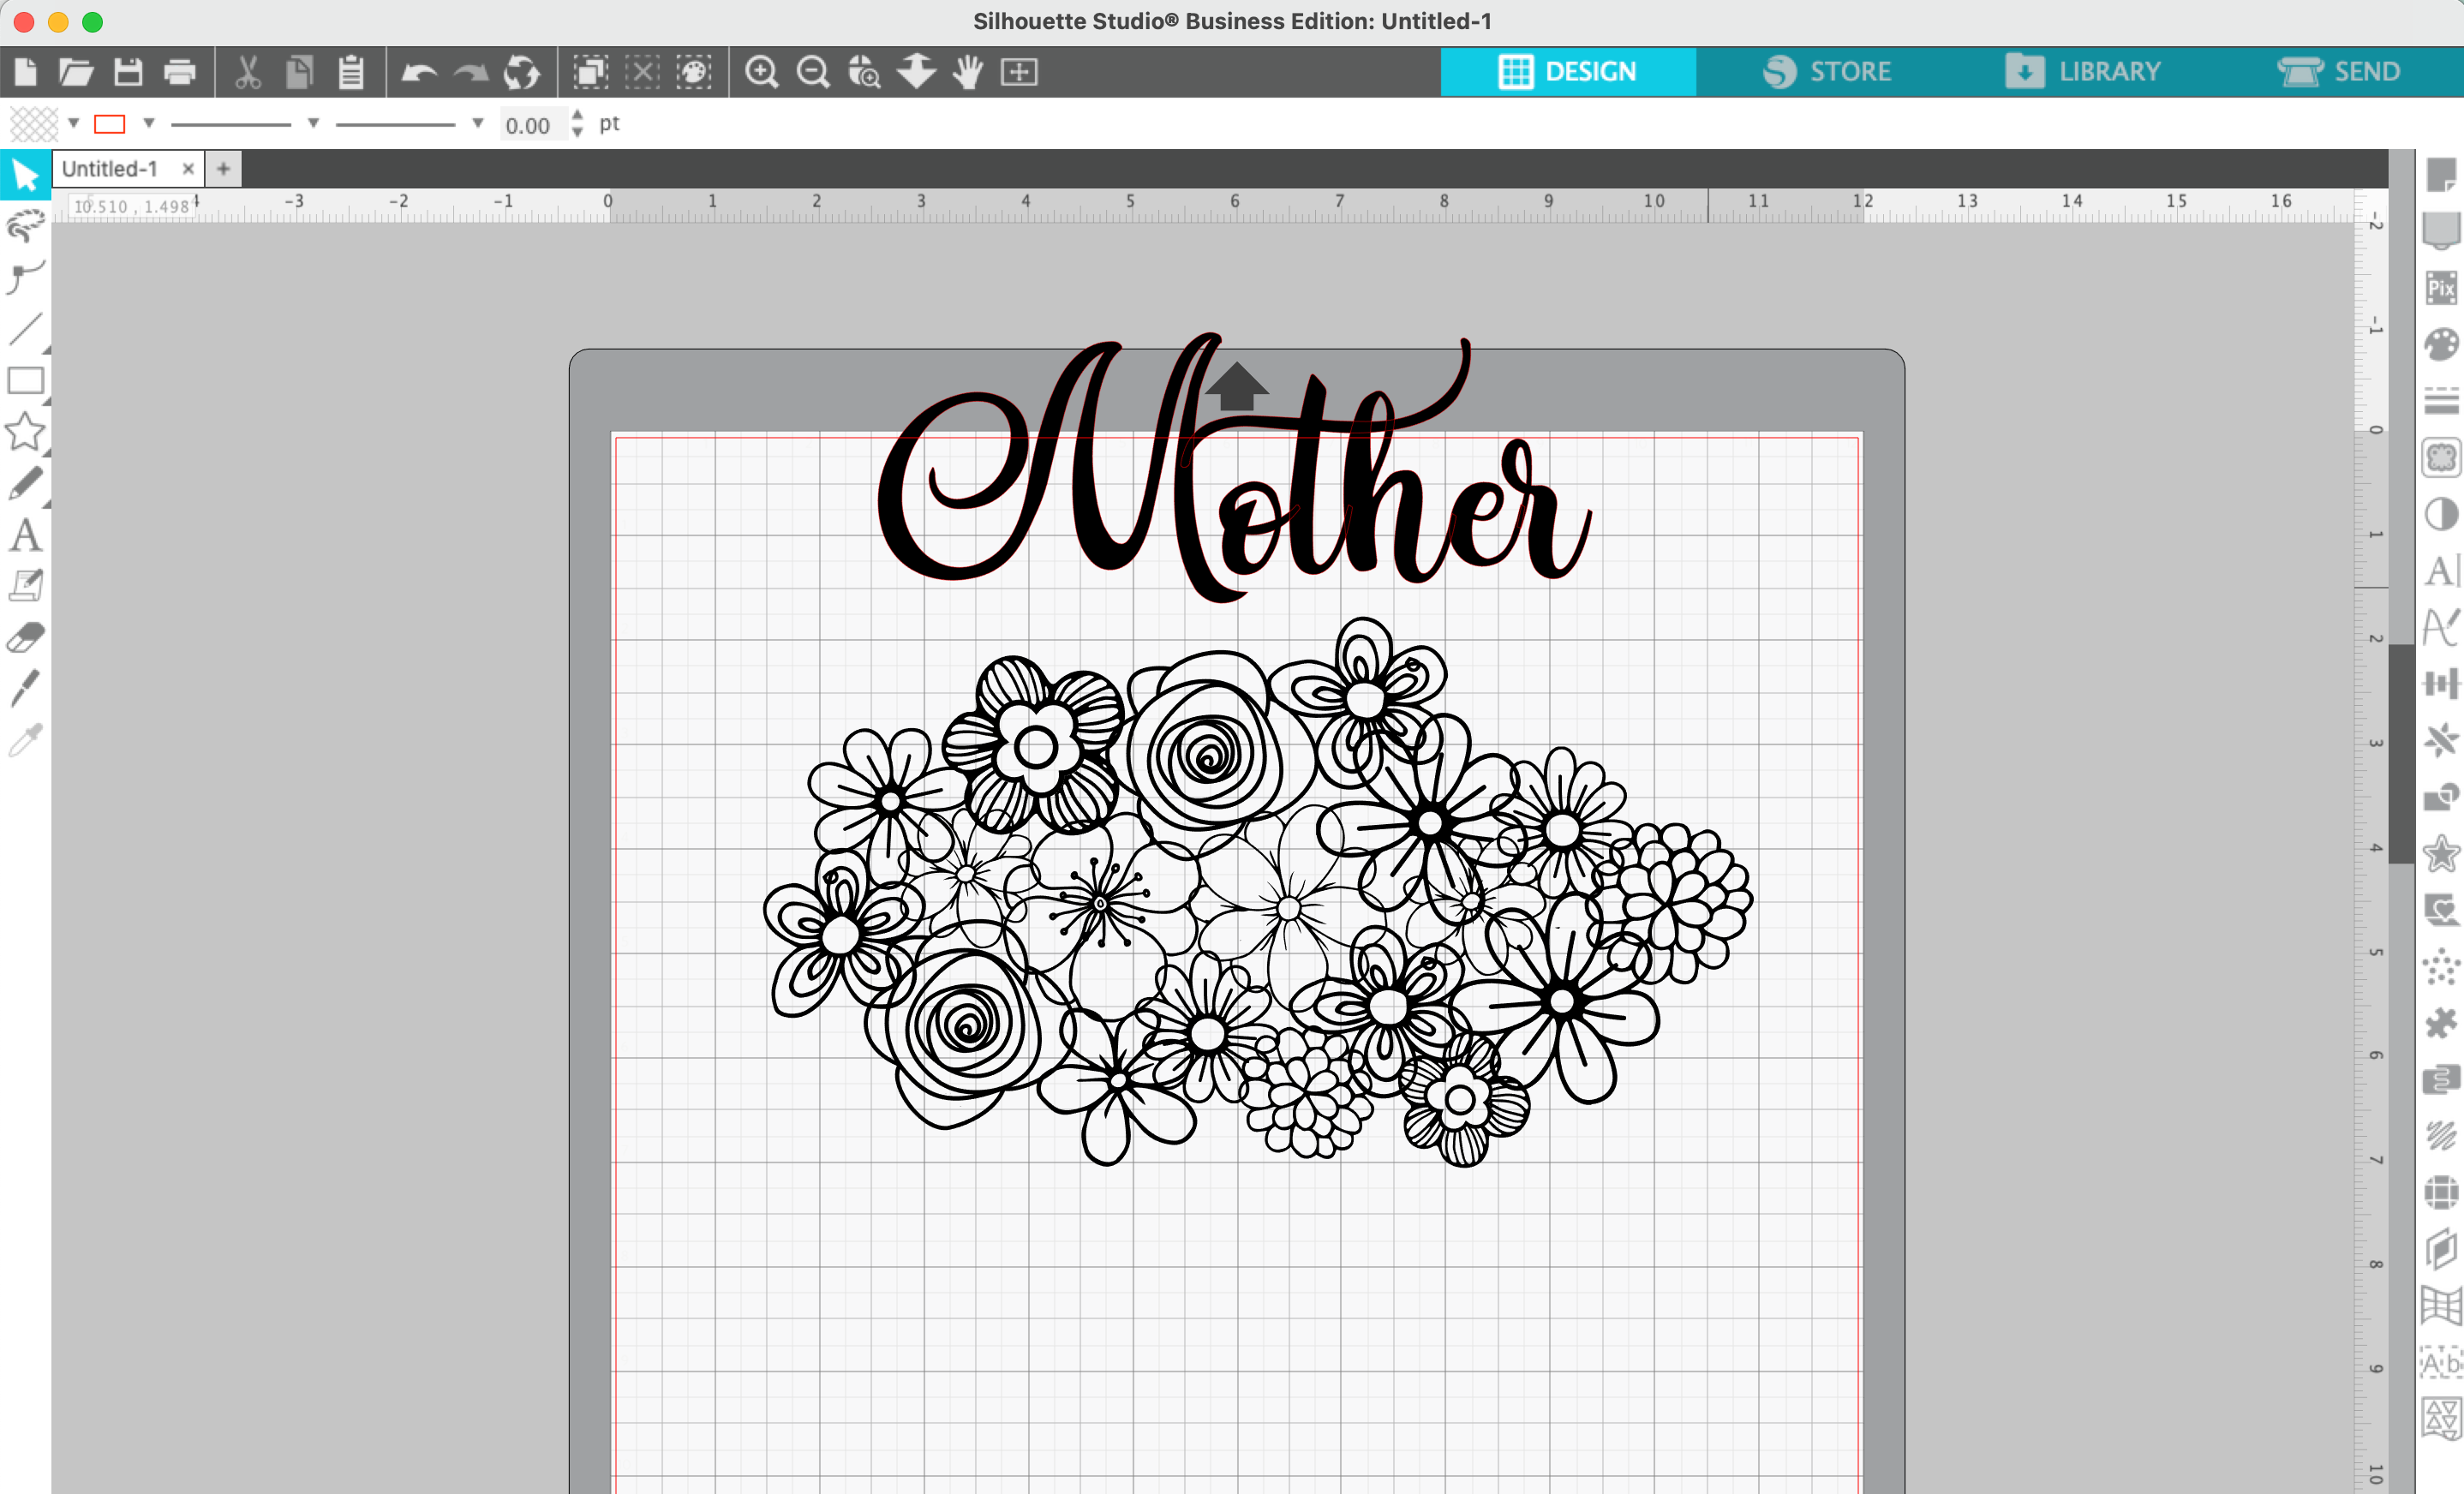
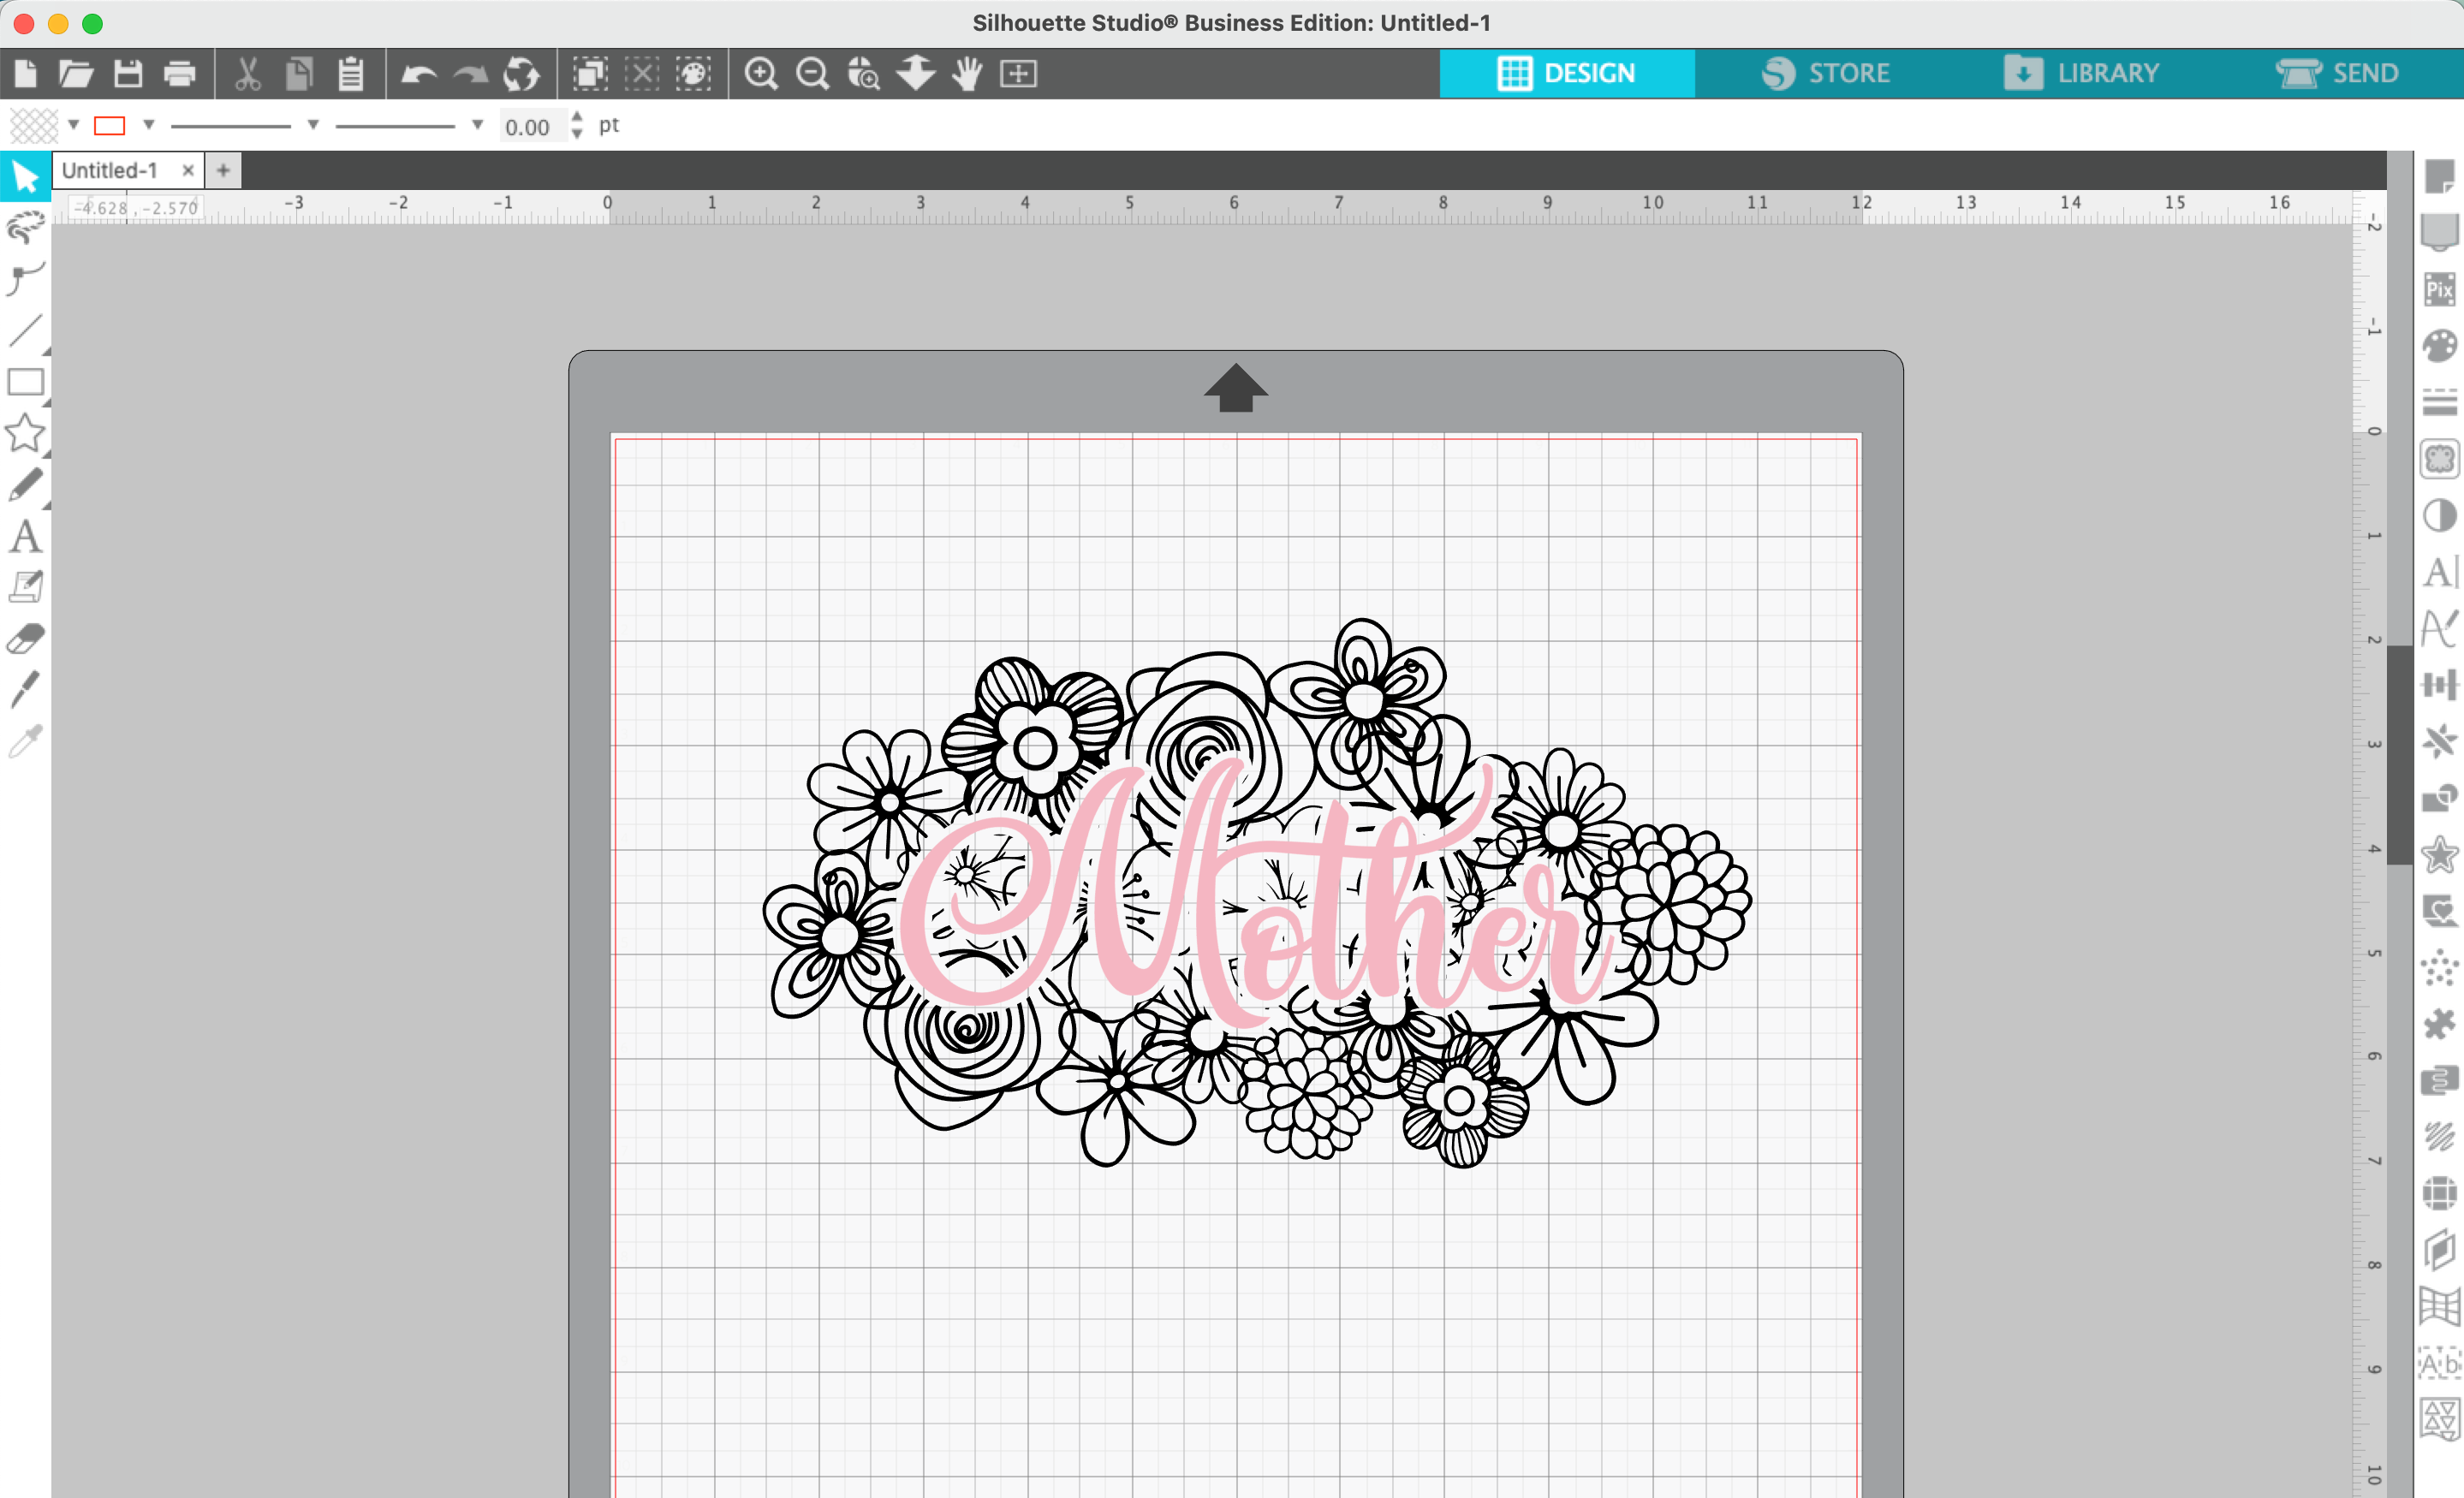
Open your line art flowers in Silhouette Studio. I’ve found the easiest way to open multiple designs on the same mat in Silhouette Studio is to just drag them from the download location onto the mat. (I have a Mac, so this may or may not work for you.)
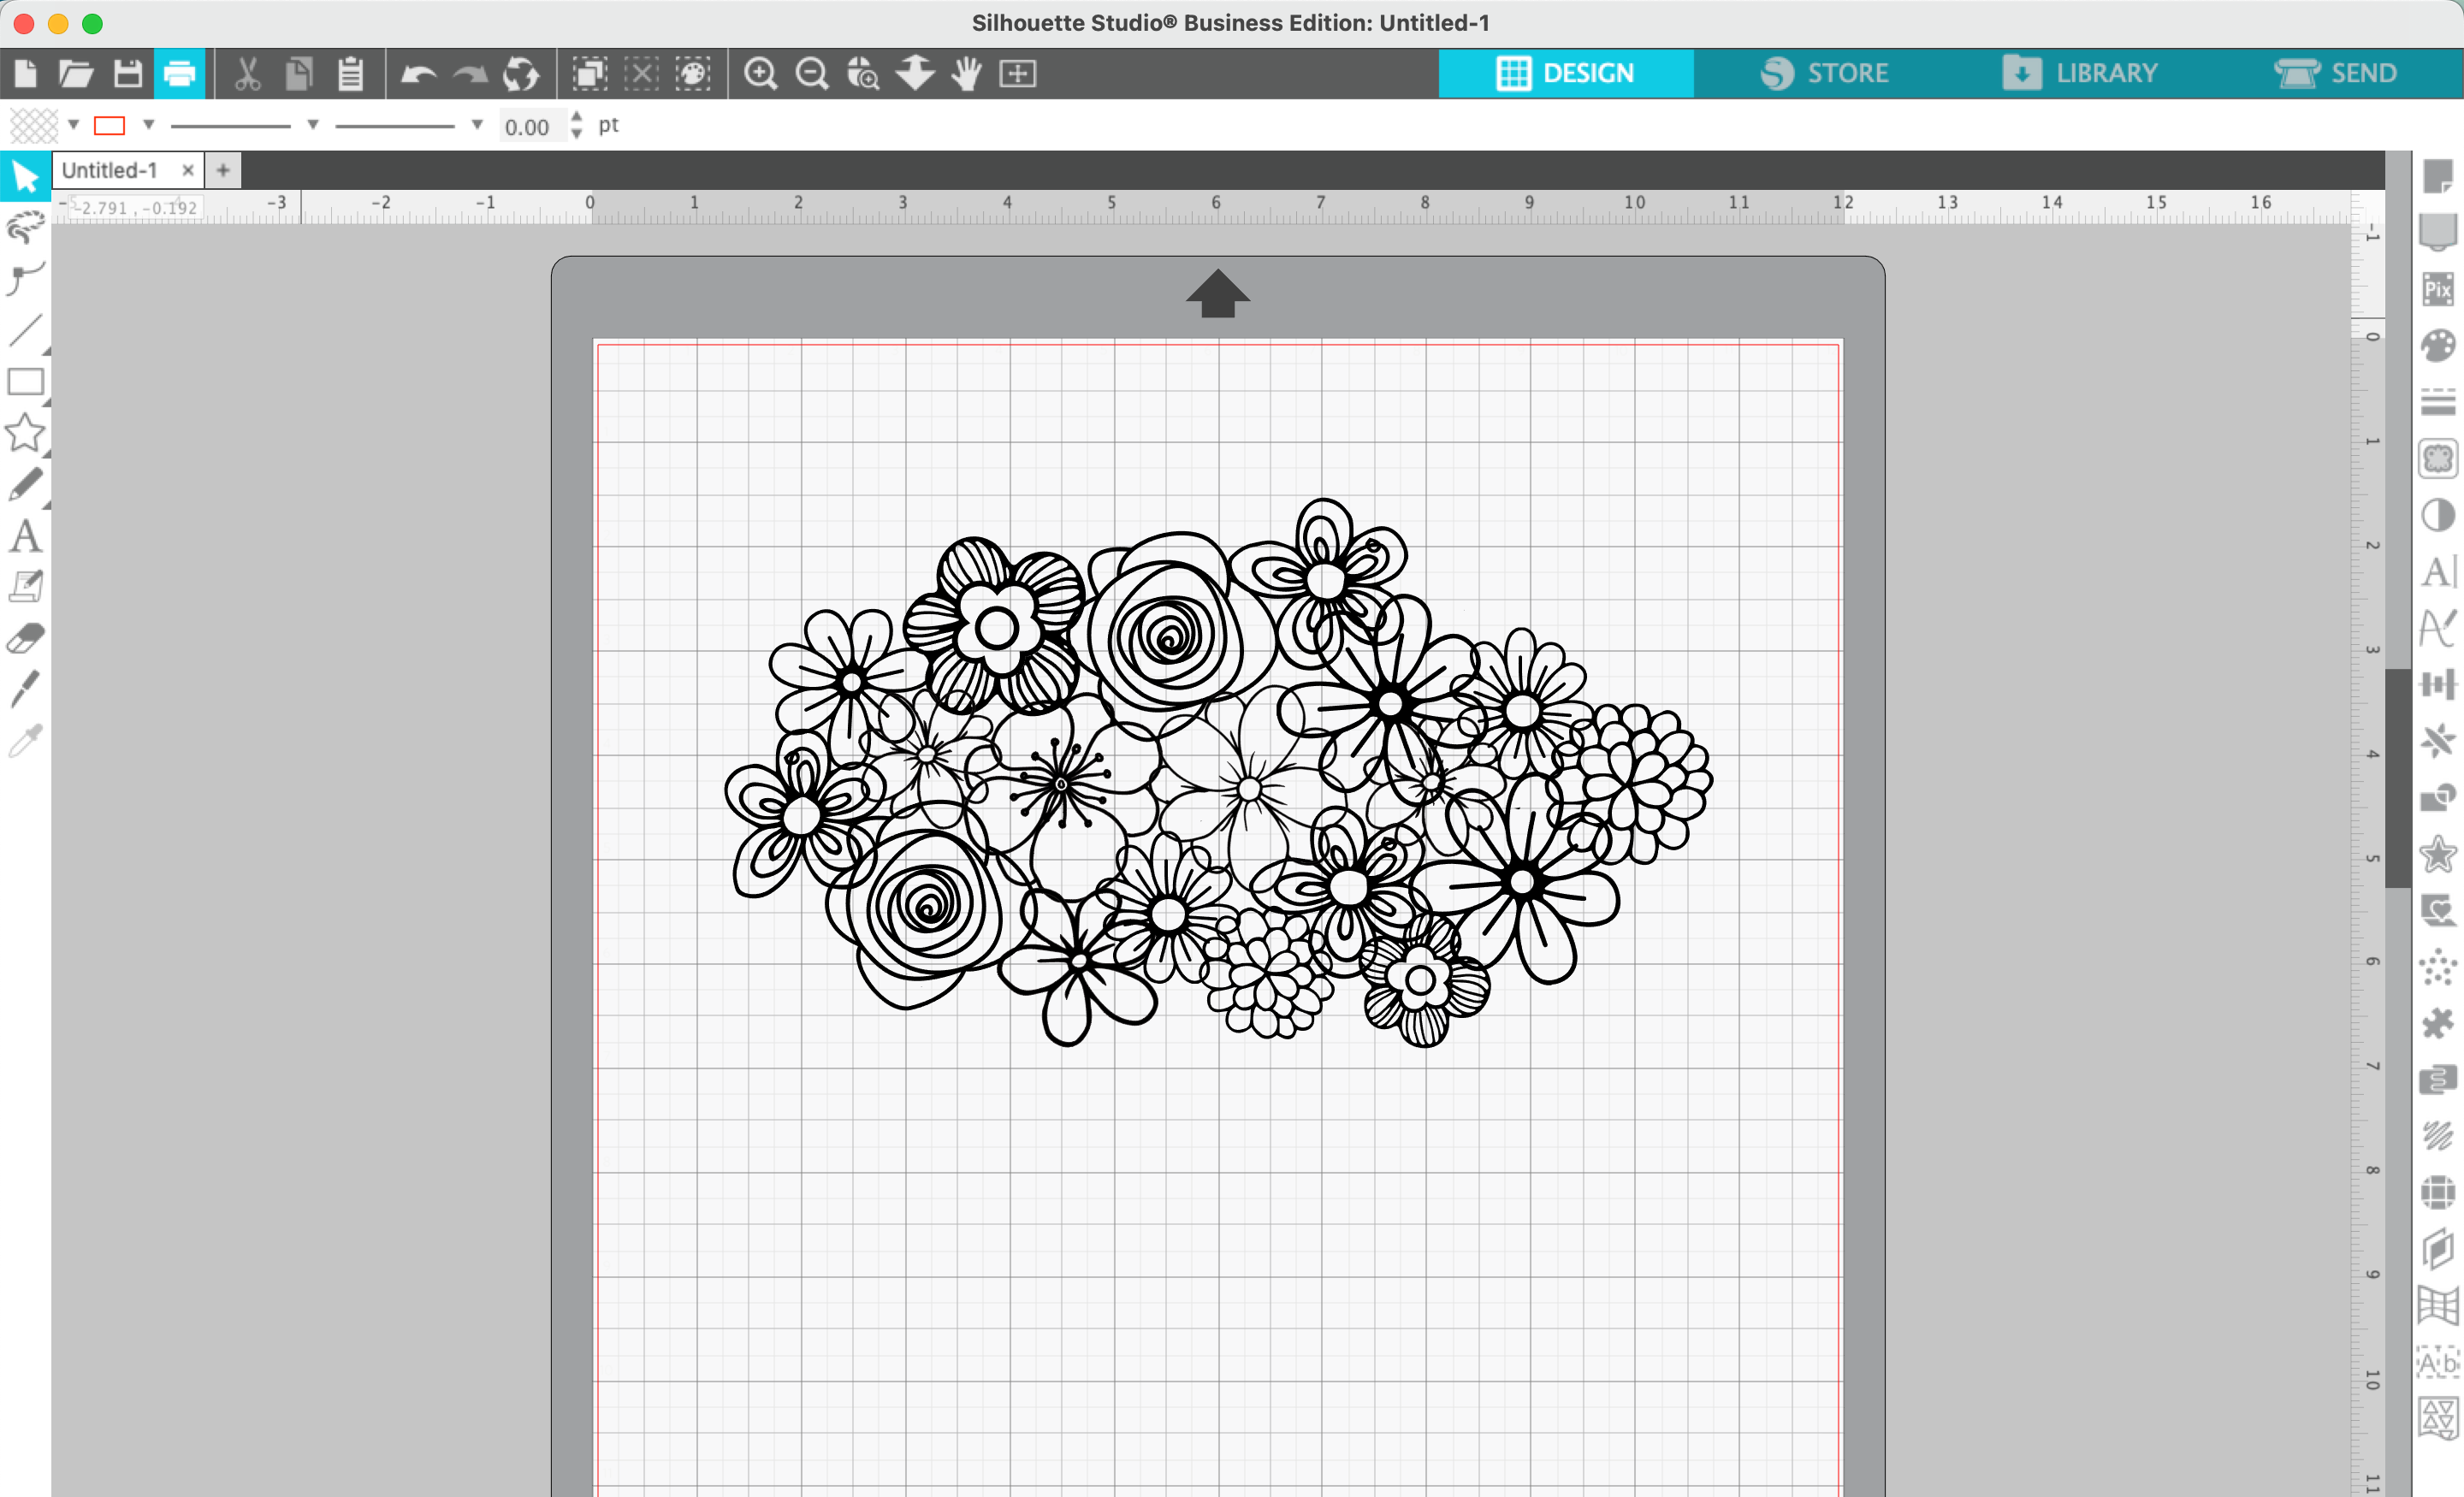
2. Once you’ve got all the designs open, arrange them into a cluster. Duplicate, resize, and rotate as needed.
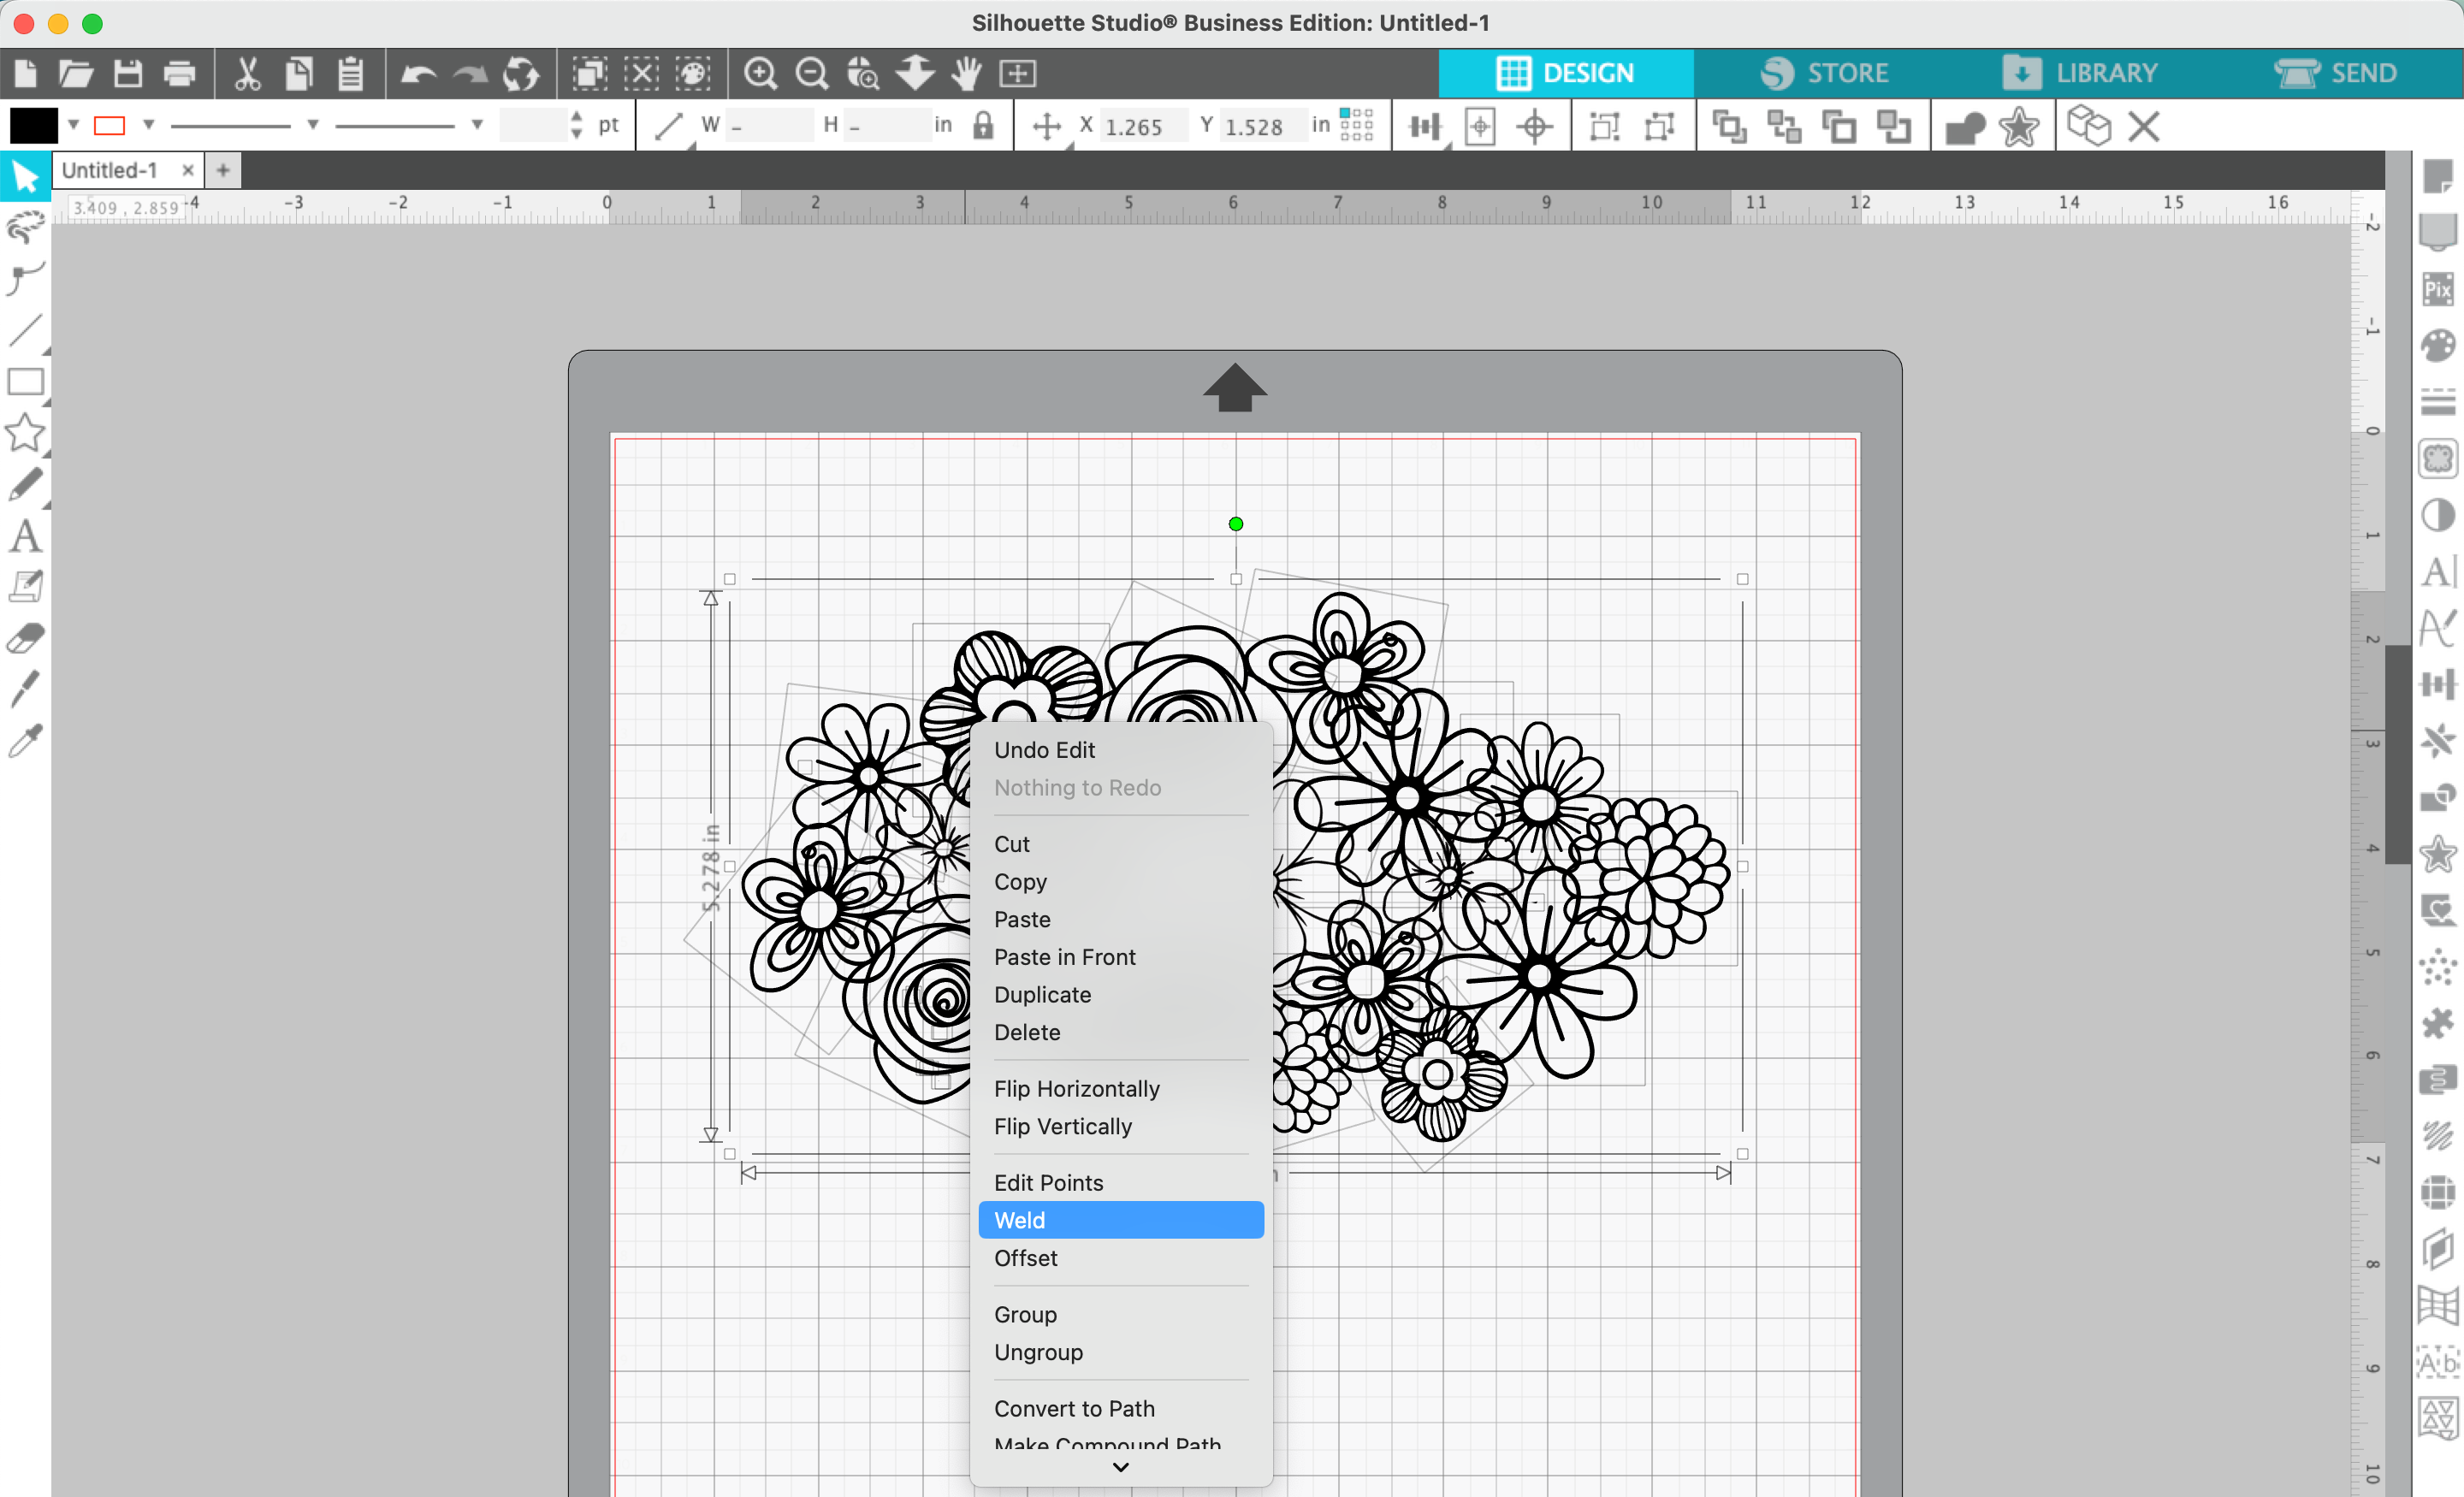
3. Select everything, right click, and ‘Weld’ together.
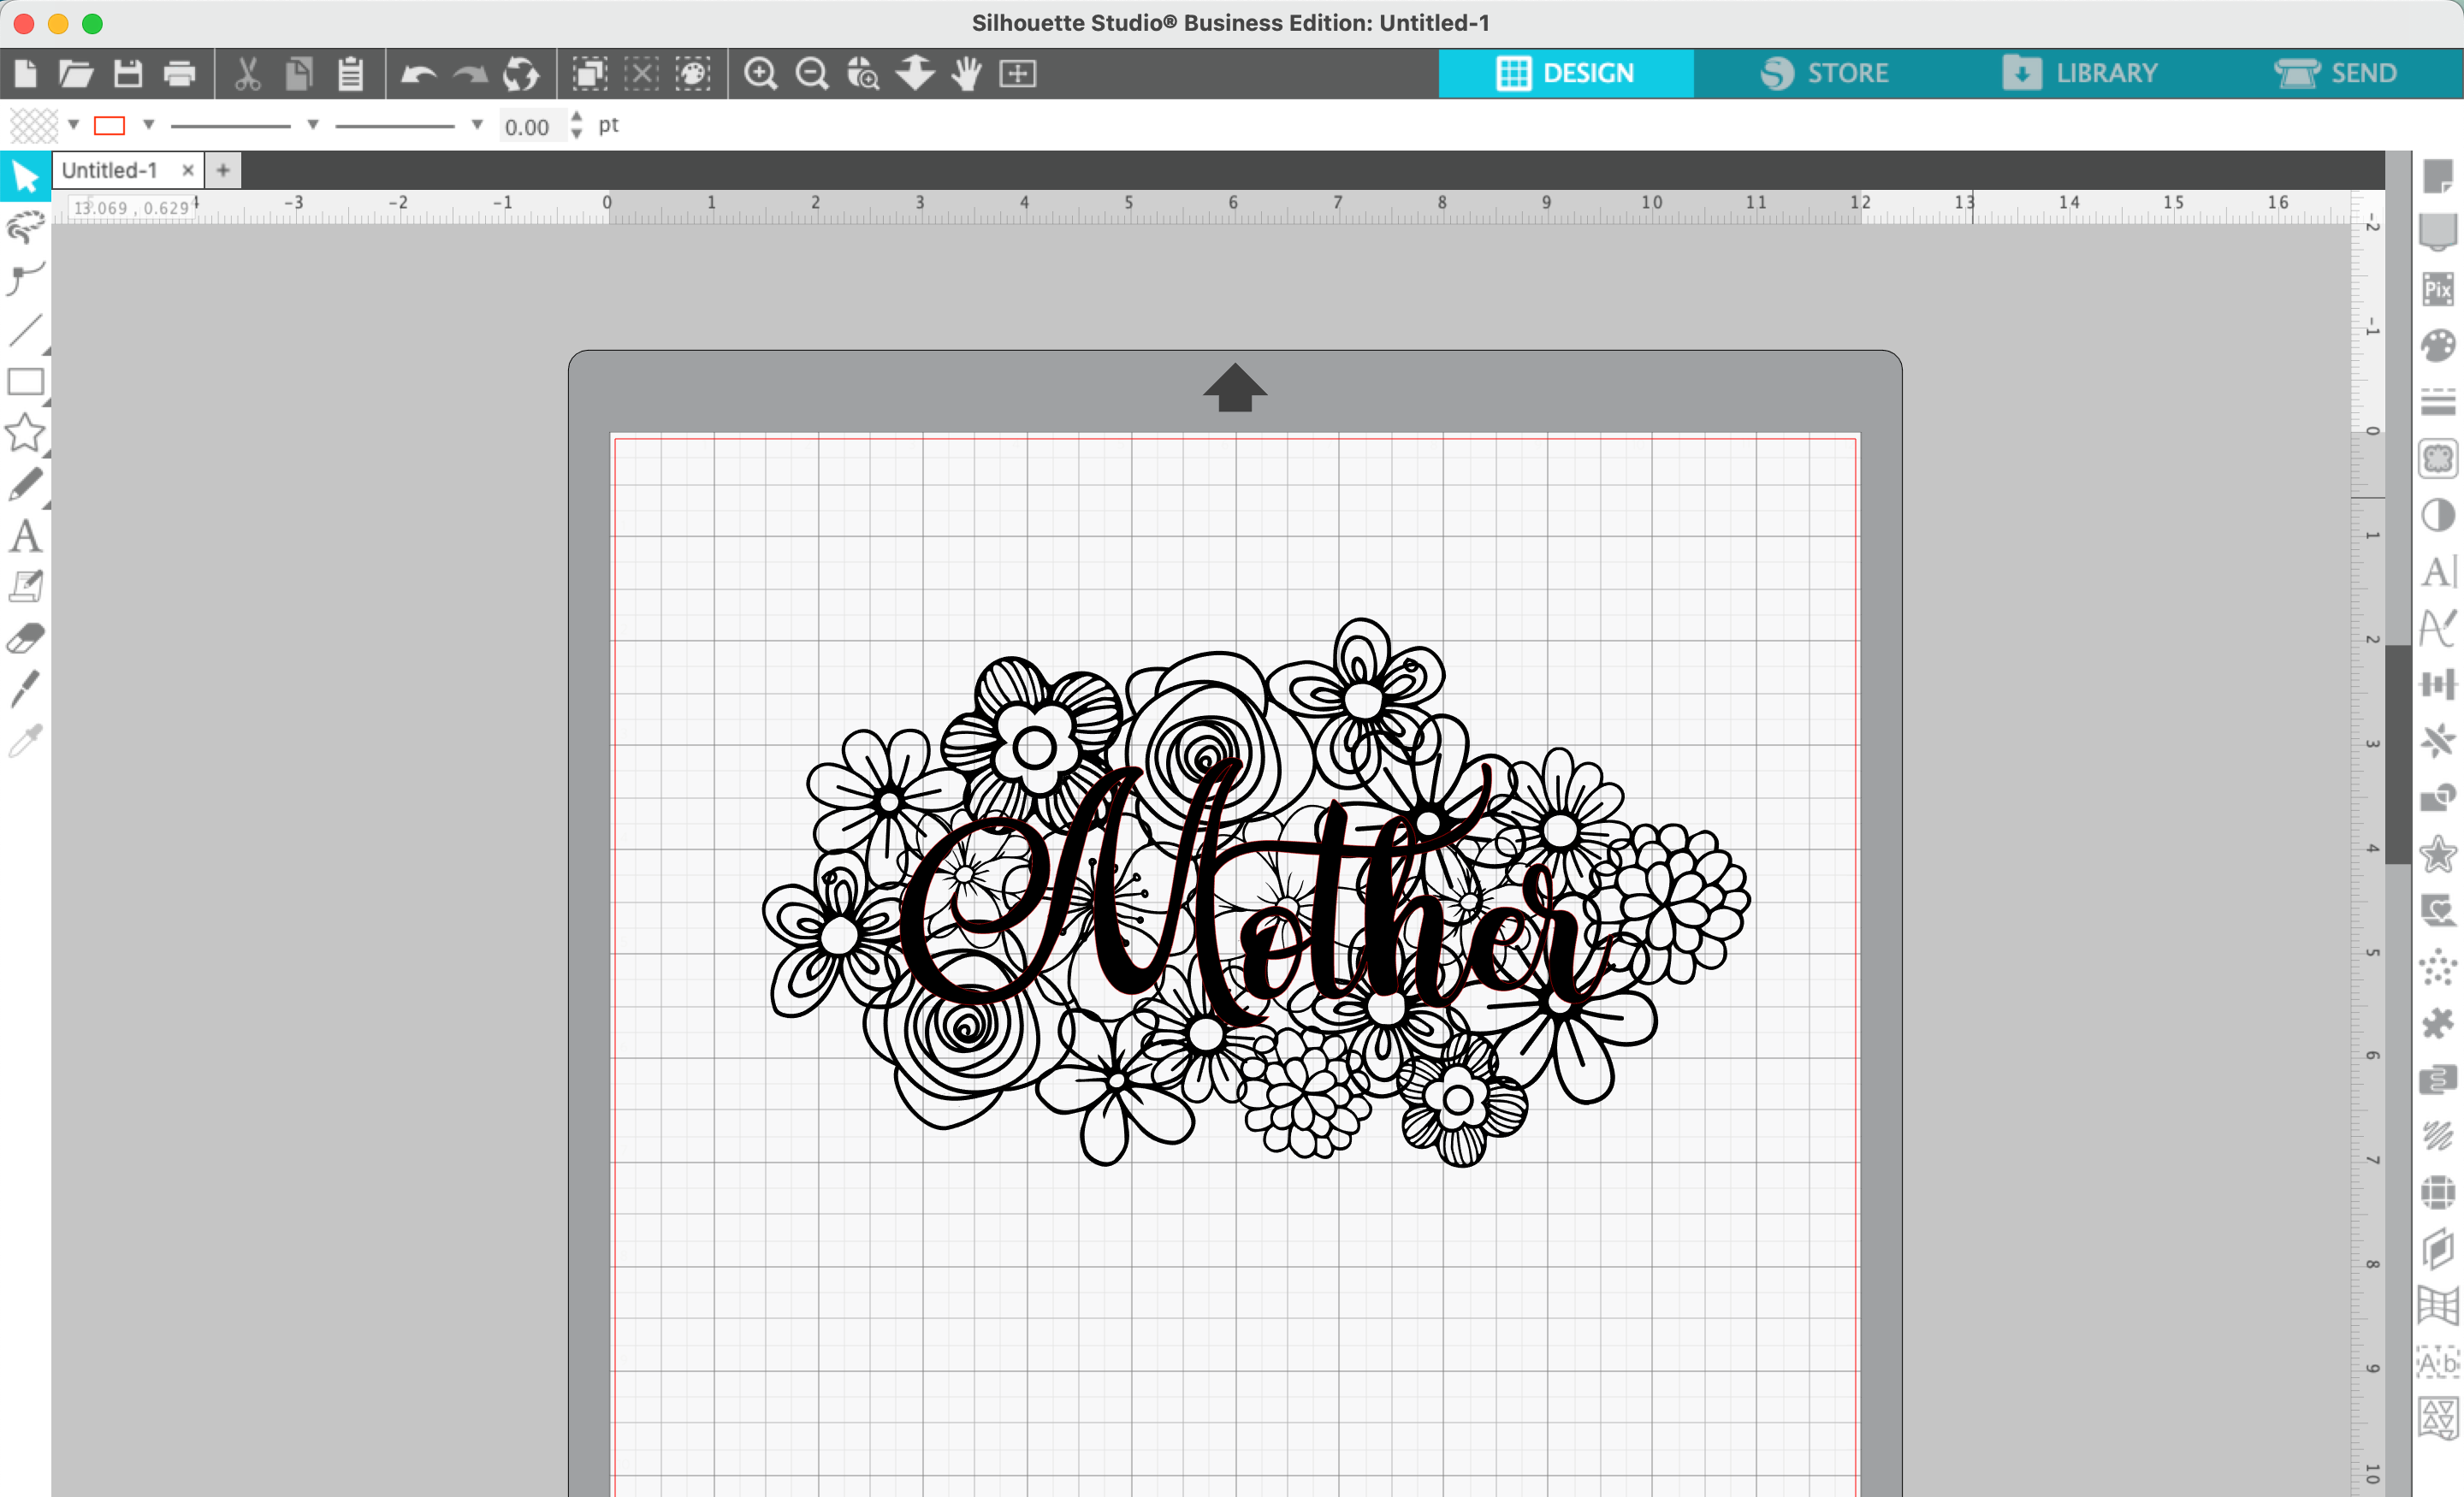
4. Type the word ‘Mother’, ‘Mom’, ‘Grandma’, ‘Nana’, and so on in a script font. In this tutorial, I’m using Amastery Script. Weld the text if needed.
5. Drag your text onto the floral cluster.
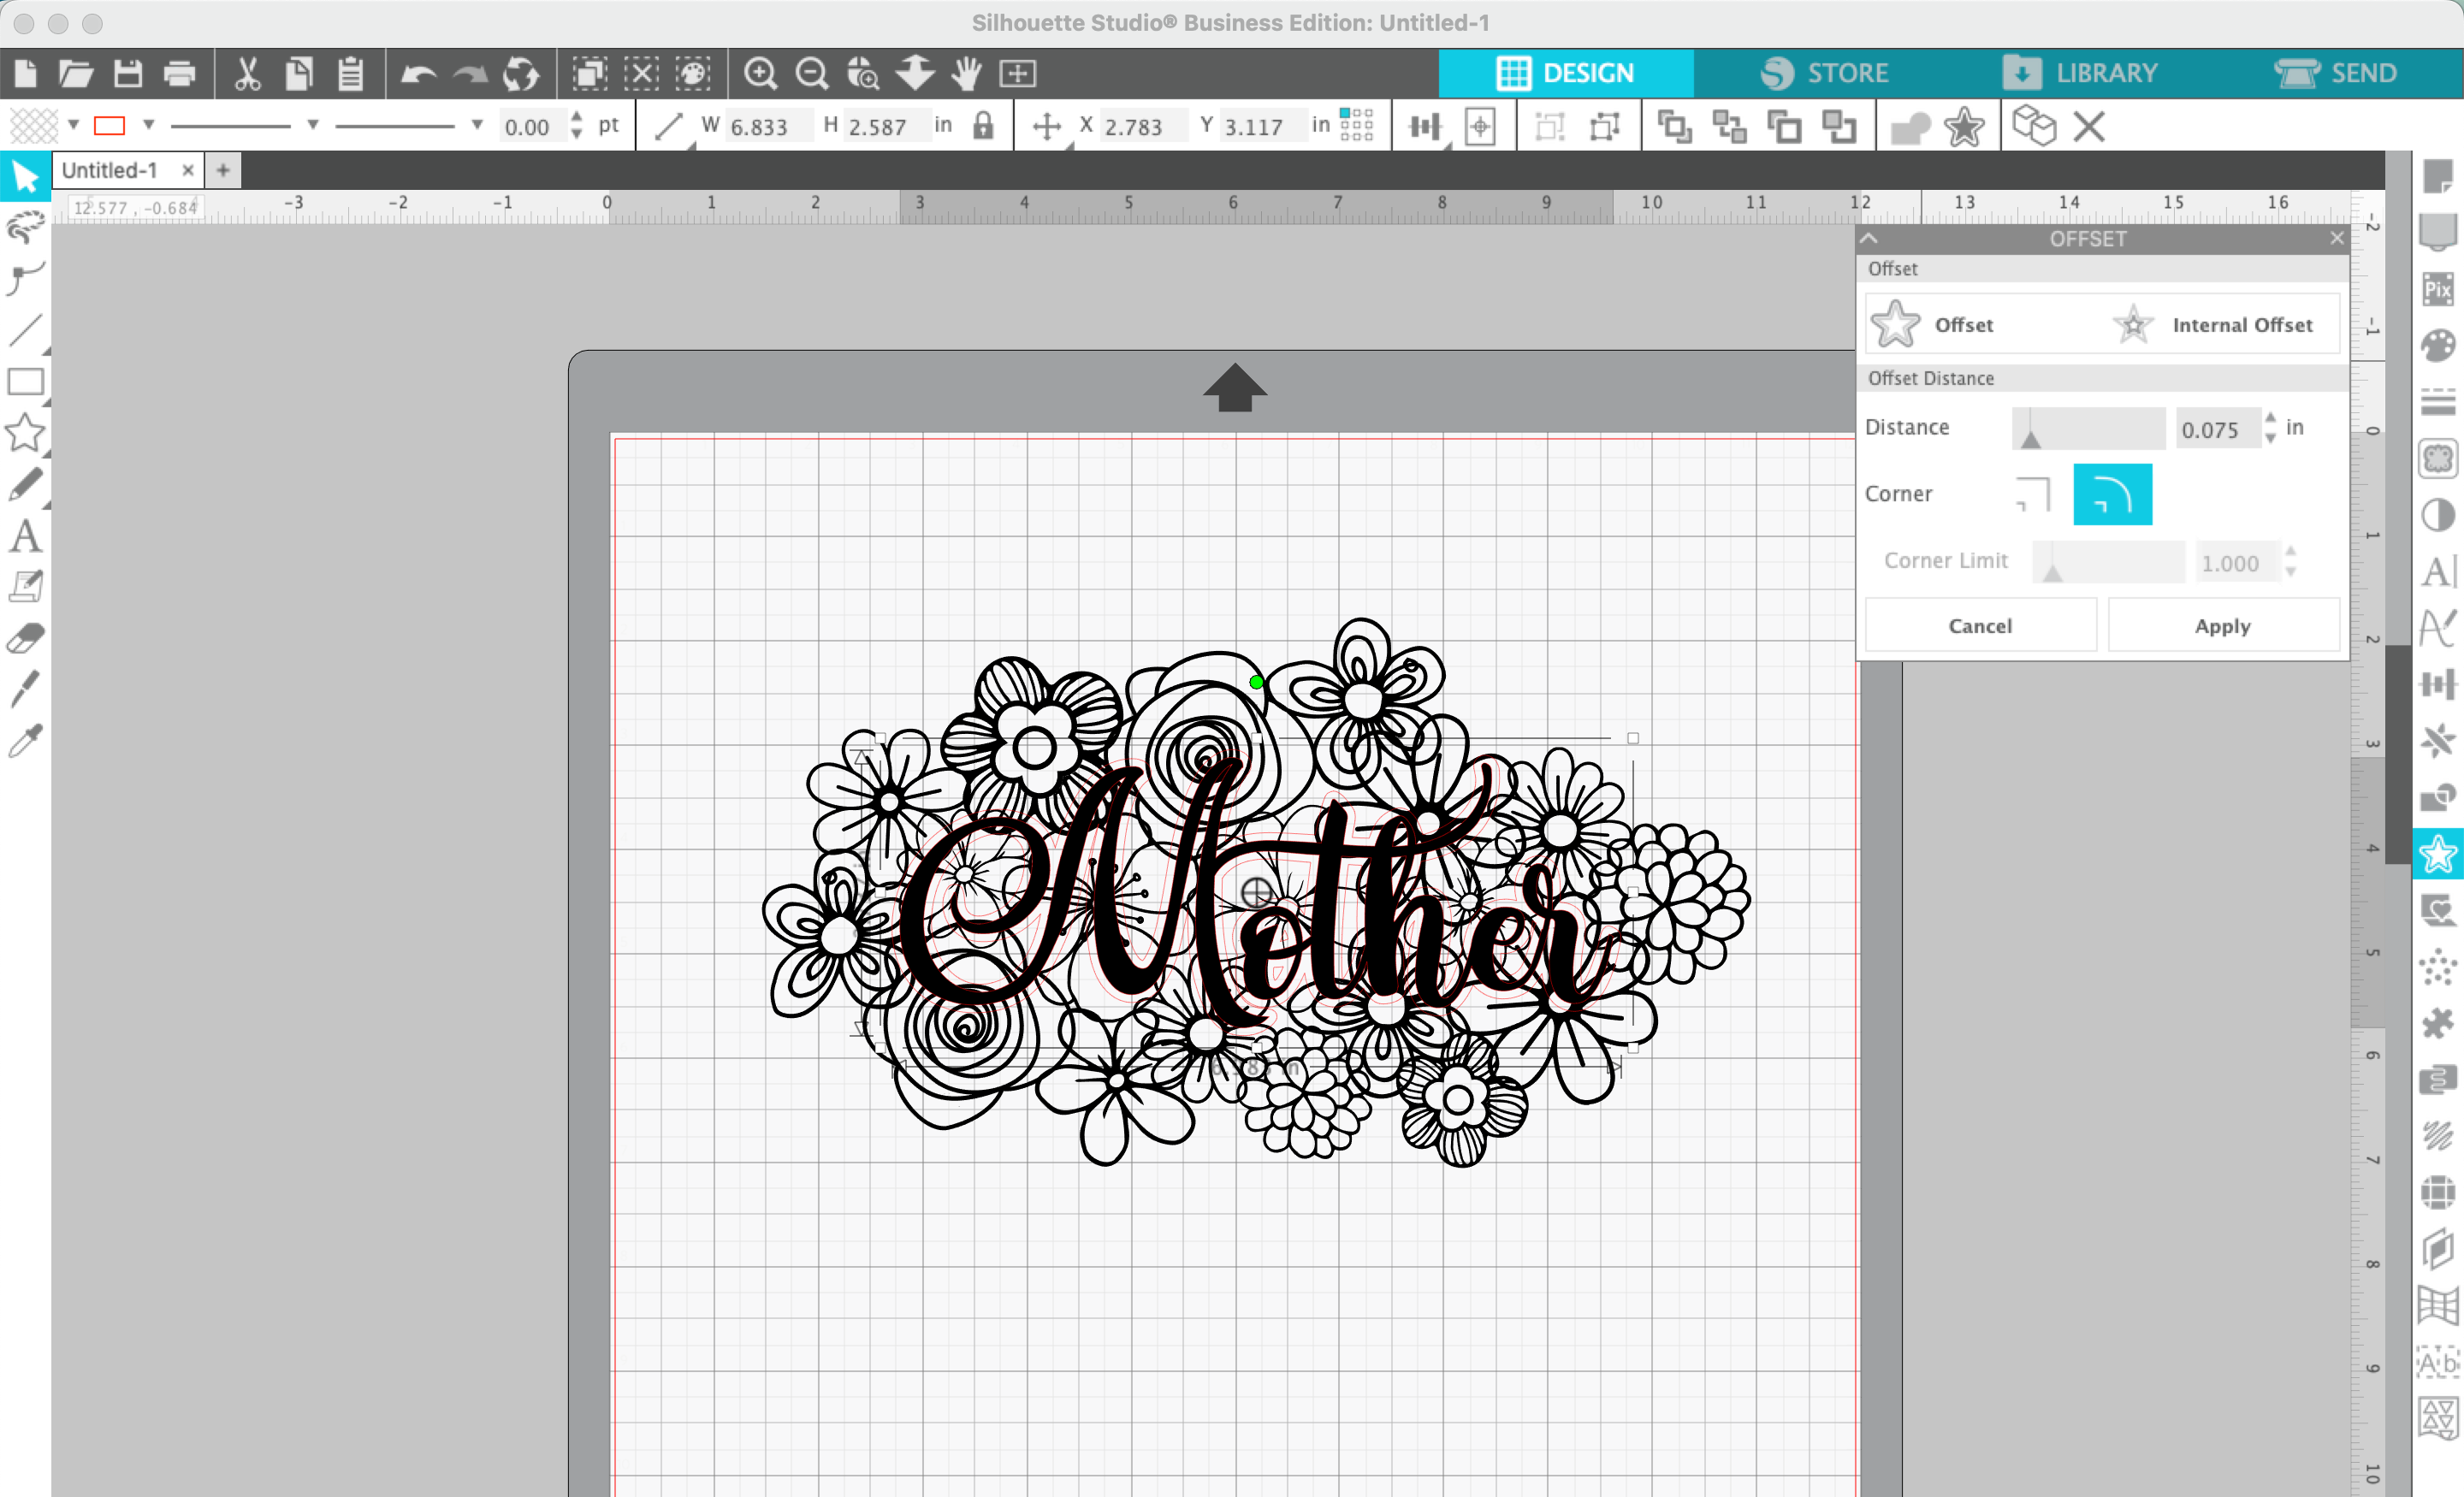
6. Navigate to ‘Panels’, then ‘Offset’, and offset your text.
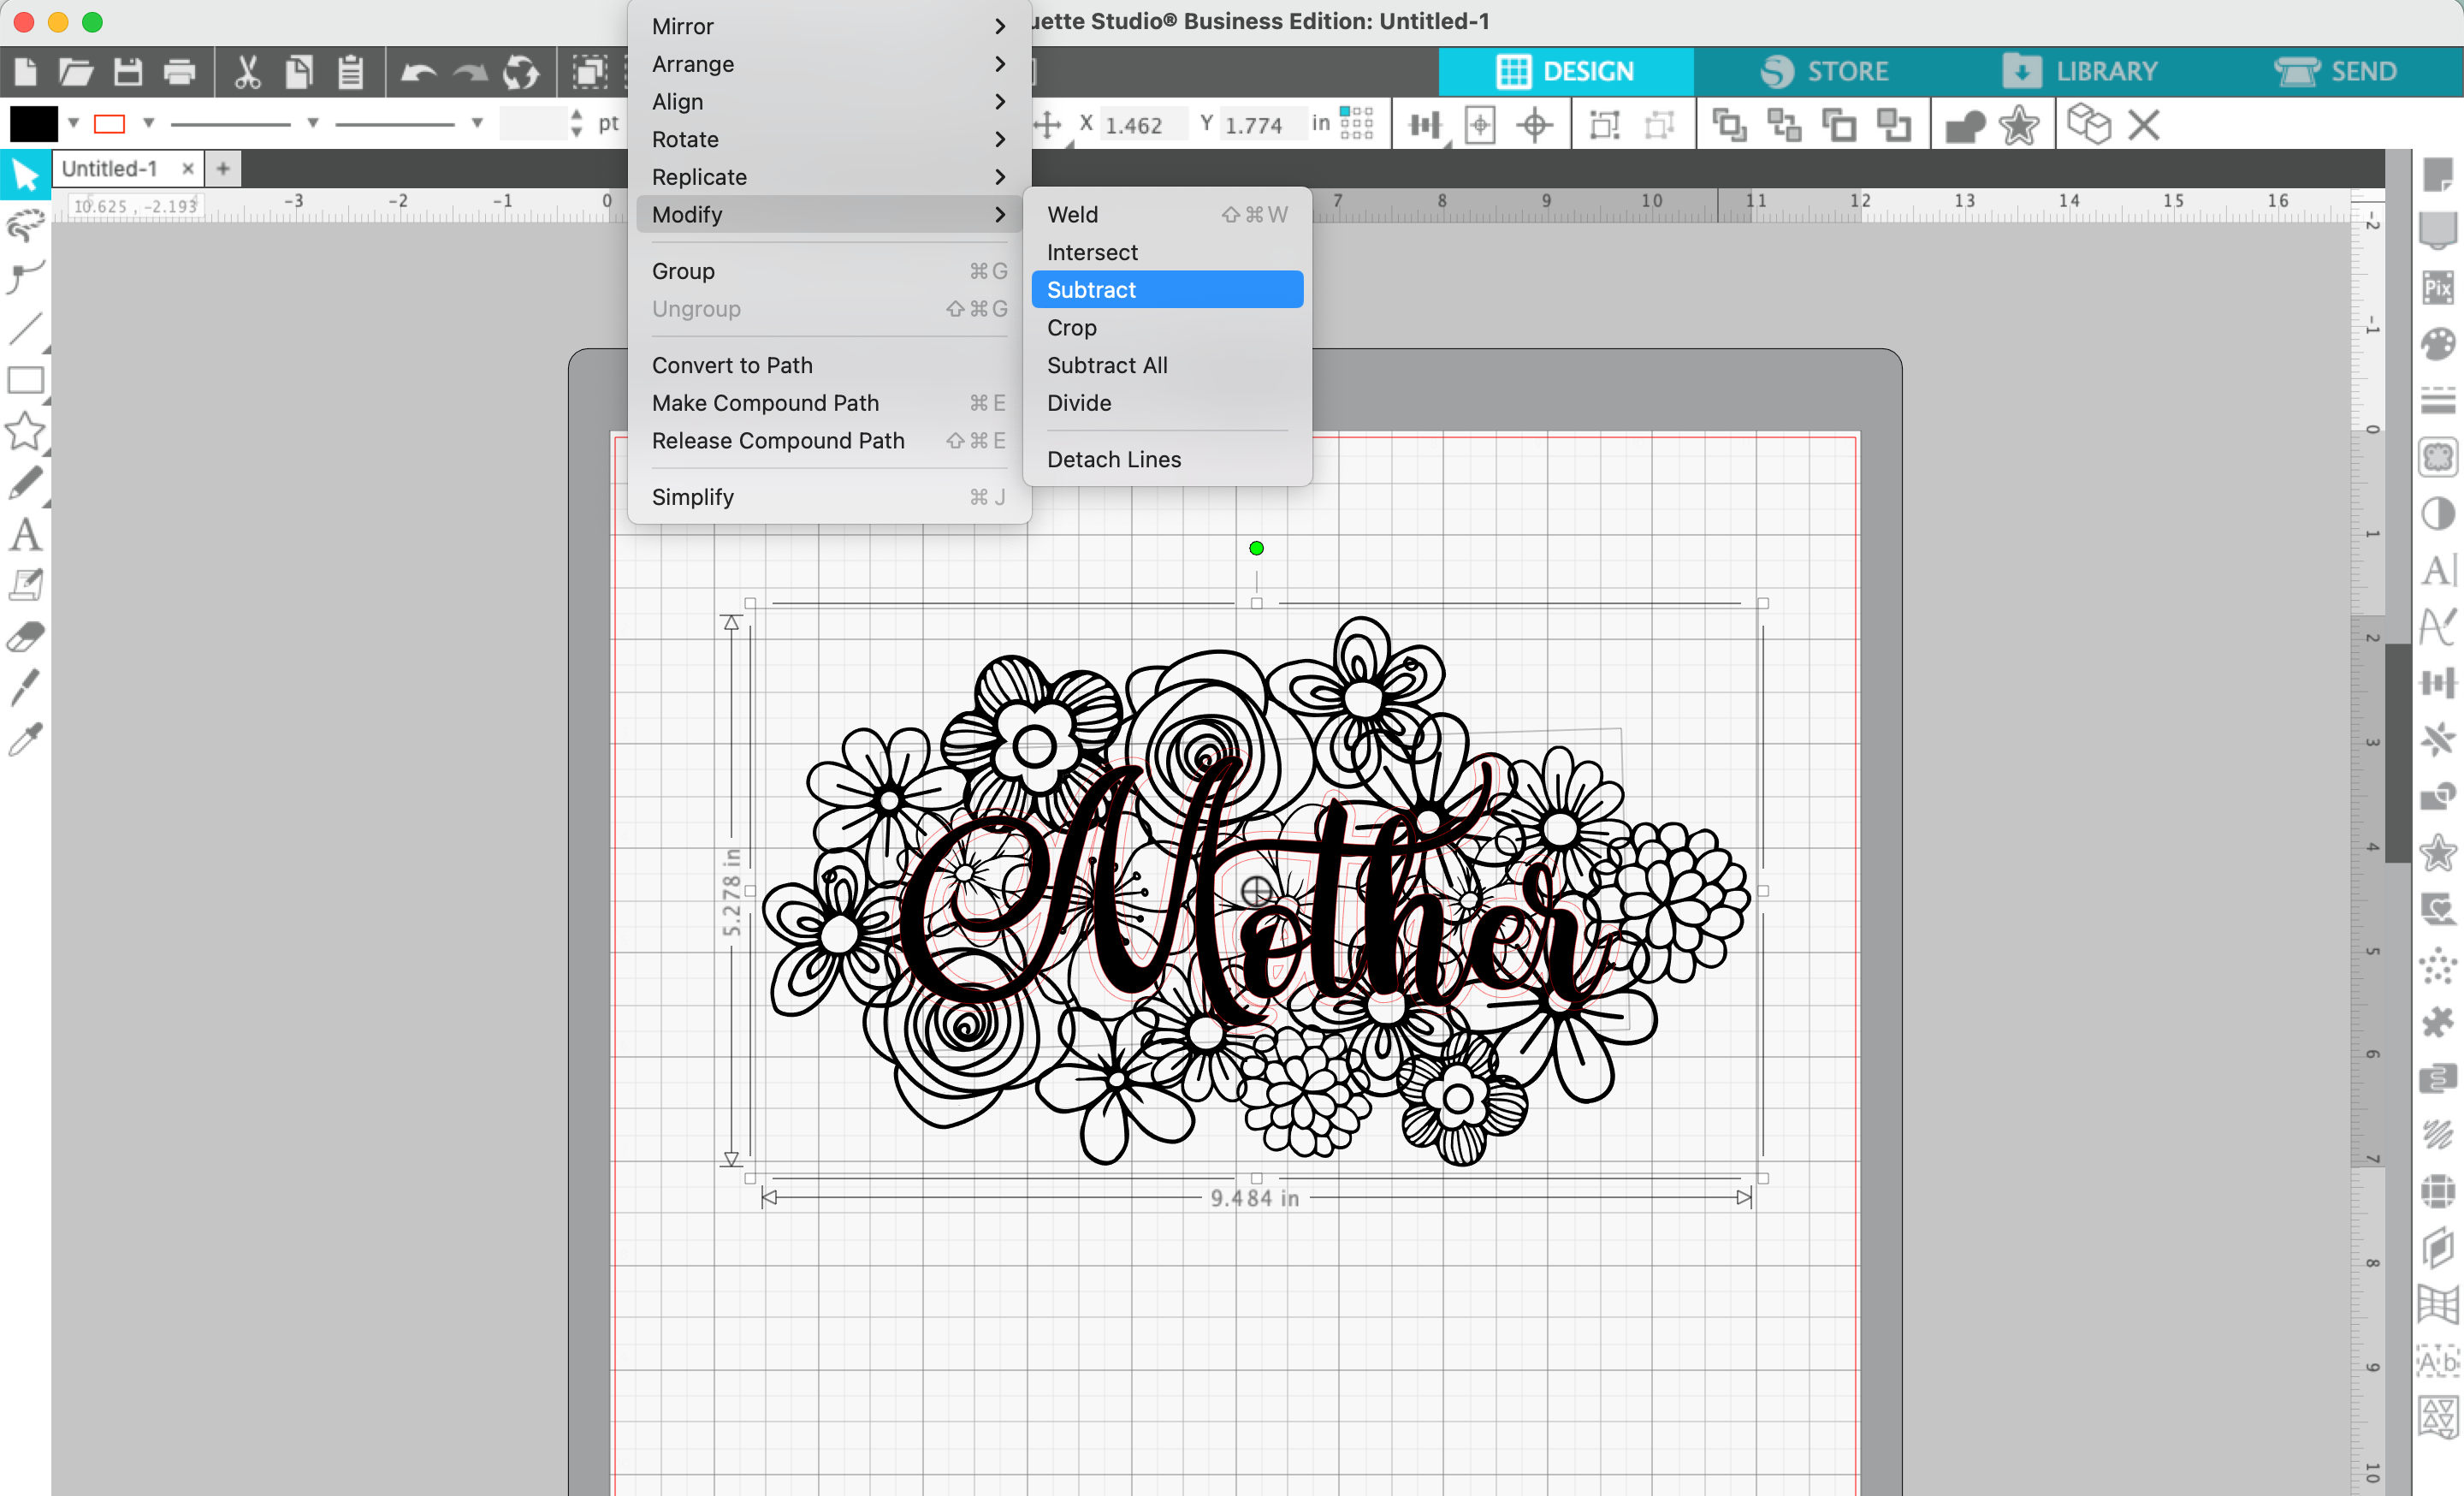
7. Select the floral cluster, then the text offset. Navigate to ‘Panels’, ‘Offset’, ‘Subtract’.
8. Add color if you’d like.
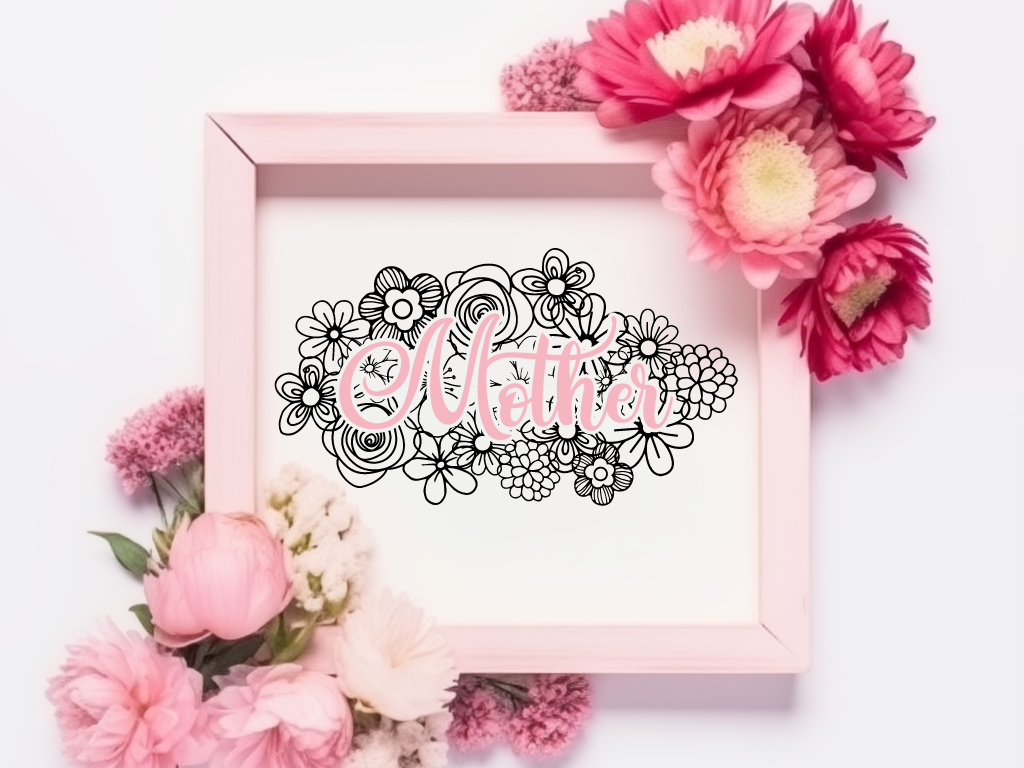
That’s it! Your design is ready to go!
Don’t Forget to Save!
To save your new SVG creation, head to ‘File’, ‘Save As’, ‘Save to Hard Drive’, name the file, then select ‘SVG’ from the dropdown menu.
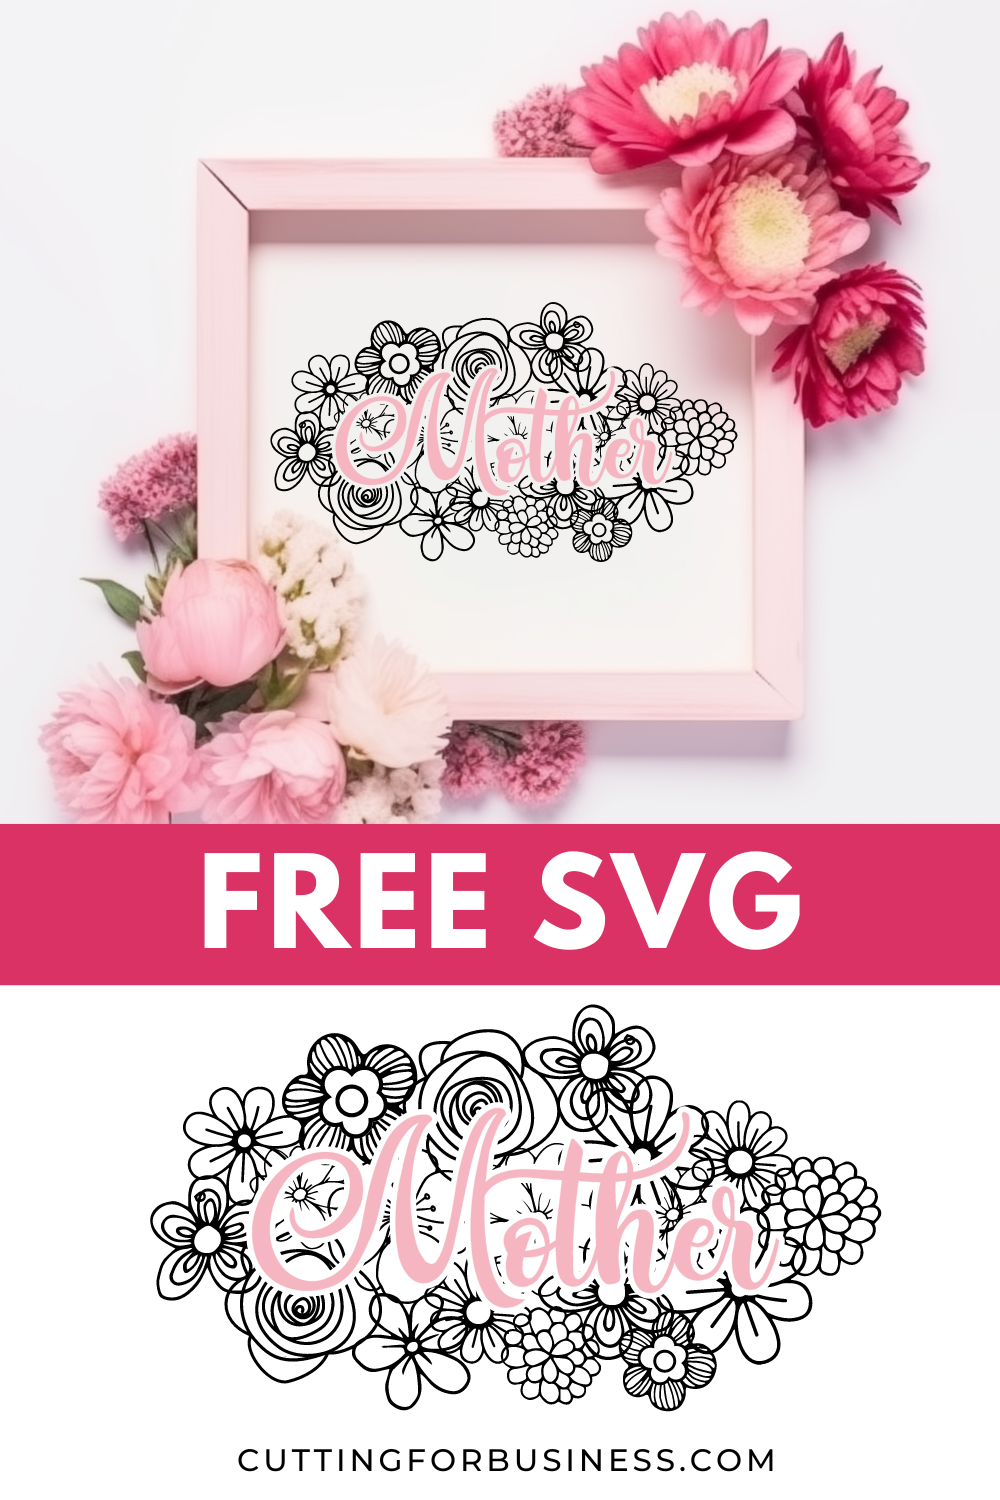
Don’t have time to design it yourself? This SVG design is available free to Cutting for Business mailing list subscribers. Download it.
What will you receive in your email box from Cutting for Business? You’ll receive 4-5 emails per week related to crafting, freebies, exclusive deals, and more!
That time of year is coming up: Graduation! Whether you are celebrating kindergarten graduation, high school graduation, or college graduation – it’s such an exciting time of year.
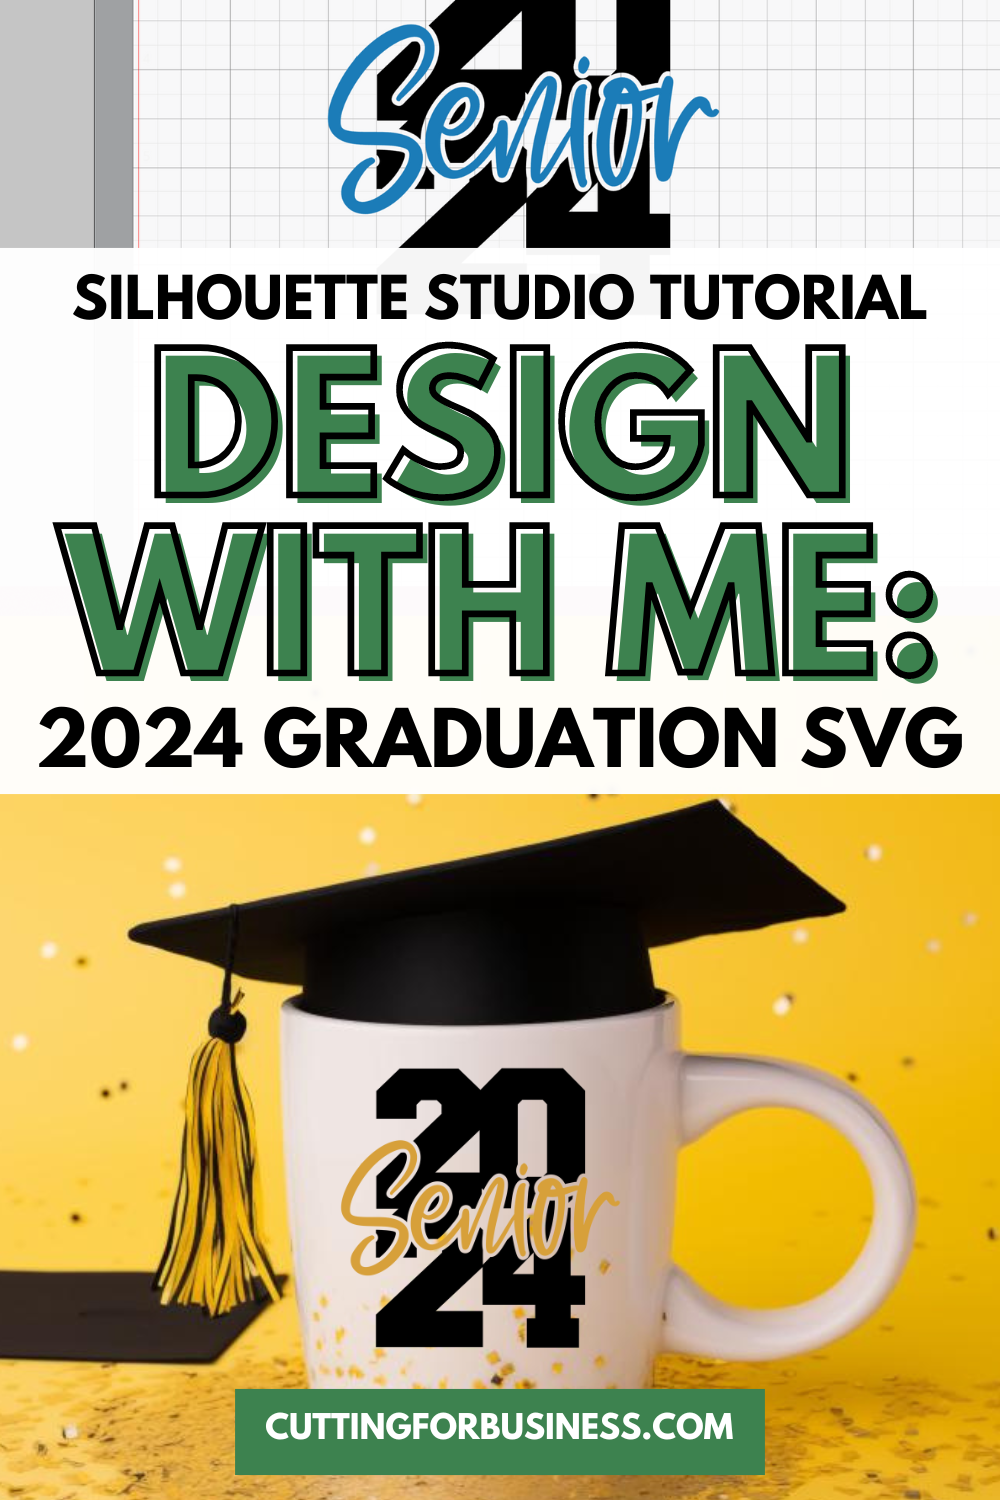
Today, let’s design a 2024 graduation SVG. Of course, if you come across this tutorial after 2024, you can follow the same steps – just change the year.
Tutorial: 2024 Graduation SVG
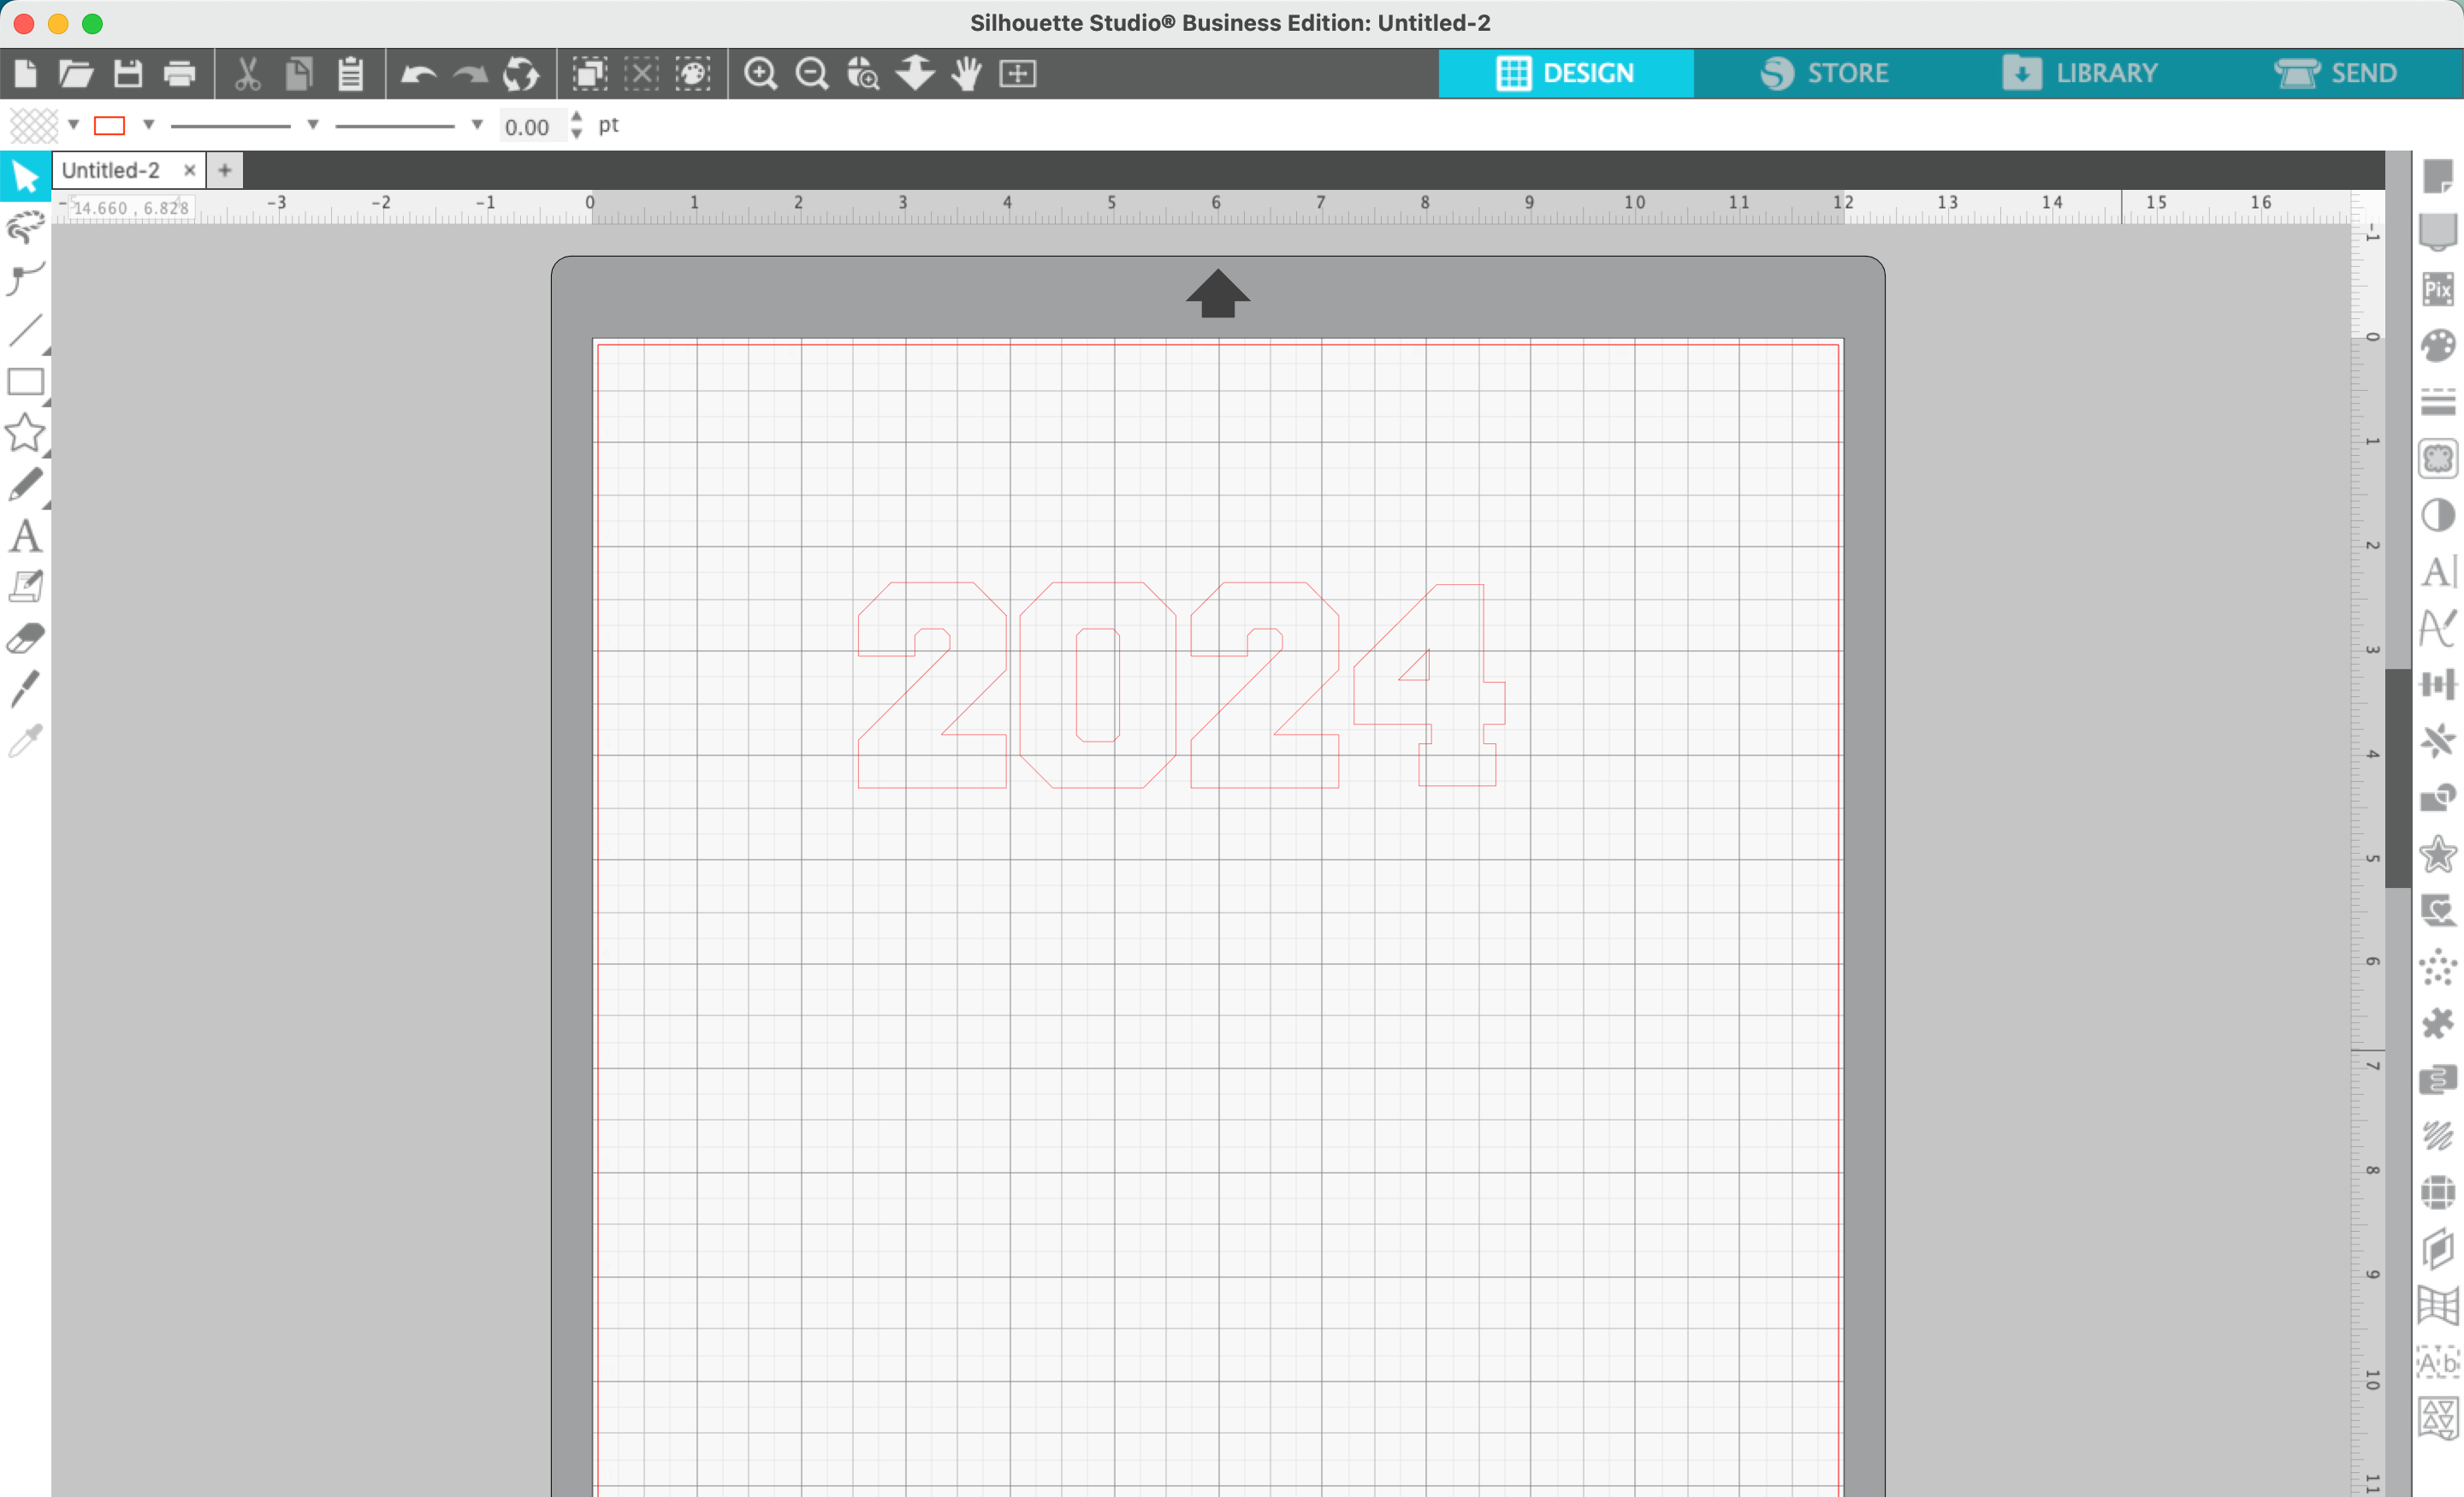
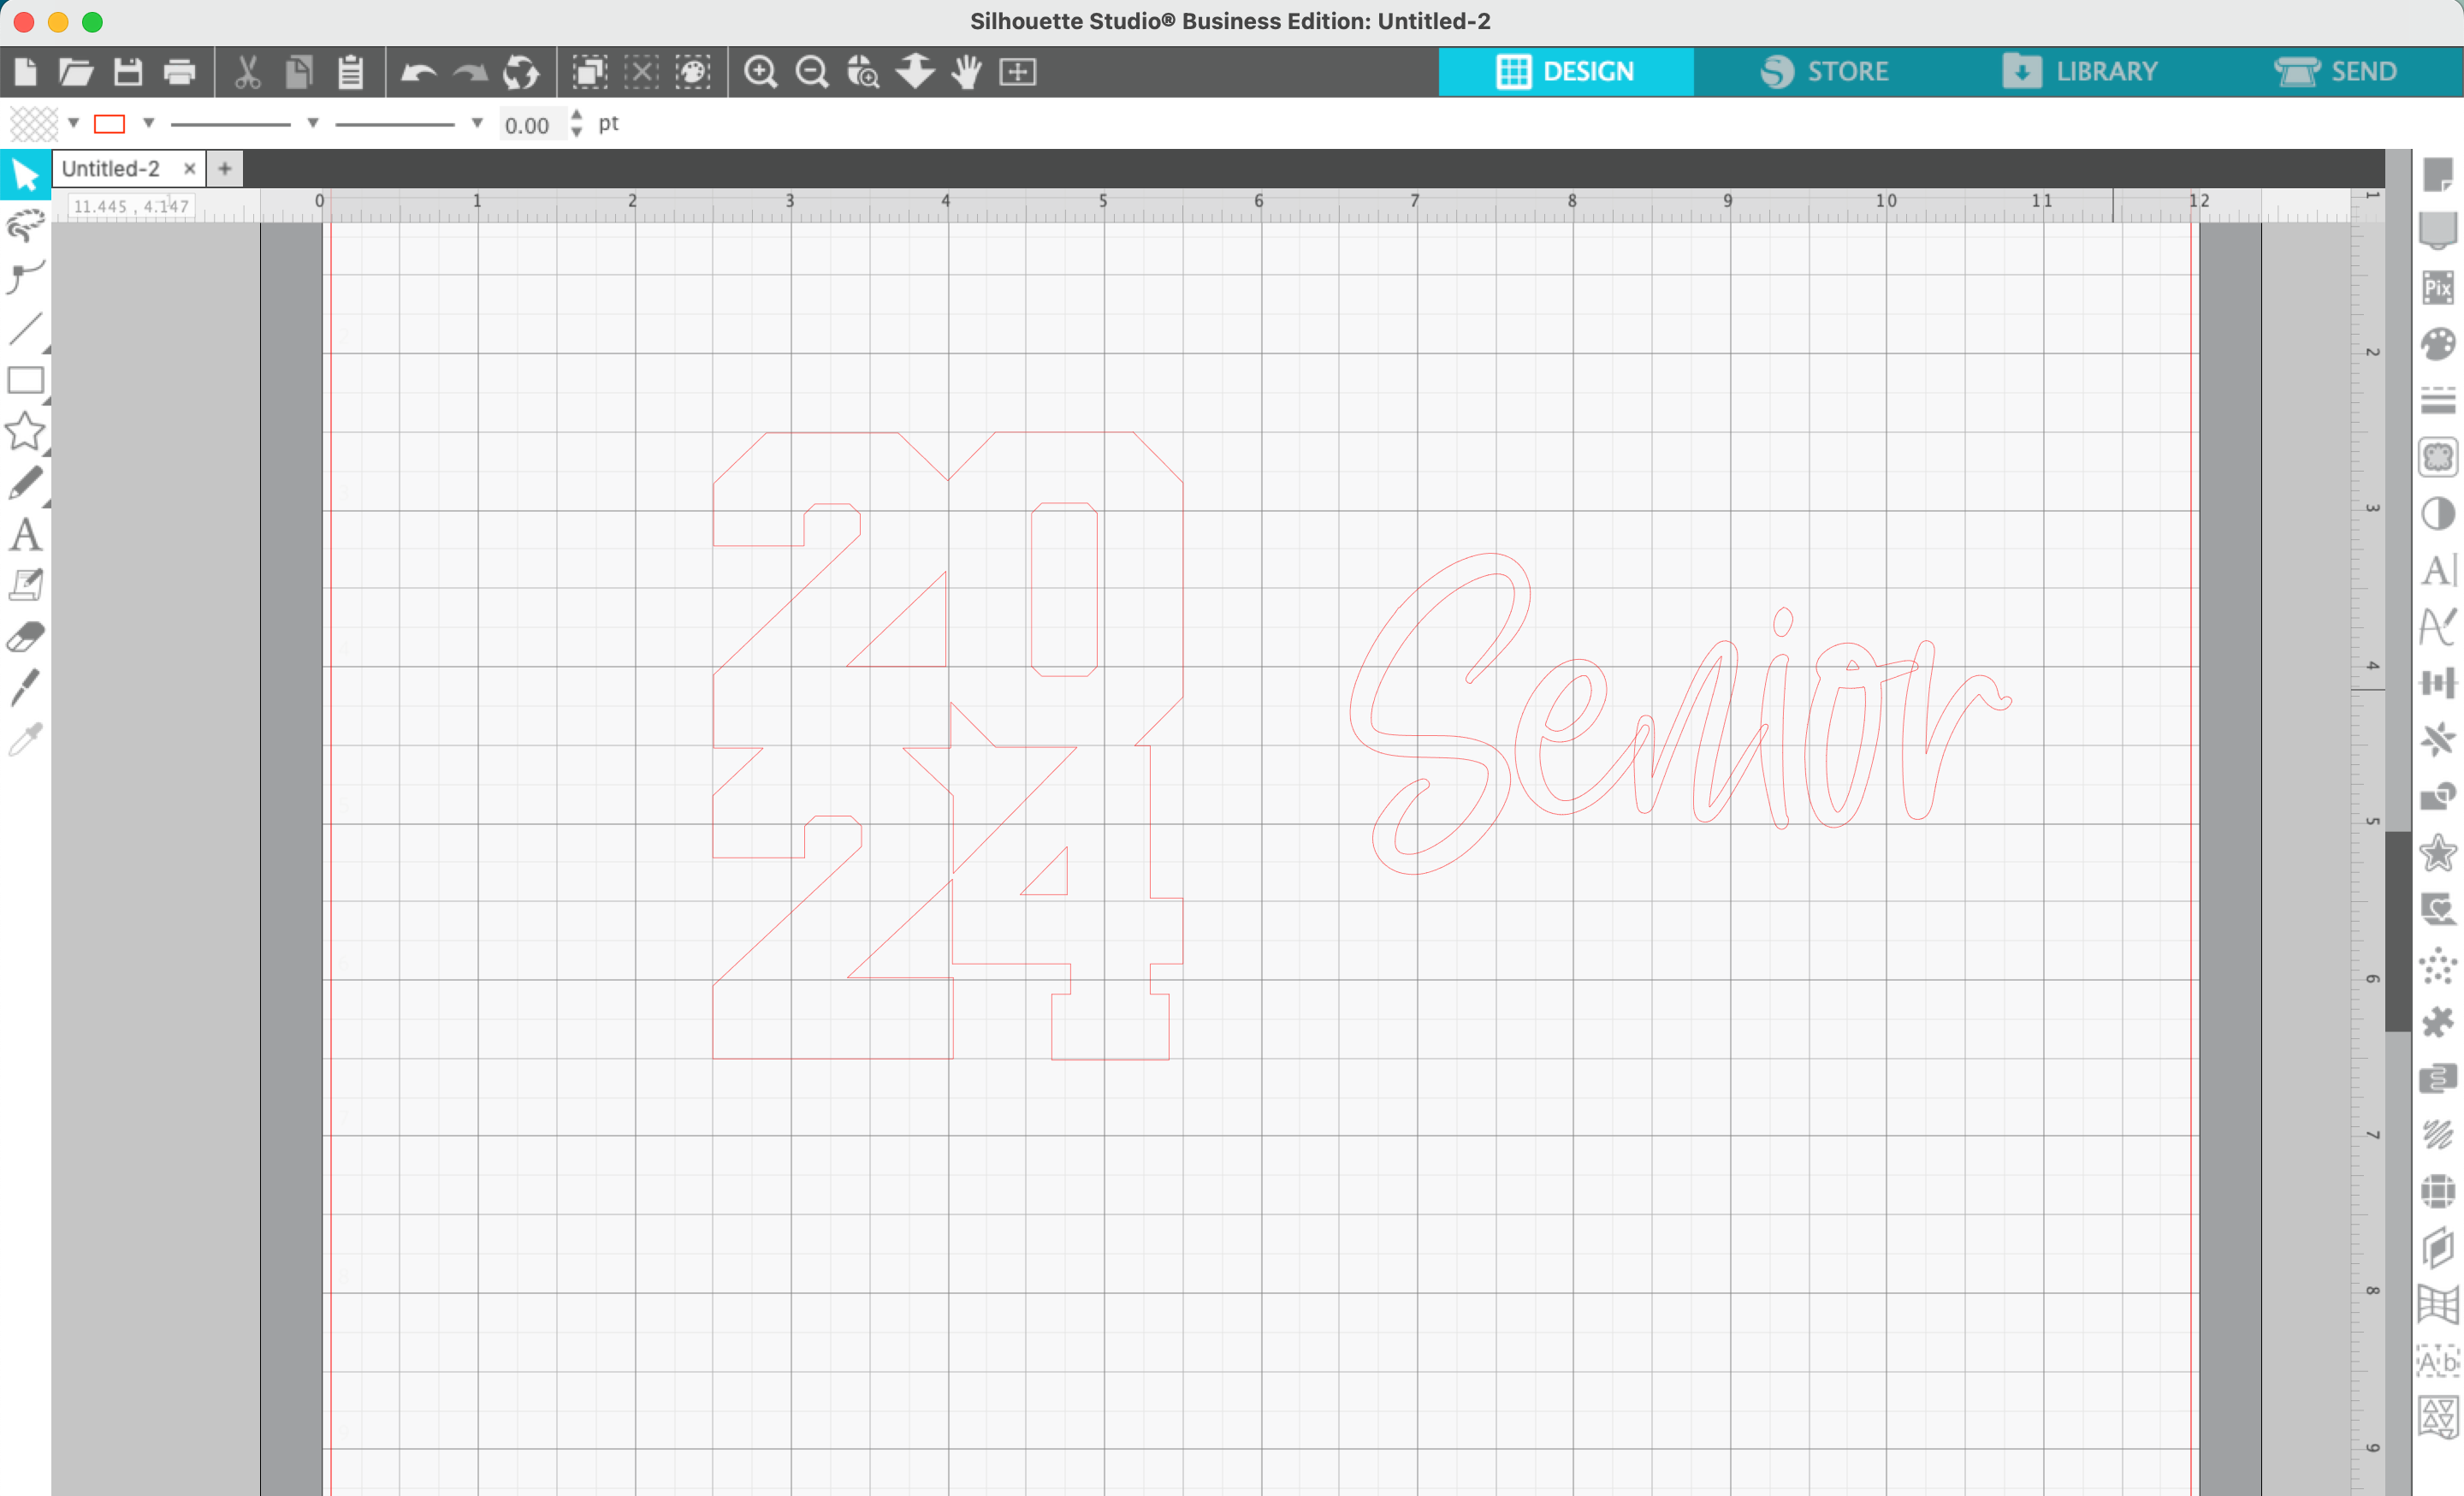
In Silhouette Studio, type 2024 (or other year). Use a chunky, blocky font. In this tutorial, I used Freshman.
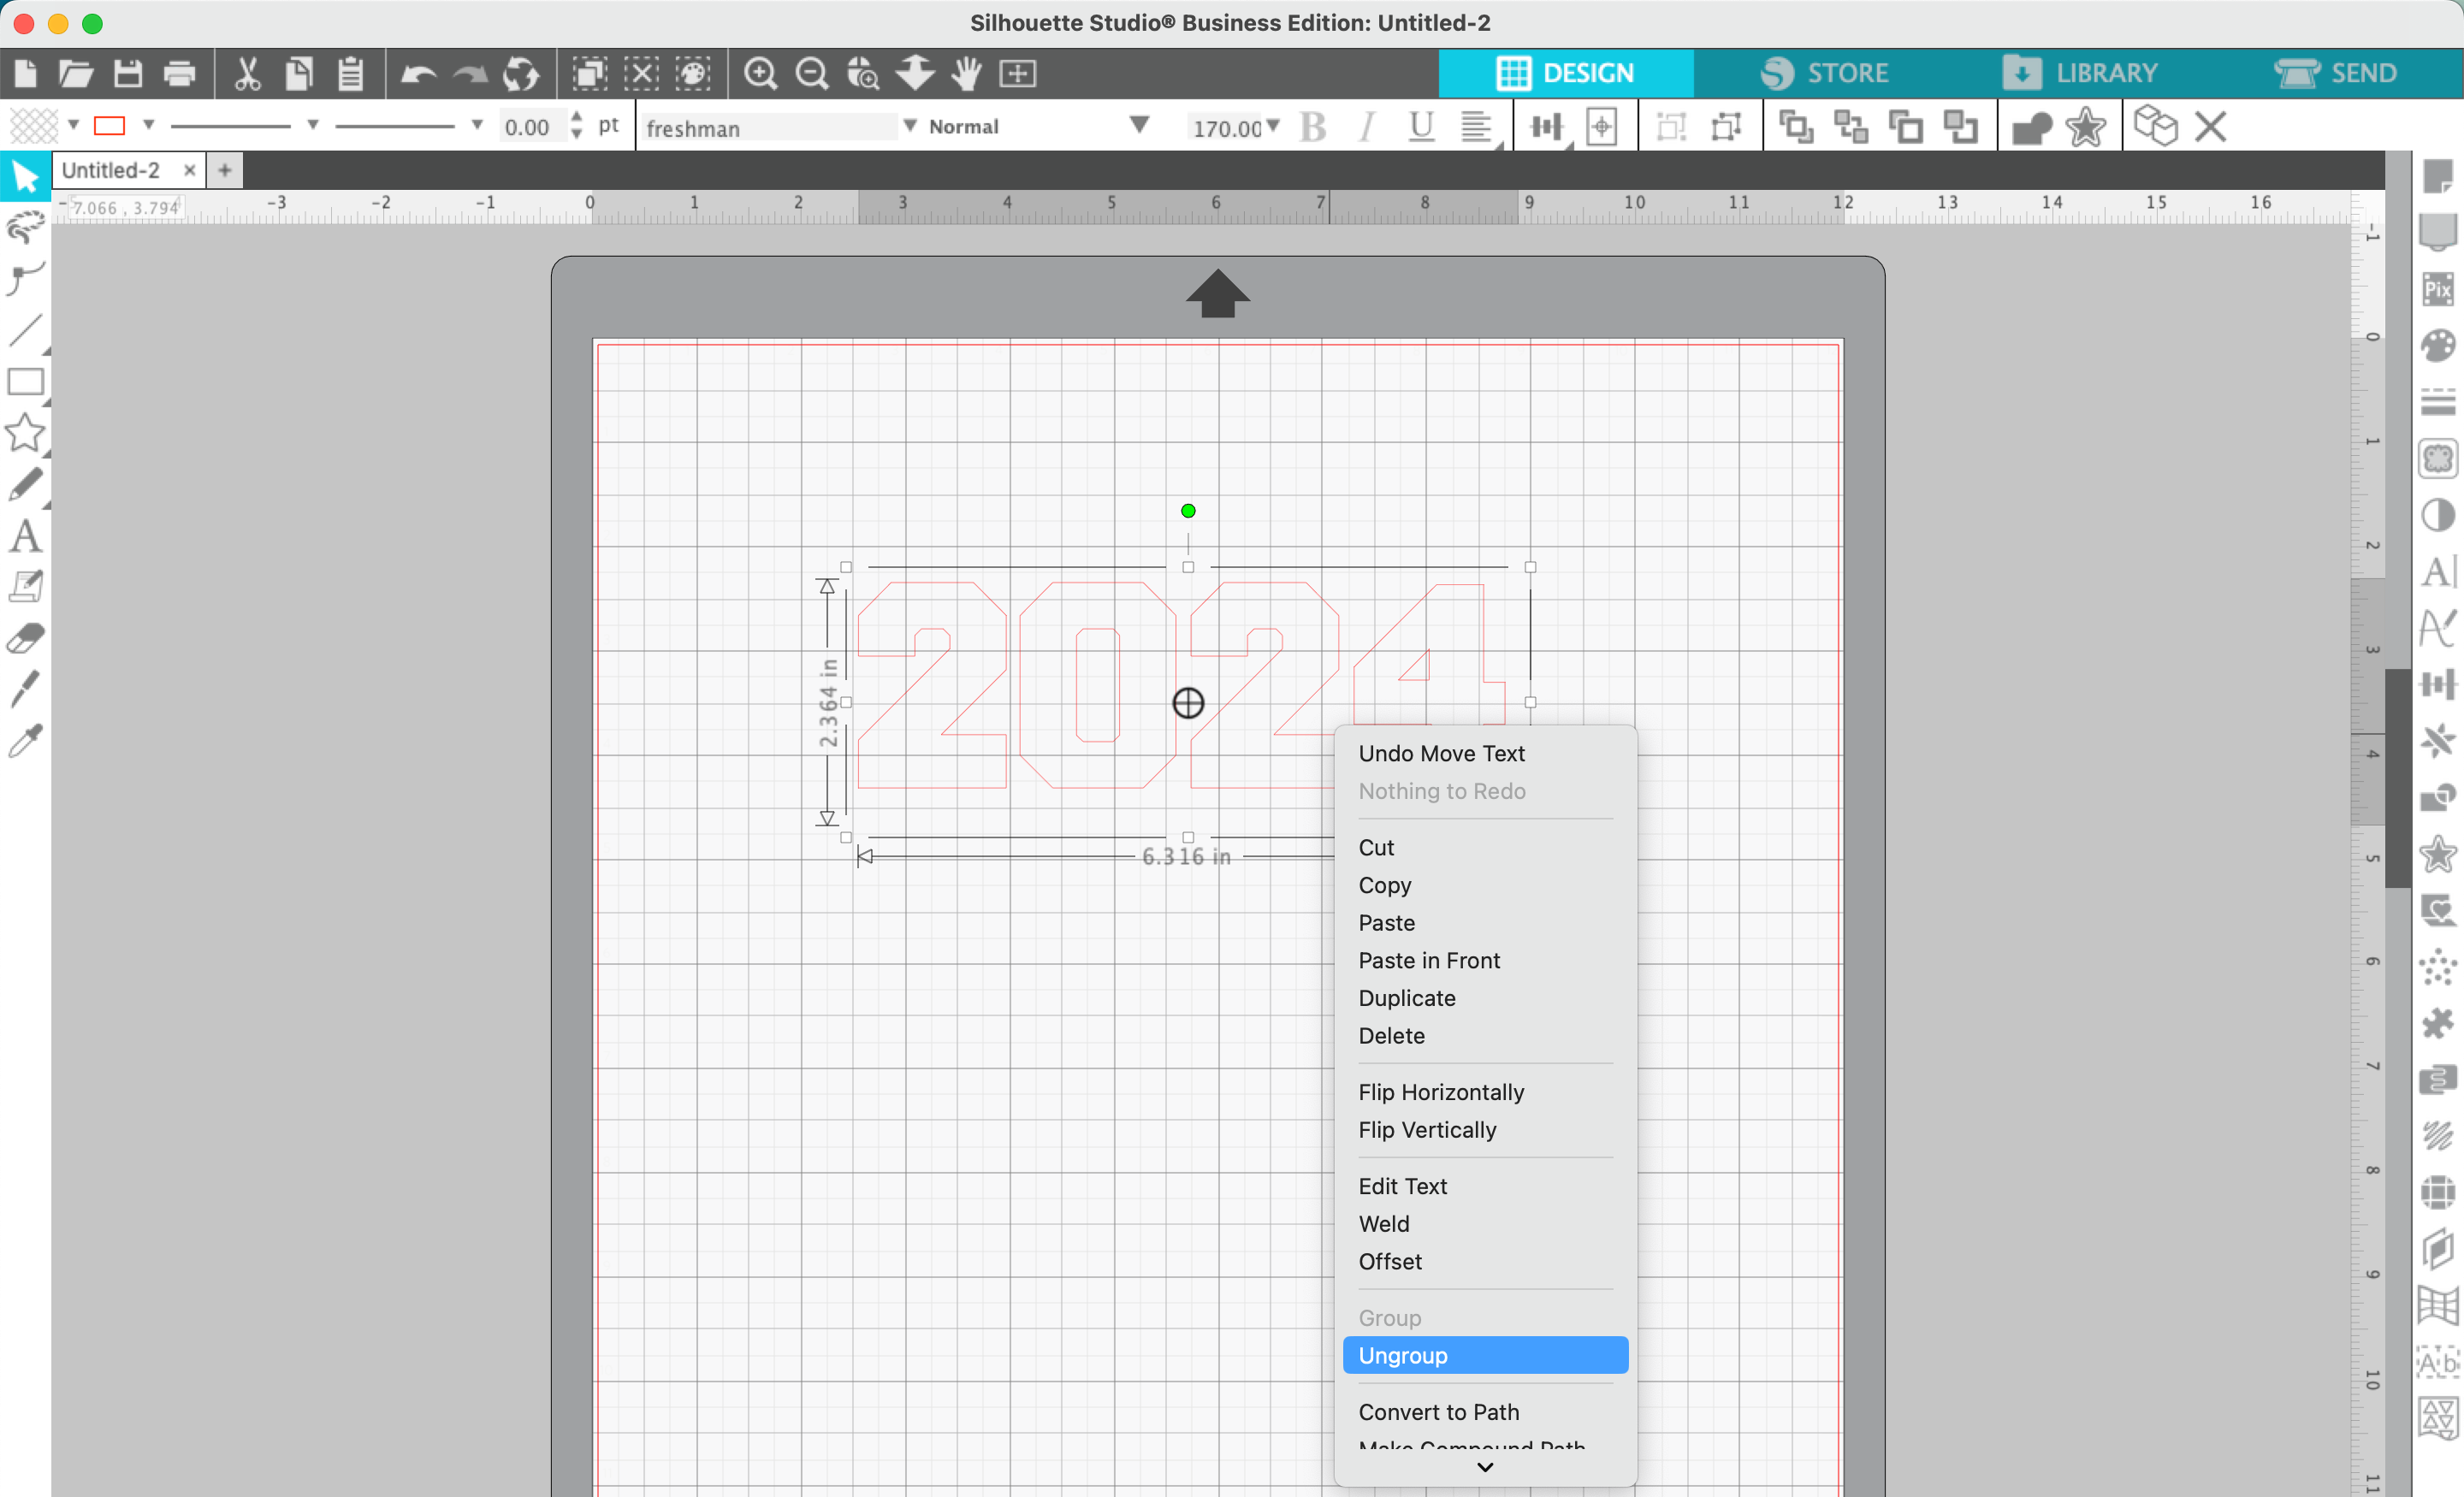
2. Right click the year and select ‘Ungroup’.
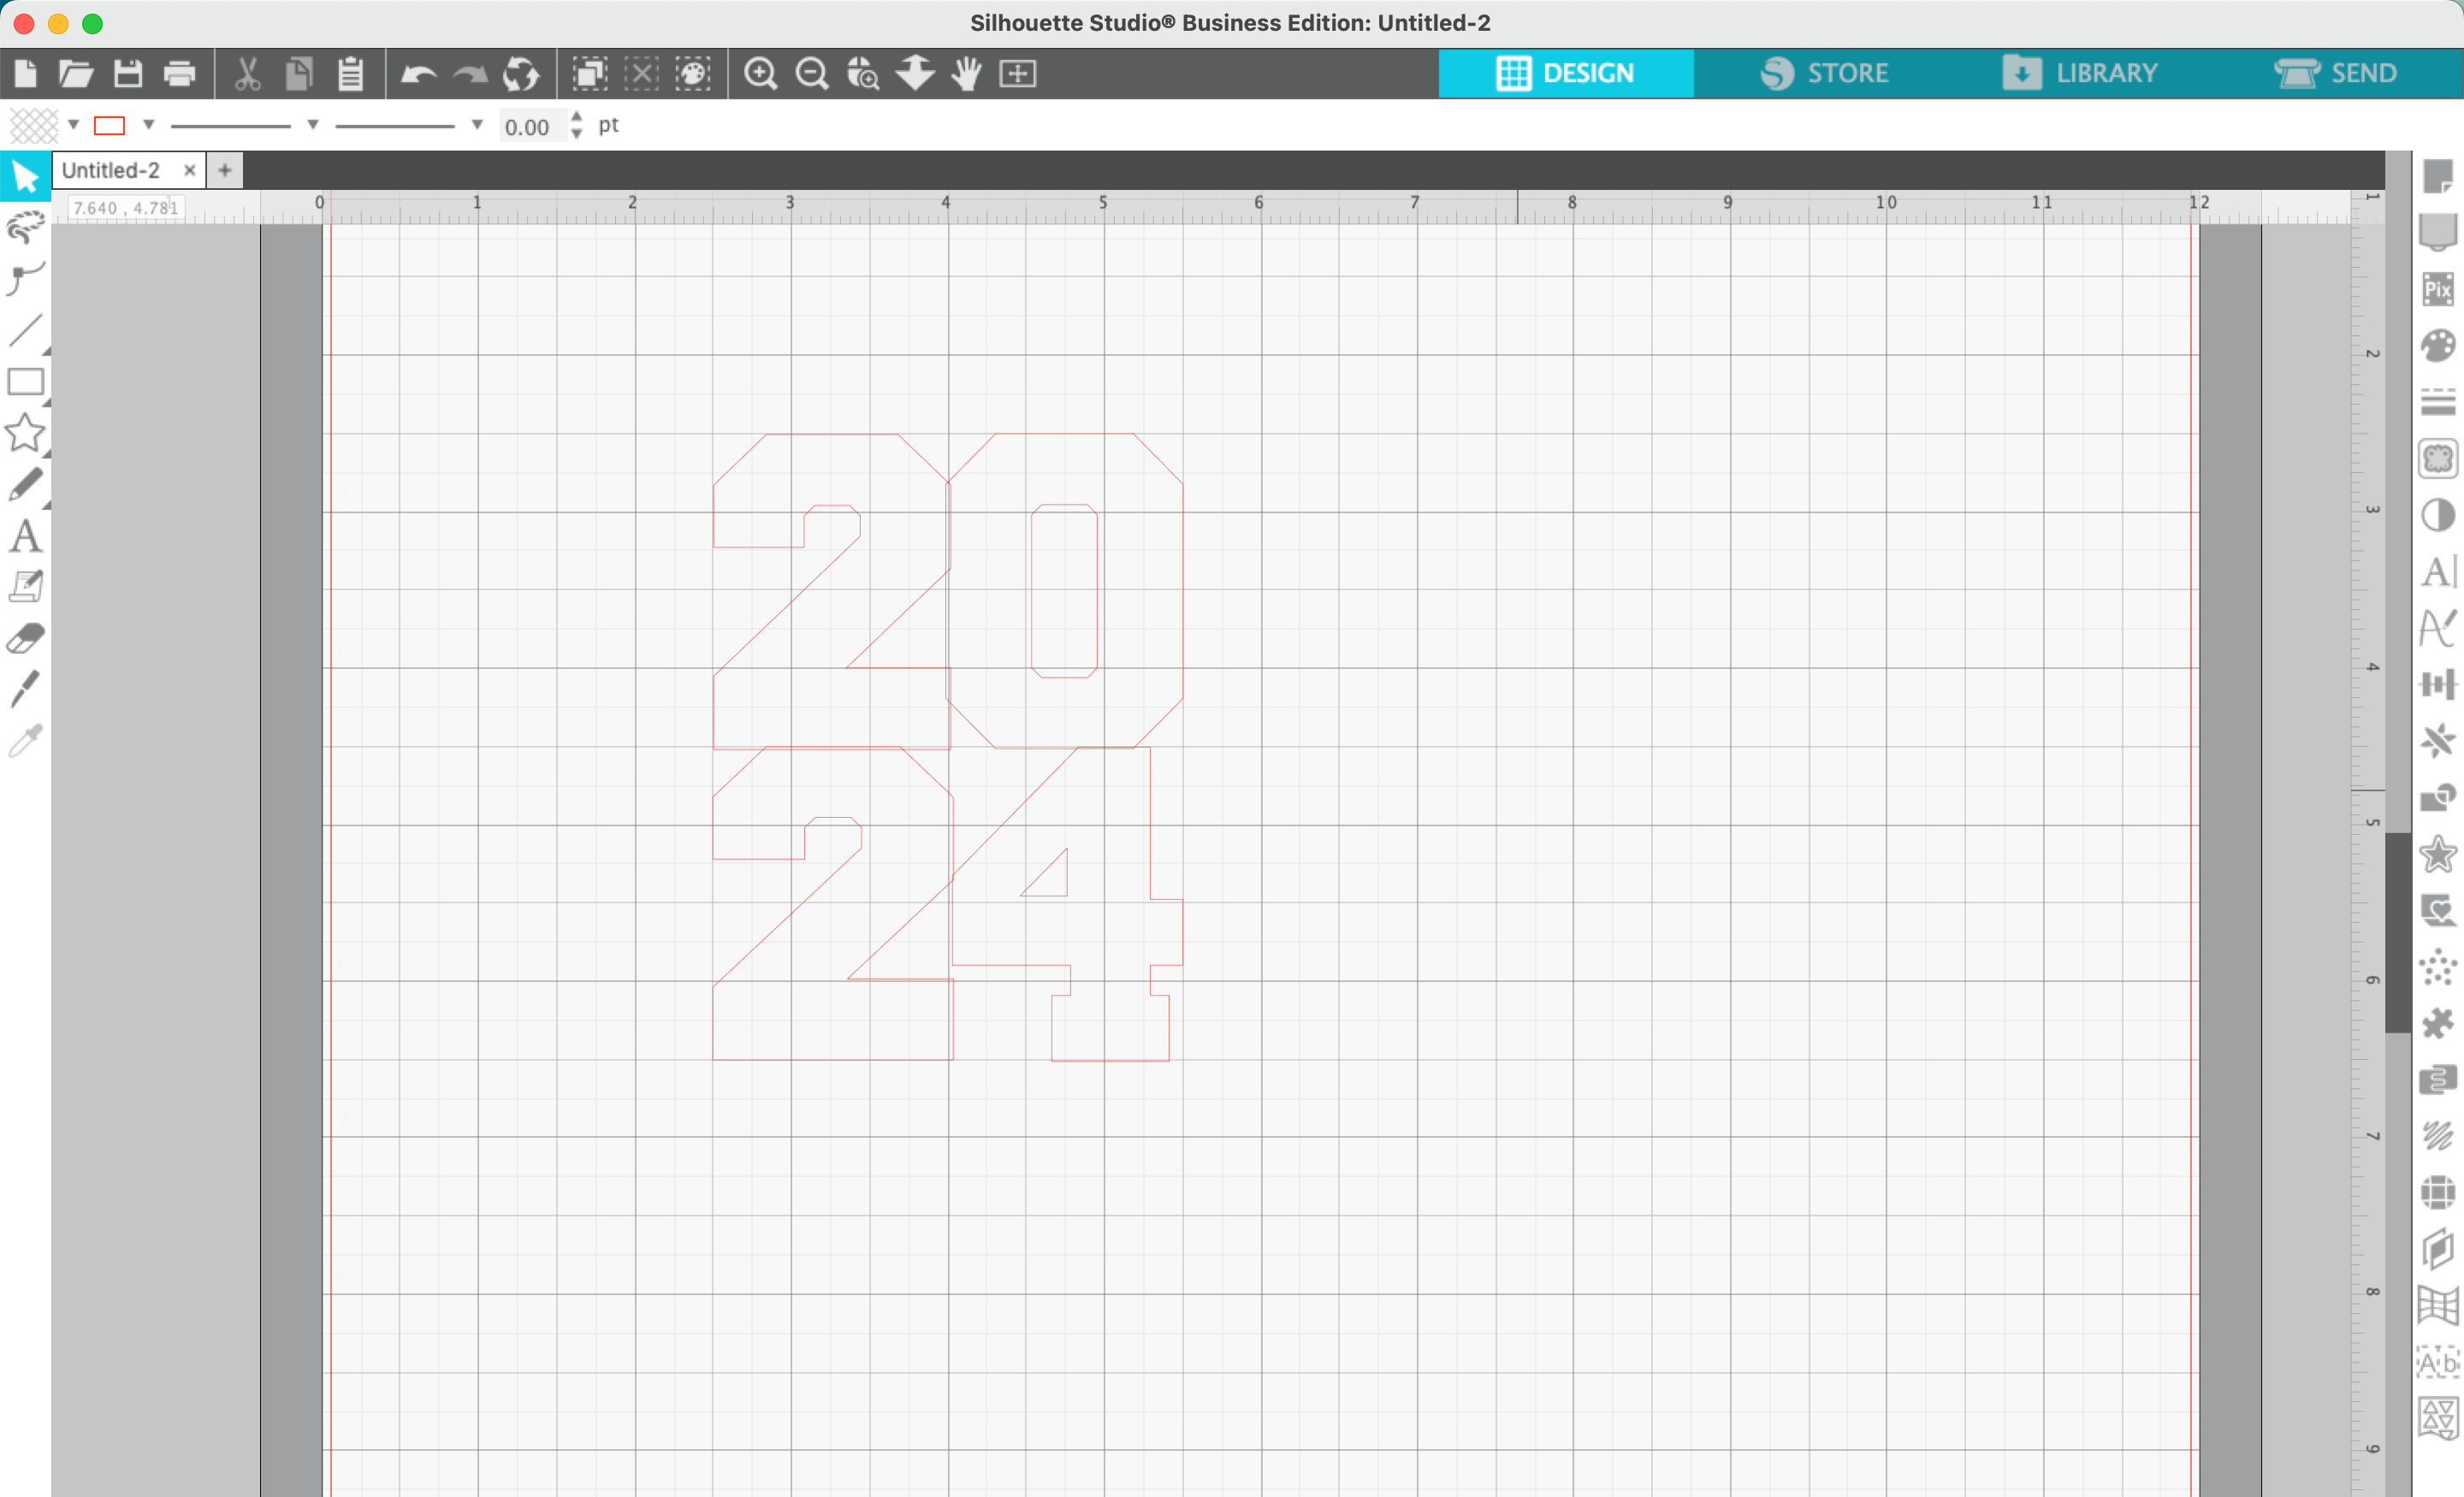
3. Drag the numbers into a square/rectangle, making them overlap each other slightly. Depending on the font you use, you may need to resize certain numbers slightly. I used the grid lines to help
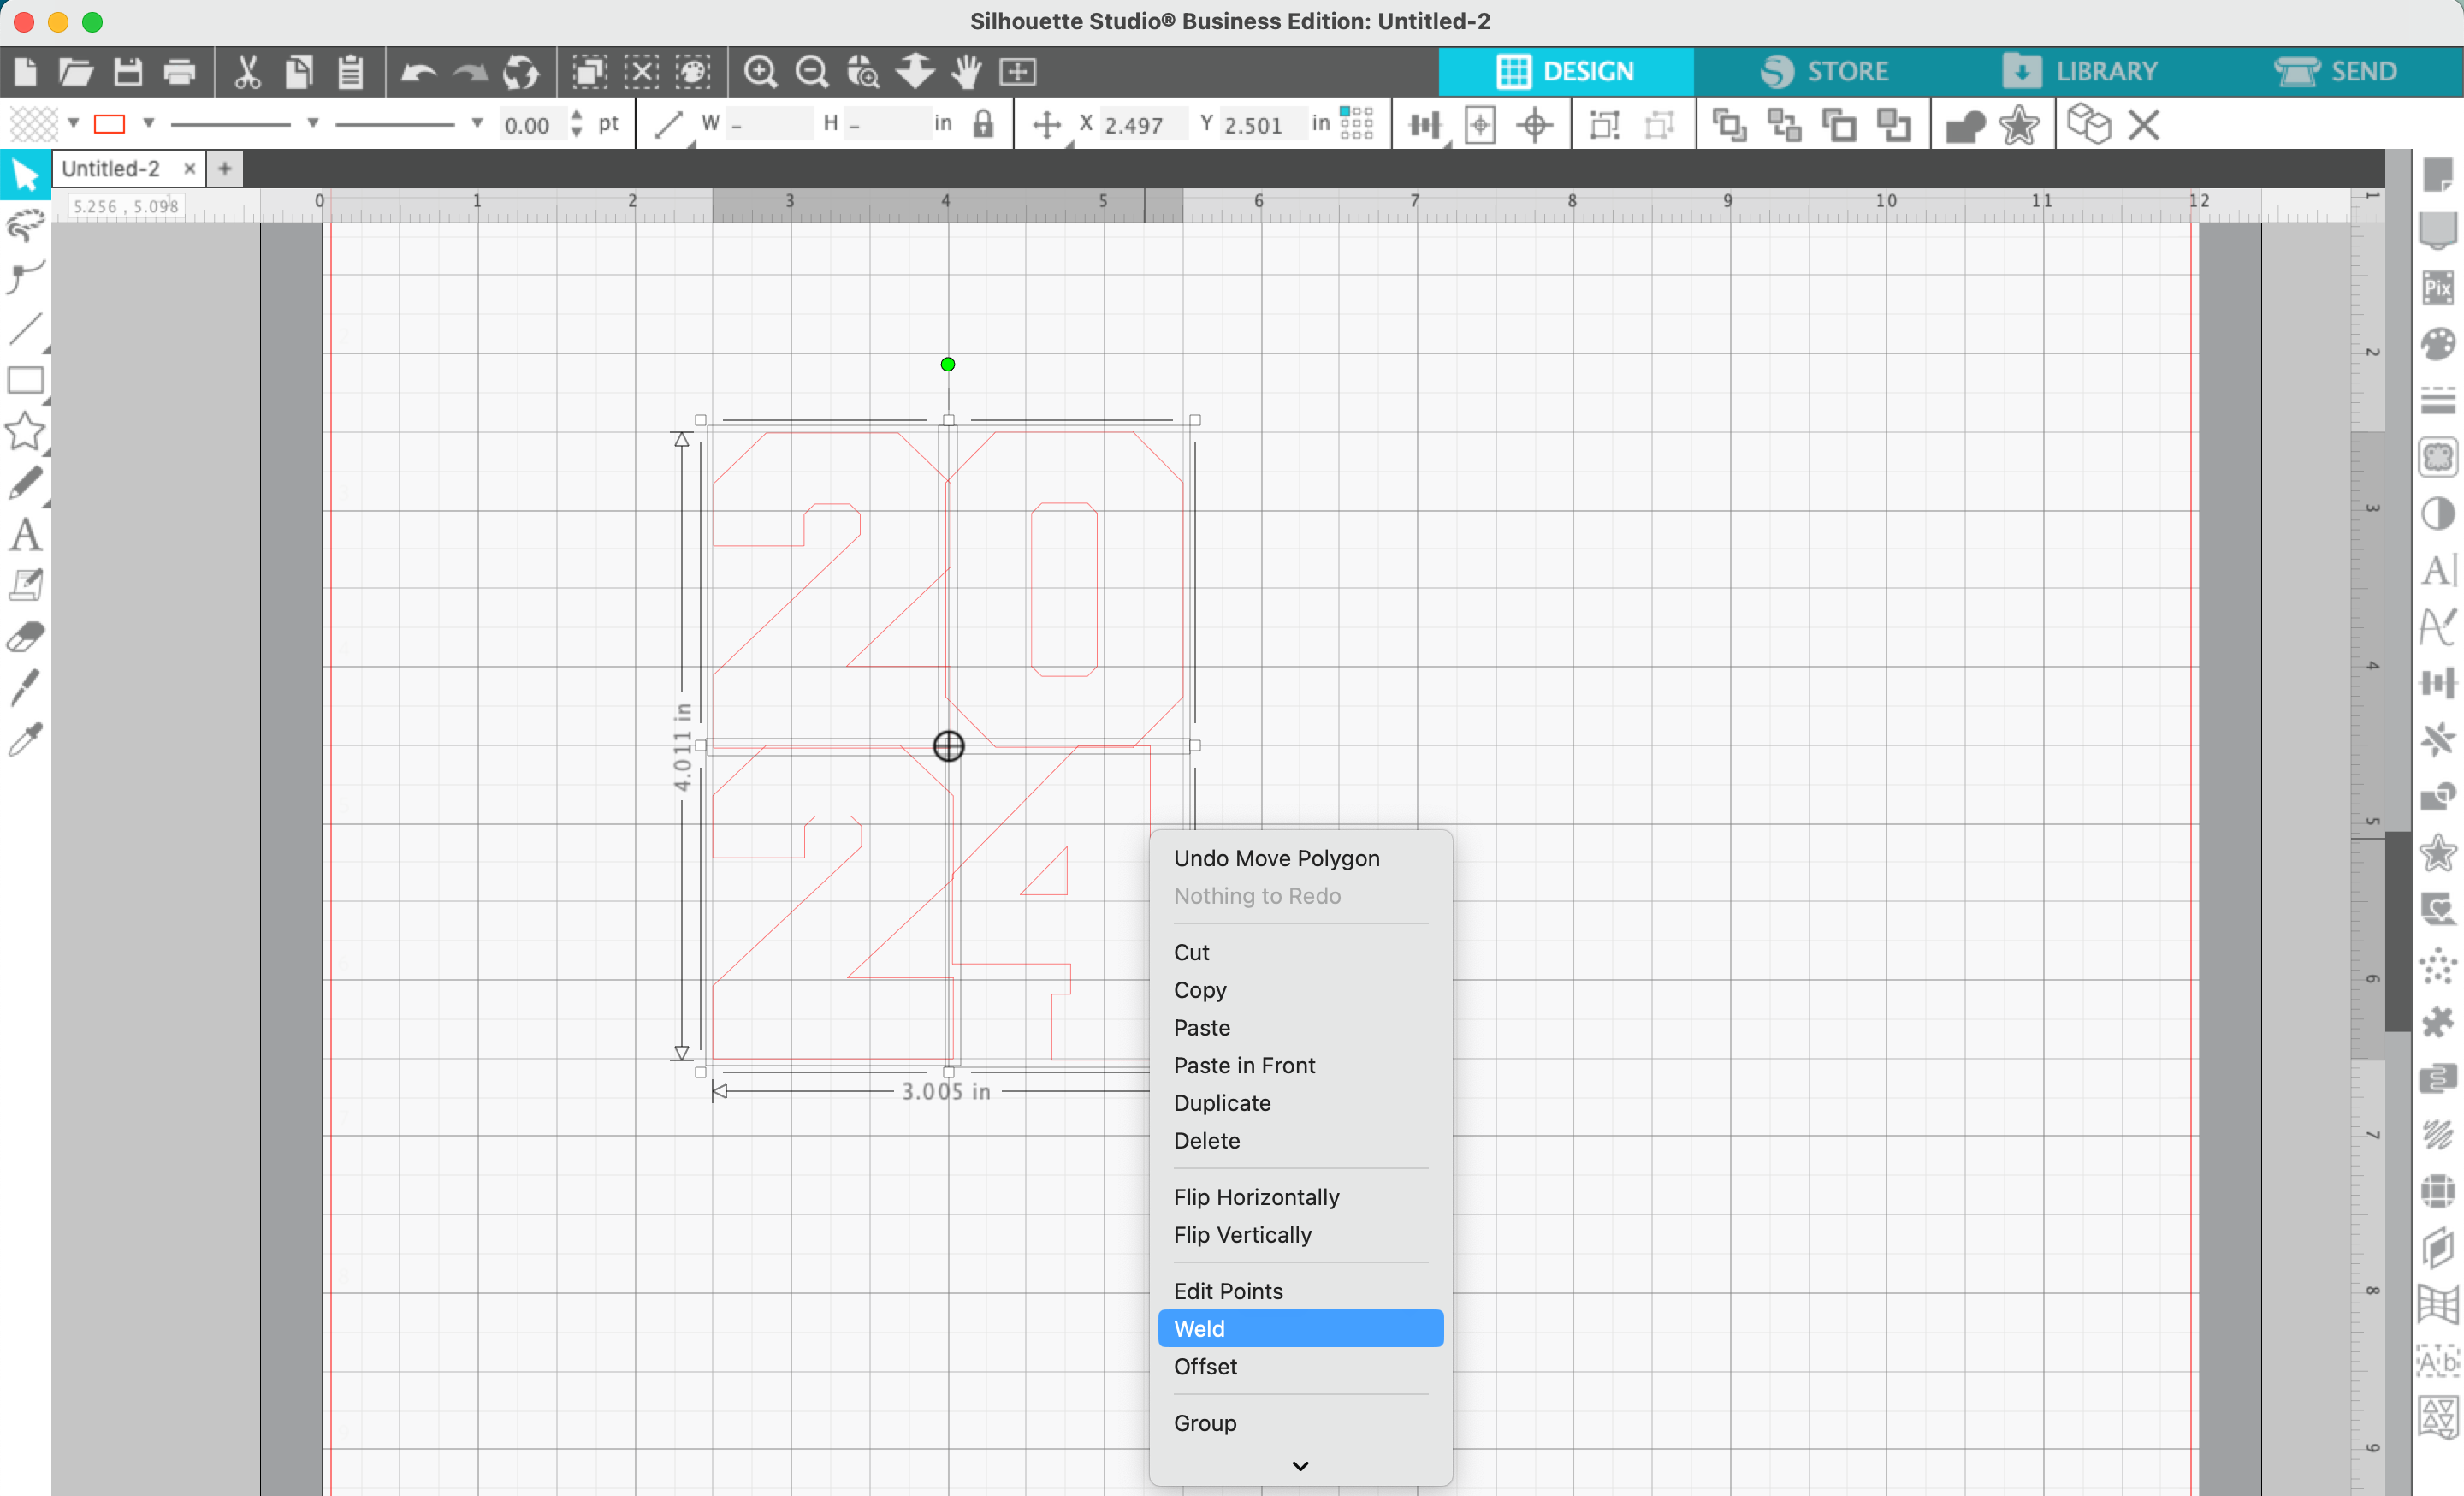
4. Select all the numbers, right click, and select ‘Weld’. This will merge the numbers together.
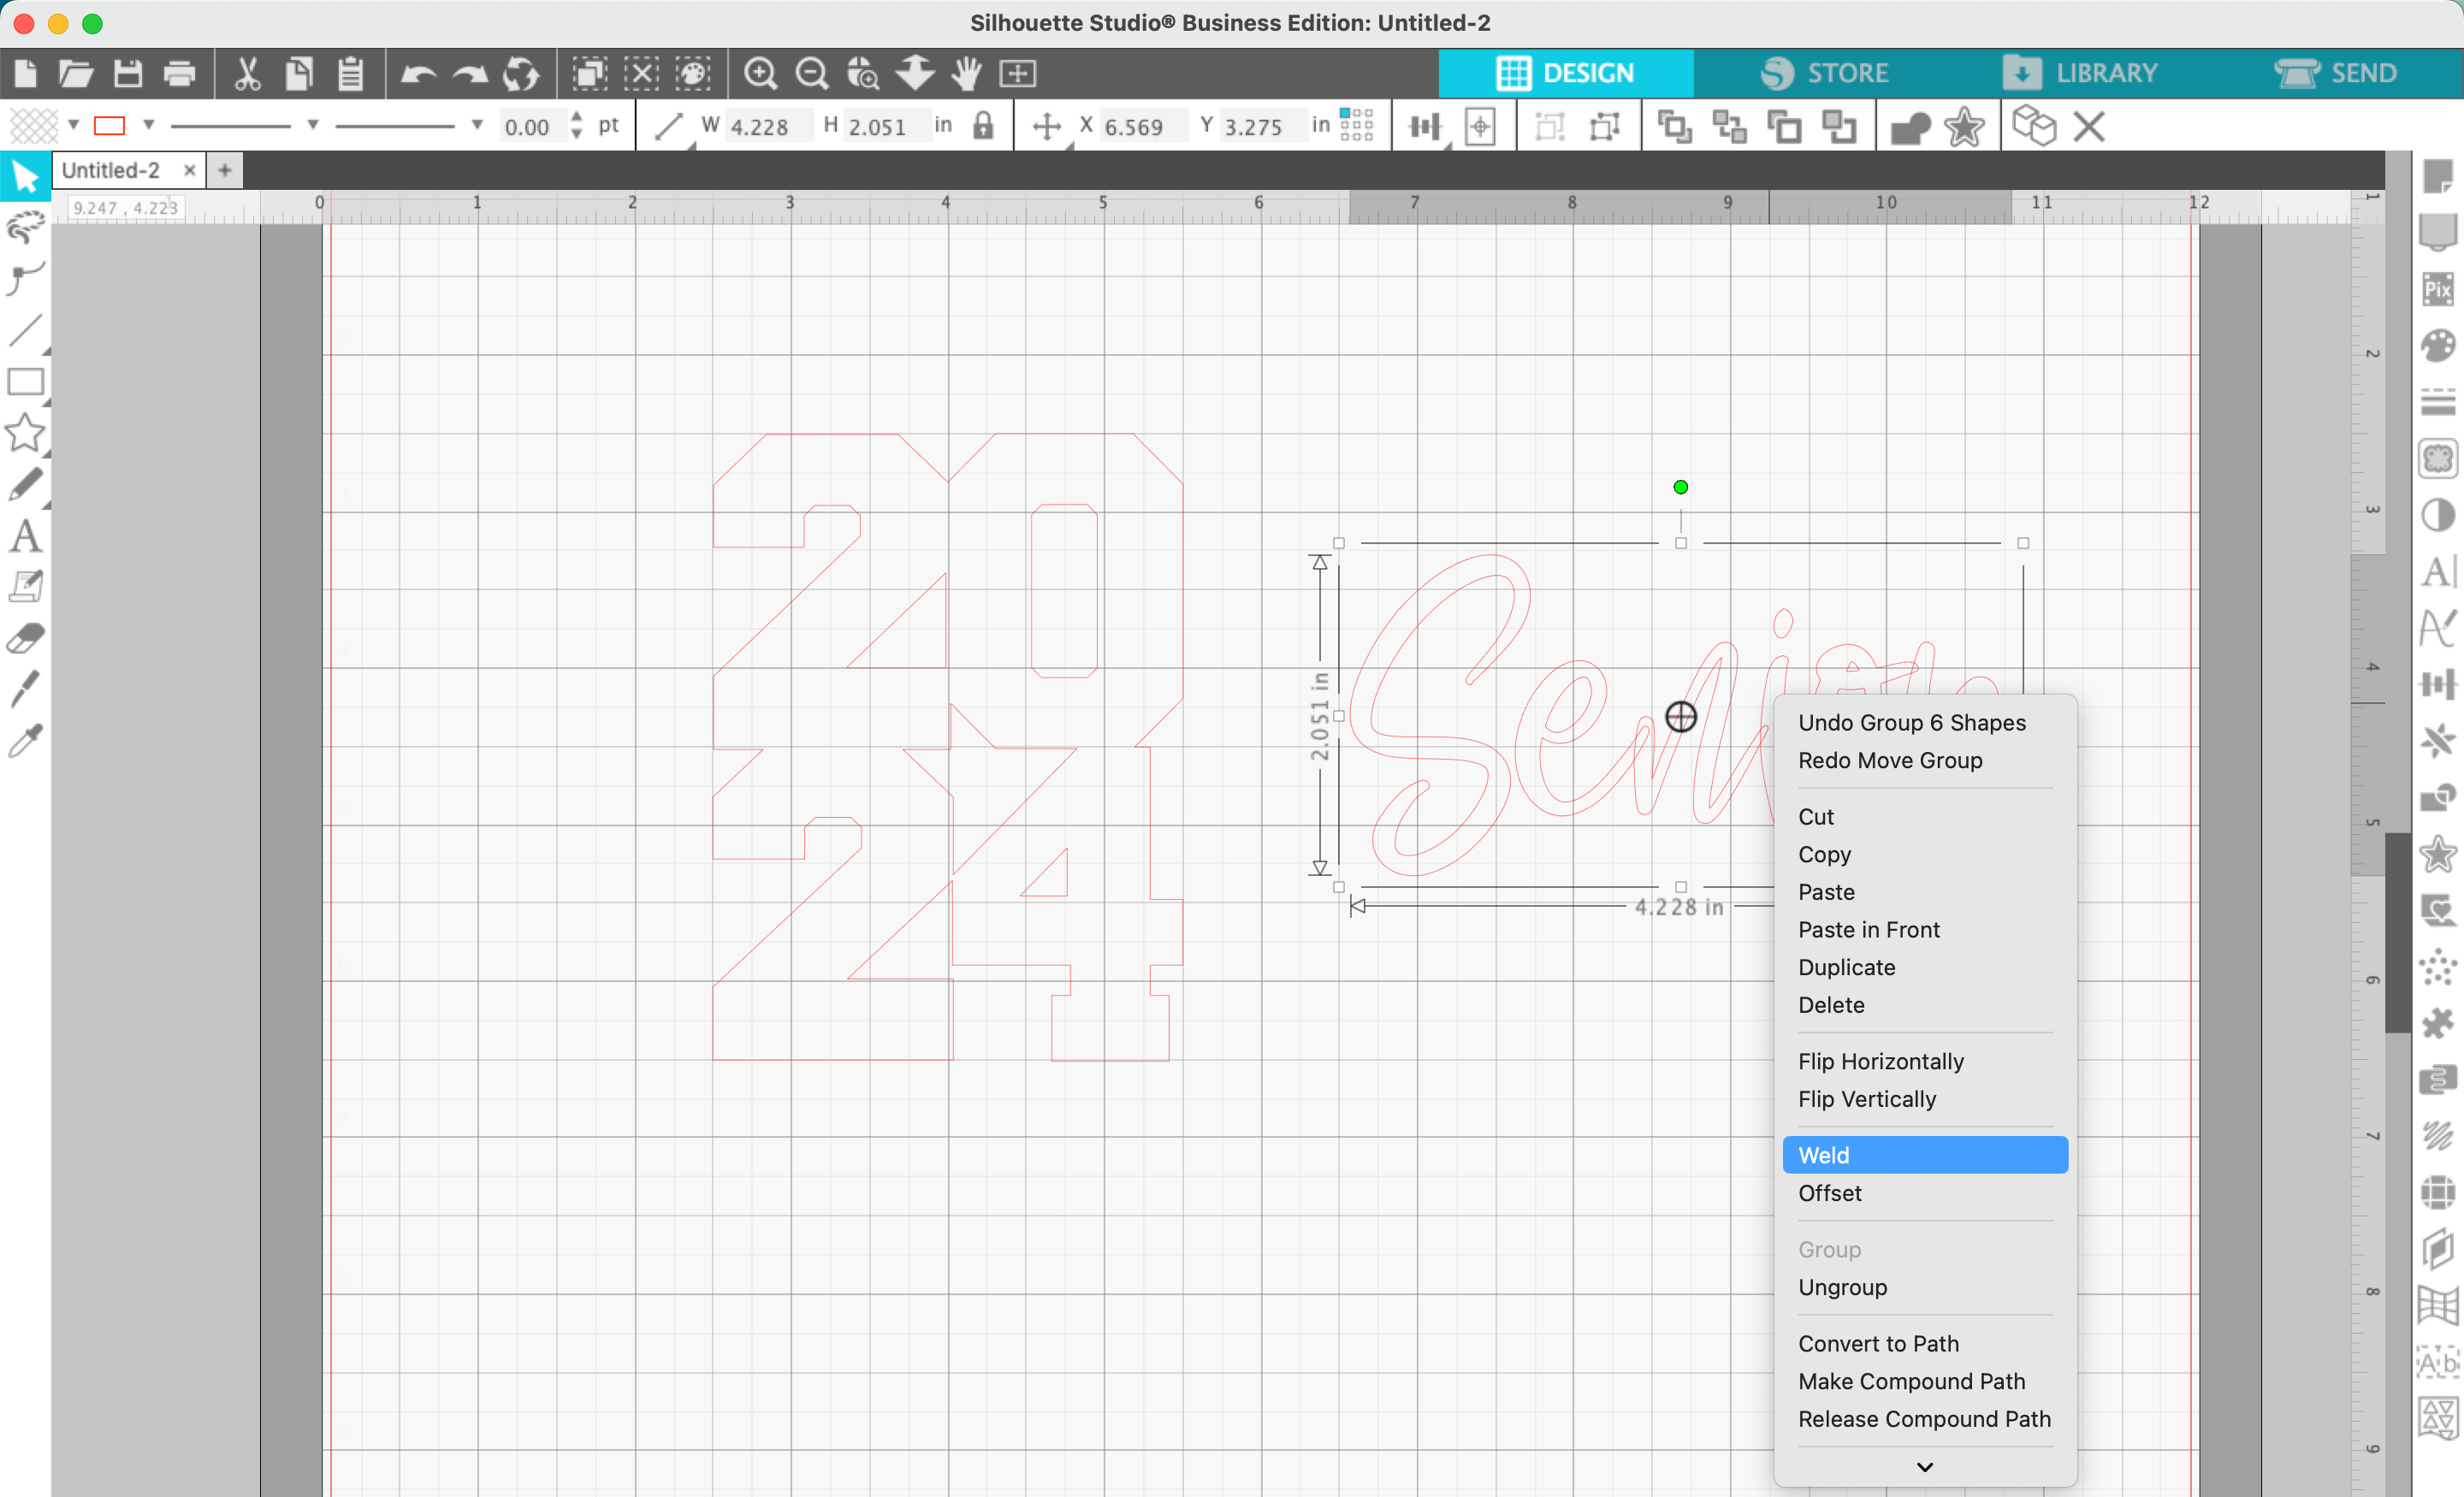
5. Type a word in a scribble or signature style font, then right click and ‘Weld’ it together. If needed, right click and ‘Group’ the welded design back together.
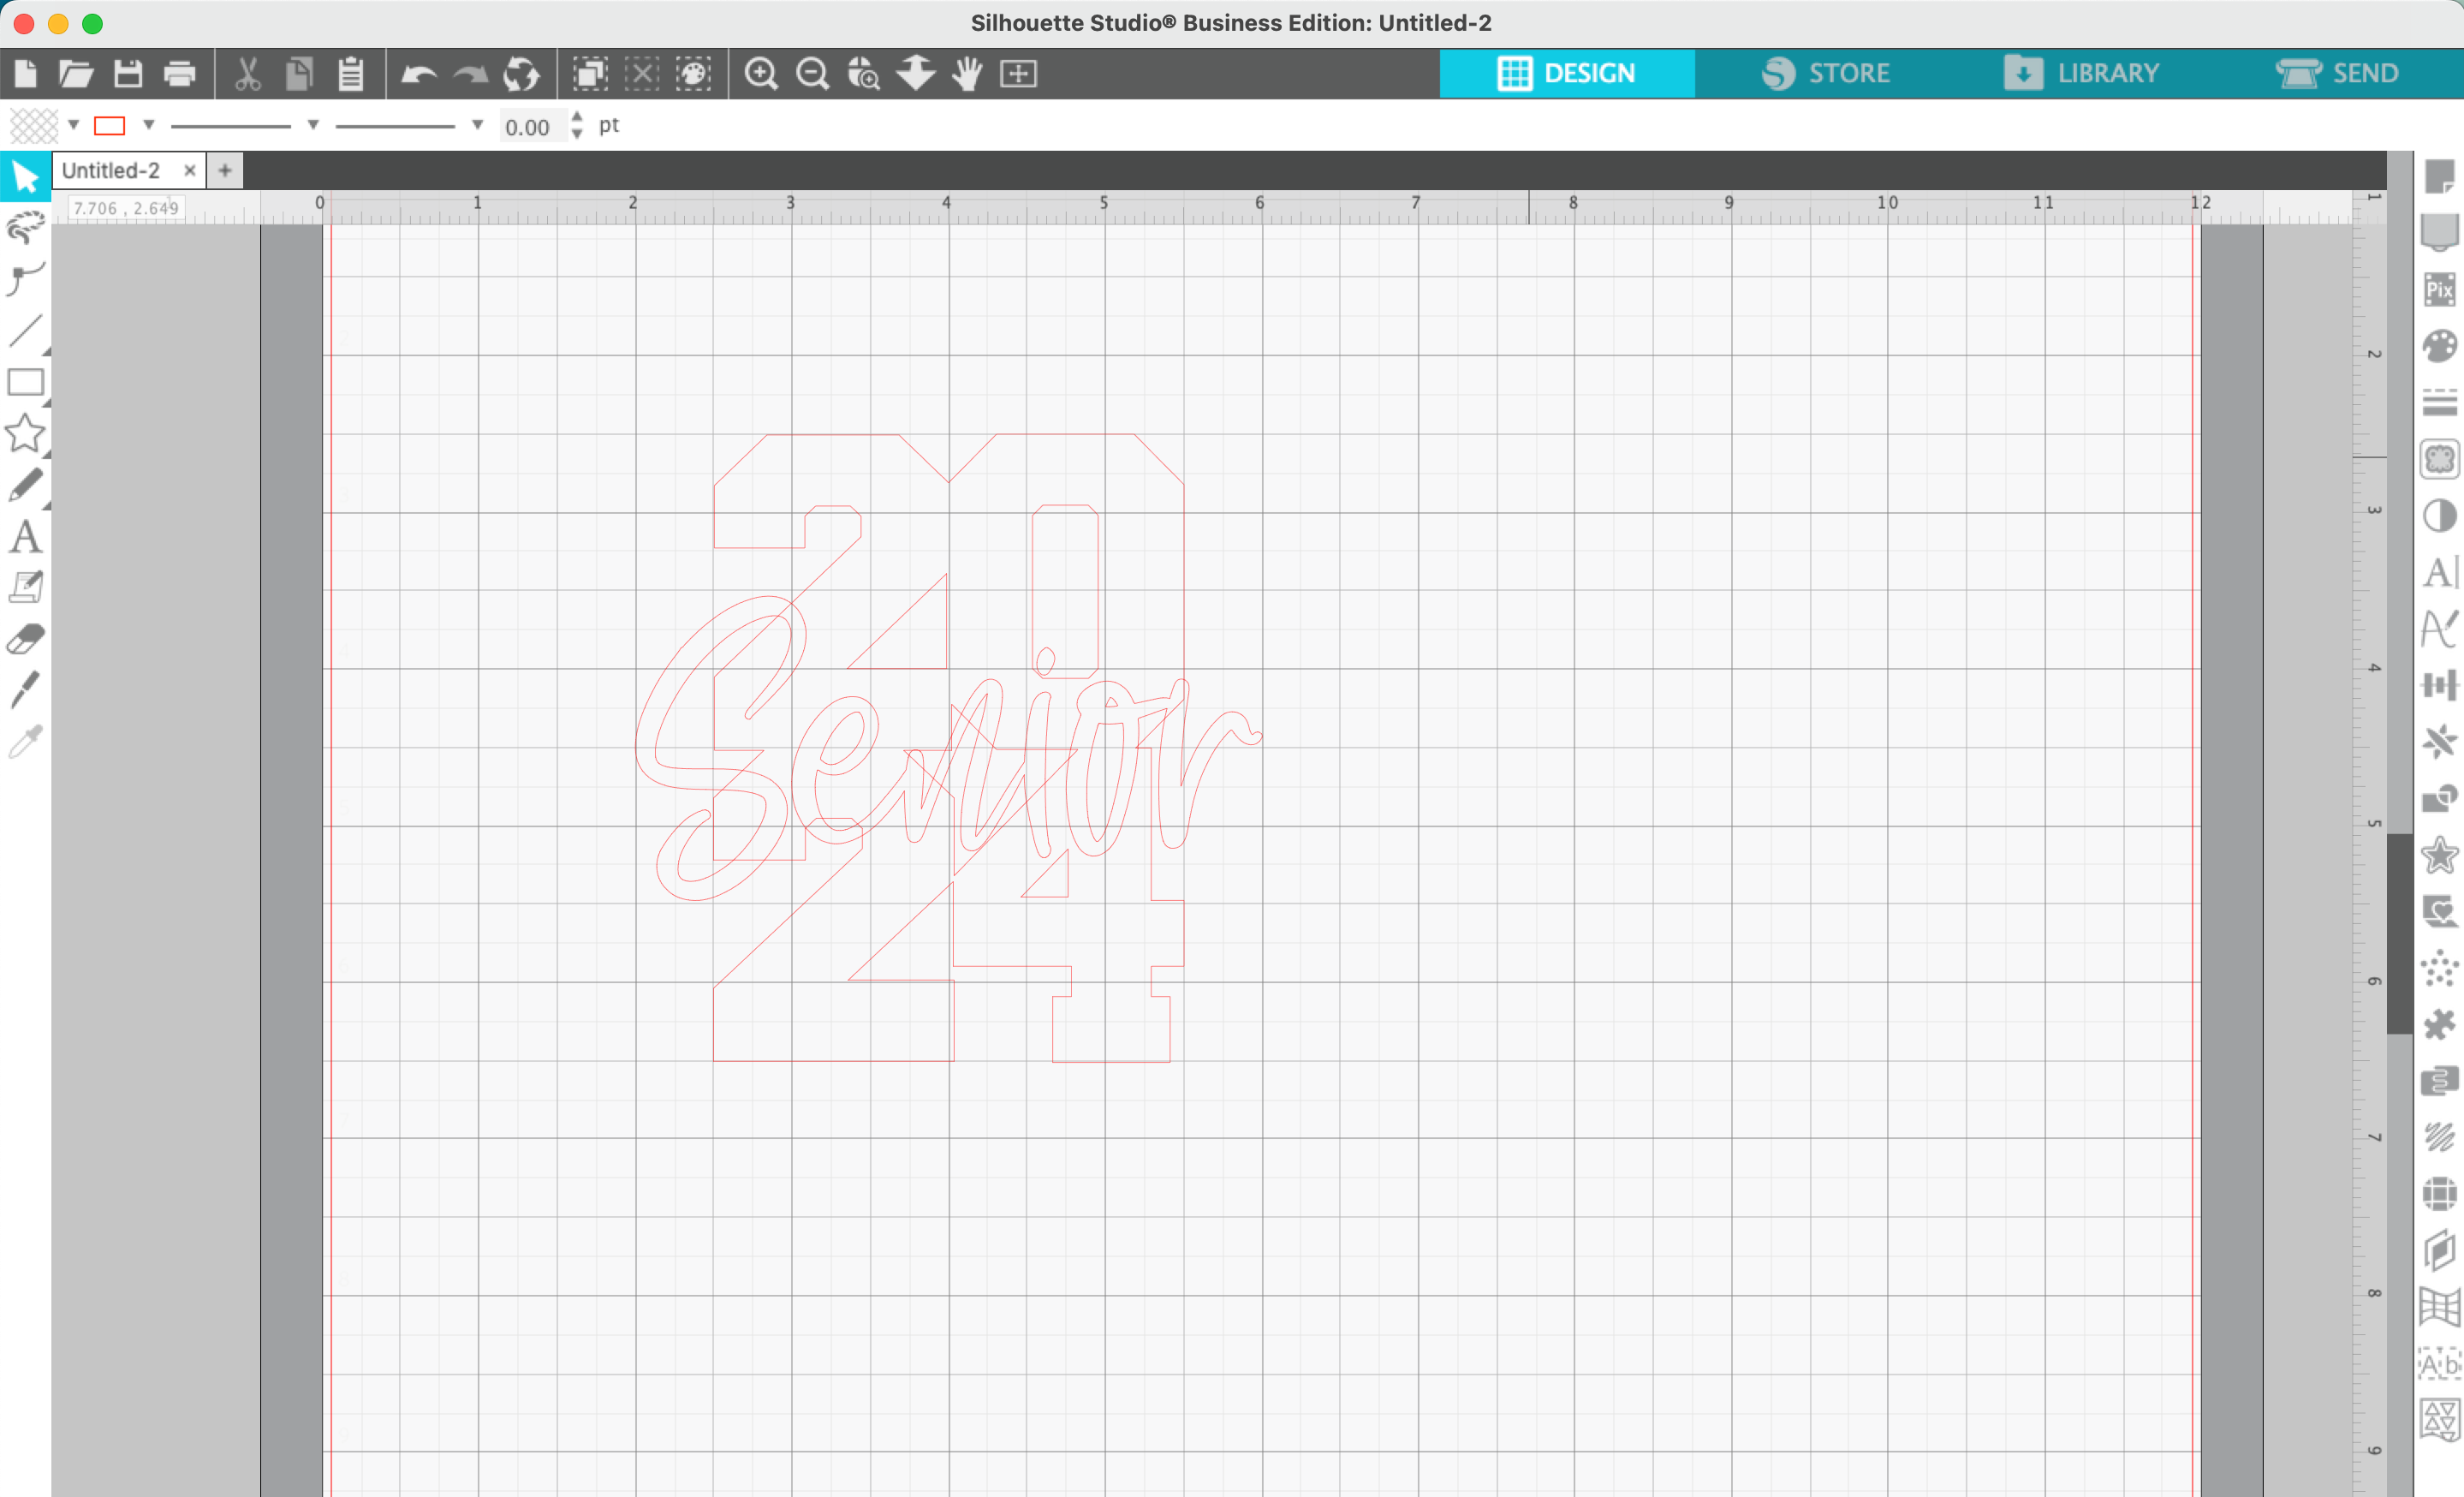
6. Drag the text onto your numbers.
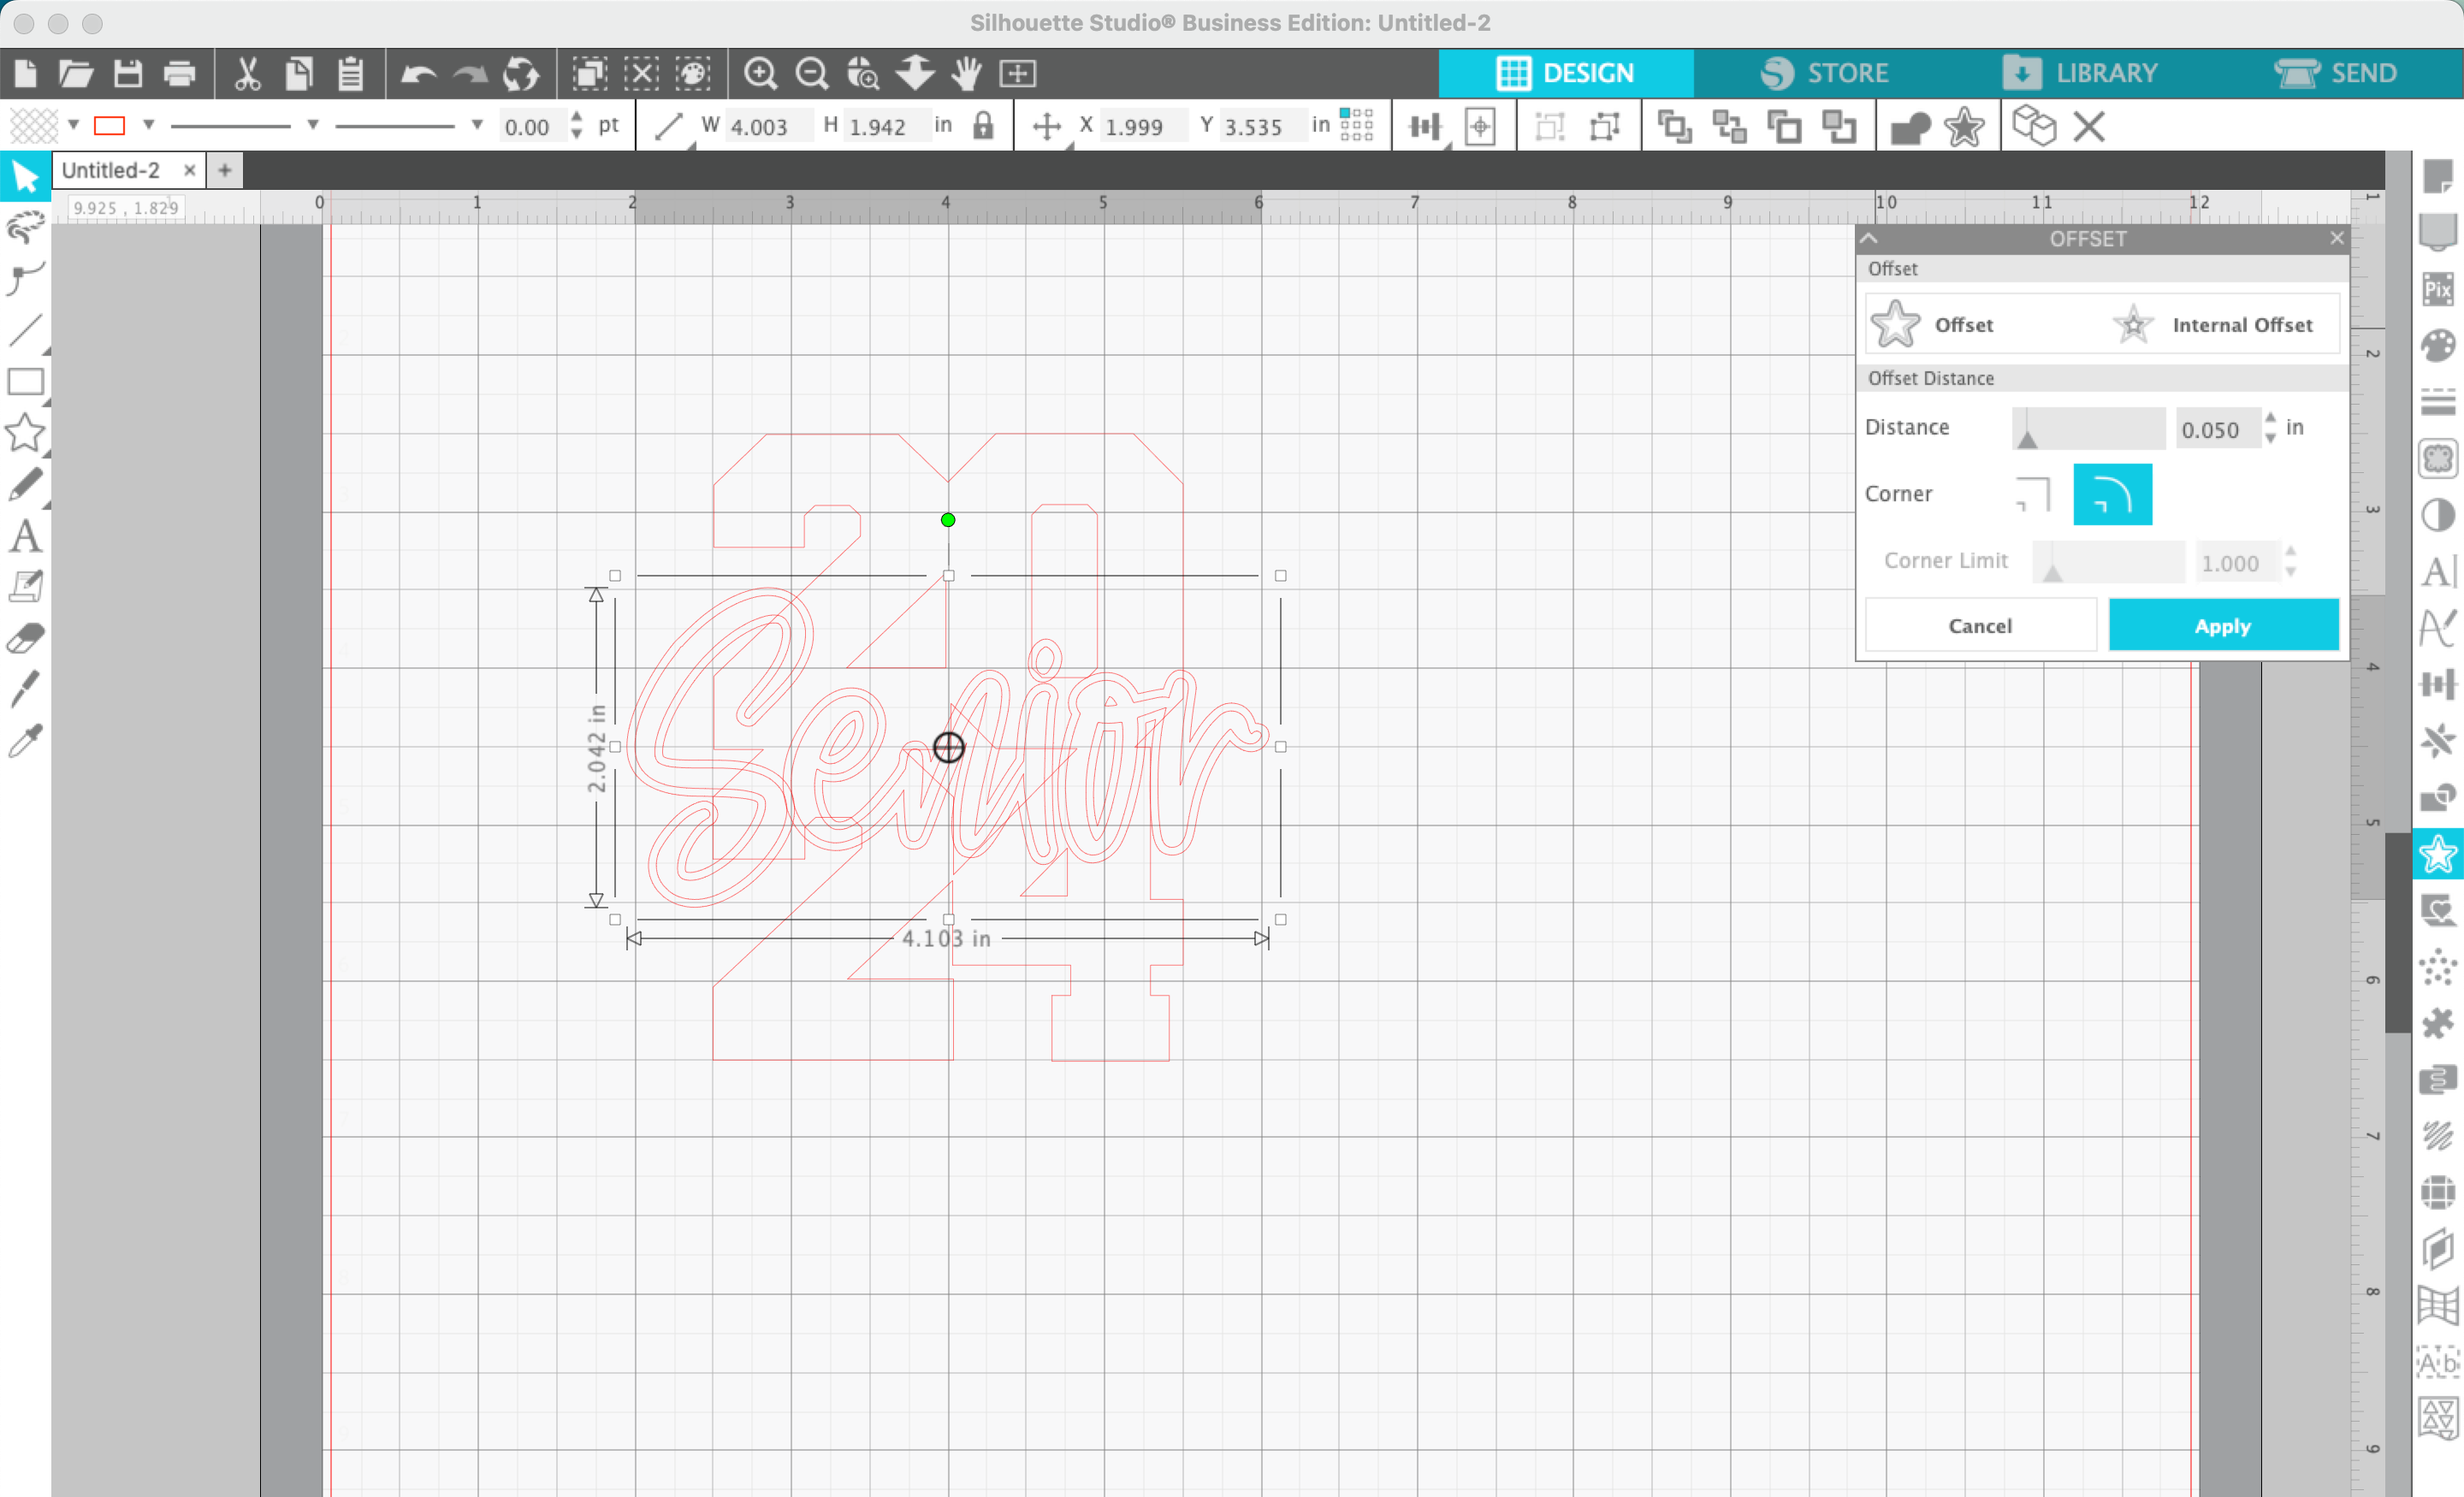
7. Navigate to ‘Panels’, ‘Offset’. Then offset the text.
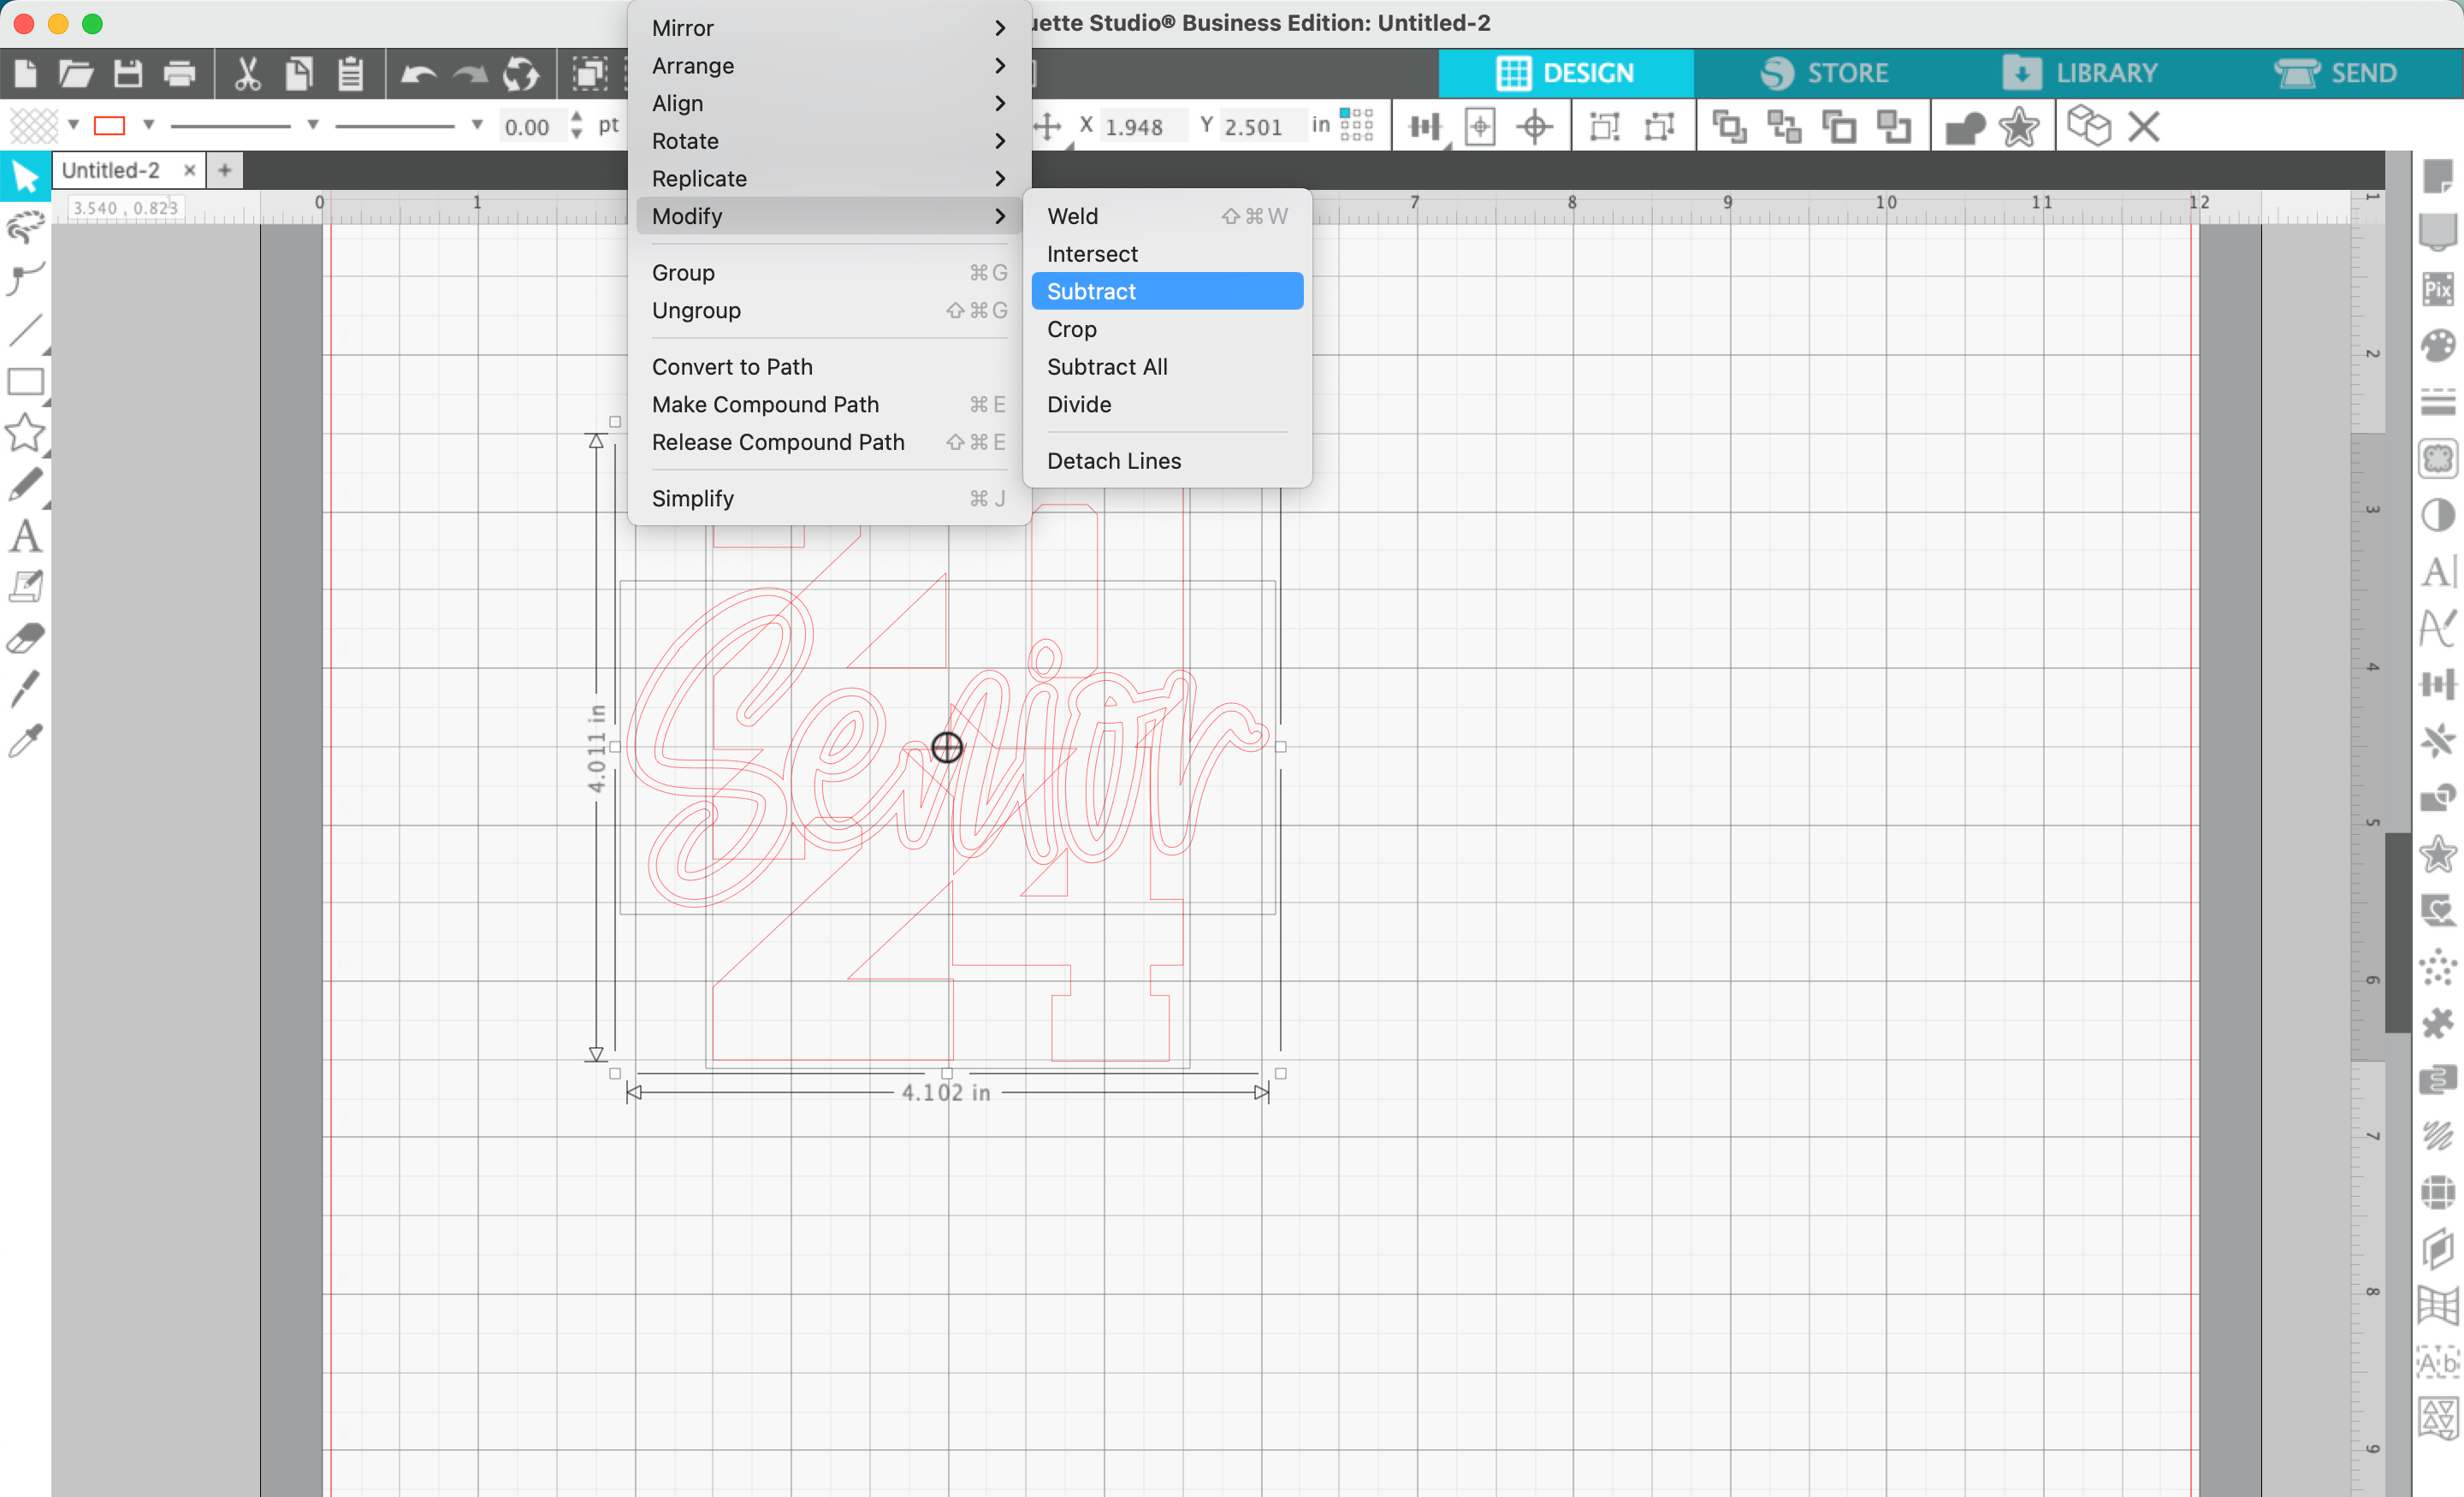
8. Select the numbers, then the offset text, then navigate to ‘Object’, ‘Modify’, ‘Subtract’. This will remove a small area around the text to make it more visible.
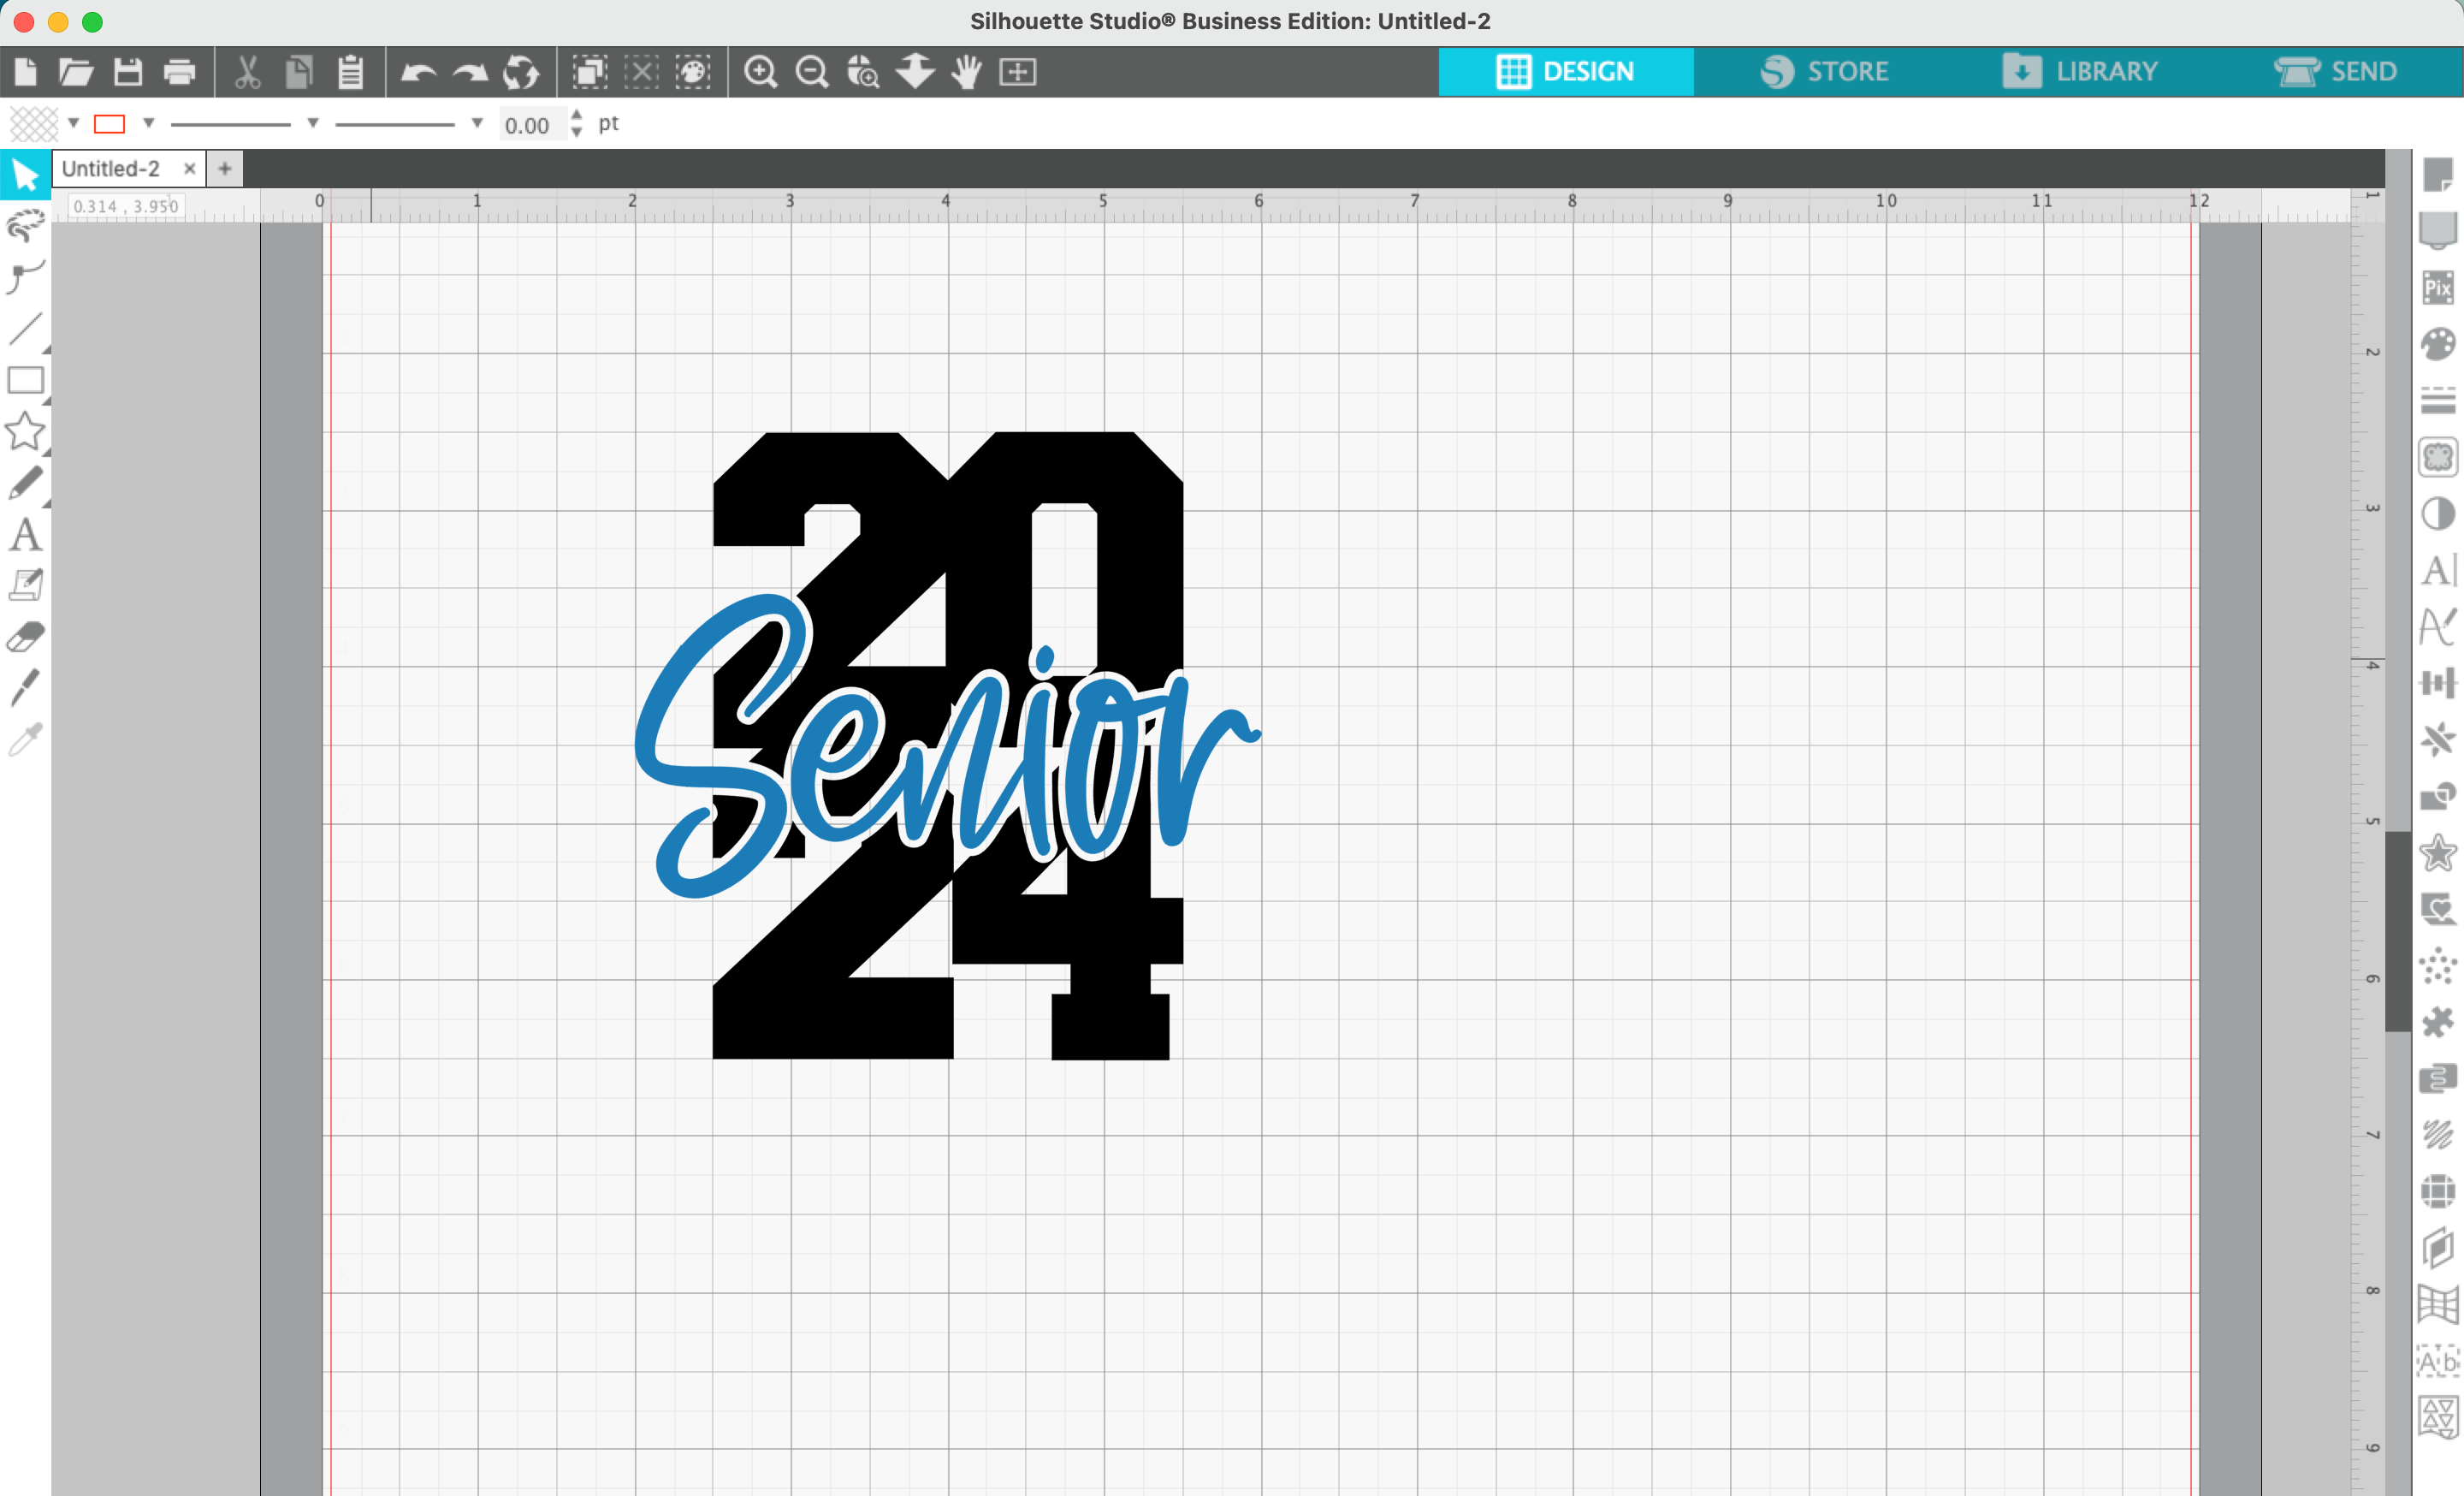
9. Add color to your design.
Design Alternatives
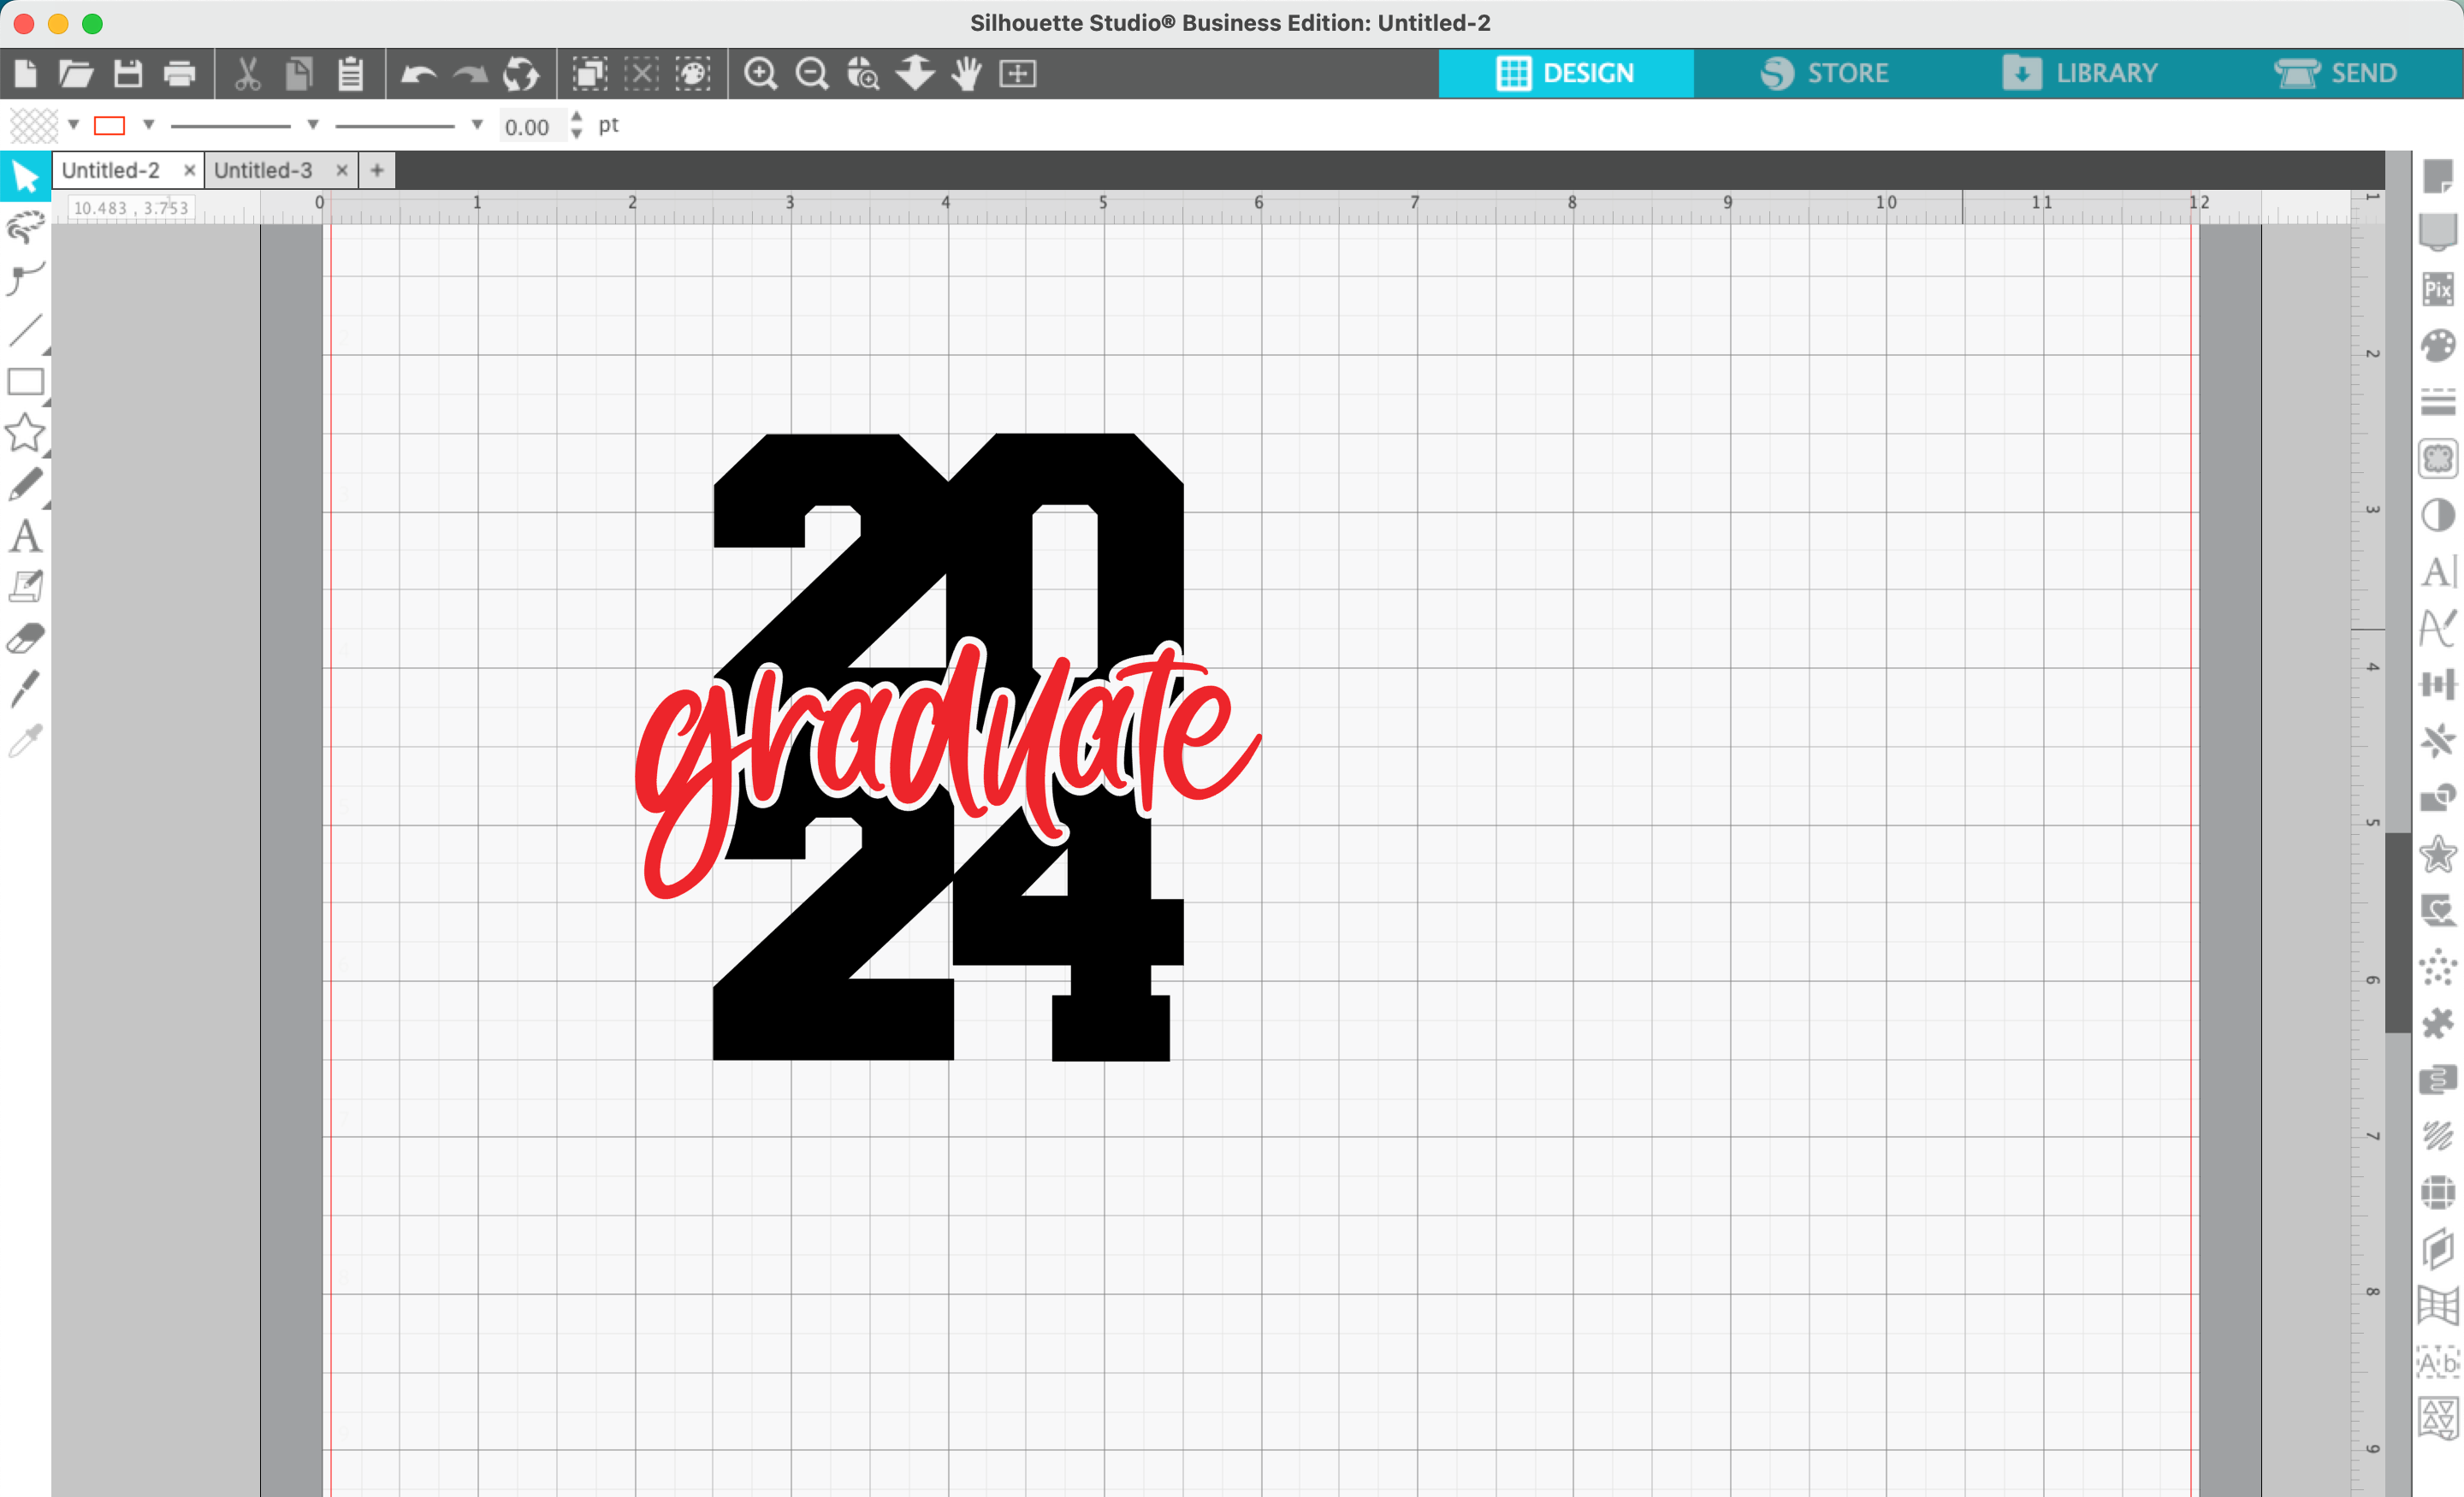
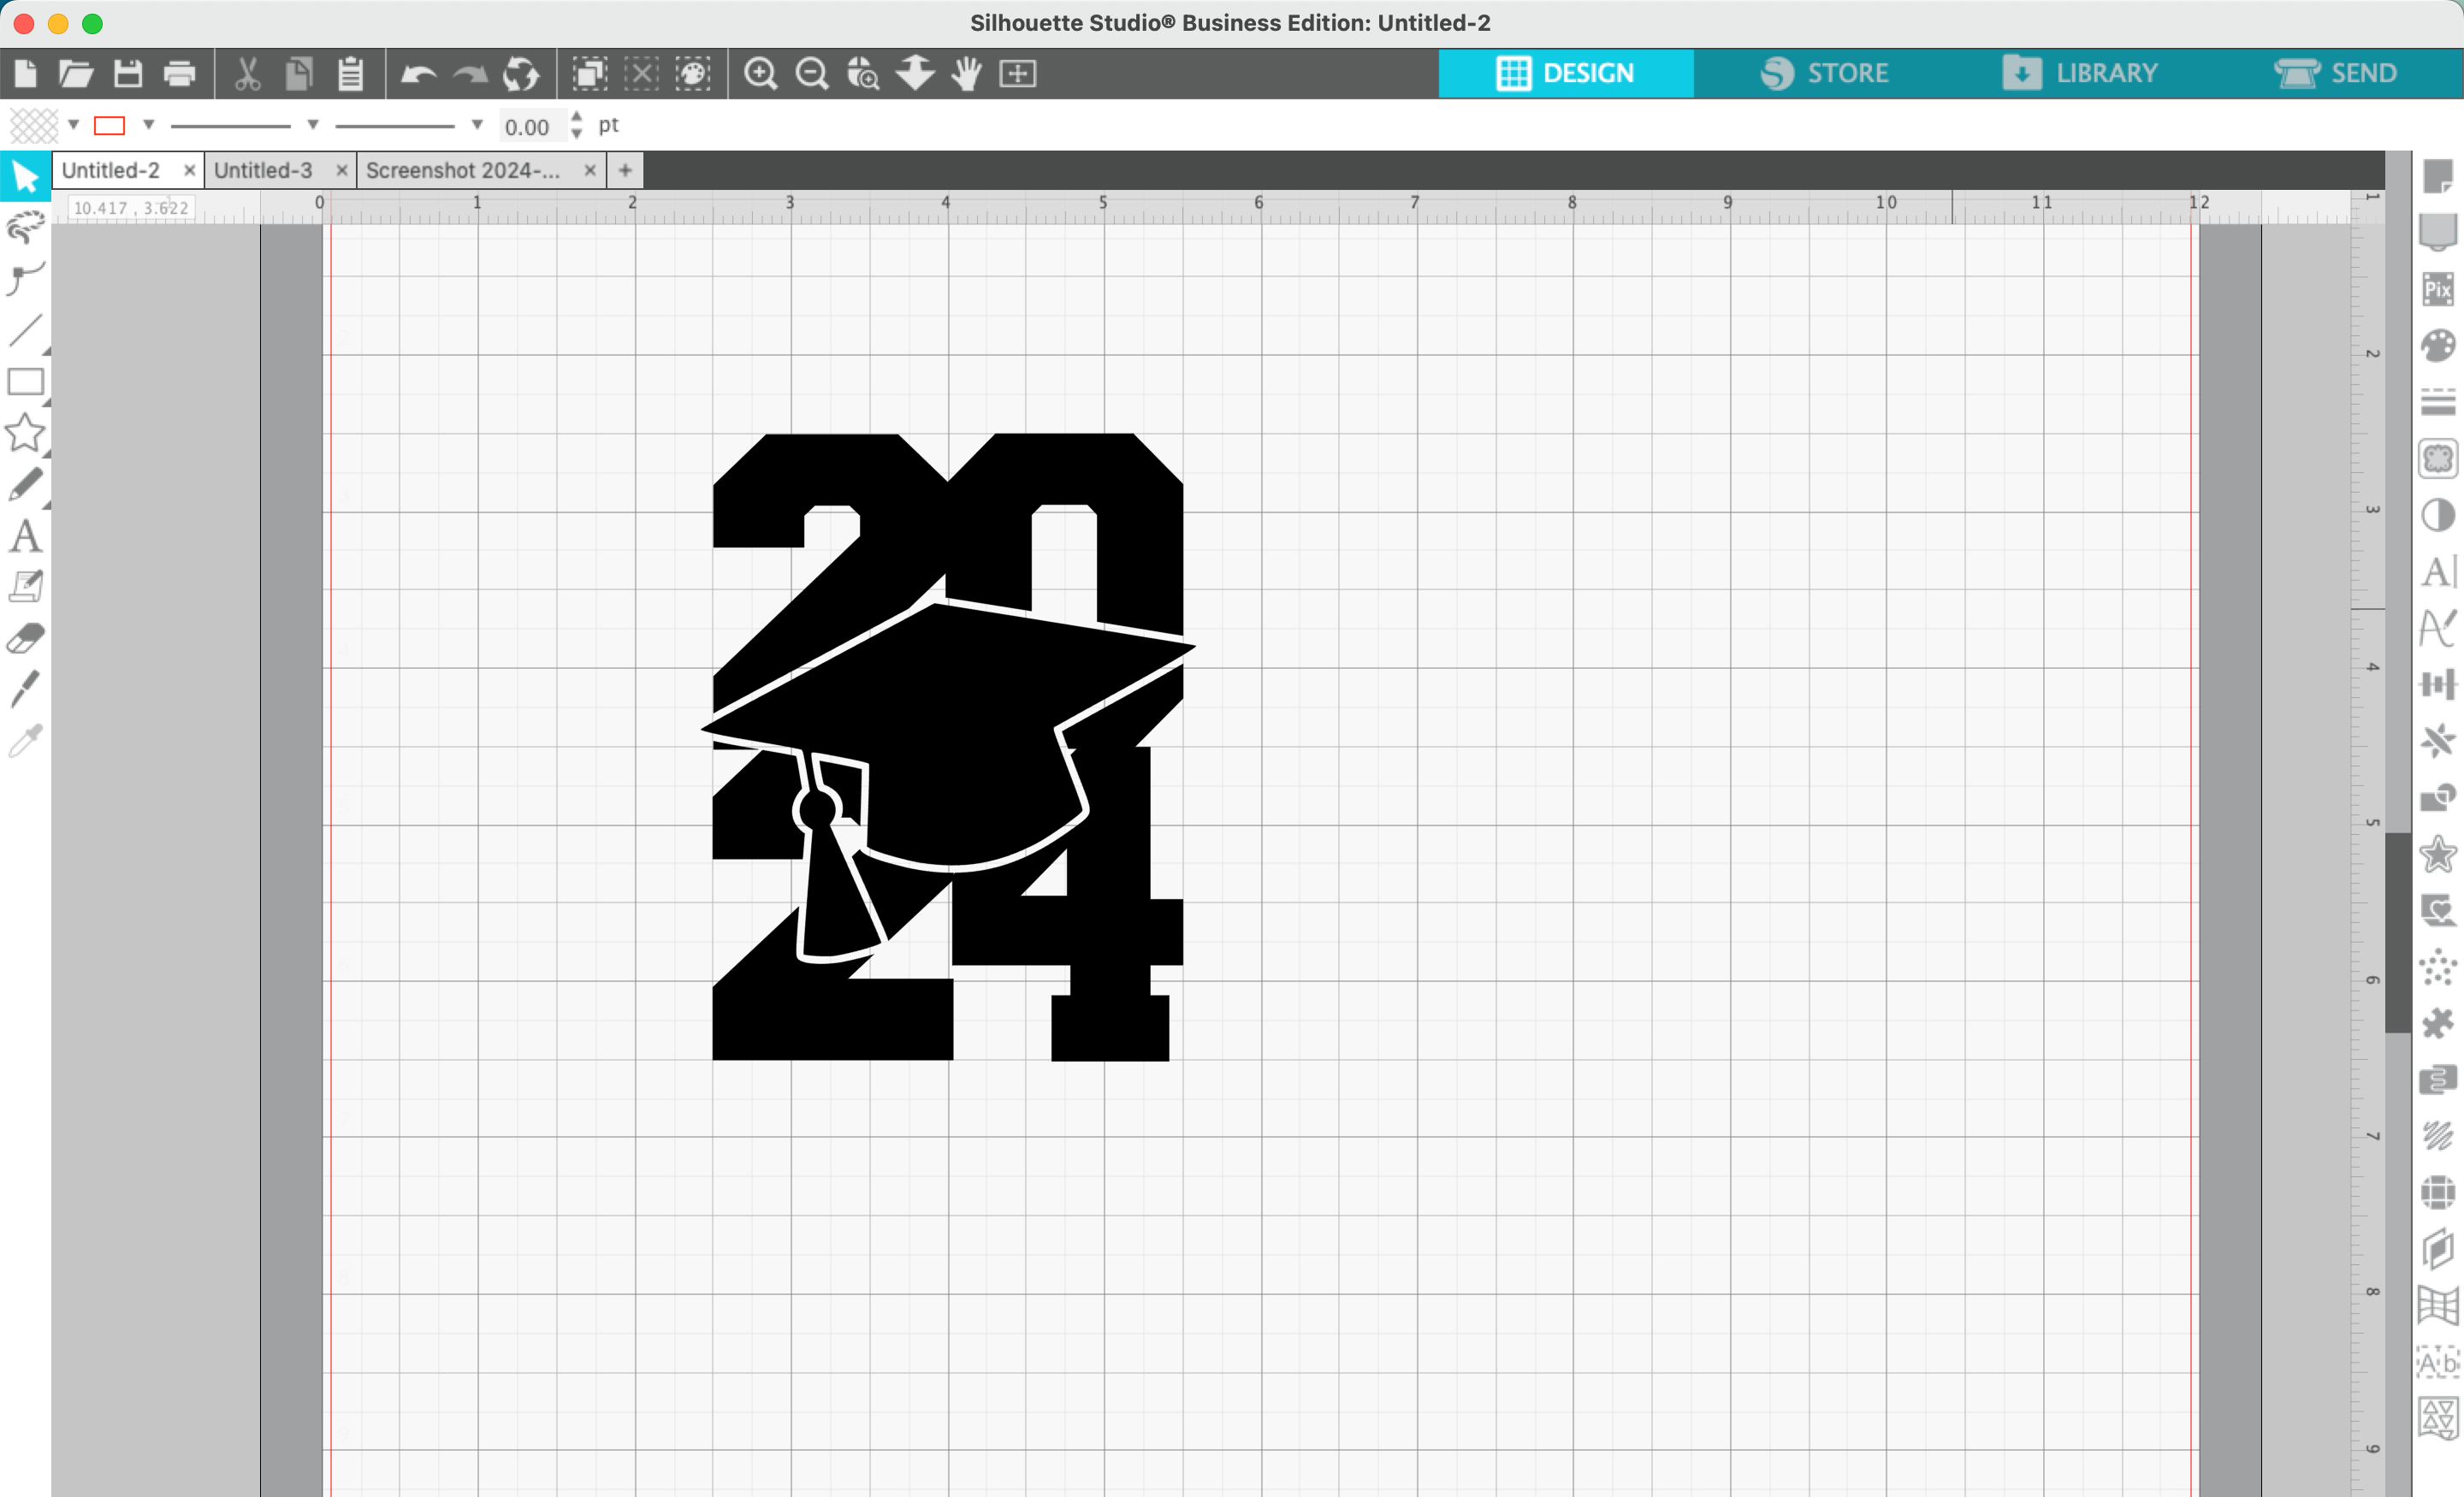
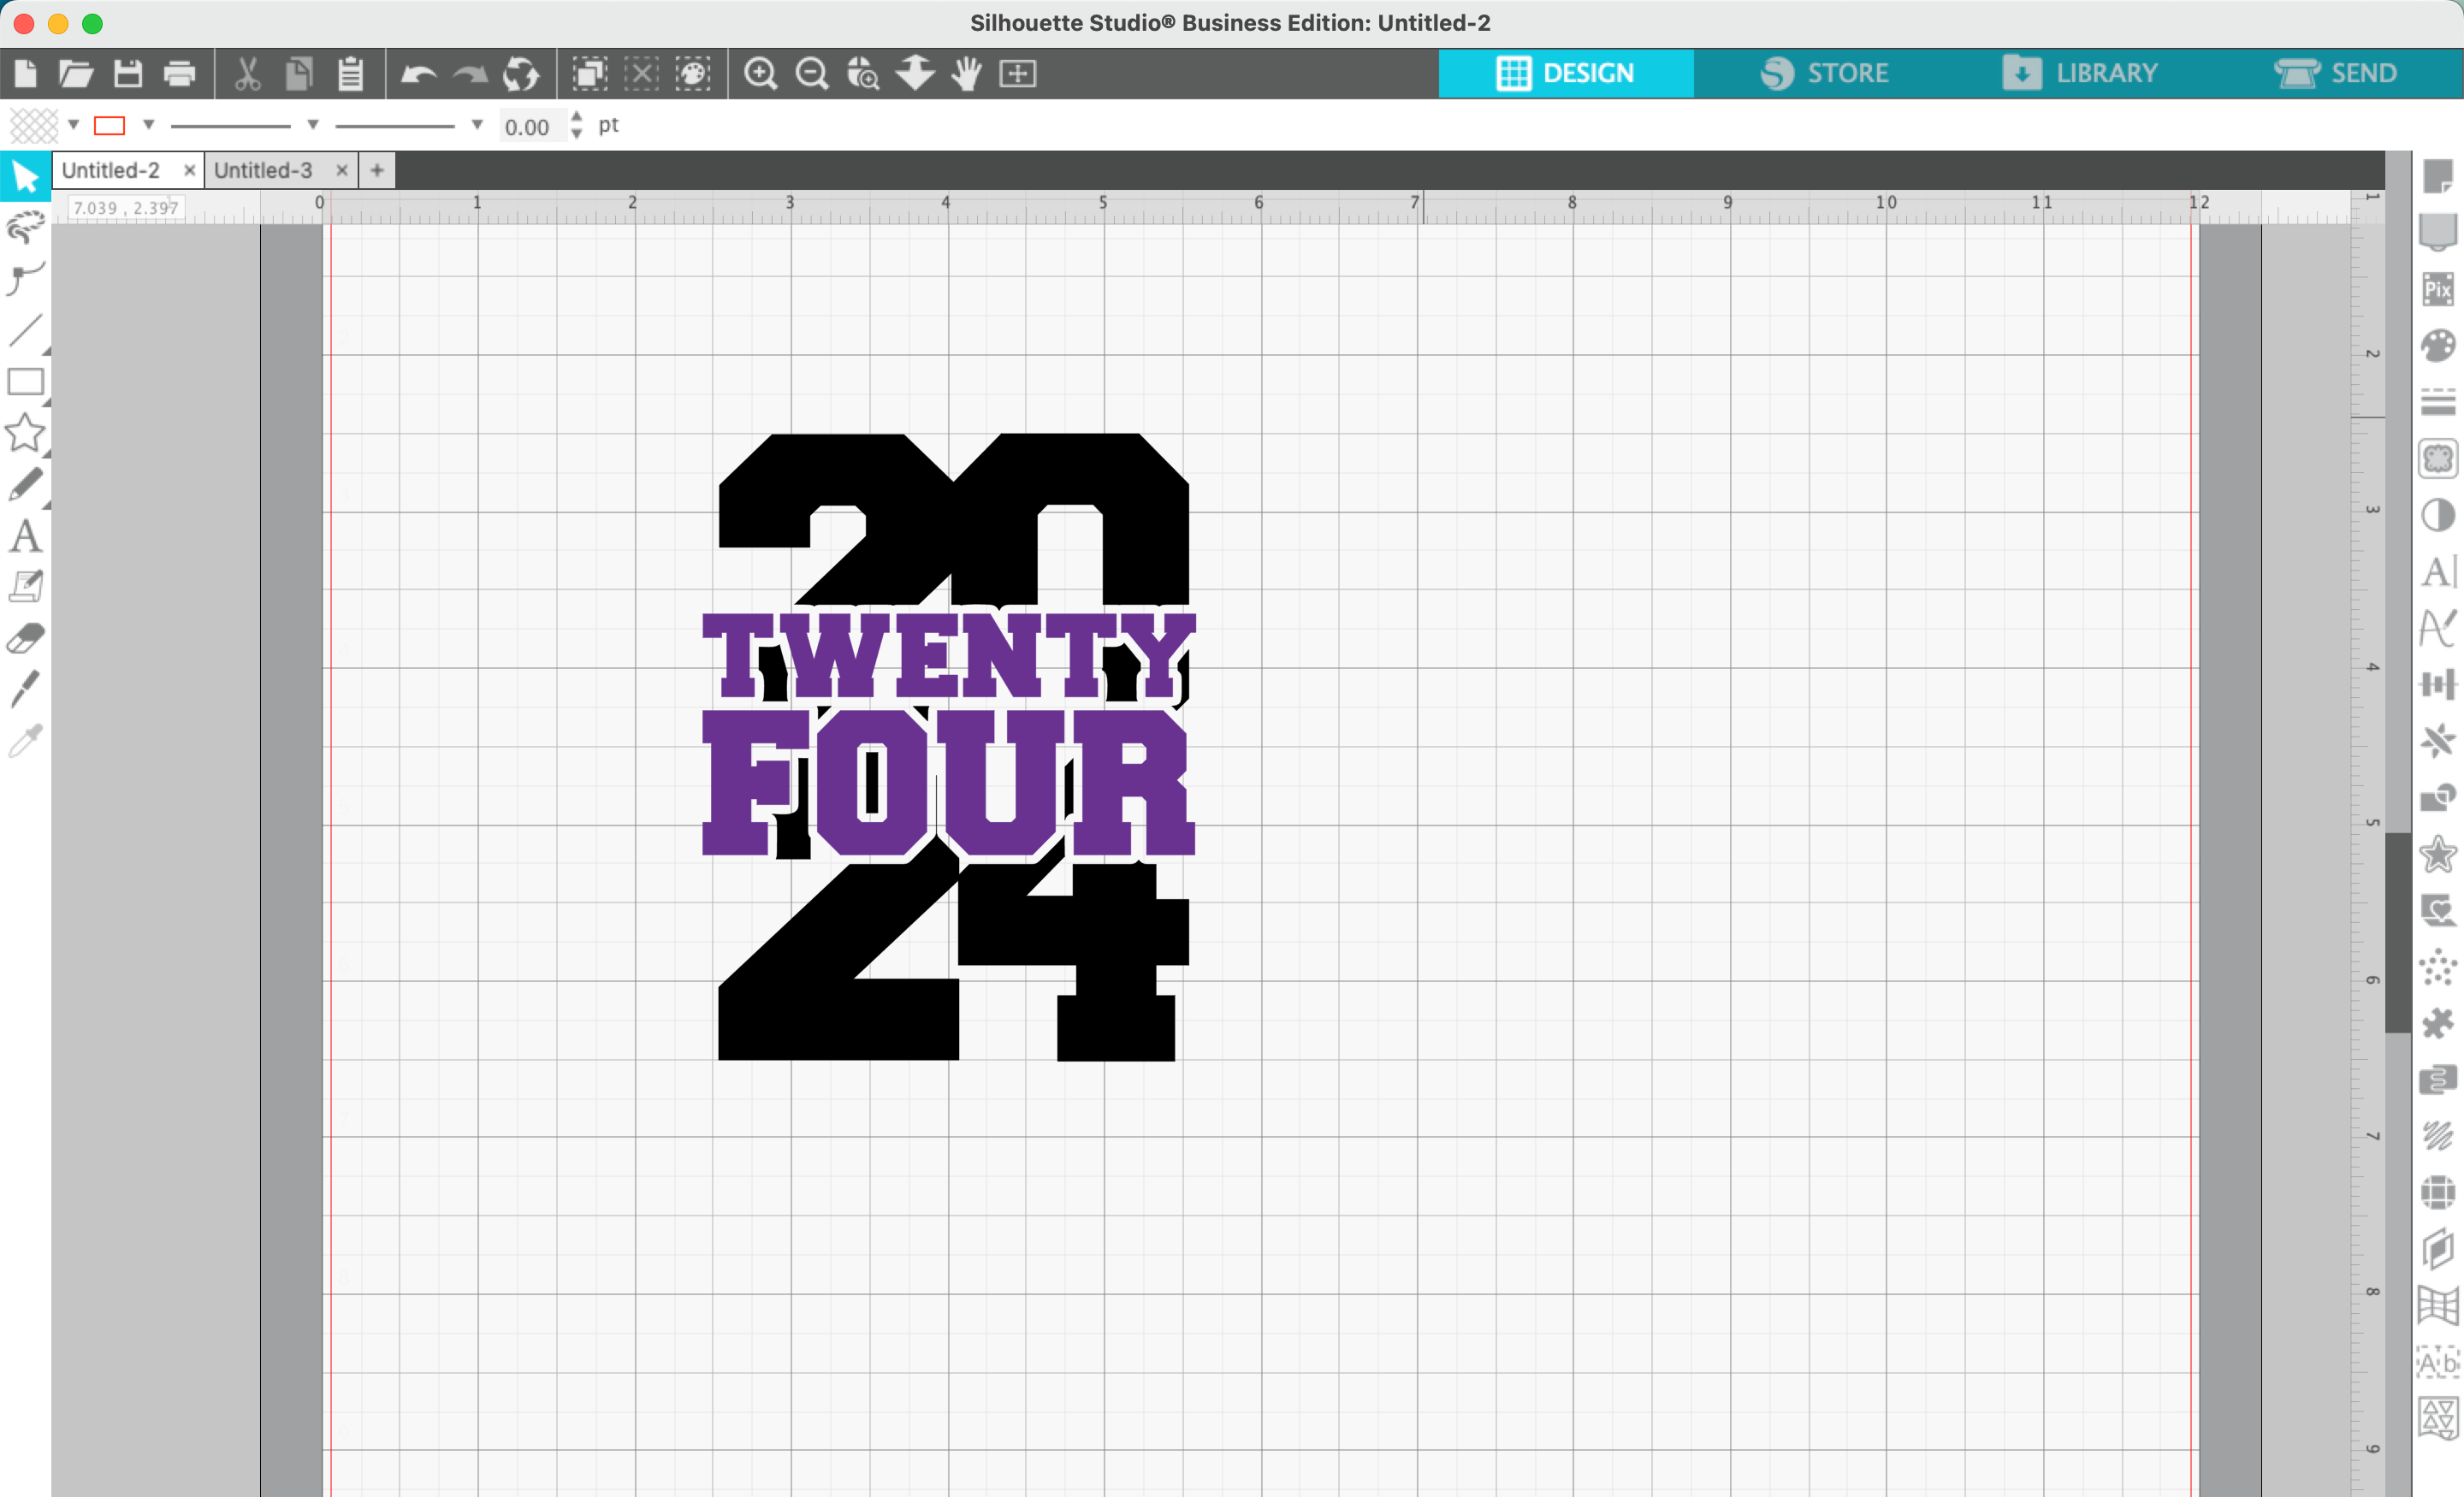
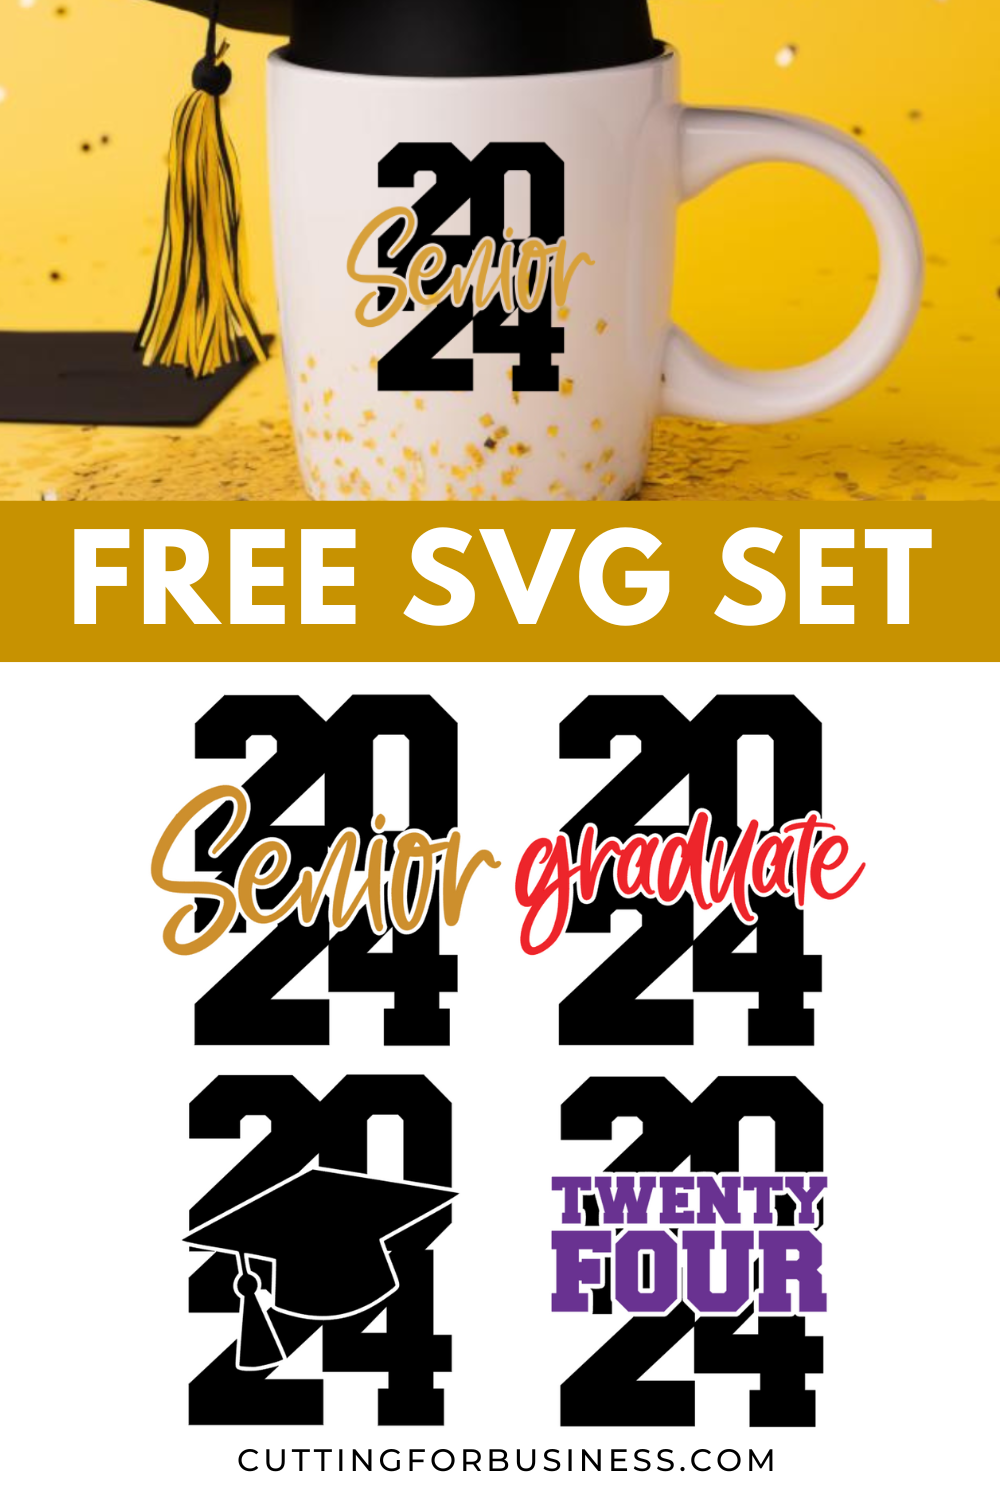
If you don’t want to use the word ‘Senior’, consider ‘graduate’, a graduation cap, or the words ‘Twenty Four’.
For example:
That’s it! Your design is ready to go!
Don’t Forget to Save!
To save your new SVG creation, head to ‘File’, ‘Save As’, ‘Save to Hard Drive’, name the file, then select ‘SVG’ from the dropdown menu.
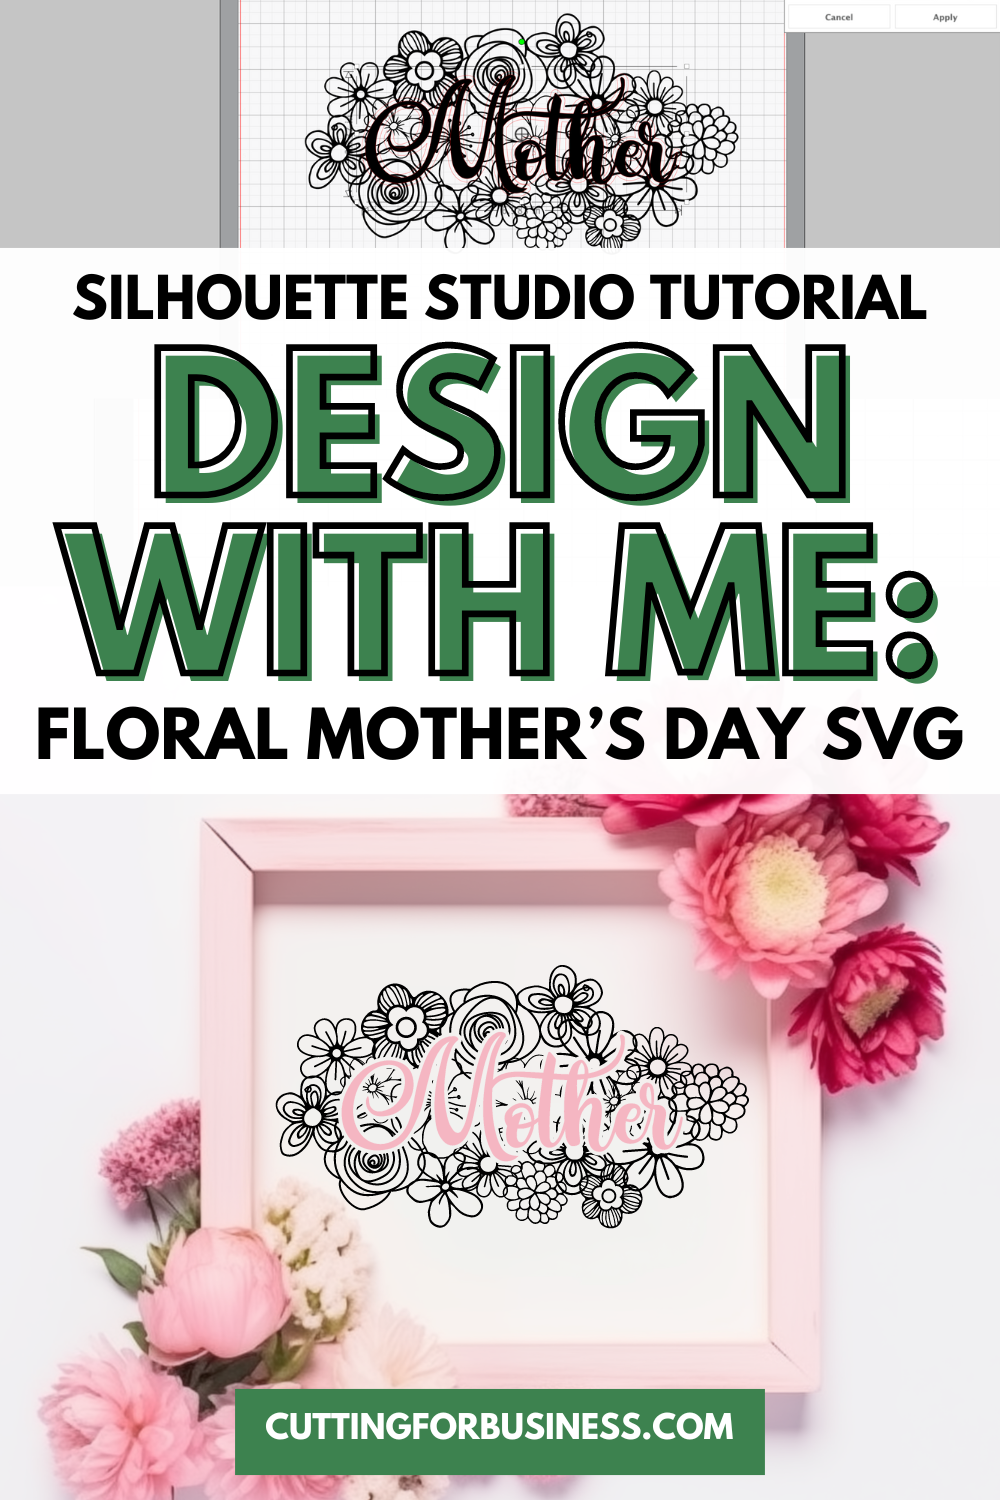
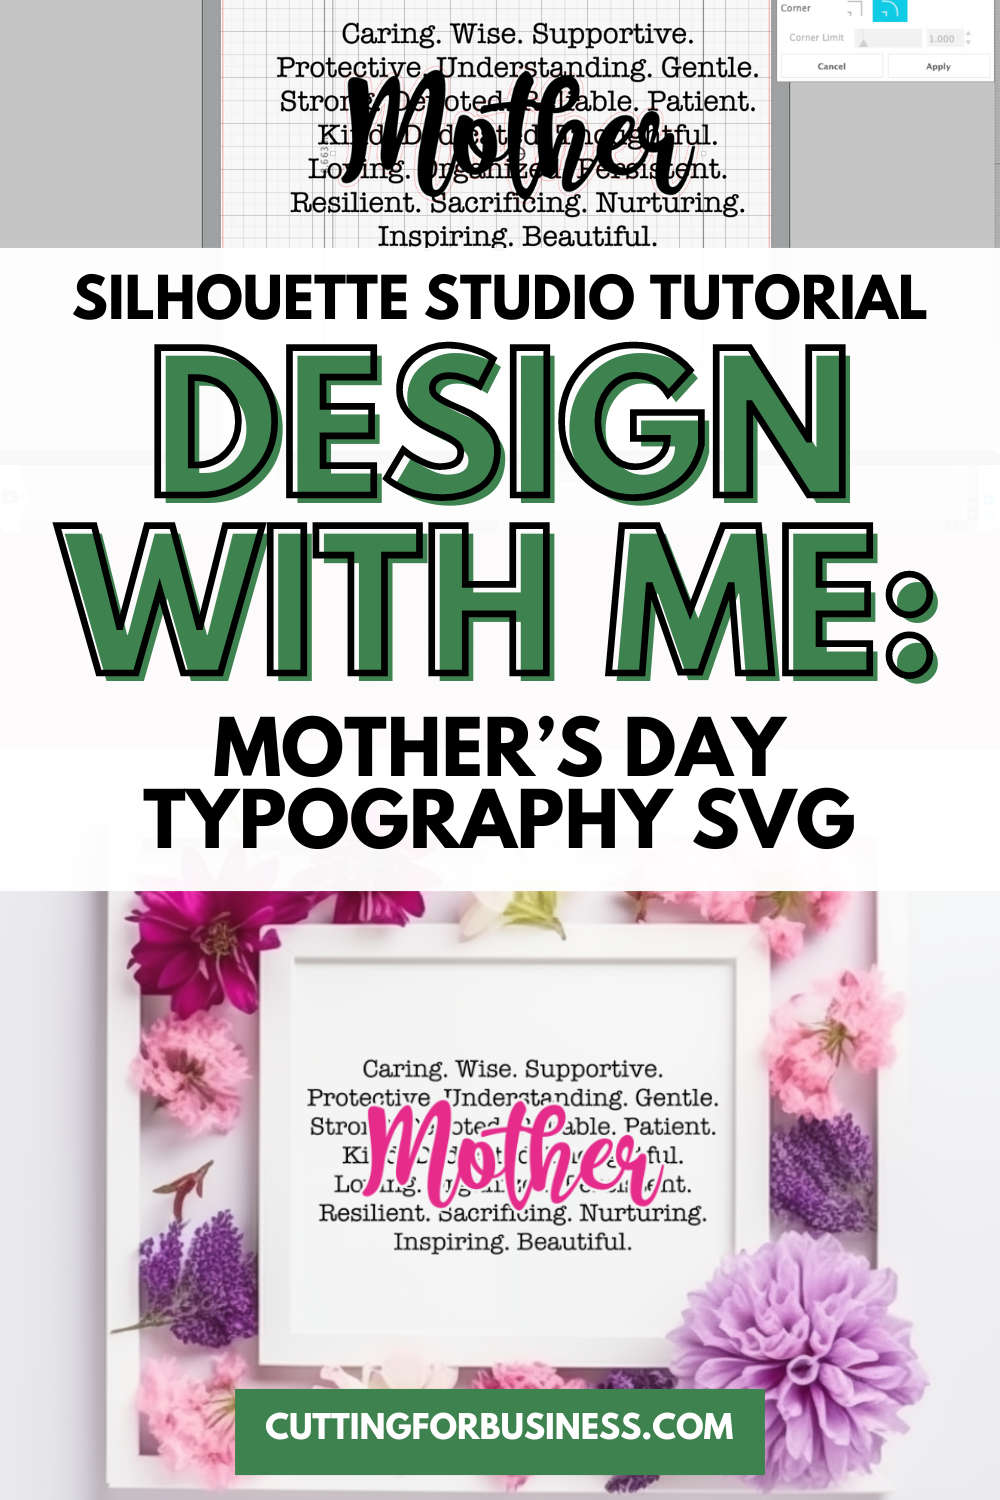
Mother’s Day is coming, so let’s take a few minutes to design a Mother’s Day SVG.
Before you start your Mother’s Day SVG, you’ll need a list of words related to mothers and qualities they possess. Here’s what ChatGPT came up with.
Tutorial: Mother’s Day Typography SVG
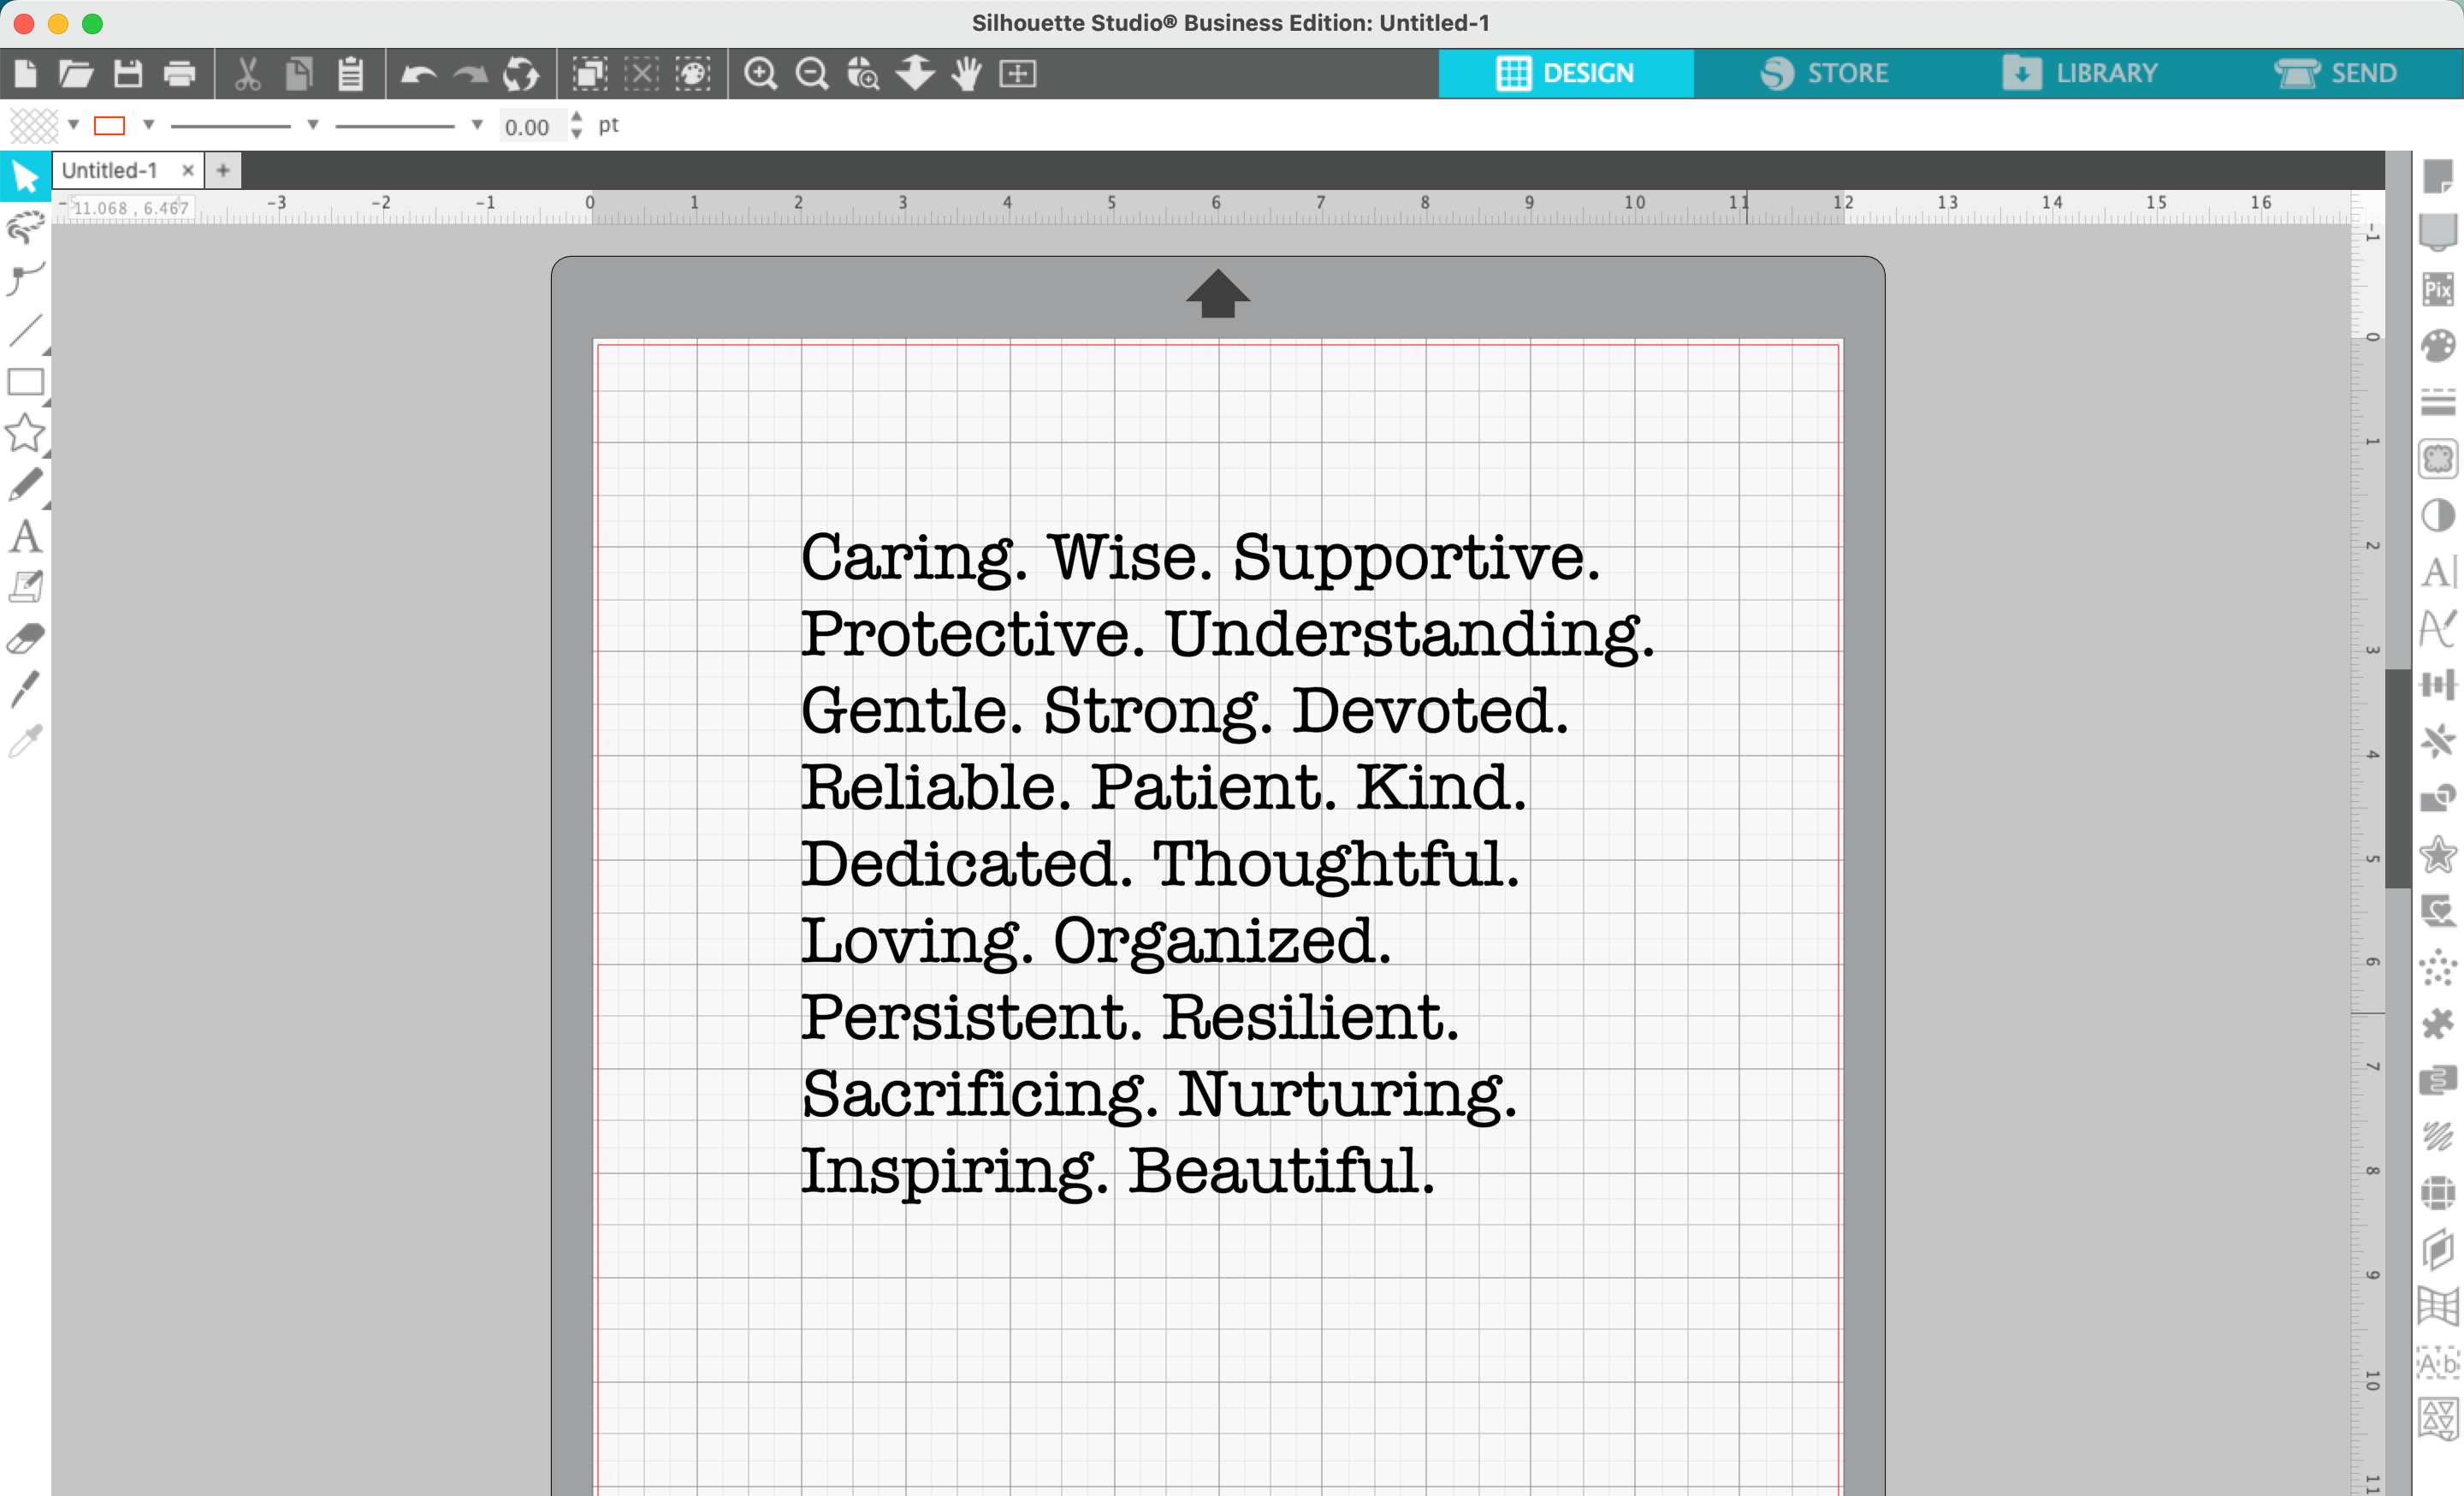
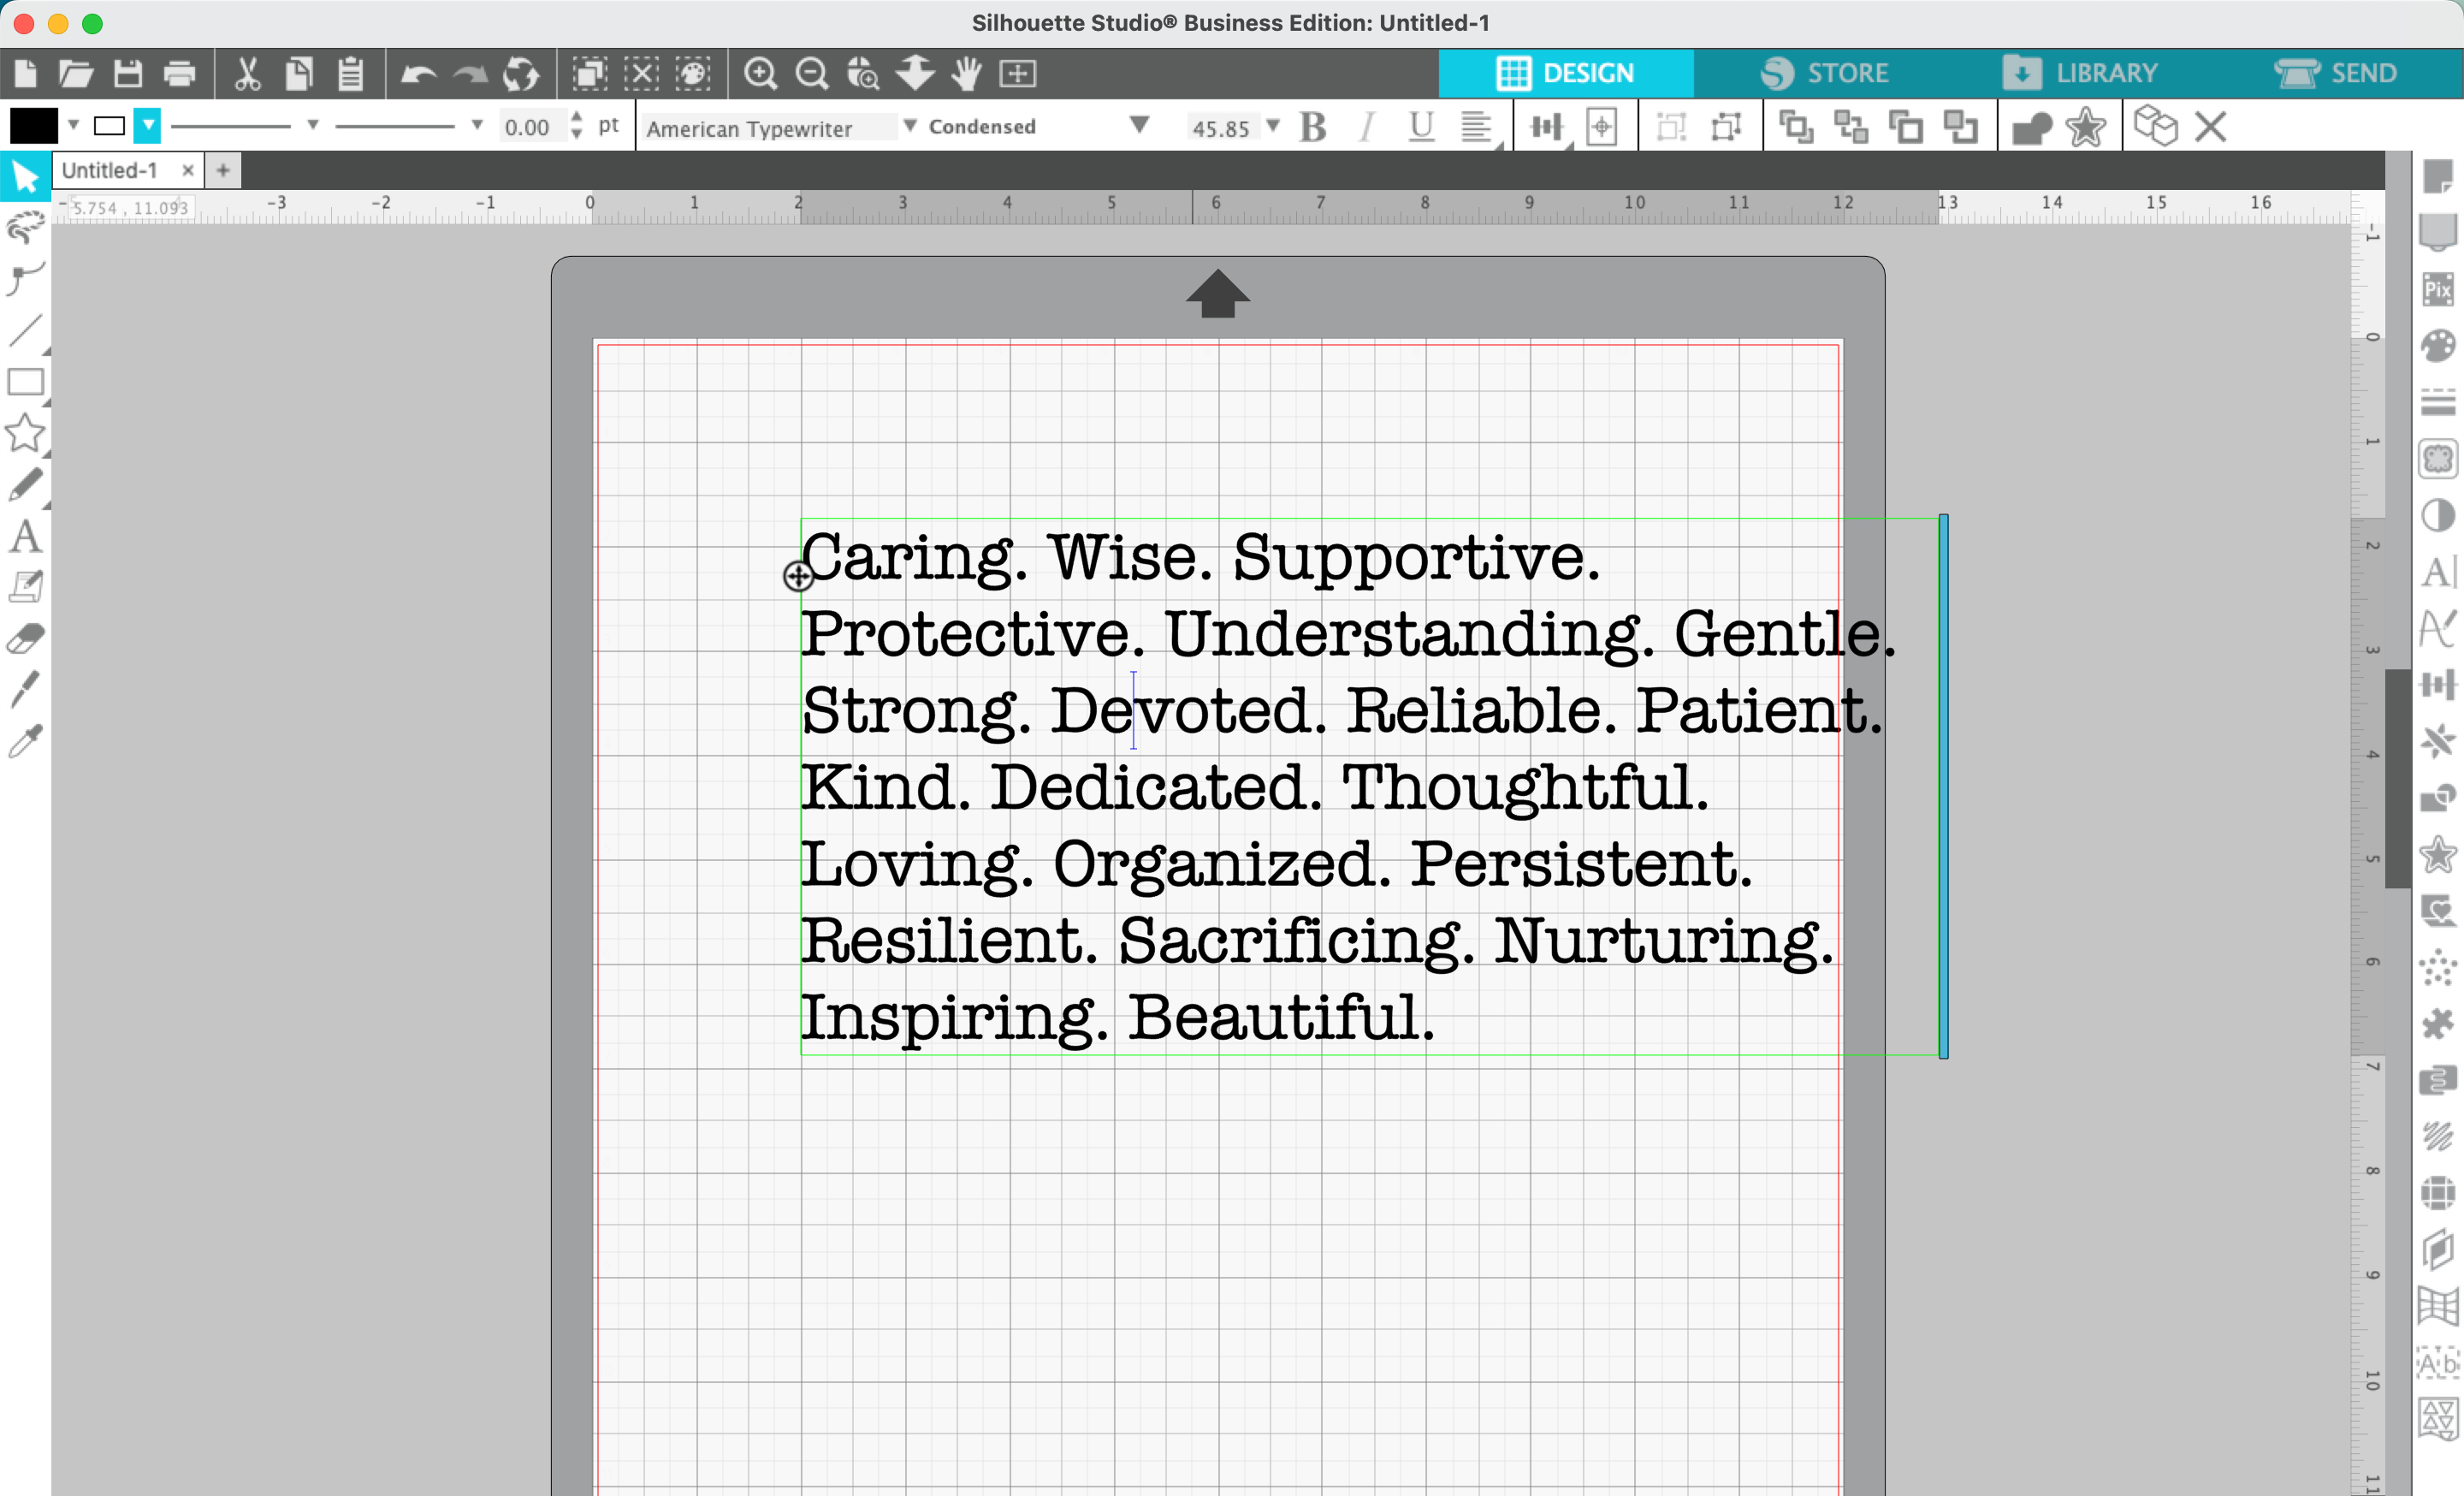
In Silhouette Studio, type about 20 of your favorite words from the ChatGPT list in a font of your choice. I used a typewriter font.
2. Double click on the words to bring up the blue bar that allows you to resize the text box. Resize the text box to arrange the words as you’d like.
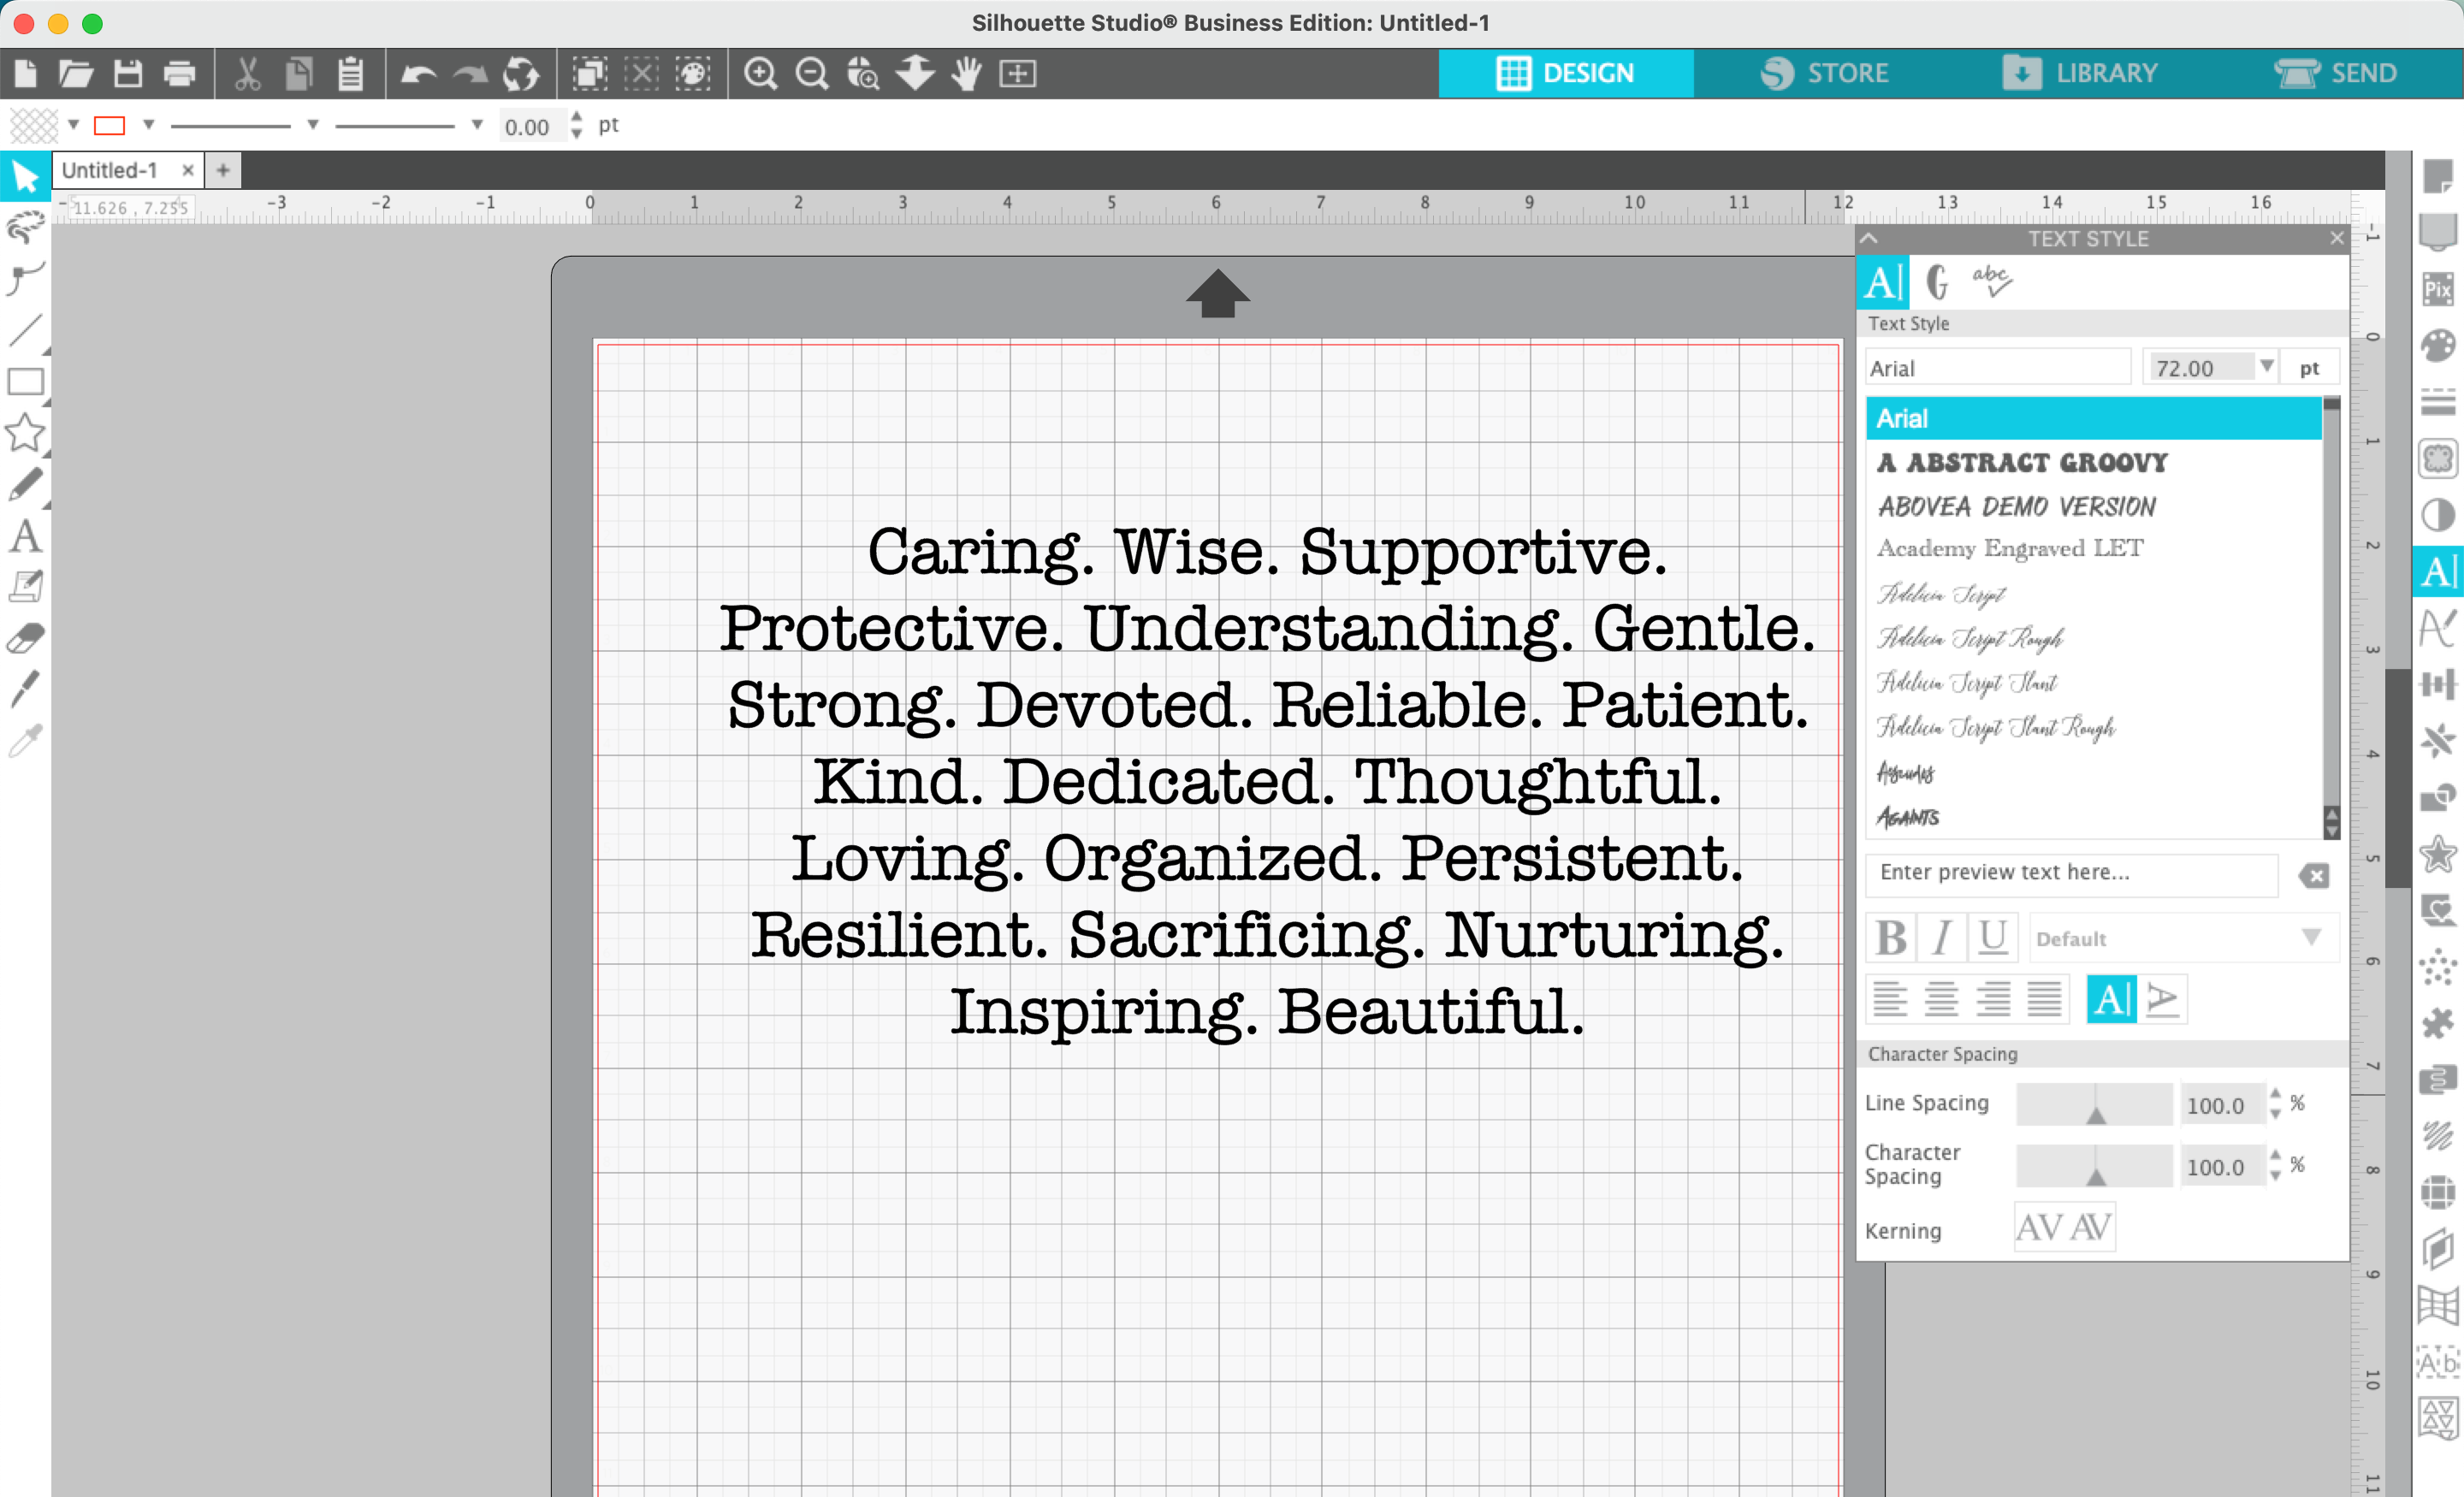
3. Navigate to ‘Panels’, ‘Text Style’. Adjust the alignment (left, right, or centered), the line spacing, or the character spacing.
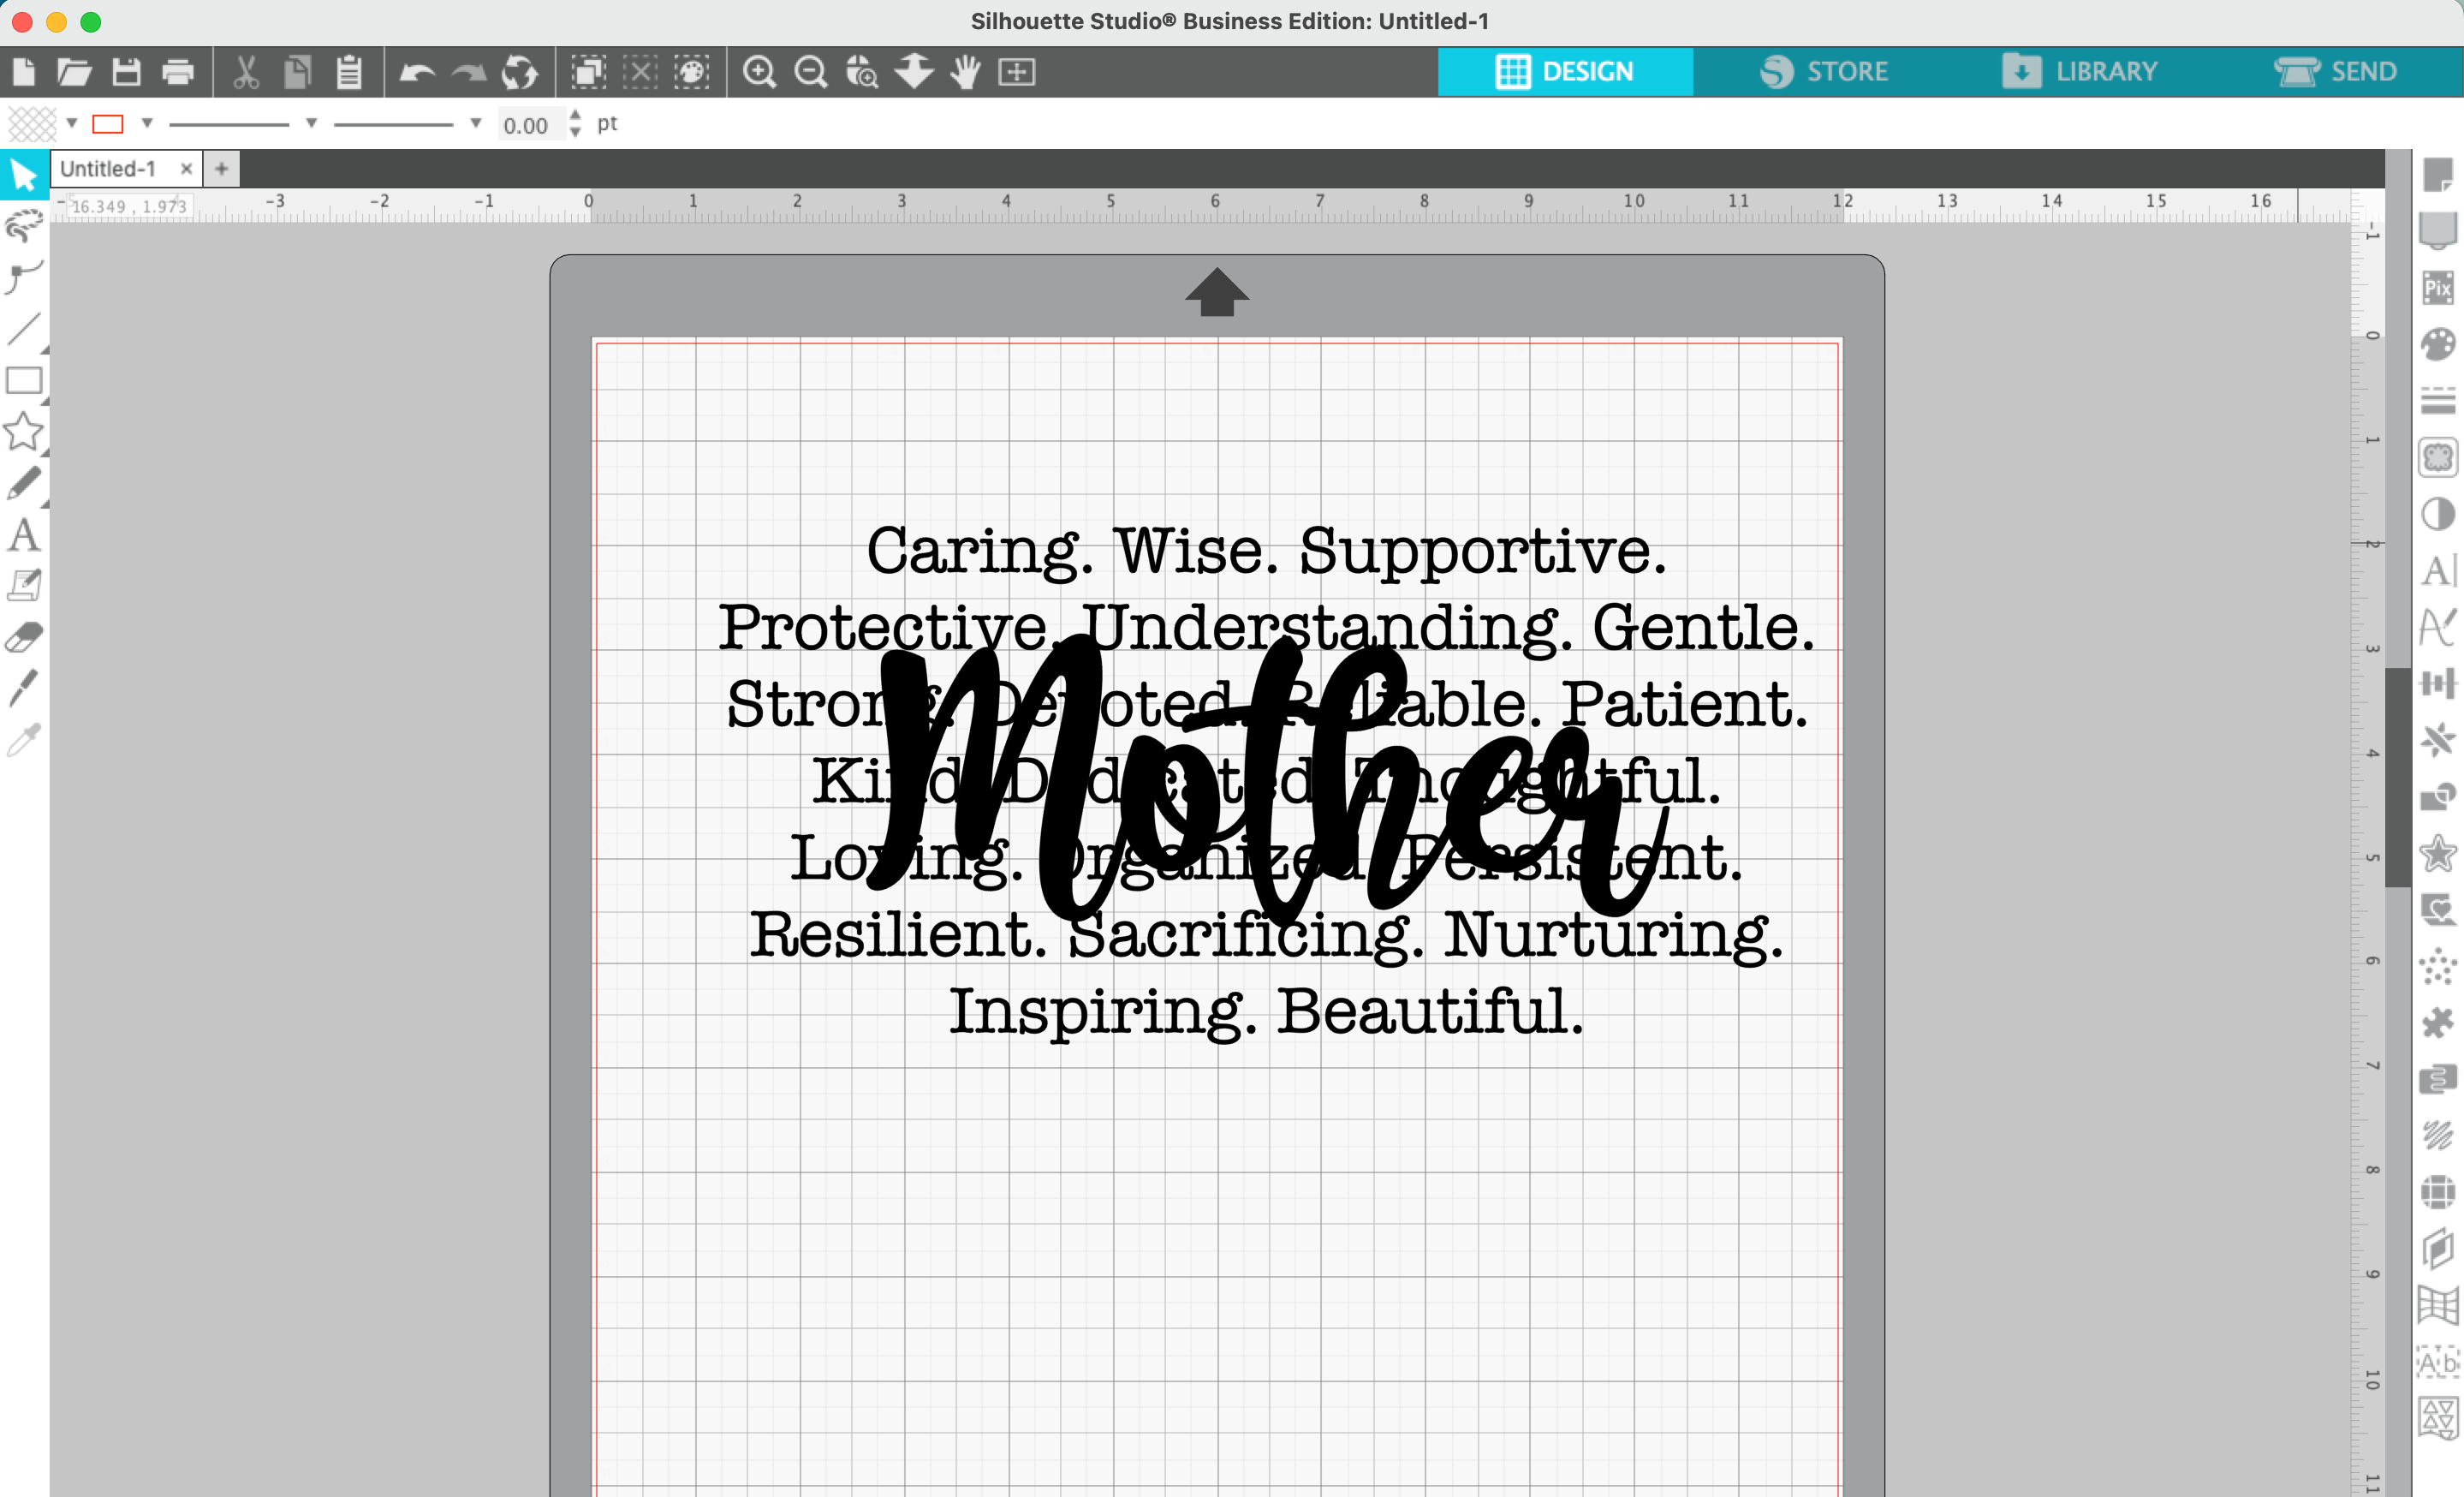
4. In a new text box, type ‘Mother’, ‘Mama’, ‘Mom’, ‘Nana’, ‘Grandma’, or other word of your choice in a script font. I used this font. Drag the word onto the top of the other words.
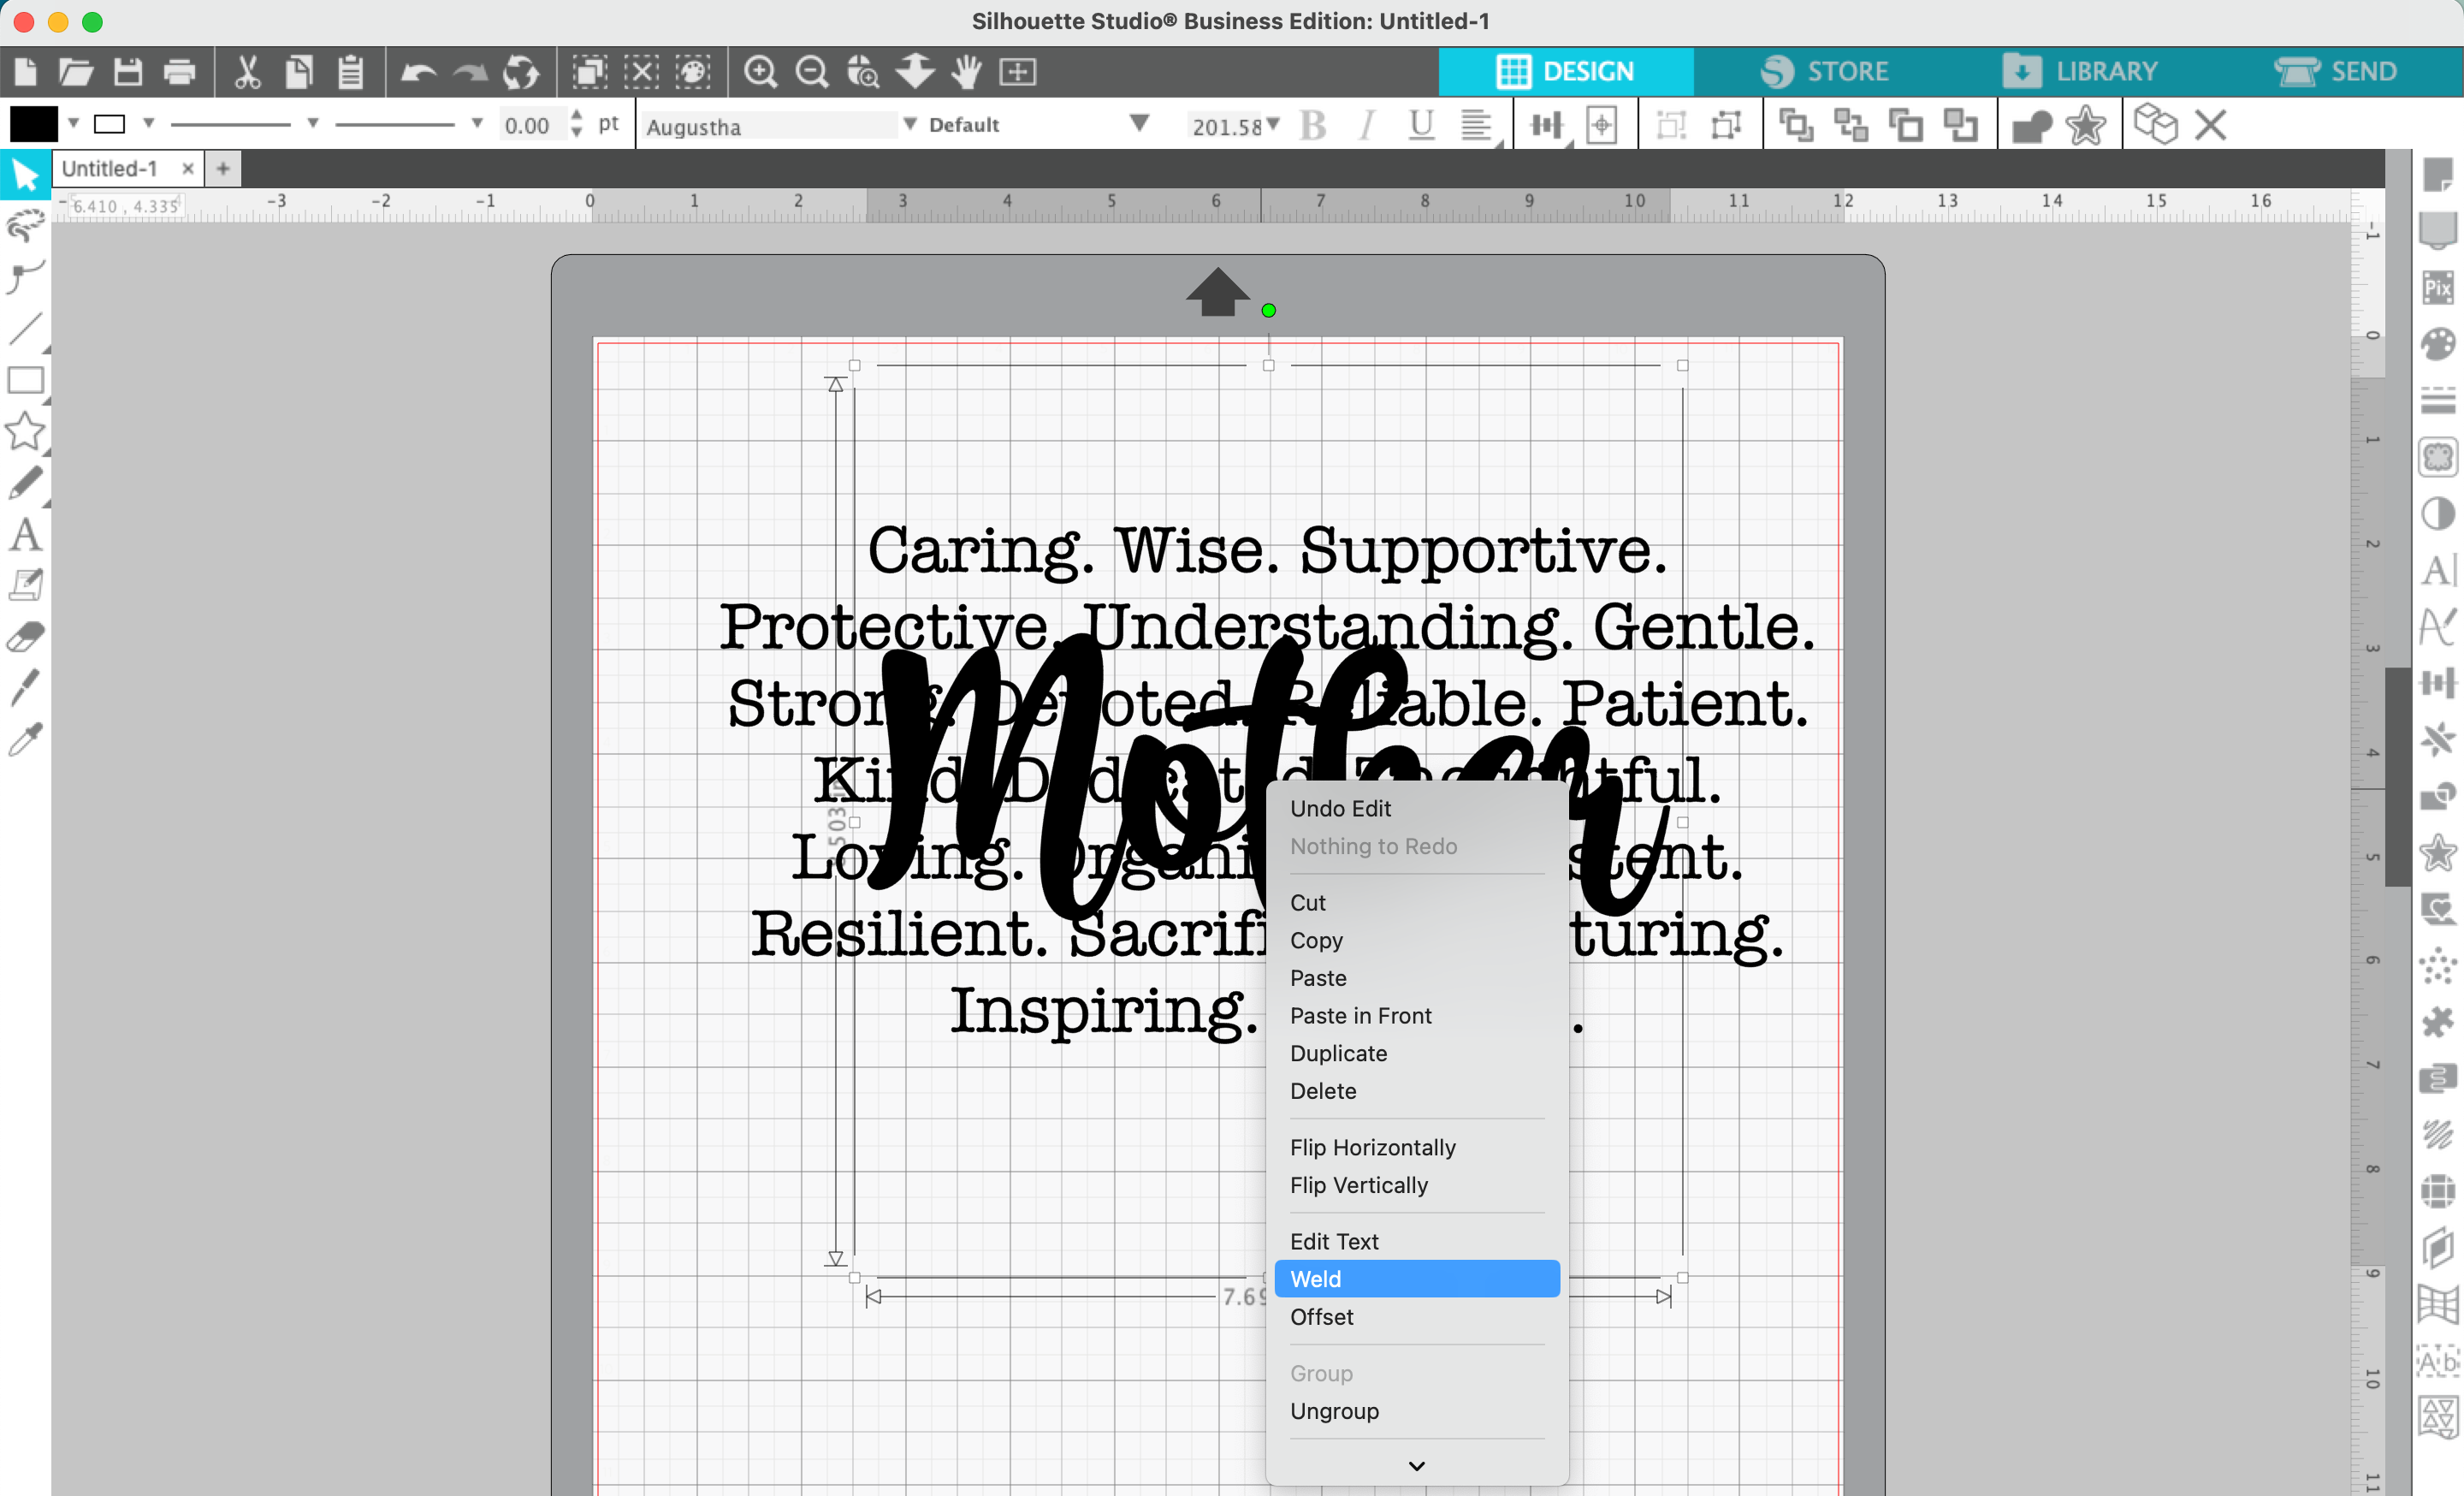
5. Right click on the text and weld it.
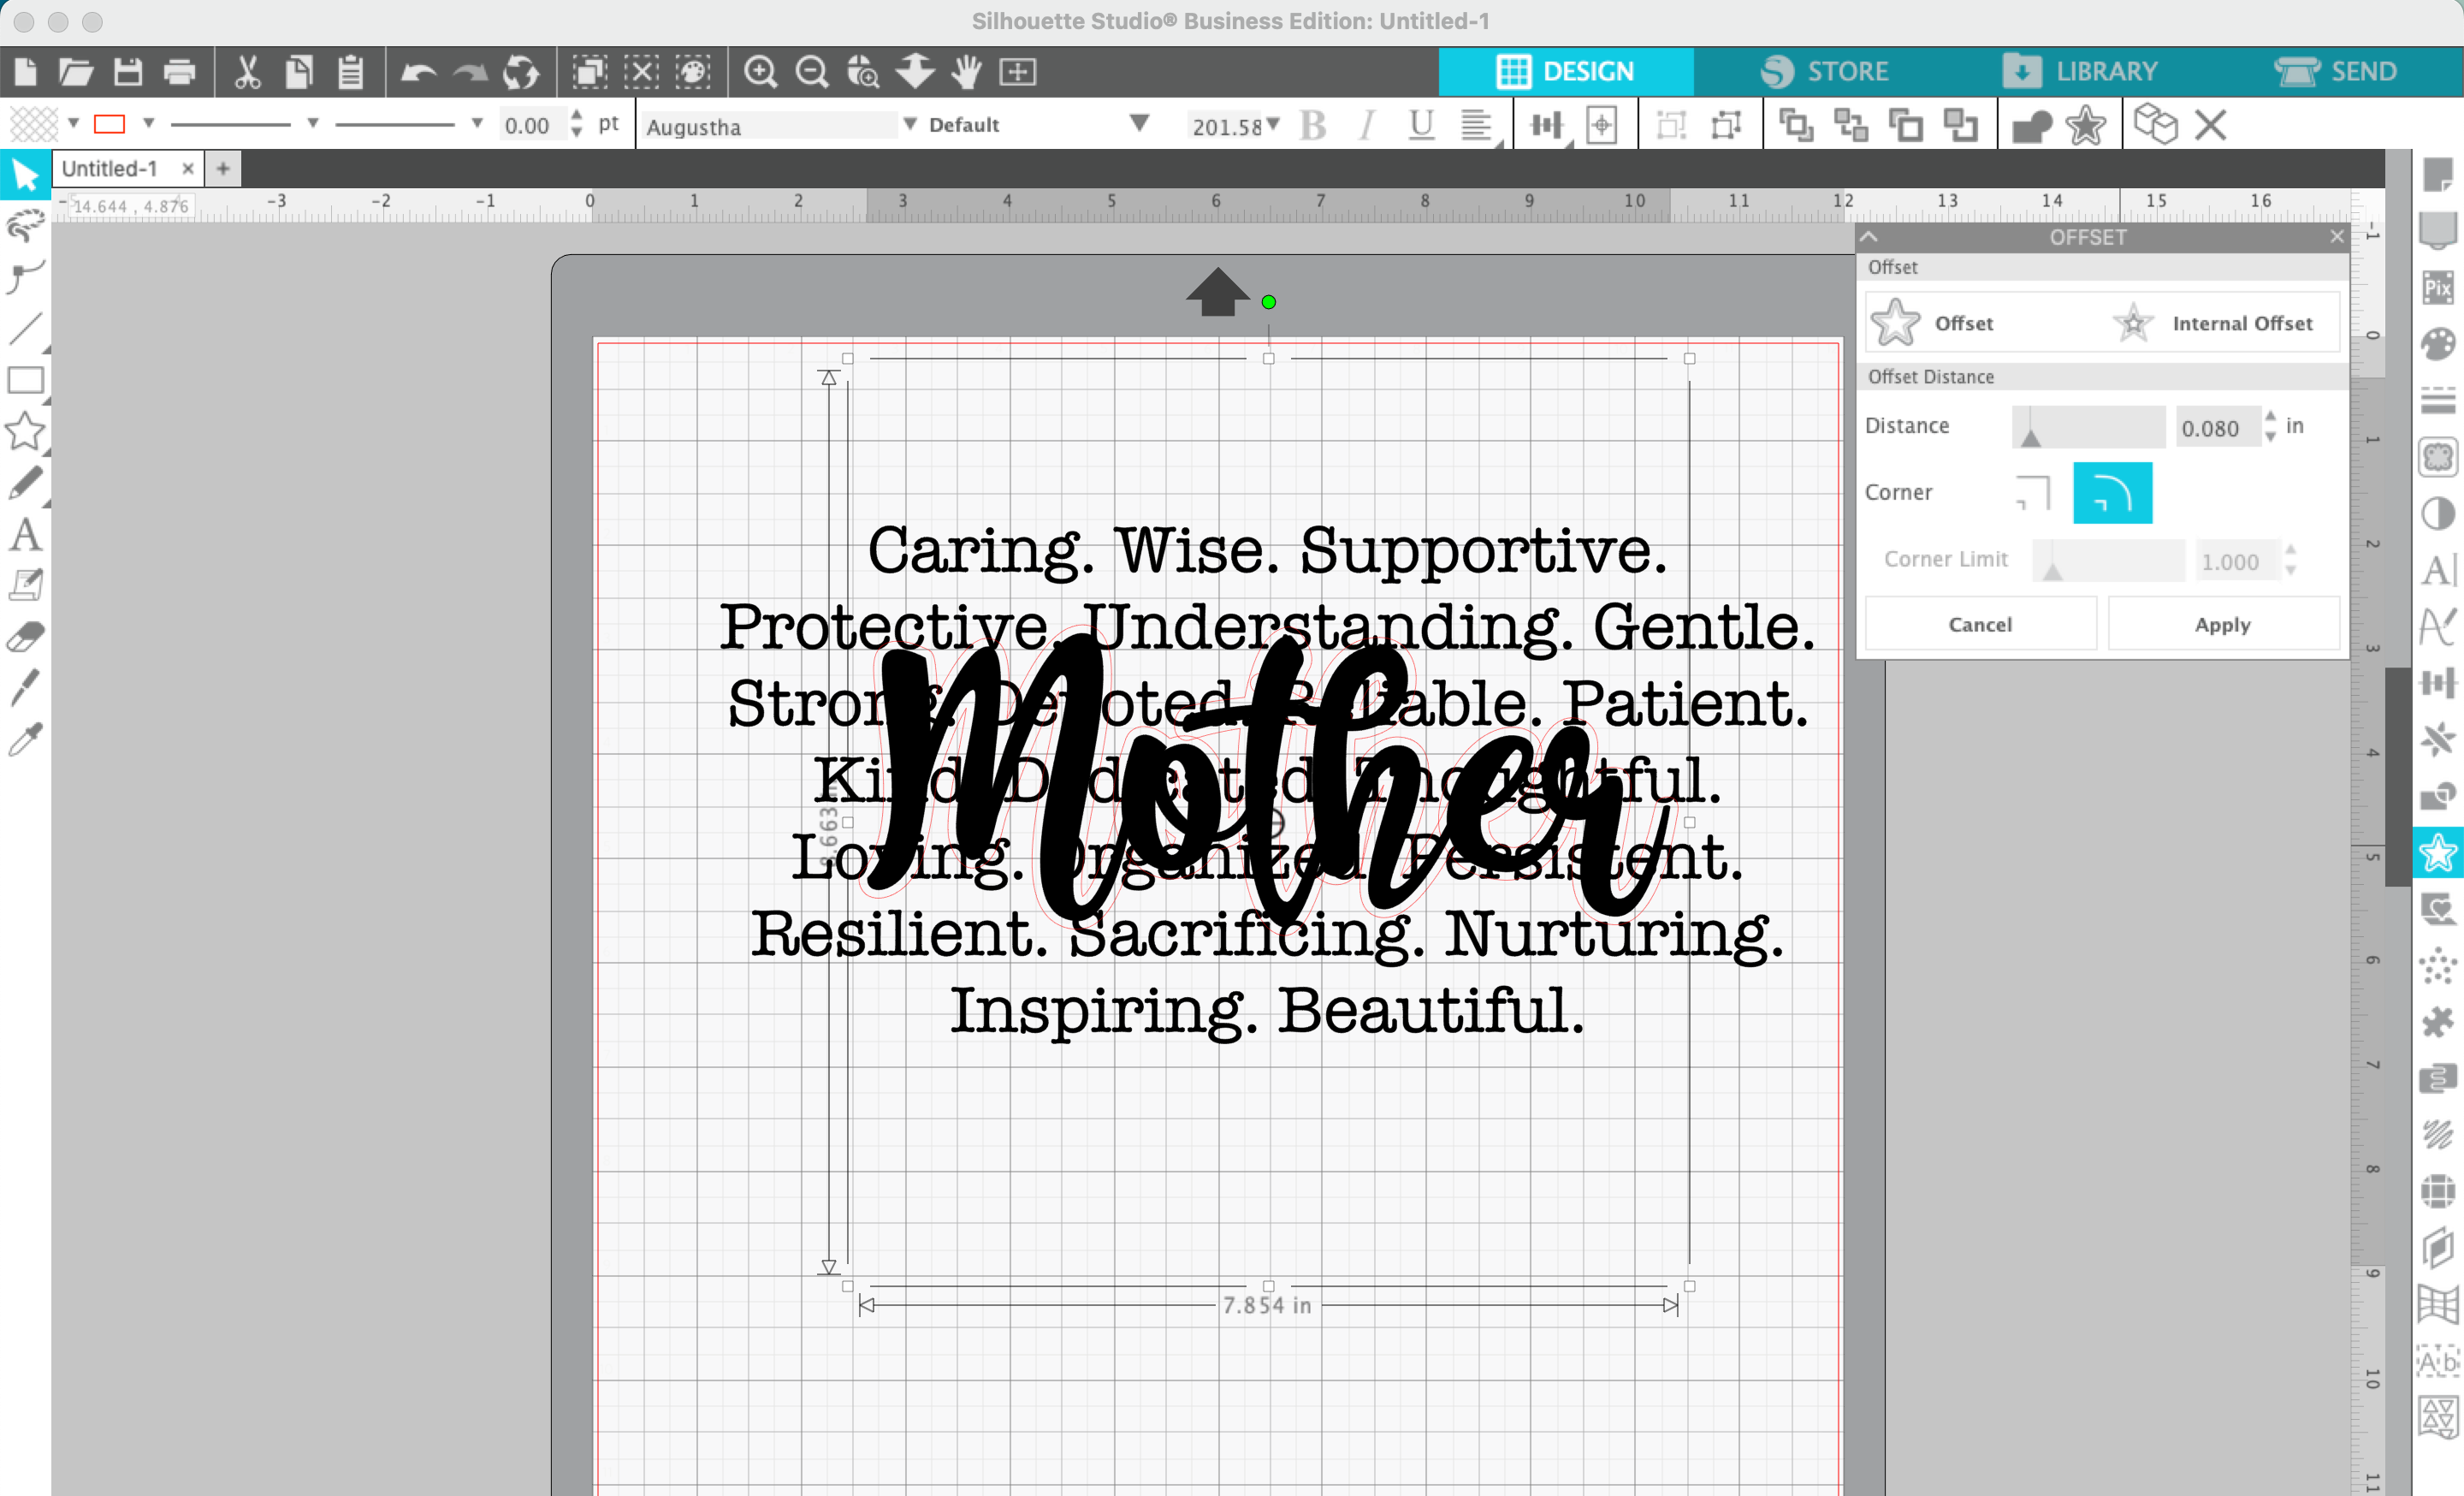
6. Navigate to ‘Panels’, ‘Offset’, then offset the word.
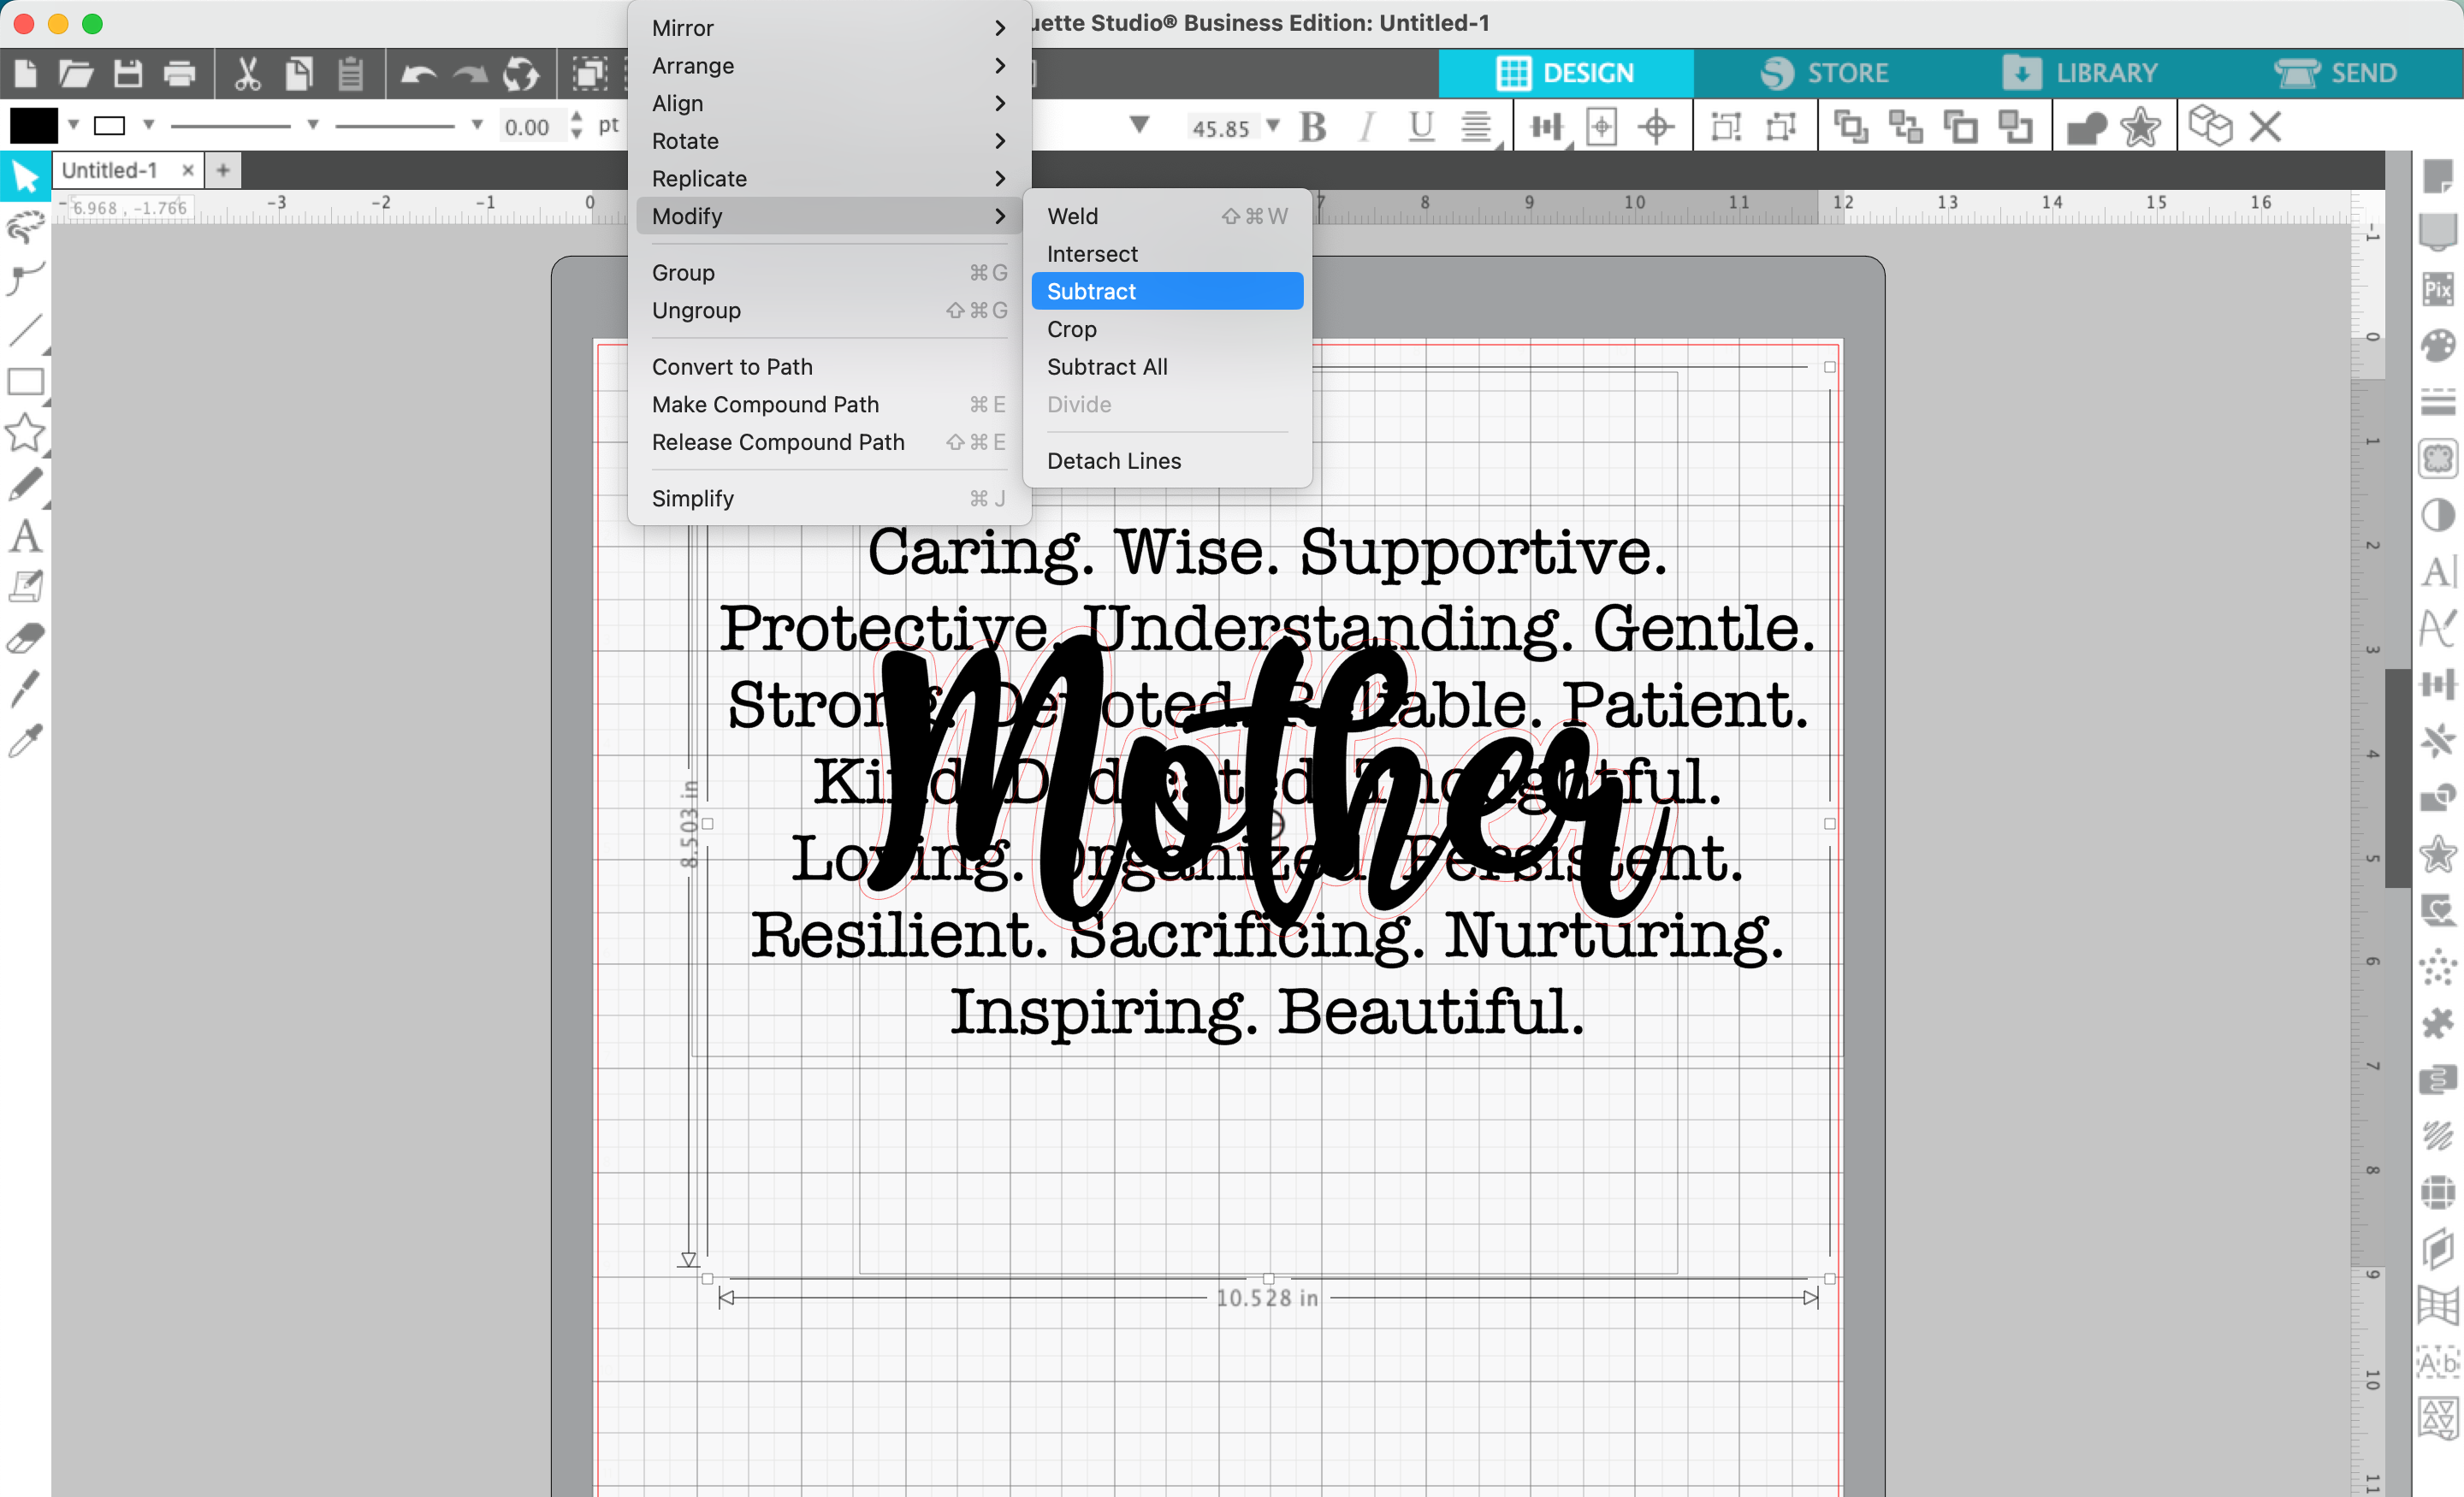
7. Click the background text, then the offset text, and navigate to ‘Object’, ‘Modify’, ‘Subtract’.
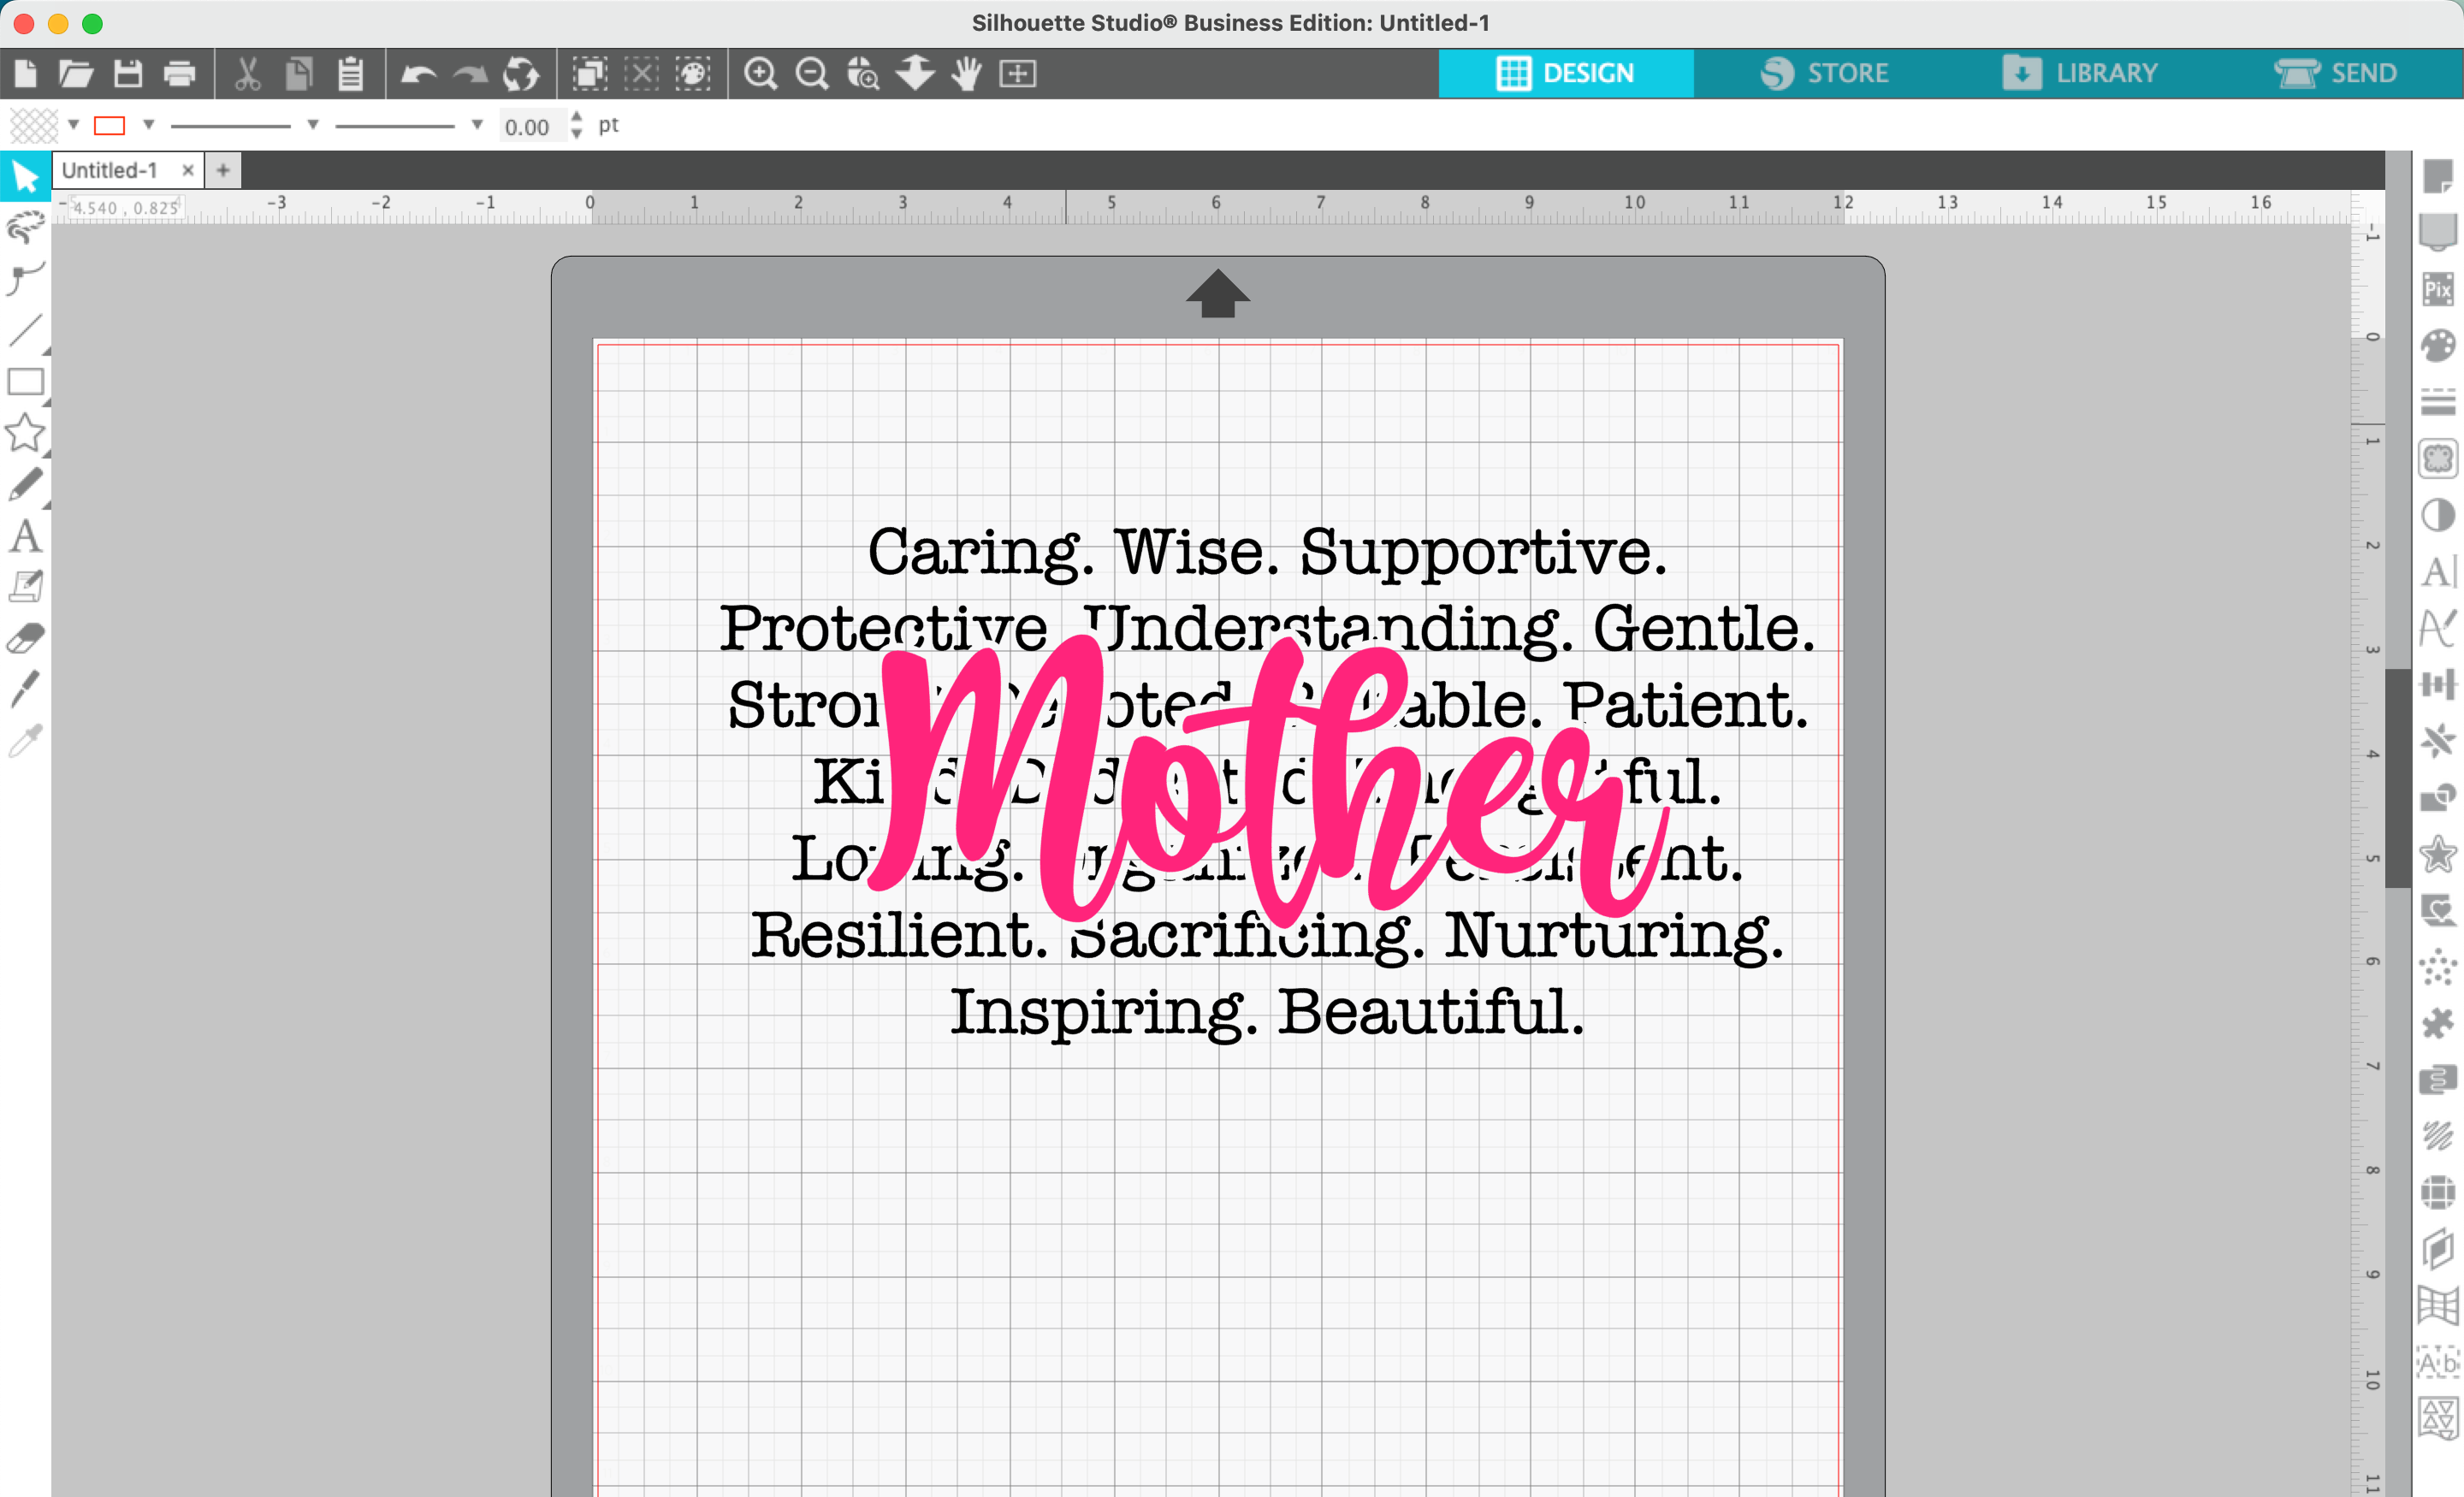
8. Add color to your design.
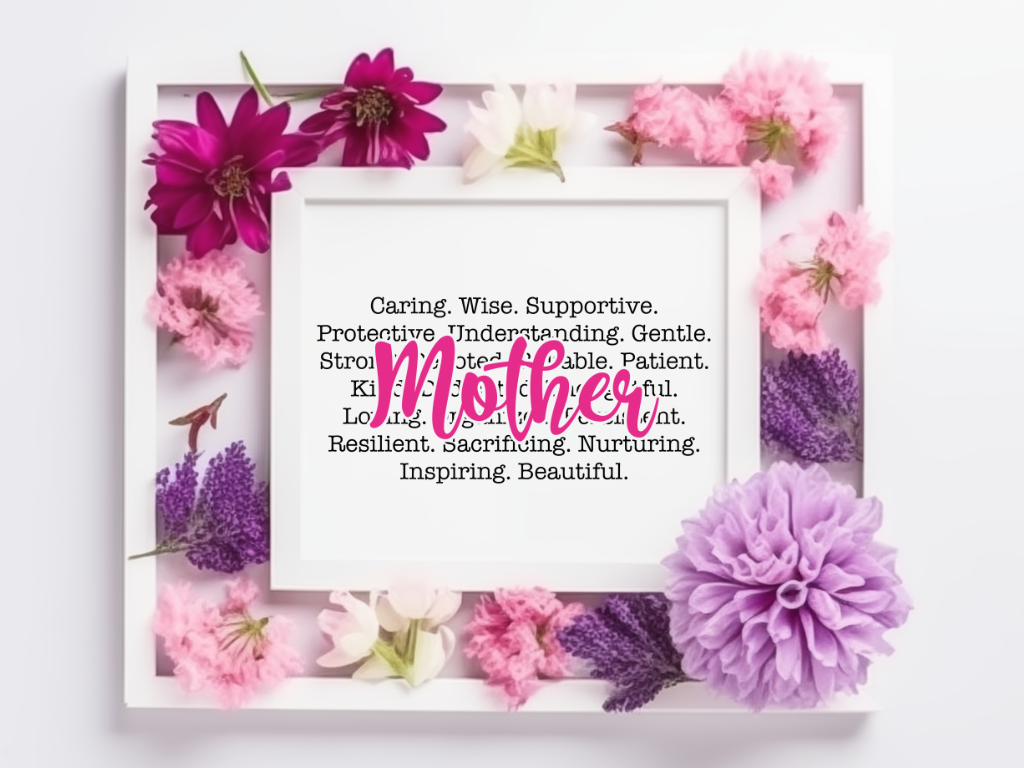
That’s it! Your design is ready to go!
Don’t have time to design it yourself? This SVG design is available free to Cutting for Business mailing list subscribers. Download it.
Don’t Forget to Save!
To save your new SVG creation, head to ‘File’, ‘Save As’, ‘Save to Hard Drive’, name the file, then select ‘SVG’ from the dropdown menu.
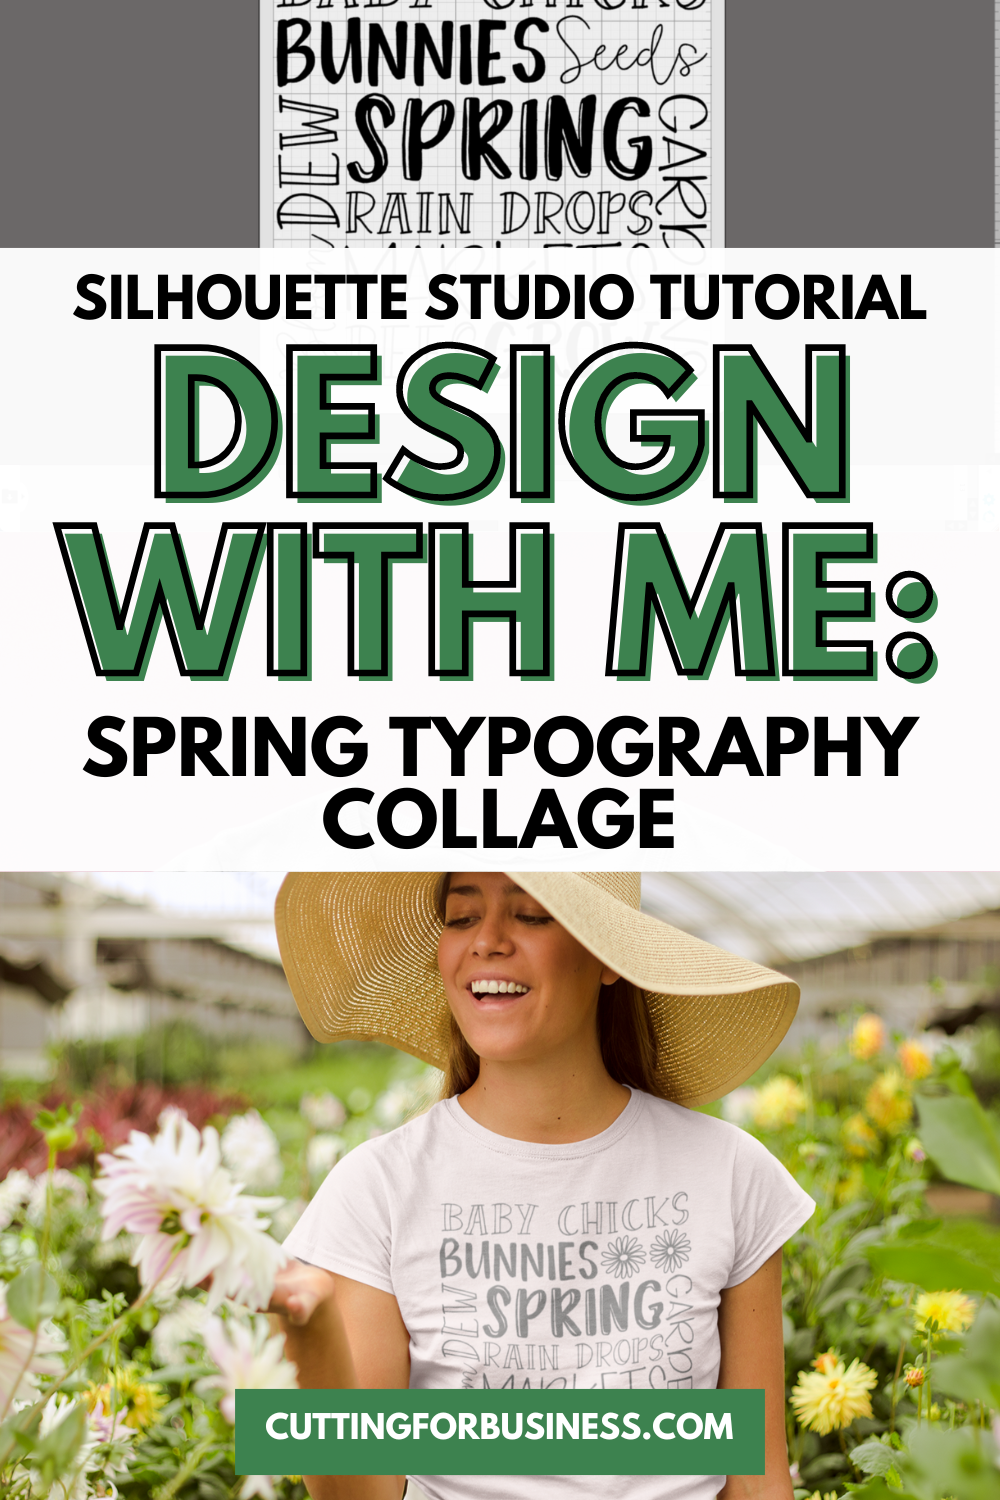
Today, let’s take a look at designing word collage SVG files.
Before you start, brainstorm a quick list of spring related words. Here are some to get you started:
Spring
Bees
Flowers
Birds
Garden
Rain
Blossoms
Markets
Plants
Grow
If you’re having a hard time coming up with Spring related words, this is the perfect task for ChatGPT.
Tutorial: Spring Typography Collage Design
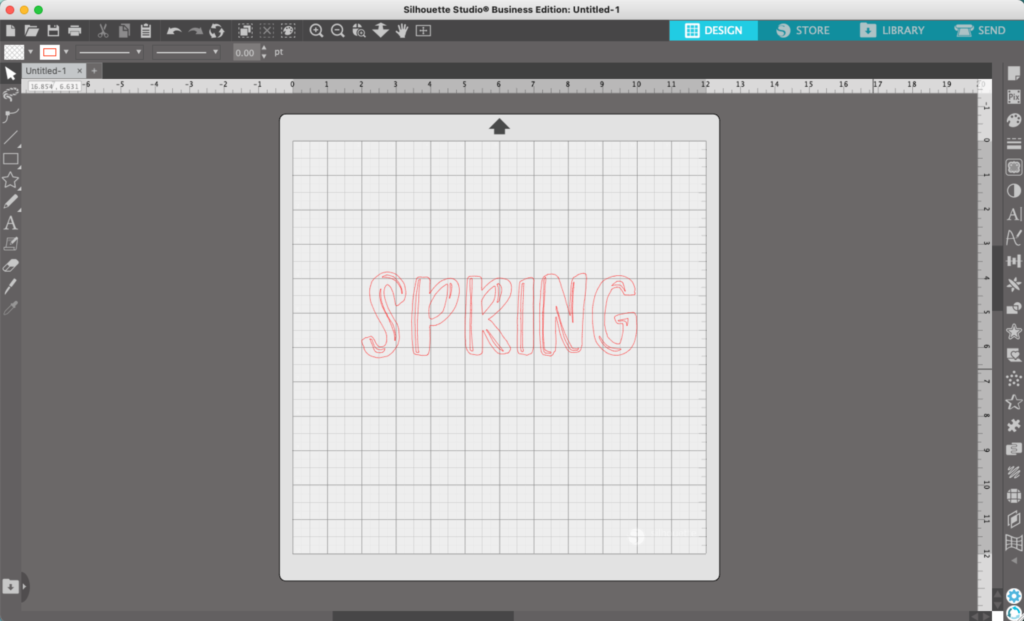
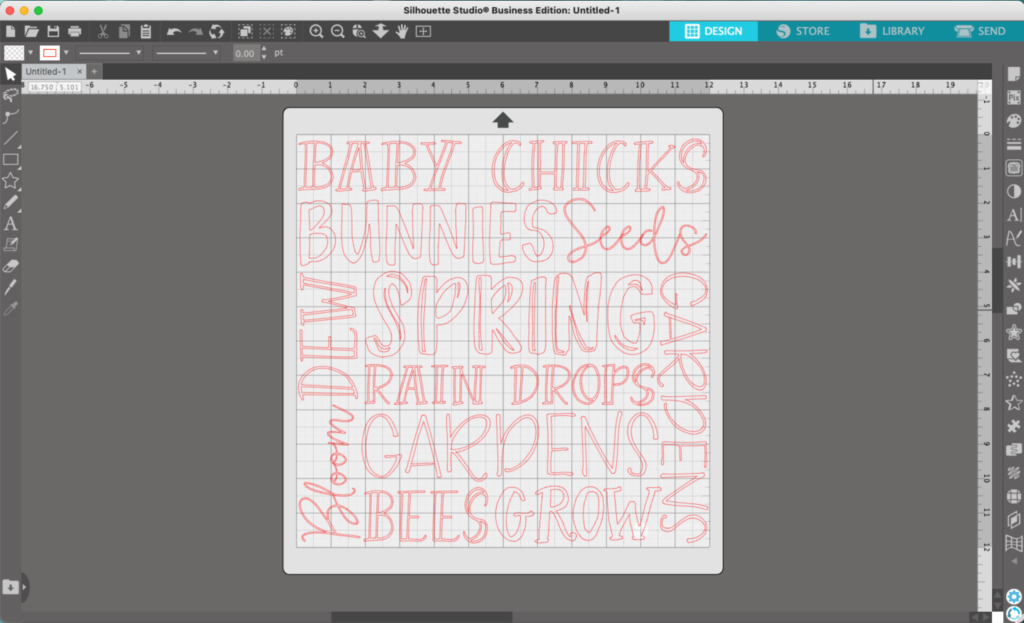
In Silhouette Studio, add a word in the center of the mat.
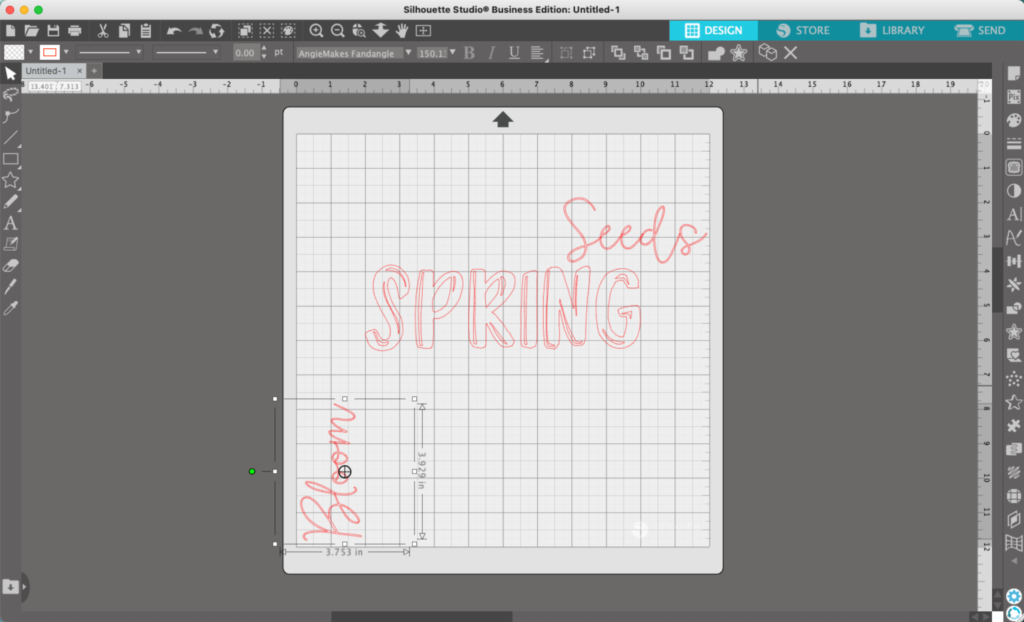
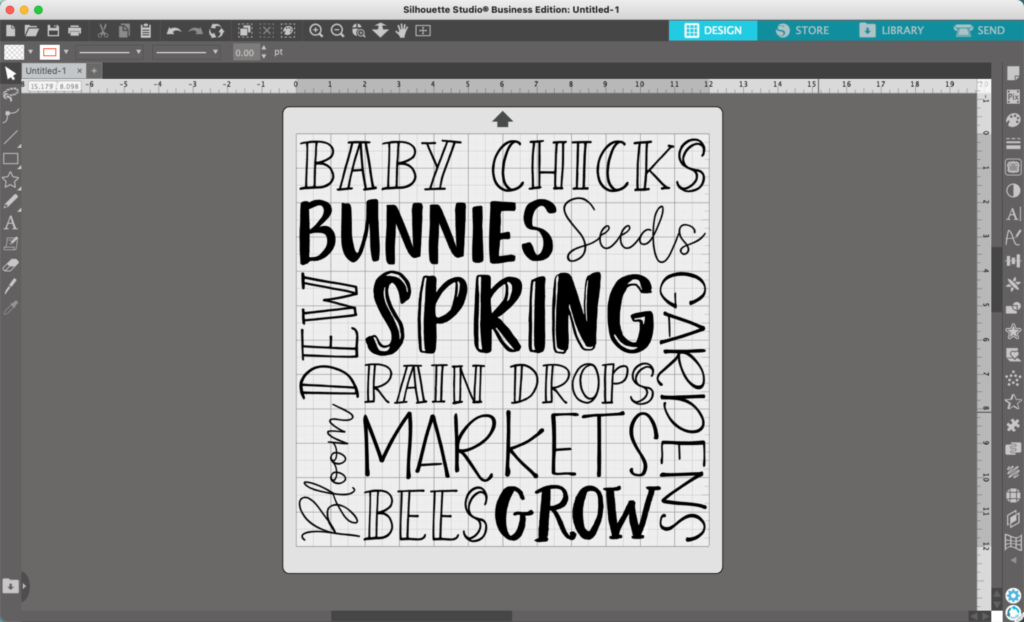
2. Add more words, turning some of them on their side. When designing these typography collages, I like to use the largest font on my focus word in the center. I make all other text smaller.
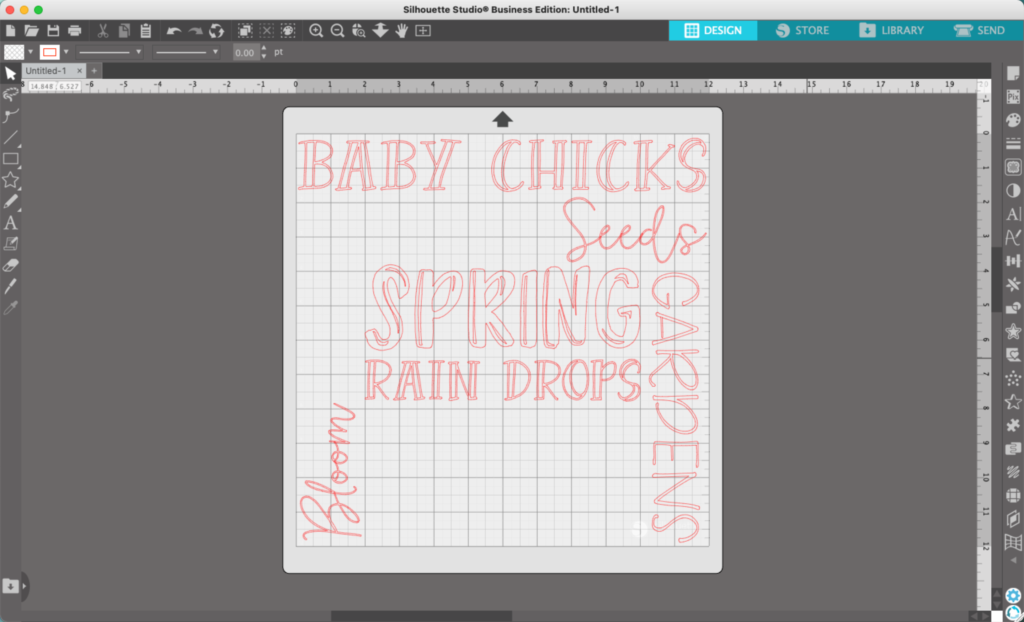
3. Add more words. For fonts, I’m breaking the rules of 2 – 3 fonts per design. However, I’m using a set of fonts that are designed to work together.
5. Fine tune placement and alignment. (And, correct any mistakes – whoops!) Then, add color to your design.
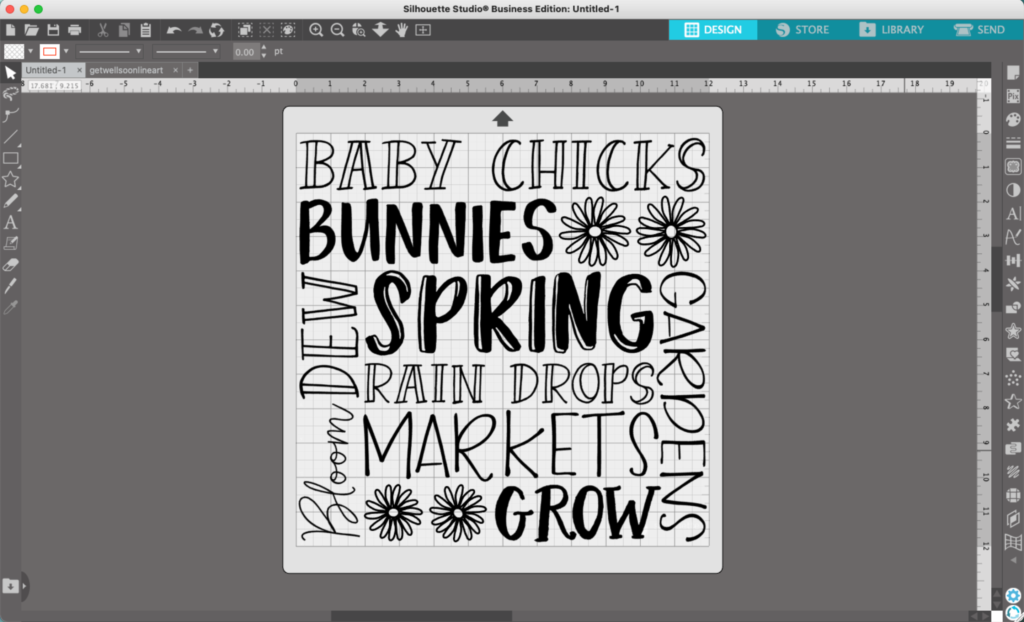
But, what if you have weird spaces you can’t fill in the design? While I lucked out with this design, sometimes you’ll have small areas you can’t fill. In these cases, I usually fill with a related clipart.
For example:
That’s it! Your design is ready to go!
Don’t Forget to Save!
To save your new SVG creation, head to ‘File’, ‘Save As’, ‘Save to Hard Drive’, name the file, then select ‘SVG’ from the dropdown menu.
I’ll be honest: Facebook is time consuming – sometimes for a small return. For example, on Cutting for Business, Facebook traffic accounts for less than 2% of referrals to my site. But, I spend a lot too much time creating posts, scheduling posts, and answering messages.
So, I recently dug into Facebook automations. Today, I’m sharing 8 different Facebook automations you can use to spend less time on Facebook, and more time crafting or running your business.
The best thing about all these automations? They are free. There’s no need to sign up for additional services, because they are included right in Facebook’s Meta Business Suite.
8 Facebook Automations for Your Business
You can automatically reply to customers when they message your Facebook Page for the first time. (This automation works on both Facebook and Instagram.)
Why this is helpful: Everyone wants new customers. You can make a great impression on your first time customer by greeting them quickly – or sharing an exclusive offer.
You can automatically reply with an Away message letting customers know you are unavailable right now. (This automation works on both Facebook and Instagram.)
Why this is helpful: If you are away and not able to respond promptly, this automation can let customers know when you will respond.
You can automatically reply with a message with your contact information.
Why this is helpful: This is an easy way to give customers additional information like your phone number, additional social media links, and more.
You can automatically share answers to Frequently Asked Questions. (This automation works on both Facebook and Instagram.)
Why this is helpful: No one likes to answer the same questions over and over. With an automated frequently asked question series, your customer can get the answers they need.
You can share your location when a customer or clients asks.
Why this is helpful: If you have a brick and mortar location or are participating in a market or show, you can tell customers exactly where you are located.
You can automatically share your business hours when a customer or client asks.
Why this is helpful: If you have specific business hours, an automated Facebook message can share your hours.
You can automatically respond based on a keyword a customer uses.
Why this is helpful: This is a great way to give customers direct information, like a link to a specific product.
You can automatically reply to a comment with a Messenger message.
Why this is helpful: This is a good way to get into customer’s inboxes and send them a direct message – automatically. Among the automations, it’s my favorite one to use.
Tutorial: How to Set Up Facebook Automations
Log into Facebook’s Meta Business Suite as your Facebook Page.
On the left hand toolbar, click ‘Inbox’.
On the top of the page, click on the atomic looking icon.
Then, click the ‘Create Automation’ button.
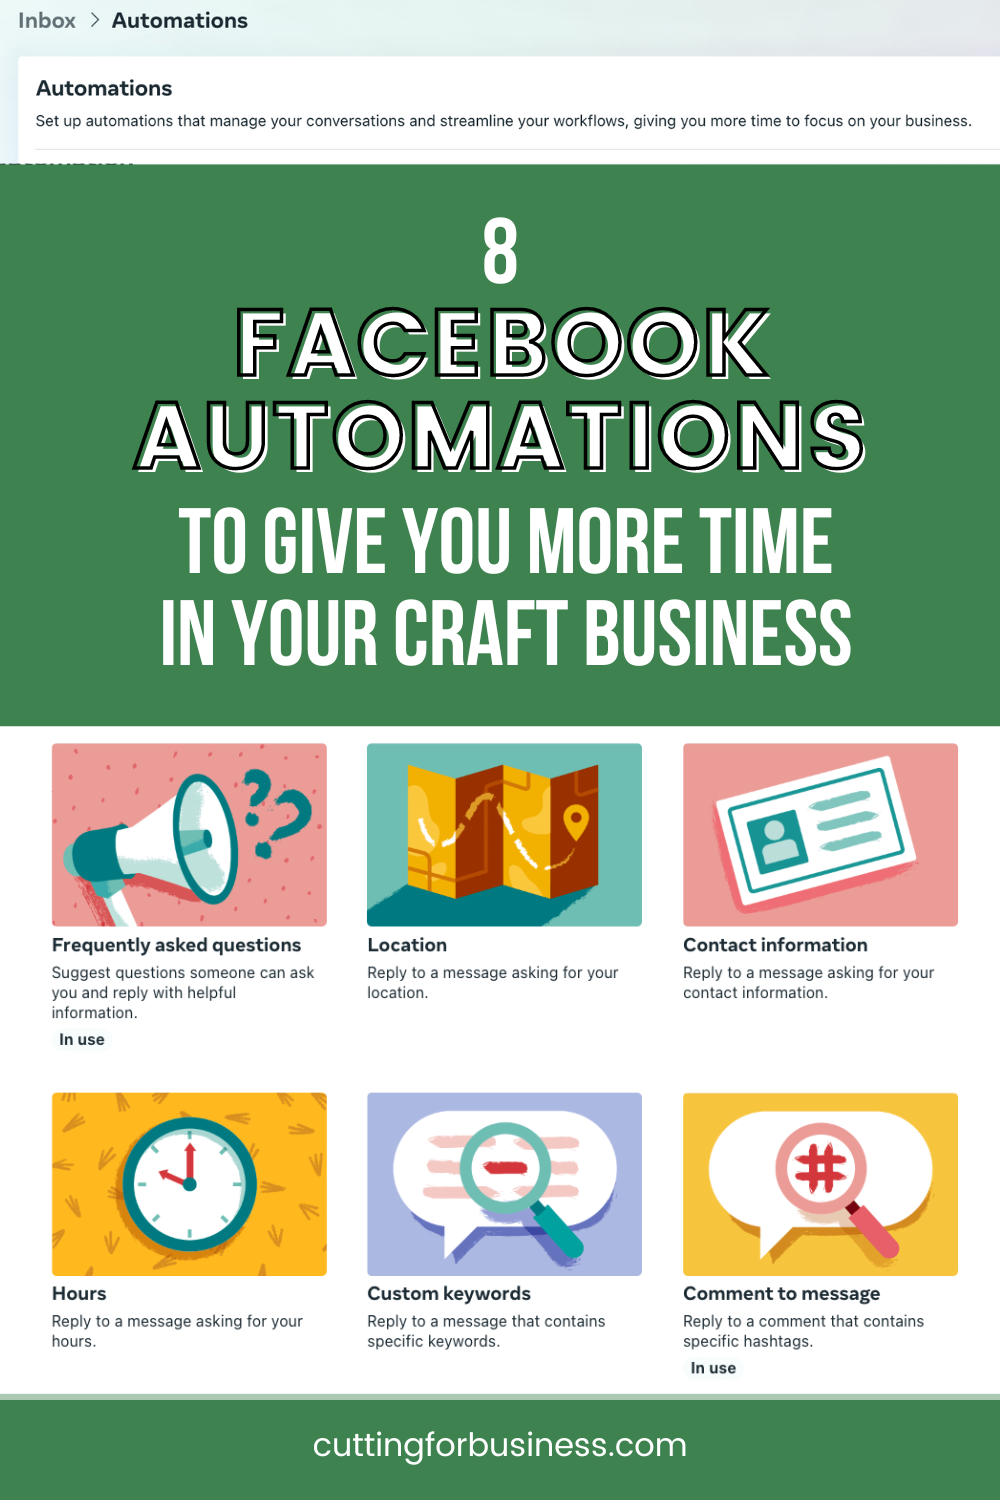
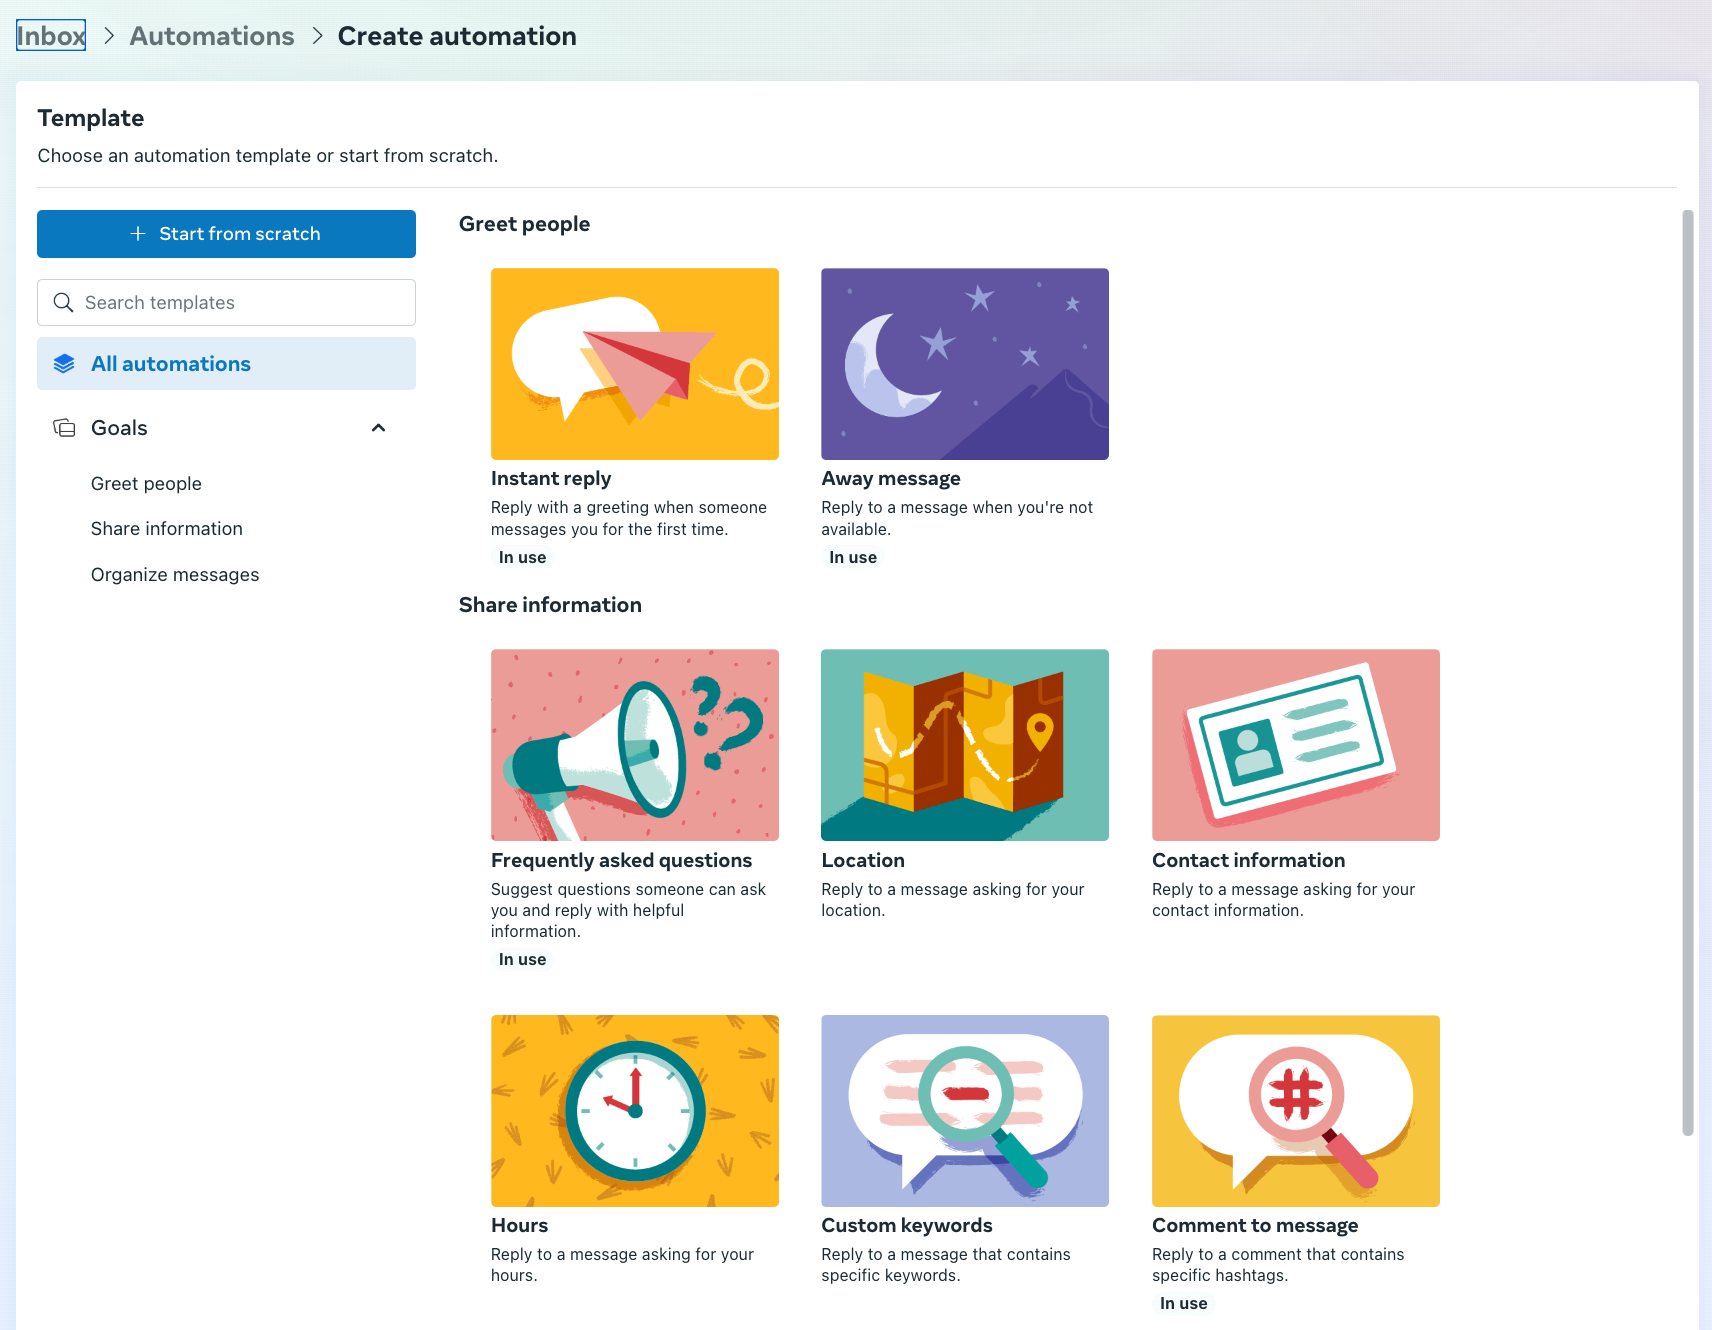
You’ll be presented with all the Facebook Automation options. Choose the one you want. I’ve found they are straight forward and easy to set up.
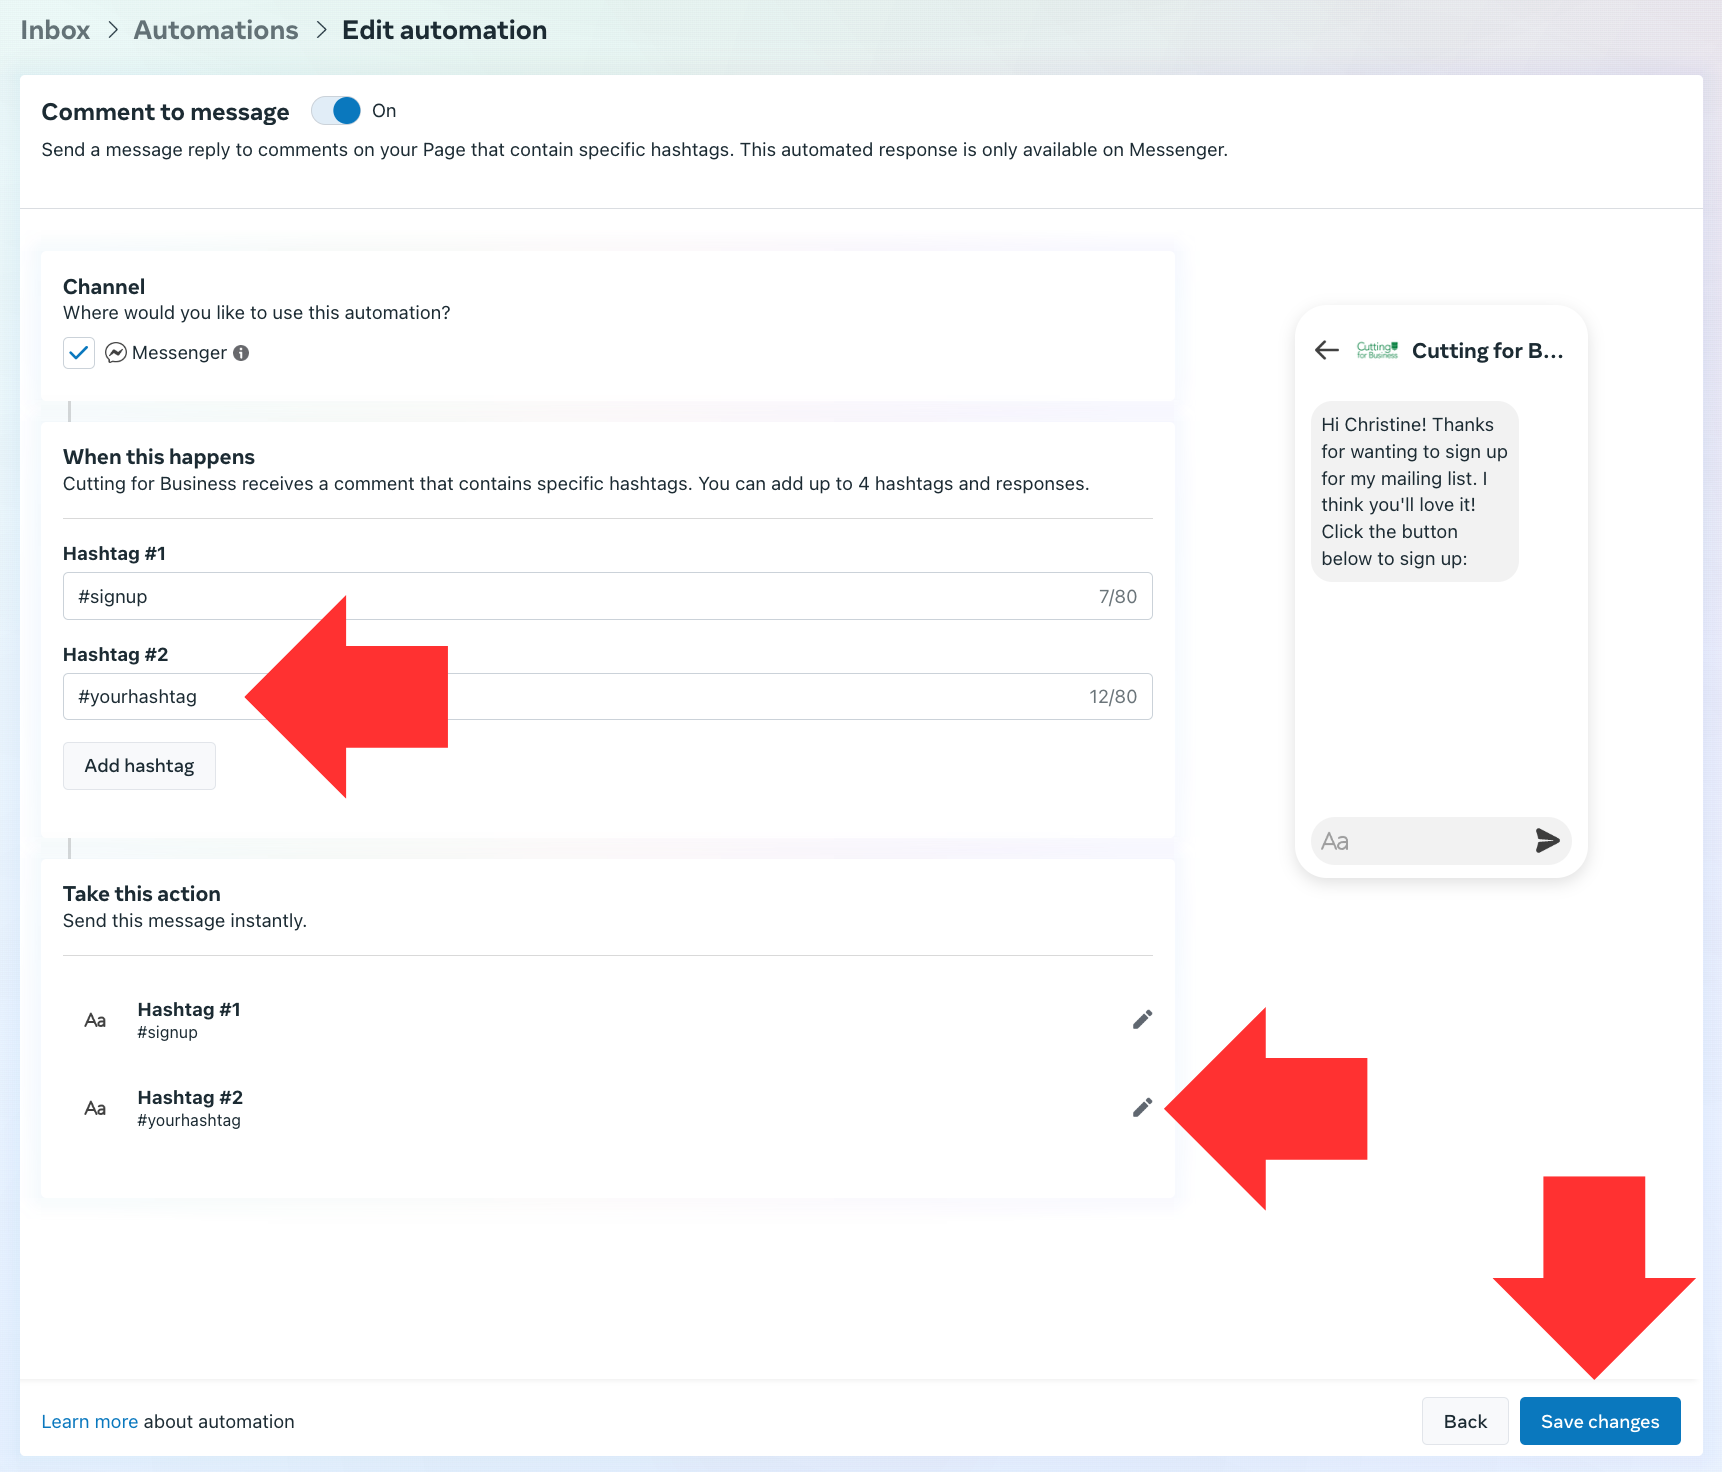
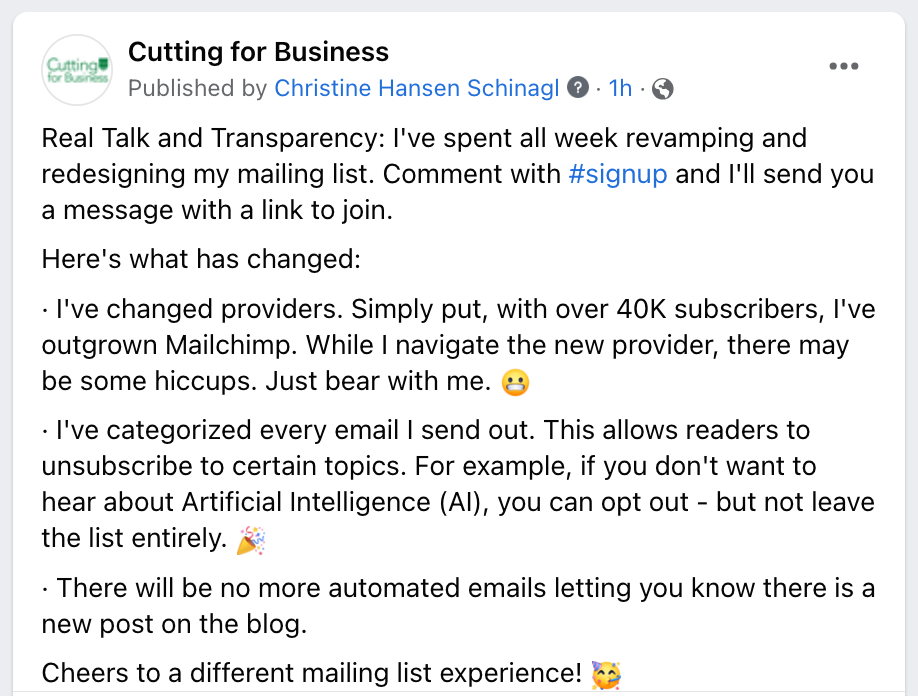
Simply follow the steps in Facebook’s Meta Business Suite to set up the automation. In this tutorial, I’ll show you how to set up ‘Comment to Message’. With this Facebook Automation, you can send a message when Facebook followers comment with a specific hashtag you’ve set up. You can see this in action or try it out in this Facebook Post on Cutting for Business.
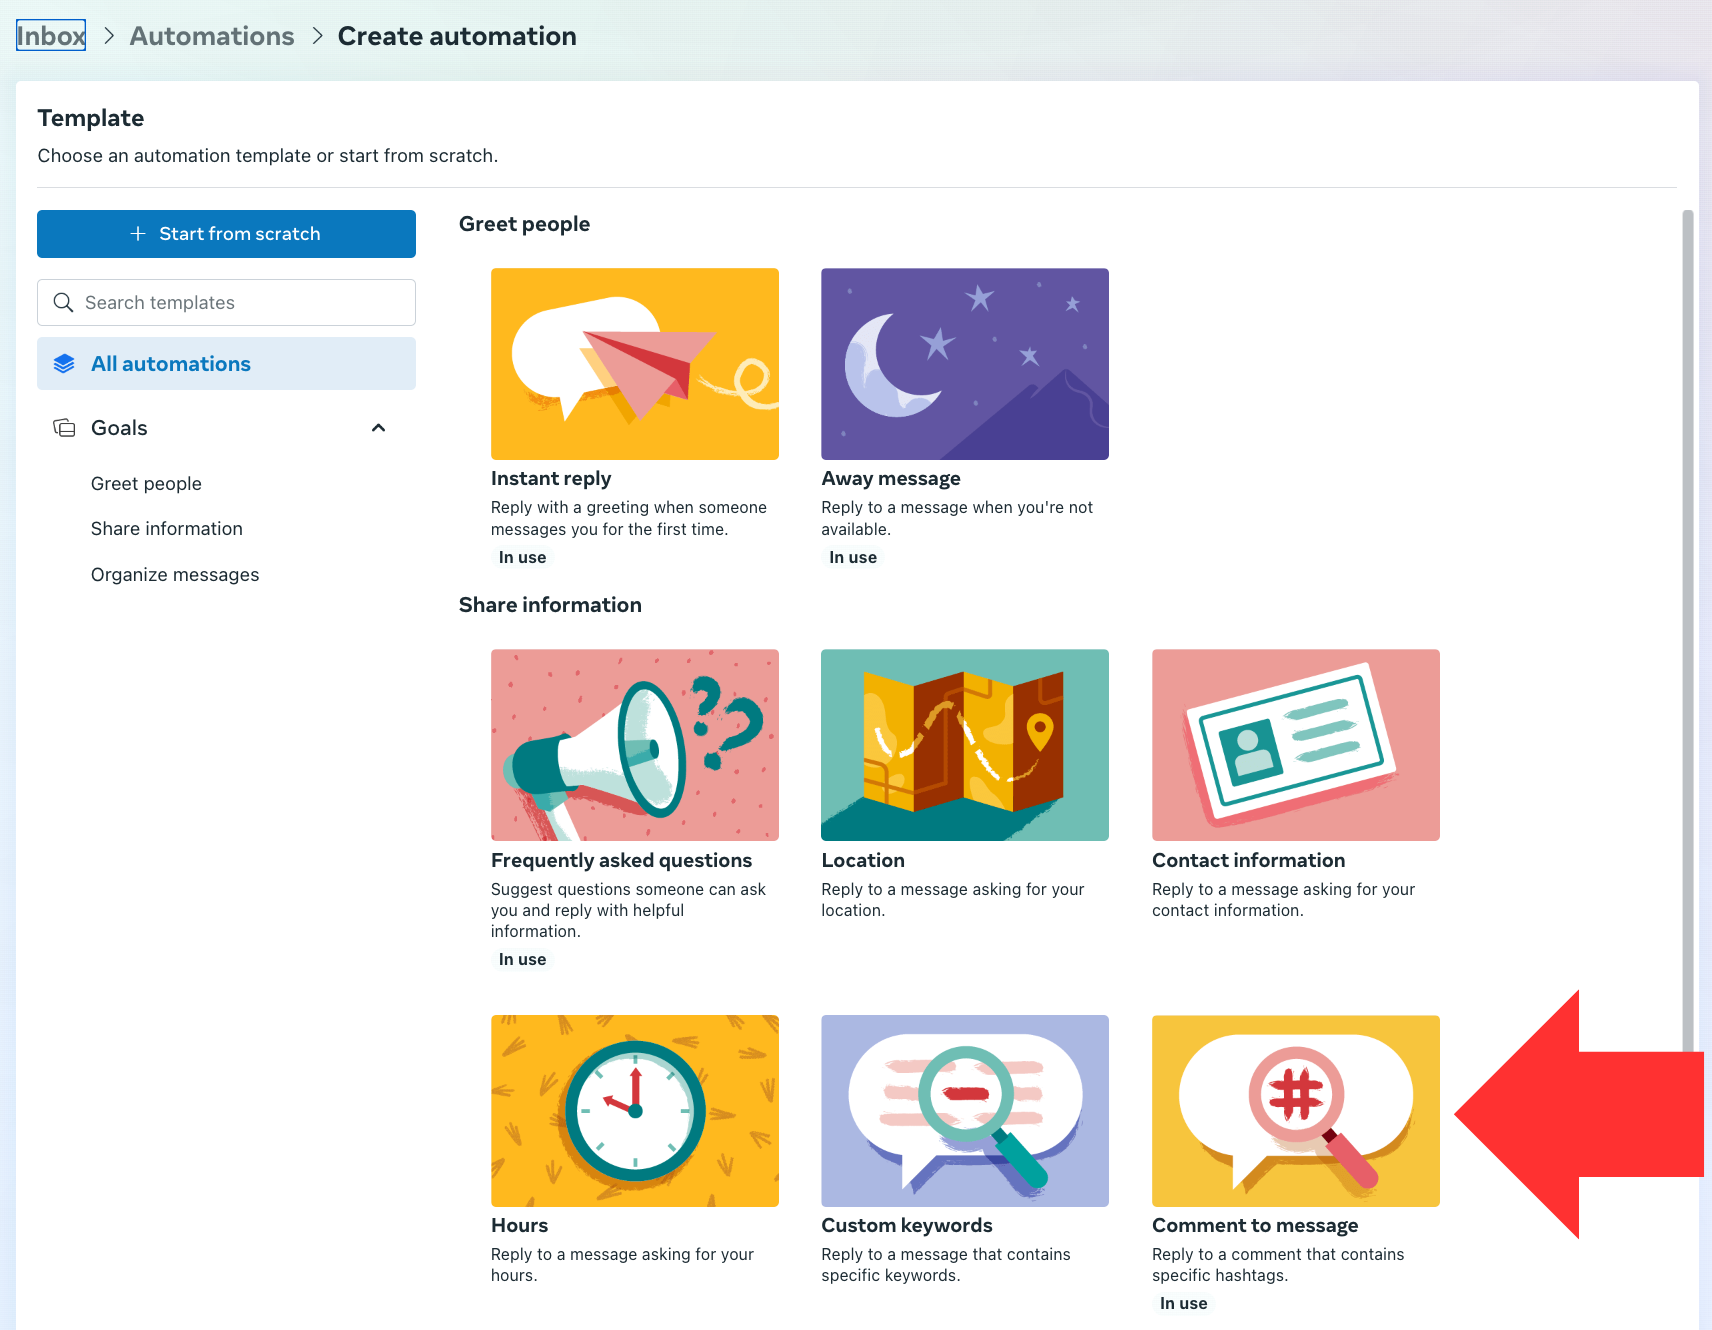
Click the ‘Comment to Message’ image.
Now, you’ll add your hashtag, set up the message, and click the ‘Save’ button.
Next, make sure that your automation is turned on.
Finally, create a post on Facebook that tells followers to leave a comment with the hashtag you set up. When followers comment with a hashtag, they will receive your message through Messenger.
Here are a few screenshots of what the process looks like:
A Facebook post with the hashtag I created:
The message that is sent when followers comment with the hashtag:
Design with Me is a new regular feature on Cutting for Business! Each Friday, I’ll bring you a new Silhouette Studio tutorial featuring how to design an SVG.
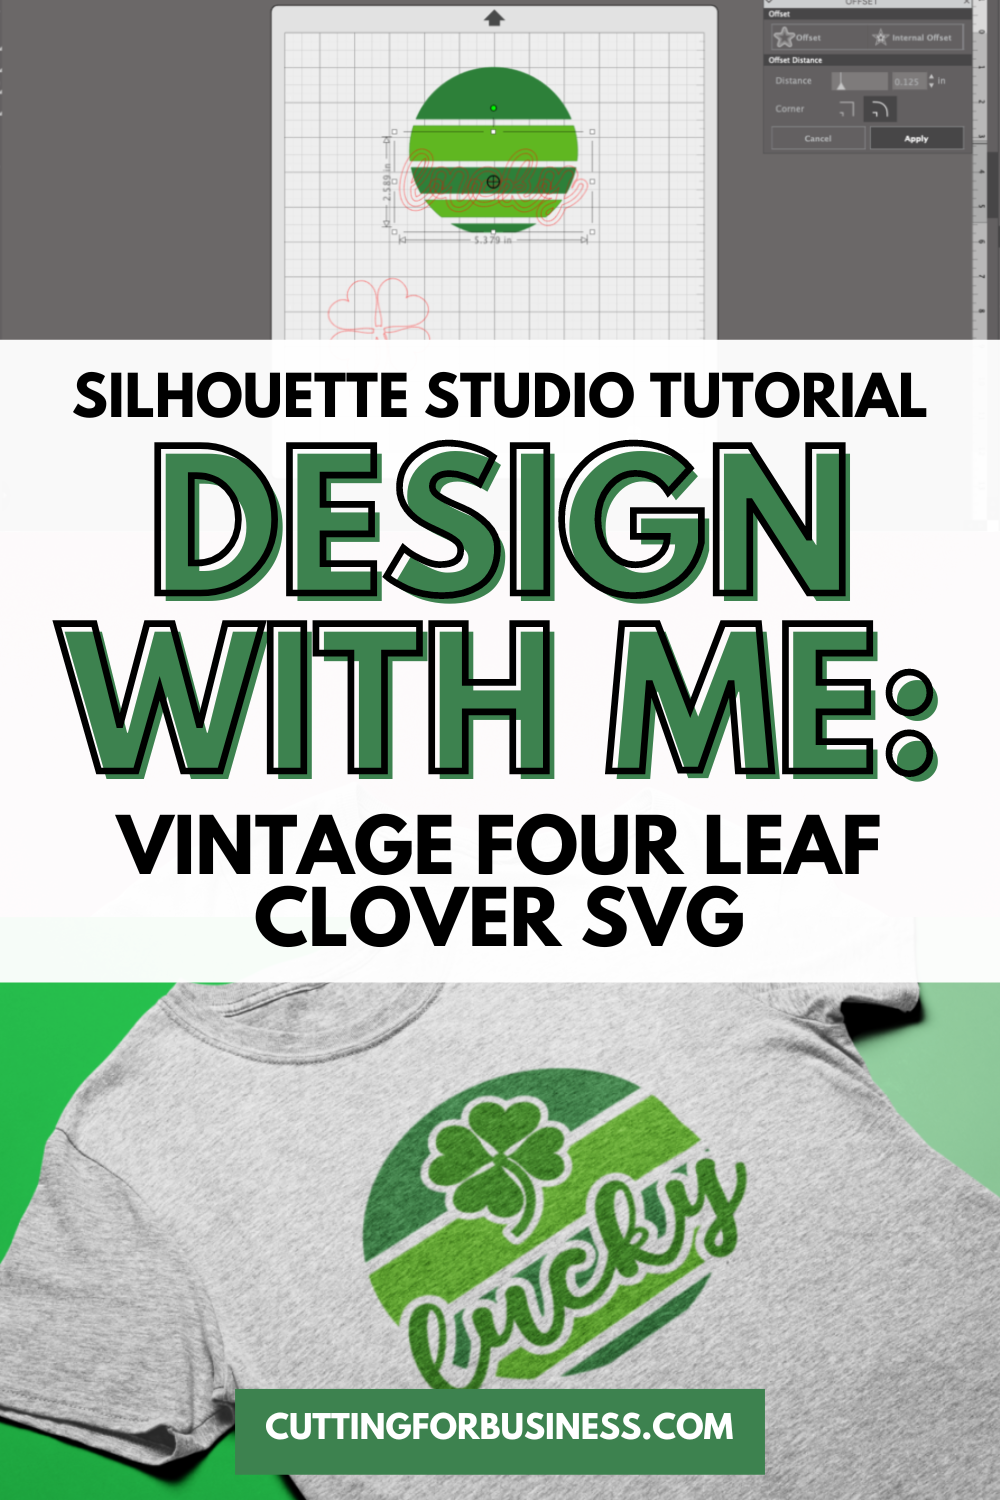
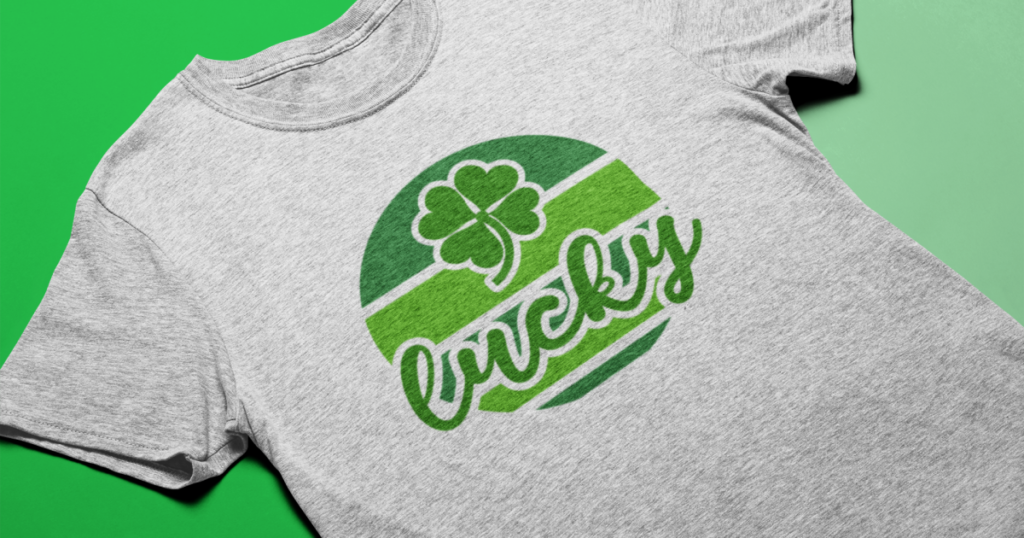
Before you pour the green beer and roll around in four leaf clovers for luck, let’s design a vintage four leaf clover SVG.
Silhouette Studio Tutorial: Simple Floral SVG
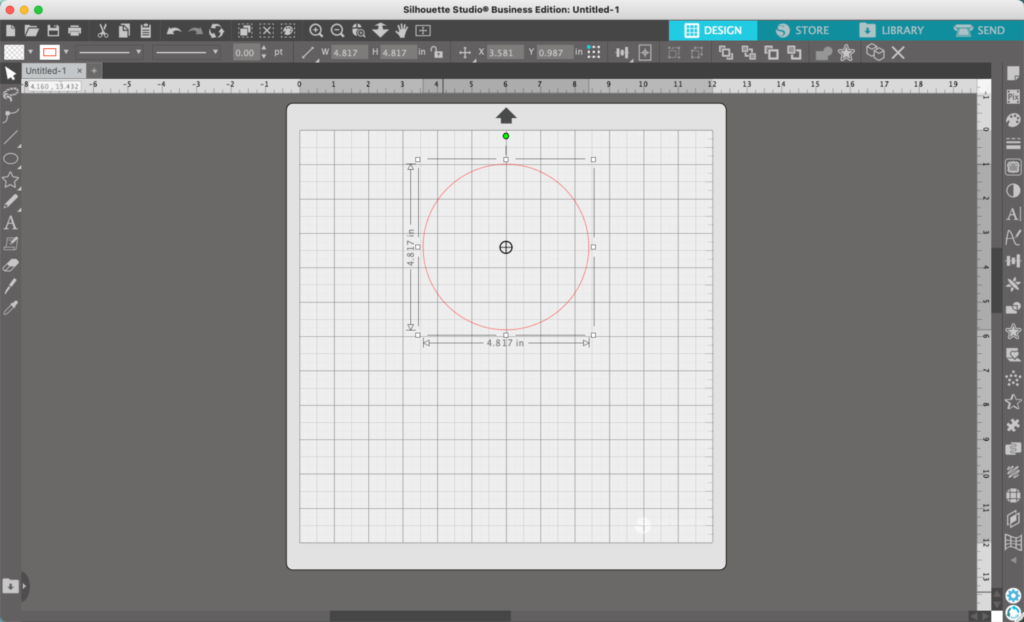
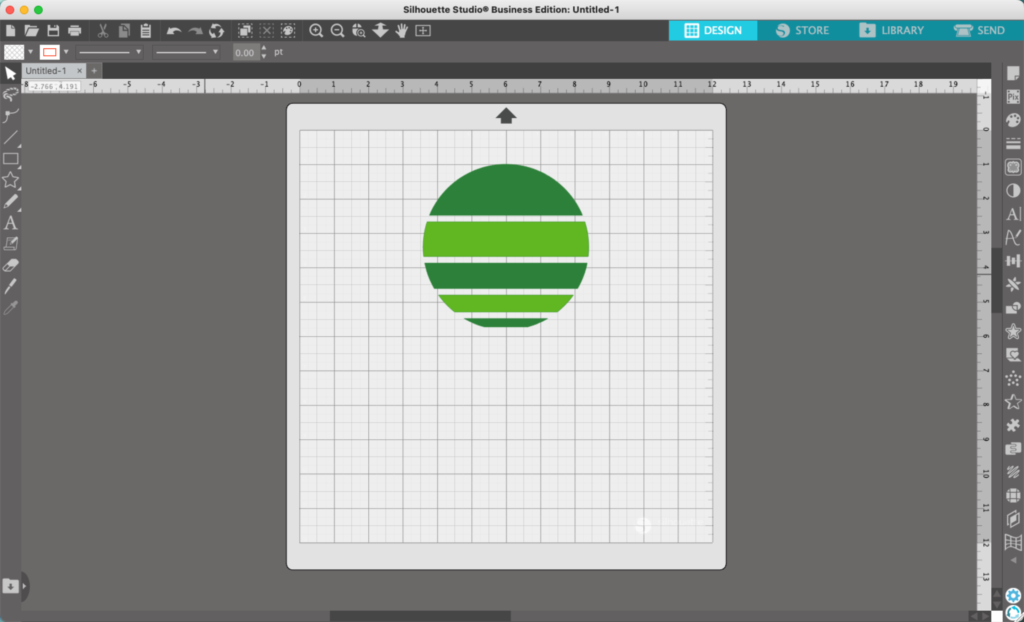
In Silhouette Studio, draw a circle. Hold down the SHIFT key to make a perfect circle.
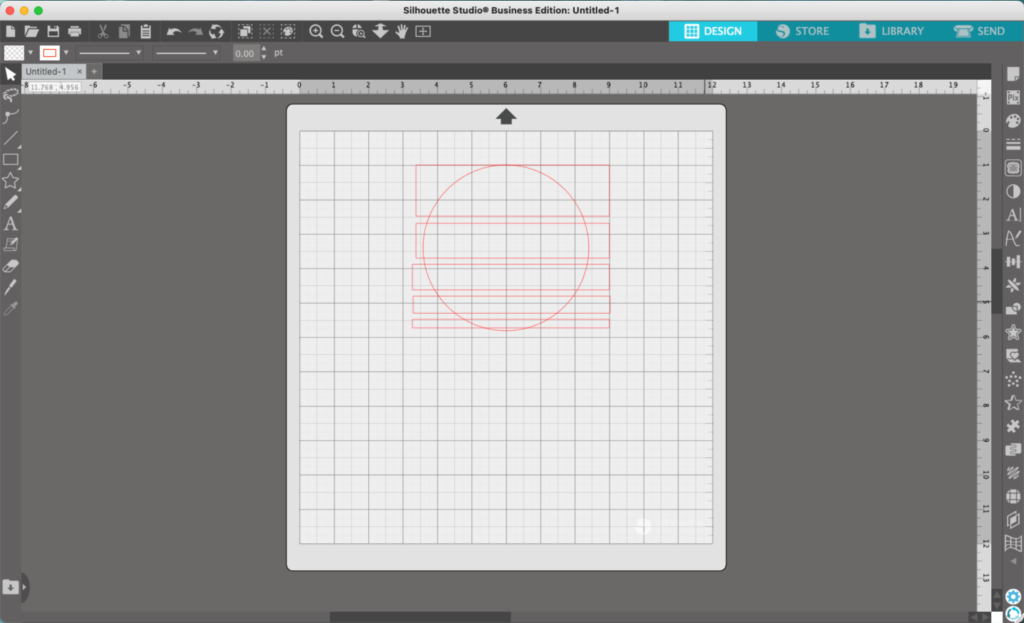
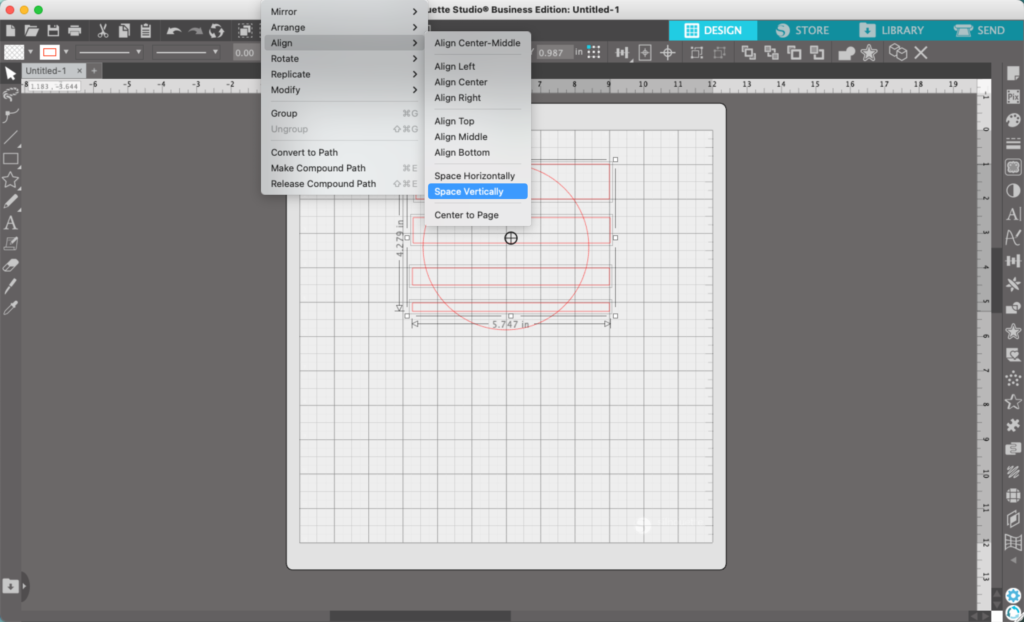
2. Draw rectangles across the circle. I made the rectangles largest at the top, and getting smaller as they go down the circle.
3. Select all the rectangles, then navigate to ‘Object’, ‘Align’, ‘Space vertically’.
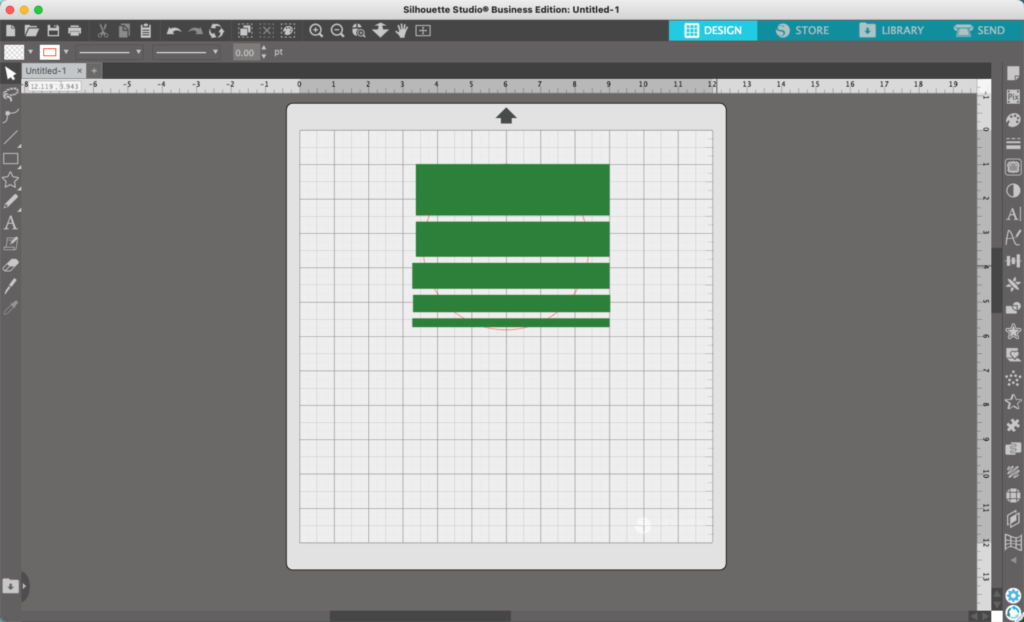
4. Add color to the rectangles.
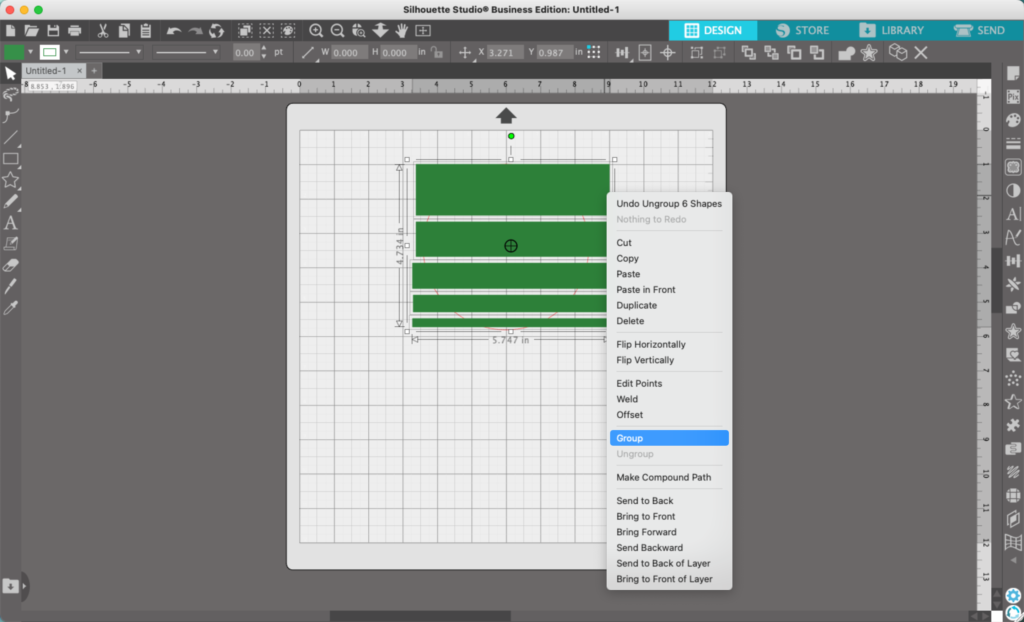
5. Select the rectangles, right click, and ‘Group’ them together.
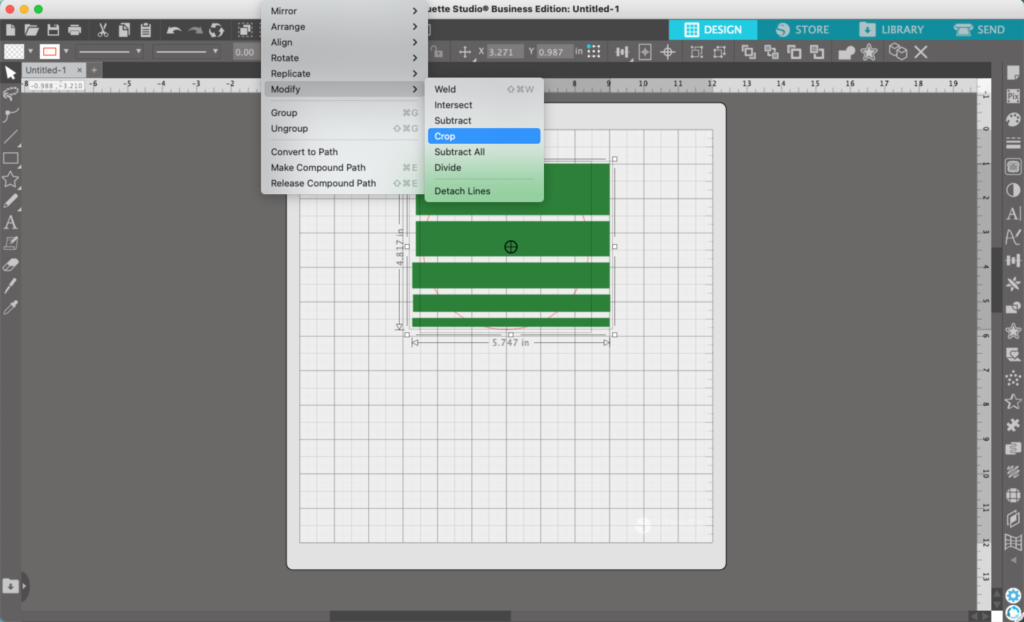
6. Select both the rectangles and the circle, then navigate to ‘Panels’, ‘Object’, then ‘Crop’.
7. To add interest to the design, I colored two of the former rectangles a different shade of green.
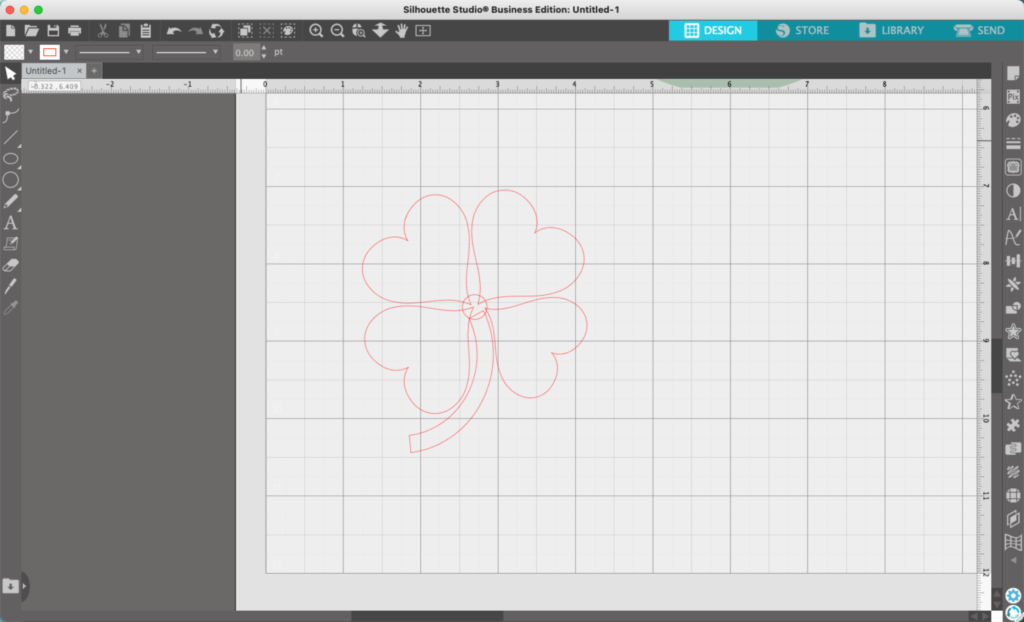
8. Off the side of the circle, use Flexishapes to create a four leaf clover. It’s four hearts, a stem that I crafted from the third Flexishape in the first row, and a circle in the middle.
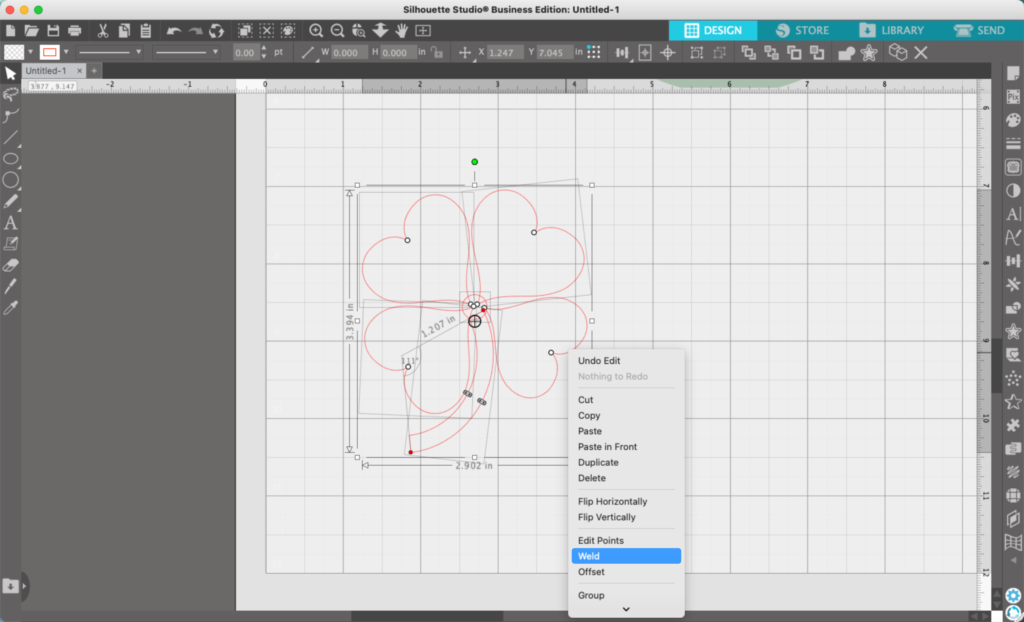
9. Right click and select ‘Weld’ to weld the clover together.
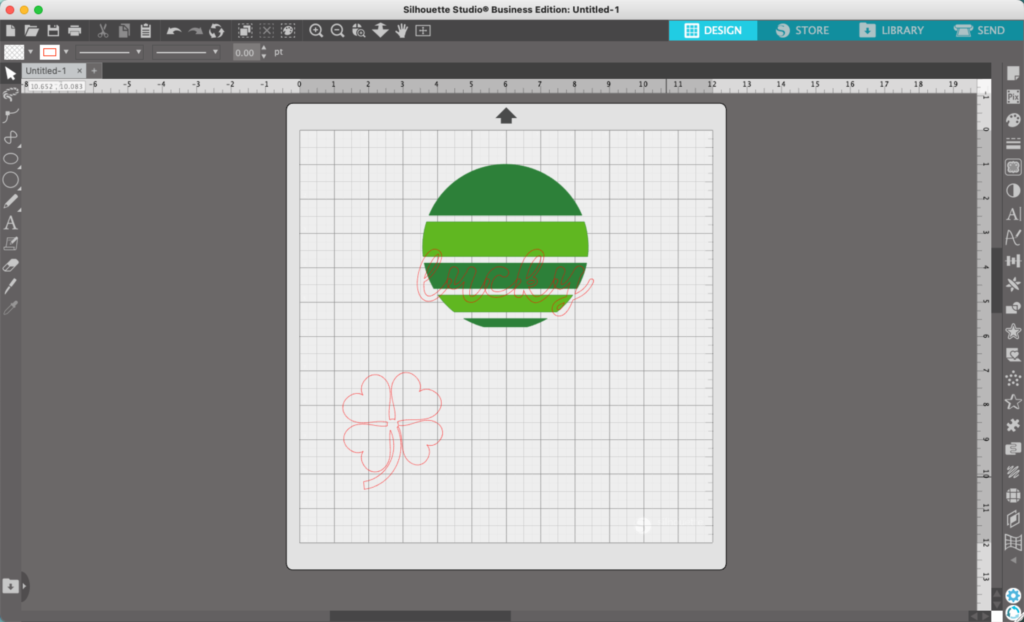
10. Go back to the circle design and add a St. Patrick’s Day word. I’m using the word ‘Lucky’ in Watershed font.
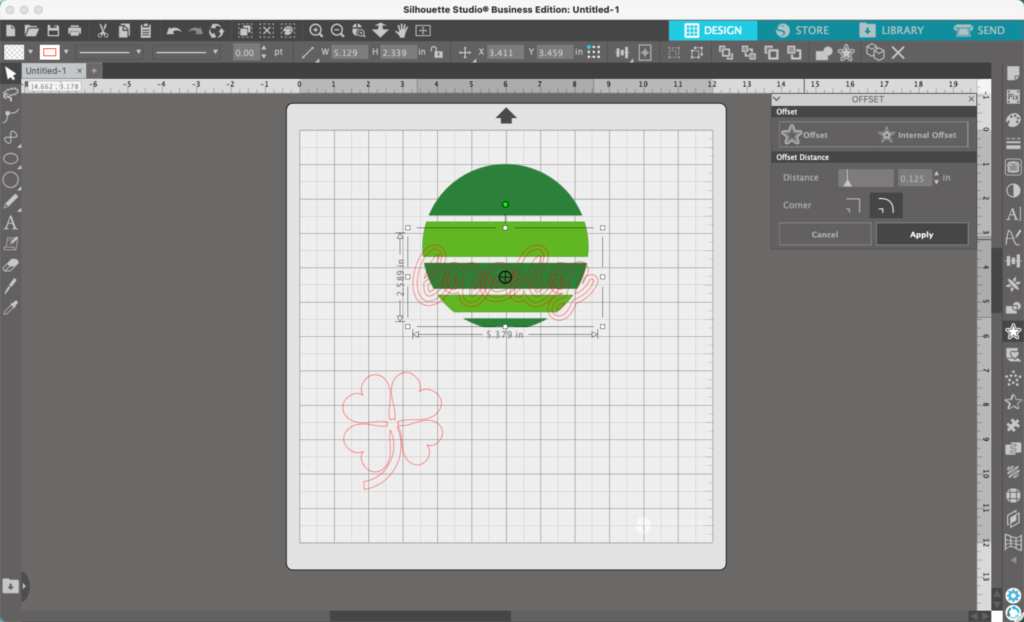
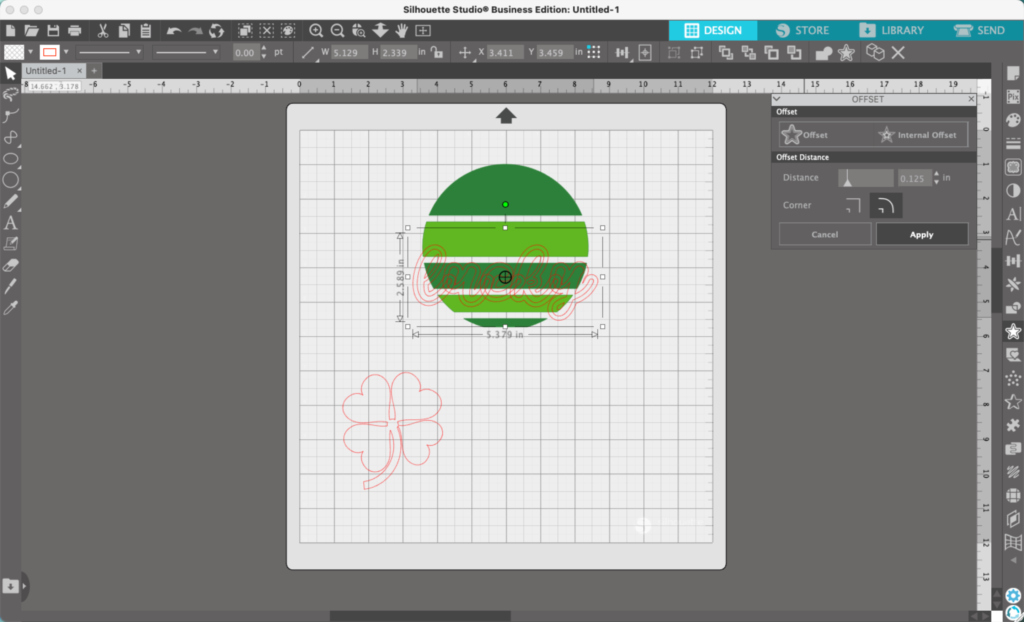
11. Navigate to ‘Panels’, ‘Offset’, and perform an offset on the word.
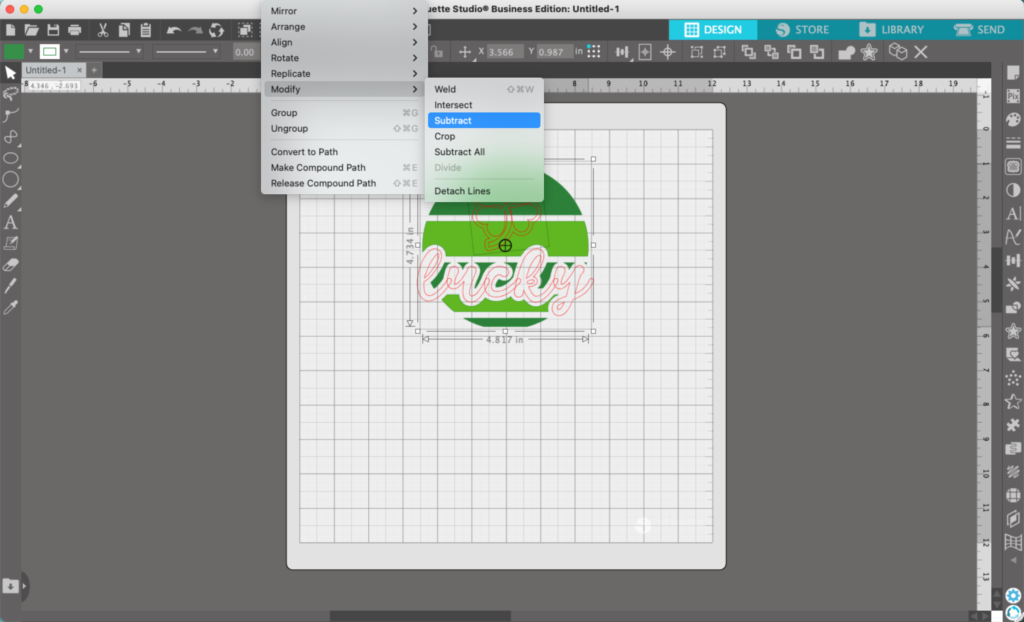
12. Select both the circle and the word’s offset. Then, navigate to ‘Modify’, ‘Subtract’.
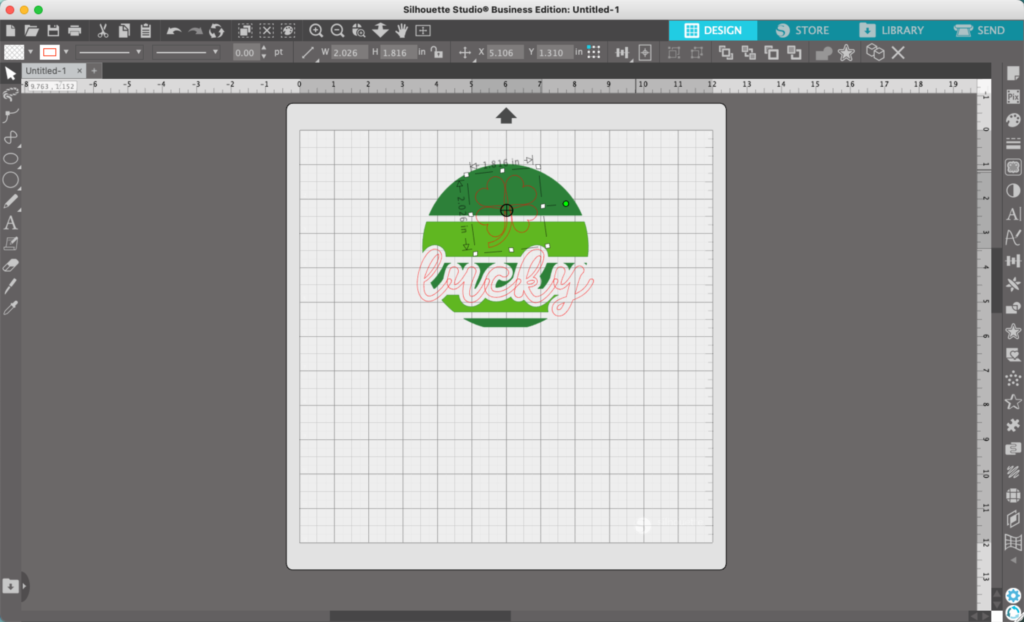
13. Move the four leaf clover on top of your circle.
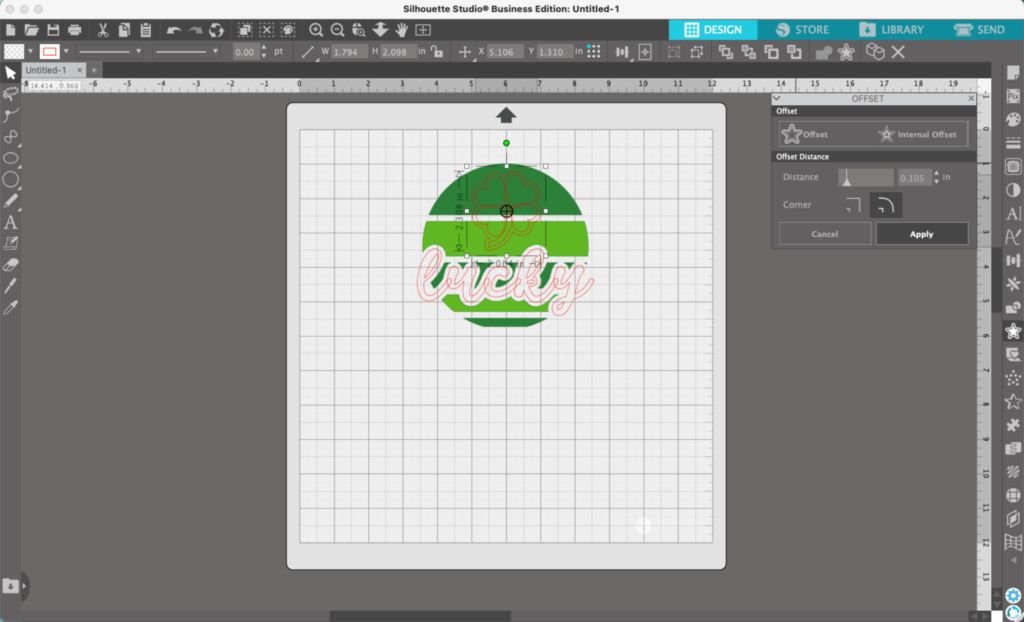
14. Perform an offset on the four leaf clover.
15. Then, select the circle and the offset of the clover. Navigate to ‘Object’, ‘Modify’, and ‘Subtract’.
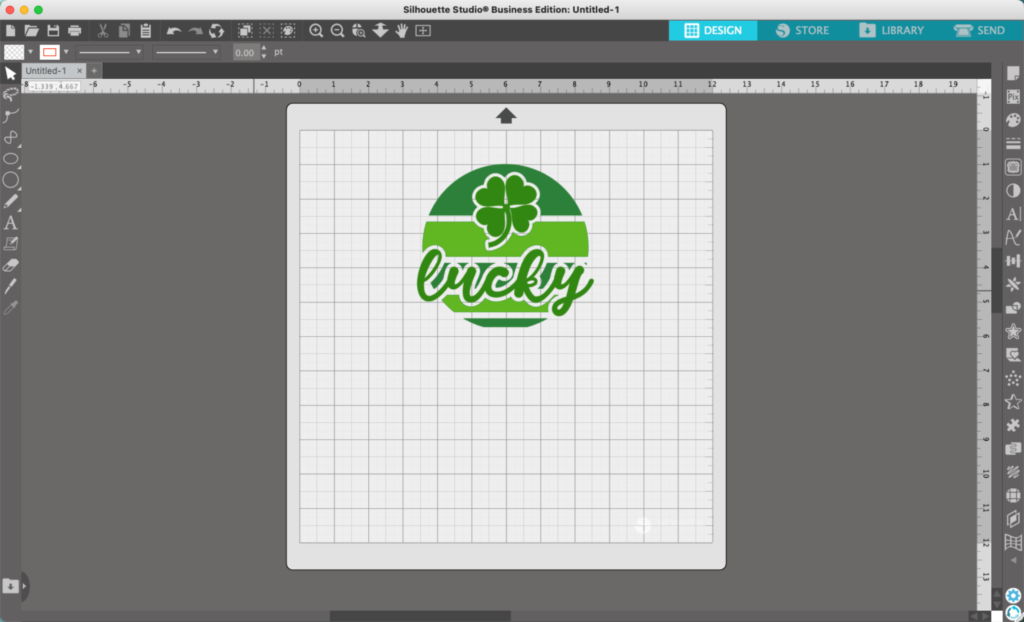
16. Finishing touches. Weld the text together. Then, add the final colors.
That’s it! Your design is ready to go!
Don’t Forget to Save!
To save your new SVG creation, head to ‘File’, ‘Save As’, ‘Save to Hard Drive’, name the file, then select ‘SVG’ from the dropdown menu.
Welcome to another Design with Me on Cutting for Business! Each week, I’ll bring you a new Silhouette Studio tutorial featuring how to design an SVG.
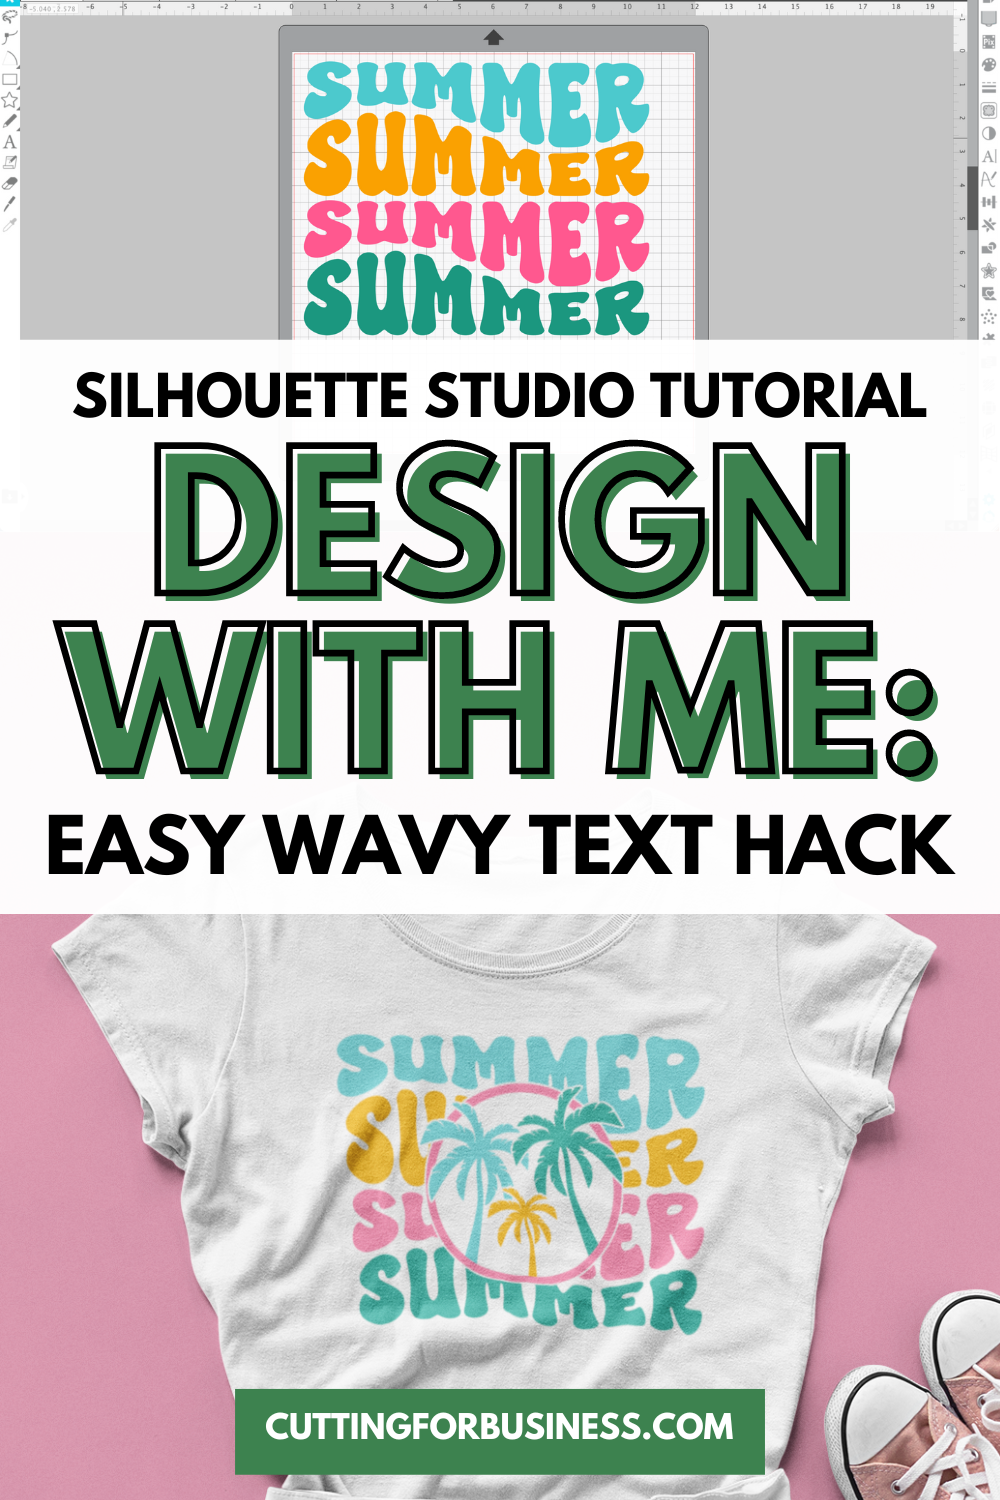
Wavy retro text designs are in! Let’s take a look at them today.
Silhouette Studio Tutorial: Wavy Retro Text SVG
Most of my tutorials are done completely in Silhouette Studio. And, this wavy retro text design can be made entirely in Silhouette Studio, but the warp tool is clunky and takes a long time. Today, let’s look at the fastest, easiest way to create a wavy text design.
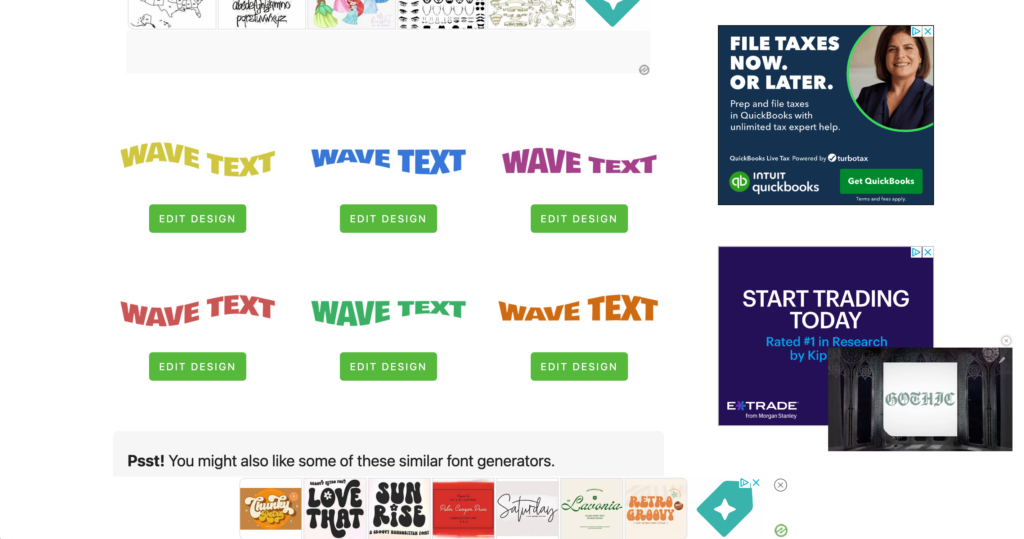
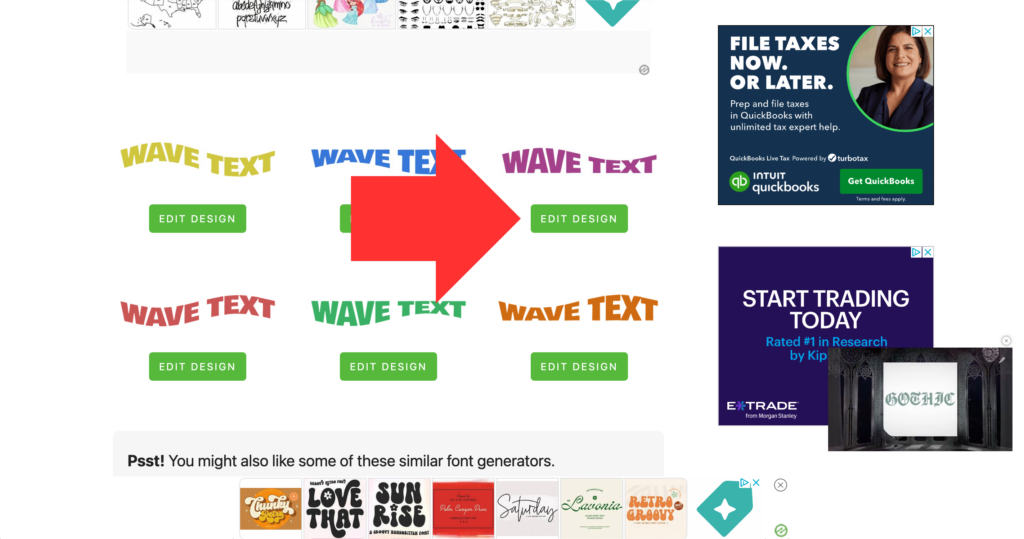
Head over to Vector Dad’s free Wavy Text Generator. Now, the resource is free – but there are a lot of ads. The ads likely help pay Susrut’s (Vector Dad’s owner) site expenses and provide a small income. After you arrive on the site, scroll down until you find this section:
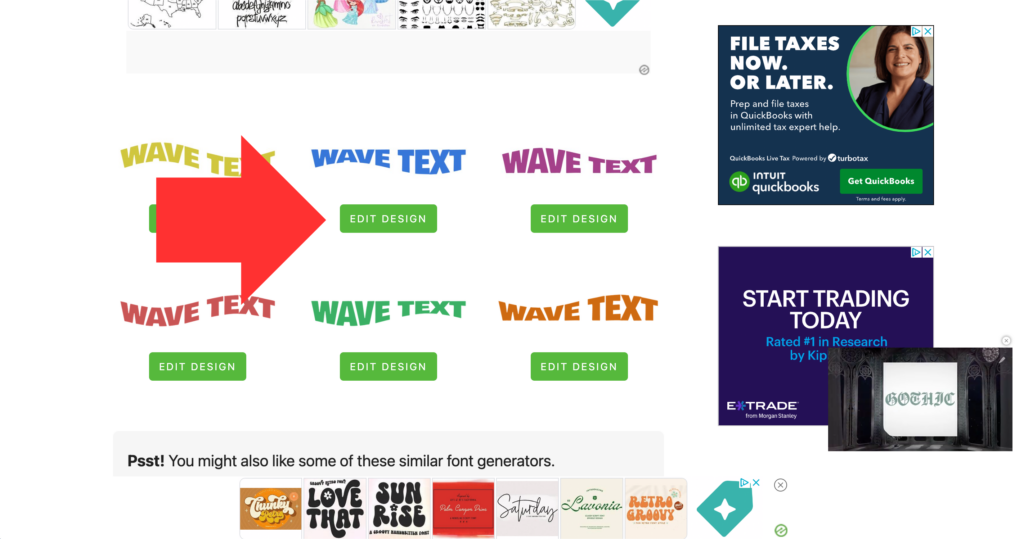
2. Click on the ‘Edit Design’ button under the blue wave text.
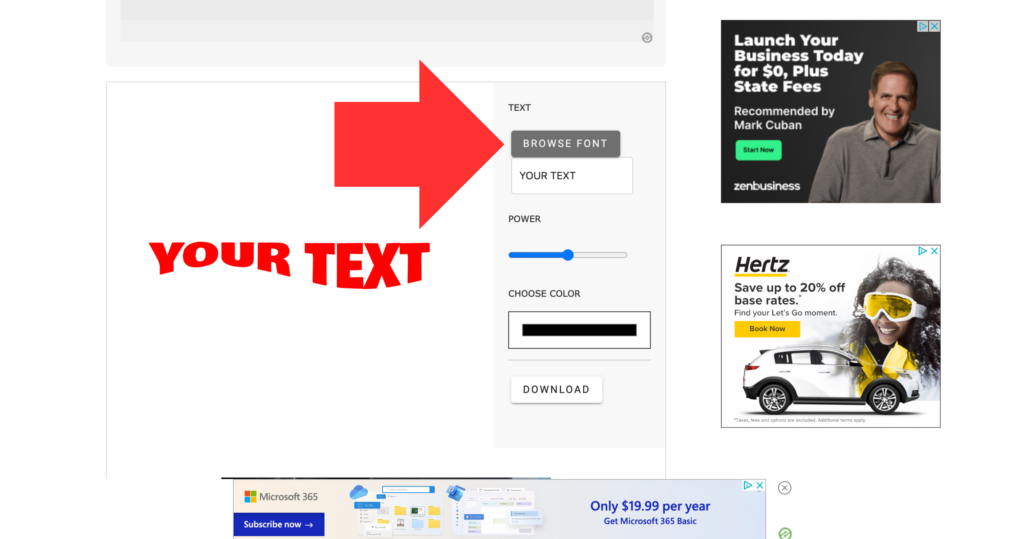
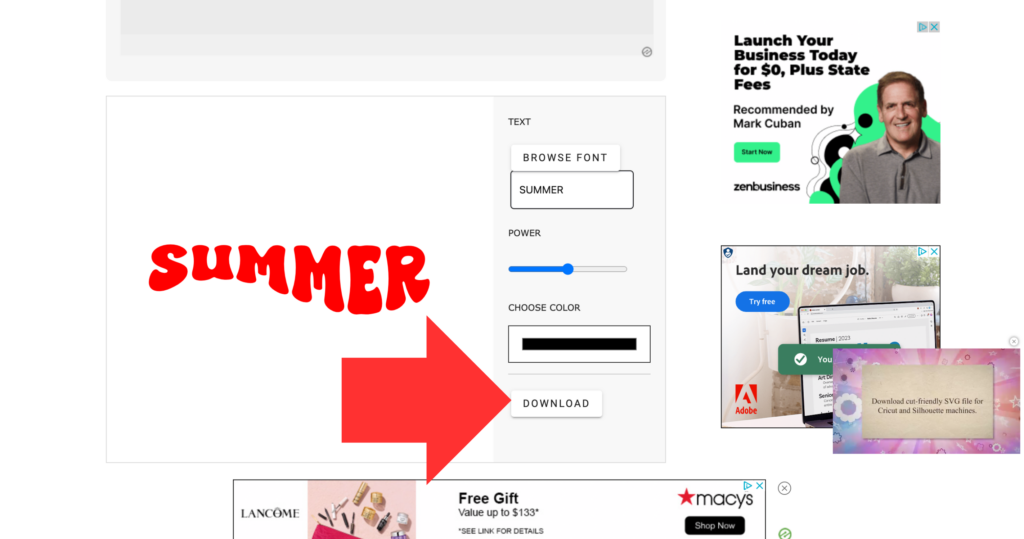
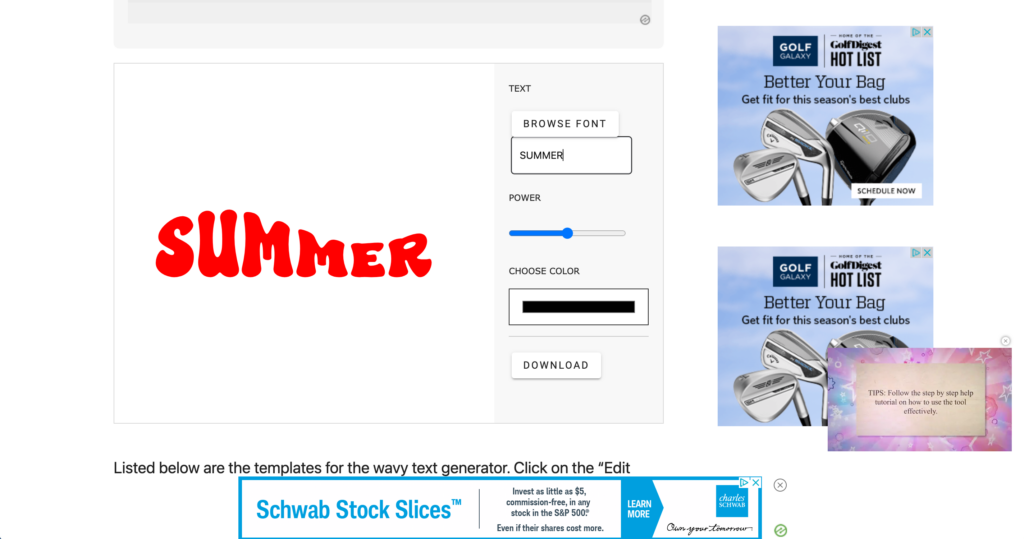
3. Once the editor loads, click the ‘BROWSE FONT’ button and upload the .ttf version of the font you’d like the generator to use. I’m using the Super Spicy font.
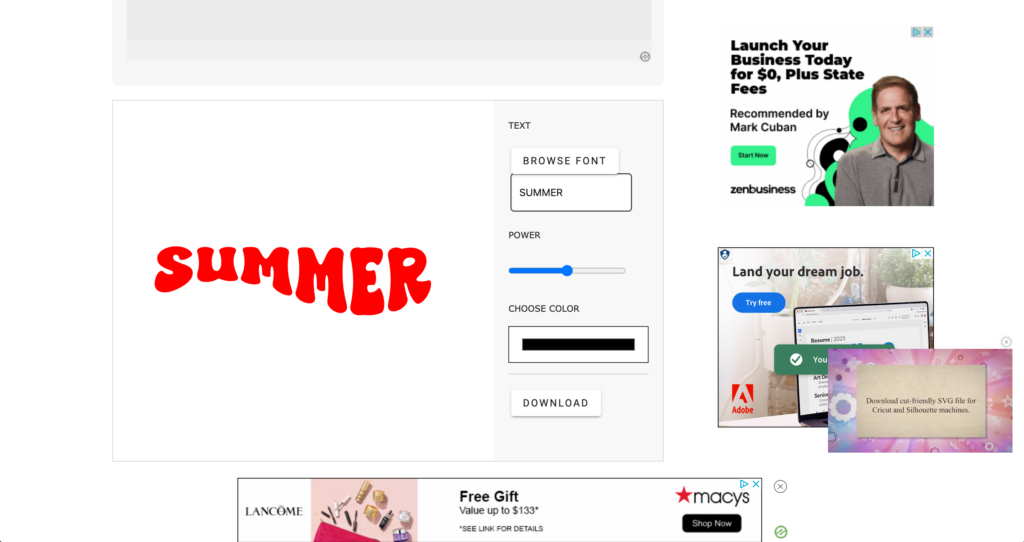
4. Then, enter your word into the ‘YOUR TEXT’ box. I’m using the word ‘summer’.
5. Click the ‘DOWNLOAD’ button and download as an SVG.
6. Return to the generator and this time, click the ‘EDIT DESIGN’ button under the purple text.
7. Add your font, and word. Again, I’m still using the Super Spicy font and the word ‘summer’. Then, download the word as an SVG.
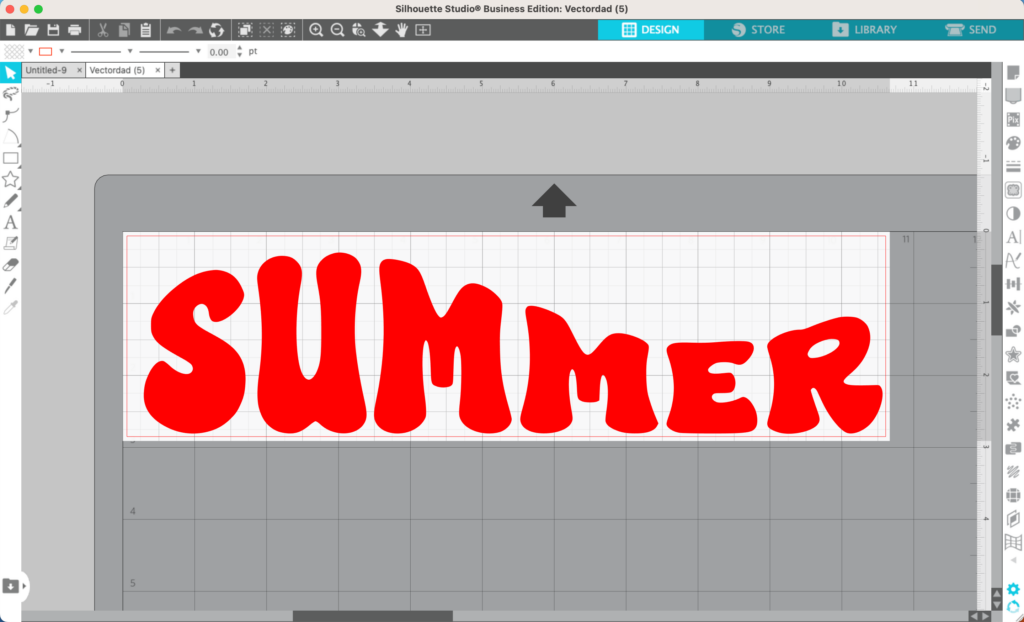
8. Head to Silhouette Studio and open both files you just created.
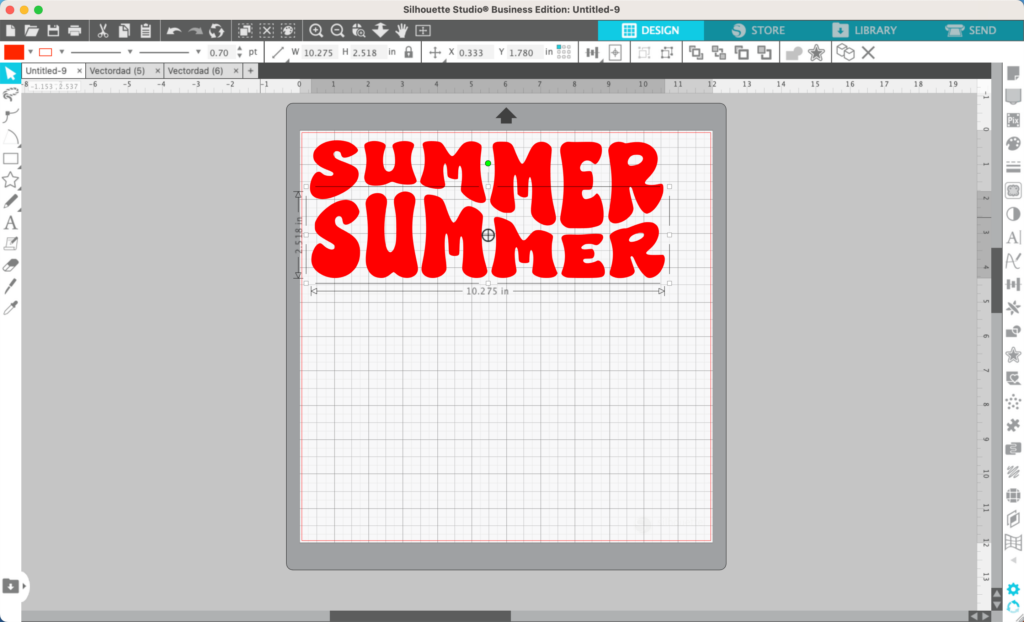
9. Copy and paste both words you created onto one mat. (And admire how nicely they fit together!)
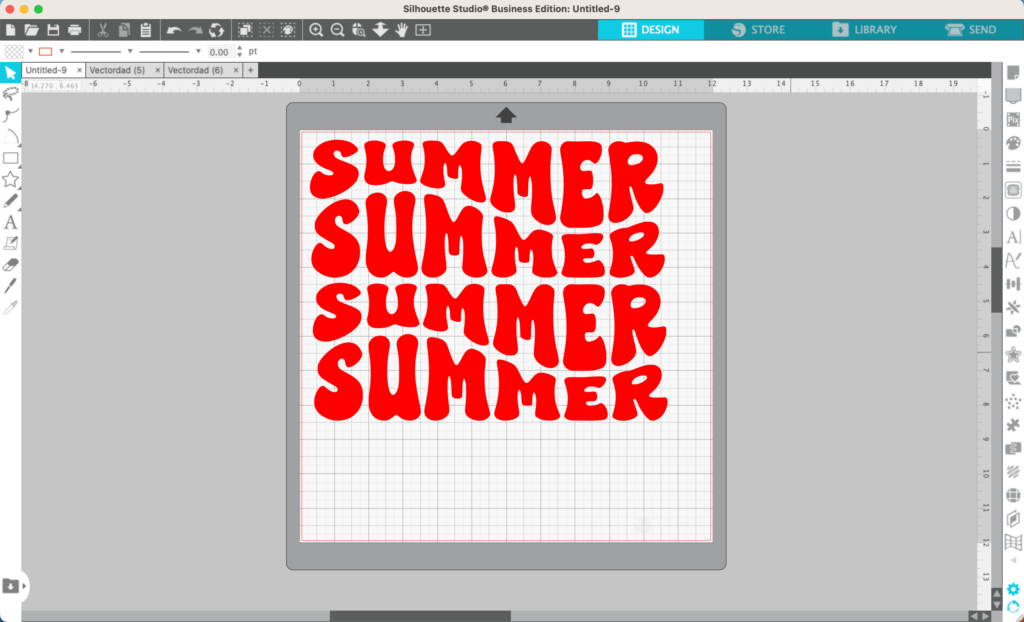
10. Duplicate both words until you’ve got your word four times.
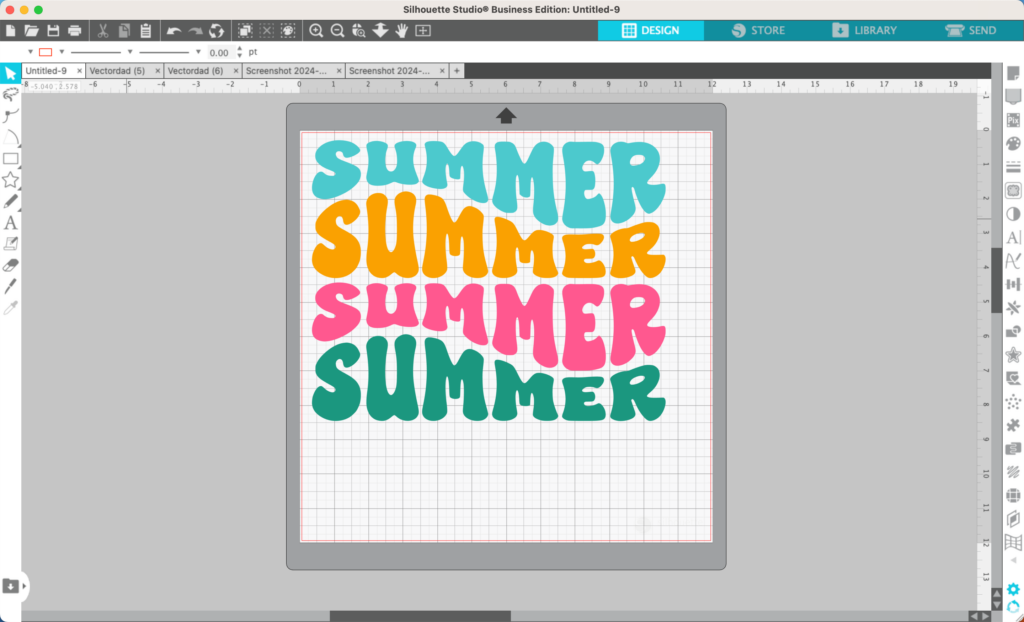
11. Adjust the spacing (Object – Align). Then, add color.
12. Now, you can group everything together and your SVG design is done.
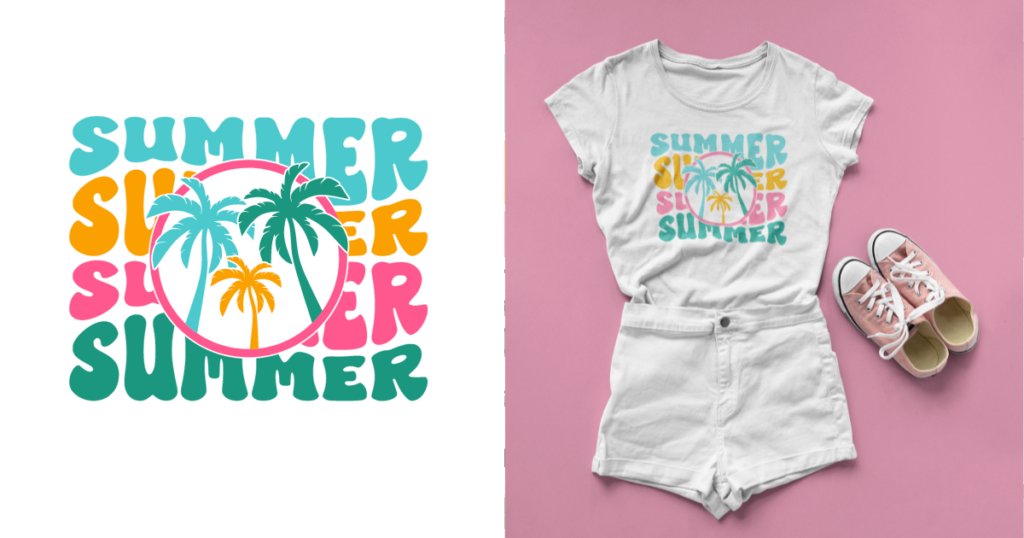
Or, you can add some additional details. To complete my design, I added a knocked out circle in the middle with some palm trees. If you’d like to download it, it’s available on my Buy Me a Coffee page.
Don’t Forget to Save!
To save your new SVG creation, head to ‘File’, ‘Save As’, ‘Save to Hard Drive’, name the file, then select ‘SVG’ from the dropdown menu.
Design with Me is a new regular feature on Cutting for Business! Each Friday, I’ll bring you a new Silhouette Studio tutorial featuring how to design an SVG.
Spacing is so important in design, and it can have such an impact on the feel of the design overall.
While I normally keep my spacing tight, it’s fun to do something s p a c e d o u t once in a while, too.
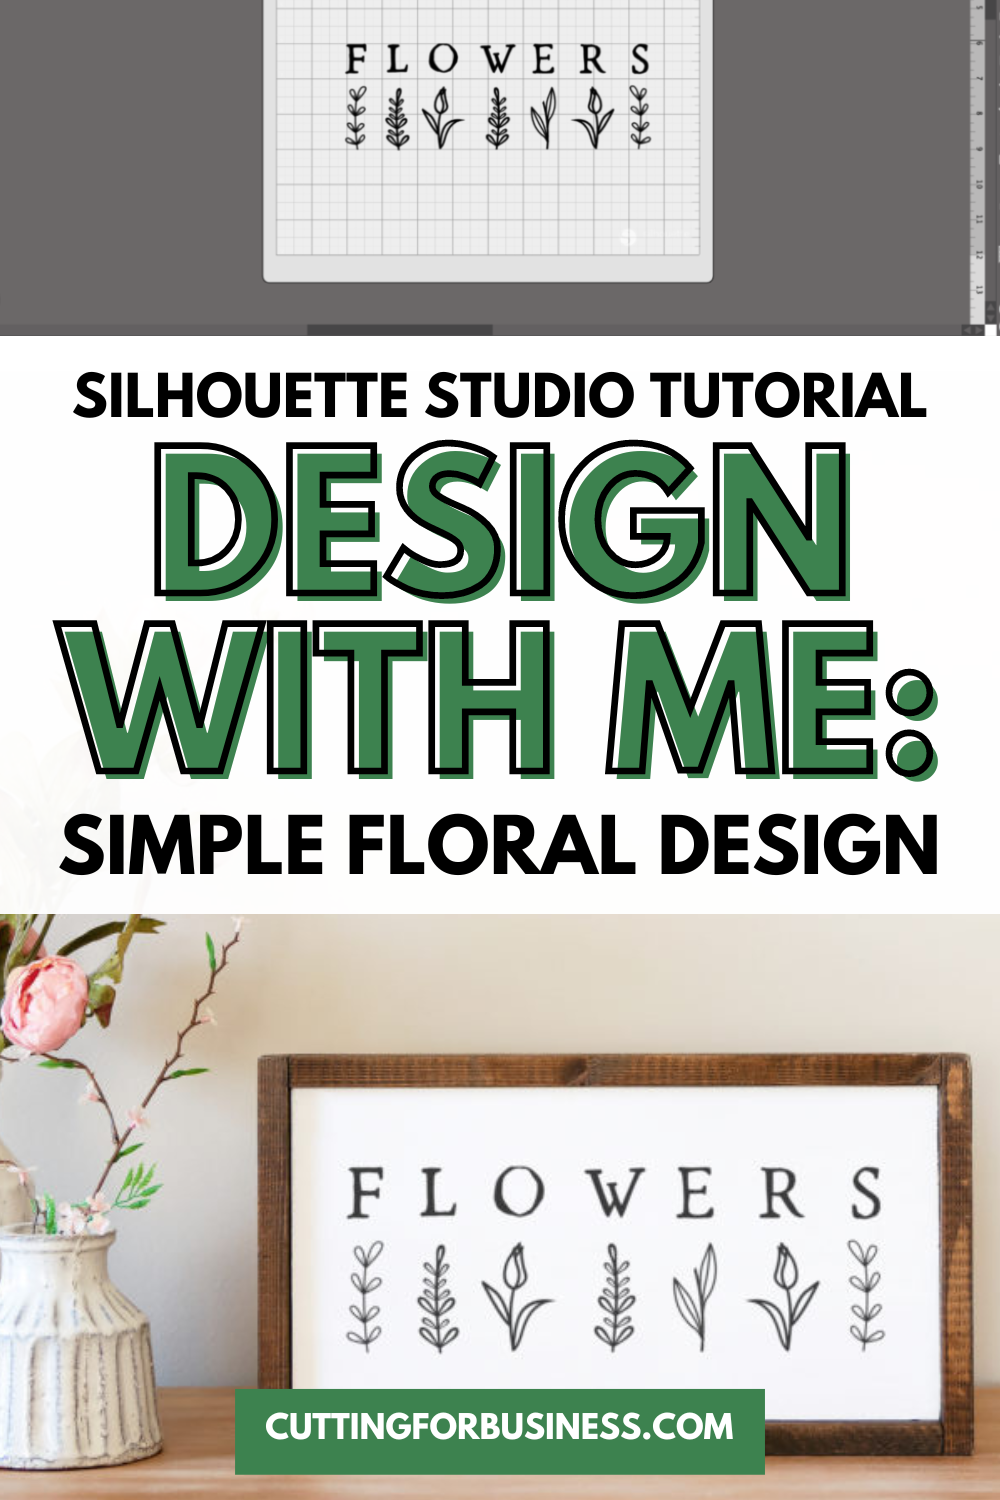
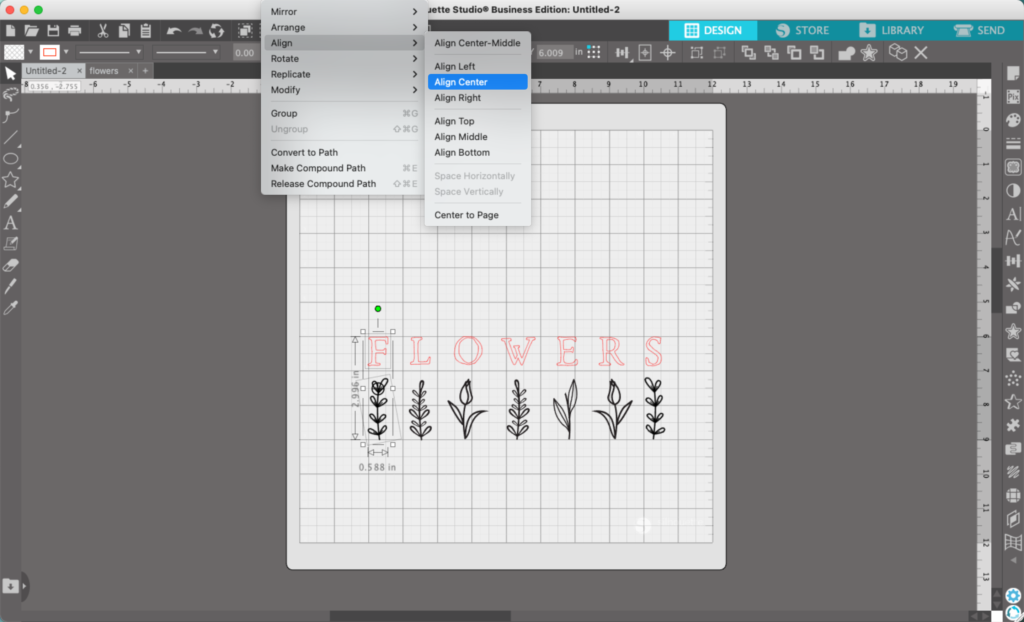
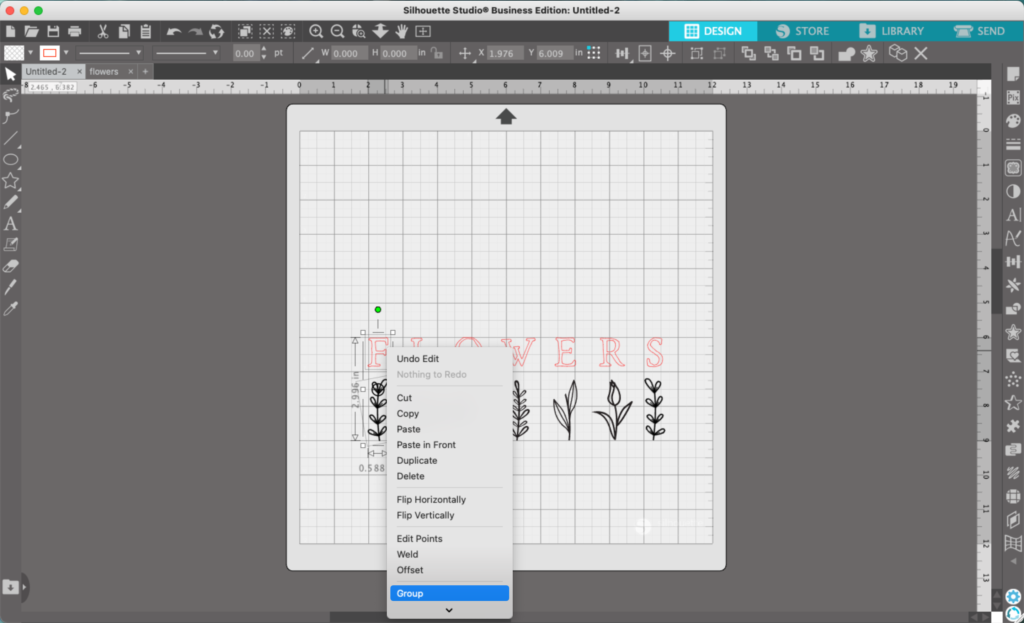
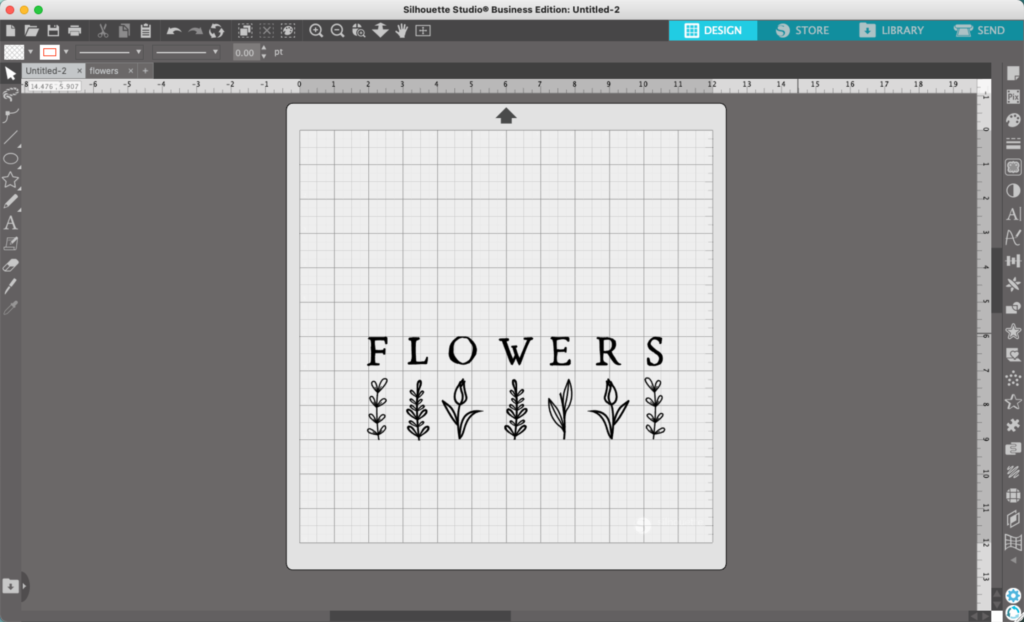
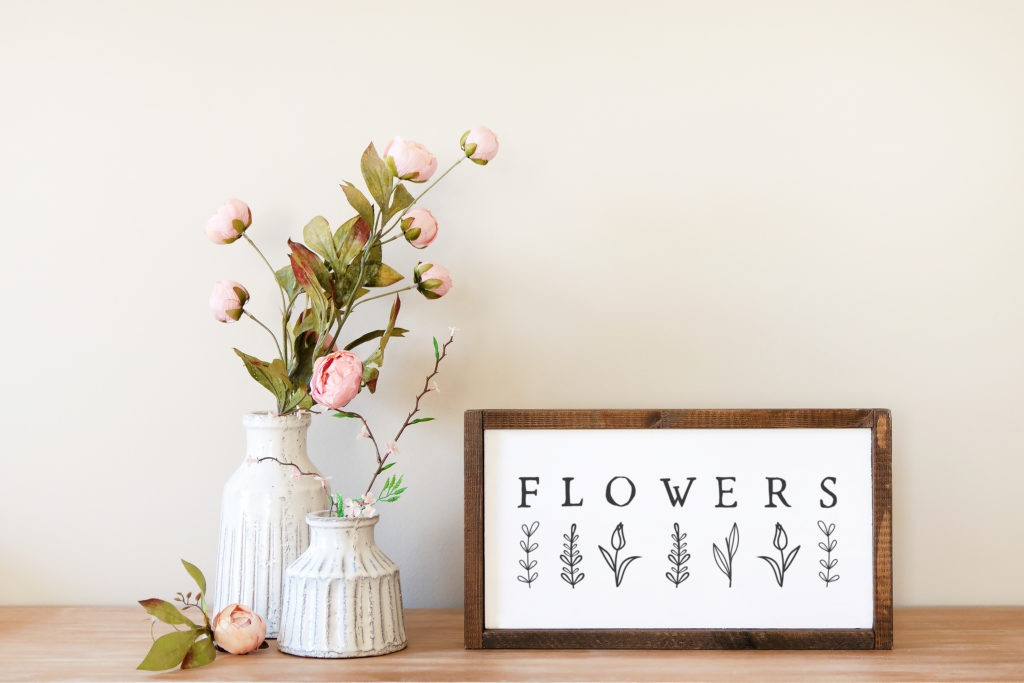
Let’s take a look with this spring-y design tutorial for a simple floral SVG:
Silhouette Studio Tutorial: Simple Floral SVG
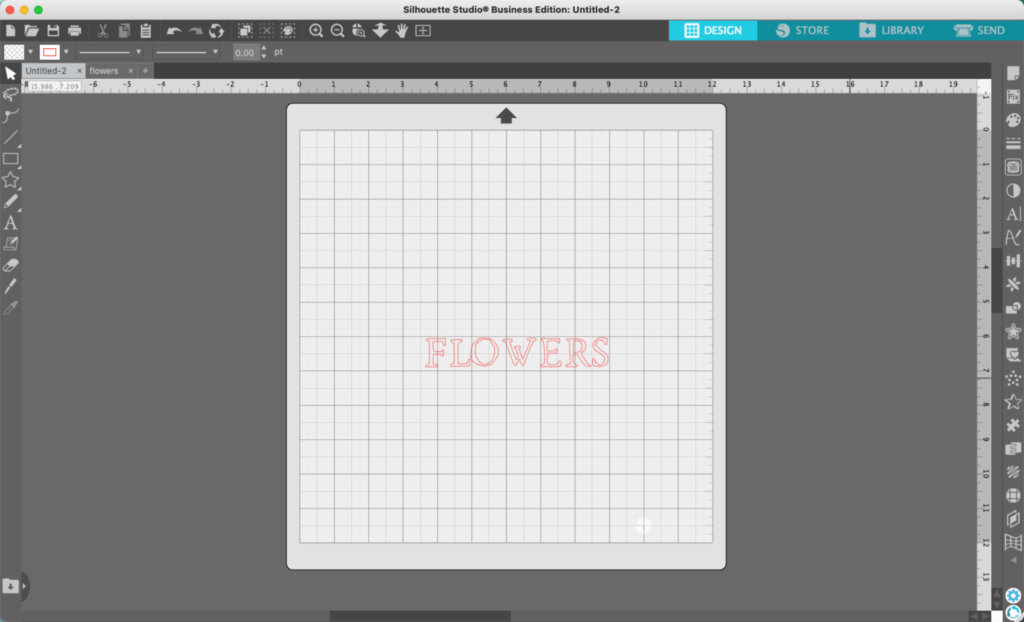
In Silhouette Studio, type a word. In this tutorial, I’m using the Spring Market font.
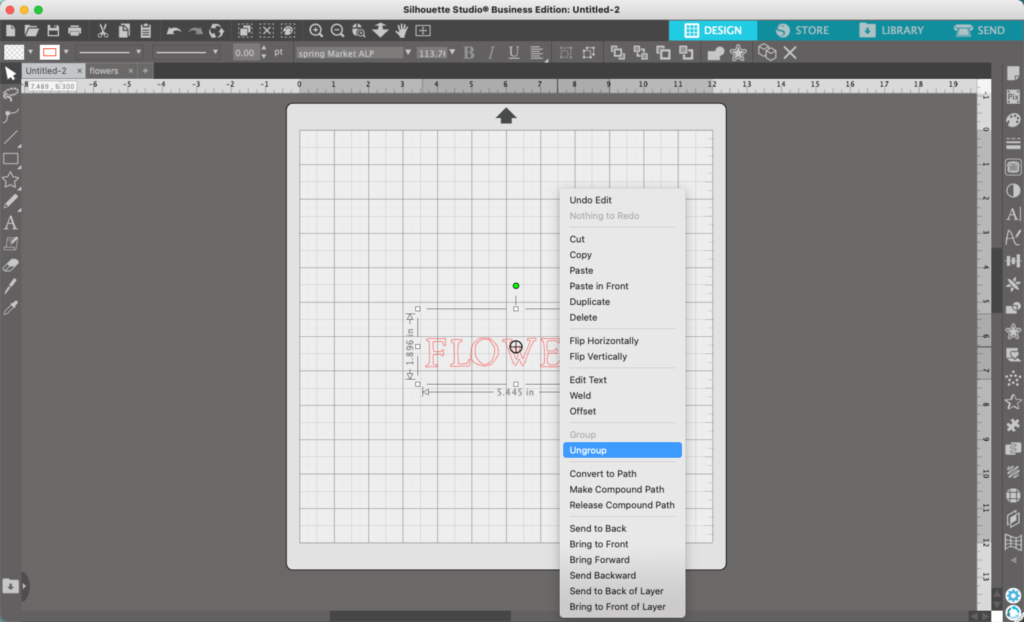
2. Right click on the word and ‘Ungroup’ it.
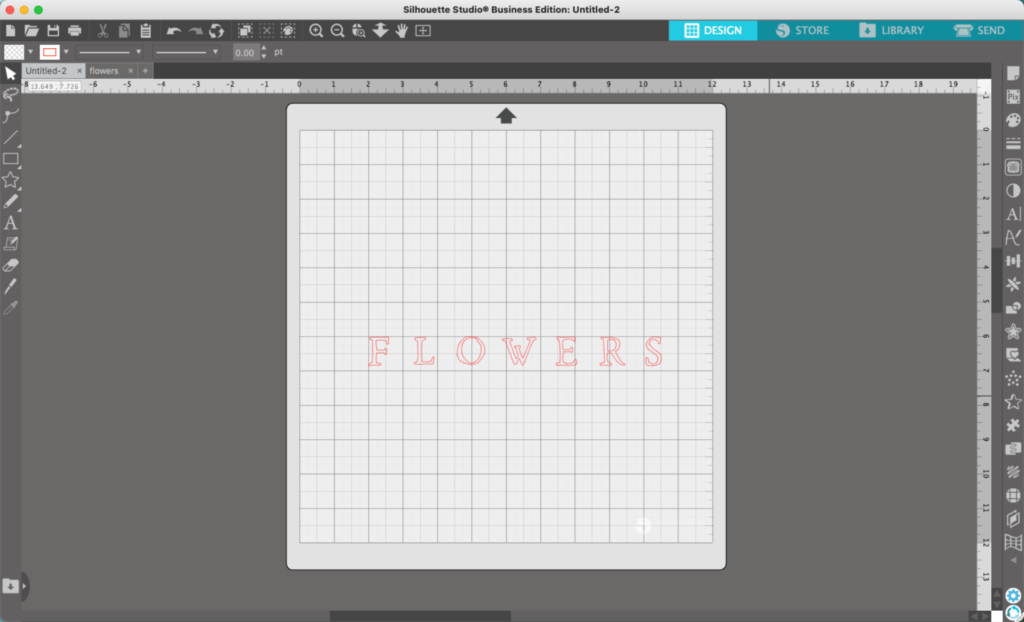
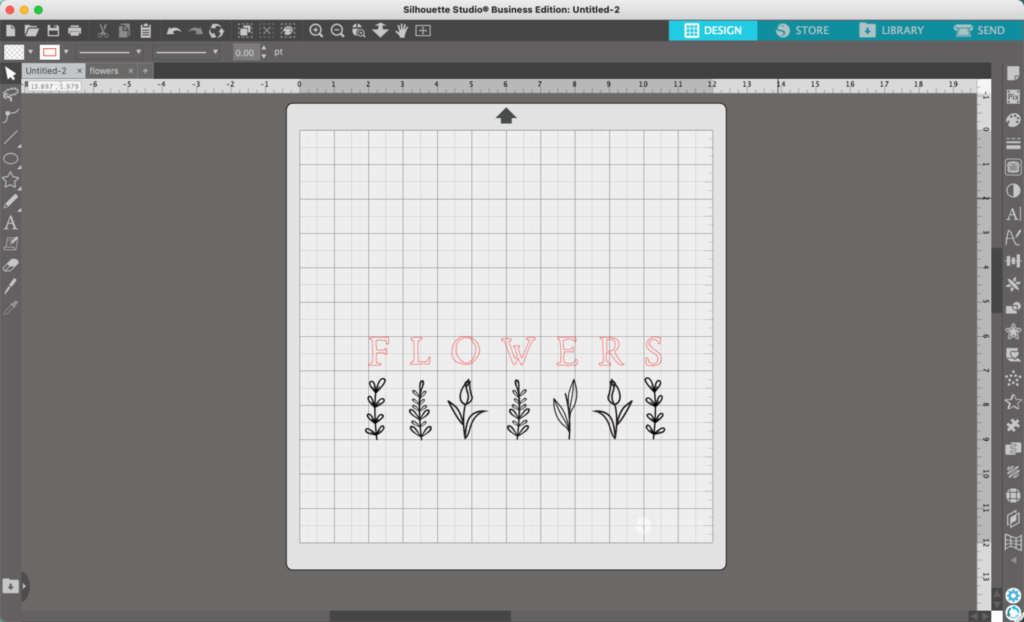
3. Drag the letters apart. I just eyeballed this, so they aren’t evenly spaced.
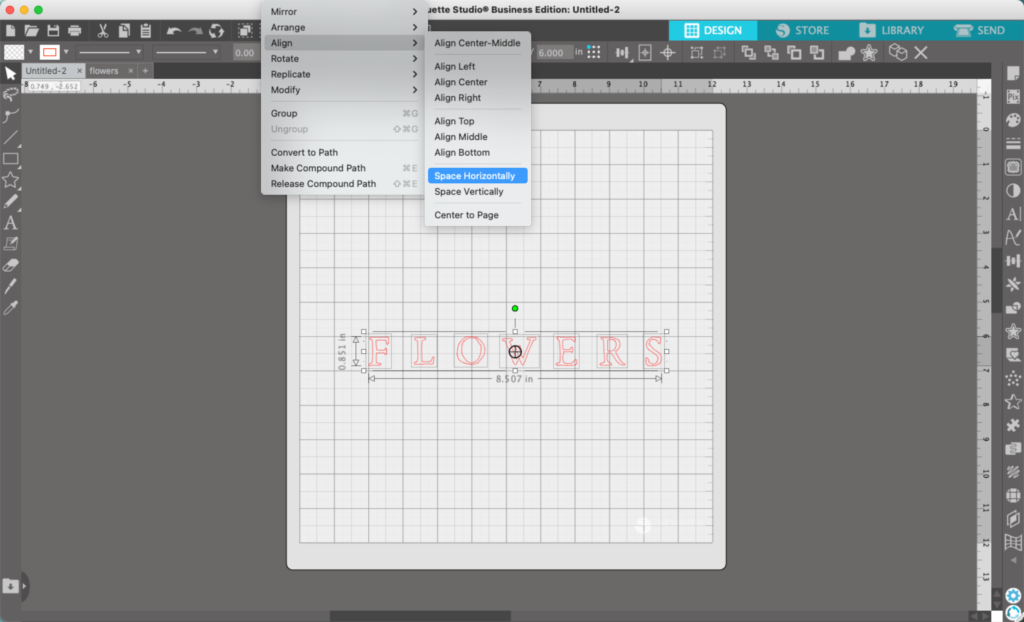
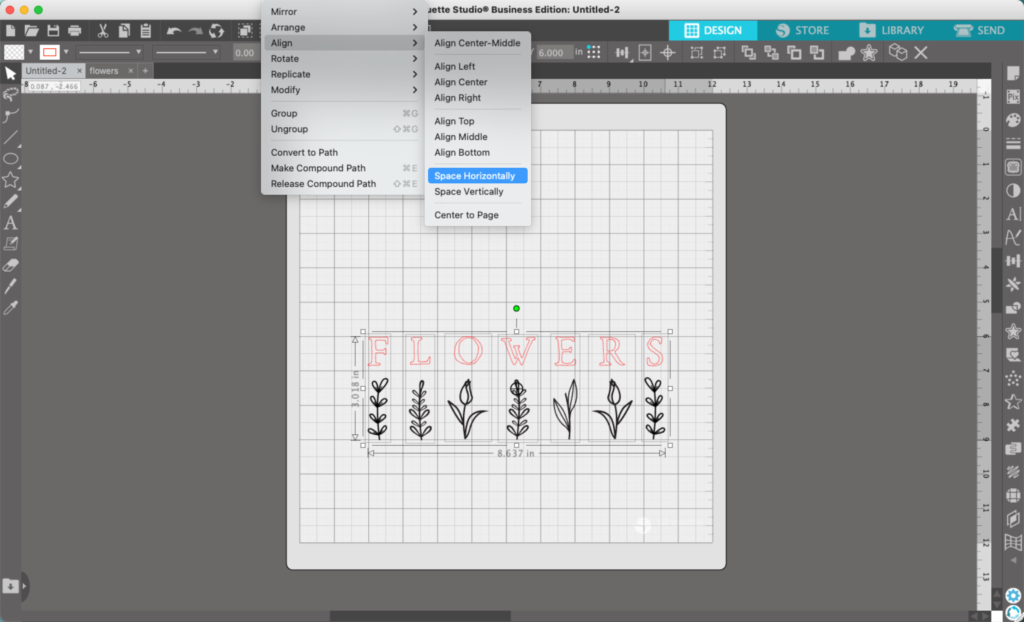
4. Select all the letters, then navigate to ‘Object’, ‘Align’, ‘Space Horizontally’.
Design with Me is a new regular feature on Cutting for Business! Each Friday, I’ll bring you a new Silhouette Studio tutorial featuring how to design an SVG.
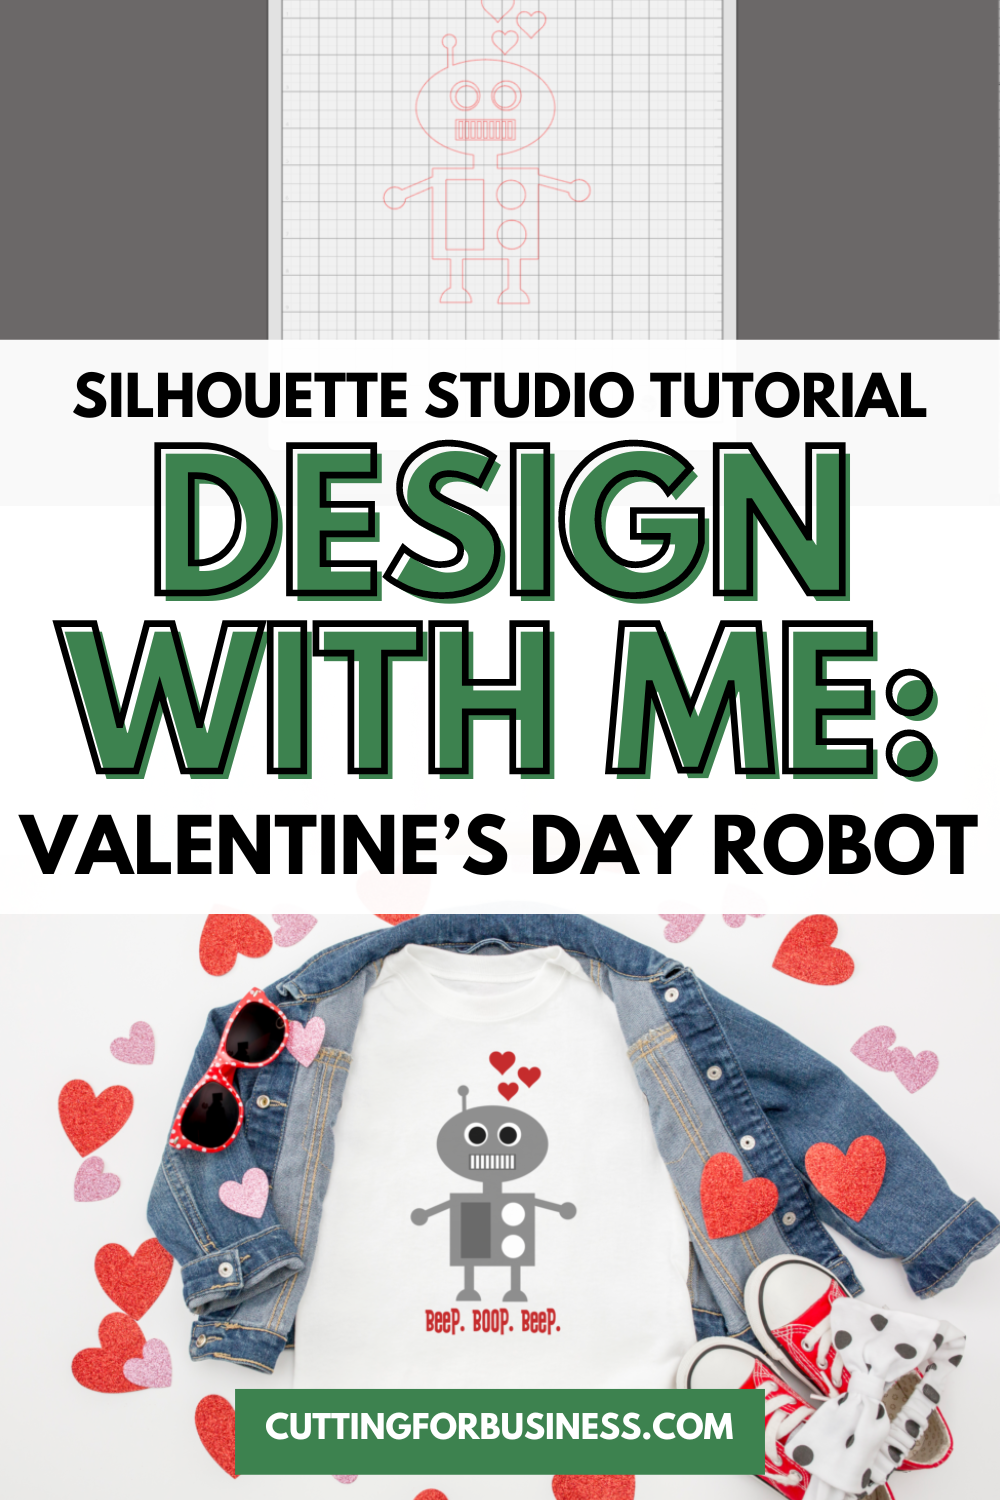
Let’s talk Valentine’s Day today, specifically – how to make the cutest robot you’ve ever designed.
Silhouette Studio Tutorial: Love Robot SVG
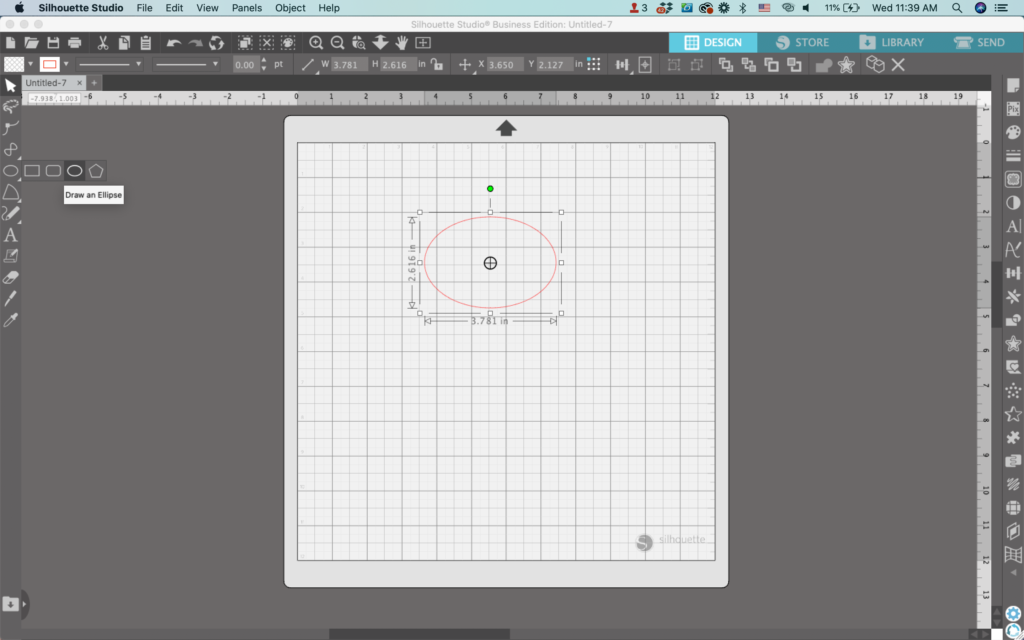
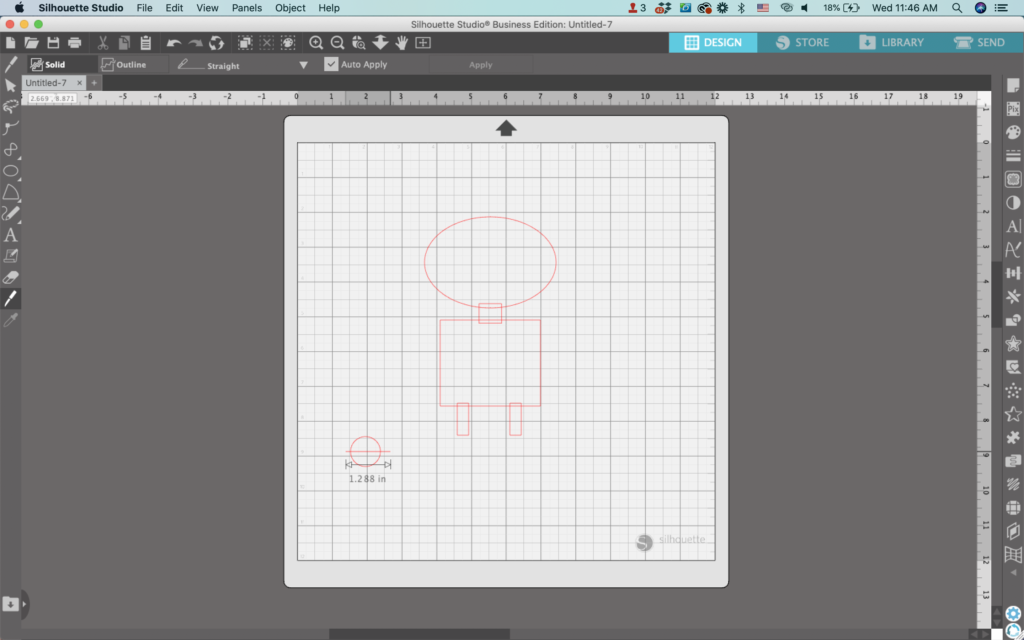
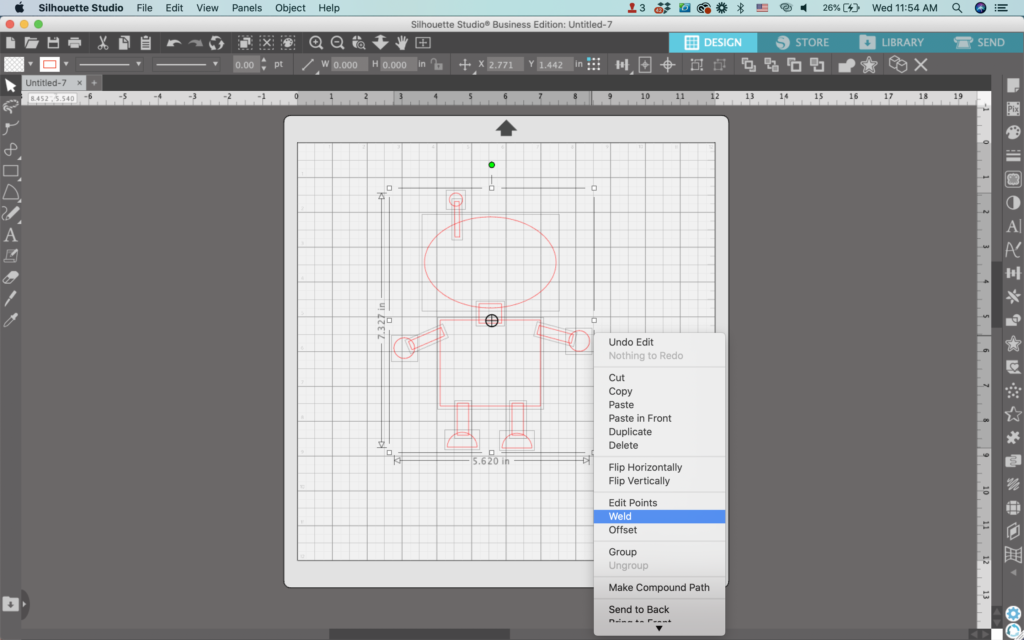
In Silhouette Studio, use the ‘Draw an Ellipse’ tool to draw an oval. This will be the robot’s head.
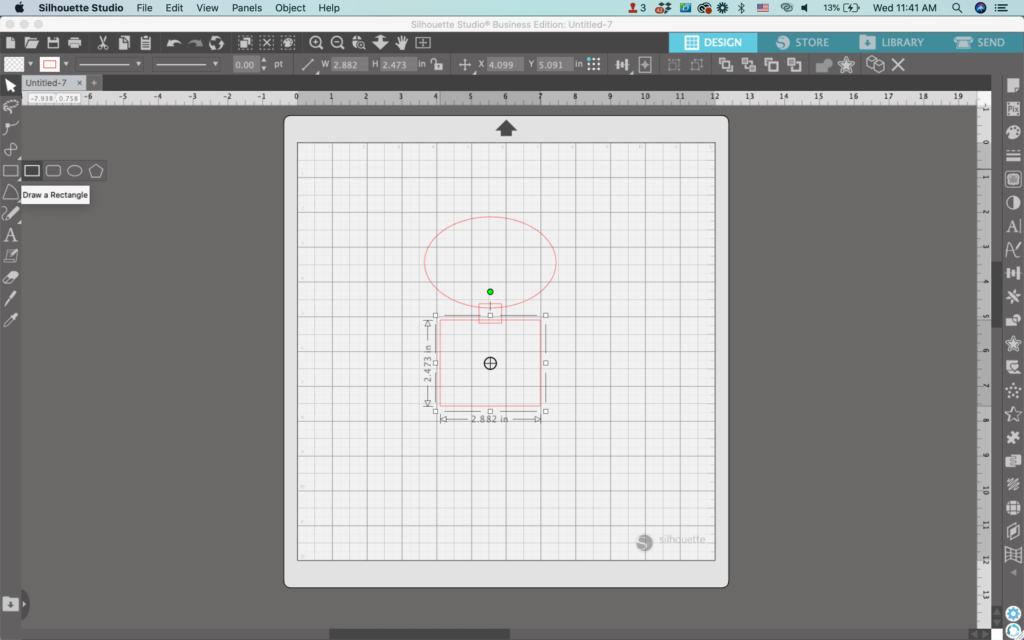
2. Use the ‘Draw a Rectangle’ tool to draw both a neck and a body. Make sure that each body part slightly overlaps the next.
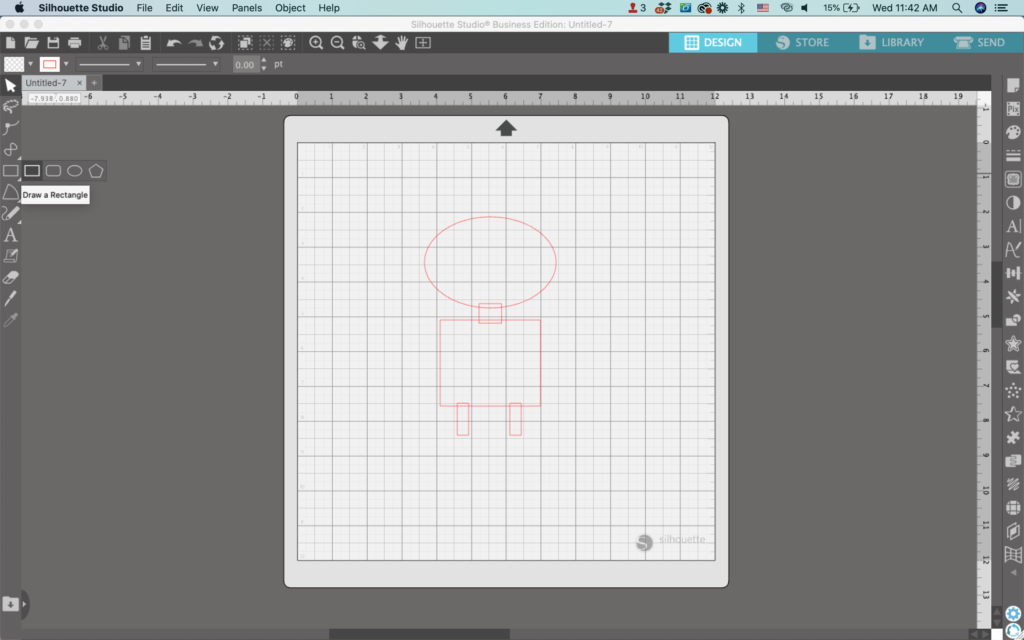
3. Draw two additional rectangles for the robot’s legs. Again, make sure they slightly overlap the body.
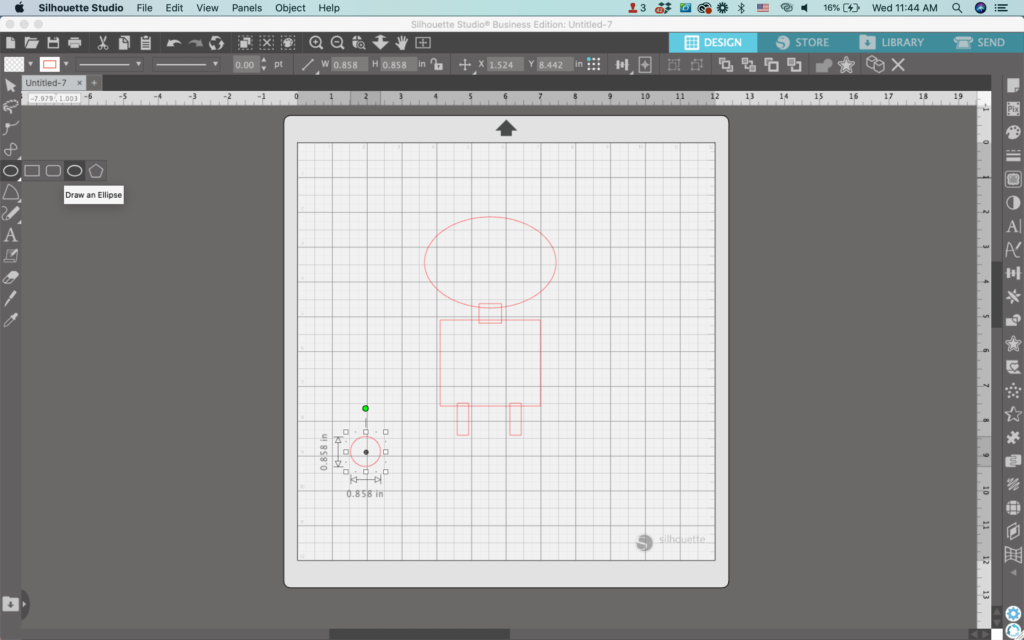
4. Use the ‘Draw an Ellipse’ tool while holding down the SHIFT key to make a perfect circle.
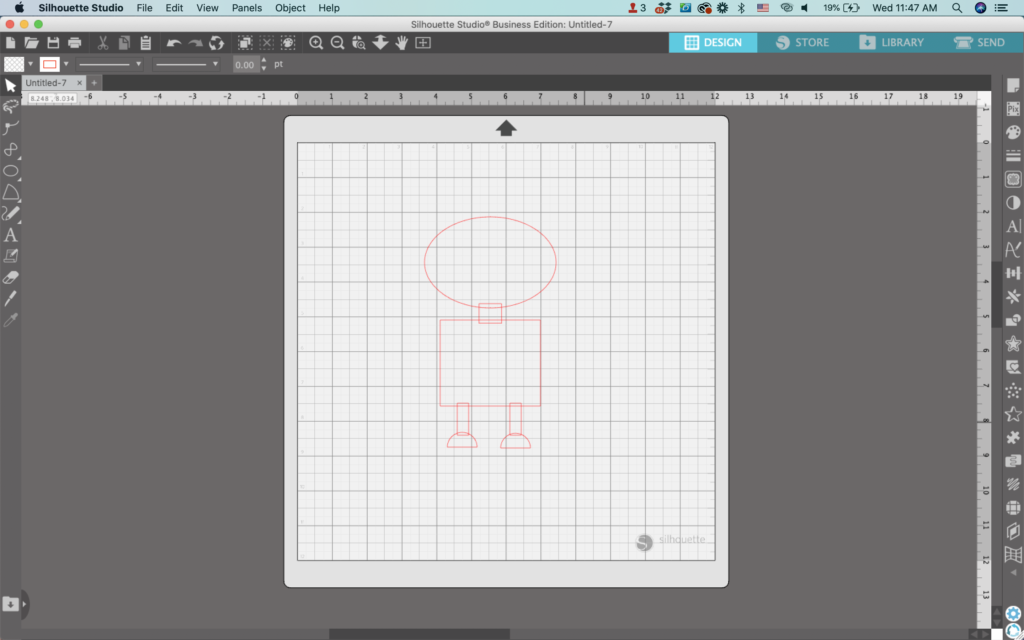
5. With the ‘Knife Tool’ (it’s second from the bottom on the left hand side), slice the circle in half. Be sure the knife setting is set to ‘Solid’.
6. Move the half circles into place to make the robot’s feet. Of course, make sure they overlap slightly.
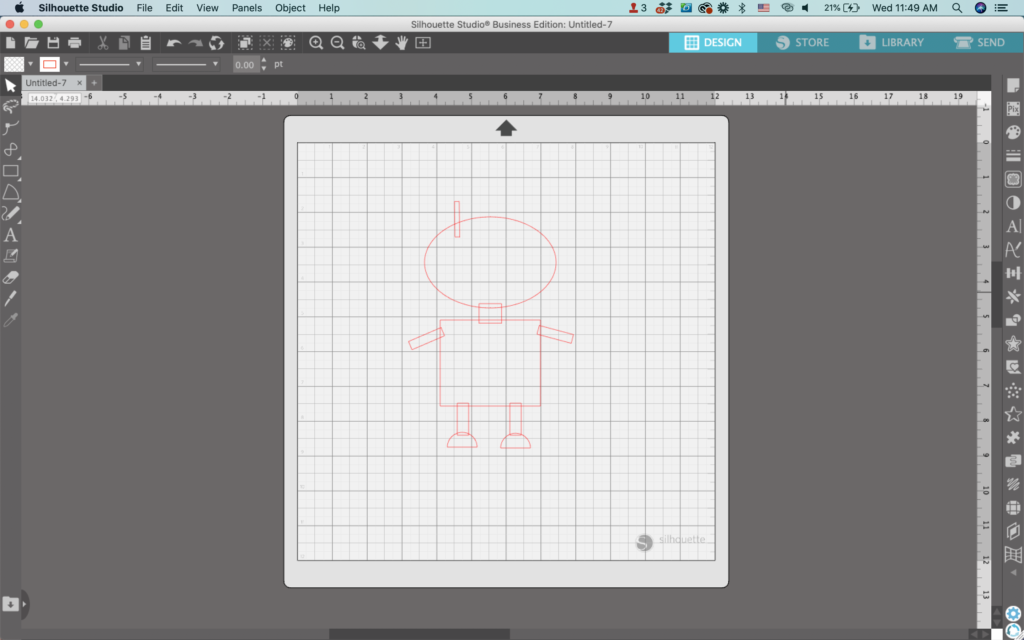
7. Draw three additional rectangles using the ‘Draw a Rectangle’ tool. Move them into place as the robot’s arms and an antenna. Again, overlap them slightly with the shape next to it.
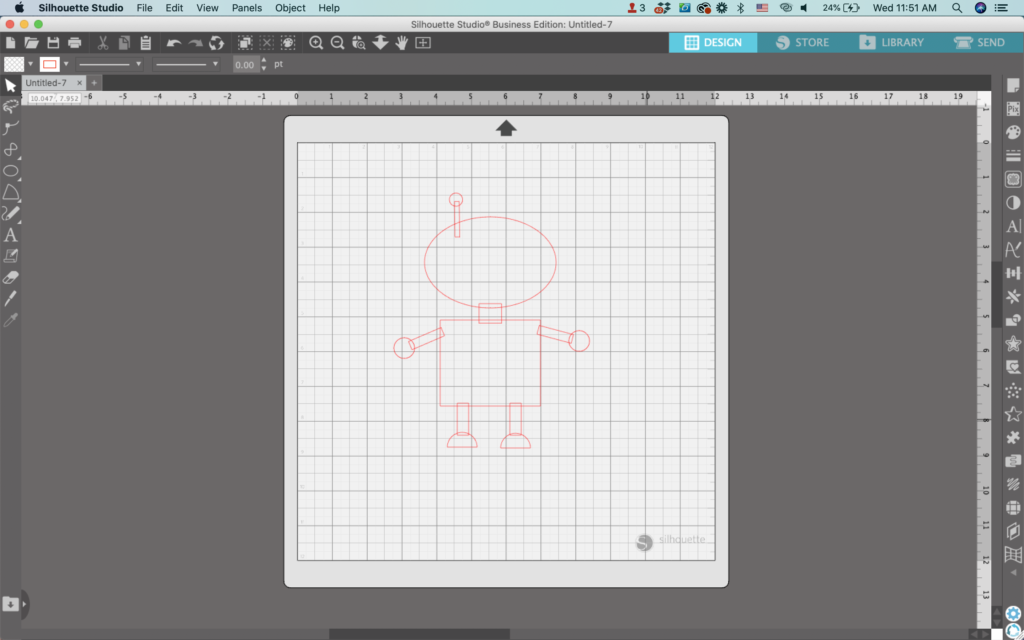
8. Draw three circles using the ‘Draw an Ellipse’ tool. Move them into place as the robot’s arms and antenna topper. You guessed it: They should overlap the other pieces slightly.
9. Select all the robot’s pieces and right click, then select ‘Weld’ to group the pieces together.
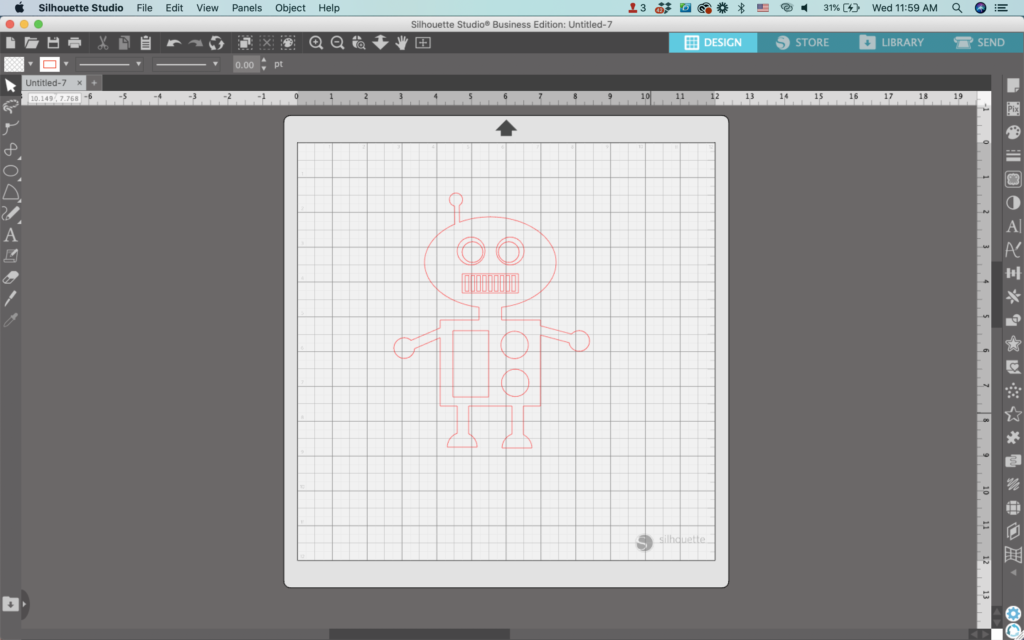
10. Using shapes, add additional details like buttons on the robot’s body, eyes, and a mouth.
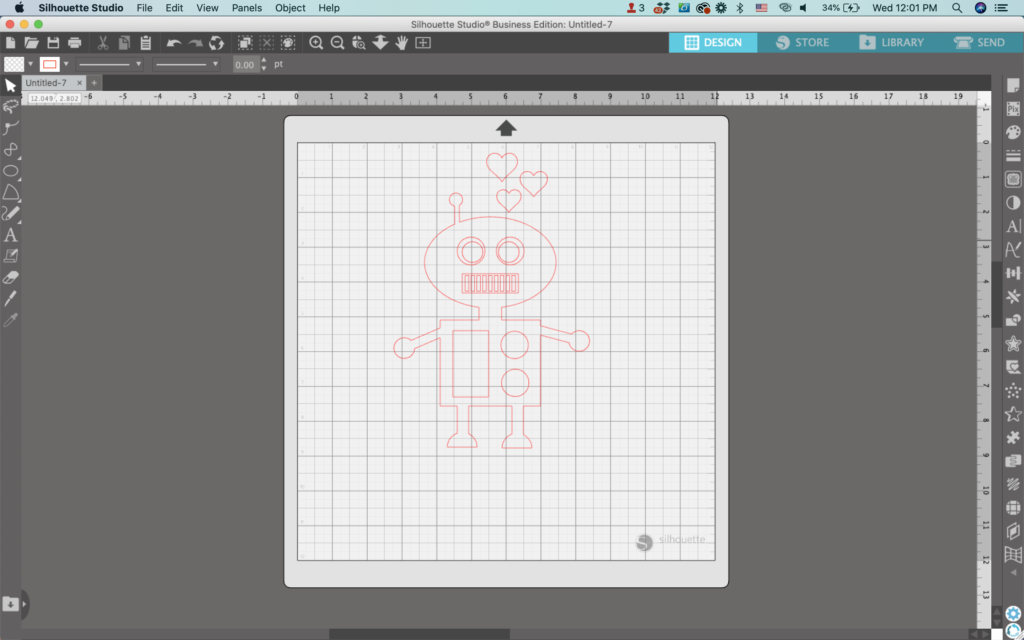
11. Add a few hearts around the robot. To make the hearts, I used the Border Bits font.
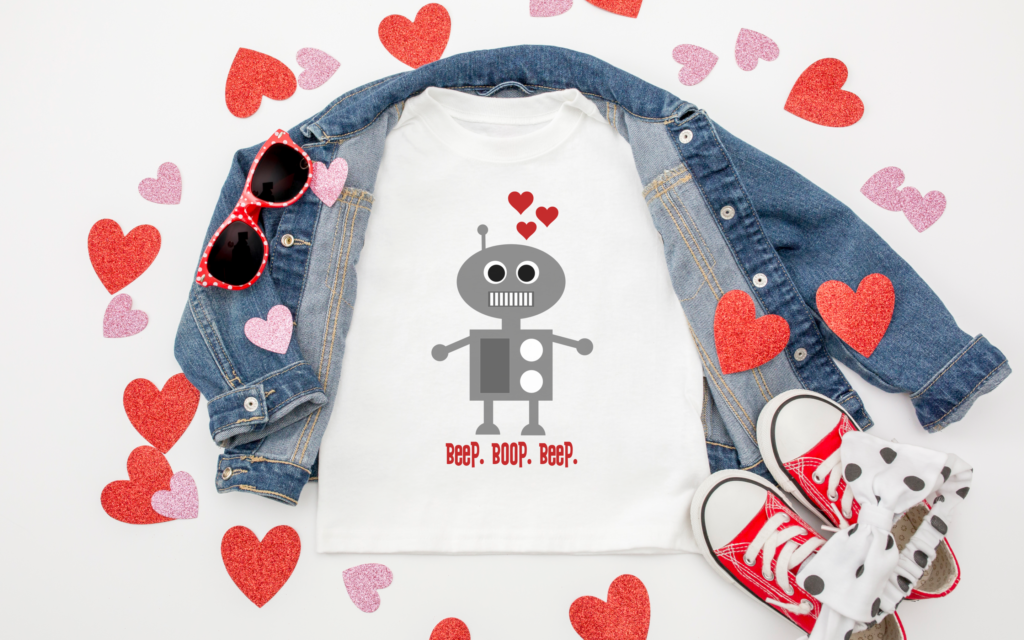
12. Fill your design with color and add any additional details. I added some robot ‘words’ to the bottom of my design using the ZP Ex Boyfriend font. My final design looks like this:
That’s it! Your design is ready to go!
Don’t Forget to Save!
To save your new SVG creation, head to ‘File’, ‘Save As’, ‘Save to Hard Drive’, name the file, then select ‘SVG’ from the dropdown menu.
I recently set up a shop on Creative Fabrica. I’ve found it different from other marketplaces I’ve sold on, so I wanted to share my experience setting up my shop – and answer some FAQ along the way.
What is Creative Fabrica?
Creative Fabrica is an online marketplace for digital goods. At the time of writing this article, Creative Fabrica has more than 8 million digital products for sale and 50,000+ designers.
Launched in 2016, Creative Fabrica and Cutting for Business have a long history together. I’ve been an affiliate since they launched their affiliate program, have written blog posts and taught a class on their AI called CF Spark, and have purchased more products than I can count over the years.
Before you read this article, transparency is so important to me: I was not contacted by Creative Fabrica to write this post. I did it only to share my experience with the marketplace.
What Can You Sell on Creative Fabrica?
Basically, you can sell any digital asset. These include:
Design files for Silhouette, xTool, Cricut, Glowforge, and more.
Product mockups.
Digital backgrounds.
Fonts.
Stock photos.
Knitting and crochet patterns.
Online courses.
…and so much more.
How Much Does it Cost to Sell on Creative Fabrica?
Listing a product on Creative Fabrica is free. Additionally, there is no cost to open a store.
After filling out a short application with digital product samples, you’ll need to be approved. My shop was approved in a day or so.
How to Create a Listing on Creative Fabrica?
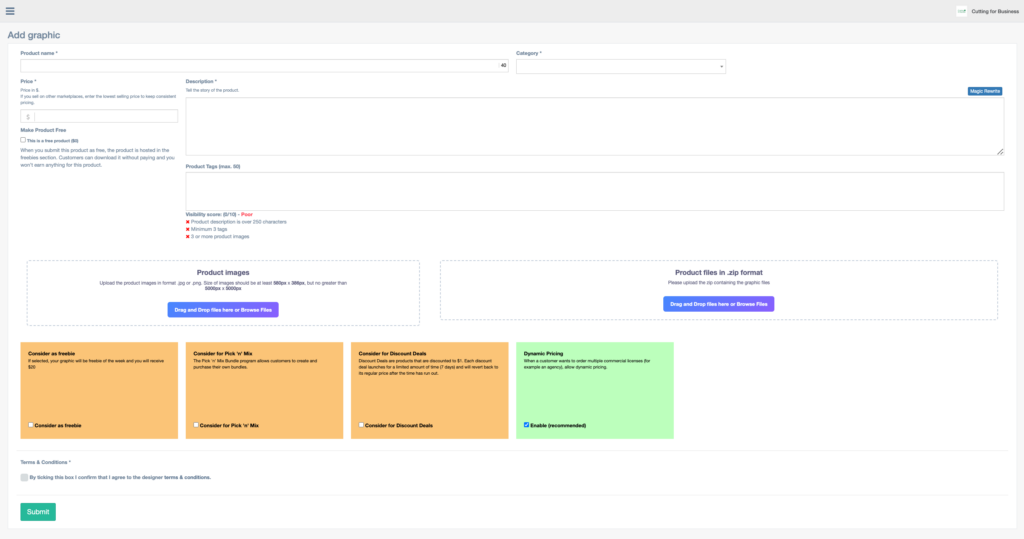
Creating a listing on Creative Fabrica is straightforward and easy. Here is a screenshot from my dashboard of what the listing creation looks like:
To create a listing on Creative Fabrica, you’ll add a product name, choose one category, set a price, add a description, add product tags, upload product images, and add your product files in a zip file.
Then, you’ll choose if you want Creative Fabrica to consider your product for three different promotions on their site: 1) Consider as a freebie. If your product is chosen as a freebie, you’ll receive a flat rate of $20. 2) Consider for Pick ‘n Mix. This option allows Creative Fabrica users to create their own bundles. 3) Consider for Discount Deals. This option allows Creative Fabrica to change your price to $1 for a limited amount of time and promote your product in their Discount Deals promotion. Finally, you’ll be able to opt in to Creative Fabrica’s dynamic pricing for discounts on agency licenses for your product.
Lastly, you’ll agree to the designer terms and conditions.
Your product will then go to the review team and (hopefully) be listed in your Creative Fabrica shop.
How Much Money Do You Make on Creative Fabrica?
There are two different ways to make money on Creative Fabrica: Selling your digital products and using your affiliate links.
Selling your digital products: You can set the price for your digital products. Creative Fabrica takes 50% of your sale price. In the world of online marketplaces, I think this is hefty. However, Creative Fabrica only takes 25% of your sale price when you refer the sale through your affiliate link. For products of yours that are included in Creative Fabrica’s promotional bundles or sold to Creative Fabrica’s customers with subscriptions, sales are split through a point system. (Note: There is extensive documentation available to designers regarding the point system. Unfortunately, Creative Fabrica requests that it not be uploaded publicly. If you become a designer, you’ll be able to access it.)
I think it’s important to remember that while the commission split is high, you have to remember that one product may sell over and over again. It becomes passive income when you upload a product once and it can sell for years to come.
Selling through affiliate links: When you become a designer on Creative Fabrica, you are automatically given an affiliate account. You can use your link to promote your products or other products on their site. You’ll earn a varying percentage on affiliate purchases: 25% of whatever a customer pay for a product and 20% of subscriptions.
How Do You Get Paid on Creative Fabrica?
All money you earn is collected in a digital wallet. You can then request a payout to your Paypal account, a bank transfer, or Payoneer.
Payments are then sent in about a week. Minimum payout amounts and transaction fees vary depending on how you choose to get paid.
What About Licensing on Creative Fabrica?
All products you list on Creative Fabrica are subject to their blanket commercial use license. Read their license.
Unfortunately, you cannot add your own license to your listings on Creative Fabrica. So, if you wanted to list a digital product for personal use only – you wouldn’t want to list it on Creative Fabrica.
Some Quirks About Selling on Creative Fabrica
Up until this point in this article, everything has been pretty standard: Apply for a shop, get approved for a shop, enter your shop settings, and list your products.
Now, let’s talk about what I call… quirks about selling on Creative Fabrica:
Creative Fabrica is a juried marketplace that requires approval before listing. This means that every listing you create needs to be approved before it’ll be live in the marketplace. To me, this is not a big deal. It keeps inappropriate products out of the marketplace. And, product listing approval has always been a day for my products. Since I’m in the US and Creative Fabrica is in the Netherlands, I submit products throughout the day and they are approved in the middle of the night and in my shop by the time I wake up.
Once your product is listed, you can only make limited edits. This goes along with Creative Fabrica being a juried marketplace. Once your product is listed, you can only edit the product title, the product settings, the product tags, the price, and the featured images. You cannot edit the file you uploaded, the product description, or the product category. This means you need to check and double check your product listing for typos and errors before submitting it. (Note: You can submit an email to Creative Fabrica to have your product updated – but I have not done this – and honestly, it seems like a hassle.)
Deleting a product from Creative Fabrica takes up to 3 months. This is included in the Designer Terms & Conditions you agreed to when opening your shop. I find it odd that I cannot delete a product right away. But, is it a deal breaker for me? No.
You cannot offer coupons or single product sales. Within your Creative Fabrica shop, you cannot create coupon codes for products, or put a single product (or a group of products) on sale. Any promotion that you run in your shop will apply to all products in your shop. Additionally, you can only list shop promotions for 50% off, 60% off, 70% off, 80% off, or 90% off.
How My Shop is Doing on Creative Fabrica & Will I Continue to List There?
My shop has been open for only about a week at the time of writing this article – with around 100 products. While I haven’t had any sales, I have had several downloads of my free products (no income for those), several users have followed me, and I’ve amassed some favorites from other users.
I will continue listing on Creative Fabrica, a few listings every week to keep my shop fresh. I’m hopeful to get some of my products chosen for upcoming Creative Fabrica promotions.