My kids went back to school last week, what about yours? Are you sad summer is over or are you ready to get your kids back in school?
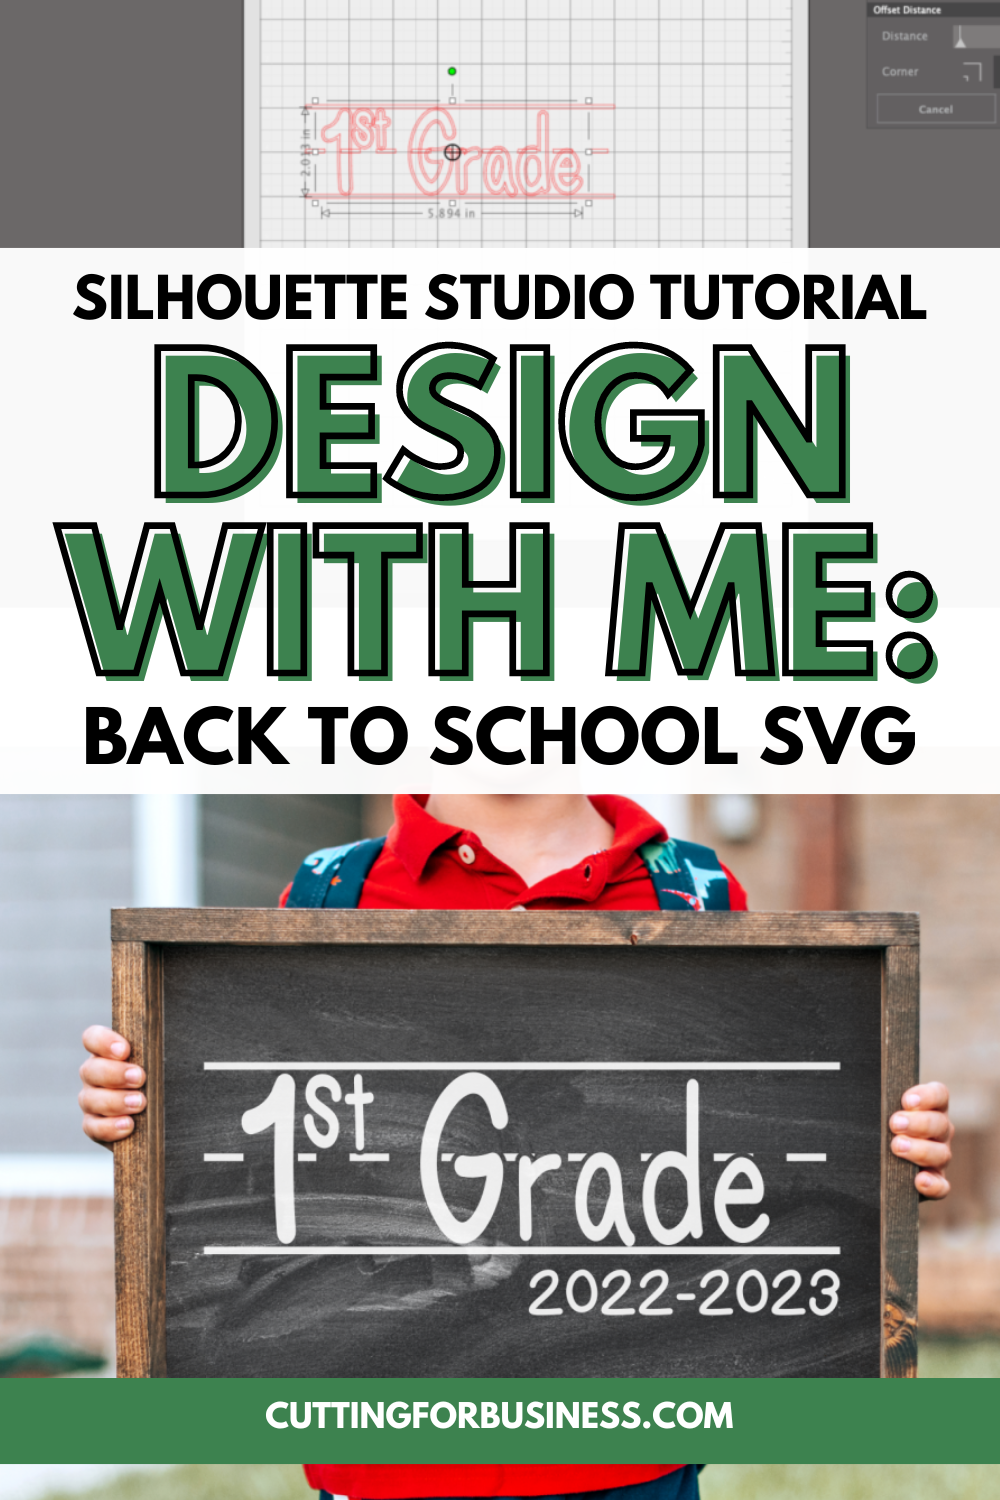
Today, let’s create the *cutest* back to school lined paper SVG design – perfect for a t-shirt, bulletin board, or wood sign.
Tutorial: Back to School Lined Paper Design
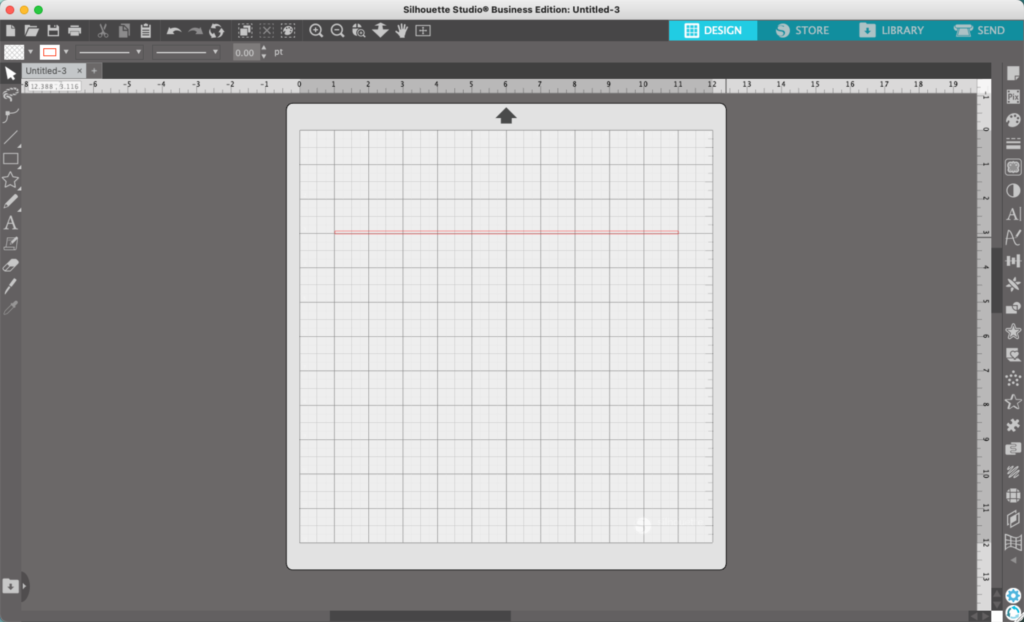
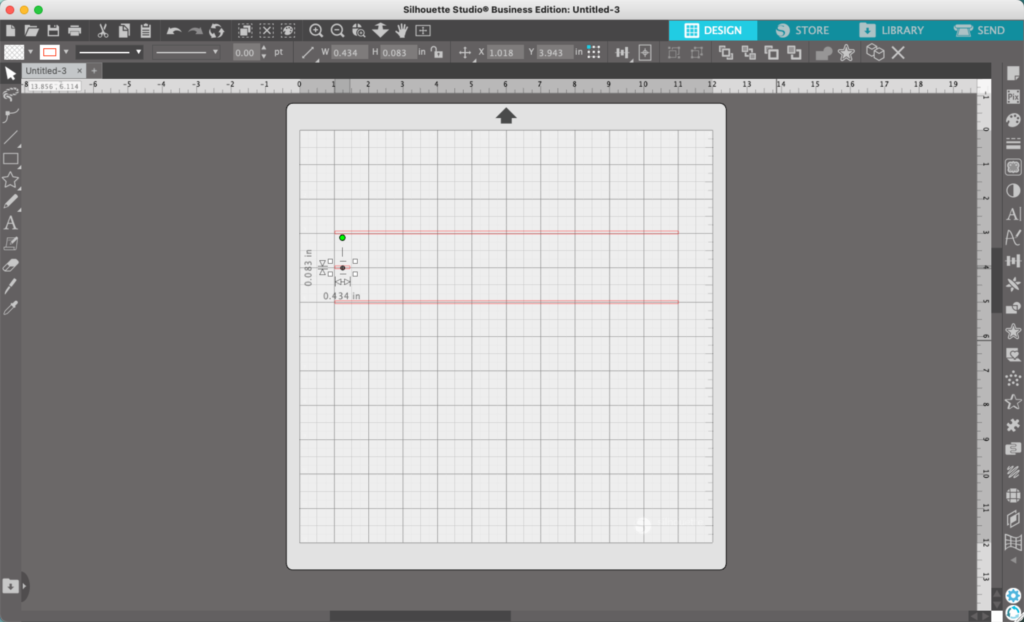
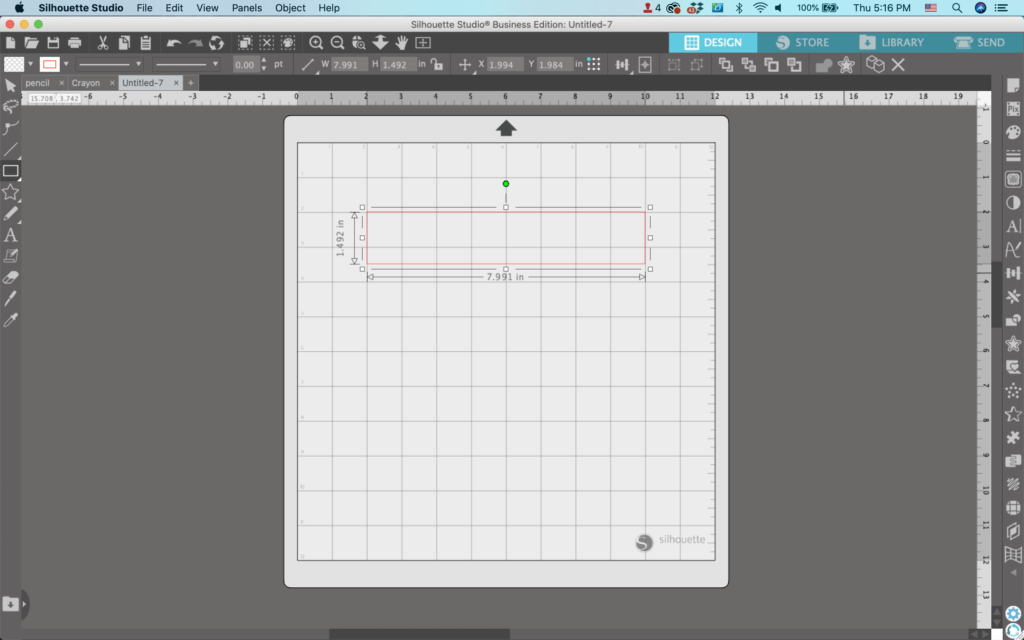
Use the ‘Draw a Rectangle’ tool to draw a long skinny horizontal box.
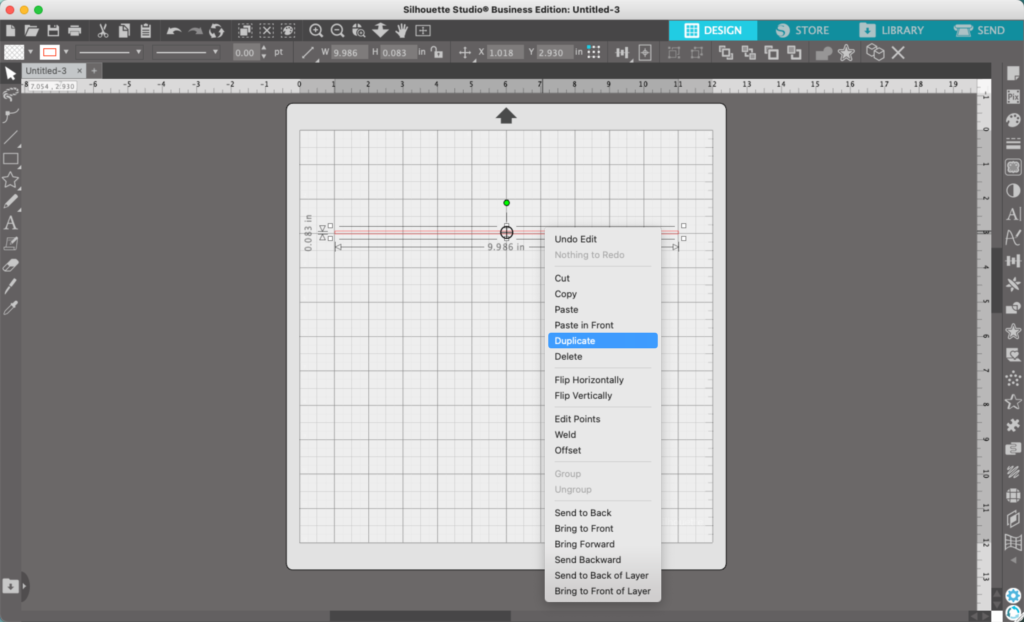
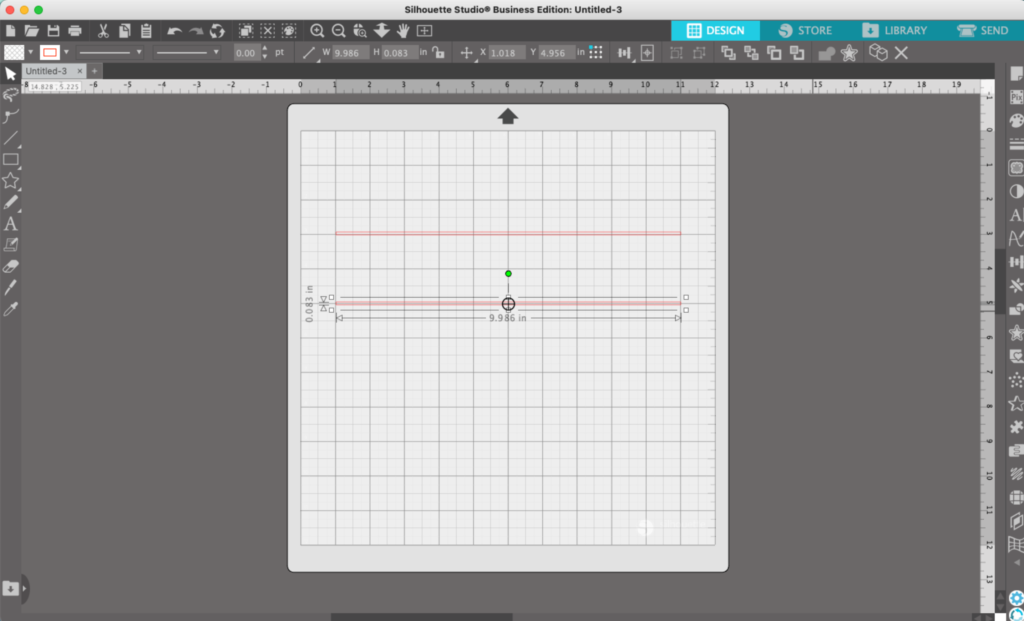
2. Right click to duplicate the skinny rectangle. Then, align it lower than the first rectangle.
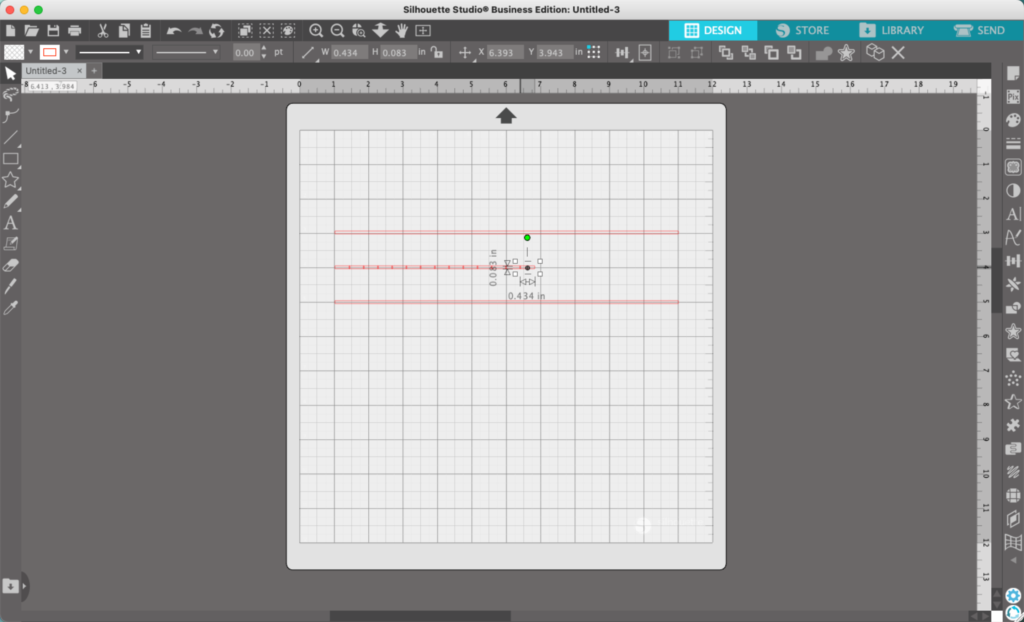
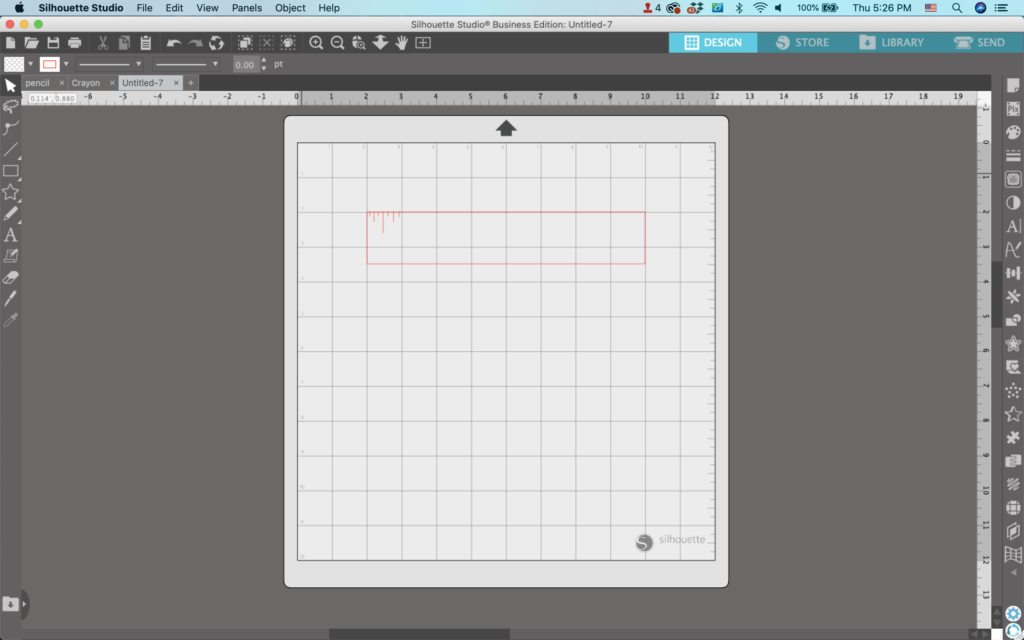
3. Use the ‘Draw a Rectangle’ tool again to draw a small rectangle between the two long rectangles.
4. Right click the small rectangle and duplicate it several times.
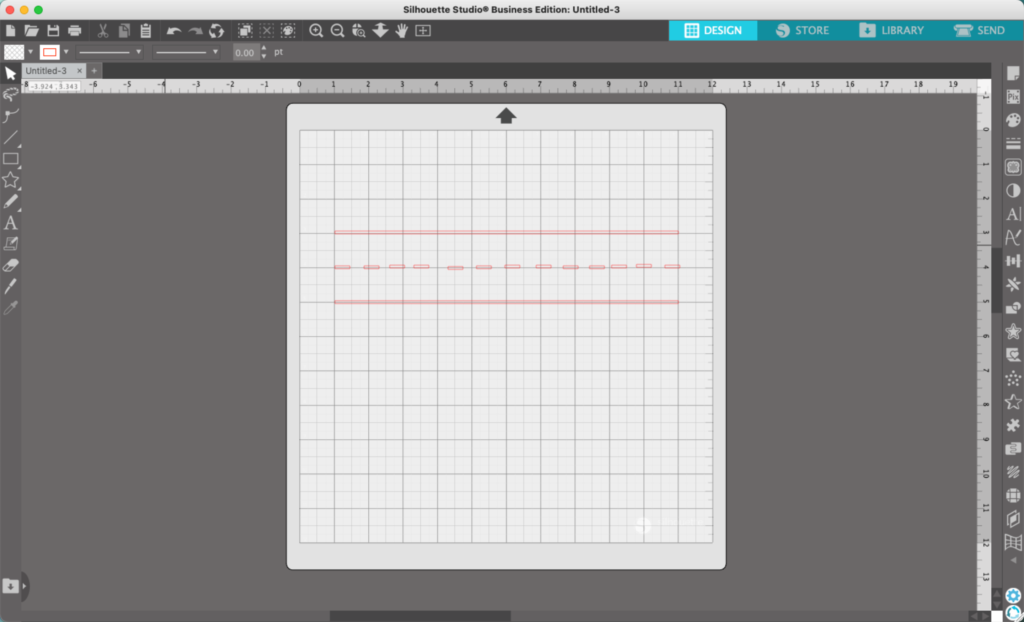
5. Drag the short rectangles apart. It doesn’t matter if they are spaced evenly or aligned perfectly – we will fix that in a minute.
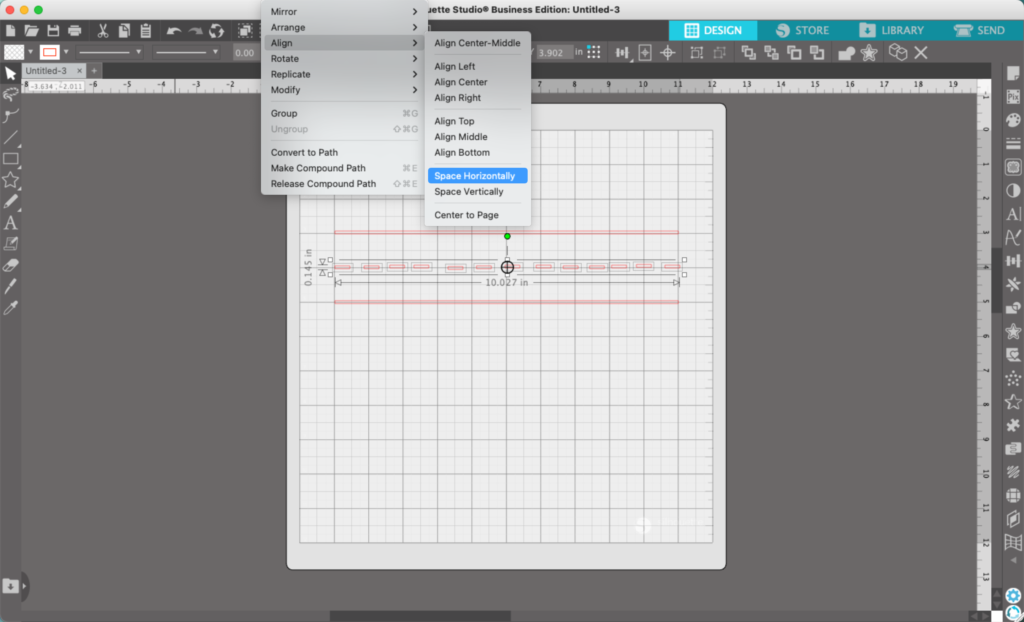
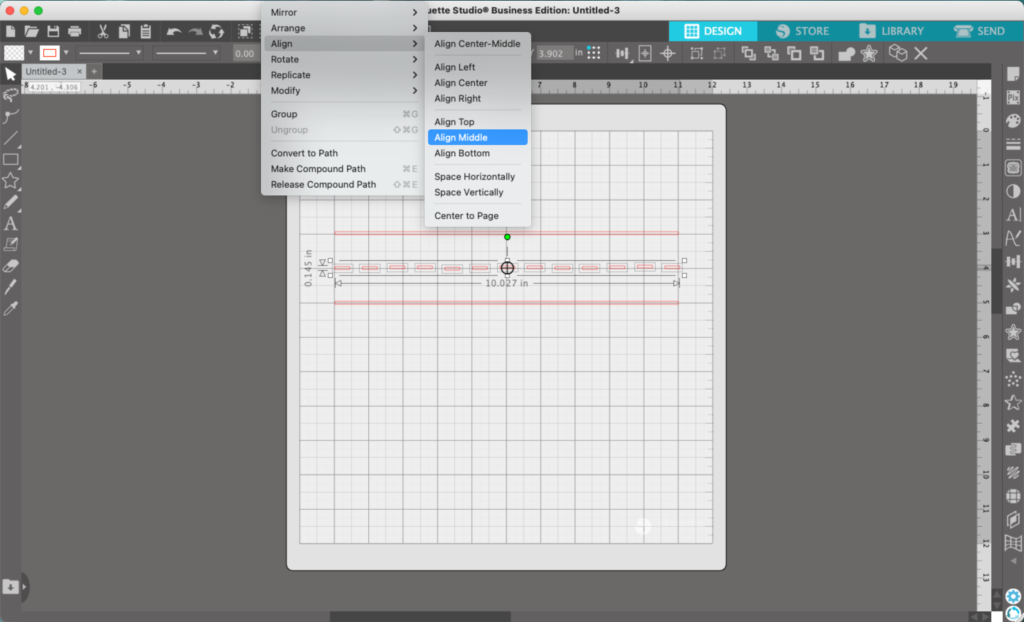
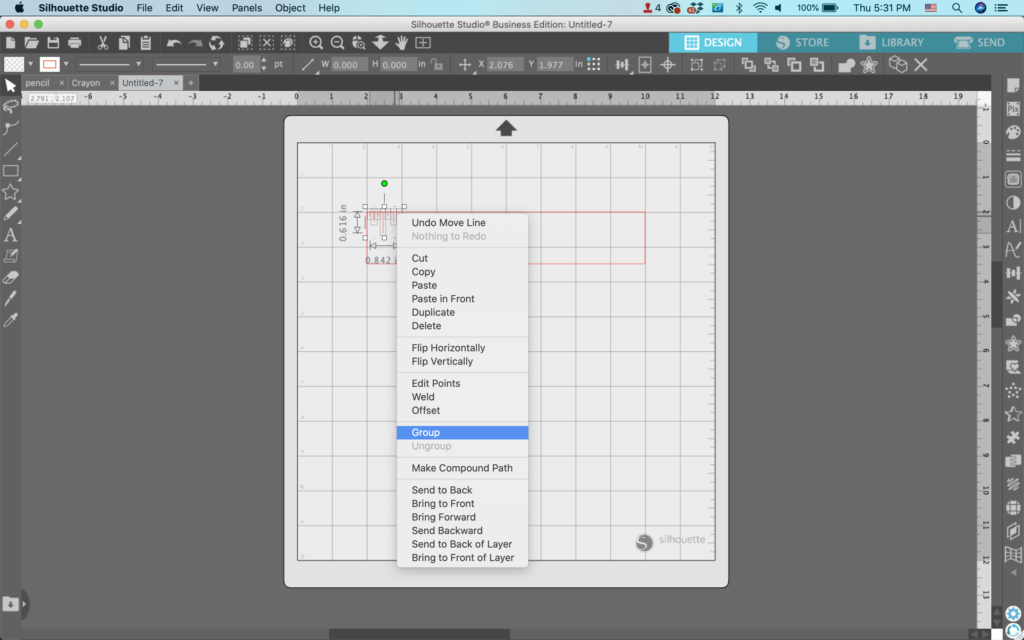
6. Select all the rectangles (my favorite way to select multiple elements is to draw a box around all the pieces). Then, navigate to ‘Object’, ‘Align’, ‘Space Horizontally’.
7. Return to ‘Object’, and ‘Align’, but this time choose ‘Align Middle’. The dashed lines will be lined up perfectly now. Right click and select ‘Group’ to lock together the dashes.
8. Add text of your choice. You could add a grade, teacher’s name, school name, and more. I used the Sleepy Sloth font.
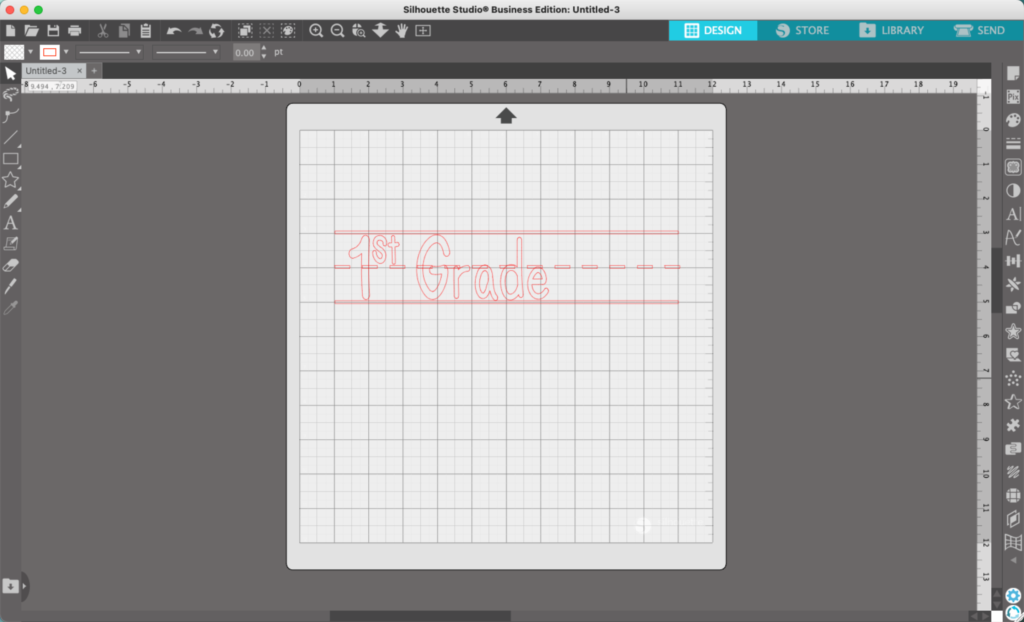
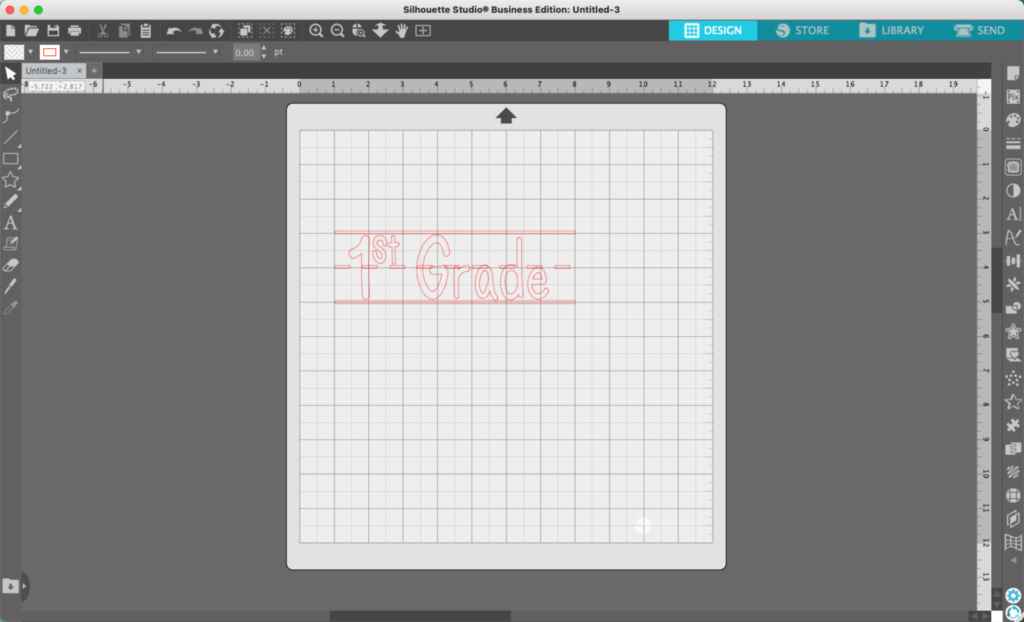
9. Use the knife tool to trim the line down to size.
10. (Optional) Depending what you use the final design for, you may want to subtract the text from the dashed lines.
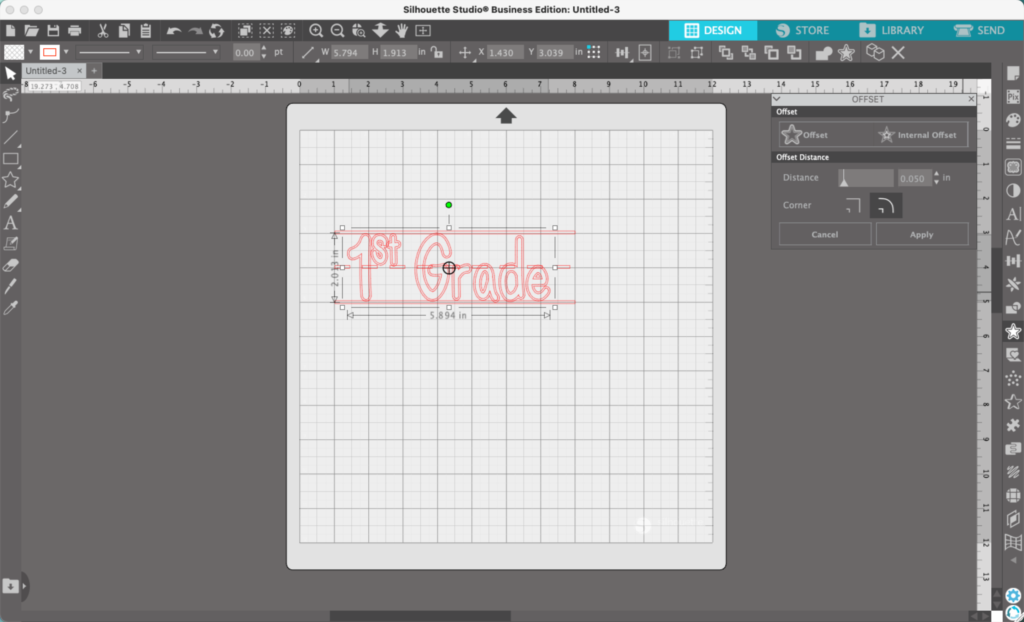
If so: Select your text, then navigate to ‘Panels’, then ‘Offset’. Perform a small offset of the text.
Then, select the dashed lines, then your offset, and go to ‘Object’, ‘Modify’, ‘Subtract’. Group everything back together as desired.
11. (Optional) Add color to the design and any additional details.
My final design looks like this:
Don’t Forget to Save!
To save your new SVG creation, head to ‘File’, ‘Save As’, ‘Save to Hard Drive’, name the file, then select ‘SVG’ from the dropdown menu.
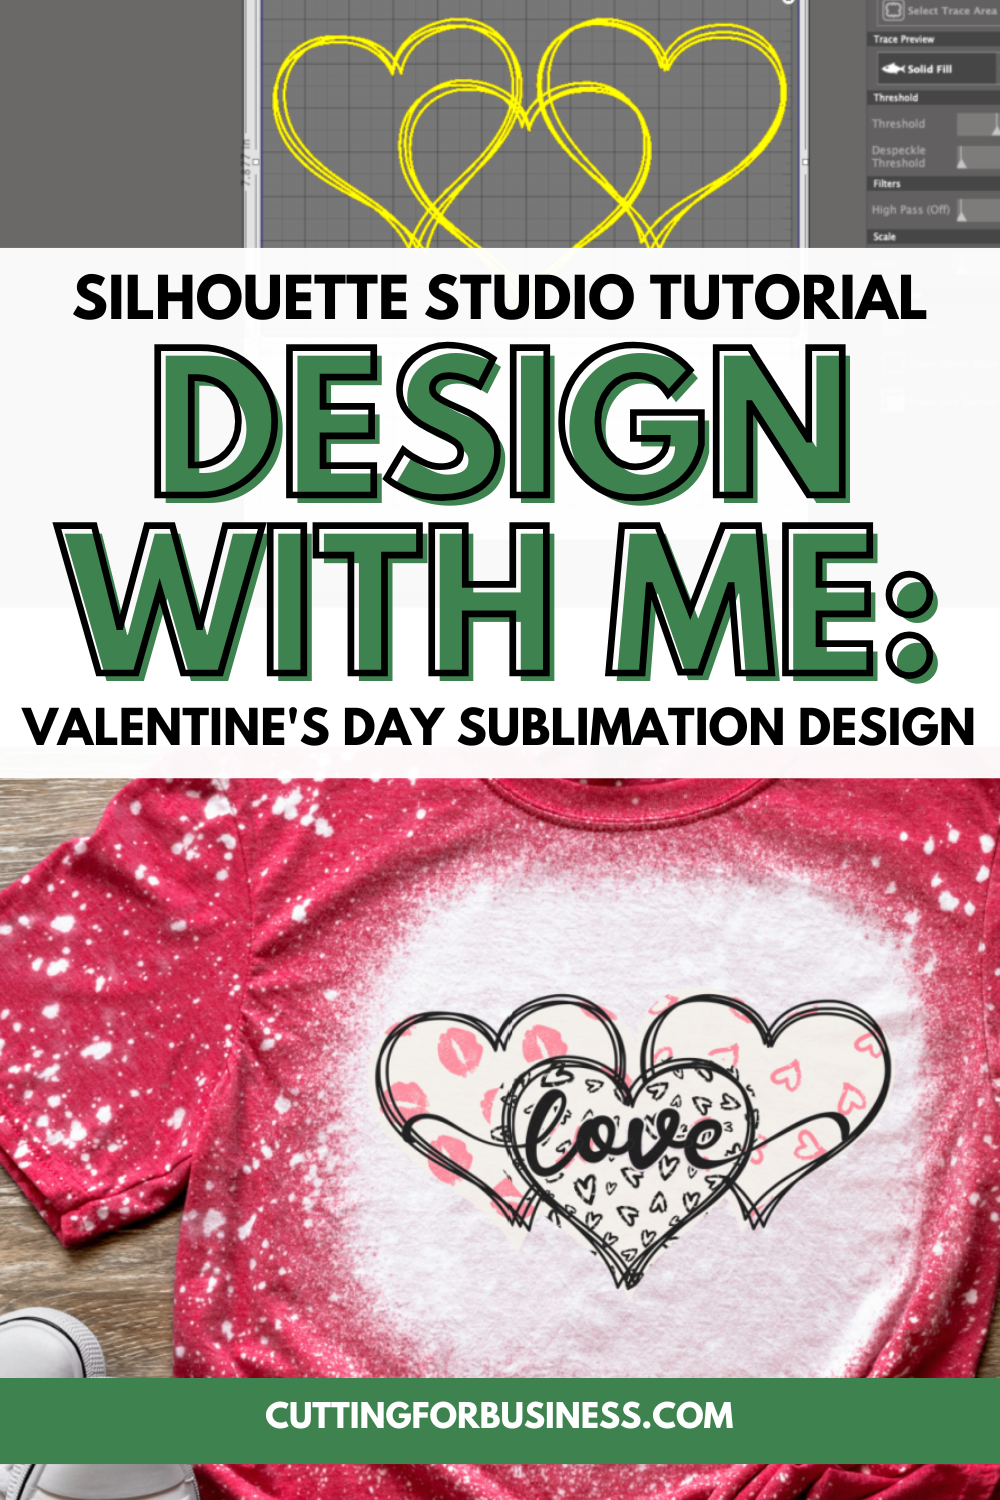
Valentine’s Day is soon and I love red, pink, hearts, and… sublimation! Let’s look at a tutorial today.
Tutorial: Valentine’s Day Sublimation Hearts
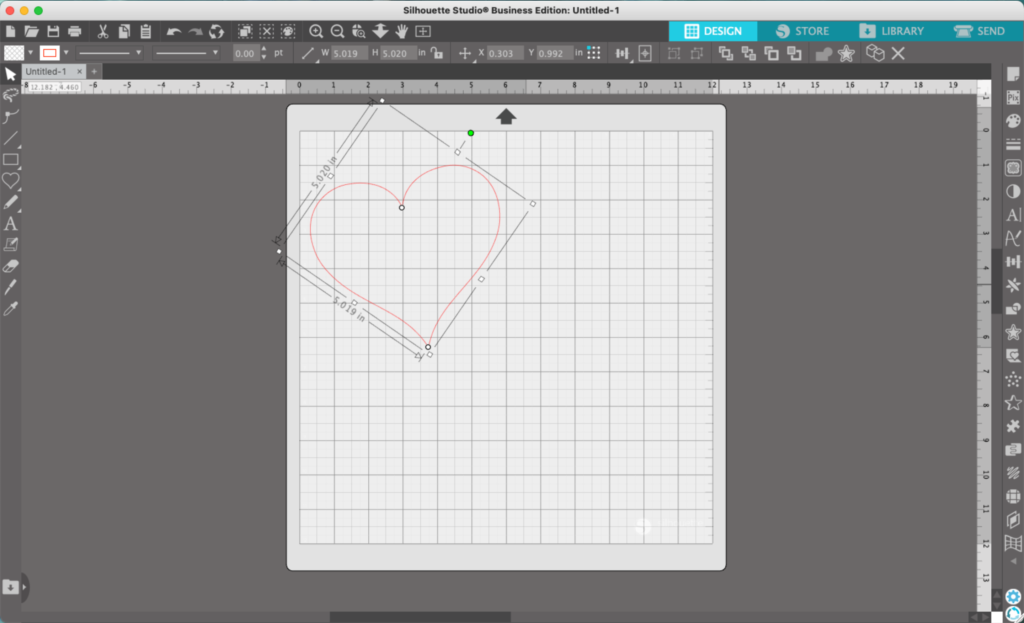
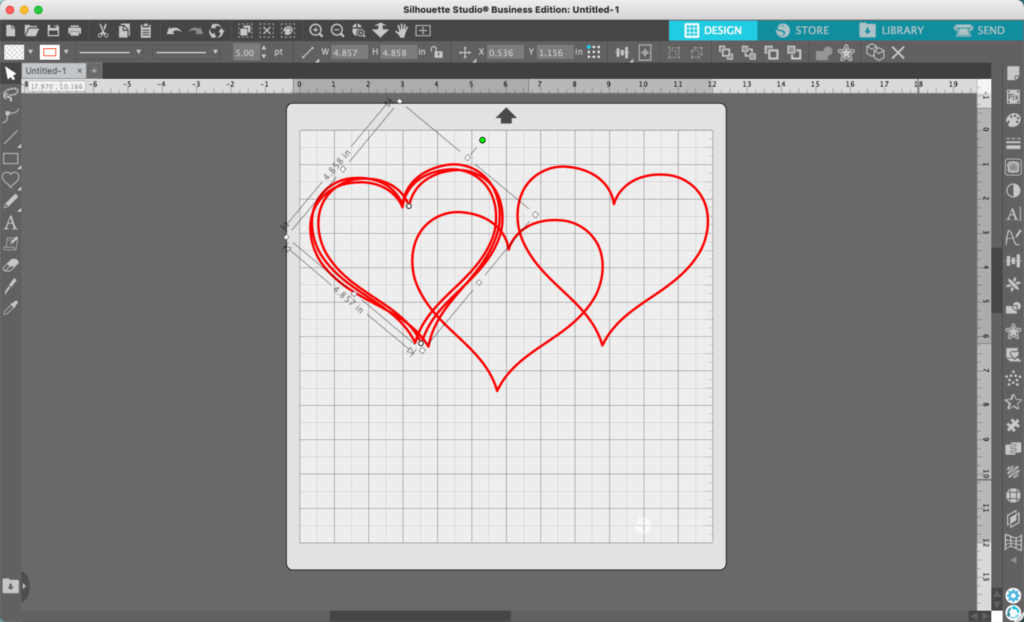
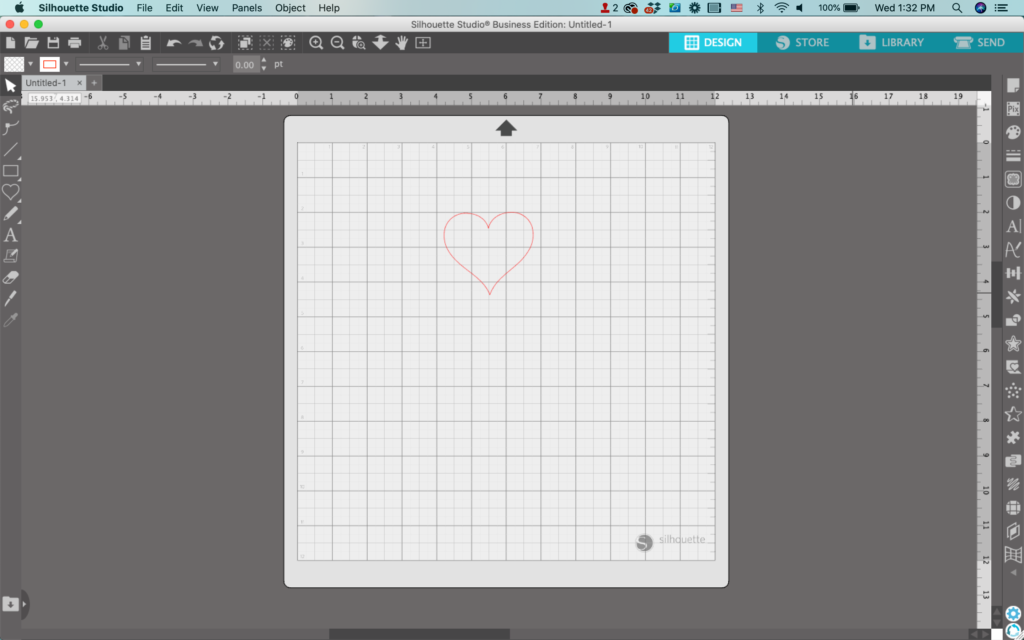
In Silhouette Studio, use Flexishapes to draw a heart.
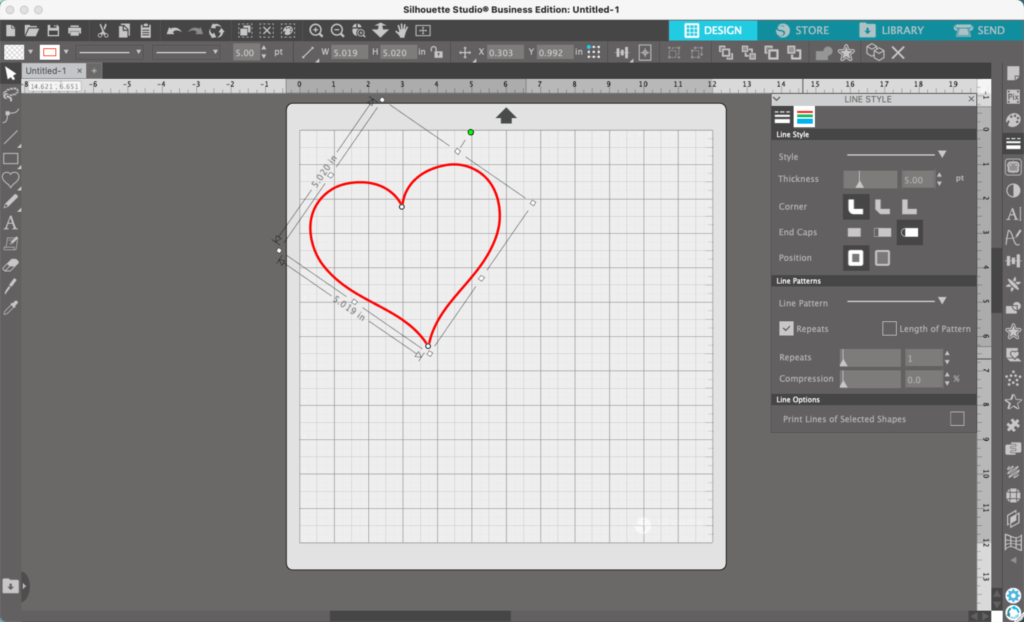
2. Navigate to ‘Panels’, ‘Line Style’, and thicken the line on your heart.
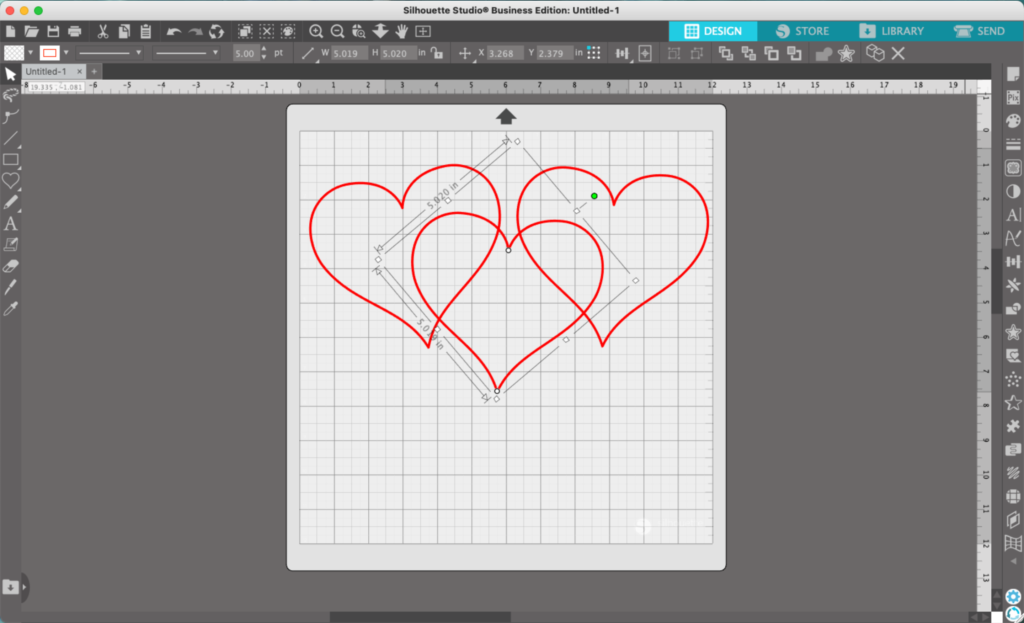
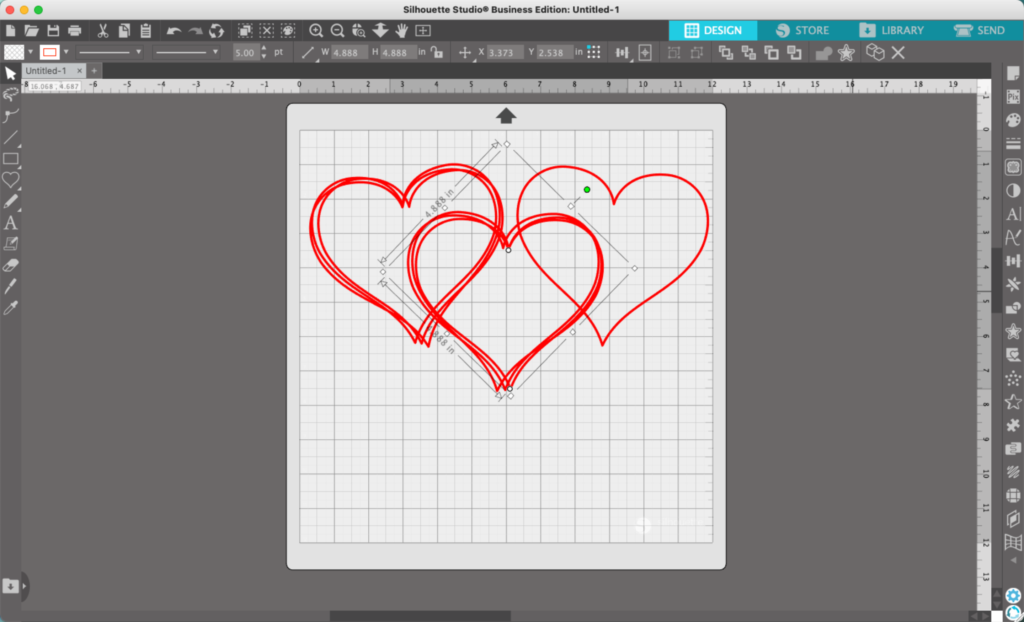
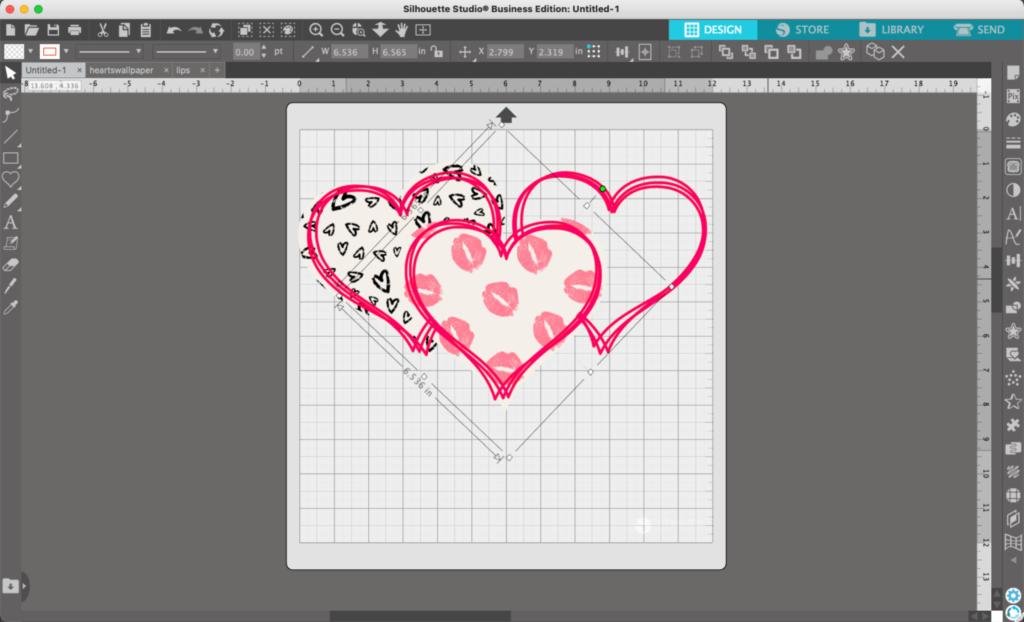
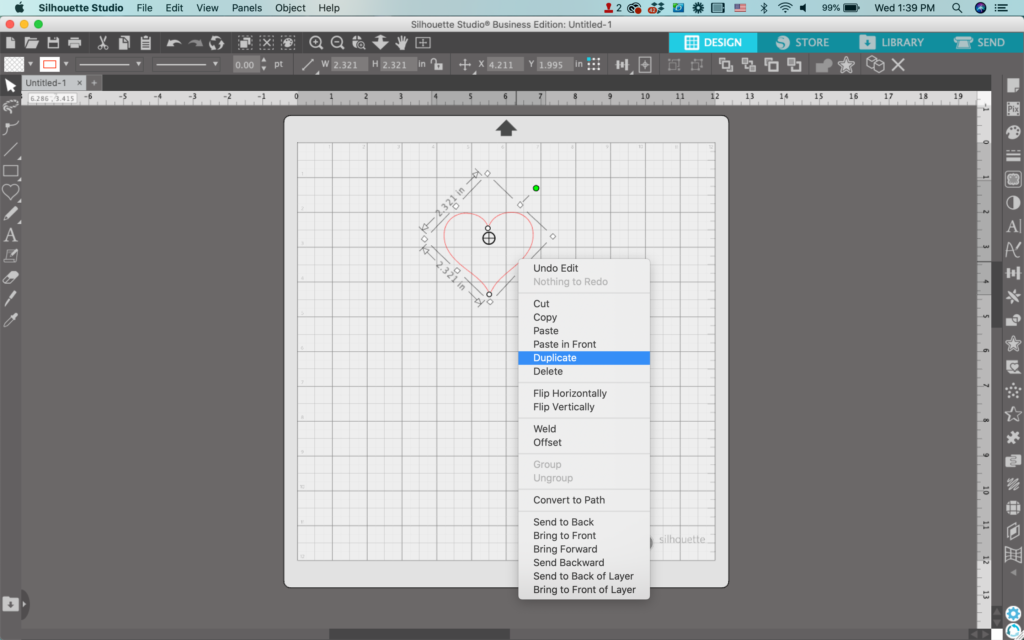
3. Duplicate the heart two times and arrange them as desired.
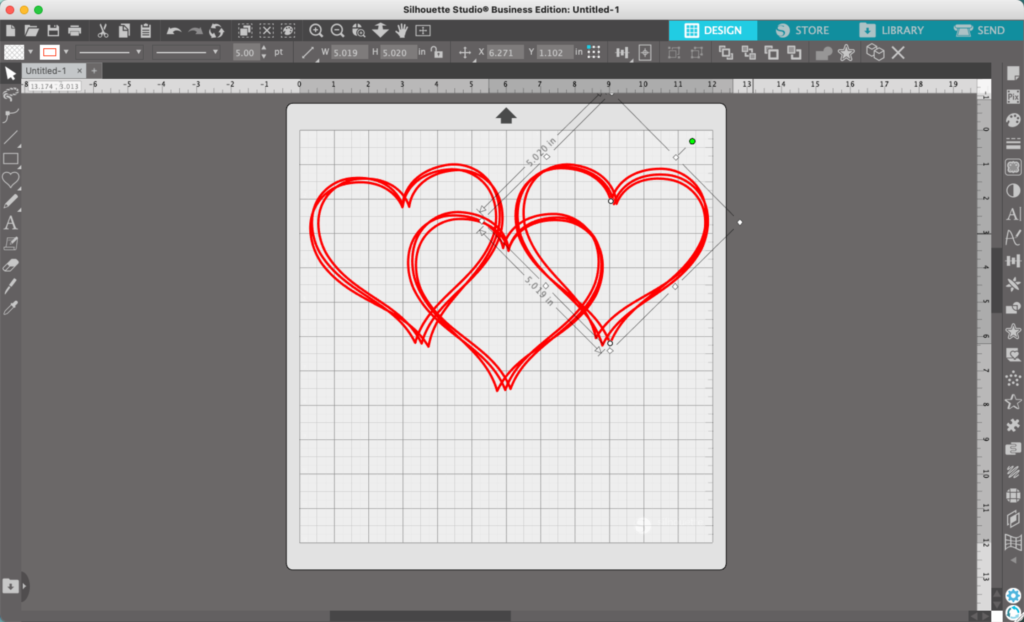
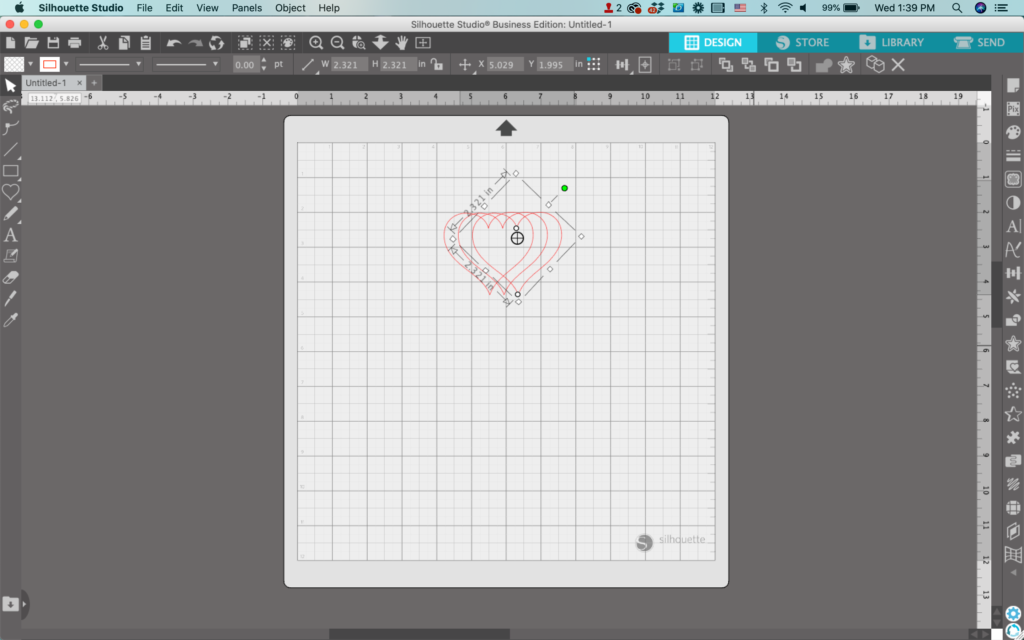
4. Now, duplicate your first heart and place the duplicates on top of the first heart.
5. Repeat step 4 for hearts 2 and 3.
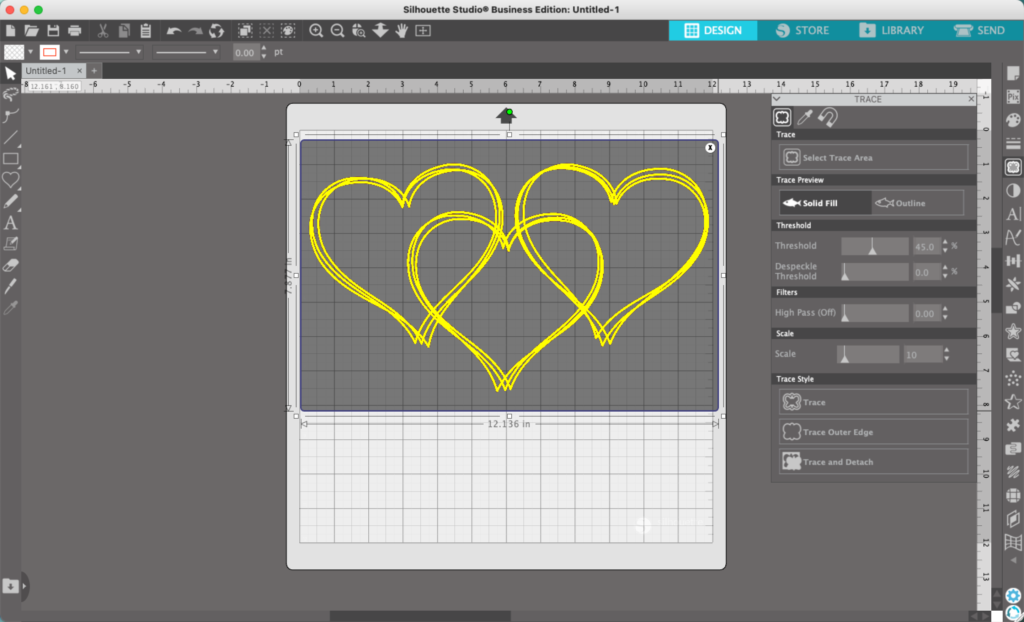
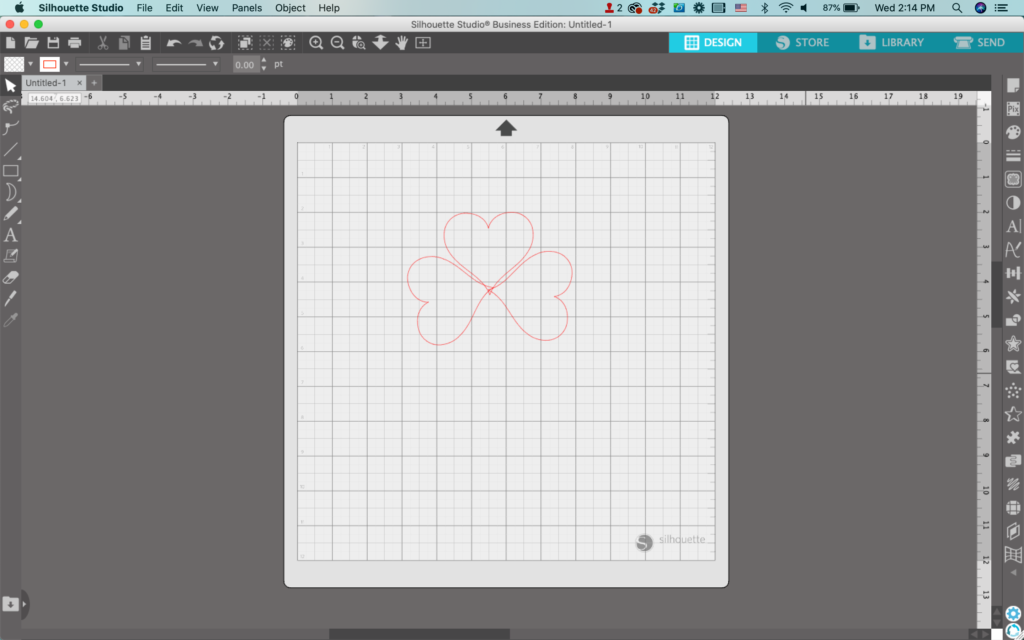
6. Navigate to ‘Panels’, ‘Trace’. Trace all the heart outlines you made.
7. Delete the original hearts.
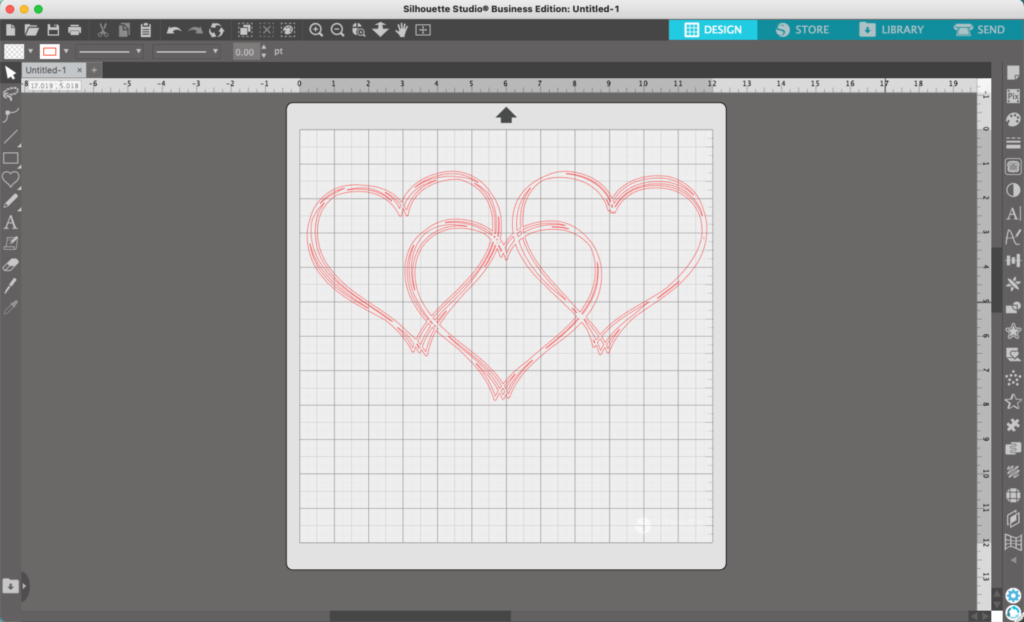
Now, there are several things you can do from here. The design can be cut now. It would look similar to this if cut from vinyl or paper:
But, you could use the knife tool and cut away the overlaps – then delete them.
And then, you could turn it into a sublimation design. Here’s how:
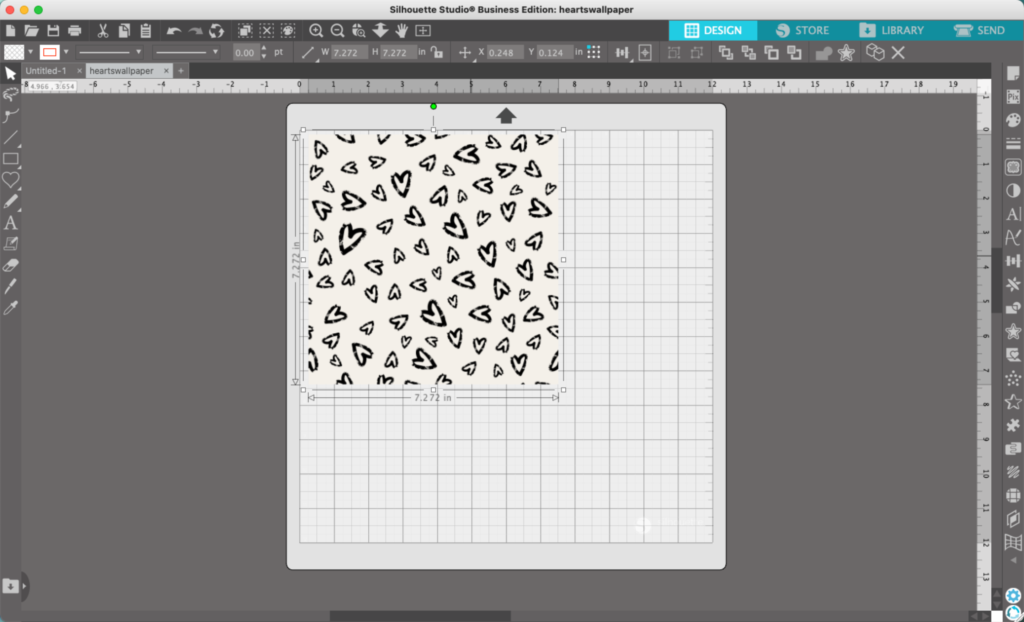
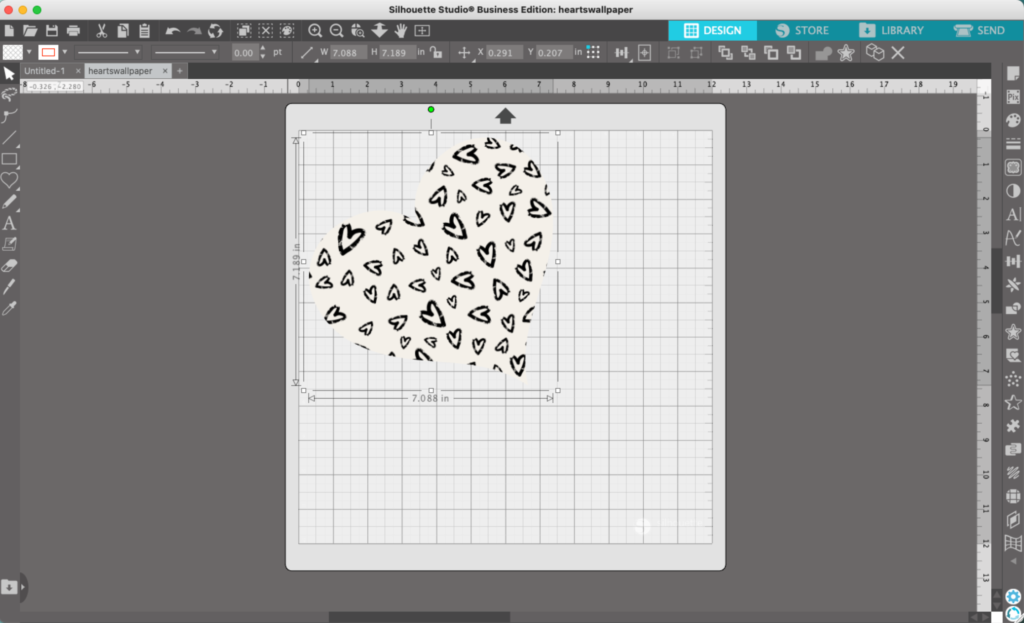
Open a wallpaper in Silhouette Studio. I downloaded one from Adobe Stock.
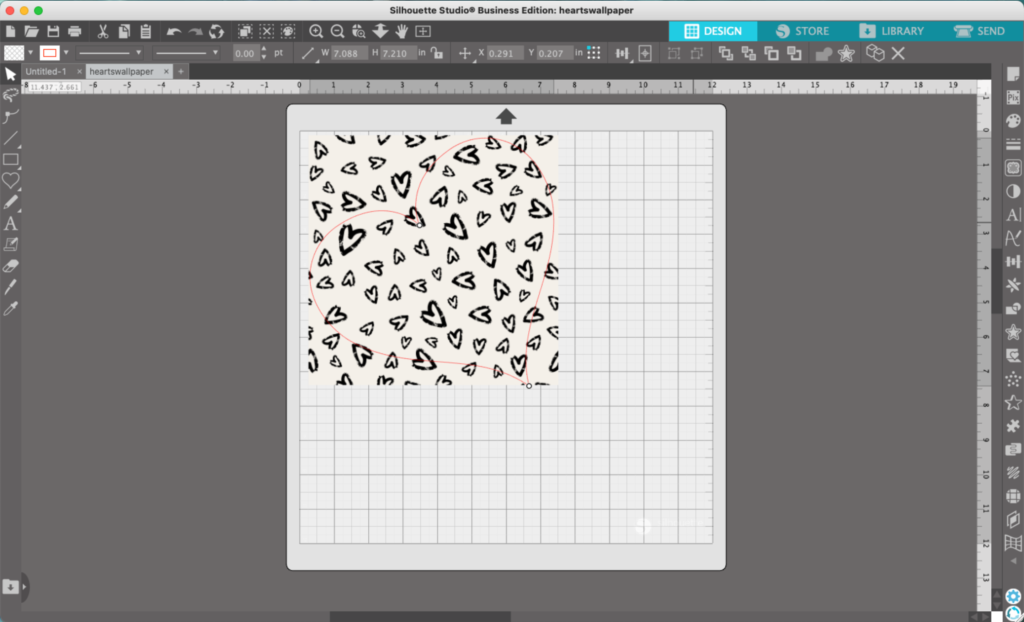
2. Use Flexishapes to draw a heart, roughly the same size of the other hearts.
3. Select the heart and the wallpaper. Then, navigate to ‘Object’, ‘Modify’, and ‘Crop’.
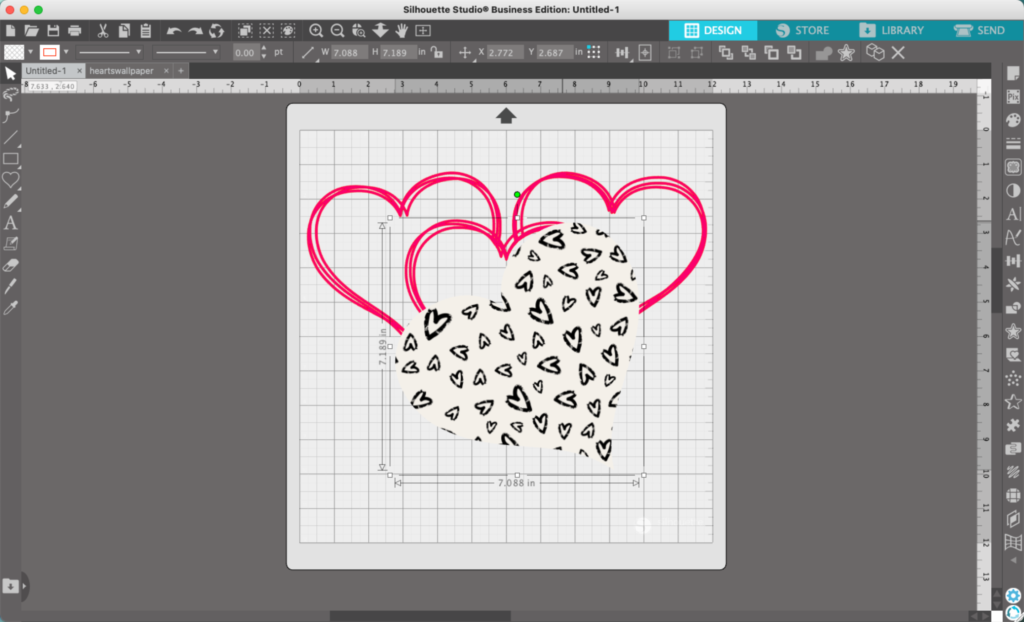
4. Copy and paste the heart onto your design.
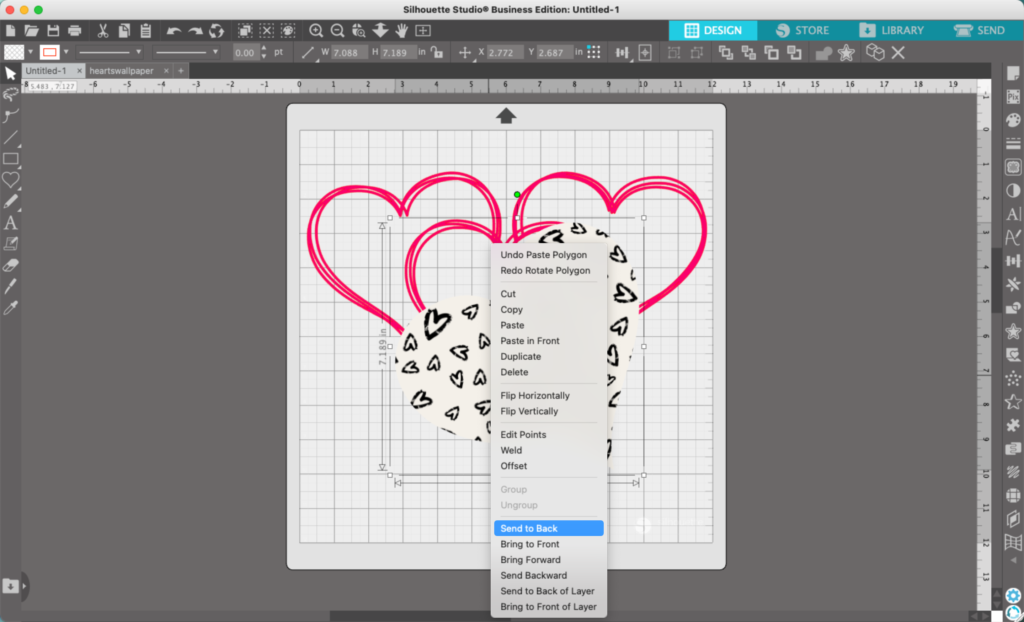
5. Right click the wallpaper heart, and select ‘Send to Back’.
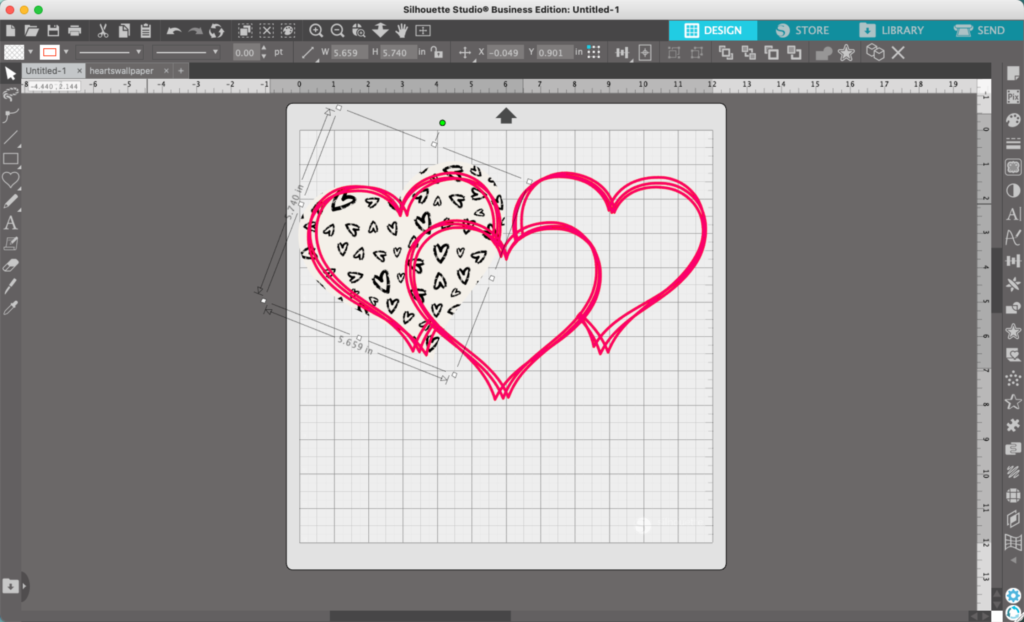
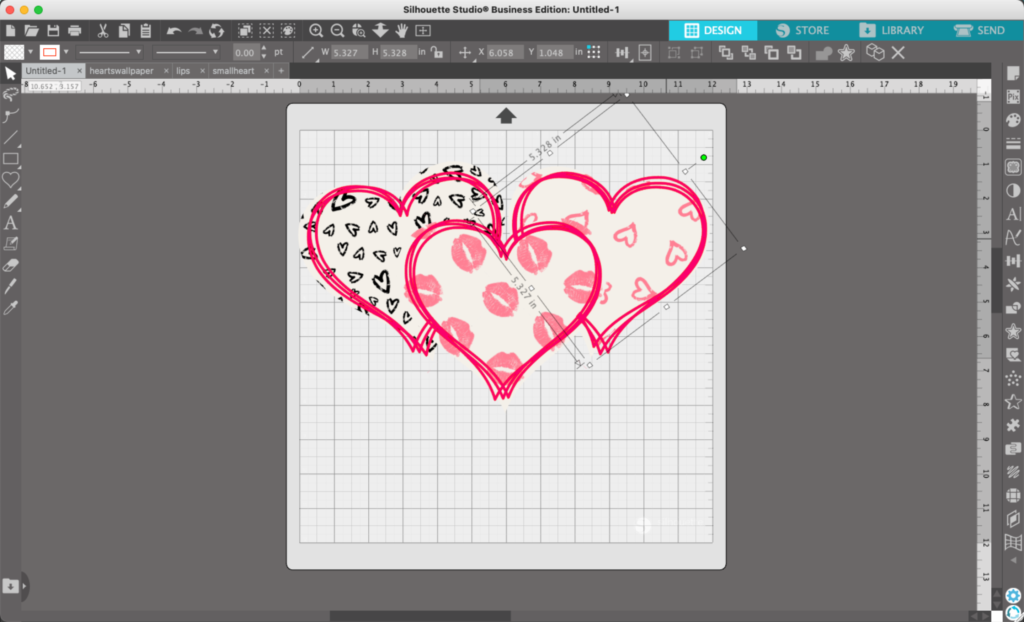
6. Resize and move the wallpaper heart behind one of the hearts.
7. Repeat steps 1 to 6 for the remaining hearts.
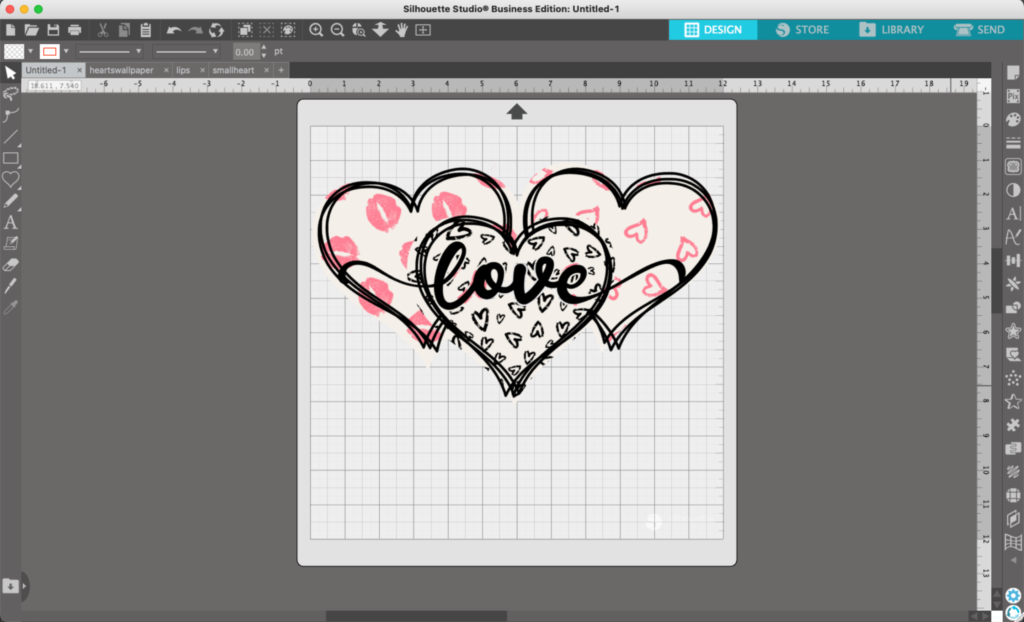
8. Change the colors or add text to finish the design. (You’ll also note that I moved the wallpaper hearts around.) If the font looks familiar, it is Watershed.
That’s it! Your design is ready to go!
Don’t Forget to Save!
To save your new SVG creation, head to ‘File’, ‘Save As’, ‘Save to Hard Drive’, name the file, then select ‘SVG’ from the dropdown menu.
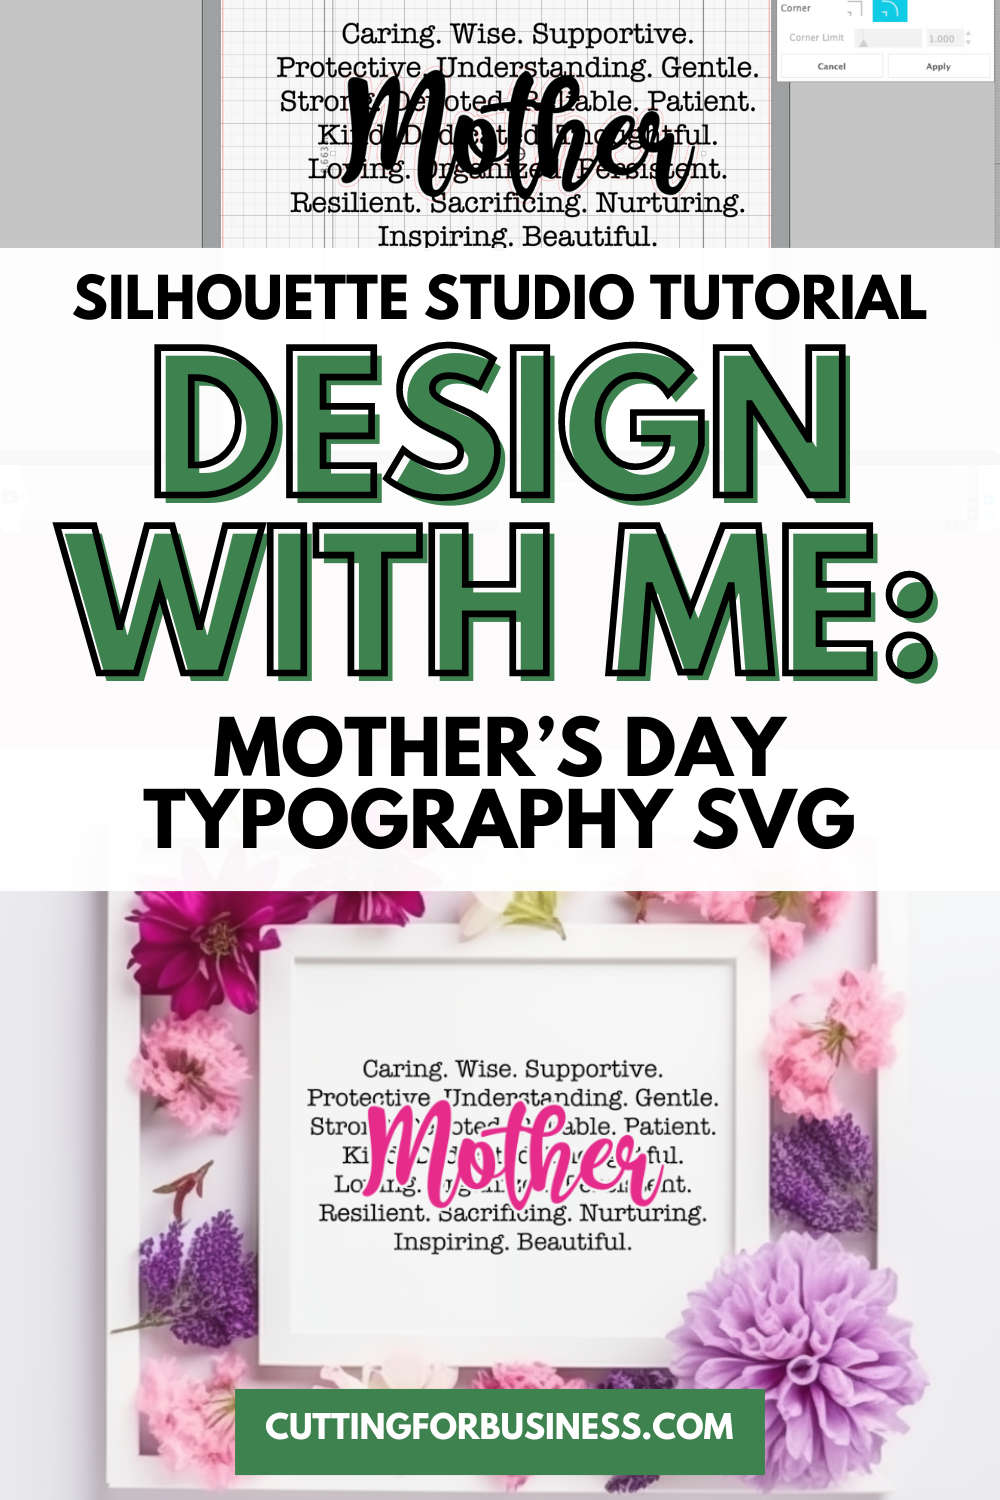
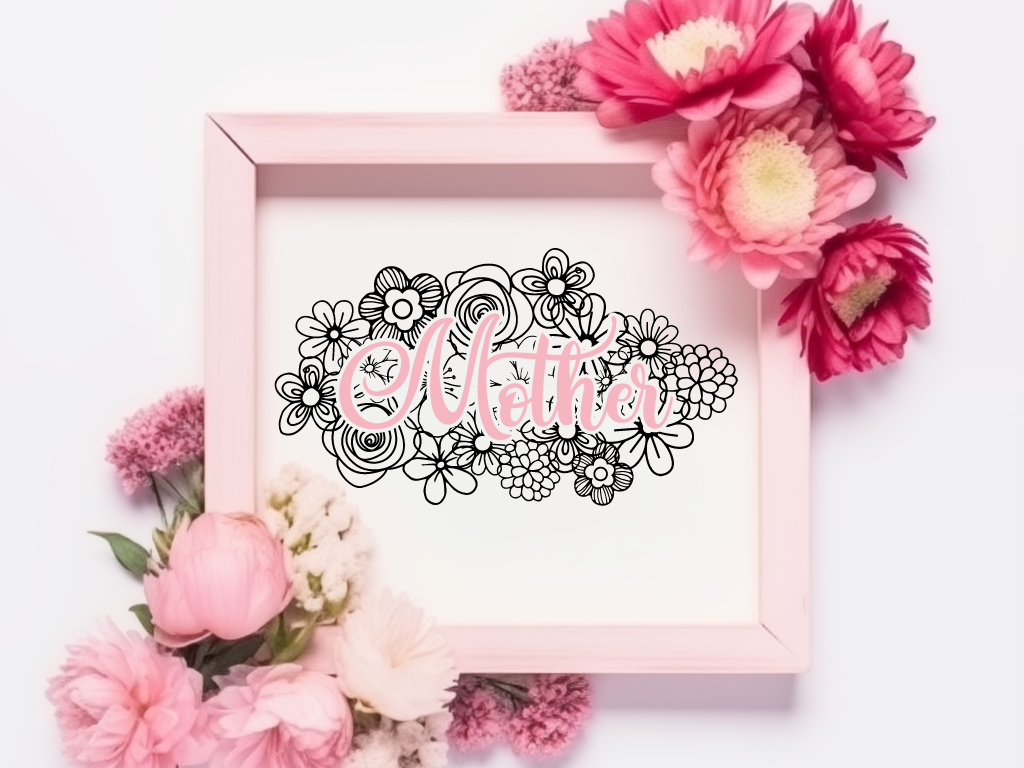
Mother’s Day is coming, so let’s take a few minutes to design a Mother’s Day SVG.
Before you start your Mother’s Day SVG, you’ll need a list of words related to mothers and qualities they possess. Here’s what ChatGPT came up with.
Tutorial: Mother’s Day Typography SVG
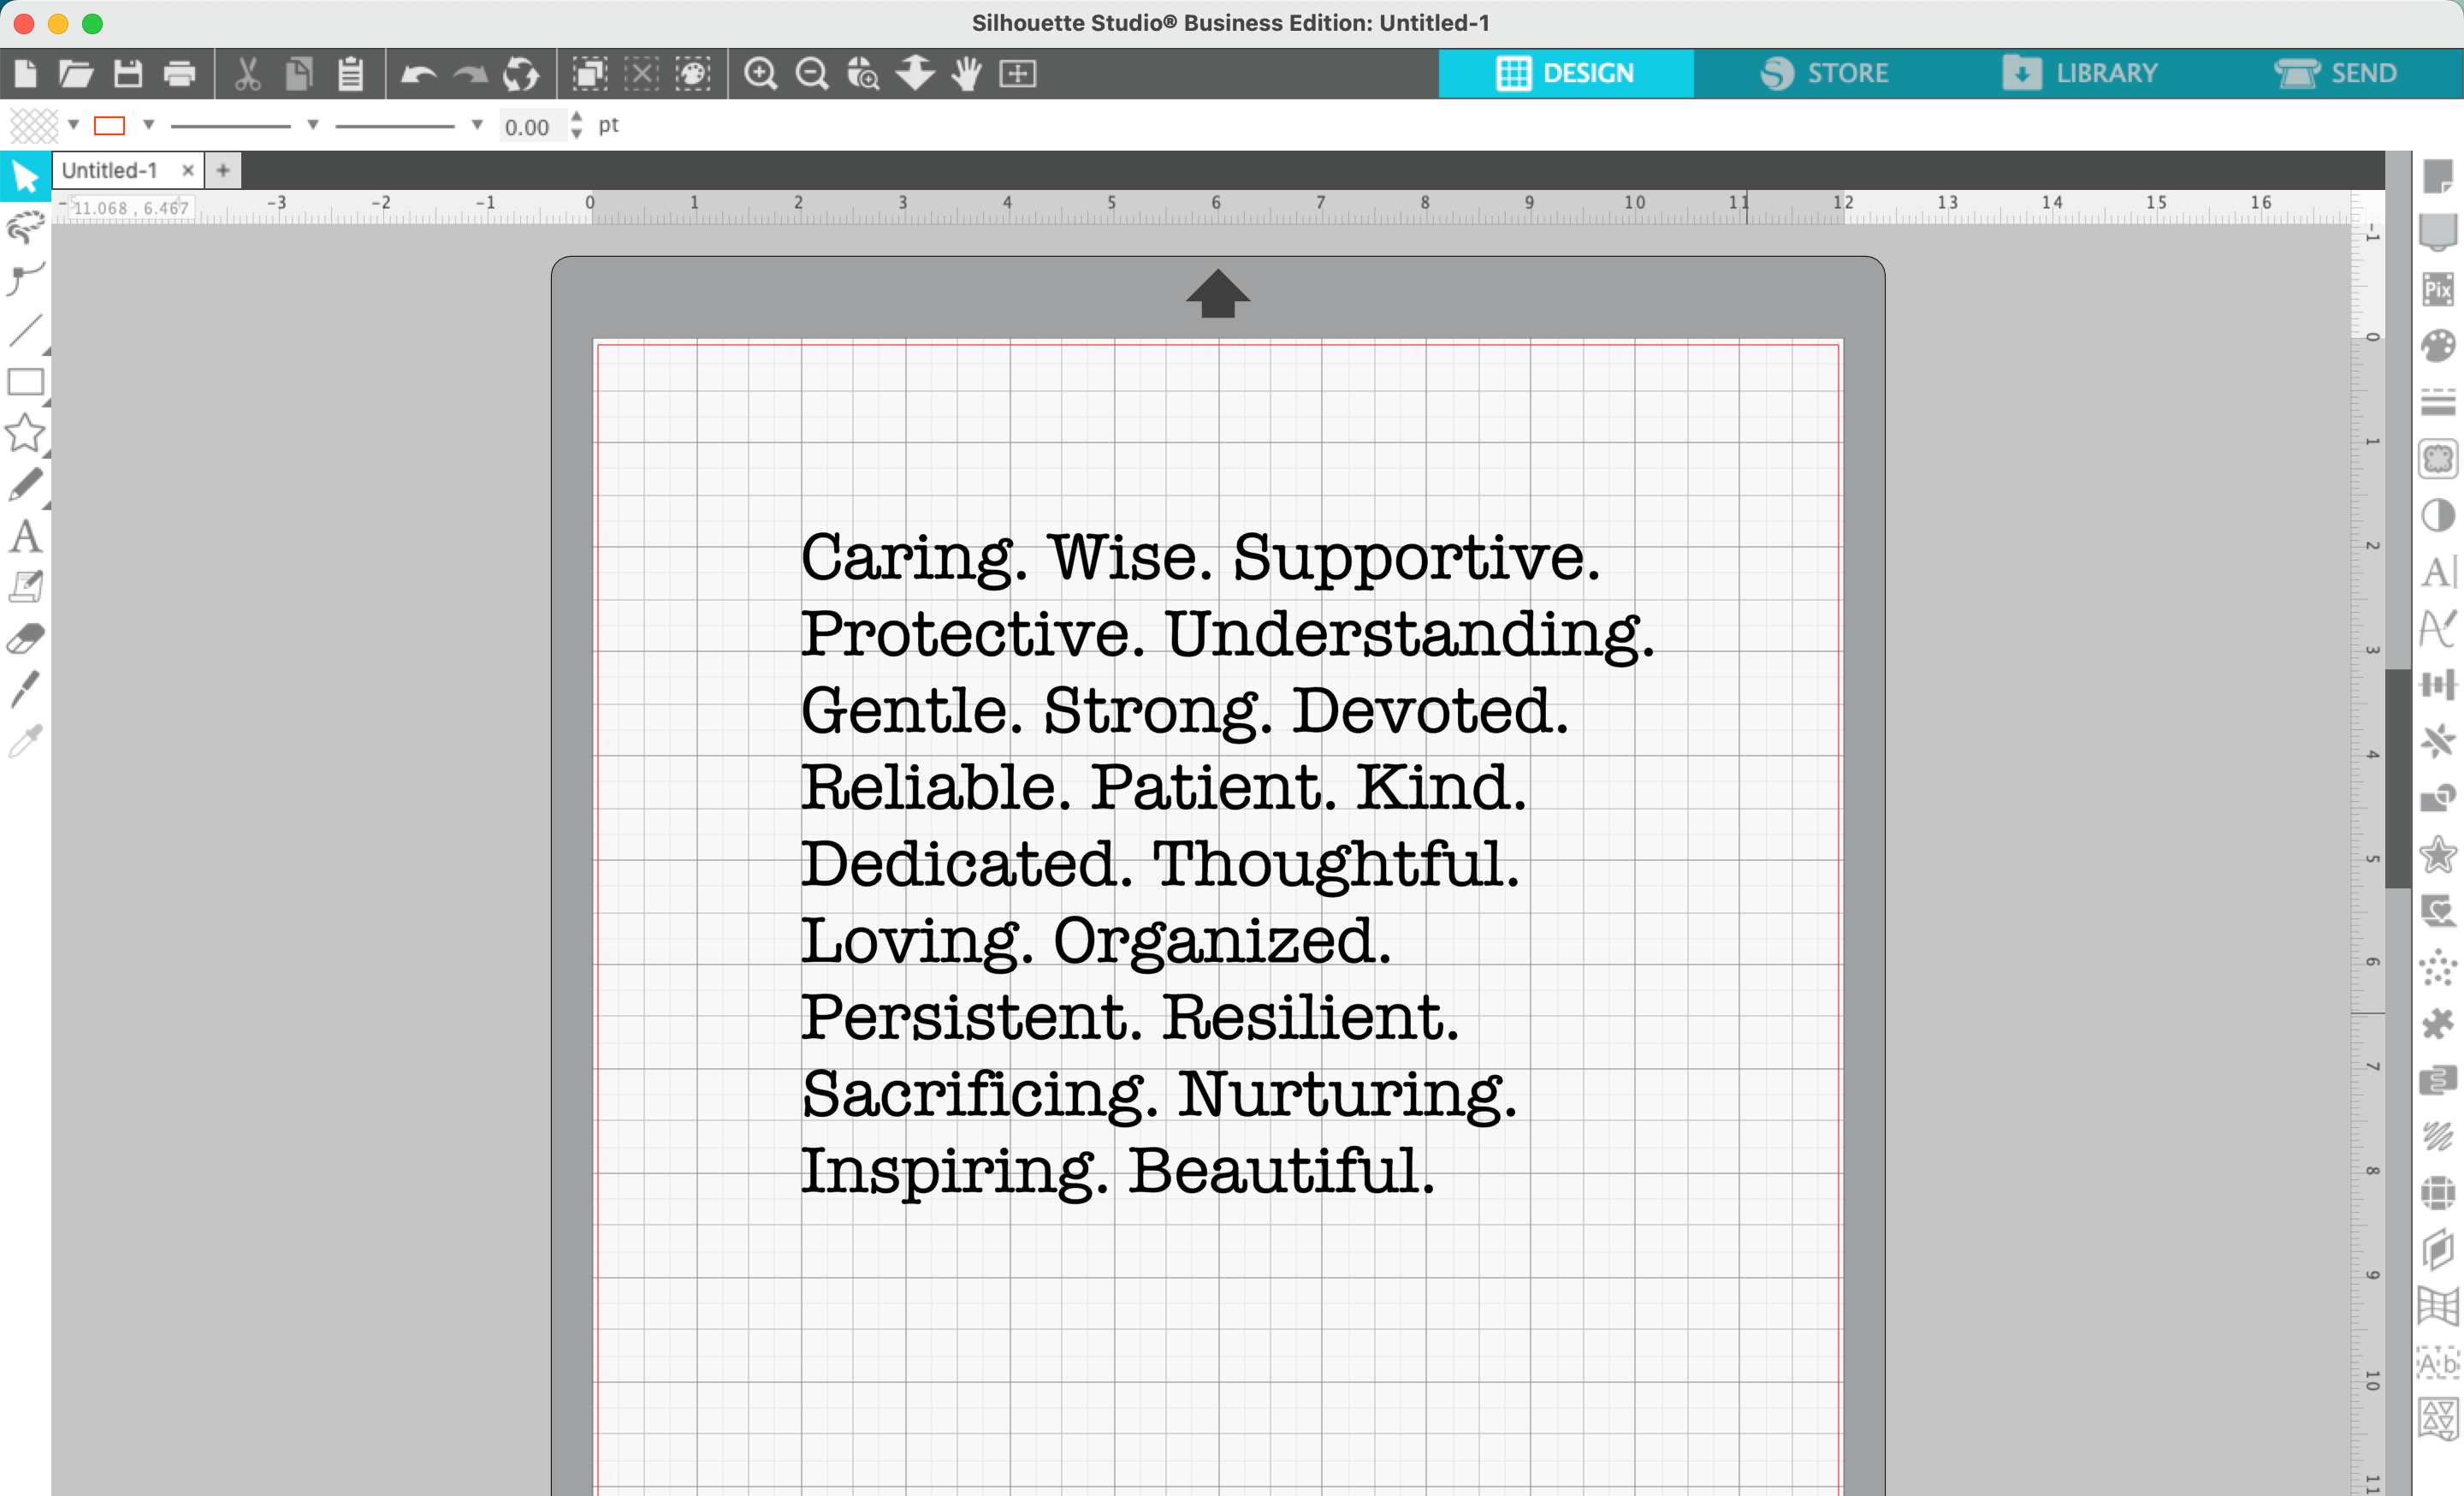
In Silhouette Studio, type about 20 of your favorite words from the ChatGPT list in a font of your choice. I used a typewriter font.
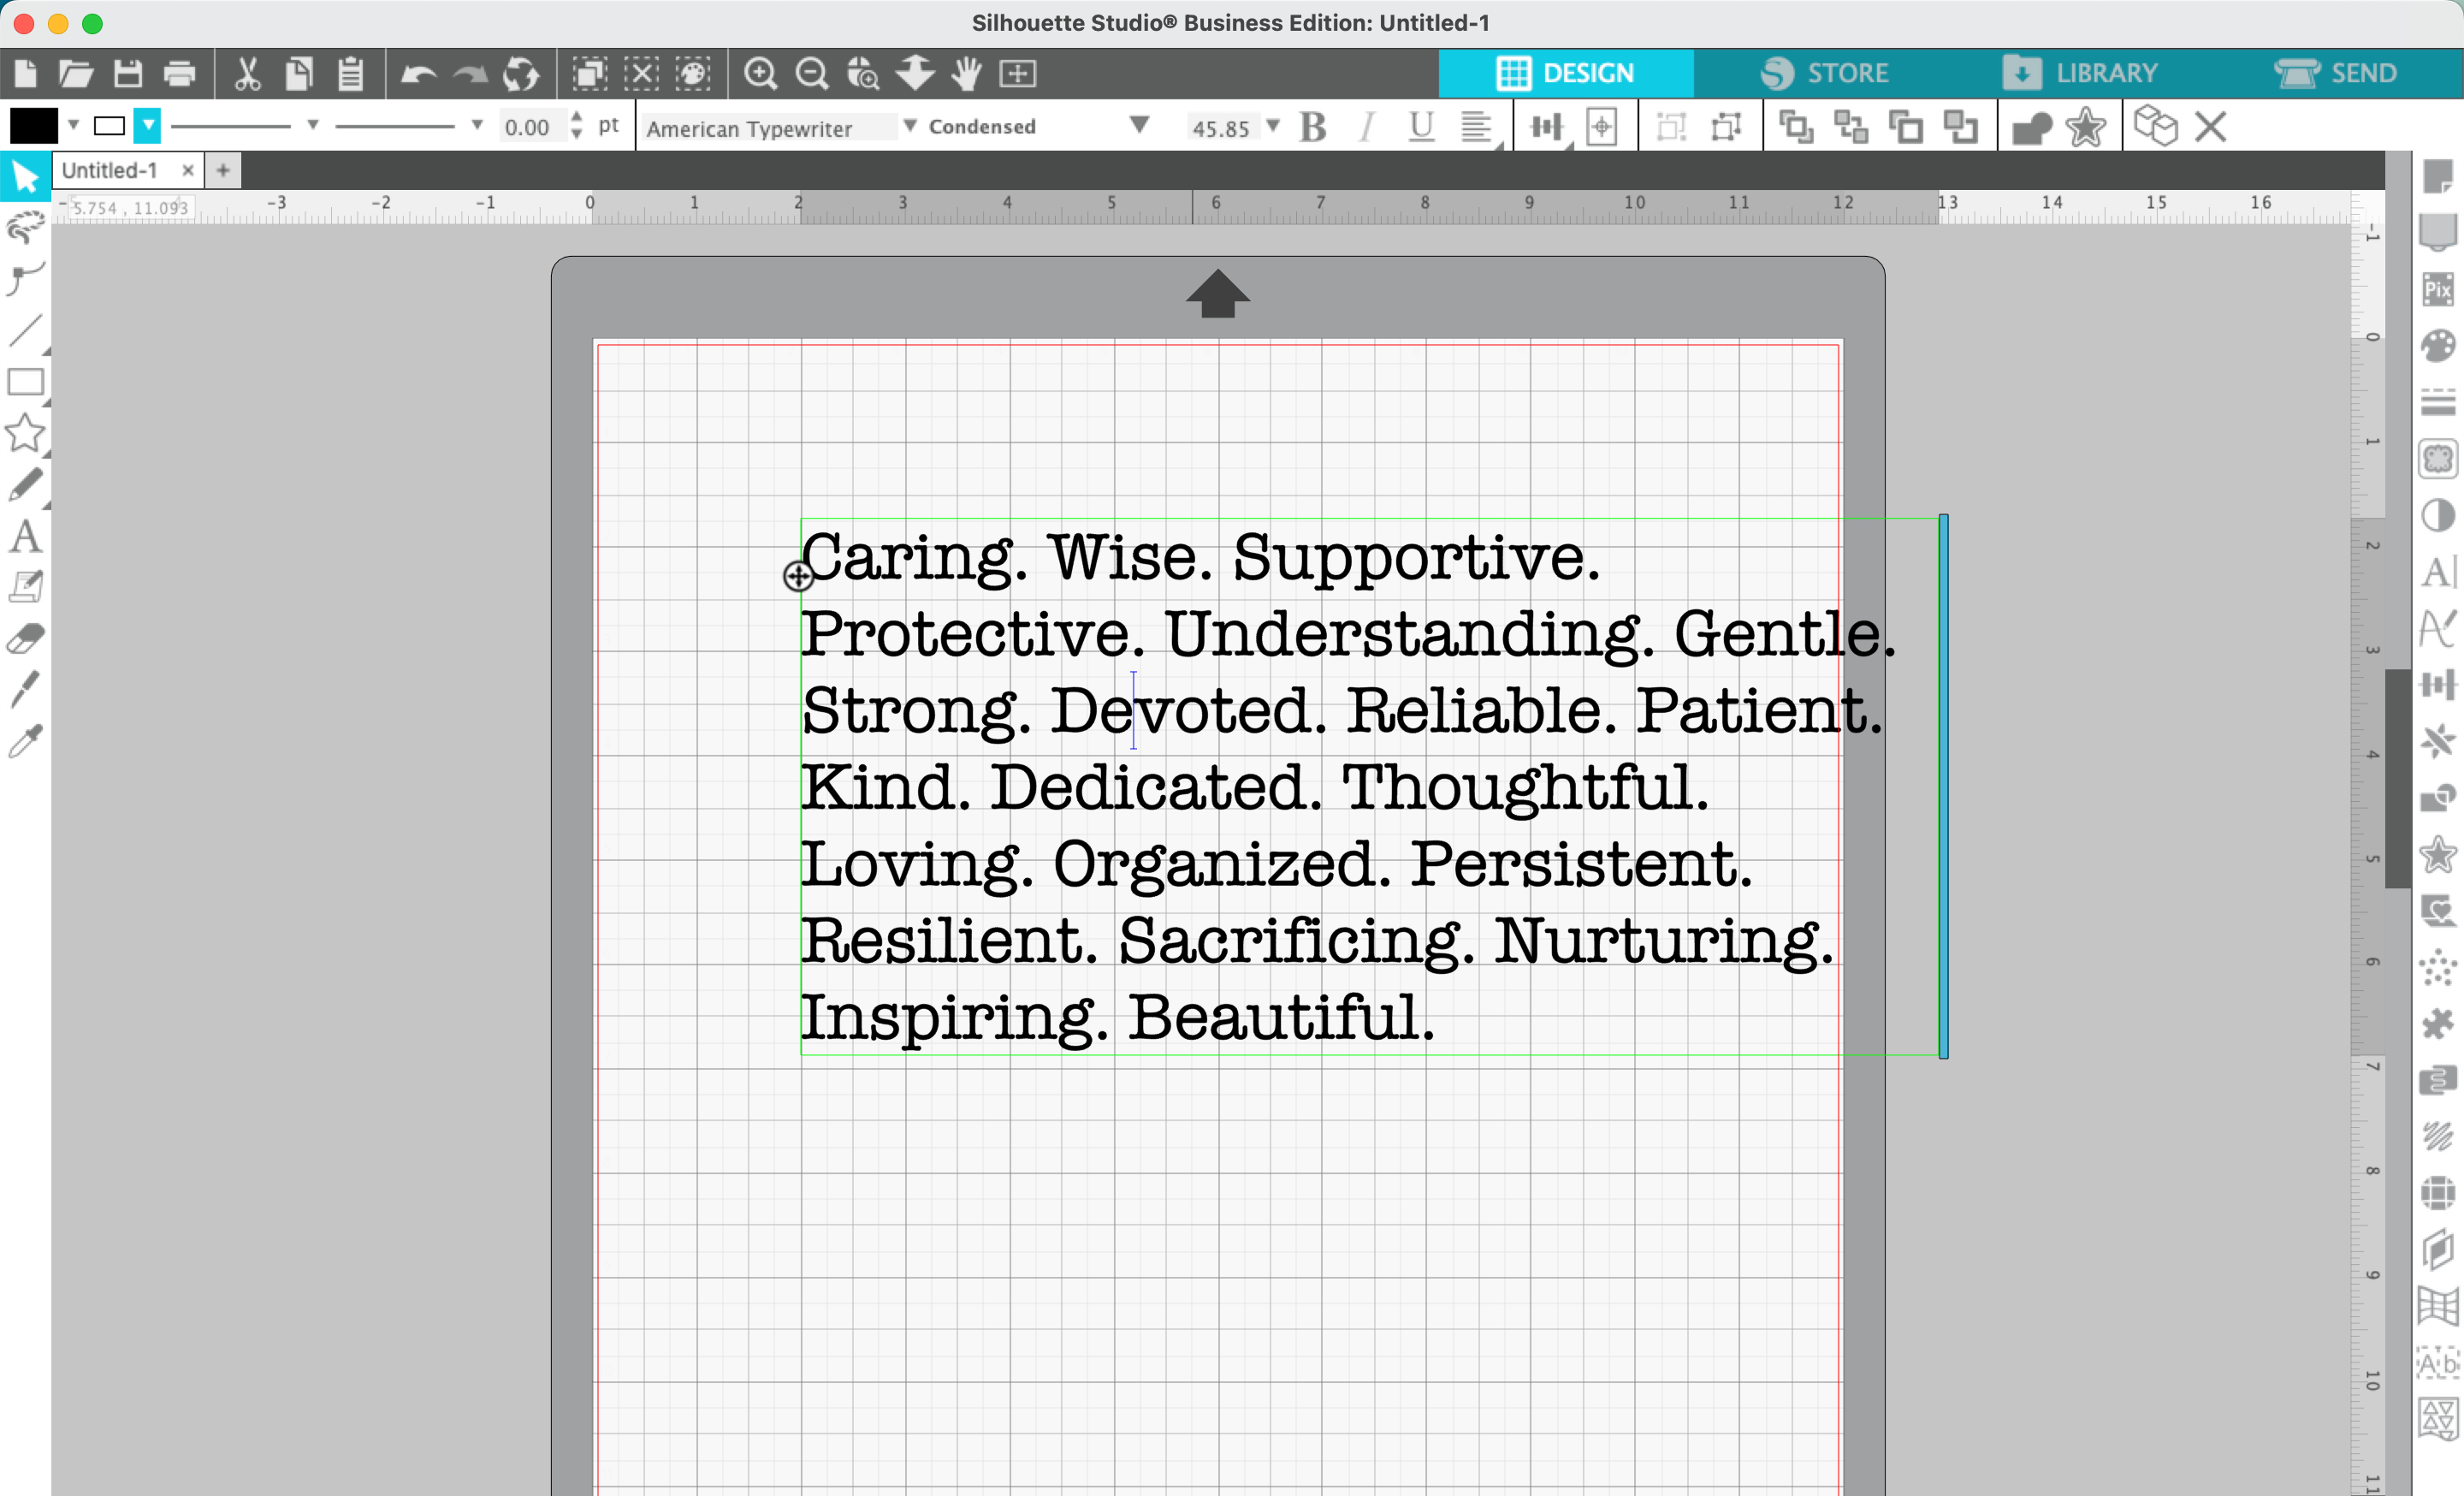
2. Double click on the words to bring up the blue bar that allows you to resize the text box. Resize the text box to arrange the words as you’d like.
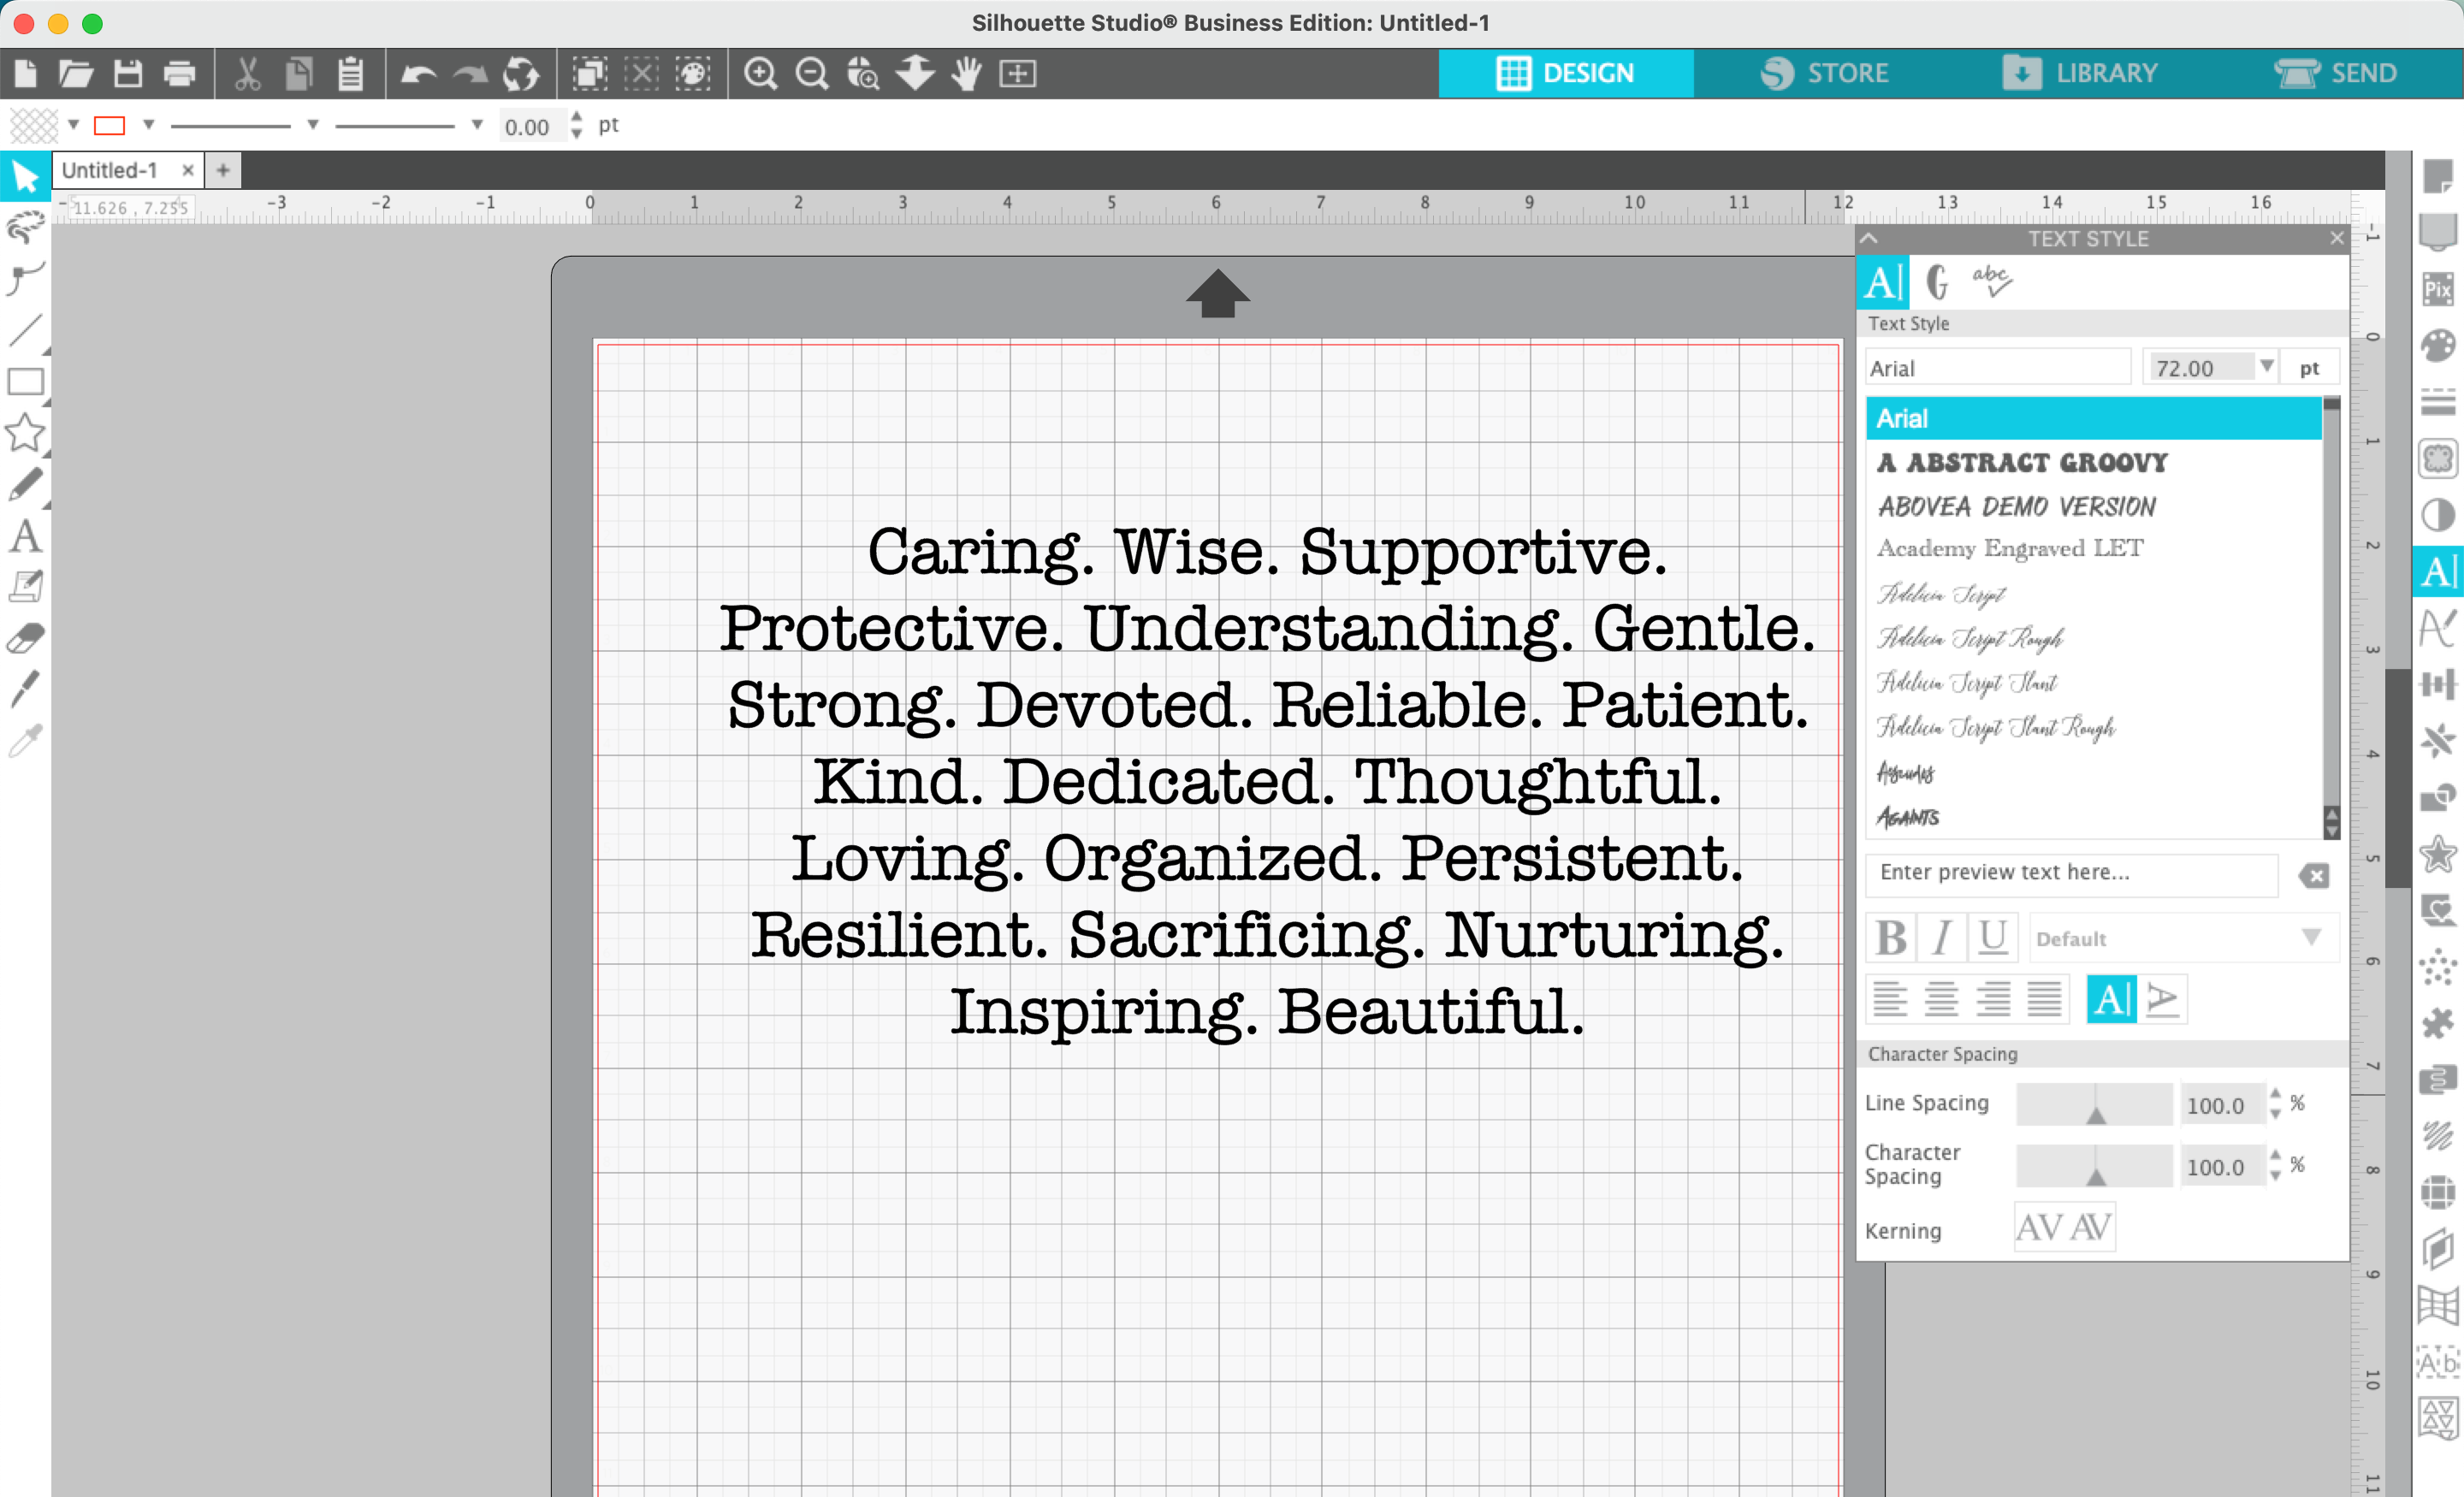
3. Navigate to ‘Panels’, ‘Text Style’. Adjust the alignment (left, right, or centered), the line spacing, or the character spacing.
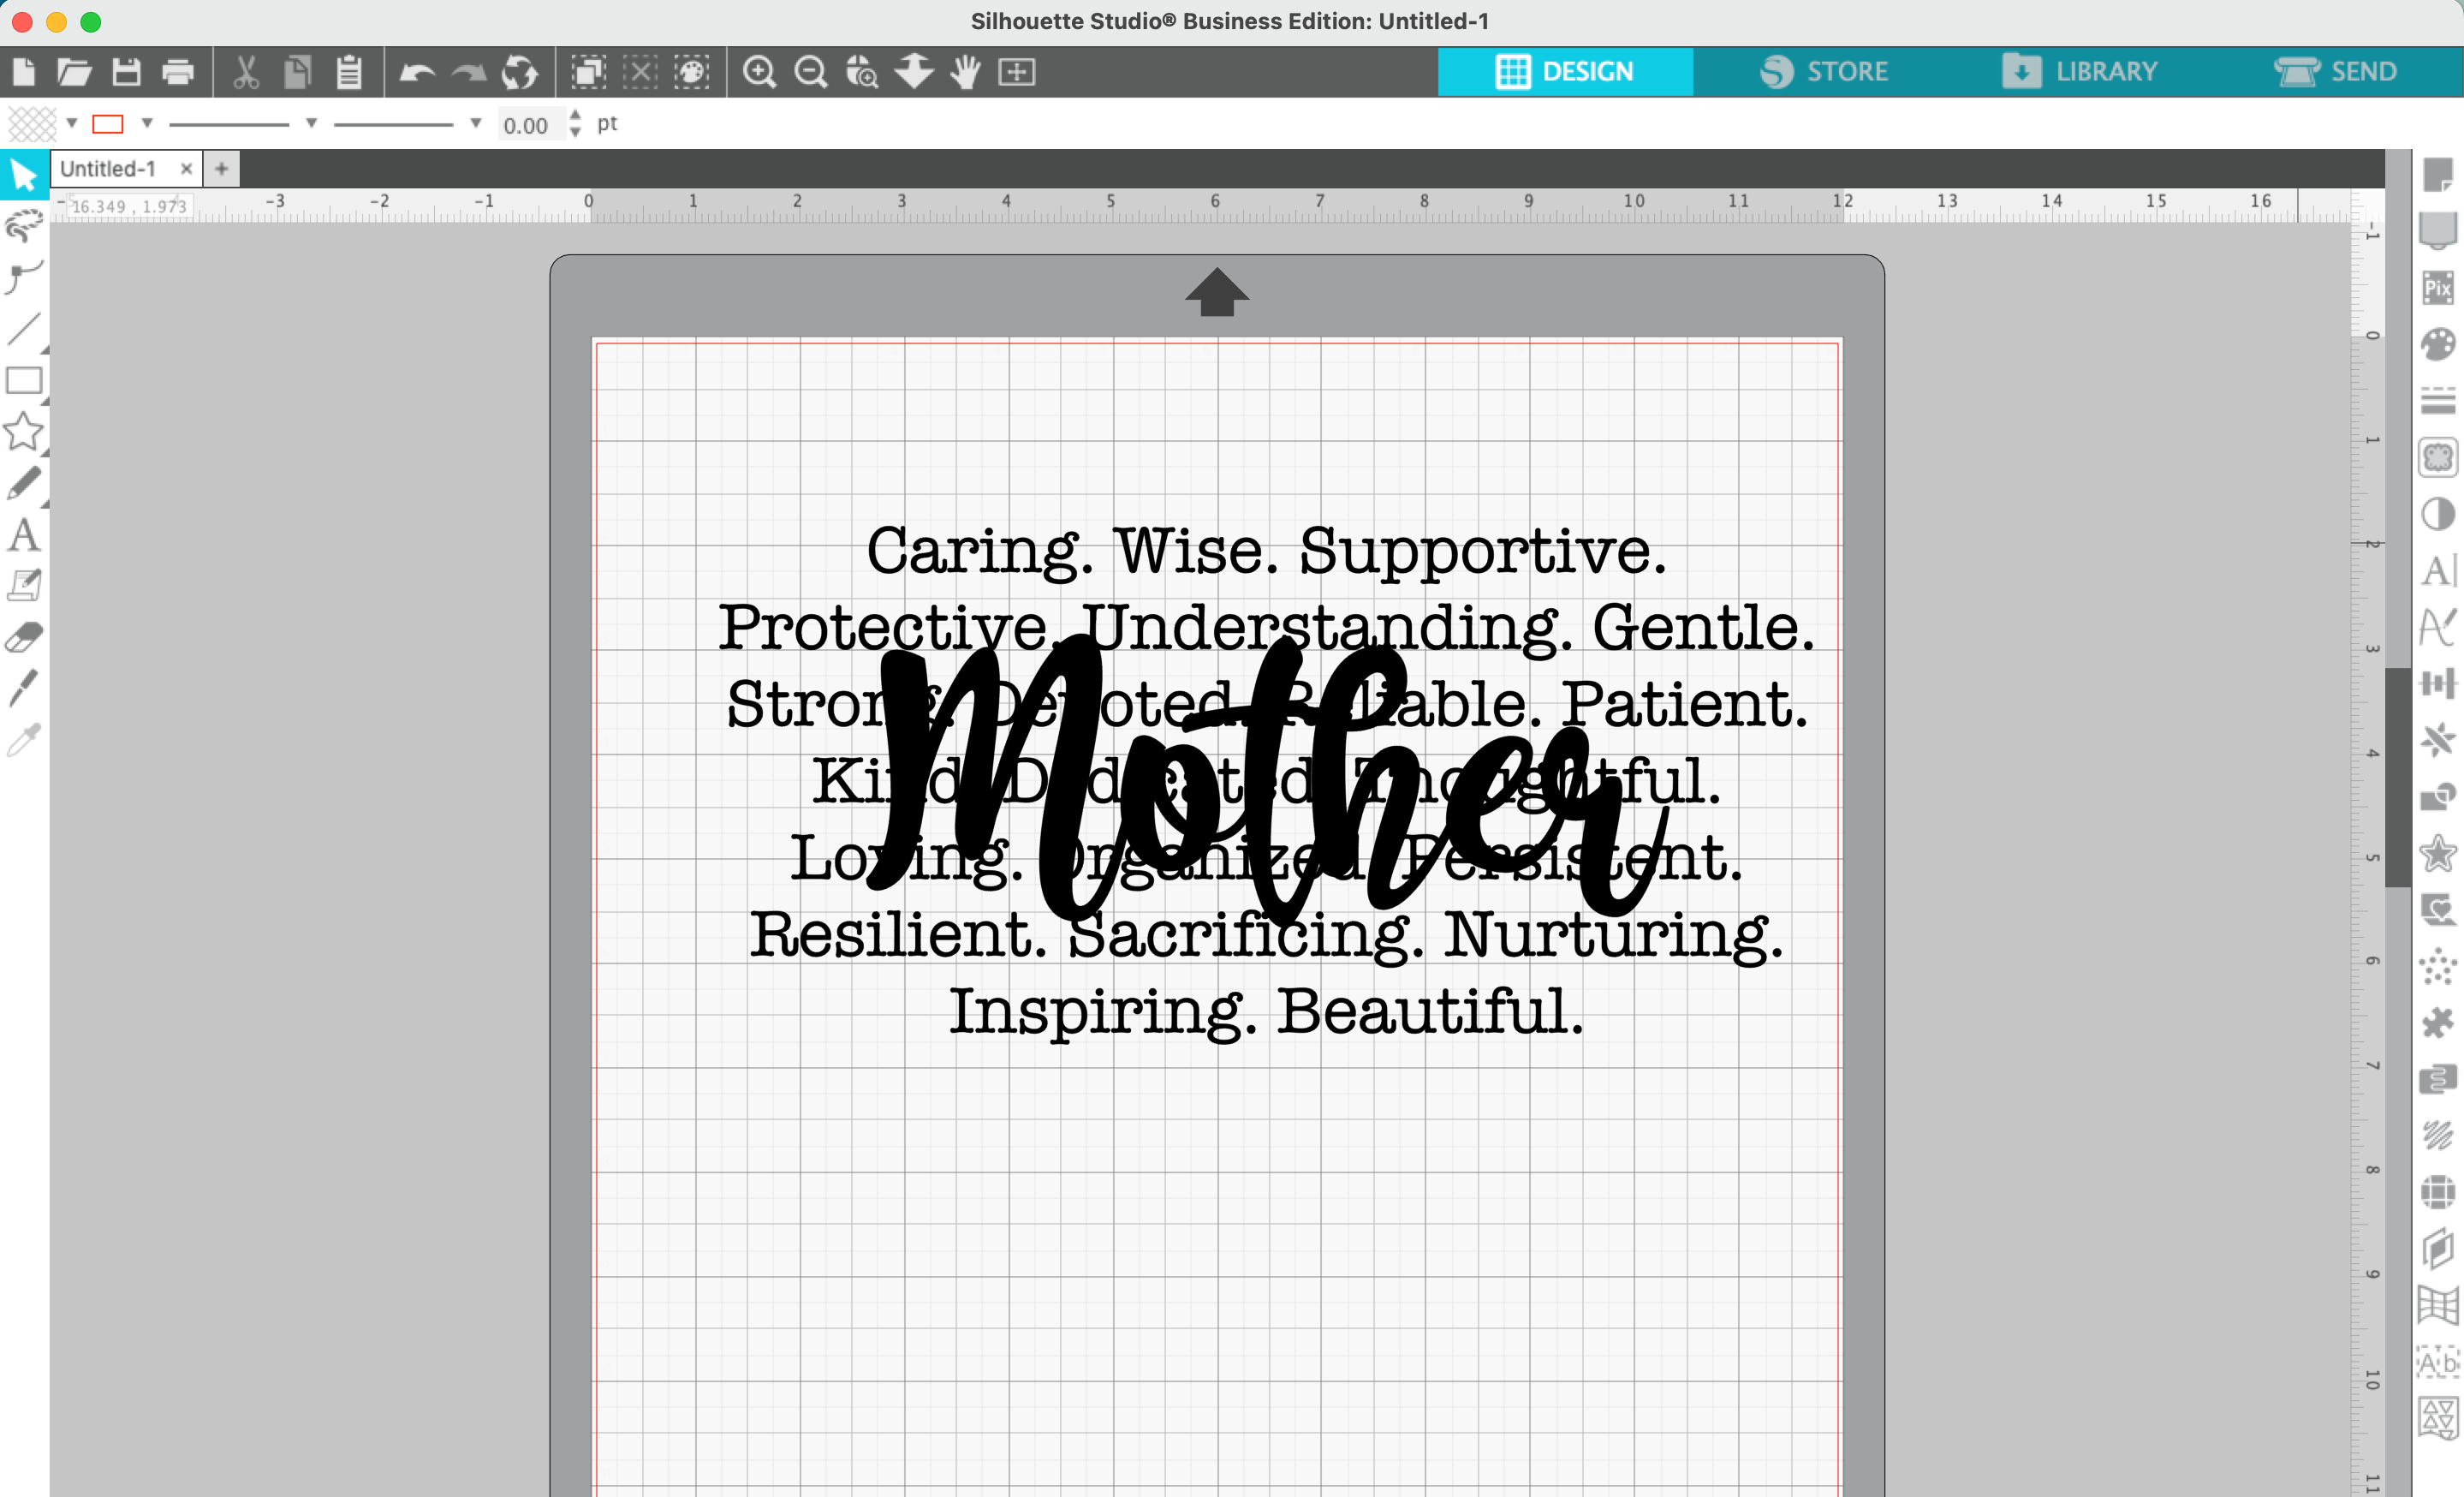
4. In a new text box, type ‘Mother’, ‘Mama’, ‘Mom’, ‘Nana’, ‘Grandma’, or other word of your choice in a script font. I used this font. Drag the word onto the top of the other words.
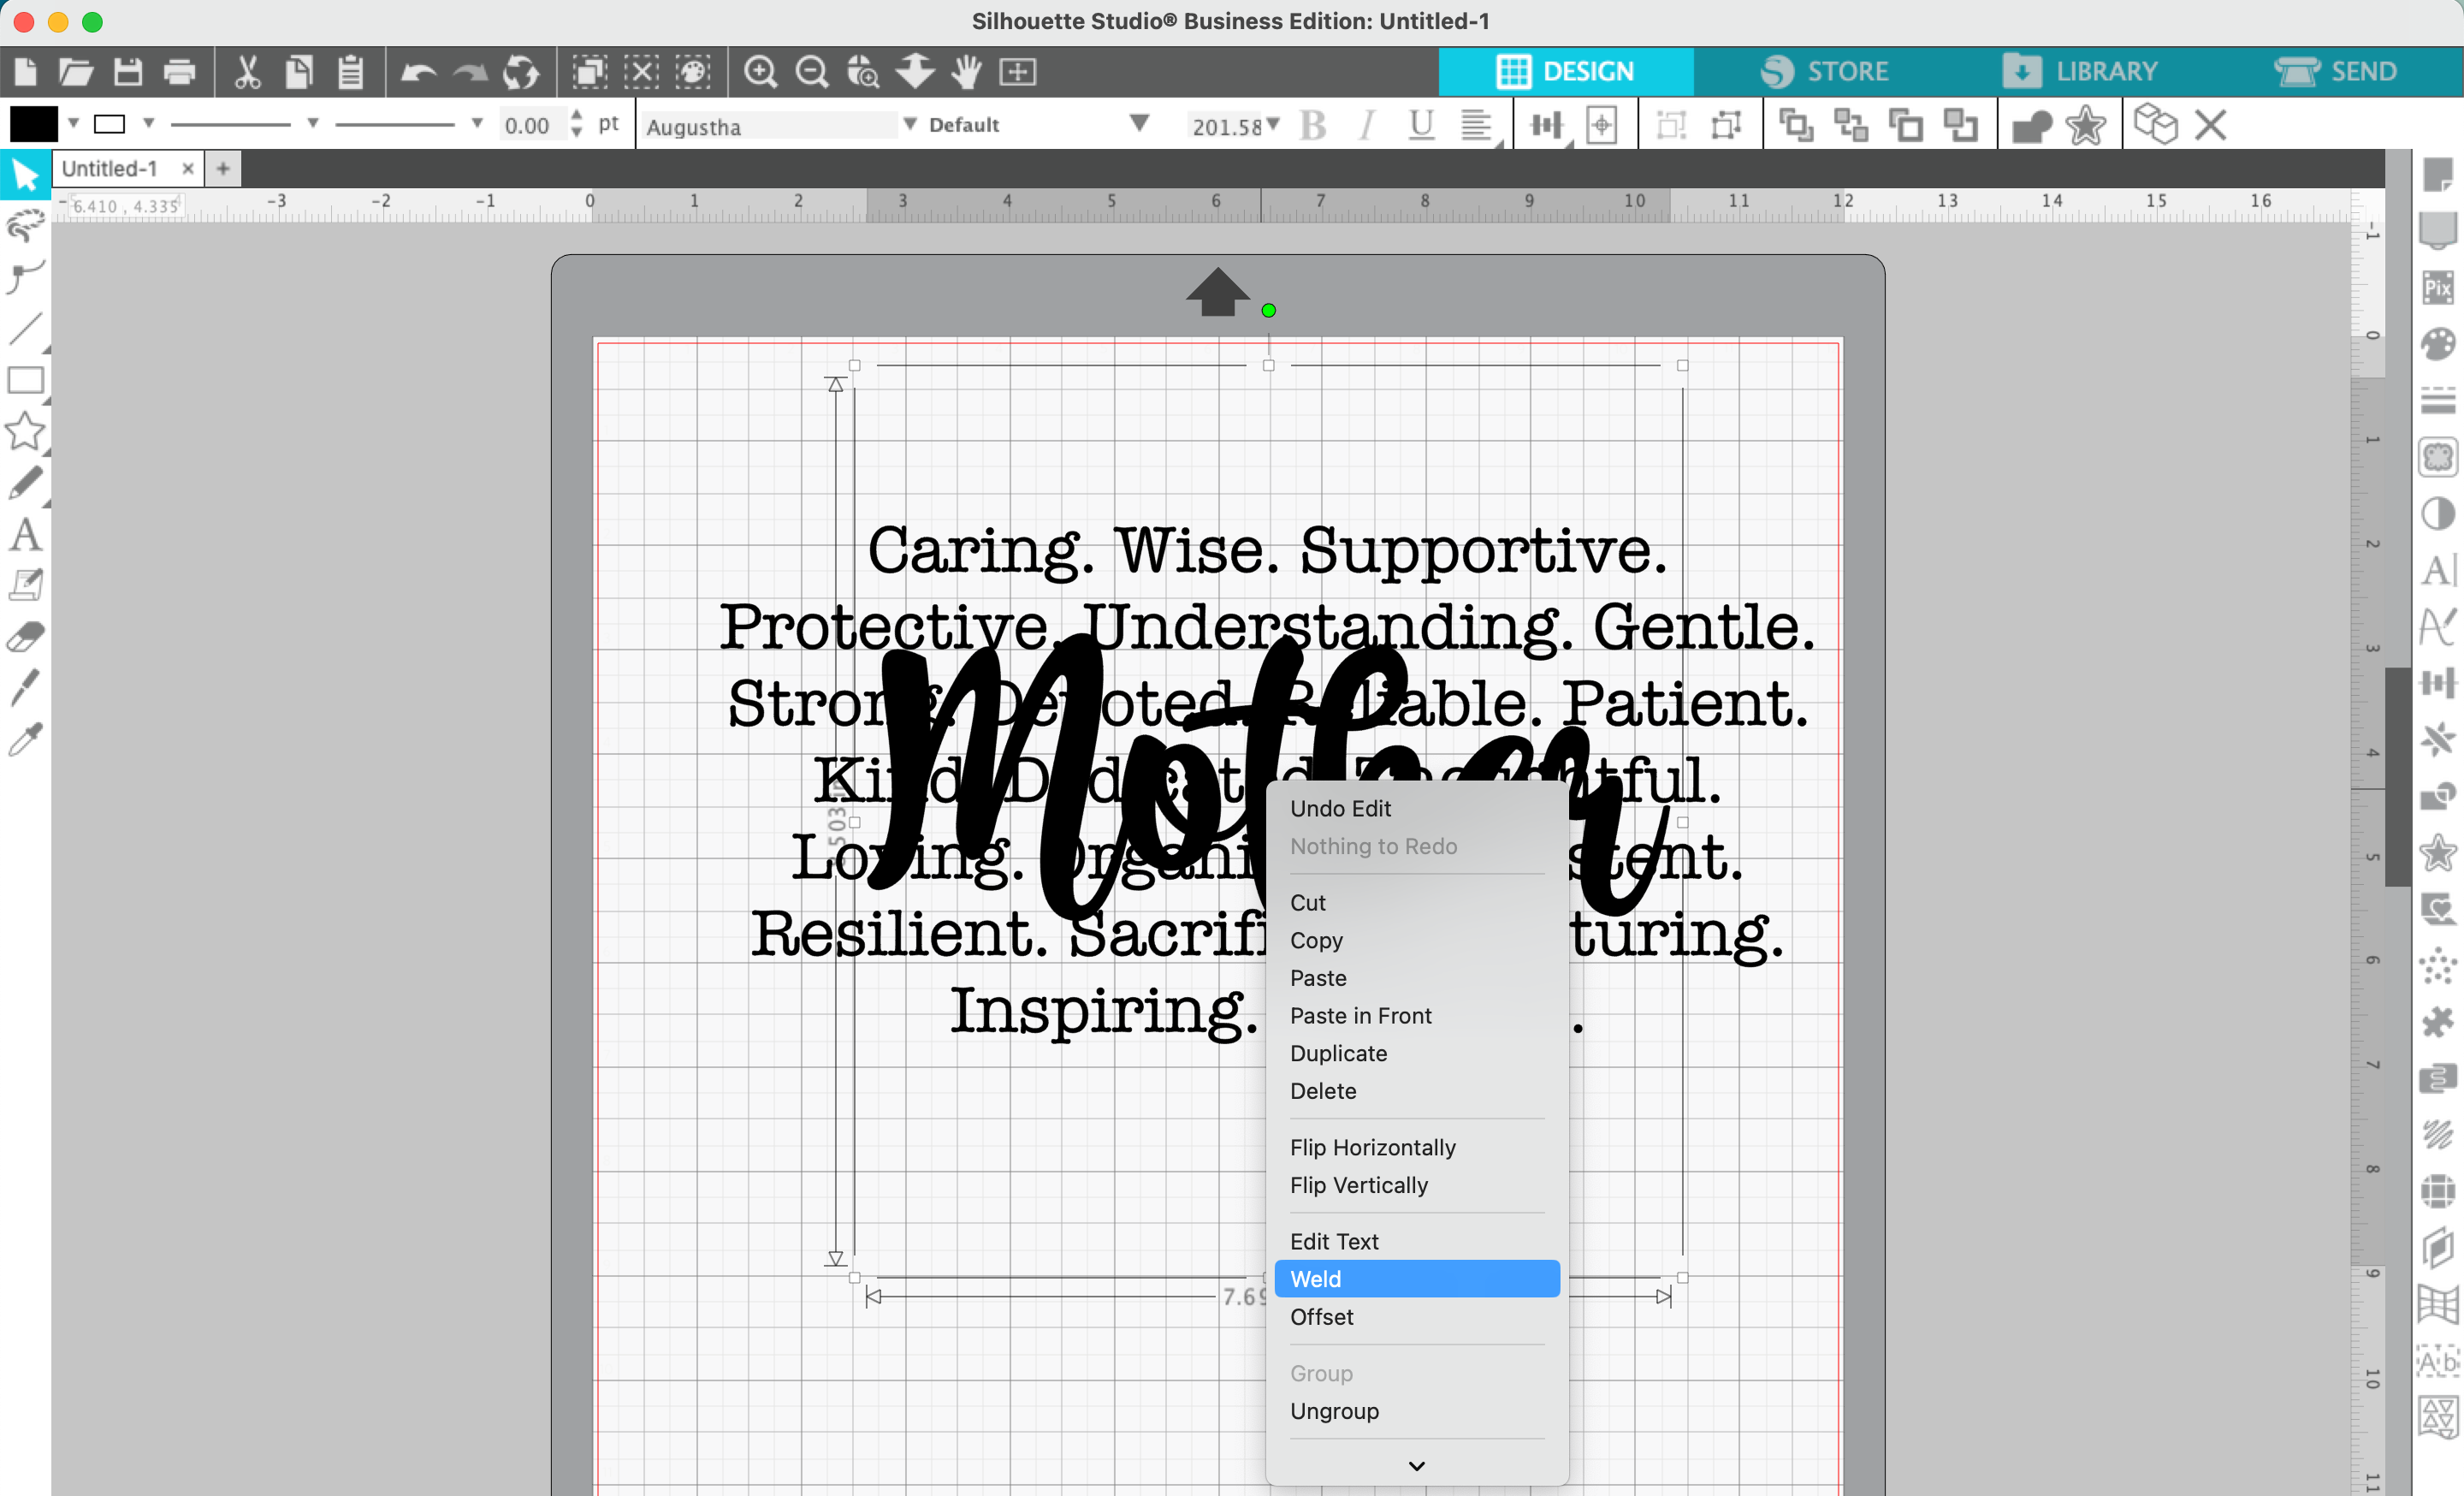
5. Right click on the text and weld it.
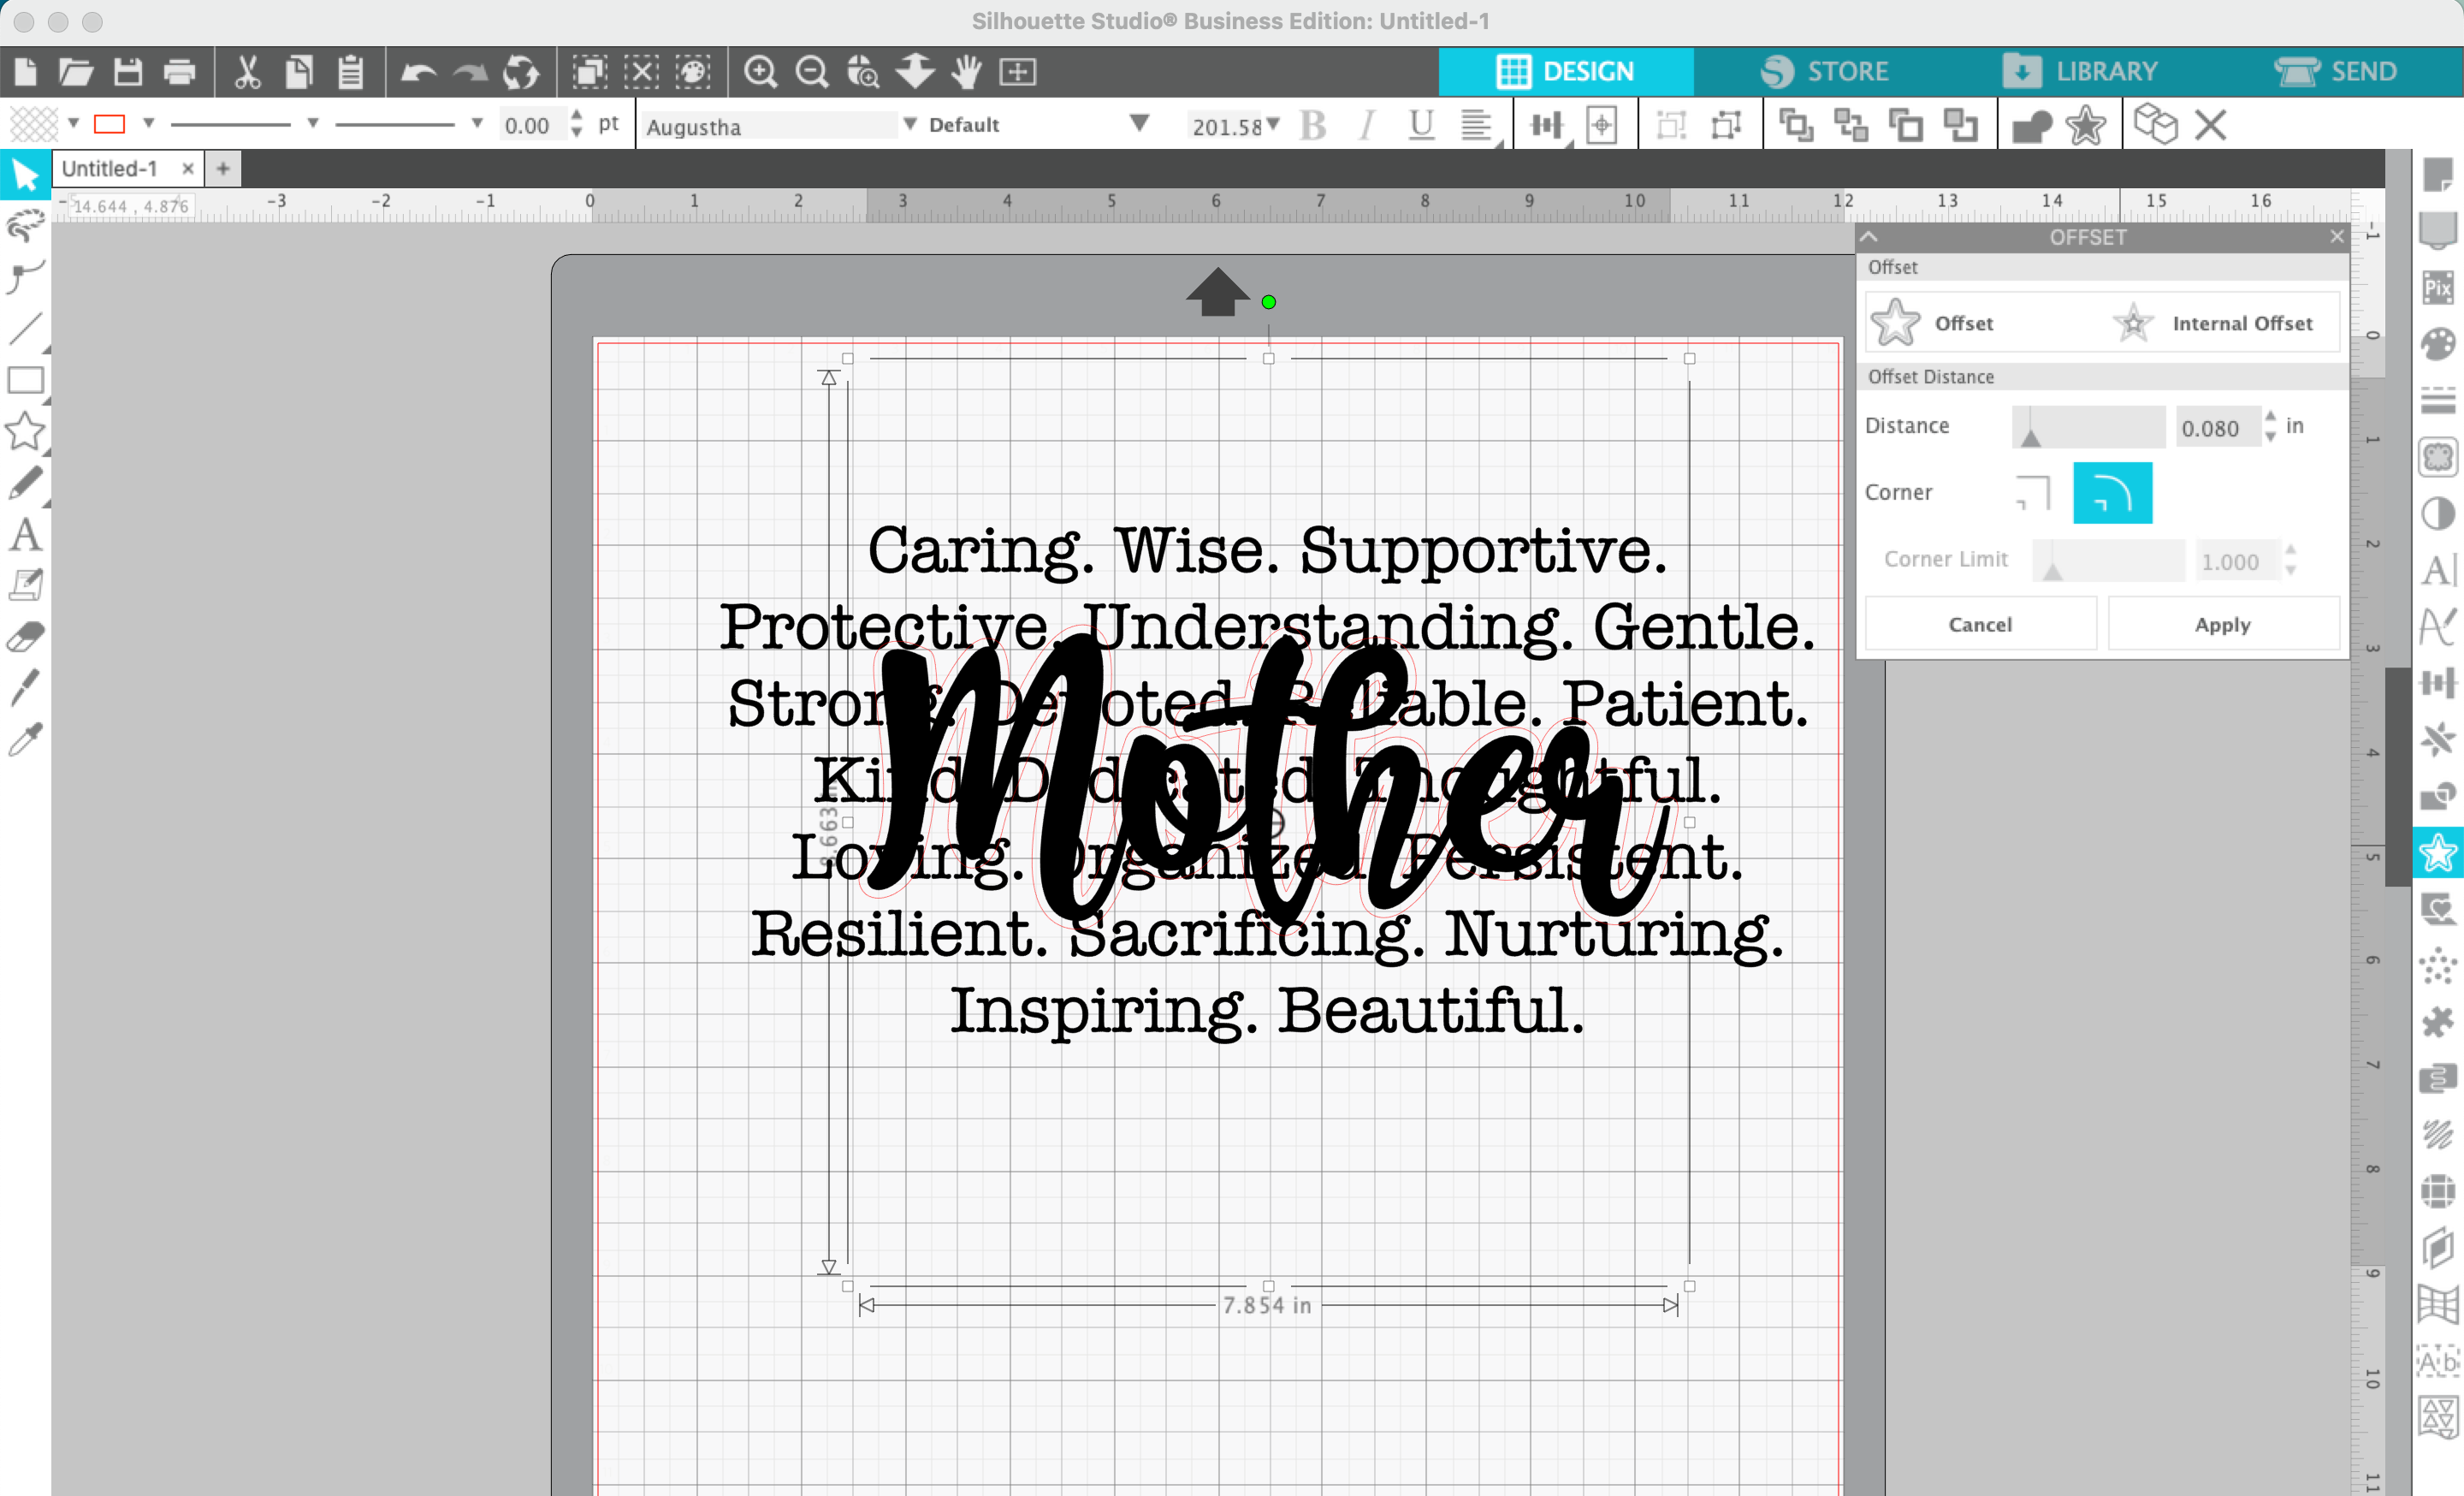
6. Navigate to ‘Panels’, ‘Offset’, then offset the word.
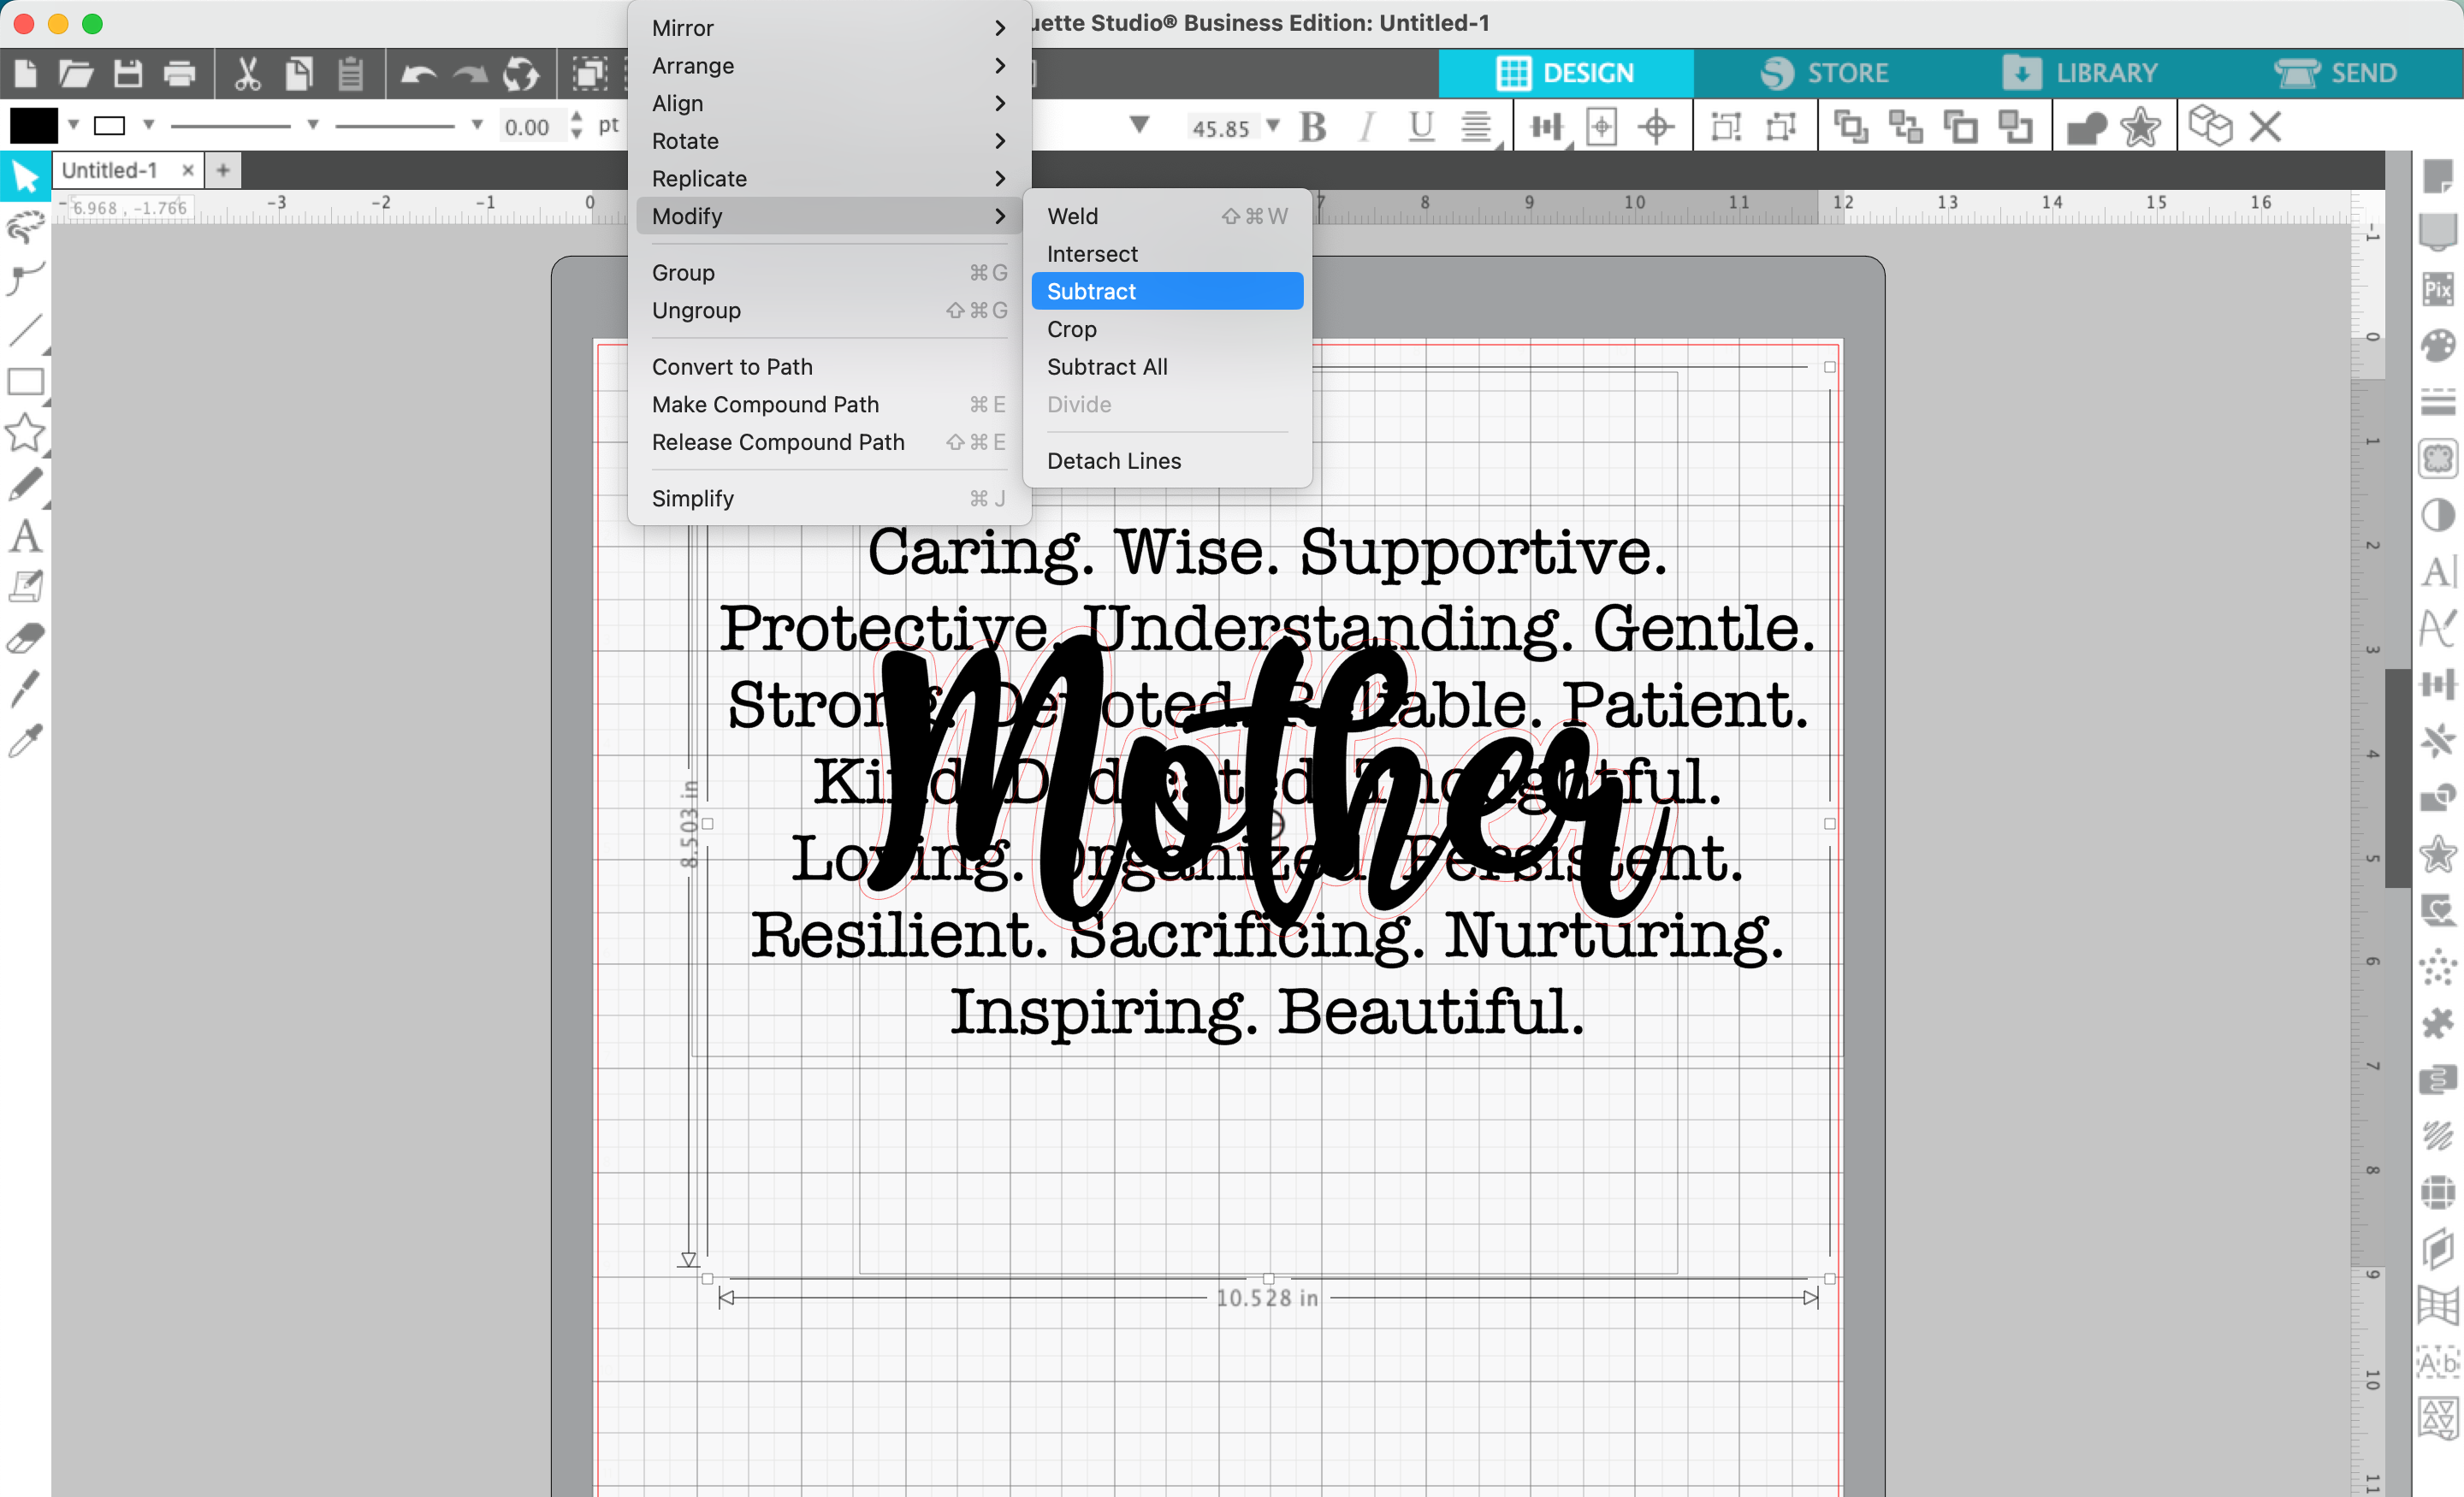
7. Click the background text, then the offset text, and navigate to ‘Object’, ‘Modify’, ‘Subtract’.
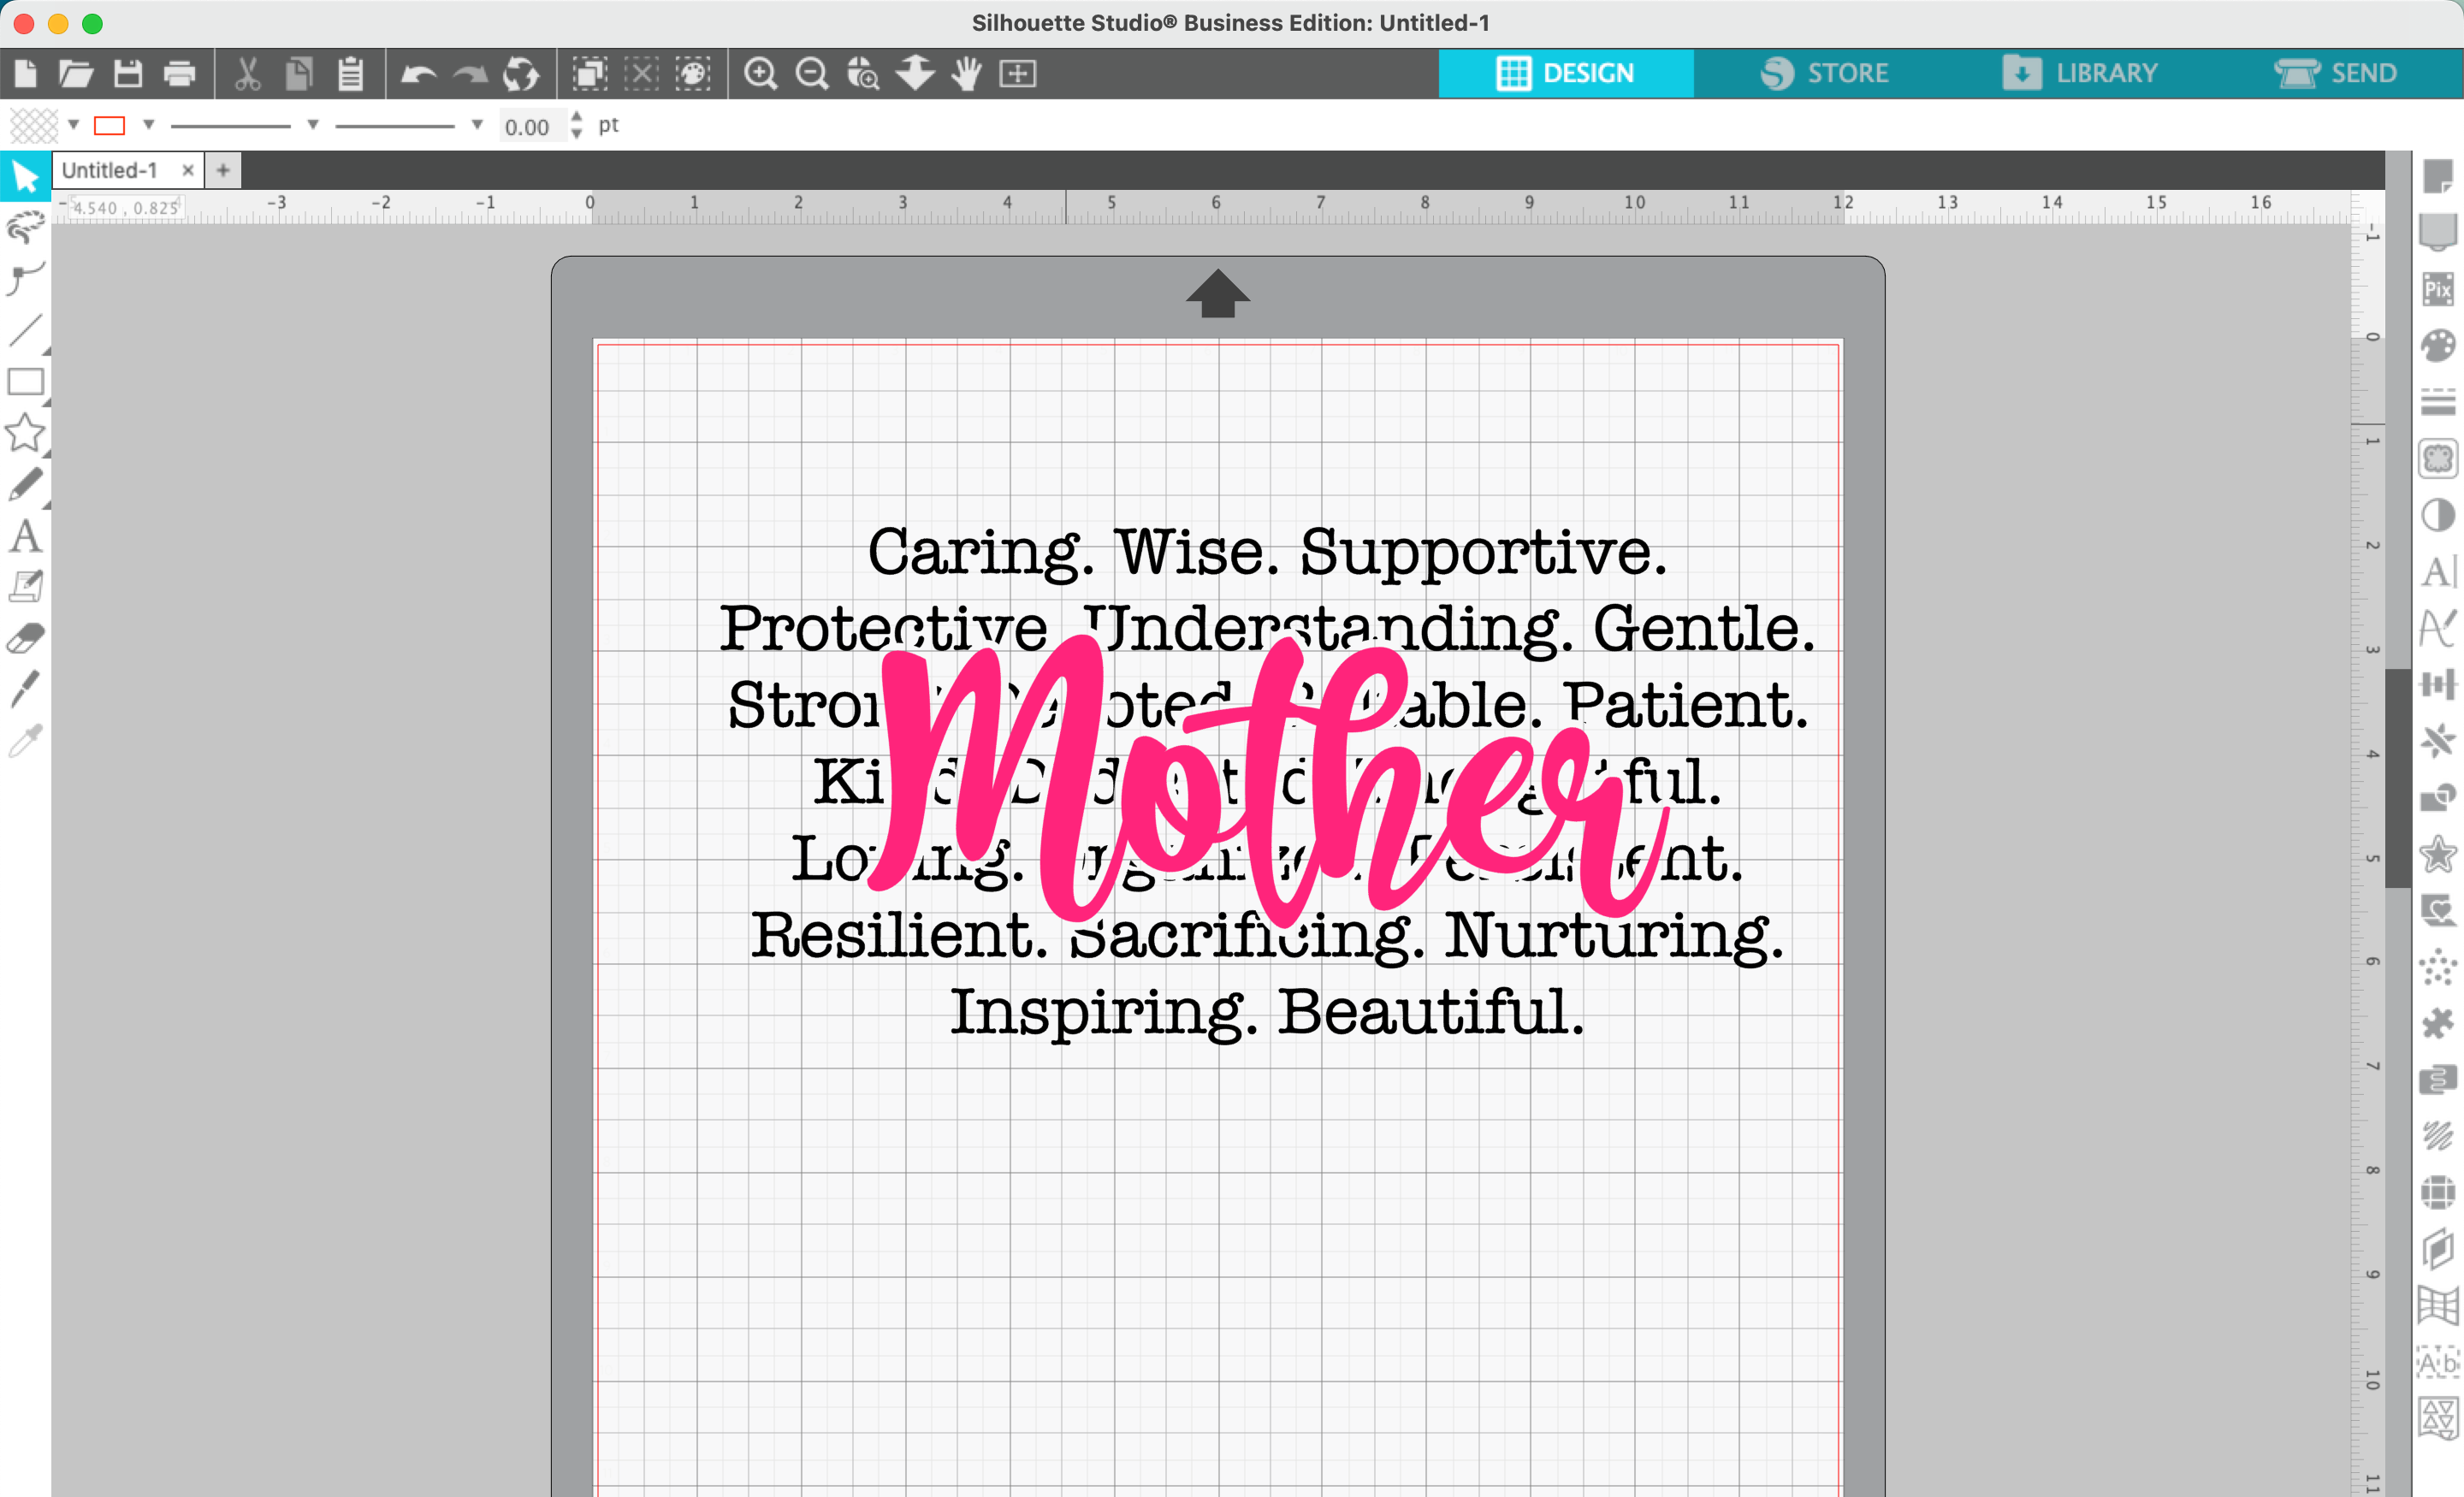
8. Add color to your design.
That’s it! Your design is ready to go!
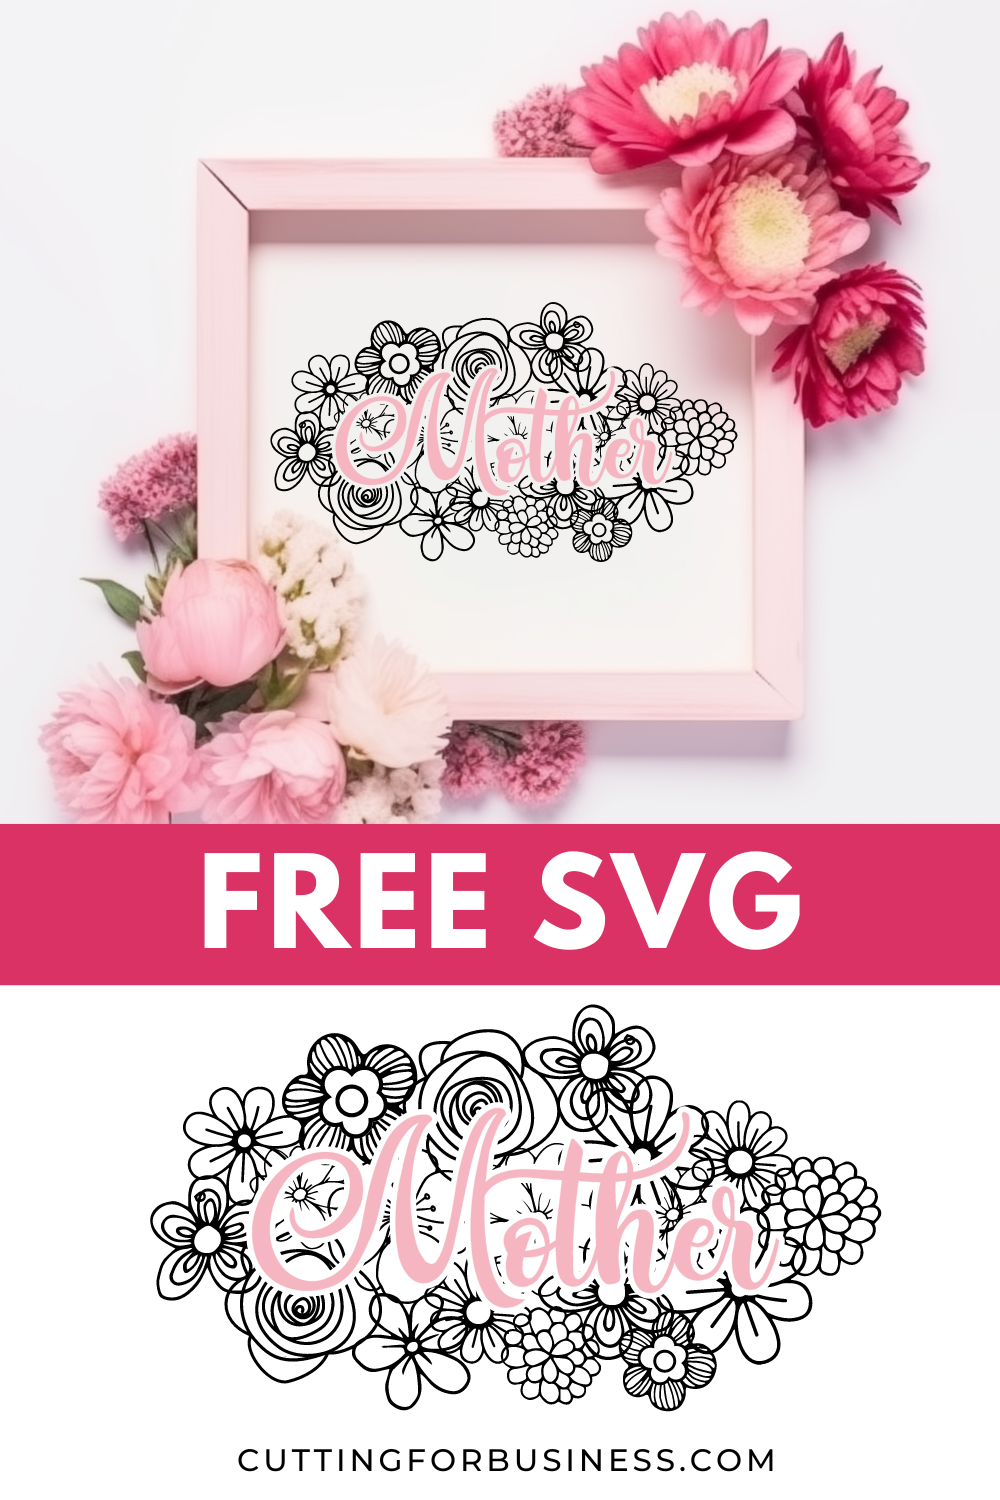
Don’t have time to design it yourself? This SVG design is available free to Cutting for Business mailing list subscribers. Download it.
Don’t Forget to Save!
To save your new SVG creation, head to ‘File’, ‘Save As’, ‘Save to Hard Drive’, name the file, then select ‘SVG’ from the dropdown menu.
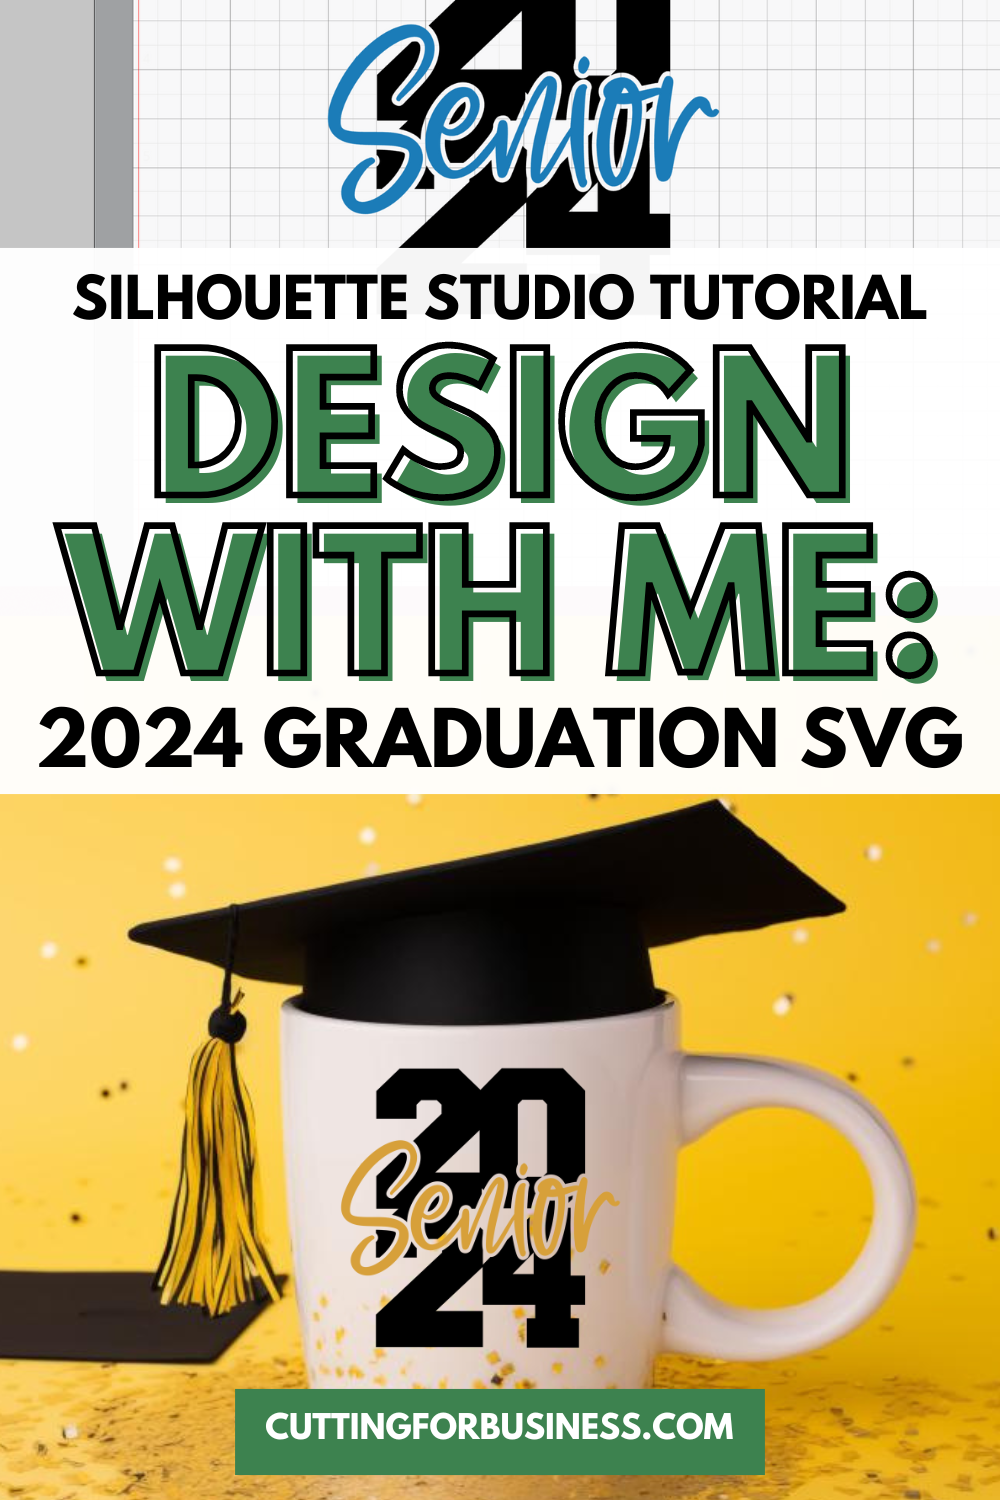
That time of year is coming up: Graduation! Whether you are celebrating kindergarten graduation, high school graduation, or college graduation – it’s such an exciting time of year.
Today, let’s design a 2024 graduation SVG. Of course, if you come across this tutorial after 2024, you can follow the same steps – just change the year.
Tutorial: 2024 Graduation SVG
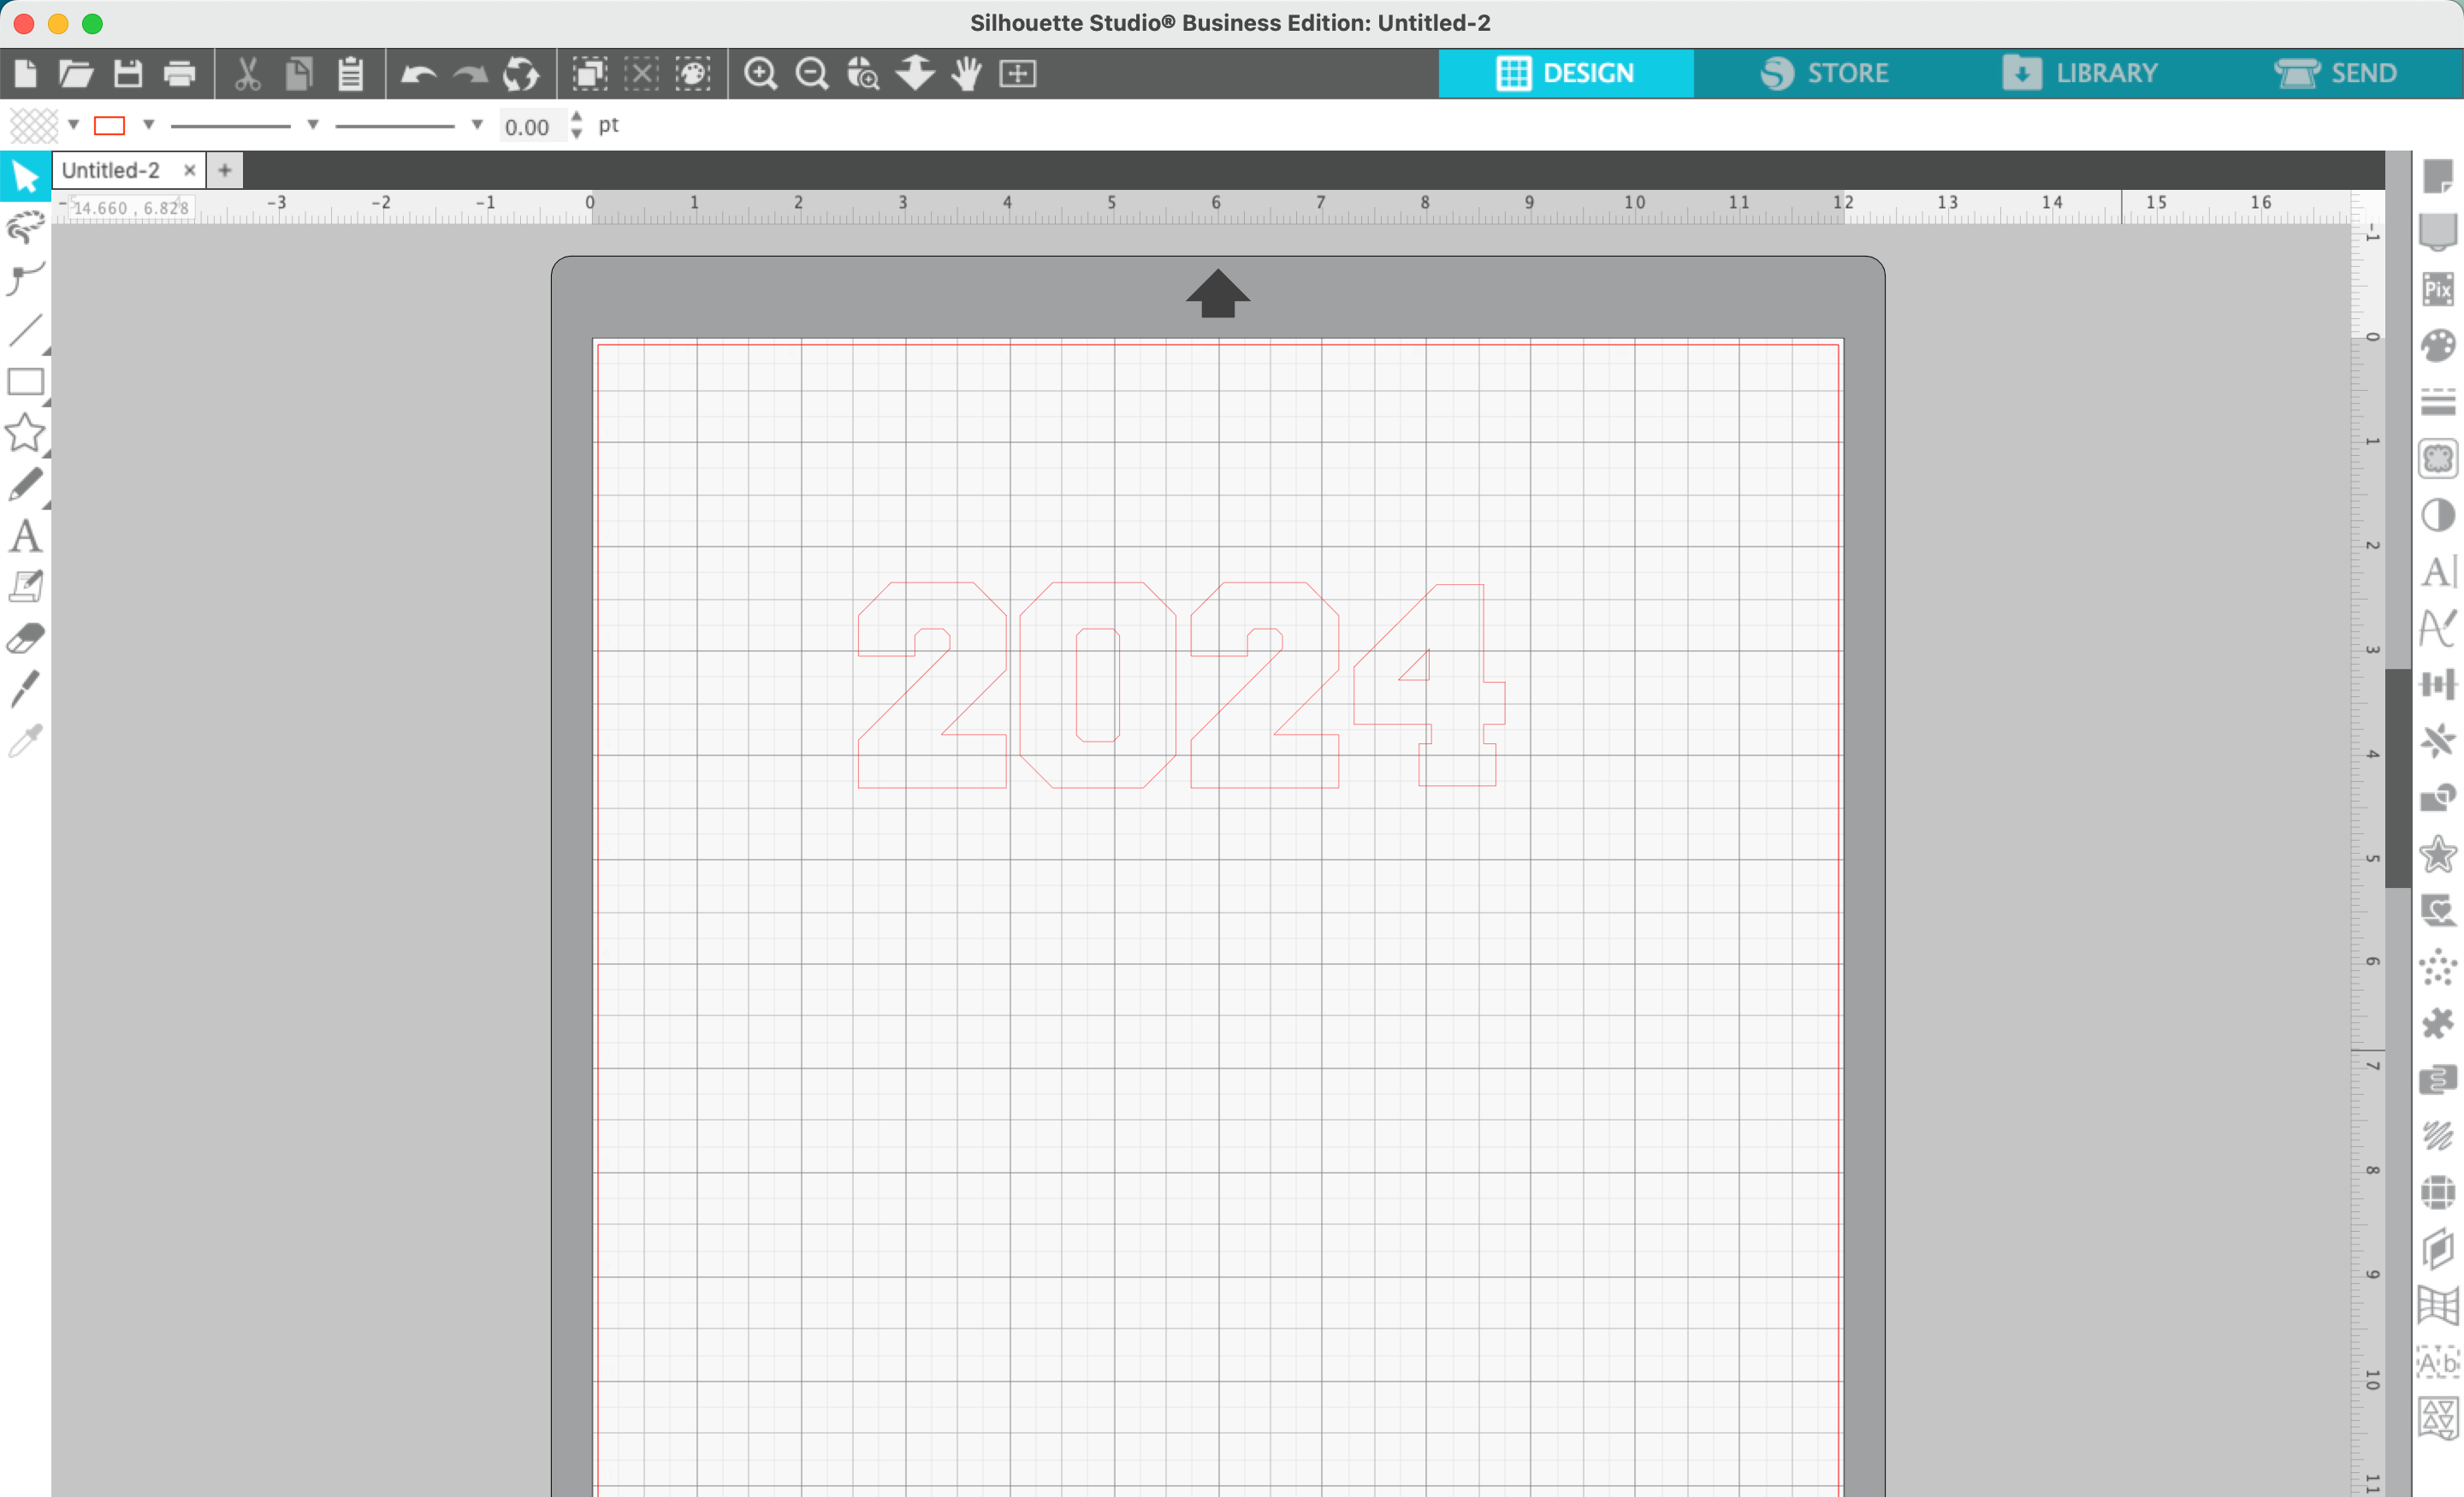
In Silhouette Studio, type 2024 (or other year). Use a chunky, blocky font. In this tutorial, I used Freshman.
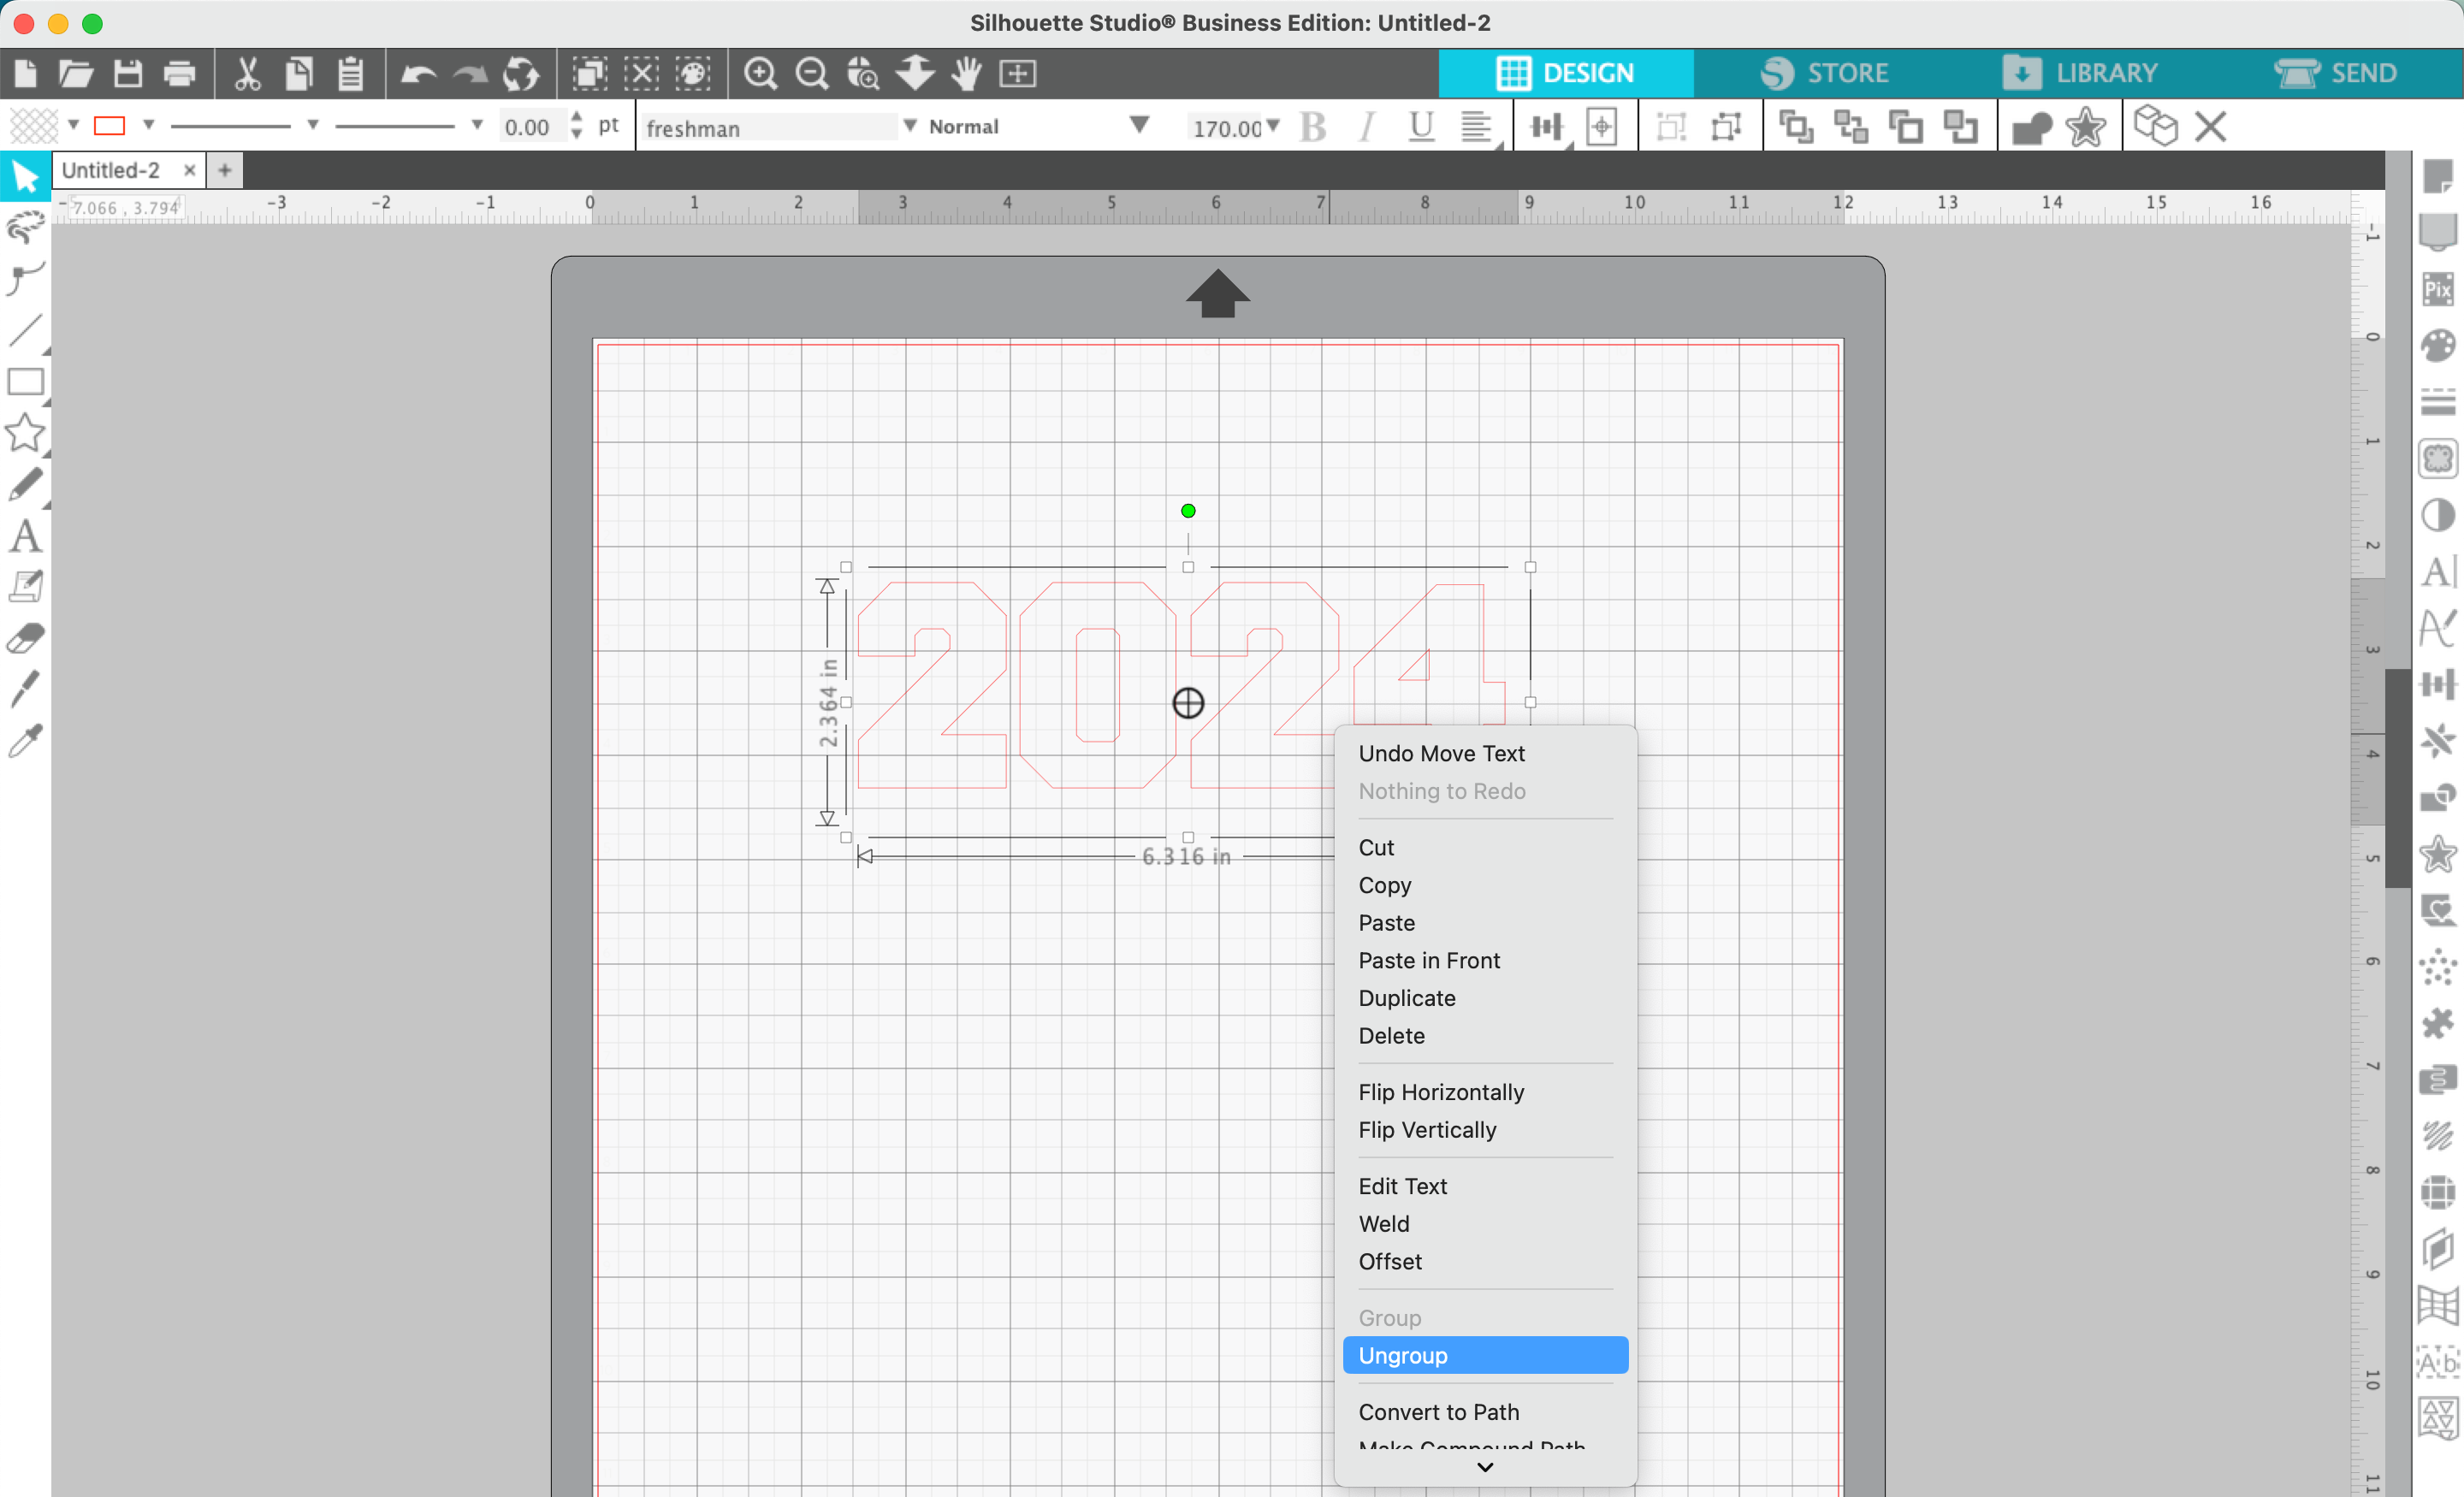
2. Right click the year and select ‘Ungroup’.
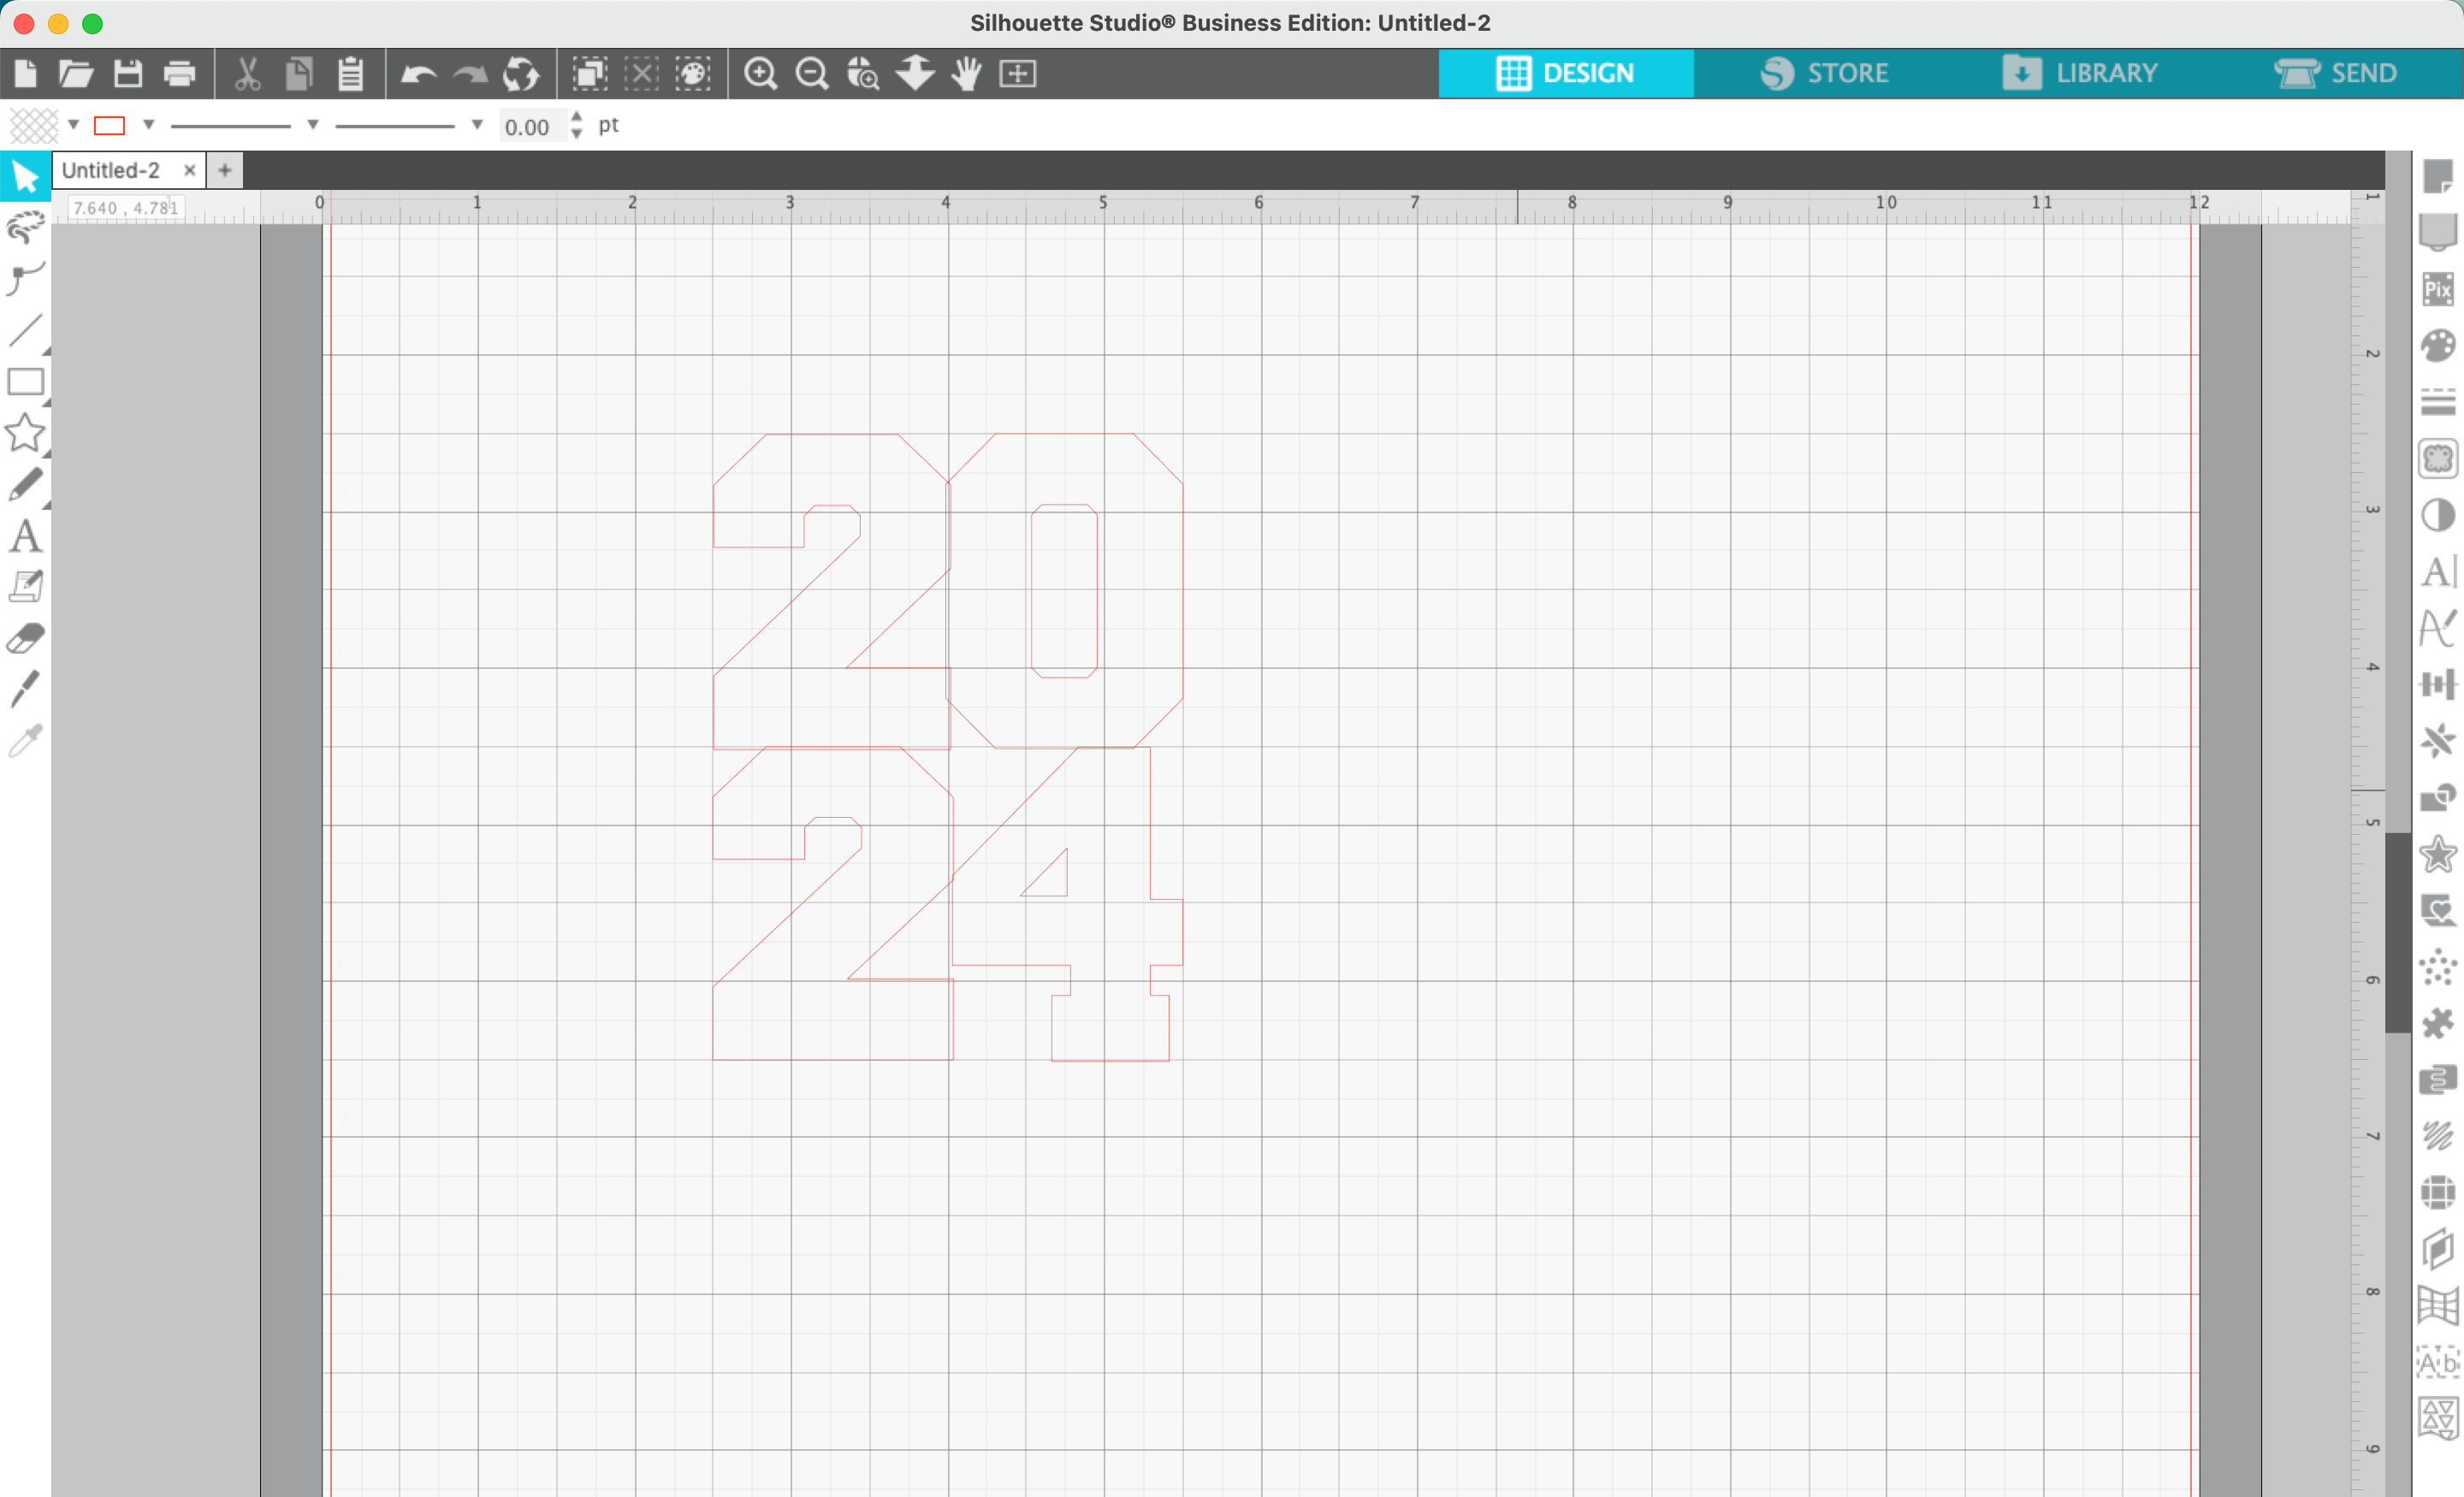
3. Drag the numbers into a square/rectangle, making them overlap each other slightly. Depending on the font you use, you may need to resize certain numbers slightly. I used the grid lines to help
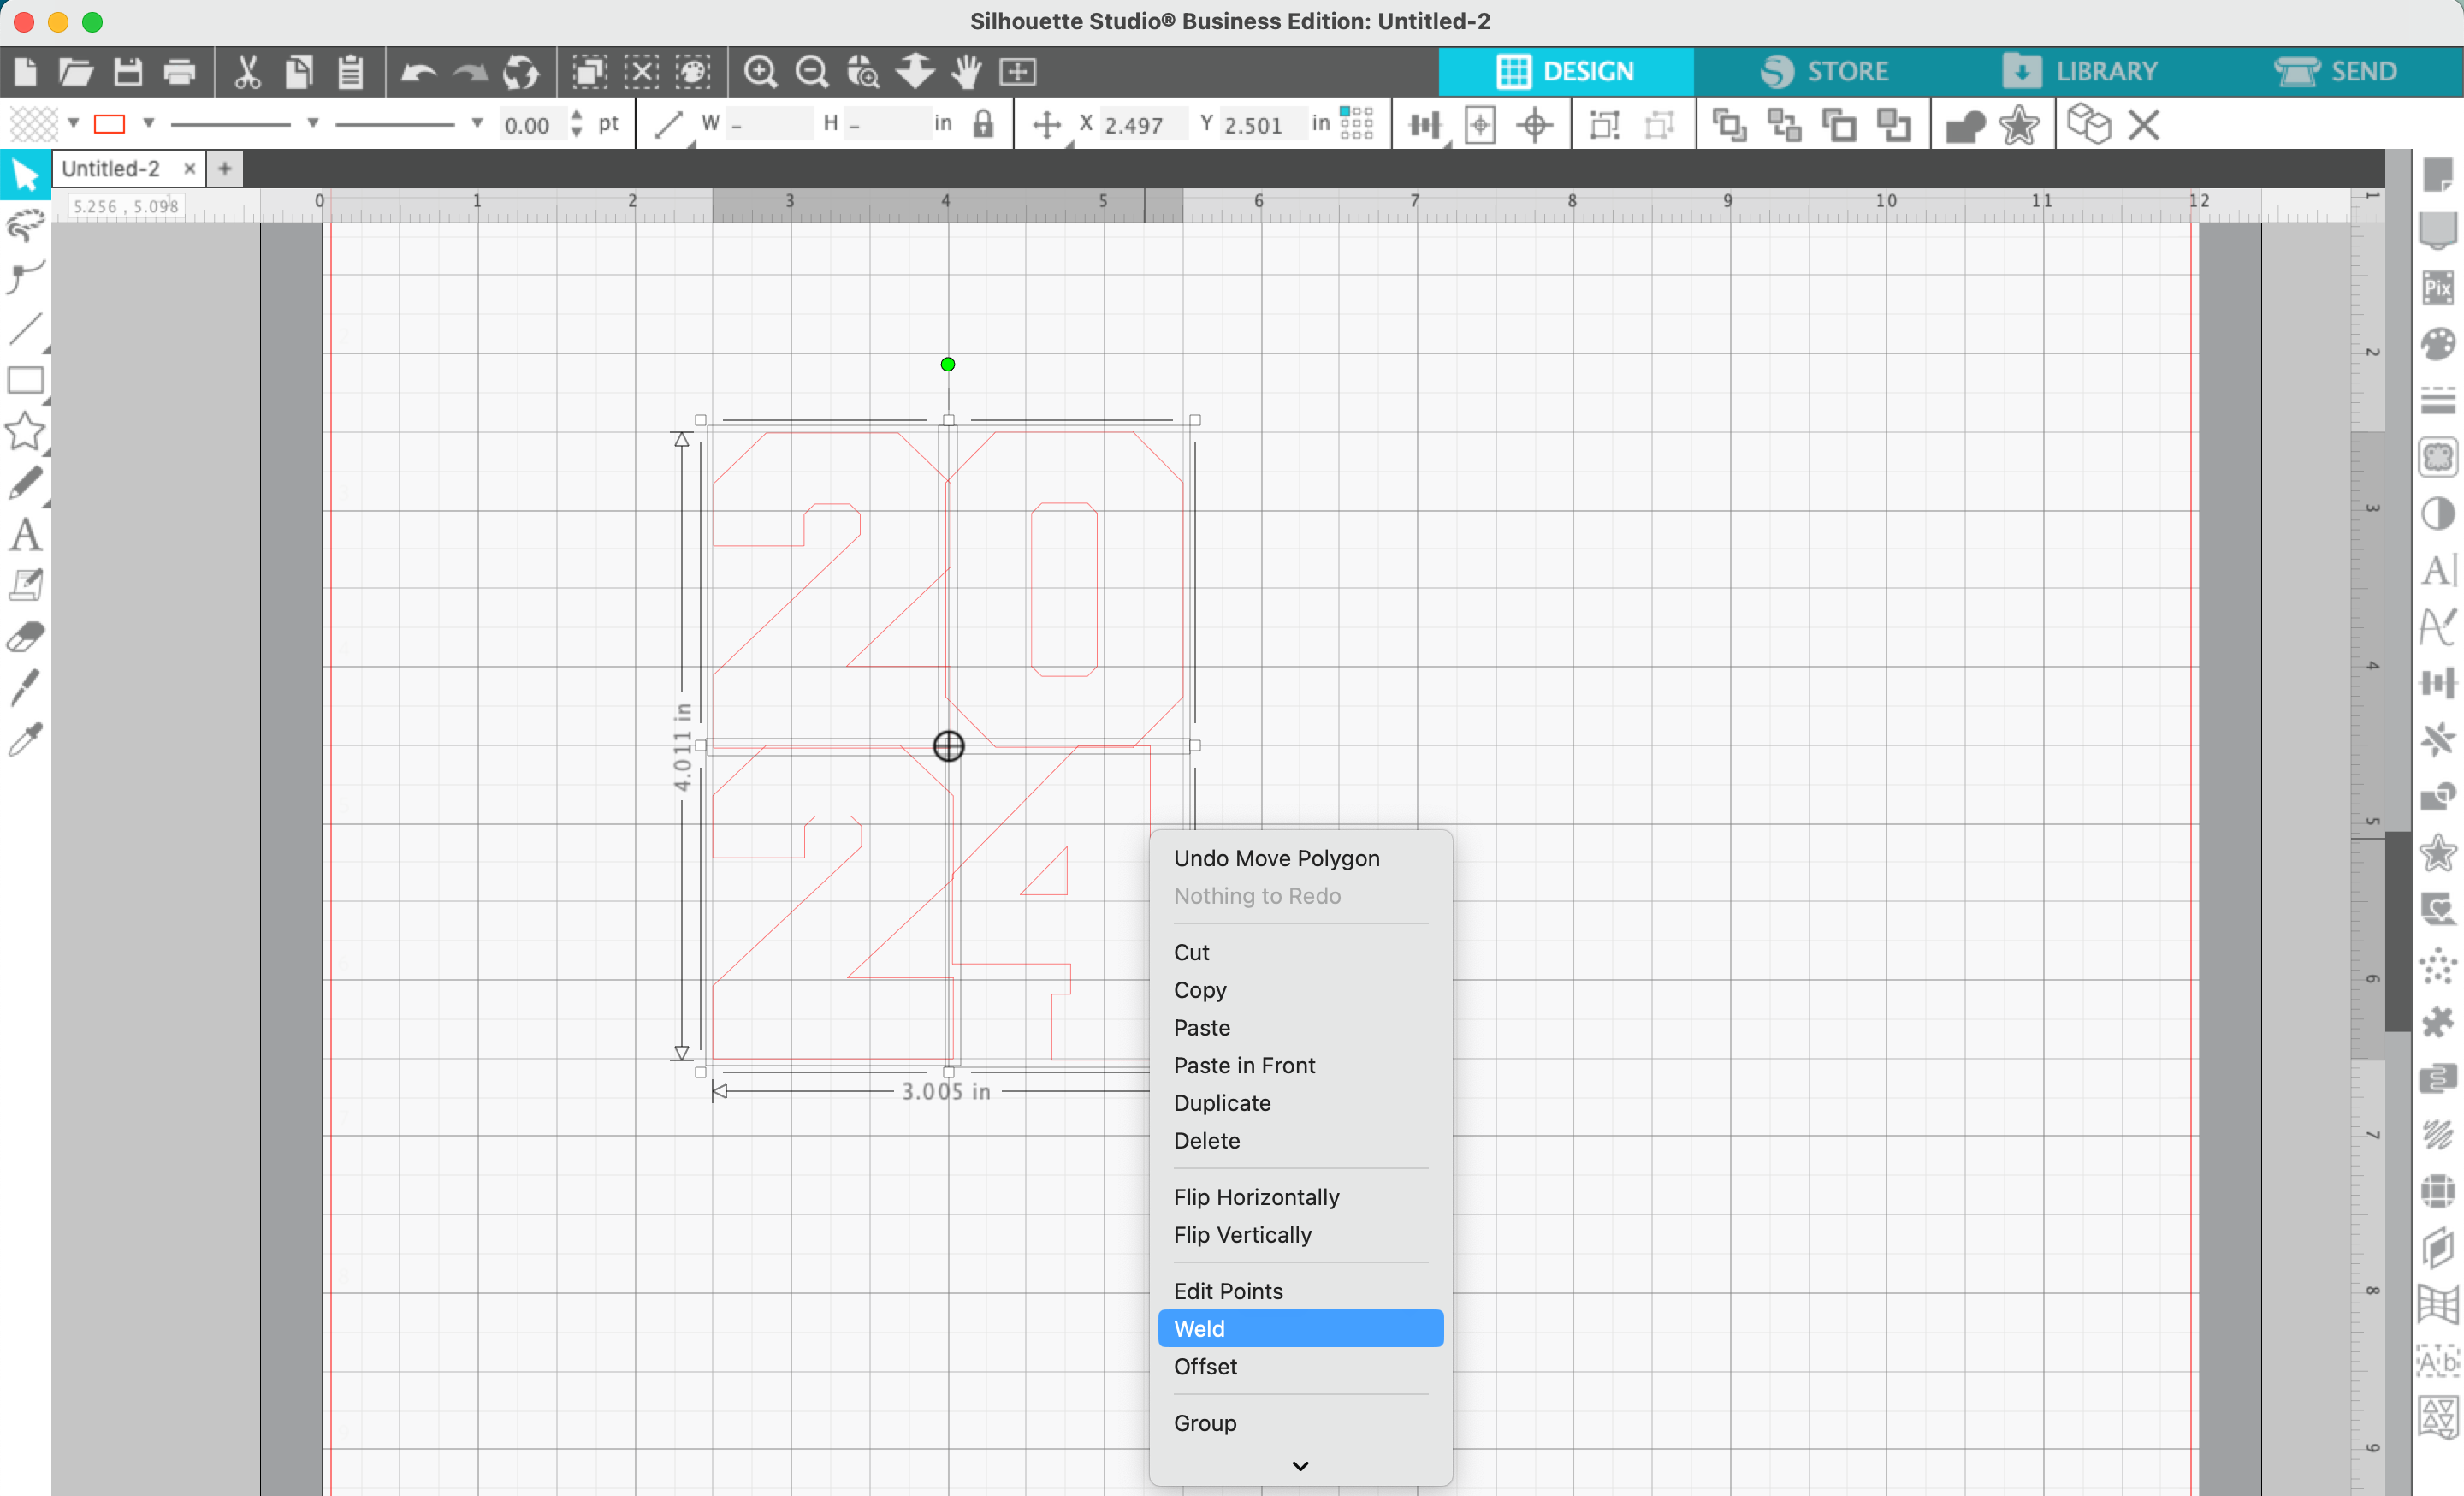
4. Select all the numbers, right click, and select ‘Weld’. This will merge the numbers together.
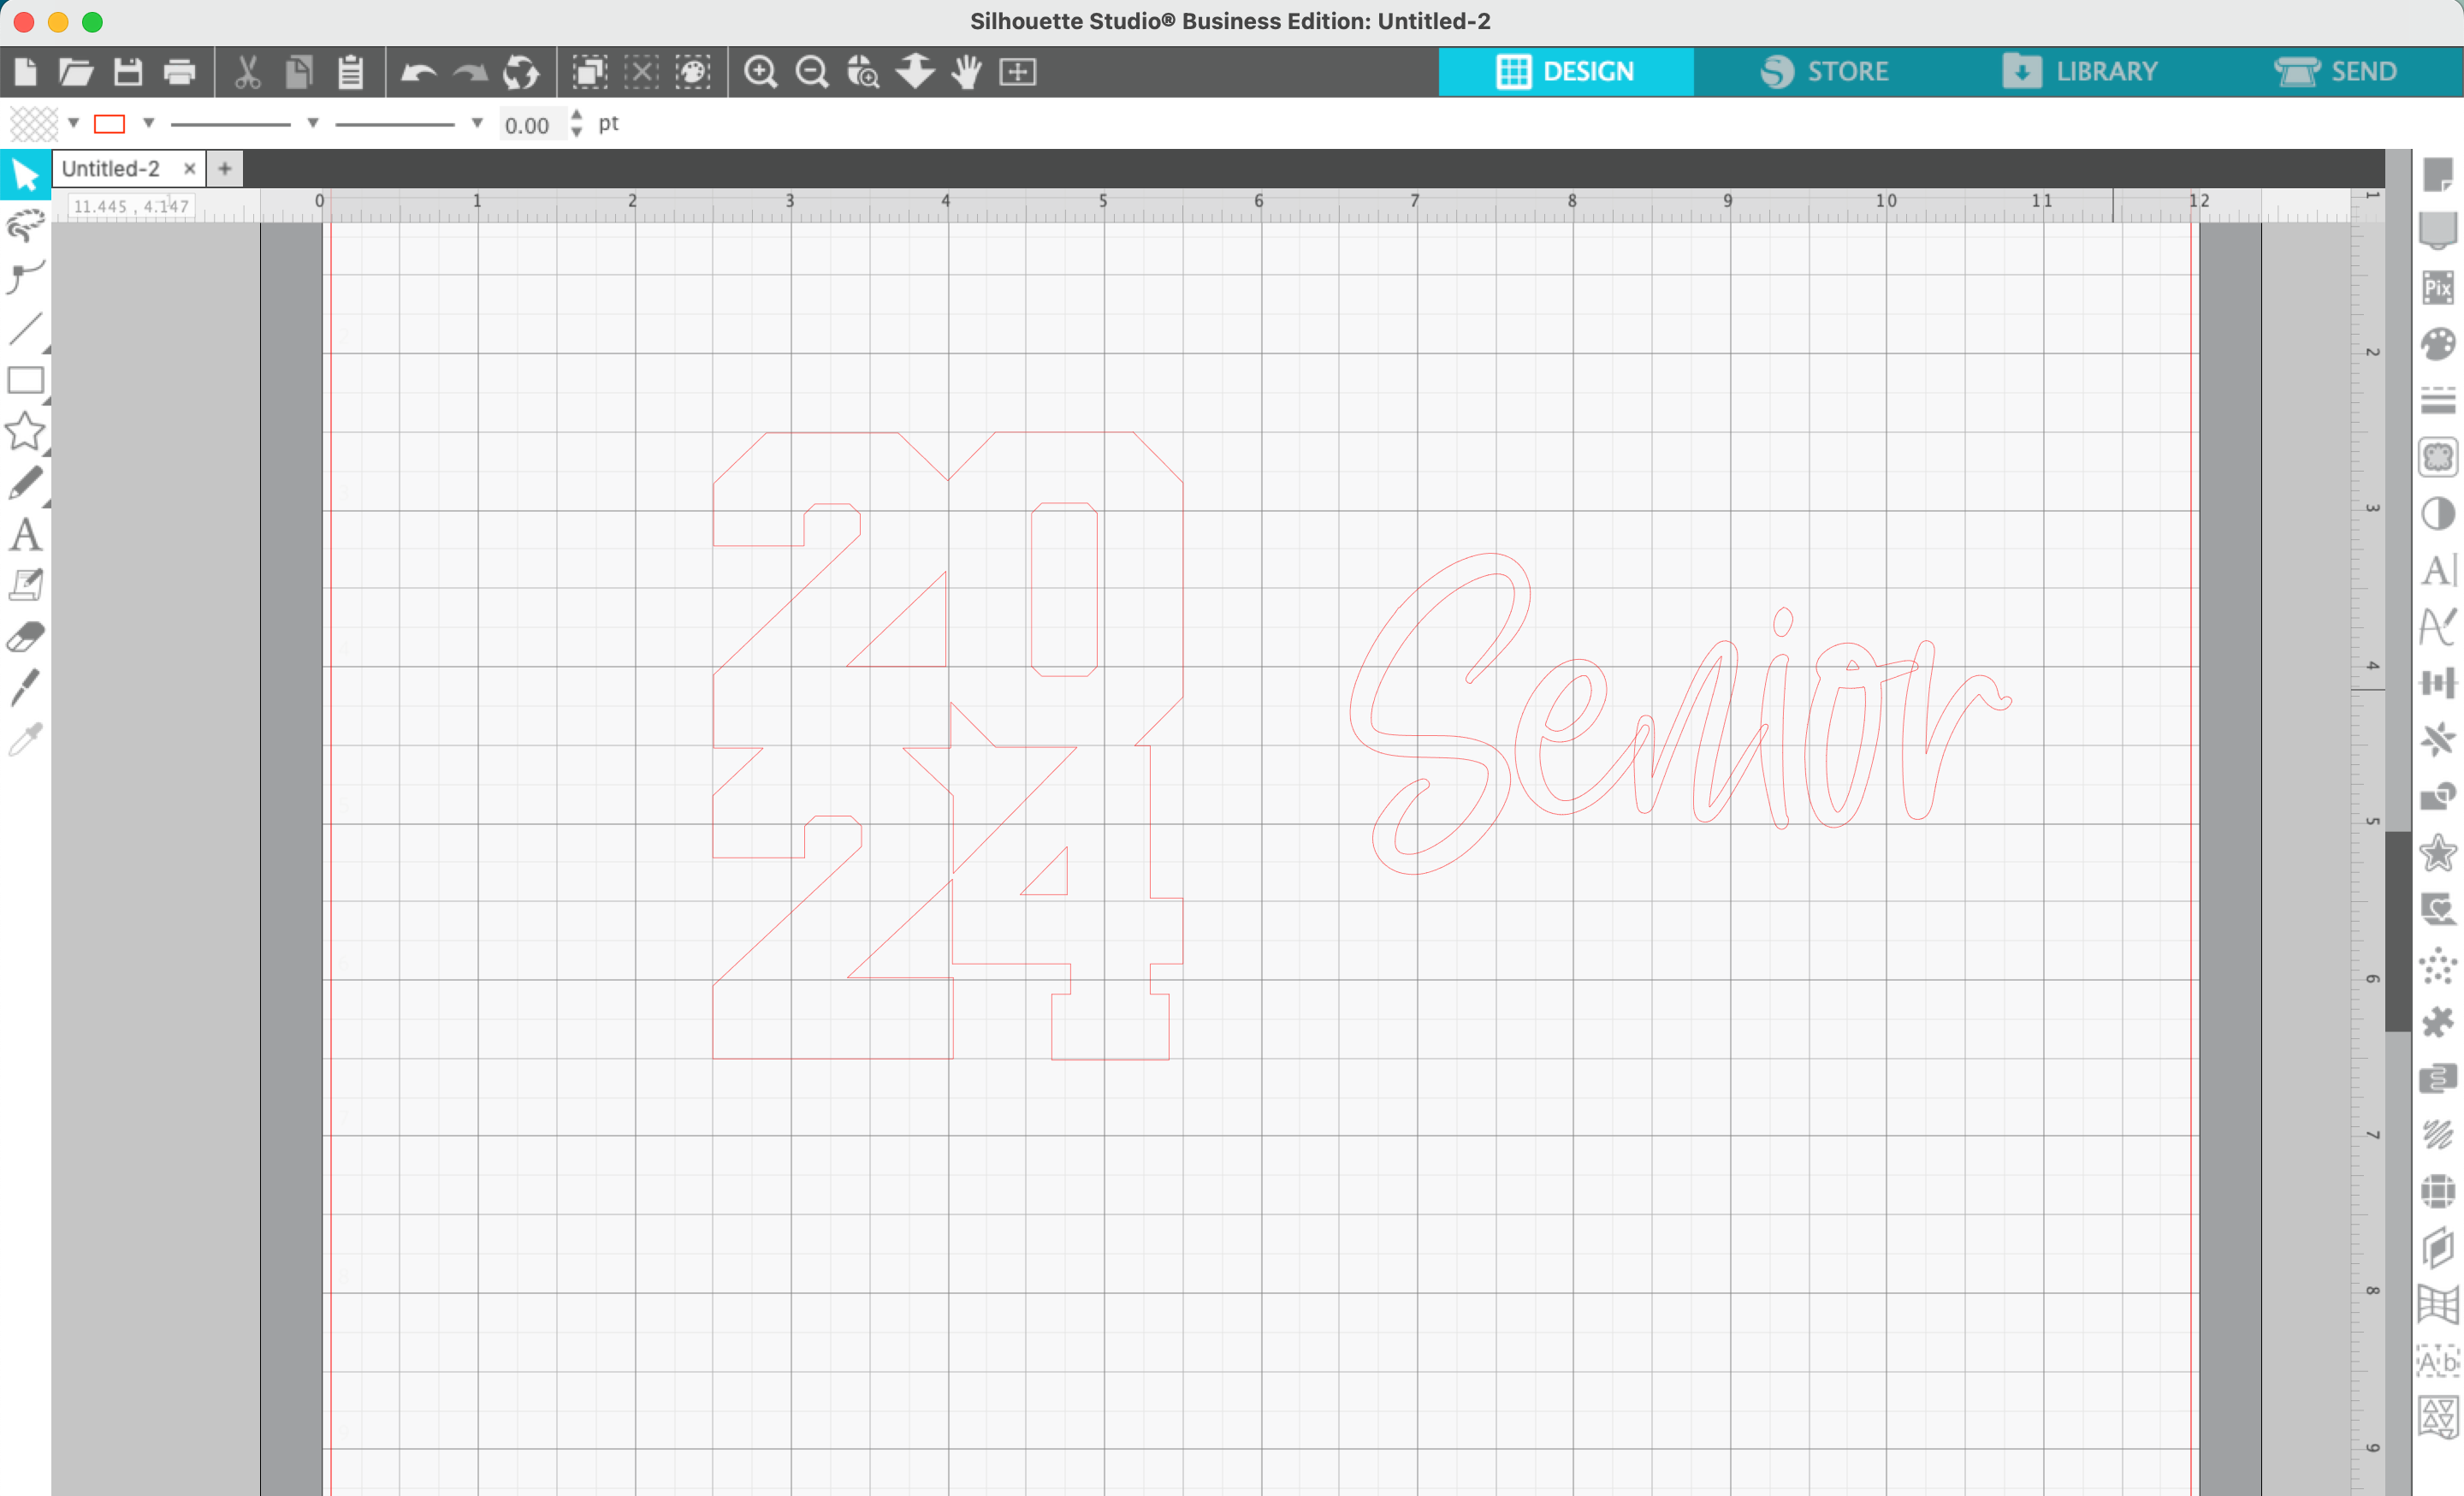
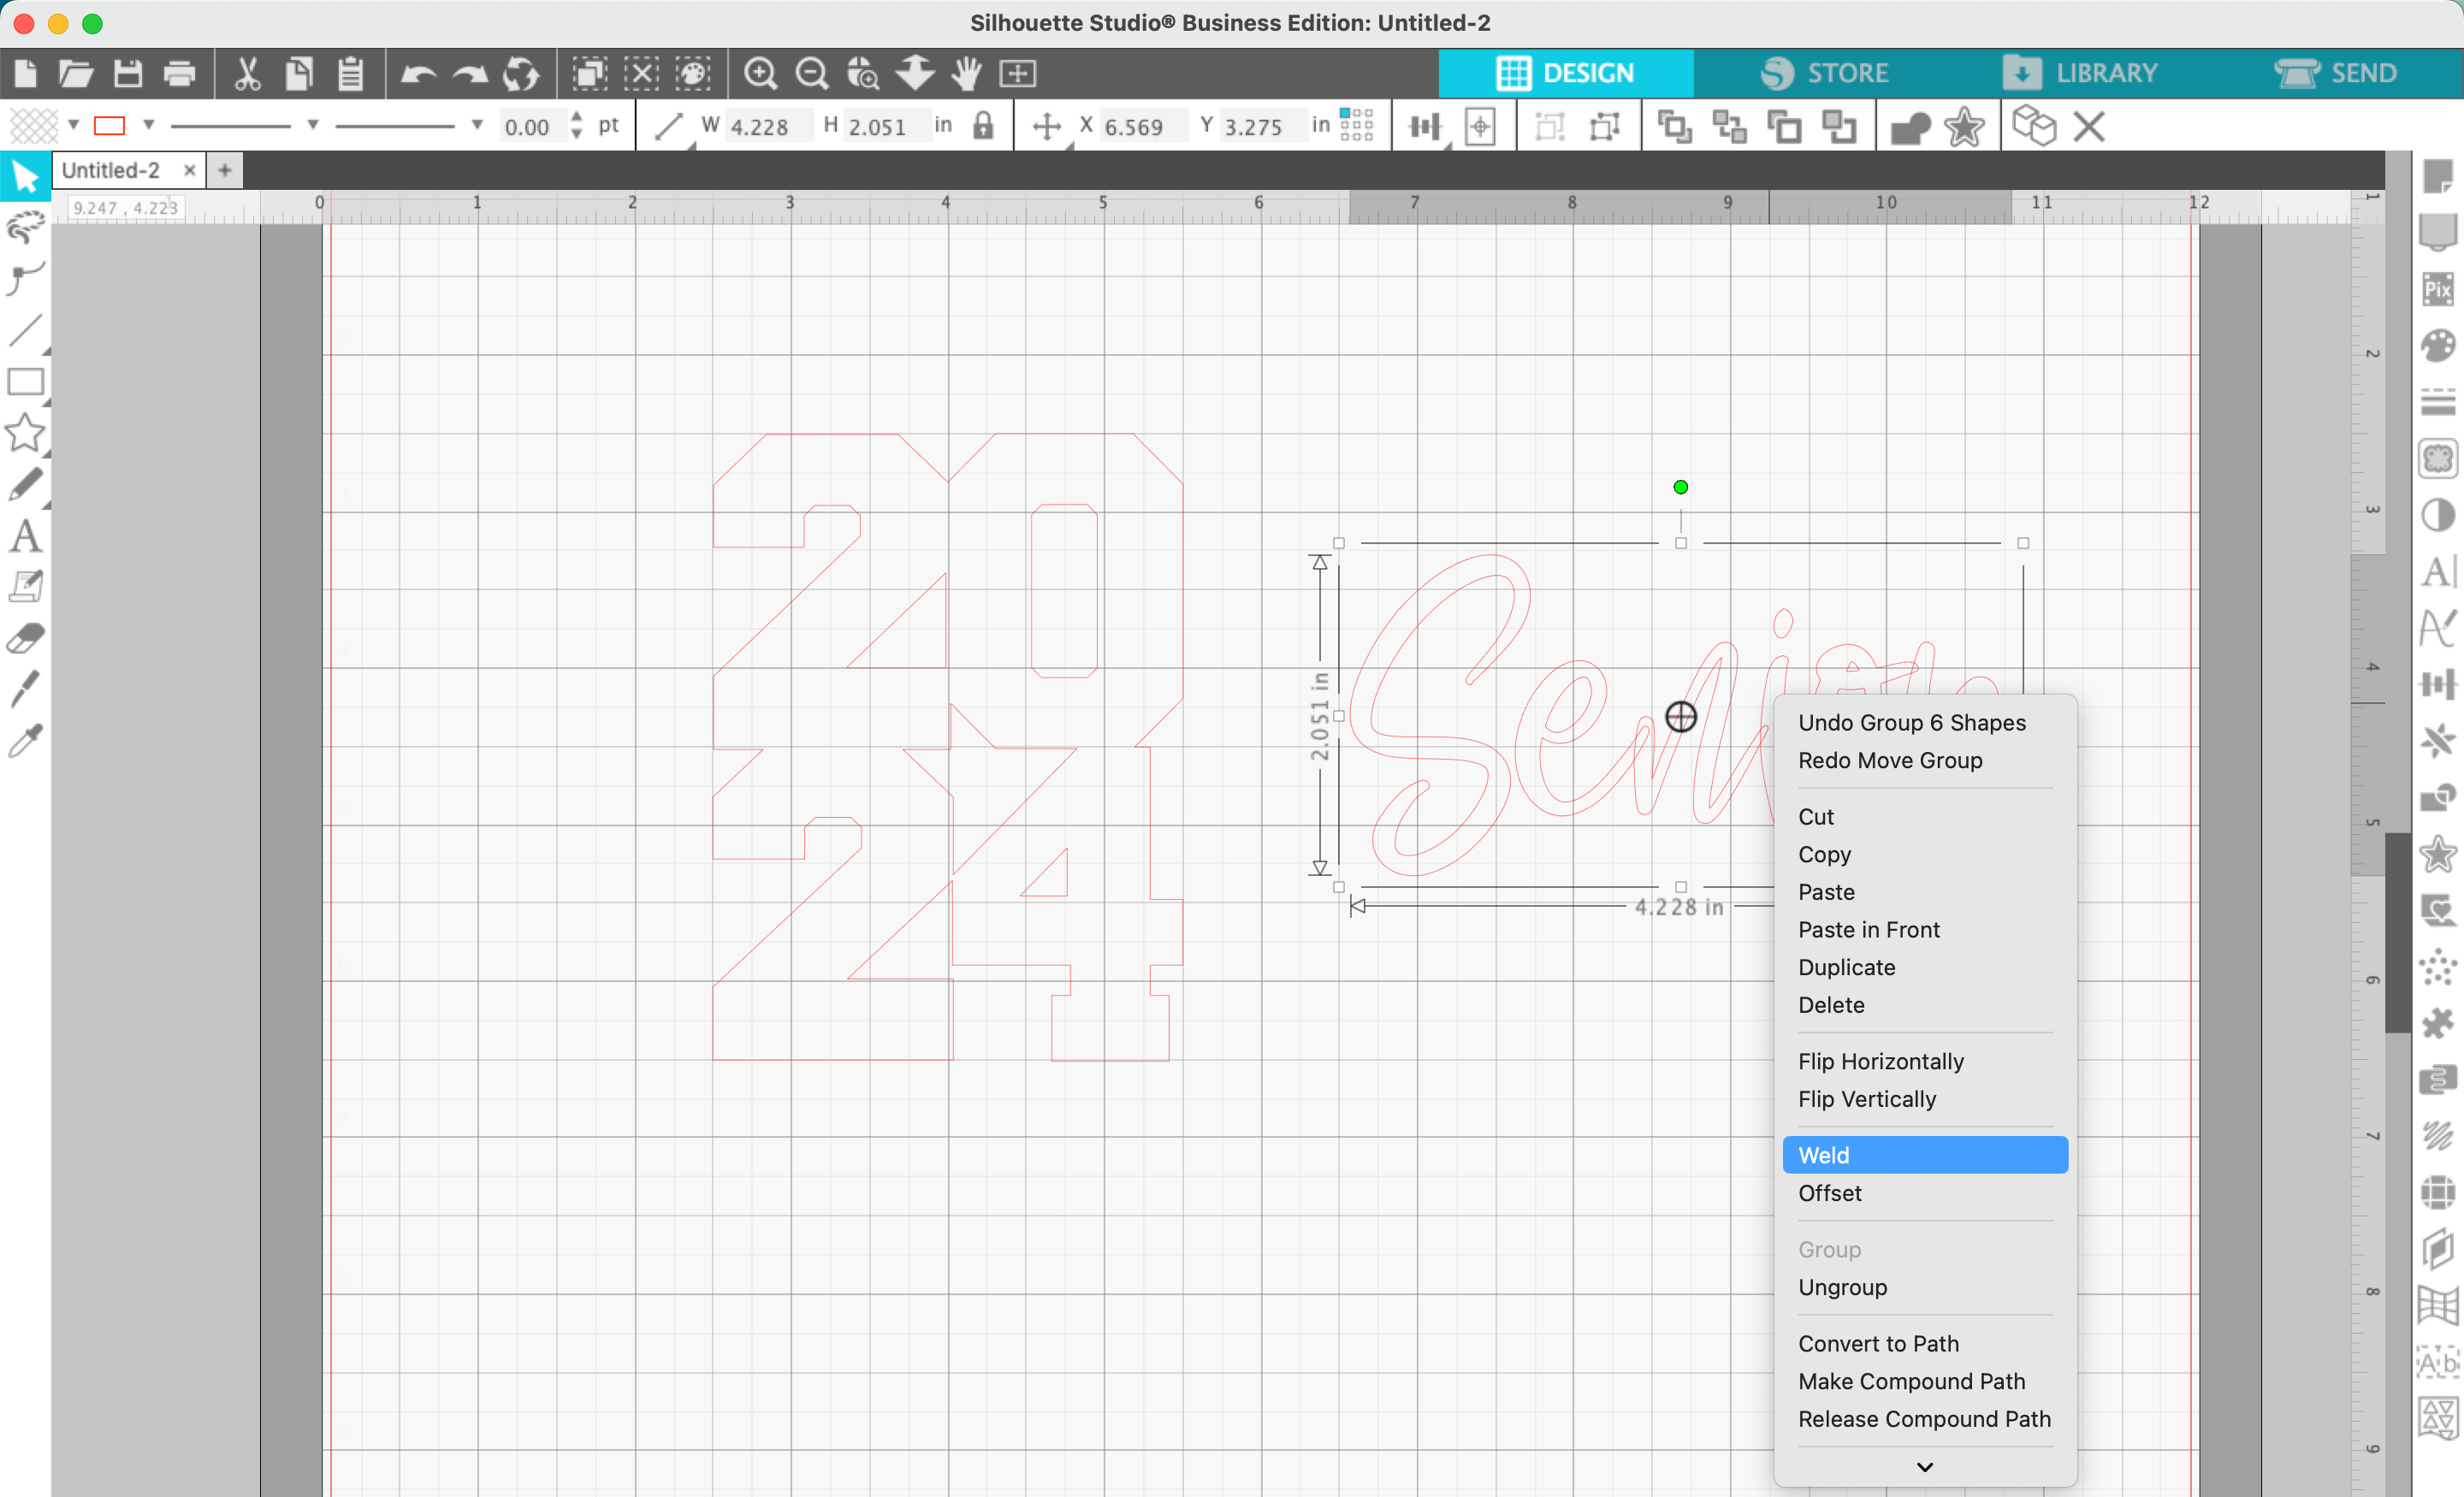
5. Type a word in a scribble or signature style font, then right click and ‘Weld’ it together. If needed, right click and ‘Group’ the welded design back together.
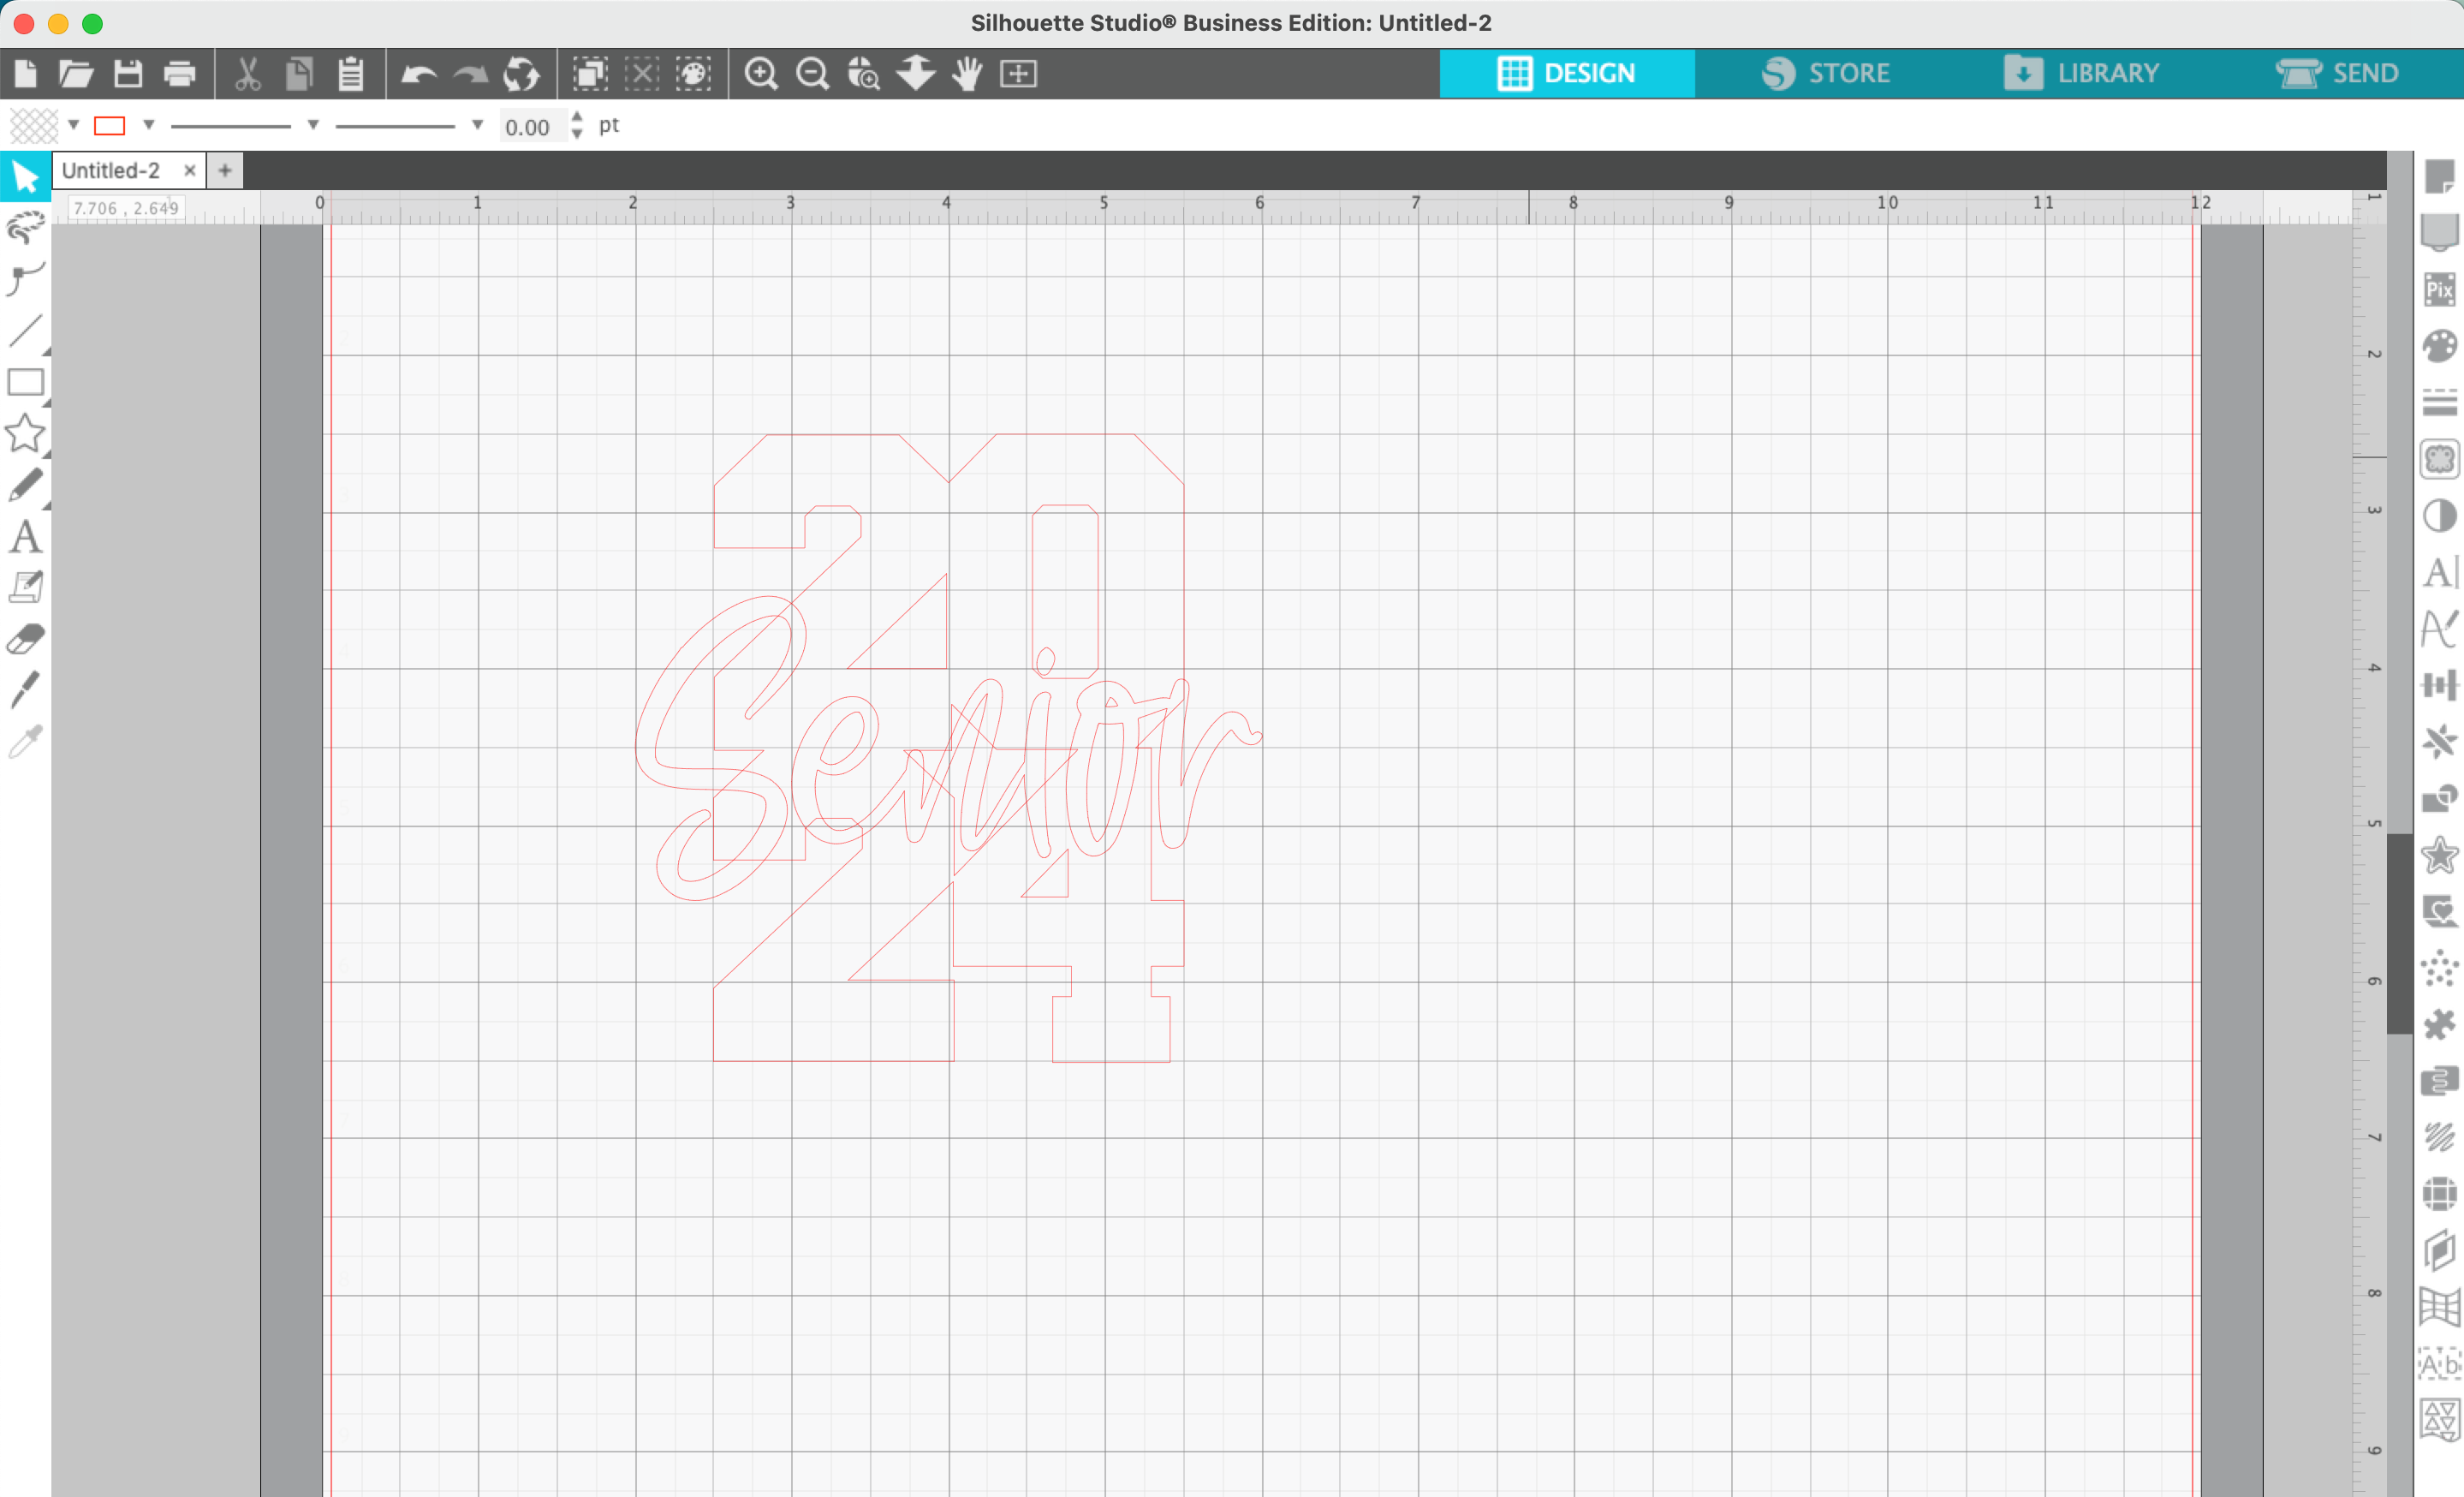
6. Drag the text onto your numbers.
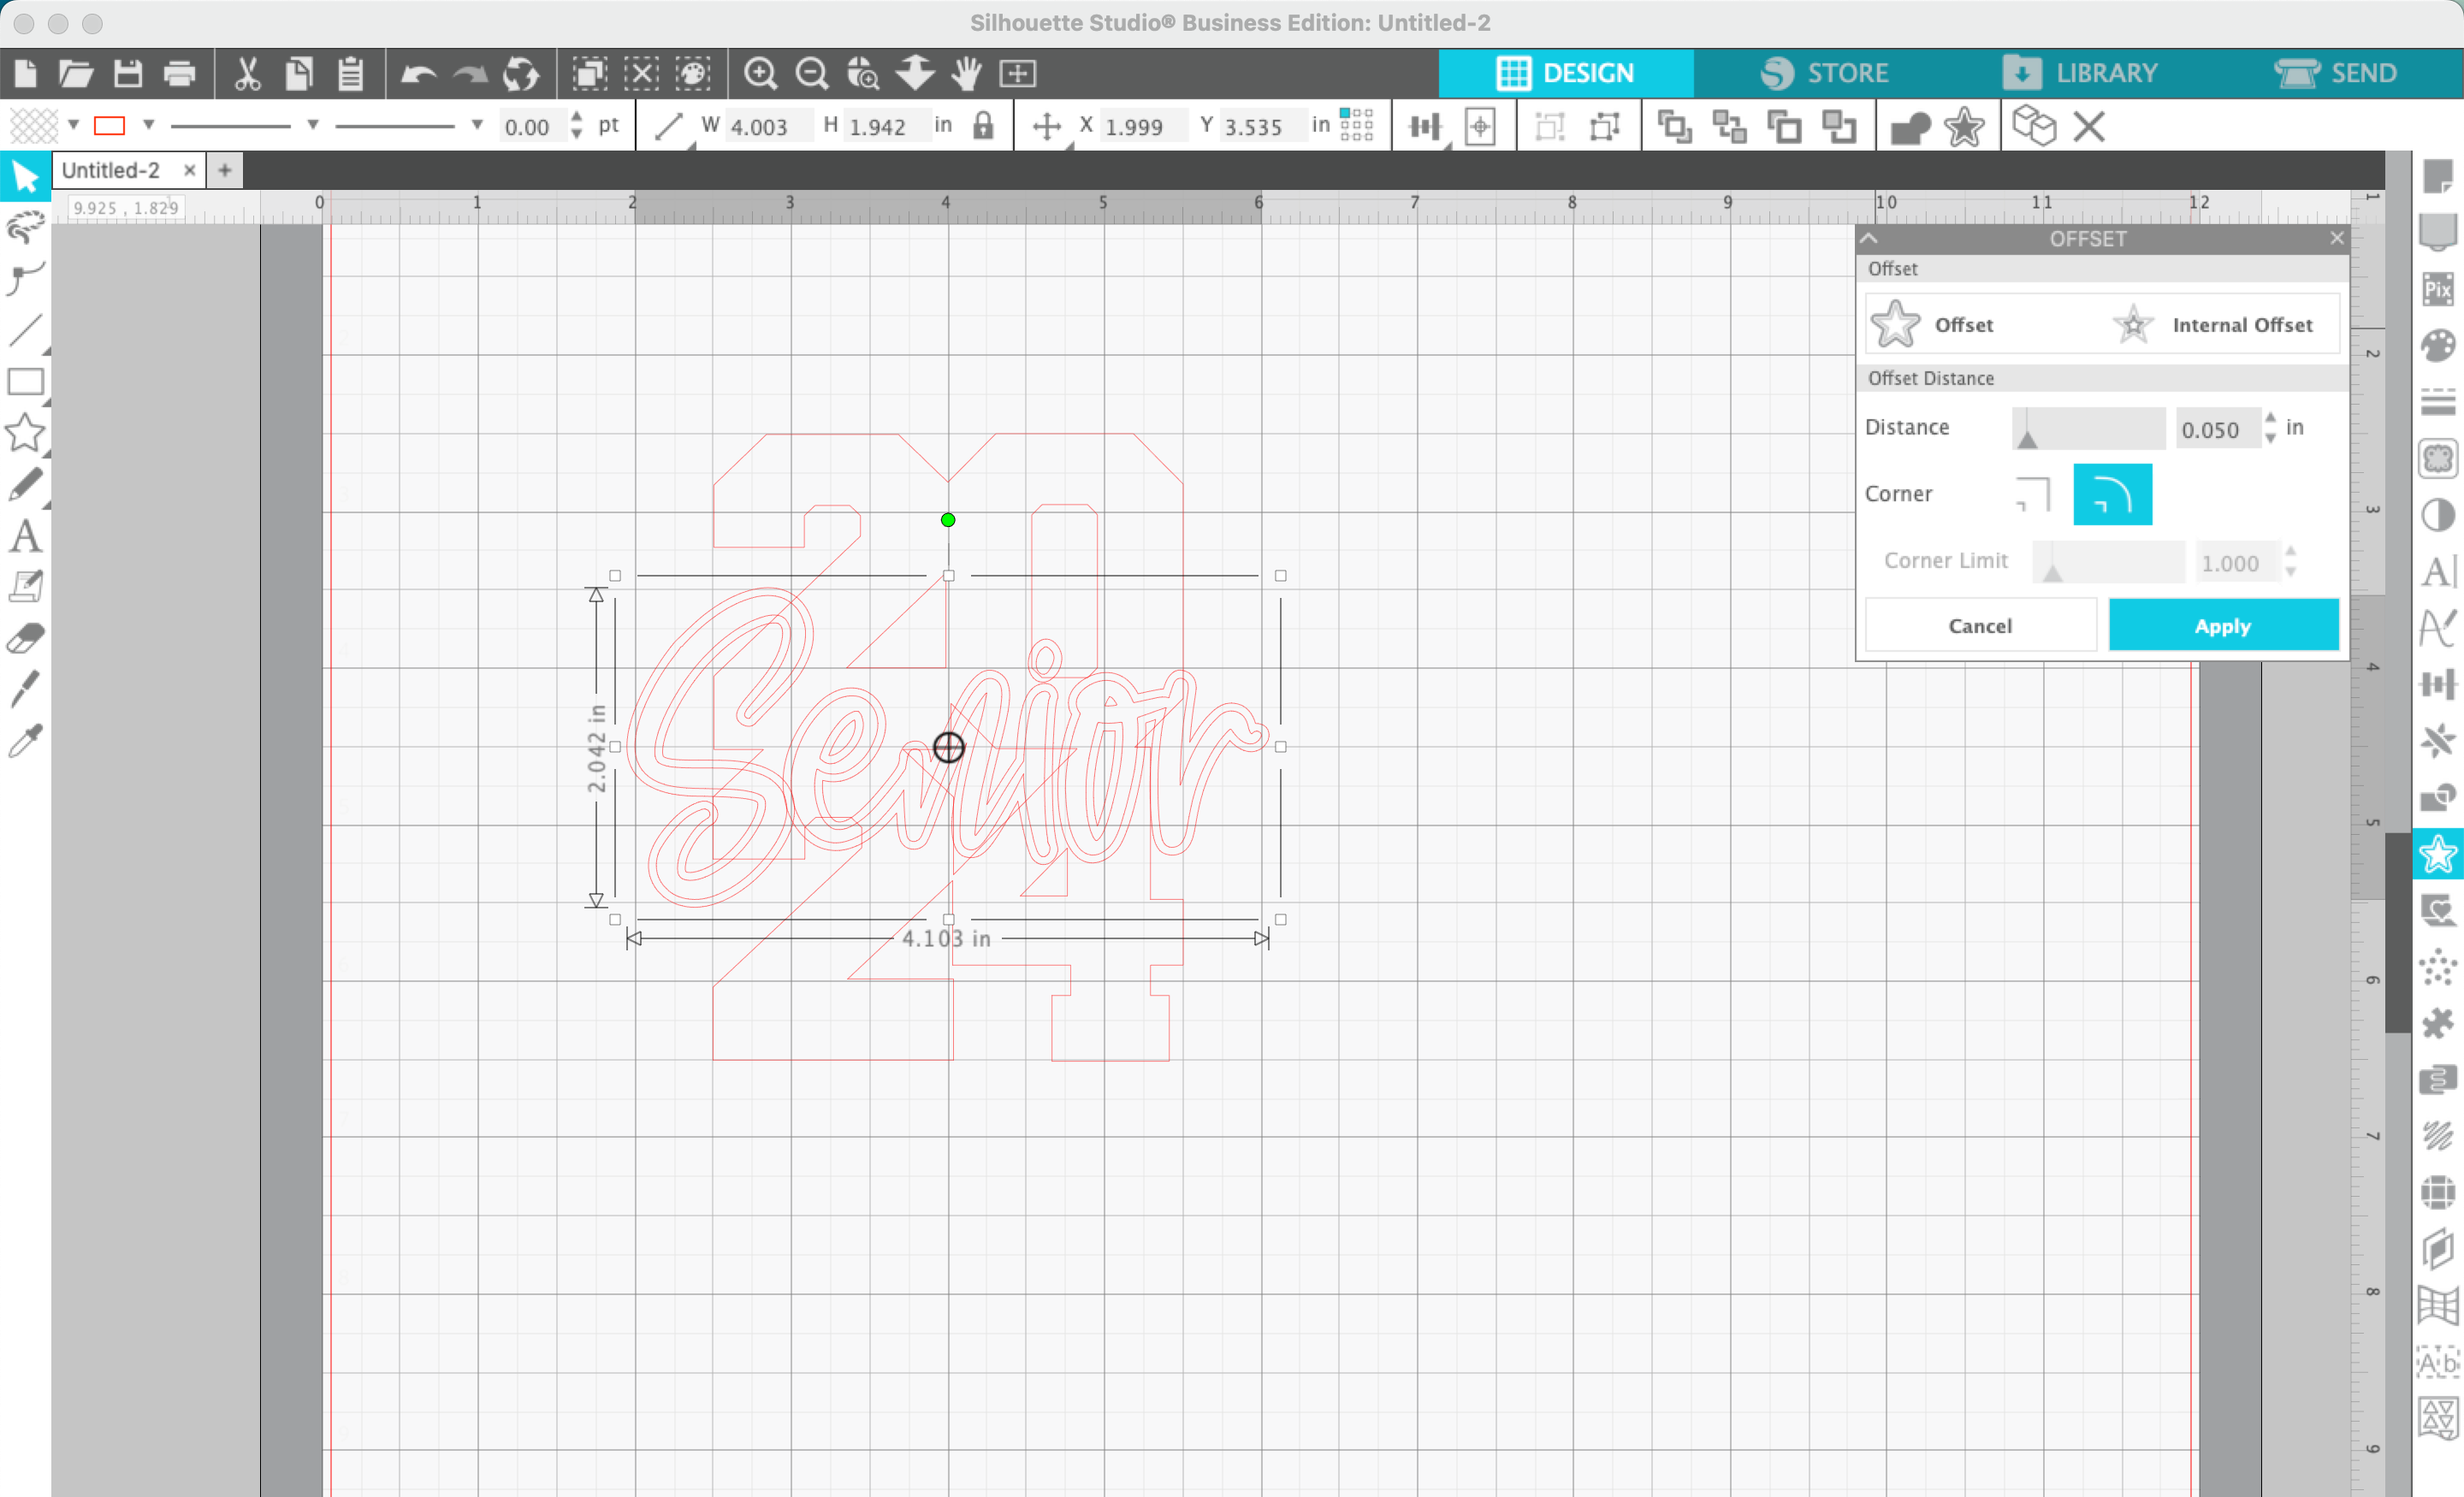
7. Navigate to ‘Panels’, ‘Offset’. Then offset the text.
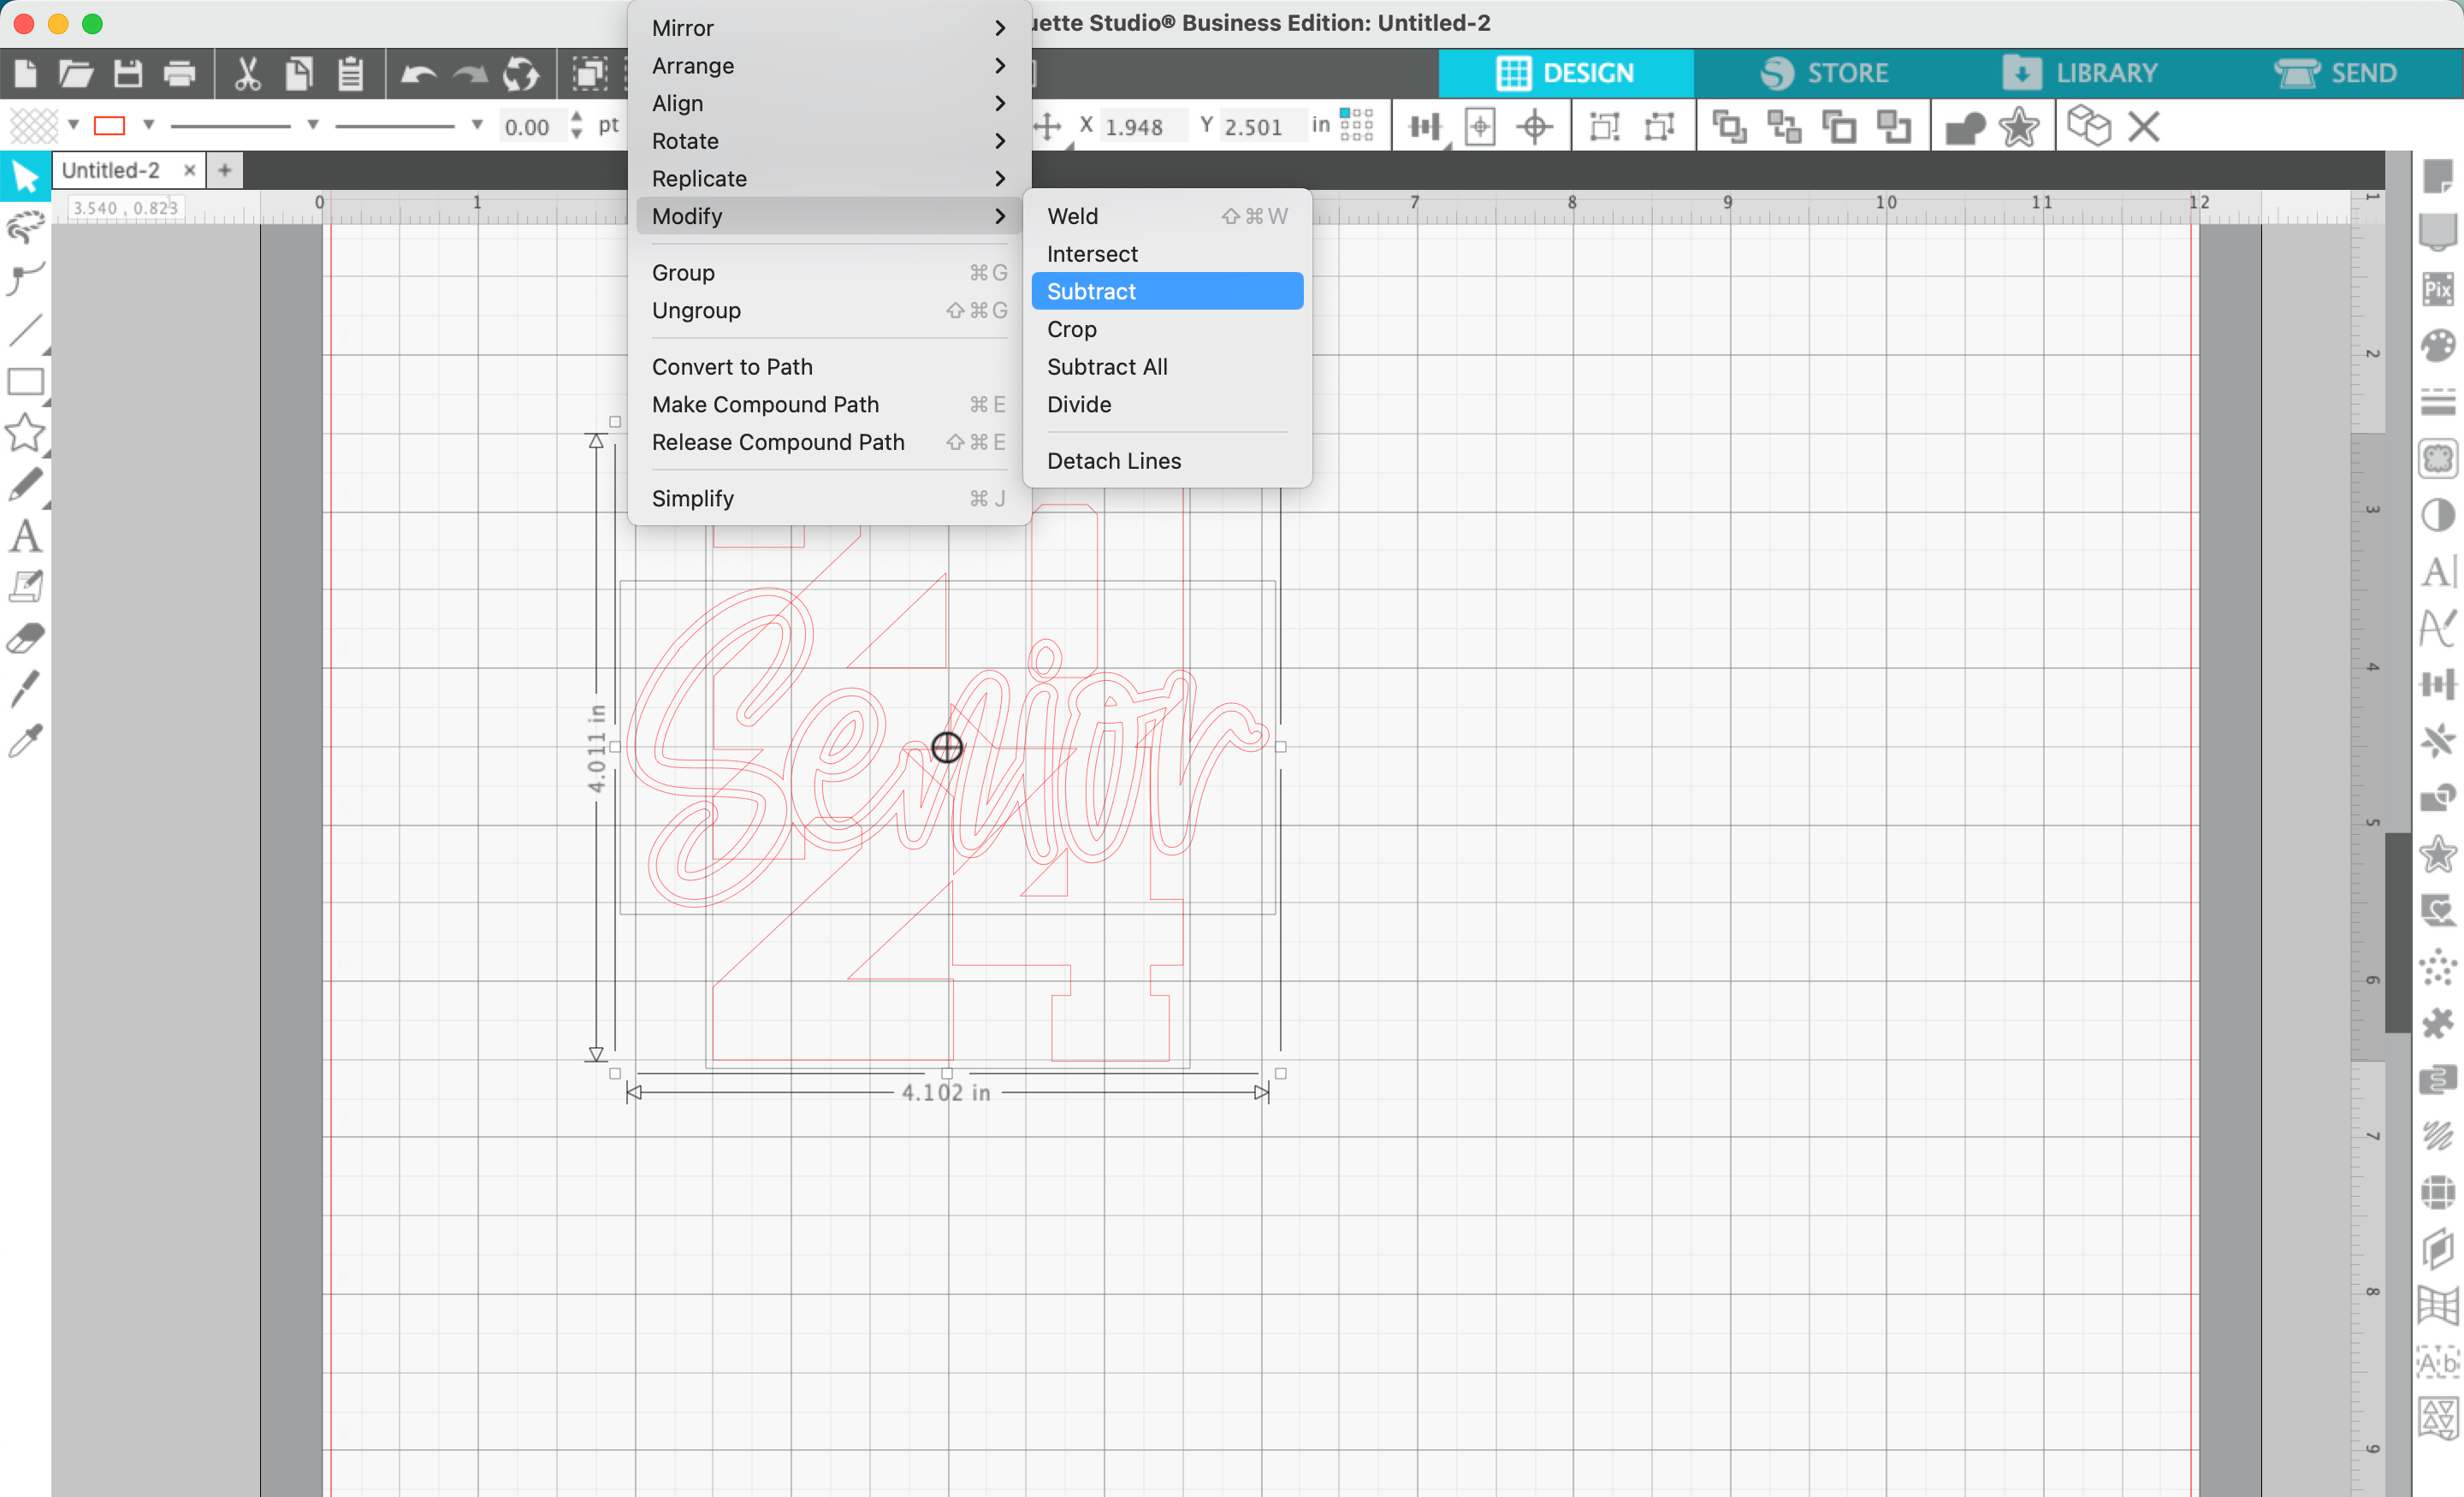
8. Select the numbers, then the offset text, then navigate to ‘Object’, ‘Modify’, ‘Subtract’. This will remove a small area around the text to make it more visible.
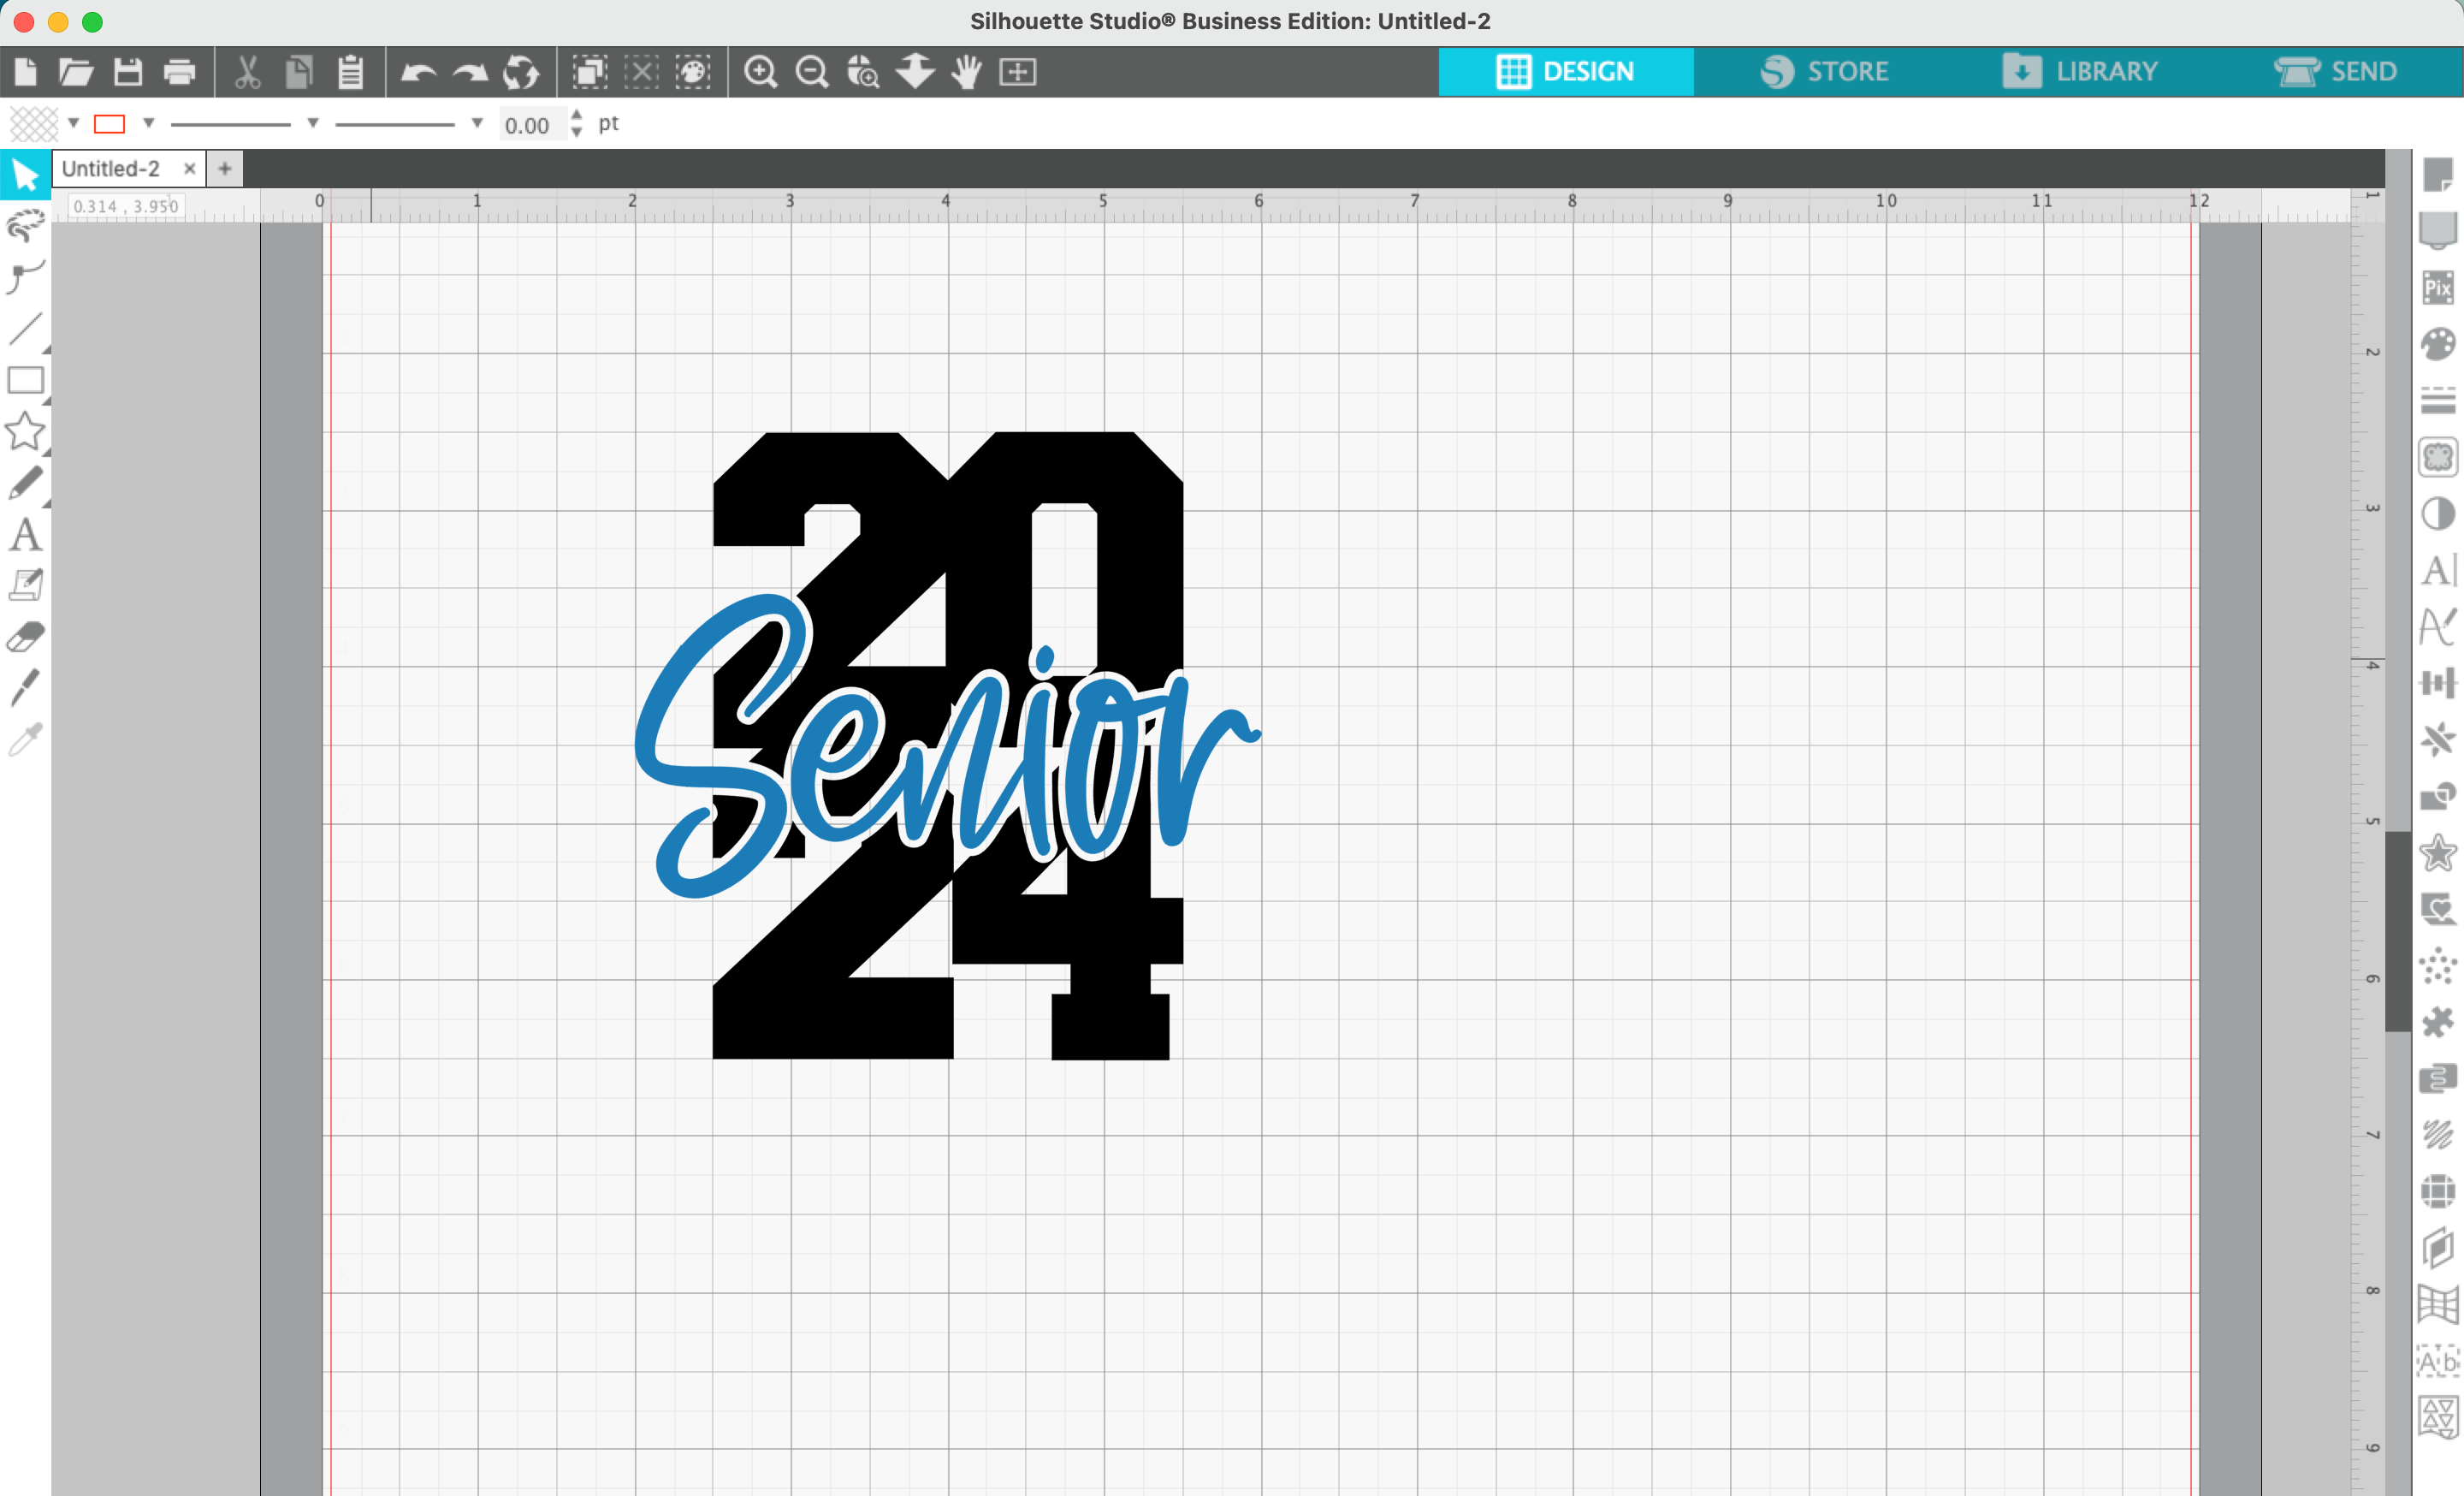
9. Add color to your design.
Design Alternatives
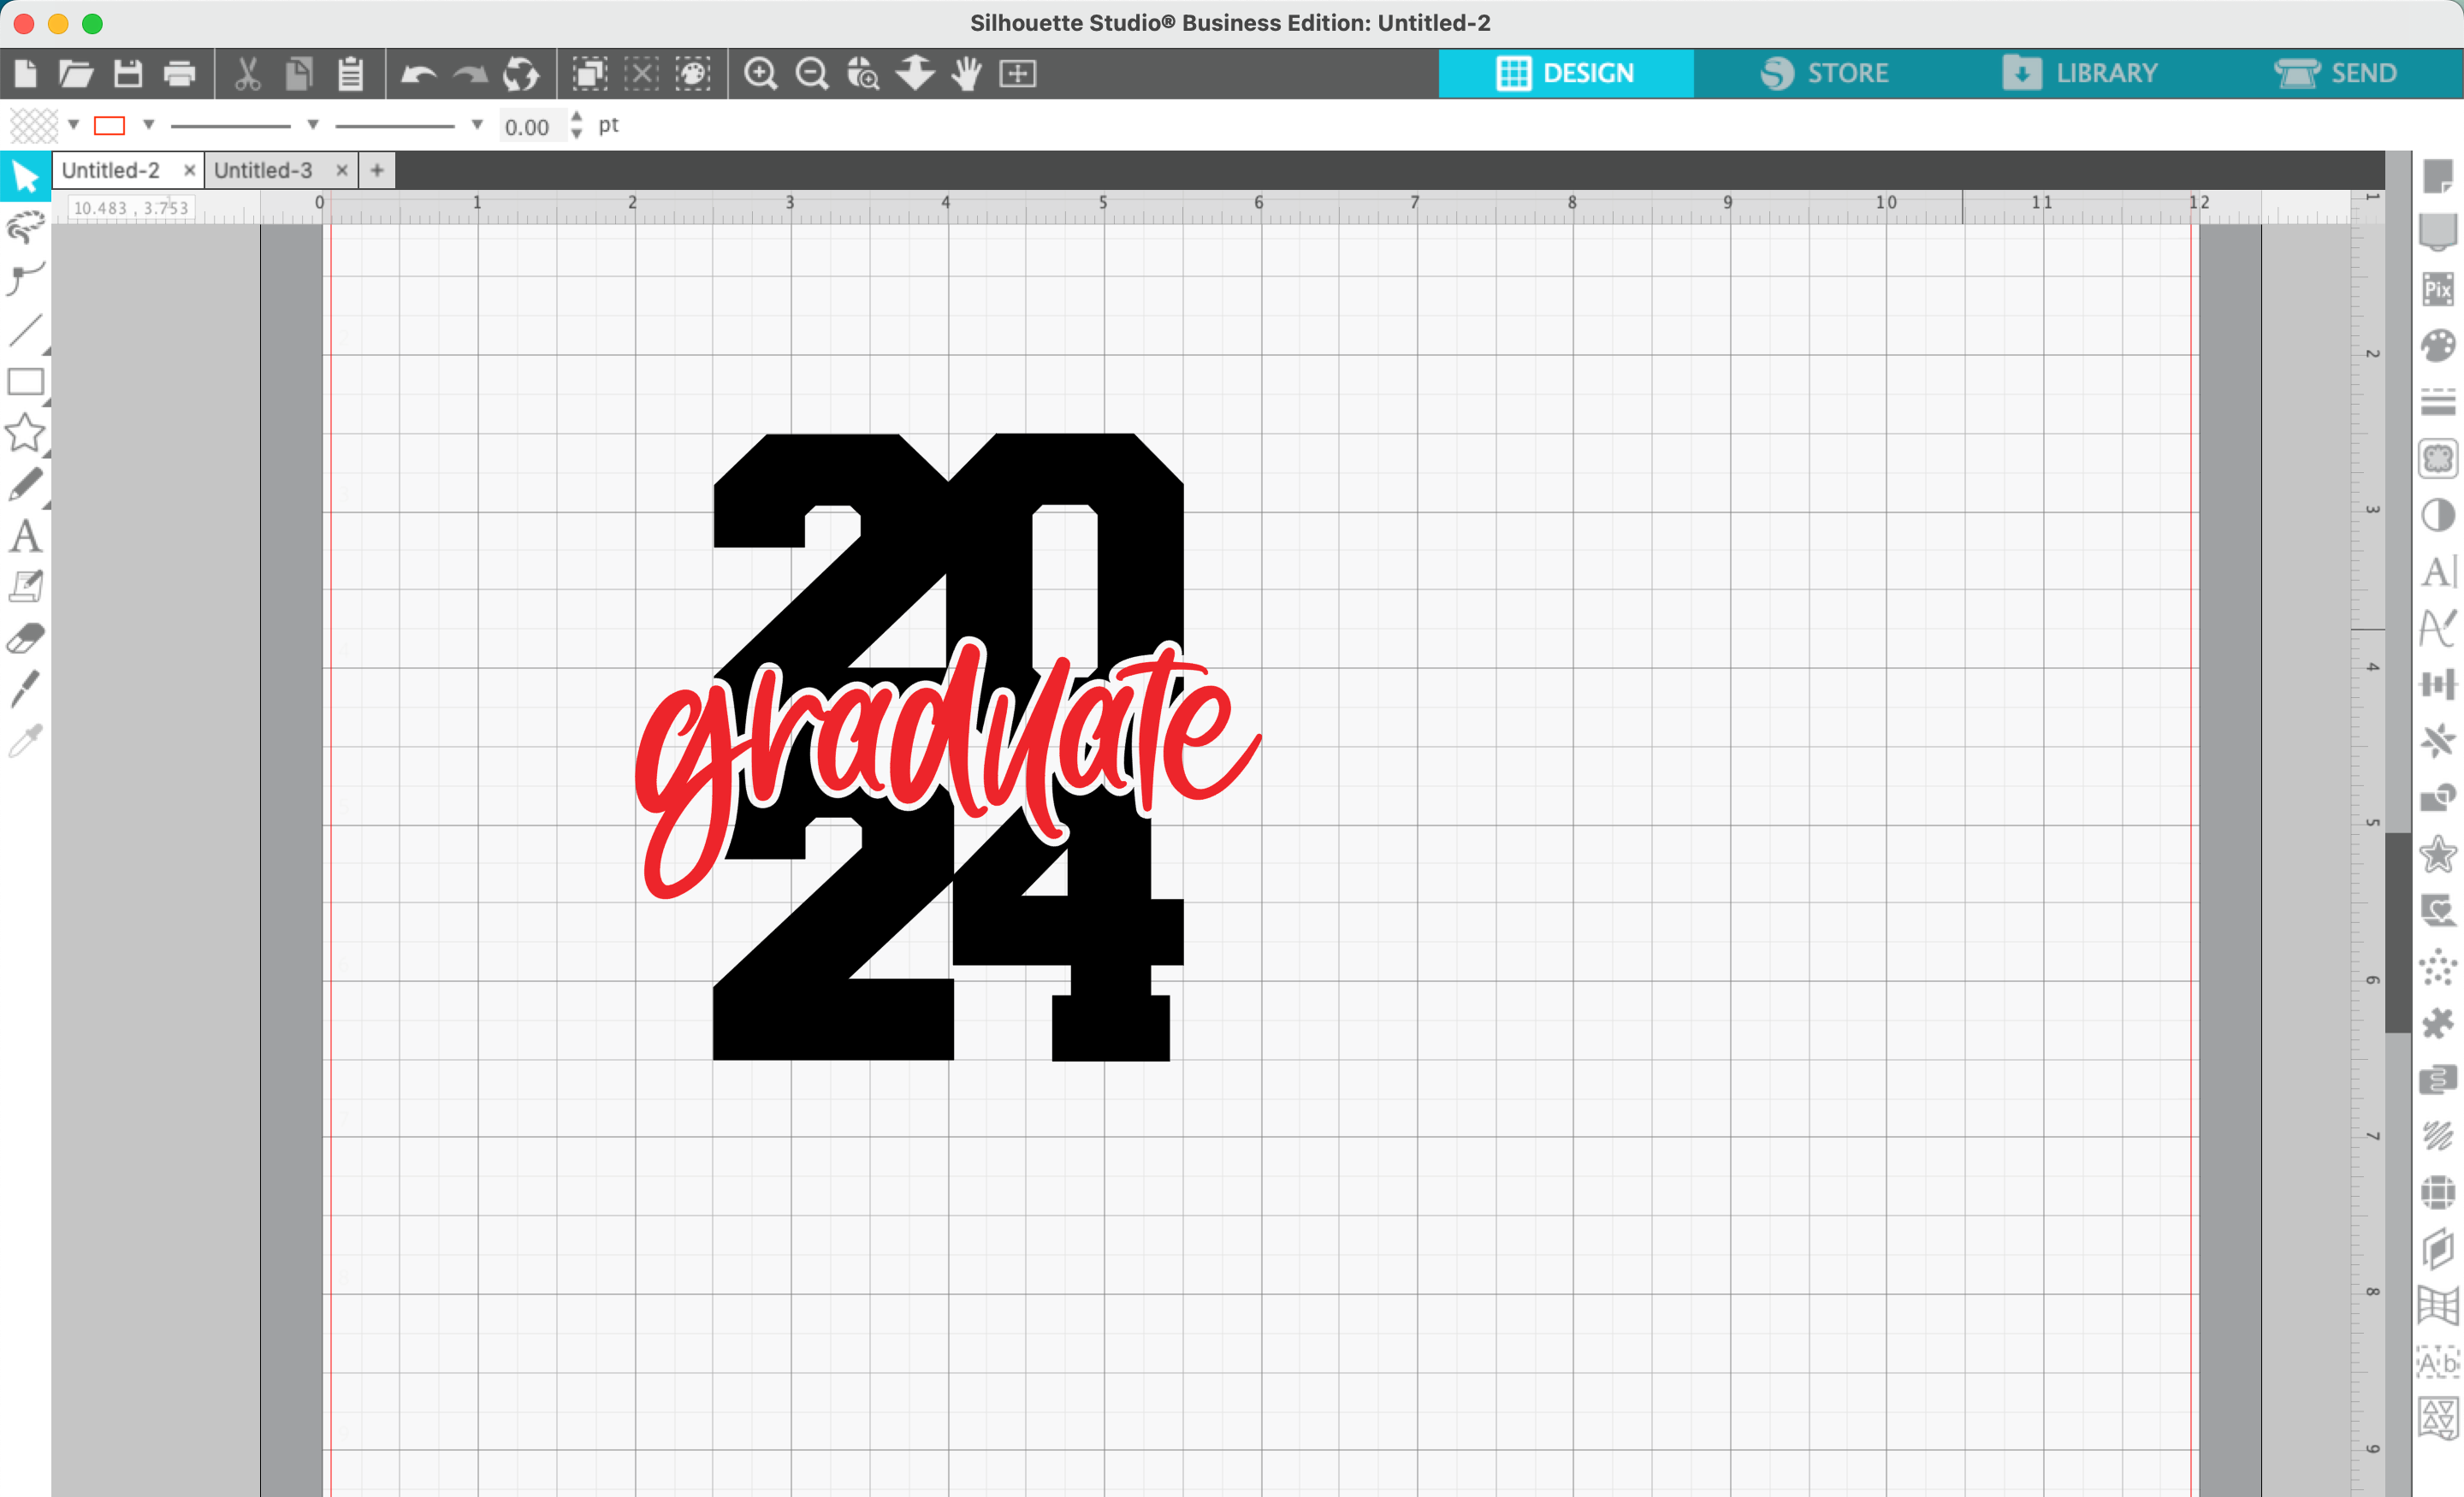
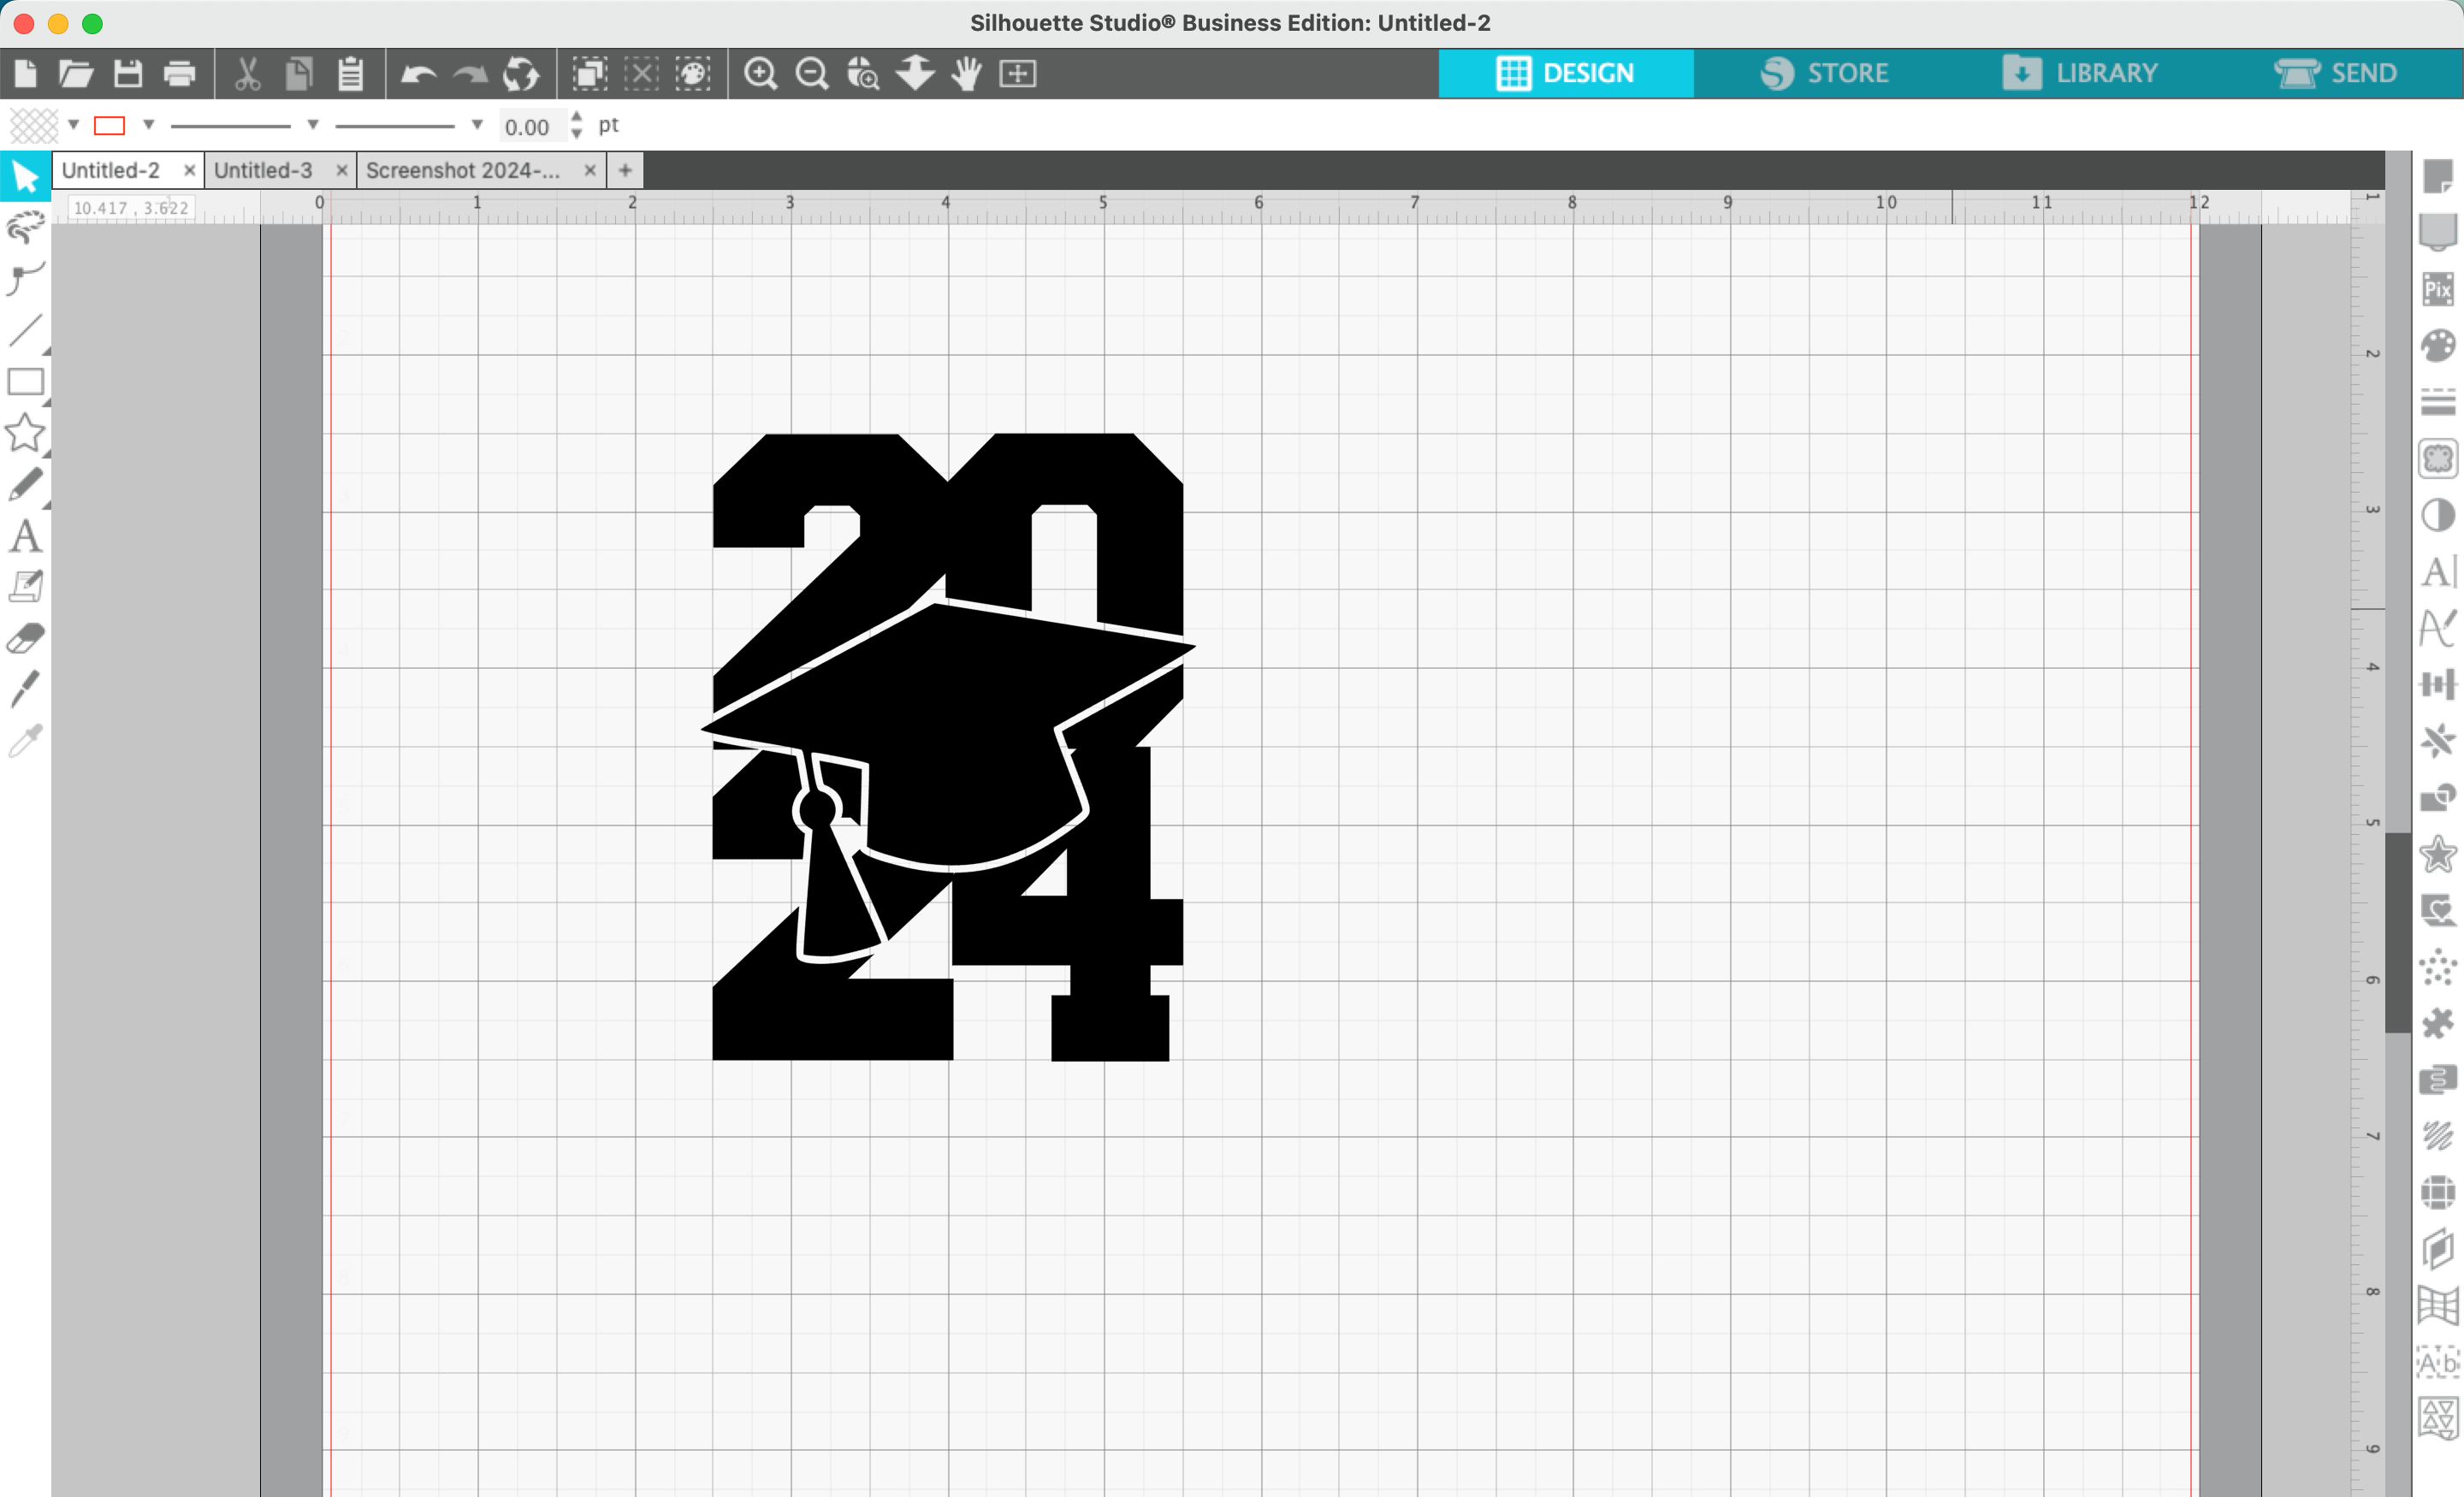
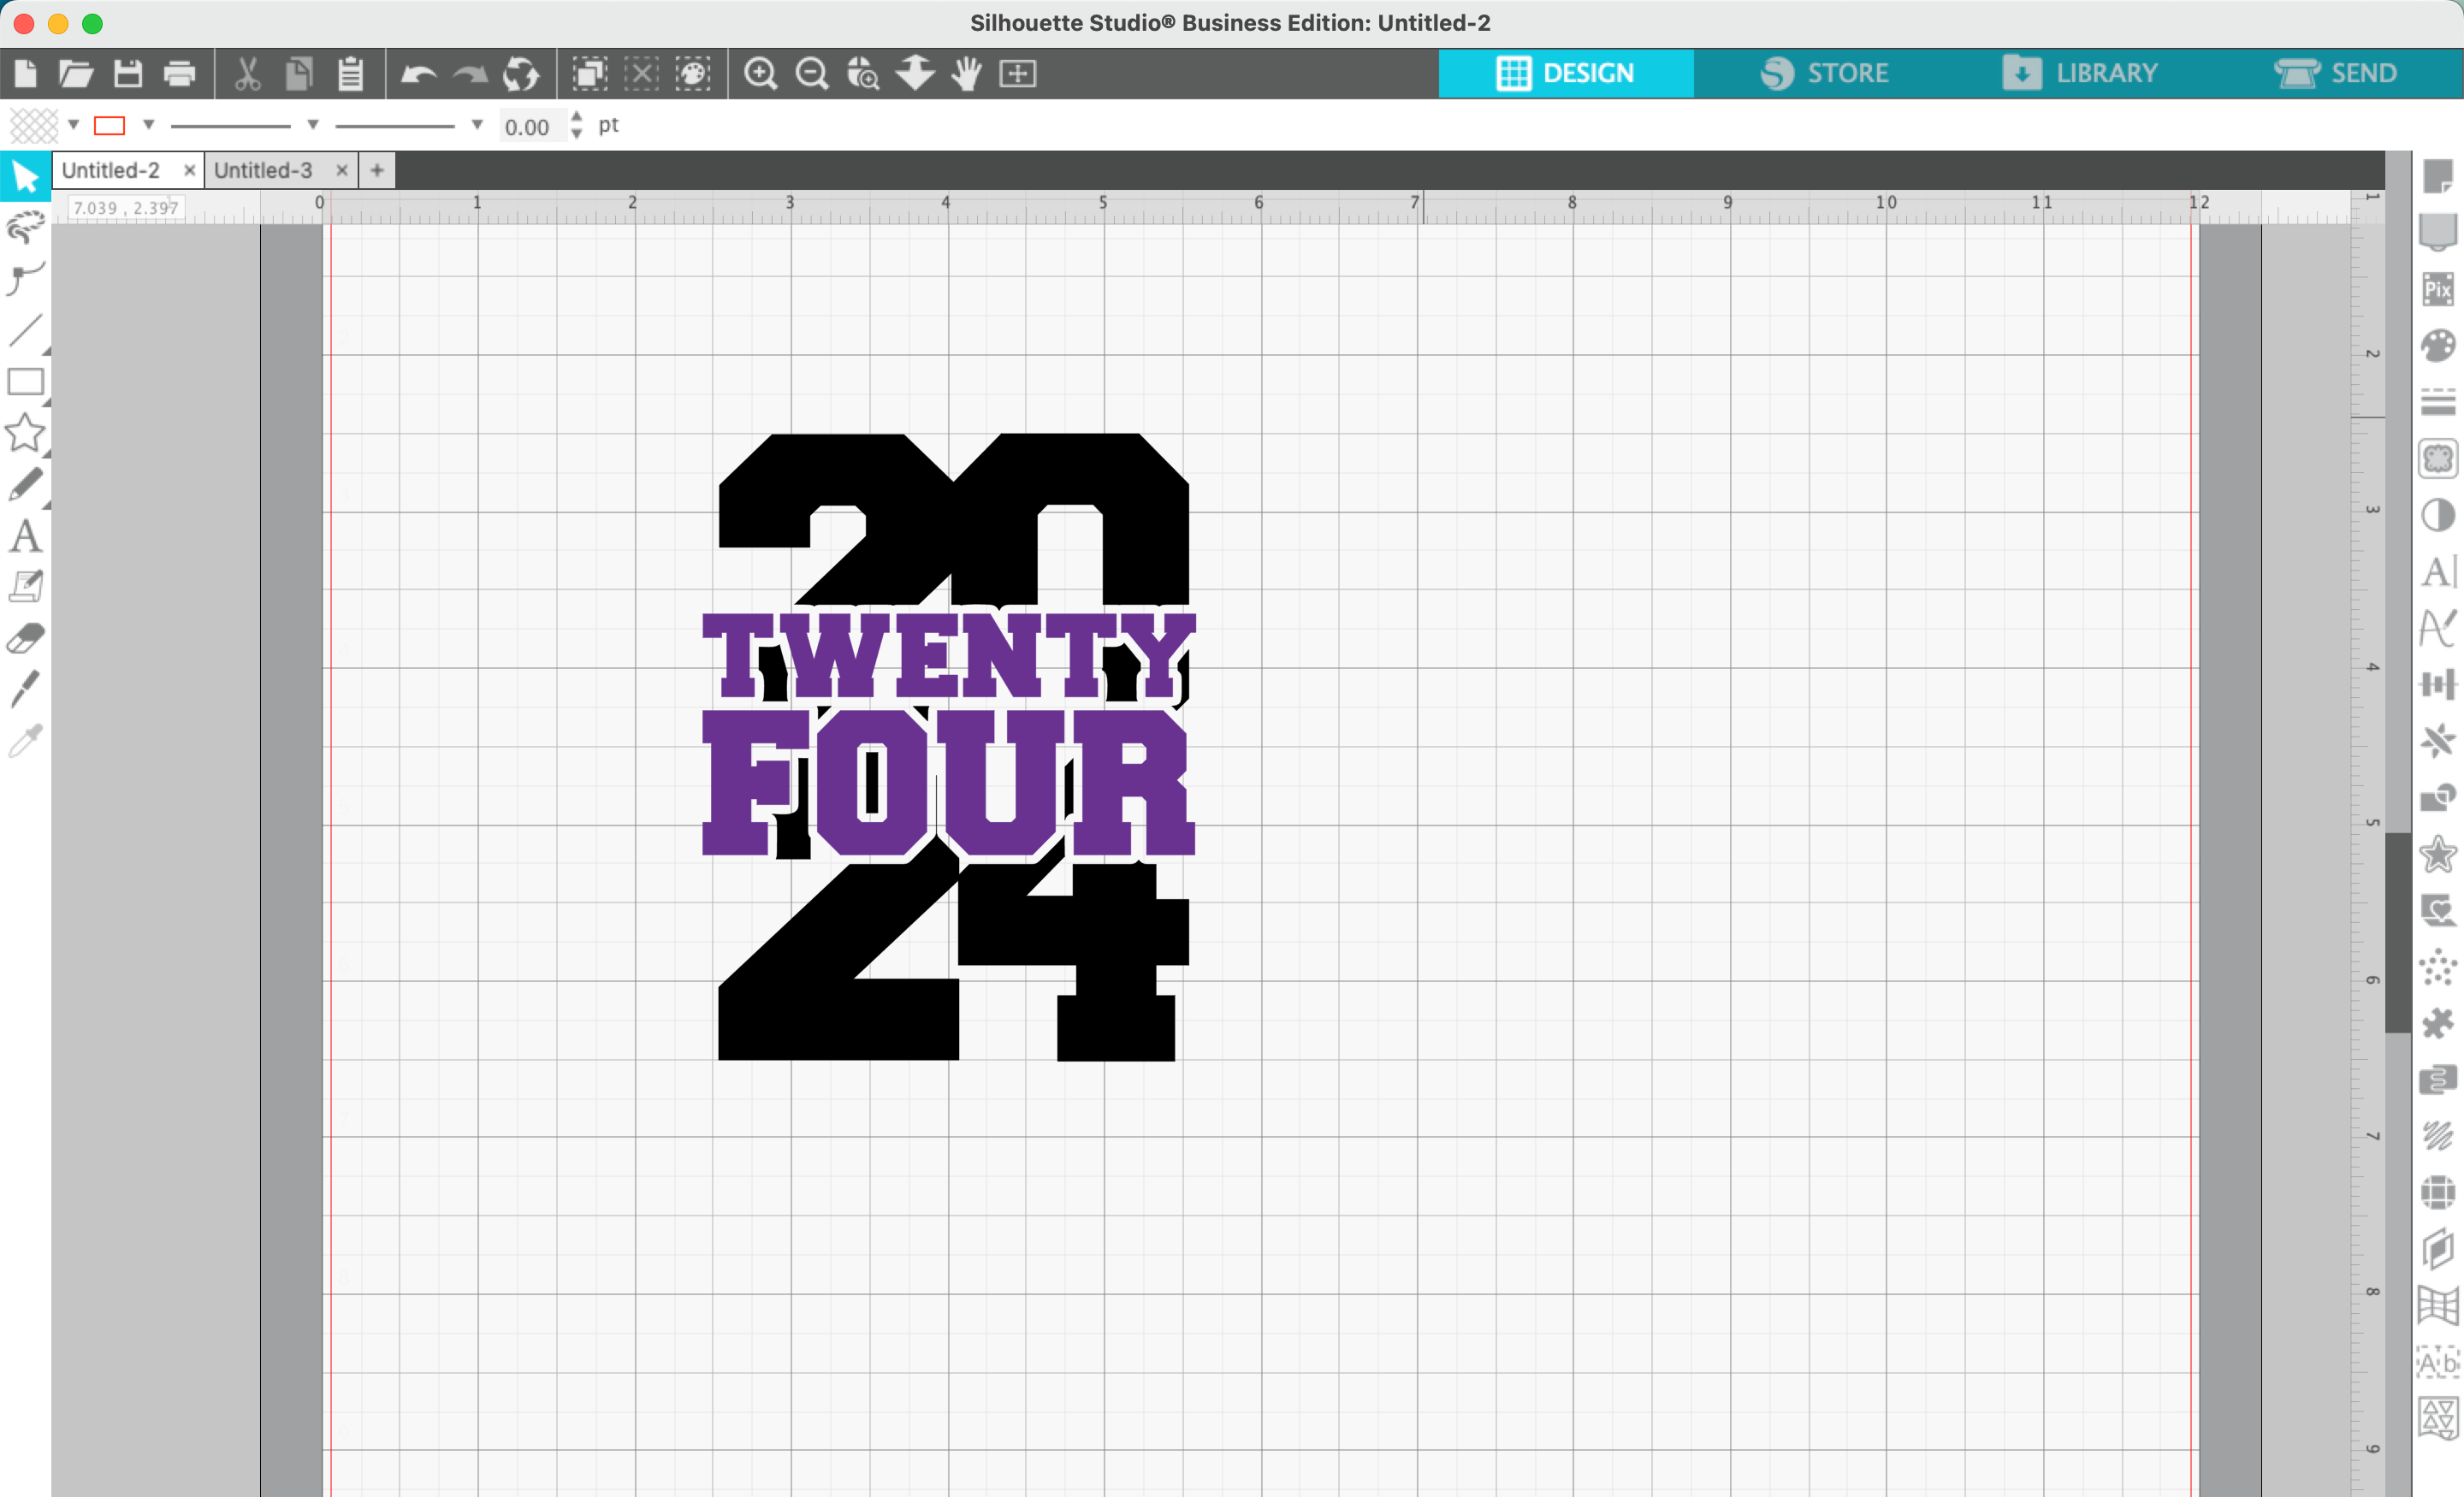
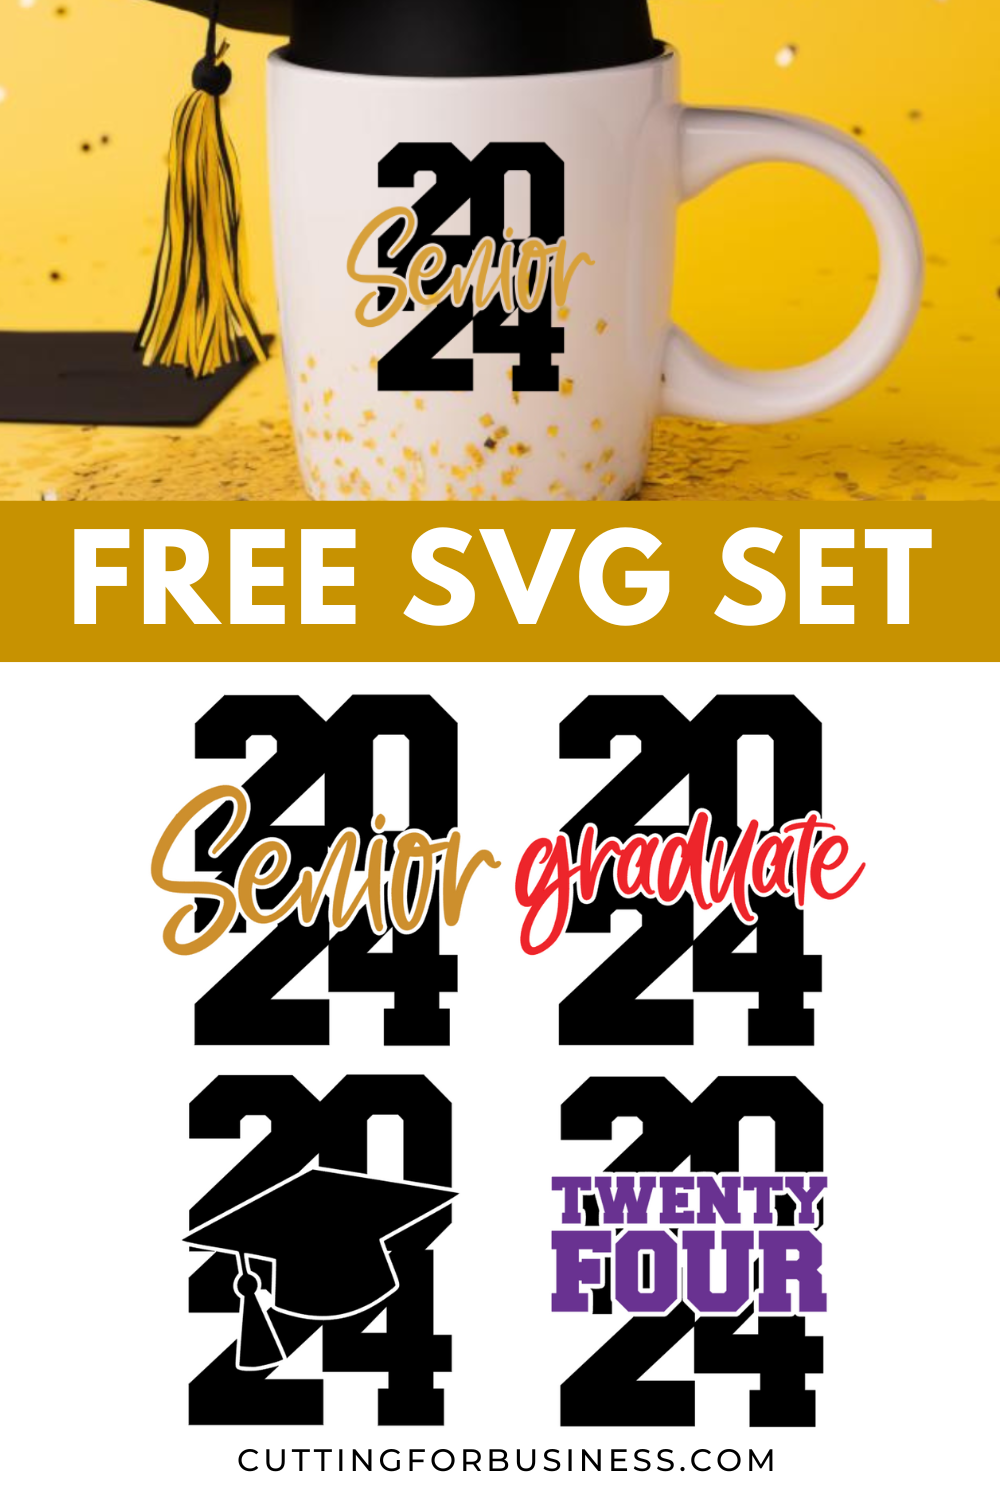
If you don’t want to use the word ‘Senior’, consider ‘graduate’, a graduation cap, or the words ‘Twenty Four’.
For example:
That’s it! Your design is ready to go!
Don’t Forget to Save!
To save your new SVG creation, head to ‘File’, ‘Save As’, ‘Save to Hard Drive’, name the file, then select ‘SVG’ from the dropdown menu.
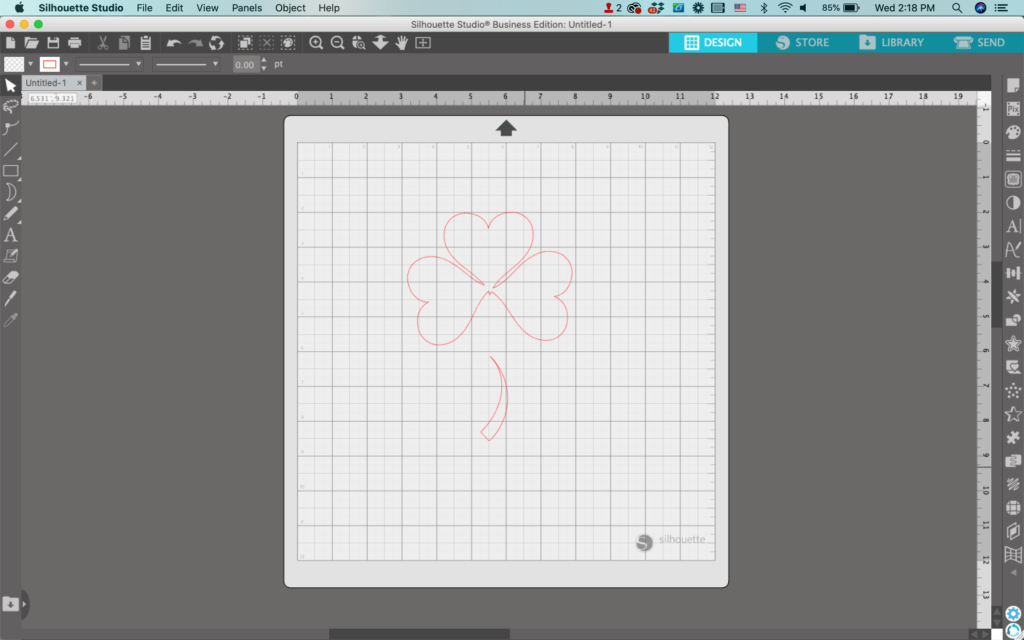
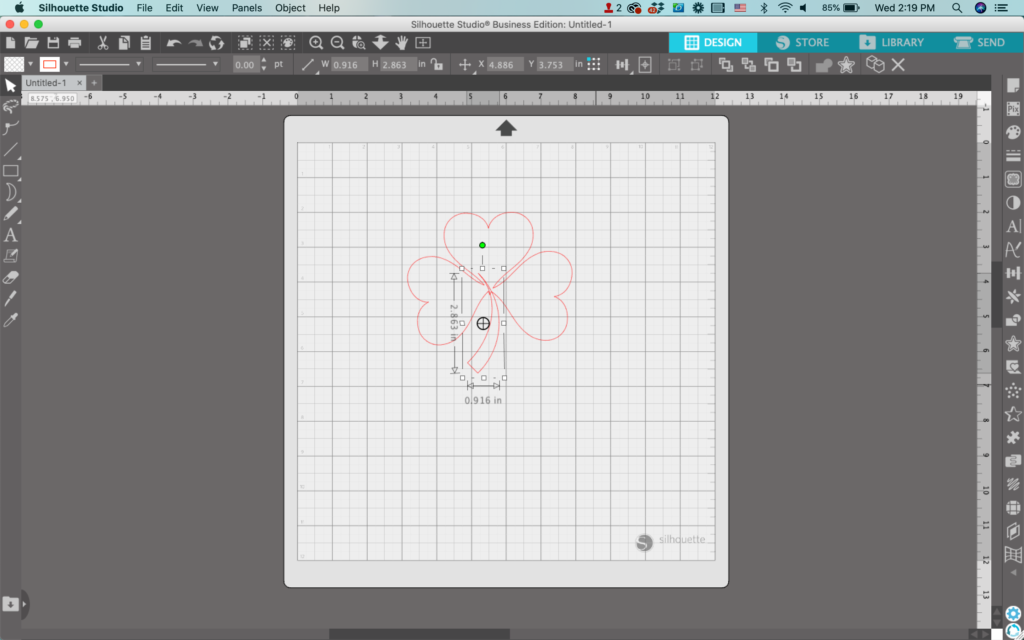
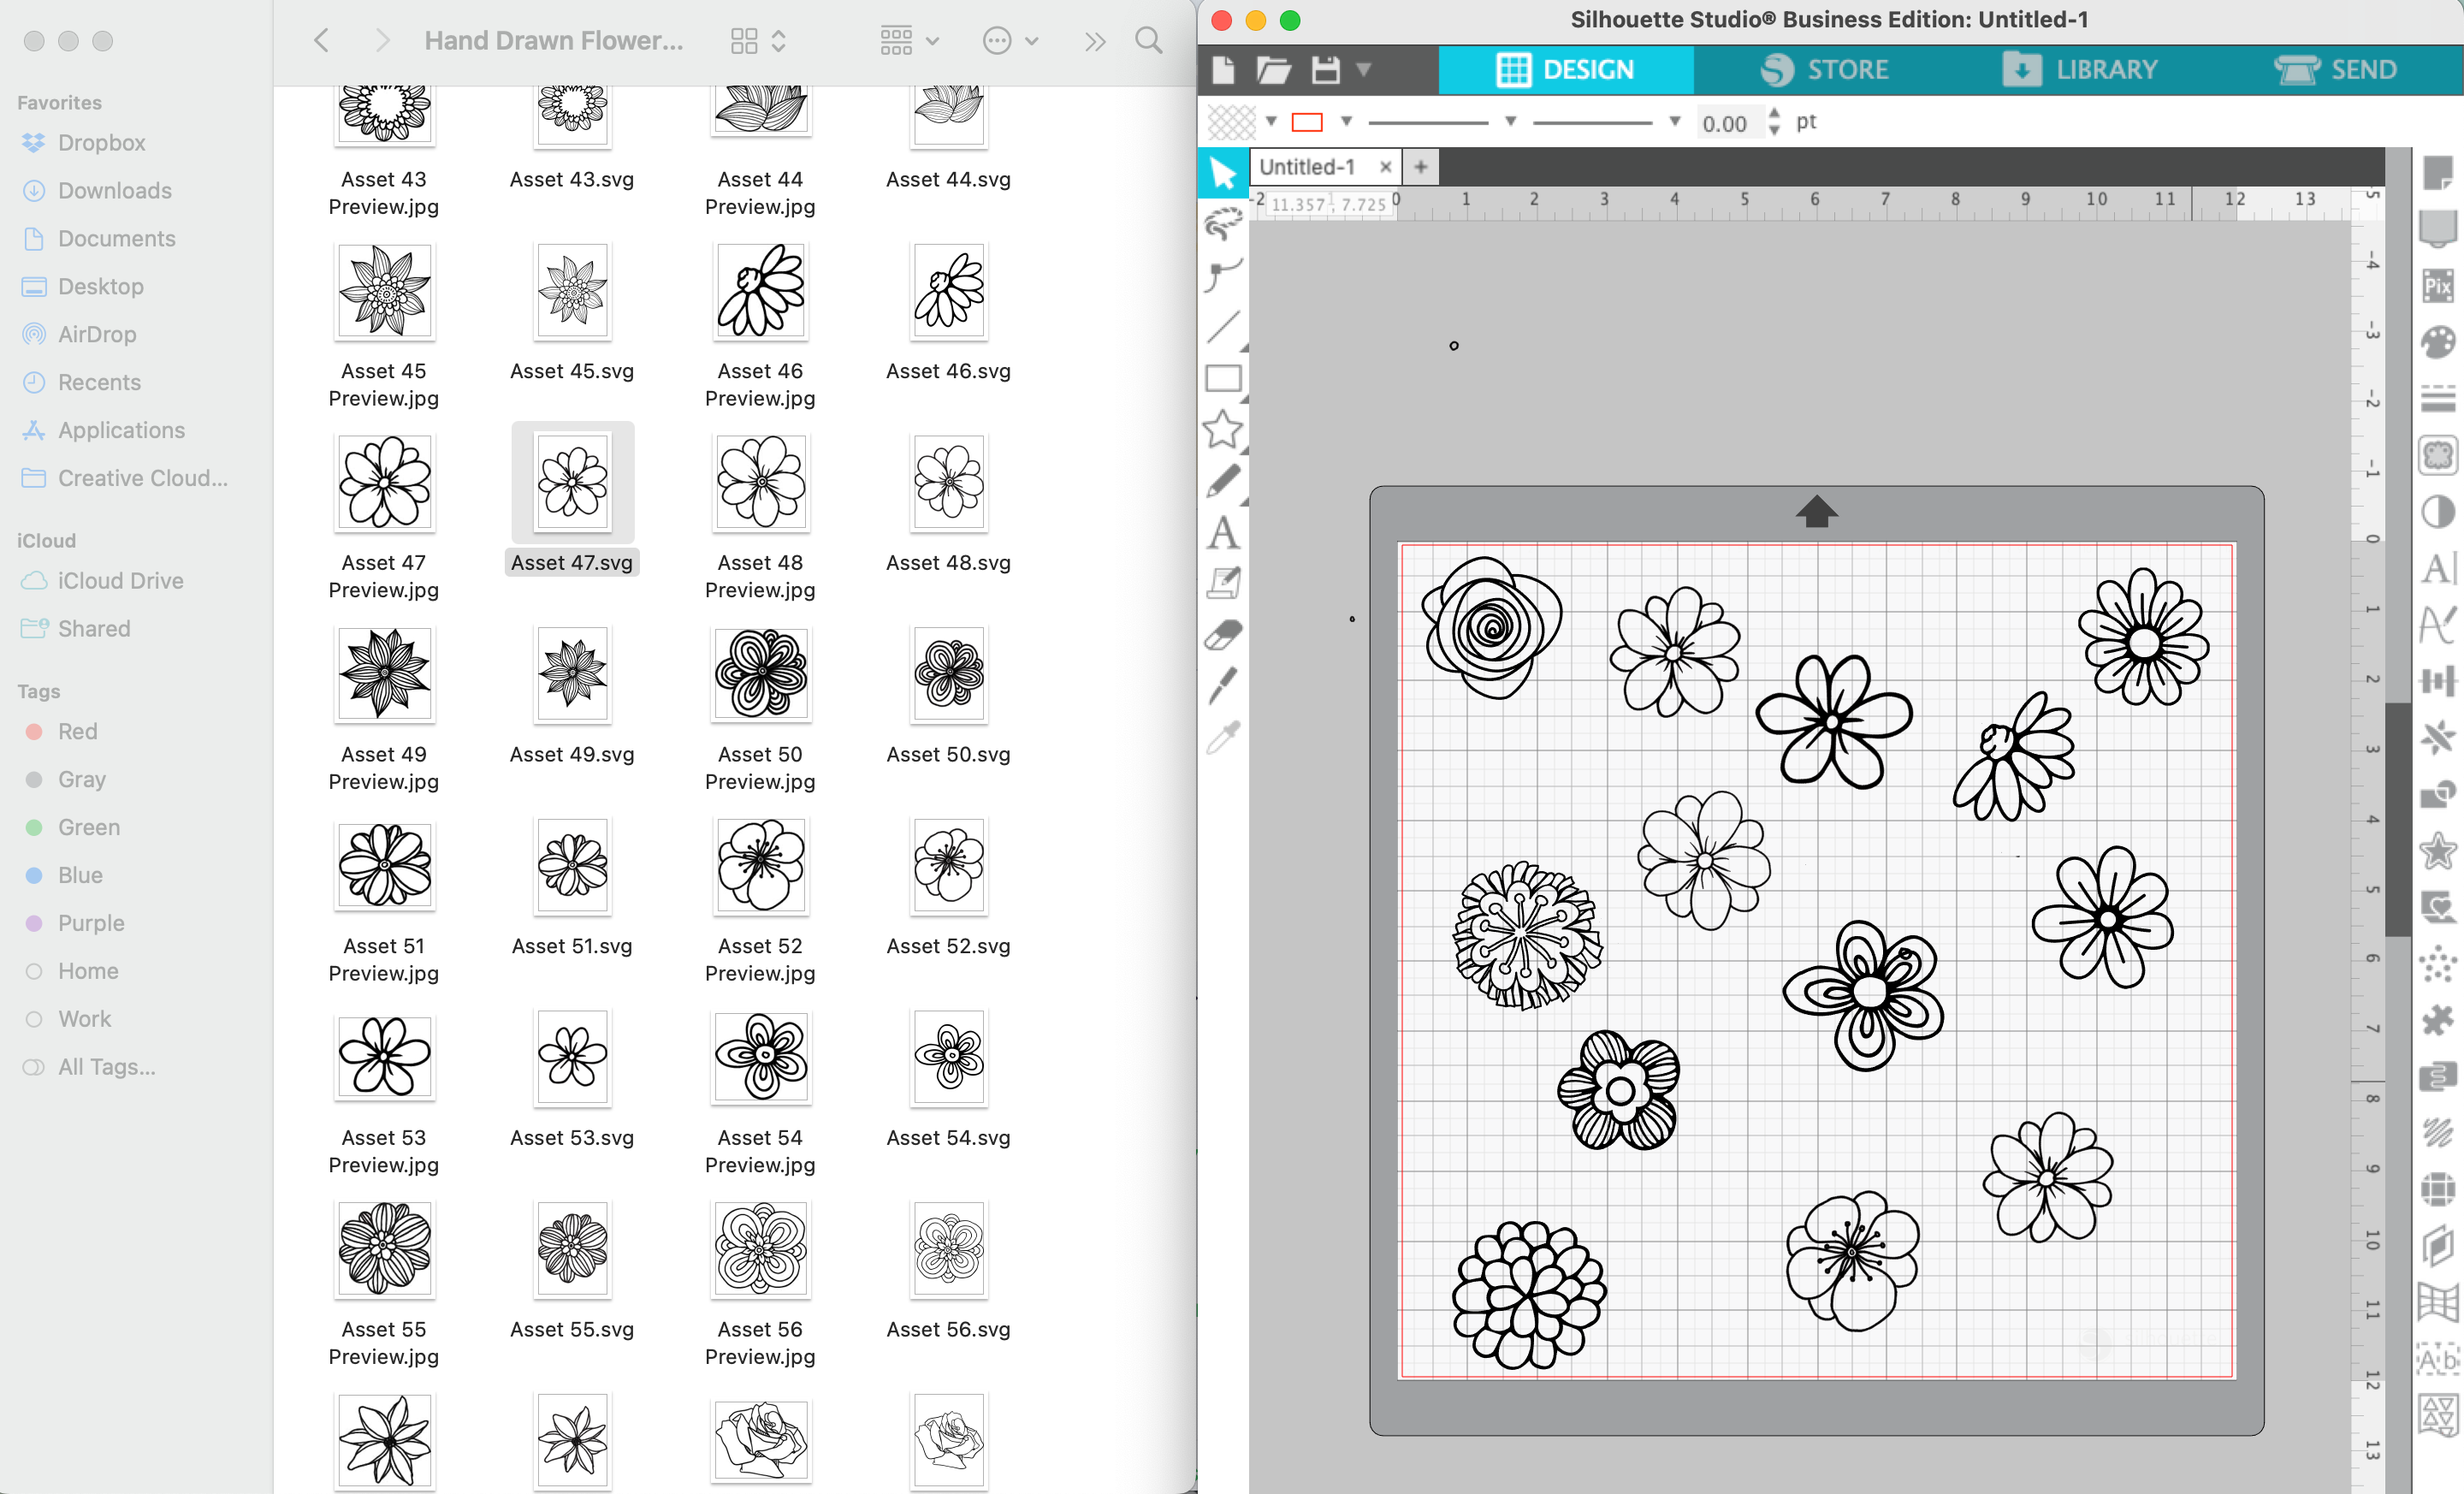
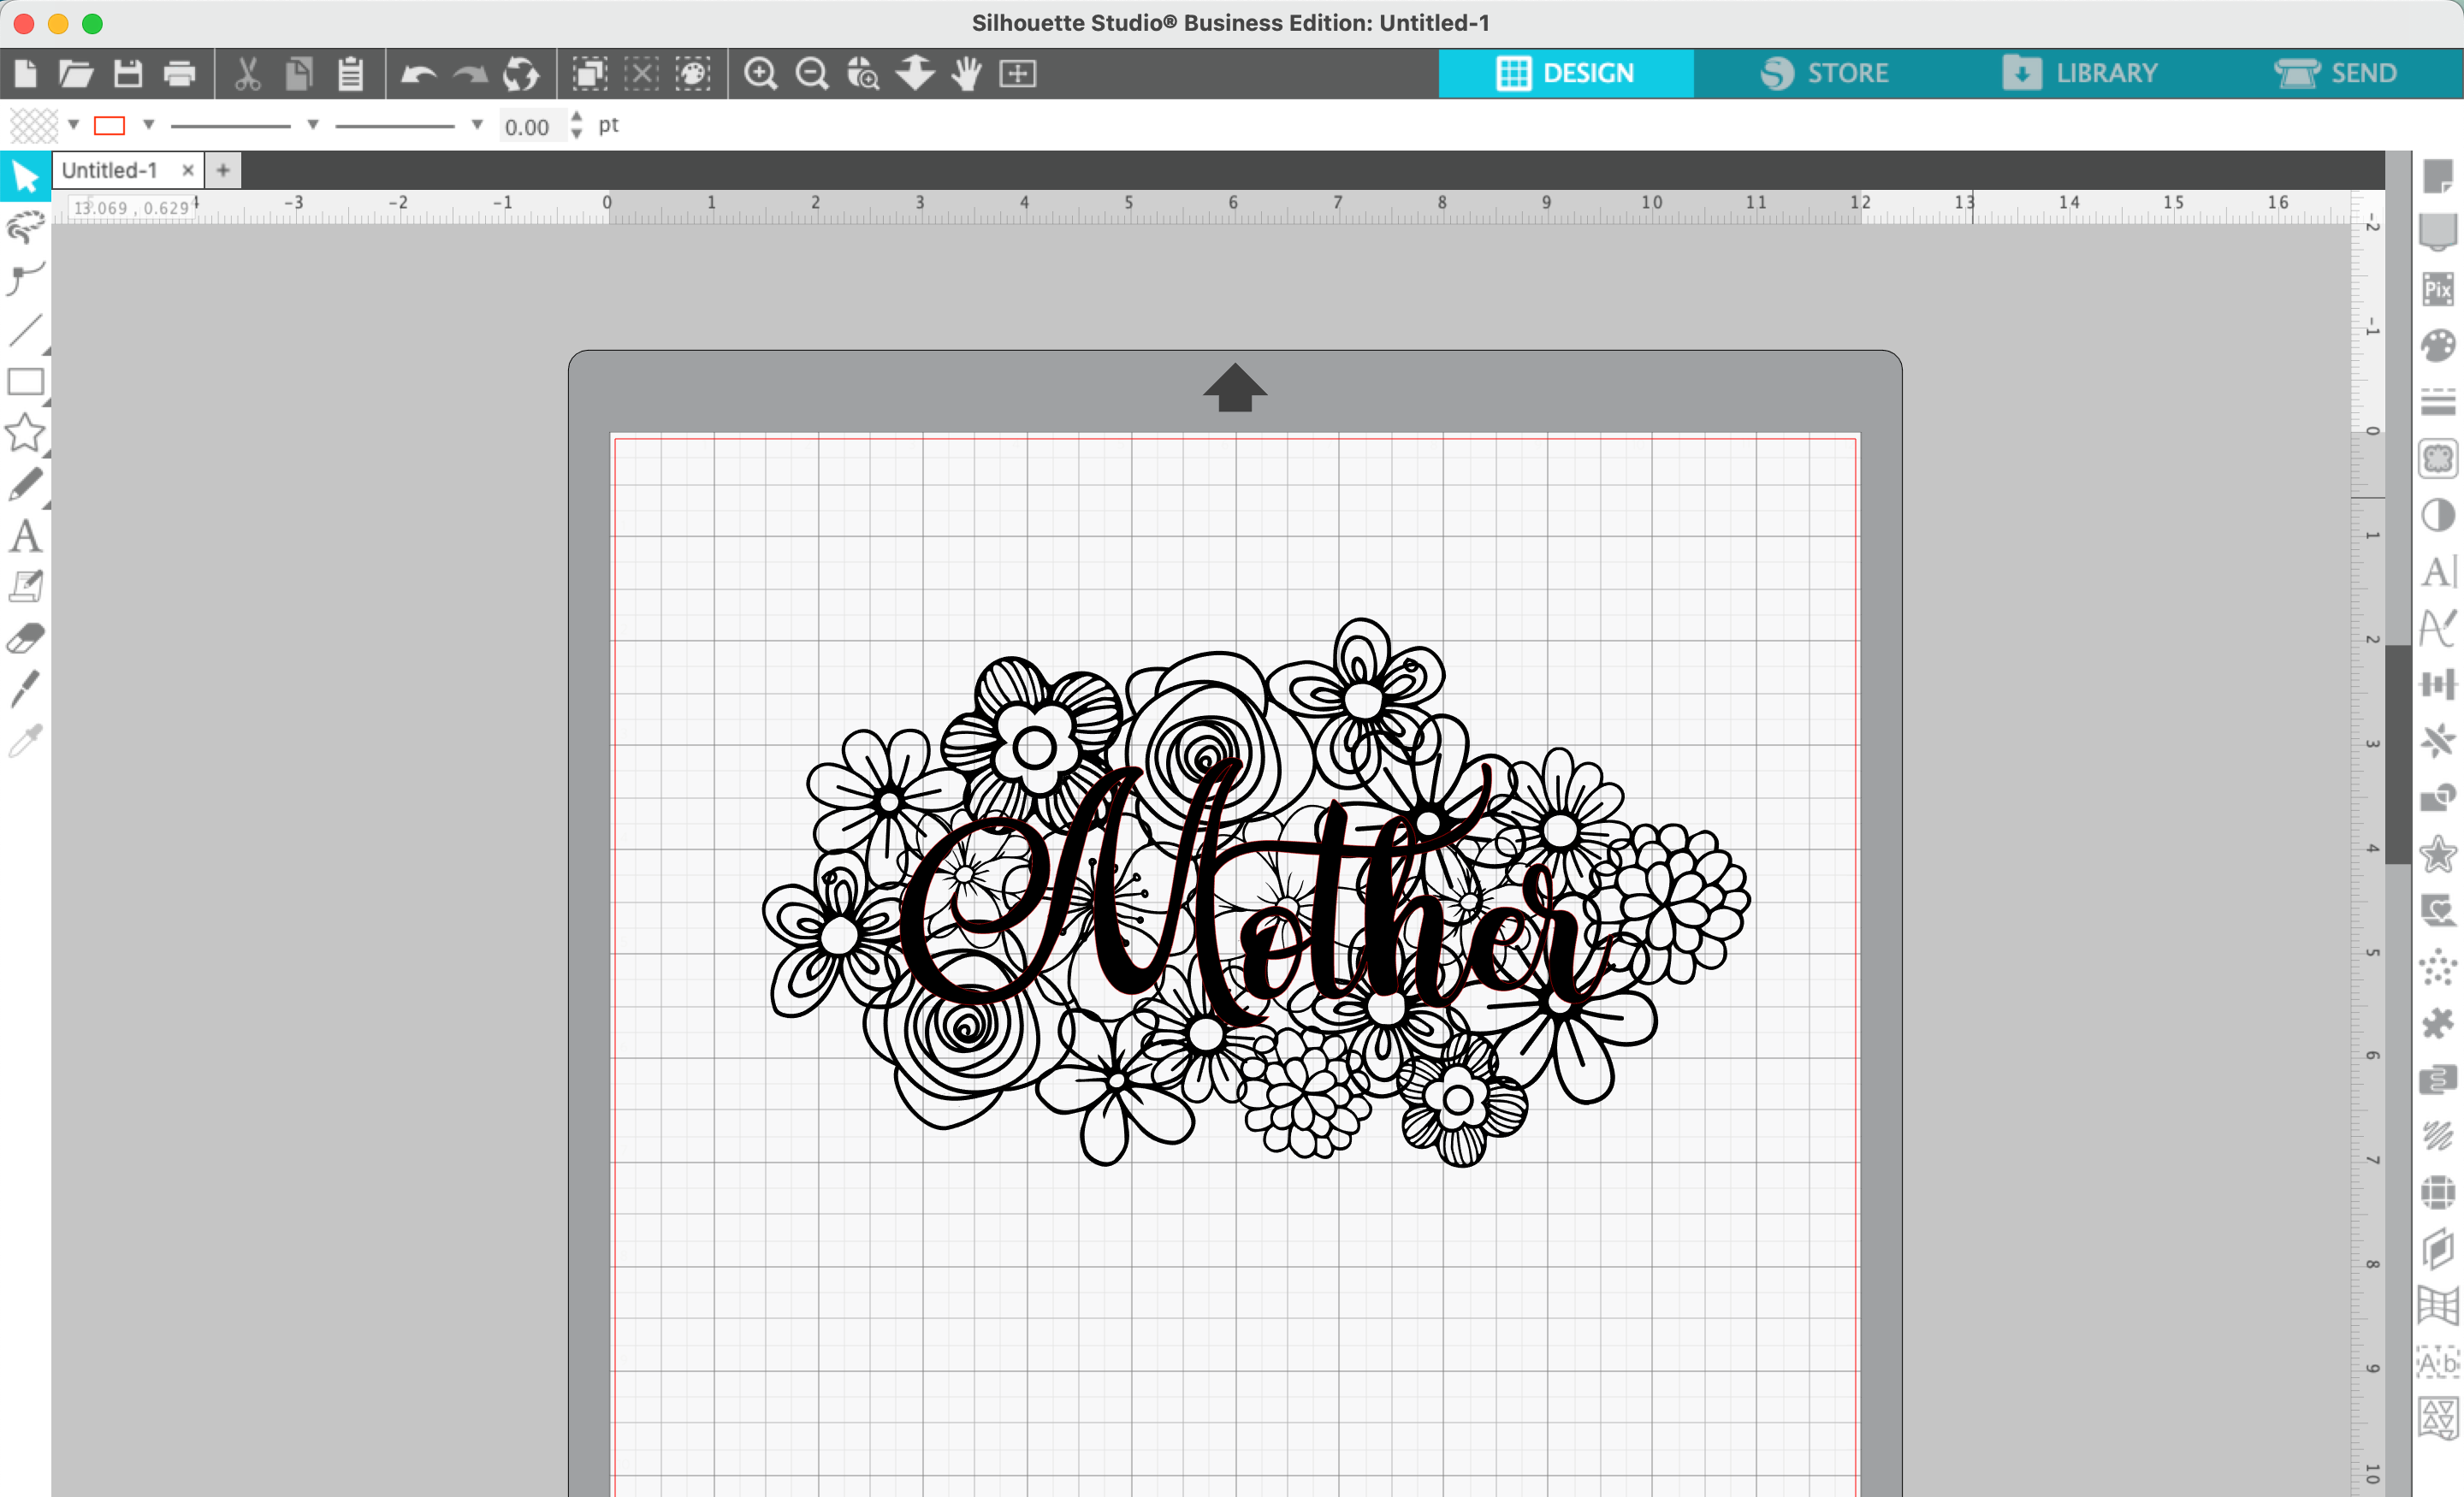
Open your line art flowers in Silhouette Studio. I’ve found the easiest way to open multiple designs on the same mat in Silhouette Studio is to just drag them from the download location onto the mat. (I have a Mac, so this may or may not work for you.)
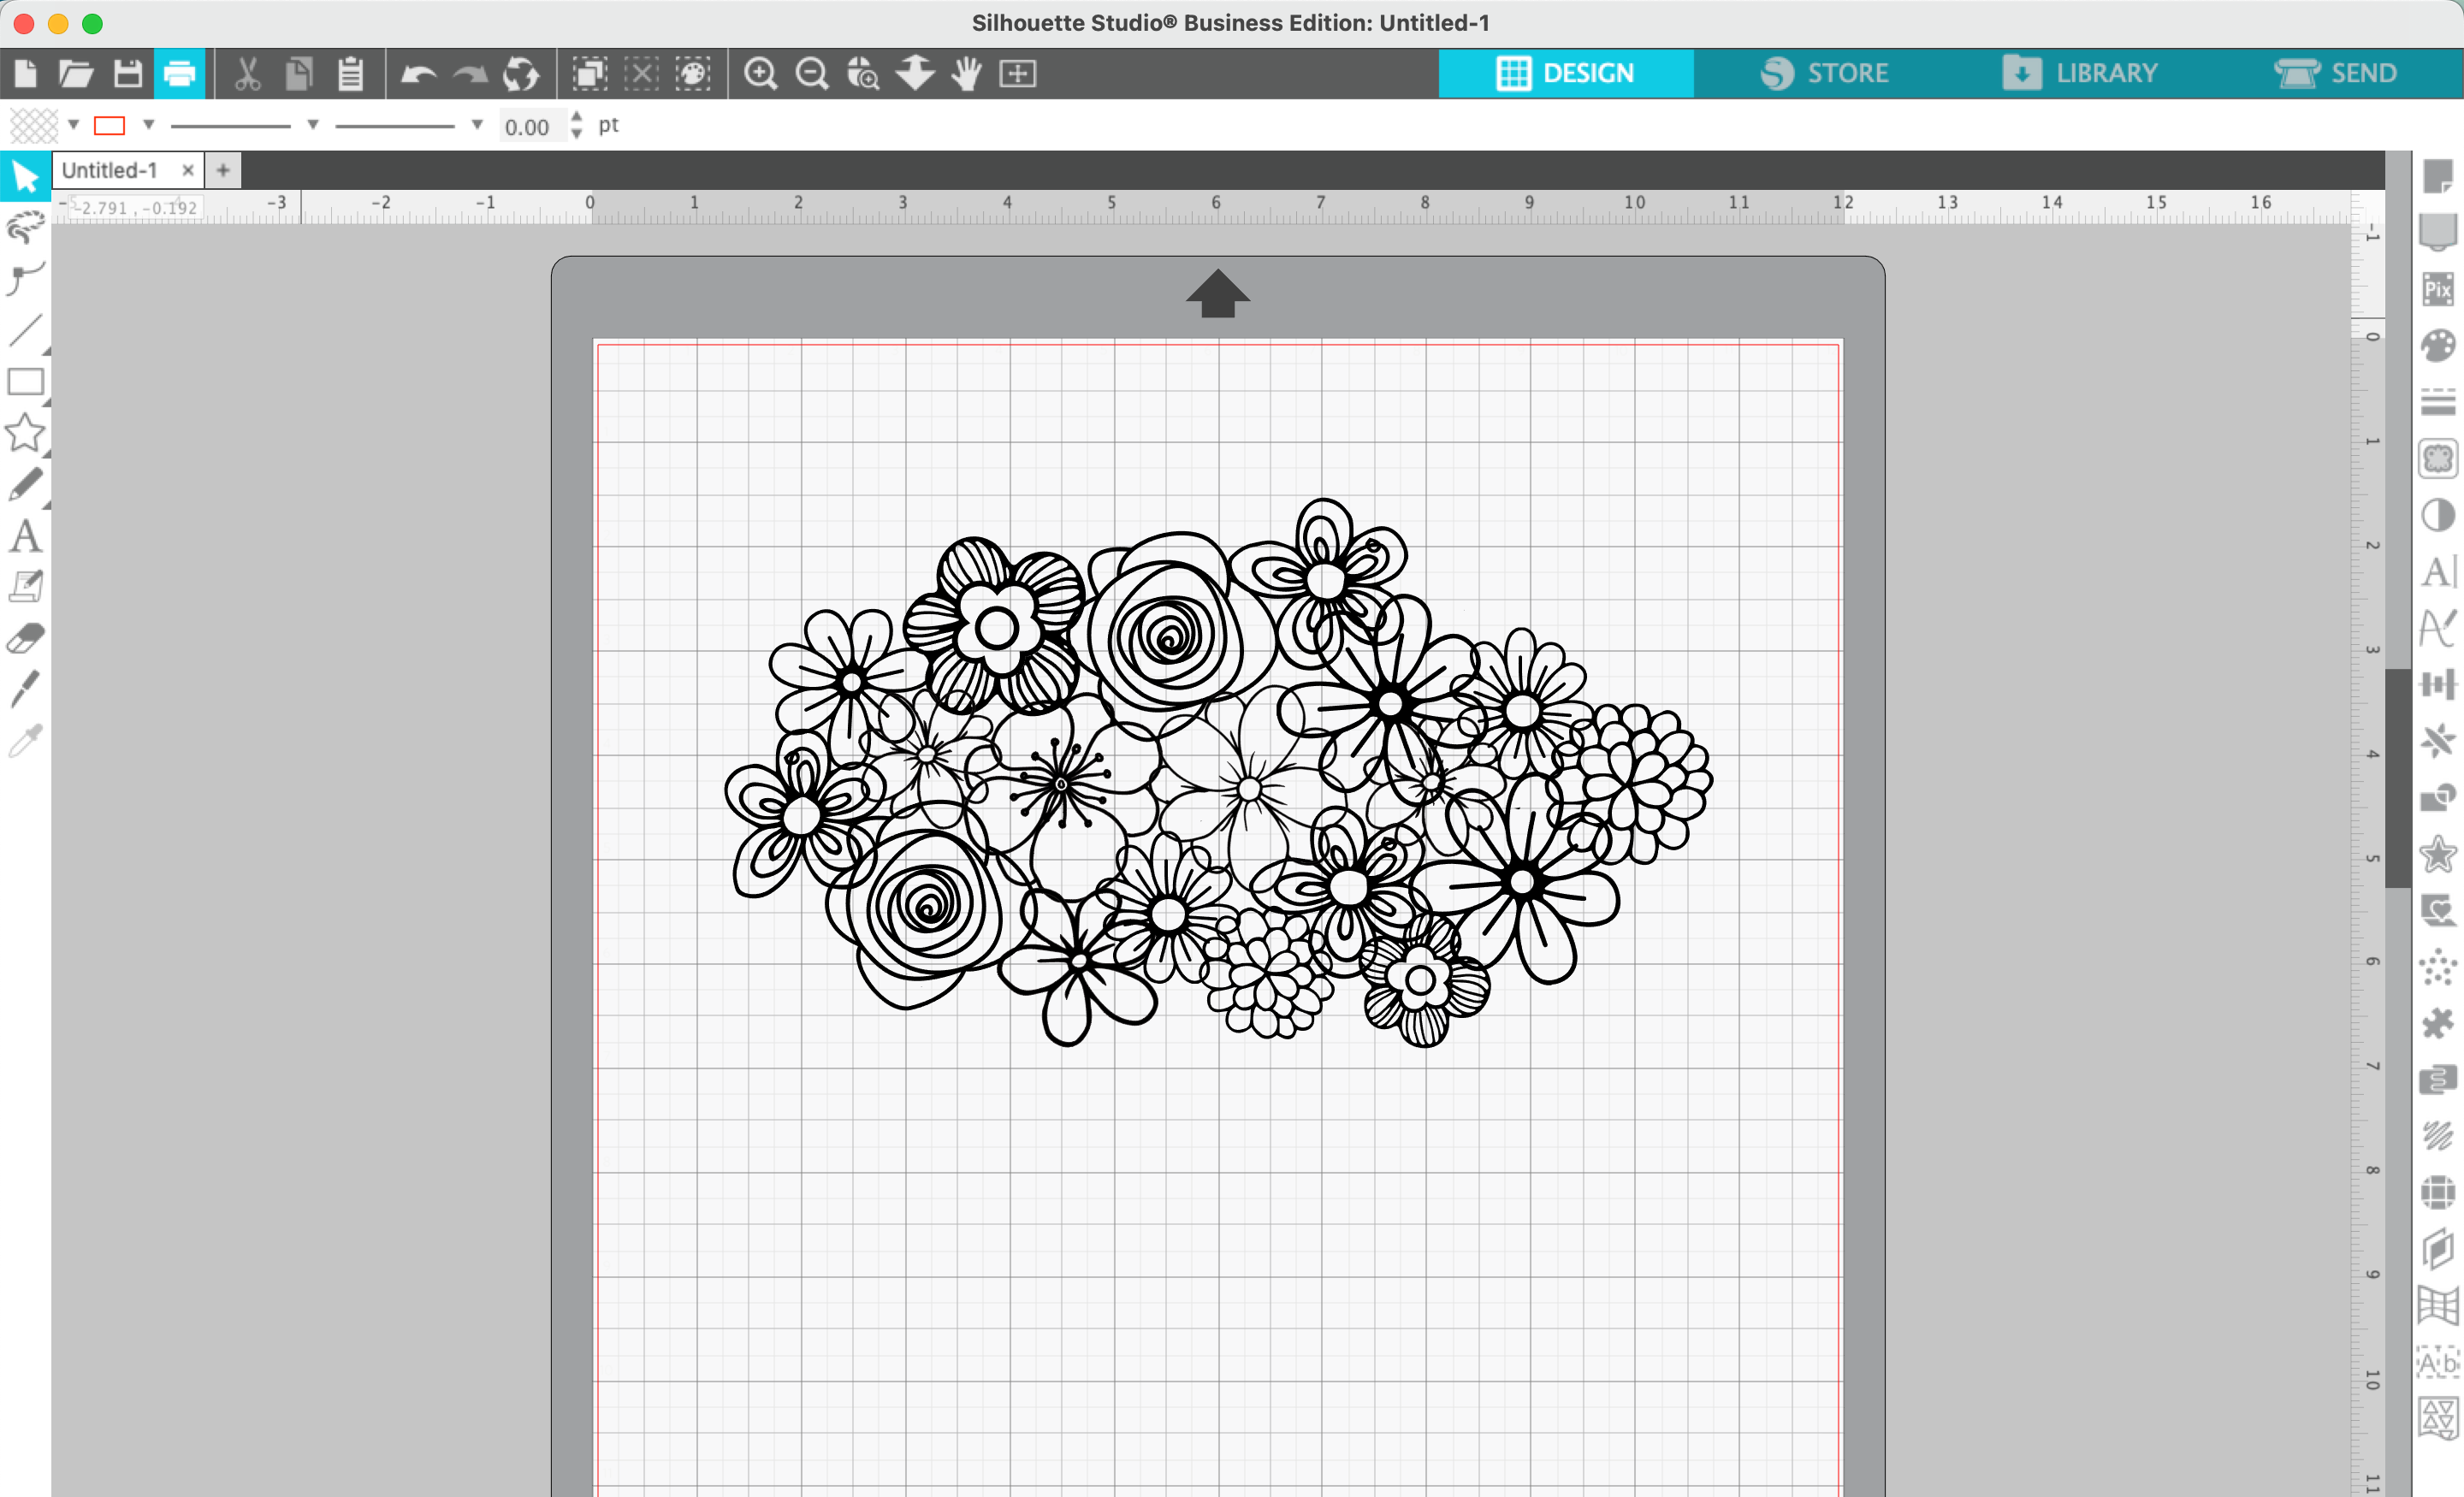
2. Once you’ve got all the designs open, arrange them into a cluster. Duplicate, resize, and rotate as needed.
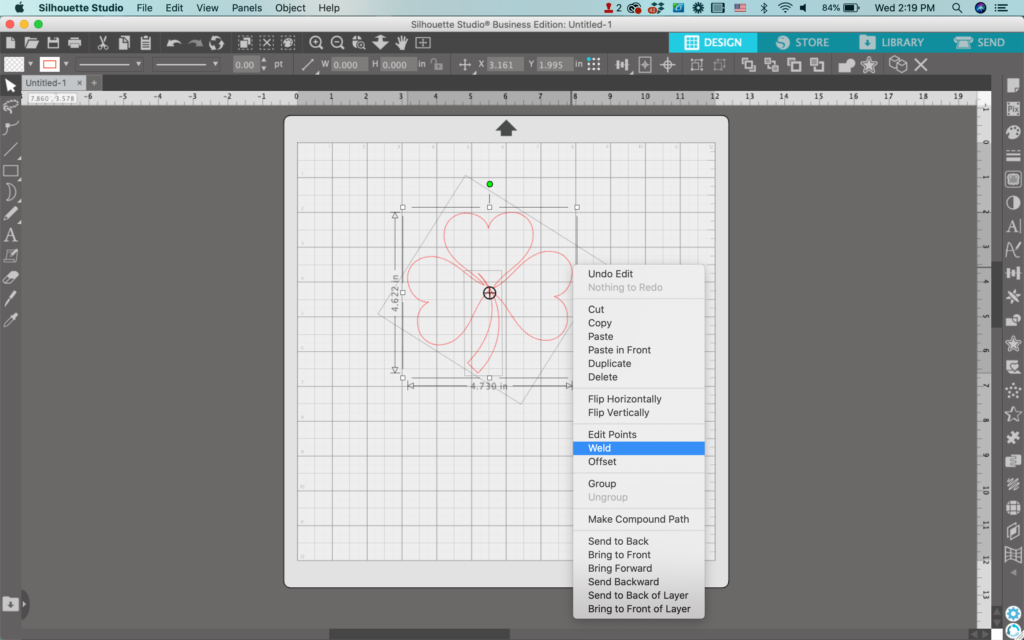
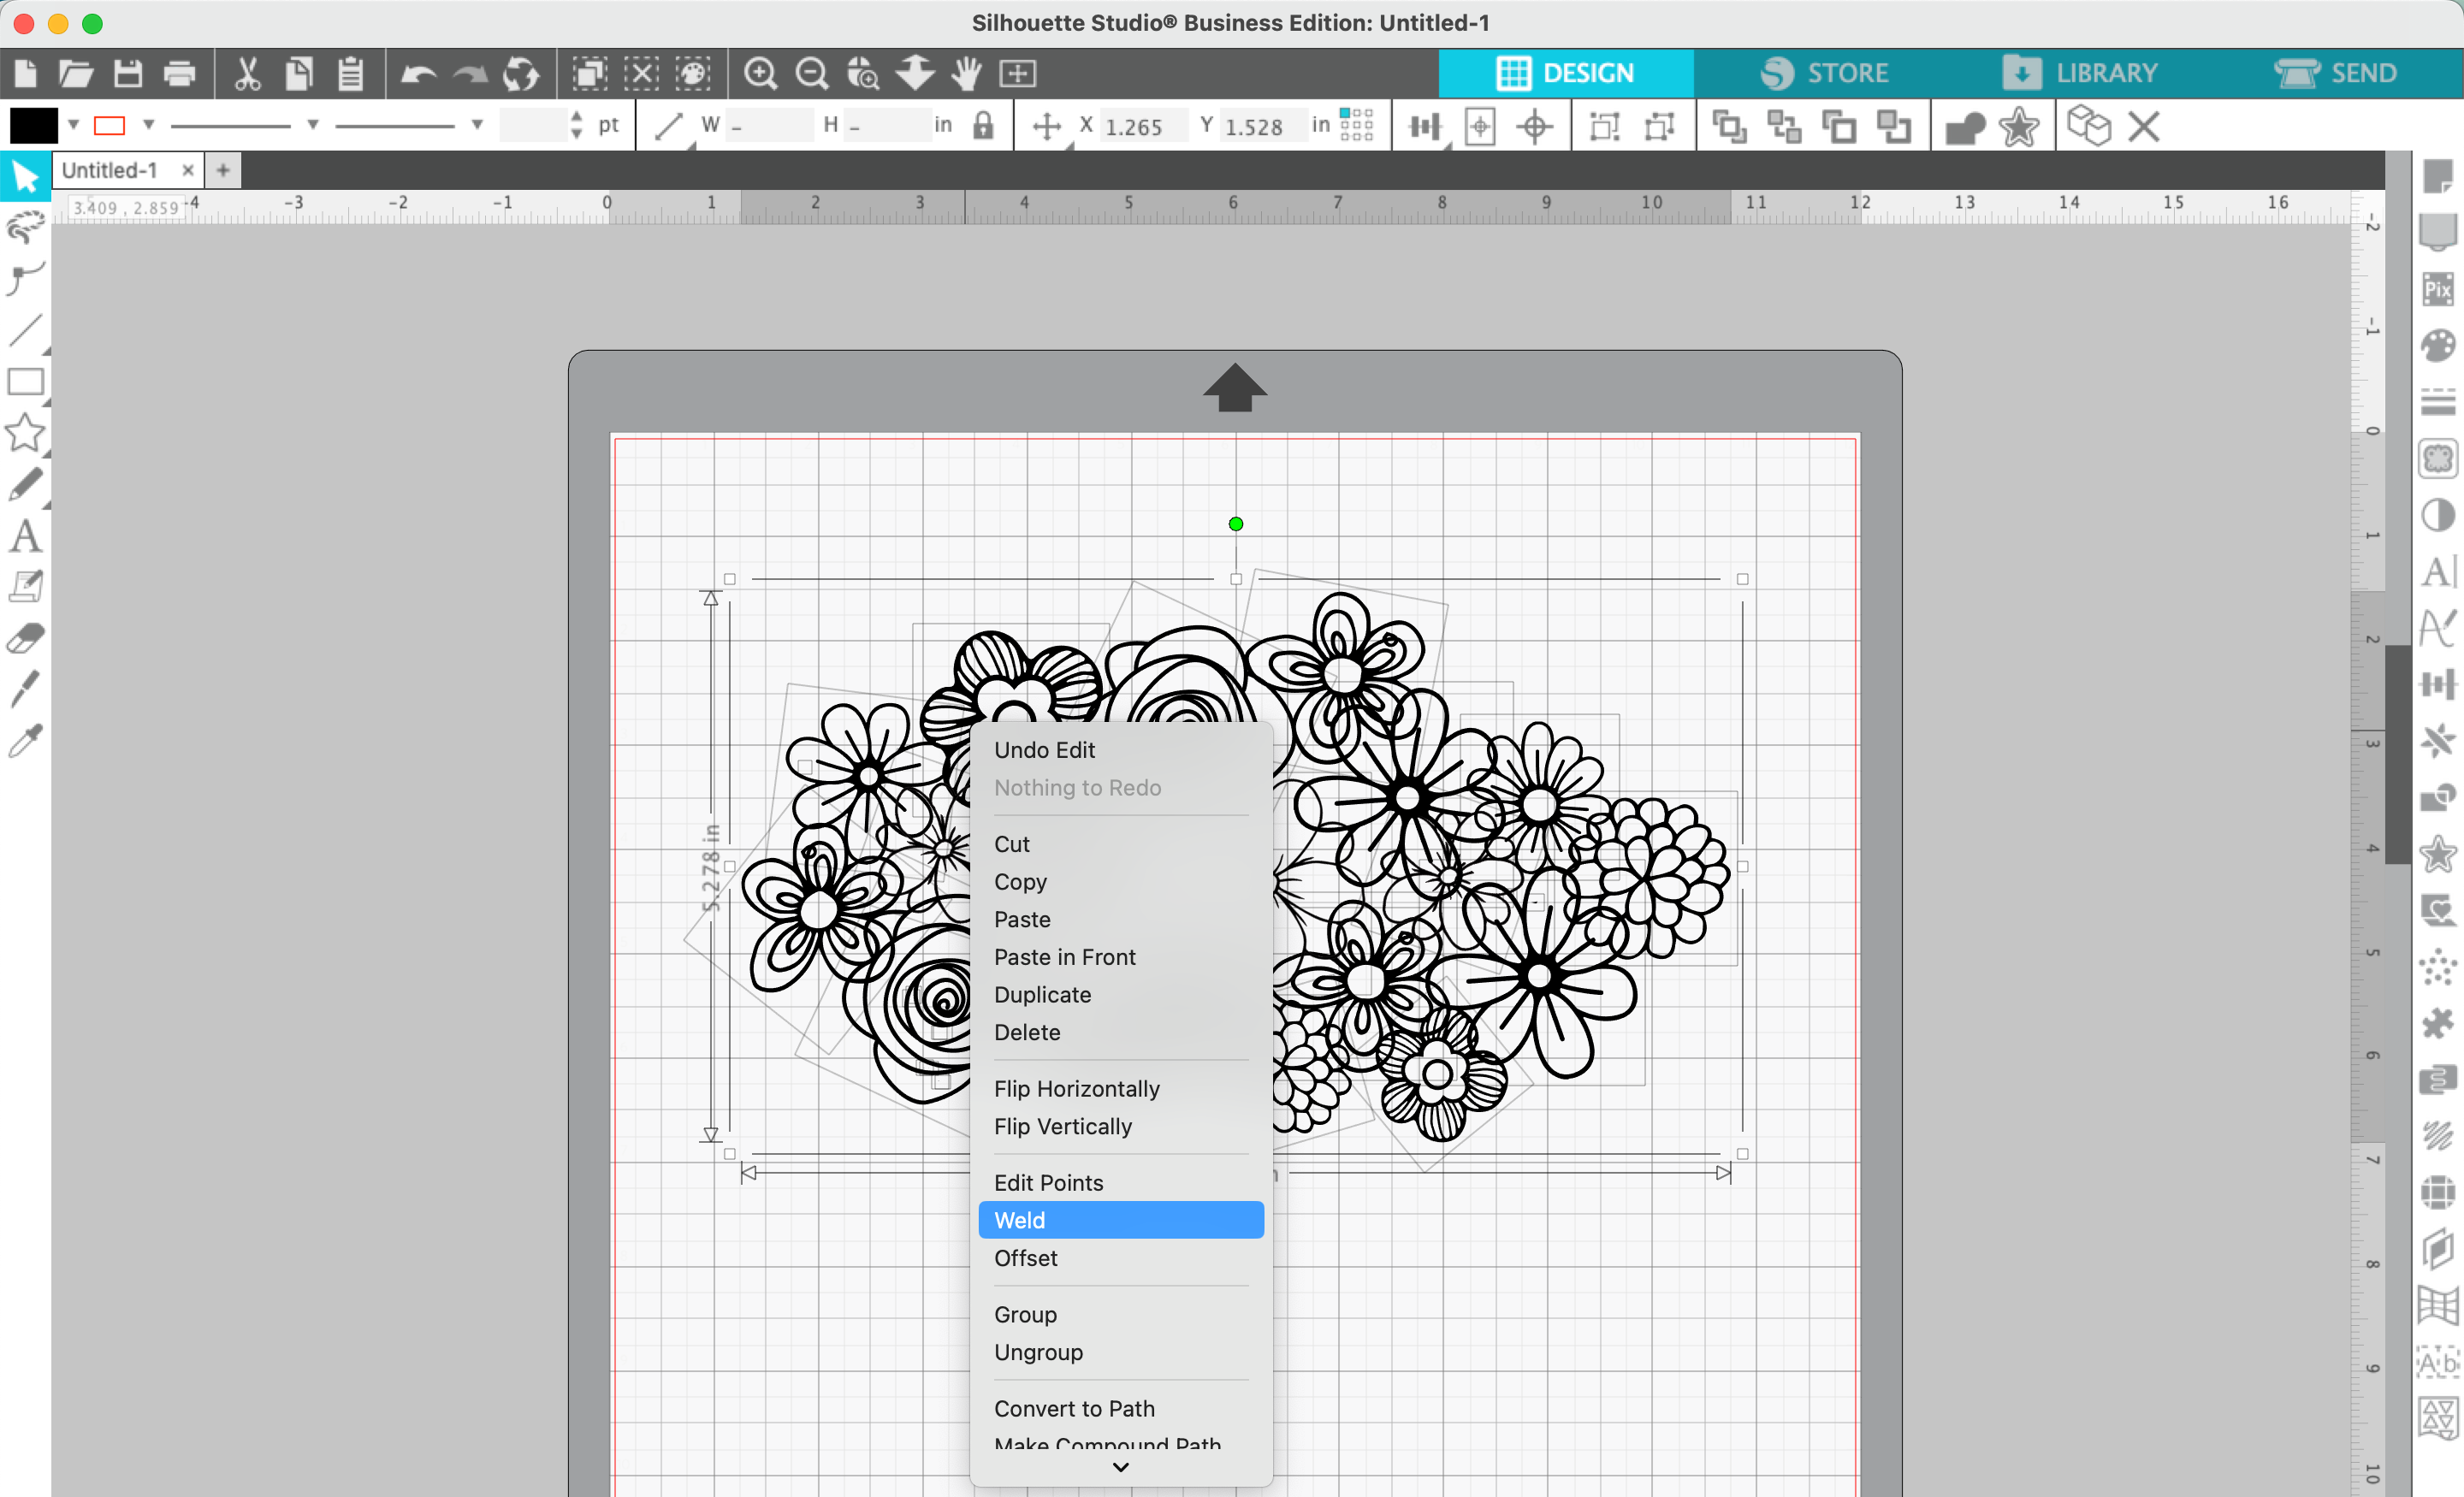
3. Select everything, right click, and ‘Weld’ together.
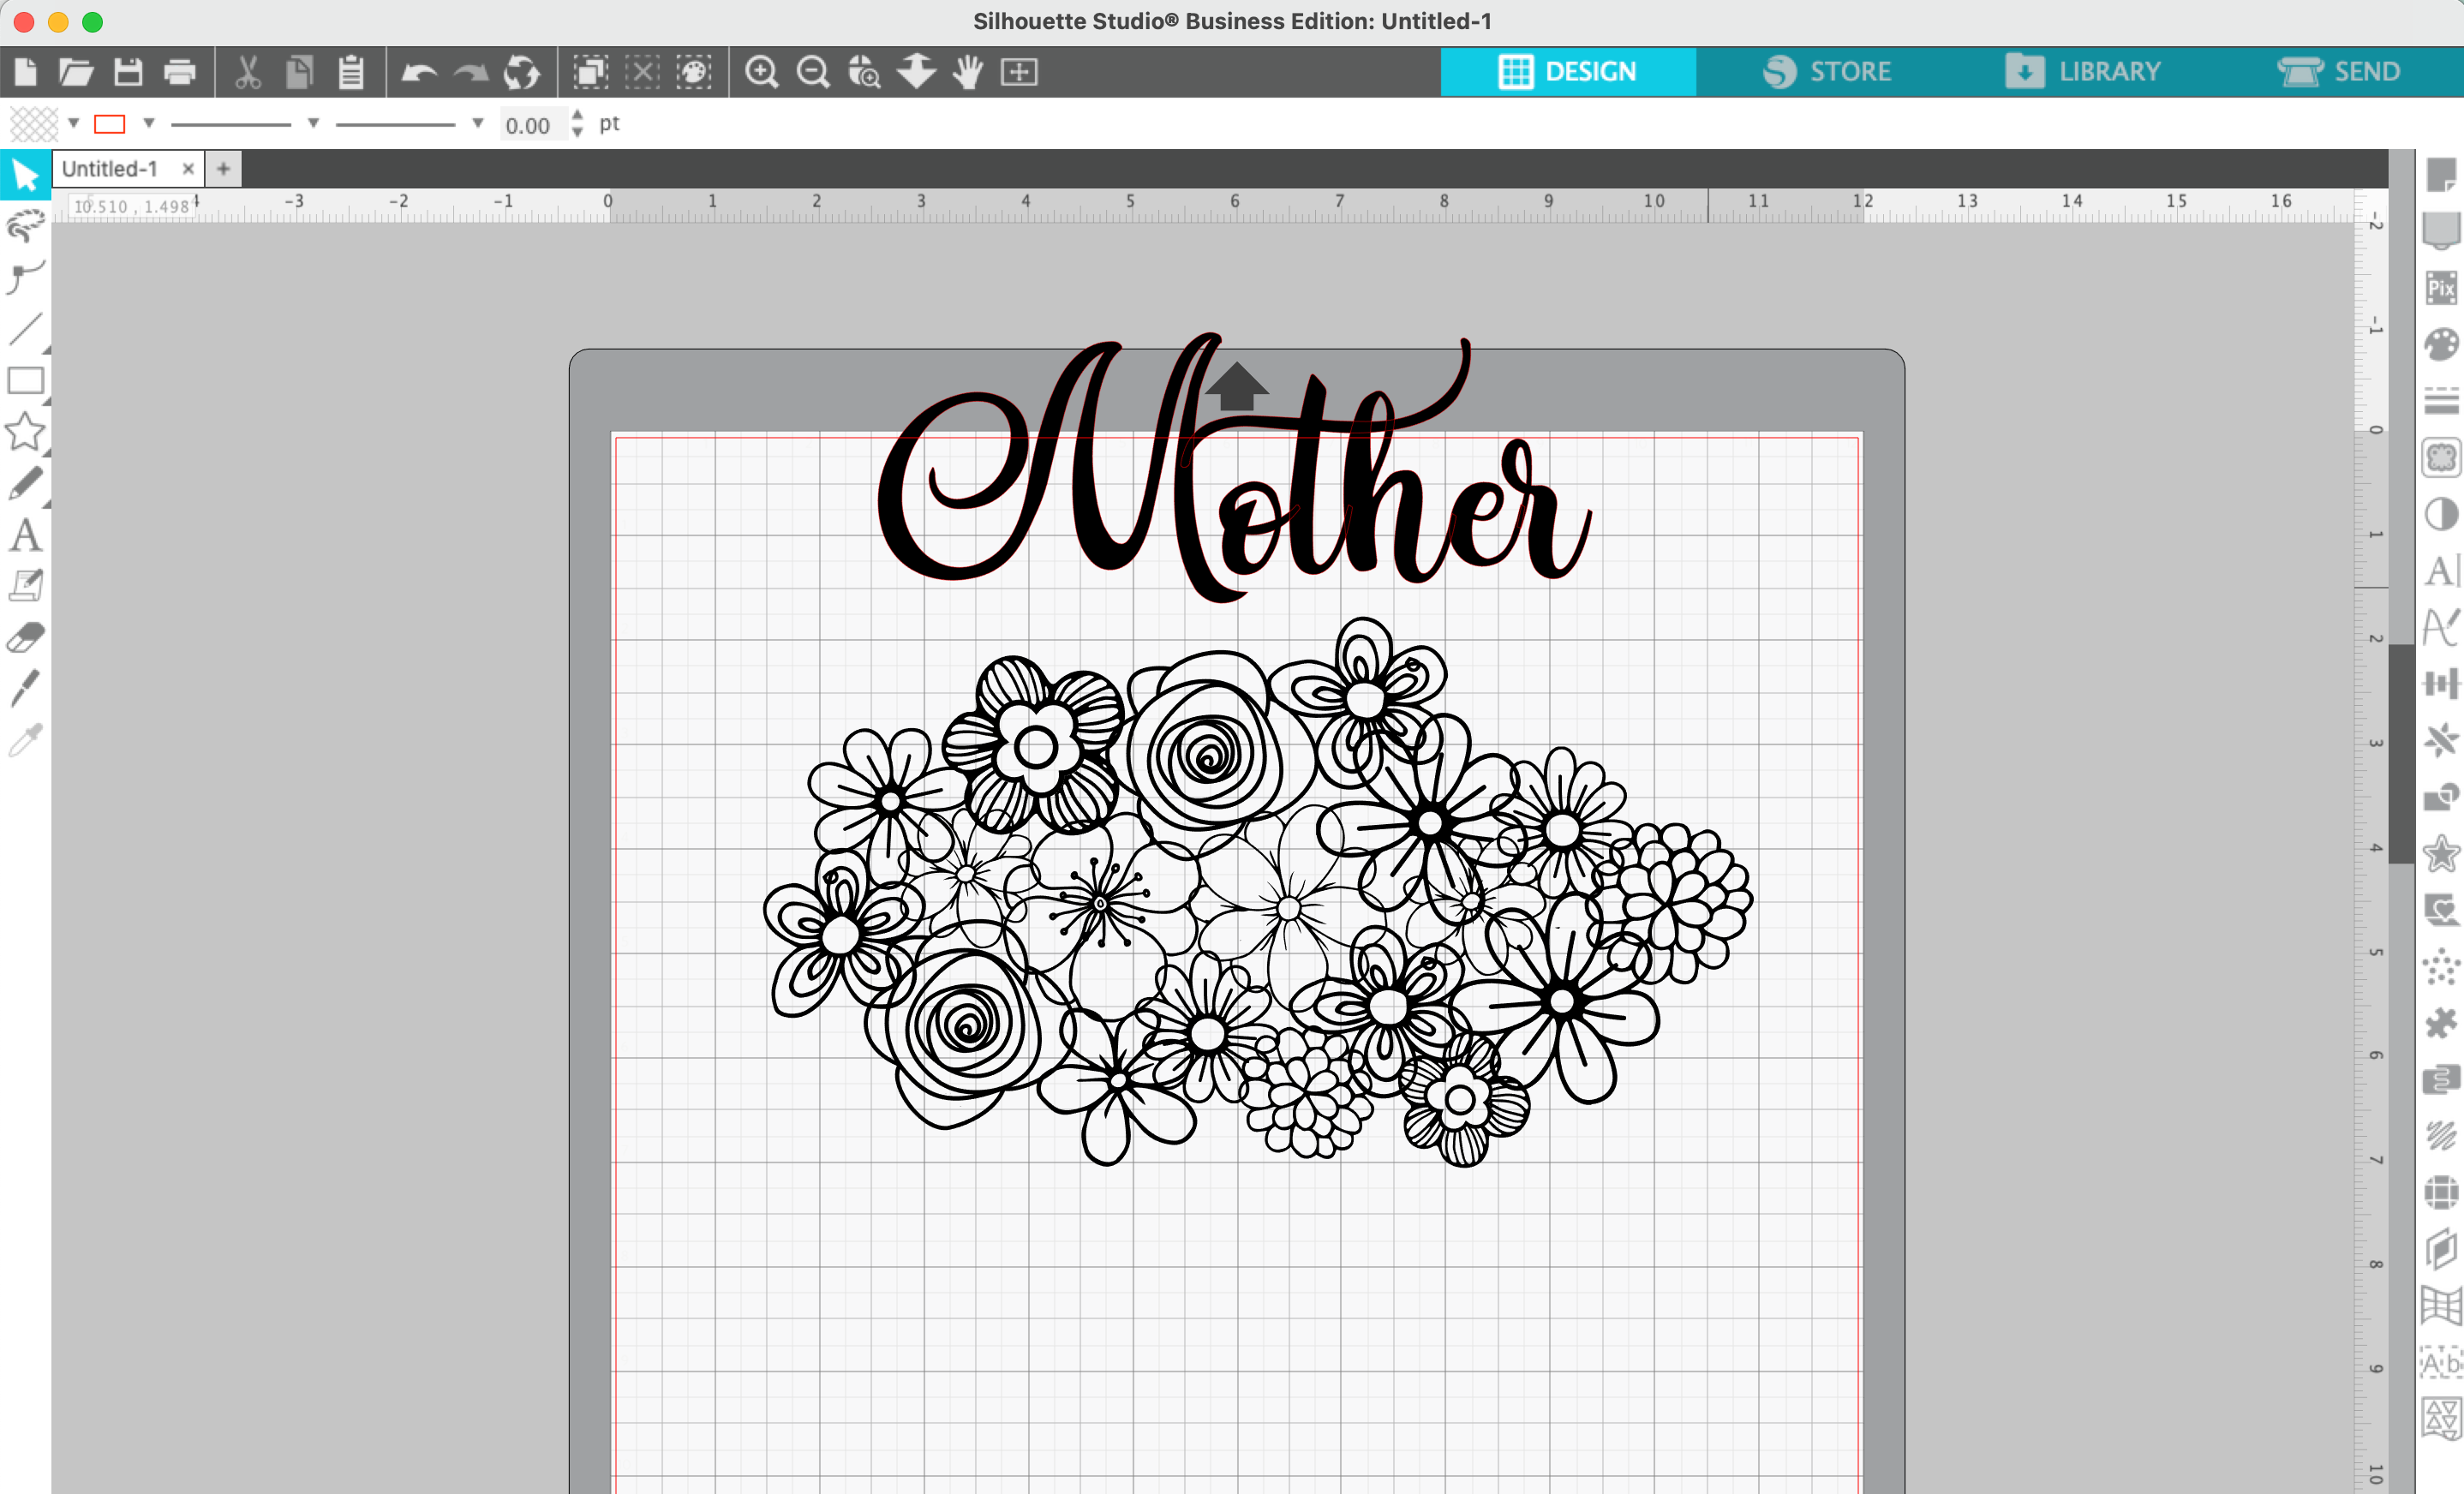
4. Type the word ‘Mother’, ‘Mom’, ‘Grandma’, ‘Nana’, and so on in a script font. In this tutorial, I’m using Amastery Script. Weld the text if needed.
5. Drag your text onto the floral cluster.
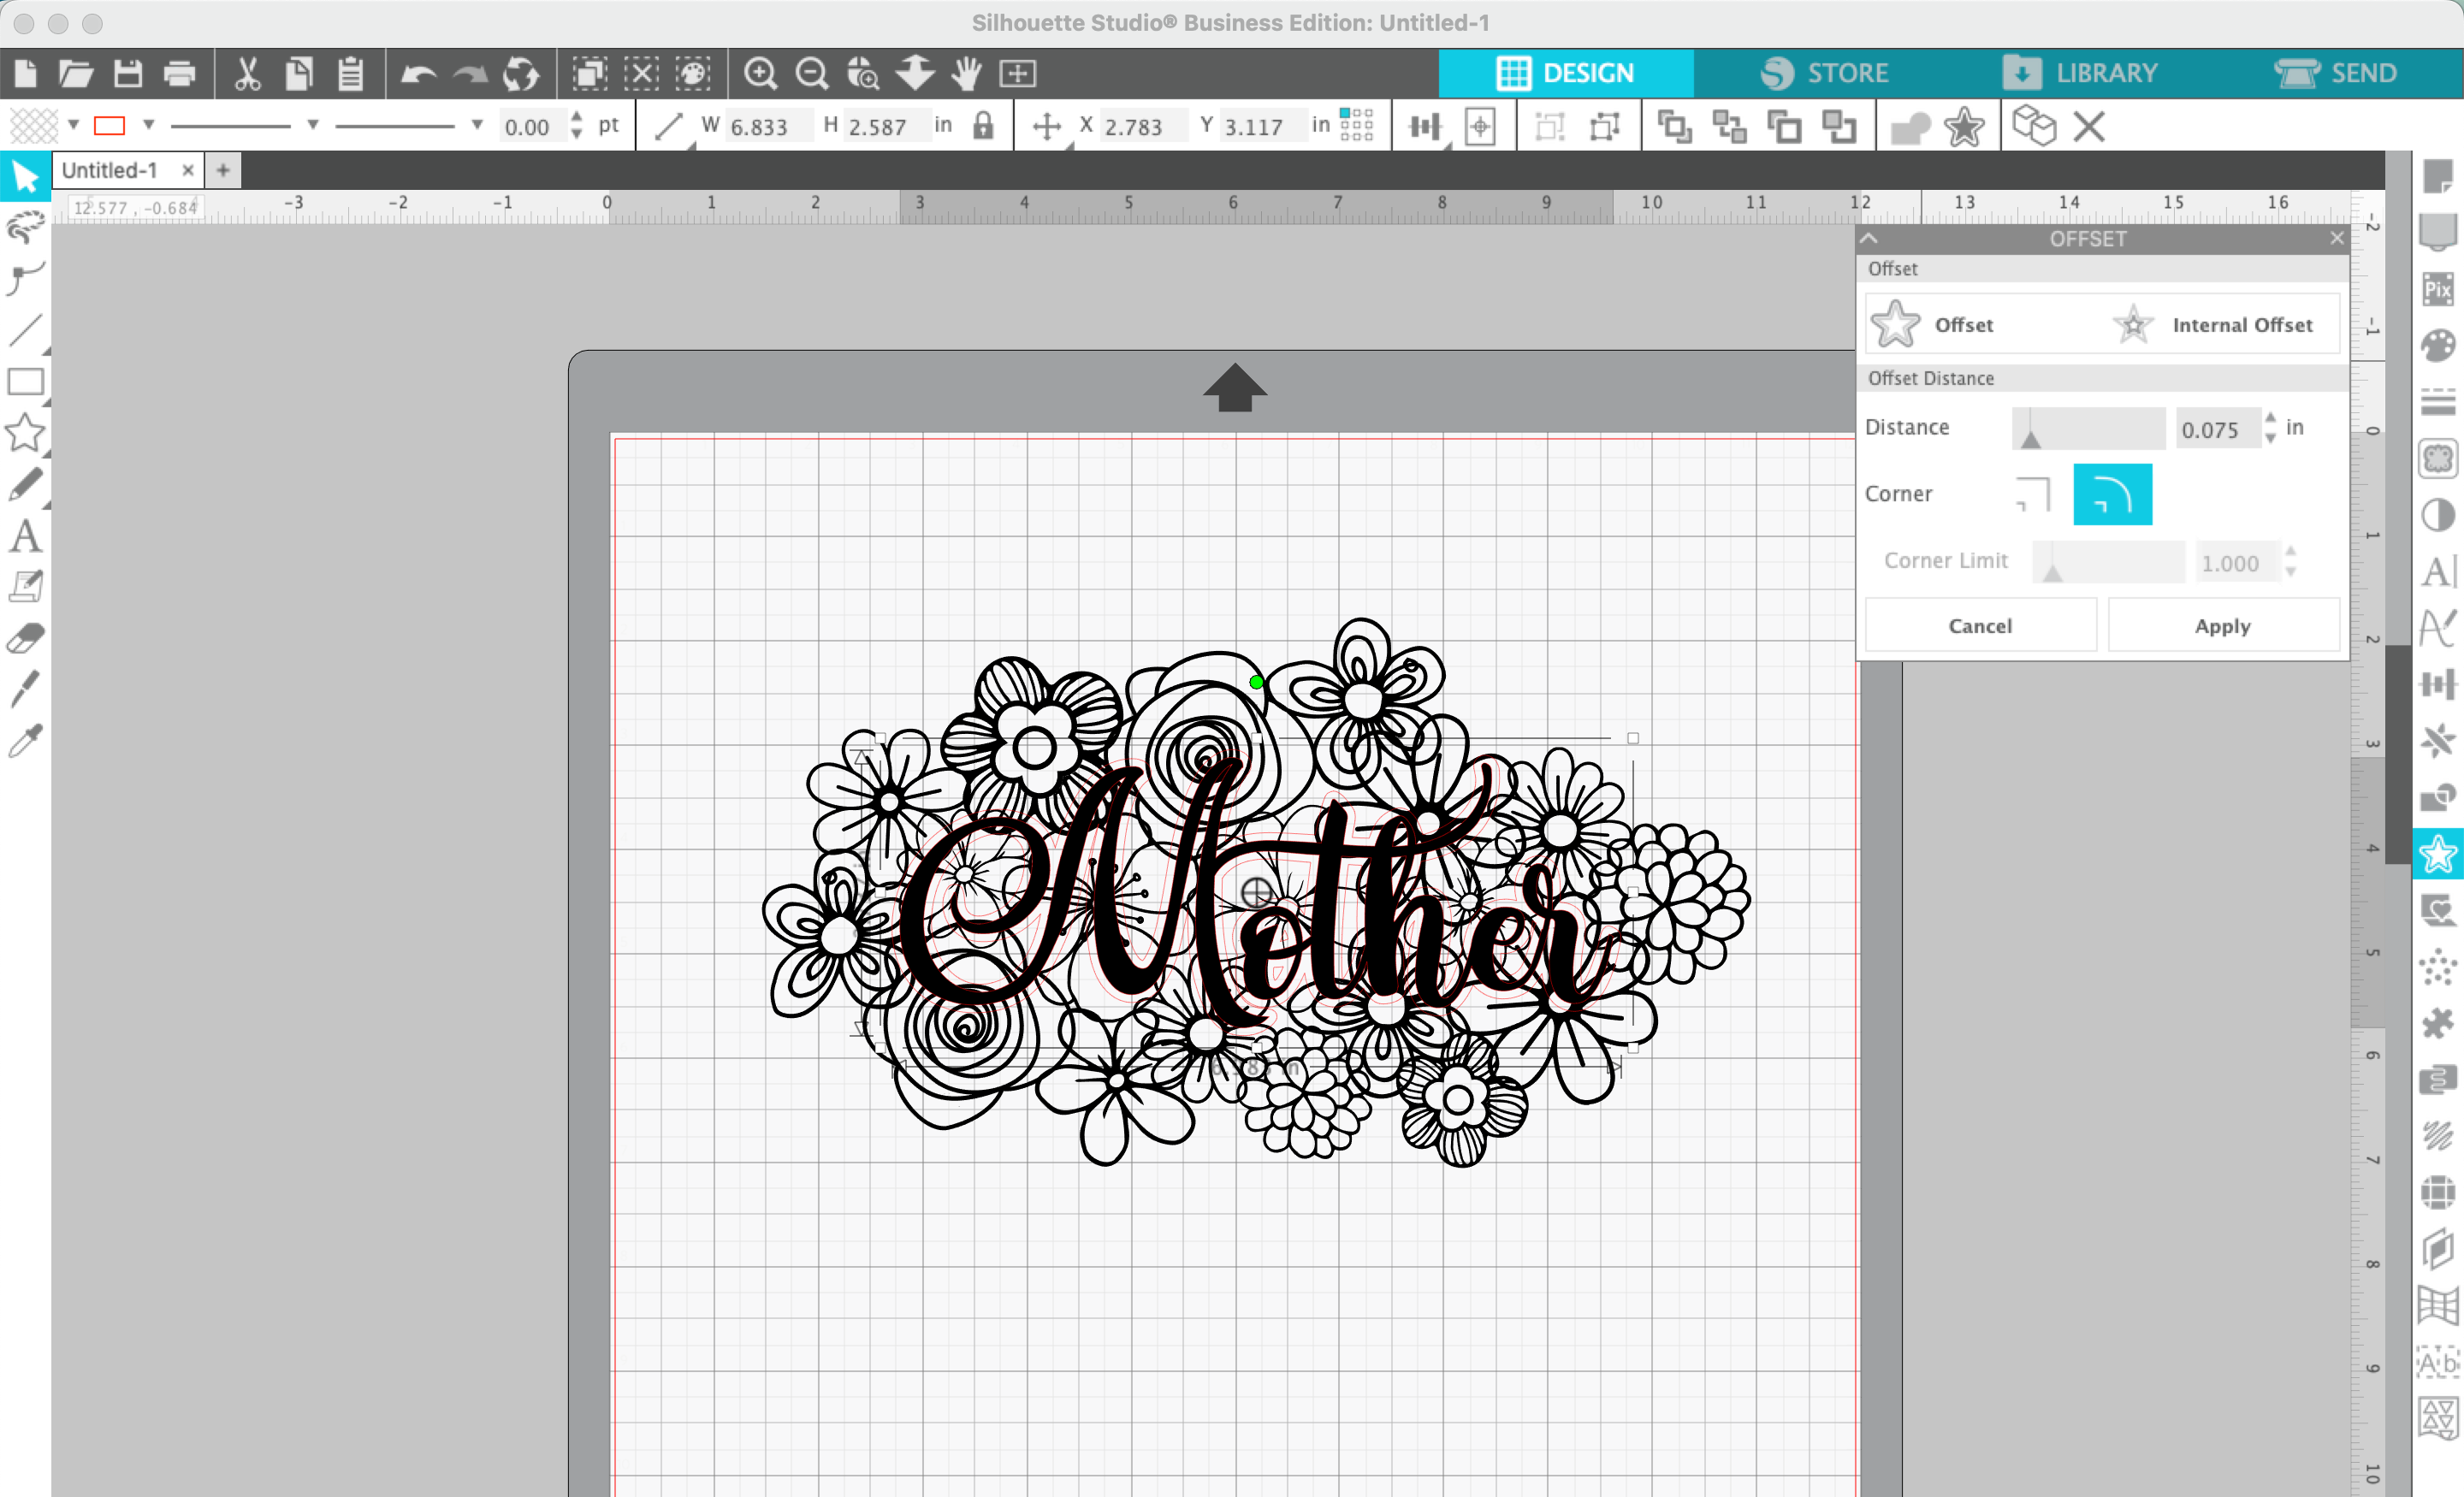
6. Navigate to ‘Panels’, then ‘Offset’, and offset your text.
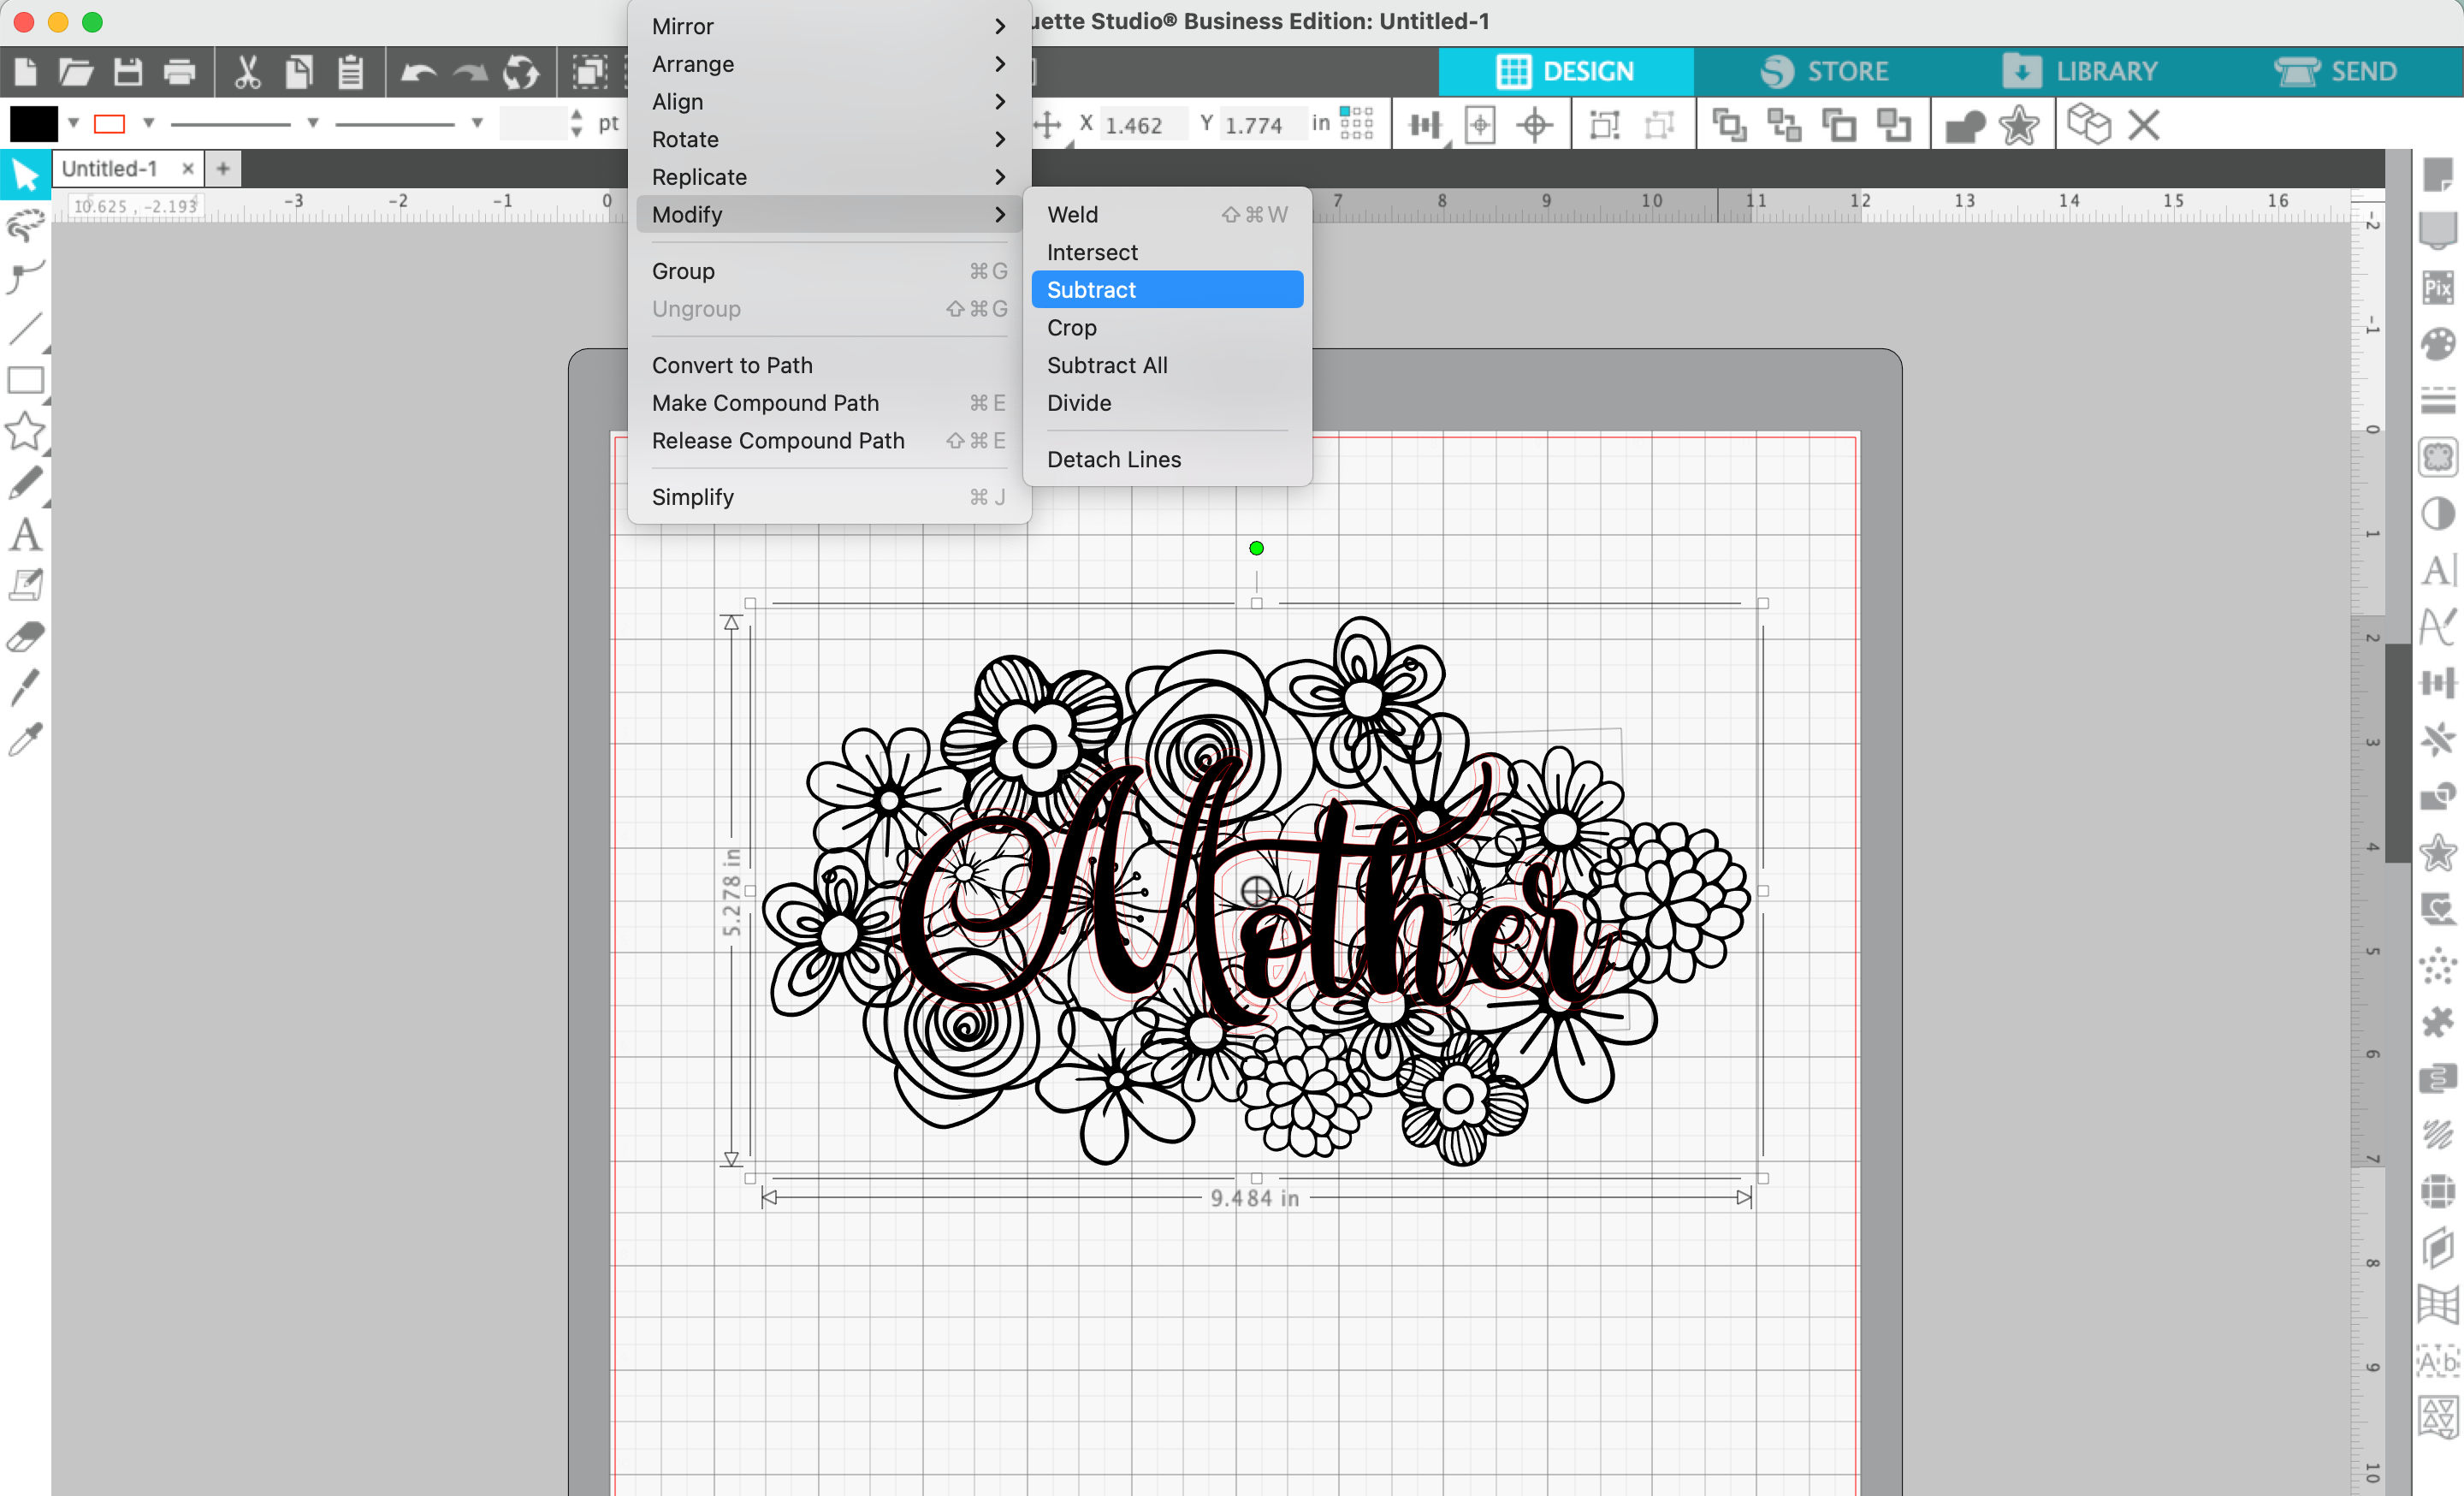
7. Select the floral cluster, then the text offset. Navigate to ‘Panels’, ‘Offset’, ‘Subtract’.
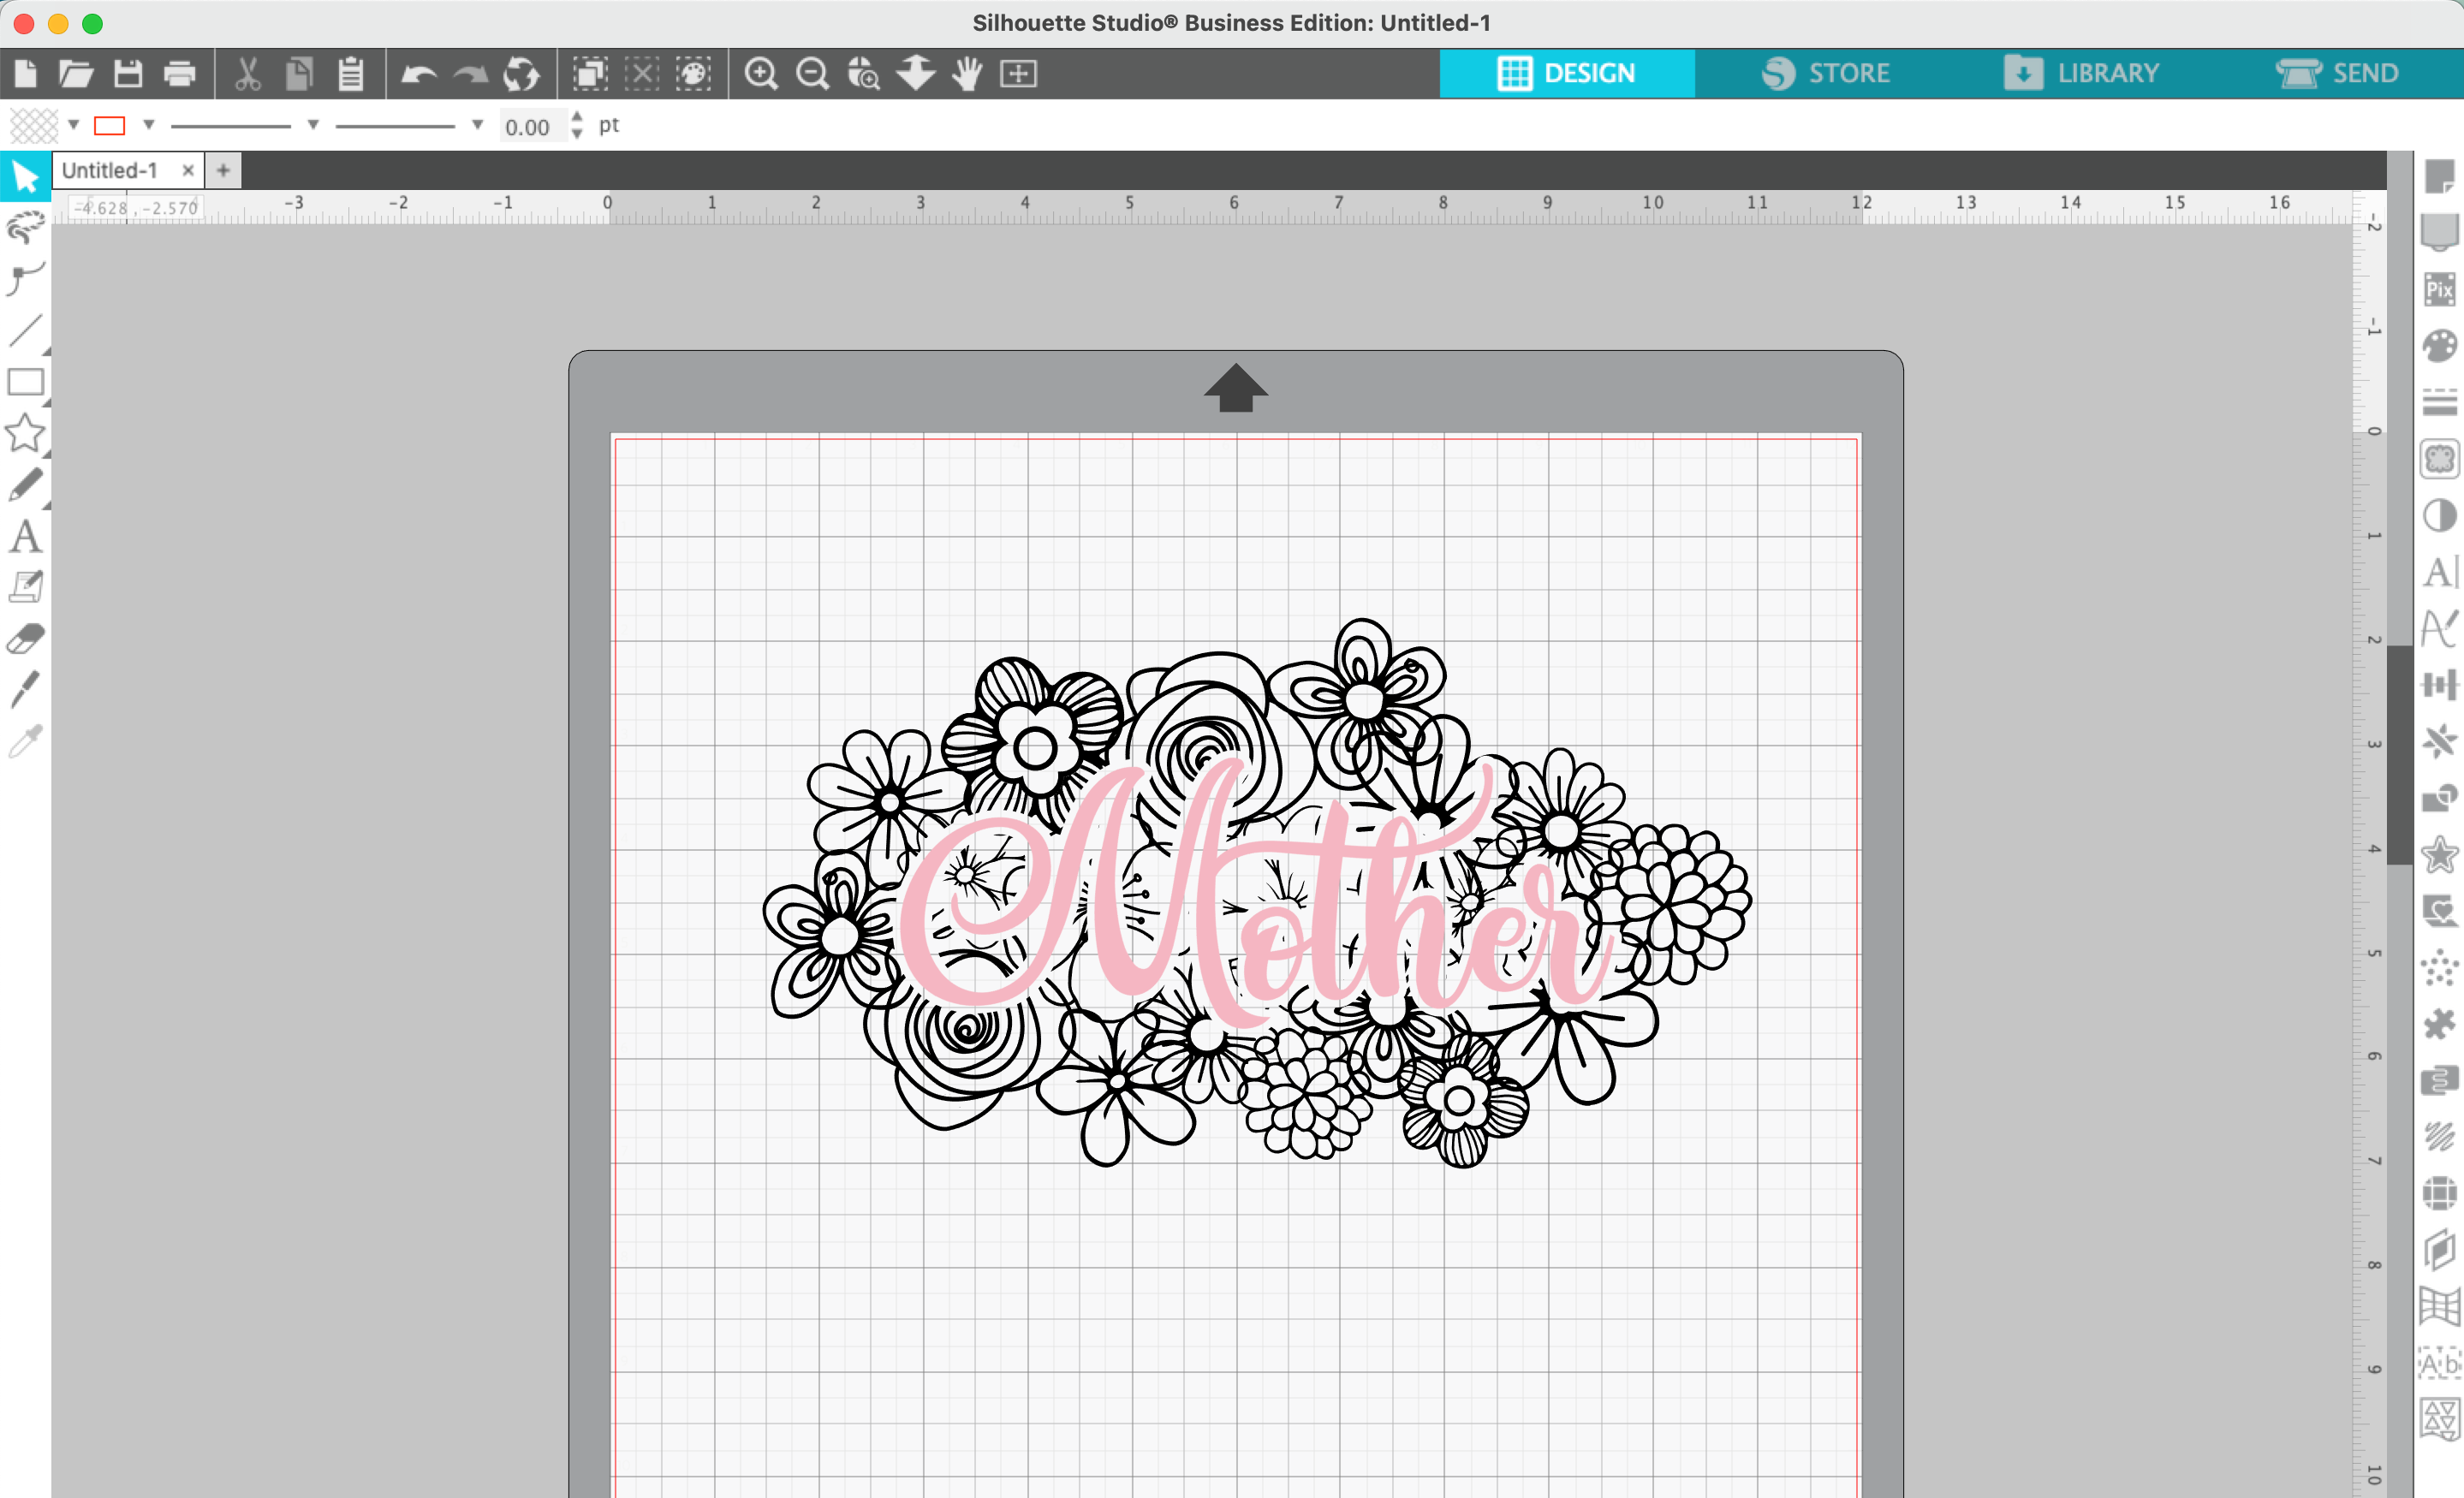
8. Add color if you’d like.
That’s it! Your design is ready to go!
Don’t Forget to Save!
To save your new SVG creation, head to ‘File’, ‘Save As’, ‘Save to Hard Drive’, name the file, then select ‘SVG’ from the dropdown menu.
Don’t have time to design it yourself? This SVG design is available free to Cutting for Business mailing list subscribers. Download it.
What will you receive in your email box from Cutting for Business? You’ll receive 4-5 emails per week related to crafting, freebies, exclusive deals, and more!
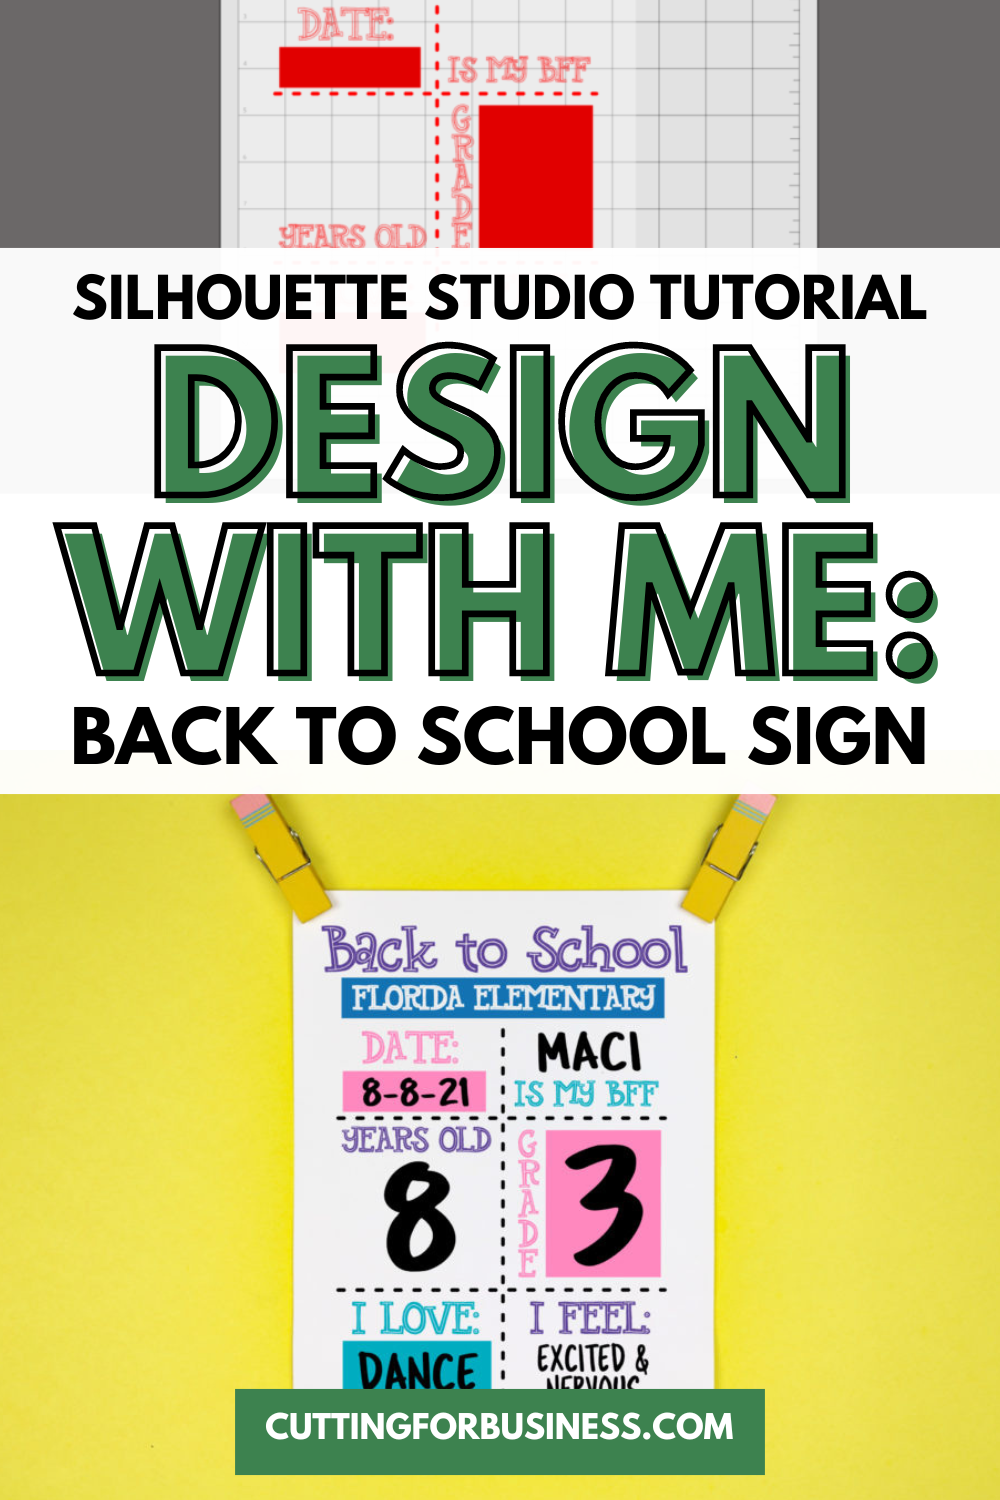
With Back to School just around the corner, I wanted to take a few minutes to show you how to design a Back to School Sign.
Before you start designing, you need to decide how many sections you’ll need on your sign. I’ve seen signs that list the age, weight, height, favorite color, favorite song, new skill, favorite hobby, Teacher’s name, school name, favorite subject or sport, future profession, and so on. You’ll need one section for each question.
Tutorial: Design a Back to School Sign
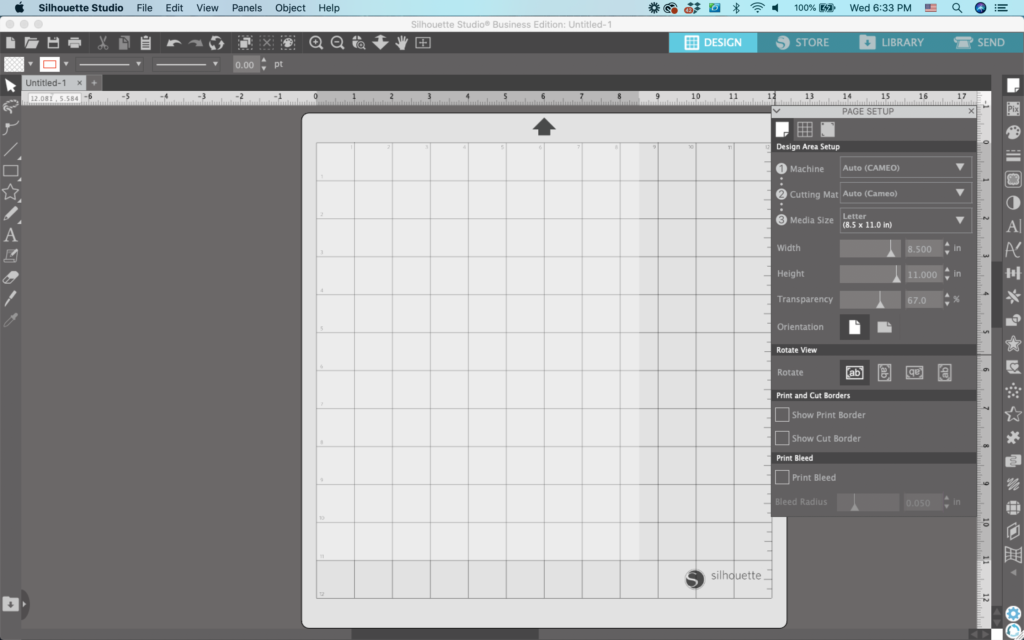
Open Silhouette Studio and navigate to ‘Panels’, then ‘Page Setup’. Set your page to the same size as your Back to School Sign will be. In this example, I plan to print out the sign on paper, so I set the media size to 8.5″ x 11″.
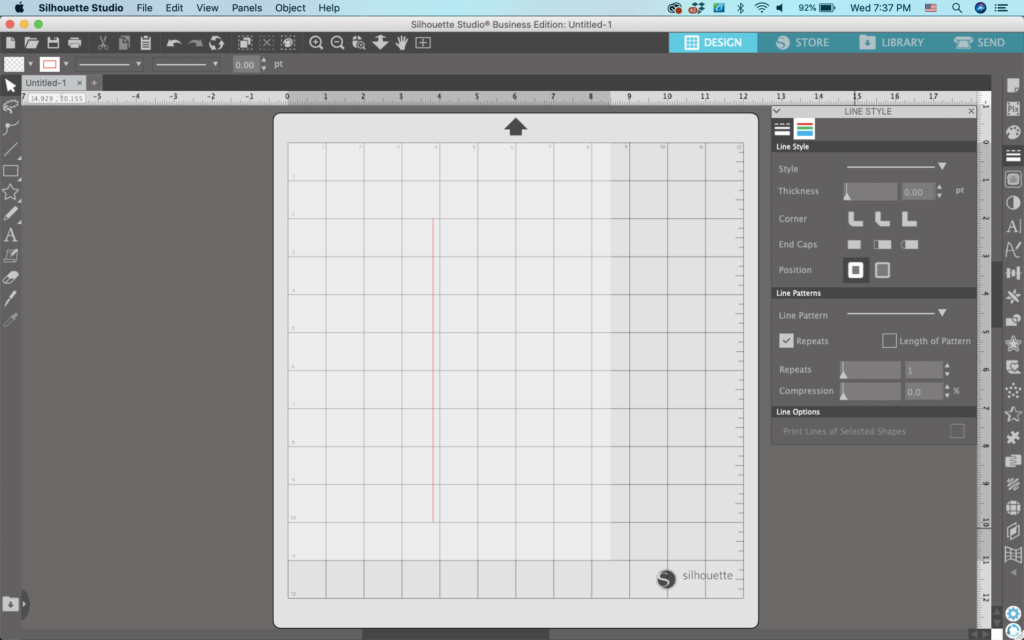
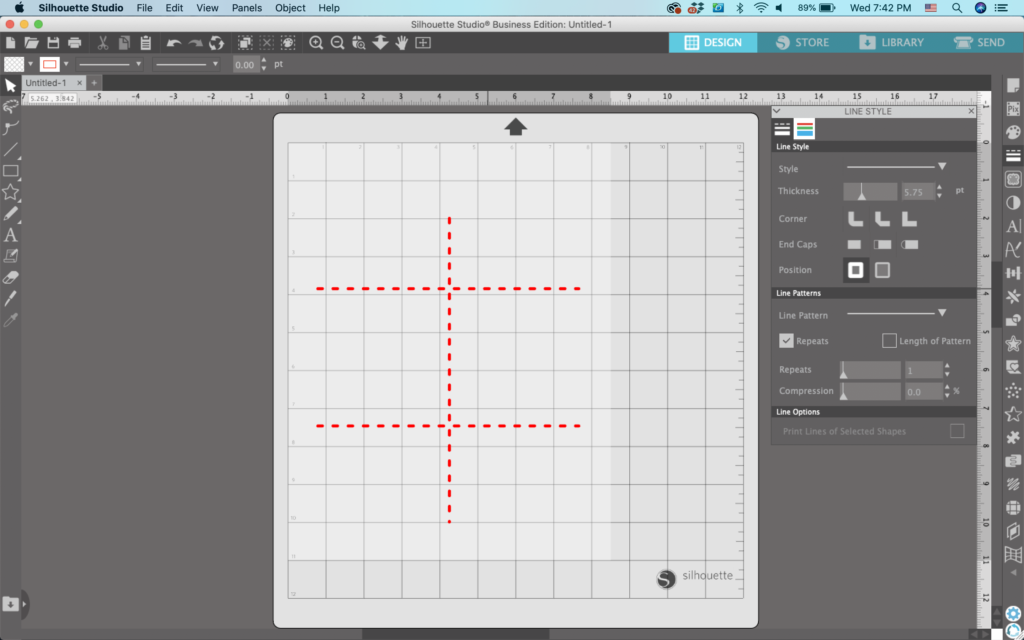
2. Using the ‘Line Tools’, draw a line down the center of the page. You’ll notice I left a space at the top to put text.
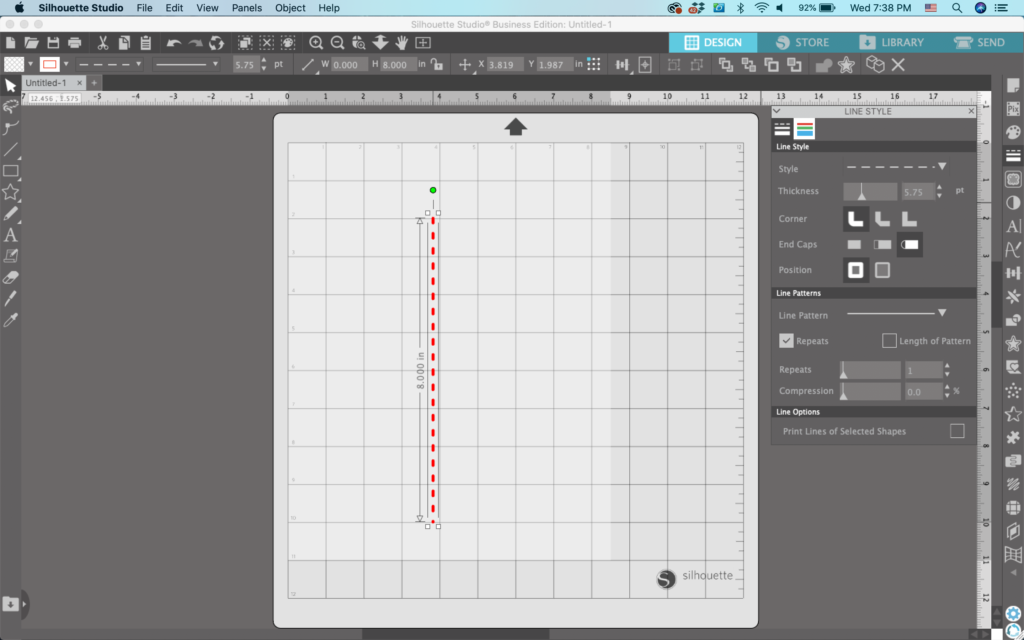
3. Navigate to ‘Panels’, ‘Line Style’. From this panel, you can change the line style to something fancy like dots or dashes. You can also thicken the line or make it into a pattern.
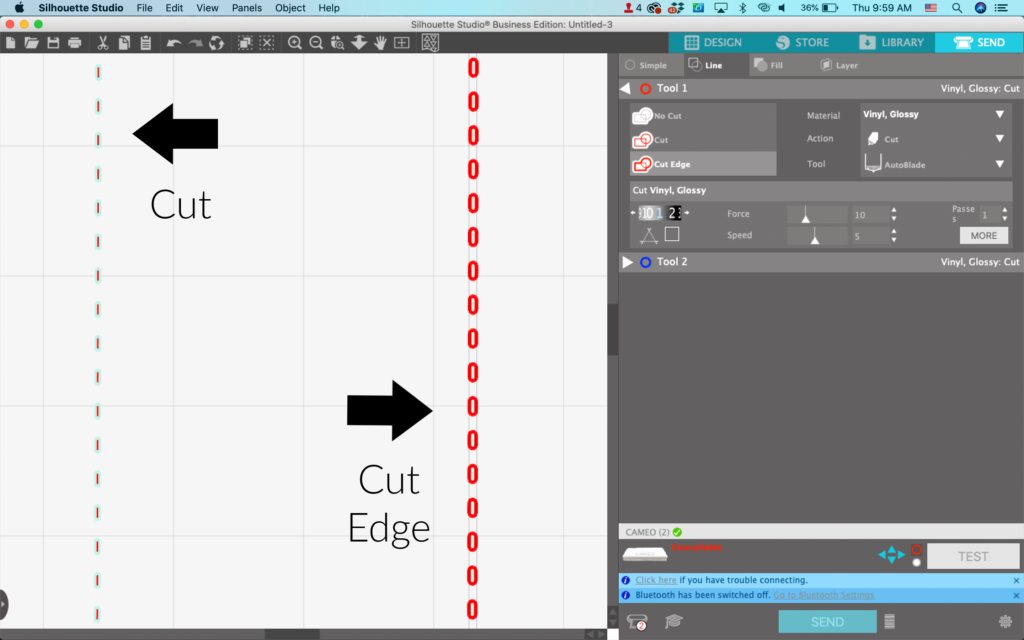
(Note: It’s important to note that if you plan to cut in vinyl, you’ll need to use the Cut Edge command when working with lines. If you don’t you’ll get a single line cut down the middle.) Take a look at Cut versus Cut Edge below on a line of dashes:
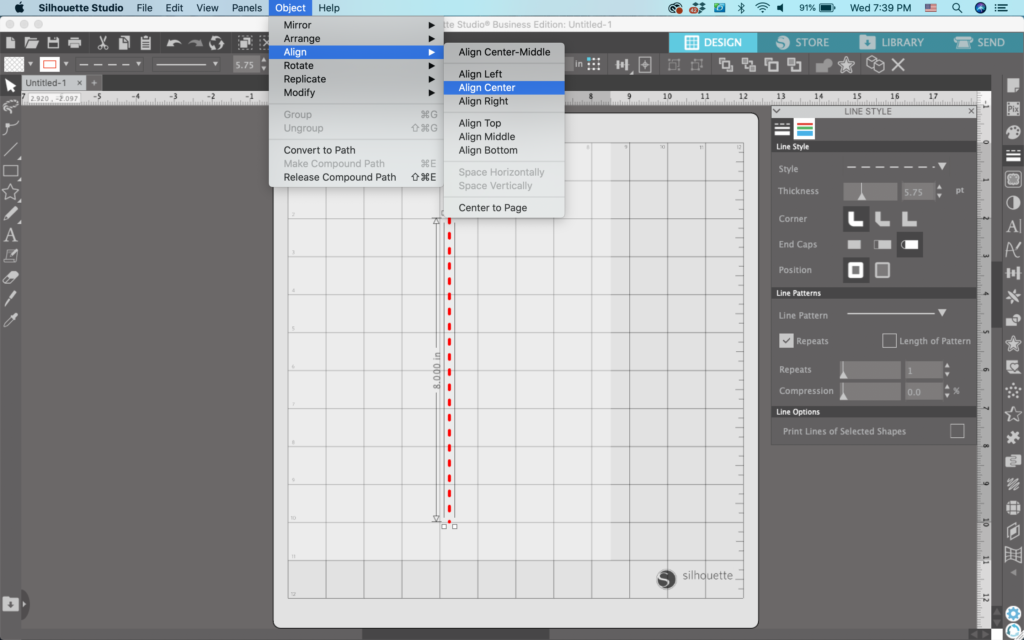
4. Select your line and navigate to ‘Object’, ‘Align’, ‘Center’ to make sure your line is centered.
5. Add horizontal lines and style them.
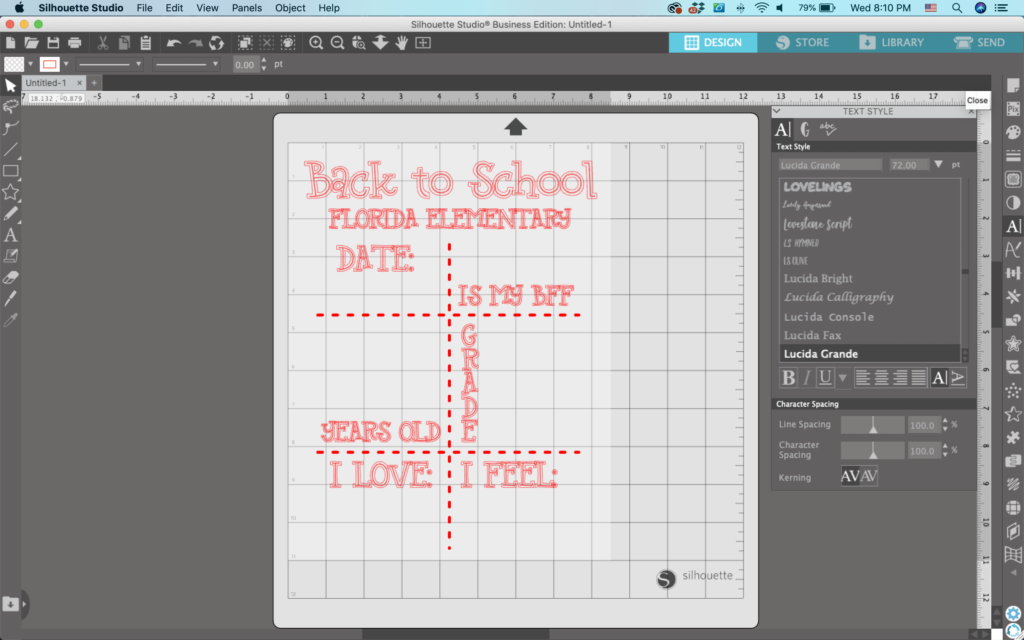
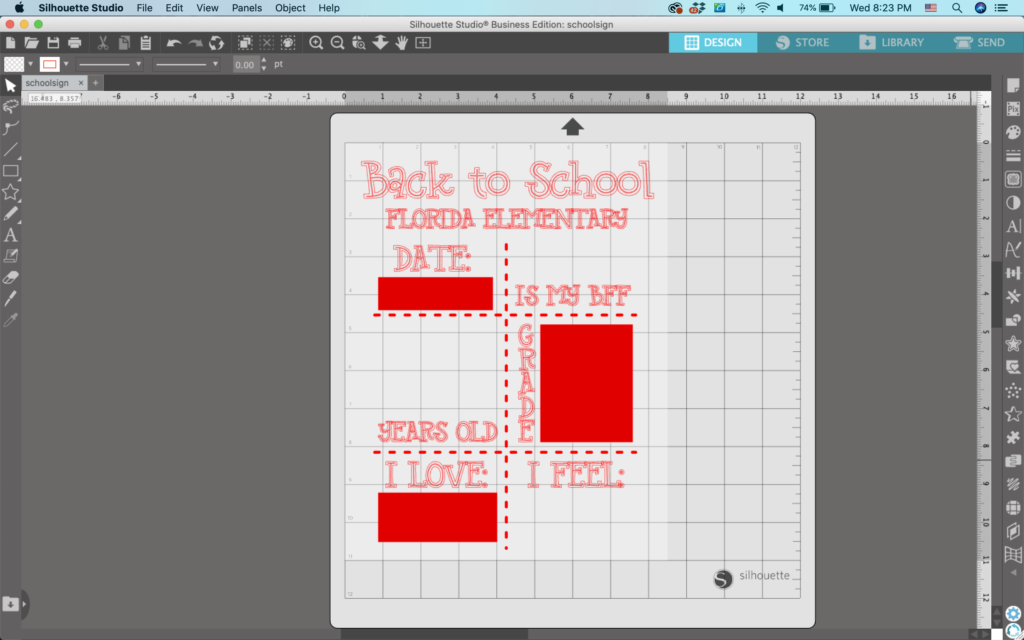
6. Add your text. You could put the name of the child at the top, first day of ___ grade, last day of ___ grade, and so on. Use the ‘Text Styles’ Panel to choose fonts, change character spacing, or line spacing. Don’t forget to use an age appropriate font.
7. Add some ‘flair’. Kids designs should fun and light hearted. Sprinkle in some glyphs or add some shapes. I used the Gab font. I’ve got a list of other kid’s fonts at this link.
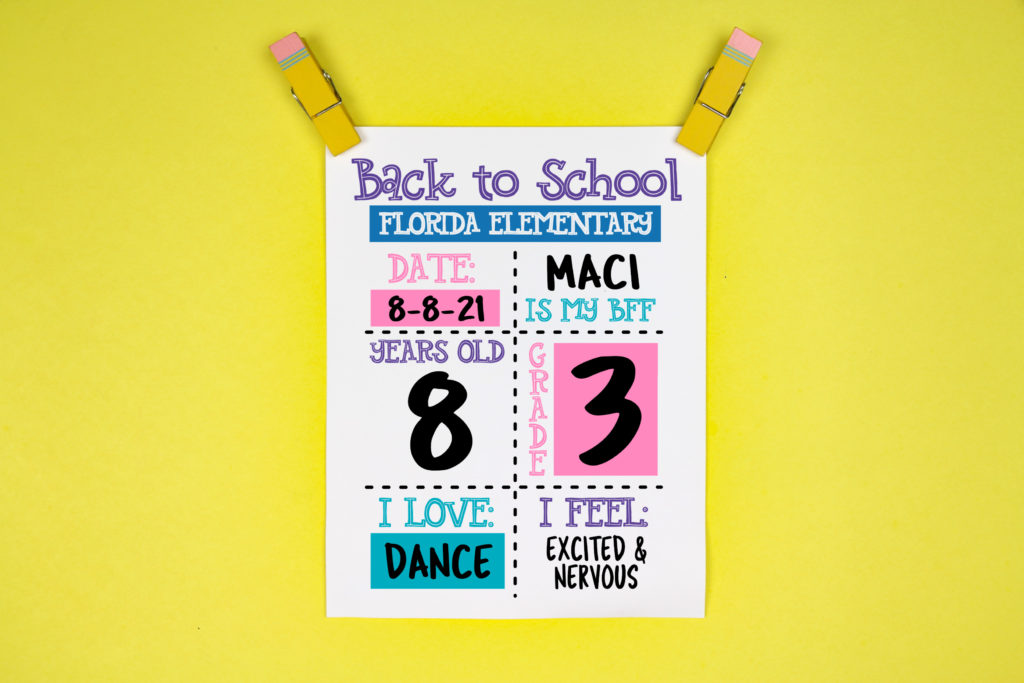
8. Add color to your design. My final design looks like this:
That’s it! Your design is ready to go!
Don’t Forget to Save!
To save your new SVG creation, head to ‘File’, ‘Save As’, ‘Save to Hard Drive’, name the file, then select ‘SVG’ from the dropdown menu.
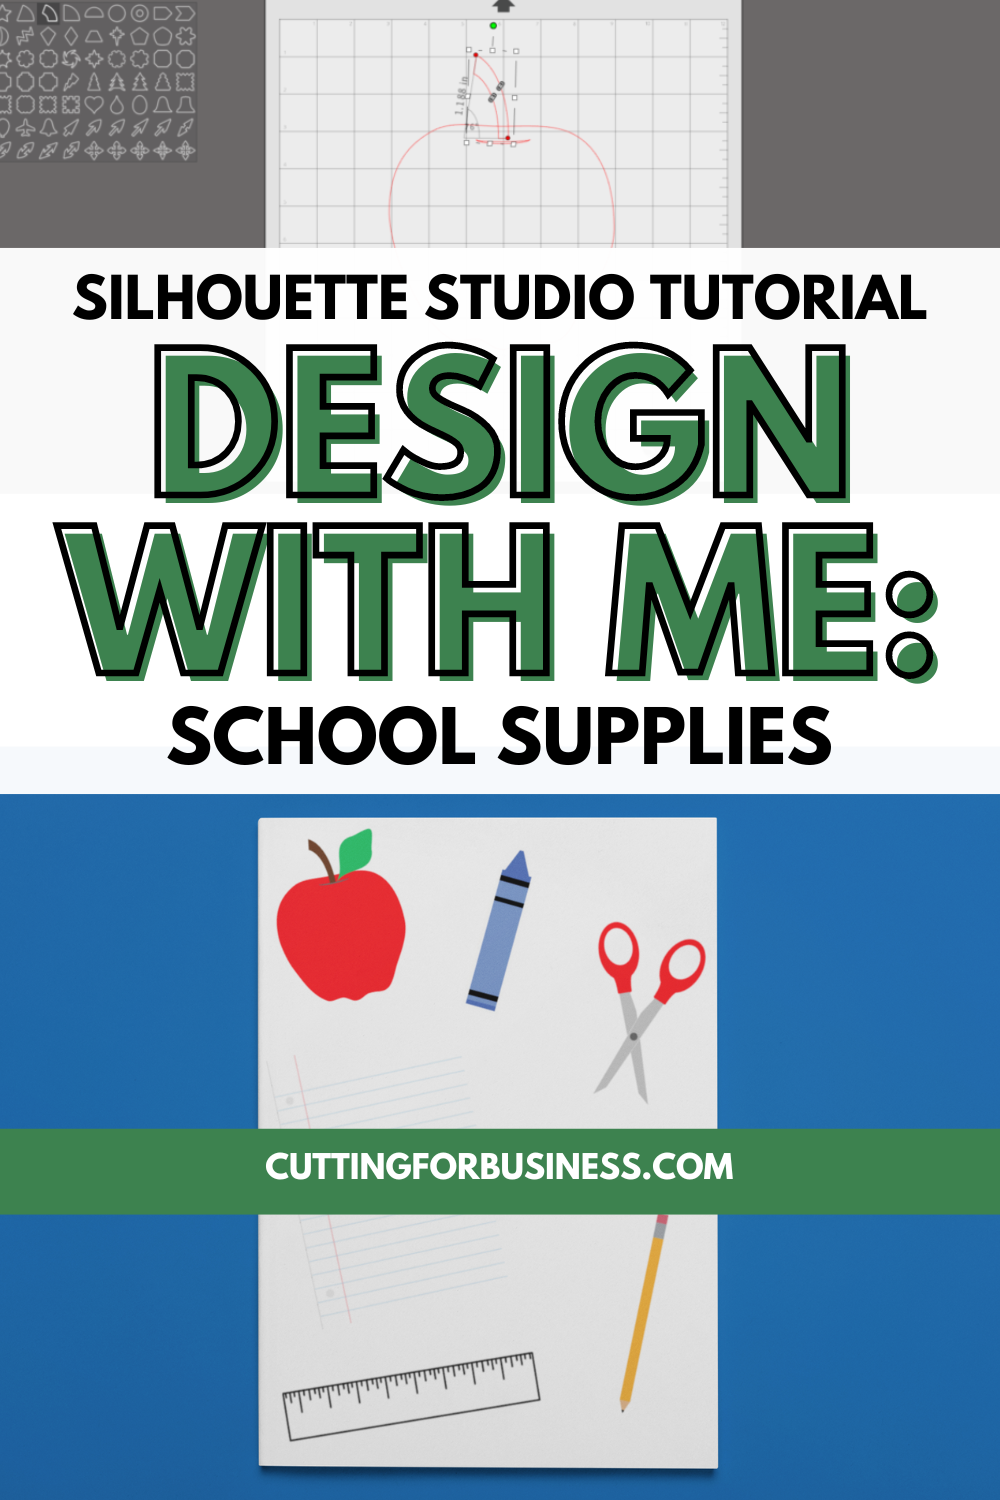
We are just weeks away from Back to School time! So, let’s take a look at how to draw school supplies right in Silhouette Studio. I think you’ll be surprised at how quickly and easily they come together.
How to Draw 6 School Supplies
Mini Tutorial 1: How to Draw a Pencil
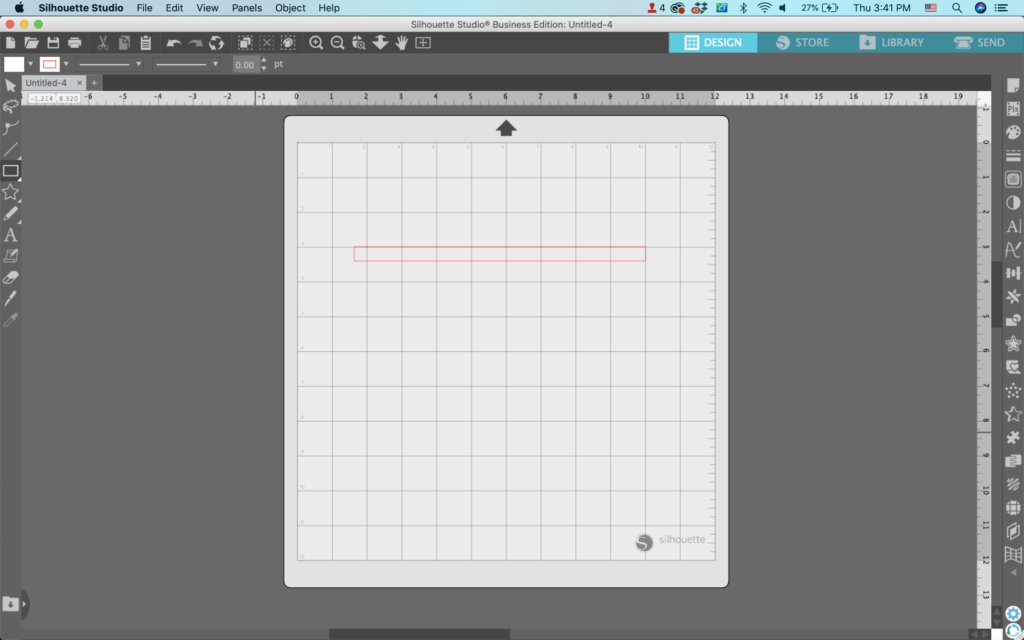
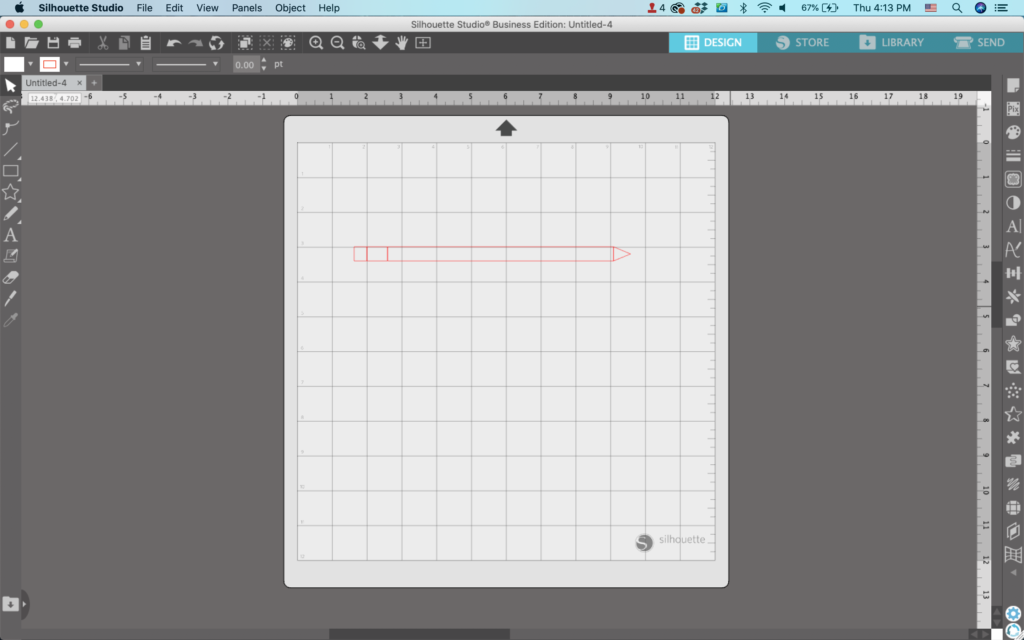
Draw a long, skinny rectangle.
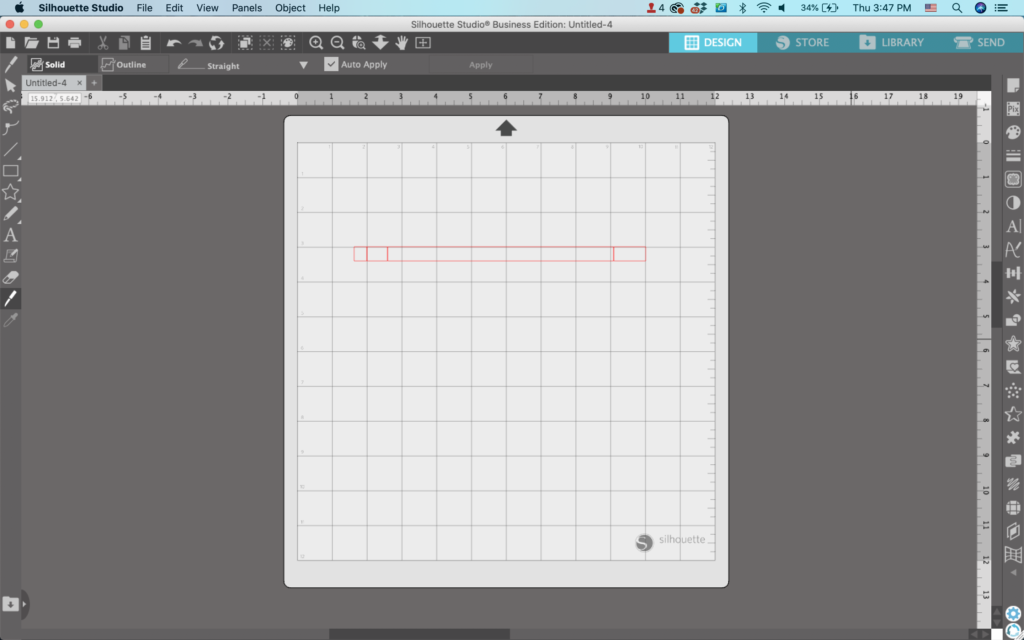
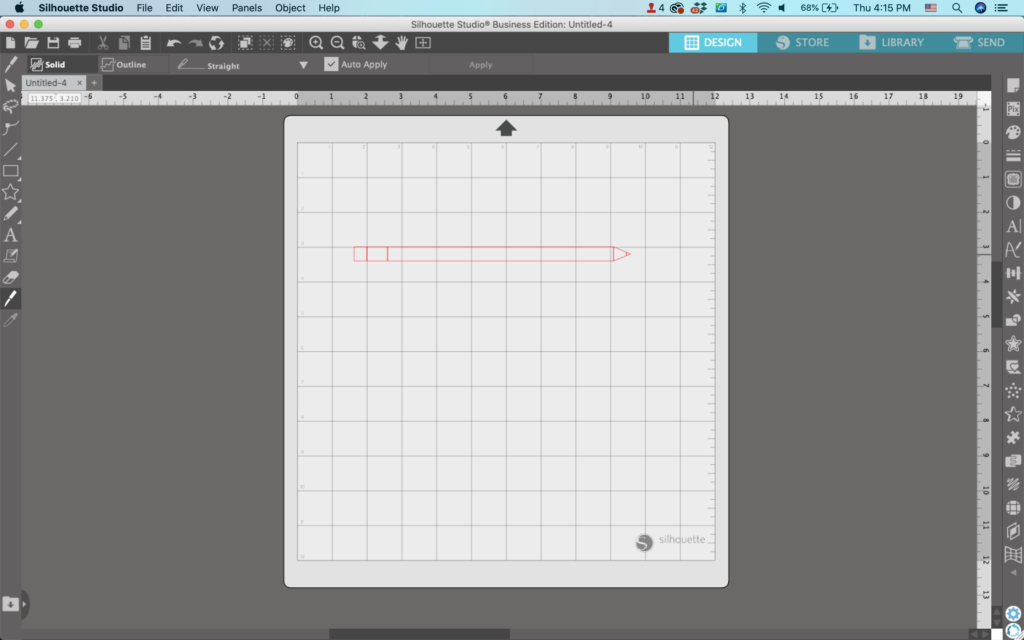
2. Use the knife tool and make three cuts. These will become the eraser, the metal band at the top, and the sharpened end.
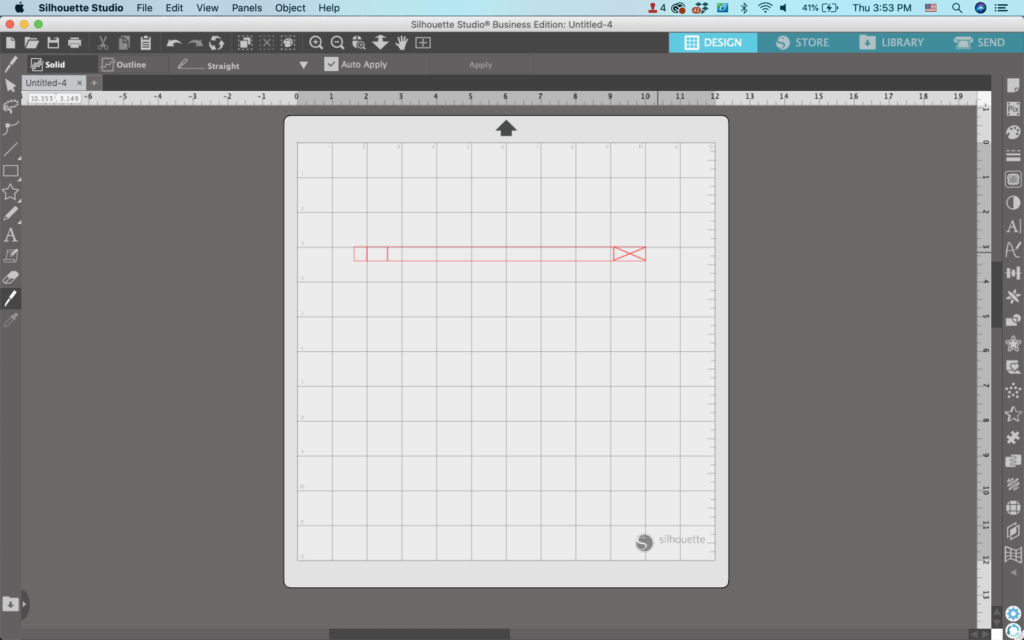
3. Use the knife tool again to make an X in the far right rectangle.
4. Delete three of the four triangles to make a point.
5. Use the knife tool one more time to create a lead point on the pencil.
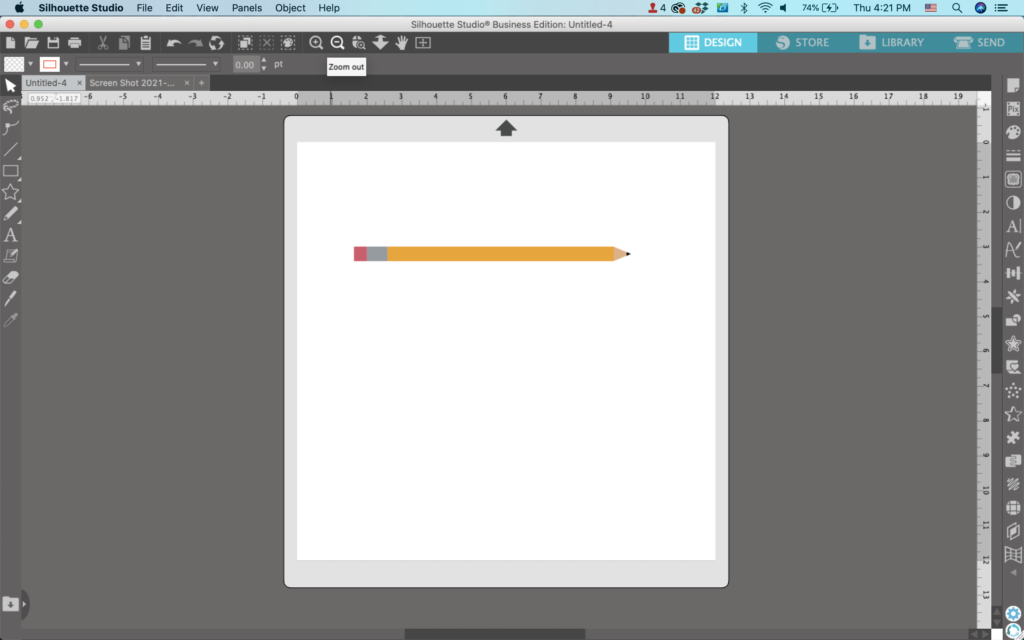
6. Make any final adjustments, group elements as needed, and fill the pencil with color.
Mini Tutorial 2: How to Draw a Crayon
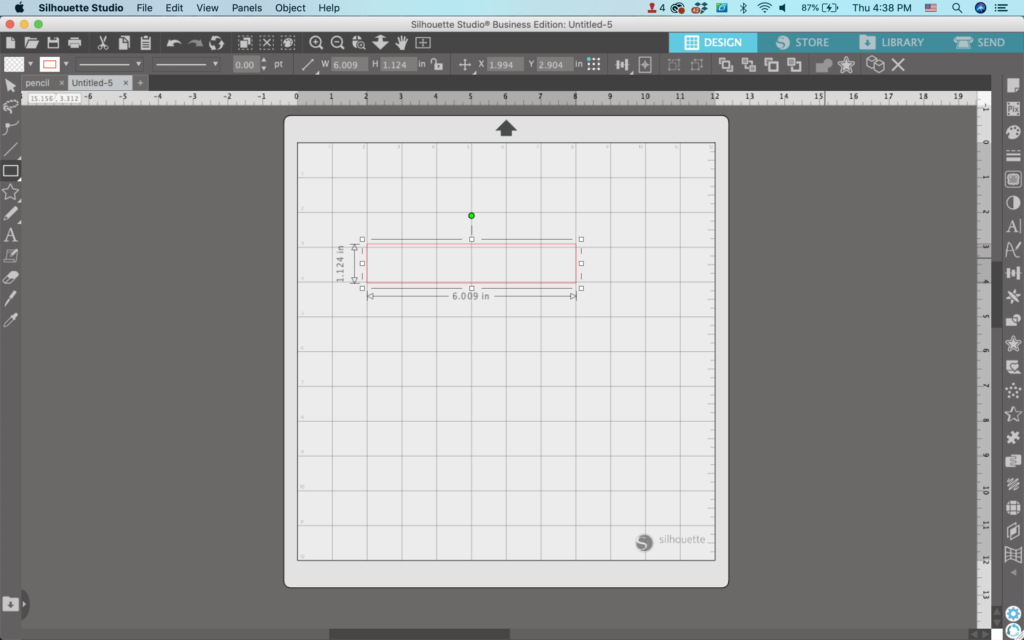
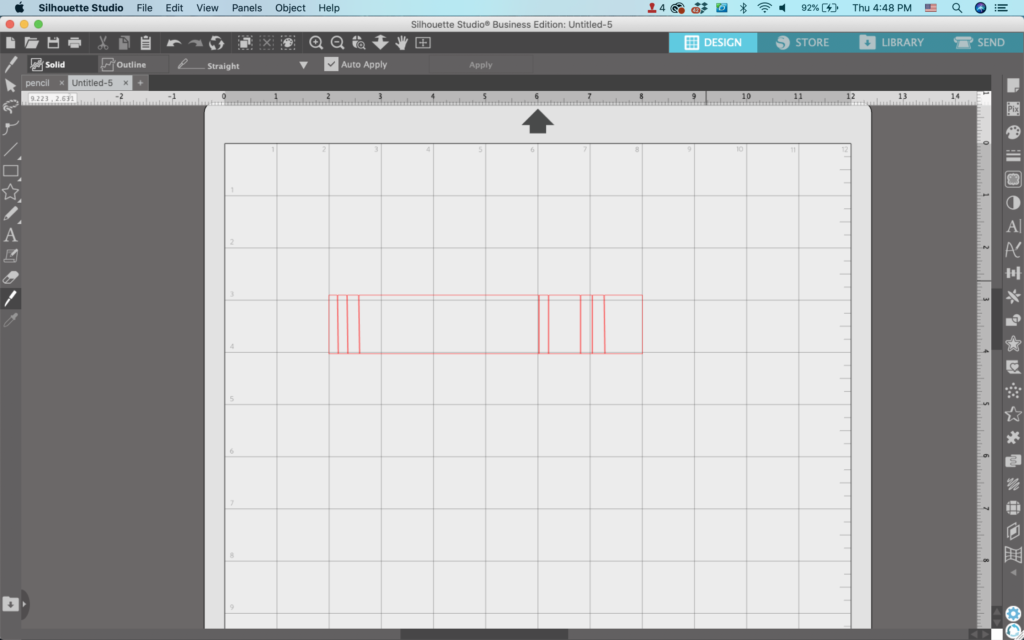
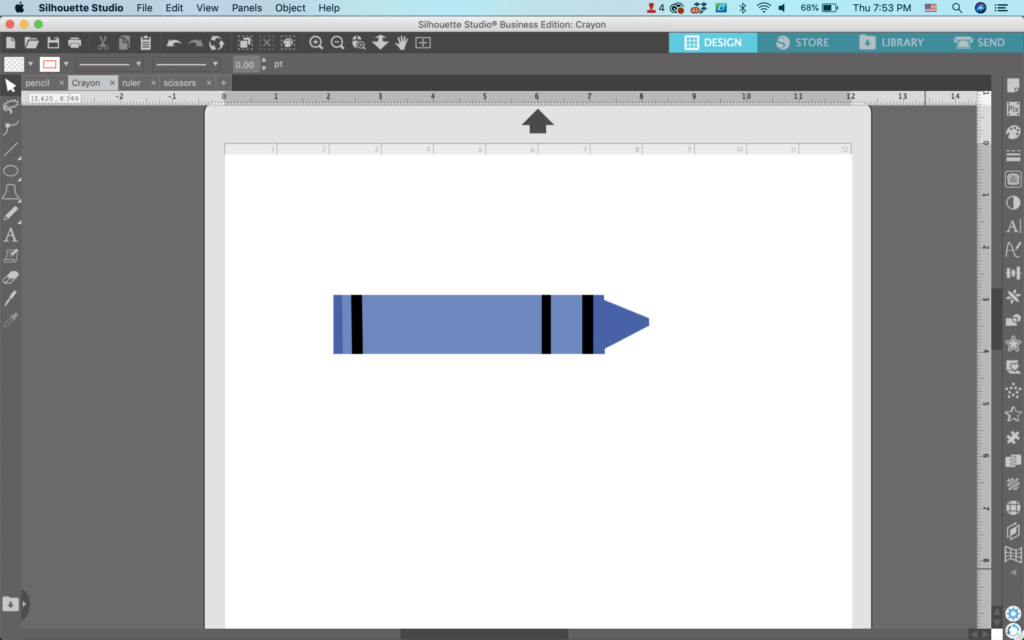
The crayon will come together a lot like the pencil we did above. First, draw a rectangle. Make it slightly thicker and chunkier than the pencil.
2. Using the knife tool, slice into the rectangle eight times. When you are finished, it’ll look similar to this:
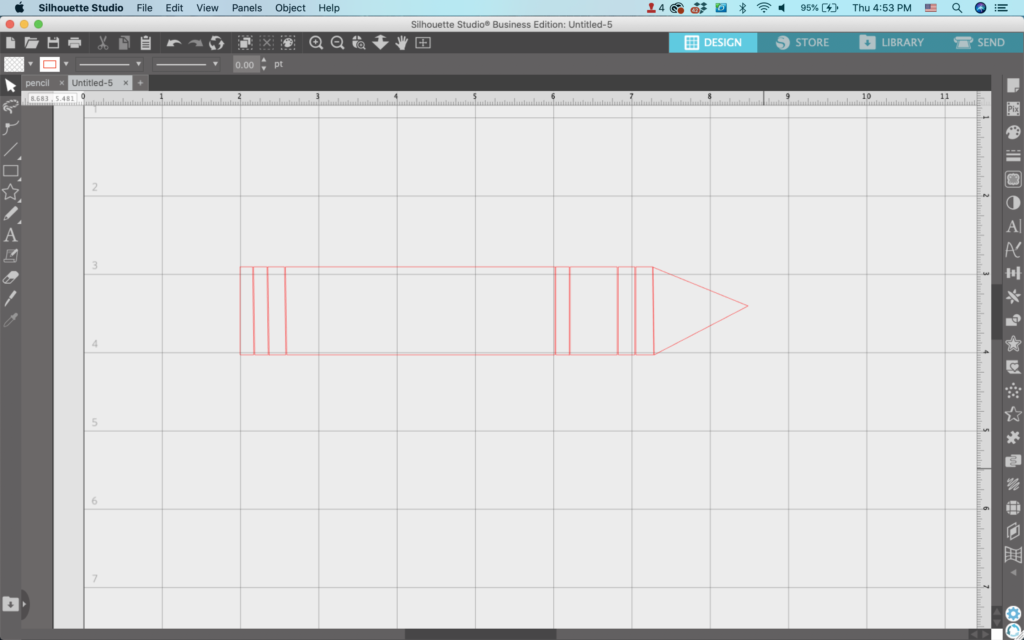
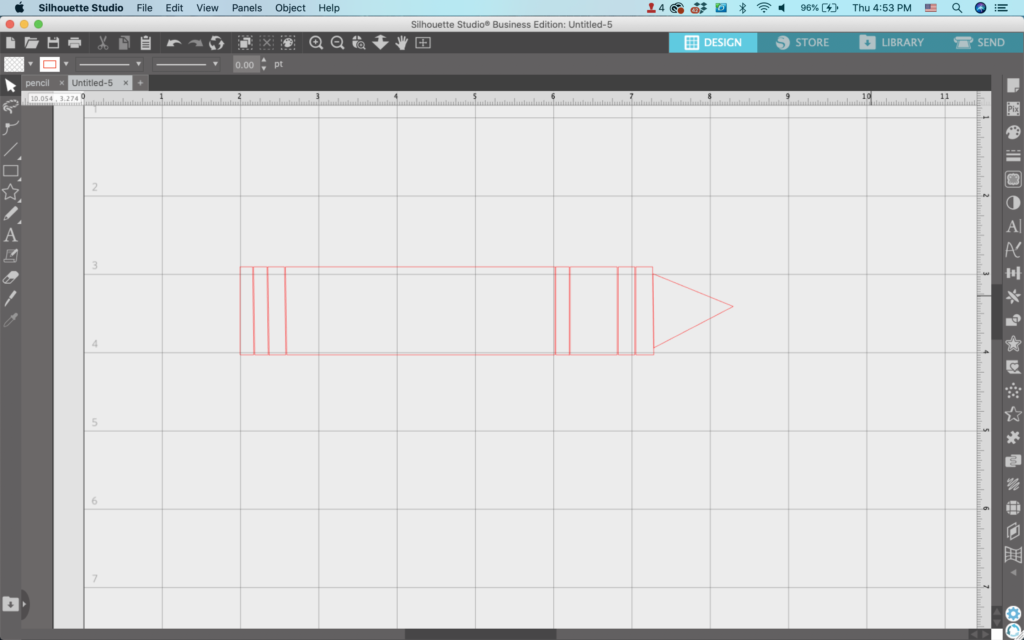
3. Use the knife tool to make the right most rectangle a triangle.
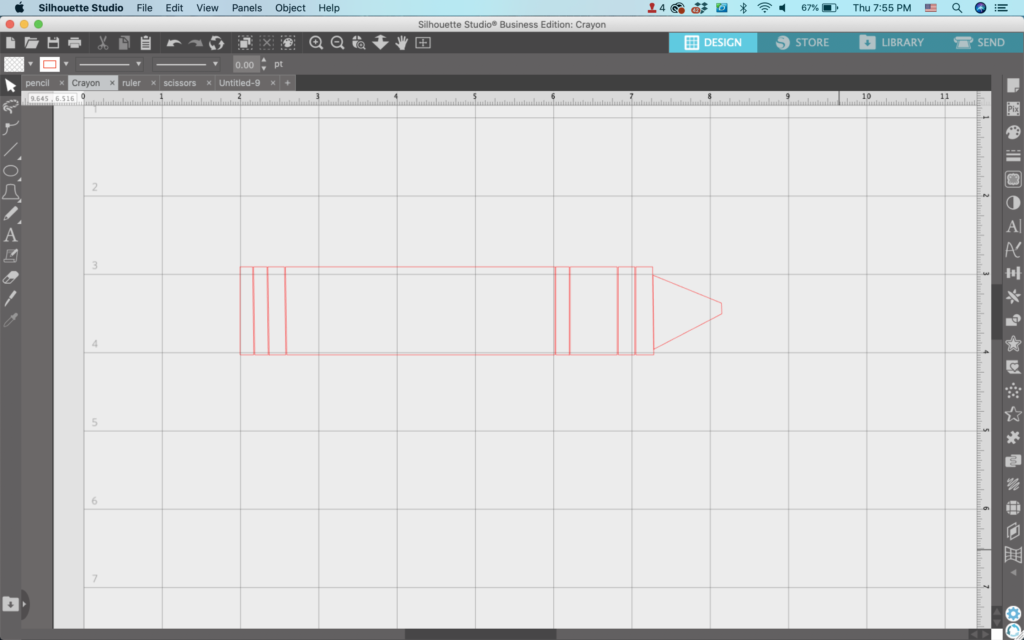
4. Make the triangle slightly smaller than the current size and use the knife to flatten the tip.
5. Make any final adjustments, group elements as needed, and fill the crayon with color.
Remember, you don’t want to make your crayon label look like well known name brands – or you will have a trademark issue on your hands.
Mini Tutorial 3: How to Draw a Ruler
Draw a rectangle. I made sure to use the grid when drawing the rectangle. I started at the edge of a grid square and ended at the edge of a grid square.
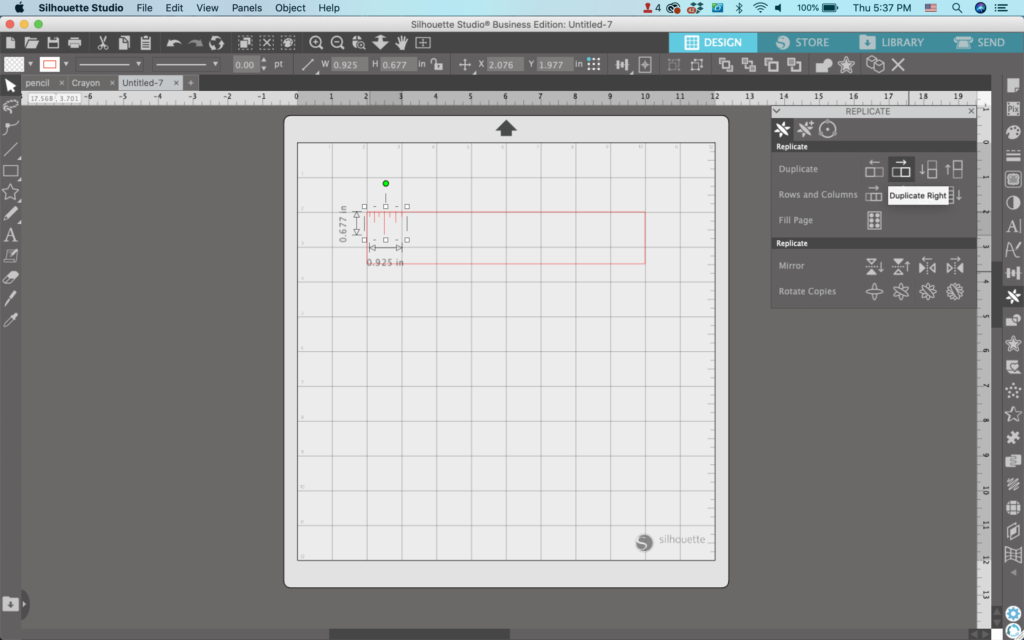
2. Using the line tool, make lines in one square. These will represent the measurements on the ruler.
3. Select all the lines, then group them together.
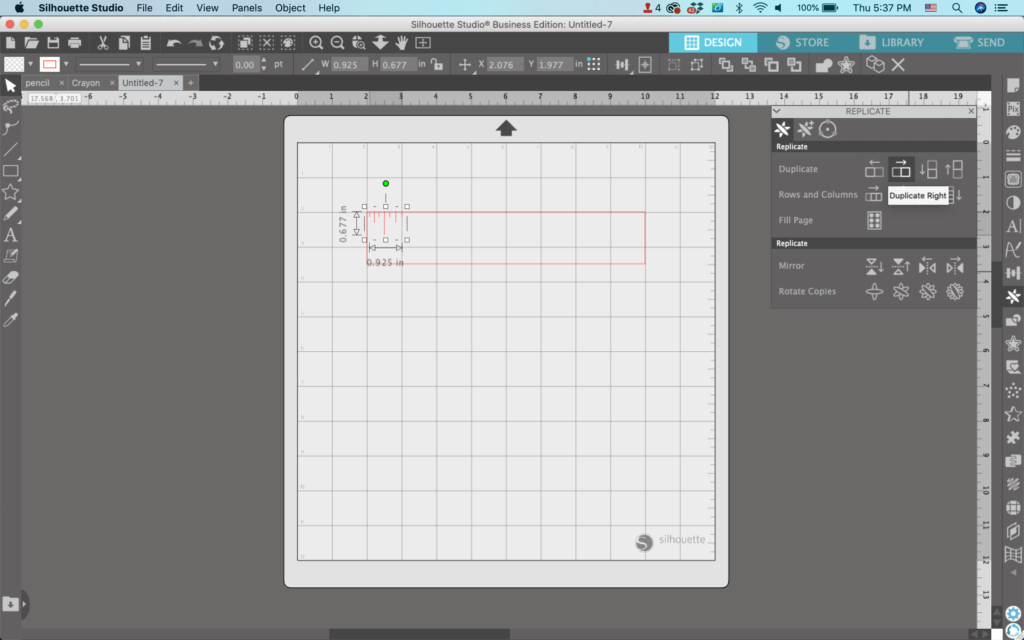
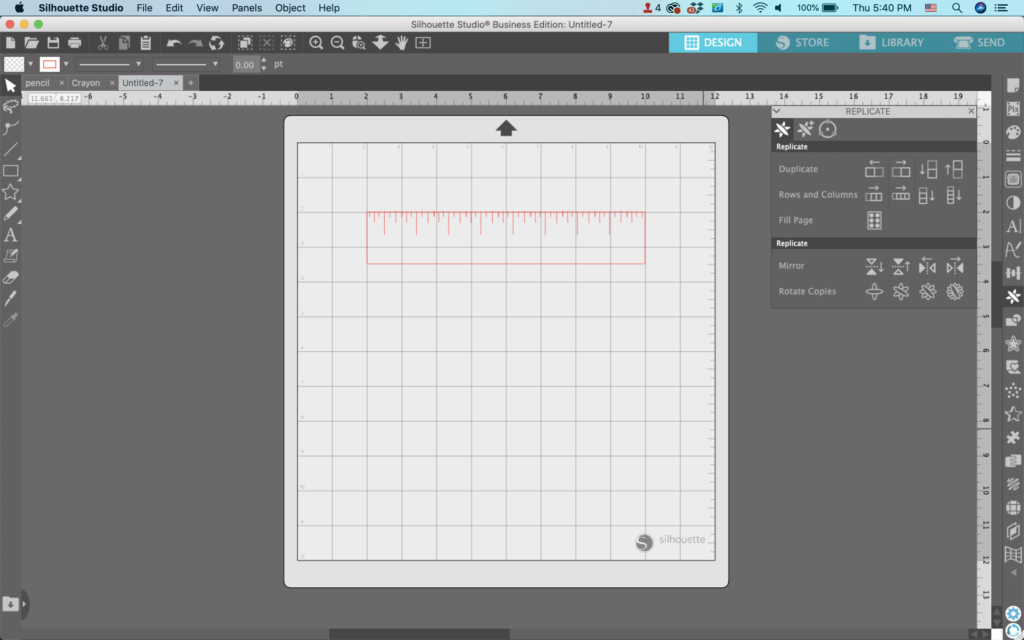
4. Navigate to ‘Panels’, ‘Replicate’, and ‘Duplicate Right’. This will fill in the marks on the rest of the ruler.
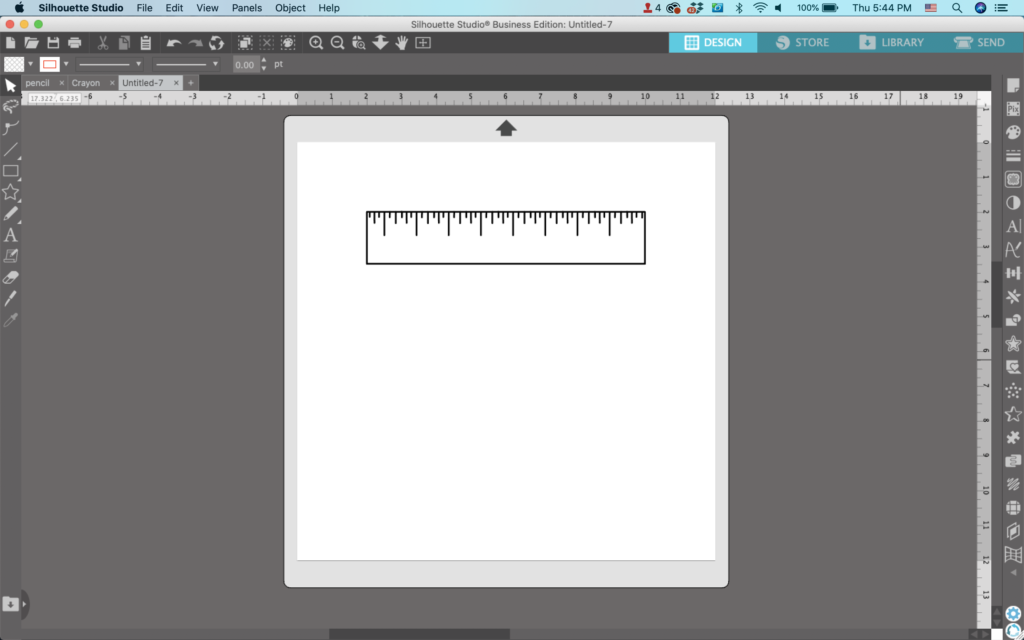
5. Make any final adjustments, group elements as needed, and fill the ruler with color or thicken the lines – your choice!
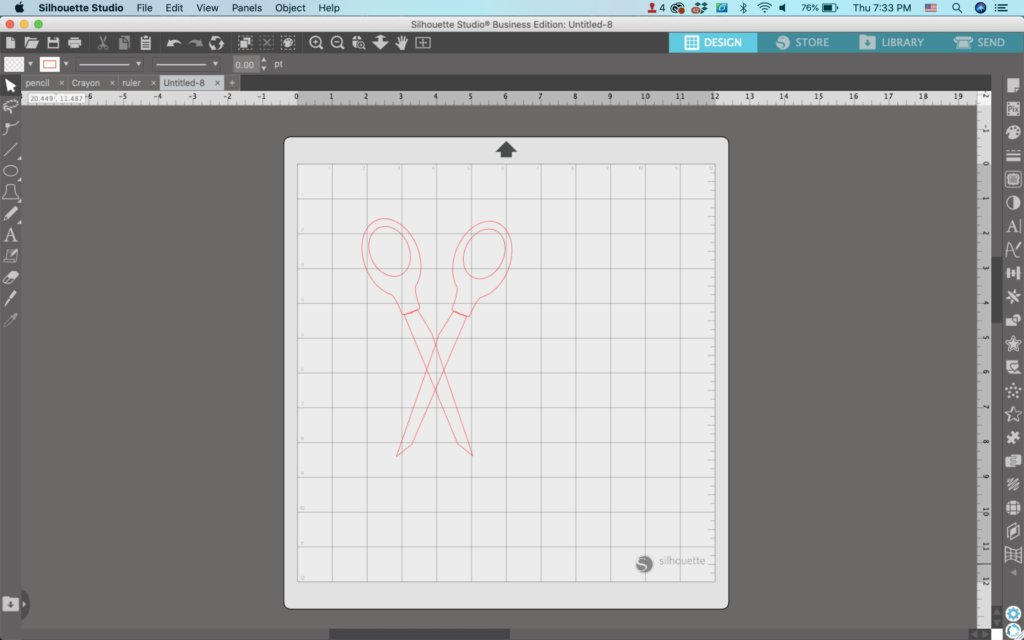
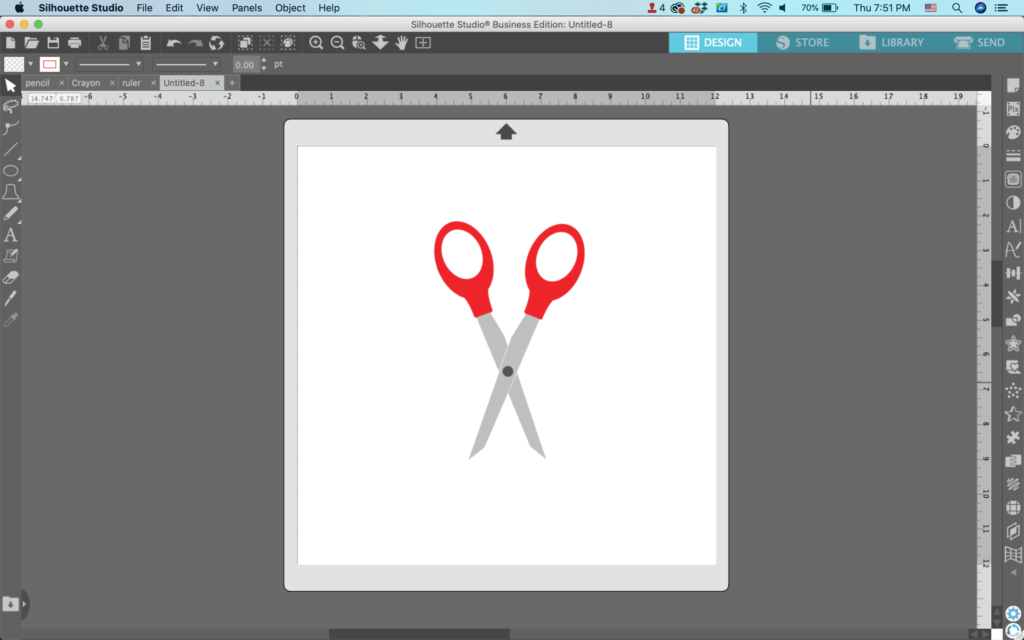
Mini Tutorial 4: How to Draw Scissors
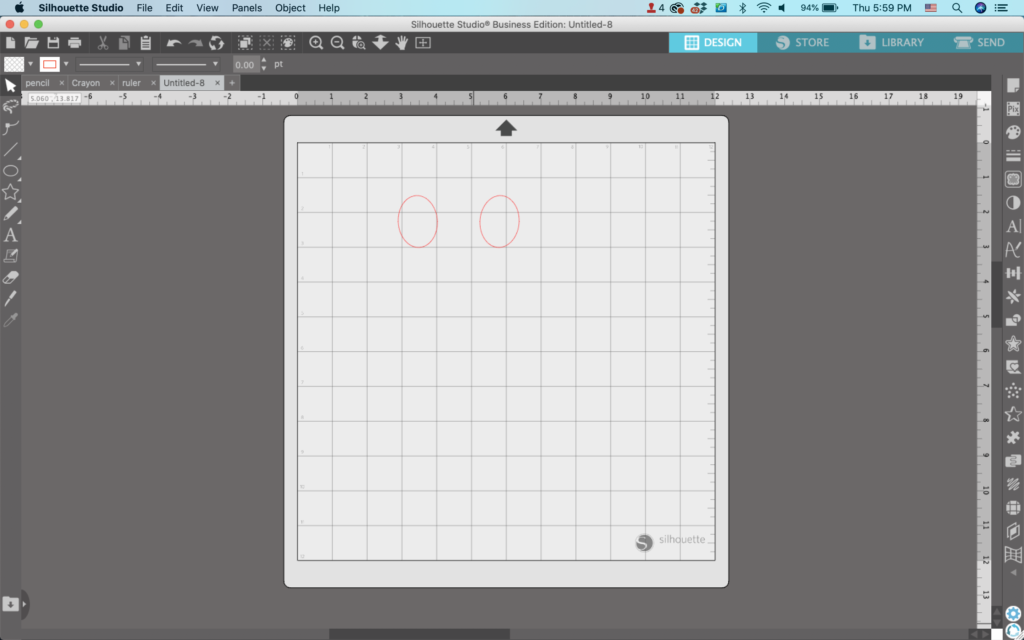
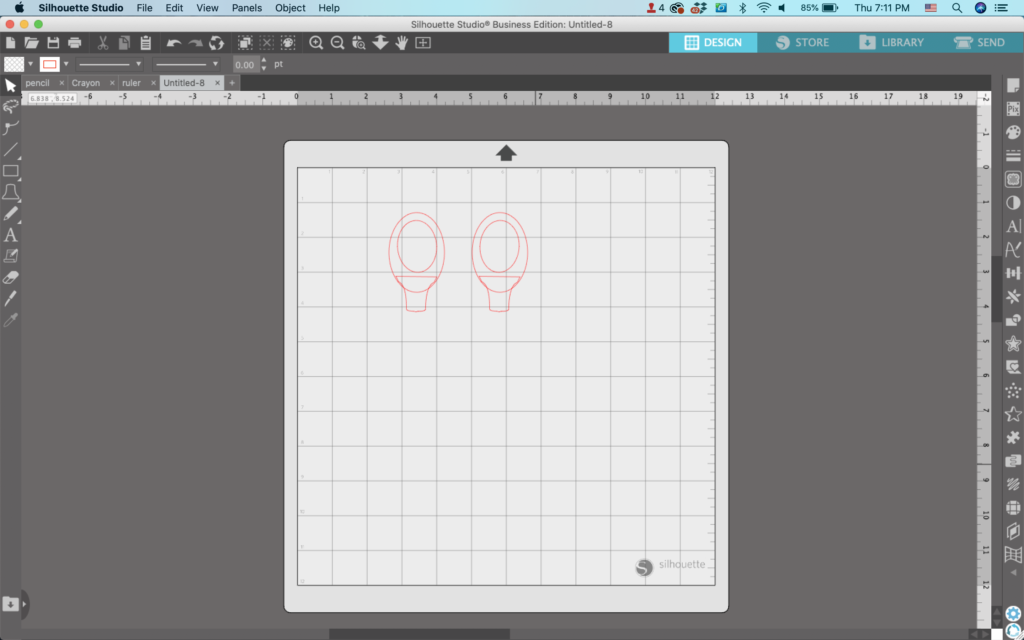
Draw two ovals.
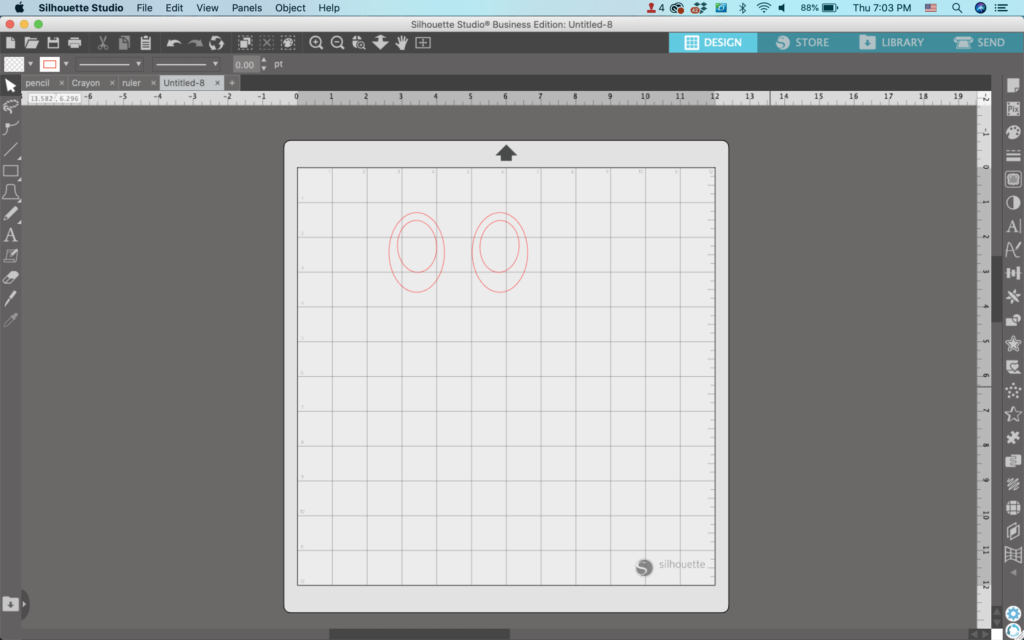
2. Draw two more ovals/egg shapes and put them over the first two.
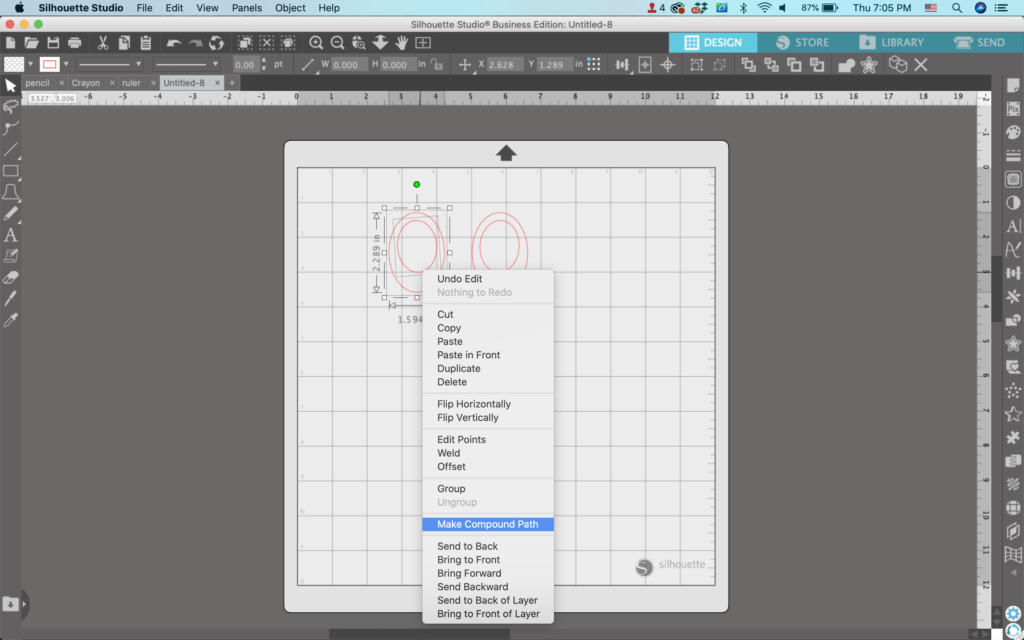
3. Select two oval elements, right click, then choose ‘Make Compound Path’. Repeat with the other set.
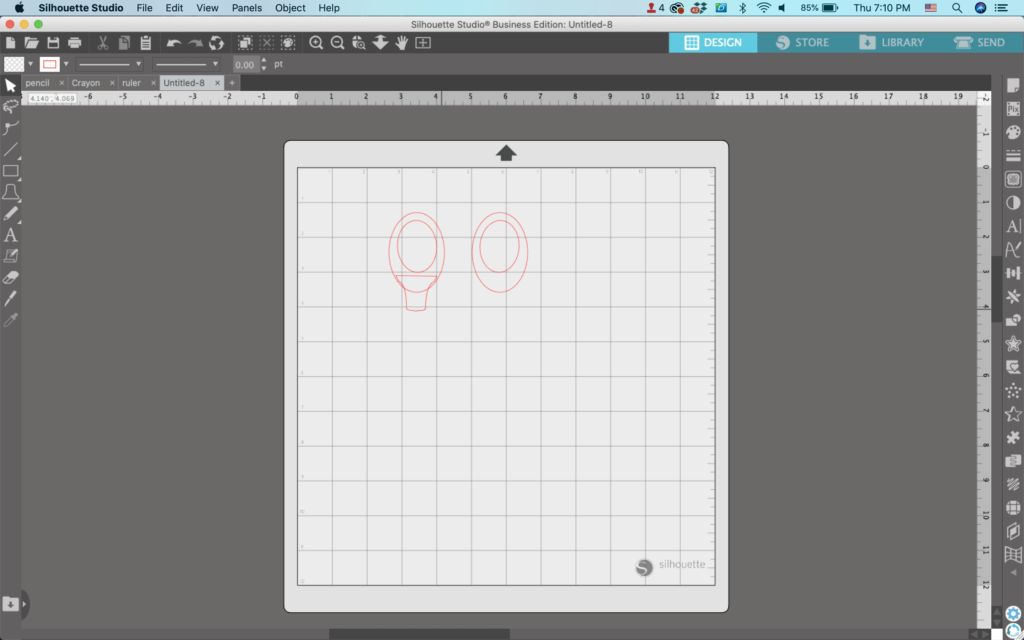
4. From the Flexishape menu, select the bell (last one, 5th row). Then, rotate it around as I did in the following image:
5. Repeat for the other oval set.
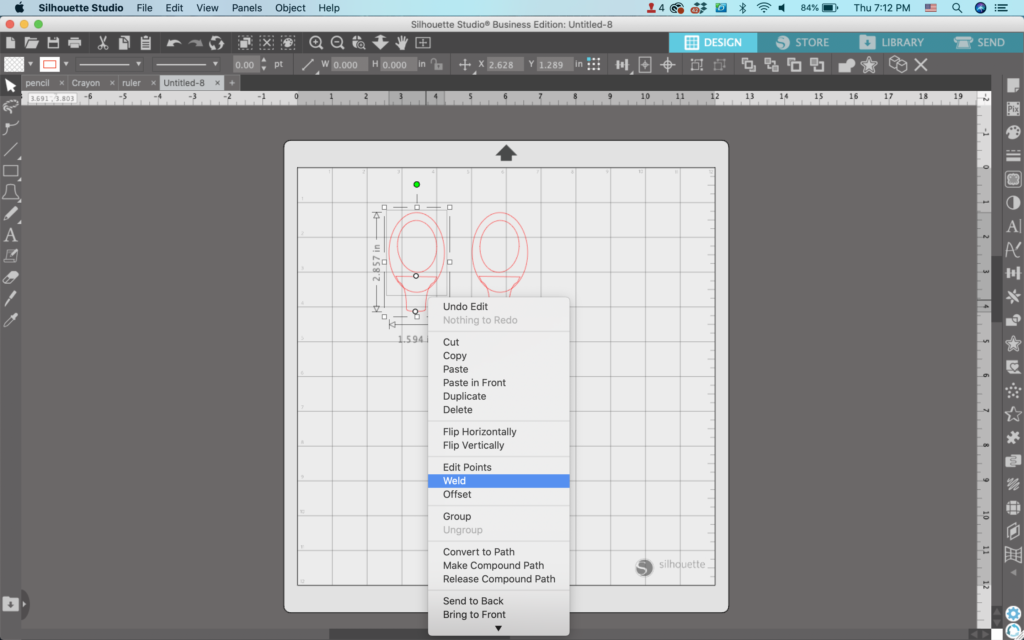
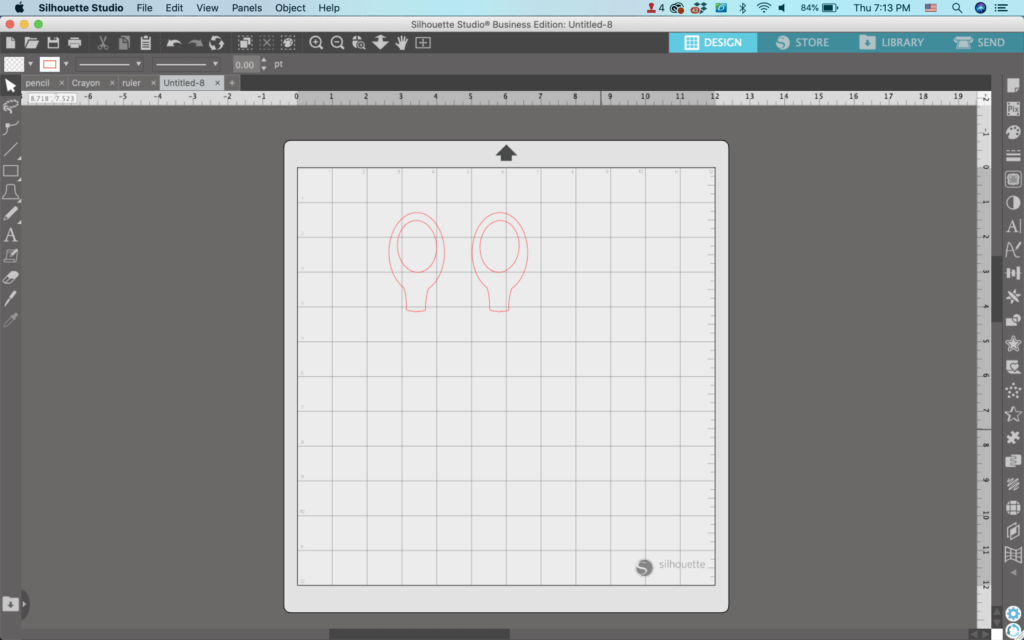
6. Select the oval and the bell and weld (Right click, ‘Weld’) them together. Repeat on the other side.
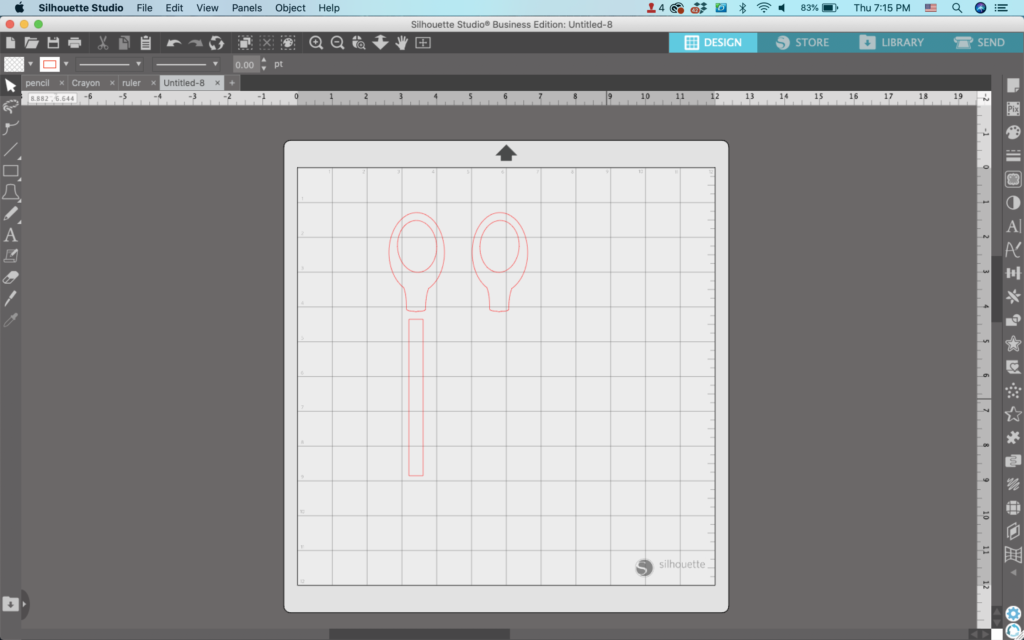
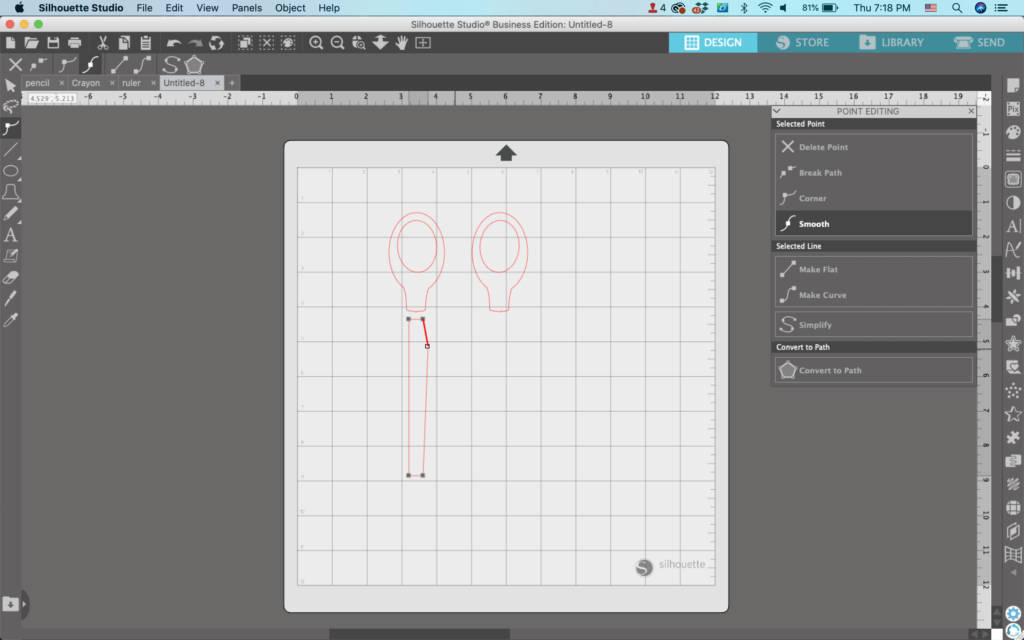
7. Draw a long, skinny rectangle.
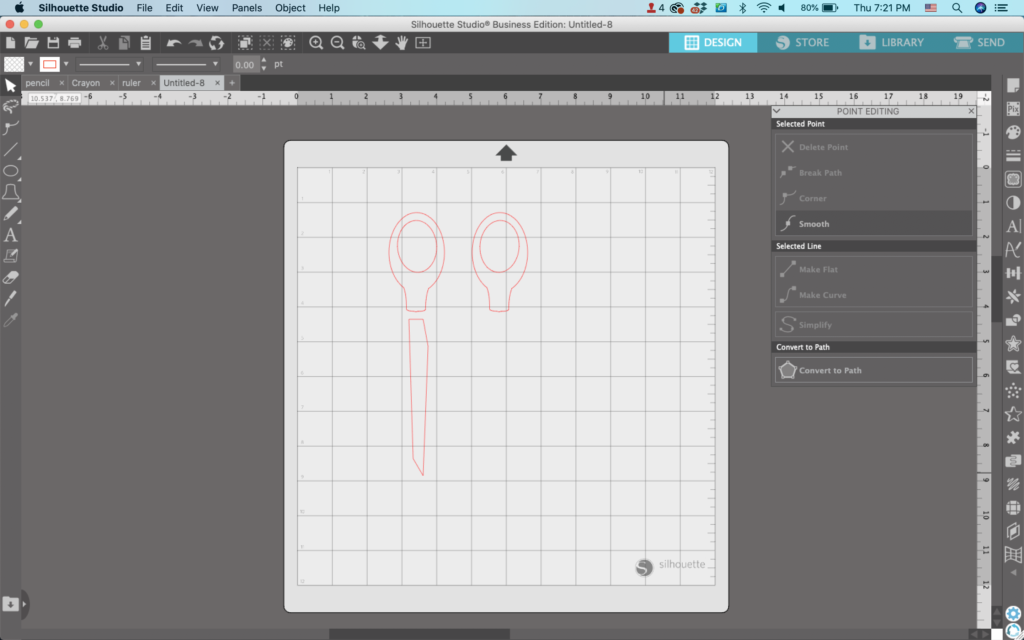
8. Double click on the rectangle to open the ‘Point Editing’ Panel. Drag one side of the rectangle slightly to make a shape similar to mine:
9. Move the bottom corner to create a point at the end of the scissors.
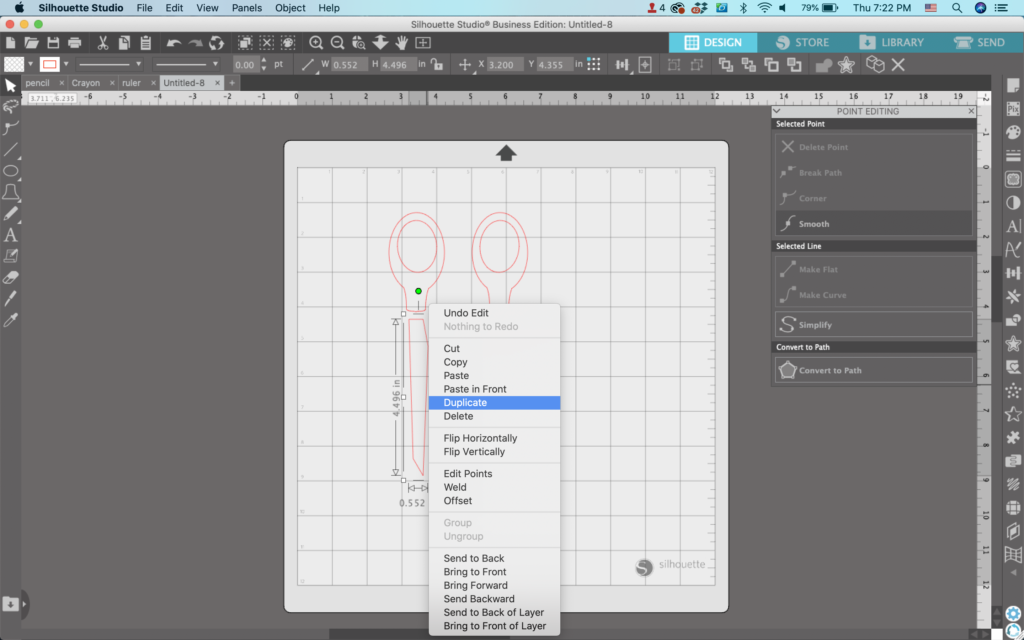
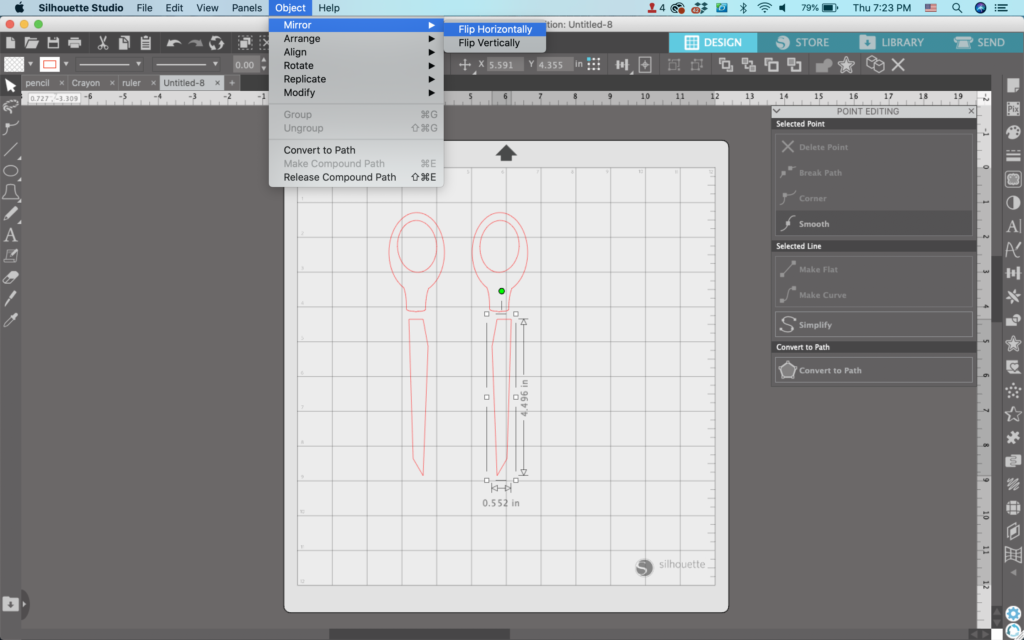
10. Duplicate the blade (Right click, then ‘Duplicate’) and navigate to ‘Object’, ‘Mirror’, ‘Flip Horizontally’.
11. Move everything into place to create scissors.
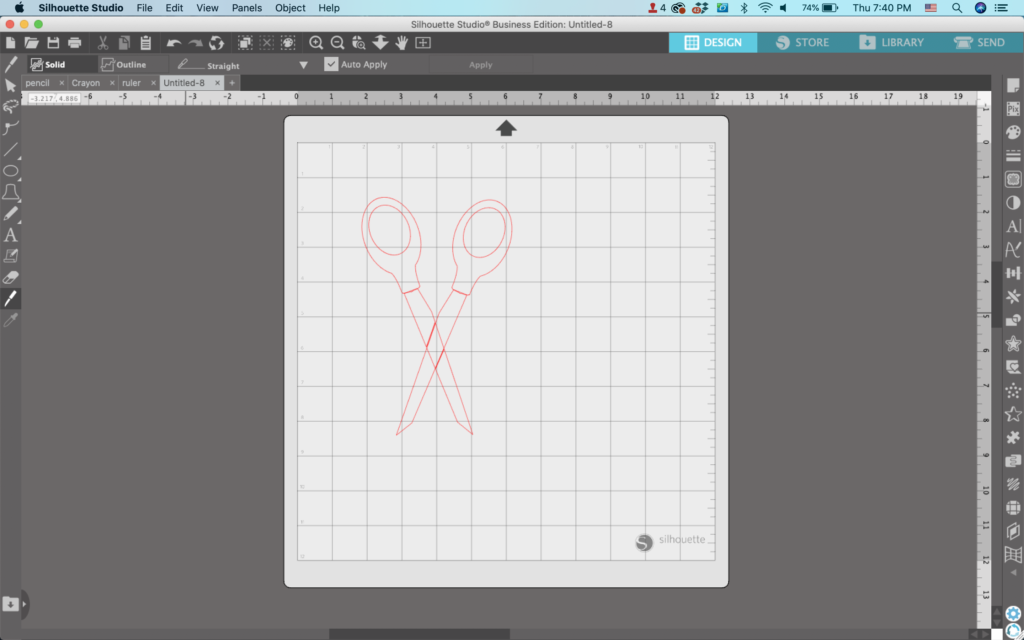
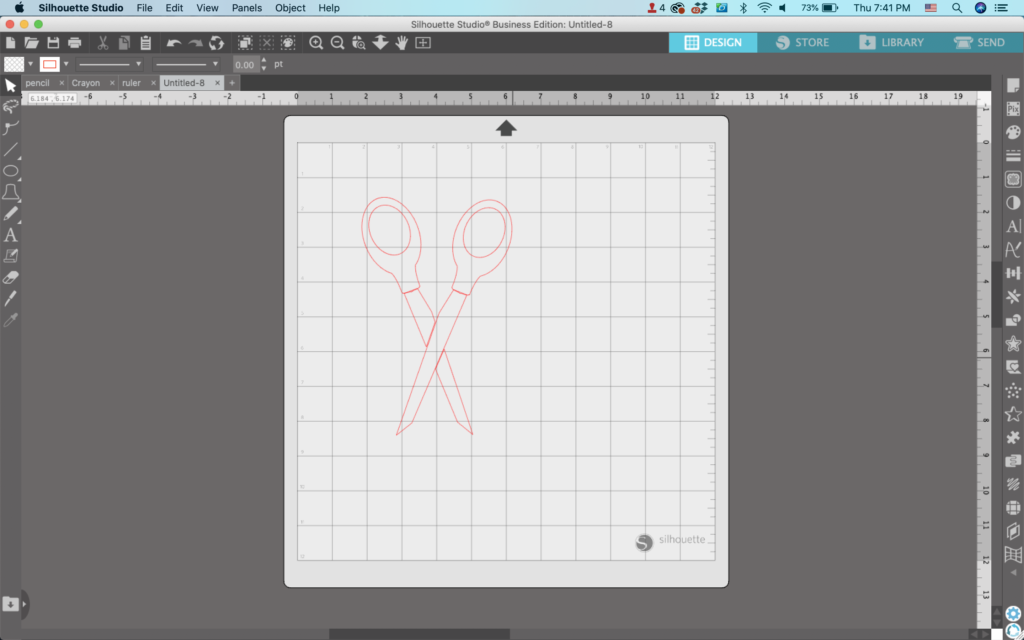
12. Use the knife tool to slice one of the blades to make it look like they overlap. Then, delete the remaining piece.
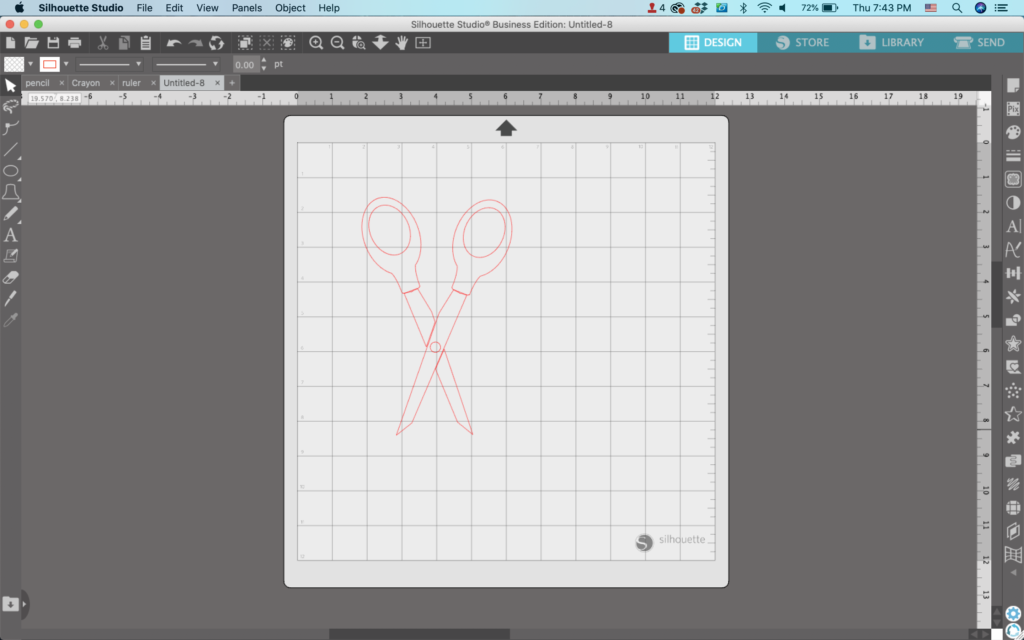
13. Add a circle for the hinge of the scissors.
14. Make any final adjustments, group elements as needed, and fill the scissors with color.
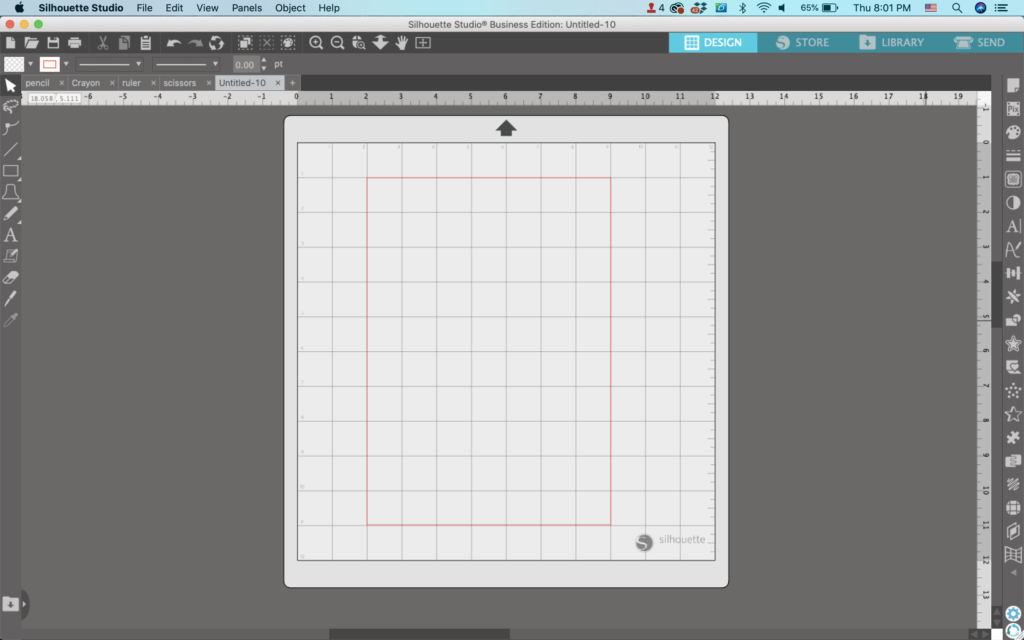
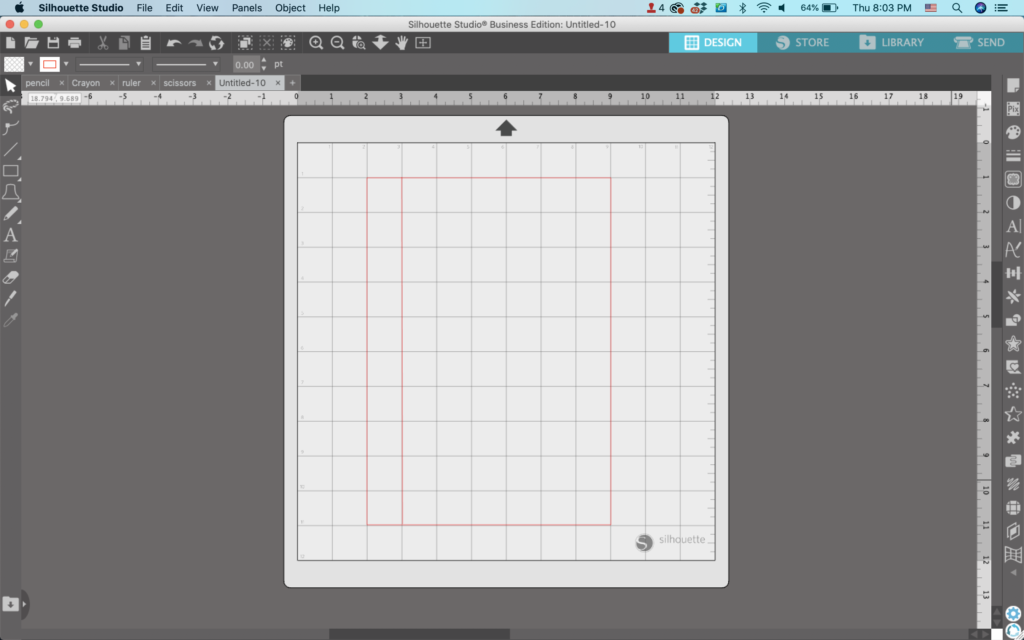
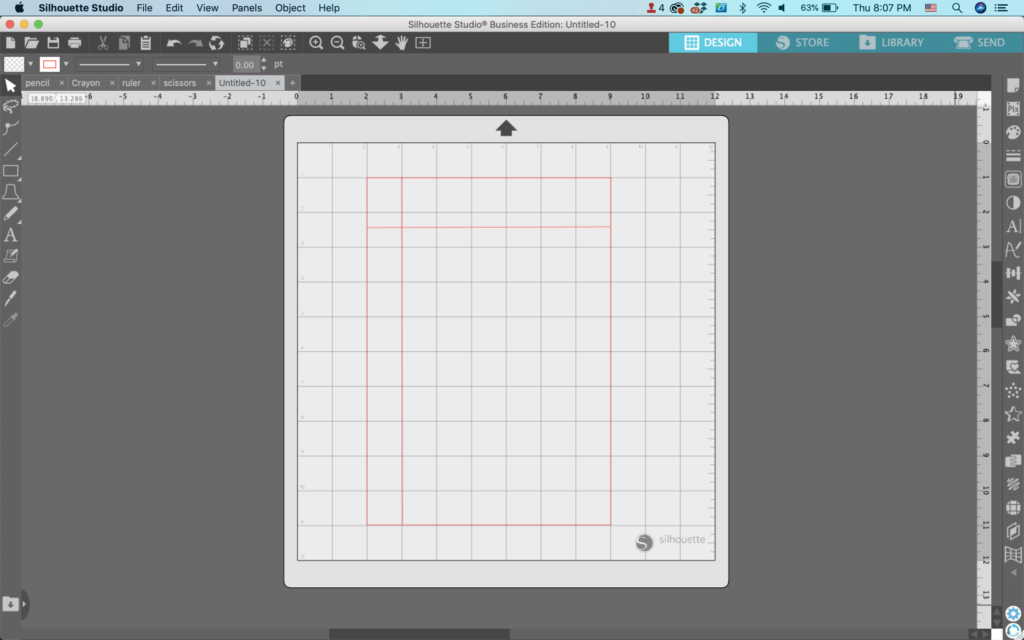
Mini Tutorial 5: How to Draw Notebook Paper
Draw a rectangle in Silhouette Studio. You’ll notice I lined up the rectangle on the grid lines.
2. Draw a vertical line near the left side.
3. Draw a line across the top, leaving some space for a header.
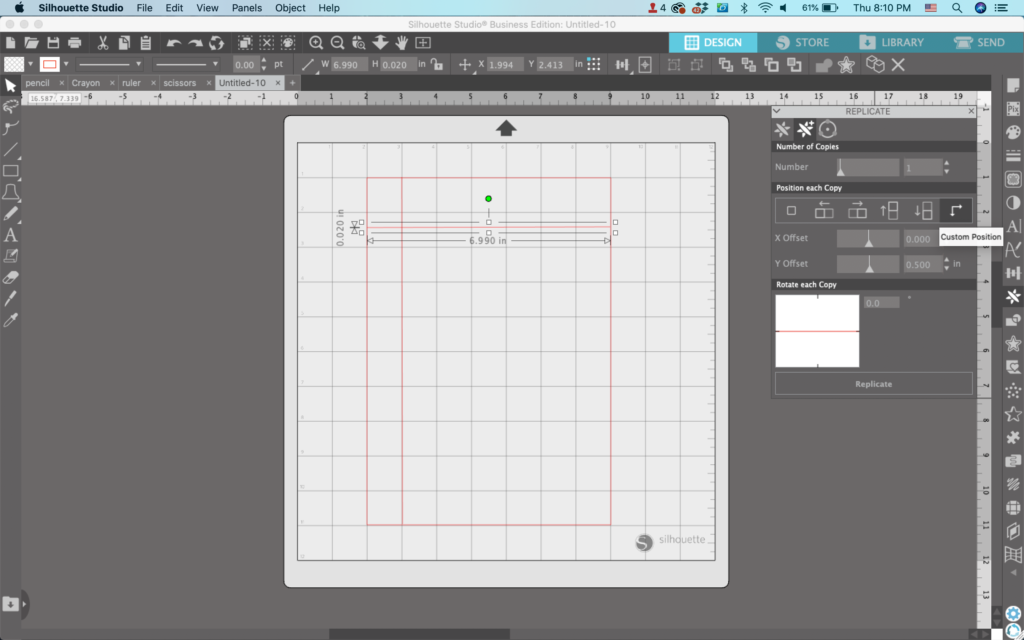
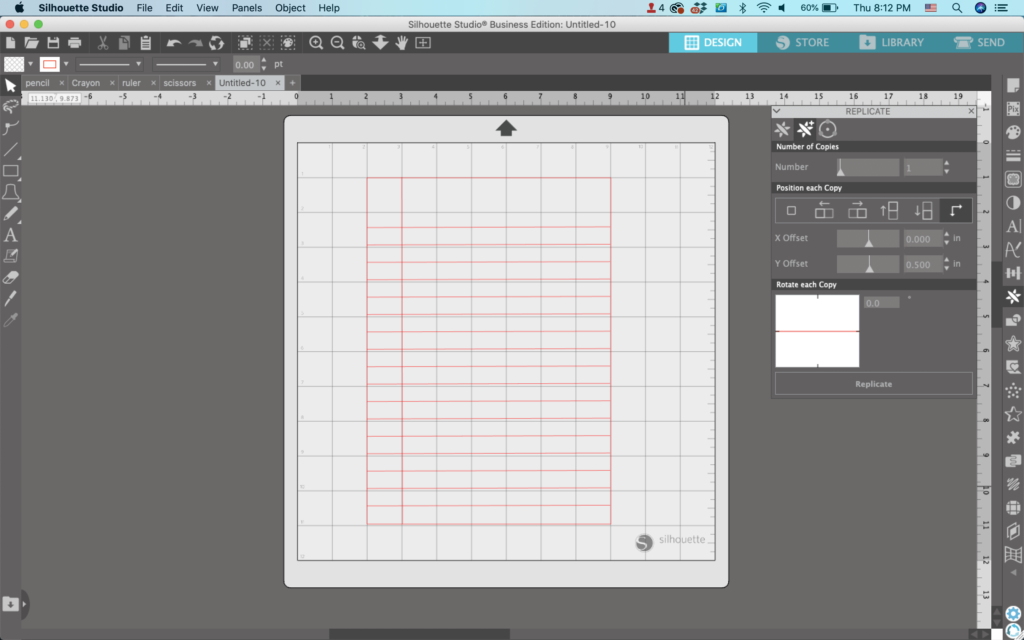
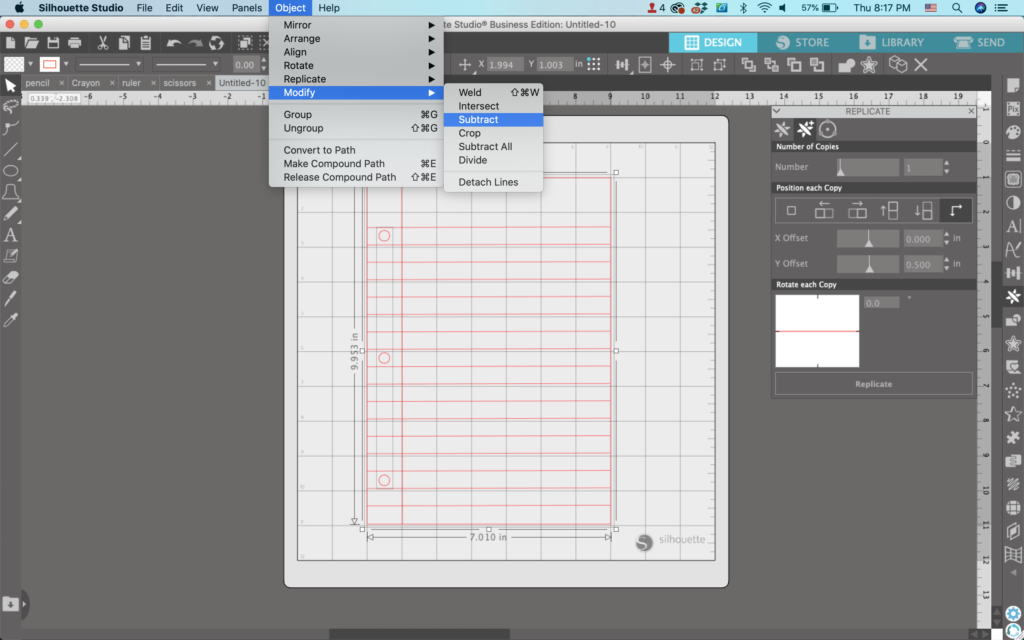
4. Navigate to ‘Panels’, then ‘Replicate’. From the ‘Advanced Replicate’ tab (it’s the second one), choose ‘Custom Position’. Set the ‘Y Offset to 0.500. Then, replicate the horizontal line you made until you reach the bottom of your notebook paper.
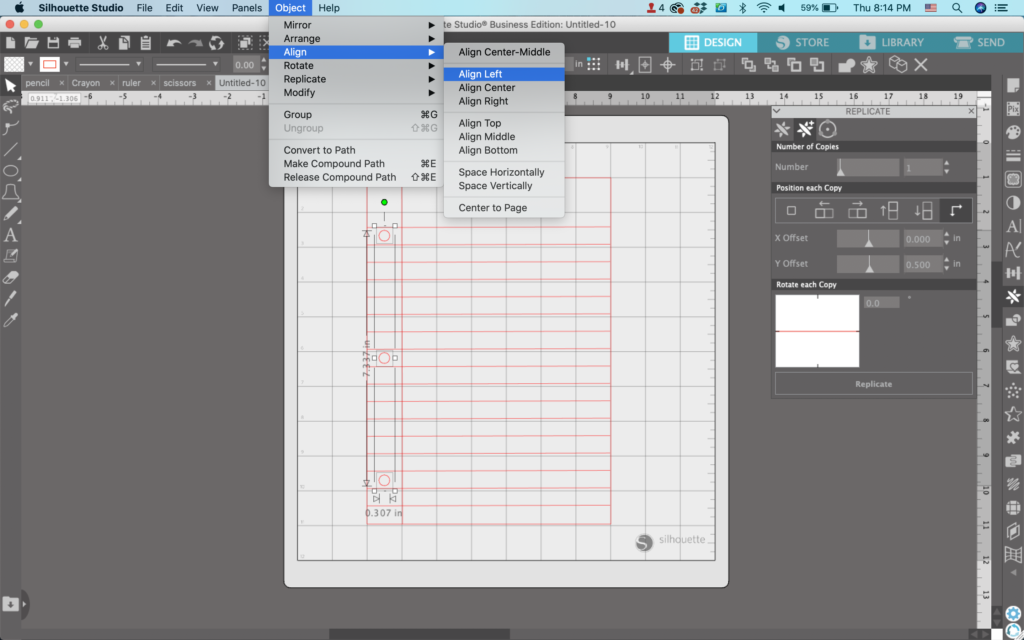
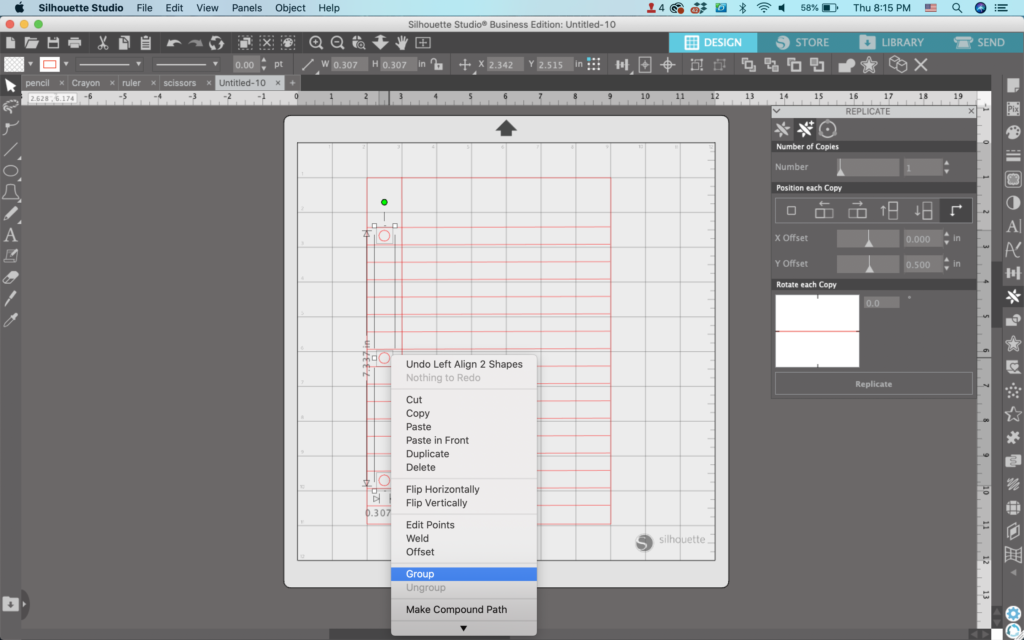
5. Make three circles on the left hand side and subtract them from the notebook paper. I aligned mine using ‘Object’, ‘Align’, ‘Align Left’. Group the circles together.
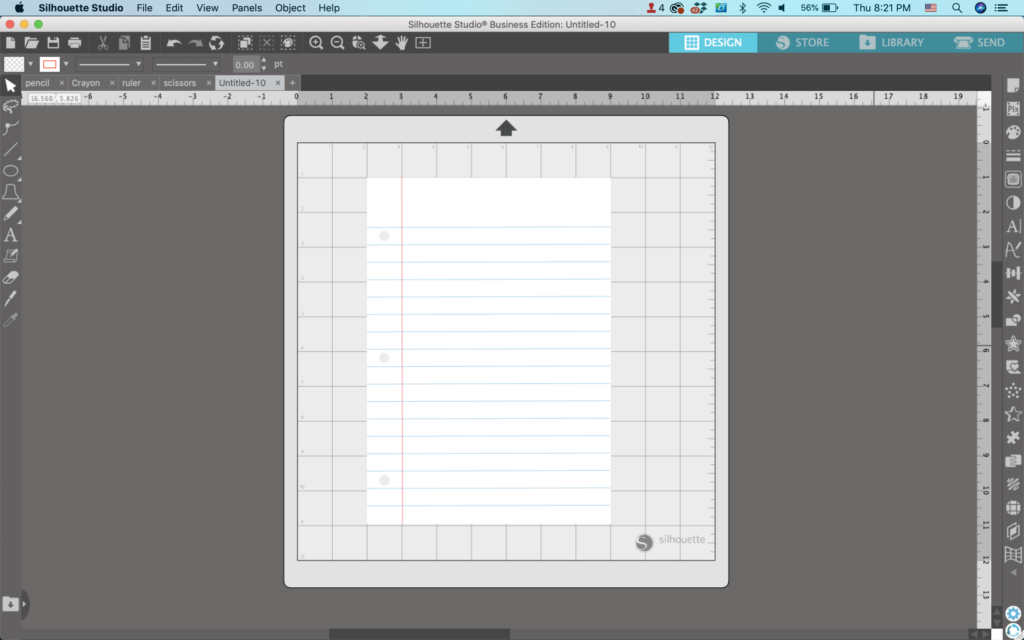
6. Subtract the circles from the rectangle. (Select both elements, then navigate to ‘Object’, ‘Modify’, ‘Subtract’.)
7. Make any final adjustments, group elements as needed, and fill the paper with color.
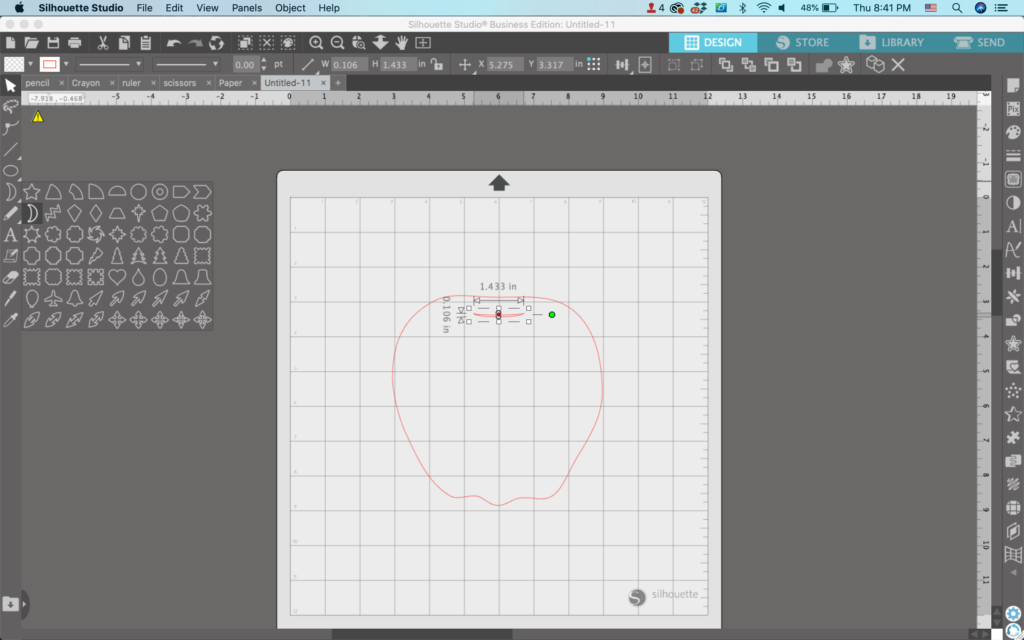
Mini Tutorial 6: How to Draw an Apple
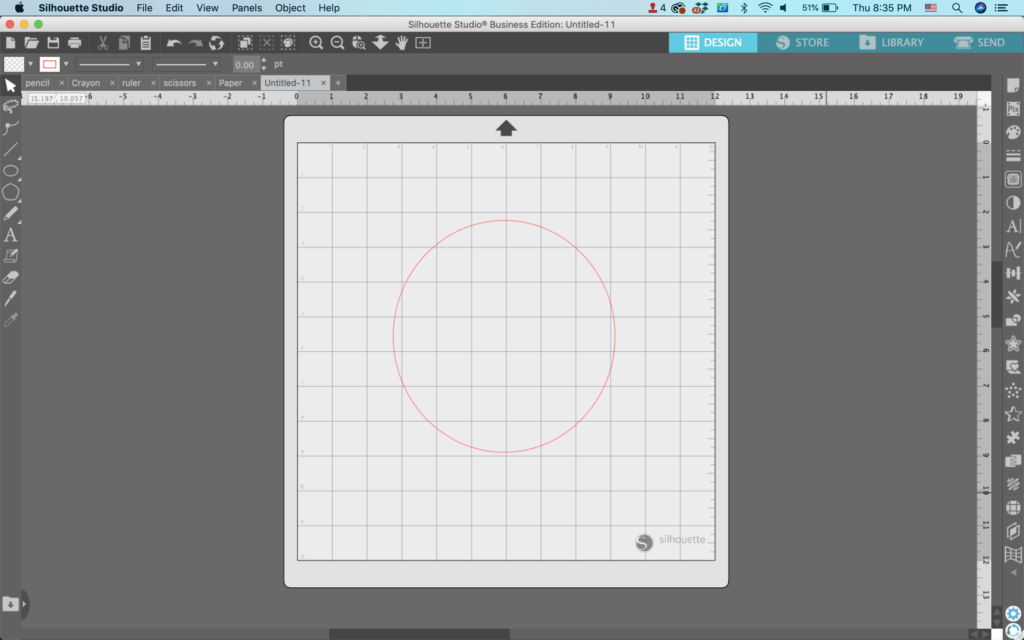
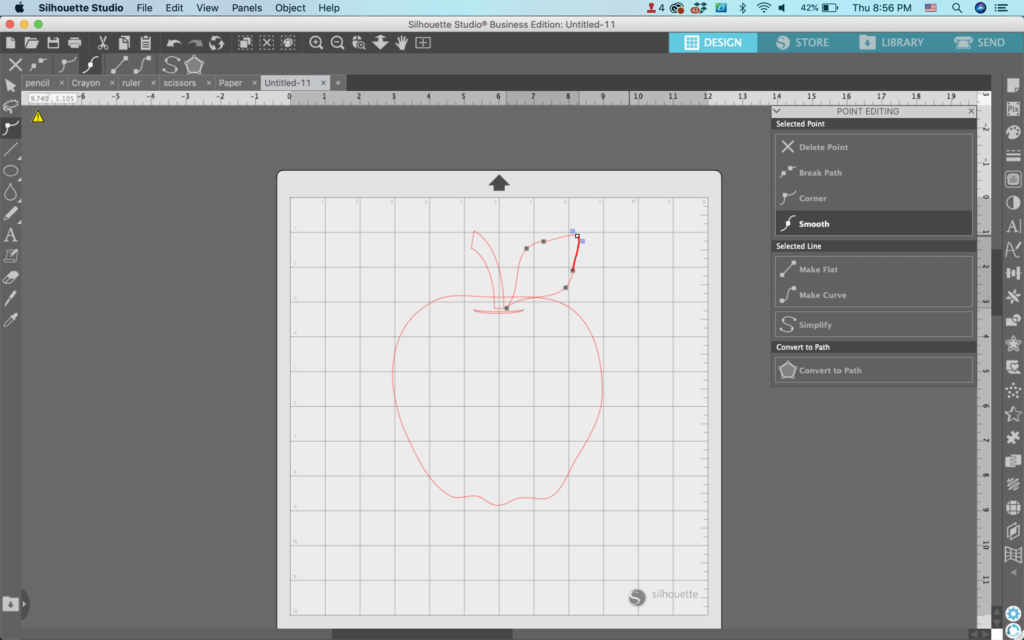
Draw a circle.
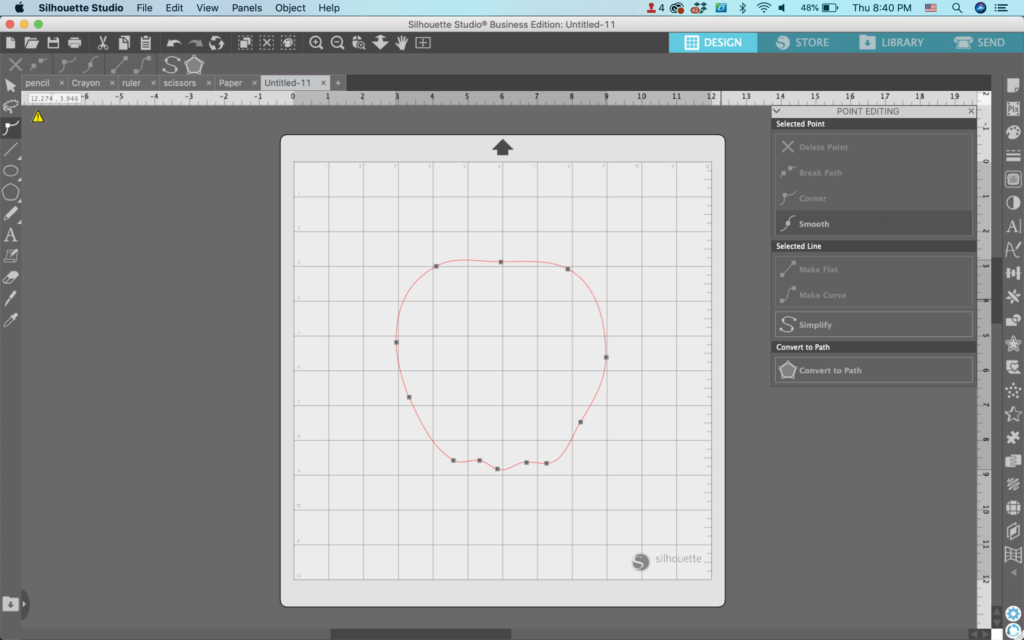
2. Double click the circle to open the Point Editing Panel. Add points and reshape the circle shape into something that looks like an apple.
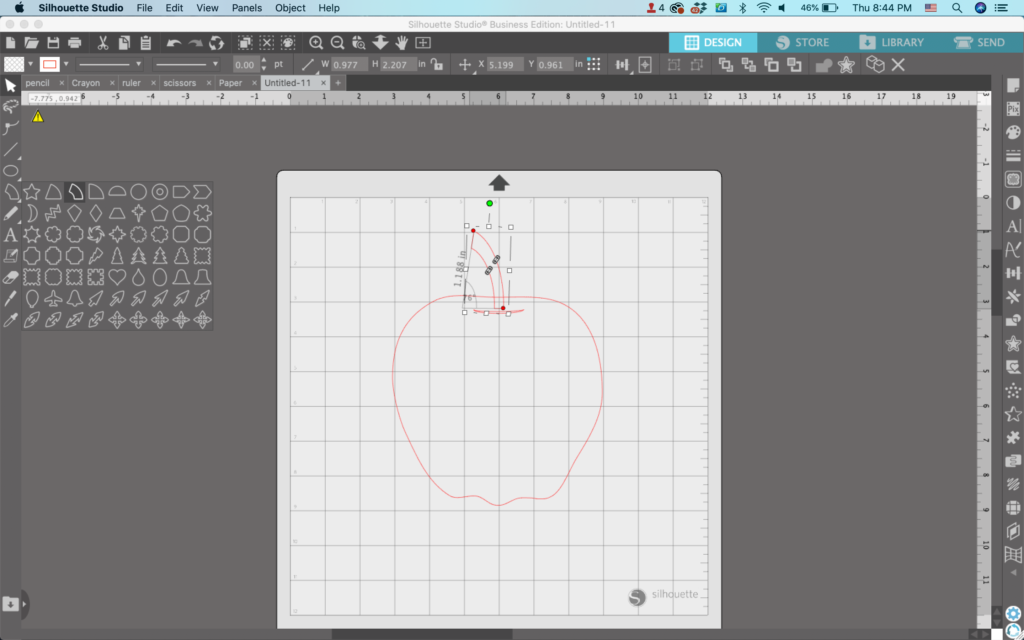
3. Use Flexishapes to draw a moon shape (1st one, 2nd row). Make it skinny and move it near the top of the apple.
4. Use Flexishapes to draw a macaroni shape (3rd one, 1st row). Move it to the top of the apple.
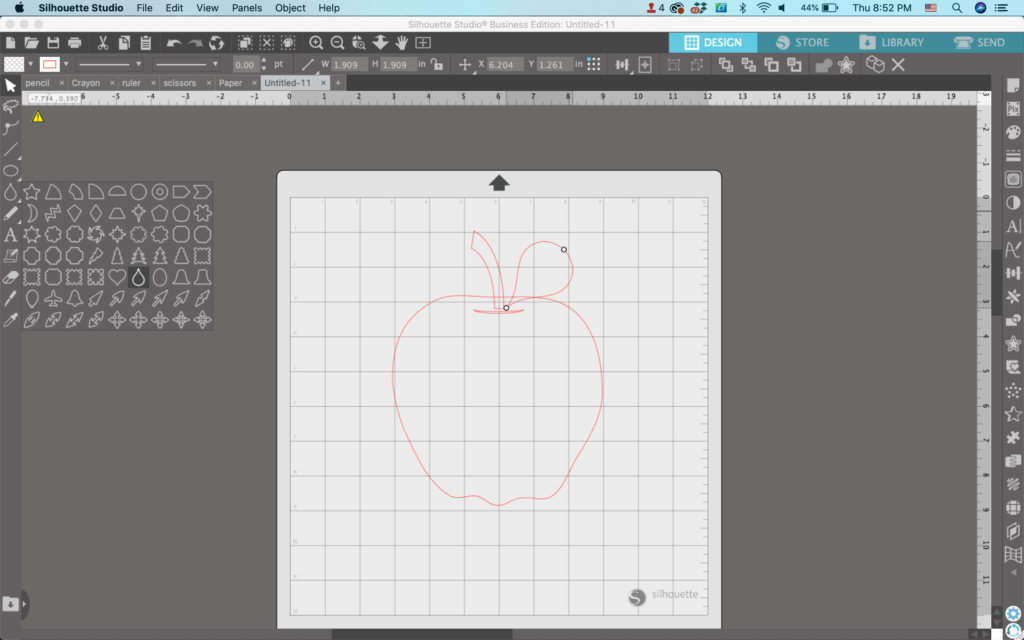
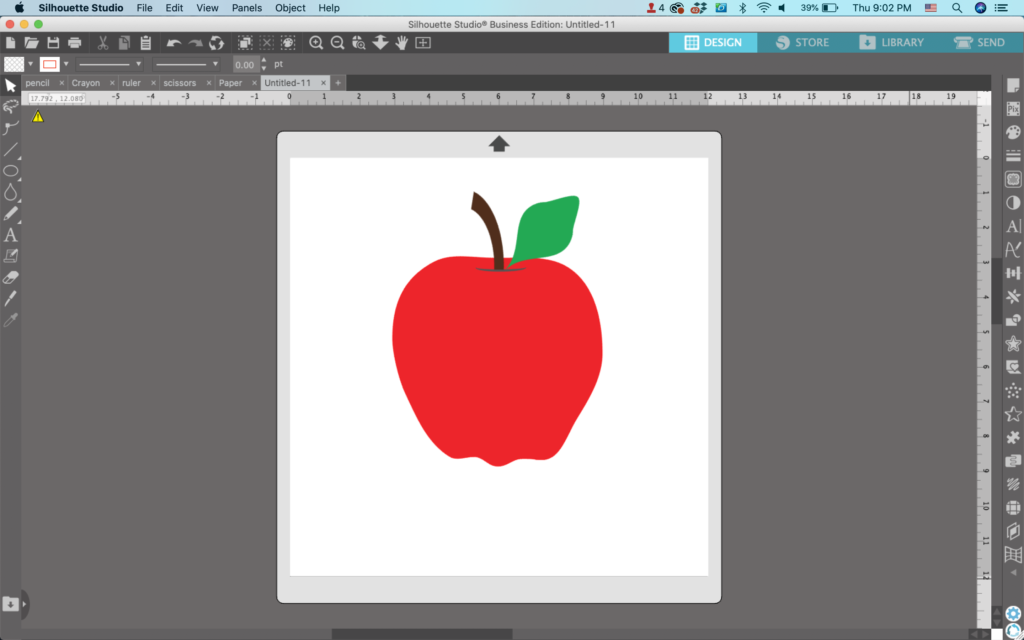
5. Use Flexishapes to draw a teardrop shape (6th one, 5th row). Move it to the top of the apple to be the leaf.
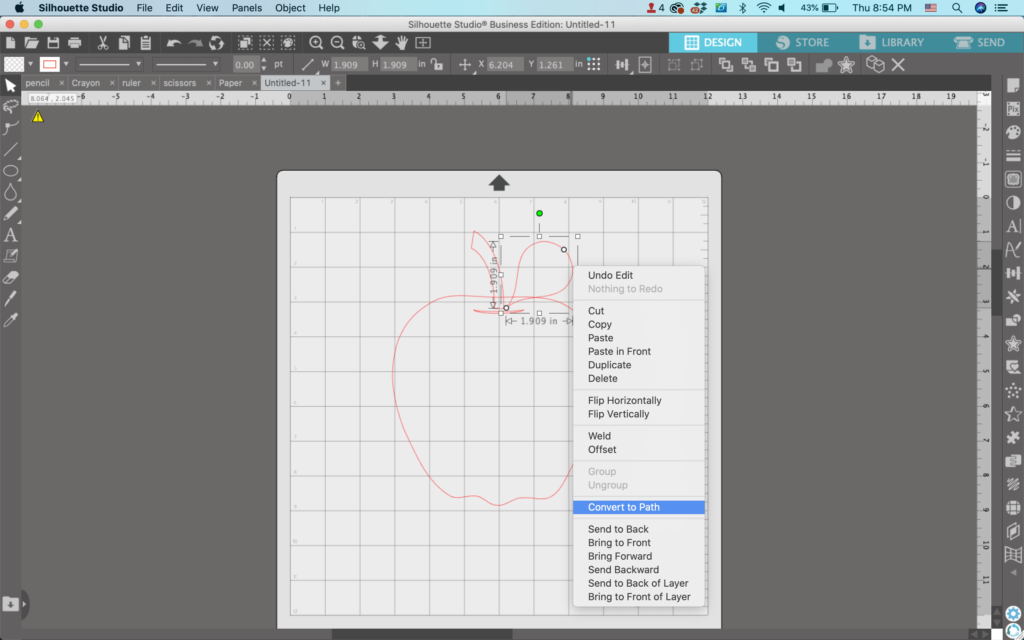
6. Select the teardrop leaf, right click and select ‘Convert to Path’.
7. Double click the teardrop leaf to open the Point Editing Panel. Drag the round side to change the teardrop shape into a leaf.
8. Make any final adjustments, group elements as needed, then fill the apple with color.
That’s it! Your designs are ready to go!
Don’t Forget to Save!
To save your new SVG creation, head to ‘File’, ‘Save As’, ‘Save to Hard Drive’, name the file, then select ‘SVG’ from the dropdown menu.
Design with Me is a new regular feature on Cutting for Business! Each Friday, I’ll bring you a new Silhouette Studio tutorial featuring how to design an SVG.
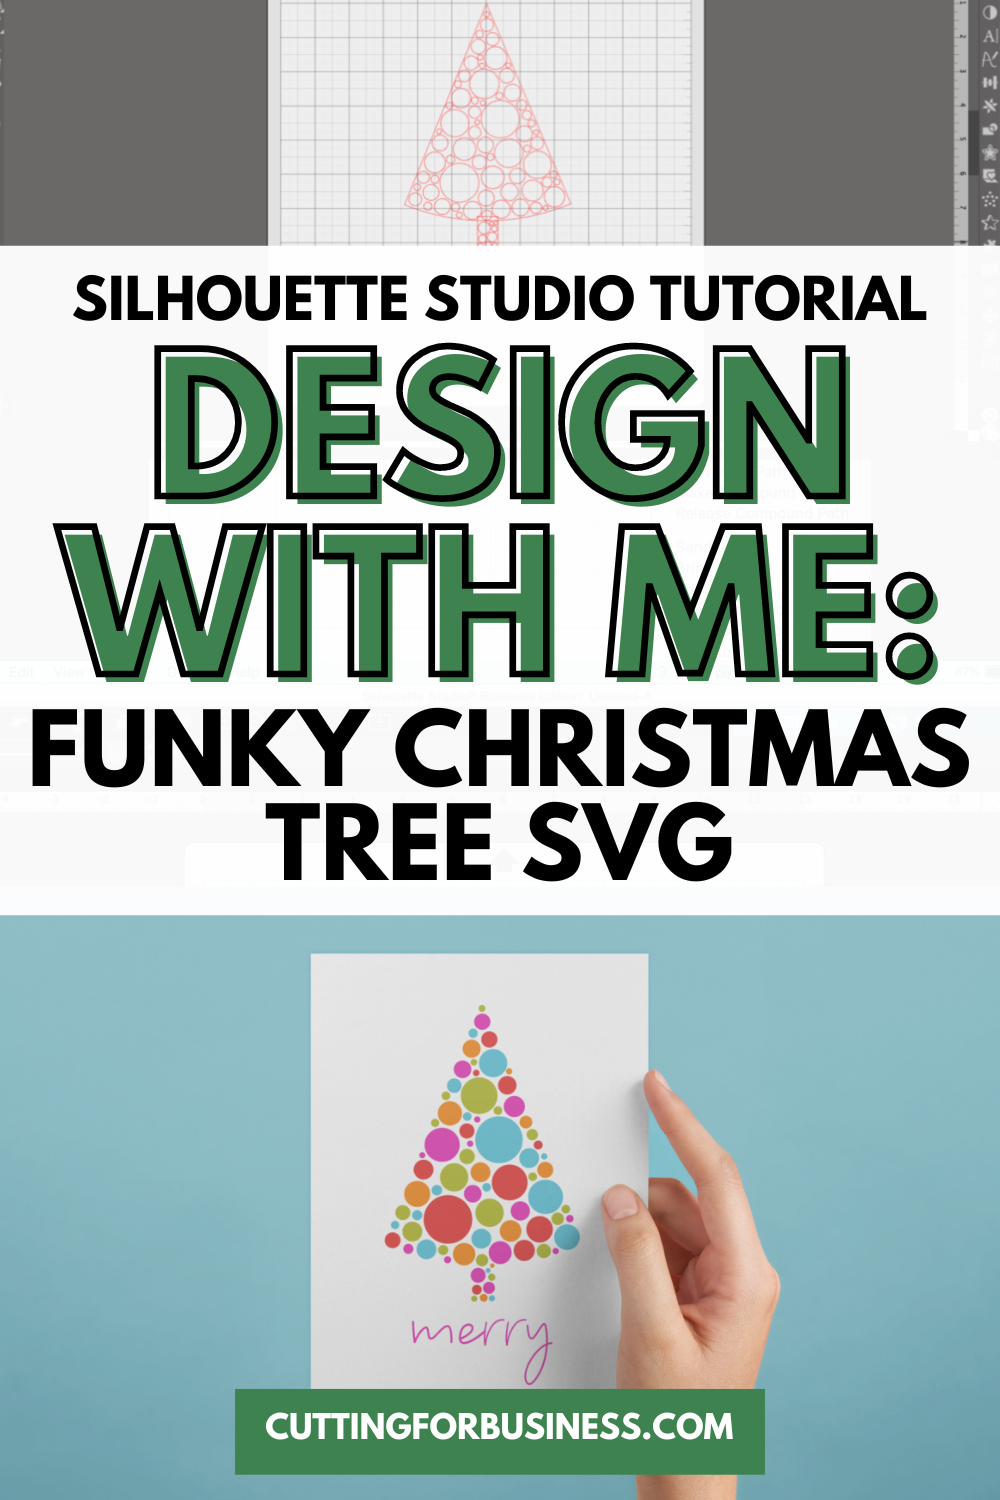
It’s almost Christmas! I can’t wait! Today, let’s create a funky Christmas tree.
Silhouette Studio Tutorial: Funky Christmas Tree SVG
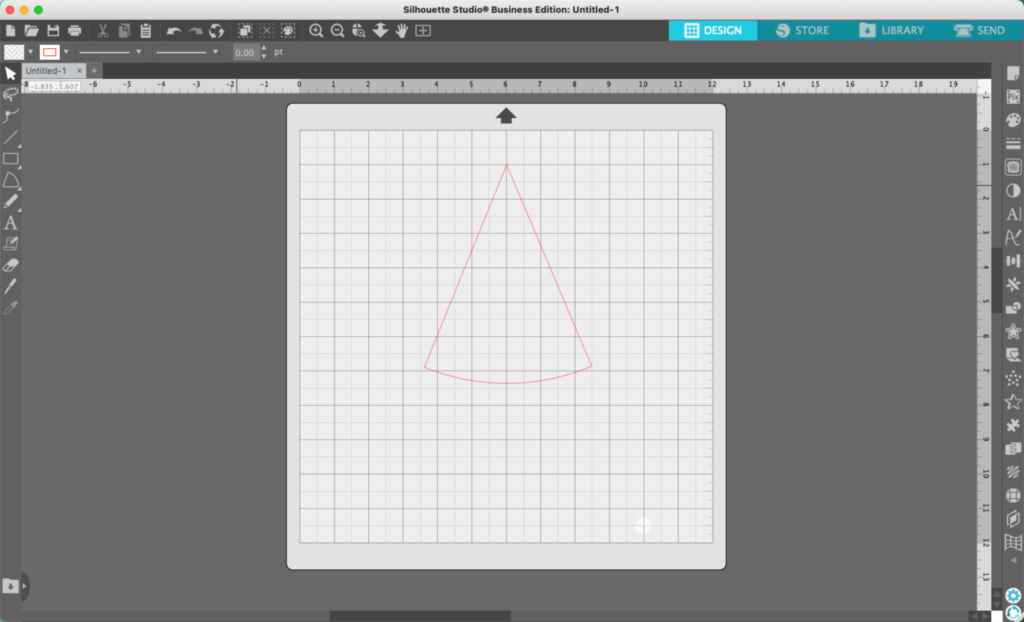
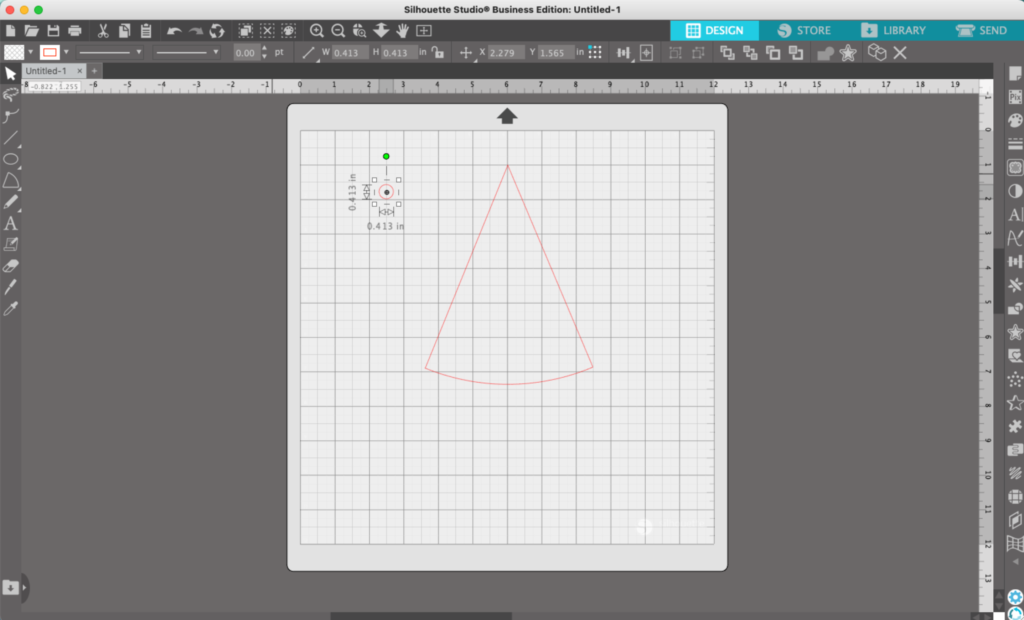
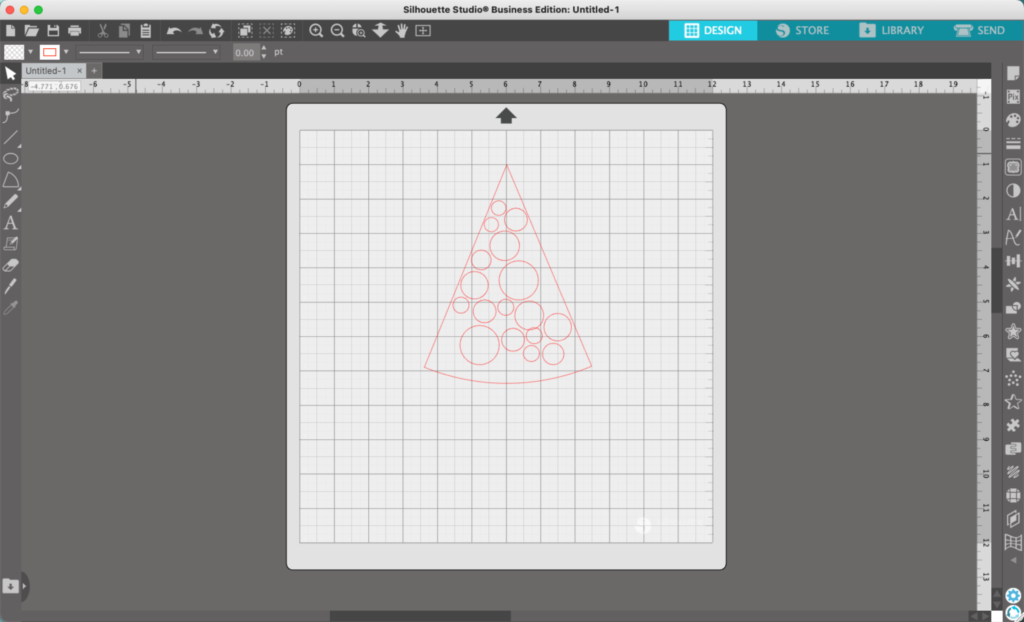
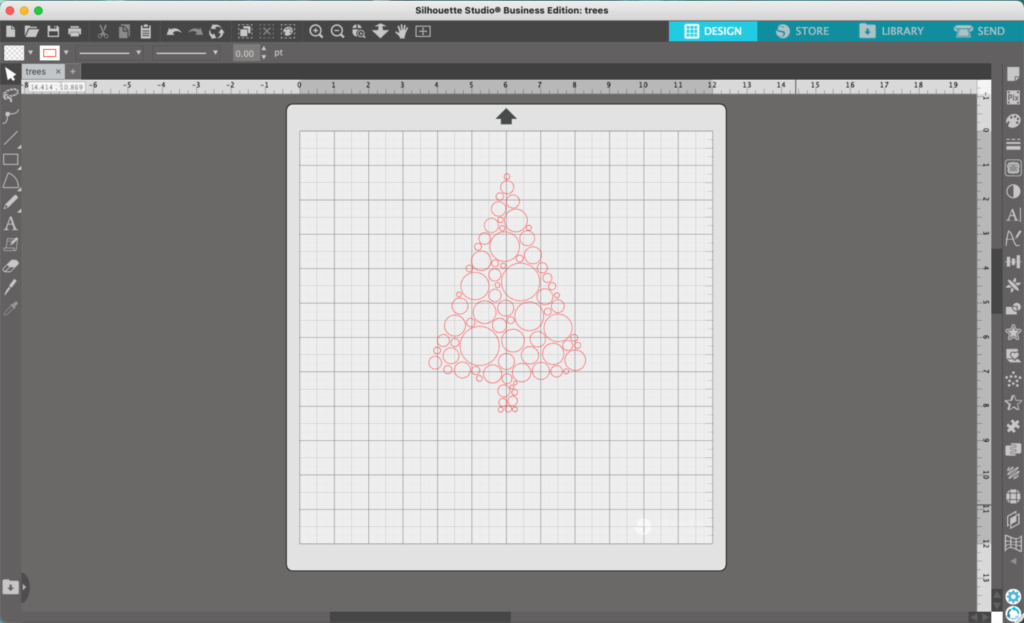
In Silhouette Studio, use Flexishapes (6th tool on the left sidebar) to draw a triangle/tree shape. I used a basic triangle, but you could choose a more detailed tree.
2. Draw a small circle using the Draw an Ellipse tool (5th tool on the left sidebar). Hold down the SHIFT key to make a perfect circle.
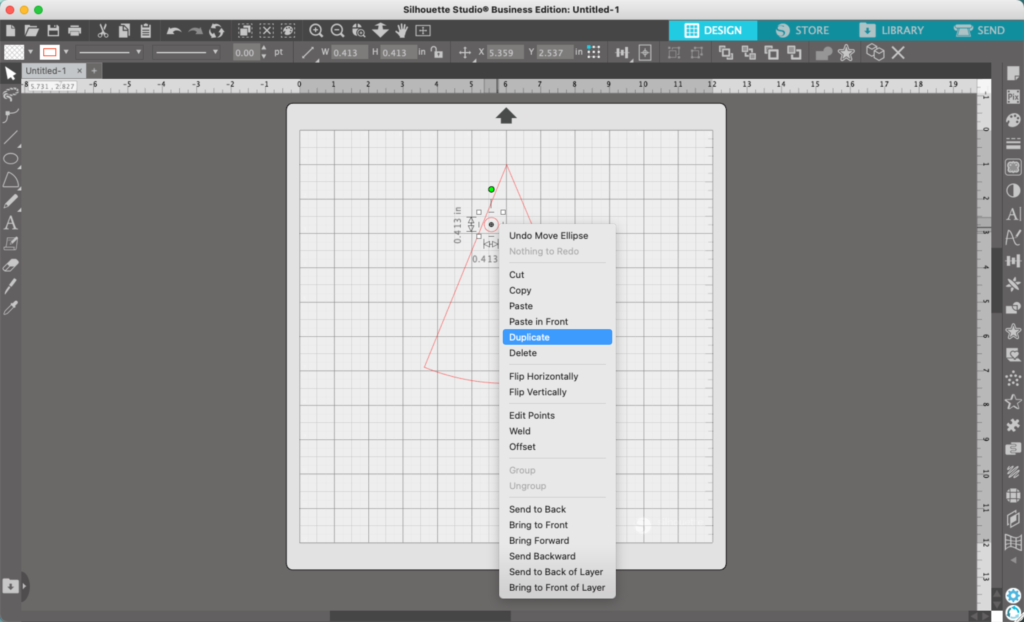
3. Move the circle into your triangle/tree. Then, right click the circle and choose ‘Duplicate’.
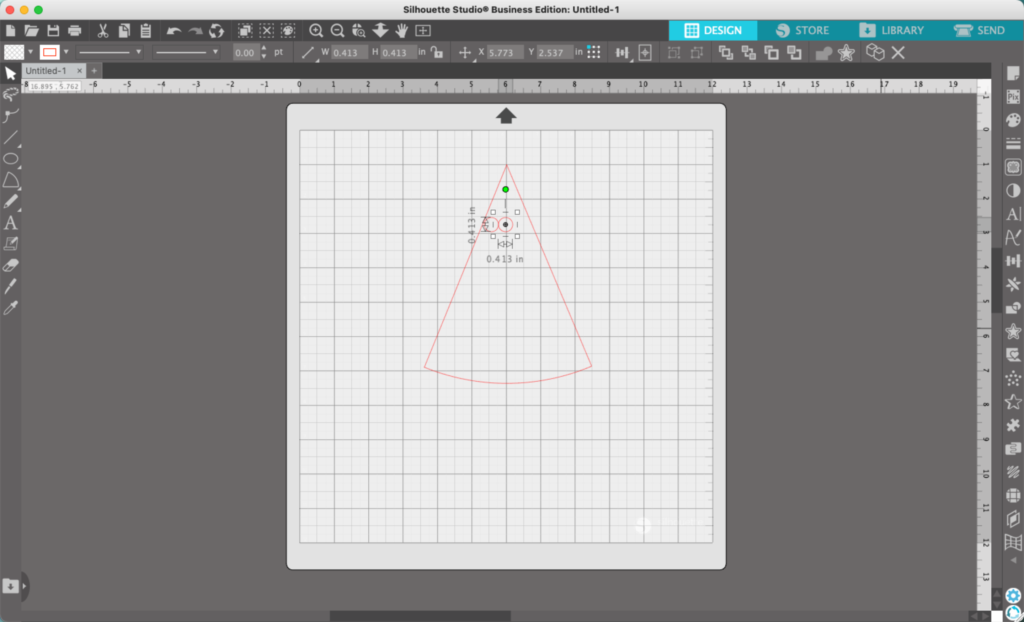
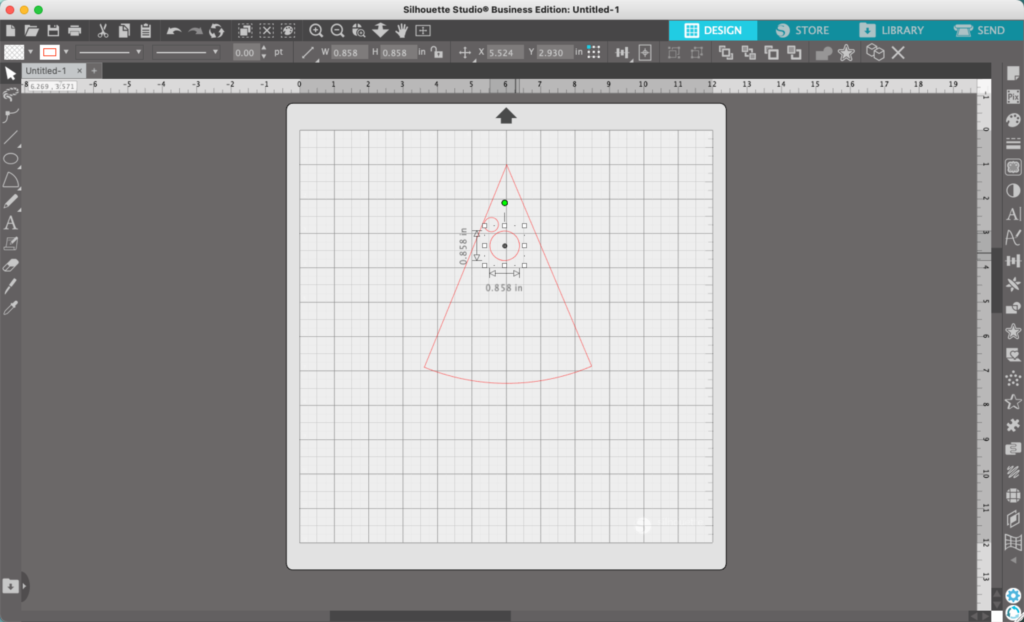
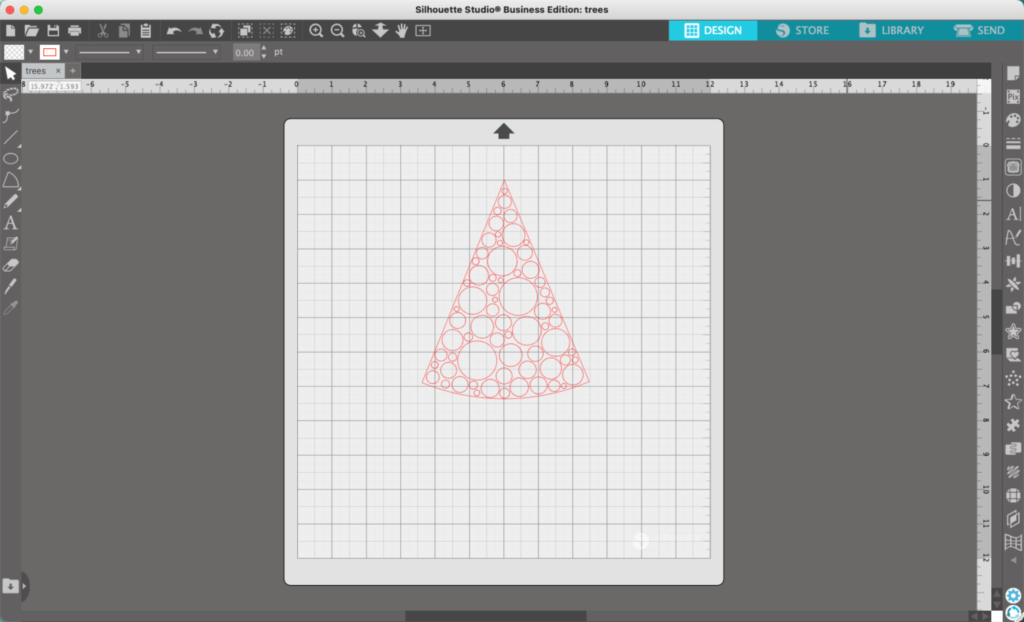
4. Resize the circle and move it.
5. Repeat steps 3 and 4 until your triangle shape is full of circles. Be sure to keep the circles near the triangle shape line – at the end you’ll be deleting the triangle shape.
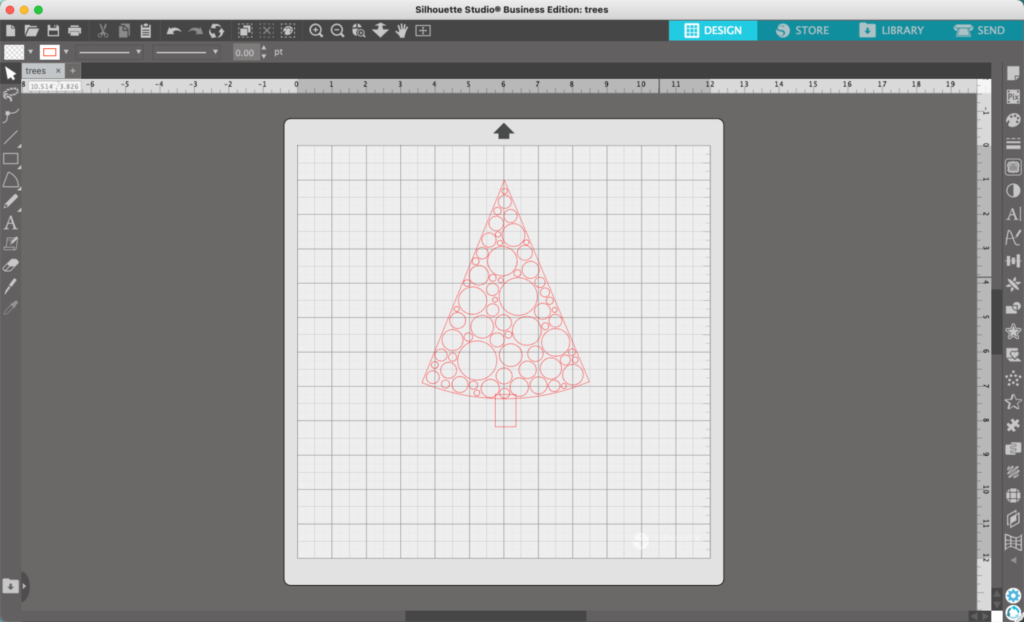
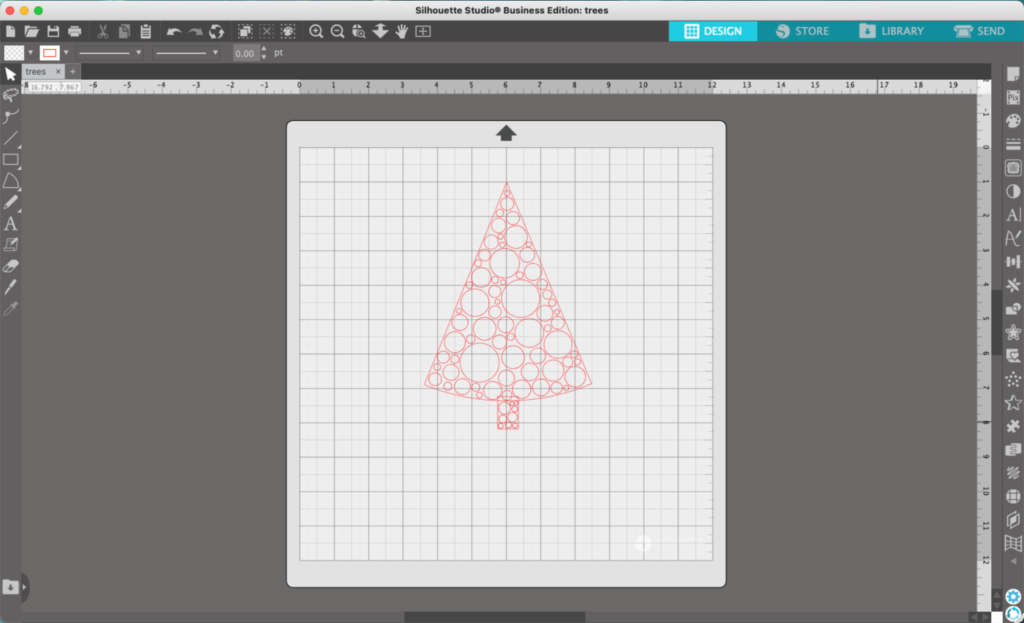
6. Add a rectangle for a trunk and fill it with circles.
7. Delete the triangle and the rectangle.
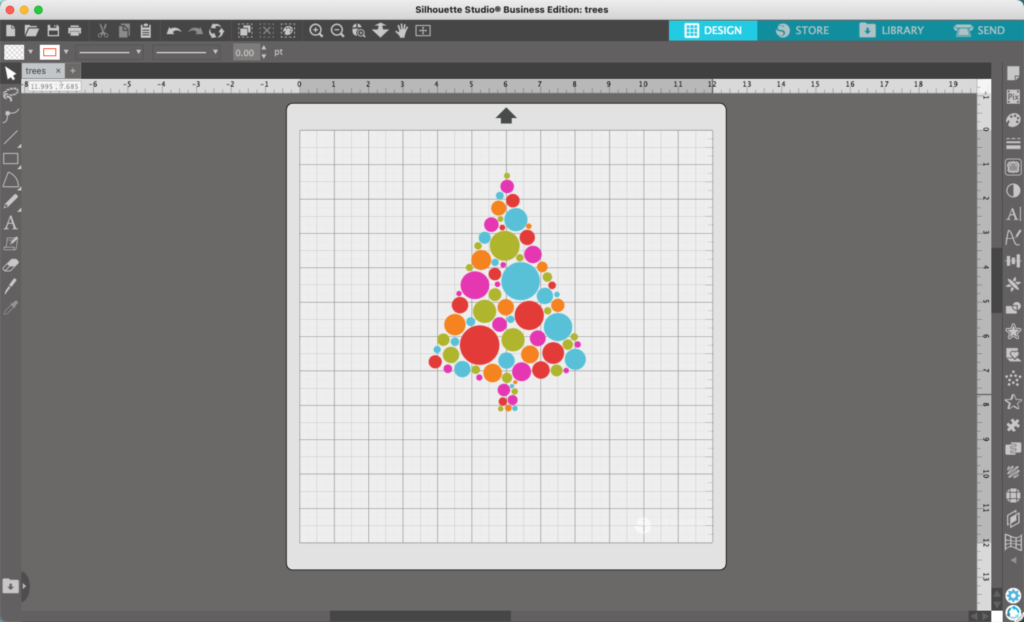
8. Add color to the design.
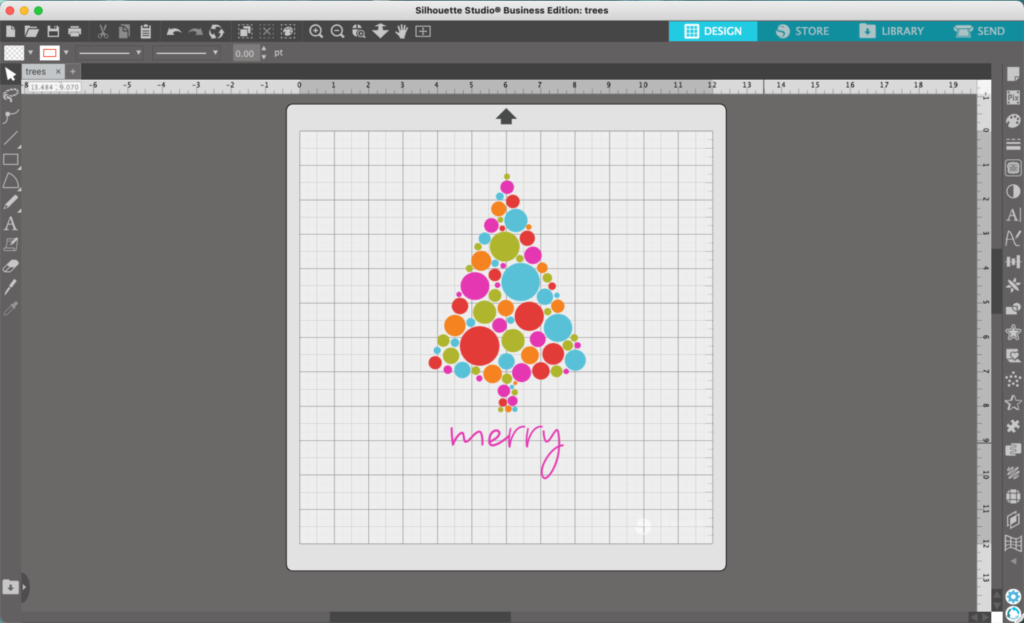
9. Add additional details or text. (Font used: Kate Johnson.)
This tutorial was fun with circles, but you could use anything: How about an alphabet themed Christmas tree for a bulletin board in a classroom? What about a dinosaur filled tree for a toddler boy’s shirt? What if you forgot the tree and used an entirely different shape? It’s your choice… you are the designer!
That’s it! Your funky Christmas tree is ready to go!
Don’t Forget to Save!
To save your new SVG creation, head to ‘File’, ‘Save As’, ‘Save to Hard Drive’, name the file, then select ‘SVG’ from the dropdown menu.
Design with Me is a new regular feature on Cutting for Business! Each Friday, I’ll bring you a new Silhouette Studio tutorial featuring how to design an SVG.
It seems fitting to end this great year on Cutting for Business with a New Year’s Eve SVG.
Wondering what I’ll be doing on New Year’s Eve when the calendar flips? Probably sleeping! LOL! What about you?
Silhouette Studio Tutorial: Block Letter New Year’s Eve SVG
Before you get started, decide what words you will put into your design. Then, count the letters.
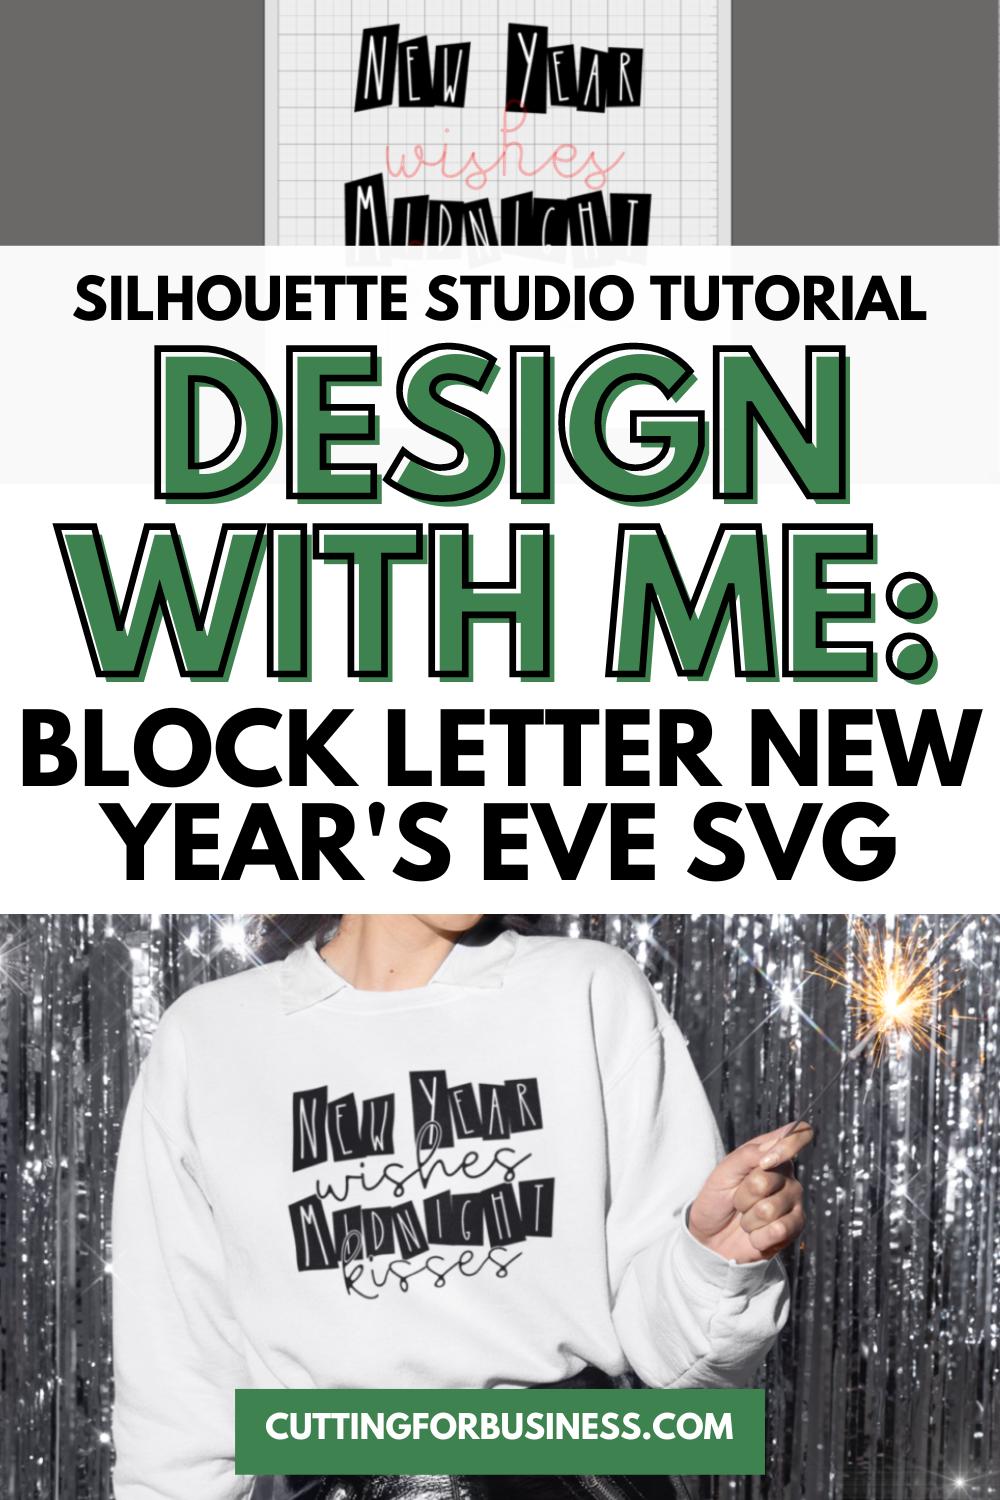
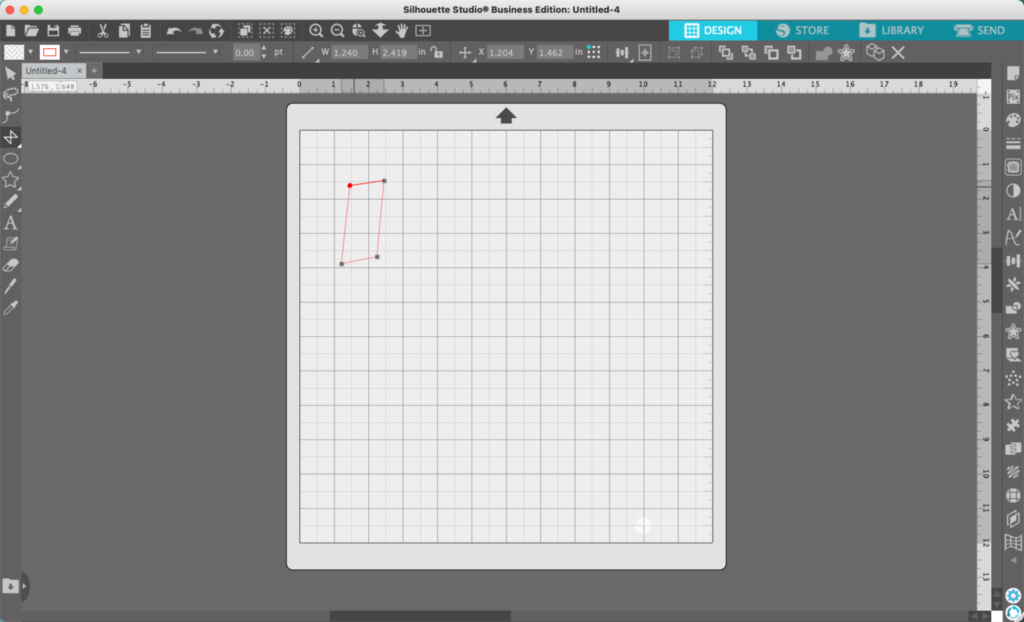
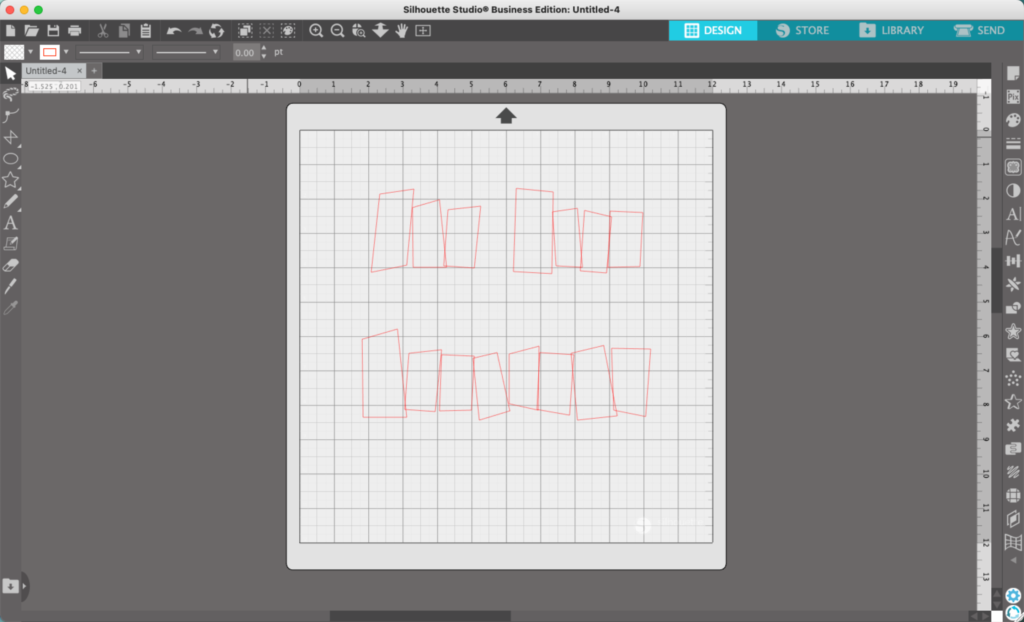
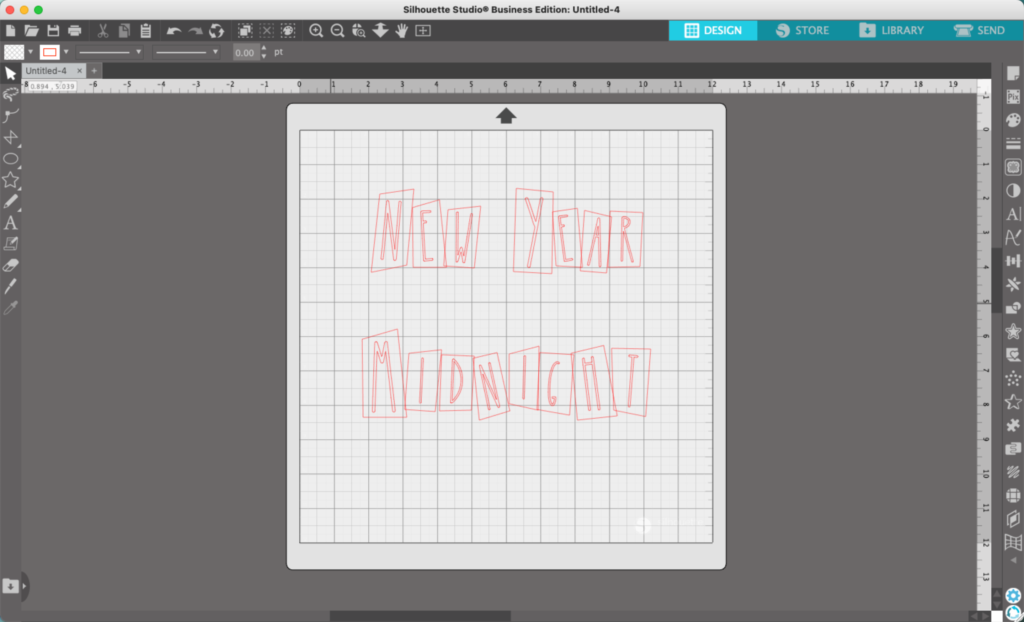
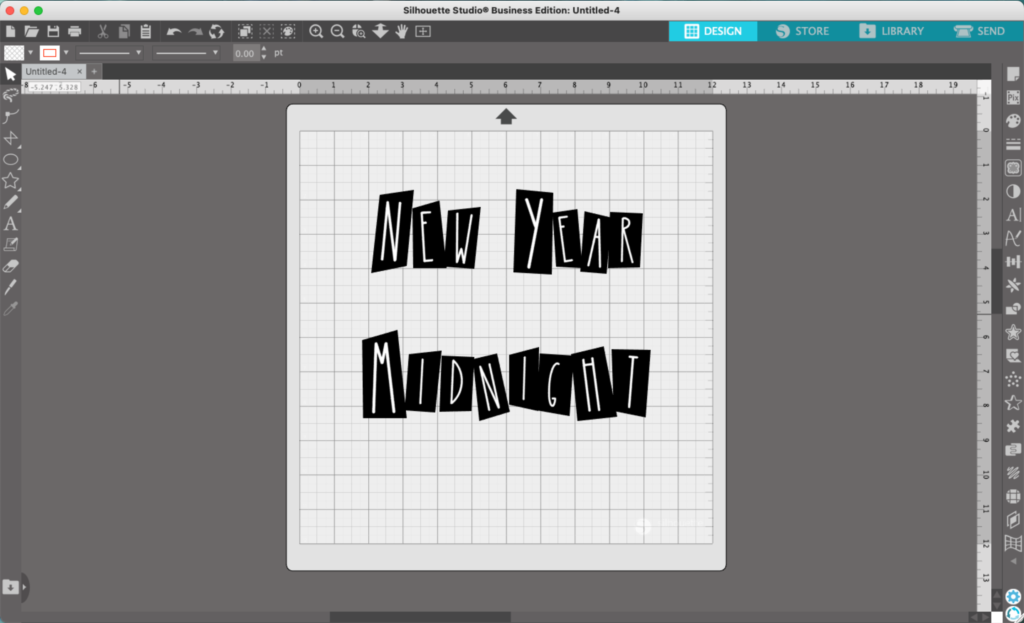
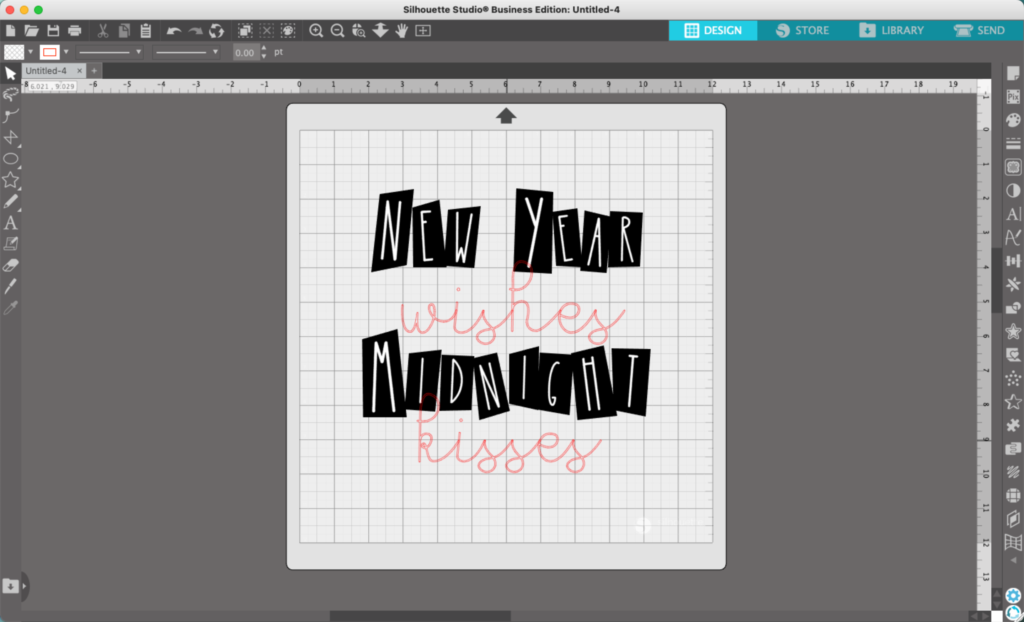
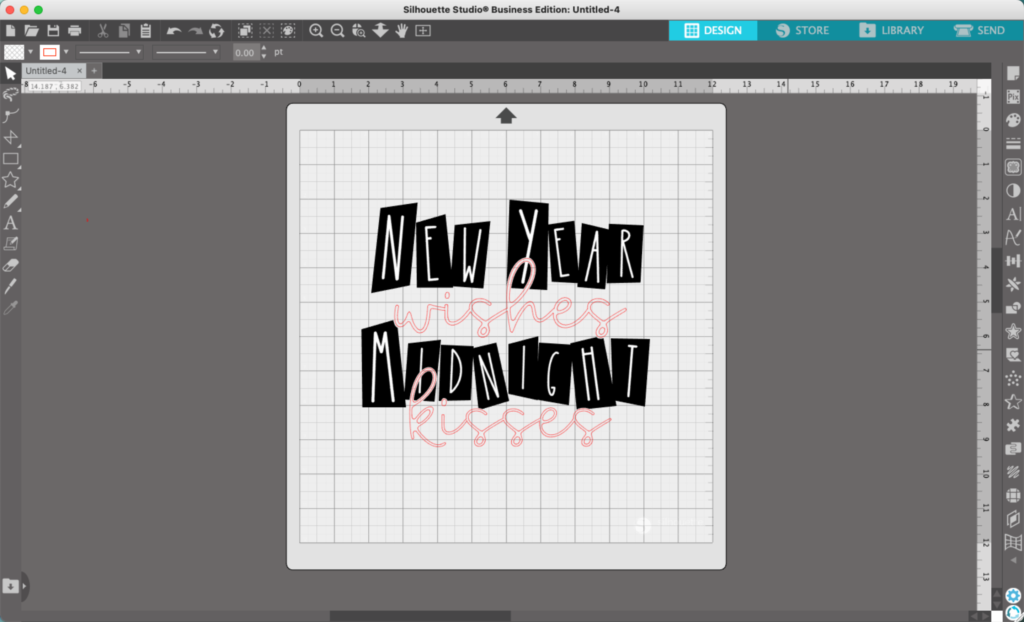
In Silhouette Studio, use the ‘Draw a Polygon’ tool to draw a box for each letter in your design. In this example, my design will say: New Year Wishes Midnight Kisses. I’ll draw enough boxes for NEW YEAR and MIDNIGHT. The boxes can be sloppy and not even, just make sure they each overlap slightly.
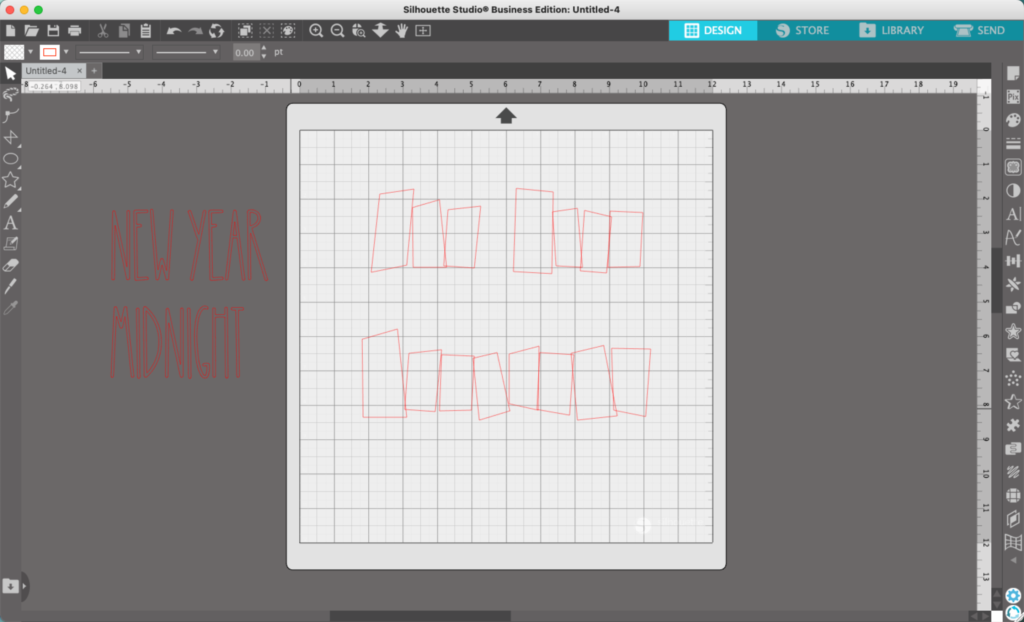
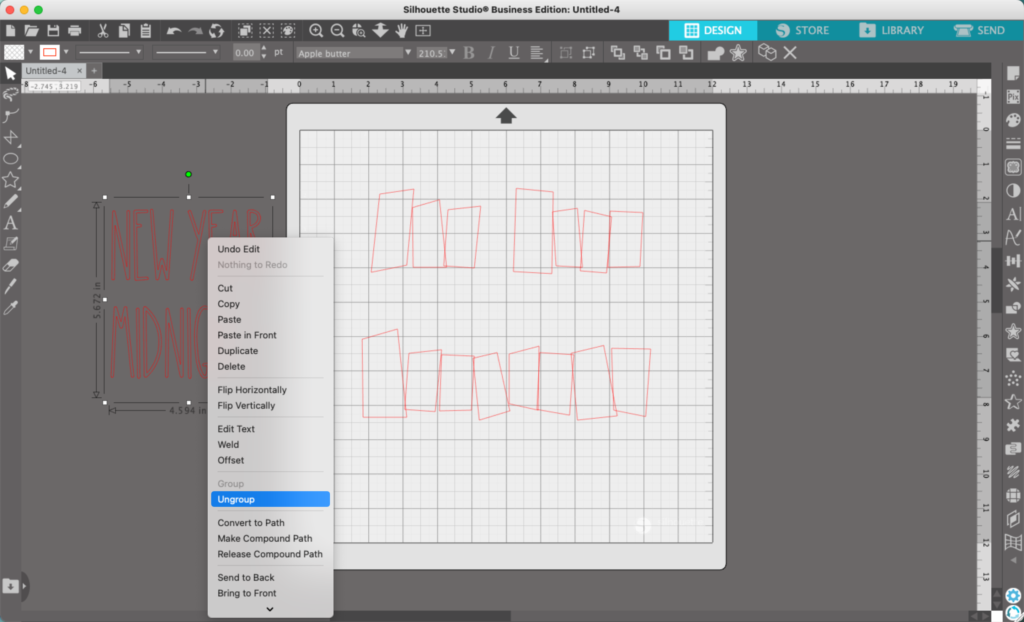
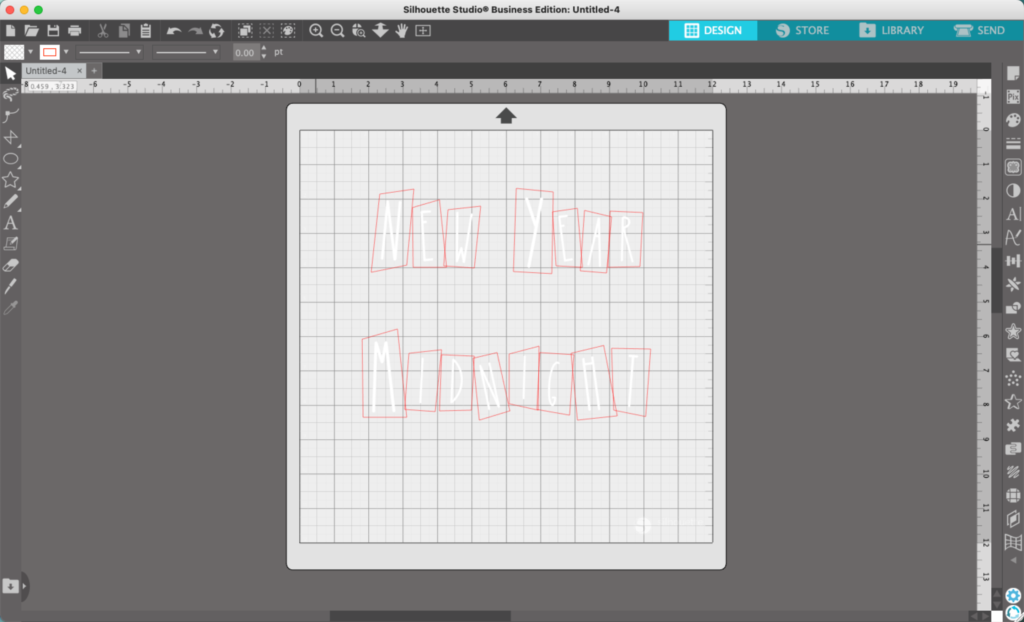
2. Add text to your blocks. You’ll want to type the text, right click to ungroup it, and move each letter into place.
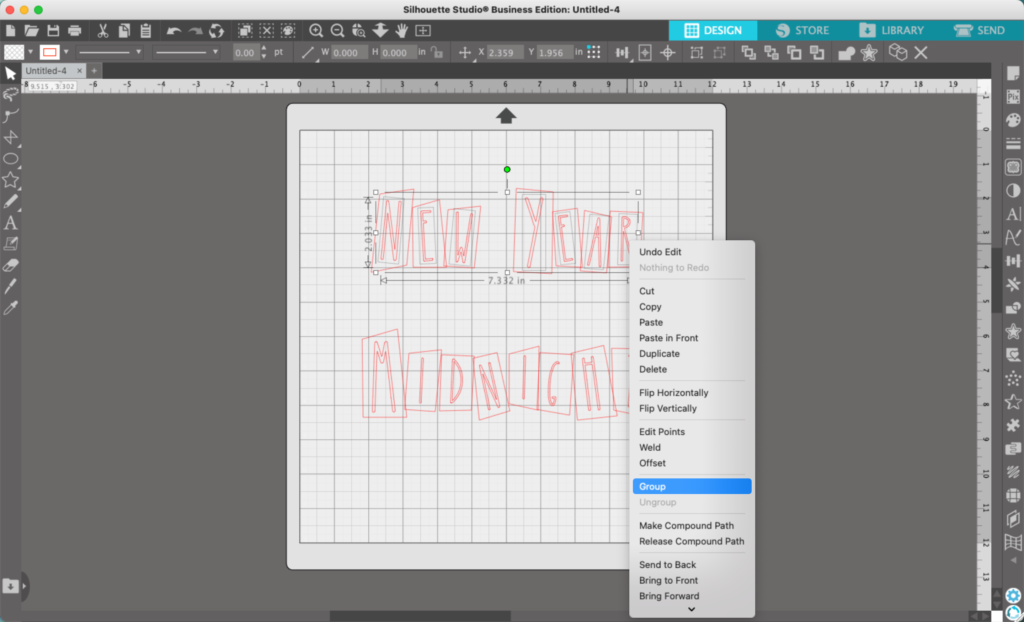
3. Select all the letters, right click, and ‘Group’ them back together.
4. Add color to the letters. In this tutorial, I’m using white.
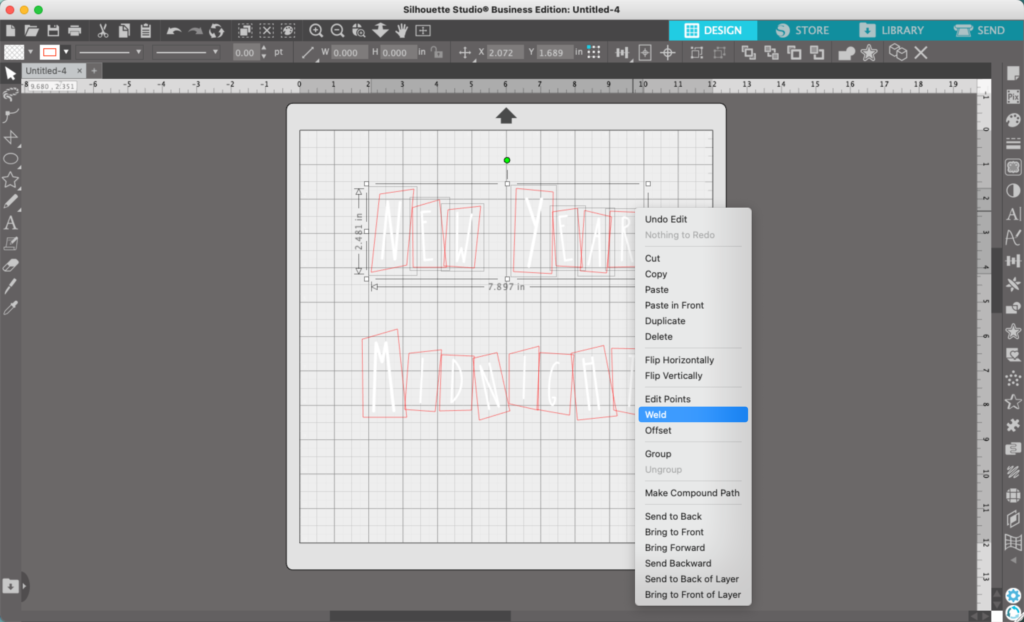
5. Select all the boxes, right click, and ‘Weld’ them together.
6. Add color to the boxes. I used black.
7. Add the remaining text in a script font.
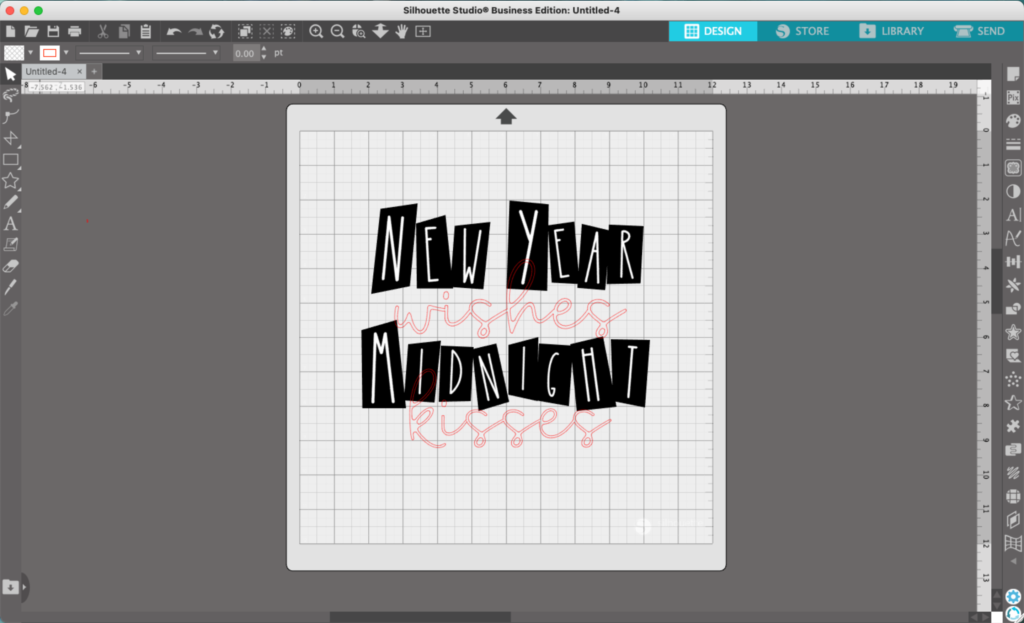
8. Resize and align everything as desired.
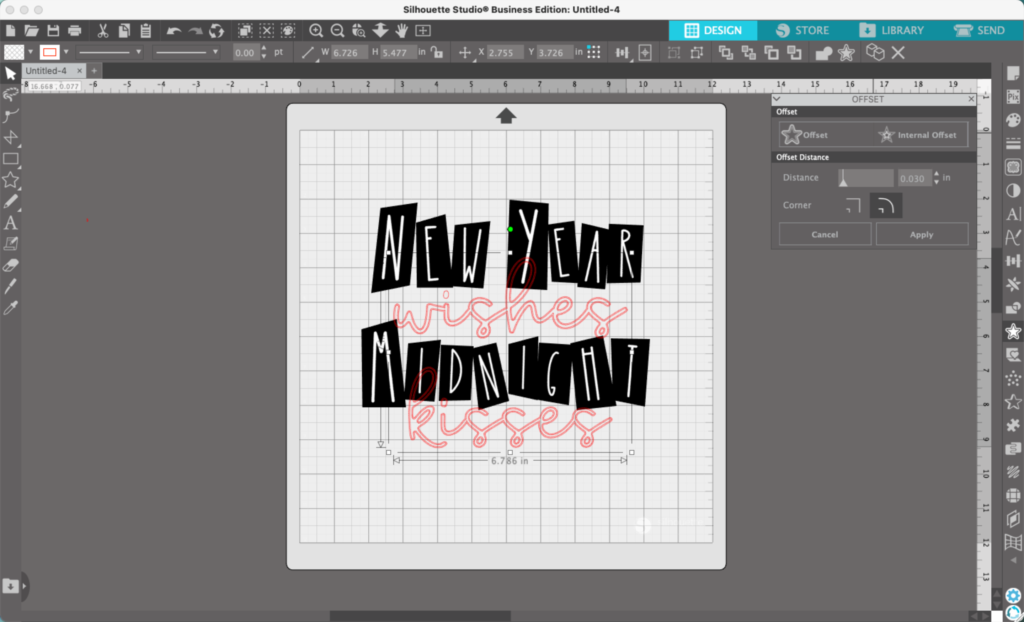
9. Navigate to ‘Panels’, ‘Offset’, and perform an offset on the script text.
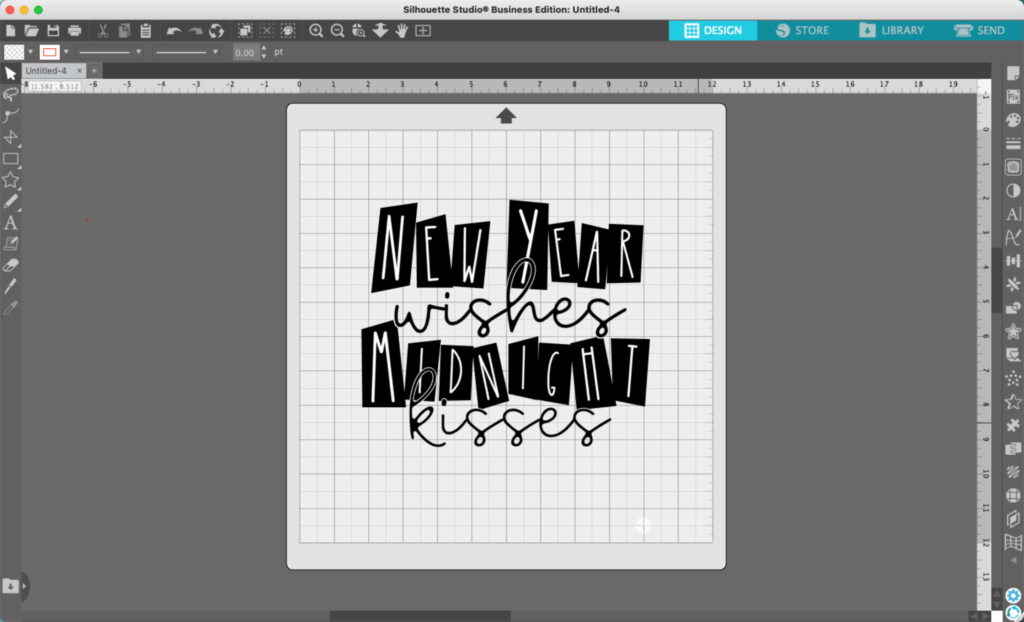
10. Subtract the offset letters from the blocks. As a reminder: Select the blocks, then the text, then ‘Modify’, ‘Subtract’.
11. Add color to the remaining text and group everything together.
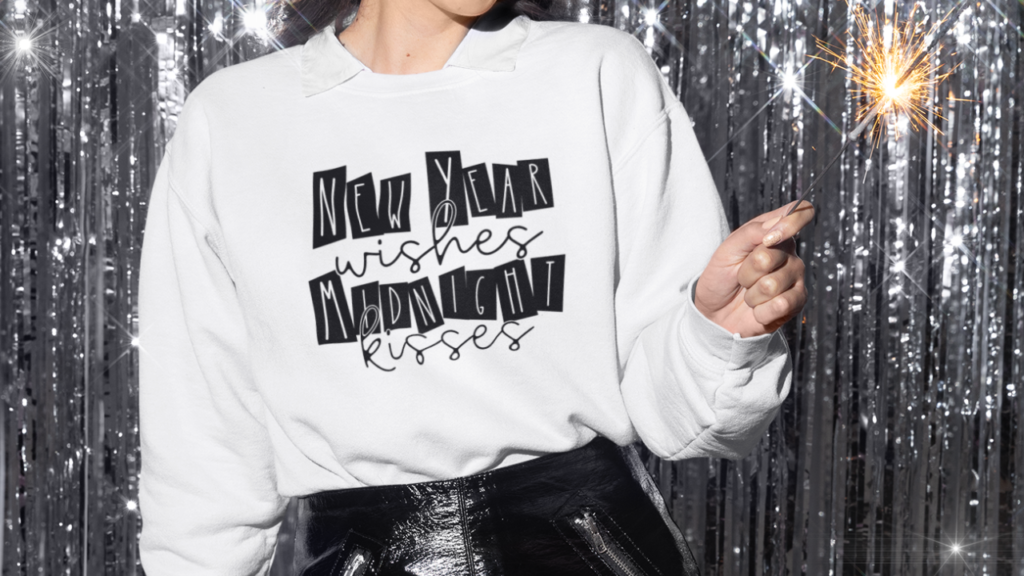
It’s ready to print on a design. If you are cutting in vinyl, you’ll want to be sure to subtract each letter from the block it sits in.